How to Create a Photorealistic 3D Digital Double Character
A digital-double is quite a tricky exercise, mainly because the vision we all have of ourselves is not the most objective. When you do your autoportrait, maybe you’ll think about improving certain features or erasing some flaws.
A digital-double is quite a tricky exercise, mainly because the vision we all have of ourselves is not the most objective. When you do your autoportrait, maybe you’ll think about improving certain features or erasing some flaws. However, it is all your distinctive features that are going to make a portrait who’s the closest possible to you.
Reference pictures & photogrammetry
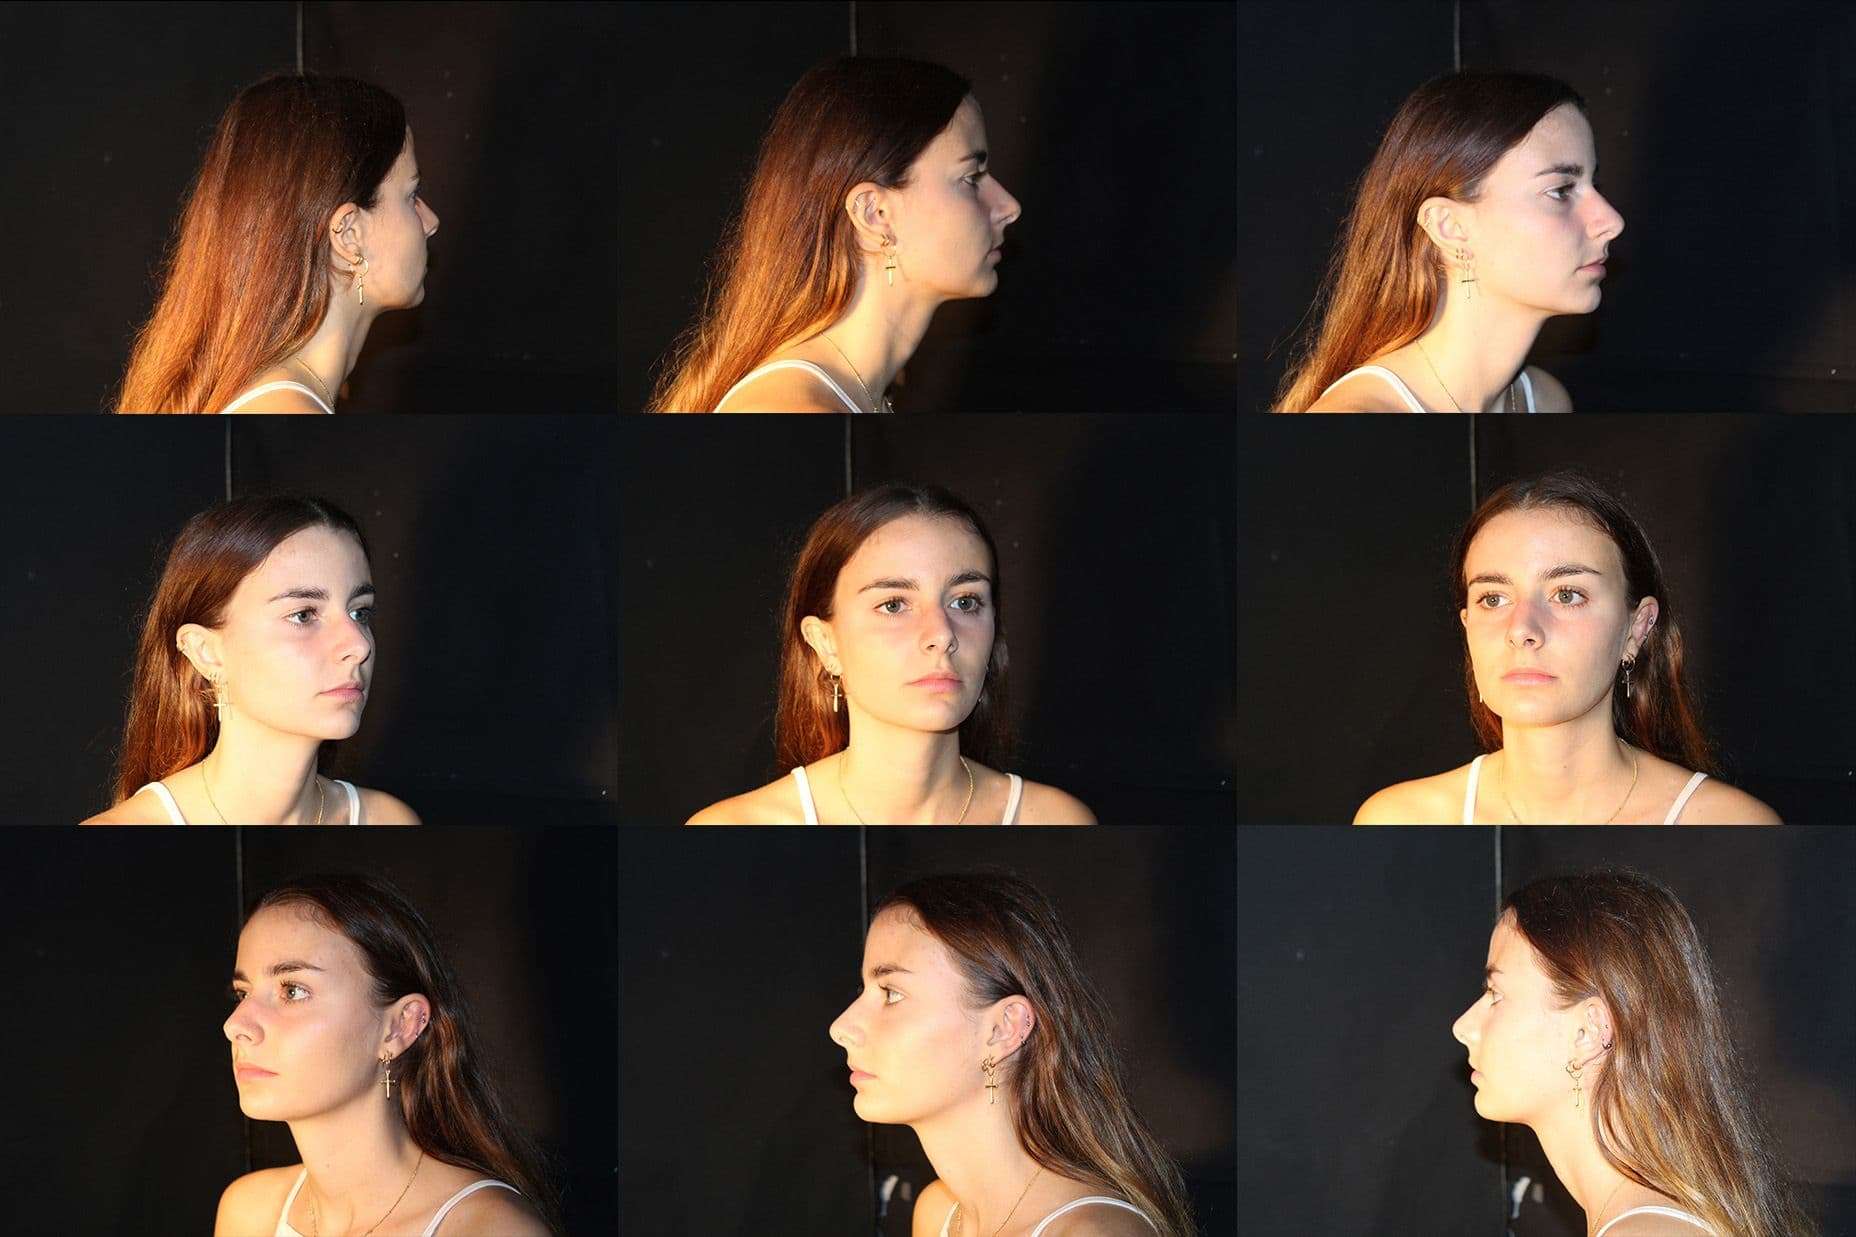
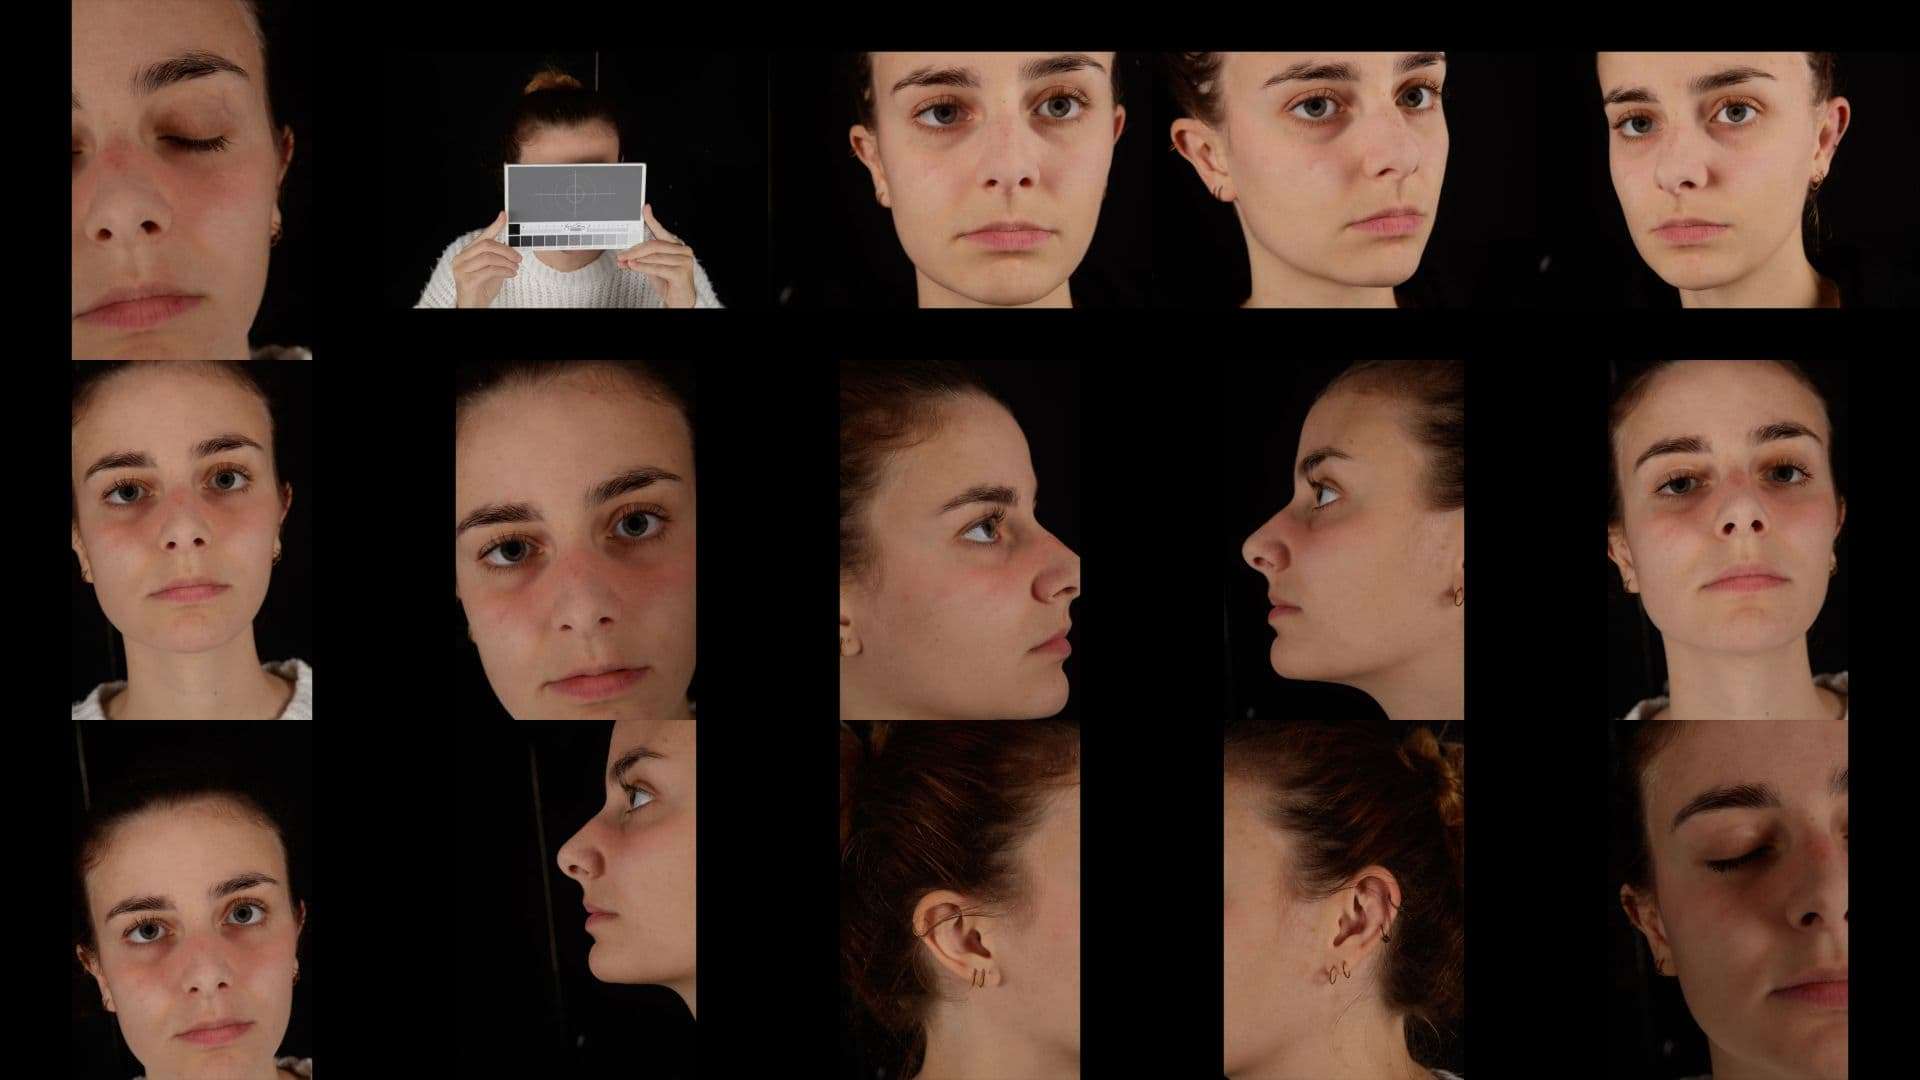
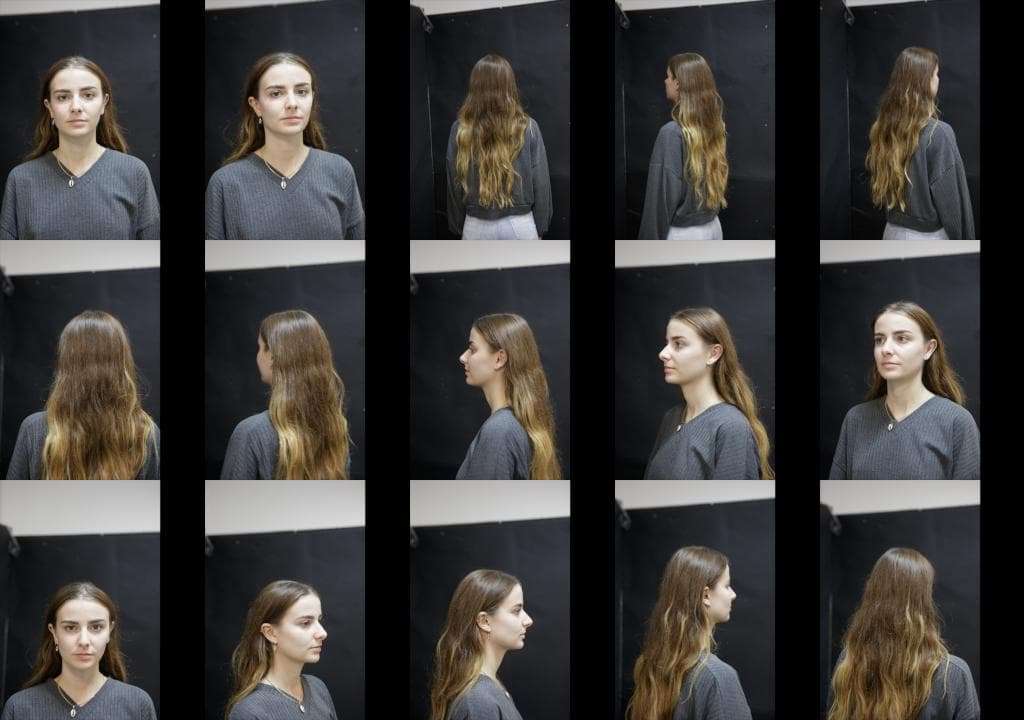
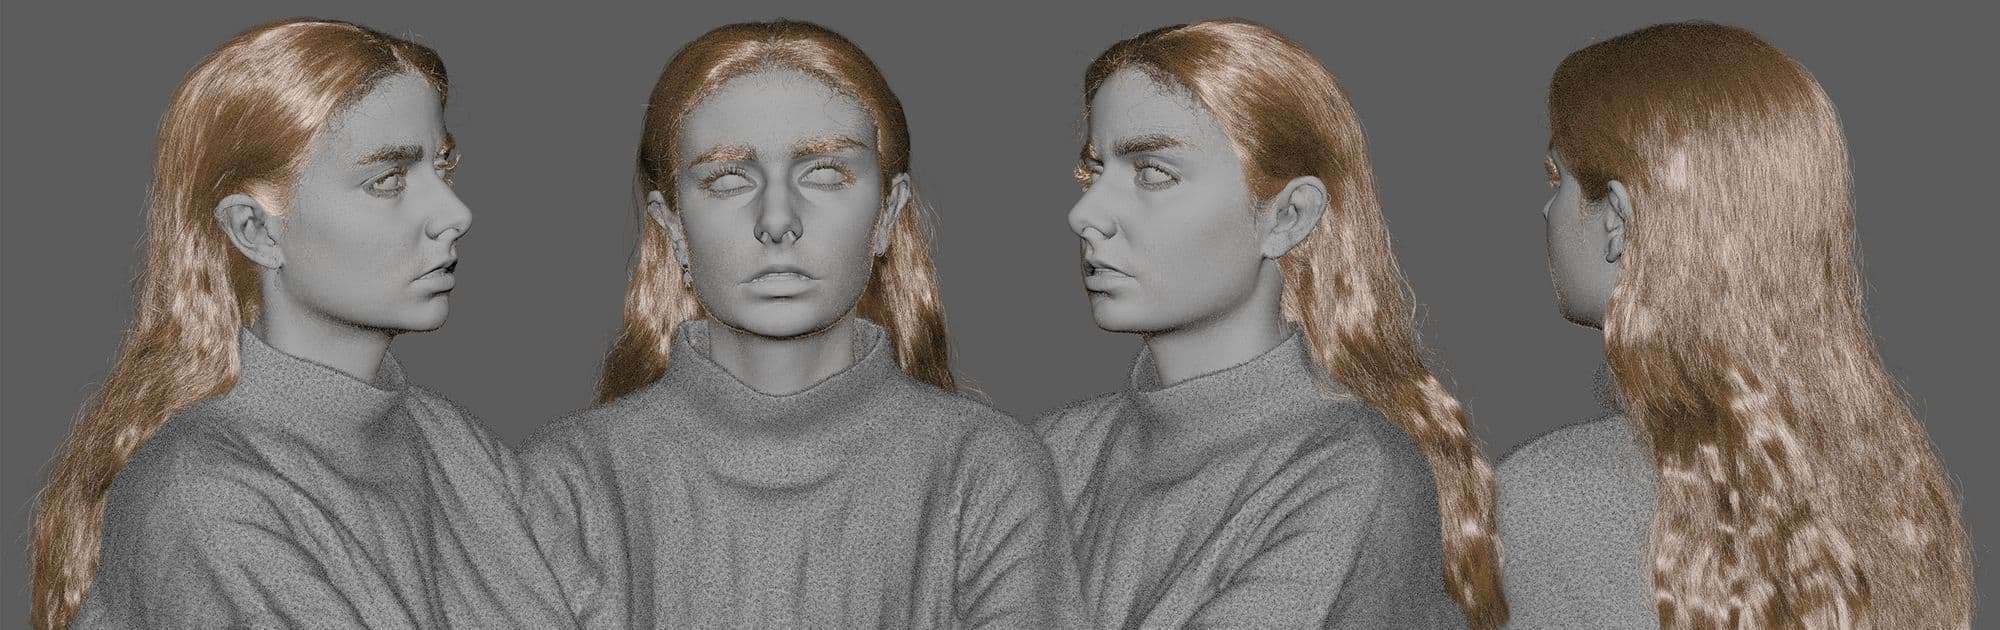
Before you start anything, it is super useful to take a turnaround reference pictures of your face. Use a sharp light, so you can really see all the volumes and details. This turnaround is going to help you during all the stages of your work. Try to use a focal that doesn’t deform your face too much, about 70mm should be right.
References
I didn’t modelize my model from scratch, I used photogrammetry. It is a technique of measurement that use the parallax obtained between images acquired from different points of view. Then, it can be converted to a 3D model. It is often used in the industry.
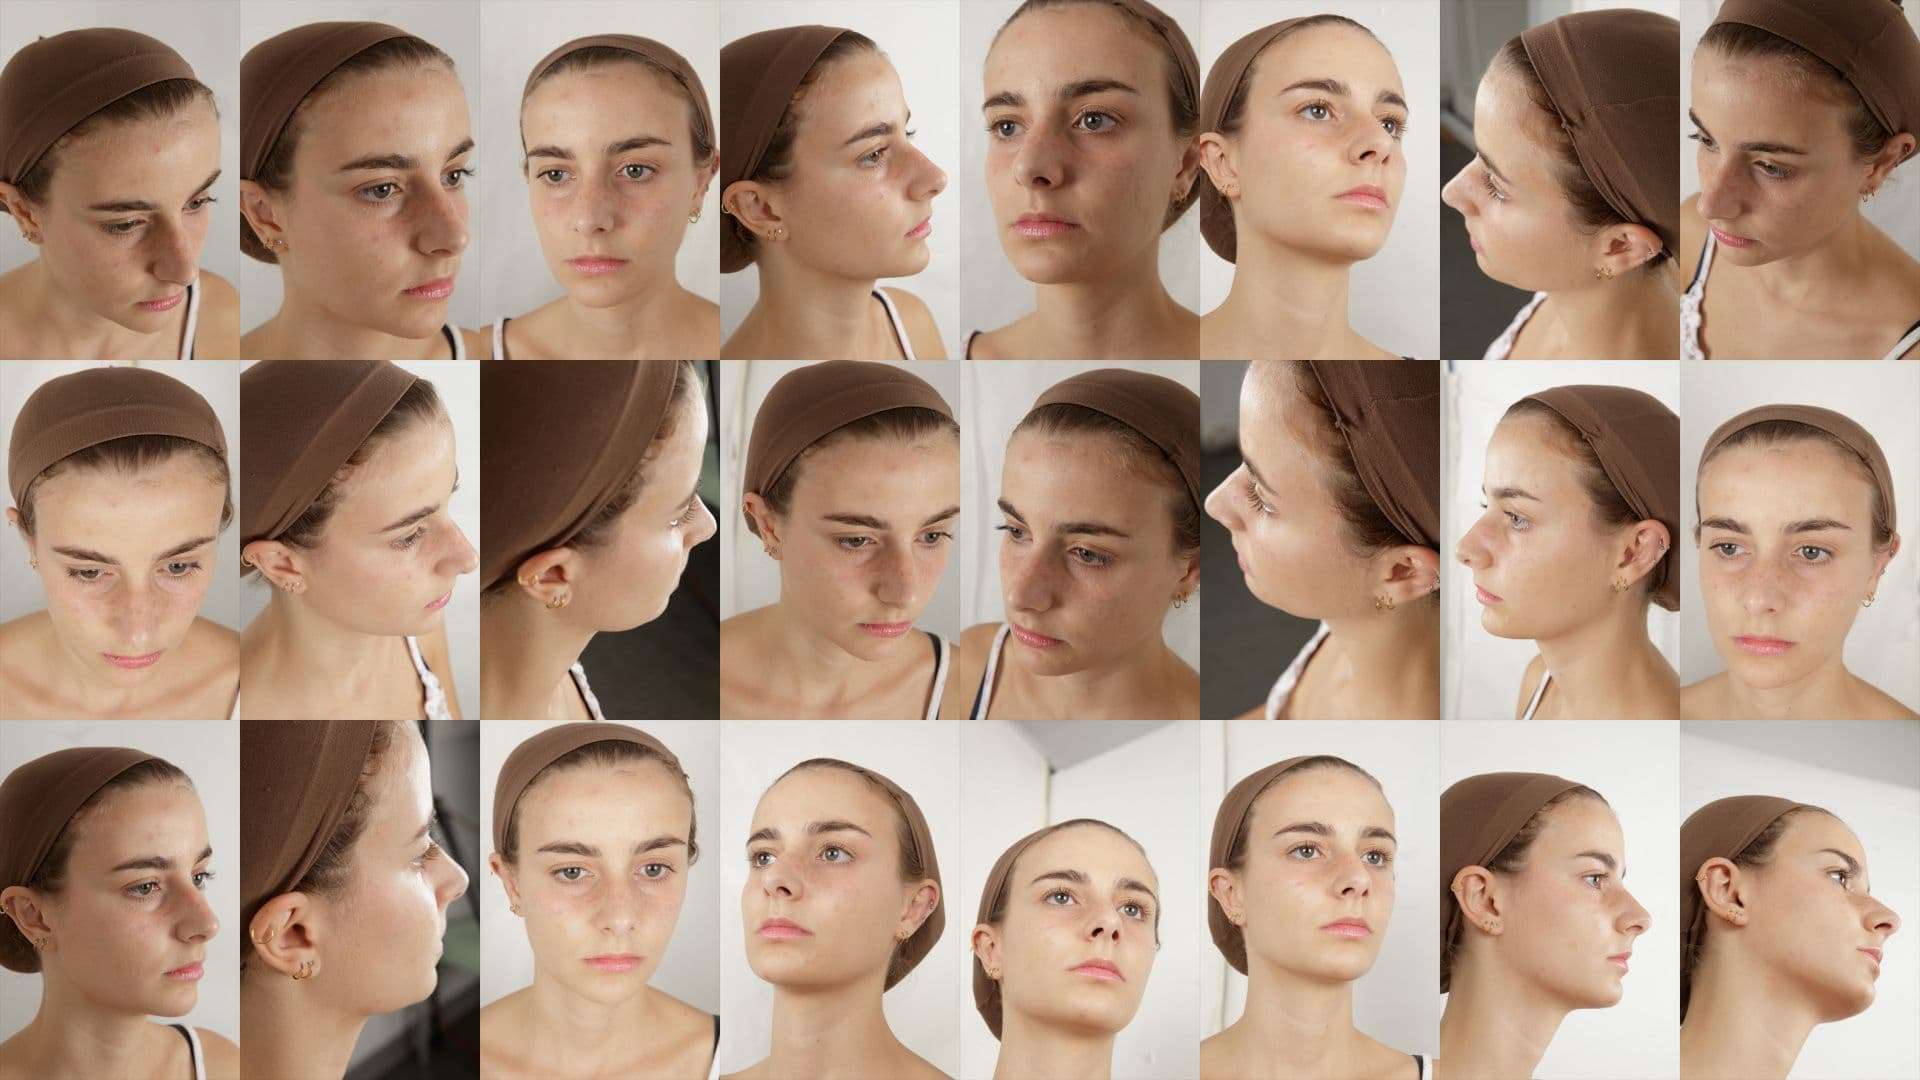
For the photogrammetry shoot you’ll need to take about 200 portrait pictures. For this part I recommend to use a soft light or to shot on a cloudy day, the goal is to have clear neutral pictures. Make sure to shoot all the possible angles. Take pictures from extreme angles from above and from below. Your entire head from the top of the crane to the clavicles should be present on the pictures. Don’t try to capture more of your body as the quality of the head will get lower and lower. If you want to scan your body you should take a second photo shoot of it.
The model must stand still with a neutral expression and the light should not move for the entire shoot. Also, you can put on a swim hat or a tight on your head to pull your hair off the way and make your crane as smooth as possible. If you’ve got beard or a mustache, the best way would be to shave it off (sorry guys!) but if you don’t want to it’s totally fine. You’ll just have a bit of reconstruction work later on.
Scan shoot
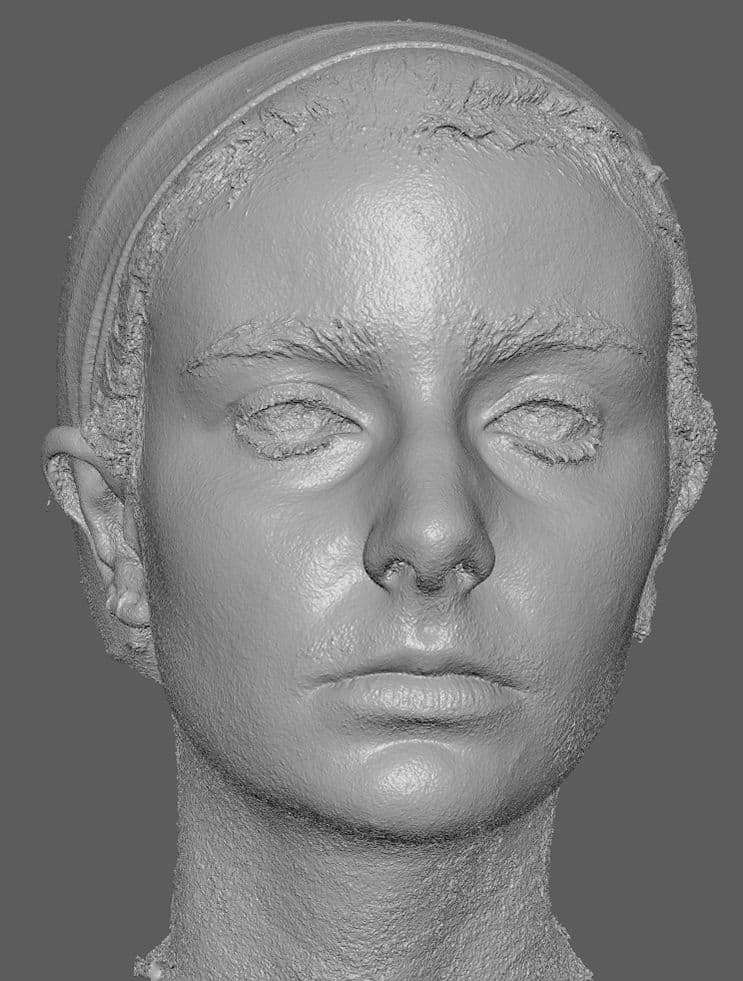
Then, I used Agisoft to generate a HD scan. If the photos were not taken correctly on the previous step, the scan might be a bit botched on certain areas. Make sure to take the time to take good pictures. The better the scan, the less you will have to work on the model later on.
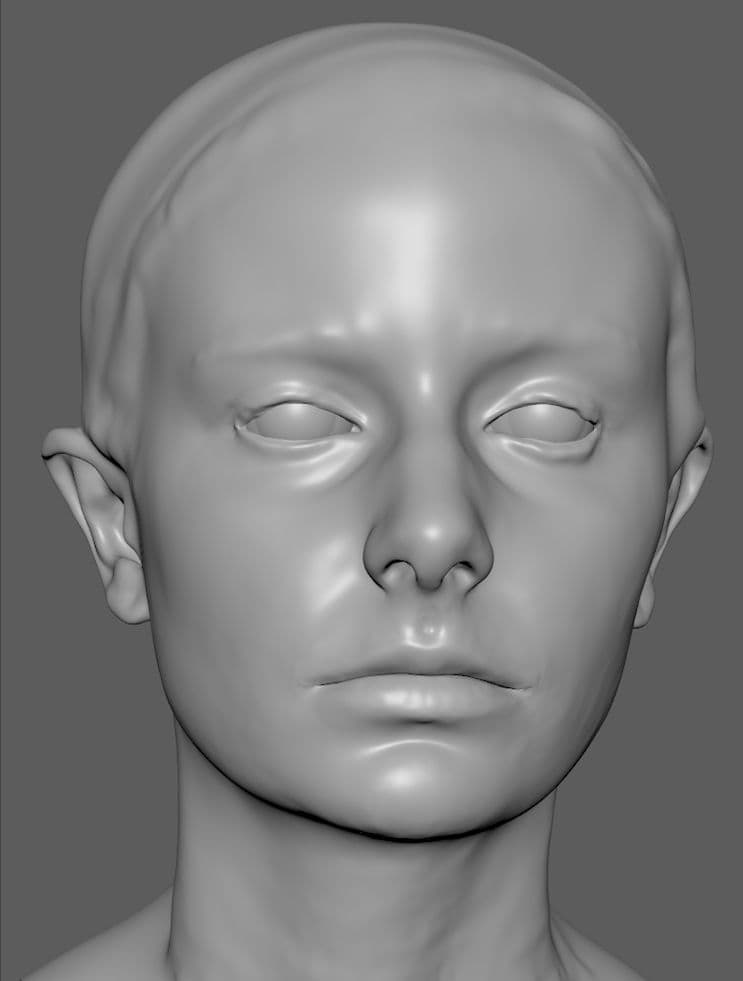
Scan
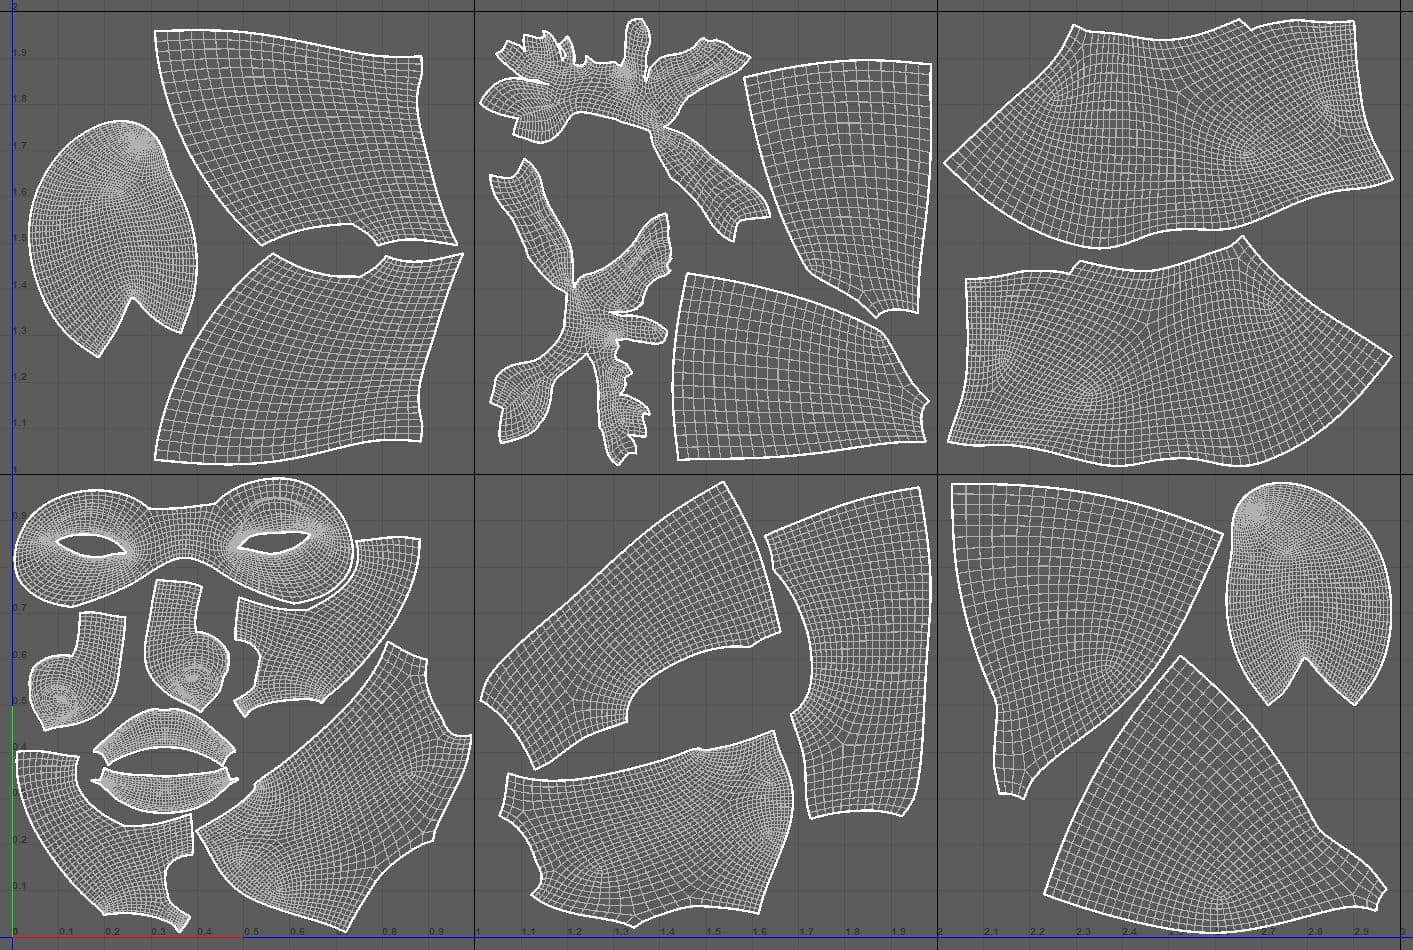
Retopology / Wrapping
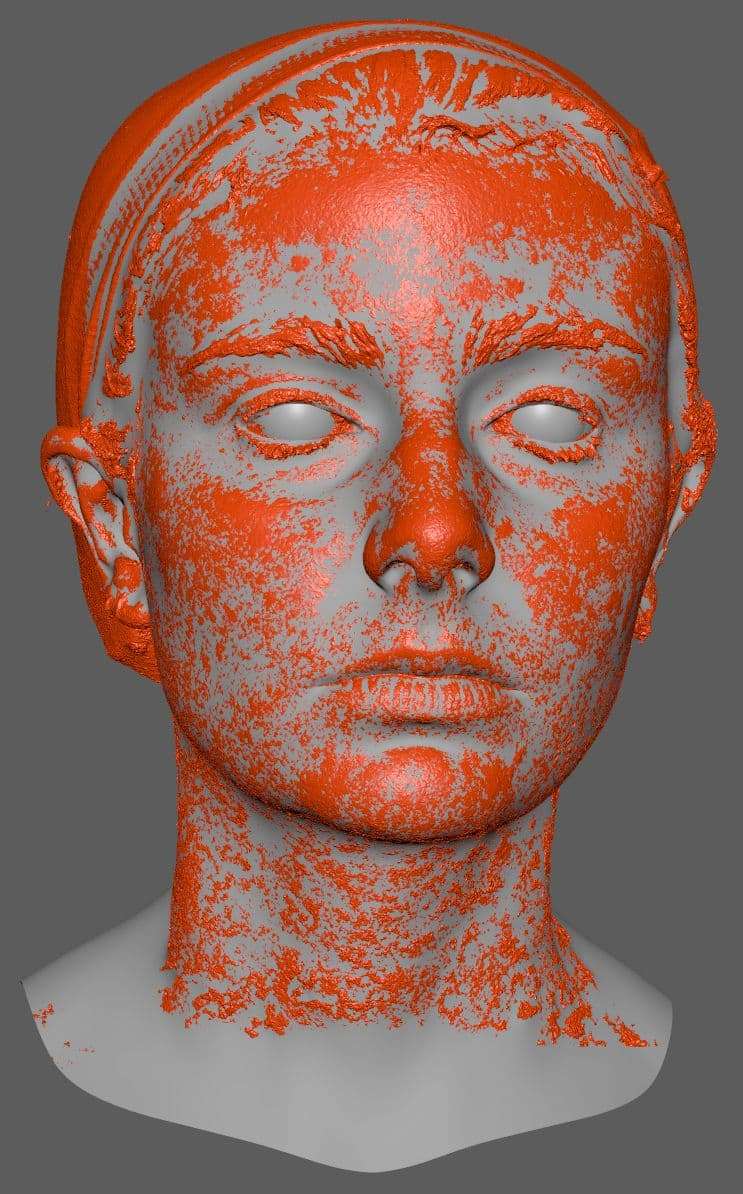
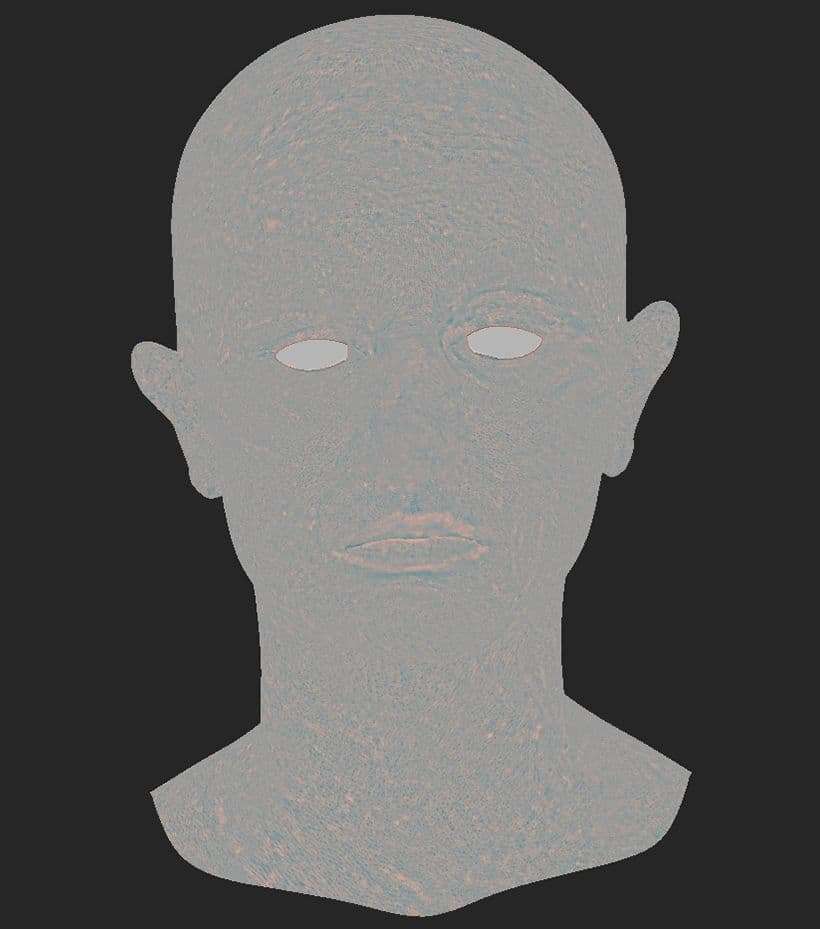
At this stage you’ve got a high triangulate mesh of your face, you’ll need to retopologize it. I used a wrapping software, R3DS Wrap, to do the retopology. The wrapping method is very simple, it’s a comparison of points between your mesh and the base mesh of the software. Andrew Krovopuskov did a great tutorial of this.
The wrap makes me gain a lot of time of retopology while giving me a really good mesh. The process will necessarily erase a lot of details as it is no longer high poly. You’ll have to replace it in displace and bump later. A lot of big volumes are going to be smoothed too, a bit of sculpt is definitely needed. The mouth and eyes parts will need a bit of work as often the scan has its limits on these areas (even more true when you’ve got long eyelashes on the way). The eyes are what we look at first in a portrait, make sure to put some extra work on it.
Wrap
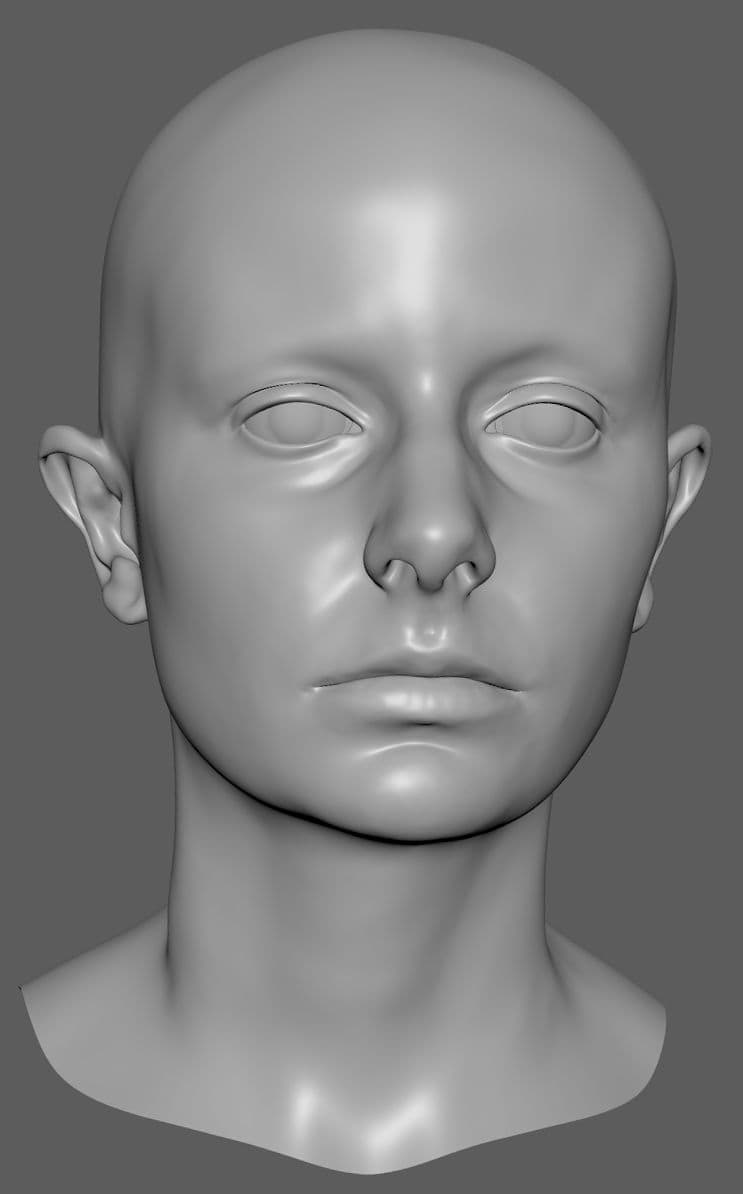
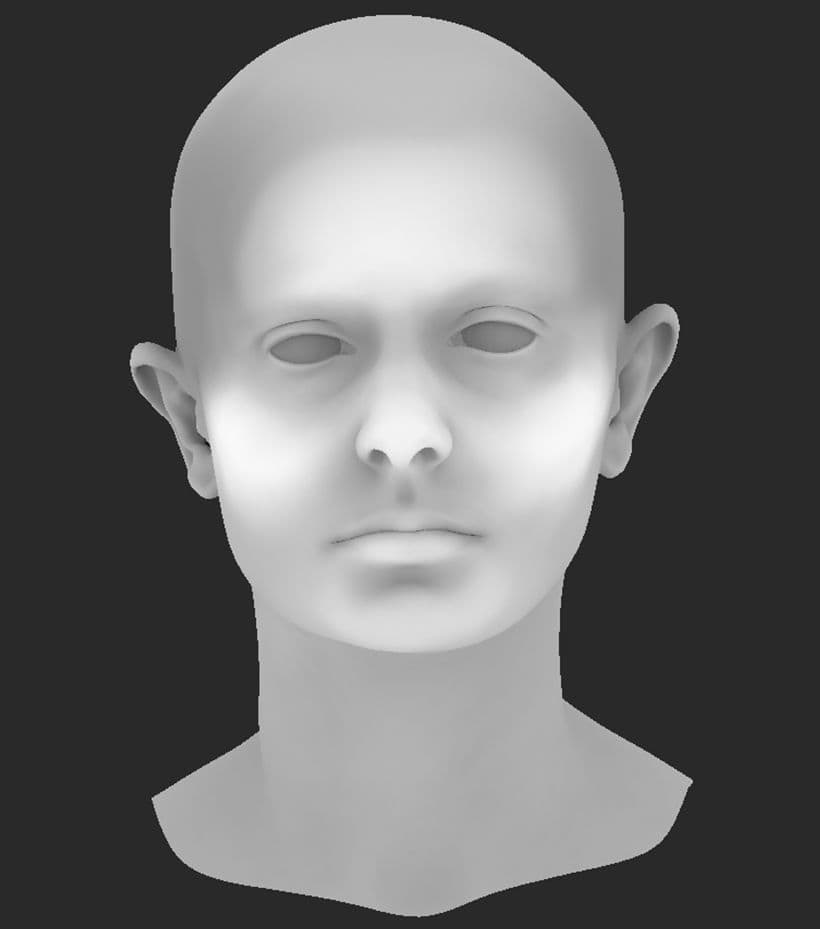
Sculpt & UVs
You can directly import your model on a sculpt software. I used Mudbox for this part as it’s very useful for simple sculpt. I also imported the high poly mesh scan as it’s a really good reference. You can put a colorful shader on your scan, it’s going to overlap with your model and that way you’ll be able to see clearly all the areas to sculpt.
First I erased the volume of the hair, eyebrows and lashes. Then, I reconstructed all the missing volumes. I added some edges on the eyes to accentuate the eyelid. I find it’s the most difficult part of modeling a realistic face because you want the feeling of the eyelid resting on the eyeball. I watched a lot of eyes references to really understand the anatomy of this part. It is also good to rapidly create the eyeball as it’s quite helping in the constitution of the eyelid.
Sculpting steps
Overall, take your time to observe yourself and make the best model. It’s super important to not rush this part as it’s going to be the pillar of everything.
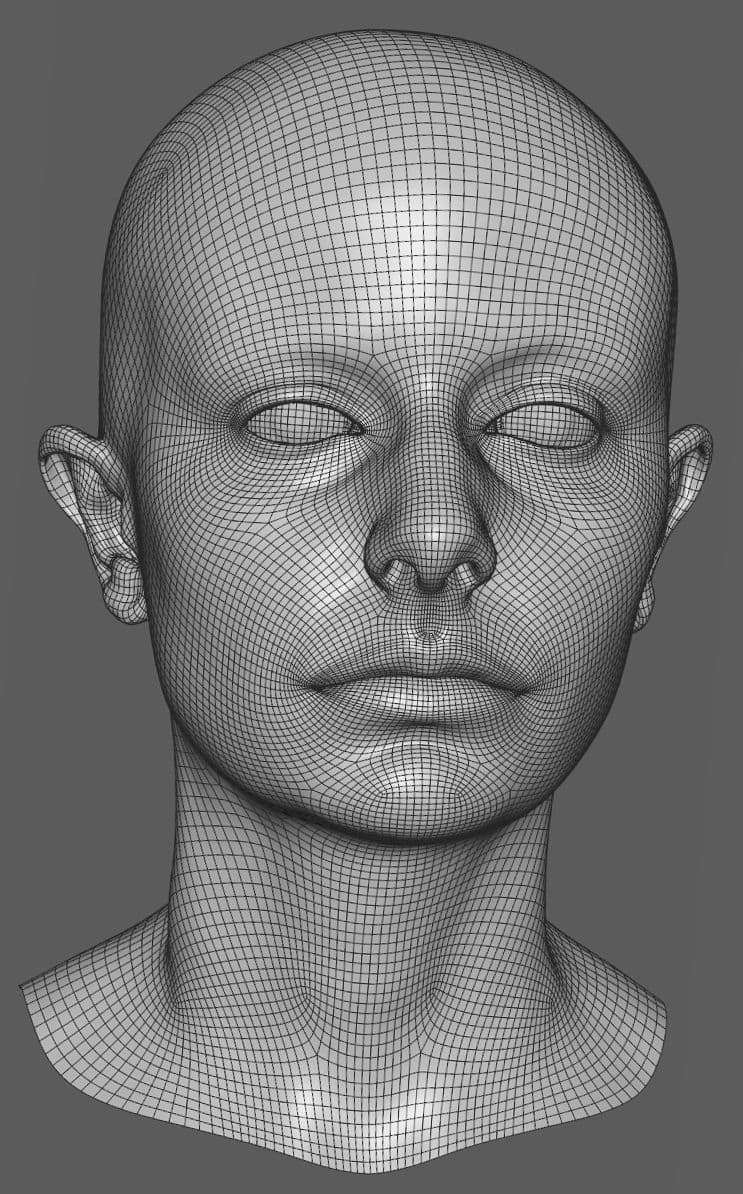
Once it’s done it’s time for the UVs, I planned to texture on Mari so I choose to make the UVs into 6 UDIMS (each UDIM being 4K). While I wanted to be able to make quite close renders, my goal was not to make real close up.
UV's
Texturing
Albedo
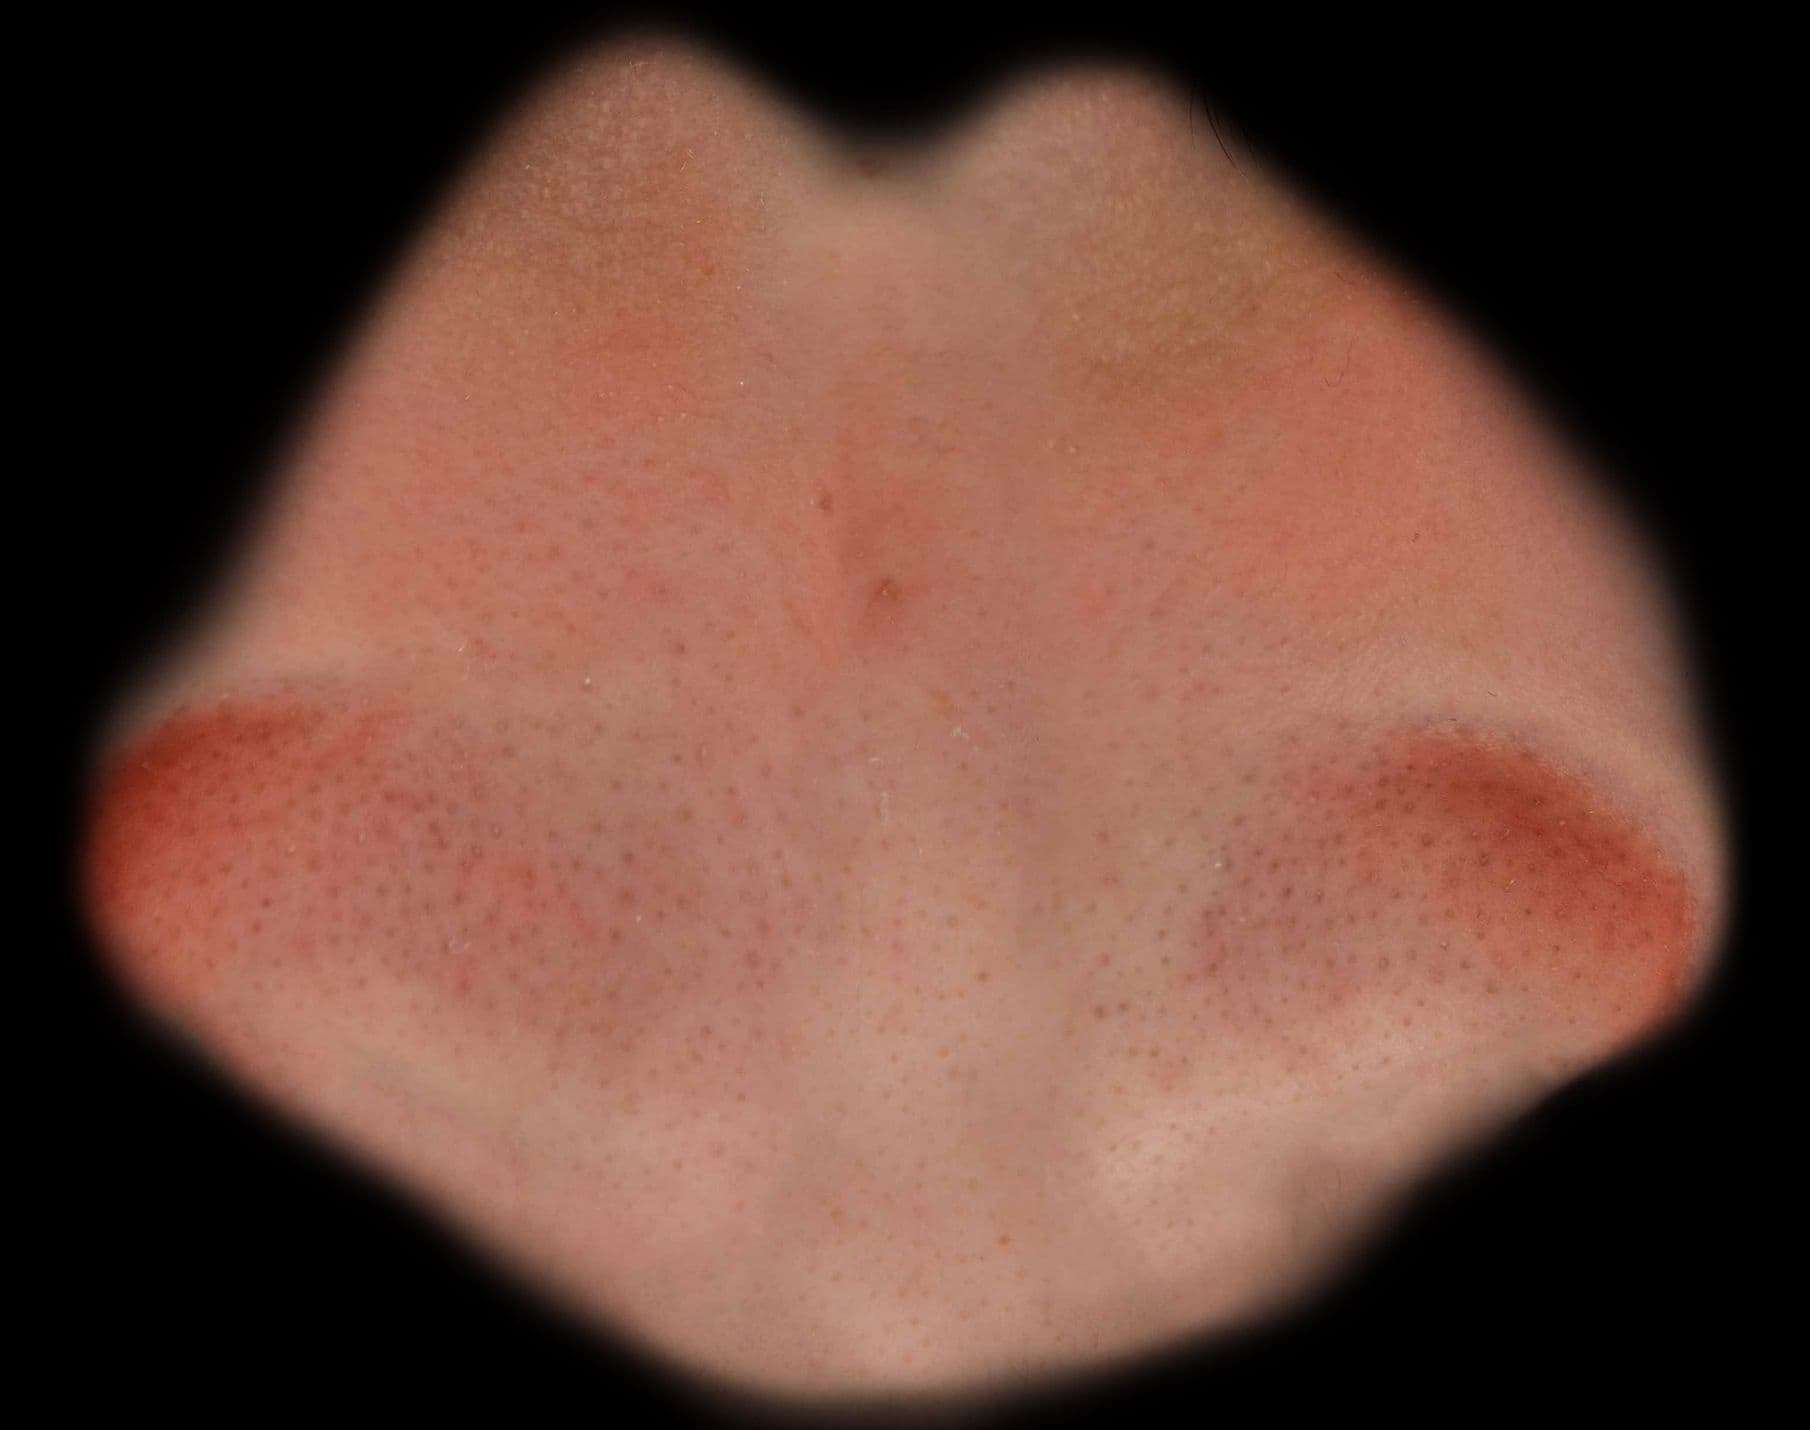
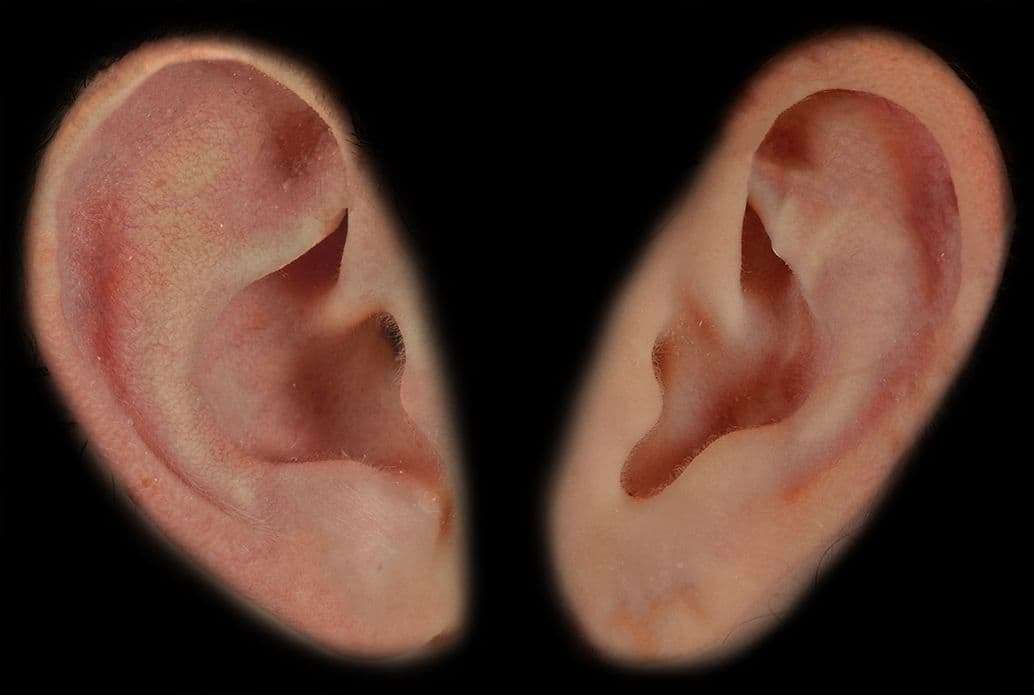
For this part, I also did a photo shoot to have my real textures. This time I used a cross polarized filter placed on the camera lens. This filter is going to get rid of nearly all the specular on your pictures. It is super interesting as you will no longer have to edit them and by doing that, deteriorate your textures. Shadows removal is still going to be needed as the filter has no incidence on it. Taking pictures, make sure to be perpendicular to the area you’re taking (if not, some parts are going to be blurry). It is also important to take a picture of a grey chart to do some white balance and exposure compensation next.
Cross polarized shoot
Once you’ve got all the differents parts of your face (eye, nose, forehead, jaw, neck and ears) it’s time to assemble them in preparation of Mari. I assemble four patches of texture on photoshop : the most of the face, the nose, the neck and the ears.
Texture patches
I used Mari as I wanted to do a lot of projection and because it easily supports UDIMs. I imported my patches in Mari and projected each areas on differents layers to be able to tweak them later.
Once you’re done with the projection of the patches, it is important to make sure everything is homogeneous between the different parts. Doing some levels and hsl on the differents layers can really help you with that.
Then, you can enhance the level of details of the albedo. Like increasing some colors on the cheeks and all the parts that tend to blush/redden, or paint some veins if you have thin skin, etc.
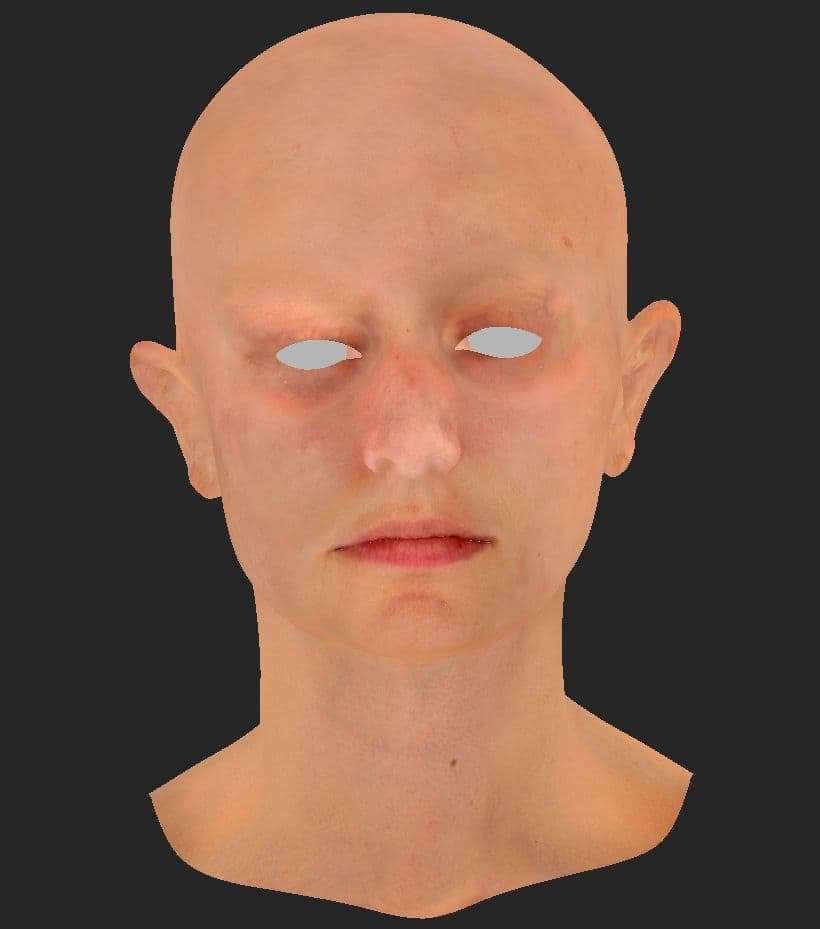
When you’re satisfied with your albedo, you can start to make some renders to check everything out. It is going to be a back and forth between Maya and Mari to adjust the shader how you like.
Check out your references at each step of the project to make sure it is true to life.
Albedo
Displacement
I used the xyz multichannel maps. Basically, it’s a technique where each RGB channel contain informations. Displacement on the red layer, tertiary on the green and micro on the blue. If you’re interested in human texturing, I advise you to check out their website.
The red channel will mainly be plugged on the displacement slot. The green on the bump and roughness. The blue on the bump, roughness, and specular color (to kill a bit of the reflexion on the skin pores). If you want to know more about it, here is a good tutorial of how to use it : https://texturing.xyz/pages/discover-uhd-displacement
The same way as before with the albedo I start projecting the textures on Mari. You can have a better visualisation of your displacement in Mari if you use a copy channel to isolate the red channel, then plug it in the bump slot. Also, regularly check out what the displacement looks like in Maya as it will not look the same.
Now that we’ve got the main displacement, it’s time to create a more personal one. I blend it with the previous on Maya.
To do it, in Mudbox, I imported my albedo maps to visualize the places I had to sculpt. I sculpt eyes wrinkles, skars, microcyst, moles, pimples : all the little imperfections that makes you who you are. One more time, really focus on the eyes as there’s a lot going on the eyelid.
For some part of the displace, I combined my xyz displacement and tweaked albedo maps on Photoshop. I especially did it for the lips, as I find the wrinkles we got here vary a lot from people to people.
Displacement/bump
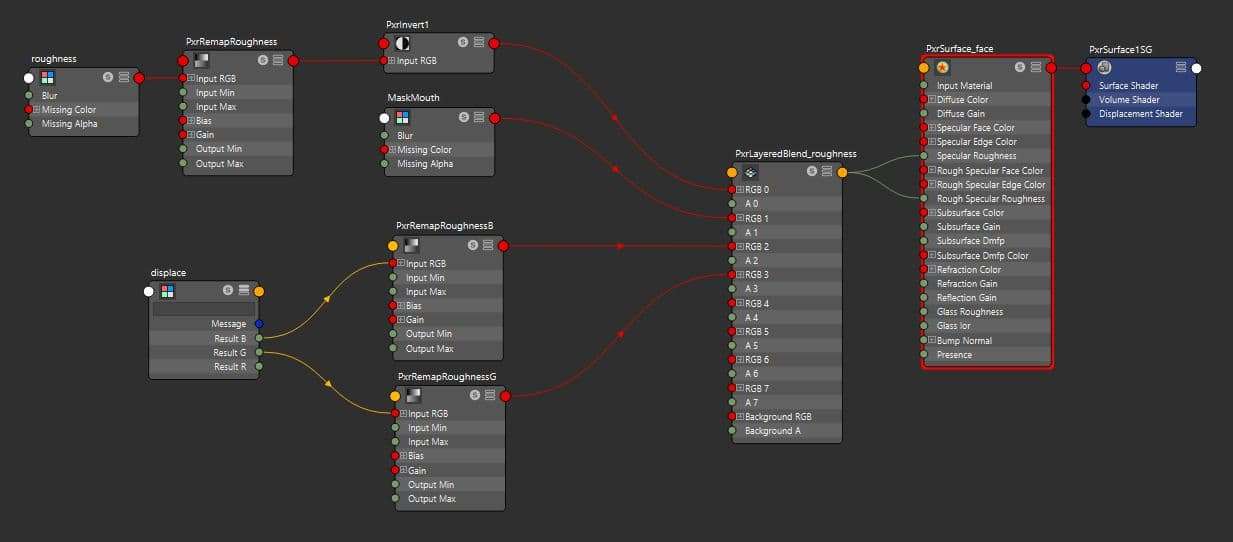
Roughness
The blue and green channel of xyz textures we already projected are going to be useful on Maya later to have variation and details. Still, we need to create a basic roughness map.
I check value references for the specular of each area on USC website. Here are the base values I found : 0.60 for the forehead, 0.30 for the temples, 0.45 for the cheekbones, 0.85 for the nose and 0.70 for the chin. These are base values that are good to use, but we are all different. Some may have very dry skin and others very oily skin, so make sure to observe yourself and play with the roughness values according to it.
I also painted some masks to directly change the values in Maya with a blend. I find it more clear to directly view the results of what I’ve done on render. I principally did it with the mouth, that way I can make it more moisturized easily.
Roughness
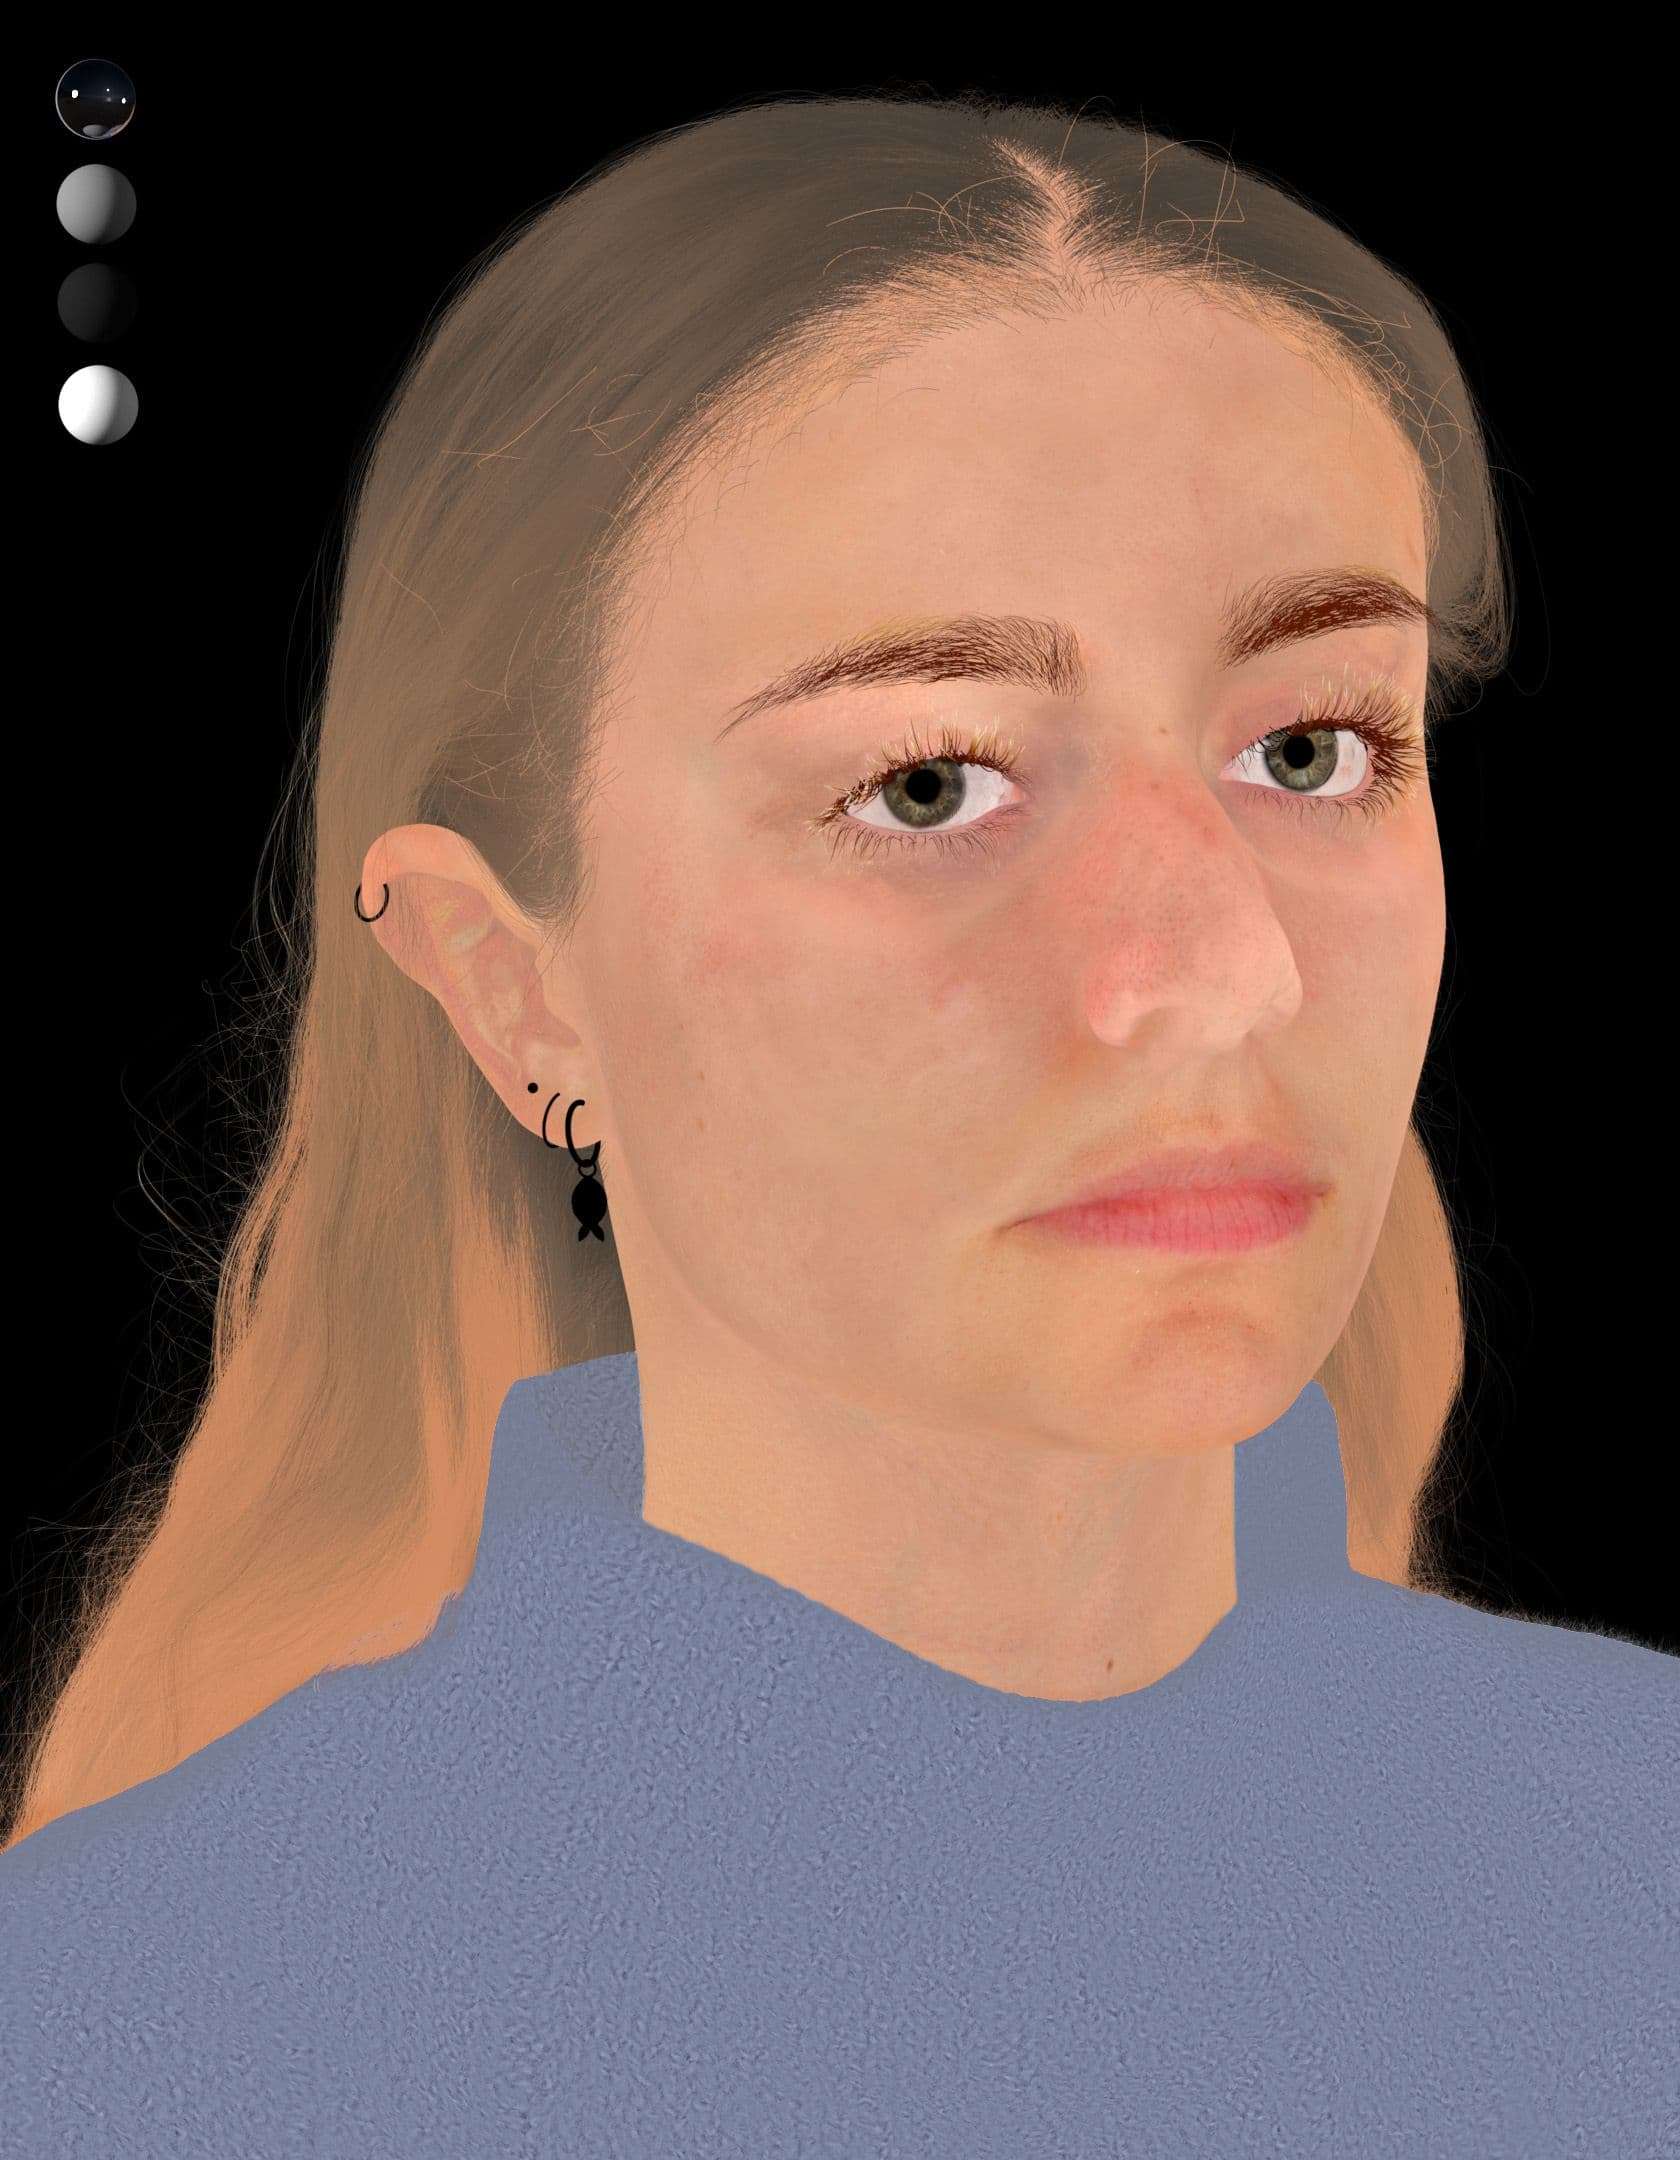
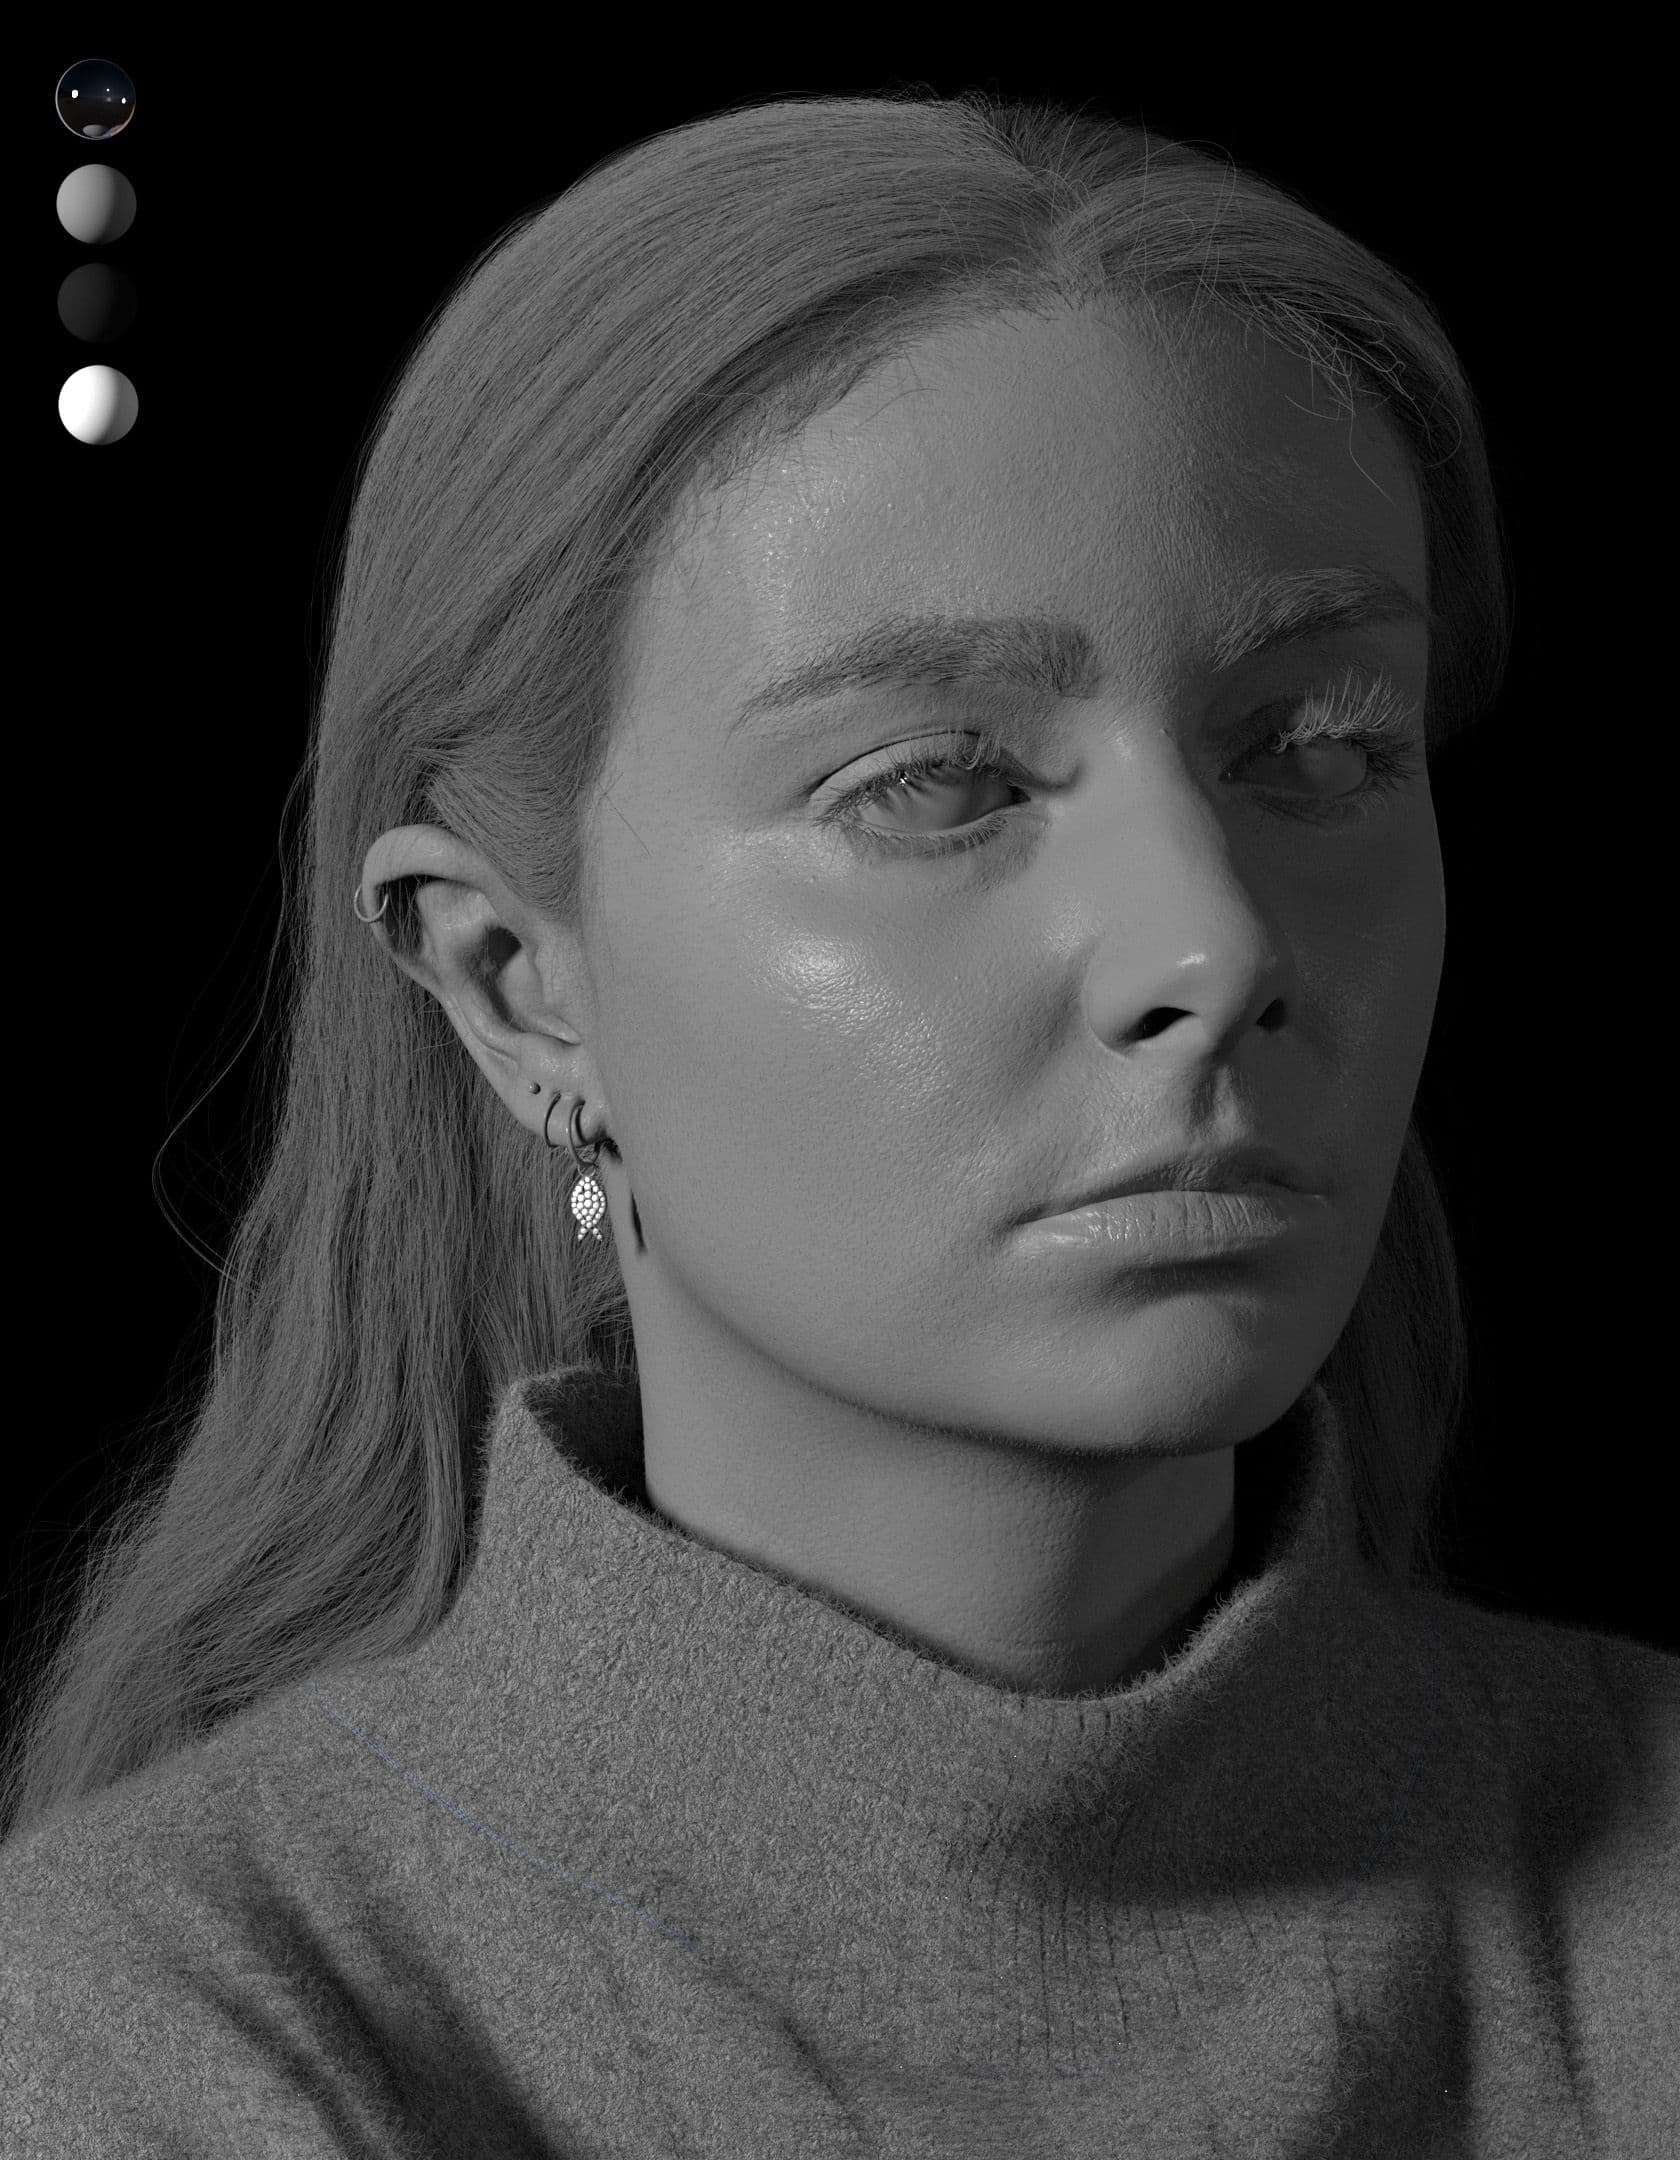
Shading / Look-dev
I used Pixar’s Renderman for the shading/lookdev as it’s what I’m the most used to, I wanted to be the most efficient possible. However, each rendering software works nearly the same so it should not be difficult to adapt it to any other soft like Redshift, Arnold or Vray.
It’s not really a whole new stage of the project as I always make sure to go back and forth between the texturing and shading. It’s a package that should not be separated : you have to always check if what you’ve done on textures works on render. Often you’ll not create your textures in one go, it takes a lot of trials and errors.
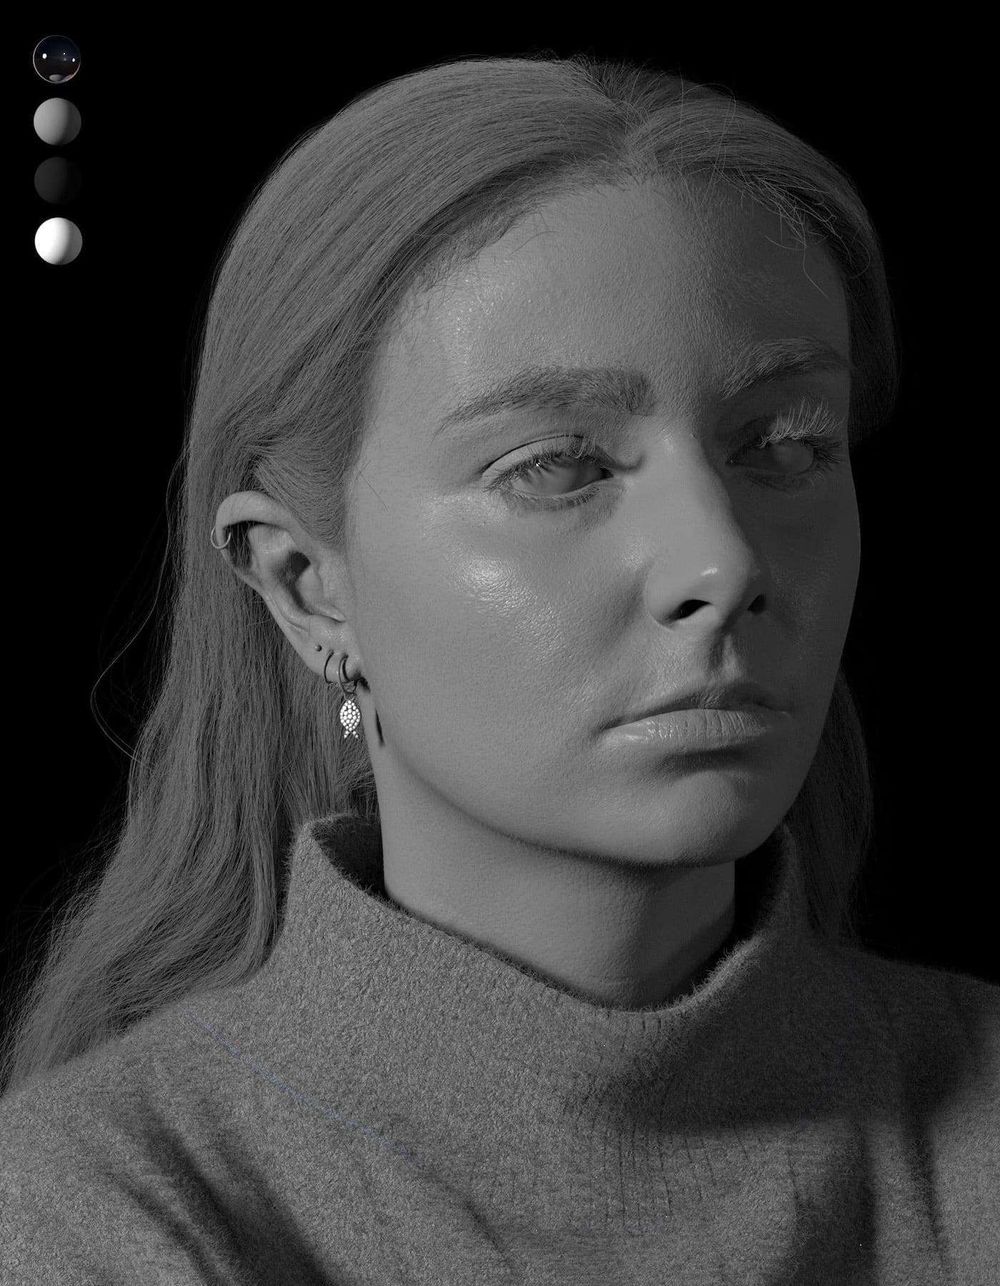
Here are some advices to create your lookdev scene. You want it neutral and with an average lighting (neither to exposed or under exposed). You can make a 3 points neutral lighting or use a neutral environment HDRI. Here are good websites where you can find some : http://www.jahirulamin.com/environments, https://hdrihaven.com/
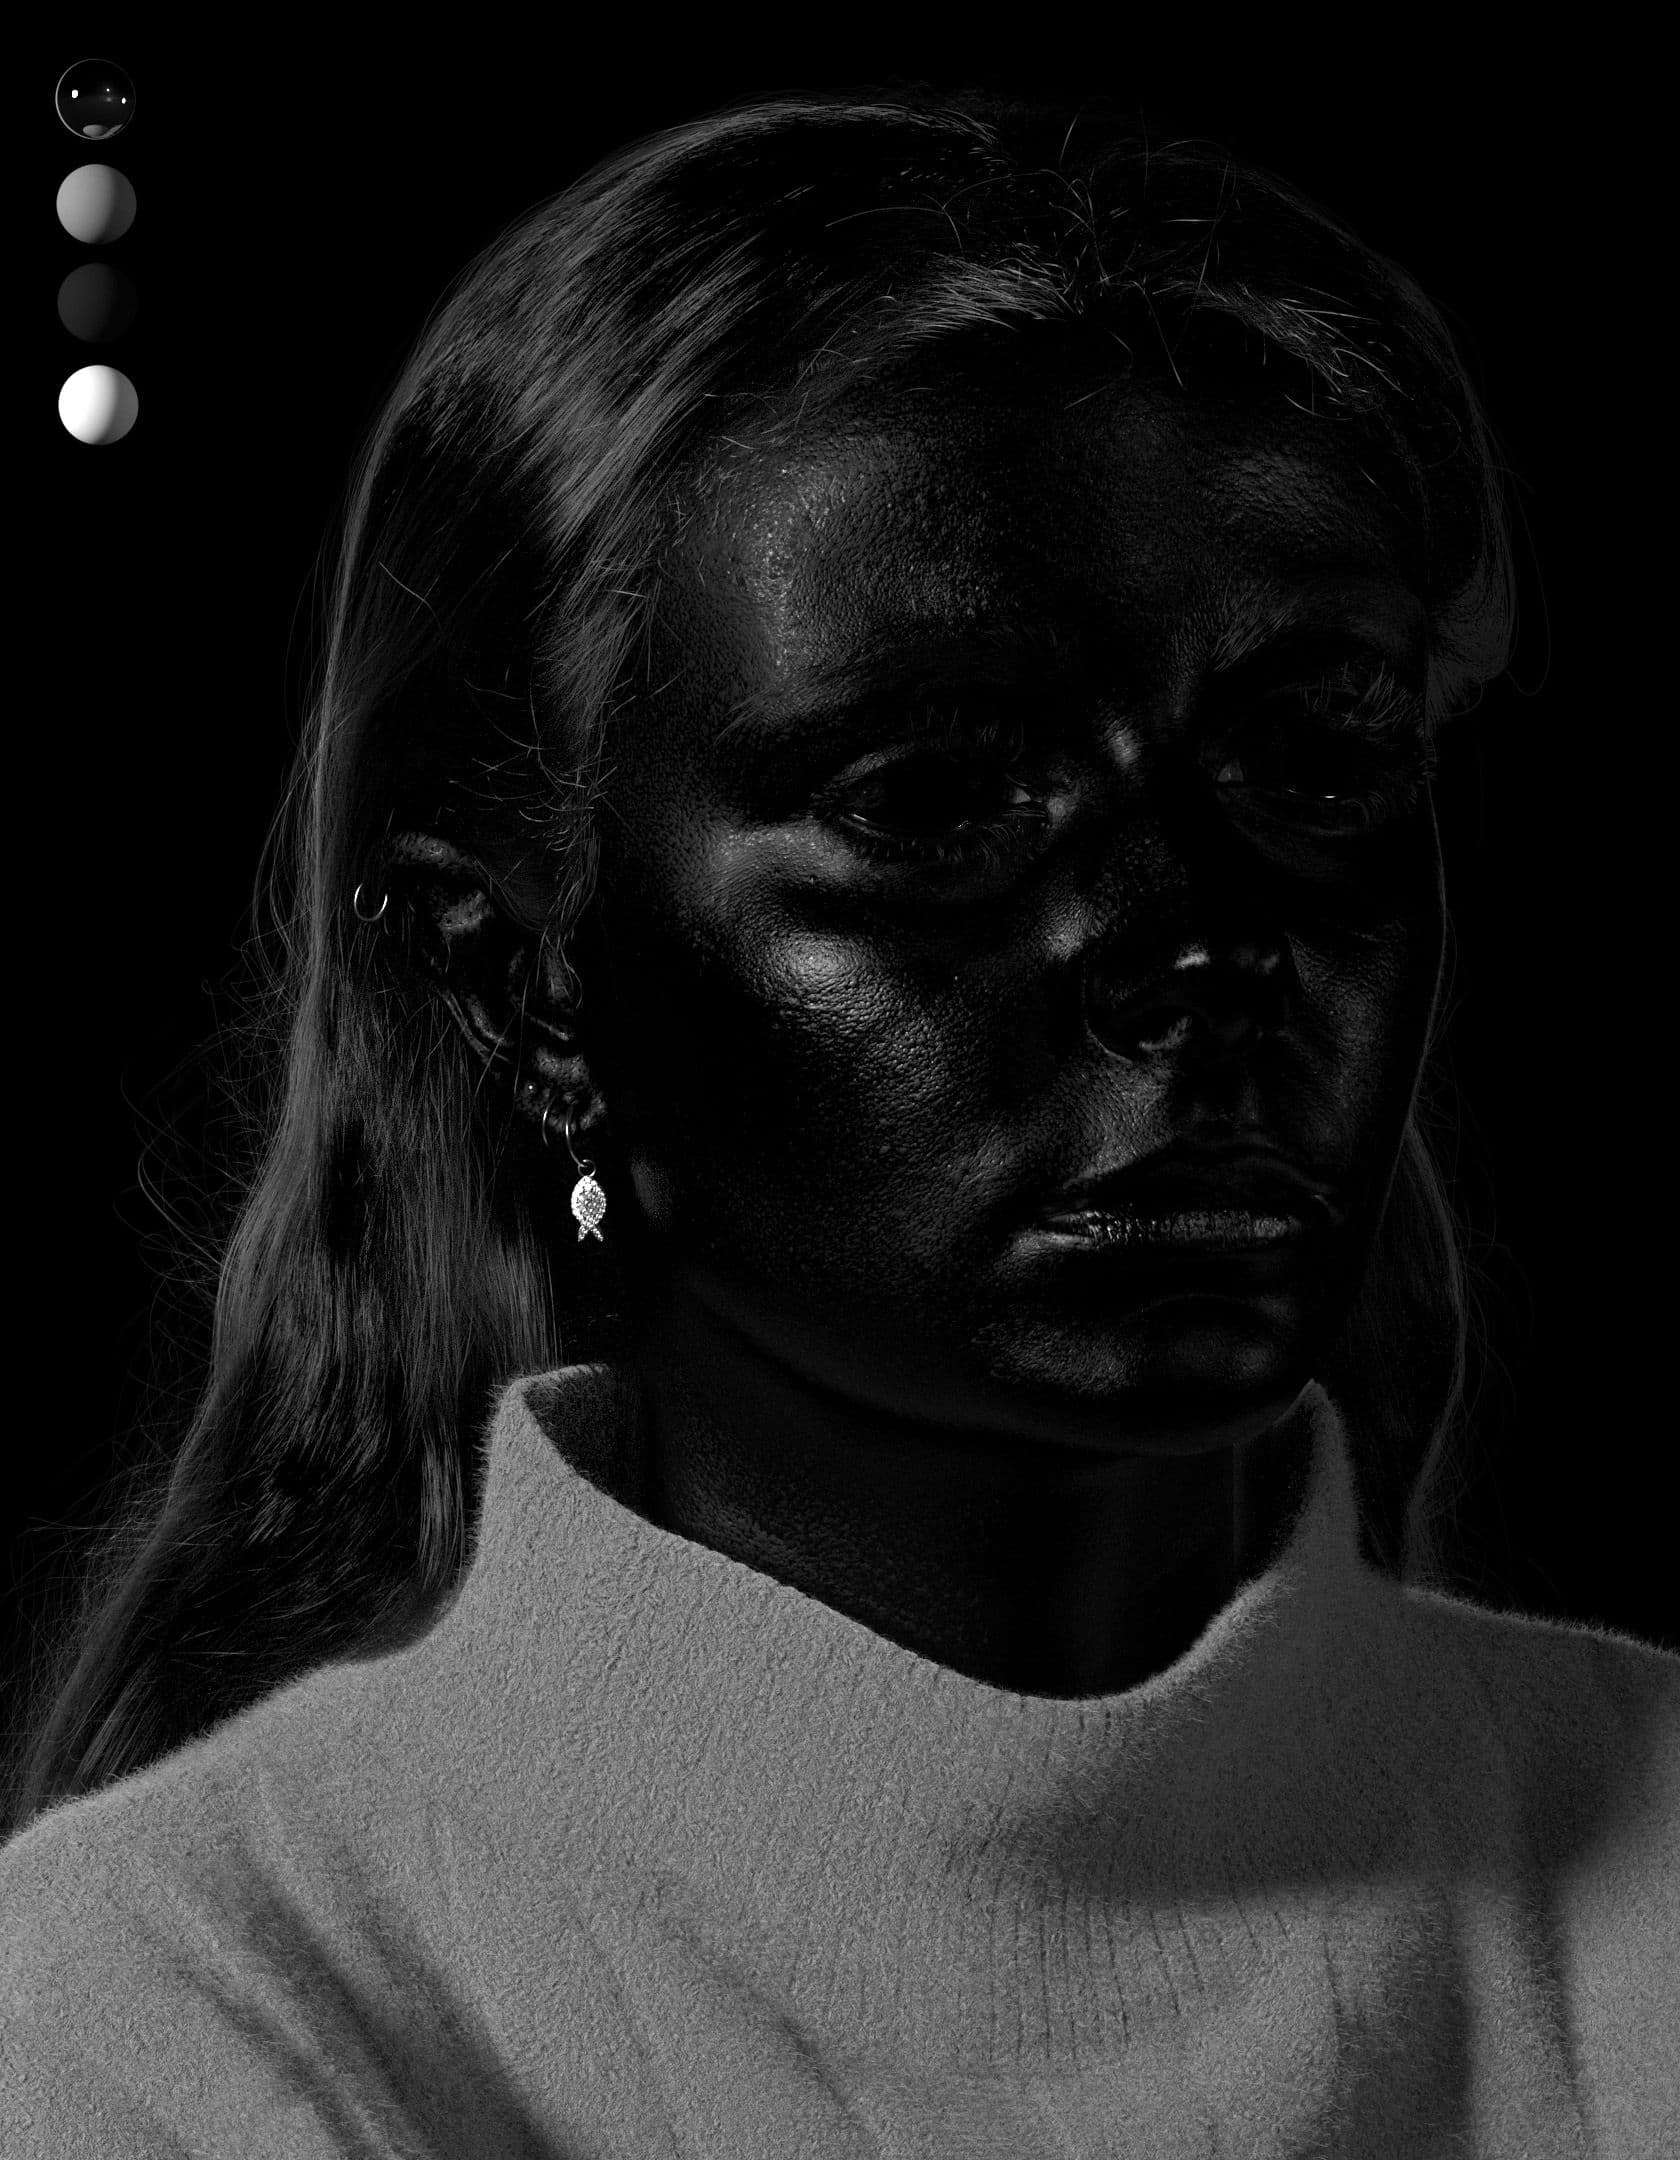
It is very useful to place balls on your scene (a greyball, white ball, blackball and chromeball) to check if the lighting is at mid grey 0.18. The white ball should have a value of about 0.875, the black ball about 0.004 and the grey ball about 0.18. The chrome ball is used to see your environment and light rig.
At this stage, I like to use 3 points lighting as it’s more tweakable and it doesn’t add any environment informations and variations. However, when you’re a bit more advanced on the shading process it can be quite useful to use an HDRI. That way, you can easily check if your shadings works under differents types of lighting.
Once you’re done with your scene setup, you can start to plug your maps and tweak it. I used two main specular lobes, one primary specular and one rough specular.
The primary specular is going to give us all the sharp main specular whereas the rough specular will create the oily effect on all the skin. The lobs works together, and double specular takes double energy. Make sure to divide the intensity value of each specular by 2 so the global energy is well kept.
I used the green and blue channels of my xyz maps plus my roughness maps blended together to create my specular roughness. The green tertiary channel is used to create some nice variations on the roughness maps. I used the blue microdermal channel to shut down the reflection on the pores. It’s really going to recreate the depth of all the tiny pore our skin has, it’s an important part of the skinny effect we want to create.
I did the same process with some tweaking for the Specular Edge Color.
Shading network roughness
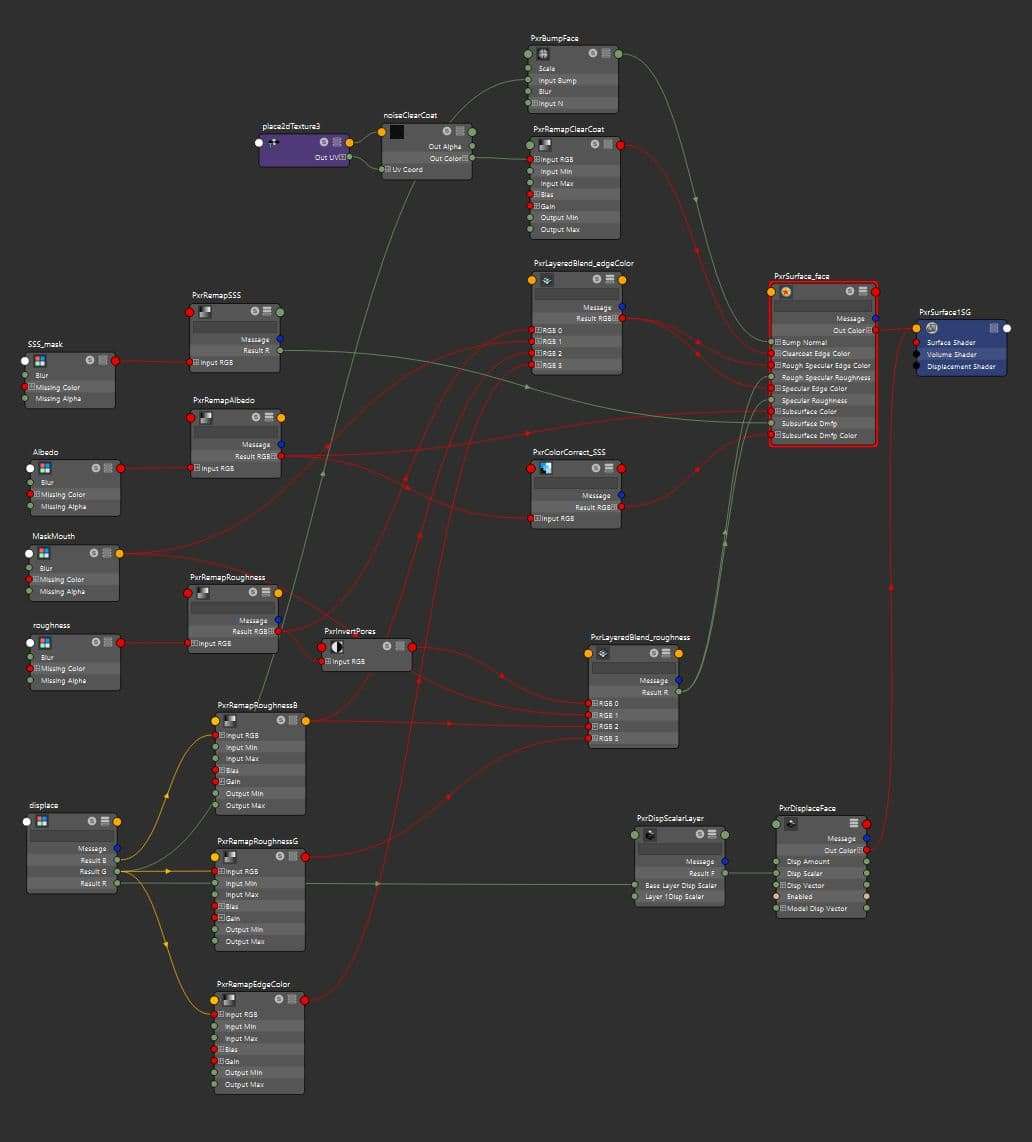
Tip: I used a 3rd specular lobe, a clear coat. On its edge color I plugged a small and eparse procedural noise to replicate the tiny specular sparkles we sometimes get on our skin.
For the albedo, as it’s skin you’ll need to use some sub-surface scattering (SSS). You can check out Renderman documentation for this part. I chose the exponential Path traced and plugged my albedo maps in SSS color.
You’ll also need to set the SSS Mean free Path Color, which is basically the color of your subsurface. You have to correct the albedo RGB channels as they don’t propagate the same way under the skin. The red should scatter farther than the green and the green farther than the blue. According to that I color corrected my albedo maps so that my RGB gain is 1.0 for the red channel, 0.35 for the green and 0.2 for the blue. Then, plug it on the Mean free Path Color slot.
Next step, you’ll have to specify how far the light travels in your model with the Mean free Path Distance. Be careful with it as it depends on the scale of your scene.
I set my directionality at 0.8 which is keeping the areas of effect mainly to the ears, nose and mouth. I also painted a map that I plugged in the SSS Mean free Path Distance to lessen the effect of the SSS on the eyelid areas. The volumes are really thin around here so the SSS is often too strong.
The bump and displacement slots are going to depend on the scale you choose for your renders. In my case, for the displacement, I blend together the xyz red channel and my displacement personal maps. For the bump, I plug the xyz green tertiary channel.
If you’re closer to the subject you may need to plug your xyz green tertiary channel on the displacement slot.
Shading network
Groom
This part won’t derogate to the rule : you will need a lot of references of the chosen hairstyle. Of course you’ll also need eyebrows and eyelashes references, but the lasts photo shoots should do the job.
Hair references
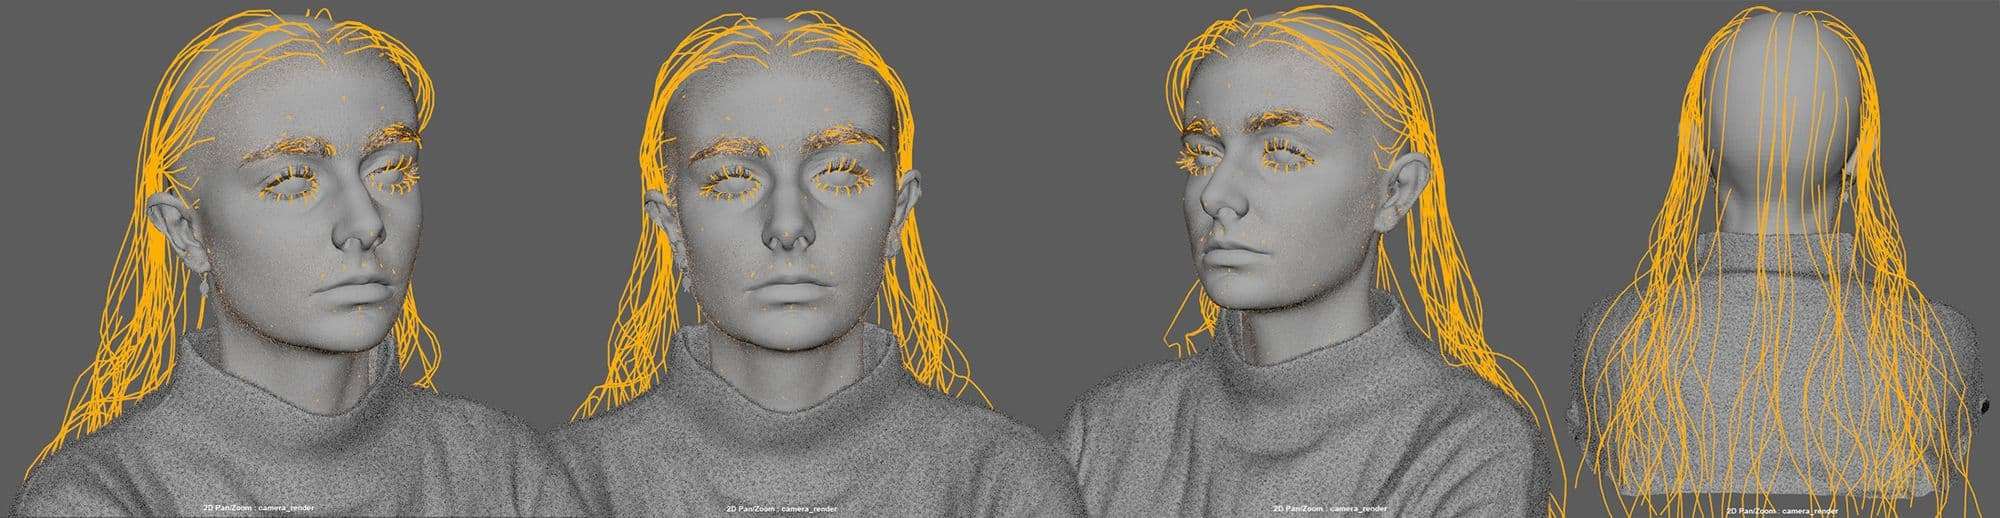
I used Xgen Interactive Grooming. Before anything you’ll need to create scalps wrapped on your mesh for the hair, eyebrows, eyelid and duvet. Those scalps are the isolation of the mesh areas the groom is going to take its roots in. That way you will still be able to modify your mesh without affecting the groom. It works if you want to create blend shapes for example (still, it should be done when your modeling is finished, don’t change the topology at this step).
Once you’re done with that, you can create your descriptions and your guides. Watch closely the flow of hair and the main direction it takes. Take your time, the groom is a slow process, all is in the observation. You need to know the nature of your hair, are there thin ? Do you have a lot ? Are they straight, wavy, curly, frizzy ?
I created 3 descriptions for the hair. A main one with the principal flow of hair, a stray hair one for all the crazy hair sticking out of the way, and one for the baby hair. Those baby hair at the implantation make a good transition to the rest of the hair and gives a lot of realism.
You can create each guide by hand or use the makes Guides Dynamic option, with a bit of tweaking it can make great results.
If you’ve got hair parting, you may need to use a region map to separate the different hair parts. To create a wavy effect on my hair I used a noise modifier directly under the guides. There’s also a curl option in the clump parameters.
Guides
Don’t hesitate to play with the modifiers and layer them. I applied at least 4 clump modifiers and 3 noises of different intensity. I start with the impacting and rough modifiers to finish with the more subtle ones. Tweak and play with parameters values to give a lot of variations and details.
When my groom is nearly finished, I like to add a sculpt modifier to change tiny details how I like (the freeze tool is a must have for that).
Once you’re satisfied with your groom you can bake your descriptions, it will make your project less heavy.
Groom
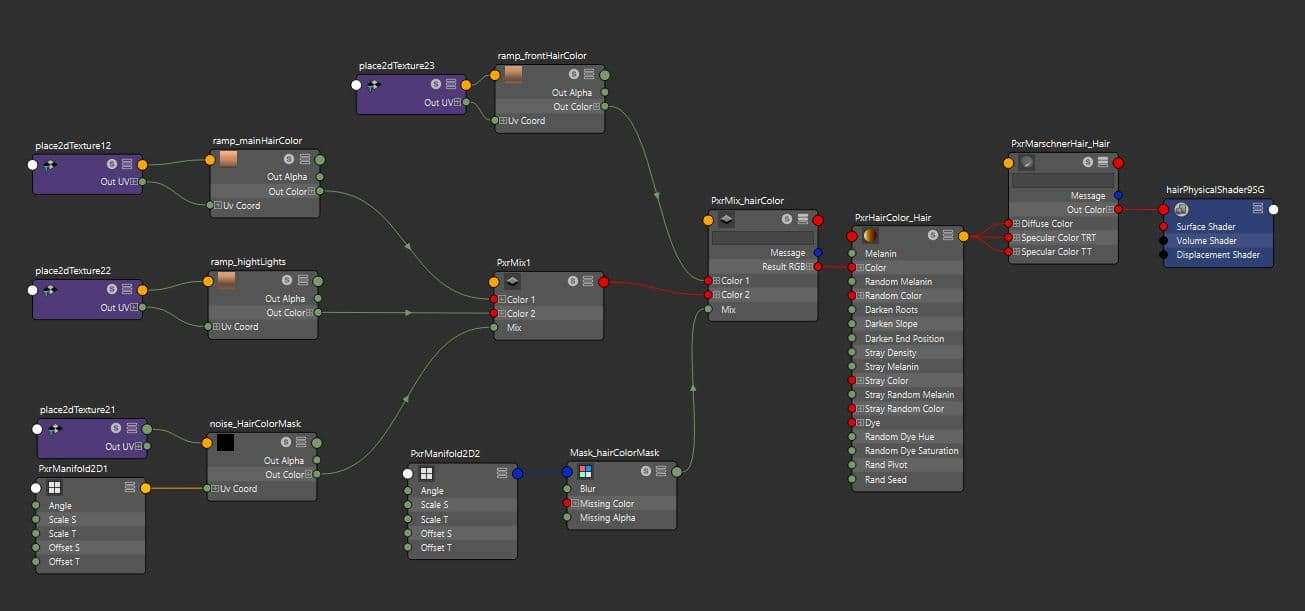
Now, it’s time to shade your hair. I used Pixar's Renderman MarschnerHair and HairColor nodes. What’s the most important in this part is to observe all the nuances you’ve got in them. Very often hairs are not uniform : there’s a lot of variation going on. I used the stray hair Color parameters on the PxrHairColor, but it was not enough to give the highlights effect I wanted. On the Hair Color, I used procedural noise masks and ramps of degraded colors to create all the lighter strands of hairs and gives more depth to the hair.
Groom shading network
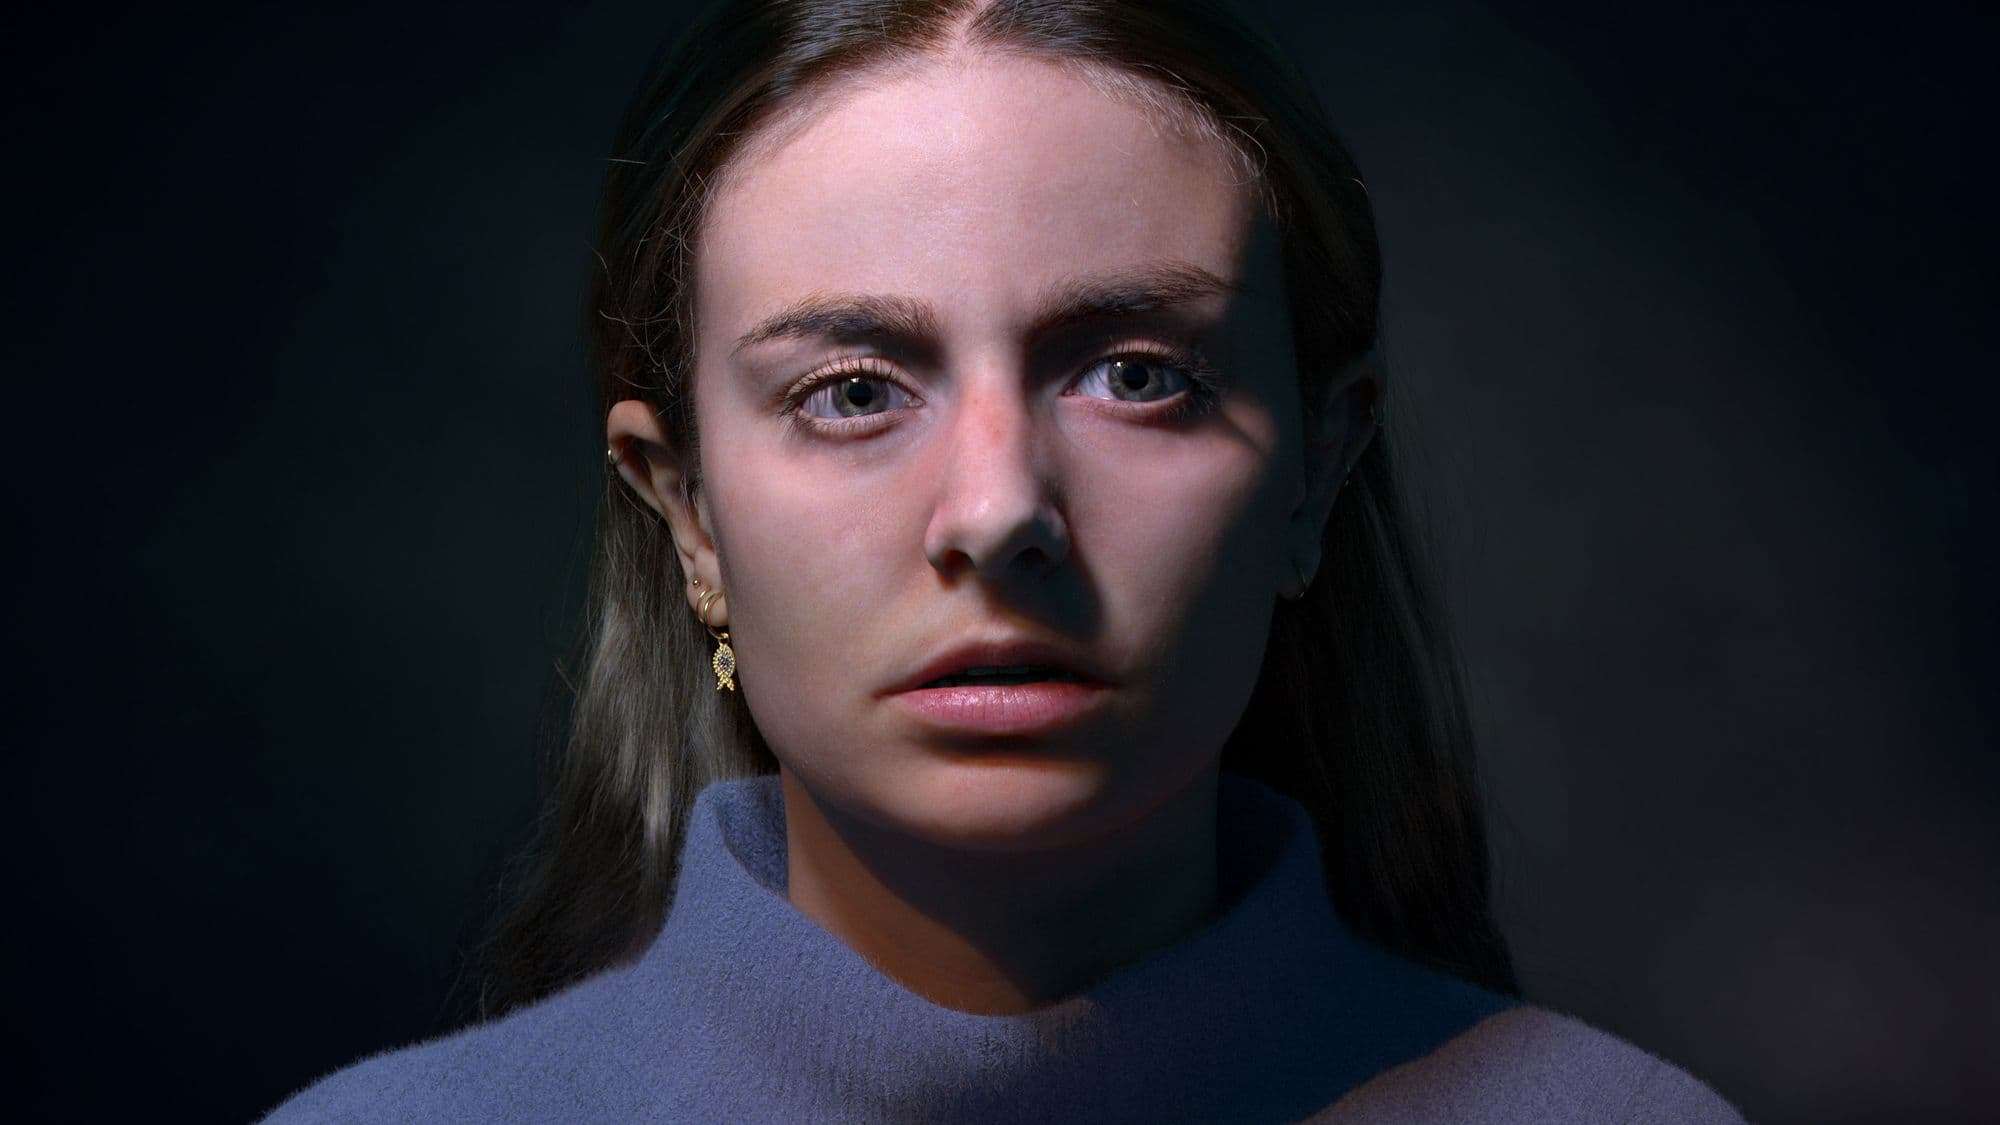
Final renders and lighting
It’s time to show your work, think about the intention and the feelings you want to convey. Searching for references about what your want is a great way to give you ideas.
Also, keep in mind your lighting must show and emphasize all the work you’ve done until now, don’t overdo it ! Also, plugging maps or IES profile on your lights can help you to add more variations to your lighting when working on it.
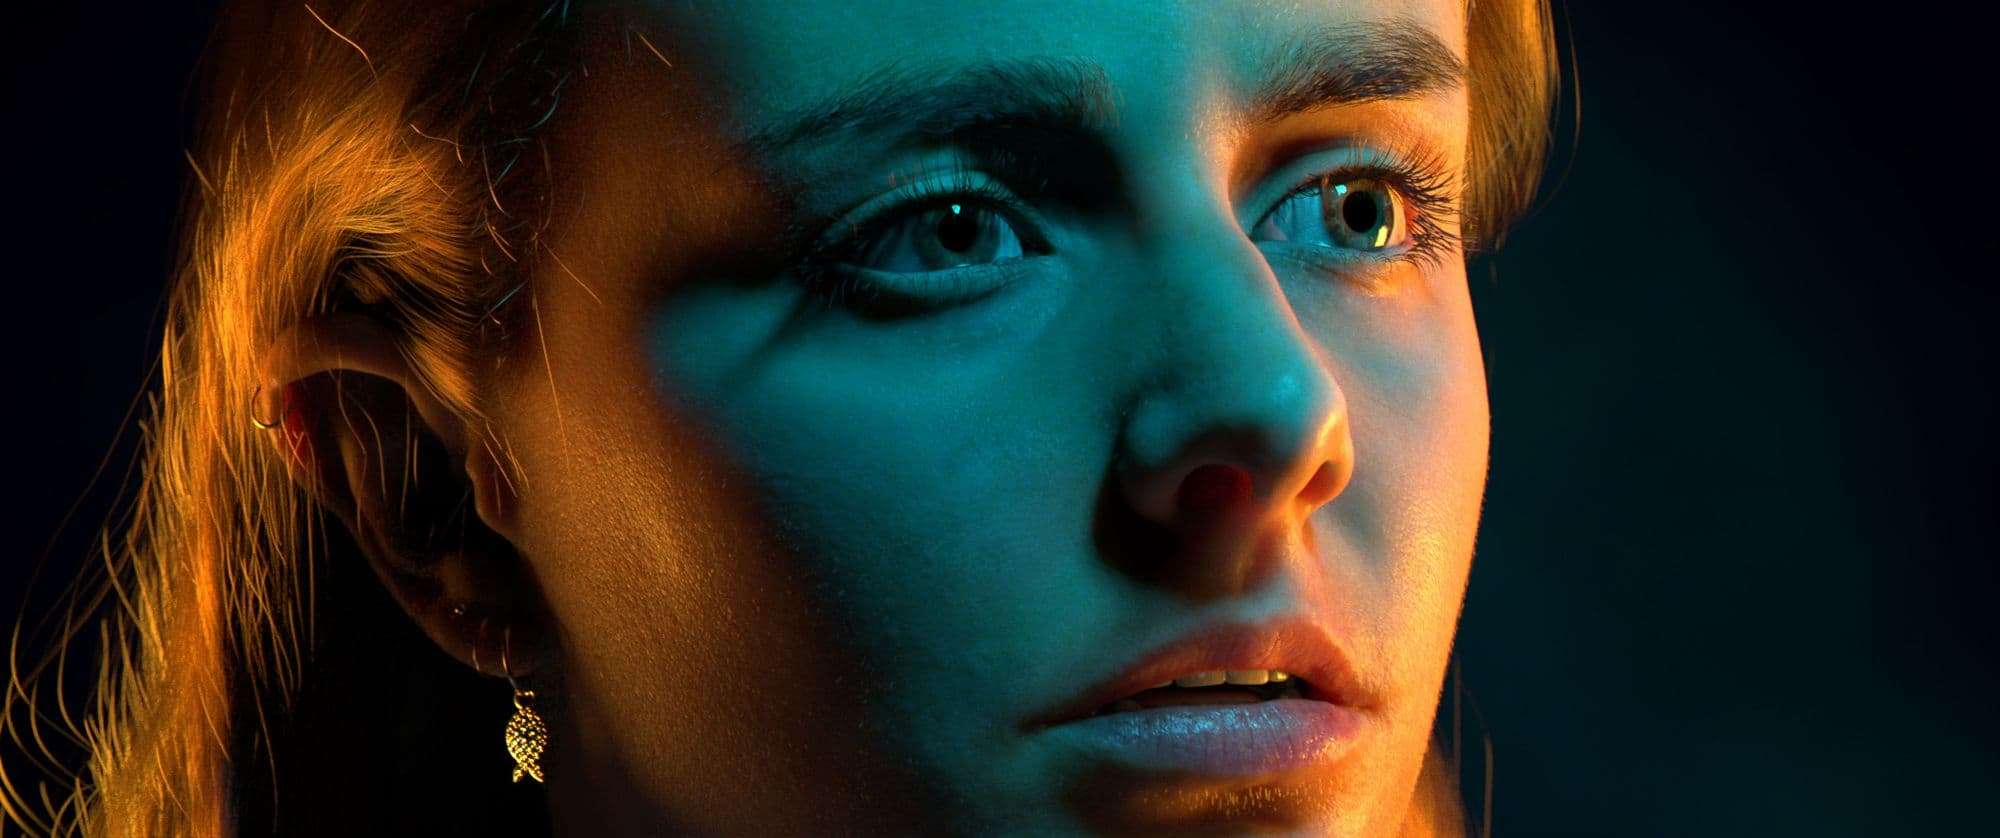
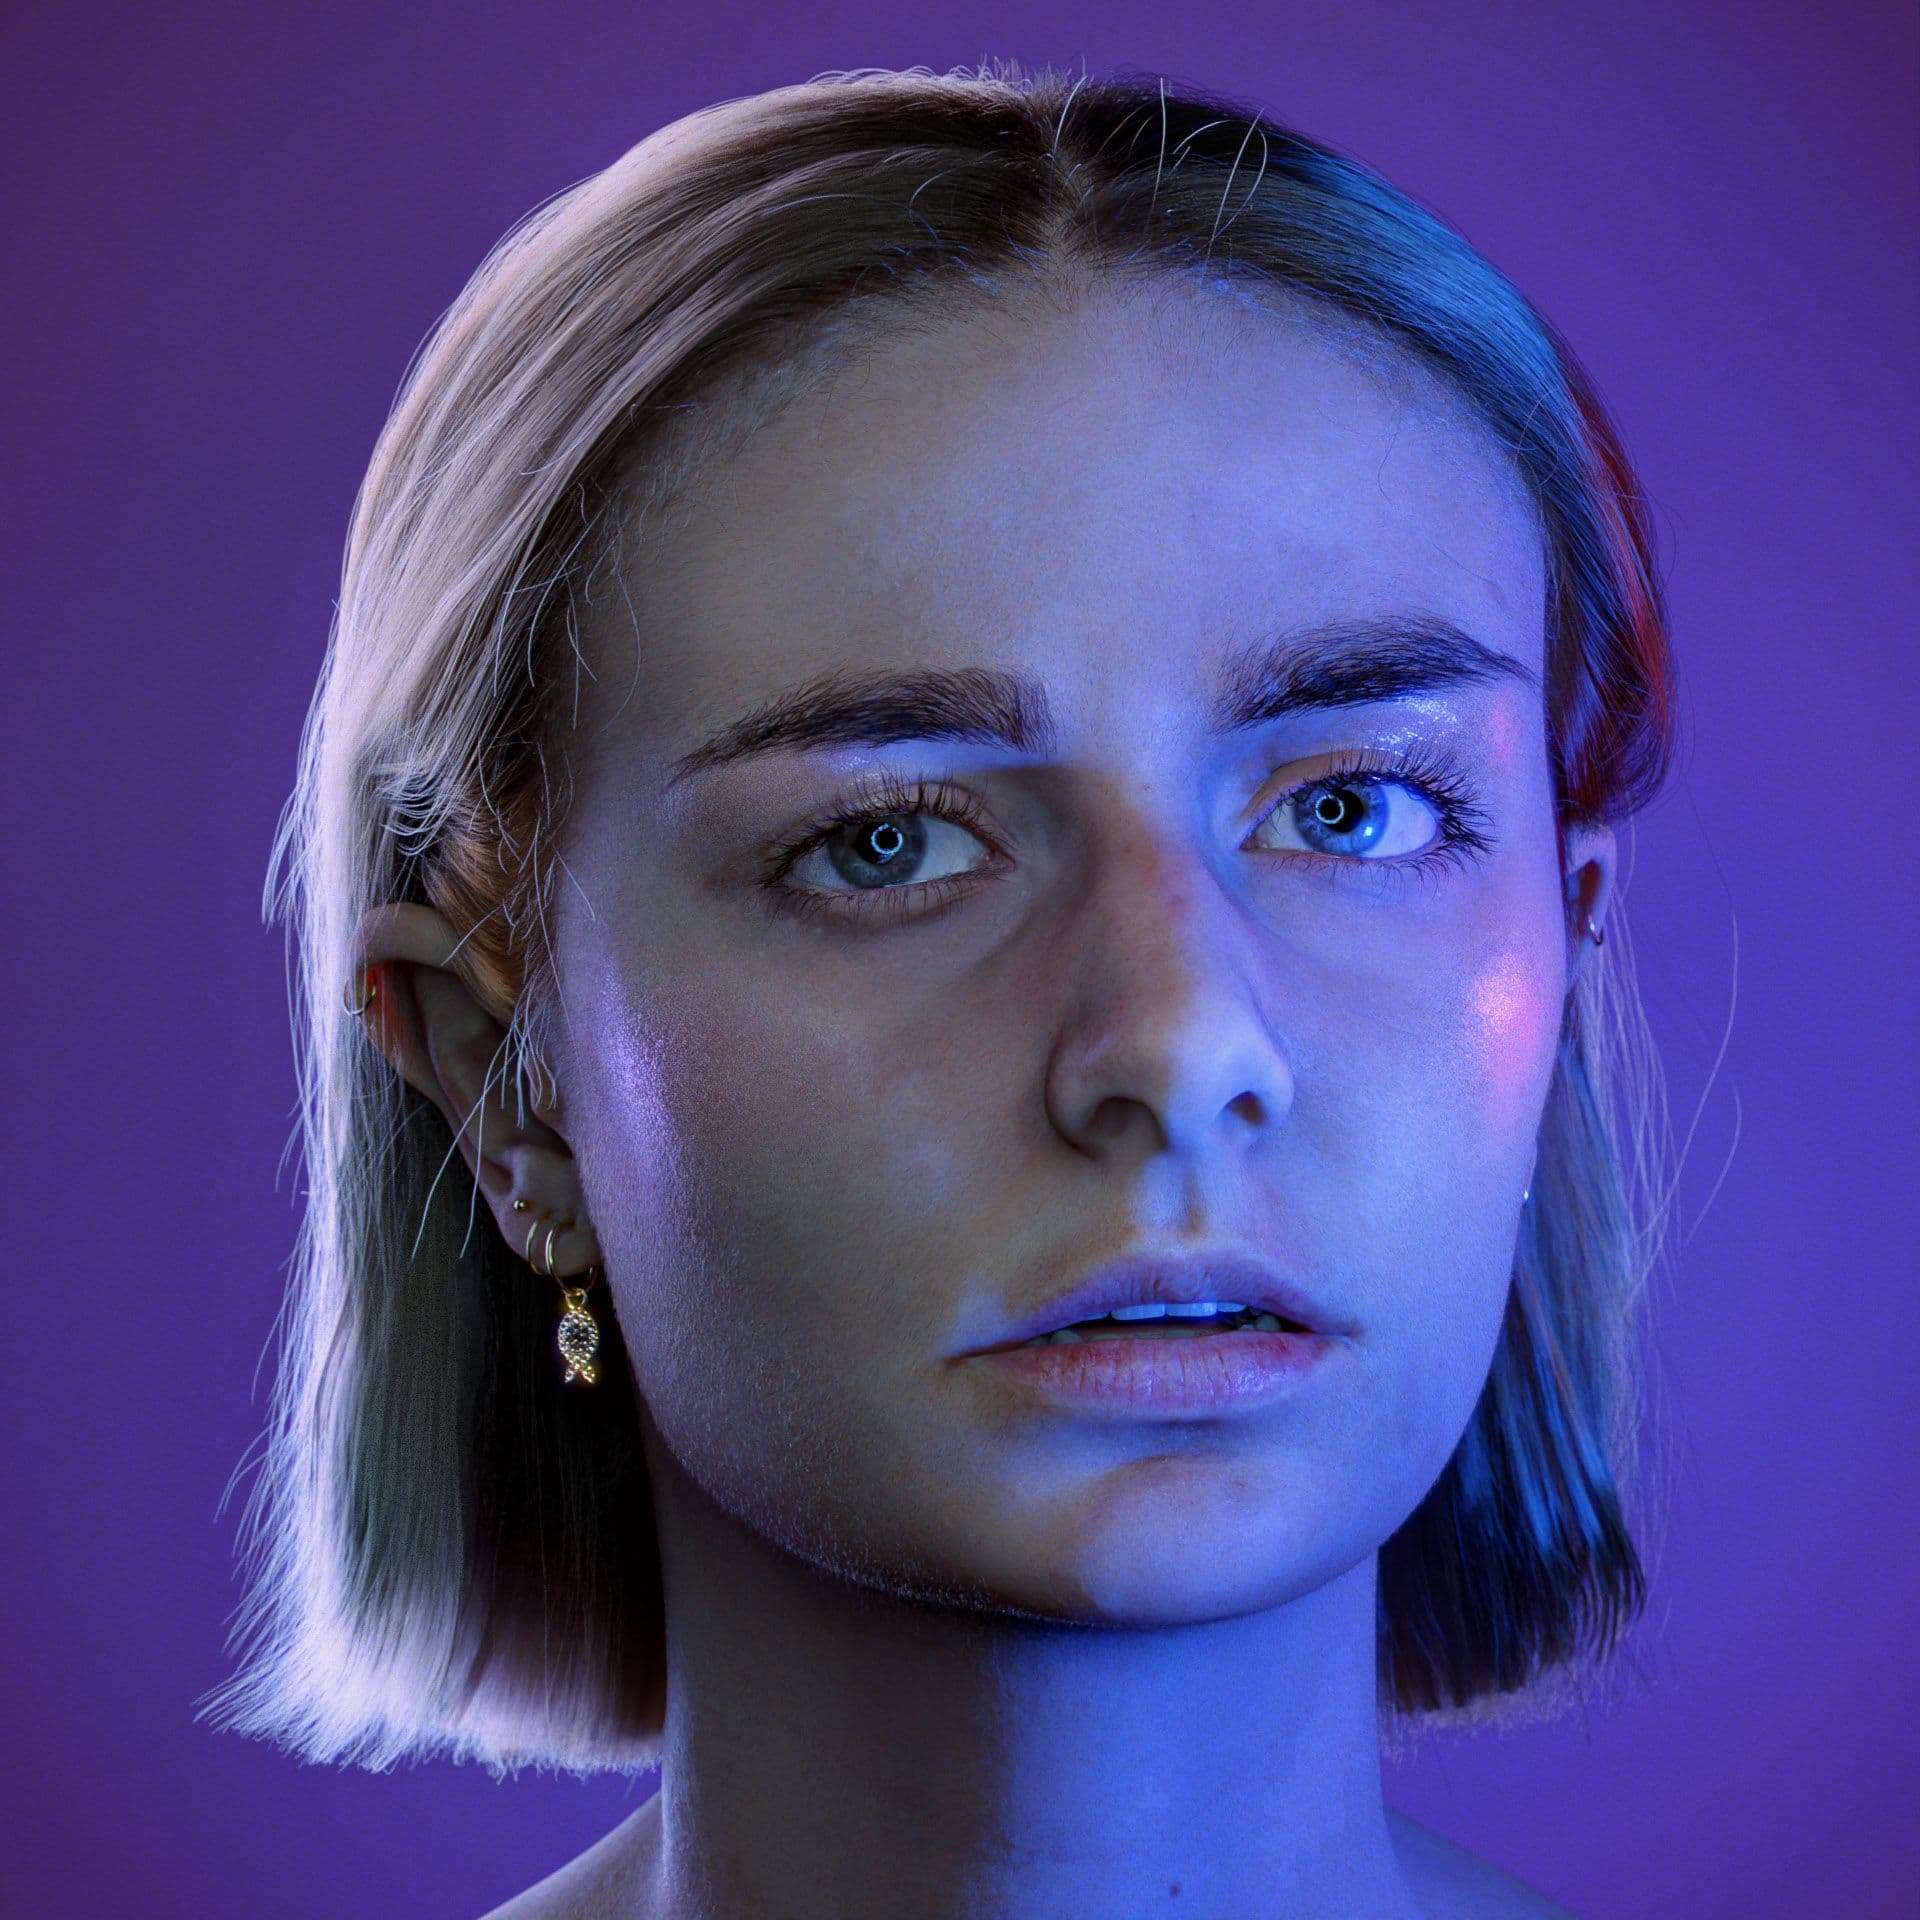
Here I was just having fun seeing what I would look like with short hair and makeup, don't mind me!
Tips
Ask reviews from your friends and family, they know your face better than yourself!
Check your references at each step of the project, you’ll discover things you can’t invent by yourself.
Take some breaks to come back with a fresh eye.
Face expressions done in blendshapes can help you to bring some life to your portrait.
Don’t focus too much on tiny details, but when you’re nearly finished adding details like jewels can bring more realism.
Likeness is a hard exercice where the imagination is kind of left over. However, it is the best way to learn a lot on a short time.
Don’t be shy to experiment and to have fun!
Thank you for reading, I hope it helped you to learn something new or even encourage you to try your own Digi Double! Don't hesitate to reach me out on my social media if you have any questions. Thanks again to my friends who helped me with their feedbacks throughout the whole process and to my instructor at ESMA Julien Duval.