Creating an Game Environment Using Quixel Bridge to Unreal Engine
I had to do some magic in Photoshop to create a nice alpha or cutout from the logo so I can create a little of separation in the roughness in Substance Painter.
I had to do some magic in Photoshop to create a nice alpha or cutout from the logo so I can create a little of separation in the roughness in Substance Painter.

This is a great article from Alberto Cordero discussing his workflow of using Quixel Bridge to Unreal Engine 4, and doing the finishing touches using Substance Painter to create a Game Environment.
My task here was simple, find a reference for your project, that was the assignment from the bootcamp, and I really thought this was going to be a simple task to get done in a short amount of time, we only had like a week before the next stage started.
One of the things I did not count on was that I wanted to do all of them, not good, I just needed one. It took a few days to come up with an idea of what I really wanted to create, type of environment, mood, light, condition of the scene, and without knowing about it, the type of scene I wanted was derelict environment, wasn’t till later in the process that in a feedback session this word came out to explain so much about my scene.
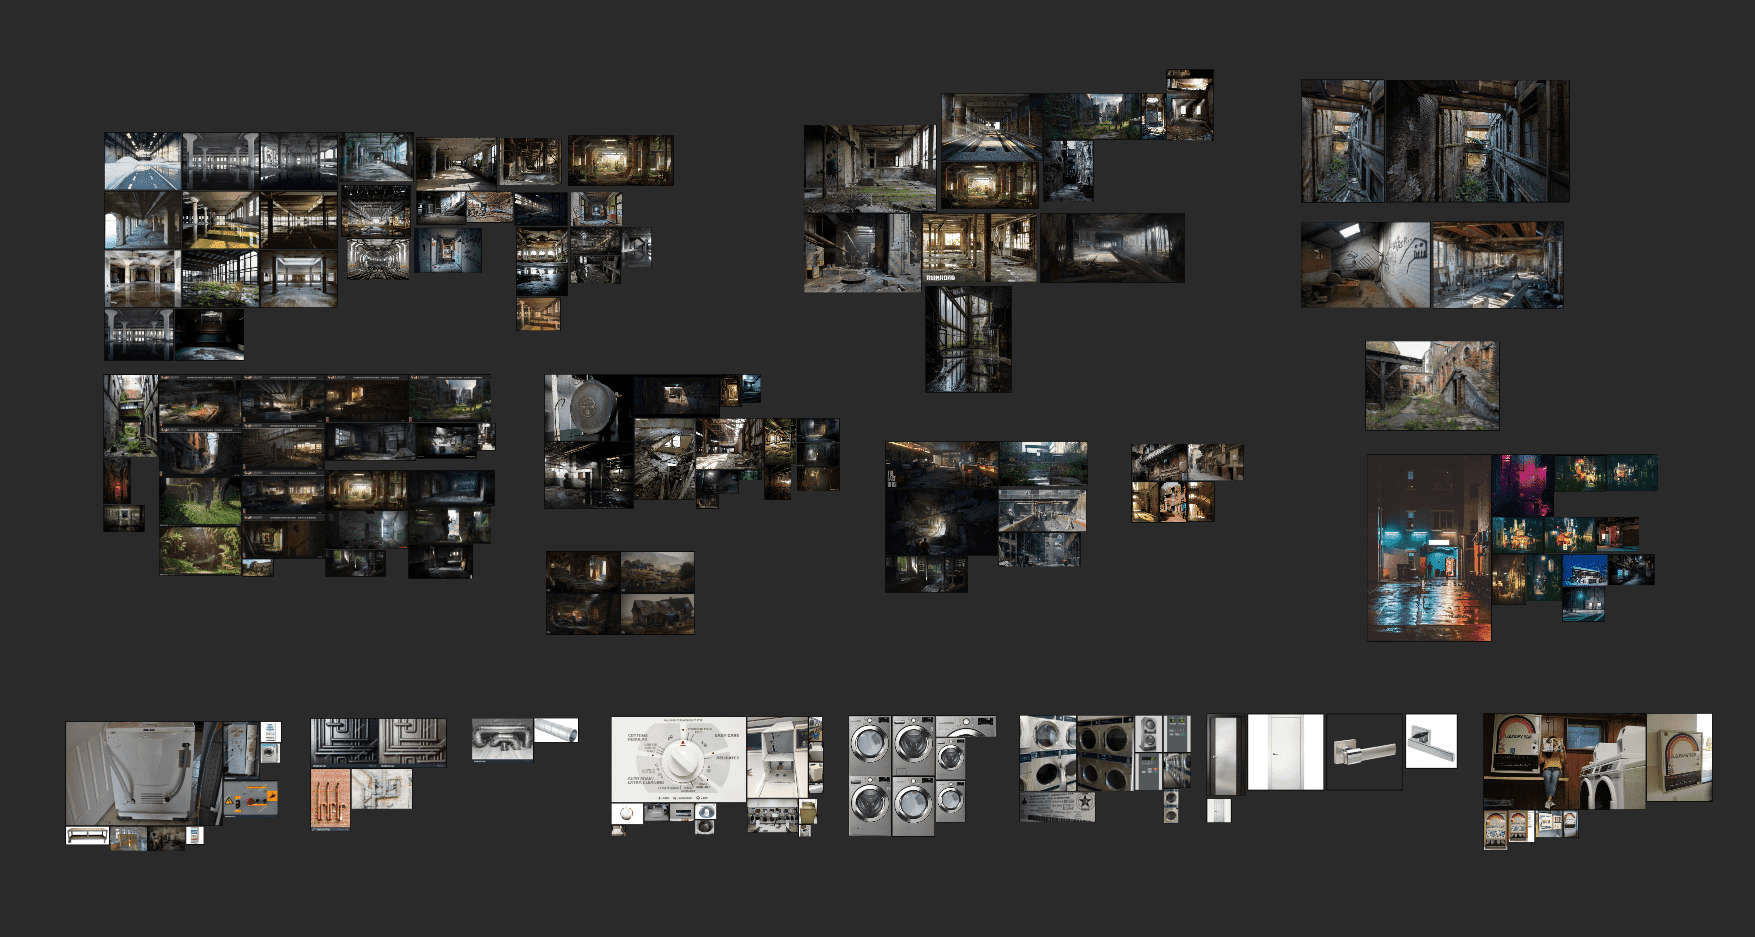
I started looking for so many images related to my scene, games like The Last of Us was the one I was targeting, the mood in the game, the environments, the absence of human touch, the abandoned feeling, the toxicity, contamination and most of all, traces of a past that’s now forgotten.
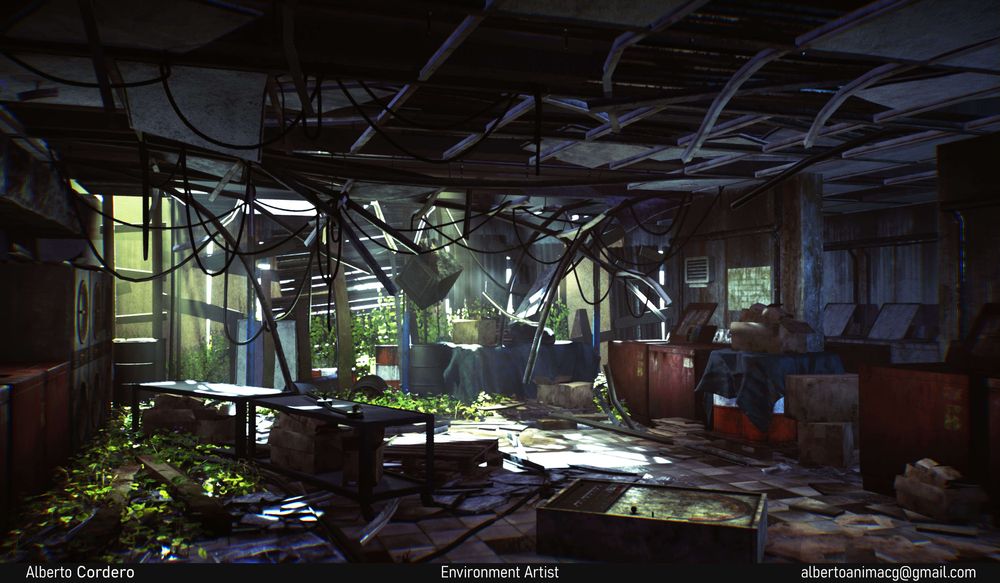
I finally found a reference that I was really into it, was concept created by Aaron Limonick, an old Laundromat scene that had at least a 50% of what I was looking for, and if you see the reference and my final image, you’ll notice that I kept most of the structure and laundromat feeling, like washing machines some signs and the walls. I did contact the artist about using the concept art as a reference, is something you must do always.
The thing about starting a new project is, that sometimes in the middle of it, you start by asking so many questions about it, maybe you’re stuck in some process that your vision gets all cloudy, and the best thought you have is just to start a new one, the feeling of start a new project is very contagious and can get you in to a loop of never finishing anything!
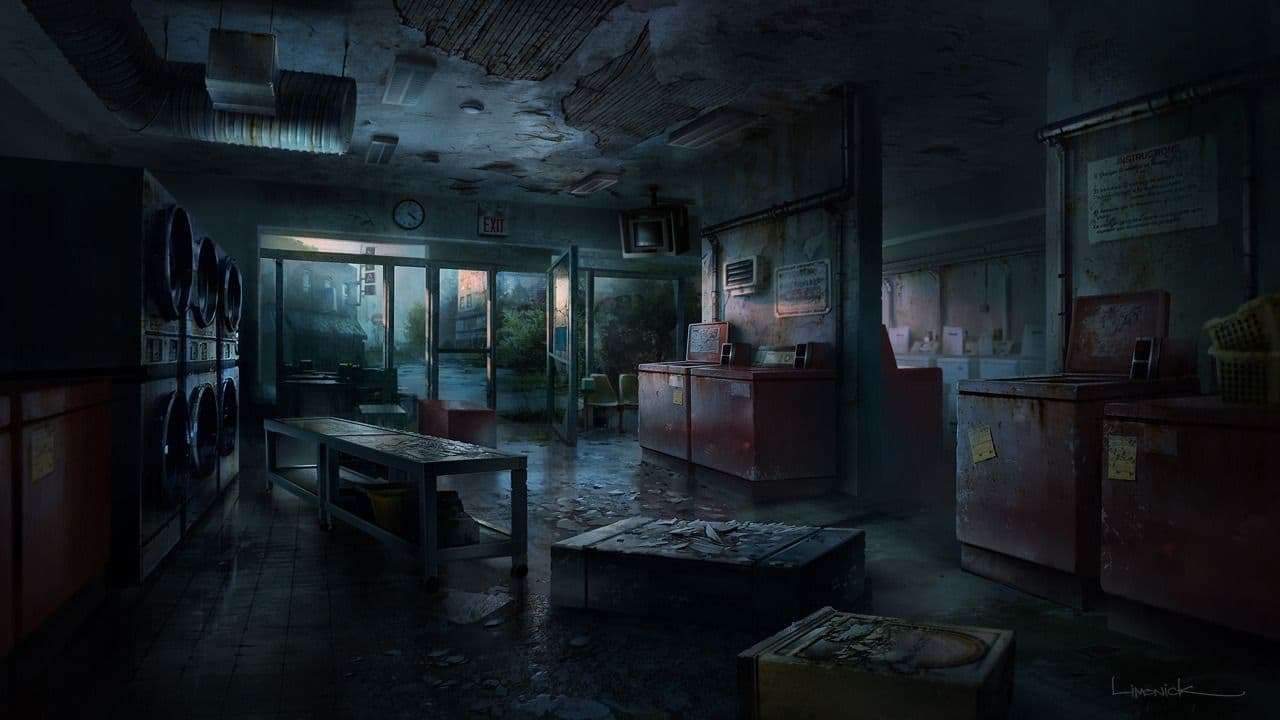
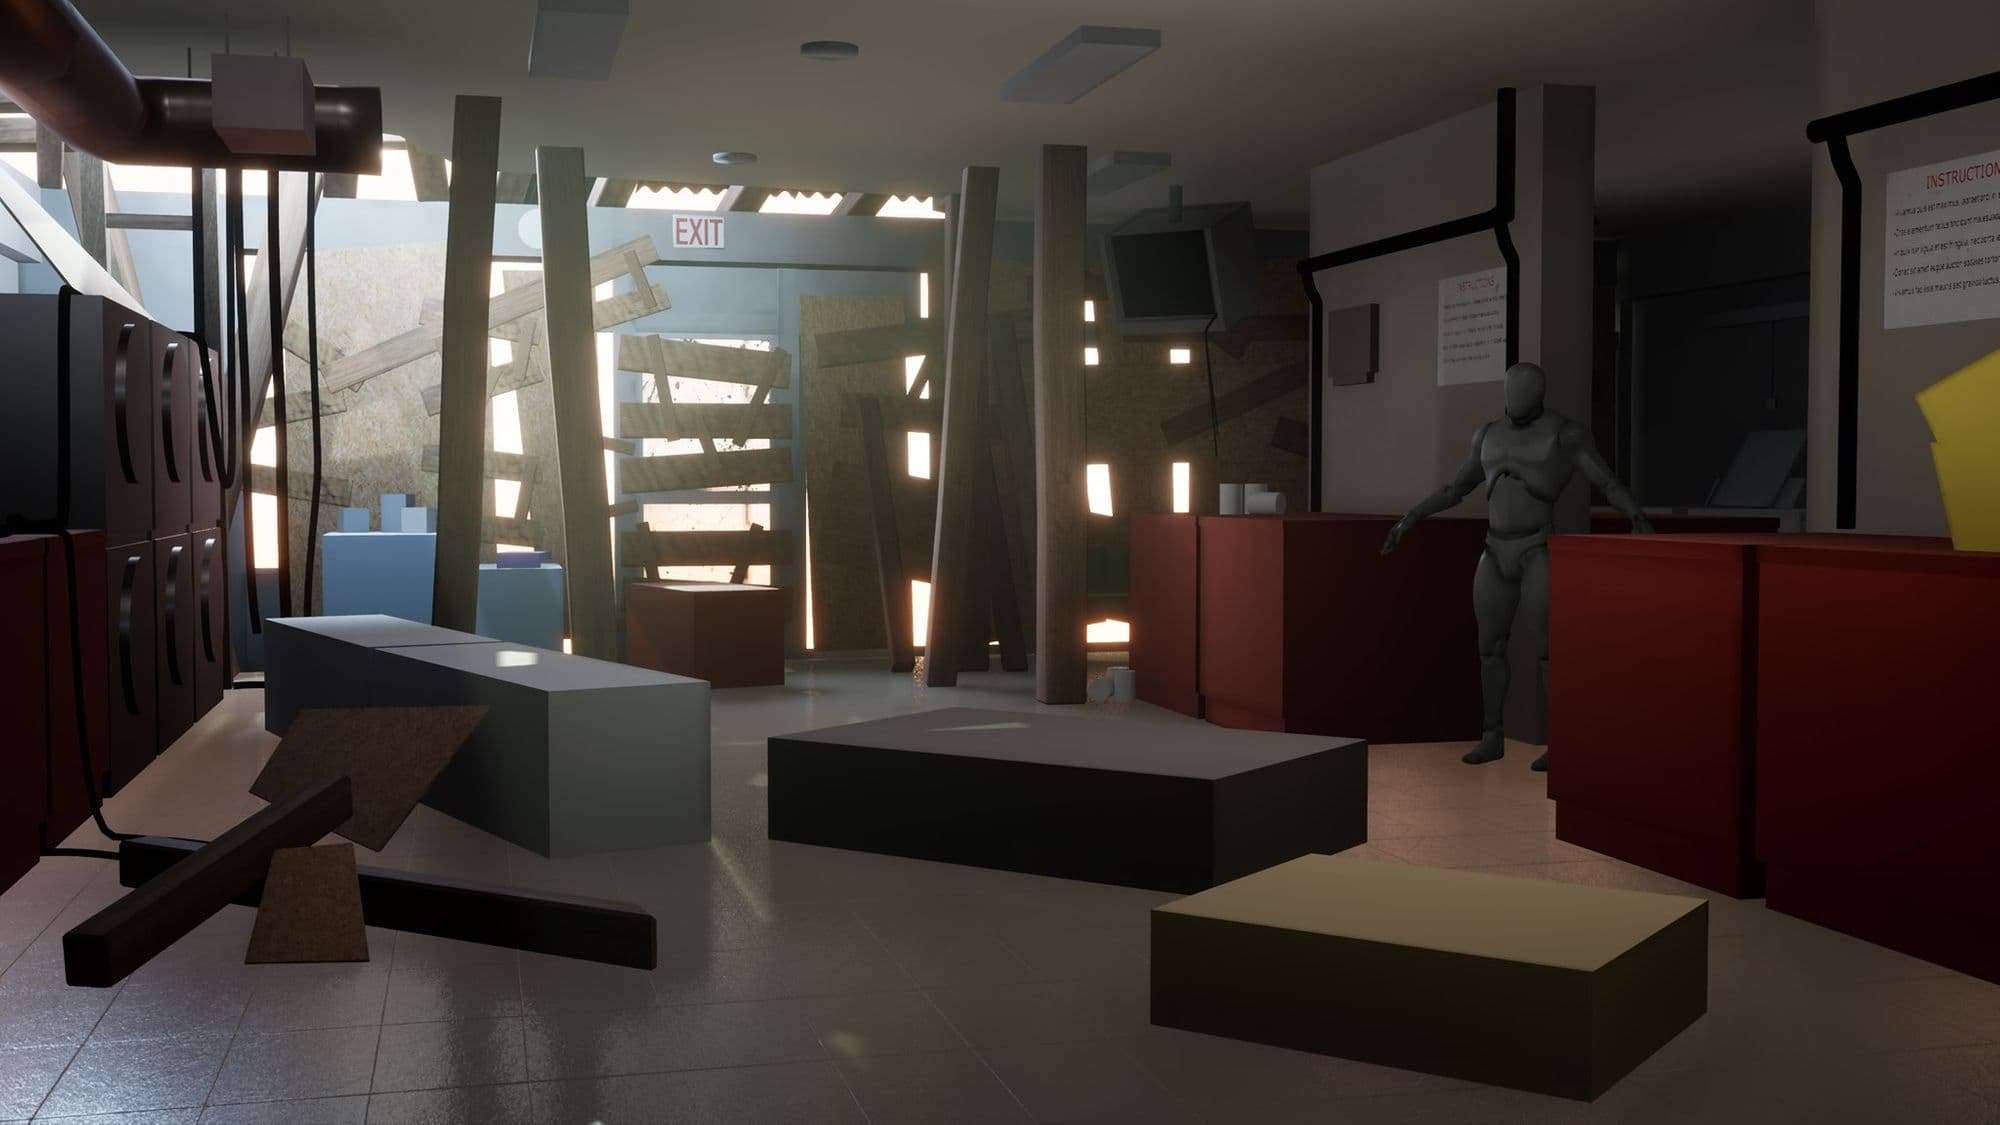
This is the concept art I started with, and I did fall in love with the view and the mood of the scene, and once I started working on the blockout, that’s when I knew that I had a problem in project, I didn’t had enough time to for on the exterior of the scene, too many elements like the buildings and the greenery, trees, grass etc.
So, this was my first “going back to the drawing board” sort of thing, because I knew immediately that I was not going to work on that, so I need a Plan B for the scene.
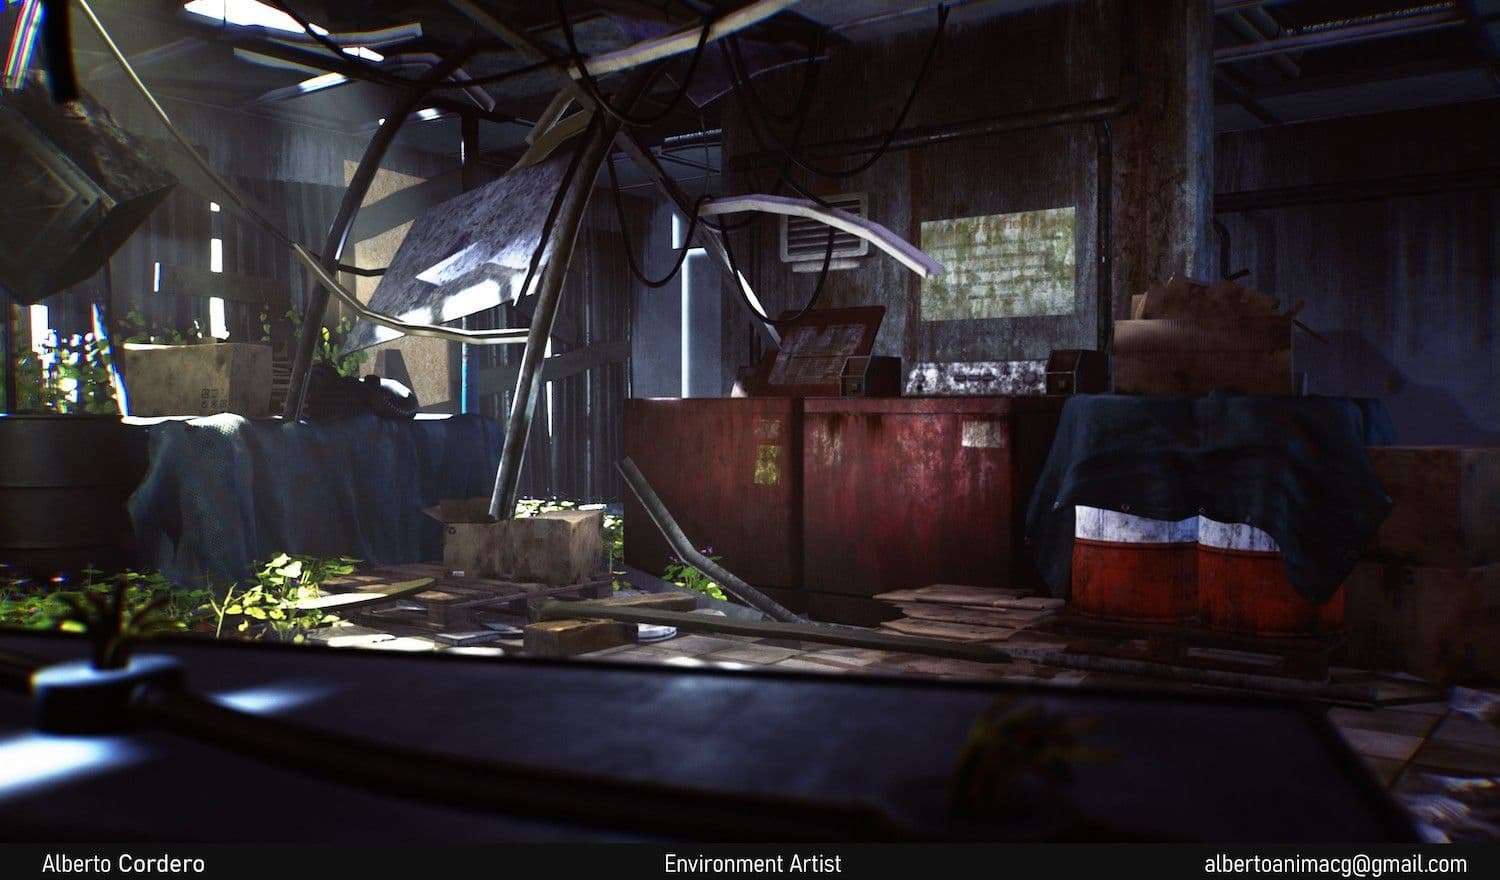
After so many brainstorm sessions I had to myself, I decided to block the front, make it look like there’s no entrance possible throughout the front side, created a hole in the ceiling, put a ladder in, wanted to indicate that this was an entrance and exit from the HideOut to the outside world.
I did love this idea, using wood planks to block the front it did broke the simplicity of the scene, it gave me all the answers to the details I wanted to use here. So, I final y had my concept developed basically only in the blockout stage, and sometimes that is all you need, mix the concept art with a solution to an existing problem.
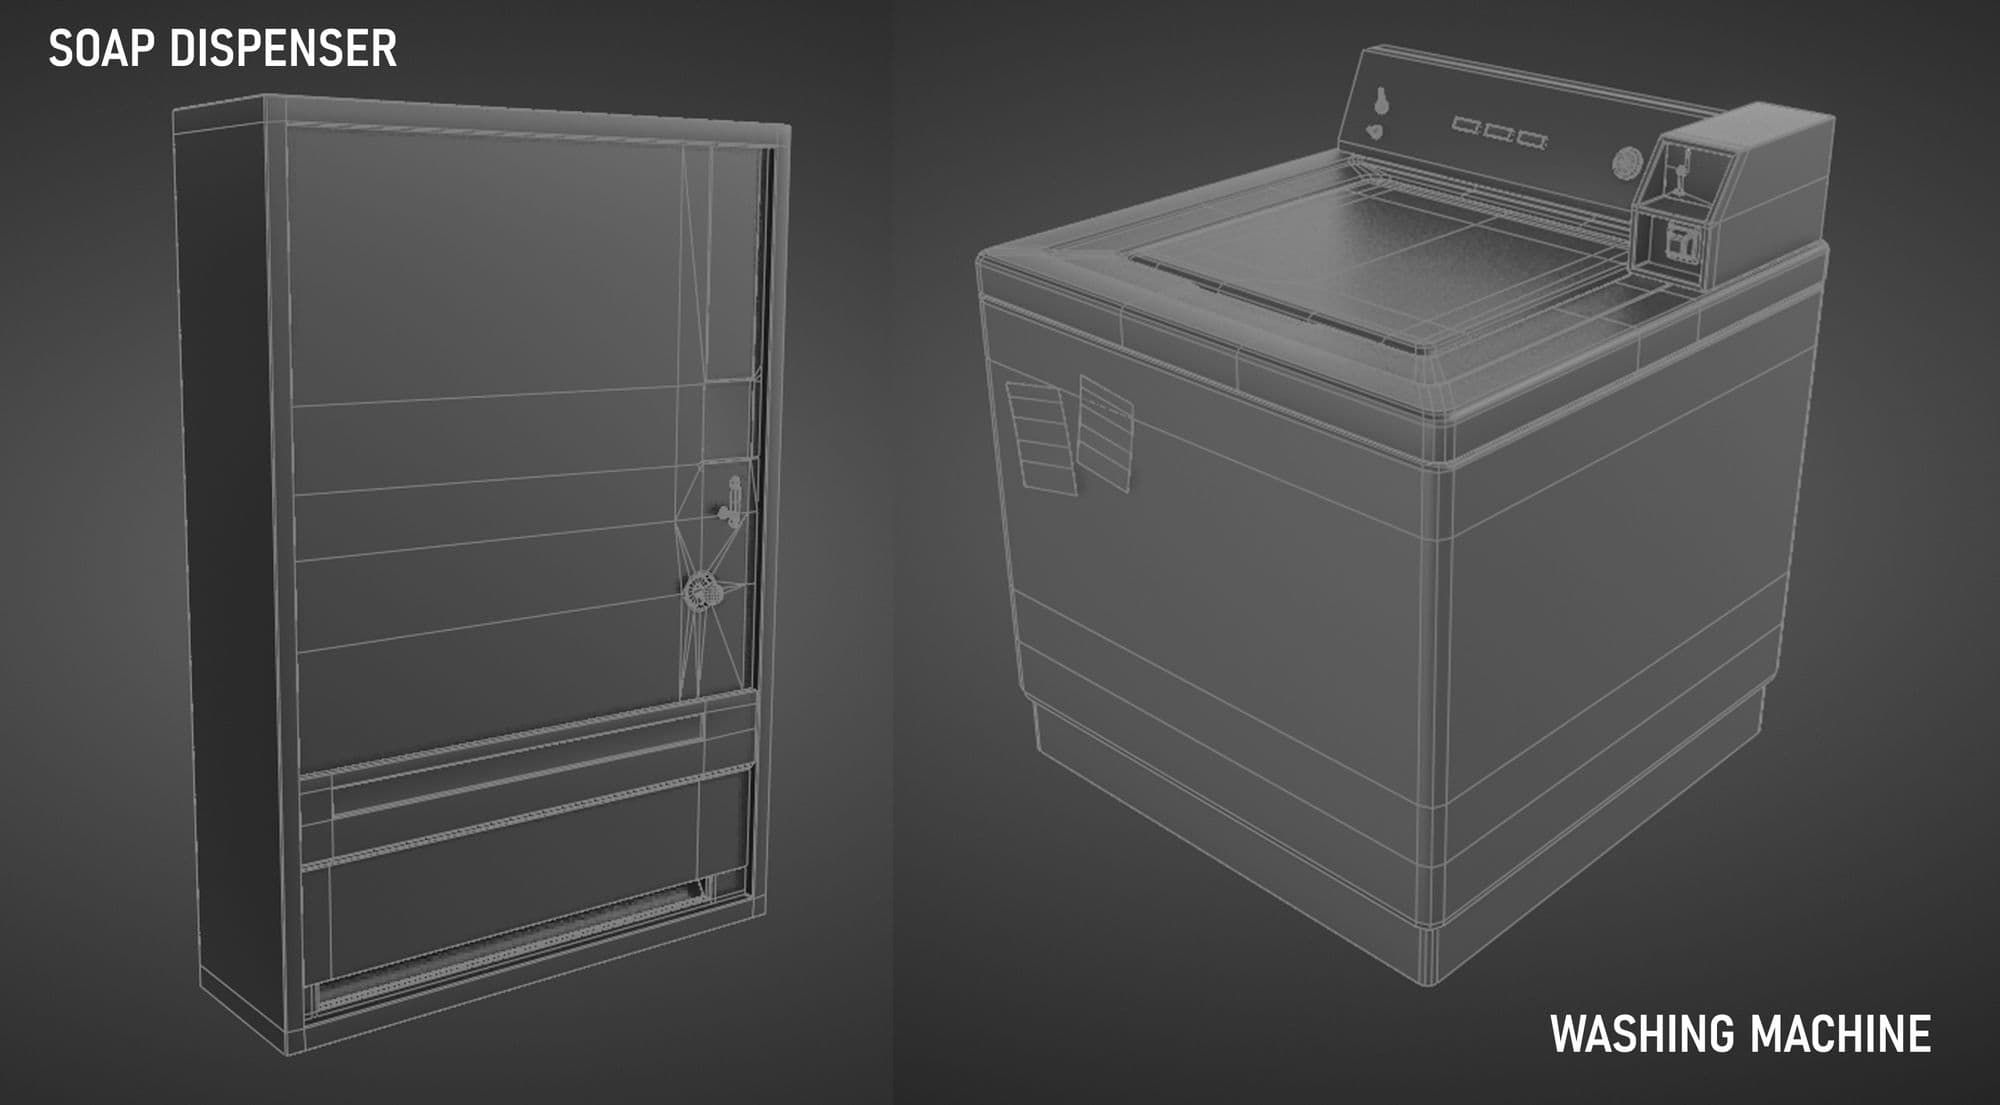
After getting my concept in the right spot, I decided to go for the research of the props I needed in the scene, all the washing machines, cables, walls, signs, textures, materials etc. I created an entire block of all those references before going into the props, I was anticipating myself to textures, like, tags, names, things that needed to get fixed in Photoshop, like the Soap Dispenser I had to do some magic in Photoshop to create a nice alpha or cutout from the logo so I can create a little of separation in the roughness in Substance Painter.
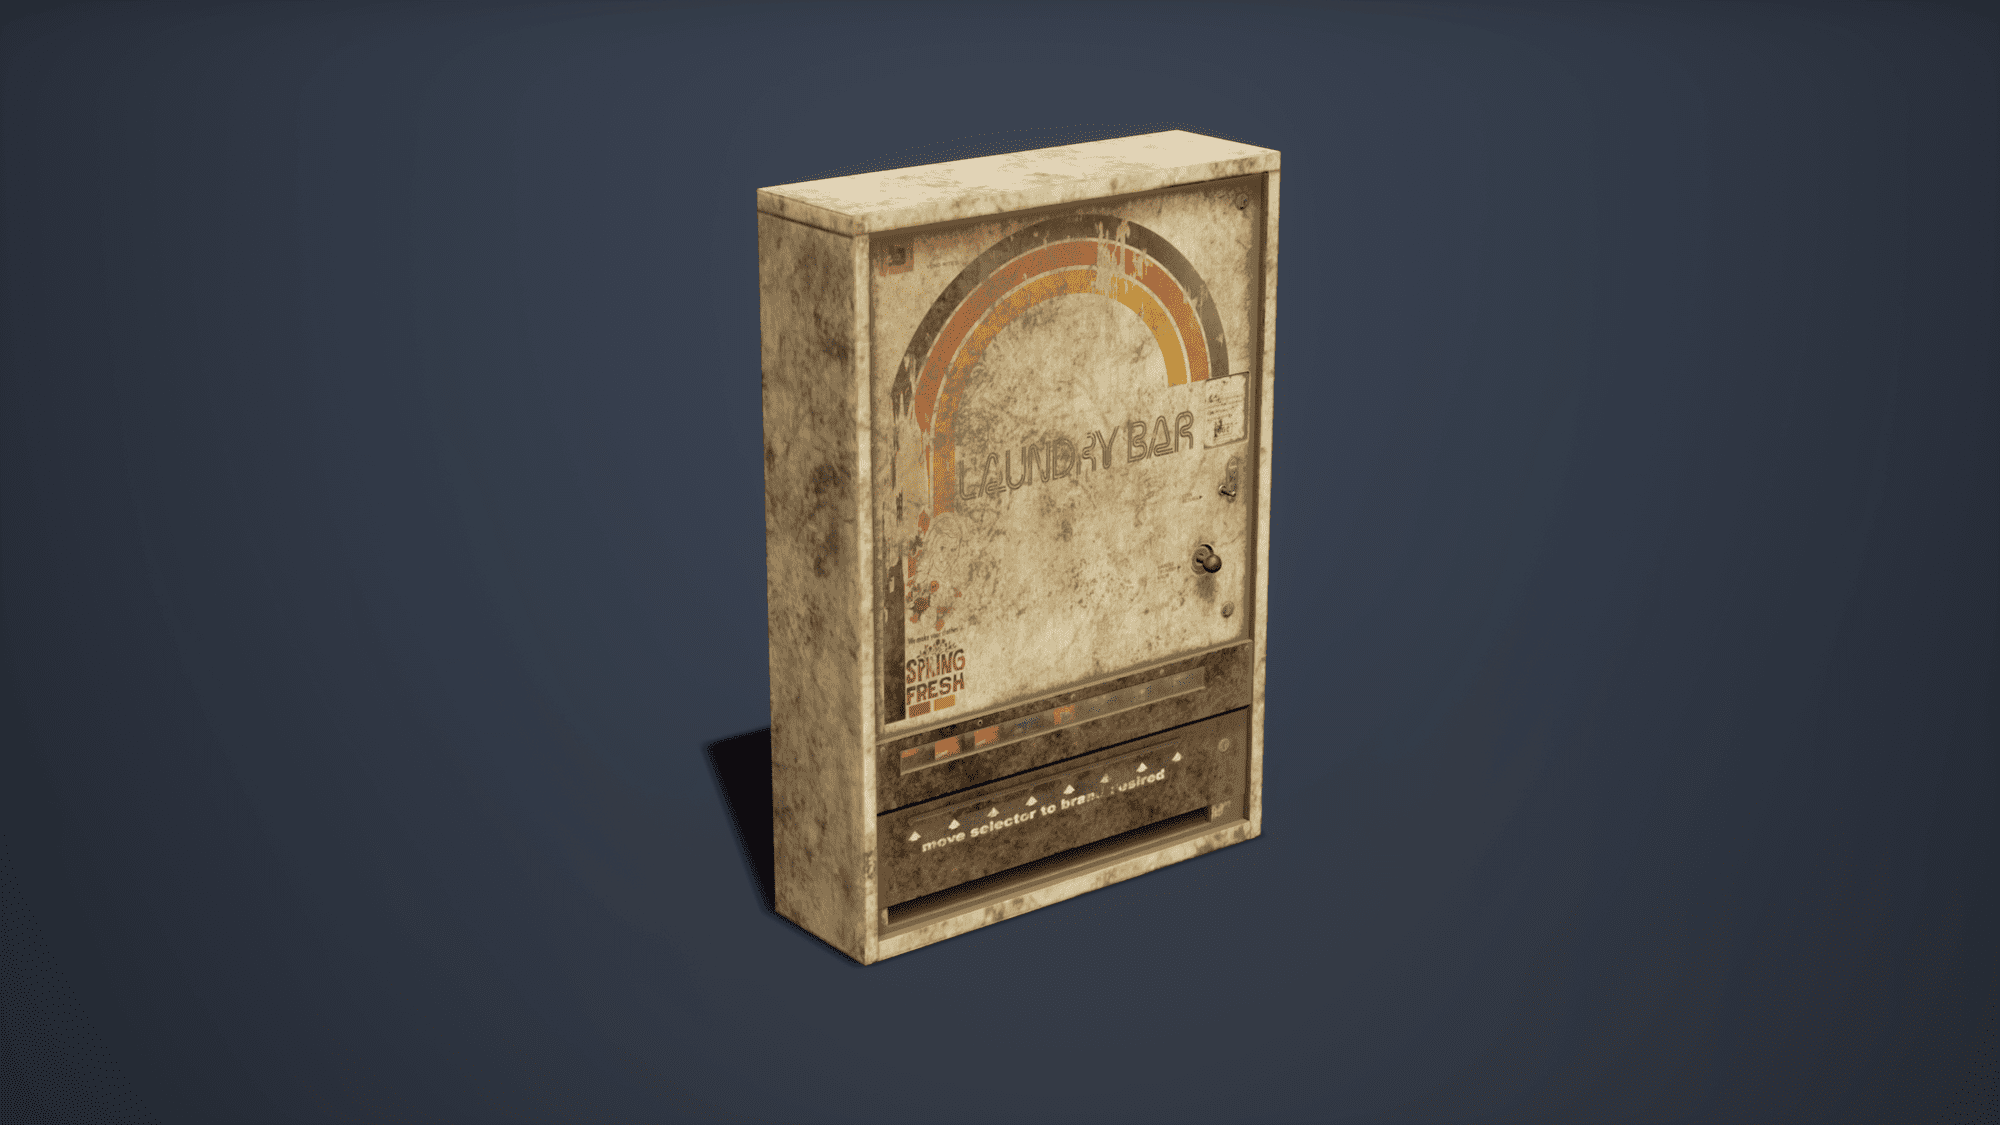
This one was in the original concept, I did a lot of research to find a good shot from different angles of the texture specially, to get it in the right spot.
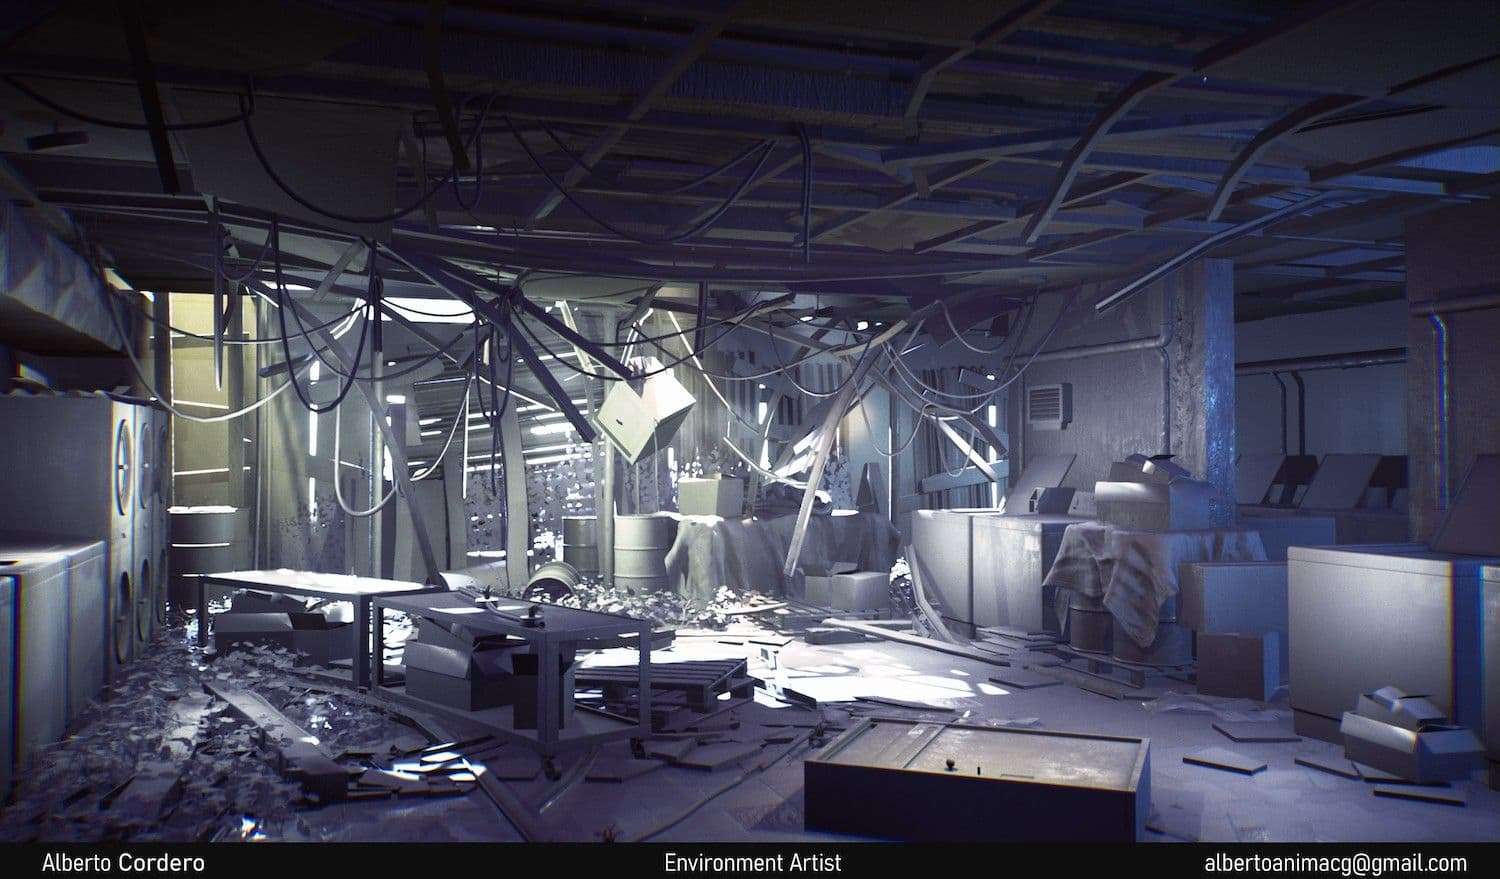
I never thought this stage was so important for environments. In the initial stage it is vital that we start setting up all our proportions in the scene. We need to know quantity, location and design, shapes etc.
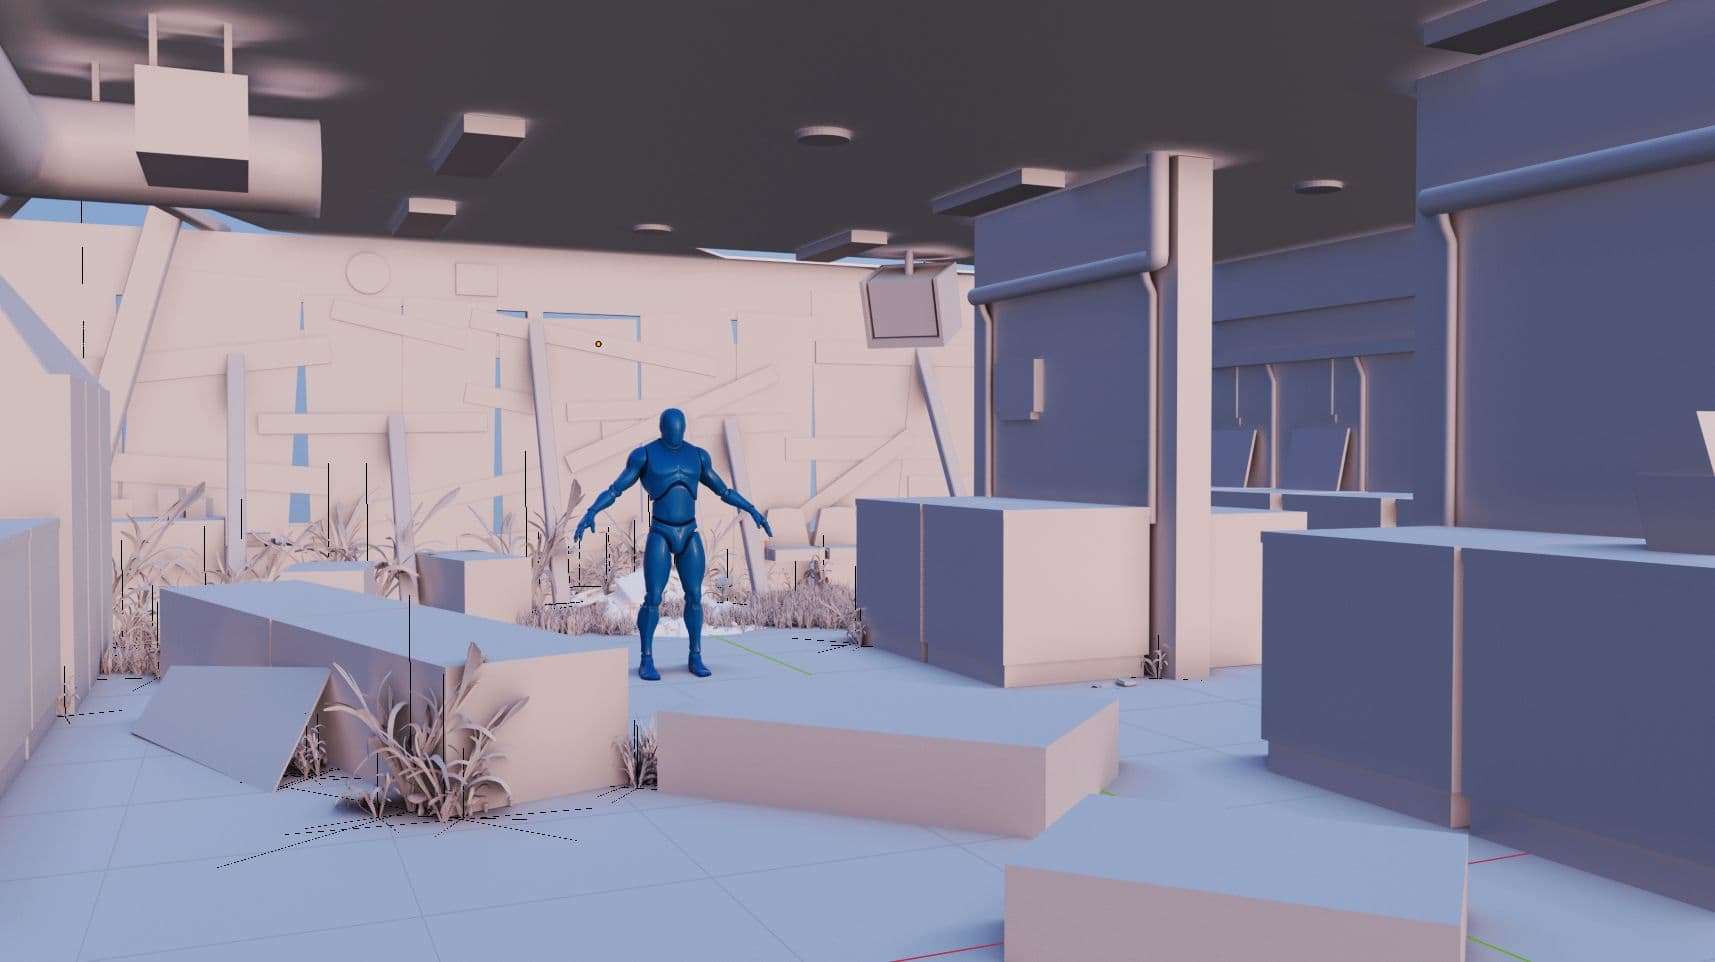
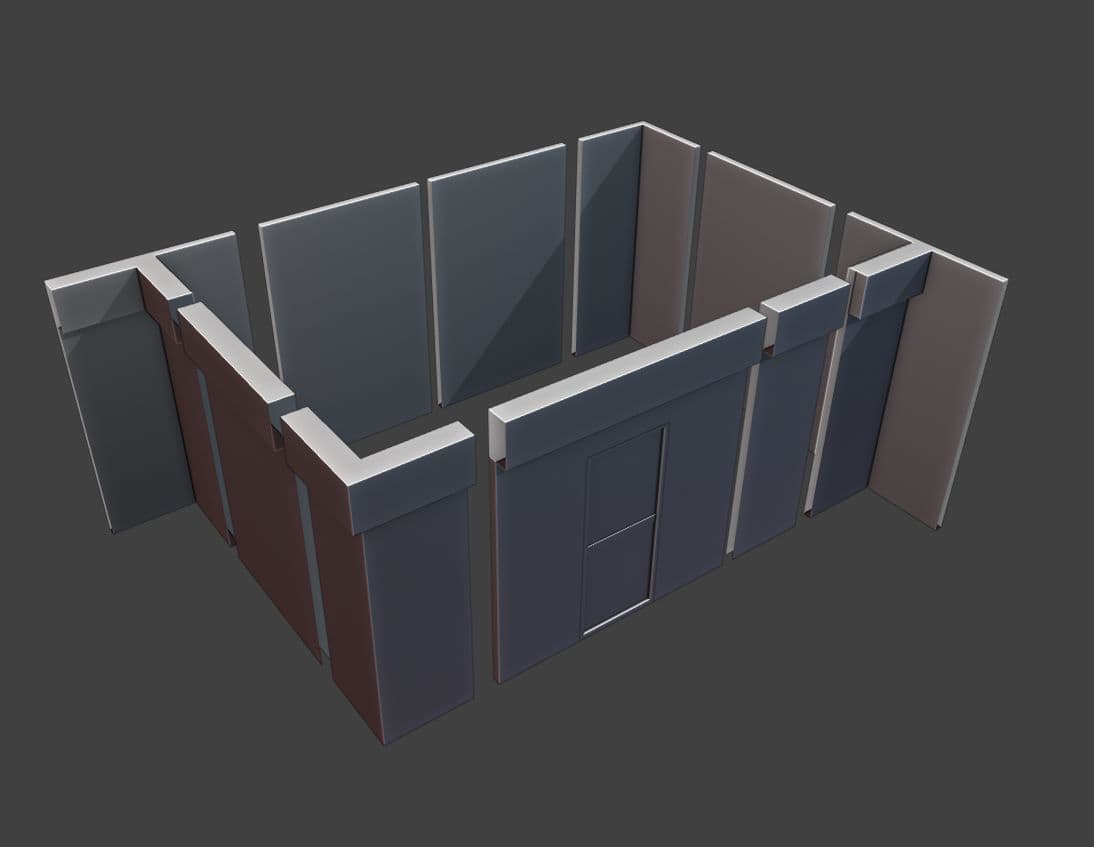
I created the entire Blockout in Blender. I did not know much about any tools that can be use for blocking in Unreal Engine. I decided to go with what I know best. Blender allowed me to visualise the scene better by using the new features from Blender 2.80. The light is perfect for this kind of purposes.
I started the process by blocking the walls first. I wanted to get the right distances, height and location. I was trying to keep all the main structures from the concept. I did including the main props, like the washing machines and tablecloth in the scene.
Find someone that can give you that honest and well needed feedback. “looks nice” “aww that’s so cute” all those comments are good, but you need more than that.
I had so many references related to the type of environment I needed. The front of the scene is a mix of ideas from those references. Something I do is to create a separate file for a testing area, it helps to make mistakes and explore a little more.
In my mind I wanted to block the front part but not completely. I had this idea of some light coming in the scene, with the fog applied it will generate a nice look for those rays coming in.
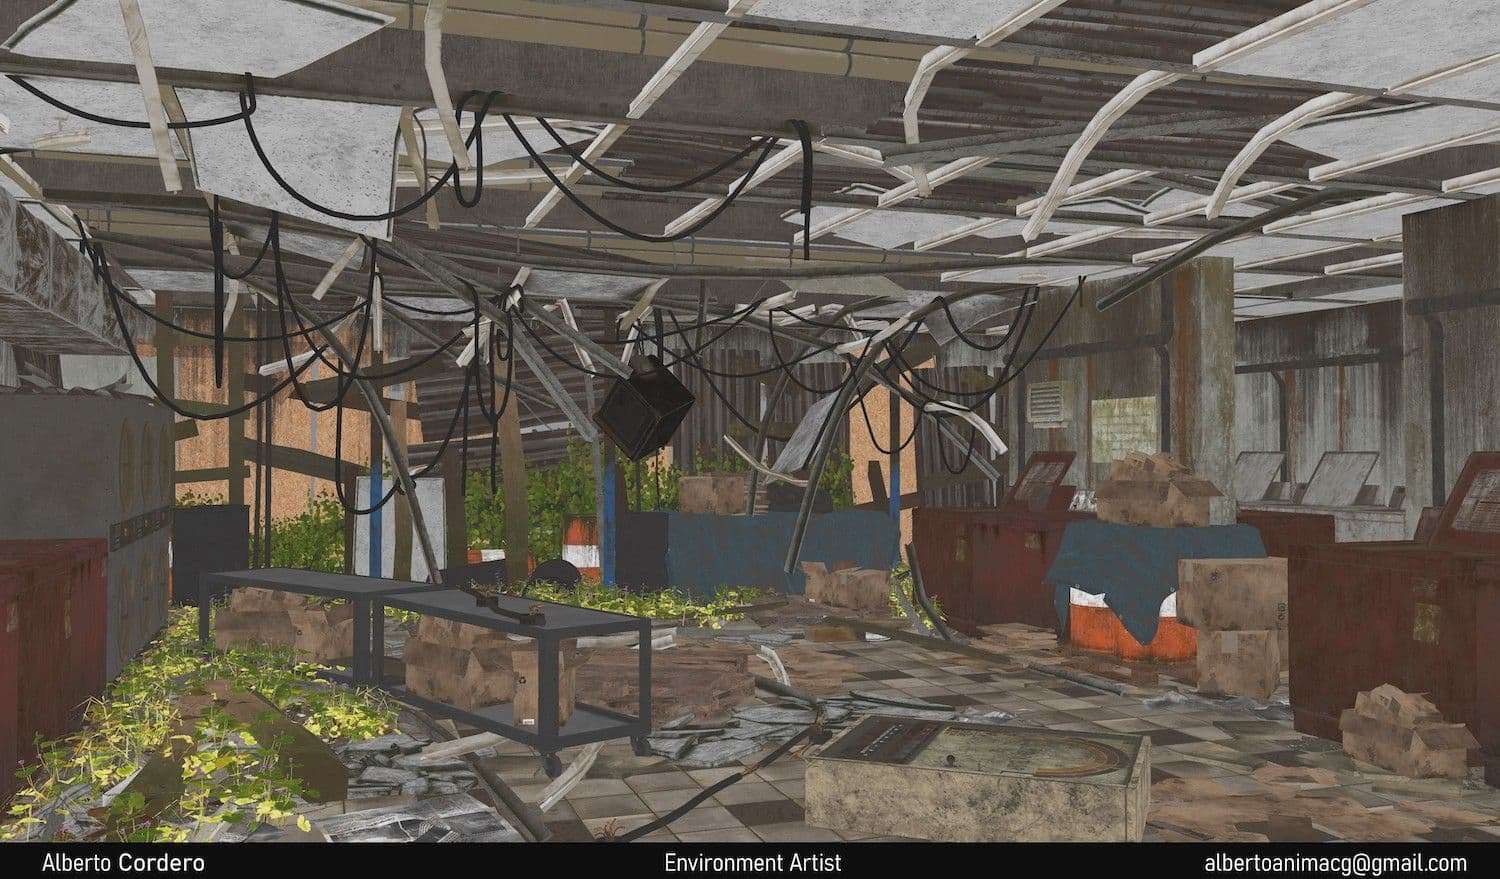
I love the exploration on finding the right materials for the props, the walls, floor, ceiling etc. All the props where textured in Substance Painter, I wanted to have a very dedicated time with those. Textures are the essence of any scene, you can see right away good quality or not so good, that is why I wanted to expend some time only working on the props, good metals, paint, plastics etc.
The floor texture is coming from Quixel Megascans. I did a few modifications to it in Quixel Mixer, added some randomness to the tiles and a little bit more of dirt. The Plaster in the walls and most of the decals are also from Megascans, the quality is the best out there.
In the bootcamp I got a lot of feedback, that is one thing you need in your life while creating anything! Find someone that can give you that honest and well needed feedback. “looks nice” “aww that’s so cute” all those comments are good, but you need more than that. You need the little details, “work on the metals, get the right plastic, the prop needs more modelling work, don’t be lazy!”
The whole purpose of placing materials is for you to have an idea of what is going on in your scene. You need to understand your scene. You need to know the type of resources you have and the ones you will need to create or find. I already knew a few places where to find them, of course I had in mind Quixel Megascans.
There’s a few ways to this process. I use the addon Batex: Batch FBX Export. You can export multiple objects at the same time preserving the same Pivot Point per objects. If you select one object in the scene, and export that object in “.FBX”, when you import in Unreal Engine 4, you’ll se that the object has the pivot point in the middle of the scene. This is quite annoying sometimes. The ideal scenario is to have the pivot point in the same place as you had it in the 3D tool.
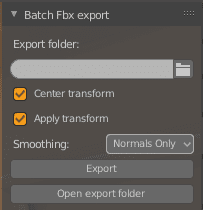
With this addon is easy to export the entire blocking to Unreal Engine. You must select all the objects, find a folder where to save the objects and select export.
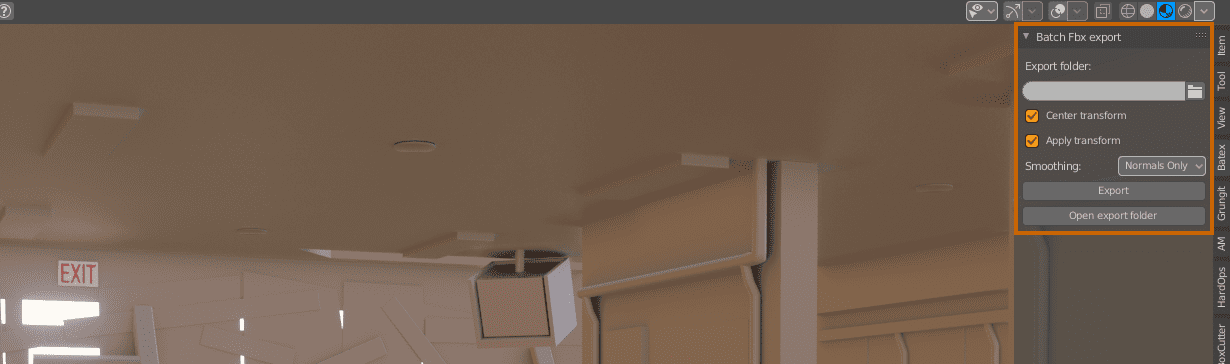
I created a folder inside Unreal only for those props. I then went into the folder directory and gave that path to the addon. This way, every time I export, the objects are going to be re-imported immediately into Unreal Engine.
One little thing, the objects must maintain the same name when export them. Otherwise Unreal Engine will import it as a new object.
I used this process for the ceiling pieces. They required a lot of modifications and revisions. Did an initial blocking to see how it will fit in the scene correctly. After this I started working on a more detailed version of it. Eventually, this process can be a little tedious, so, this addon can help you on speeding up the process.
The modelling process took quite a while, so many props to get done. I did a list of the props I needed to finish and started gathering the references in a PureRef document. Very in detail references like colour, tags, sizes, shapes etc. I wanted to be fully accurate in the washing machines. I gathered so many brands, especially old/vintage ones trying to find the right one.
I was following the same workflow for all my props. Get the High Poly done with nice bevels, right proportions and then work on the Low Poly and create a full UV layout per prop for better performance. I was thinking ahead to the baking process while modelling, questions like: What can I solve in texturing that I don’t have to model in the high poly? I knew eventually I’ll get those props to Substance Painter, where I can add more details with normal map brushes.
I started the modelling process from the list in the props with higher priority to the scene, the washing machines, the tablecloth and some floor props. I knew I will need those the most, to have a better idea on the final look in the scene.
Eventually, the ceiling got the most attention once I knew that I needed to change it. I started gathering more derelict looking places, offices with the type of ceiling I wanted to create. I did enjoy this process the most, creating all those cables, the bending metals, the overall look captured all my attention.
I can’t recommend enough, that you get as much feedback as possible, your eyes sometimes can lie to you. Feedback is going to give you a different point of view, most of the time you’ll end up seeing things in a different angle and find a solution to something.
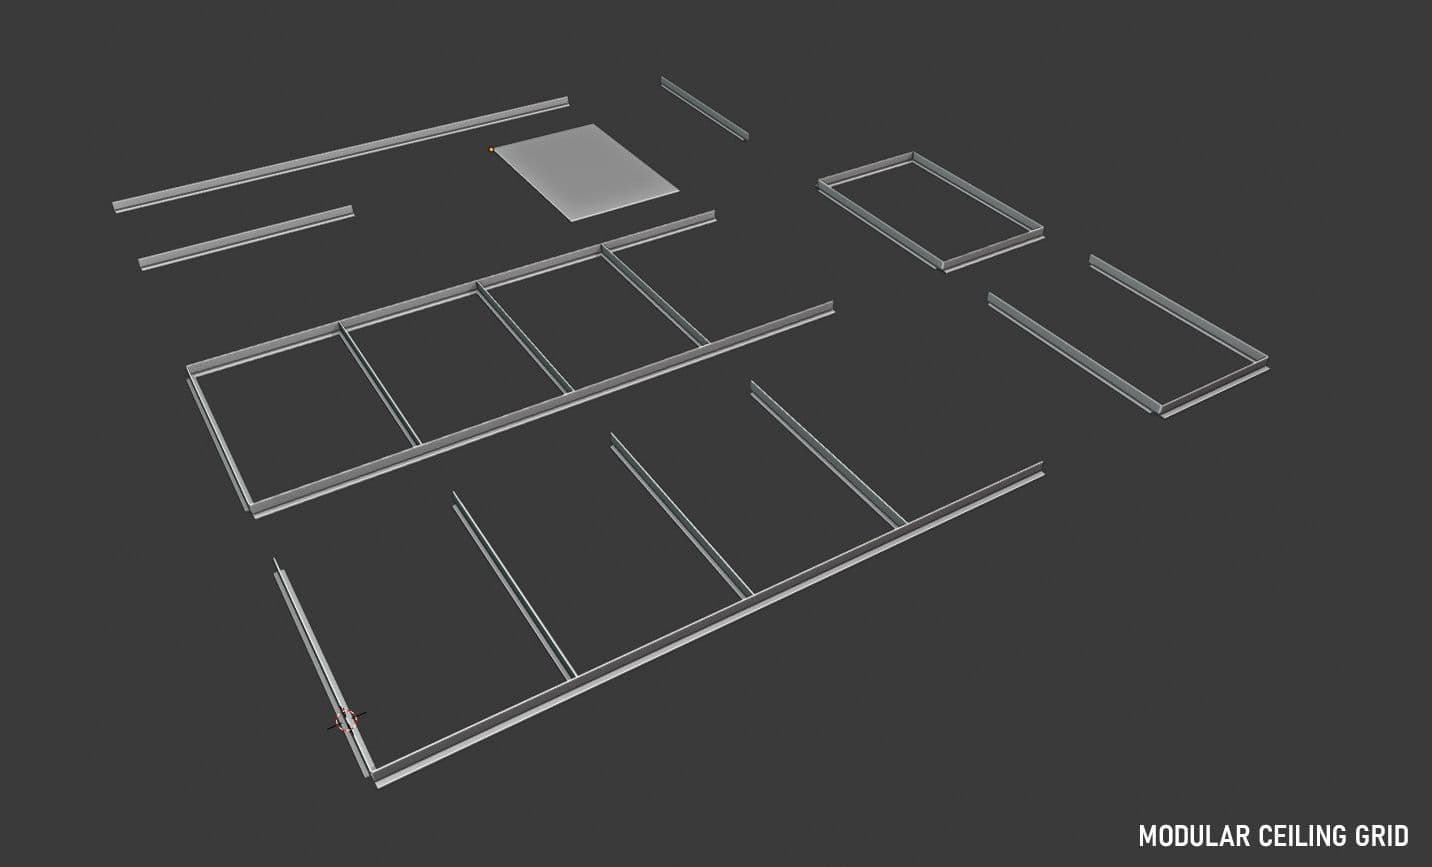
I started the ceiling grid with a few pieces first, wanted to get something very modular, something that I can use as much as possible. After a few tests in Unreal Engine, I knew this was the way to do it.
I started adding more and more details to the grid. Bend pieces, cuts, and all I can imagine. Also started adding the cables, and the foam tiles, lot of those.
Every week I had feedback, I needed to get little things out of the way and make them better or take them out, the thing about feedback, it helps you to grow and move on to a better result. Ryan Kingslien and Herry Kelly at Vertex School were a great help on my feedback, so many good things came from that experience.
I have a huge respect for the people at Quixel. Due to the high quality of the work they do, the tools, all the great content with the training, and all of that for FREE!
I used Quixel Bridge a lot of for my scene, all the plants, floor texture, and of course, decals, so many of them, and it was easy to setup in Unreal Engine.
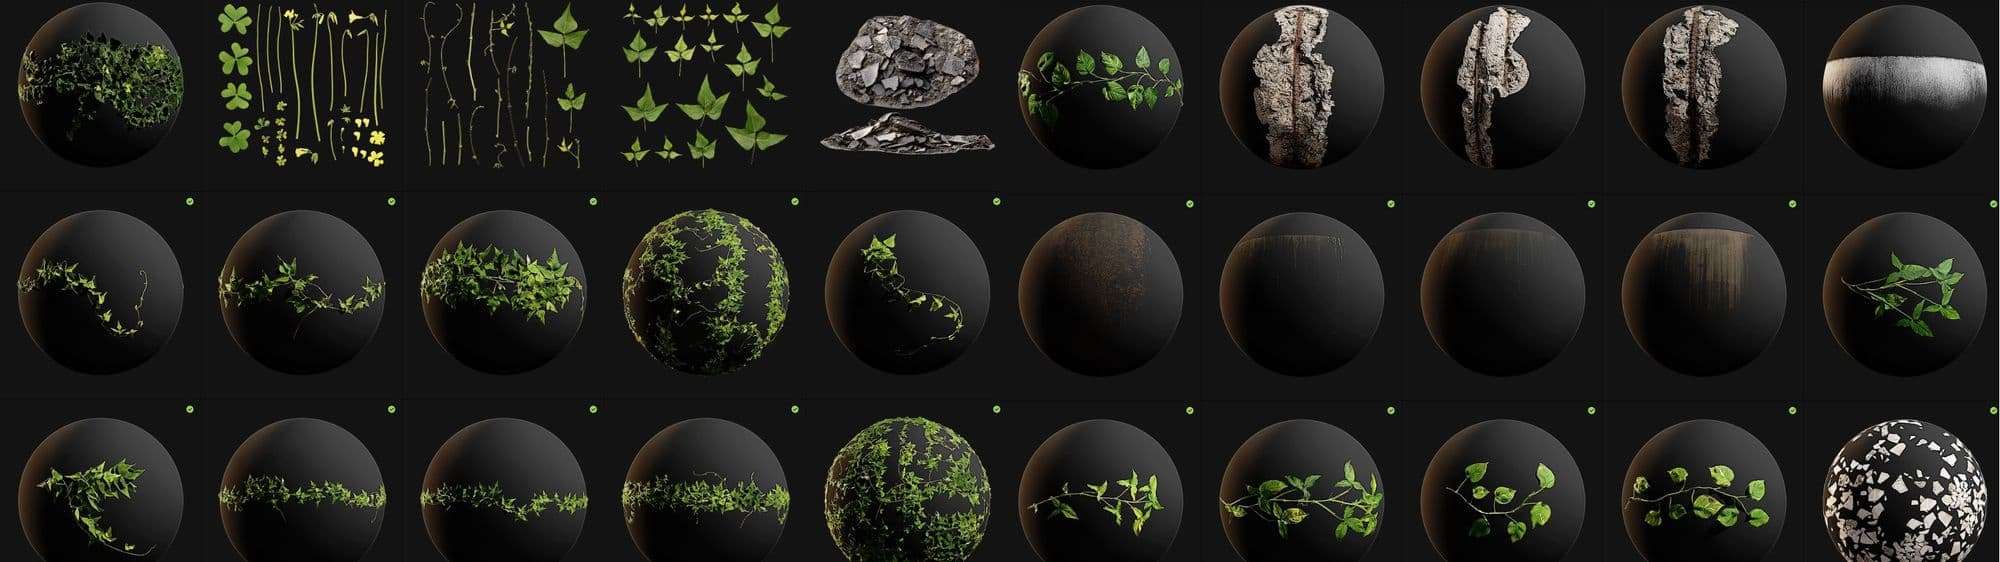
The workflow was simple, export from Quixel Bridge to Unreal Engine. Setup the materials, apply them to a deferred decal in the scene and done.
Substance Painter was a key element in the texturing process. I had to be highly organized for such a large scene with so many props. In Substance Painter I created folders for each element that needed to be isolated, more space for me.
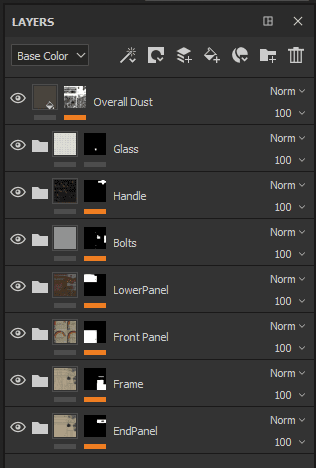
Some props didn’t need ID Maps so the process was very straightforward. Metals, plastic, glass, wood was the most common materials in the whole scene.
ID Maps helps you to separate parts in a prop/model in the texturing process, separate one material from other. You can create your own Mask or you can use a Baked ID Map for this process.
The way to create a mask as an ID Map is:
1. Put your material in a folder.
2. Right click in that folder and select Create Black Mask.
3. Draw in the object where you want this Mask.
When you’re using a Black Mask in a Folder, whatever area you draw in, that’s where your material will be shown.