It is important to write down all the set-data and camera-data. In my opinion, the least you should do is write down the camera model, lens model and focal length, height of the sensor to the ground, tilt of the camera and distance from the sensor to the spot where the CGI will be inserted.
Lennart Vulto takes us through his process of shooting a shot for CGI integration, making photorealistic fish and integrating them into this live-action plate.
Some time ago, the art-director for a graduation film at The Netherlands Film Academy, approached me with the following dilemma: in the script there was a scene where the protagonist smashes a fish tank, leaving two black veiltail fishes flopping onto the ground. Because we are against animal suffering (and wanted to be able to say “no animals were harmed in the making of this film” at the end of the credits), this of course, could not be done for real.
Well, the smashing of the tank could be done without real fish, but the scripted close-up of the fish on the ground couldn’t. As the VFX supervisor for this project, it was me who had to solve this dilemma.
In this blog post I will take you through my process of shooting a shot for CGI integration, making photorealistic fish and integrating them into this live-action plate.
The shot you see above was created for the Dutch short film En zo geschiedde, 2020 (English: And So It Happened), directed by Lobke de Boer.
Plate shoots & taking set data
I was on set when we shot the plates for the fish. In pre-production the director, the cinematographer and I had discussed the blocking of the shot, and I had made an extensive plan for the plates I wanted to shoot. When it comes to integrating CGI into a live-action shot, I like to shoot the following plates:
The hero-plate (of course): this is the actual shot in which the CGI will be integrated, which in our case was also the clean-plate (without any elements that had to be painted out).
A reference-plate: this is the same shot as the hero-plate, but this time with an object in it, which resembles your CG object as closely as possible. Ideally the proportions and material(s) of your reference object are the same as the ones of the CG object you want to integrate. This plate is a great reference for how the light on set reacts with the materials of your object/character. It shows how the shadows and depth of field look, and also provides something on set to interact with. We experienced that it is quite hard to find something non-living with fish-skin texture, so we ended up using small black plastic decorative fish. Shooting with these reference-fish was also a great means of communication of where exactly the fish should be placed in post-production.
An HDRI (High-Dynamic-Range Image): this is a big help when lighting your CGI and also great set reference. There are many ways of shooting a HDRI. In this case I used a 360° camera, the Ricoh Theta V. Our head of department at the Netherlands Film Academy, Kasper Oerlemans, created an awesome plug-in for the Theta camera, which automatically creates HDRIs. The application, Authydra, takes one image to set the base settings of the camera, then takes a set of 3 images for denoise, repeats this process for 11 different exposures and finally combines all images into a single EXR file.
Grey-ball and Macbeth plates: those are shots of a 360 degree neutral grey ball and a Macbeth colour checker chart, for lighting, colour and shadow reference.
A lens-distortion grid: this is a shot of a simple grid pattern to later extract the lens-distortion from, which you can then apply to your CGI.
Last but not least I always like to shoot what I would call an “interaction plate”. This isn’t strictly necessary (and also not always possible), but in my opinion the interaction between something that was actually there on set and your CGI really helps grounding your CGI in the shot and making it feel like it was actually there. For this reason we also shot a plate where the first AD and I were subtly poking the glass with sticks with sponges (of about the size of the fish) attached to the ends. By this point most of the crew had declared me slightly mad.
Apart from shooting all these plates it is important to write down all the set-data and camera-data. In my opinion, the least you should do is write down the camera model, lens model and focal length (which in this case was a beautiful 35mm anamorphic), height of the sensor to the ground, tilt of the camera and distance from the sensor to the spot where the CGI will be inserted. Luckily, I got help from a camera assistant writing down all that data.
Reference
You probably have read this a thousand times, but when wanting to create something in the computer, especially something photorealistic, you always have to start researching your subject and with searching lots and lots of reference images. In my case I searched especially for shape and material references, since the lighting would be determined by the actual lighting on set.
Naturally, the shape and material also has to be oriented towards the actual living fish on set, but searching for additional references never hurts and is helpful in really trying to find detailed reference images from all angels.
For the animation process we looked extensively at movement references of fish flopping on land as well (it was a fun afternoon), but more about that later.
Modelling
After shooting, we knew exactly what the fish and the shot should look like, so it was time to start the modelling process. I started with creating a very basic blocky model and went on from there.
In my experience, you should always try to subdivide as little as possible while getting the primary shapes right, before jumping into the small details on a really high poly mesh.
Fortunately, sculpting the fish was not that hard of a task, especially because I decided against sculpting each and every scale on the fish, following the advice of Maarten Verhoeven. This decision was made under the more practical consideration that the fish wouldn’t be that big on screen, so adding the scales in the texturing stage would be sufficient and save a lot of valuable time to focus on other stuff. For a really high-end production I would advise sculpting in details and baking them, but in our case, with a pretty tight deadline, this approach was the way to go.
My general advice would be to always have a good idea of the blocking and the camera angle of a shot before investing large amounts of time into details which won’t even be visible and maybe even slow down your render later on.
Another practical consideration was to only model one fish, and to simply scale it a little to get a second variation. This would be sufficient because the second fish would be completely out of focus.
For the fins I knew in advance that I wanted to simulate them, so all I needed for this were planes in the shape of the fins. Veil tail fish aren’t named that way for no reason: their fins are extremely thin, like see-through veils. I decided to model these fins in Maya, rather than Zbrush, because in Maya I find it much faster and easier to load in a reference image, create a plane and trace the shape by manipulating points on only the x and y axis, but this is of course a personal preference.
After I was done I had a pretty high poly model of the body as well as the fins, so I loaded everything into Houdini and did a quick retopo, using the amazing Topobuild tool. I could also have used quad-draw in Maya, but since about a year, I am moving more and more towards Houdini as my main 3D software. The model is still quite high-poly, because I subdivided it again after retopo’ing, but because it was such a lightweight model, this was no problem.
Animation
As I am not very much into animation, I am glad to be surrounded by some very talented animators. I asked two classmates to help me out with the rigging and animation of the fish. For the rig all credits go to Florentijn Boot, who got into rigging in Maya especially for this project. Bram Vermaas provided us with some great tips for the rig.
For the mouth of the fish we decided to use simple blendshapes.
As I mentioned, we started by looking up reference videos of fish flopping on land. Videos like this.
At this point in the process the entire ‘fish tank throwing scene’ was unfortunately cut from the movie because it wasn’t essential for the development of the story. This meant that the fish shot we had been working on was cancelled. But since I was already quite far in the process of making the fish and had asked other artists to help, I decided to finish the shot anyway. I also felt I had the responsibility to the others to do so.
One advantage of the fact that it was no longer part of the movie, was that I had complete creative freedom over the shot. This meant the animation process was a very smooth back and forth between Winston and me, by which Winston would make a versions of the animation and I would give him feedback.
Besides, my job was to match the CG camera to the actual camera that was used for the shot, which was was quite easy, considering it was a static shot and I had written down all measurements.
Simulating the fins
During the animation process I had already started doing R&D for the fin simulation. I had never done a cloth simulation before, so I had to step out of my comfort zone and try something new. I am very glad I did, because I learned so much from it and really enjoyed doing it. I ended up using Houdini’s Vellum. Especially helpful for this task was SideFX’s Vellum Masterclass by Jeff Lait.
After a lot of tweaking of parameters (especially the mass, thickness, stretch and bend stiffness, compression stiffness and also the constraint stiffness) I finally reached a look I was satisfied with.
Once the animation of the body was done, I exported the alembic into Houdini where I ran the preconfigured vellum simulation on the fins.
This had to be tweaked again to fit the animation. If you really want to take a look at how I did the final cloth simulation just send me a message and I’m happy to share the hip-file.
Texturing
Before I could dive into my texture software of preference, Substance Painter, I had to do the UVs. For this I used Maya, because in my opinion it has the best UV tools. I decided to give each “main-part” (e.g. body/eyes/top fin/side fins) an own UDIM, not only to have enough resolution, but also to increase the clarity. Maybe a bit overdoing it, but fortunately it wasn’t a very heavy scene to render.
Once my model had proper UVs, I loaded it into Substance Painter and after baking all maps I began making folders with masks for each part of the model that had a different material.
I then started with the basic colour and roughness, experimenting with some procedural smart materials as a foundation. Just as with the sculpting, I think that it is important that you first try to really get your basic materials right before delving into the small details or even the height.
Personally, I will only go more into detail and hand paint stuff like irregularities and surface imperfections once I’m satisfied with the foundation. For this part I often use real images which I take directly from Google or photobash and manipulate to my needs in Photoshop. Always remember to check your individual channels and tweak them separately.
When texturing, you have to again really look at your reference. Take your time to observe how surfaces look and how light reacts with them. Also try to think about what your model “has been through” and try to incorporate these “traces of use” in logical places in your textures.
For example, a used Second World War tank would probably have a lot of dirt on its caterpillar tracks and damaged edges (especially there where soldiers get in and out), it would probably also be paler on top because of the sun and have a lot of traces of battle, like bullet holes and so on. Luckily, my fish hasn’t fought in the Second World War, but it has its own history. Adding such details can really add a backstory to your model and bring it to life.
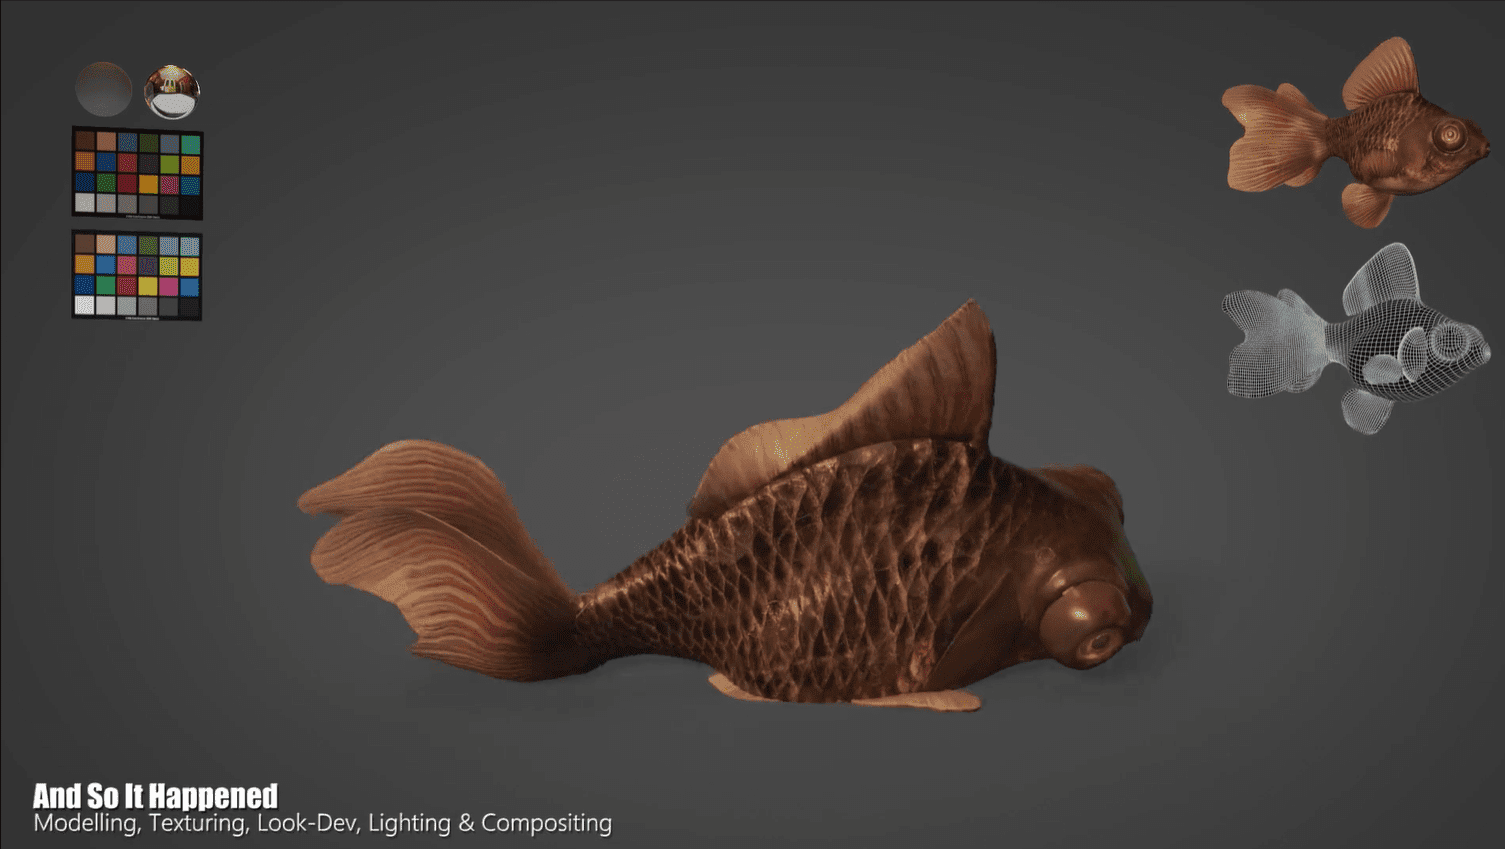
Lighting & Look-Dev:
I decided to use Arnold as my render engine. I had access to the Arnold htoa plugin for Houdini, so I assembled everything within Houdini and plugged all exported texture maps from Substance into AiStandard Shaders. I did not change many shader parameters, apart from a few small tweaks. After four months of lighting in Houdini during my internship at BigHugFX in Munich, Germany, I was prepared for the worst, but sadly (or luckily) the HDRI I had captured on set was almost enough to light the 3D fish realistically.
I only had to add some rim lights on the two fish and a bit of bounce-fill. The plates we had shot of the reference fish, the grey ball and the Macbeth chart now came in handy for matching the lighting. For the shadows I created a separate HDRI.
When rendering I always like to render at least the following AOVs, besides the beauty:
Normal
Z(-Depth)
Diffuse
Specular
Position
And depending on the situation:
Transmission
Emission
SSS
AOVs are, in my opinion, absolutely vital if you want to composite your CGI.
I also highly recommend rendering in ACES if you want to integrate CGI into a life-action plate. The Academy Color Encoding System (ACES) is a unifying colour management standard, which allows you to transform the colourspace of your renders and your live-action footage into a scene-referred colour science with a common (linear) starting point. Another advantage of ACES is its increased colour accuracy (due to its big range), which can help tremendously in achieving photorealism.
Compositing
Lastly, but definitely not least, comes compositing. Here you really get the chance to blend your CGI into the live-action. The compositing software I used was NukeX.
One of the most important things when integrating CGI is to start with matching the colours and black values of your render with those of the hero plate. Ewoud Heidanus, our amazing compositing teacher, who was an enormous help with this project, taught me to do the following steps one after the other:
Start with matching the exposure
Then apply a colour correction (to match the colours), by really looking at the separate R, G and B channels
Then match the saturation
Correct any gamma differences
And finally, match the black levels using a grade node. Again, really pay attention to the separate RGB channels
Applying these few simple nodes will make a tremendous difference in integration.
Another big help in this comp, was tweaking the specular AOV. The raw render was way too extreme, so I pulled all specular off my beauty render, matched them to the specular highlights of the plate and merged this back over my beauty. This way of working with AOVs can be an absolute lifesaver and often rescues you from having to render your entire shot again.
After the colours, blacks and specular highlights were matching, I had to defocus the right fish, to match the plate. After experimenting with a few different techniques, Ewoud Heidanus showed me a clever way of creating an anamorphic bokeh using the Convolve node, which lets you create custom filter effects by supplying your own filter image. His method was to transform a simple roto shape into the desired bokeh shape, which, in my case, was oval. Set the gain of your plate way up and then use the convolve node, with the roto shape as filter, and then merge this back over your plate.
When it comes to compositing you always have to keep the 80/20 rule in mind. This rule means that roughly 80% of your work is done in the first 20% of your time, but these last 20% of your work, to really get it to 100% takes up the remaining 80% of your time. It’s easy to be satisfied when reaching this 80%, but I think it is absolutely worth it to take your time for these last subtle fixes who elevate your final work.
Some small changes can make a big difference between photorealism and clearly CG. Some tips for achieving this goal:
Apply chromatic aberration (but don’t overdo it!). It is lens imperfections like this, which really help sell your shot.
Use the Soften node to “soften” your CGI. If your render is looking too sharp and clean, this often gives away that something is CG.
Denoise your hero plate at the beginning, extract the noise information via the difference between your denoised plate and your original to a separate noise-plate and merge this plate over your entire shot (now with CGI) at the end.
Also don’t forget to apply the lens-distortion from your actual lens on your CGI.
Here’s a little breakdown of my comp:
Like I wrote at the beginning, I always try to incorporate interaction between something that was actually there on set and my CGI, to really merge it in there. For this shot I had the plate of the glass shards getting moved. I roto’ed one glass shard from this plate and moved and timed it just right to the jump of the fish in the foreground. I also modified the leaves of the aquarium plant on the left to slightly cover the fish in the background. This helps to enclose in your CGI into the scene, like in a sandwich.
At the end I added a subtle camera shake and vignette and then there was my final result.
Takeaways
Looking back on this project I learned so much. Creatively, as well as technically. There are some things I will definitely do differently next time, but that’s inherent to learning and this will probably/hopefully be the case for every project I will do in the future. So I want to end with a few takeaways, which I hope you will remember from this blog. They will probably sound like I’m a real expert, which isn’t true at all, but hey, maybe there is something that’s still new to you:
Observe everything around you. Really soak up the details. Only if you really understand how something works in the real world (e.g. how lights reacts with a surface, how fish jump on land), you will be able to truly recreate it in the computer.
Before starting on a project, sketch a (rough) schedule and also make a priority list. At school or while working on personal projects we often have, or take, huge amounts of time to do something, but unfortunately when working in the industry this (almost) never is possible. It is in my opinion a very useful skill to be able to set priorities and also to look for creative solutions which will speed up your workflow, thereby enabling you to make tight deadlines. This will also prevent you from getting totally lost in little details and will help you to focus on the main goal at hand.
Don’t let setbacks discourage you. I was pretty bummed when I heard that the entire scene with the fish in it was cut from the movie, but it didn’t withhold me from finishing them and enjoying the experience of making them.
In my experience it’s very beneficial as a 3D artist to know (at least the basics) of compositing. Even if you, like me, don’t want to become a compositor, the compositors with whom you will be working in the future will be very appreciative for the fact that you understand what they are doing. Furthermore, it is a really great feeling to step up your own renderings a notch with some simple comp.
Finally, maybe the biggest lesson I have learned in the last few years, is to enjoy the journey of learning, and always keep experimenting with things outside of your comfort zone. For example, I was quite hesitant to get into Vellum for this project, because it meant a lot of extra work and seemed quite complicated. But looking back, the fact that I did it, might now be one of the things I’m the most proud of considering this shot.