Rescuing your ZBrush and Blender Game Art Project when everything catches fire
We all know how beautiful things are when your game development goes according to plan, you can show how skillful you are and everybody can learn the “proper way” to create and publish a game. But, there is the other side...
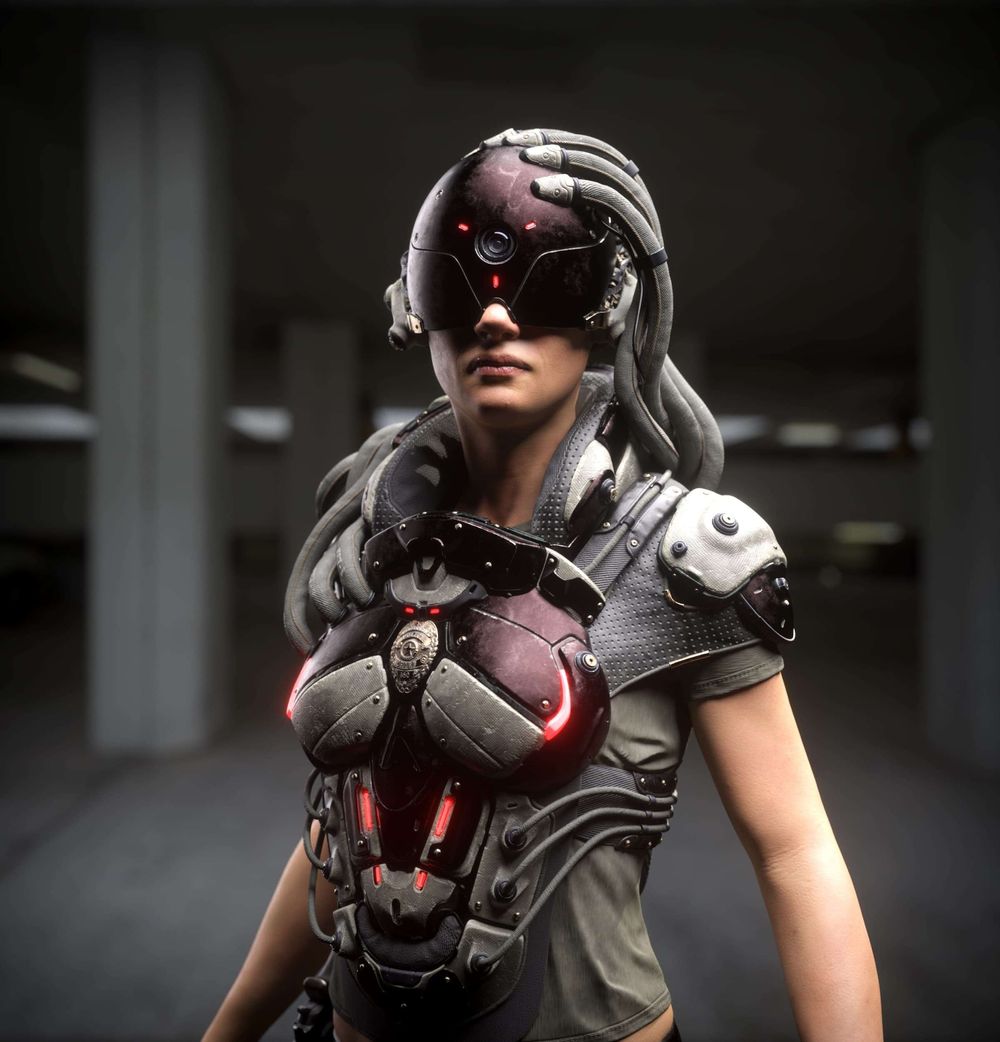
We all know how beautiful things are when your game development goes according to plan, you can show how skillful you are and everybody can learn the “proper way” to create and publish a game. But, there is the other side, those moments when your 3d illustration catches fire and you must find a way to pull through, at any cost. That is the situation Daniele found himself in recently. Thankfully, Daniel explains how he managed to get himself out of this bad situation with a recent digital illustration brief for a gaming project.
Hi I’m Daniele Colombo, an ex-video game engine programmer and now a self taught artist and this article is about how to meet a strict deadline when everything goes wrong.
First you need some context, this piece was made for a challenge between every member of the The Extra Mile Community, and as you could imagine there was a hard deadline: 31 days to make a polished illustration, not somebody’s else design. I’m not the strongest in design, I’m more the type of artist that likes to reinterpret or build on existing designs, but I accepted the challenge anyway... gulp!
From my experience the more vague a design is the more time you’ll spend in trying to figure it out while you're modeling. Since time was precious, I told myself: “ok, let’s invest the first few days coming up with a clear idea, that will help speed things up” in my mind the plan was perfect, but life always has curve balls.
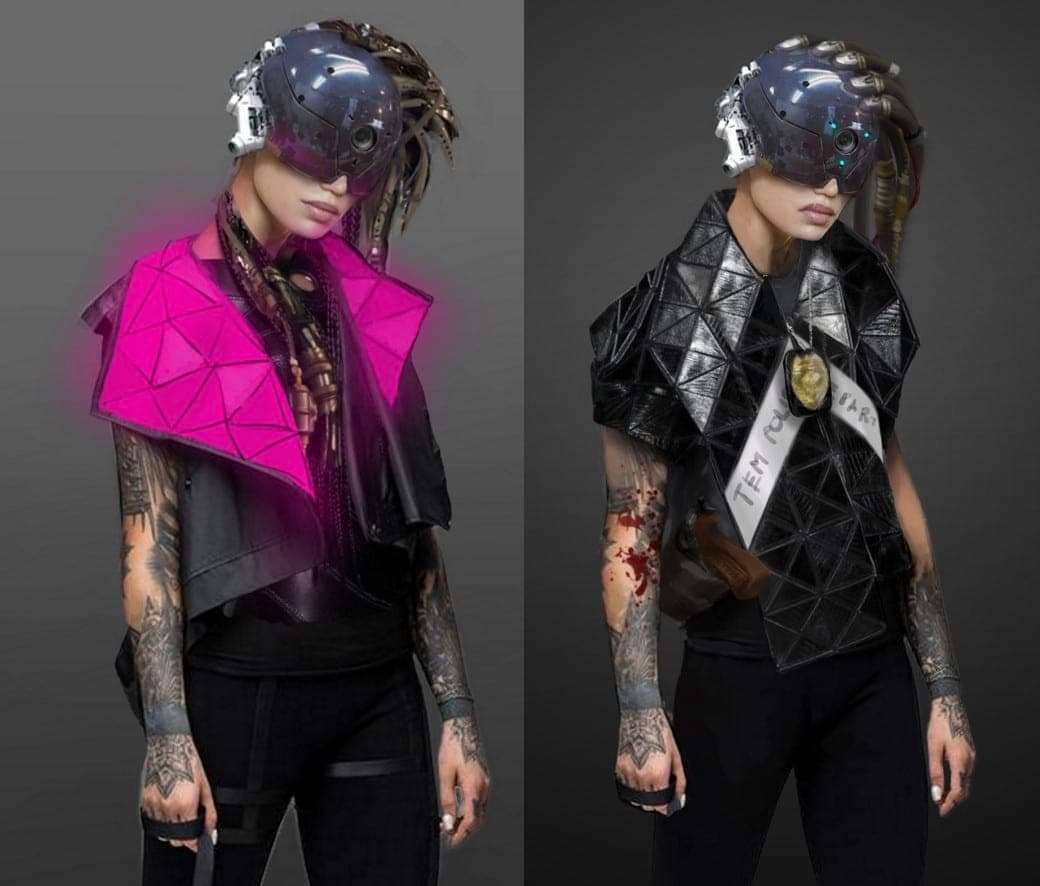
These are a couple of the more promising designs I came up with (made in Krita), at this stage a couple of days had passed and I relied heavily on texture bashing, the pros of this technique is that it’s easy to create something from scratch but much harder to develop or modify it. This is where everything started to go sideways! As every good artist advocates, you should always ask for feedback.
The feedback was crystal clear: “it doesn’t look like a cohesive protective gear [that was my idea], it’s more like a fashion design where the two central piece [the vest and the helmet] don’t even mach together”.
Here’s the big lesson: even if you don’t see it, but a lot of people are telling you there is a problem, normally there is a problem.
So I tried to make it work and I spent another couple of days on the concept. I was unsuccessful, this should have been ringing alarm bells for me to stop! I did what every artist will tell you: kill that idea.
This pivot cost me 1/3 of the time budget - the problem was I had already “wasted” 4-5 days and so I chose to do the concept directly in ZBrush, that at least in my mind was a way to say: let’s keep moving forward, but the worst was still to come...
The rapid blockout in ZBrush
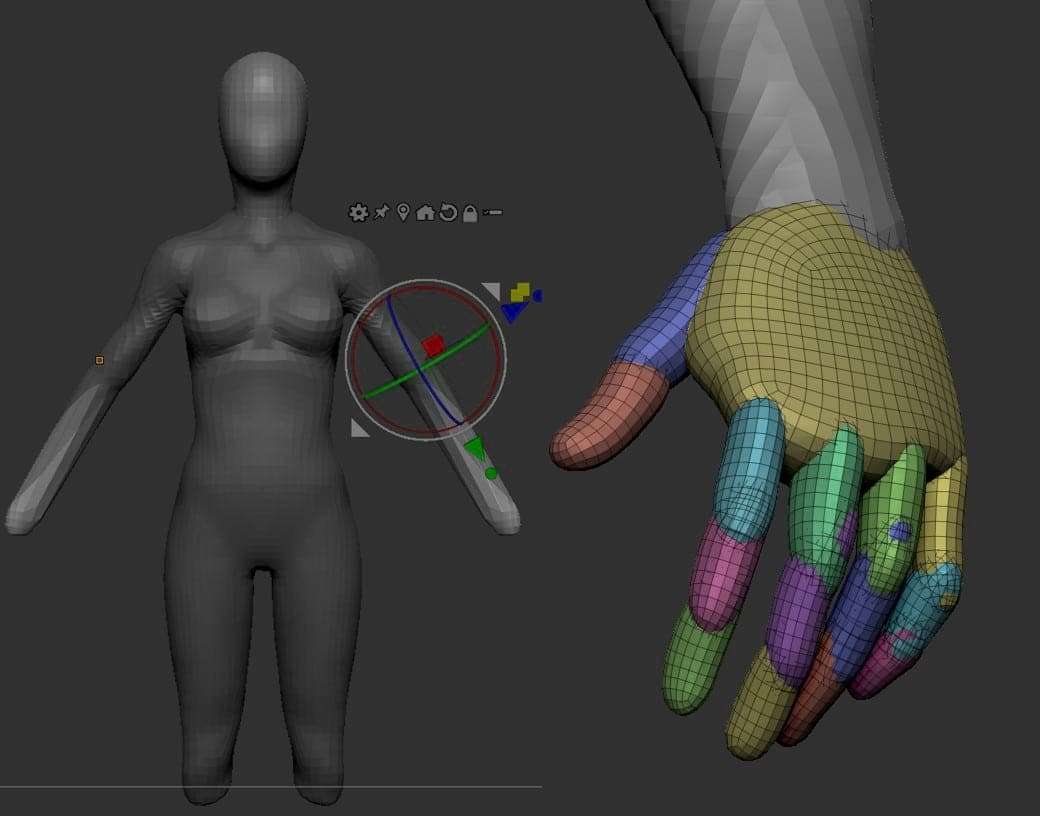
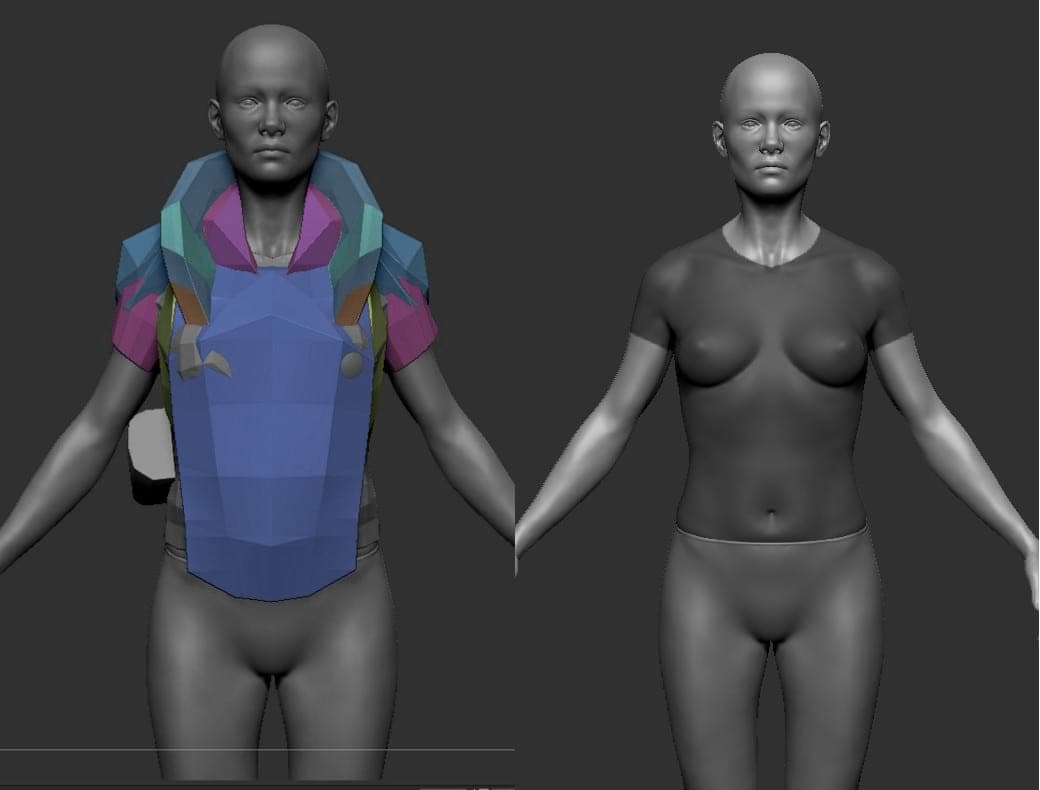
First things first, I needed a body for my character and I wasn’t sure I could use an existing one for the challenge, nothing too much of a problem I’m used to create a base body from scratch. It takes me a couple of hours to get to a decent base, here is my workflow: I usually start with a sphere for the head and use dynamesh to extrudes and create the rest of the body, you don’t need much resolution to create the main forms, when I get something similar to a body I start to cut the head from it in order to work more easily. Hands are particularly challenging to get a good base by extrusion, so I usually make a block out of them with simple primitives and then dynamesh it, I think is the easiest and faster way to do it, I also use Sculptris Pro later in the process.
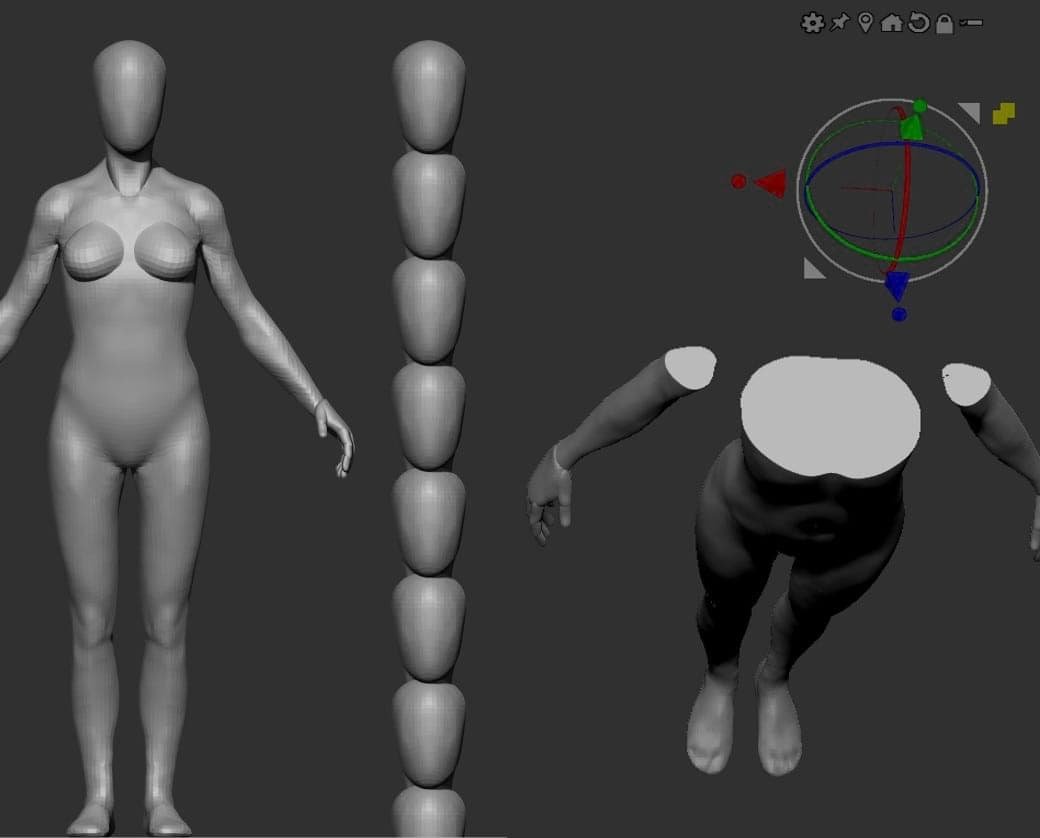
For females, it’s better to keep the breasts separated from the rest of the body, this will help you not destroying it while shaping the rib cage. At this early stage it's important to check your anatomy and proportions, a good way to do it is to have a multiple cloned heads of your character to help you place the major land marks and you can see I was going for a 7.5 head female.
The most important thing is to keep in mid the topology you are creating won’t be the final one, so don’t be limited by it.
I also find very useful to drop a very big cube into the scene, activate live boolean and scan the body from top to bottom in a “cross section” style in order to see if the shapes are good especially the rib cage and the belly area.
After the body is in a good shape I start with the blocking of the head, I highly suggest to start sculpting the head with the eye closed, it will speed up the early stages but always remember to place some real eyeballs before going too far, it will help understand the curvature of the eyelids much better.
Another good technique is to duplicate some shapes you already have and toss them on your model, flip them, mirror them, scale them Do whatever you can in order to generate coherent new shapes.
After the body, it’s time to block in the cloths, but as you know by now, I didn’t have a plan for it. I knew for certain I liked the helmet so the real problem was designing the bullet proof vest. The pants and the t-shirt where extracting via masking, for the vest I tried to “see something/create something”, by dragging simple primitives on the body and move them around with the move brush.
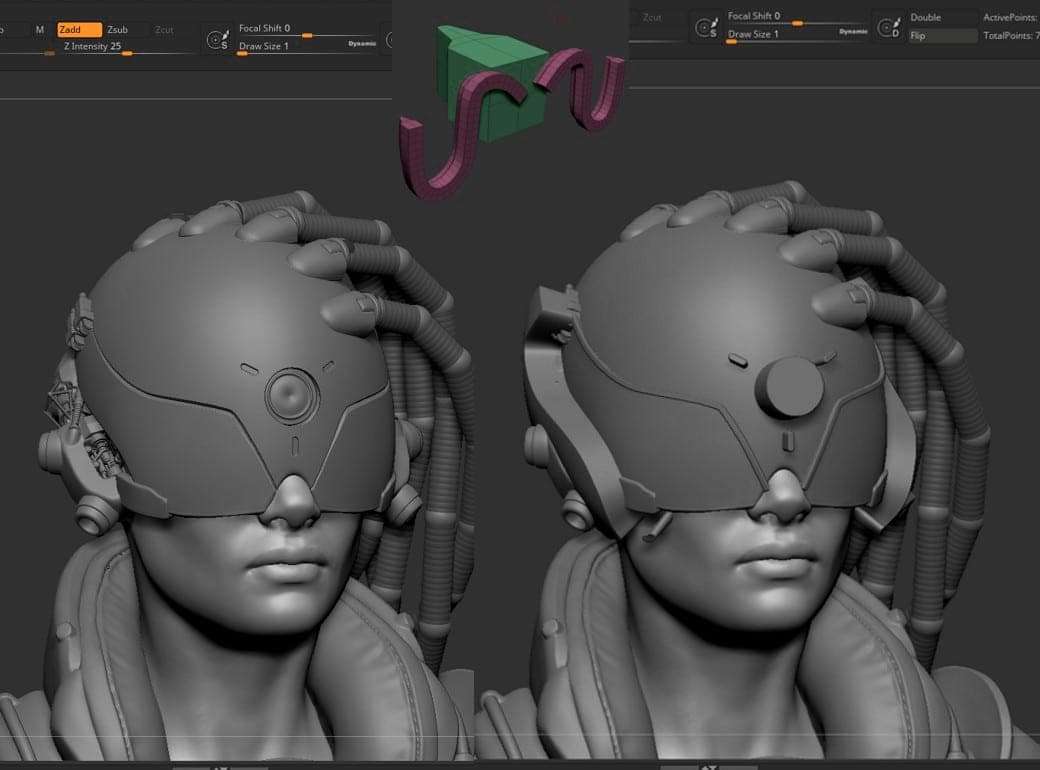
For the helmet I used live booleans to carve the panels without committing to anything yet. You can make “panel like cuts” thanks to some custom curve brushes.
For the electronics it’s way faster to use a bunch of simple meshes and smash them together, while for the cables you can use curve brushes or create some straight geometry and curved them with the bend curve modifier.
Polishing the block out
Whenever I reach a good point I always try to clean my subtools, I usually separate all the items that should not be part of the same mesh and try to make them clean, you can do your cleaning by clipping, ZRemeshing, extracting, retopology or even via live booleans.
The most important thing is to keep in mid the topology you are creating won’t be the final one, so don’t be limited by it.
Getting through the artist block
Here is where I got stuck on the bullet prof vest. I wasn’t able to move the design any further, the shapes where clean but unconvincing, especially the belly. Everything I tried was not working or worst than before.
It’s always frustrating when you can't advance. Here’s a trick that I found works for me: your mind doesn't know what it likes until you see's it. So the solution is to quickly generate the most weird unexpected shapes until your brains “see's something”. Don't be scared to try something completely different, do it quickly and if there is no positive response from the brain, change it.
I dragged and dropped a bunch of subtractive live booleans on the vest without caring on what items they were and just concentrating visually, I “found” something in this one, from there is just a matter of develop that particular idea further.
Another good technique is to duplicate some shapes you already have and toss them on your model, flip them, mirror them, scale them Do whatever you can in order to generate coherent new shapes.
Rush through retopology
Retopology is one of those things that can take you AGES, especially when working with hard surfaces. This is time that I didn’t have, I burned the majority of it in the polishing phase and my artist block phase. I was short on time, very short, I only had 5 days left. So I went for the ugly dark way again, the one that you never tell anyone about.
First, I knew the final output would be a still image, second, no animation required.
A monster was born
I zremeshed only the soft parts that I knew I was required to deform while posing, and for all the rest… well… you know… I DECIMATE THEM!
I know, I know, a shocking choice! But I had to chose between finishing the piece in time or crying in a heap on the floor. I chose the former.
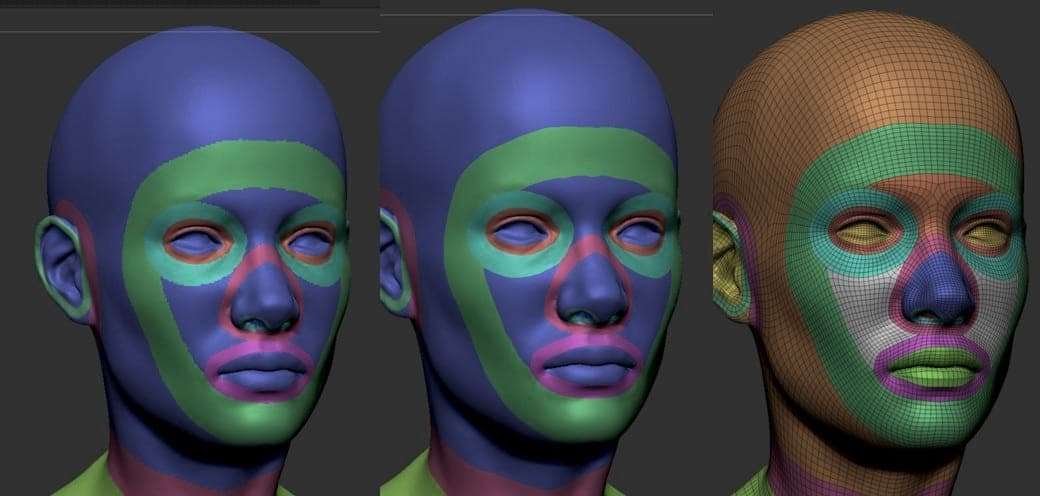
Zremesh topology is not beautiful but you can guide the algorithm using polygroups, and the same thing can be done while using UVMaster to create the Uvmapping, just make sure you boundaries are clean (use mask by border, and polish)… please don’t judge me.
Texturing at the speed of light
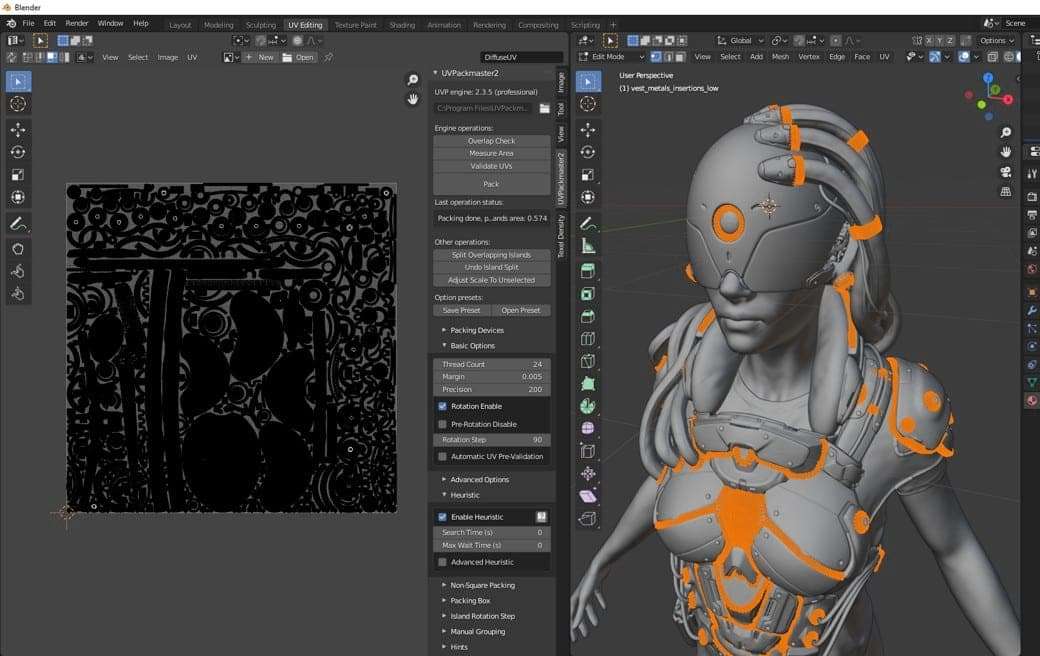
I used Blender to group the meshes by material and fix some UVs and topology problems, I also repacked all the uv islands thanks to this awesome plug in UVPackMaster2.
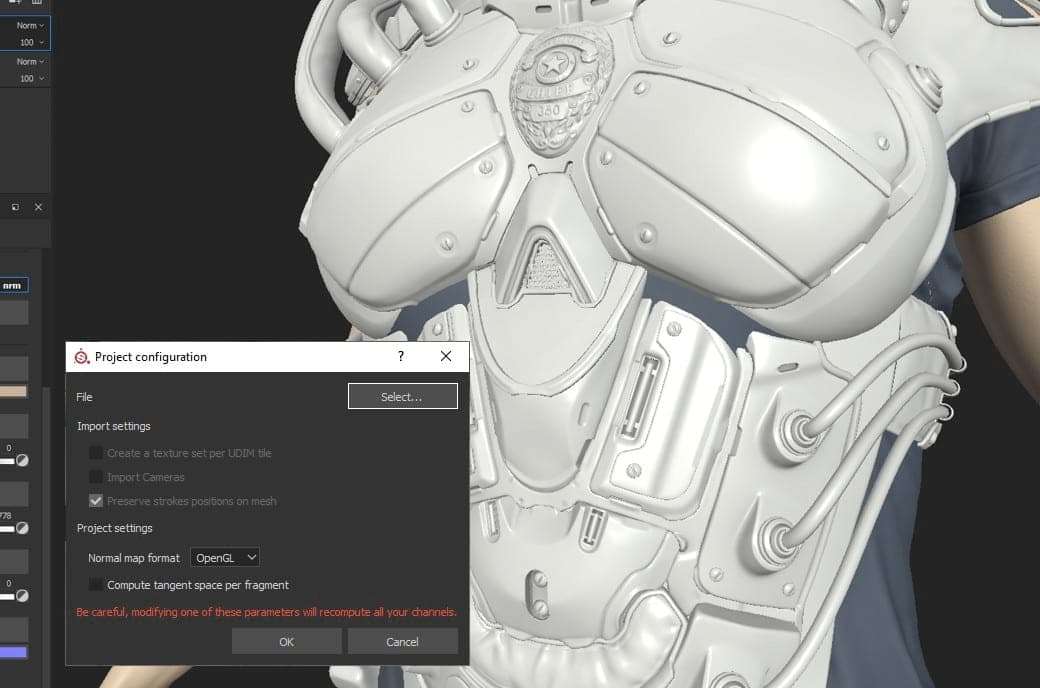
It’s at this stage (4 days left) that I start thinking about the colour palette, so I started blocking in the main colours, and than I saw it, multiple meshes were compenetrating… but nothing is lost (yet) you can always update the geo and re-import it in Substance Painter without loosing your texture work, you can do it via the project configuration.
When you don’t have time the key is to re-utilize materials, so I kept the number of Substance materials very low, I spent 1.5 days texturing (leaving other 1.5 days for rendering), that means there was no time to do much manual work, so I leveraged the power of masking, procedural texturing and generators to get things done.
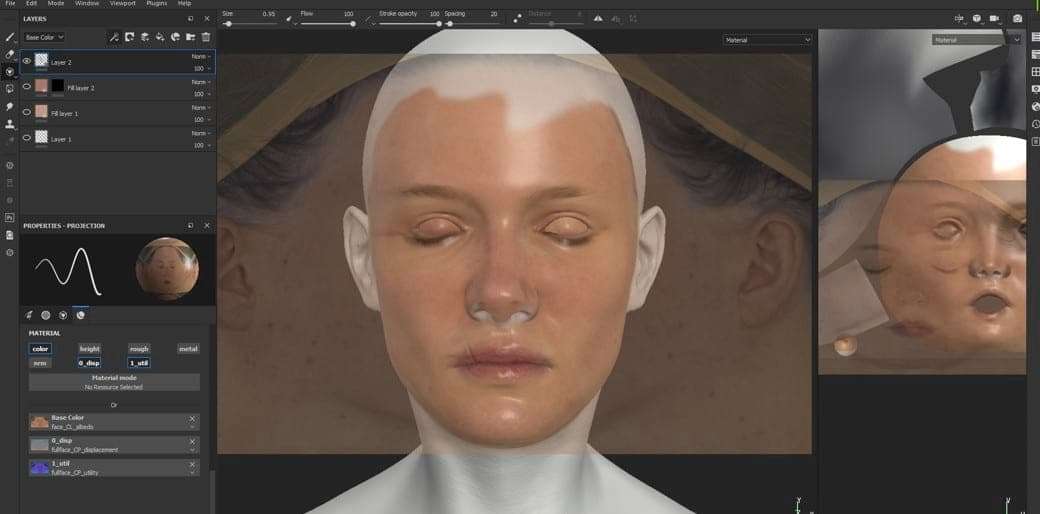
Making skin is very hard, and time consuming, there was no way to do it without using XYZ multichannel face texturing packs, and so I use them, it wasn’t planned from the beginning, thus my UVs weren’t the best for the job, but I had one last trick to pull out, the projection and clone tools in Substance Painter.
Thanks to them I was able to project all the maps I needed onto my geometry and hide the problems as fast as I could ;)
Posing and rendering
The posing was done in ZBrush thanks to transpose master, after that I start working on the final render with a whopping 1 day left before the deadline.
By know you should, speed, speed, speed, fast, fast, fast, that was the lullaby.
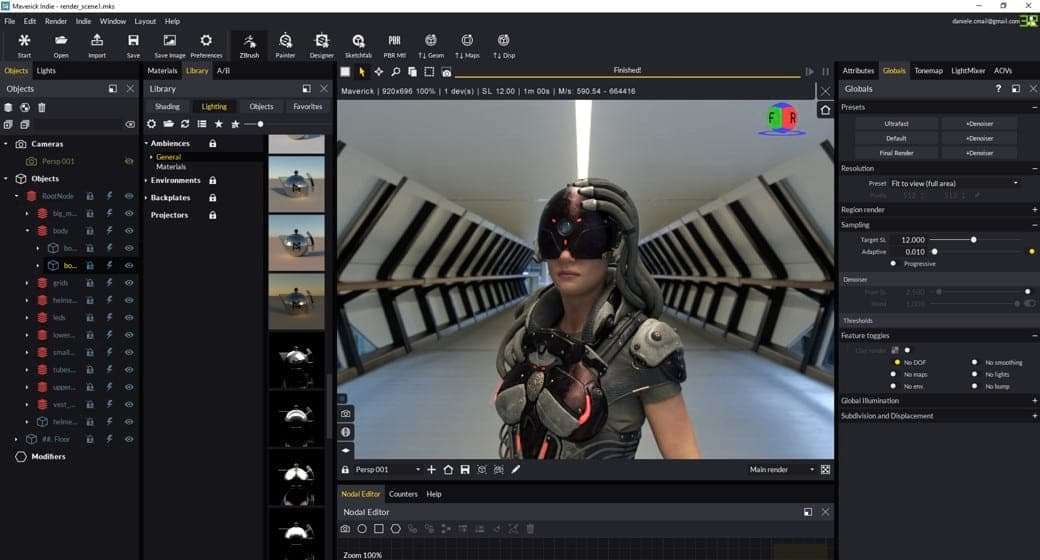
On top of that Maverick has a very solid collection of tools for lighting your scene, like environment maps, and what they call ambiances. It has an amazing tool to create and move lights along the normals of your mesh!
Plus it has everything you need in a very simple but powerful package.
I spent the night exploring rendering moods, here’s an alternative of the final image.
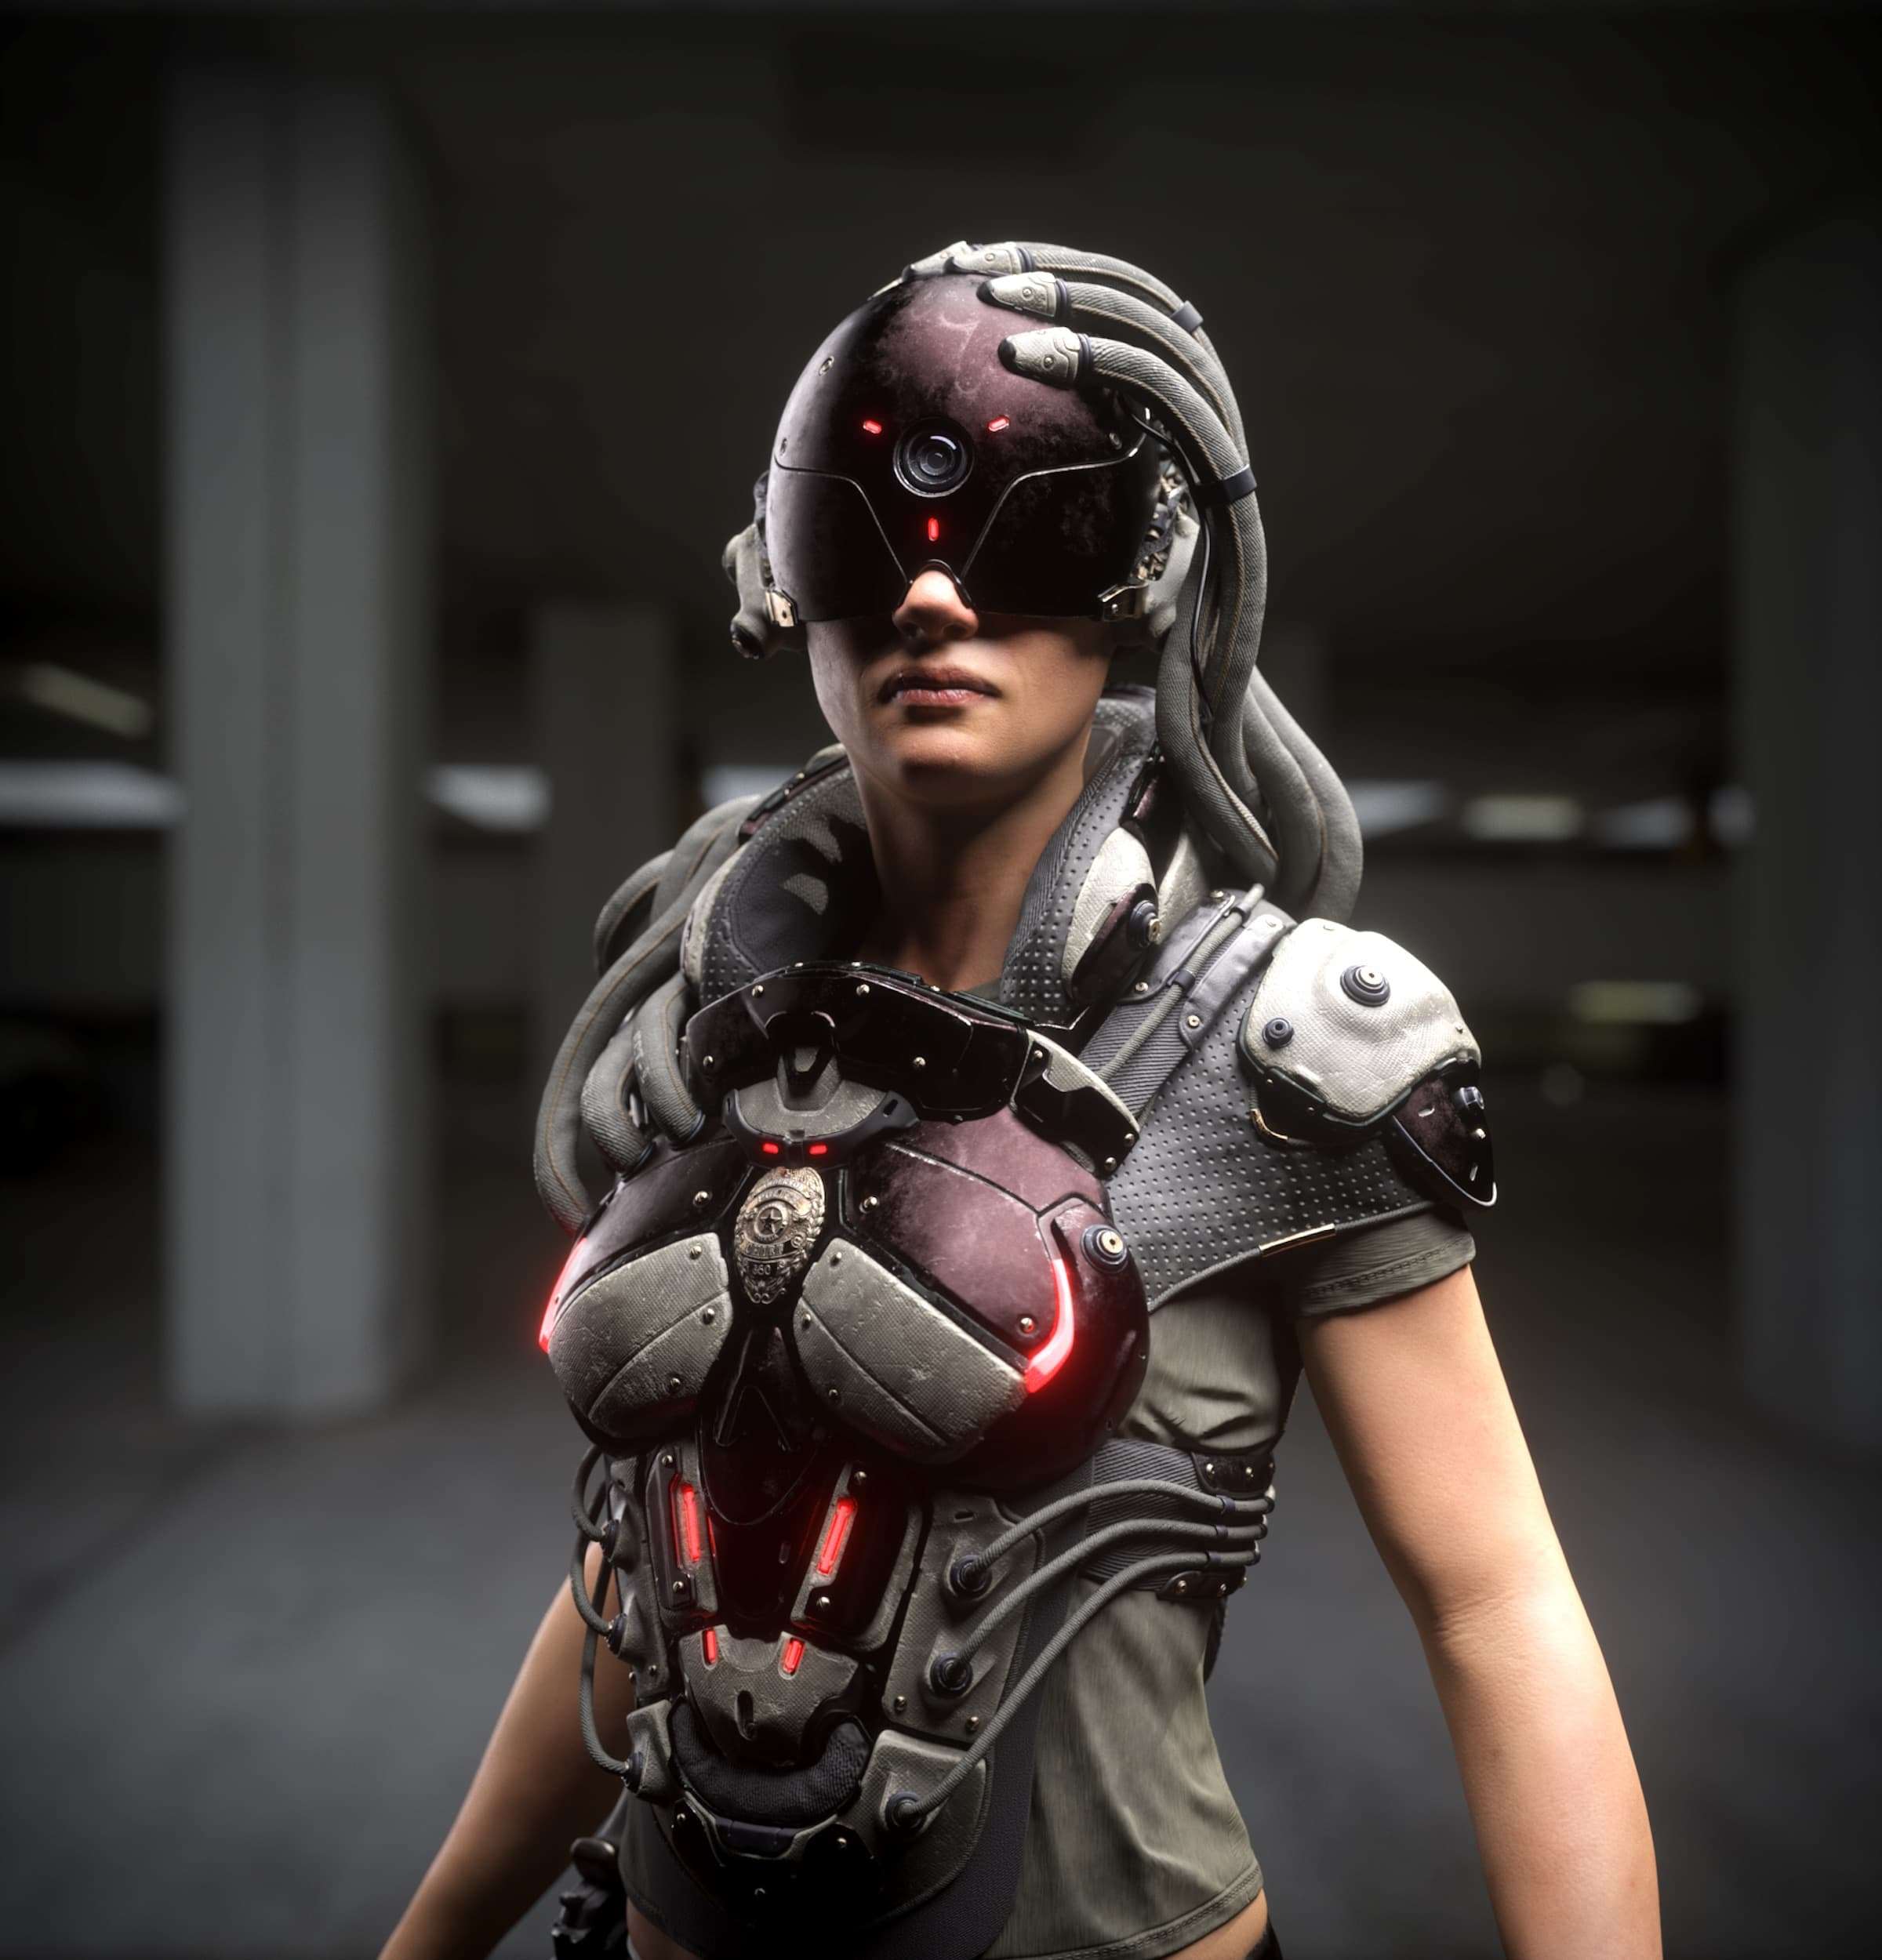
Conclusion
It was TOUGH, but I did it. The lesson here is that there is no right or wrong way of doing things, you just need to recognize when something isn't working and not be scared to try something different. Go with your gut feeling and listen to feedback from others.