AR Projects: Modeling and Texturing 3D assets for Beginners
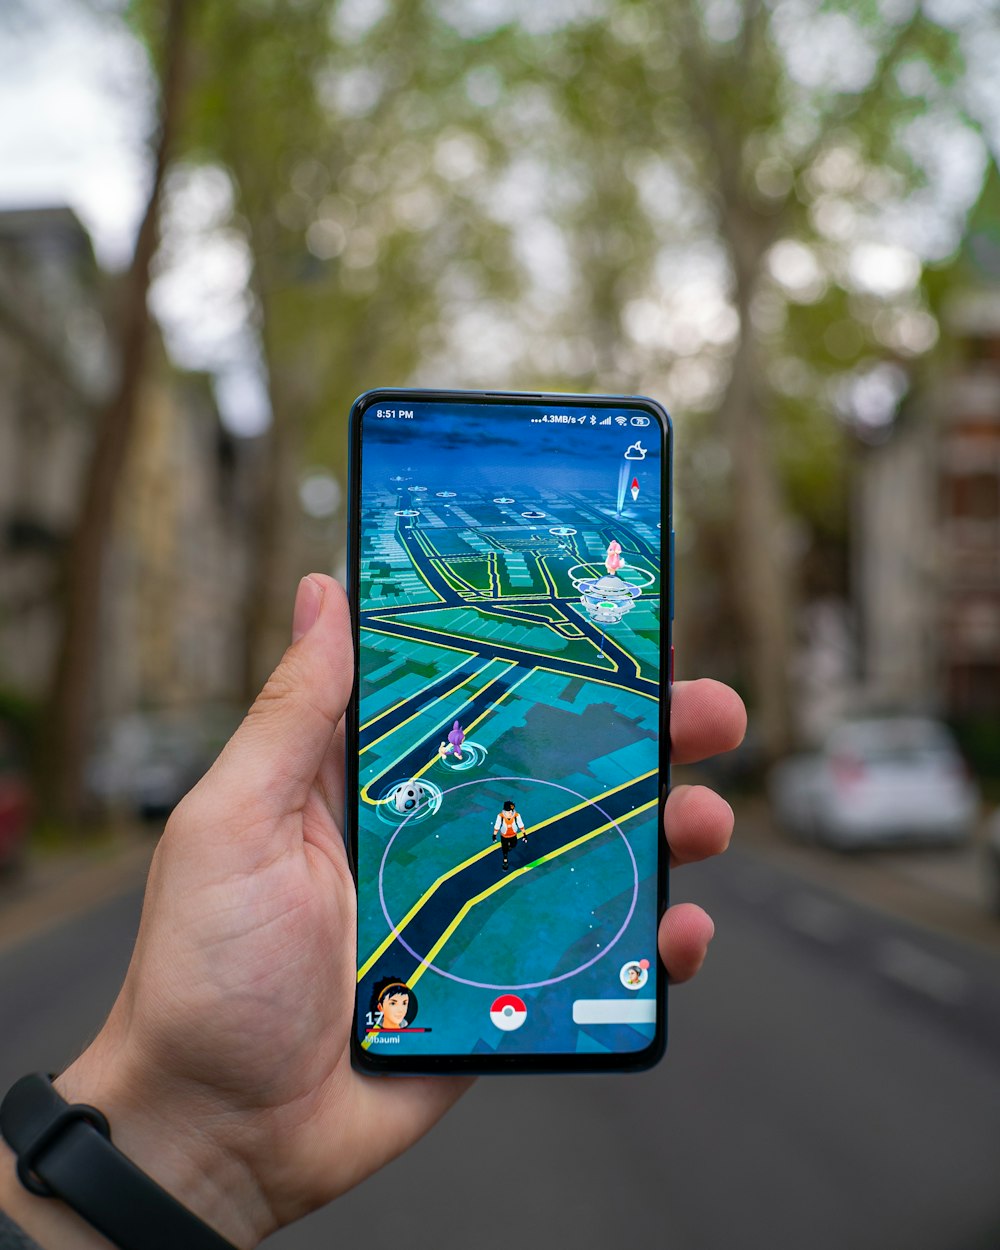
The inspiration for this app came when I saw pictures of the Hello Kitty Smile walls in Japan on Instagram. Since I knew I wouldn’t be able to travel to Japan soon, I tried to simulate the experience for myself in AR.
Natalia Cabalceta is a 3D Generalist from Philadelphia, in the U.S. She holds a Bachelors of Fine Arts from the University of Pennsylvania, as well as an A.A.S (Associate in Applied Science) in Biotechnology (ok, that's cool...). Natalia loves 3D Modelling, Immersive Media and Illustration. The thought of creating her own immersive worlds utterly excites her! She shares with us her guide to Modeling and Texturing 3D assets for AR Projects.
Collecting References
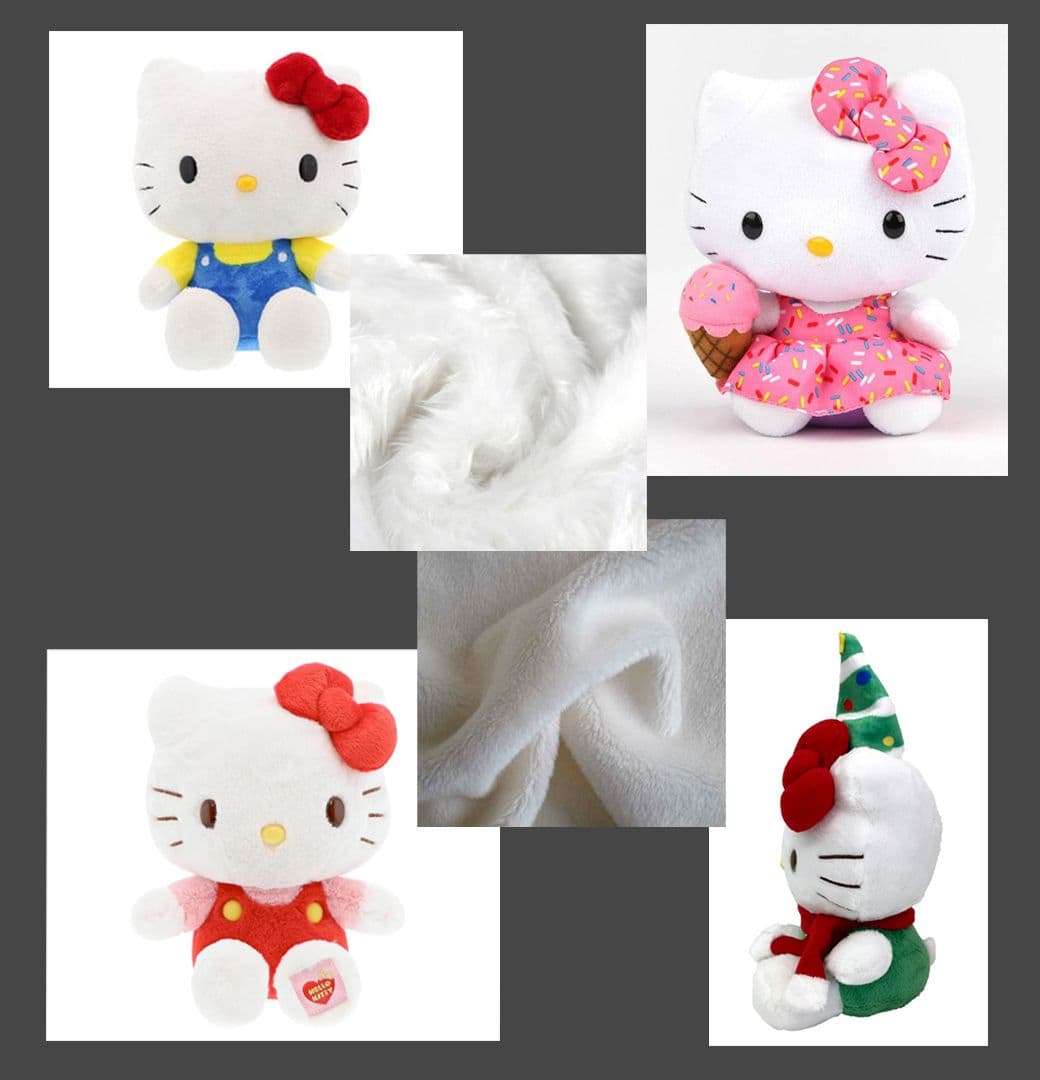
It’s best to start collecting some reference images of what you are trying to make. They will give you a good idea of whether the proportions of your model are correct and whether the textures look similar enough to the real thing, if you are going for realism. If you’re making a Hello Kitty Plush like I did, find some plushes that you like as references with a quick Google or Pinterest search. I like to have at least three so I am not overwhelmed by images, but you can source more if you’d like. Be sure to capture different angles of your object.
Modeling
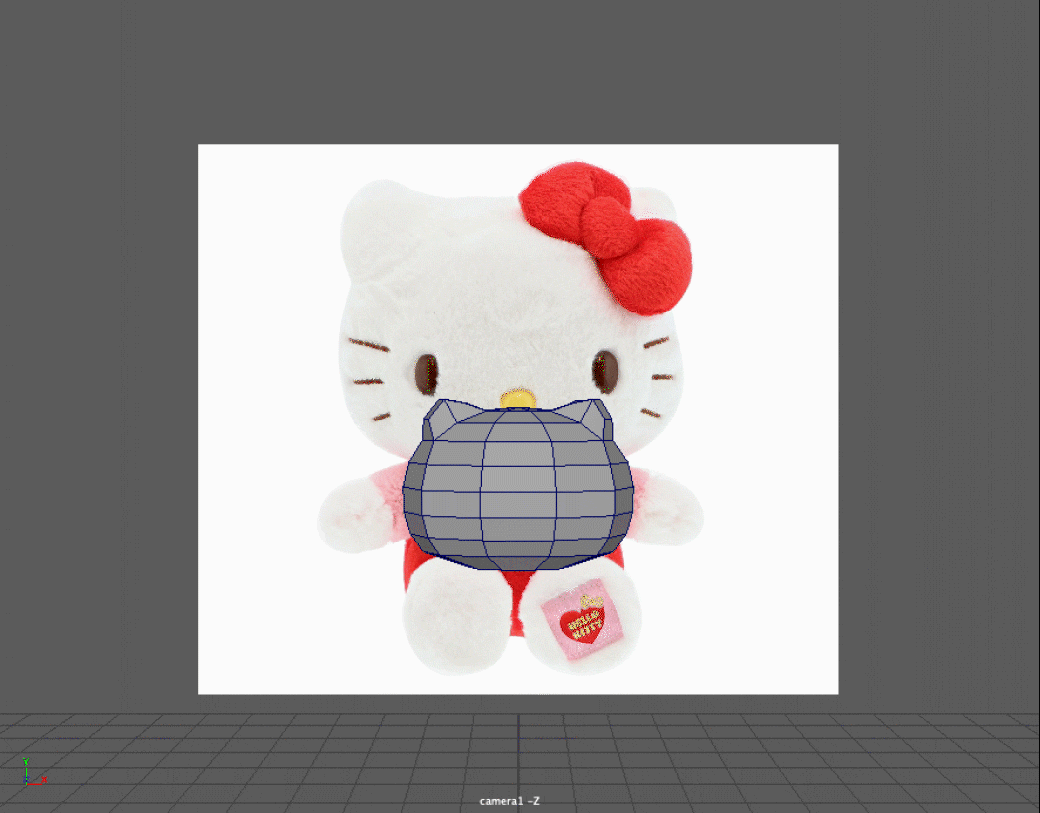
This part can feel daunting, but it’s best to take baby steps when starting out with modeling. I use Maya to model and I start by importing my reference images into the scene on a Free Image Plane. You can access it by going to your Modeling menu and clicking Create→ Free Image Plane. You’d then upload your reference pic in the Attribute Editor of the plane. You can learn more about Image Planeshere.
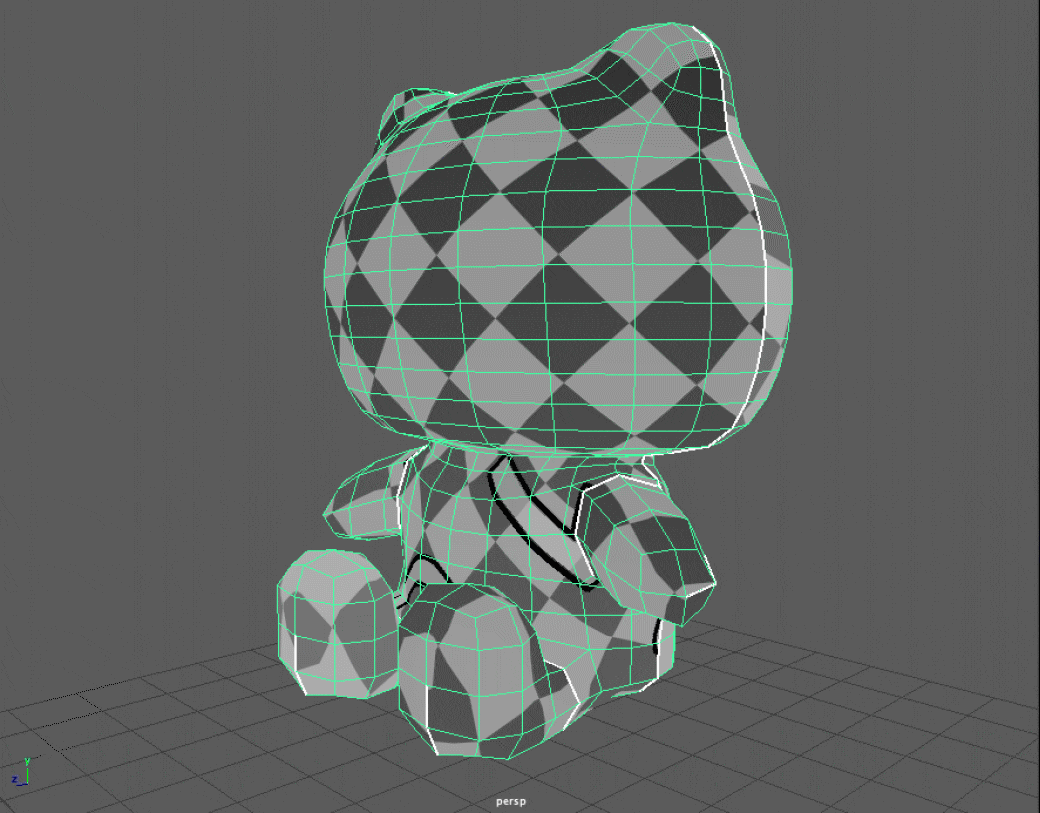
I do this so I can have my references in front of me, in the space, while I’m modeling. I start modeling with very basic shapes like spheres and cubes. Take a look below to see the step by step transformation of the plush.
There are two things to keep in mind while modeling for an AR experience:
1. Keep the models low poly
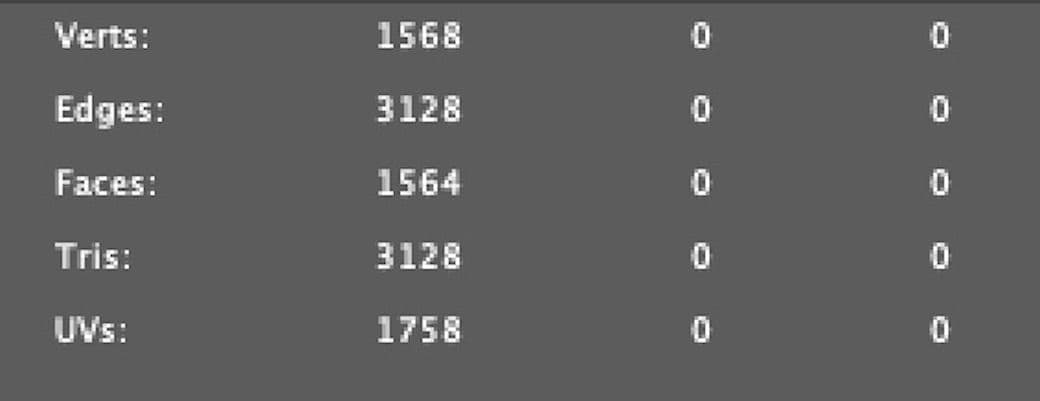
Low poly refers to the number of polygons in the mesh of the model. It’s measured in multiple ways, like the count of vertices or the number of faces. What is considered “low poly” will vary based on multiple factors like the engine you are running your app on, the app’s device’s hardware, etc. While I haven’t seen a specific number to keep below for a low poly model, keeping your model as low poly as possible, while still looking clean will be important. You can keep track of your poly count by heading to your Modeling menu and clicking Display→ Heads Up Display → Poly Count. You can learn more about Poly Count tracking in Maya here. This will put a tracker at the top left of your scene. This is mine for these models:
I keep my models low poly for when I eventually import the model into my AR scene. The lower poly count will help keep the real-time rendering quick and smooth for most renderers and hardware memory. This is because there are less polygons to render so the model won’t overpower the rendering engine in the app to cause lag.
2. Texture the details to save on poly count.
You’ll notice that I didn’t add button eyes, clothes, a button nose or any other smaller details to the models. That’s because I can use my textures to add more detail without sacrificing my low poly count. It’ll help you to think about your models as simple canvases where you can add more details with textures. More to come on that later.
**Quick tip: if you are a student, there is a special license to use Maya!
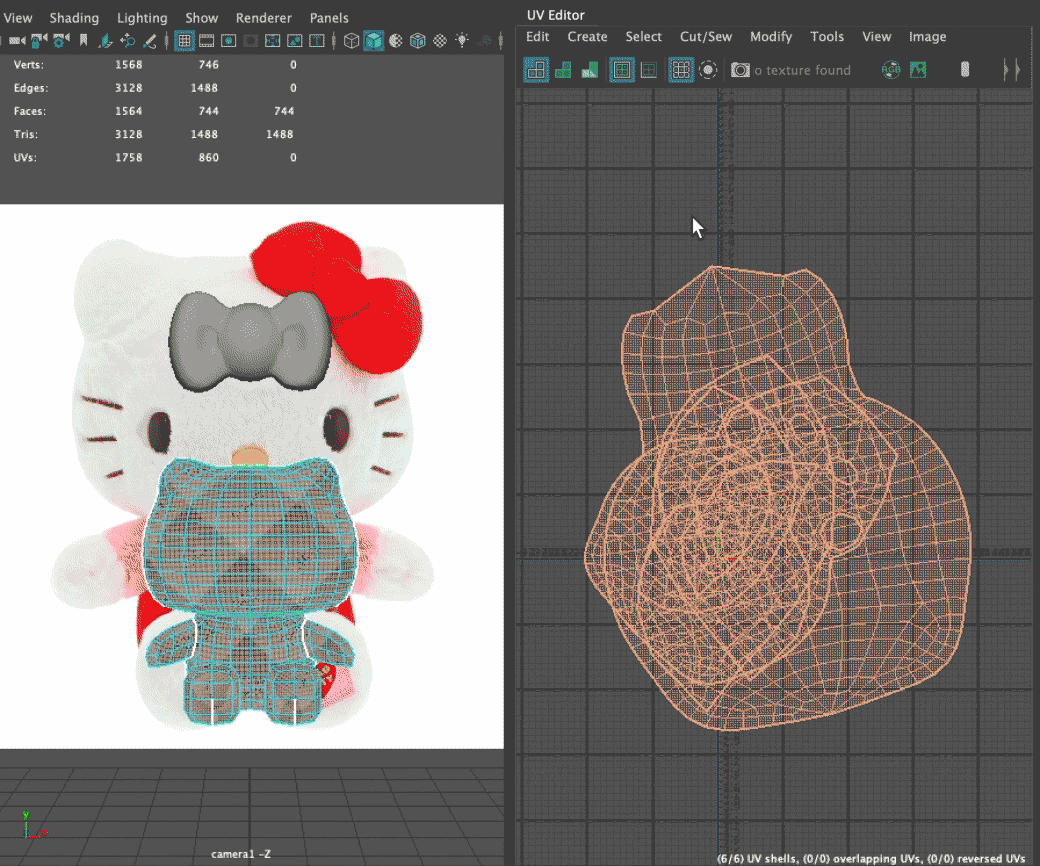
Preparing UVs
When preparing UVs for this plush, I cut seams where there are seams on a real plush. This is to add to the realism of the plush and because most plushes have seams where you can’t see them when looking straight on. You can see the white lines (seams) where I cut below.
After cutting, I unfold the UVs. When you unfold your UVs, the UV shells are usually grouped on top of one another. A quick way to get them all into the 0 to 1 space without scaling or translating each one individually, is to select all your UV shells and in the UV Editor menu click Modify → Layout. Learn more about Layout in Maya here.
It should shrink everything to fit into the square. The resolution of each UV Shell will be the same, as well. From here, you can either scale, rotate, and translate them further to layout the way you’d like, or you can leave it as is if the UVs are good to go.
Here is how mine looked after I did the above:
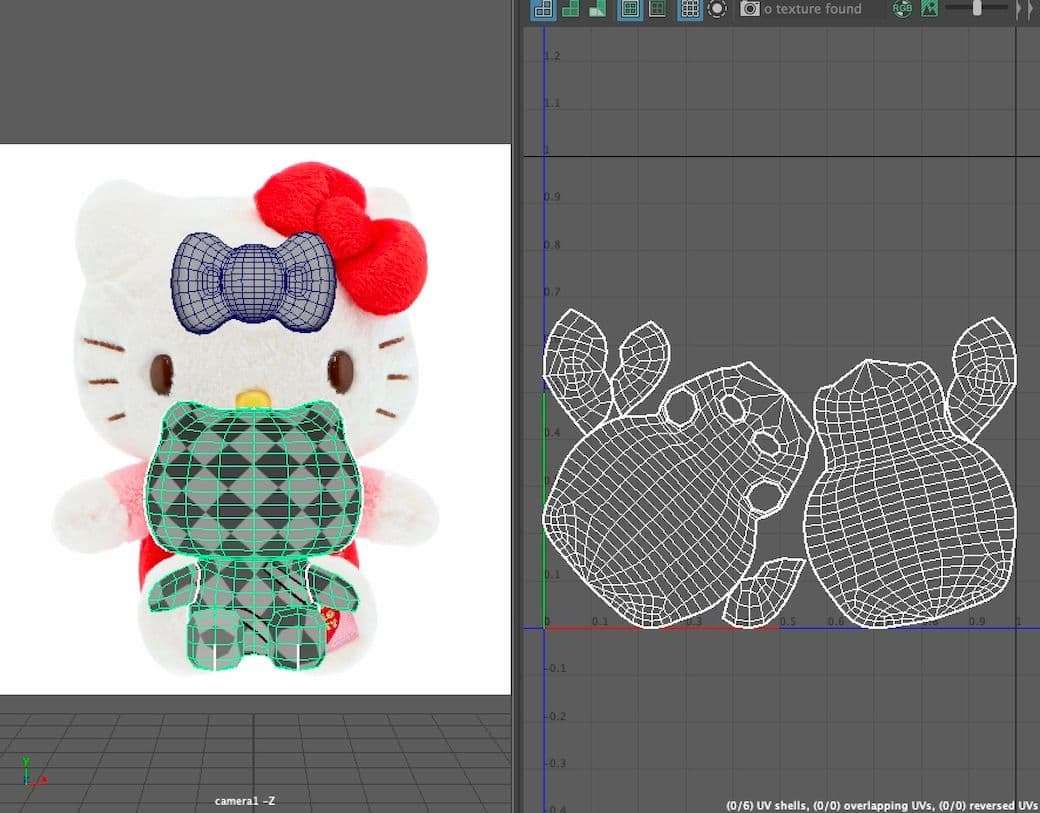
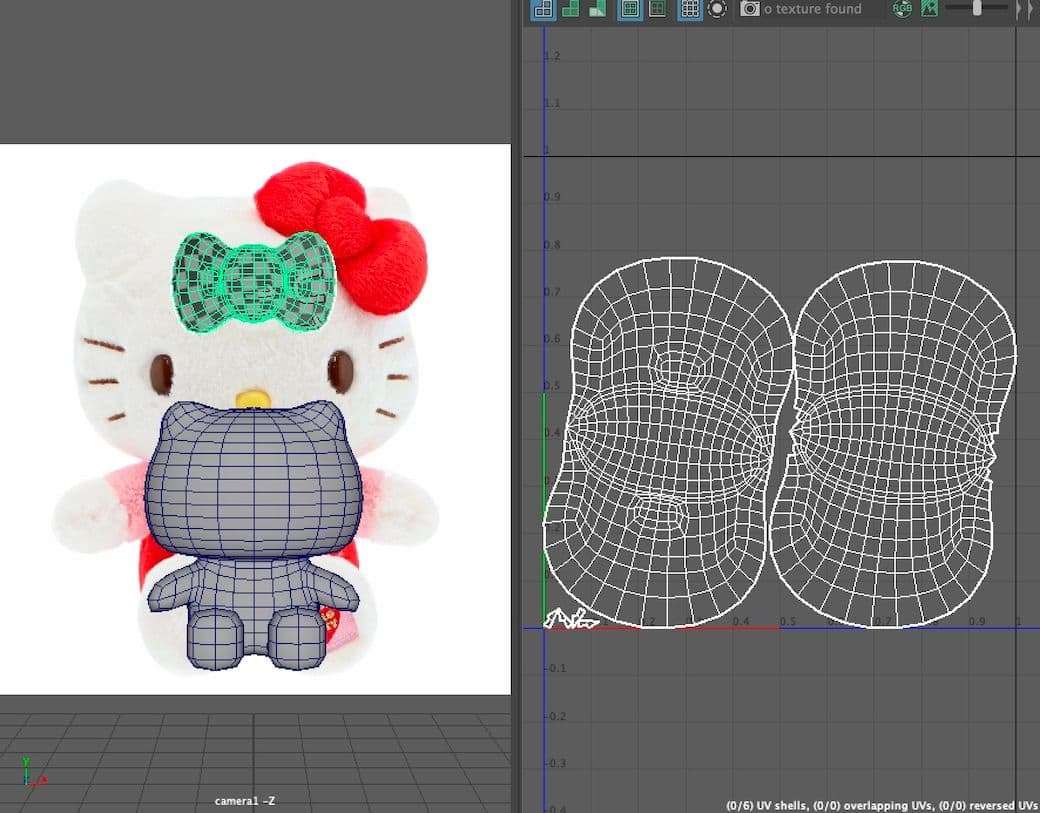
I decided to tweak the UVs for my plush and I sewed the straggly bits of the bow on the bottom left to the right bow UV.
Exporting the model and UV Snapshot:
After I am done sorting out the UVs, I export the model as an .obj and bring it into Substance Painter. I also like to export a UV snapshot, an image of your UV layout in 0 to 1 space, from Maya to work with in Adobe Photoshop in order to make masks or tweak some of the texture maps after I am done in Substance.
You can export a UV Snapshot by going to the UV Editor and clicking the camera icon below the menu. Learn more about UV Snapshots in Maya here.
Texturing
**Quick tip: if you are a student, there is a special license to use Substance Painter!
Substance Painter has a lot of great material presets. Yet, if you’re looking for something specific, like in my case plush fur, a great resource to use to check and see if someone has already made something you need is Substance Share. It’s a place where you can download materials, for free, that are donated by a community of artists. You’ll need a Substance account to access it.
I borrowed this fur texture and tweaked the parameters to achieve a short fur that I felt looked like plush fur. For the eyes and nose, I created a brush that had a grey base colour for eyes and yellow base colour for the nose, oval alphas, made sure to adjust the height of the brush so that it appears raised above the surface of the fur, and lowered the roughness so that it appeared as plastic. For the whiskers, I found a “scratch” alpha that I plugged in as a height preset to mimic embroidery. To learn more about making your own brushes in Painter, click here.
I also ensured that my shader settings were set to “pbr-metal-rough-with-alpha-blending.” This is a standard shader setting that I prefer to use in case I want something to be translucent or completely transparent. Transparency wasn’t necessary for this model, but it’s what I normally use for every project, so I figured I’d mention that here. If you’d like to learn more about PBR materials, aka physically based rendering, you can here.
Finalizing Assets for Apps
Afterward, I usually export my textures at 2048 pixel resolution and I plug them into whichever program I am using to combine the textures with the model. This will vary depending on which platform you are developing your AR app on. As a rule, I try to go with the lowest resolution that still looks good in the AR scene. Your textures have file sizes too and this will impact app performance, just like poly count.
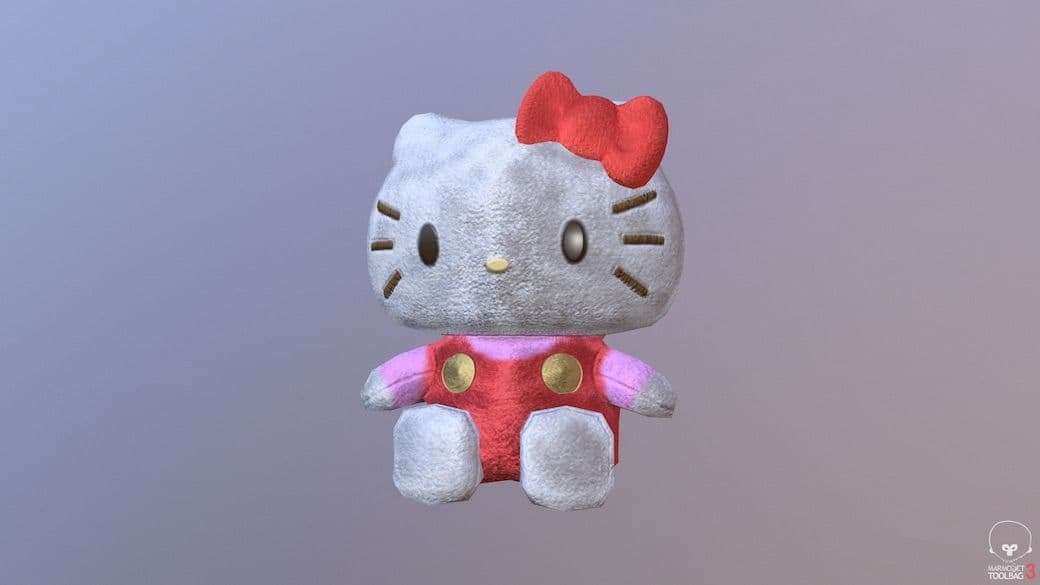
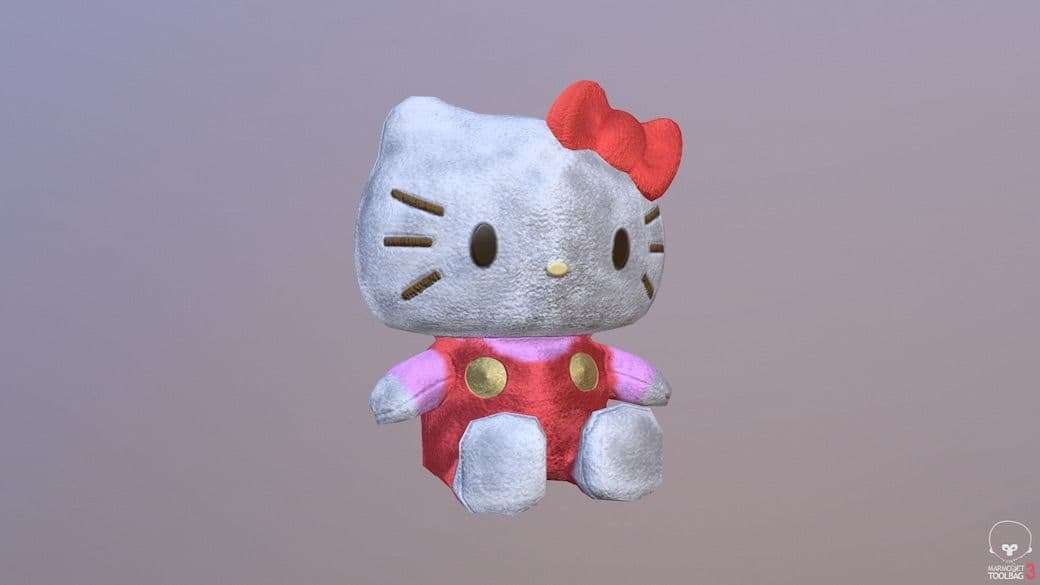
Below are some screenshots of my assets combined and rendered in Marmoset Toolbag 3.
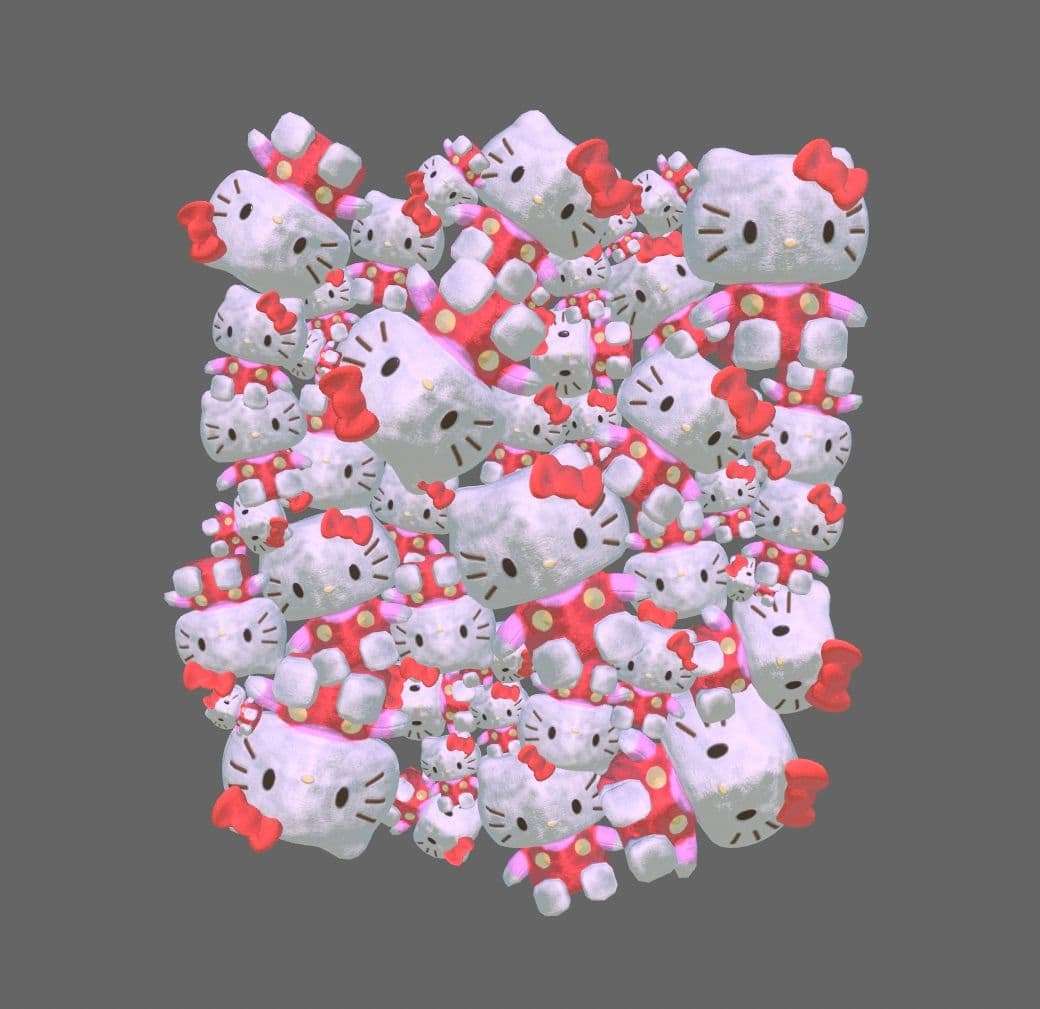
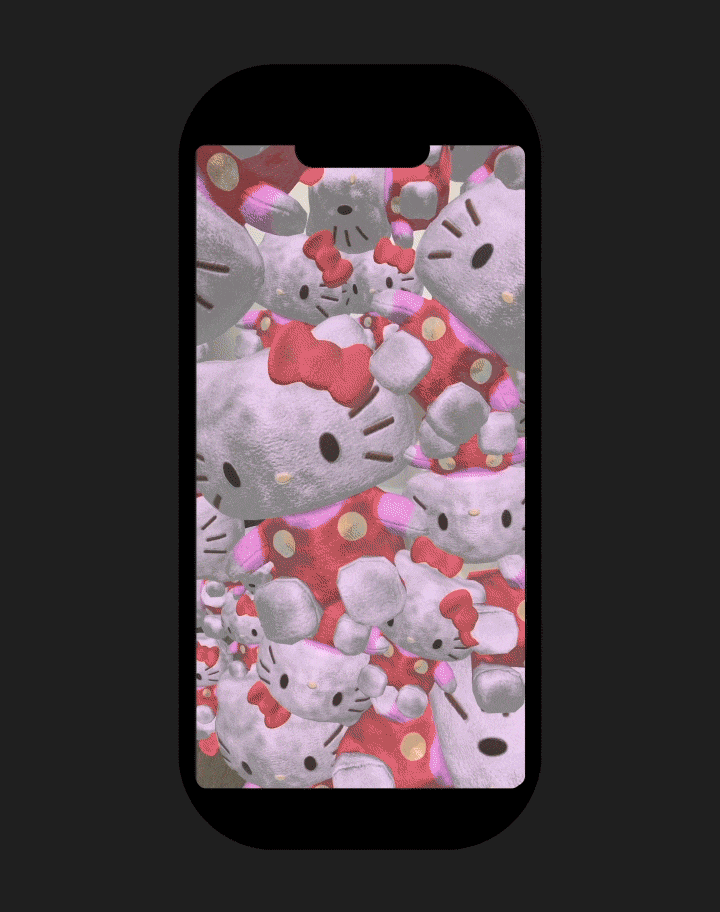
Here is a little preview of the way I arranged my assets for the app scene and how the app looked in action after development.
The inspiration for this app came when I saw pictures of the Hello Kitty Smile walls in Japan on Instagram. Since I knew I wouldn’t be able to travel to Japan soon, I tried to simulate the experience for myself. This is how the Hello Kitty Smile walls look in reality. I’m still learning about ways to optimise my assets for immersive media and hope this was helpful in showing some basics. Thanks for reading and thanks to The Rookies for having me share here!