We asked Julian Rabe, a 22 year old from Germany, to share with us how he created an environment for games, in Unreal Engine. With a passion for drawing and playing video games, Julian got into the world of 3D by way of a Maya modeling class at university at the end of 2017.
We asked Julian Rabe, a 22 year old from Germany, to share with us how he created an environment for games, in Unreal Engine. With a passion for drawing and playing video games, Julian got into the world of 3D by way of a Maya modeling class at university at the end of 2017. He then started learning more and more about 3D modeling on his own, but his training was lacking in structure. After searching for a course in 3D Computer Graphics, Julian found himself at Think Tank, graduating in 2019. This is a breakdown of his project he created during the Mentorship Term.
Think Tank Online
I had a great experience at Think Tank. I really enjoyed the live sessions with industry professionals. They guided me through my projects, gave me confidence, and eliminated the guess work. The supervisors were very supportive which allowed me to feel more relaxed and productive. I especially appreciate the fact that they helped me choose my career path as an environment artist. Throughout the program you get a good grasp of the different fields to be prepared for when it's time to specialise.
Despite being so successful, it's still a small school overall, with small classes and individual feedback for each student. The online format was the perfect balance for me; a structured curriculum, while still maintaining the flexibility and freedom that comes with learning on your own. I was able to schedule my week as I wanted but the school ensured that I kept on track and came closer to my goals.
Where I live, there are only a few good schools. To have the opportunity to study at one of the best schools on this planet, no matter where you are from, is amazing. Since this format attracts people from all over the world, you get to know international students and teachers, with all kinds of different backgrounds, which made the meetings together always interesting and refreshing.
Mentorship Term
Think Tank has a great portfolio of mentors to choose from for the Mentorship Term. Recently they added the possibility to attend weekly mentor meetings, so you can get even more feedback, in addition to your normal weekly sessions. I chose Sean Obridgewitch and he was an outstanding mentor.
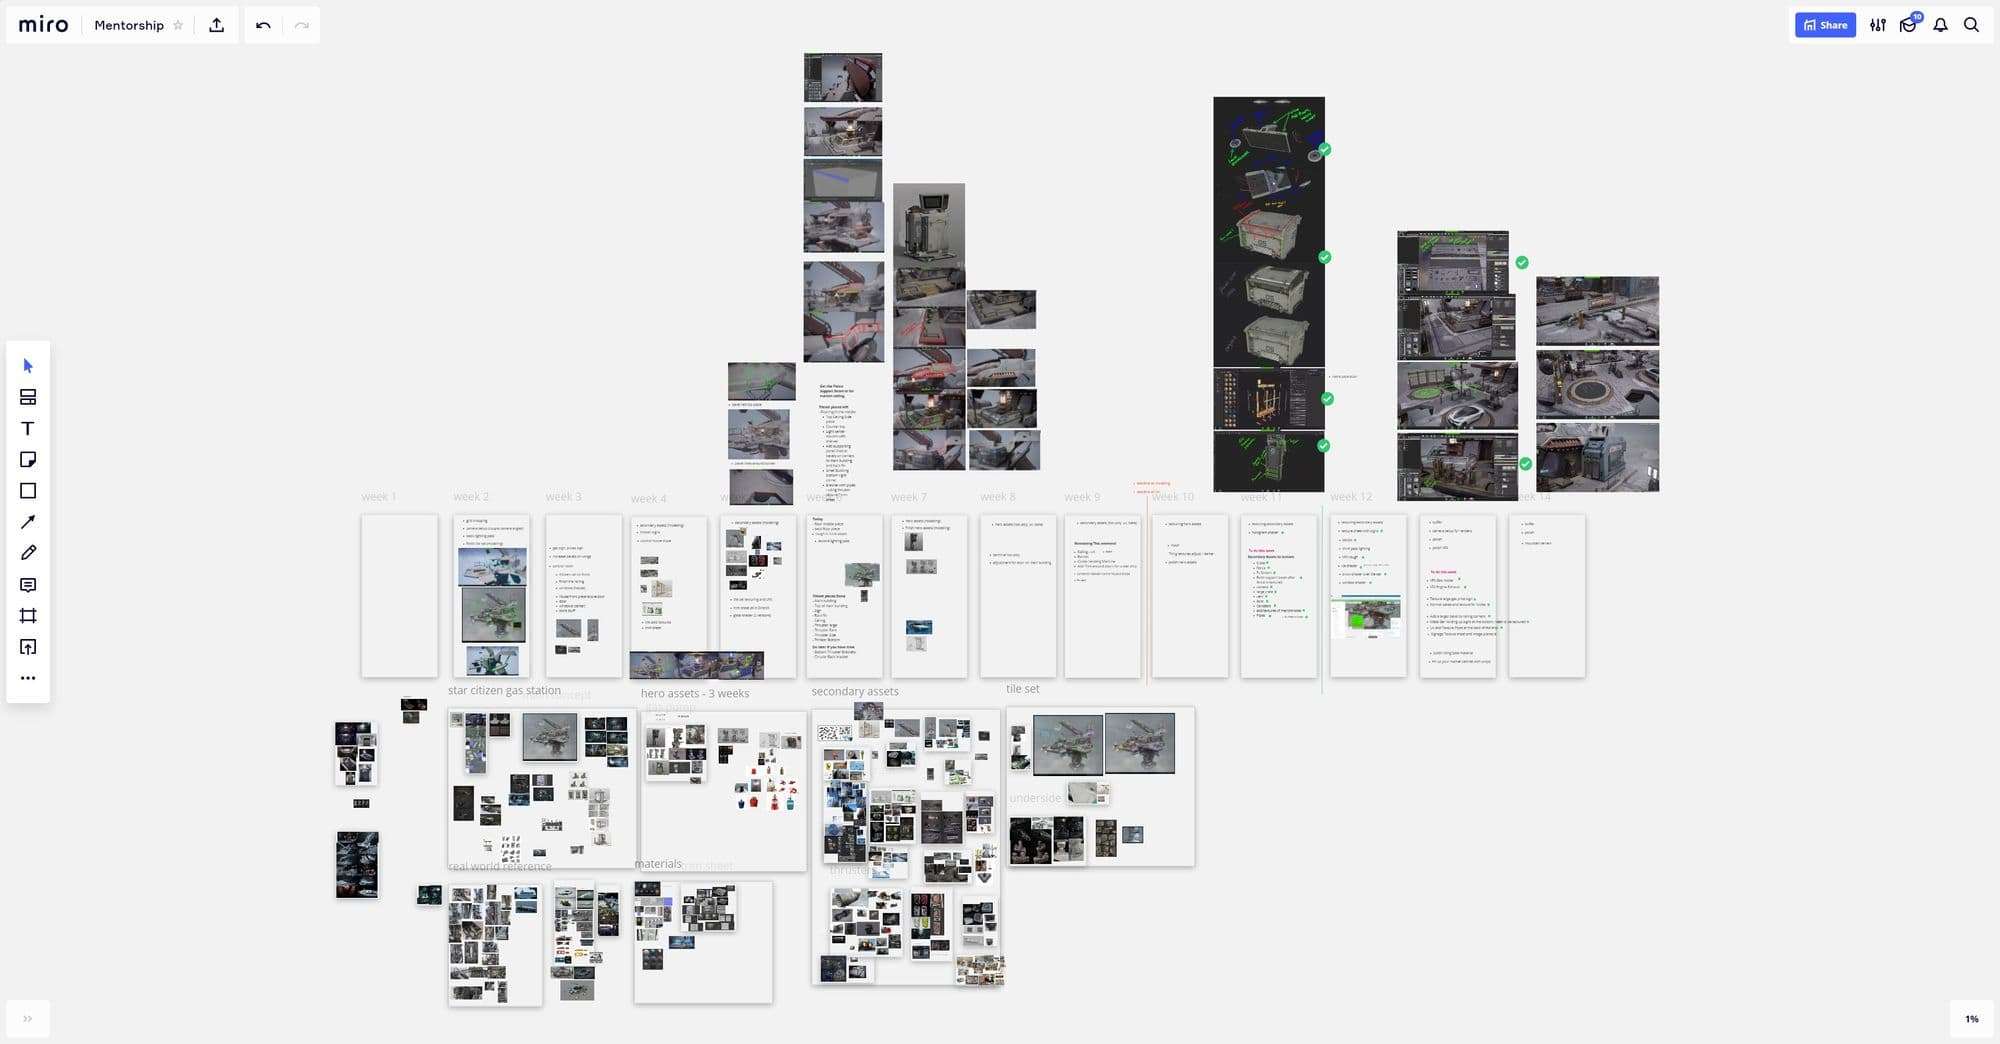
The term is 4 months long and there is a live session every week. To manage the project we collaborated on a Miro board. Here, Sean posted paint-overs and I filled up the board with concepts, ideas, and WIP screenshots. It’s similar to PureRef, but in the cloud - perfect for collaboration.
Lighting and Rendering
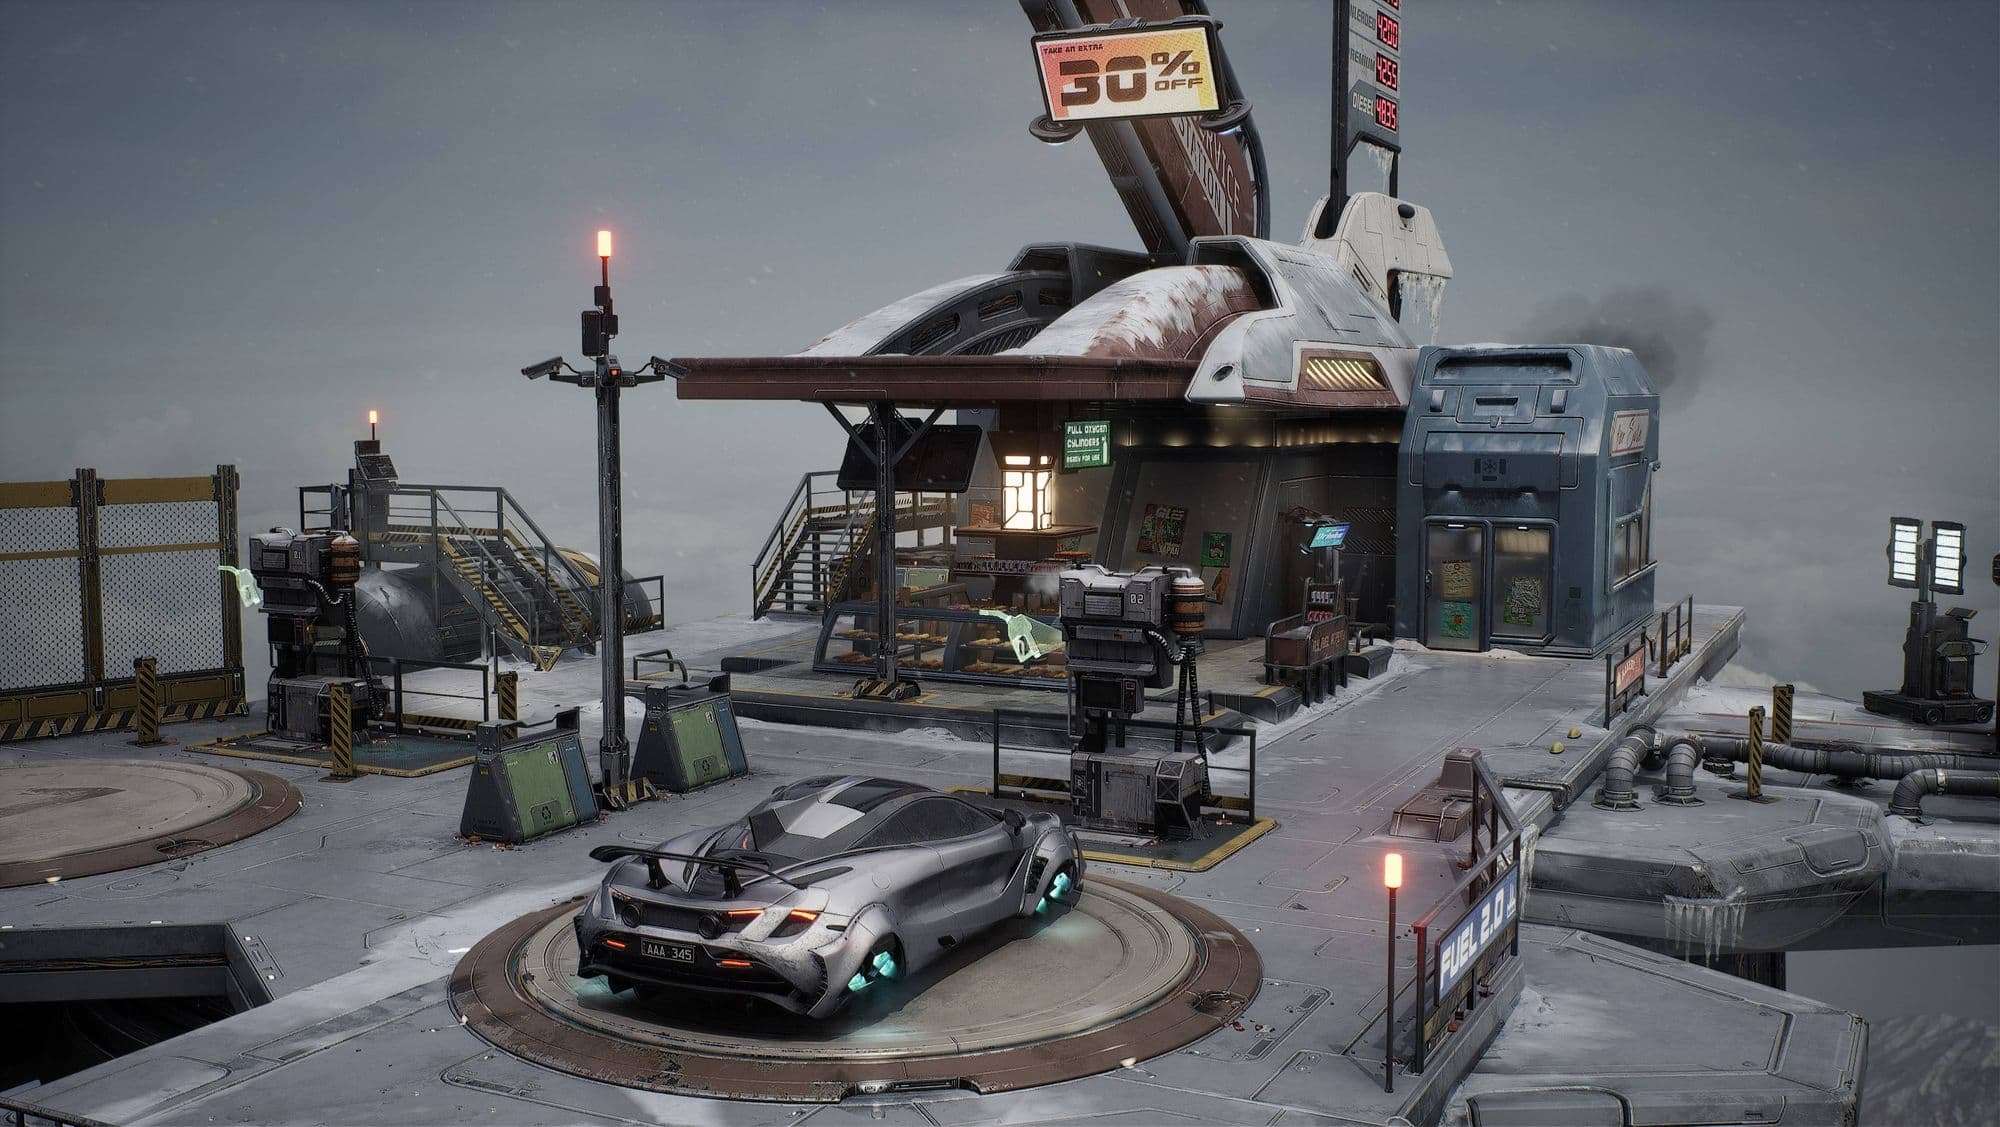
For this project, I decided to go with dynamic lighting, because it was an outdoor scene that wouldn't benefit that much from bounce light/Global illumination. Since my past projects all had static lighting, I wanted to try something new.
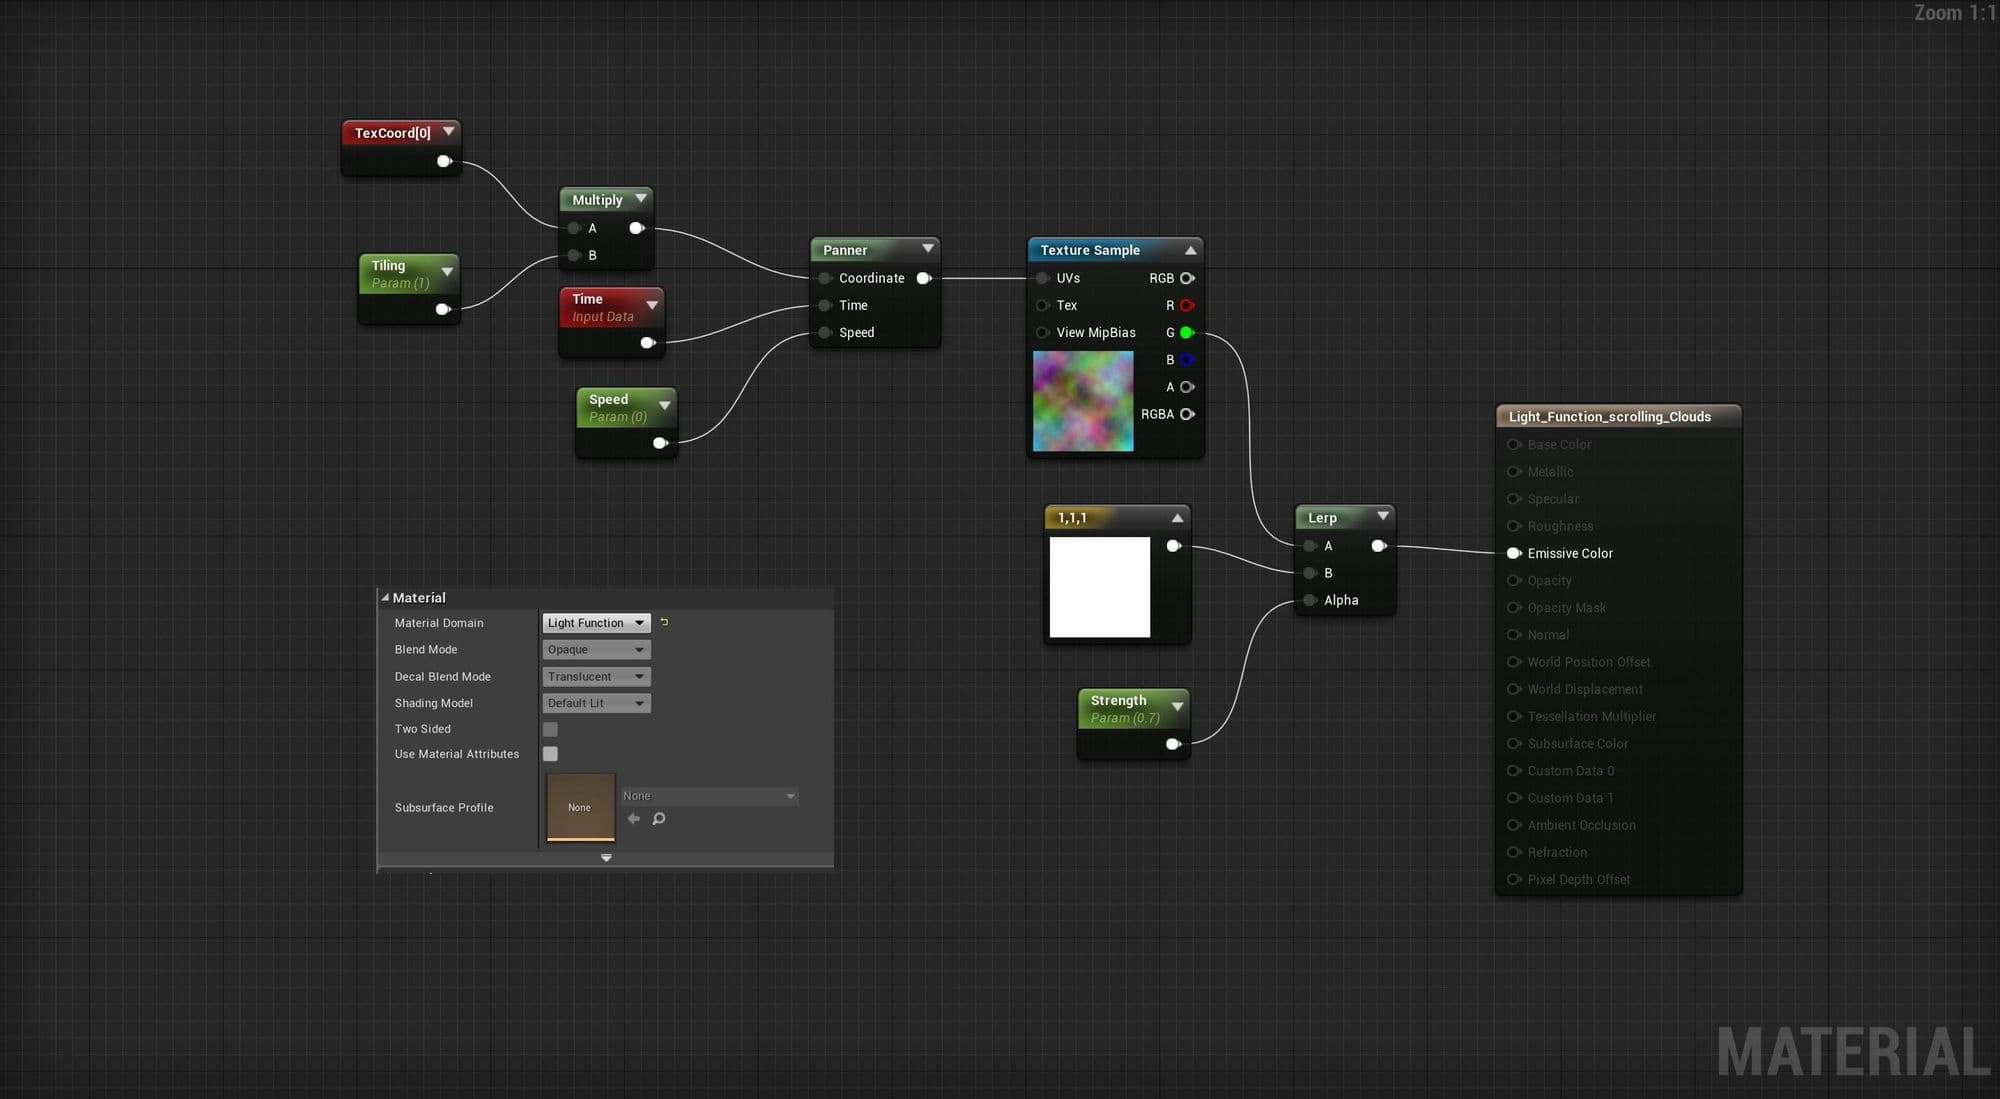
The main light source is a directional light (sun) with a light function with panning clouds. That way you get some variation and motion in the scene.
With the skylight I filled in the shadows to get more of an overcast effect. With the exponential height fog I tried to give a sense of depth and mood to the scene. Mesh distance fields were enabled in the project settings too - I used them for ambient occlusion and for shadows in the distance.
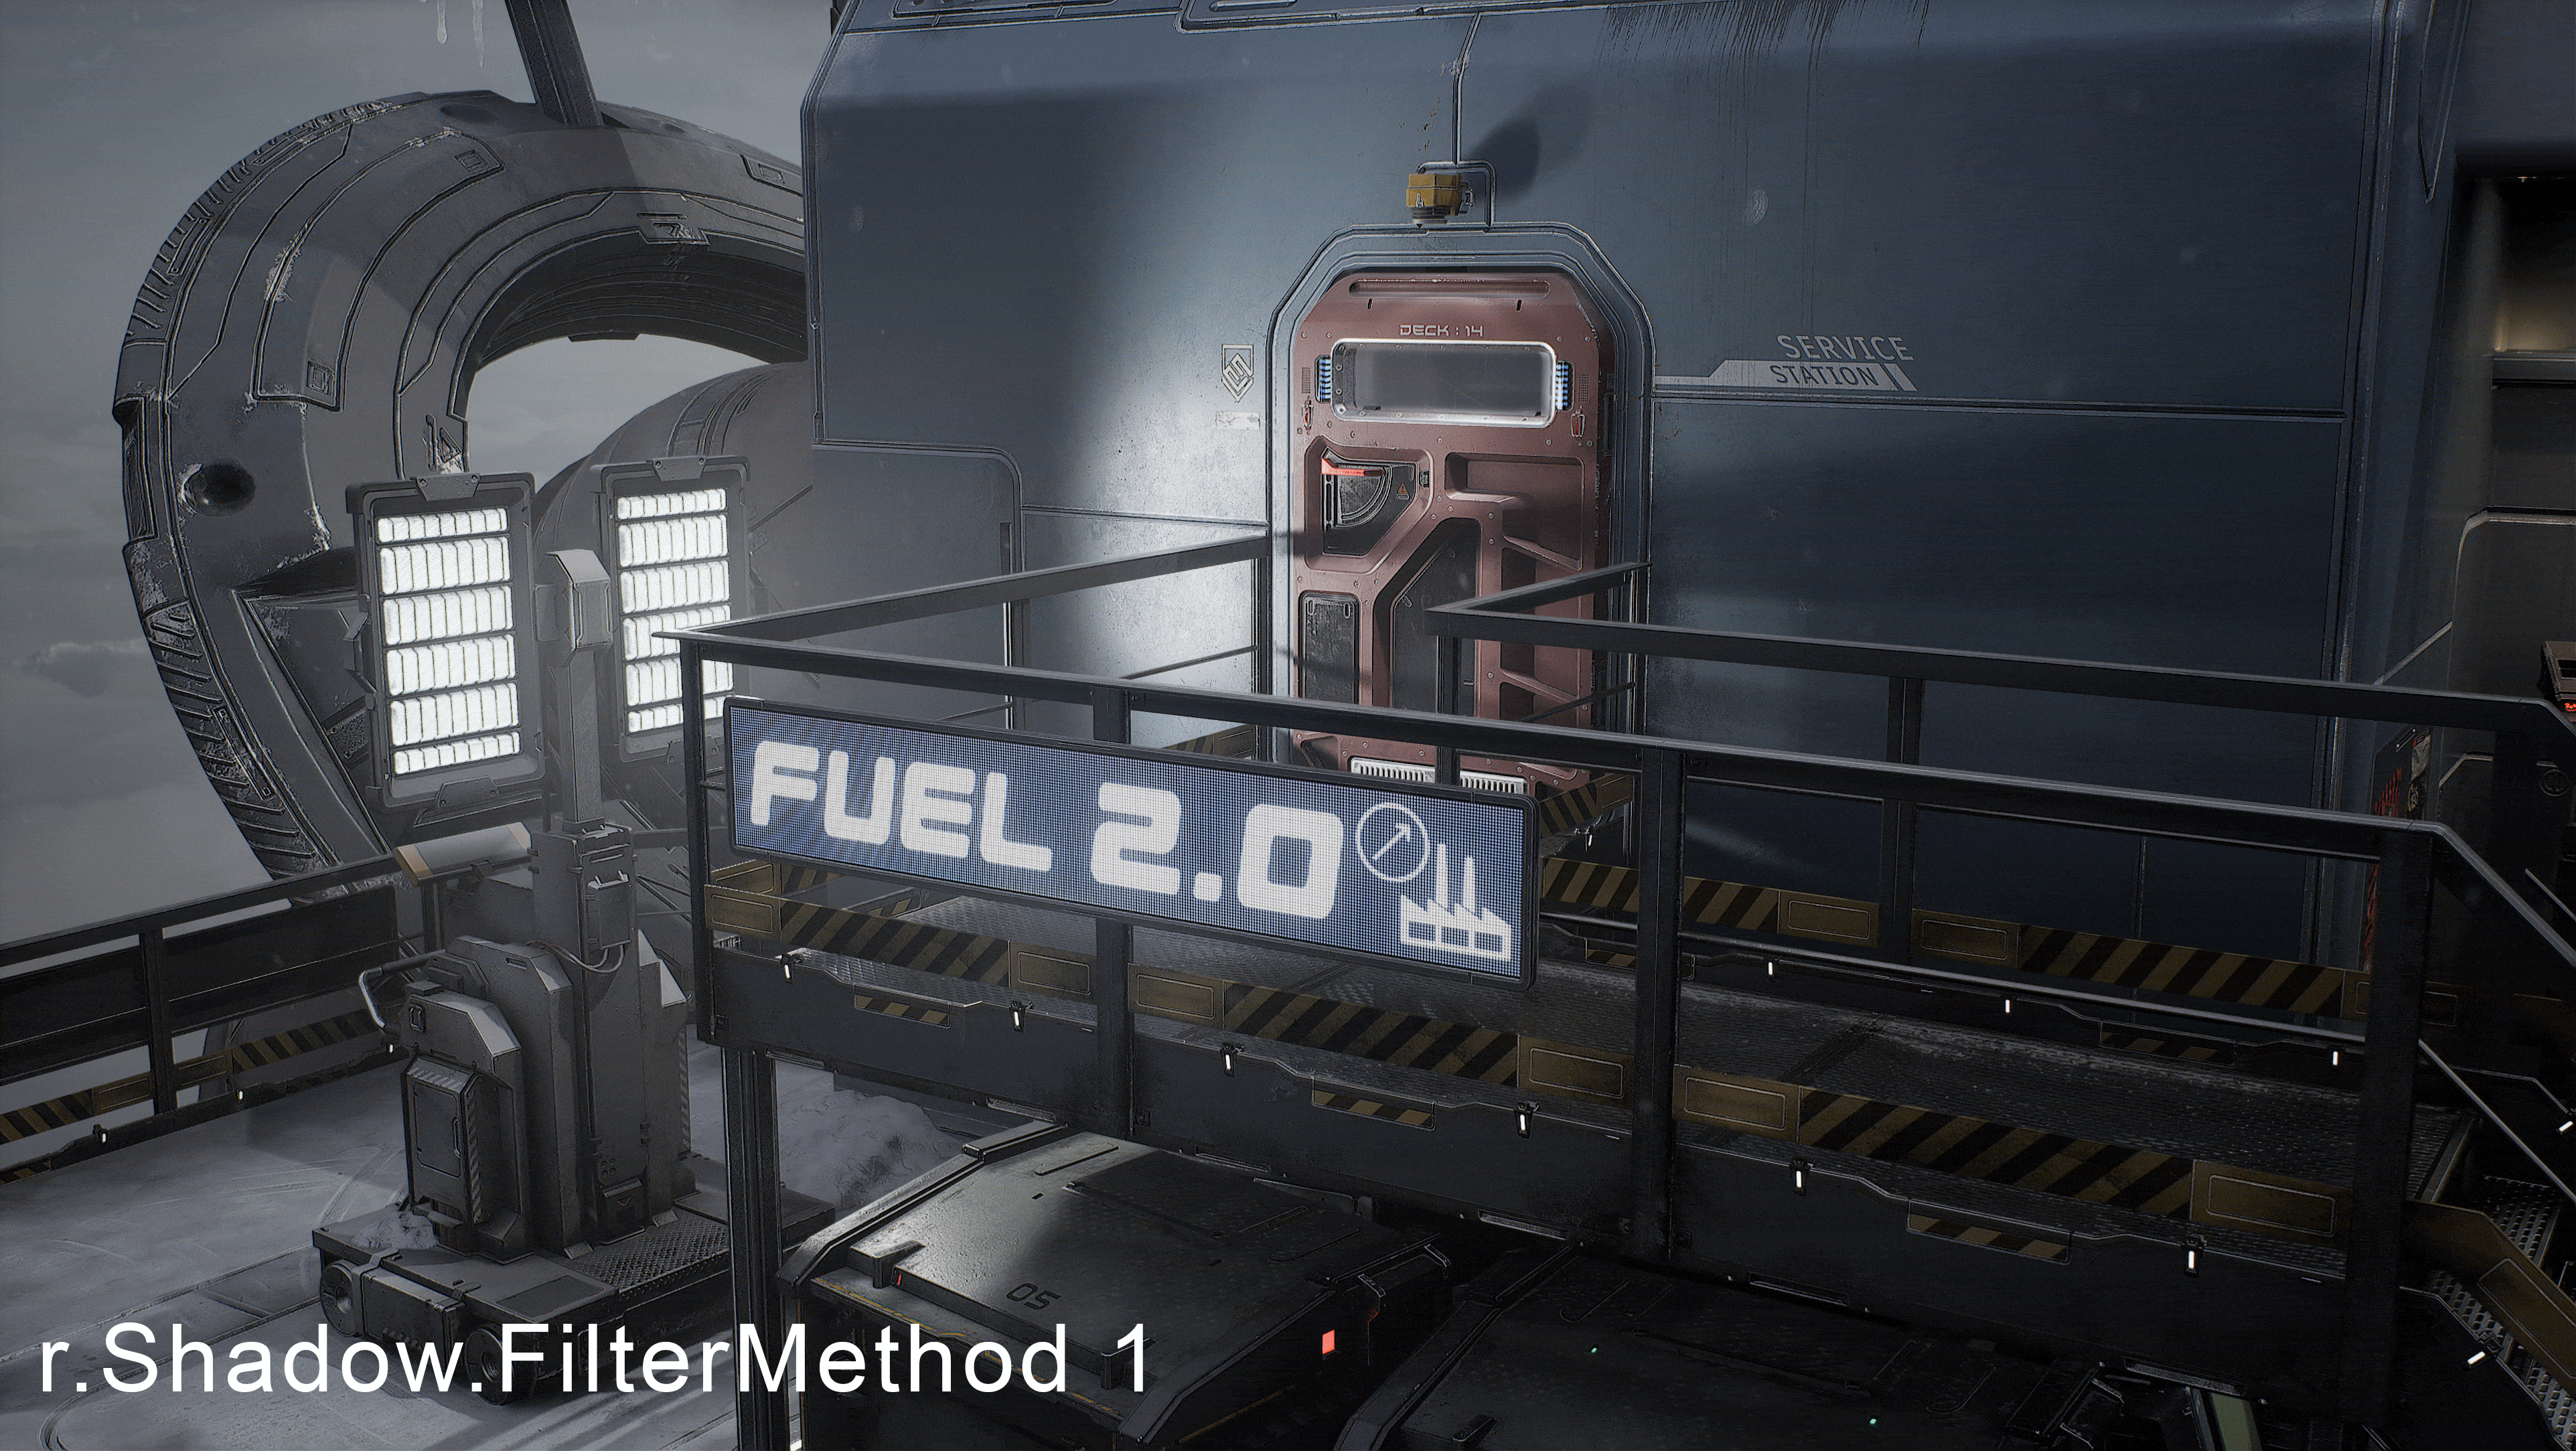
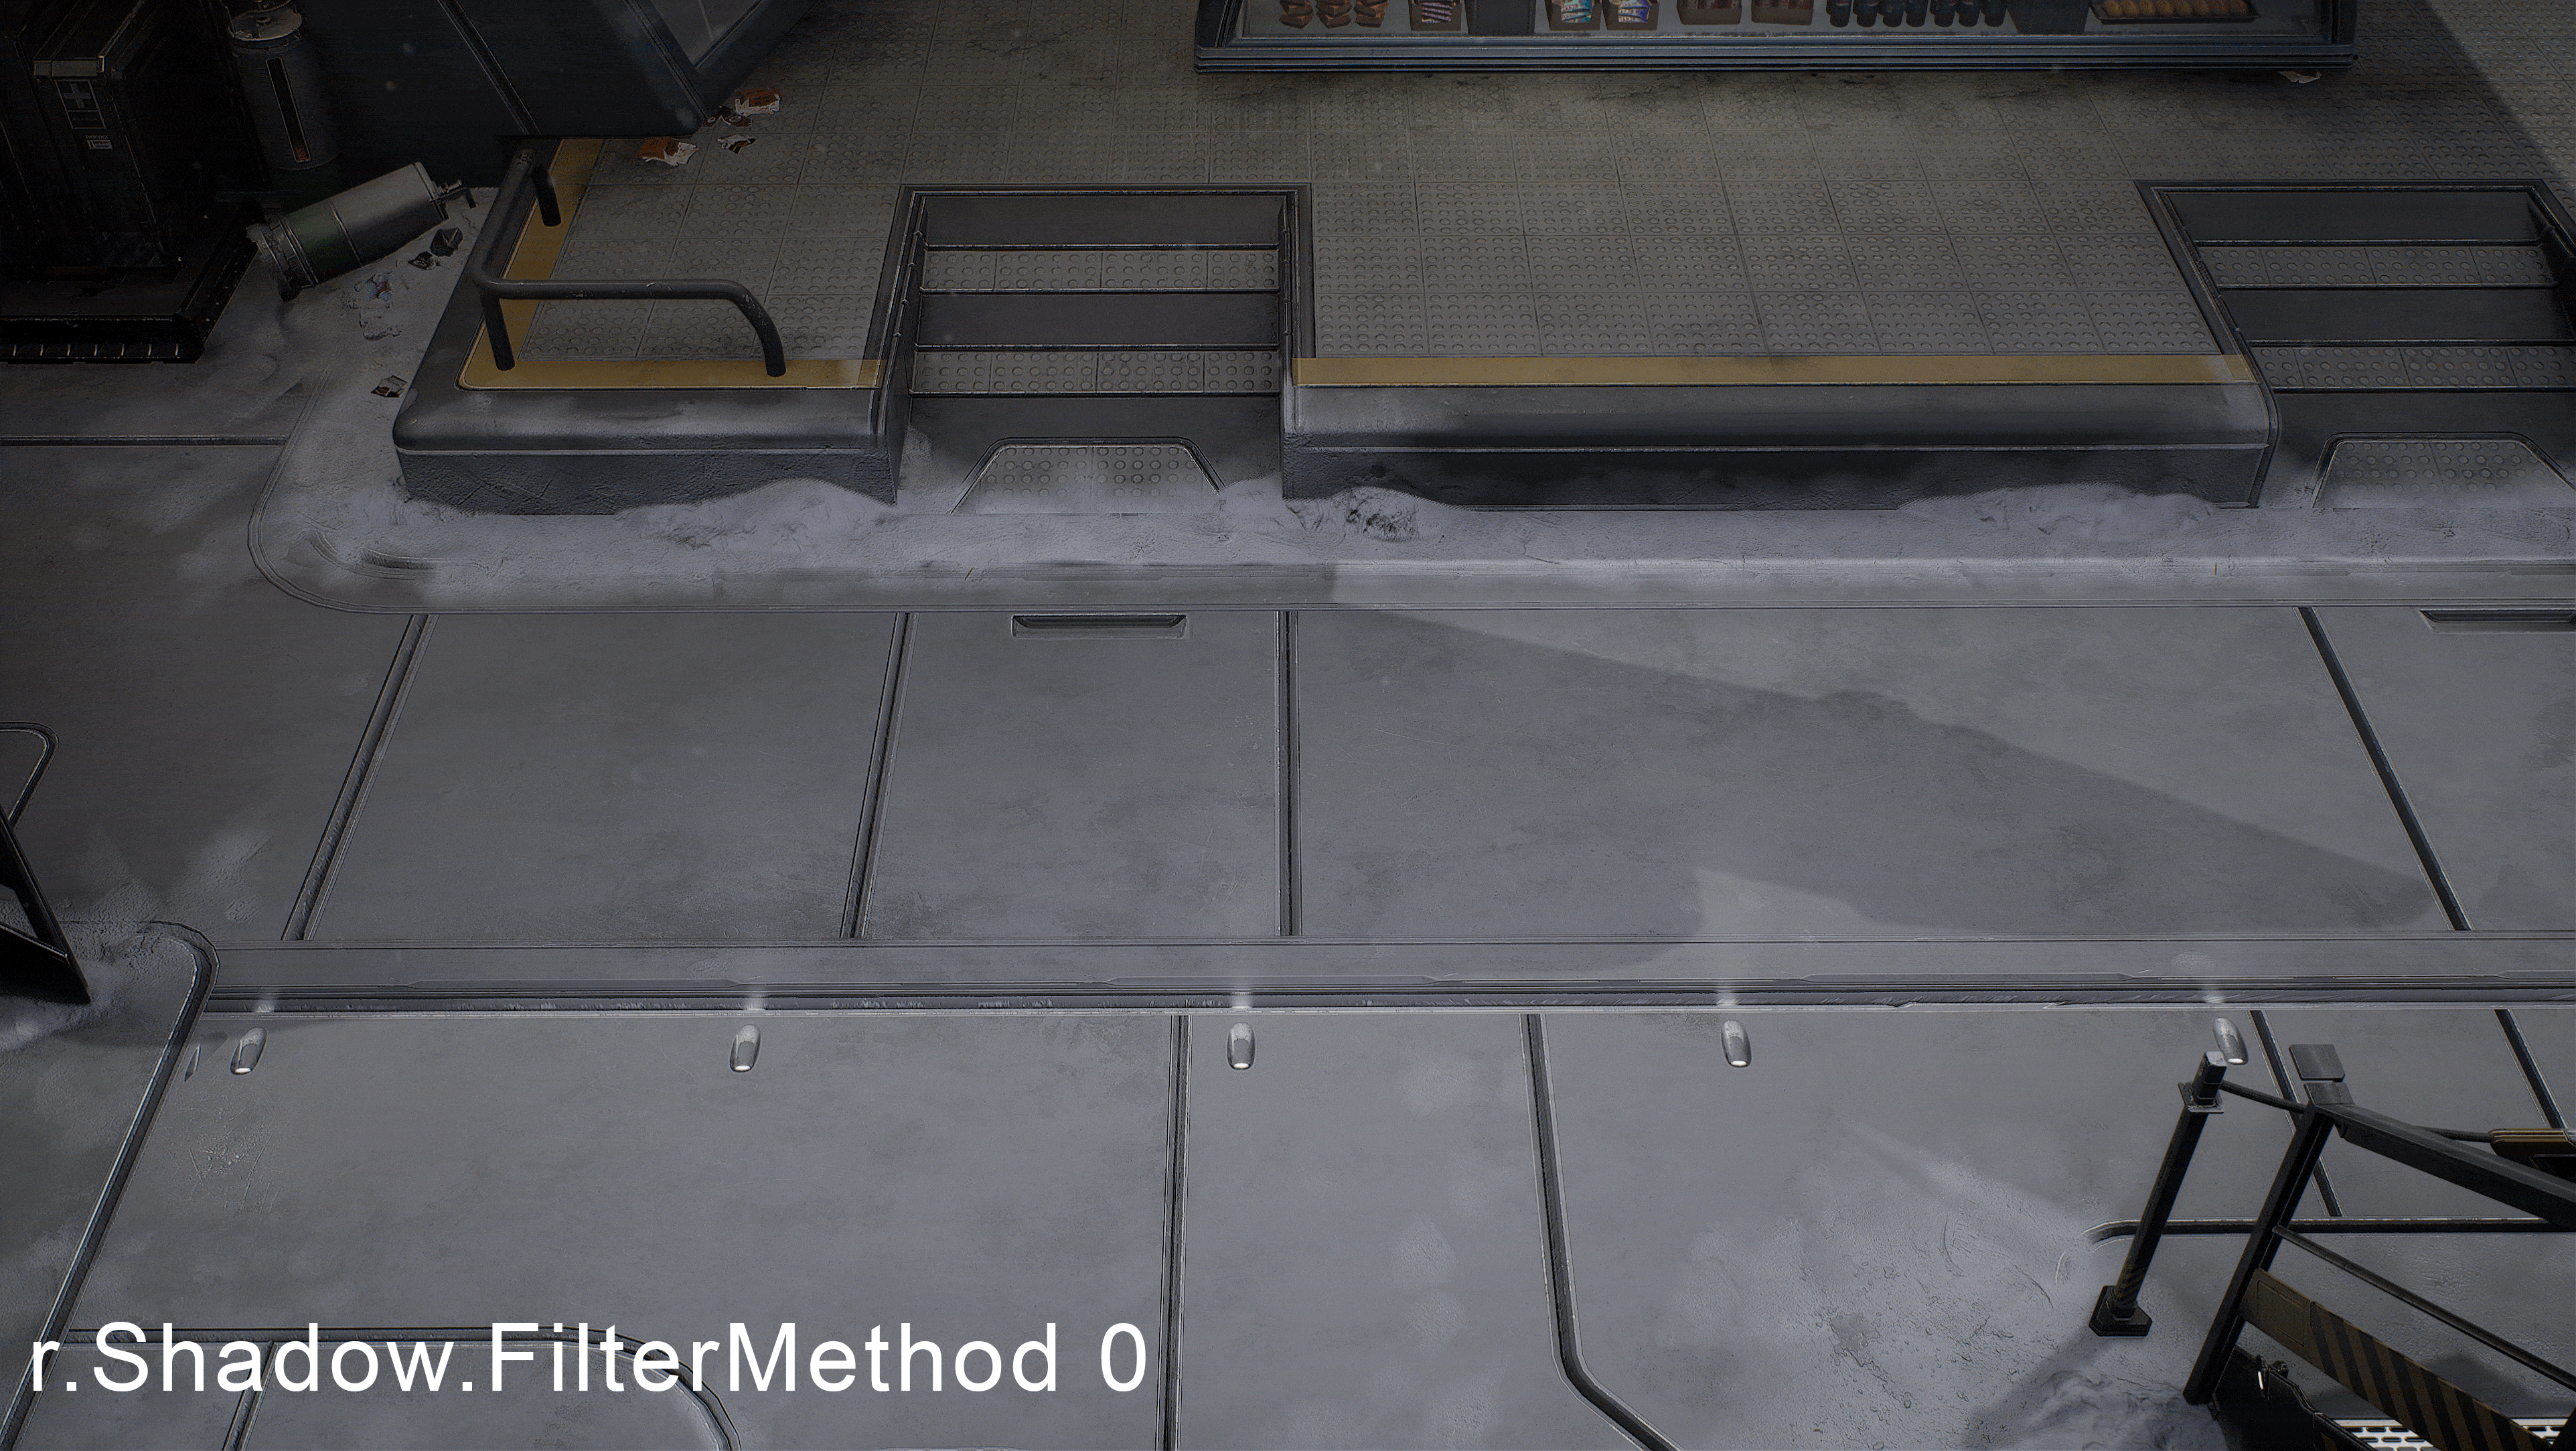
Shadow filtering method
I used an experimental feature in UE4 to improve the shadow quality and get nice soft shadows. You can enable it by typing the following command in the console: “r.Shadow.FilterMethod 1”. After that you can adjust the softness of the shadow with the source radius parameter of the light, that is casting the shadow.
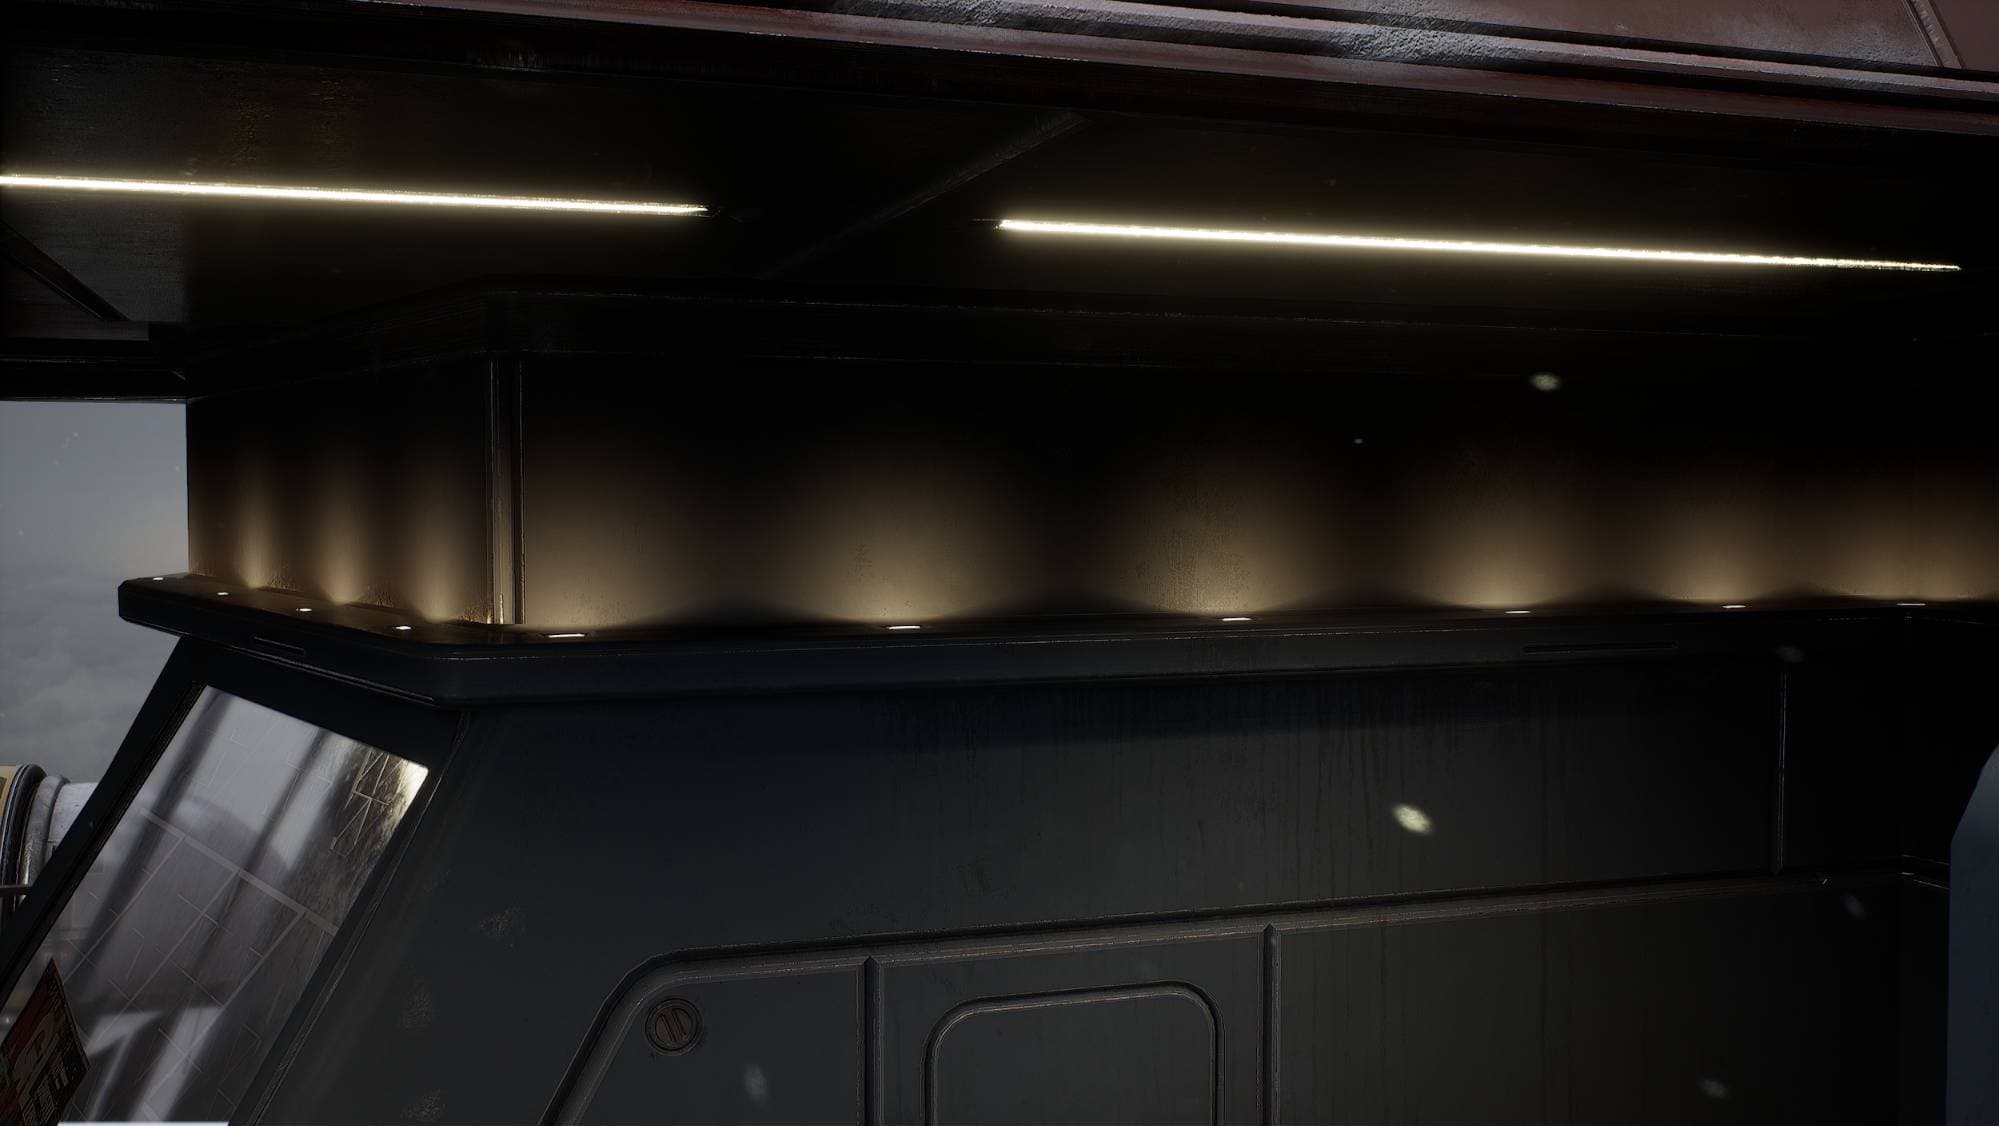
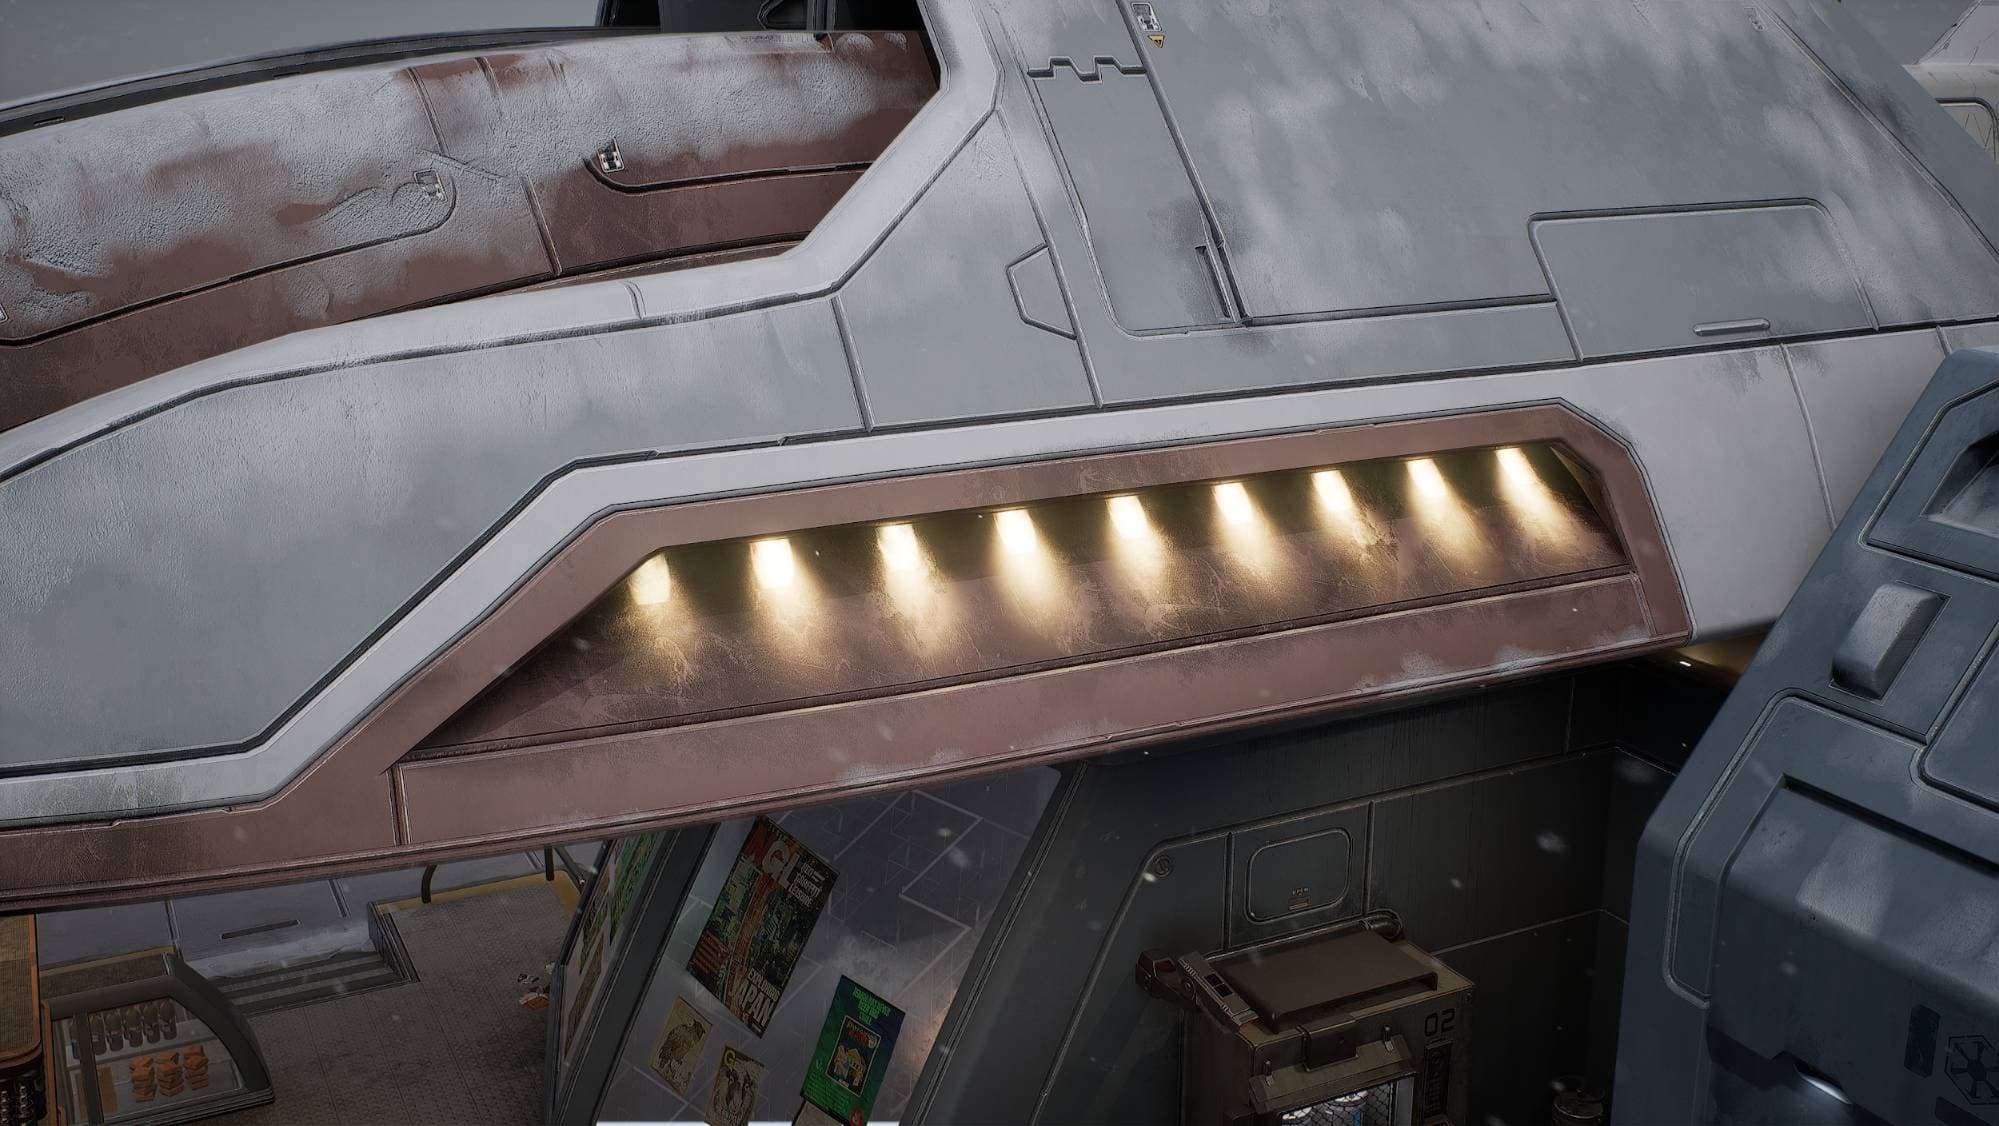
IES profiles
To get the desired light falloff I used IES profiles and played around with inner and outer cone radius of the spotlights
I also placed some lights inside the building facing the outside. It casts a light cone on the floor to increase the contrast of the warm interior and the cold outside platform.
To keep the scene optimised with the amount of dynamic lights, I decreased the attenuation radius of the lights to the minimum, to get as little overlap as possible. You should use spotlights instead of point lights when using dynamic mobility. Especially with casting shadows enabled. So for the few point lights I have in my scene, I disabled the shadows to help performance.
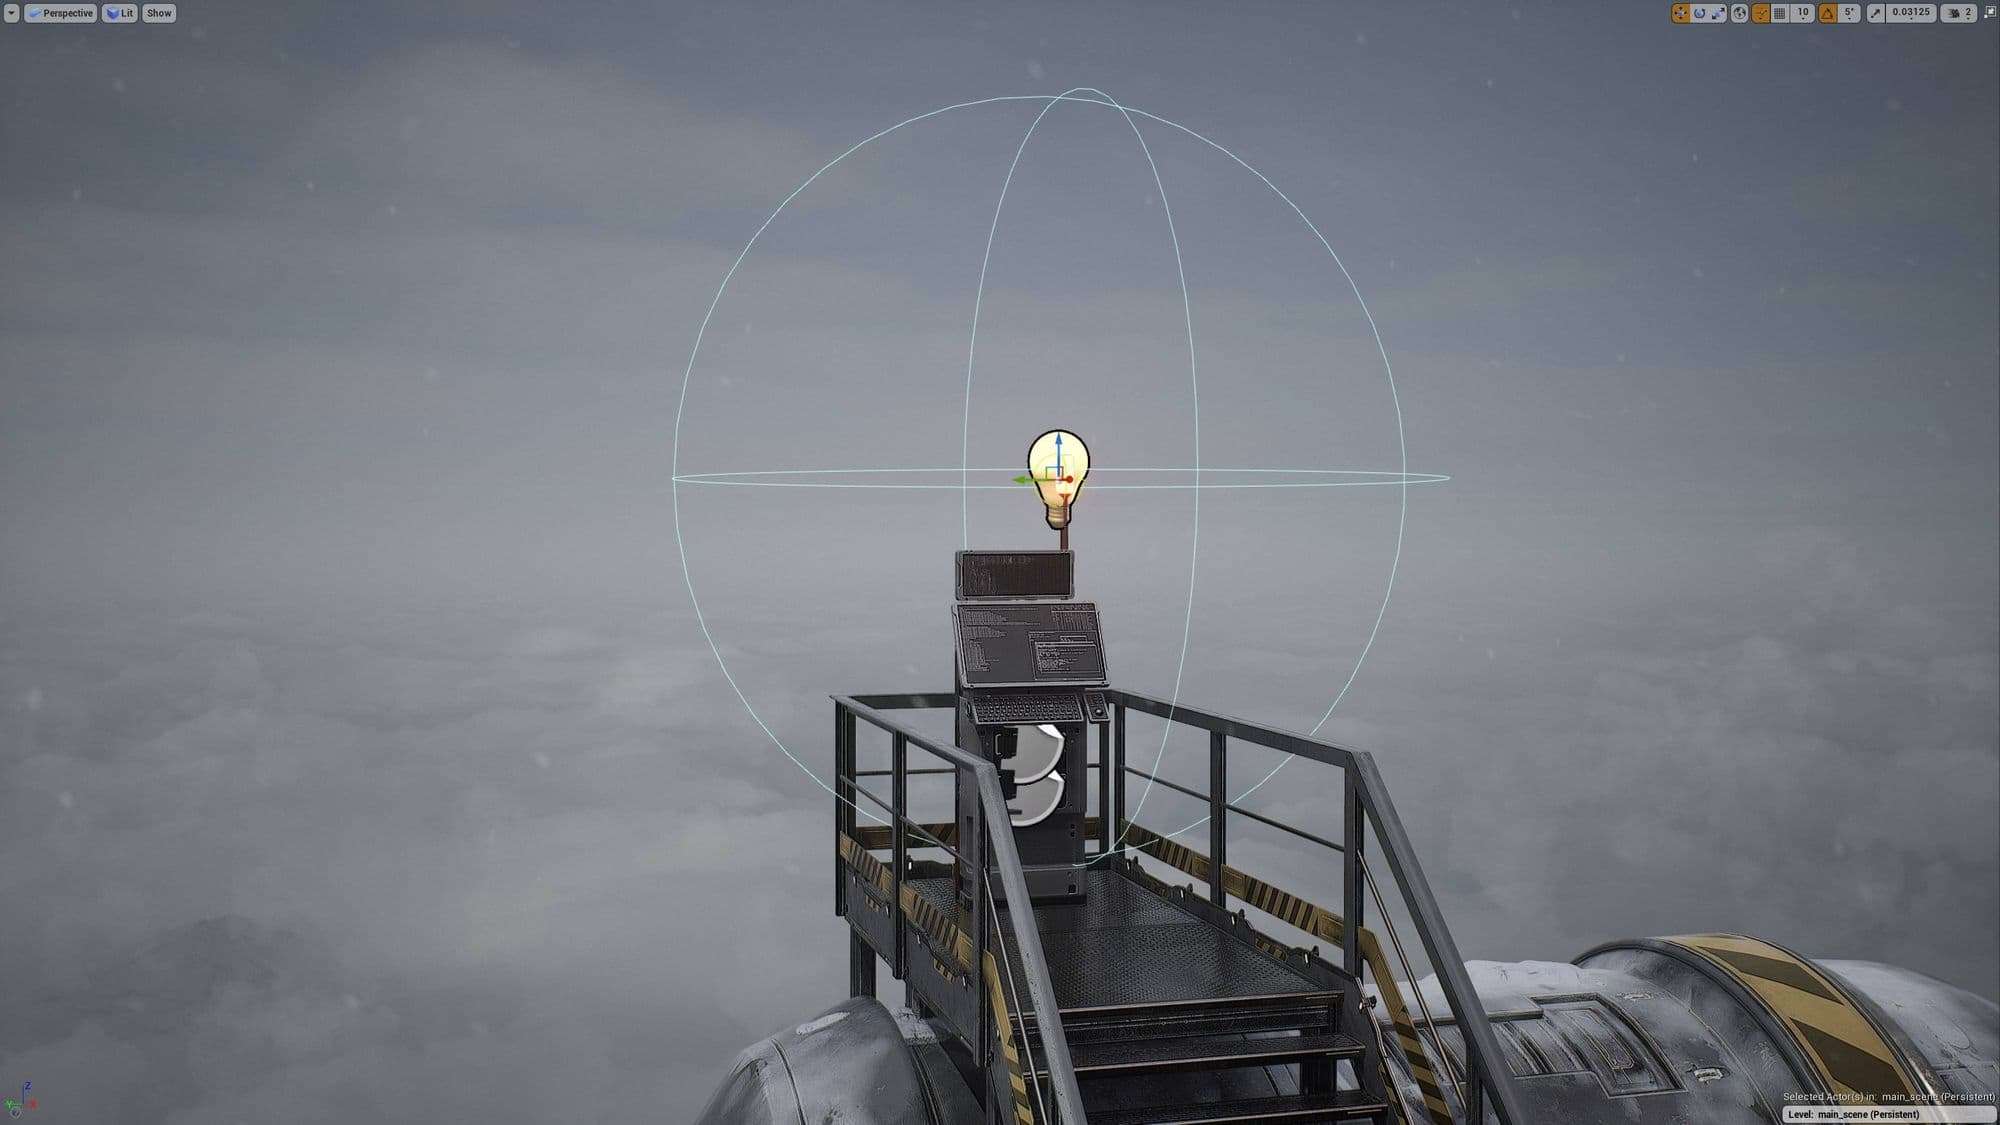
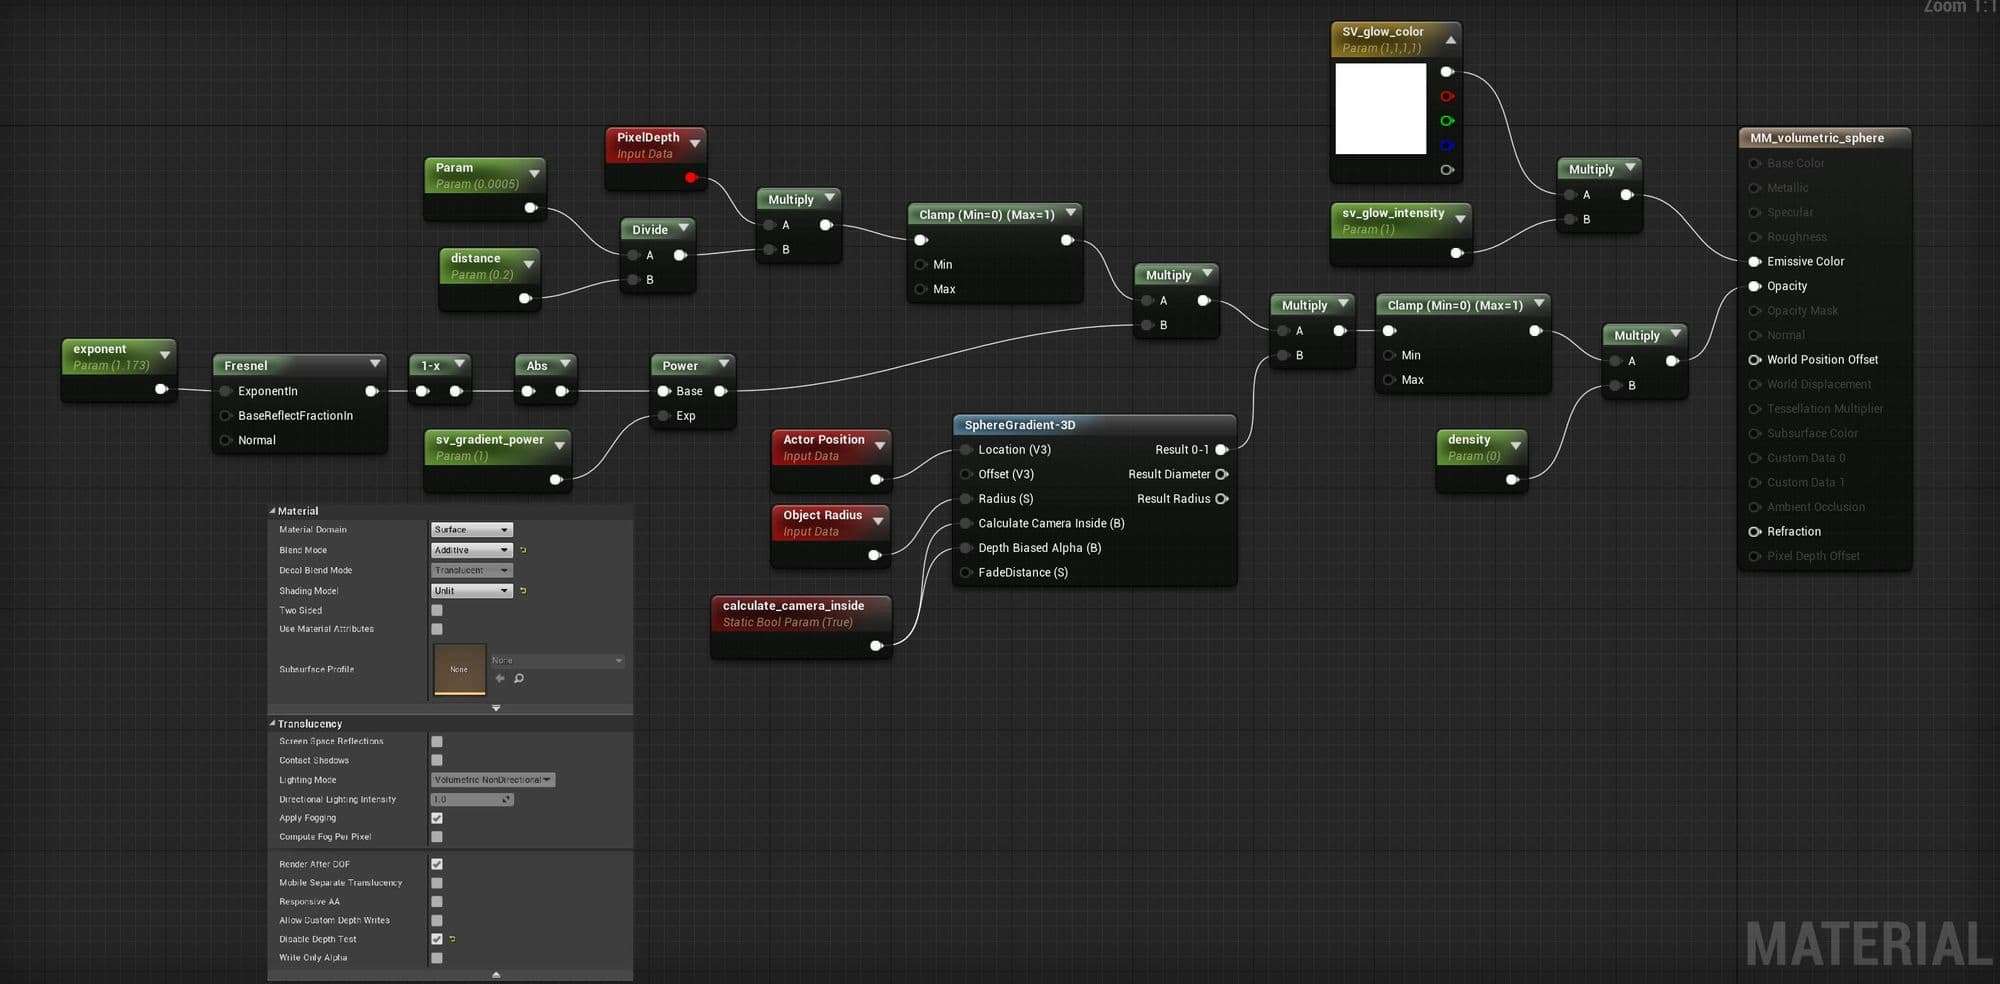
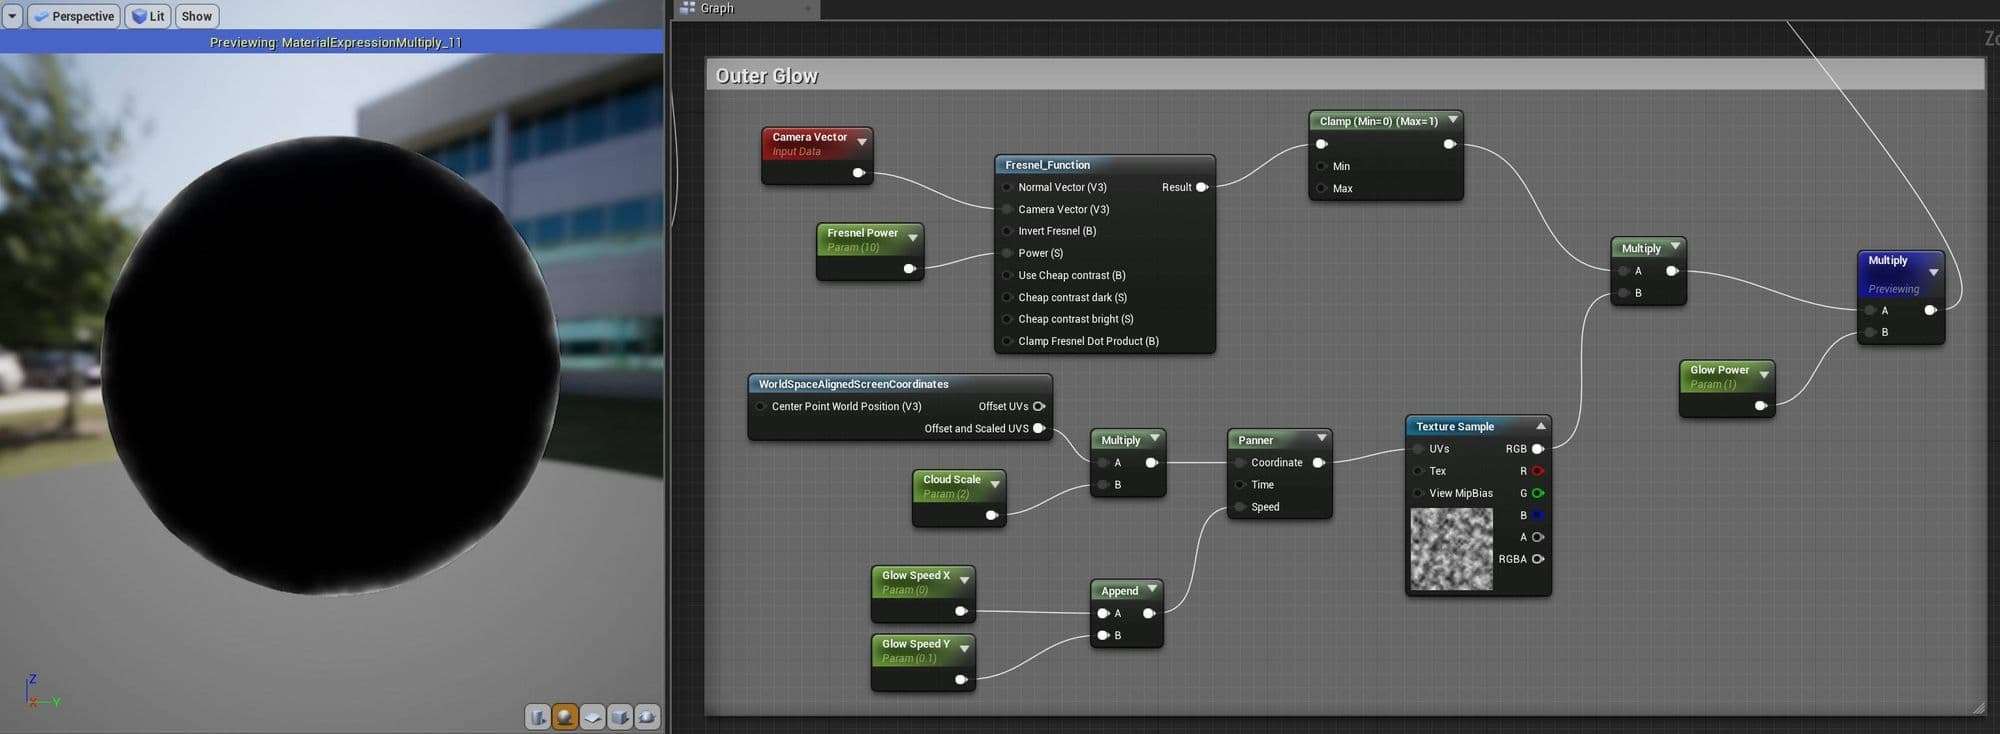
Volumetric Lighting
With the volumetric scattering parameter you can control how strong the effect should be. I used it to get a nice glow around lights and screens.
In some areas where the falloff had to be really specific, I used a special material combined with a sphere with inverted faces. The technique is described in this video (I can recommend watching the entire series it helped my a lot with lighting scenes in Unreal Engine).
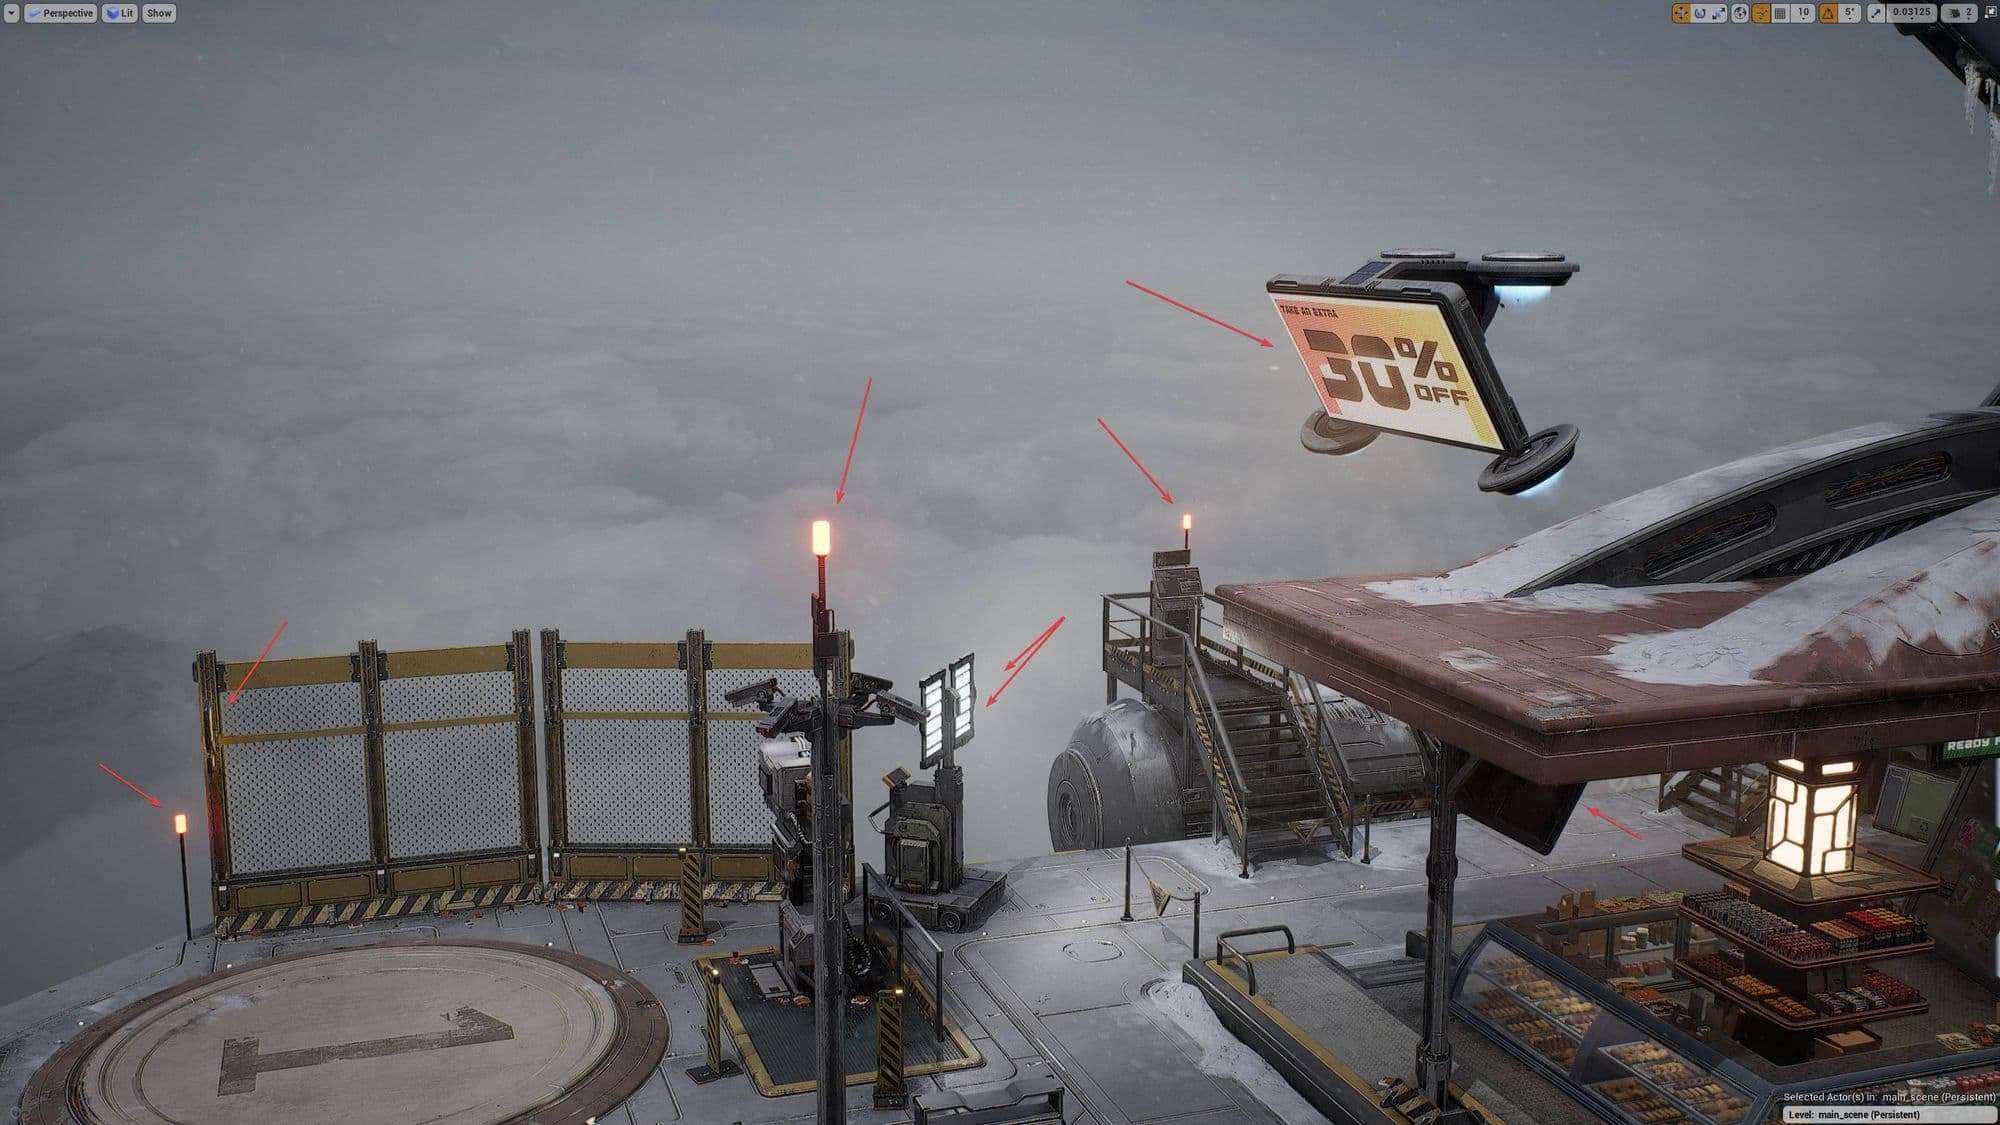
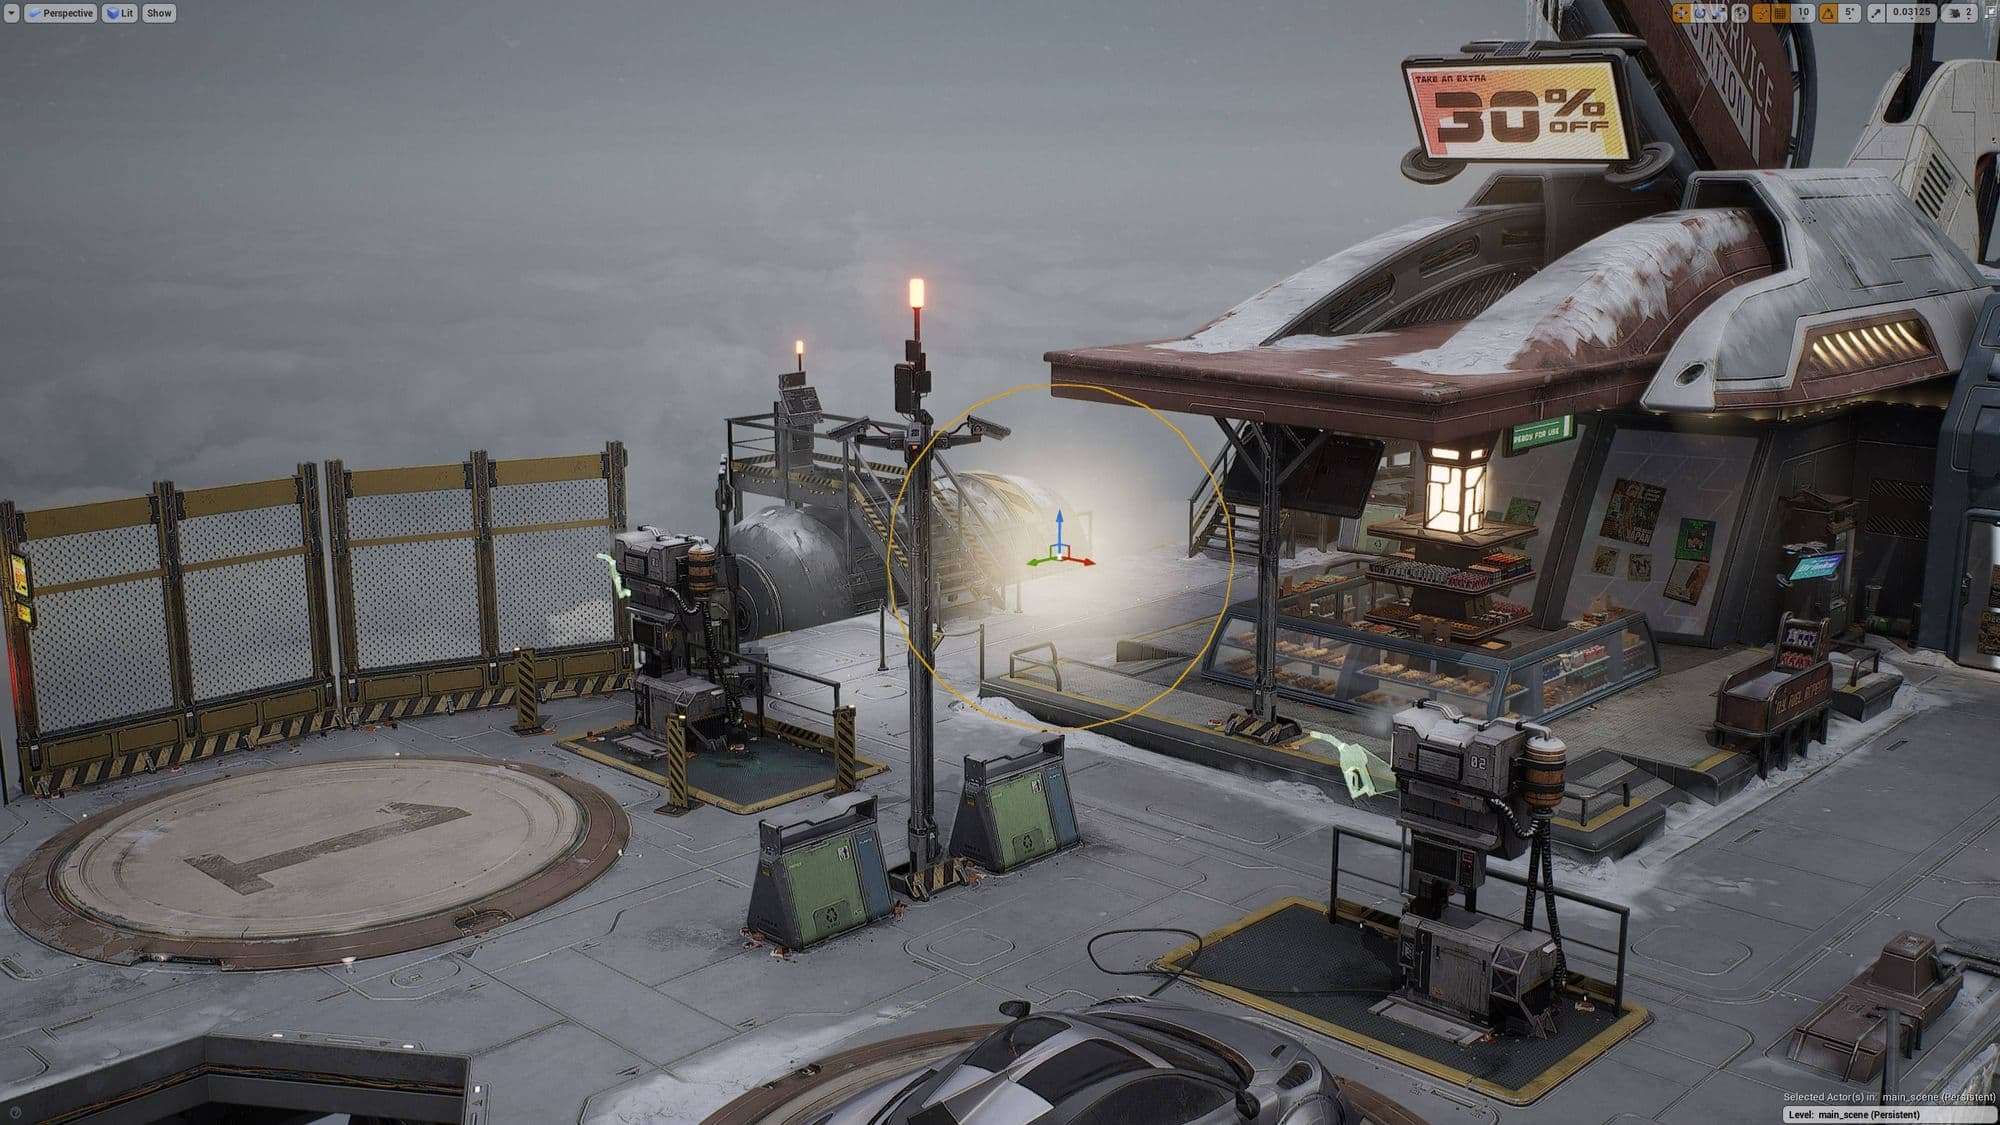
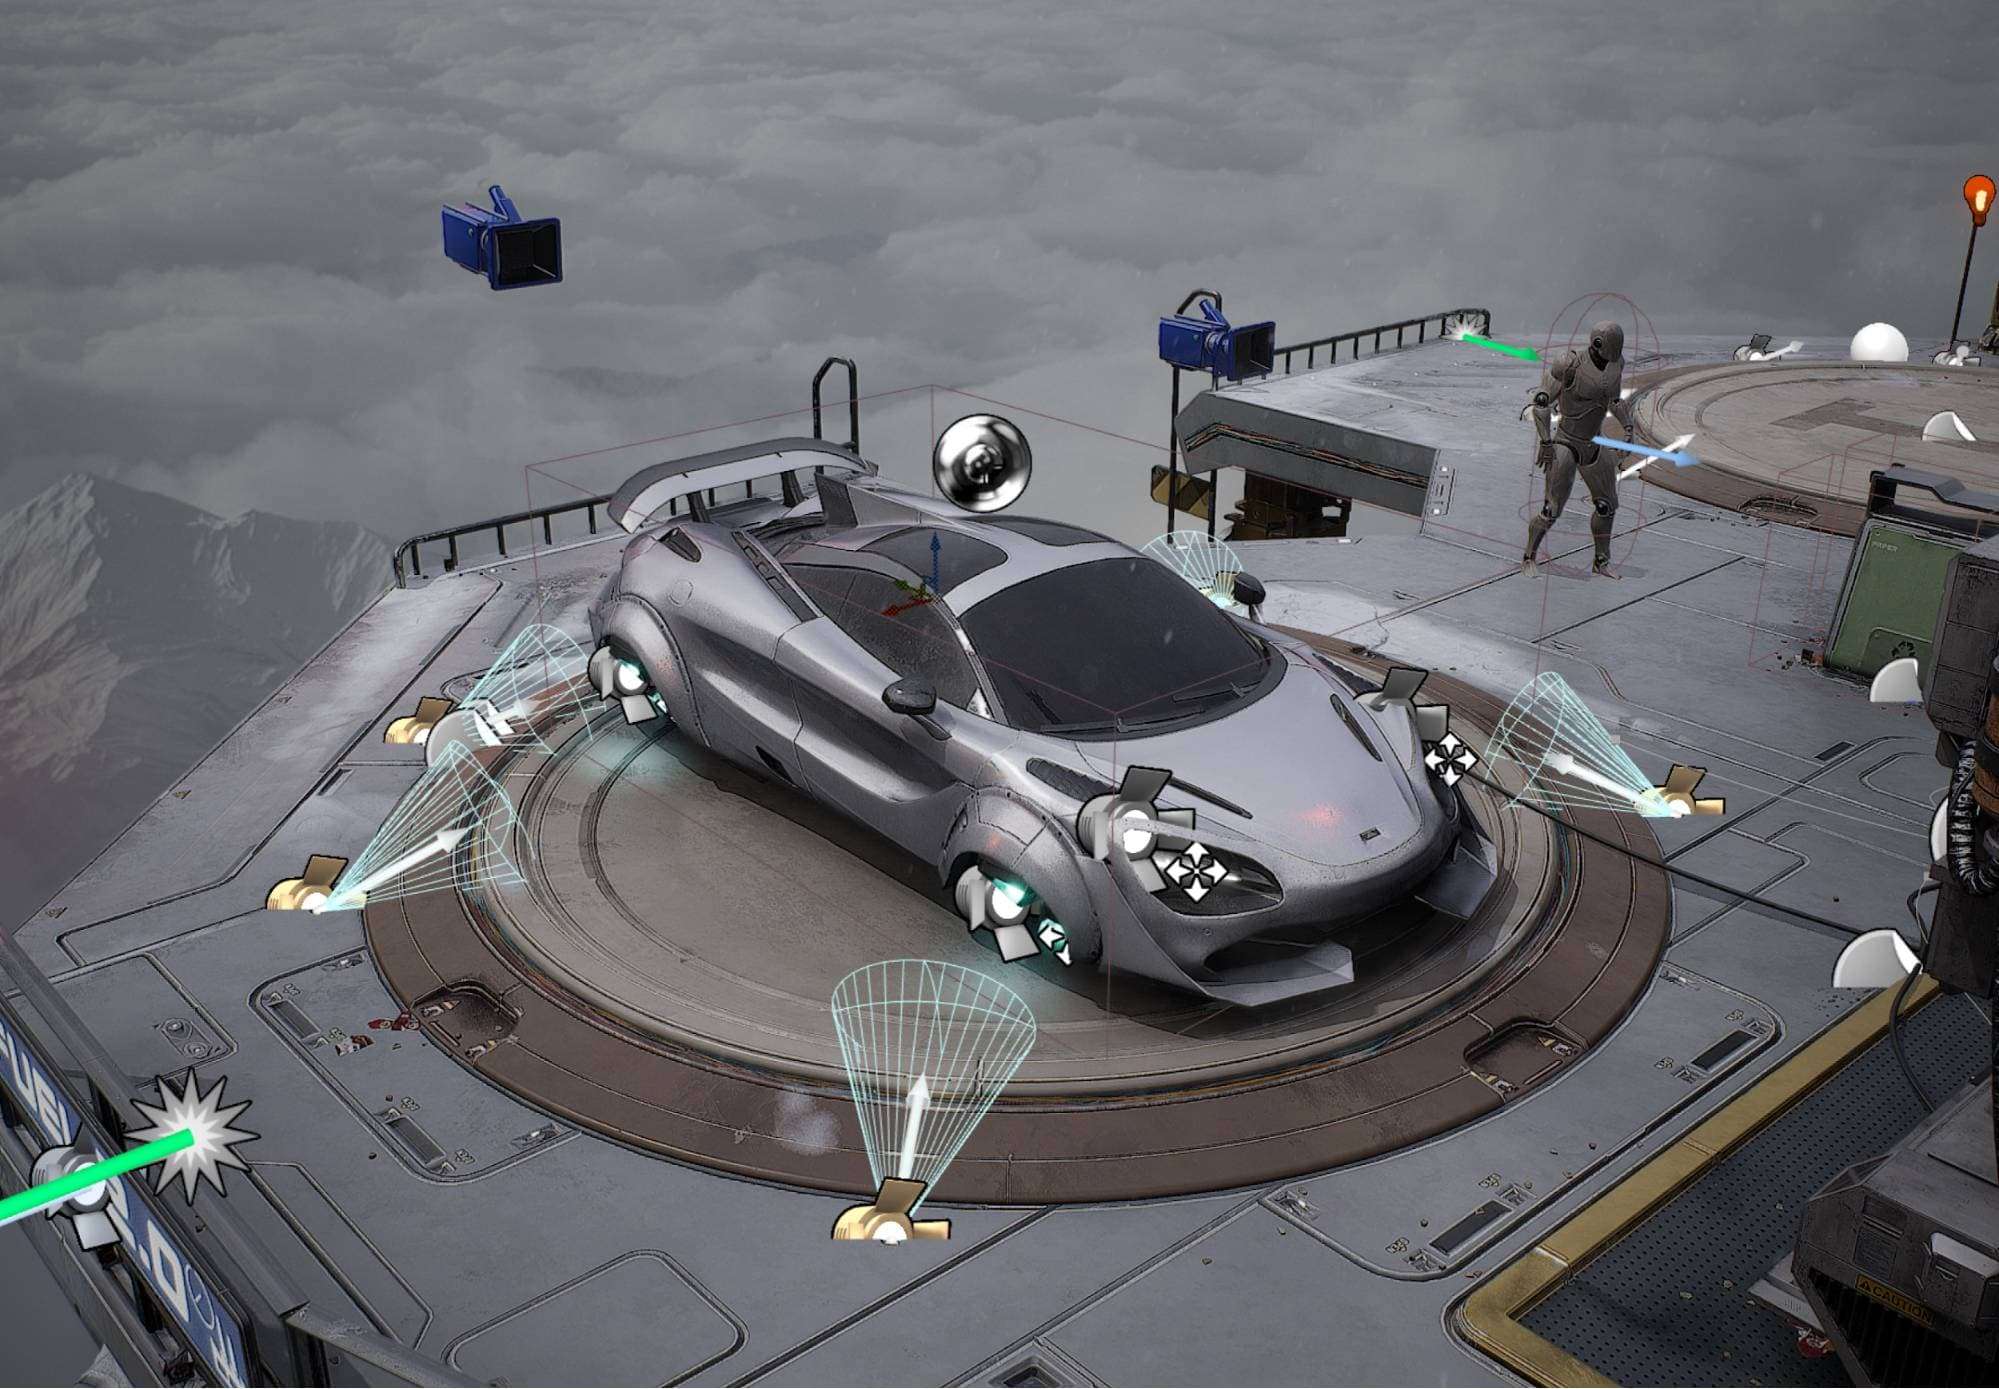
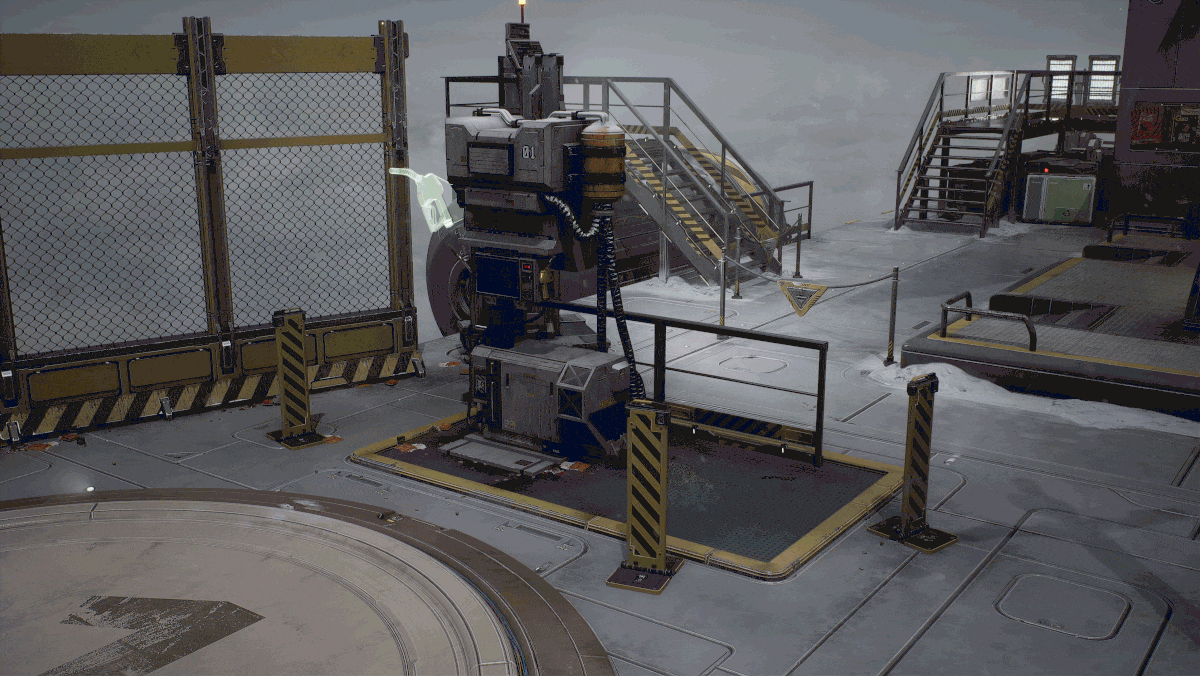
In some areas I also used the lights as compositional elements. For example on the landing platform, pointing at the car and along the path around the shop.
Shaders
Trim sheet / Advanced tiling material
The trim sheet master material definitely improved my workflow. It allowed me to work on the environment in an iterative way. A lot of the large platform pieces got multiple passes throughout the project. The ability to swap certain decals on the texture at any time, allowed me to try out different designs without modifying the geometry.
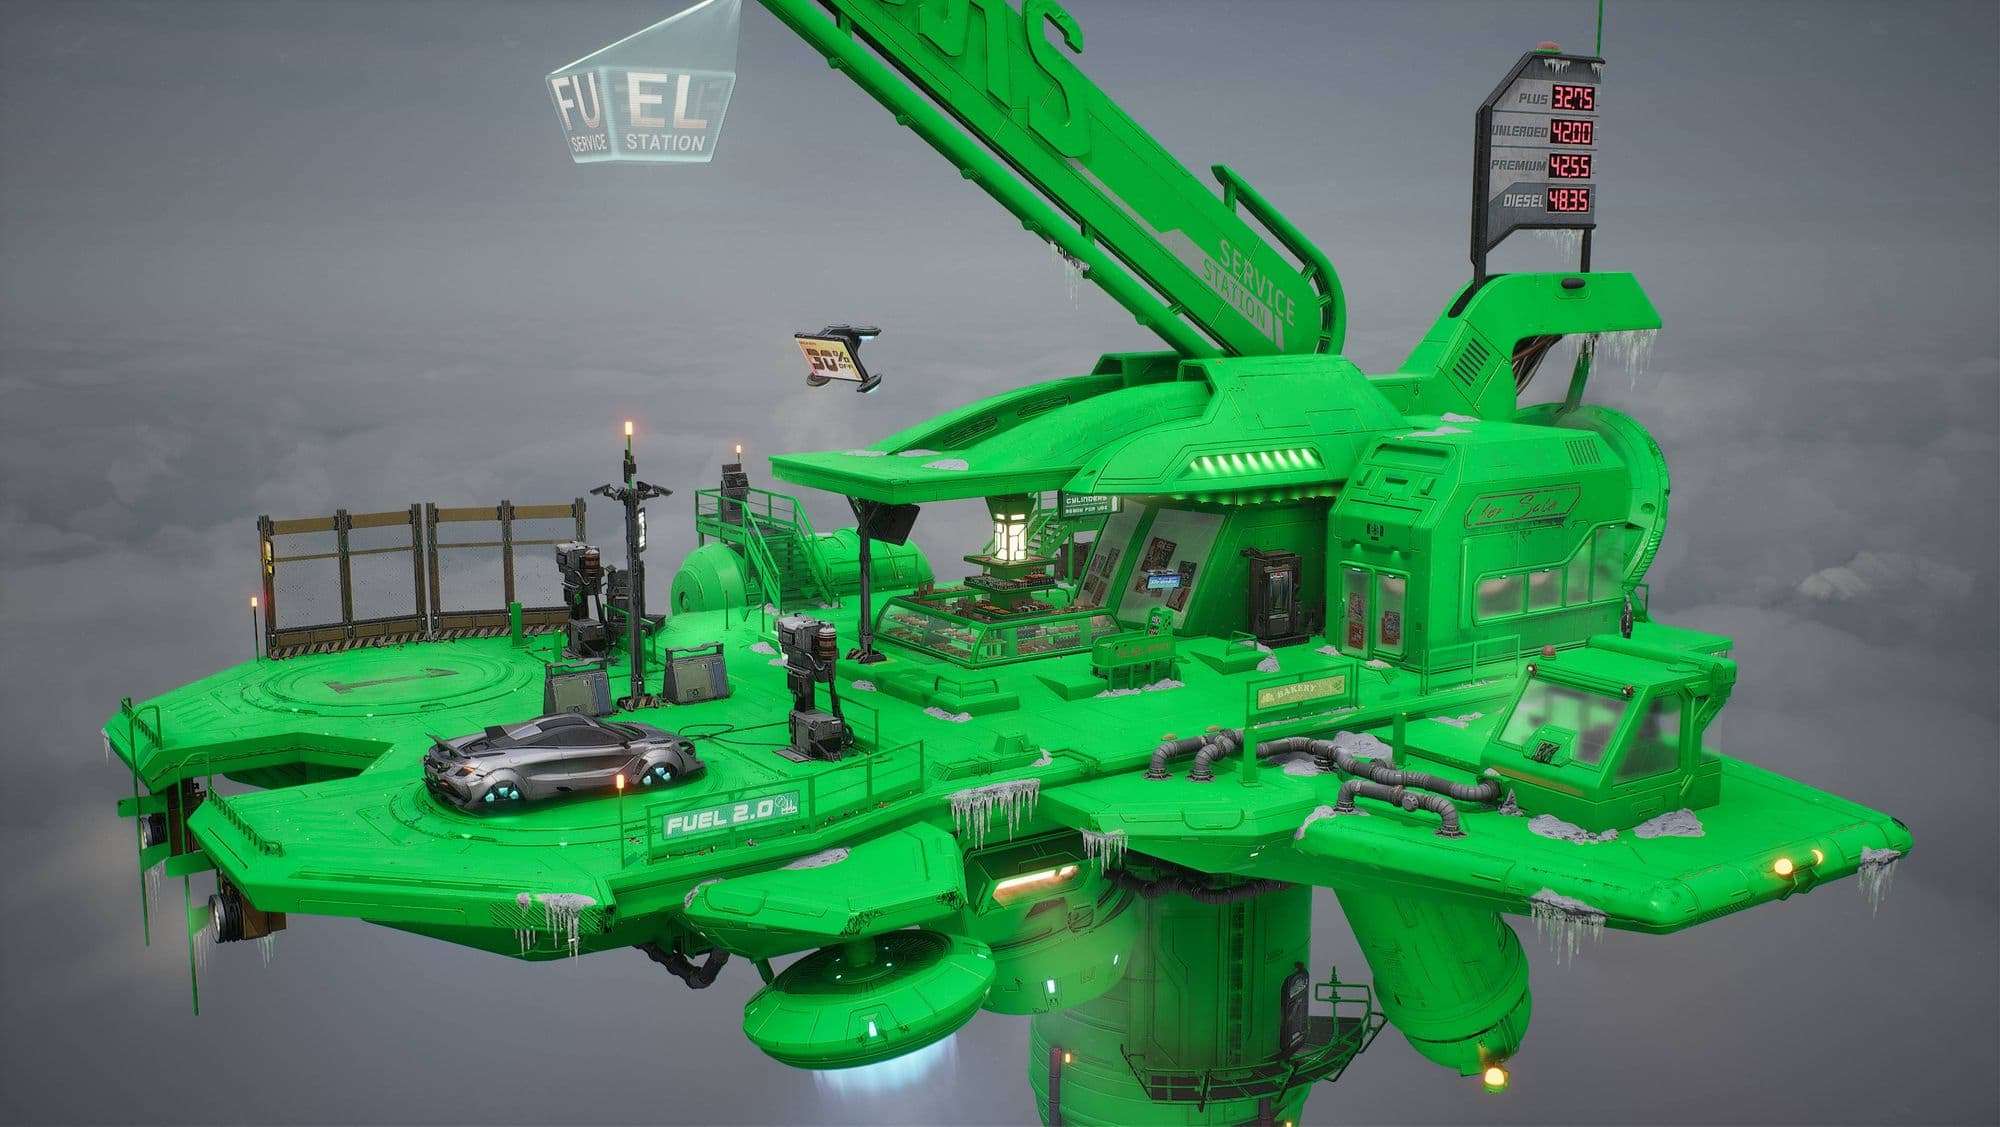
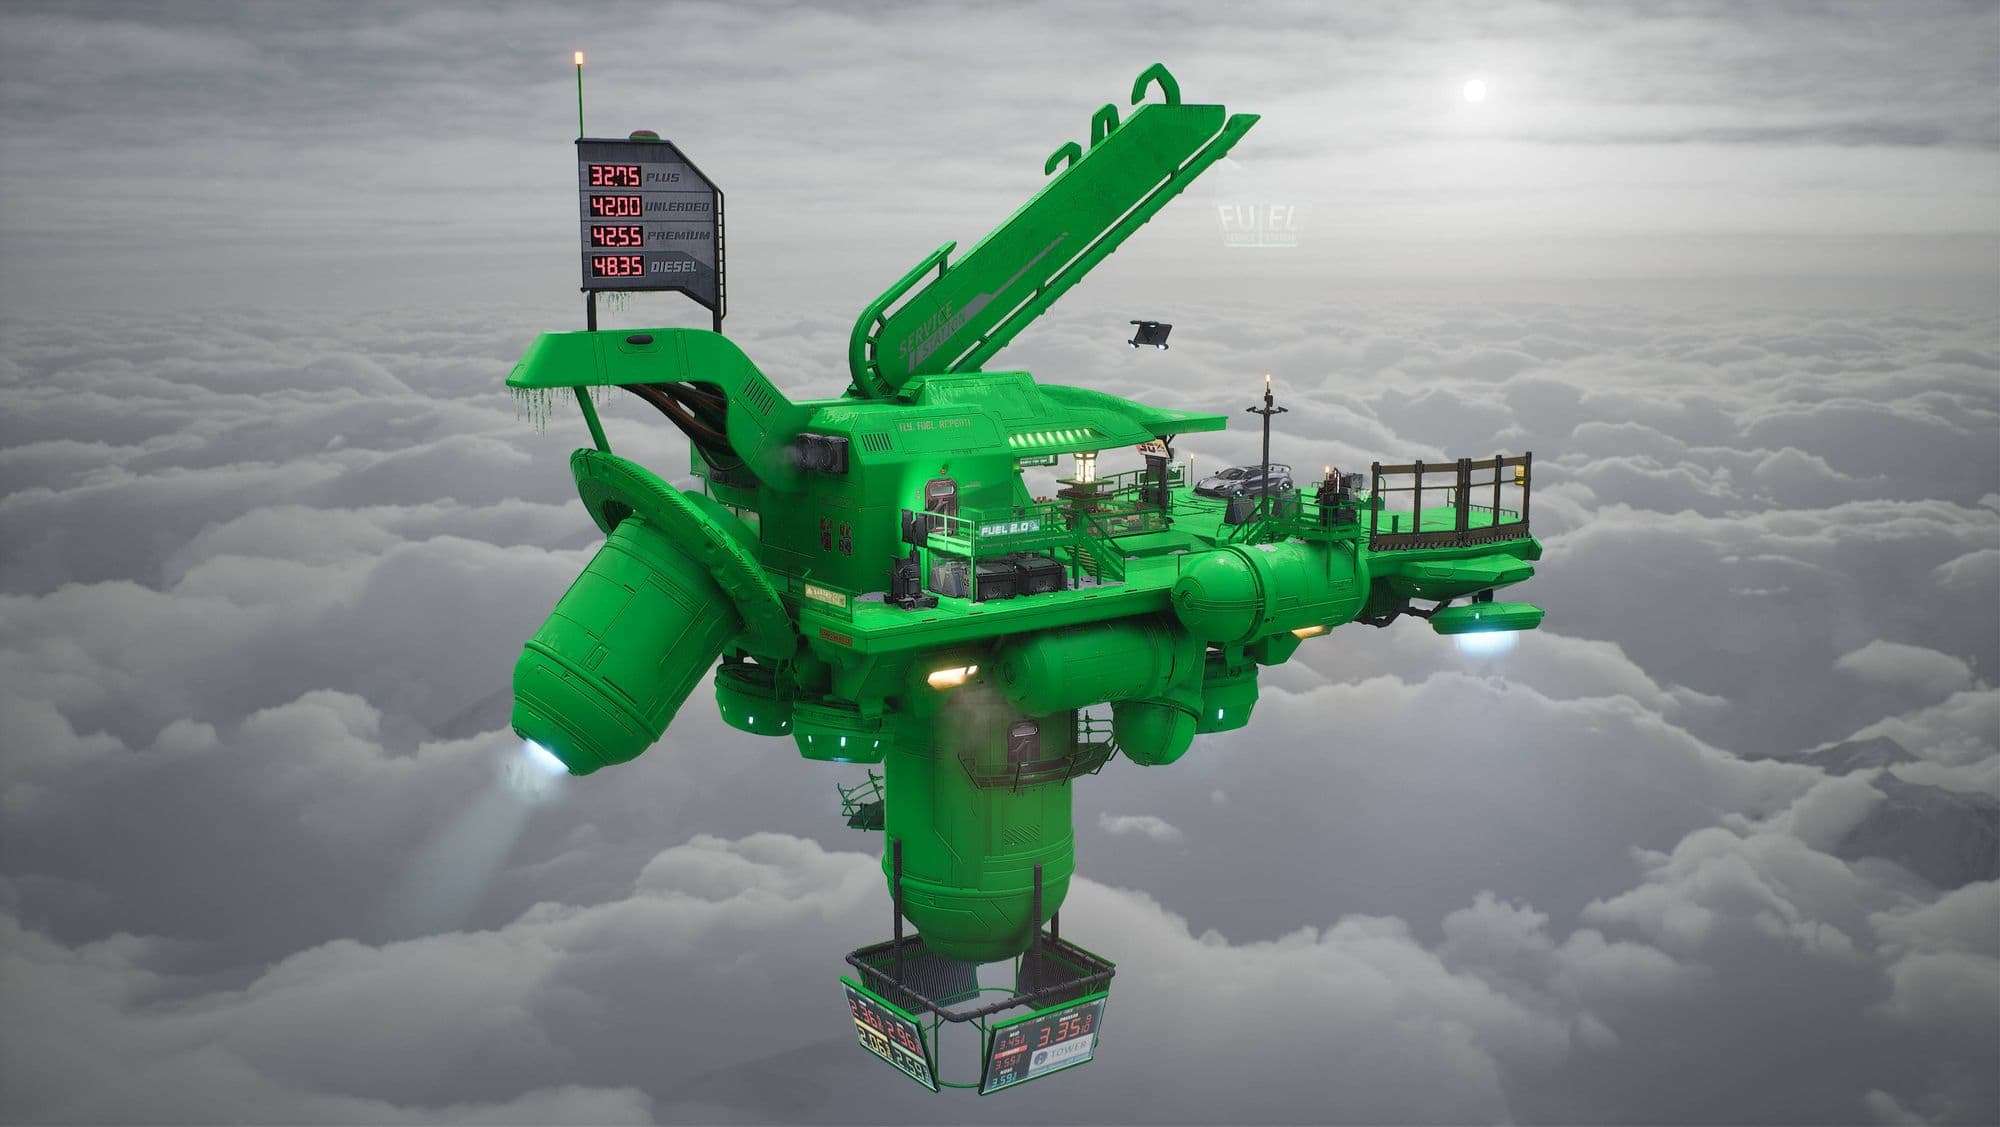
The green parts are the meshes that are using the trim sheet material, and I used it almost everywhere and even for some props that were not so important.
The trim master material uses parallax occlusion mapping to fake the decal insets so it almost looks like actual geometry. I used 3 vertex blends for dirt, metal edge wear and snow. Tinting the material with a mask made it versatile and ready to be used on a bunch of objects.
Breakdown of one piece:
I tried two different ways to achieve the effect of tileable material with a trim texture on top. The first one is to create a second UV channel and then use the first one for the decals and the second one for the tileable material. The second method is to use world aligned textures in Unreal Engine (it’s basically a triplanar projection) and only use the UV channel for the decals. This method is faster and easier because you don’t have to export a second UV map, it just works in Unreal. But it might be more expensive and you can’t animate the meshes unless you don’t mind texture swimming!
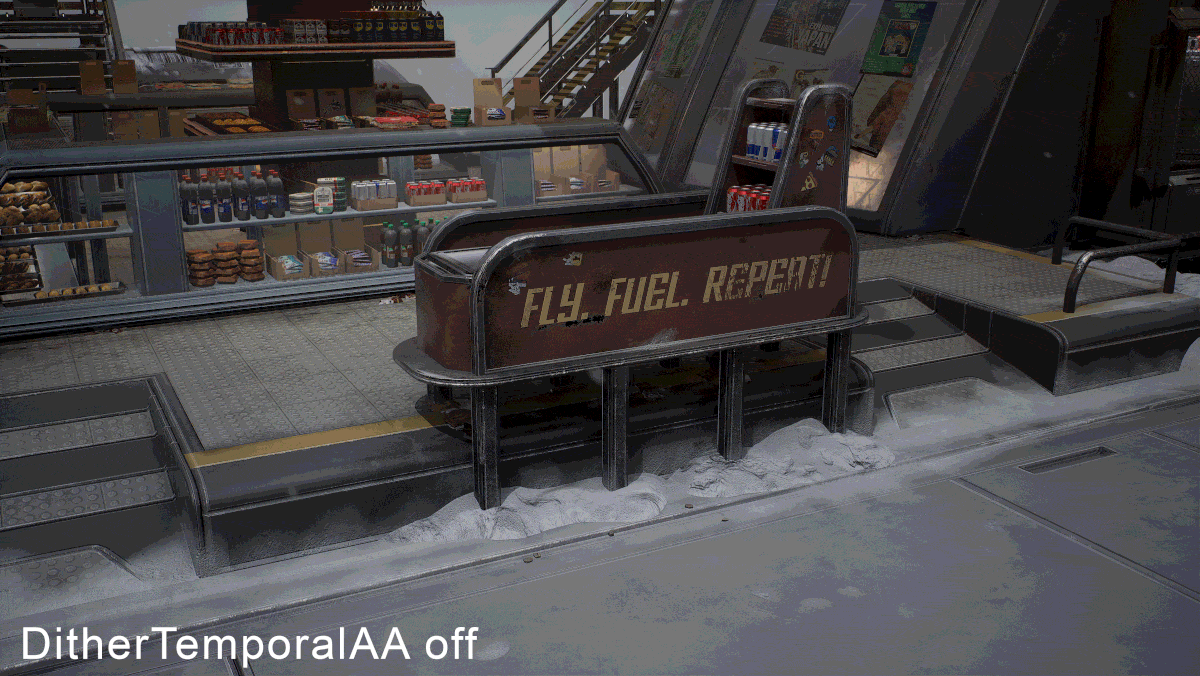
Snow and Ice
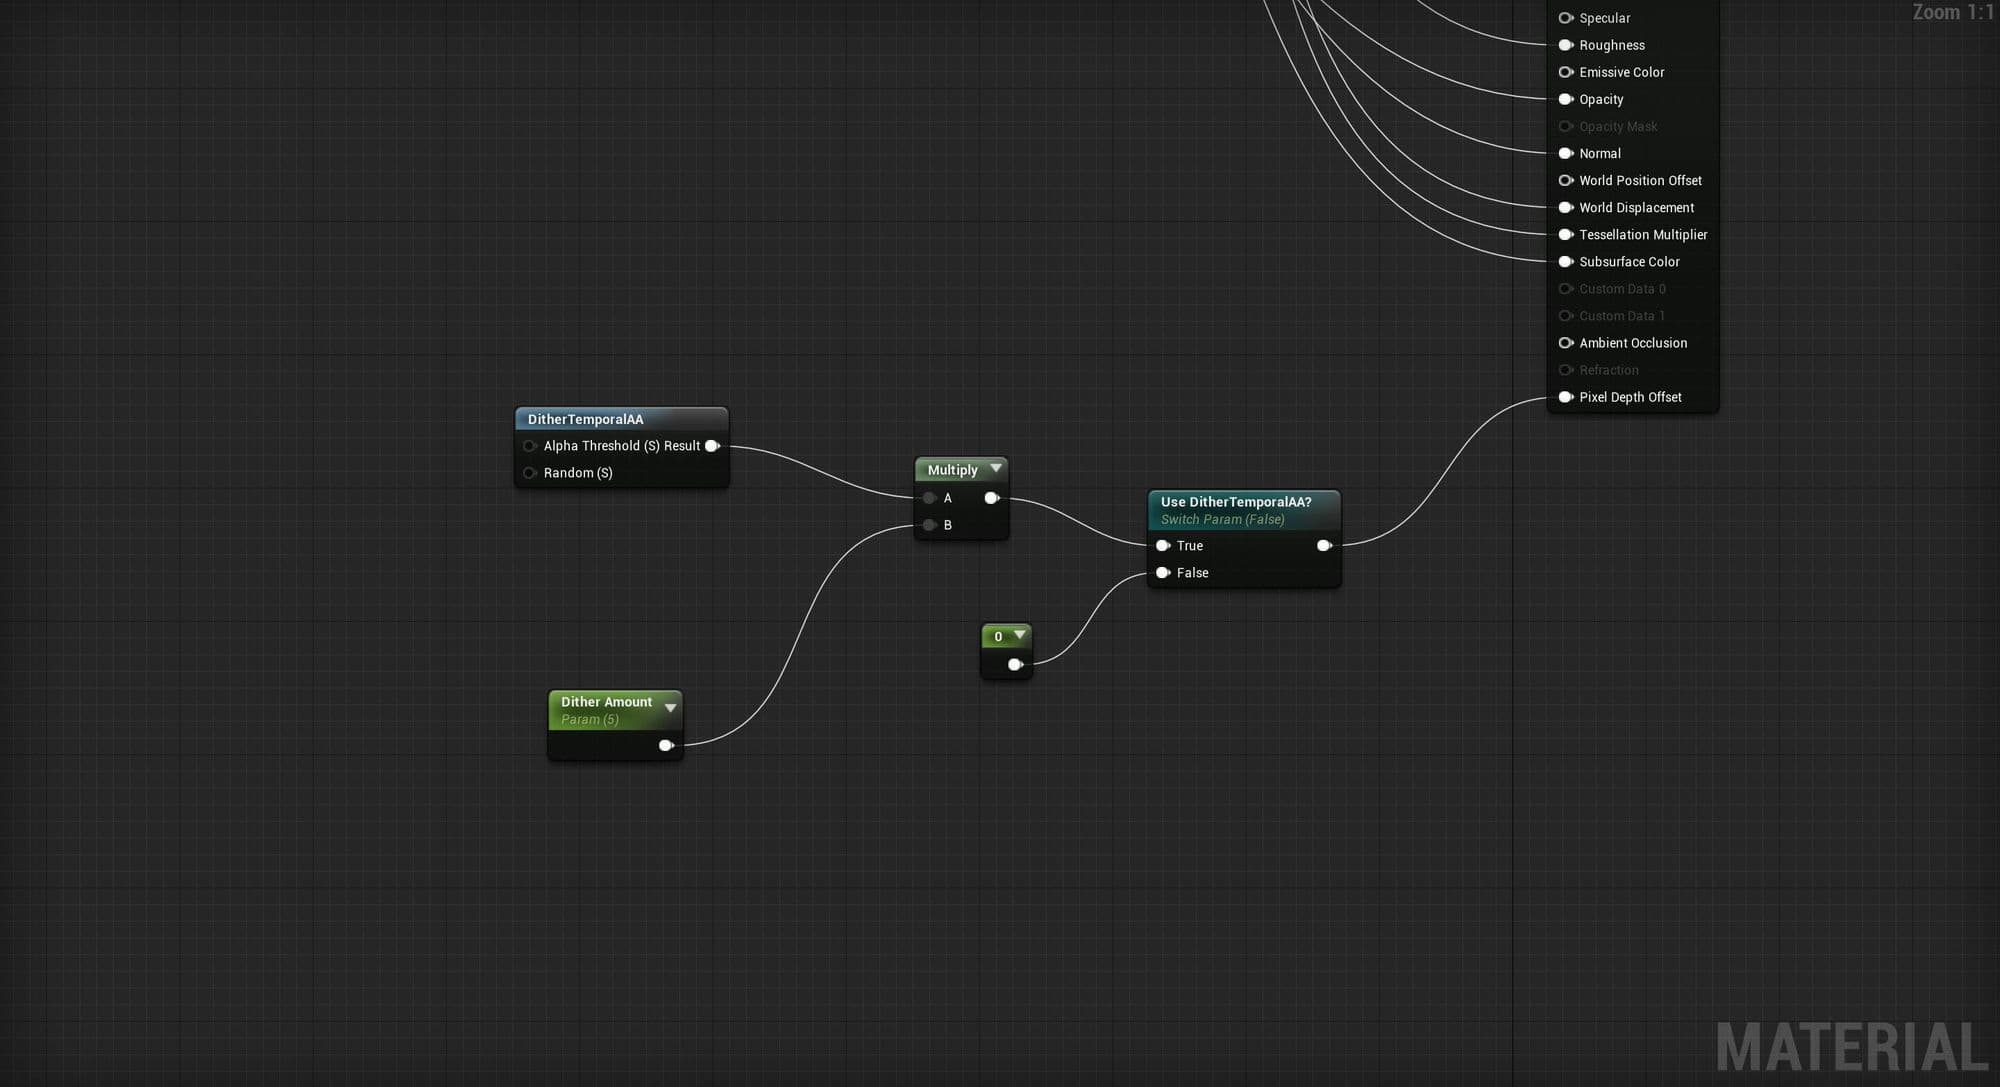
To create the snow I added a vertex blend to my master material. It uses the height blend function so it slowly fills up the cavities until it covers all the trim detail. To hide the hard edges between the platform pieces I placed snow clump meshes and some snow balls for visual interest. The snow meshes use DitherTemporalAA in the Pixel Depth Offset Input to avoid new hard edges where the meshes meet.
Notice the softer transition between the snow and the platform pieces
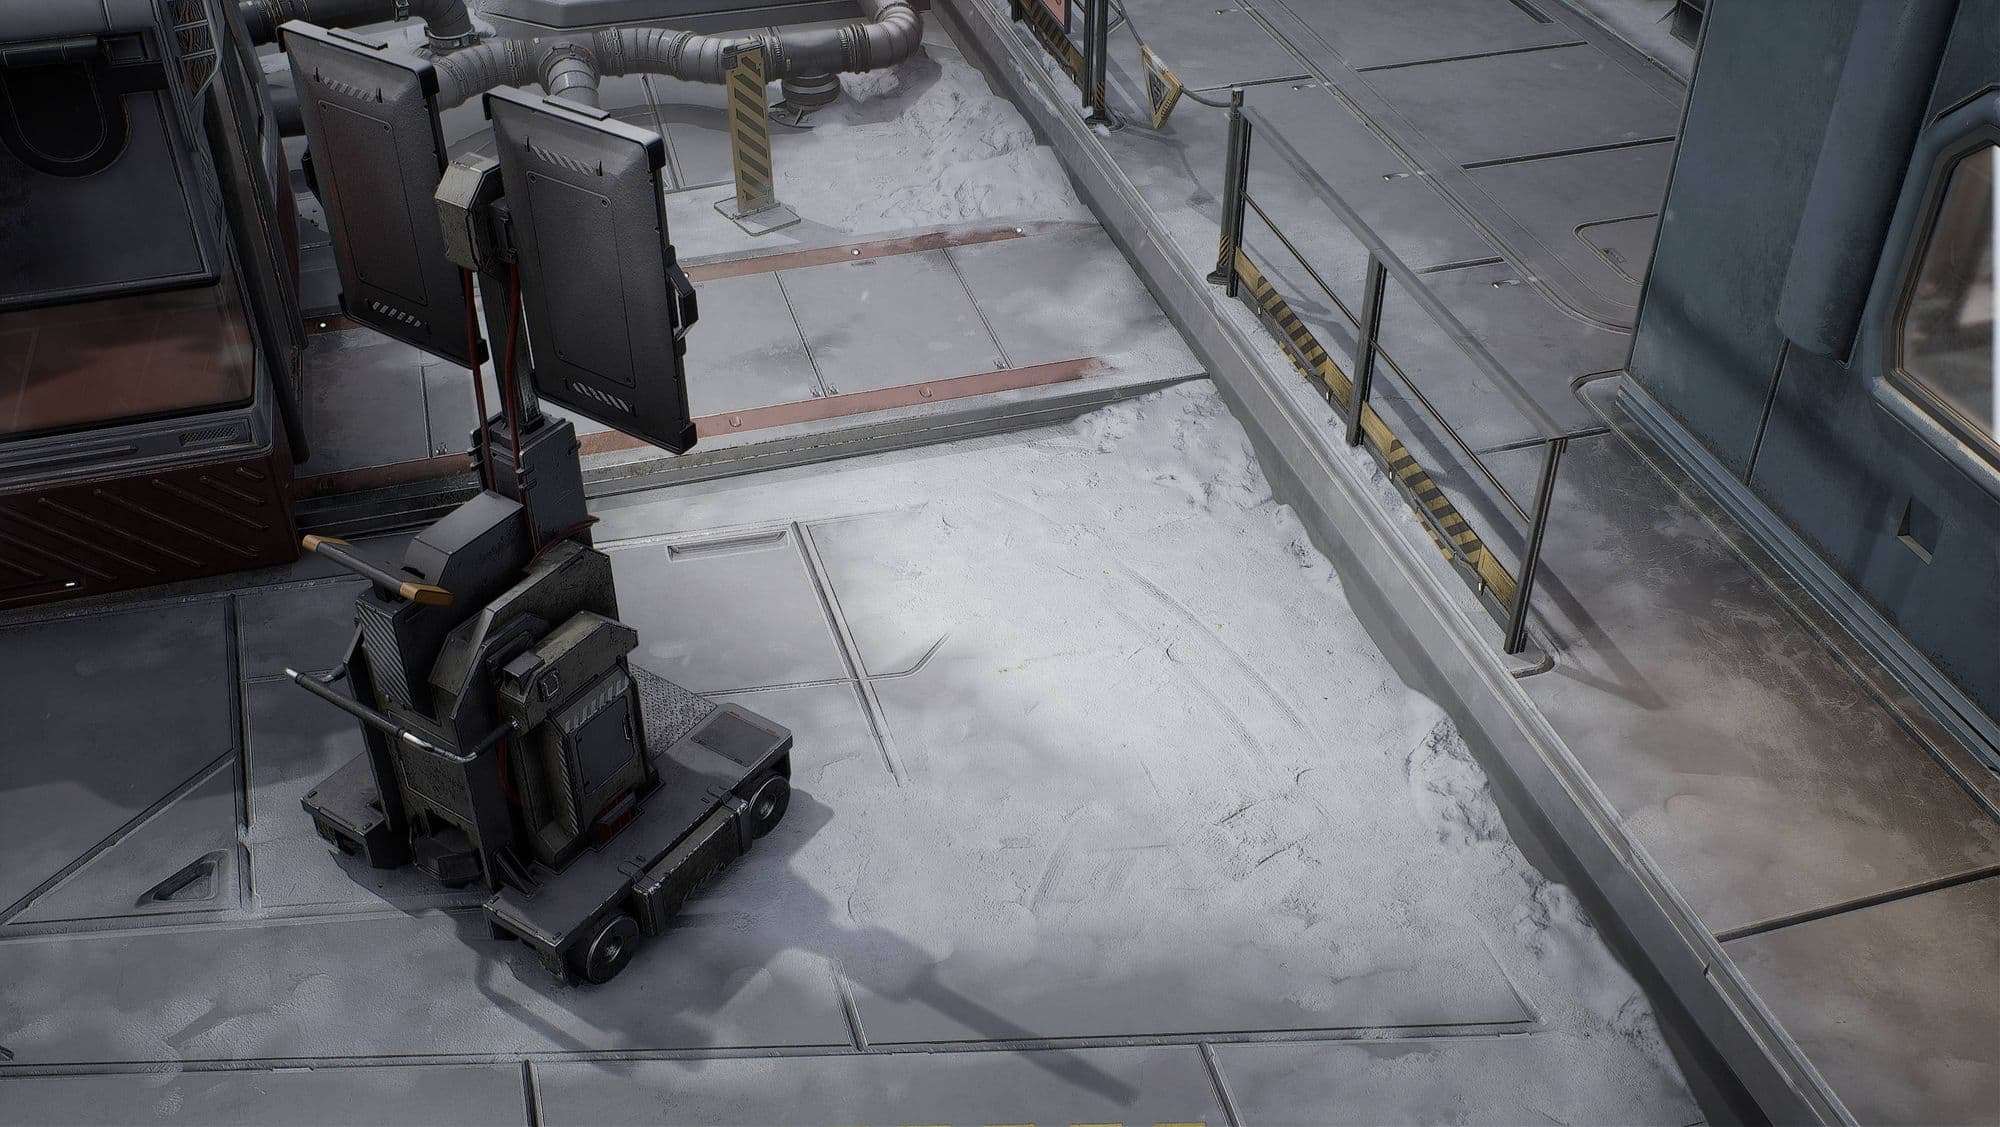
With the spline tool in Unreal Engine and a decal material on it, I created tire tracks that the mobile light rig would create when moving it around. Here, the same dither technique is used to blend it better with the ground and also you can mask the track in certain spots with vertex colour.
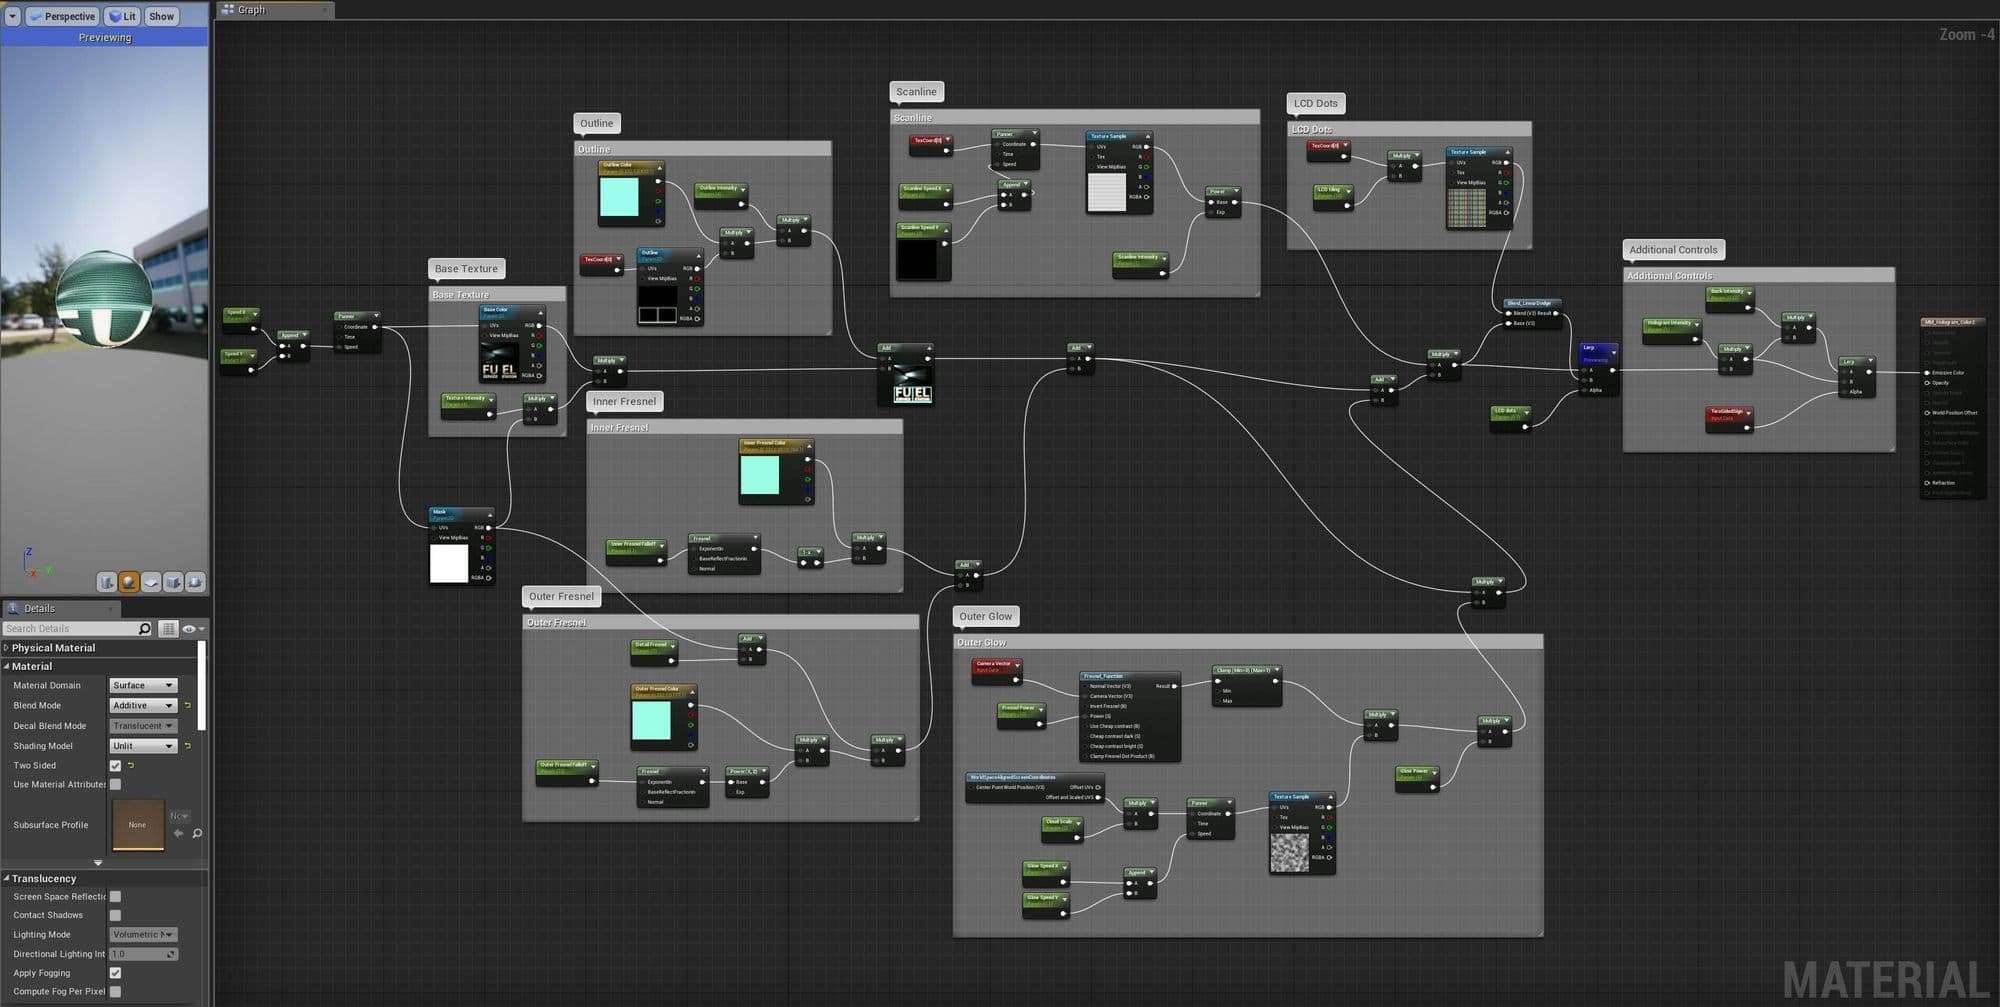
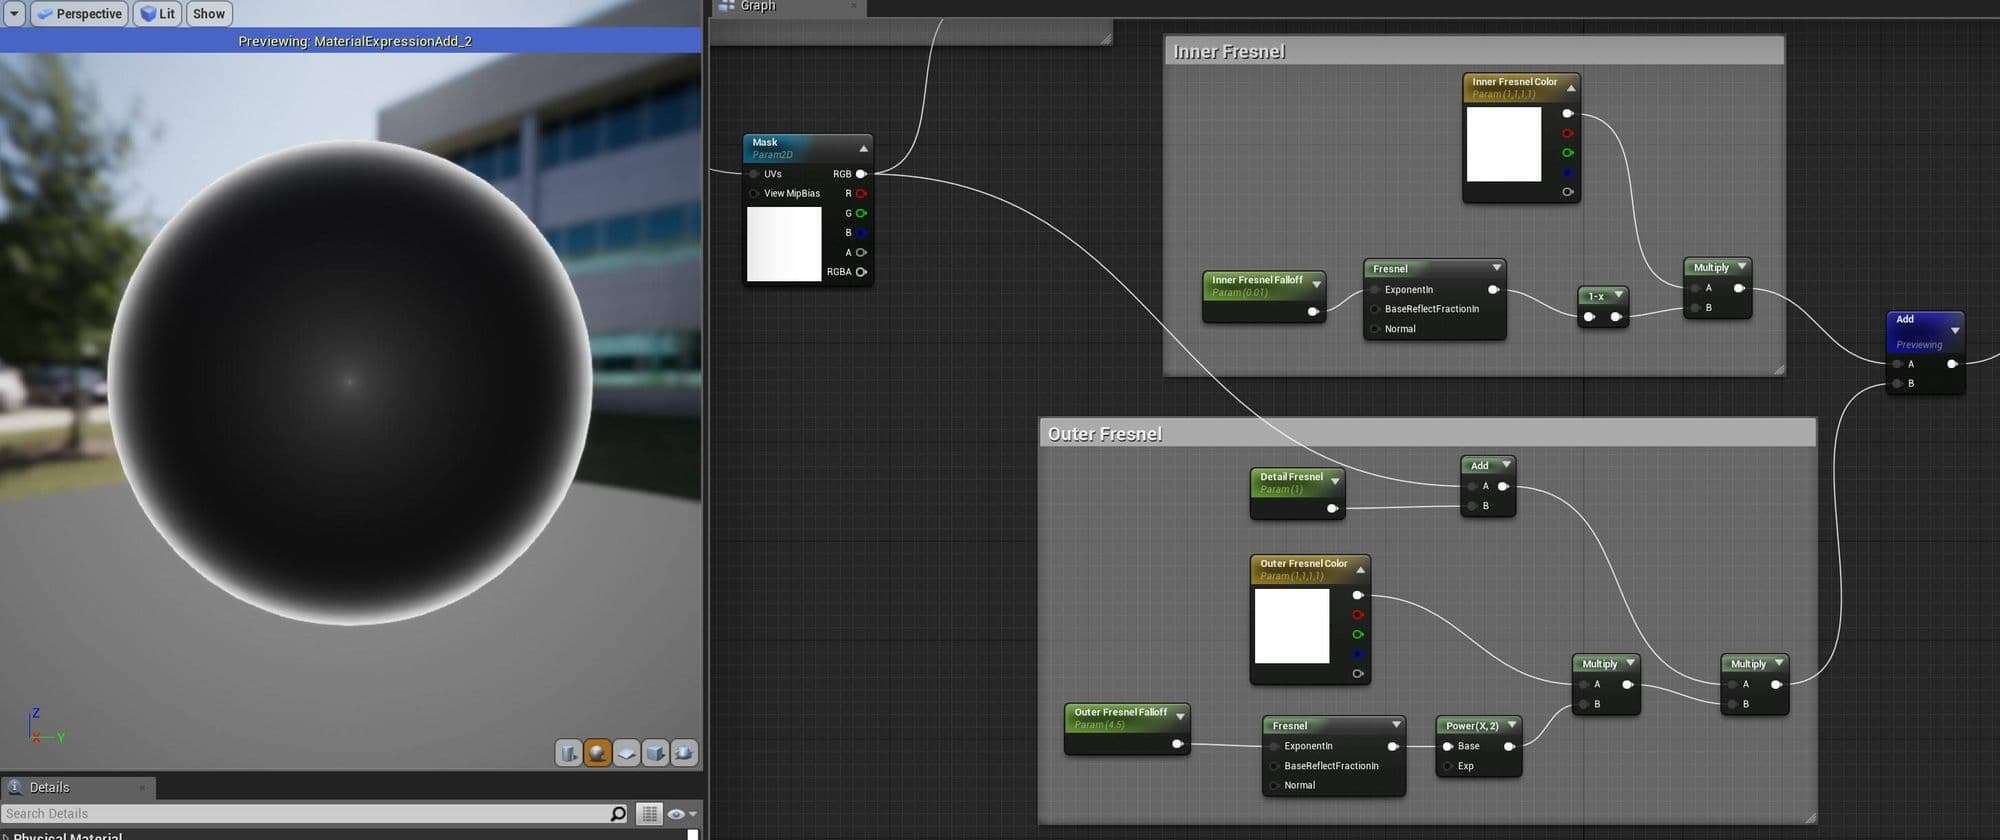
The shader is basically a texture with opacity with multiple Fresnel effects on top and panning clouds and scan lines.
Fresnel effects
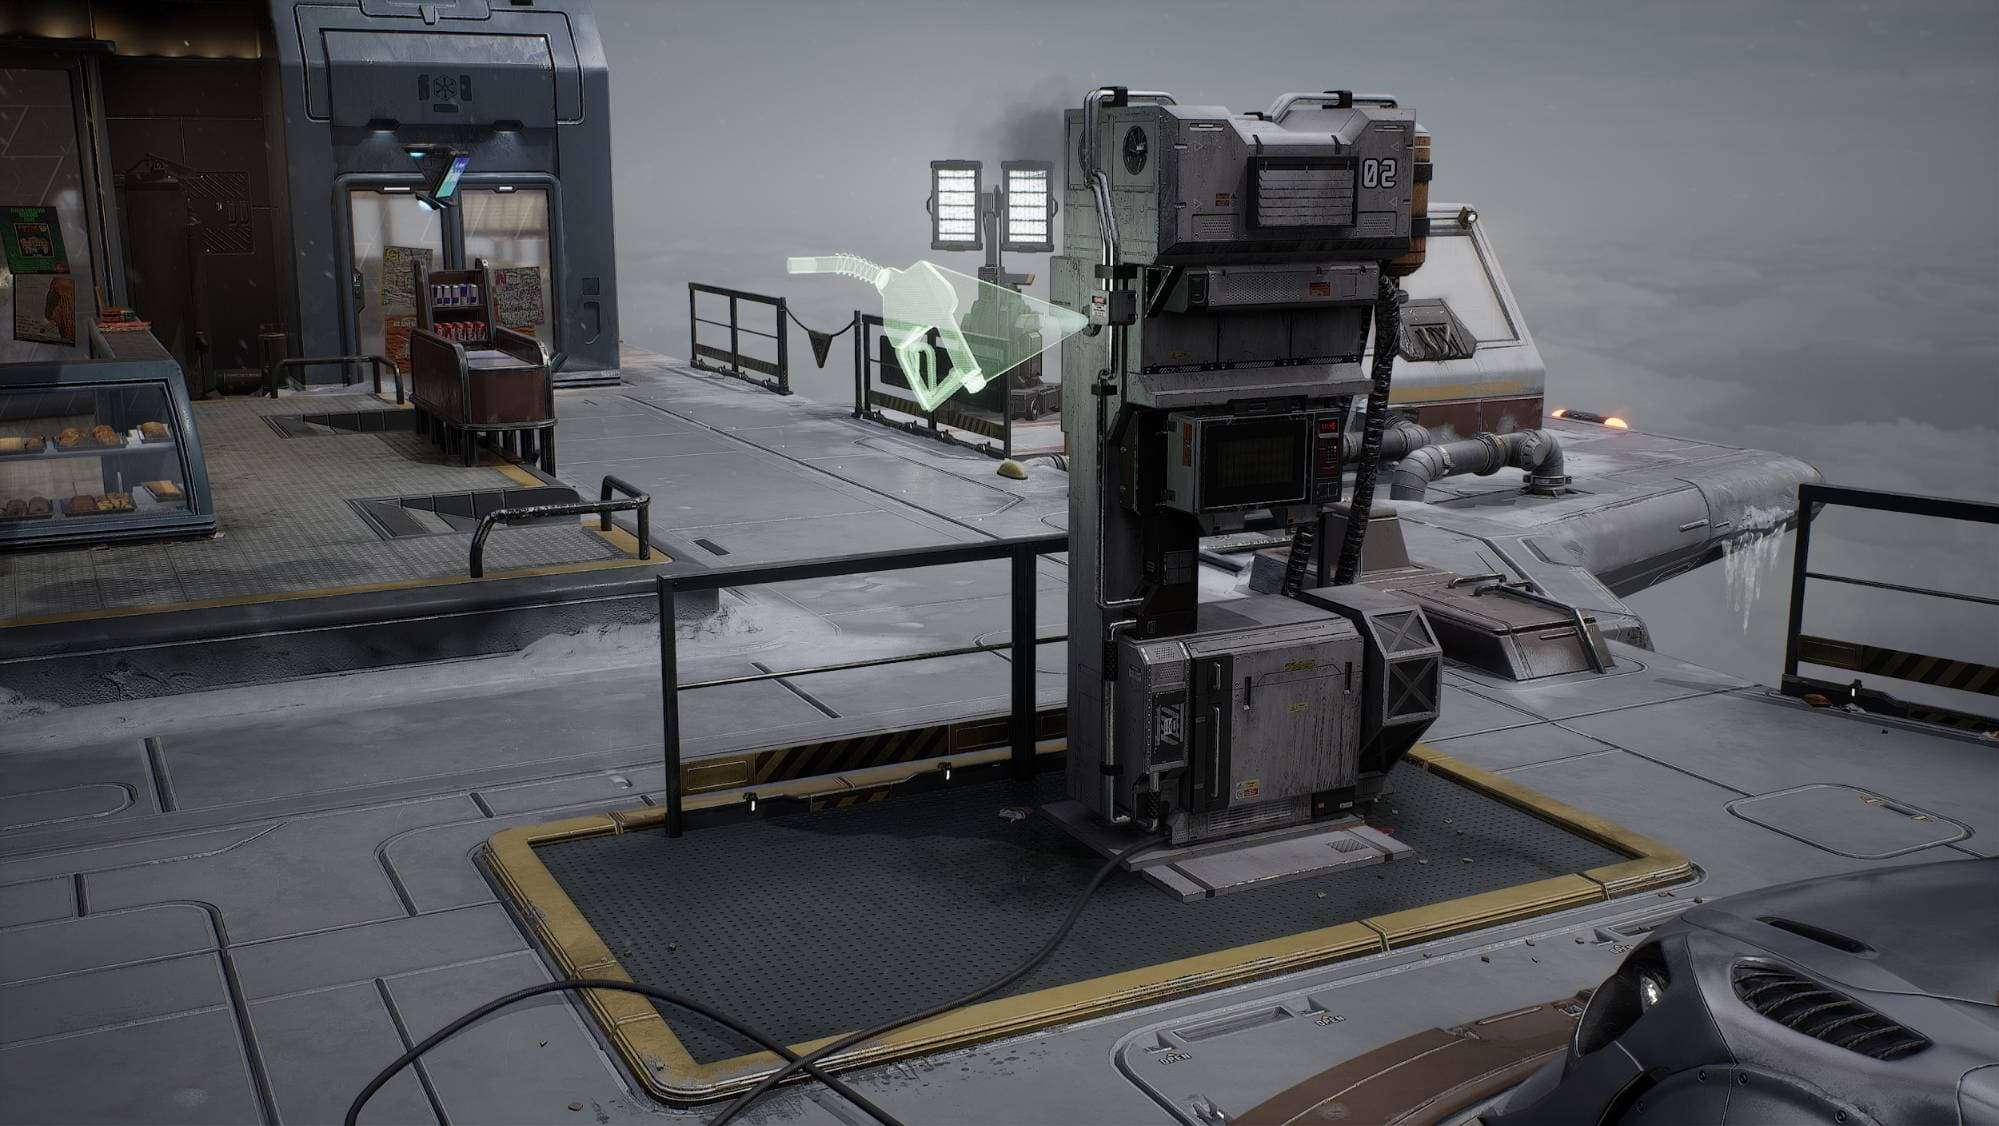
I reused the hologram shader at the bottom for the large signs and for the gas pump hologram.
Here I quickly modeled a gas nozzle mesh and projected the uvs so the scan lines went in the right direction.
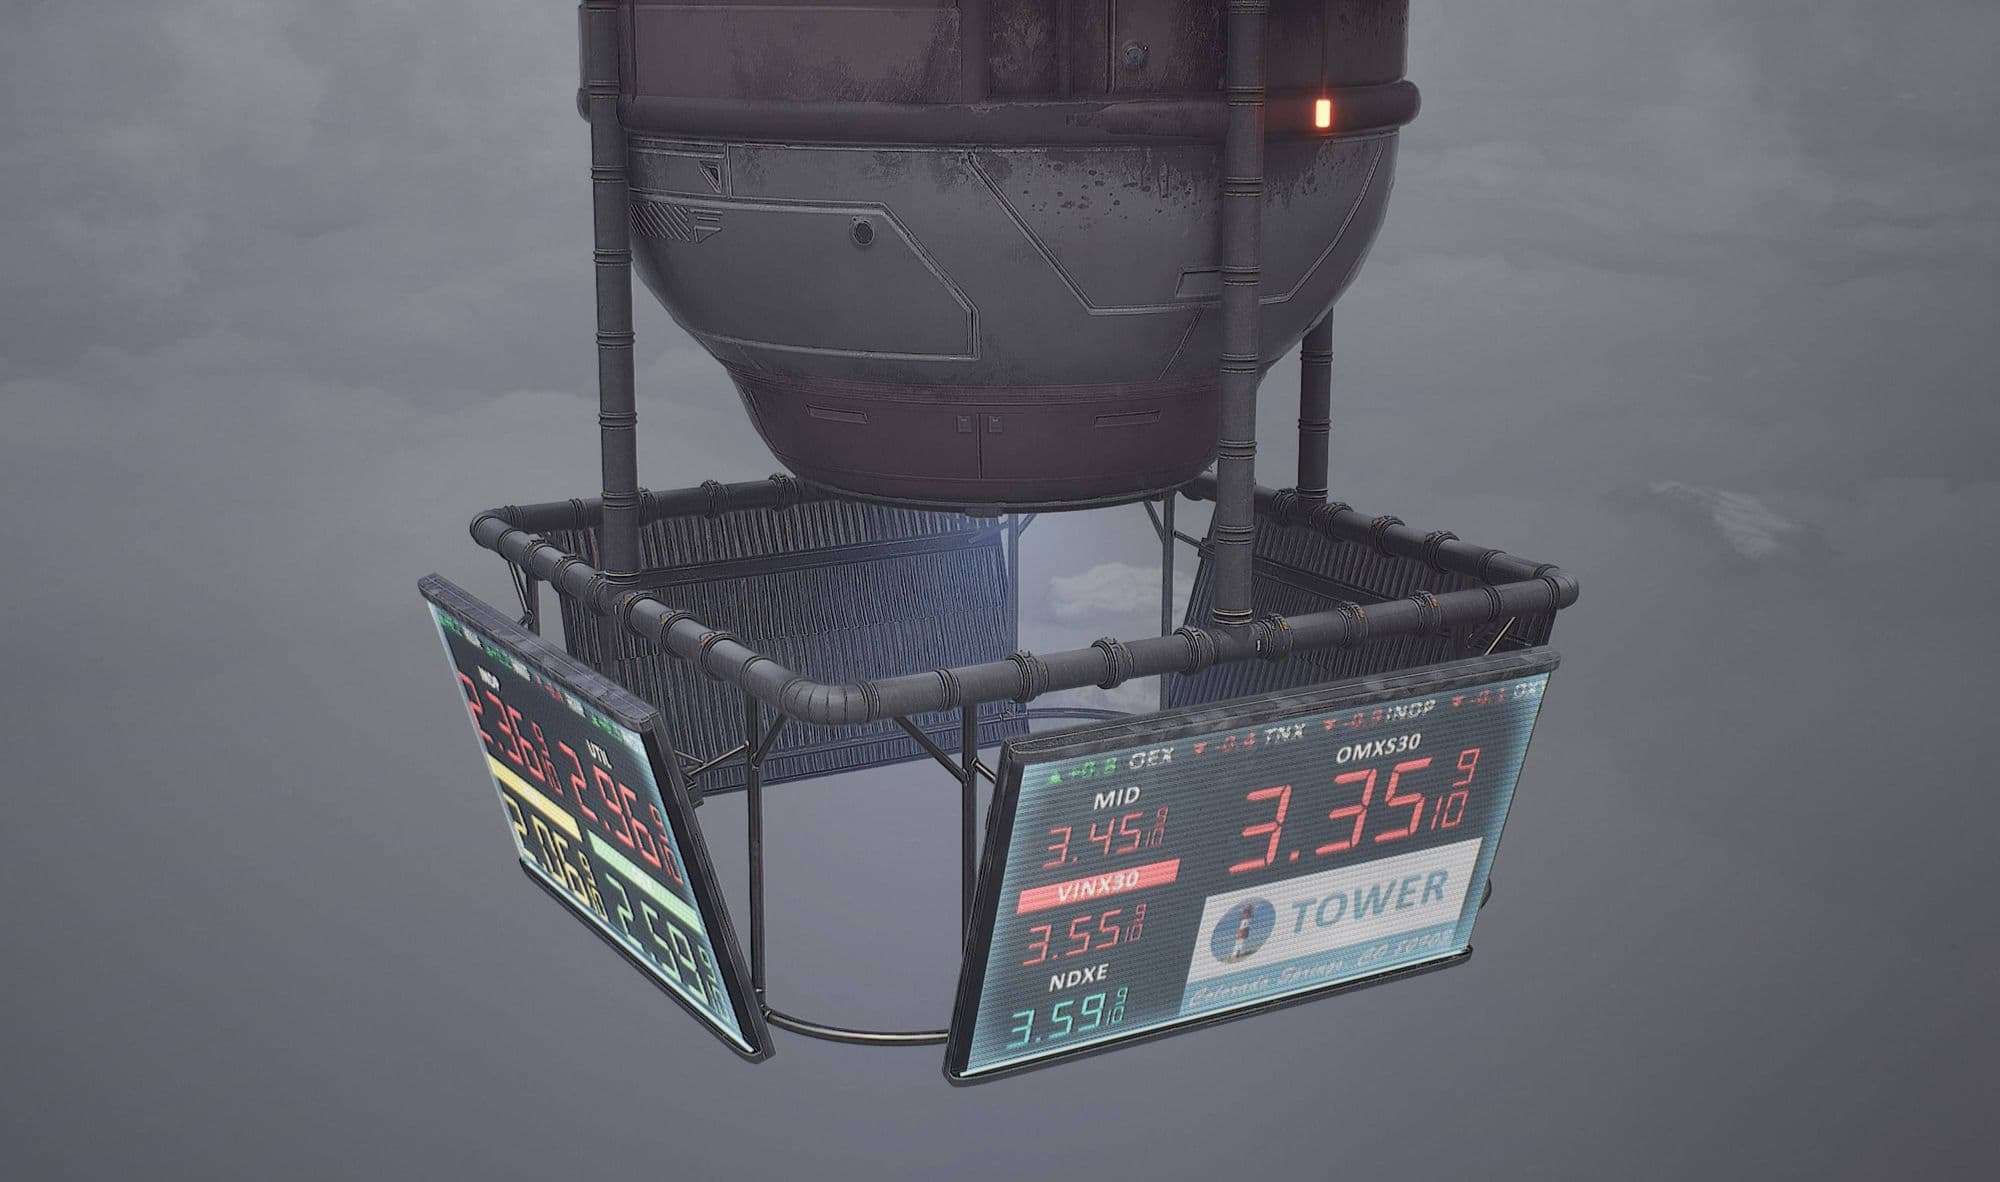
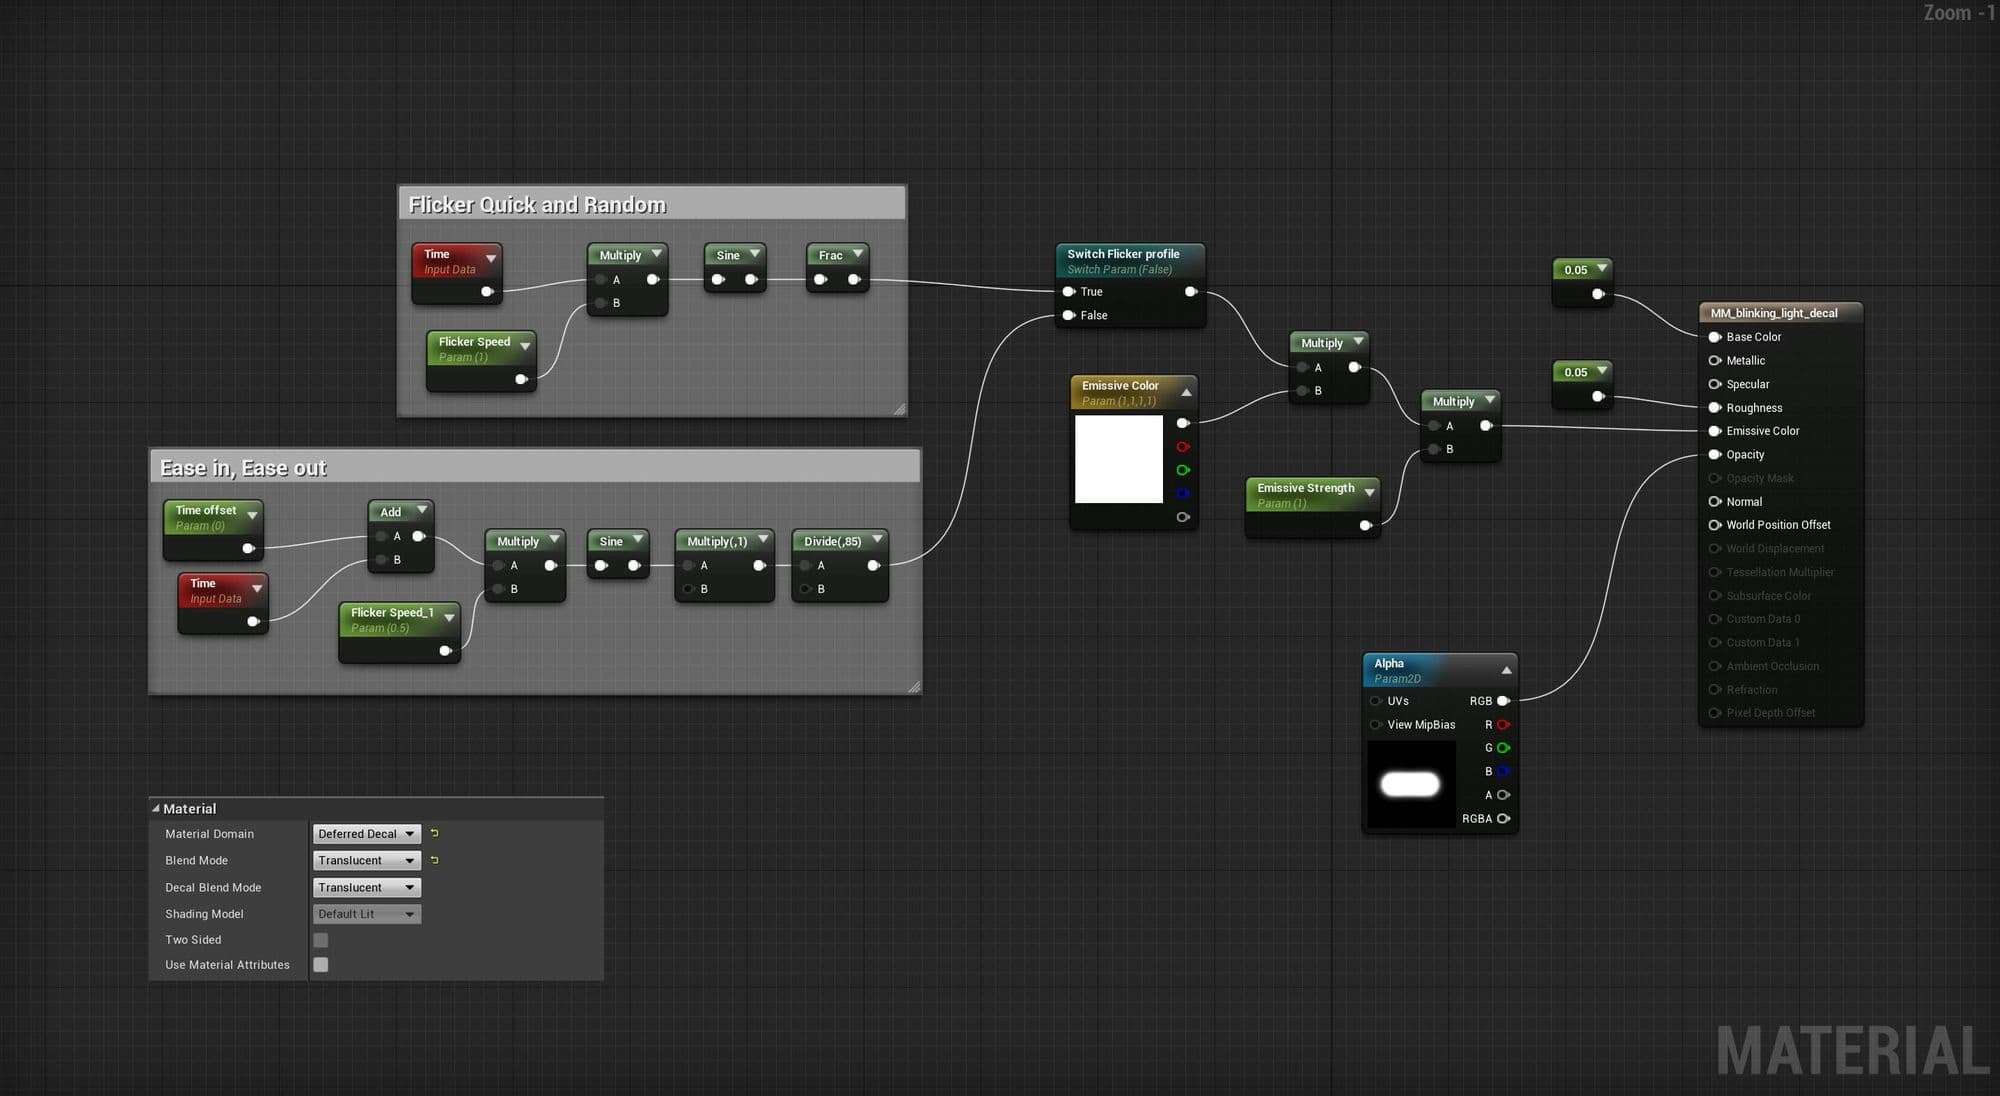
Blinking lights
In this shader I have two different blinking animations that you can select in the material instance with a static switch parameter.
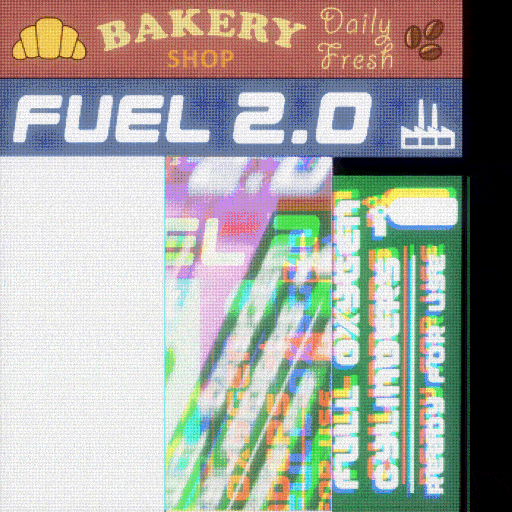
Ads
For the Ads I felt like standard emissive textures were a bit boring. So I added some glitch effects and motion graphics on top to grab more attention, like real ads would do.
Composite roughness
In a workshop about lighting, Brian Leleux showed us this feature to modify the roughness map with the normal map. You just open your roughness map or the packed map in my case and select the normal map in the compositing tab. Underneath you can pick the right channel if you have a packed texture (I had to select the green channel). You can see the effect that it has in the GIF animation below. It basically spreads out the highlights a bit based on the curvature and improves the overall readability.
Blueprints in Unreal Engine
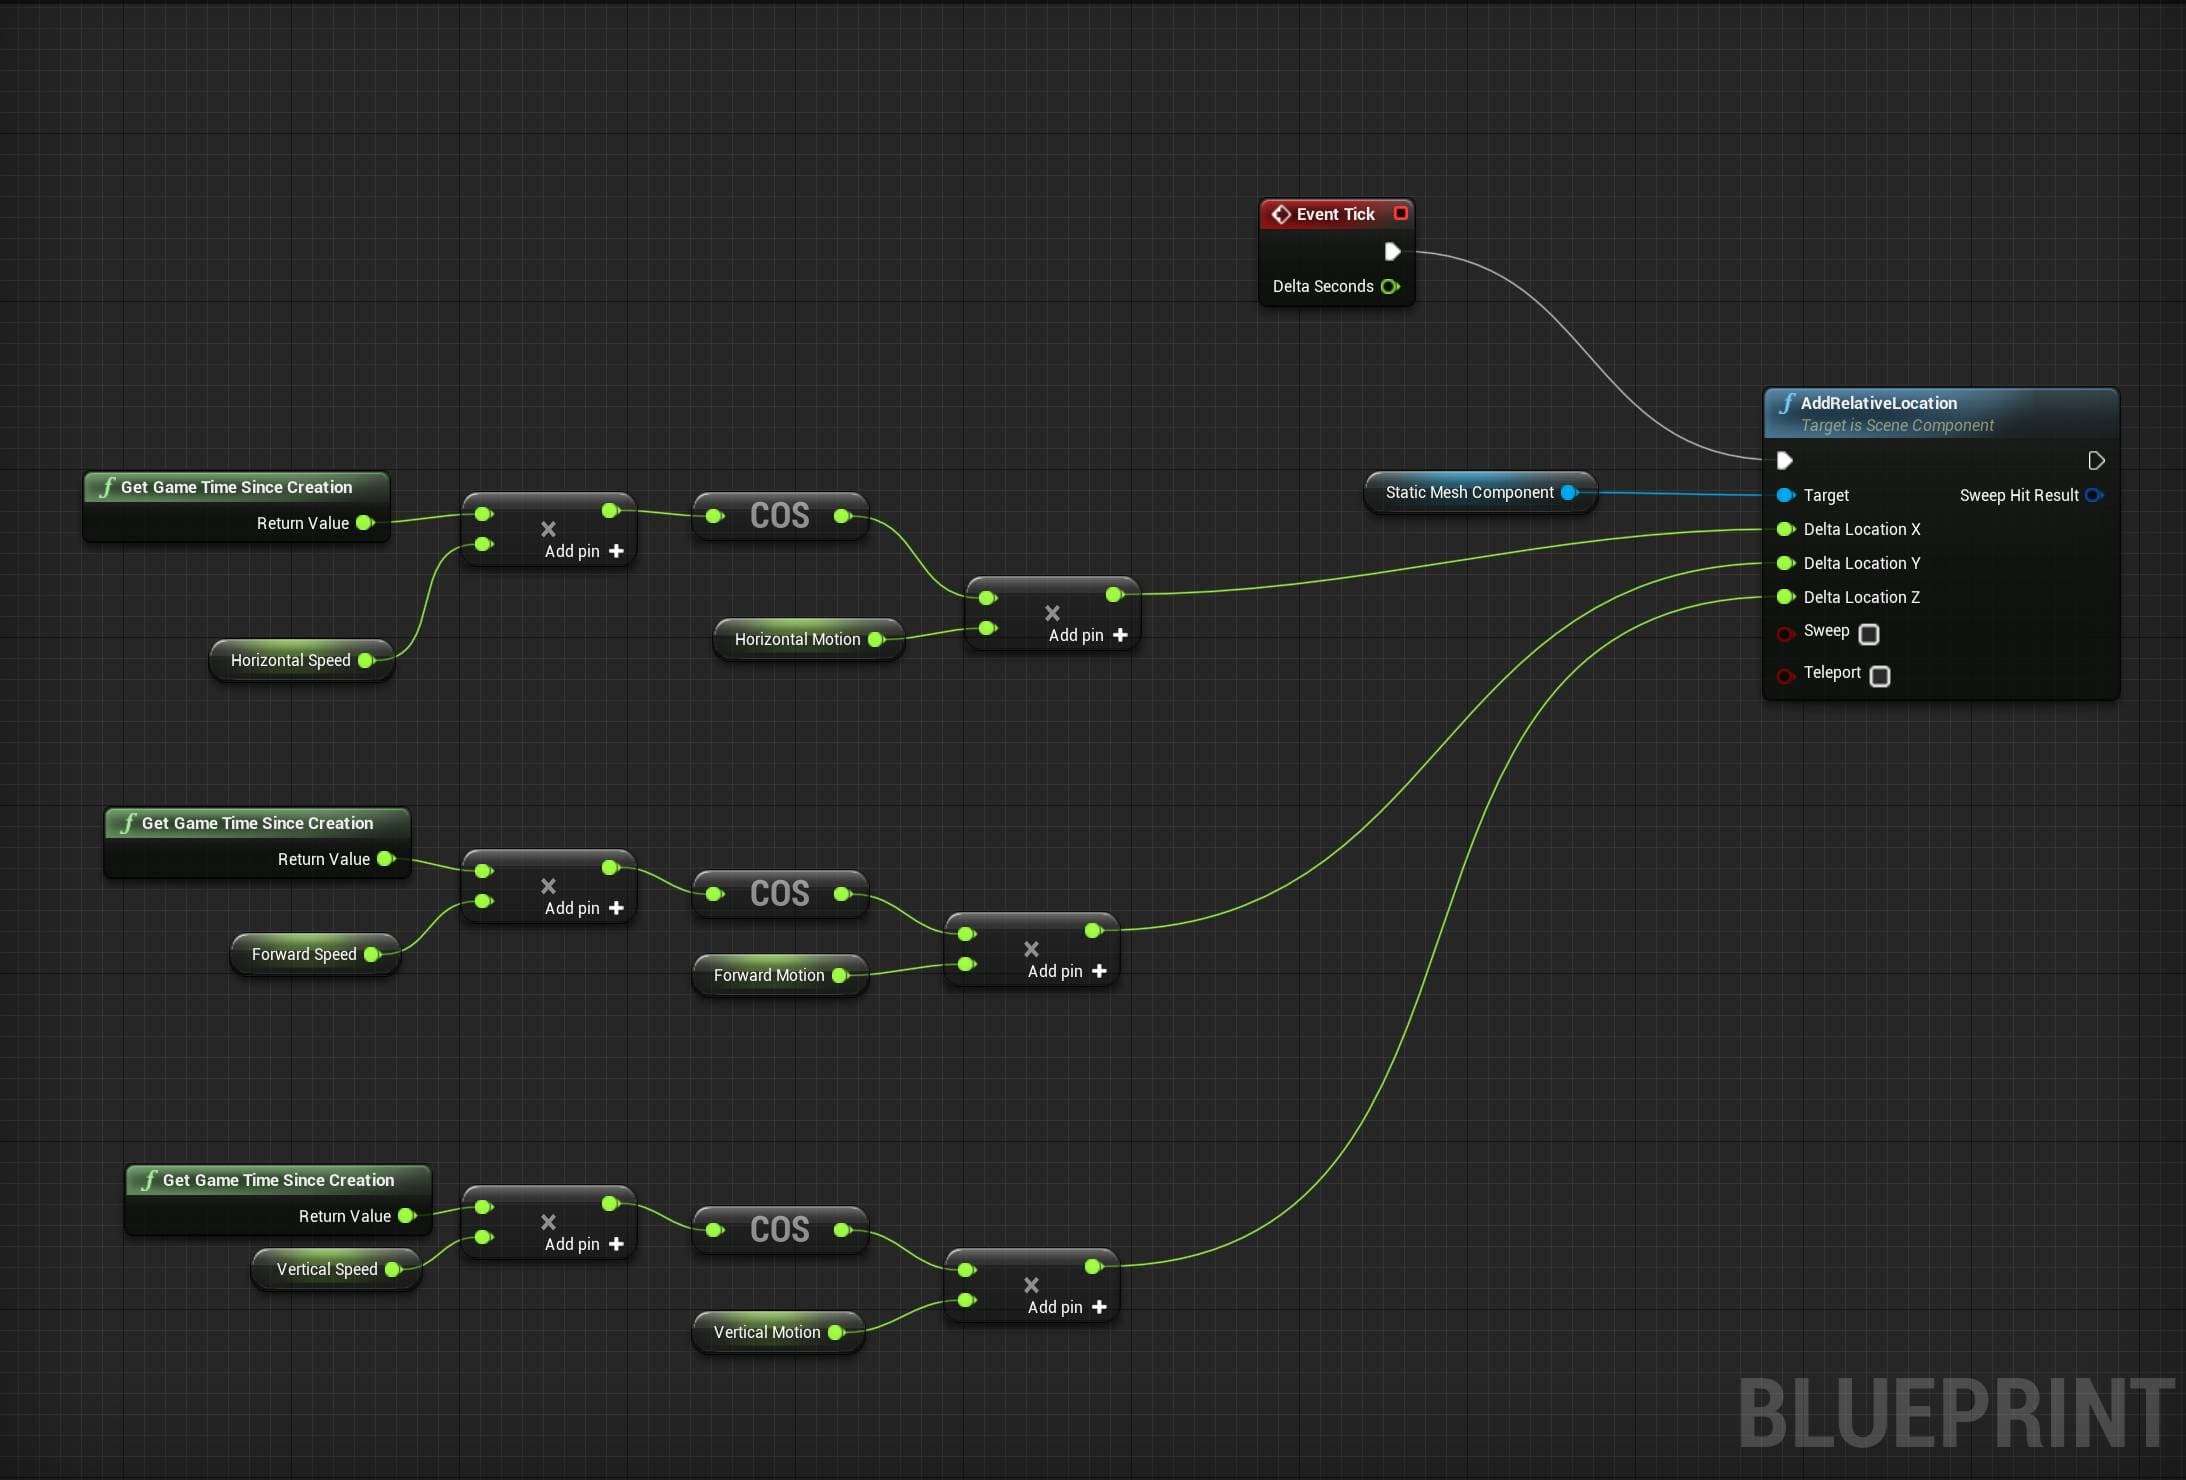
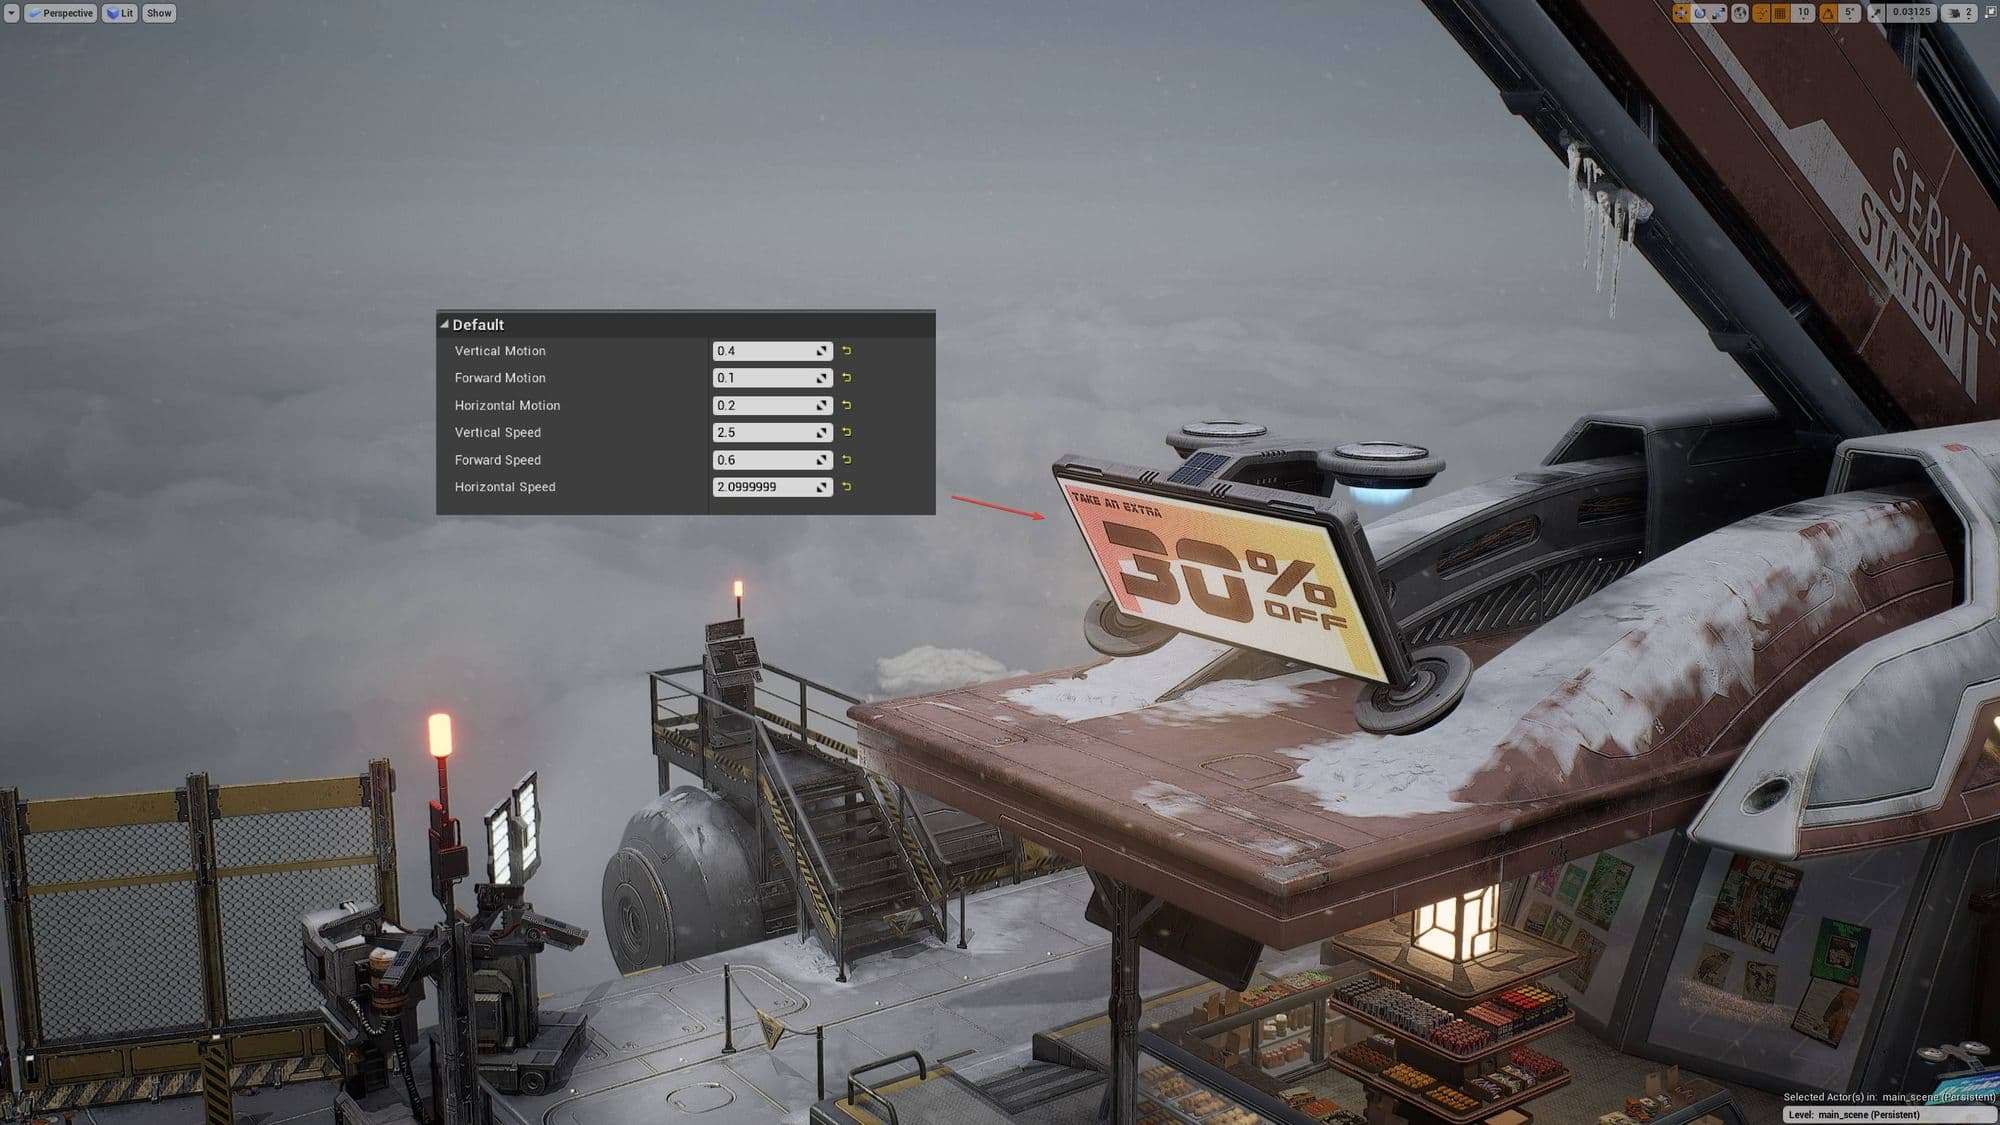
Movement blueprint
This blueprint allowed me to animate the floating sign and the vehicle procedurally with the cosine function. It's just an idle animation with small movements back and forth, up and down and left to right.
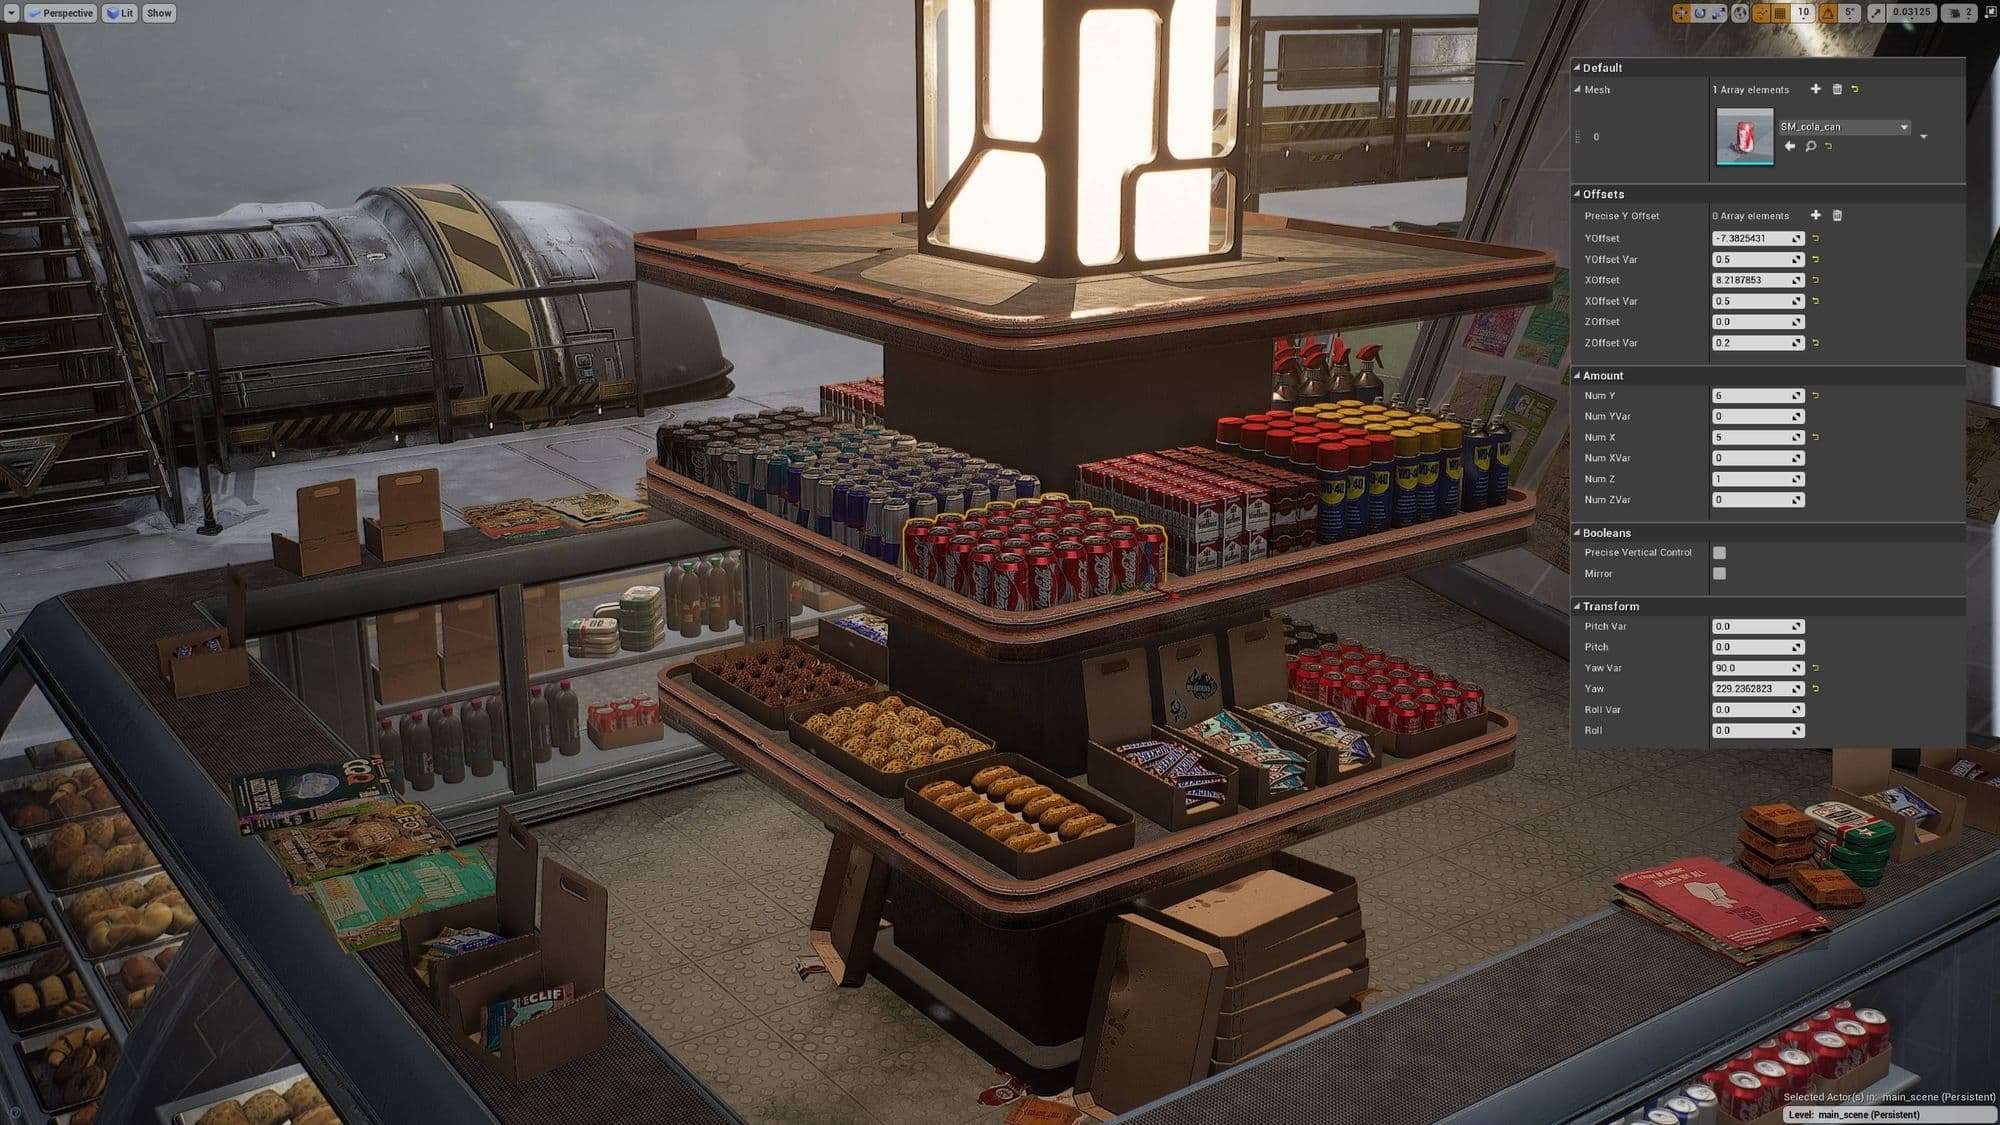
Mesh array
To populate the store shelves I created a blueprint that let me quickly create arrays of static meshes. You can adjust the amount in each axis, the offset and rotation. For every setting I added a “variation slider” to add some randomness. By default it uses instanced static meshes to help the performance. But certain assets I wanted to mirror them to get even more variety. Since you can’t mirror instances (as far as I know), as soon as you toggle the mirror boolean, it falls back to a normal static mesh components. You can also add multiple static meshes in the array and scatter them randomly.
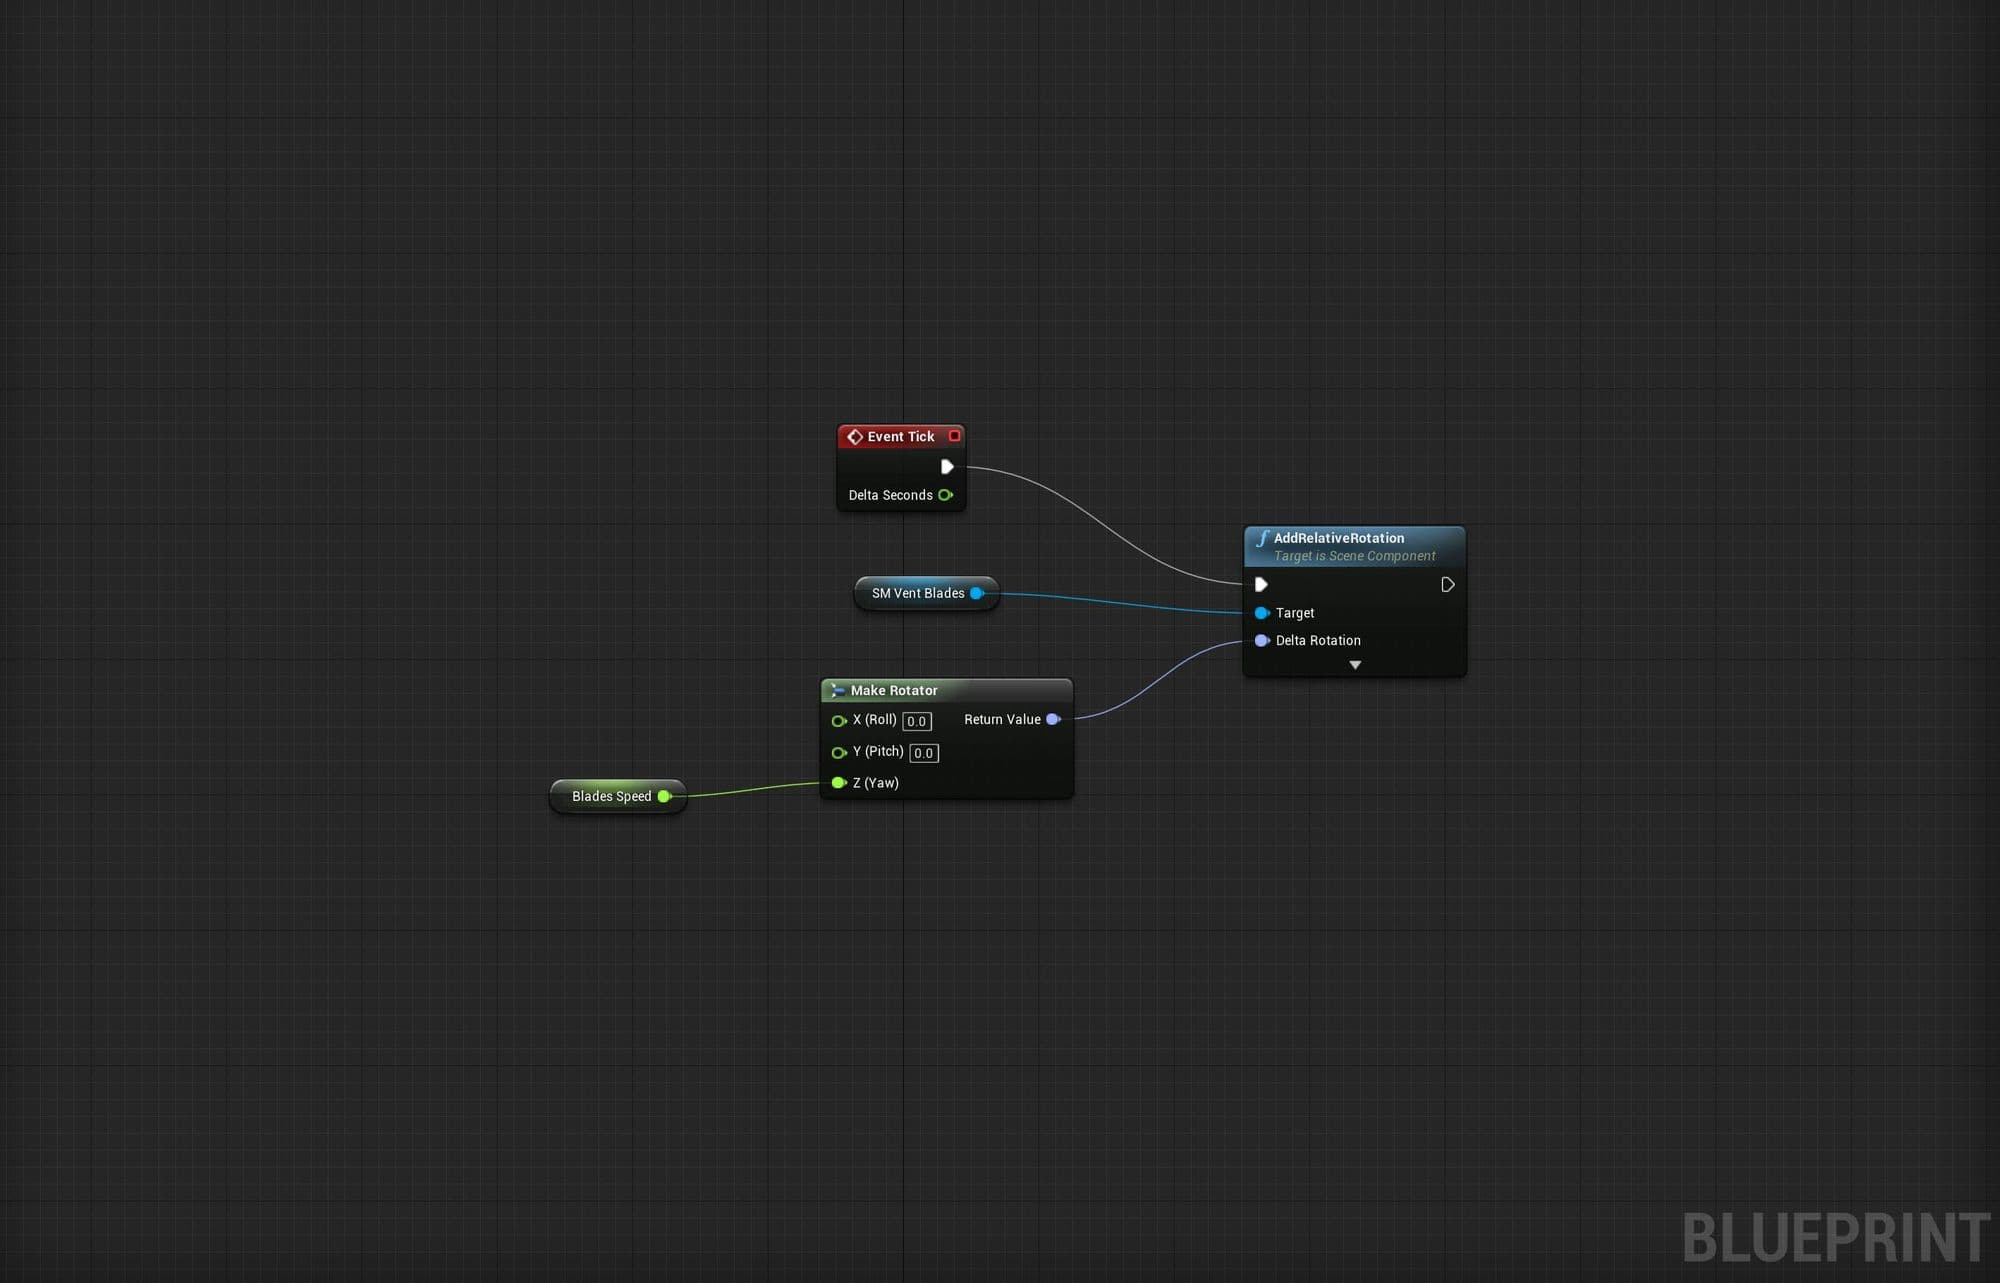
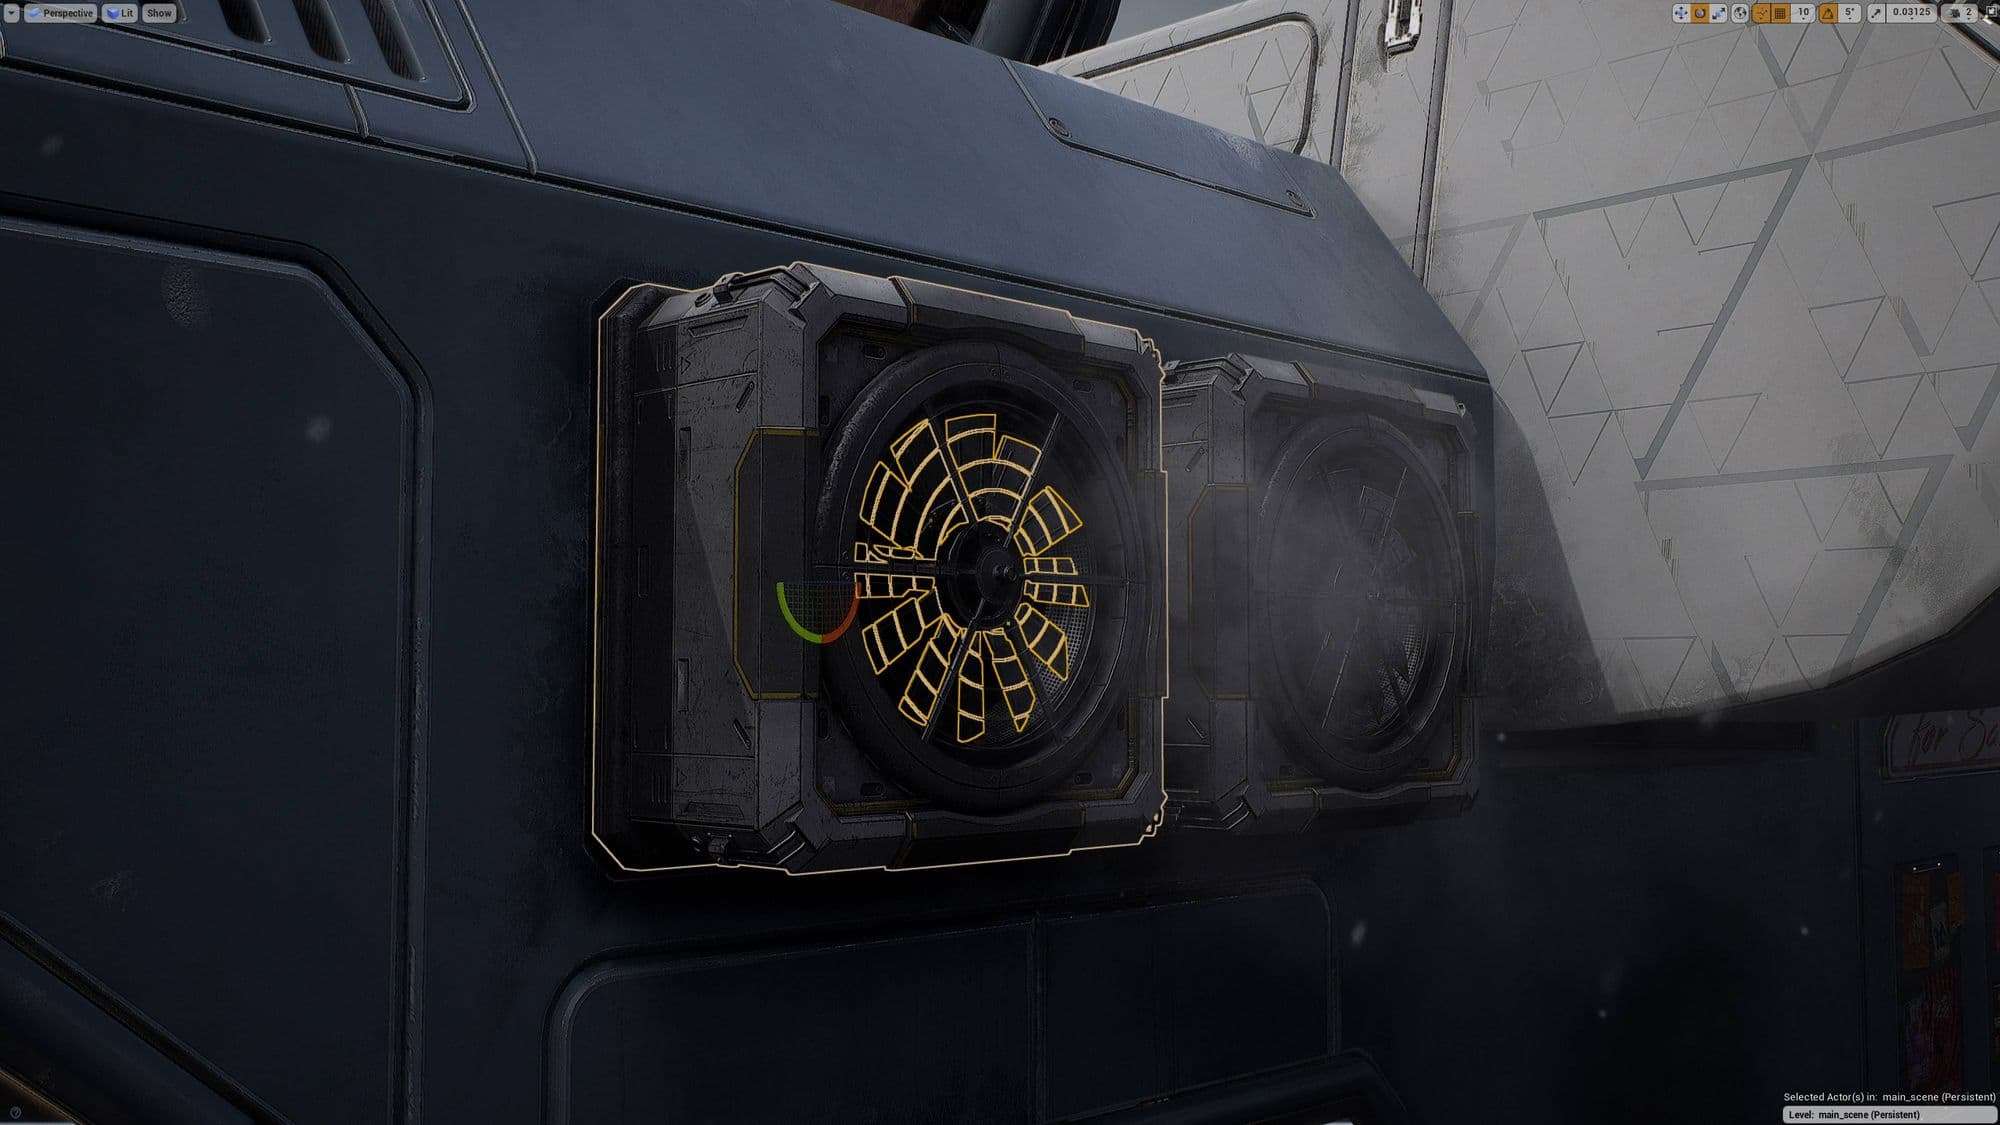
Rotating parts
For the vents in my scene I created a small blueprint to animate the blades.
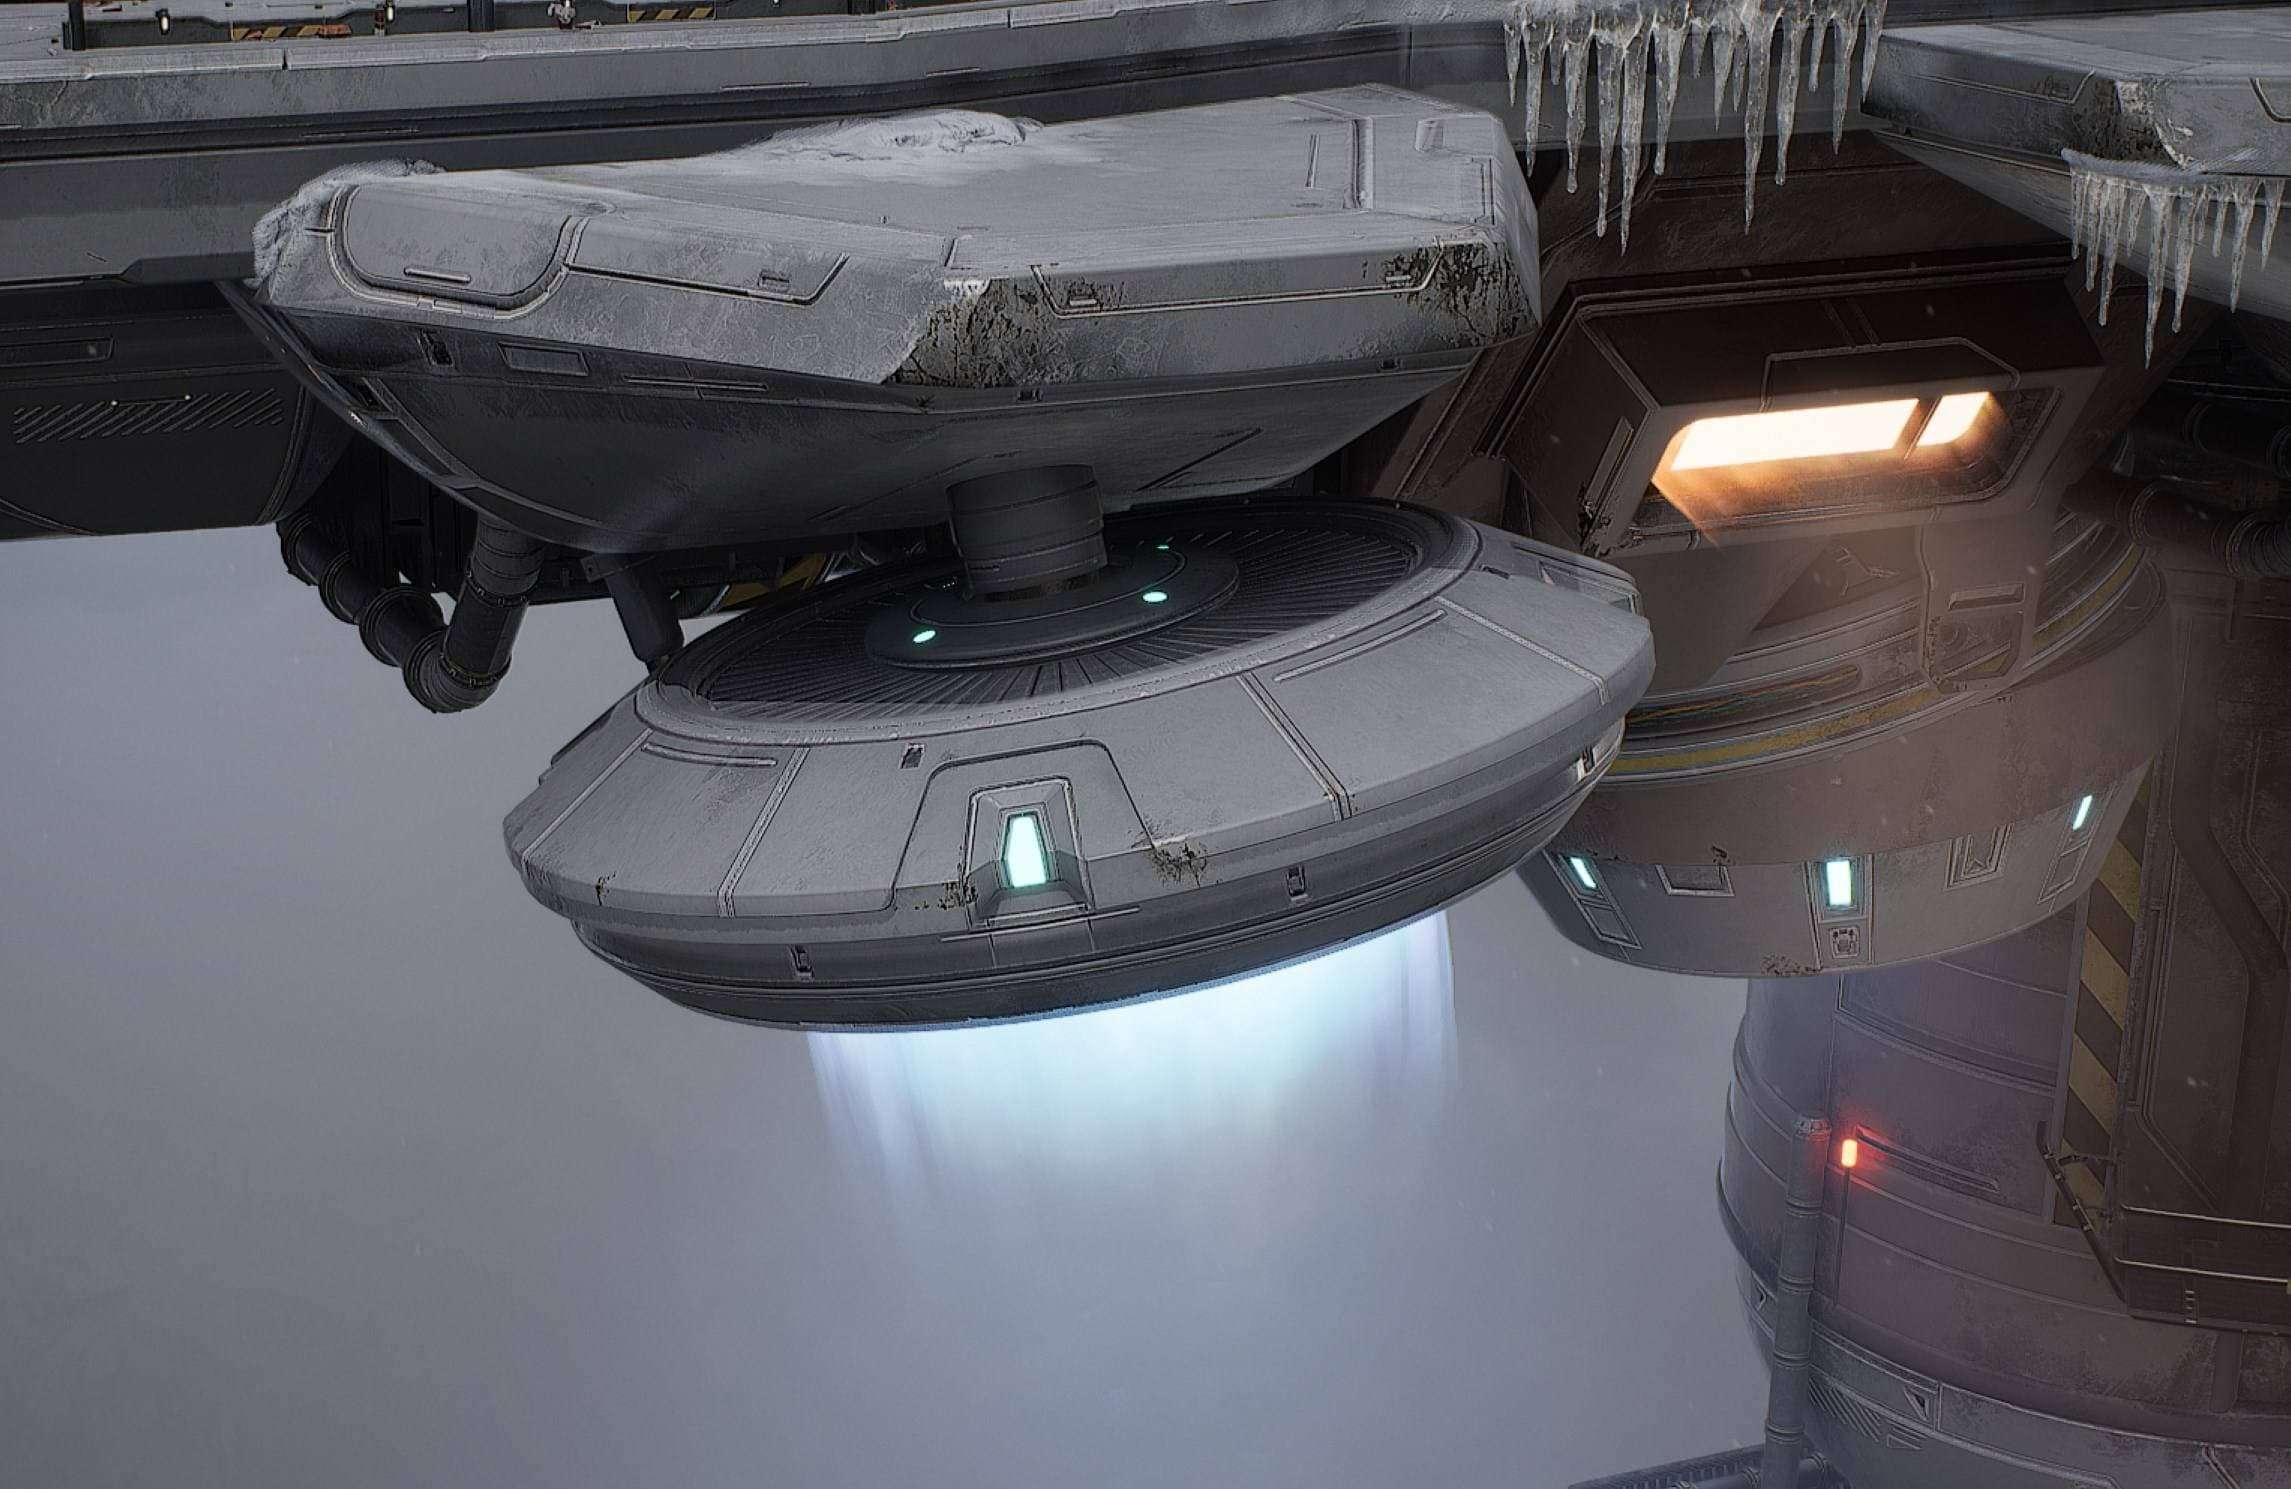
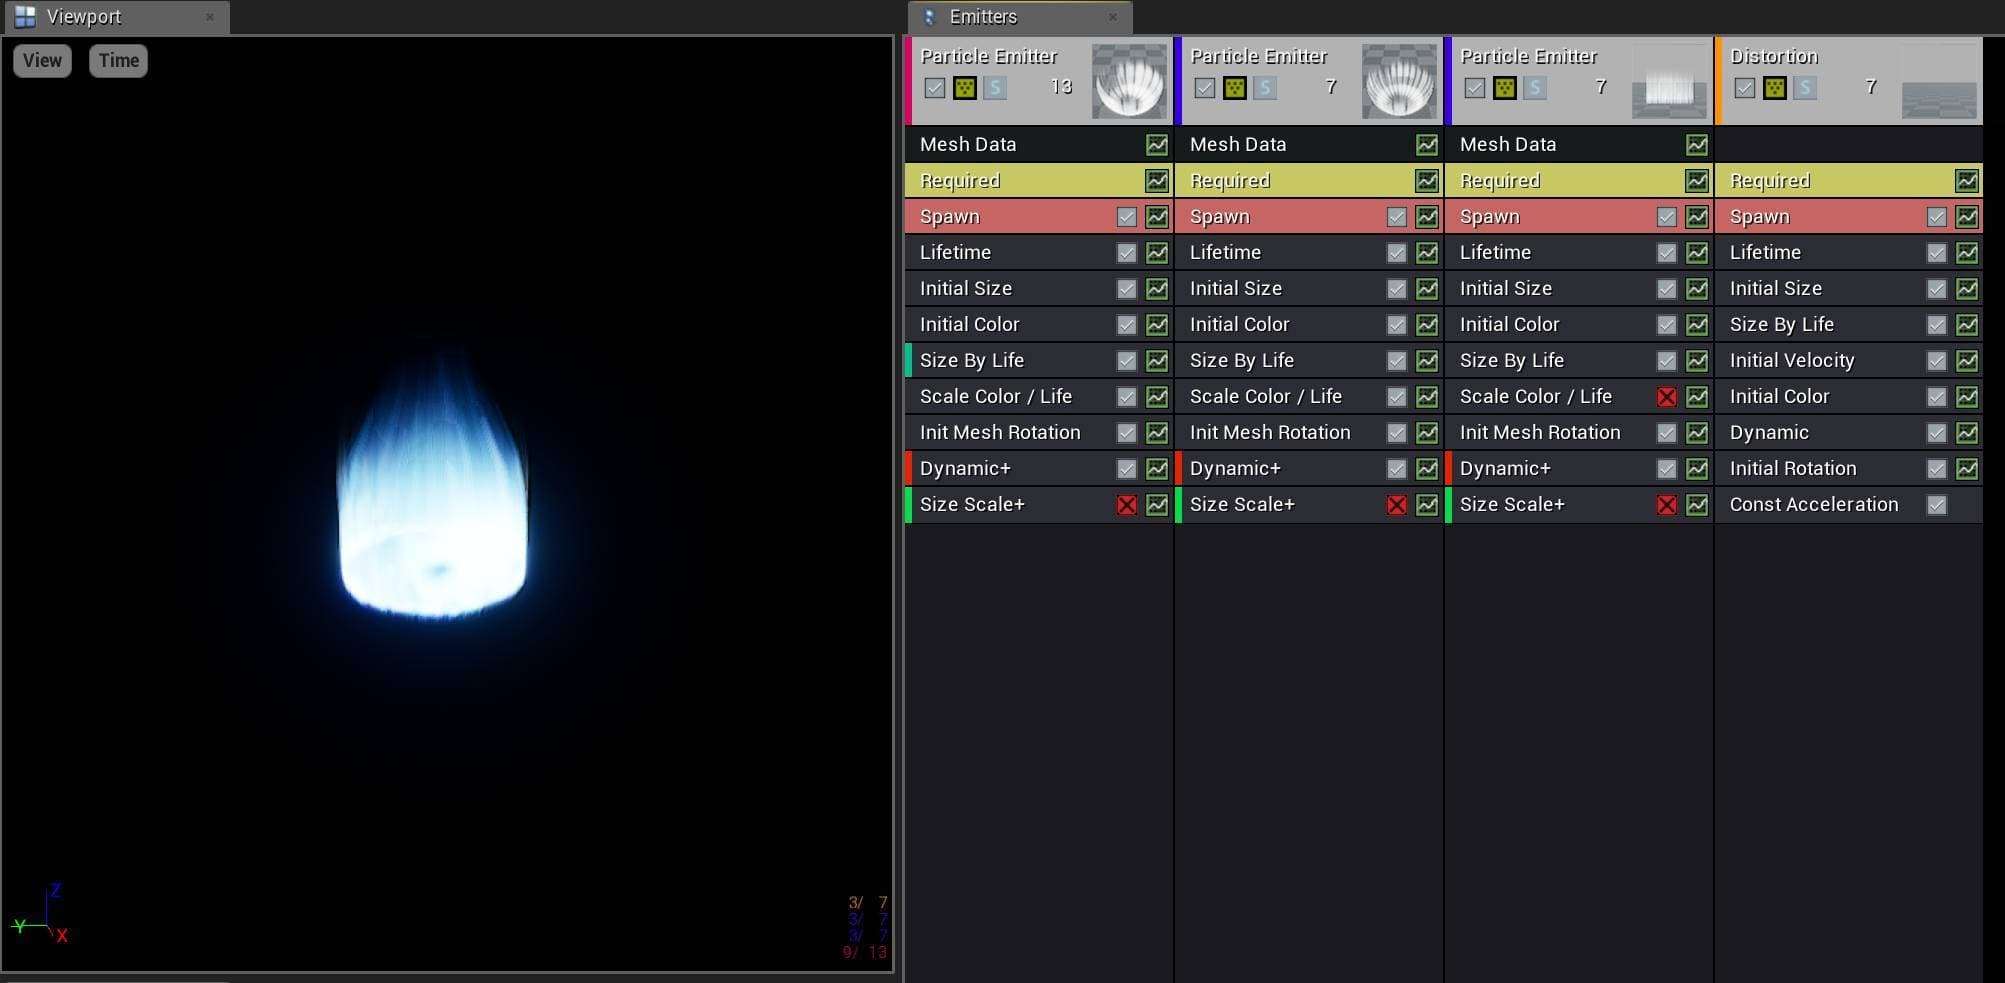
Special Effects
Jet Effect
I used an effect from the Infiltrator Demo by Epic Games as a base. After that I tweaked the settings to my liking and redid the heat distortion. The default one was quite strong and distorted the lower half of the ship too much.
Simplified, it’s a cylindrical mesh with a translucent material that is rotating quickly with some jitter. The UVs are laid out straight so the texture can tile around it.
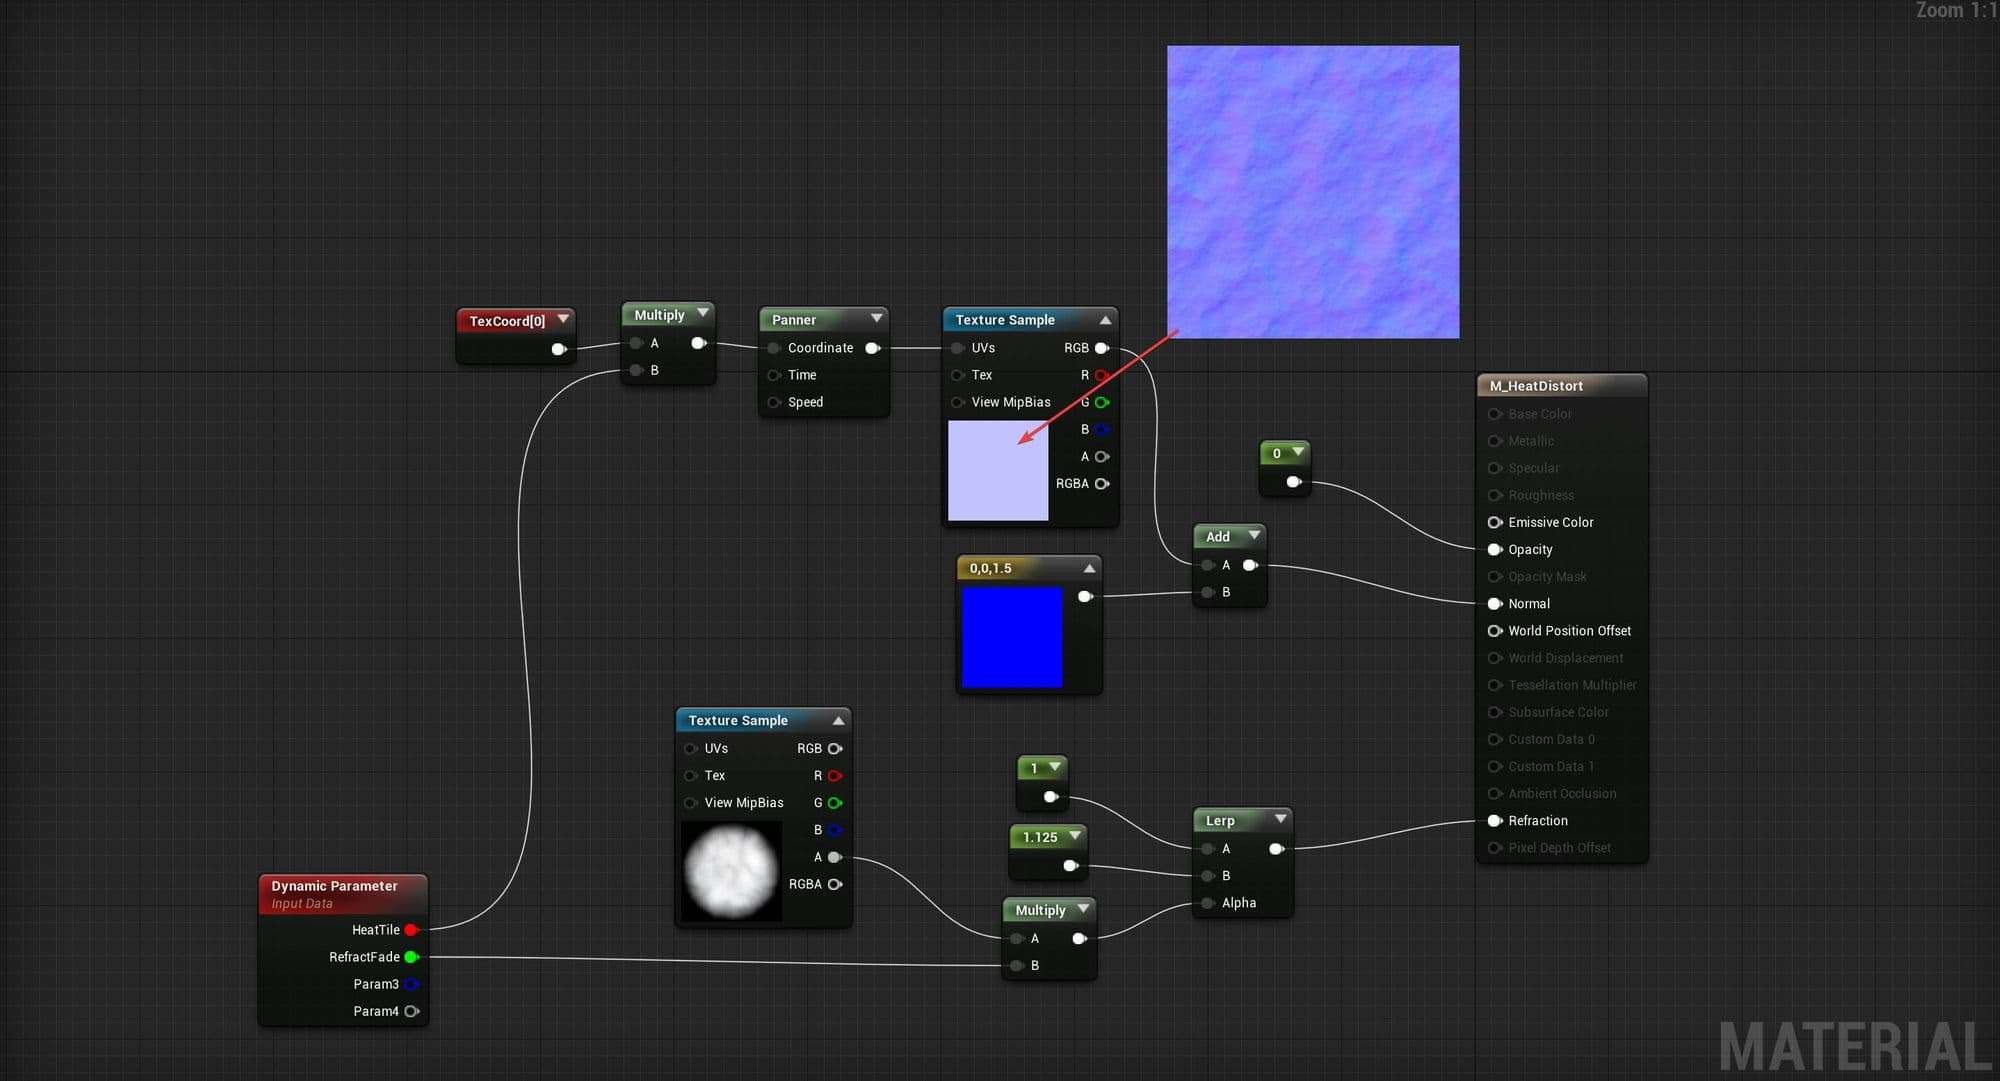
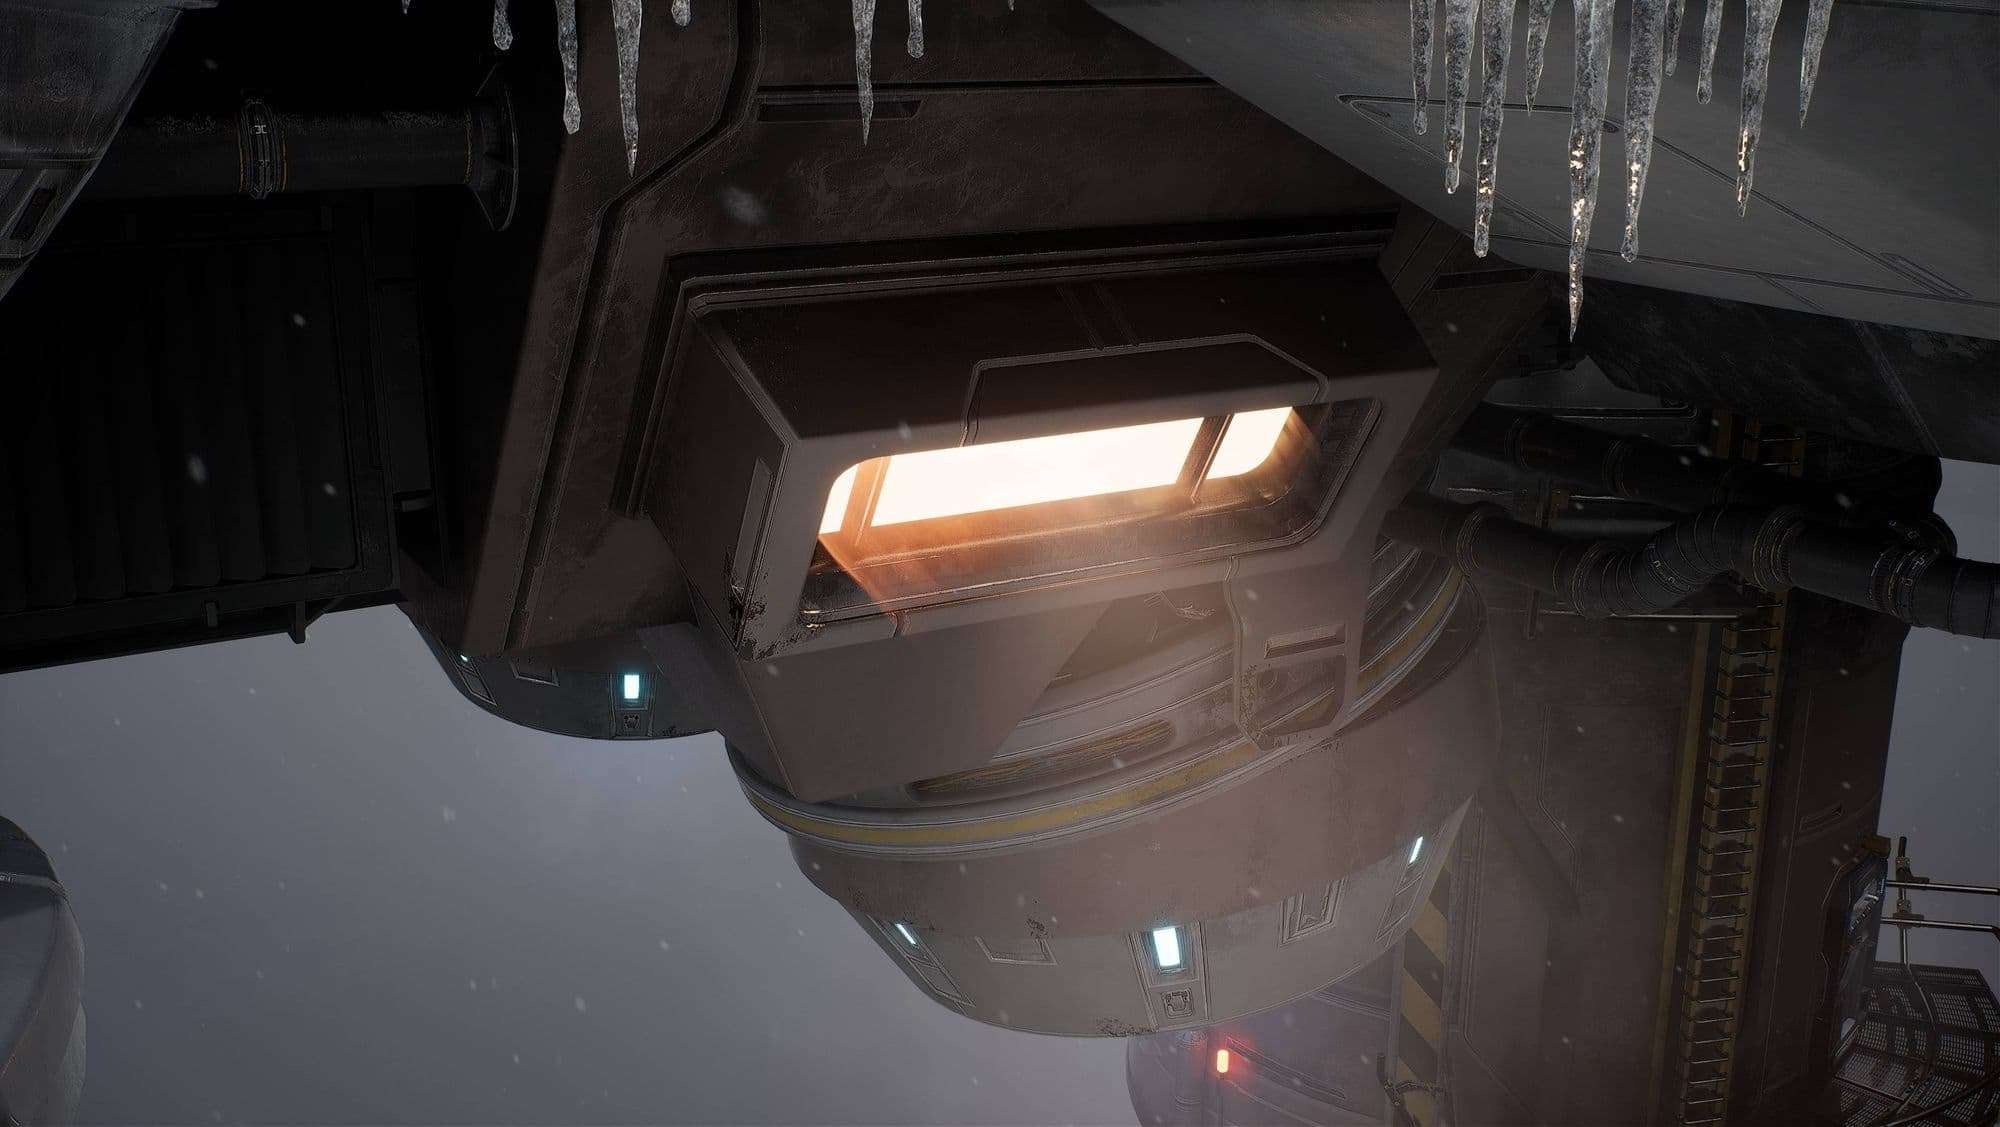
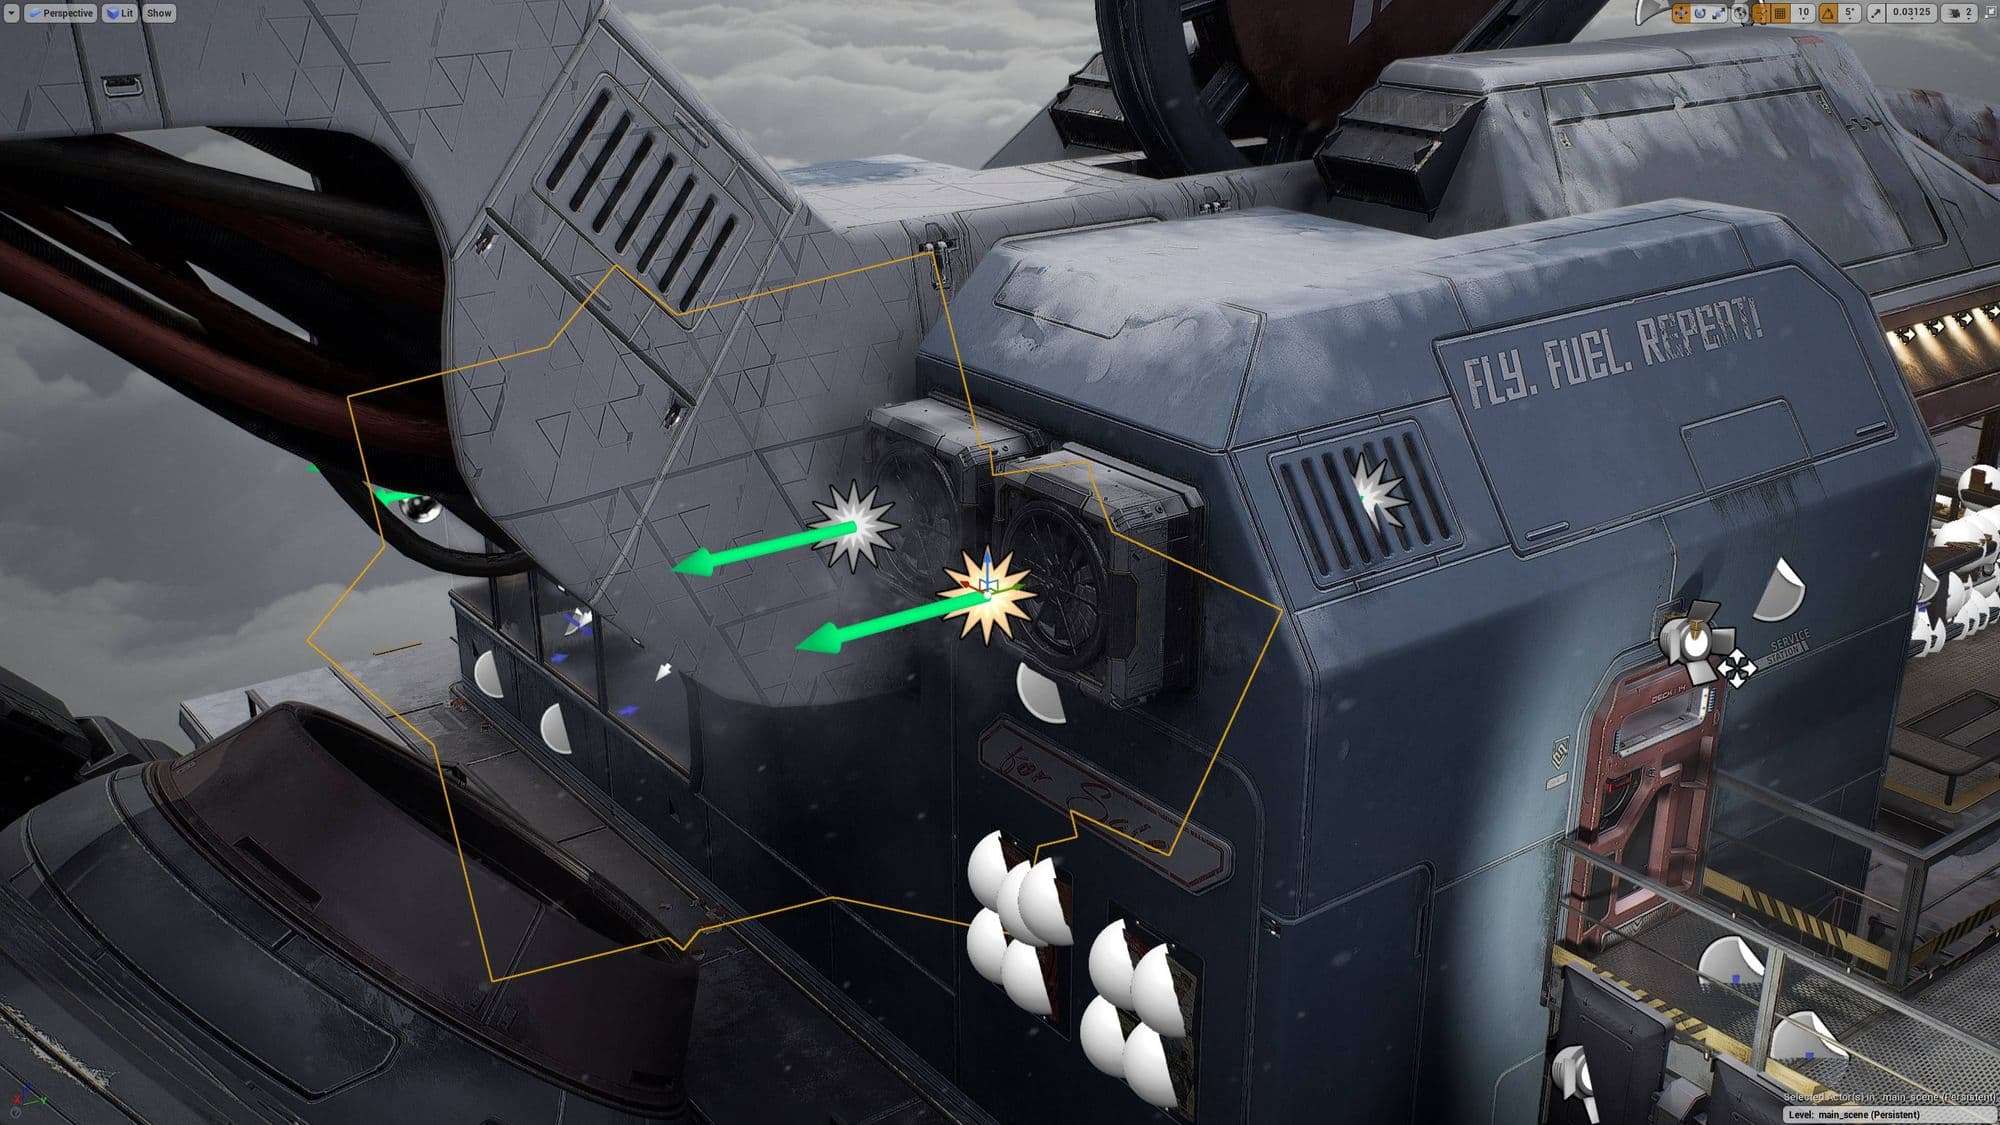
Heat distortion
For the orange side thrusters, I tweaked the color and scaled the mesh to fit to the different exhaust shape. Also, some steam and fog from vents or the engines add a lot to the scene and mood.
The feedback loop
Fortunately I had a Mentor for this project: Sean Obridgewitch. He guided me through the entire project and whenever I had a question, I could directly ask him. We had weekly feedback sessions and wrote emails almost daily, which, I can recommend since it gives you some pressure to have something presentable by the end of each day.
The Think Tank community is very supportive. For example, I organised some live sessions together with another Think Tank student (Nikhil Kedige), where students from different terms were able to show off their work and receive feedback.
I’m still very much at the beginning of my career, so who am I to give advice?! However, here are some things that I picked up so far: My number one advice is patience. Like most things in life, good things take time. Same with 3D, to learn all the software and art fundamentals takes a lot of time so make sure you’re in for the long run.
Second most important one is: Immerse yourself in the 3D world. There are so many resources out there. - Discord channels- Podcasts- Tutorials- Articles (80.lv, exp-points, Polycount). So there is never a situation where I don’t know what to do. Try to be too busy with 3D, that way you don't have time for distractions.
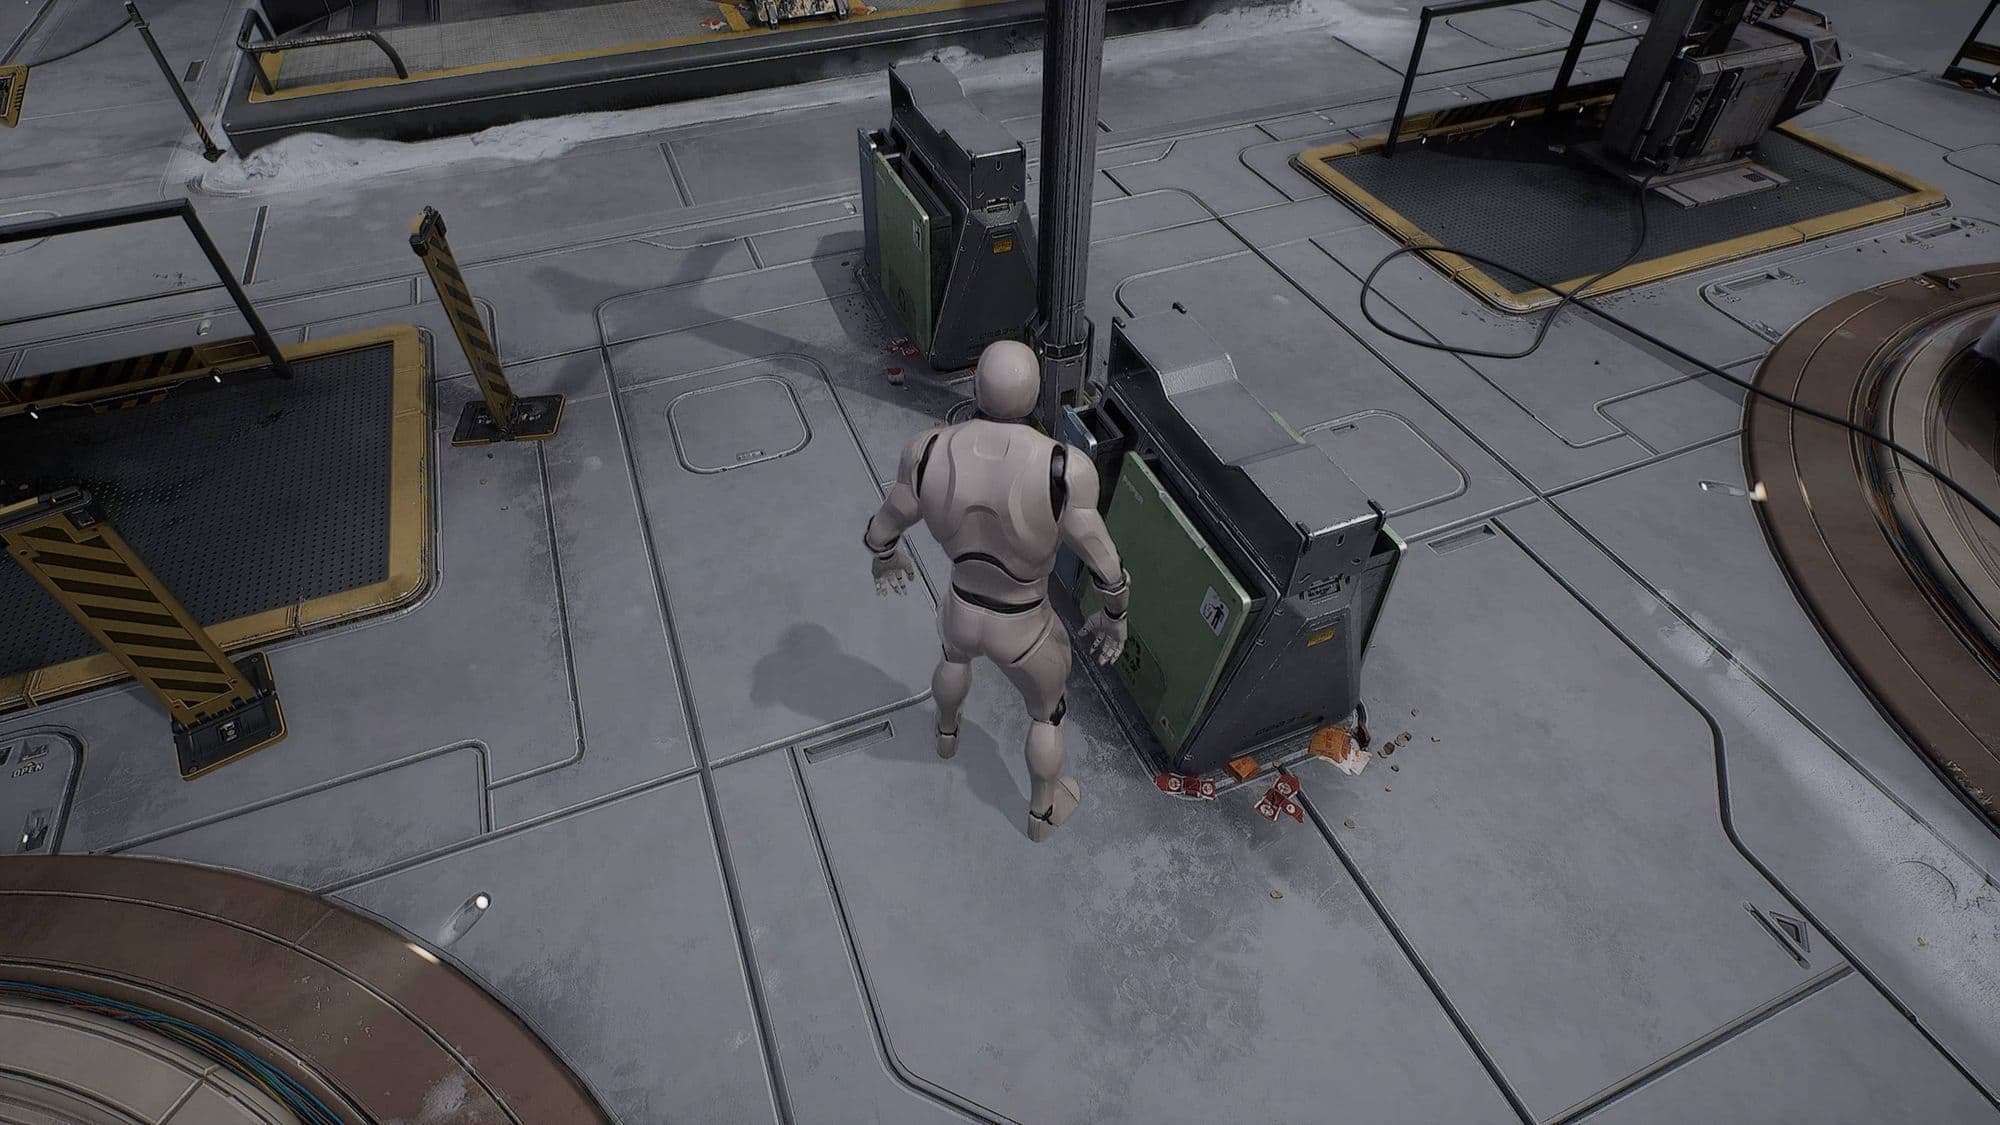
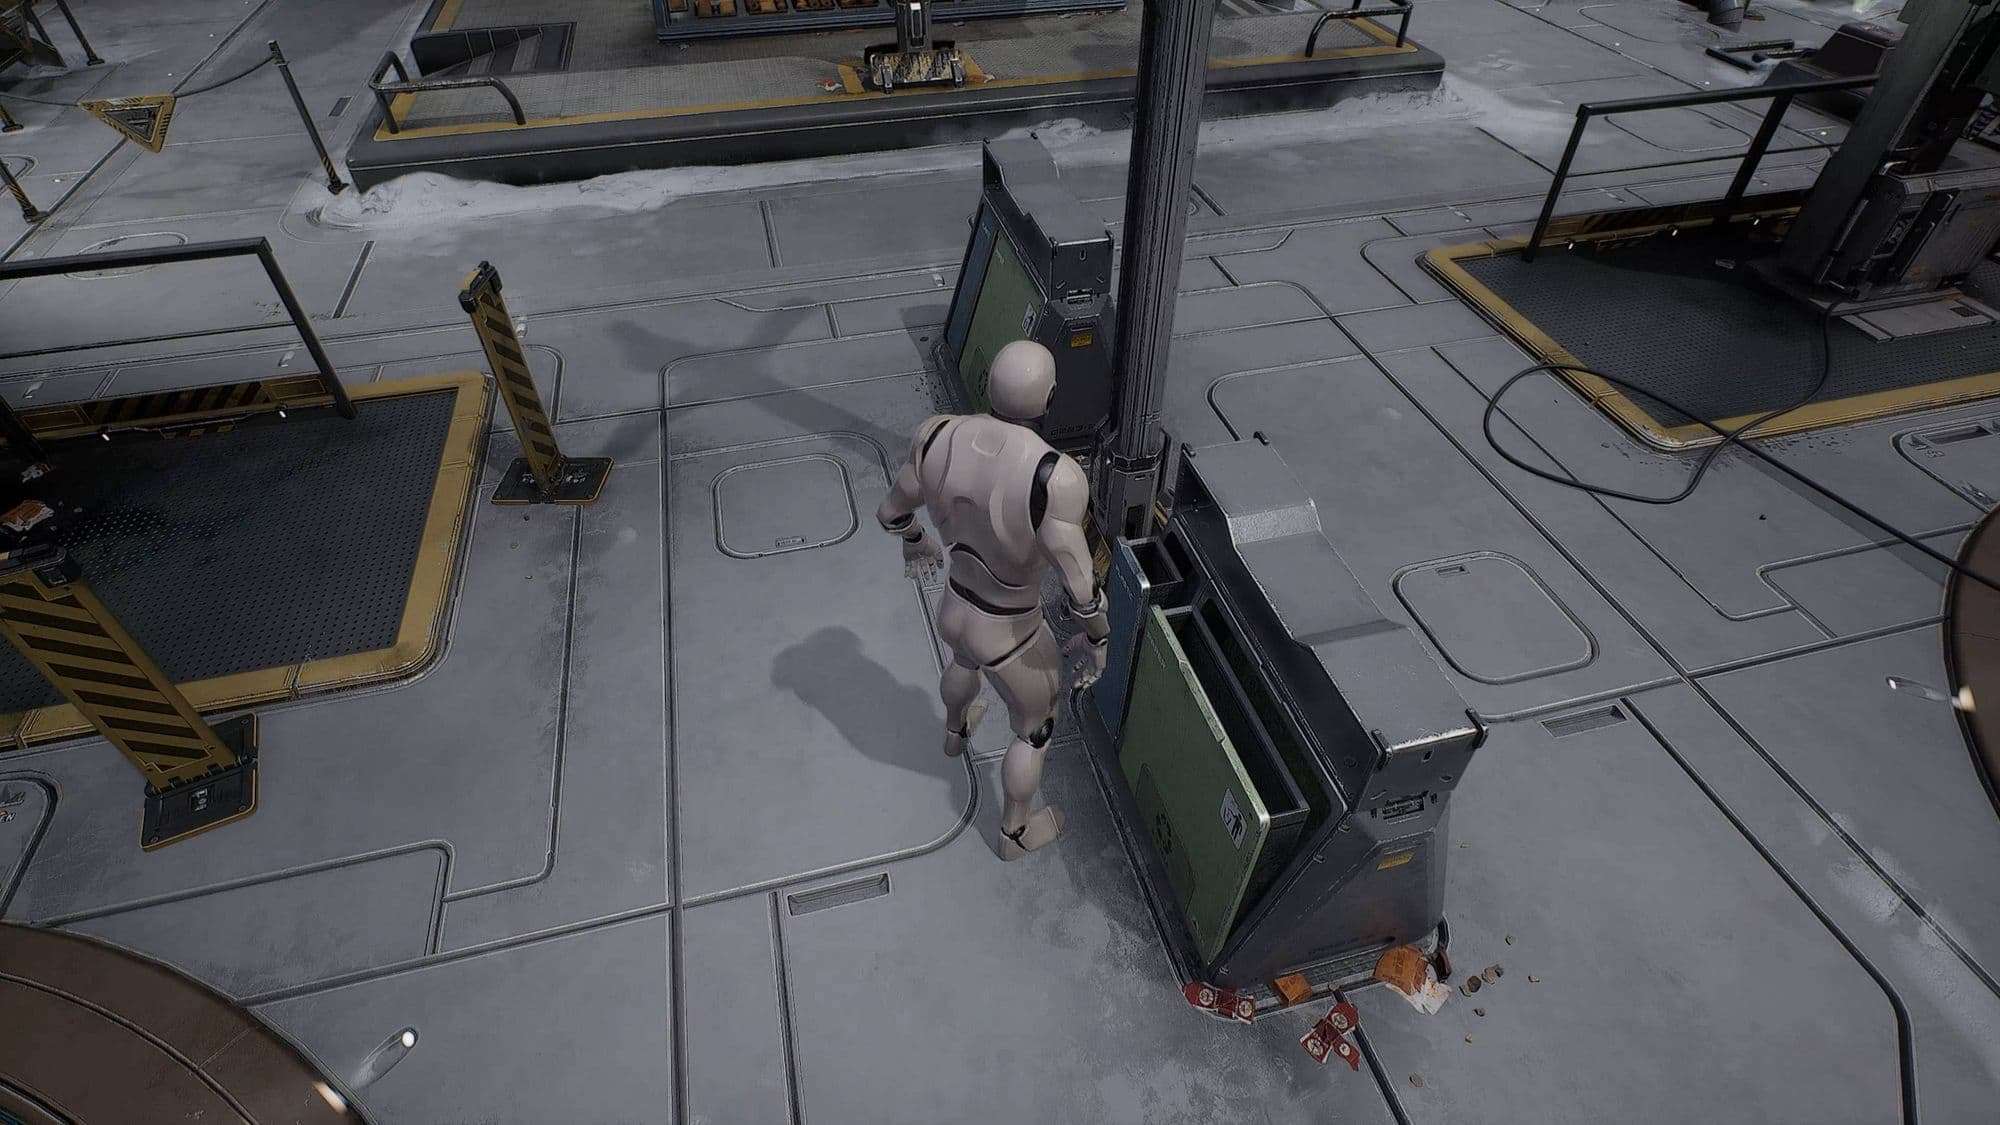
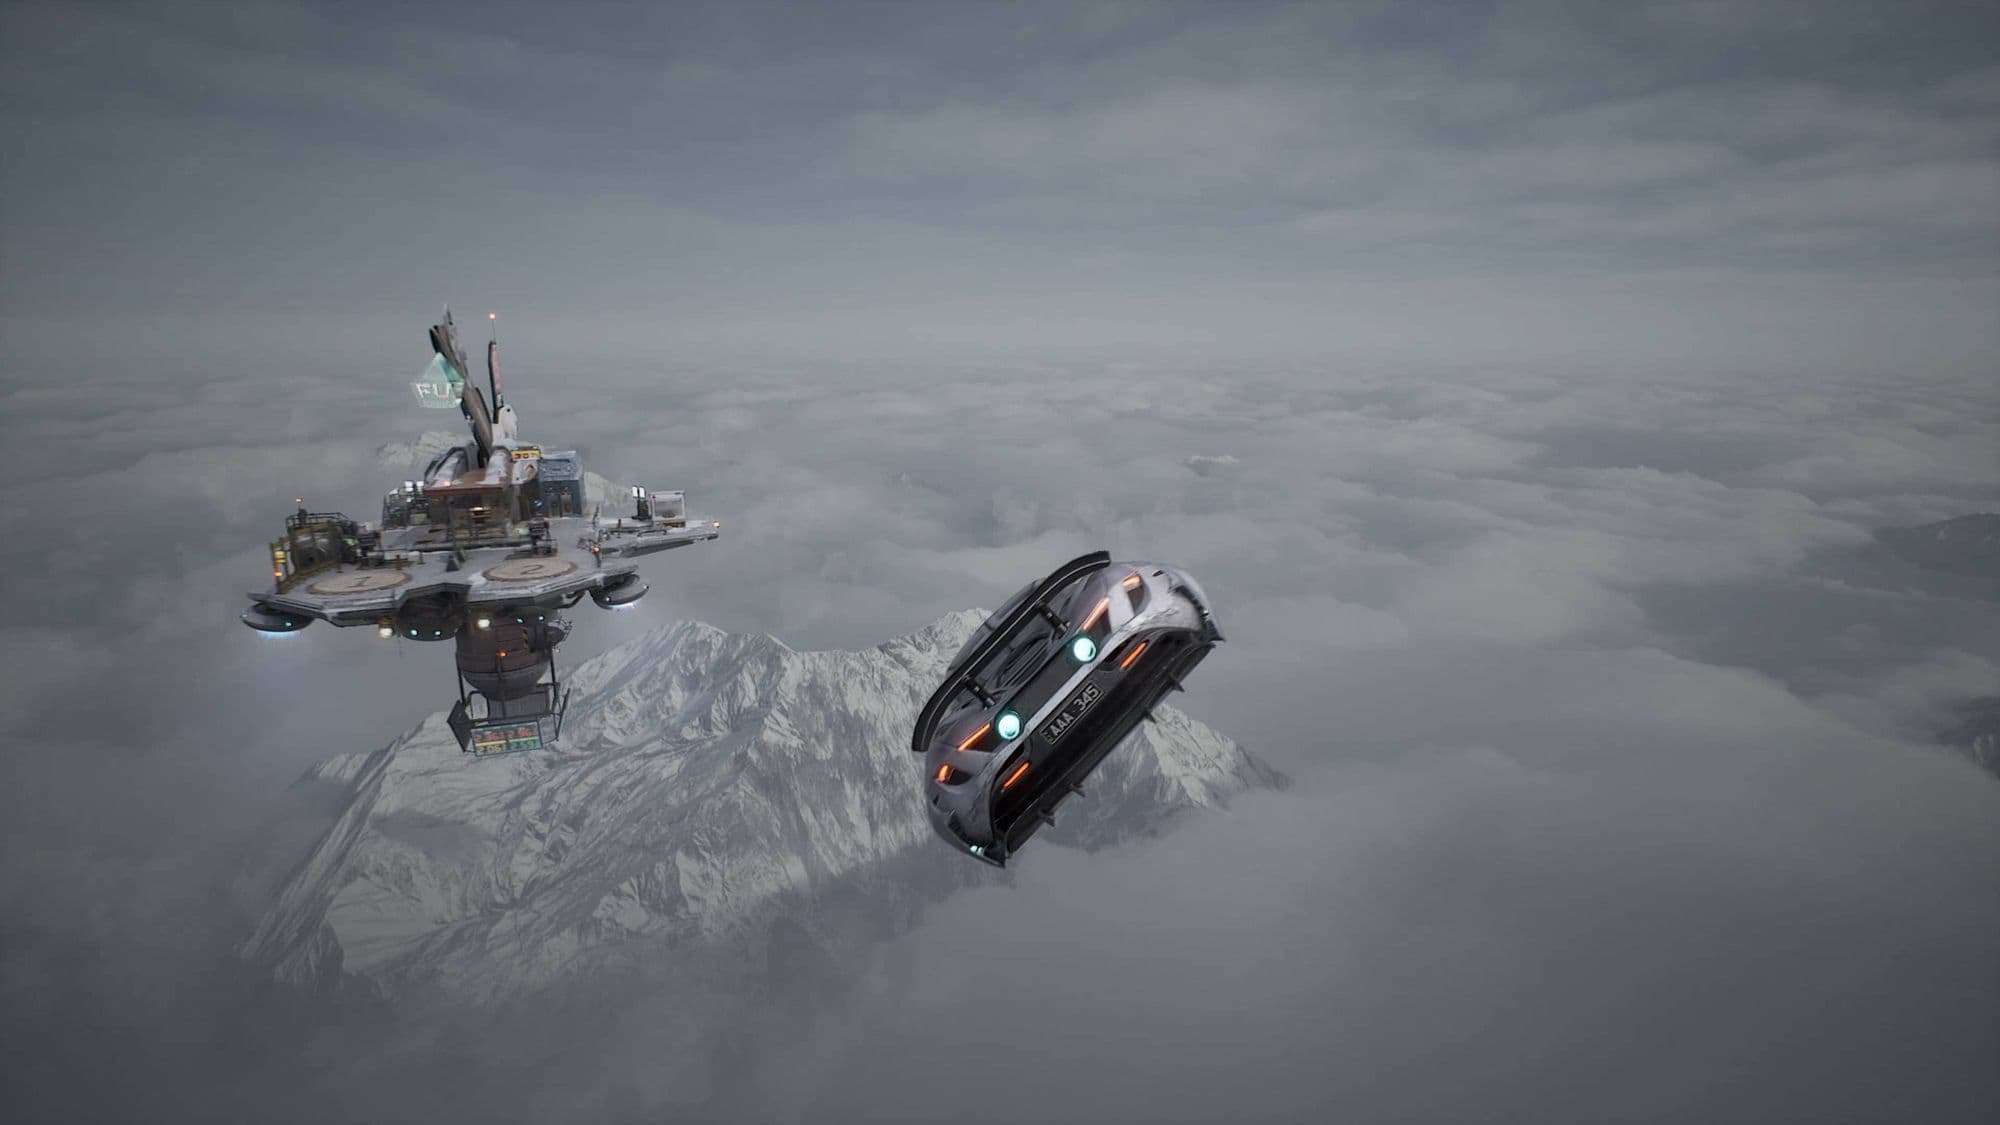
Working constantly on something instead of small bursts is a big one. By working just a few hours everyday you will get so much more done than doing crazy weekends and then recovering from it. Sometimes it’s hard to start and it happens quite often to me that I’m not that motivated at the beginning, but after a few minutes I can’t stop! If you encounter days where you really don’t feel like you want to continue working on your project, try something new to freshen up, but still related to 3D or to the environment. For example for this project, I added some functionality. When you're close to the trash bins, you can open/close them with the “E” key. Furthermore I made the car flyable with a blueprint. Doing something just slightly different is most of the time enough for me, to recharge my batteries and continue working.
Interactive trash bins
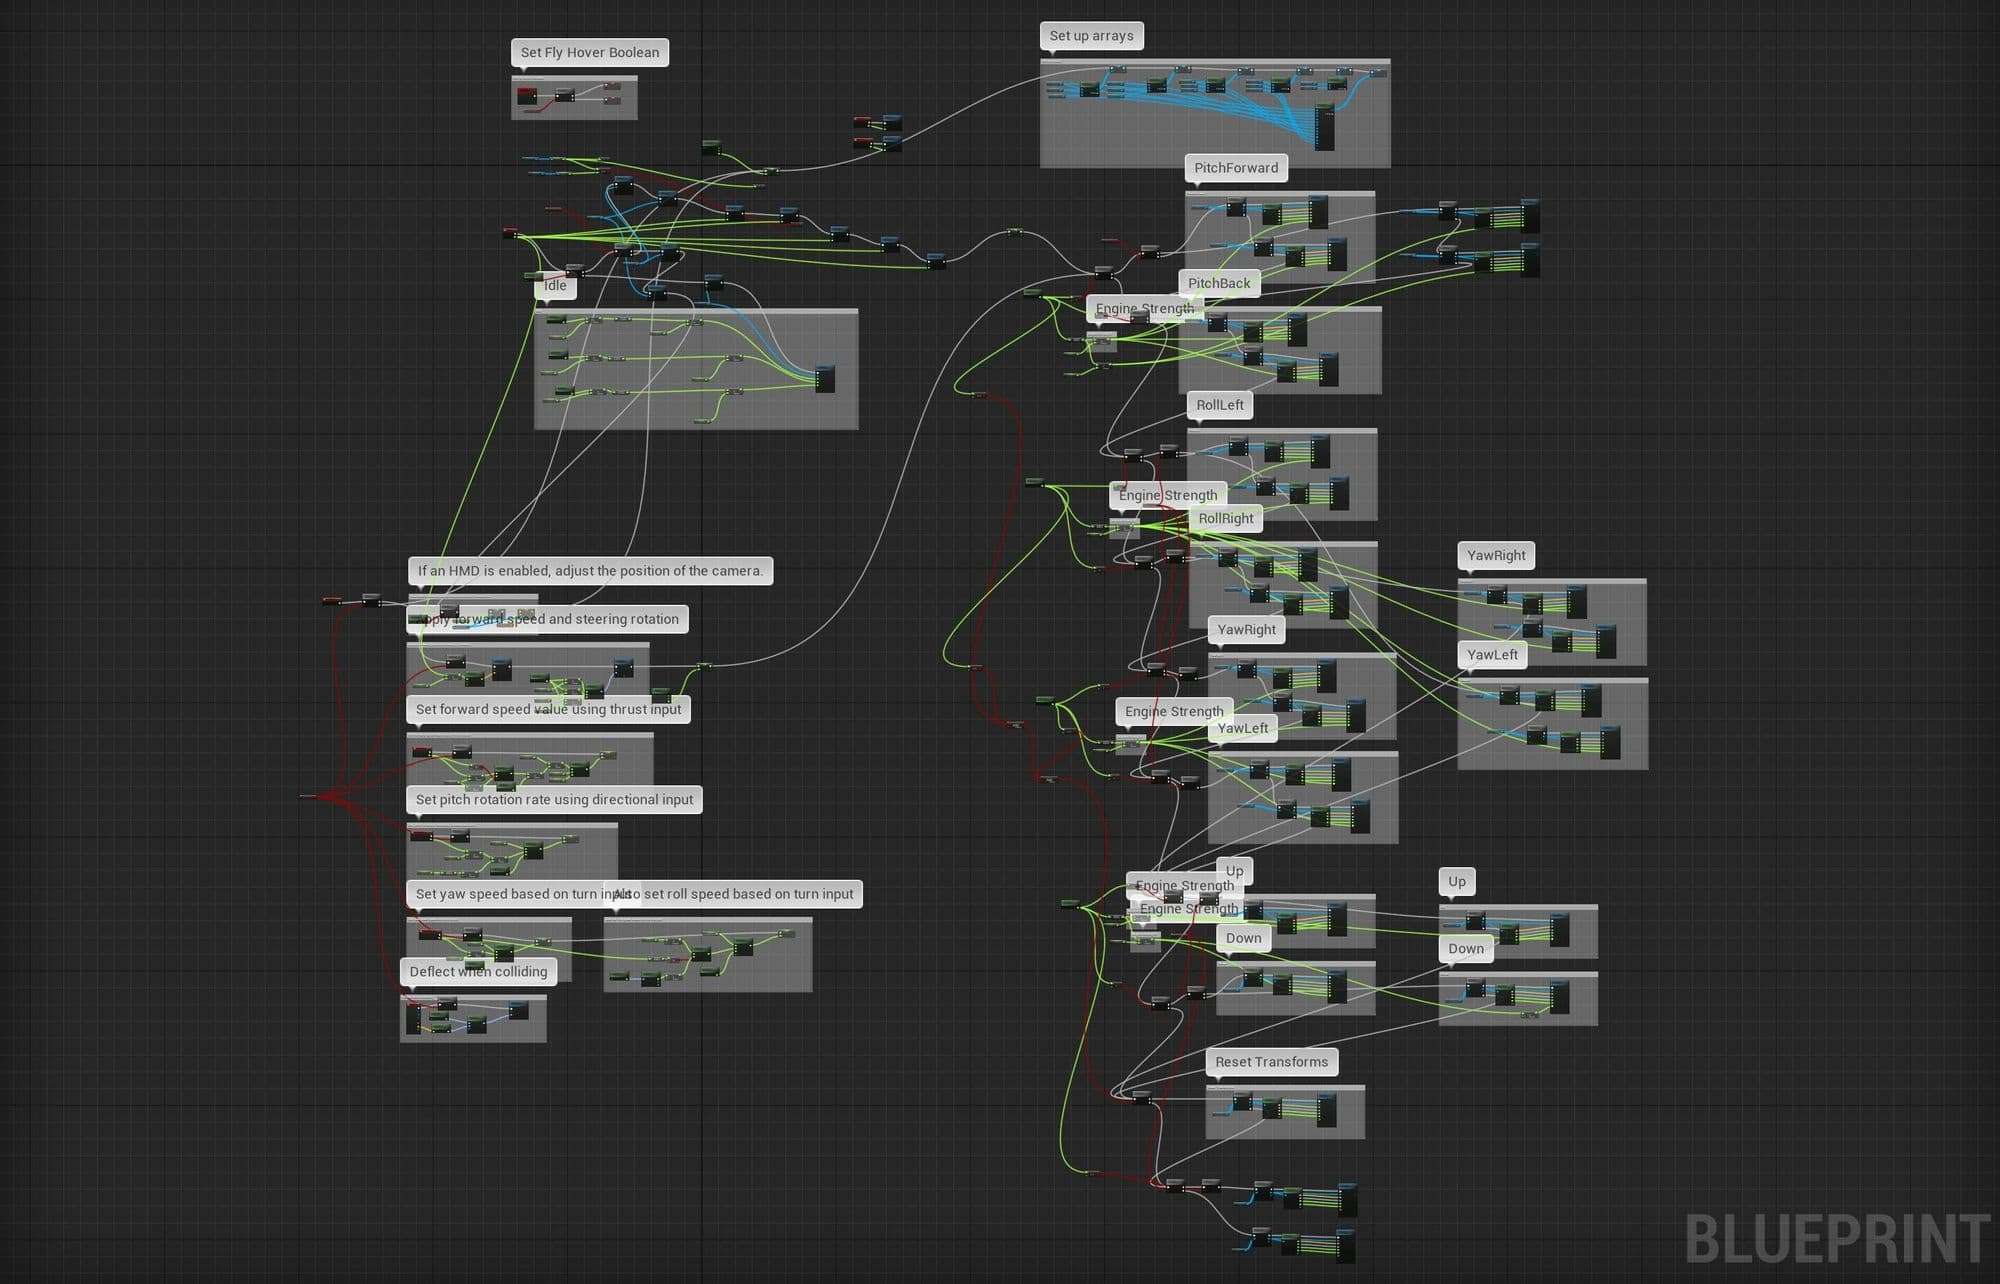
The car has two modes, a hover mode and flying mode. When hovering the controls are similar to a quadcopter, optimal for landing and maneuvering in tight areas. The flying mode is inspired by the “Flying” template in Unreal's New Project section and behaves more like a plane so you can roll, yaw and pitch.
I’m not a programmer and it’s not pretty, but the whole idea was to create something that just works. I had a lot of fun creating this, tweaking the variables to make it controllable and by the end of it, I was recharged and continued with environment art ;)
I hope you found something useful and maybe learned something new. Feel free to contact me if you have any questions [email protected]