Learn How to Create Digital Art from Traditional Artifacts
Kasita walks through the creation of "Wayang Dhalang". This project's aim was to use the technical skills taught in Gnomon to produce a piece that pays homage to traditional craftsmanship.
Kasita walks through the creation of "Wayang Dhalang". This project's aim was to use the technical skills taught in Gnomon to produce a piece that pays homage to traditional craftsmanship.
Kasita Wonowidjojo was born in Indonesia, raised in Singapore, and moved to the United States for an extended time. Growing up, Kisita was somewhat detached from her native country. Indonesia has a long history of arts and crafts - Batik textiles, wicker handicrafts, wood carving, and terracotta work are some examples. Unfortunately, many of these traditional art forms are neglected in preference for a modern digital world.
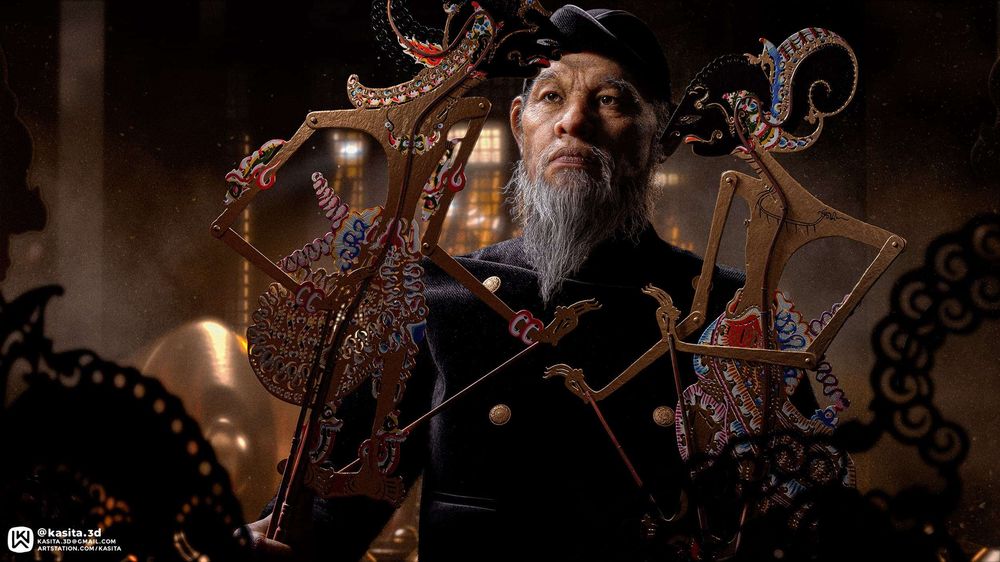
Graduate of the Gnomon School of Visual Effects, Kasita walks us through her digital art piece called "Wayang Dhalang" (translated: "Shadow Puppeteer") from her entry to the Rookie Awards 2019.
Wayang refers to classical Javanese puppet theatre performed by a Dhalang (Puppeteer); a dying art form played out in casual street-side booths or midnight-to-dawn shows during various important events. My father used to collect these puppets and I remember finding them so beautiful. These were his forms of entertainment growing up.
Dhalangs are artists and storytellers, weaving epic tales behind a translucent screen. I wanted the piece to pay tribute to their craft because I find it mimics mine, as I try to create stories through my own digital screen.
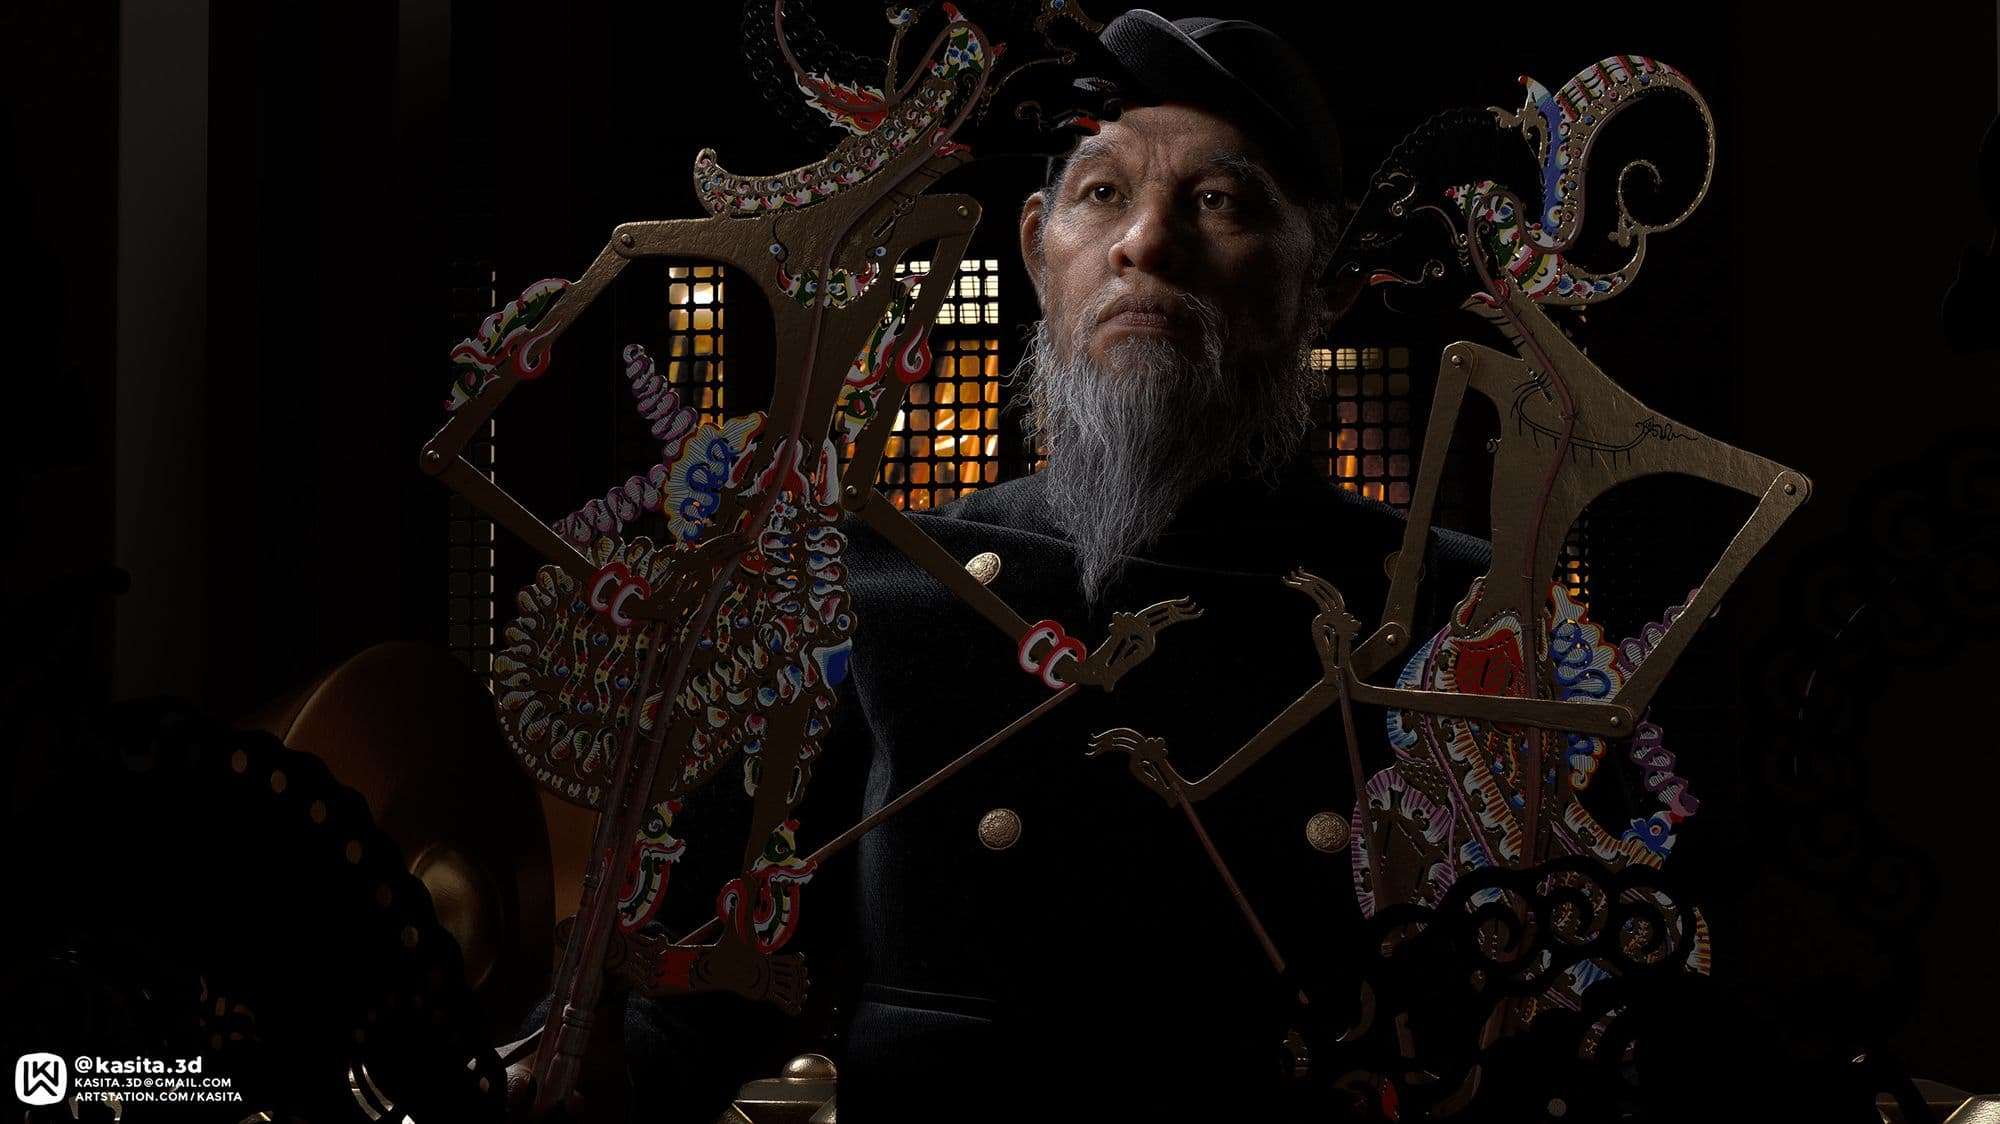
Compositionally, I wanted to create a shot that felt intimate. Depicting an artist in touch with his medium. The piece should feel timeless, grounded in a realistic environment but with an air of mystery and fantasy.
I started planning my main composition very early on. Determining a camera angle in Maya. Doing so can help establish what to focus on.
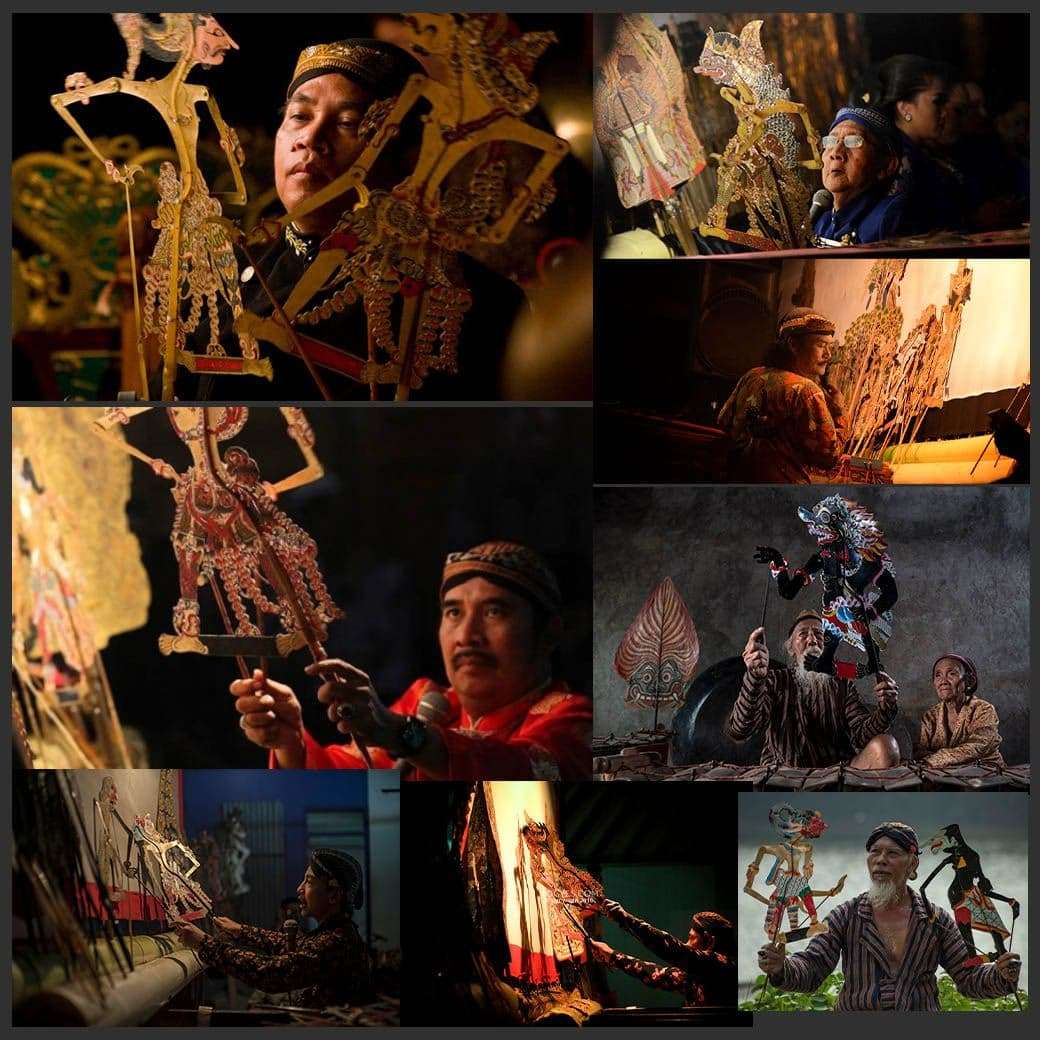
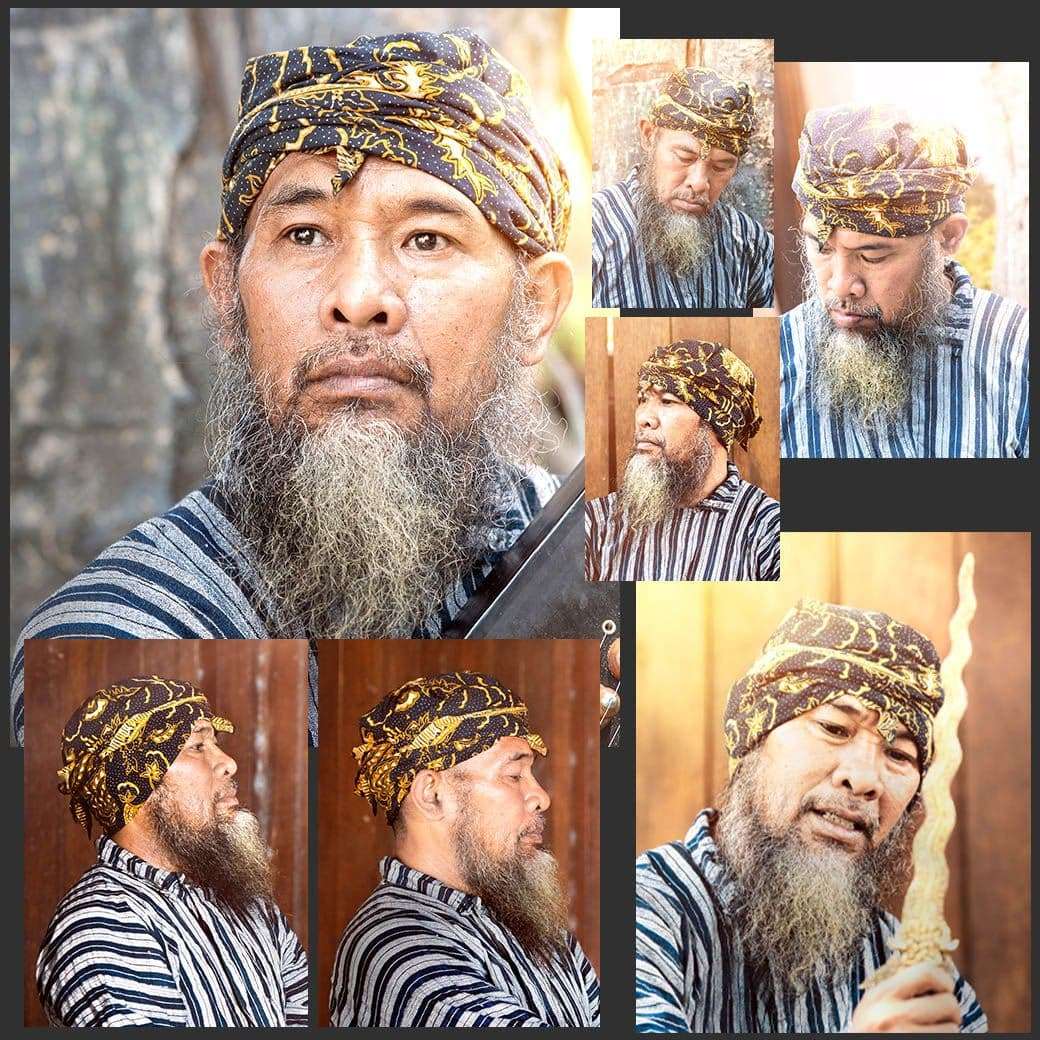
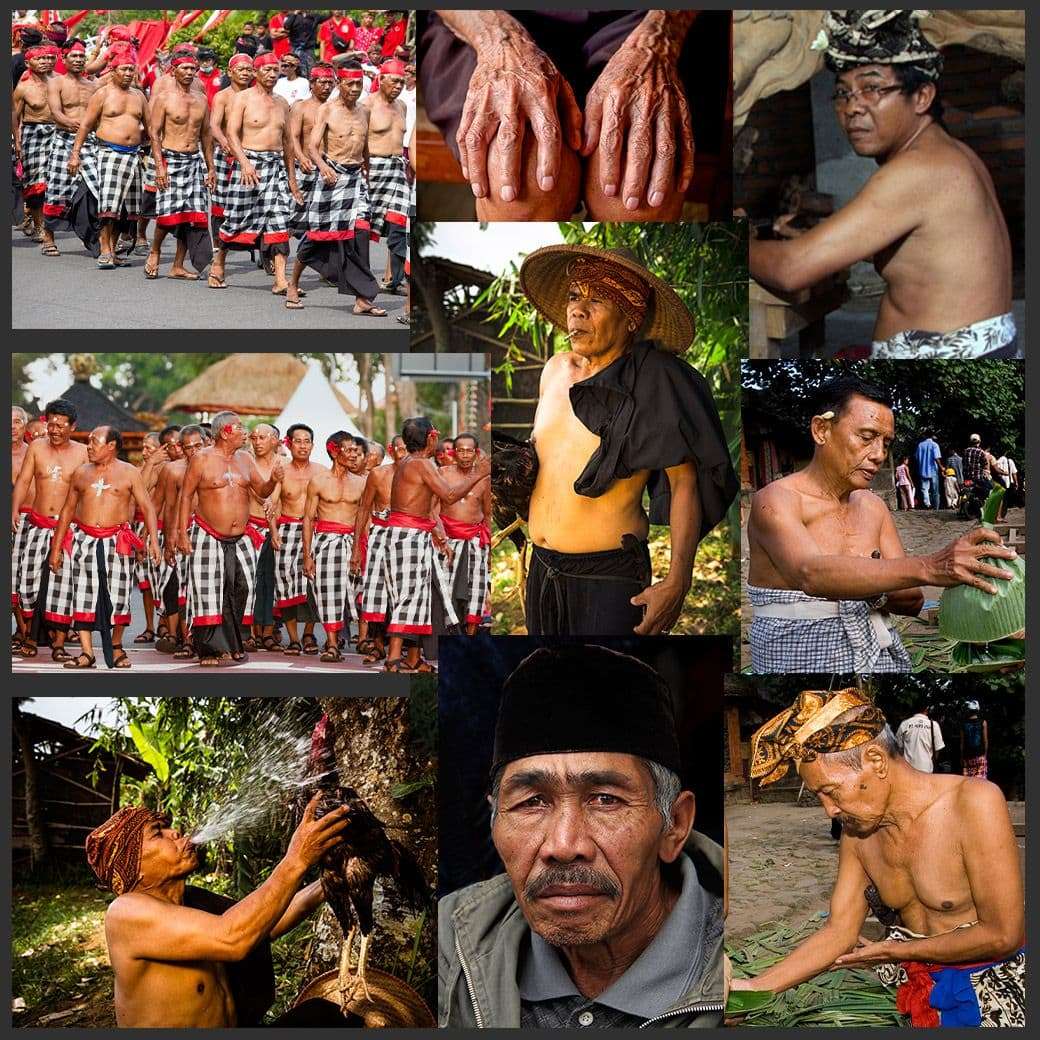
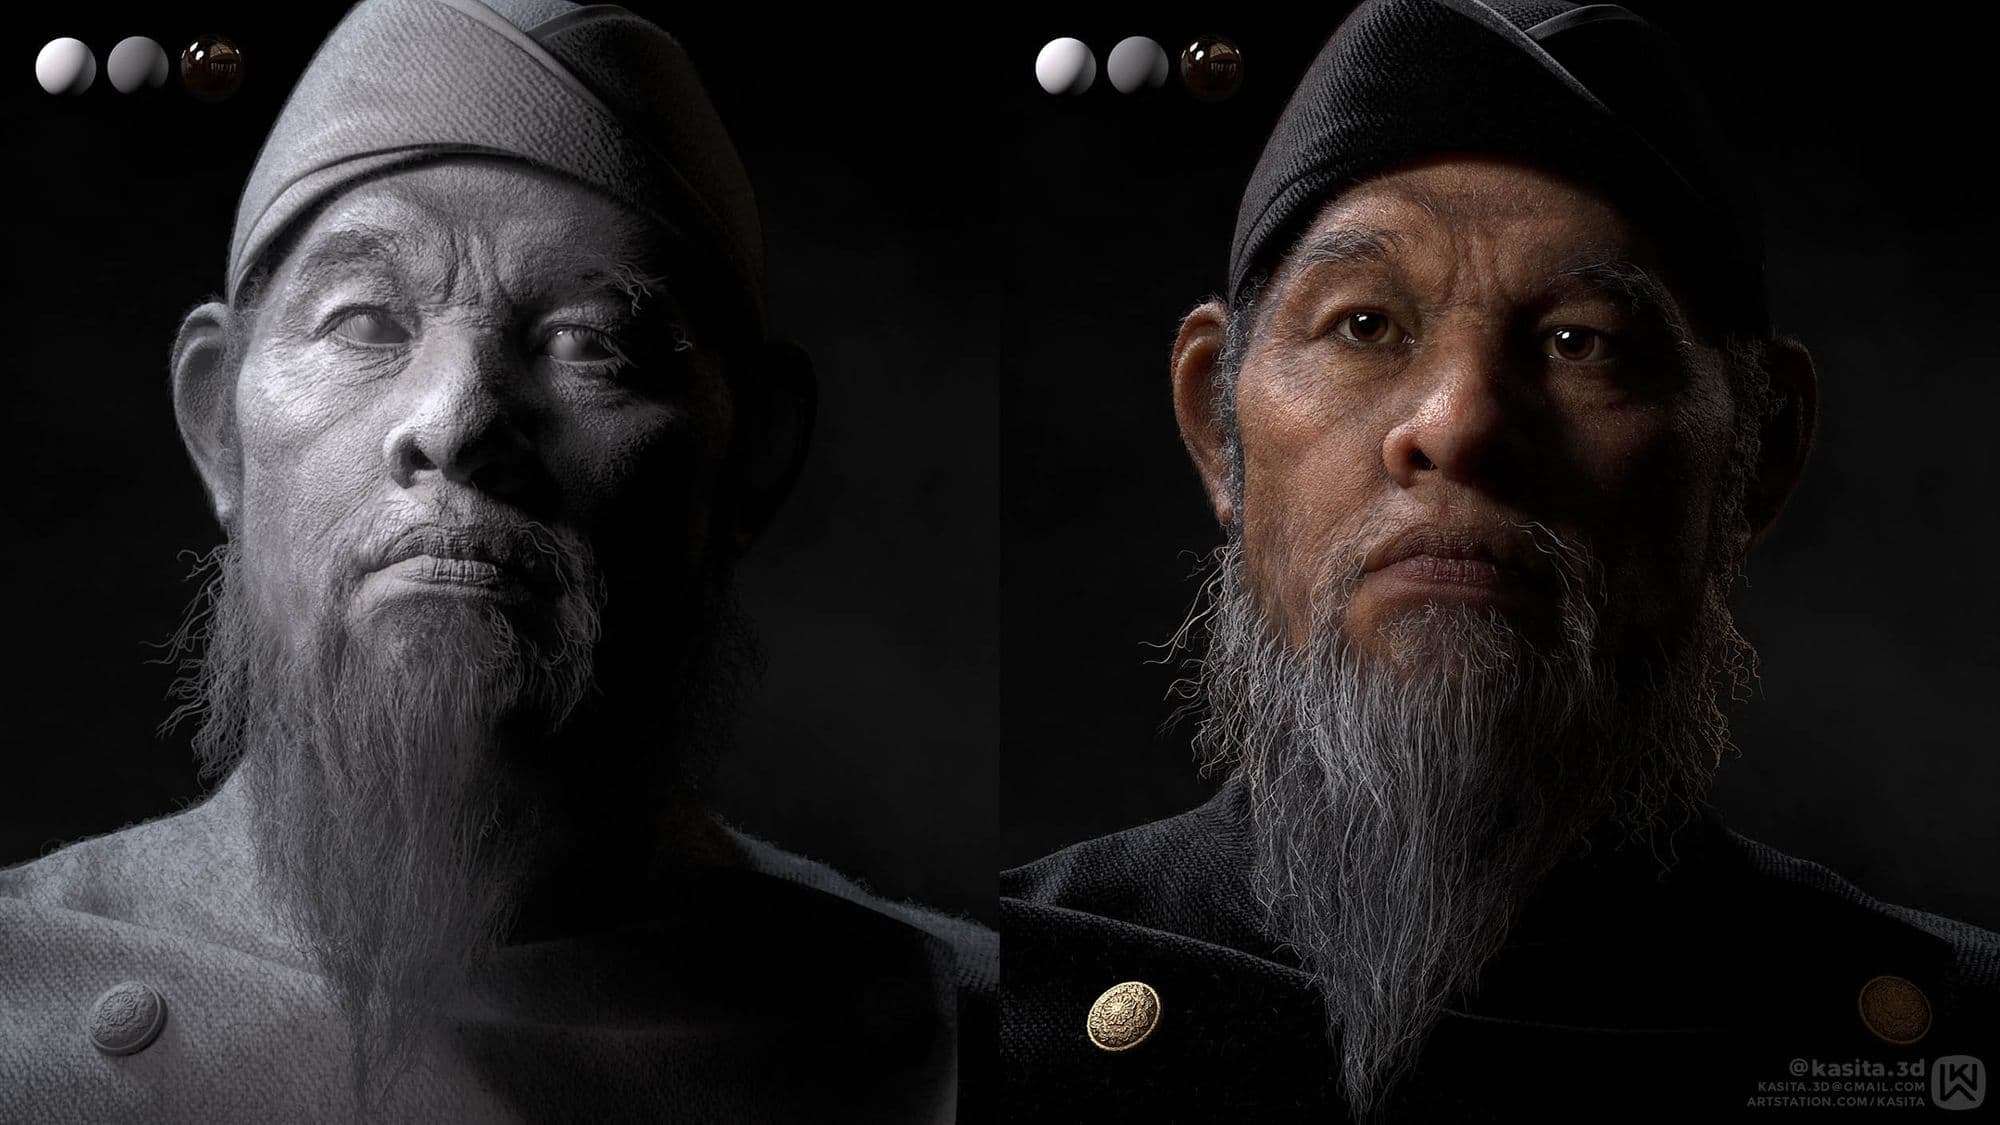
For the puppeteer, I settled on an Indonesian male in his 50s. Looking for references was quite tricky as this was very much a common man and not someone with many reference images. I found an individual on Shutterstock that worked well for the story I wanted to tell. I also found different images of Indonesian males around that age to see the body type they would have for a better understanding of form.
Scale is important for texture maps and look development. I established a real-world scale in Maya with a cube and imported this into Zbrush to ensure I kept the same scale throughout the project.
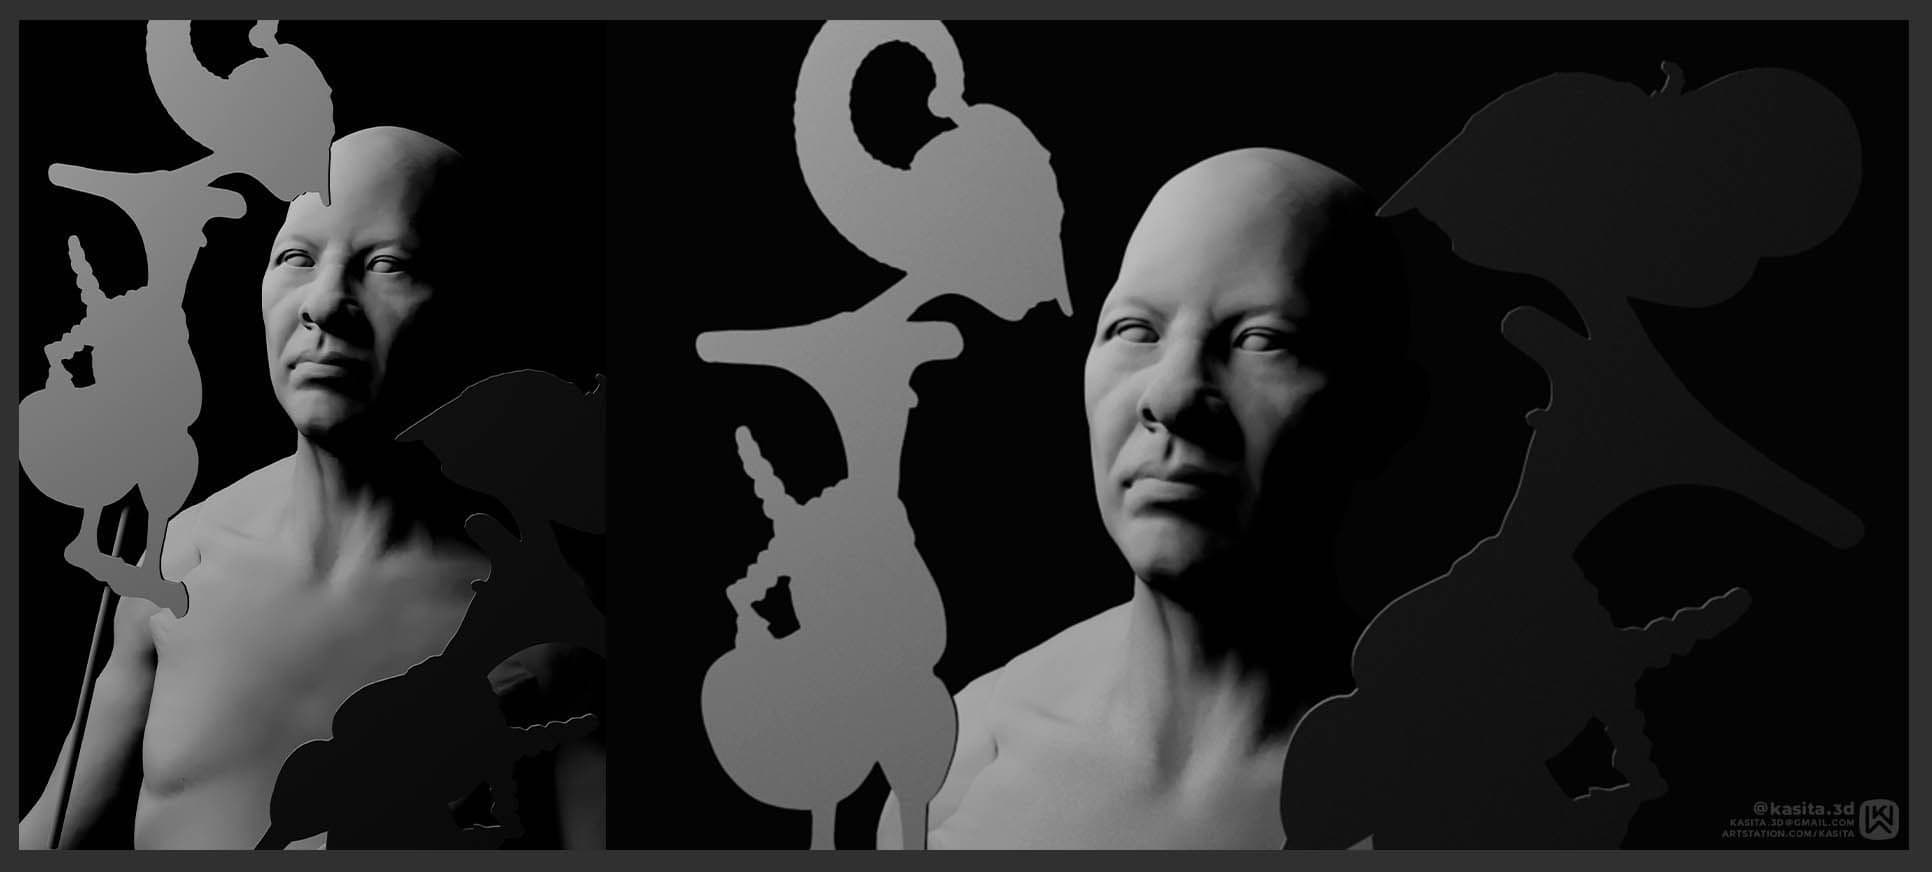
The first stage is to establish primary forms and proportions as a rough block out. I focused on getting my shapes through references as well as anatomy studies. I sculpted with more volume, like working on a real sculpture - piling more clay than needed to carve away form at later stages. I learned this technique from John Brown over at Gnomon during our Character Sculpture 1 class.
The first pass is never great, so work quickly to help avoid getting discouraged.
The second stage involves polishing prior established forms and locating underlying bone structures. When you identify landmarks of the face, you start to see the character form.
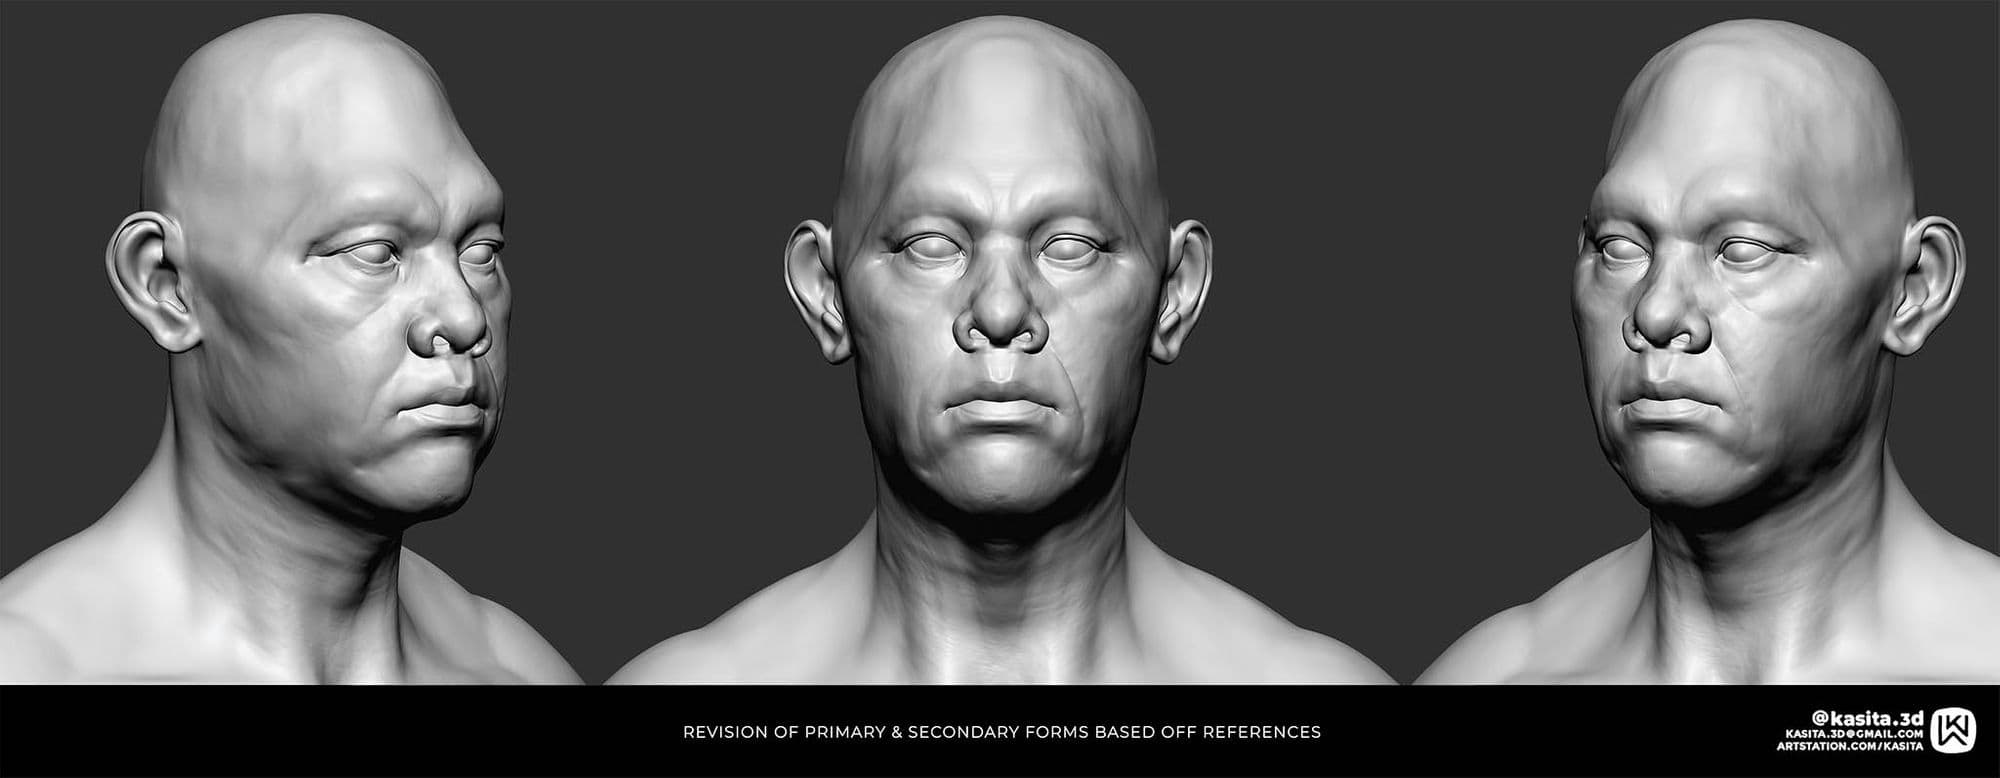
I kept going with the same approach but now adding secondary volume where I needed to, based on my references. I strayed away from smoothing since this is an older character. Having random uneven surfaces helps with realism in digital sculpture.

Since I established a camera angle, I would often take the sculpt in Maya to see how it rendered. Doing this helps get closer to the character you are trying to portray.

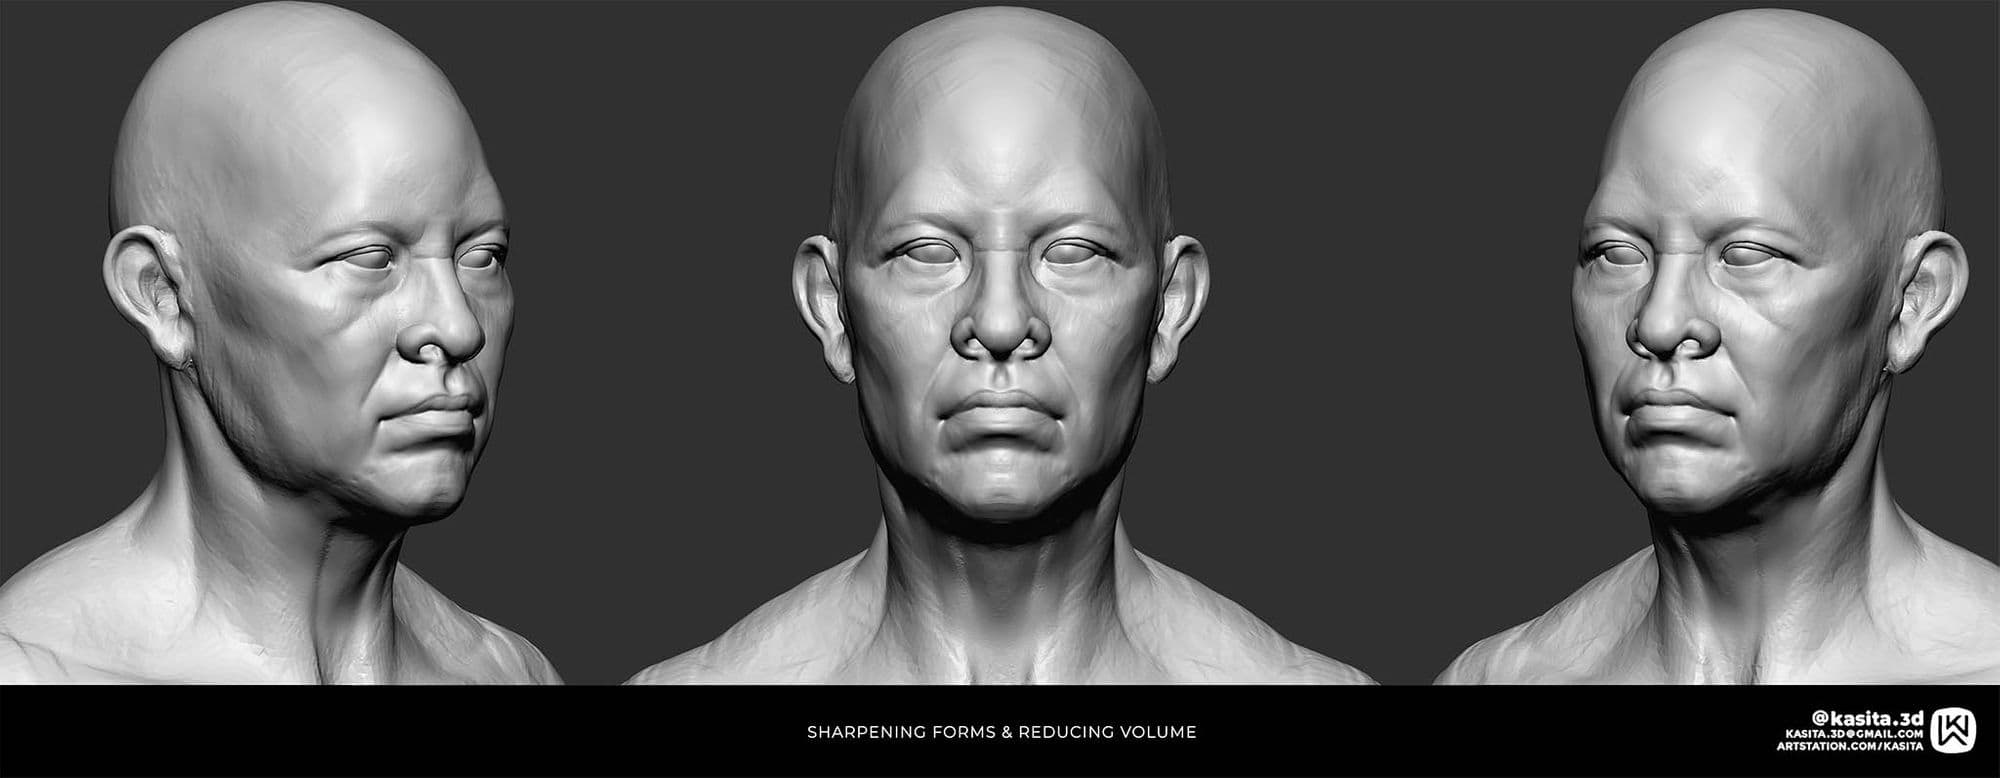
Once I was happy with the primary and secondary forms, I started on the tertiary details by adding larger pores and deeper wrinkles. These details were later exported via a displacement map.

Often with skin, it's essential to carve in the details deeper as SSS shaders often wash out high fidelity details. I like using Dam Standard v2 brush for this as it has a sharper falloff.

Finally, I did a last pass of the sculpt by ensuring his expression worked in Maya and made final tweaks to add more imperfections to the skin.
When adding organic skin details to the sculpt, look at various skin references of the character's ethnicity. Environmental circumstances will produce very different skin imperfections.
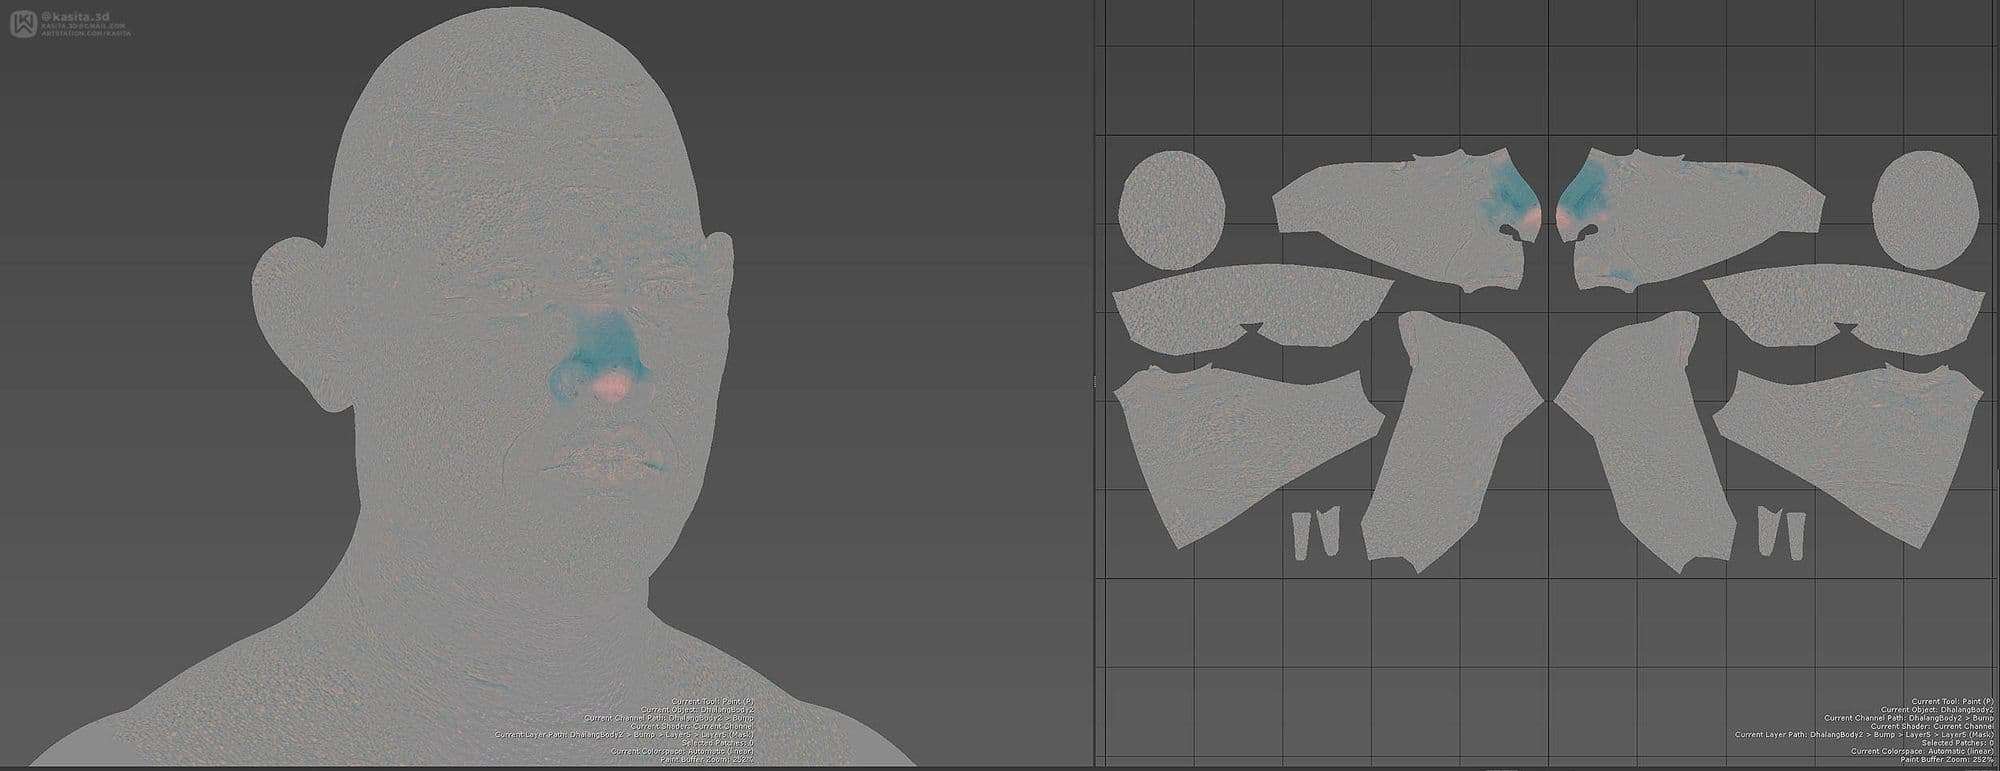
For the UVs, since this was a film based workflow, I used UDIMS for the whole character. I made sure there would be more texture space for the face and hands, which were the only parts showing in the final render.

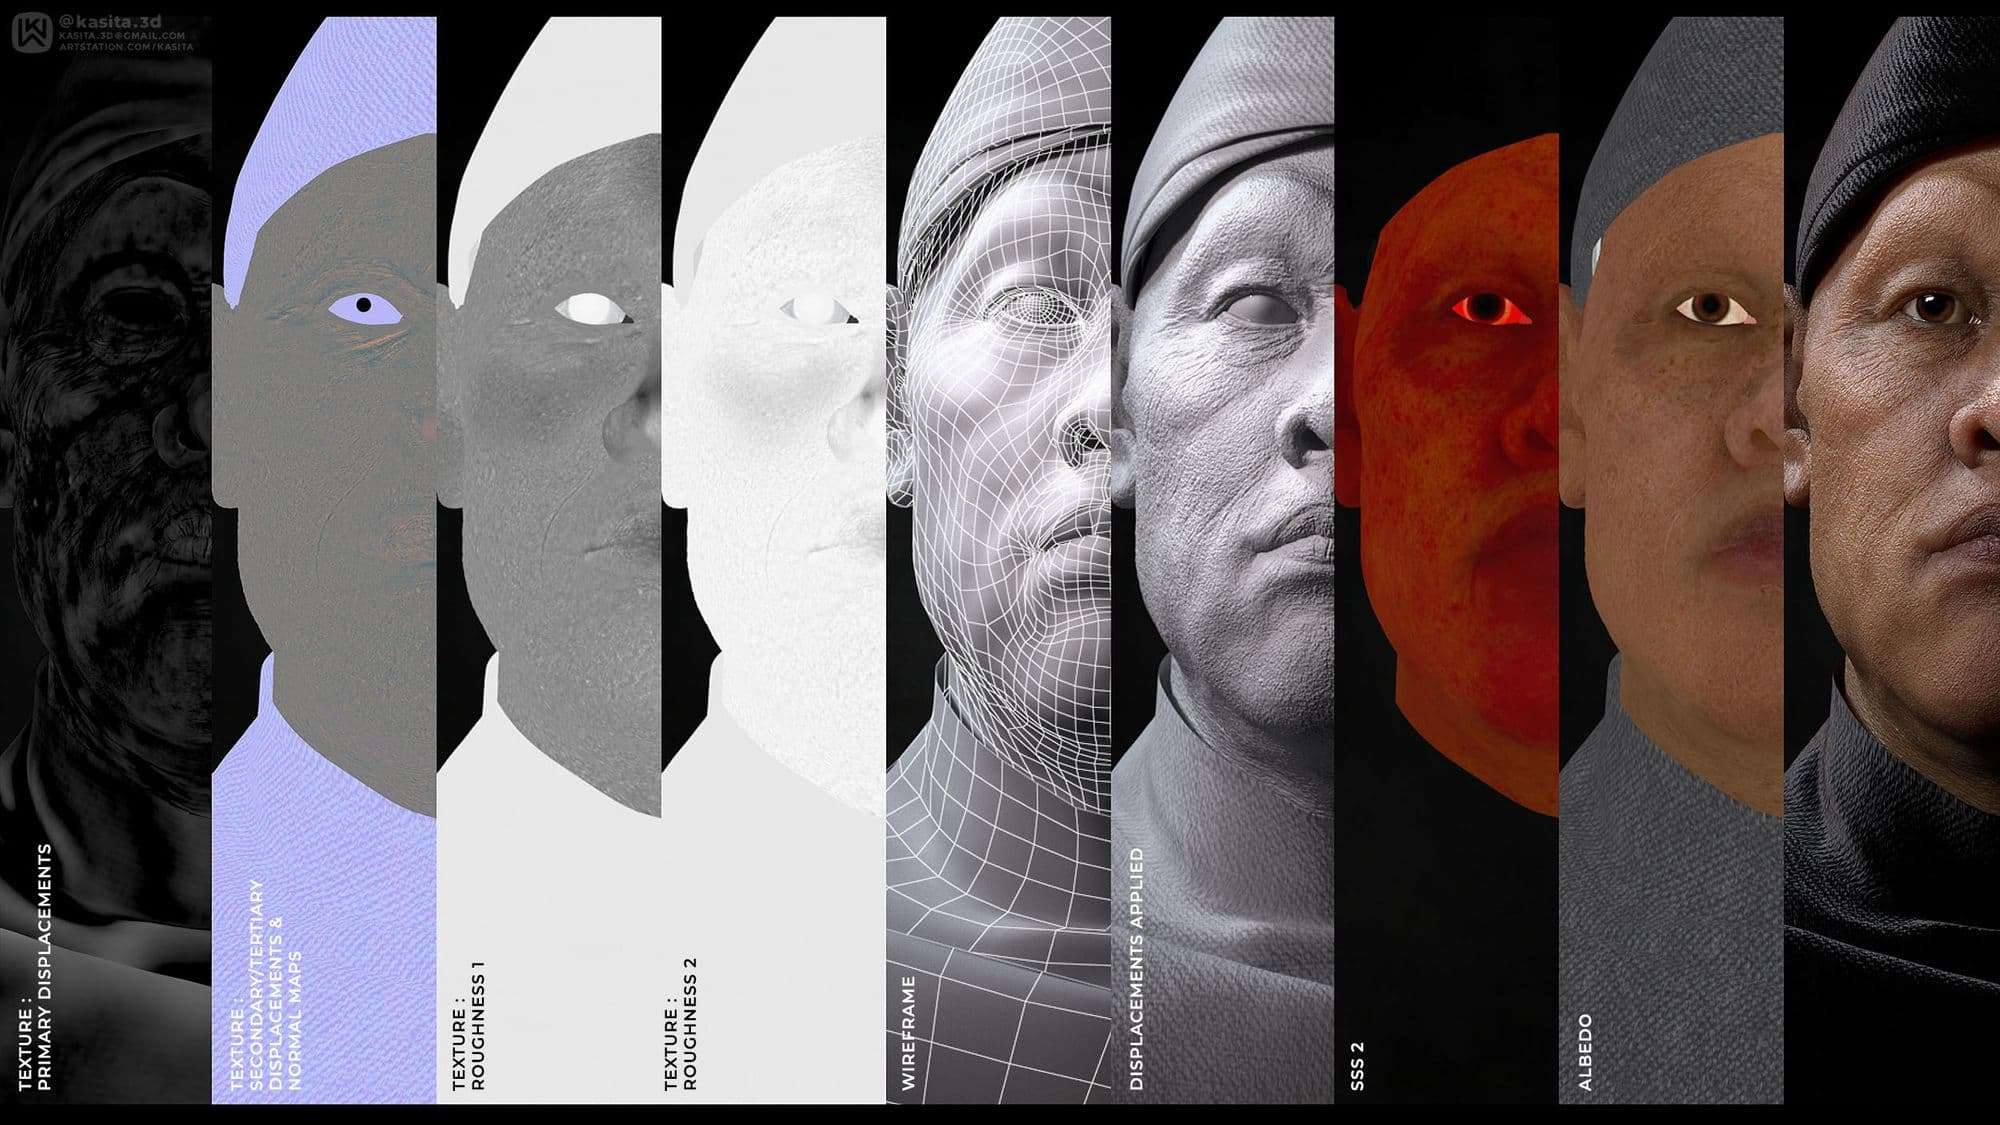
I brought my final sculpt over to Mari for texturing. TexturingXYZ is my most essential resource, their maps are something I have used in every character piece I've worked on.
When TexturingXYZ displacement maps were split into three files (displace, micro, and tertiary), I combined these in Nuke into R, G, and B channels before using them as projection maps.
In Maya, I assigned a single Vray object property to my mesh, added opensubdiv attributes, and then blended all my displacements together. I find this gives me the most control over each level of displacement.
The Albedo map is the next most important texture for this piece. I used TexturingXYZ maps for the base projection and then made several HSV nodes with masks from ambient occlusions and displacement maps.
I looked at various skin references from that age group and ethnicity to understand where discolouration and environmental damages would occur.
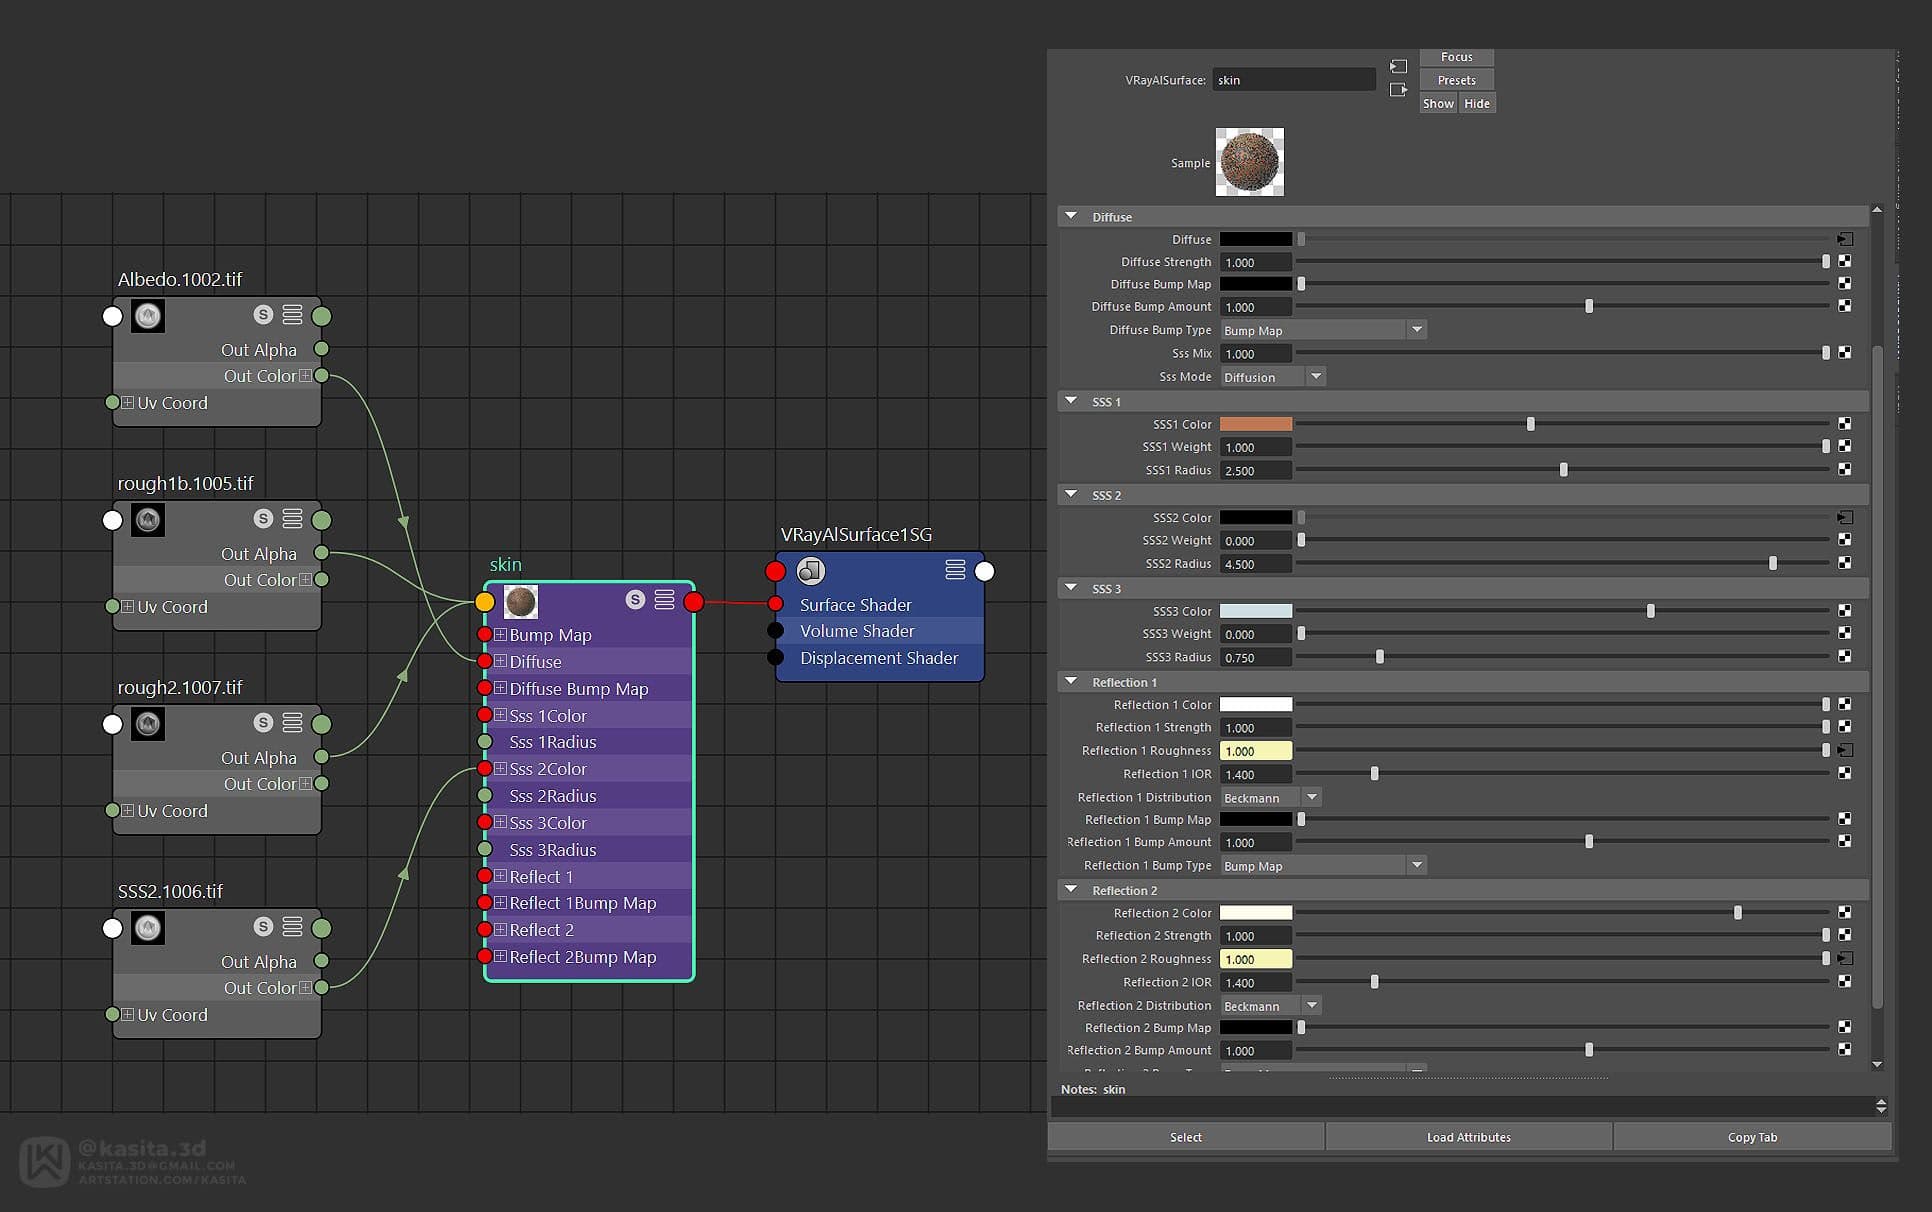
Ultimately in Mari I created roughness maps, and SSS maps to bring into Maya for shader development.
For the skin, I used V-ray alSurface material. I decided to go with solid colours for the SSS1 and SSS3 maps for efficiency reasons. The most crucial factor for SSS is the radius. This setting is per-model basis and will change depending on the geometry's scale.
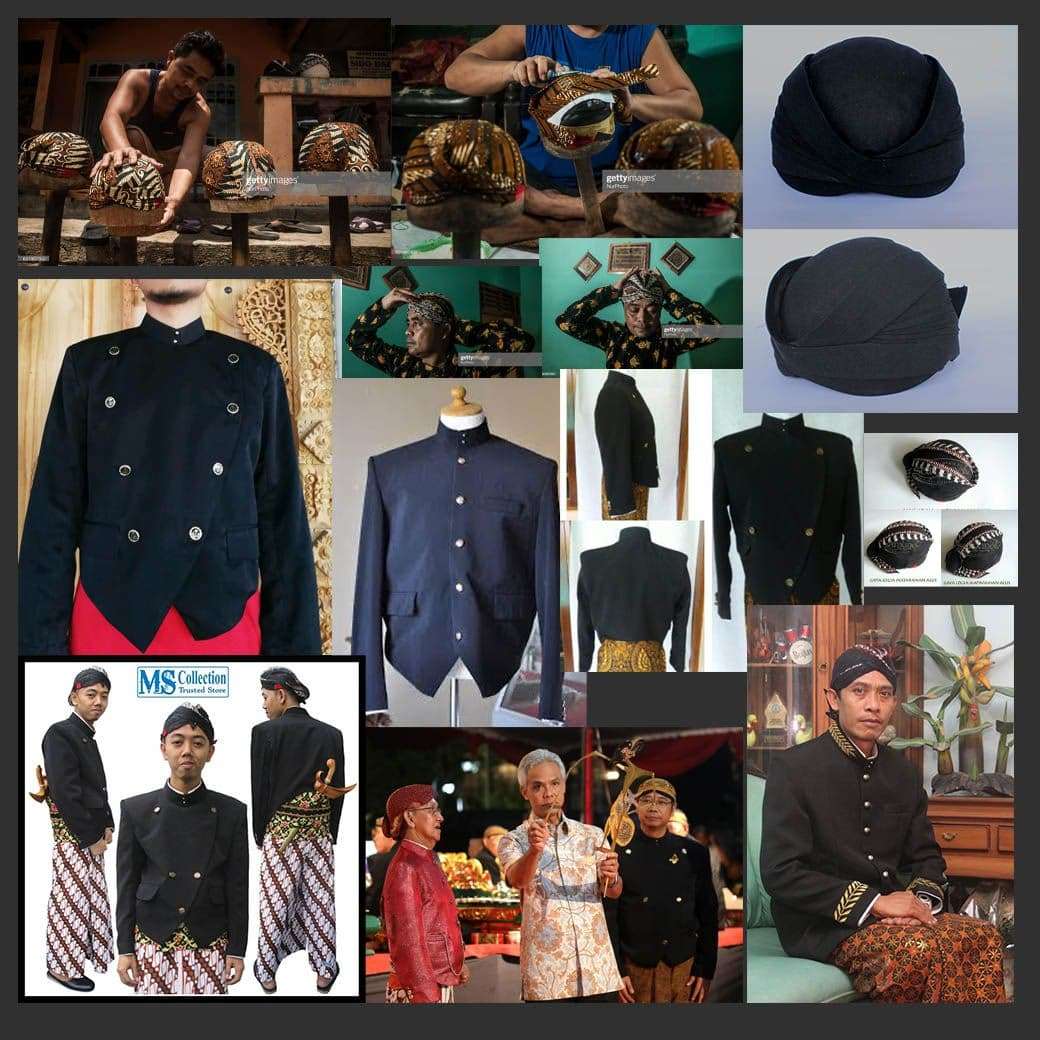
For clothing, these Dhalangs wear a formal attire called a Beskap and also a headpiece known as a Blangkon. I compiled references and found videos to see how they're made and what fabrics they're constructed out of.

I created the Beskap in Marvelous Designer, retopologised it in Maya, and added more secondary wrinkles and ornamental details in Zbrush. I retained the UVs from Marvelous Designer to be able to use a tiling texture for the fabric material.
Since the puppets were brightly coloured and ornate, I opted to balance the scene with completely black attire. Keeping in mind a 70/30 rule for my composition. This meant using neutrals or filler spaces so that the main subject could stand out.
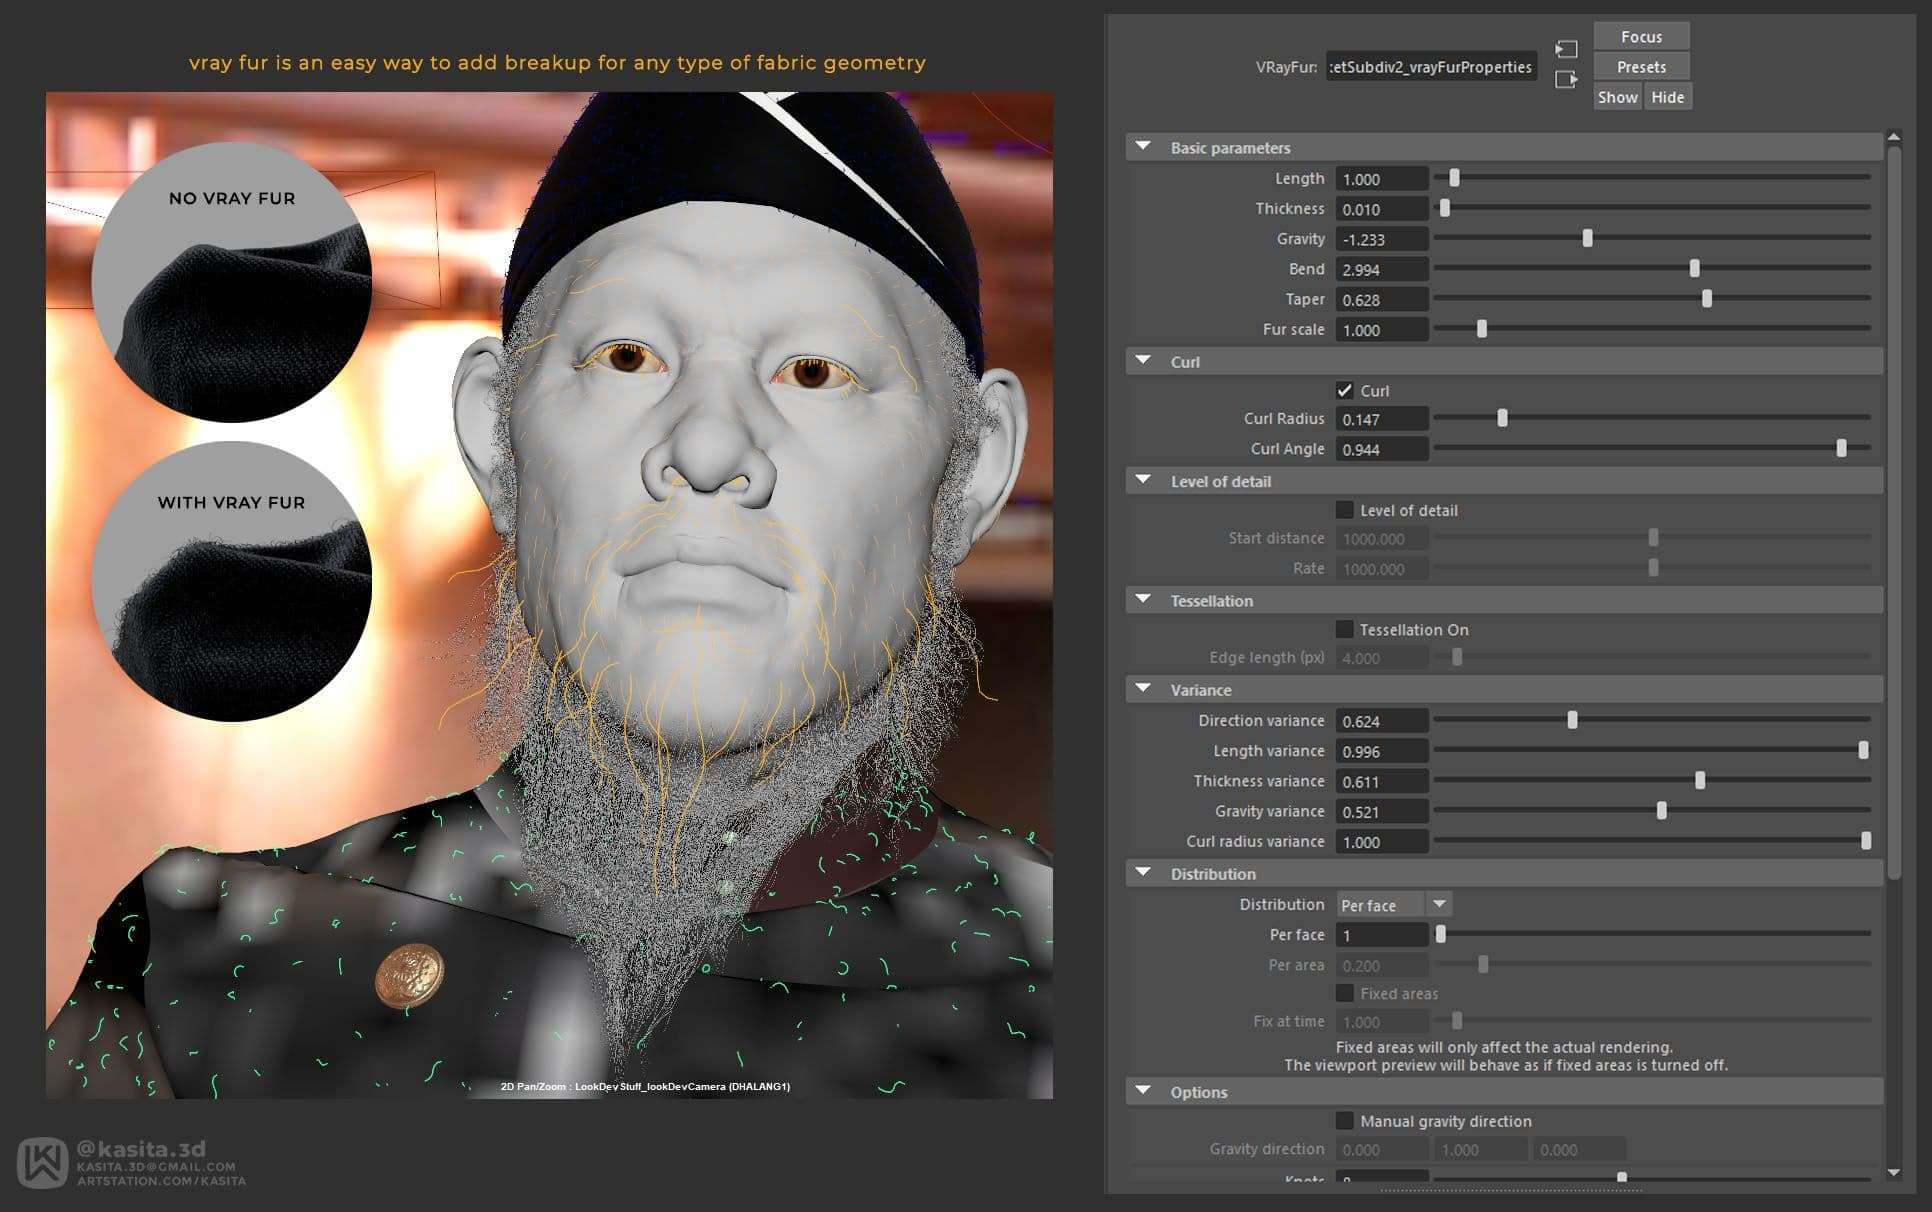
Fabric geometry can often appear too digitally stiff in a render due to how clean the silhouette is. Adding a little breakup in the silhouette can increase the realism of your shot. I do this by using V-ray Fur.
Depending on the cloth type, I would adjust the density and strands. If I wanted to create an aged corduroy fabric, I exaggerated the density of the strands so that it appeared from a distance. It might not be the most accurate, but I felt it worked better in selling the fabric.
For the Xgen of this piece, I built up the beard using several Xgen descriptions to ease grooming. The silhouette was created using fibermesh in Zbrush. This workflow gave me the fastest option in creating a somewhat messy beard.
I exported these fibermesh as curves into Maya and converted them into xgen guides. Some tweaking had to be done for the guides but the bulk of the work was completed in Zbrush.
The brows, lashes, and peach fuzz were done by drawing paint effects strokes on the mesh and then converting them into curves, then Xgen guides. I find this way of working for shorter hair strands to have the highest amount of grooming control. I gave my character more peach fuzz because I wanted the peach fuzz to act as transitions for the other facial hair the character has.
With all those elements in place, the character work is completed.
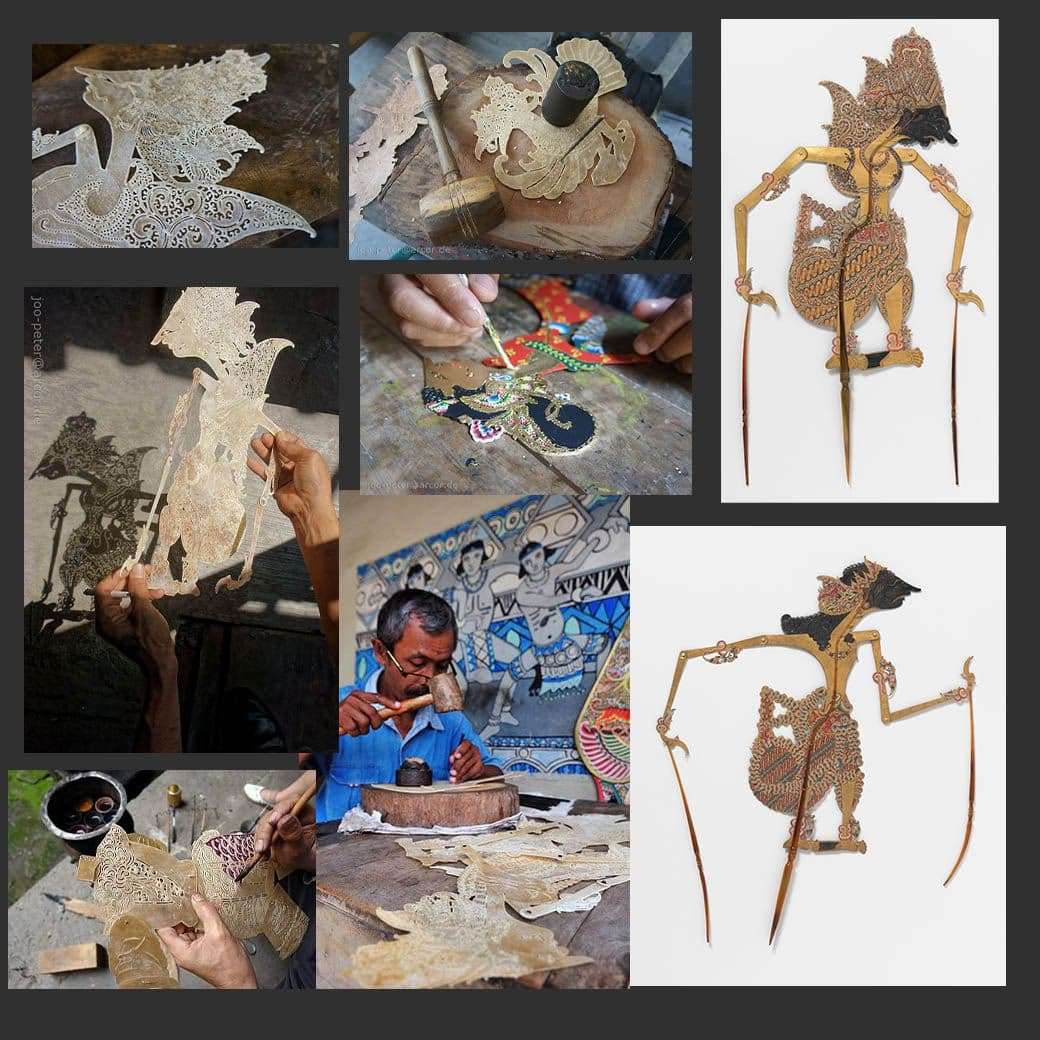
The puppets are the main hero prop of the piece. I wanted to approach them with the same amount of care that traditional Wayang artists would. These, in reality, are made from water buffalo hide, cut and punctured by hand, one hole at a time before paint is applied on top.
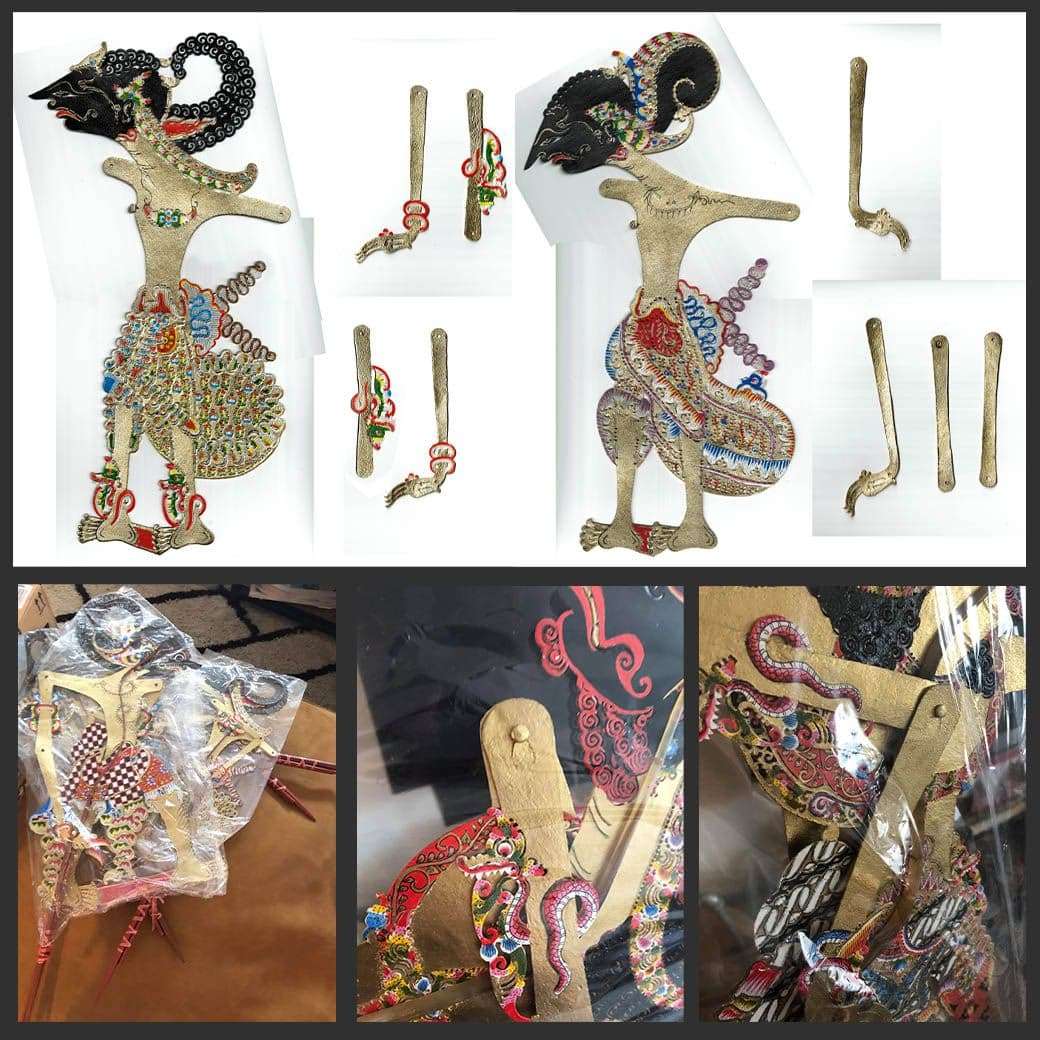
My family back home sent a set of these puppets as a reference, and I was able to take apart 2 of them to create my piece. I scanned them into my computer for texture and modeling reference.
Having something tactile on hand to observe is a very different experience from just looking at 2D references. This helped in allowing me to understand the object better.
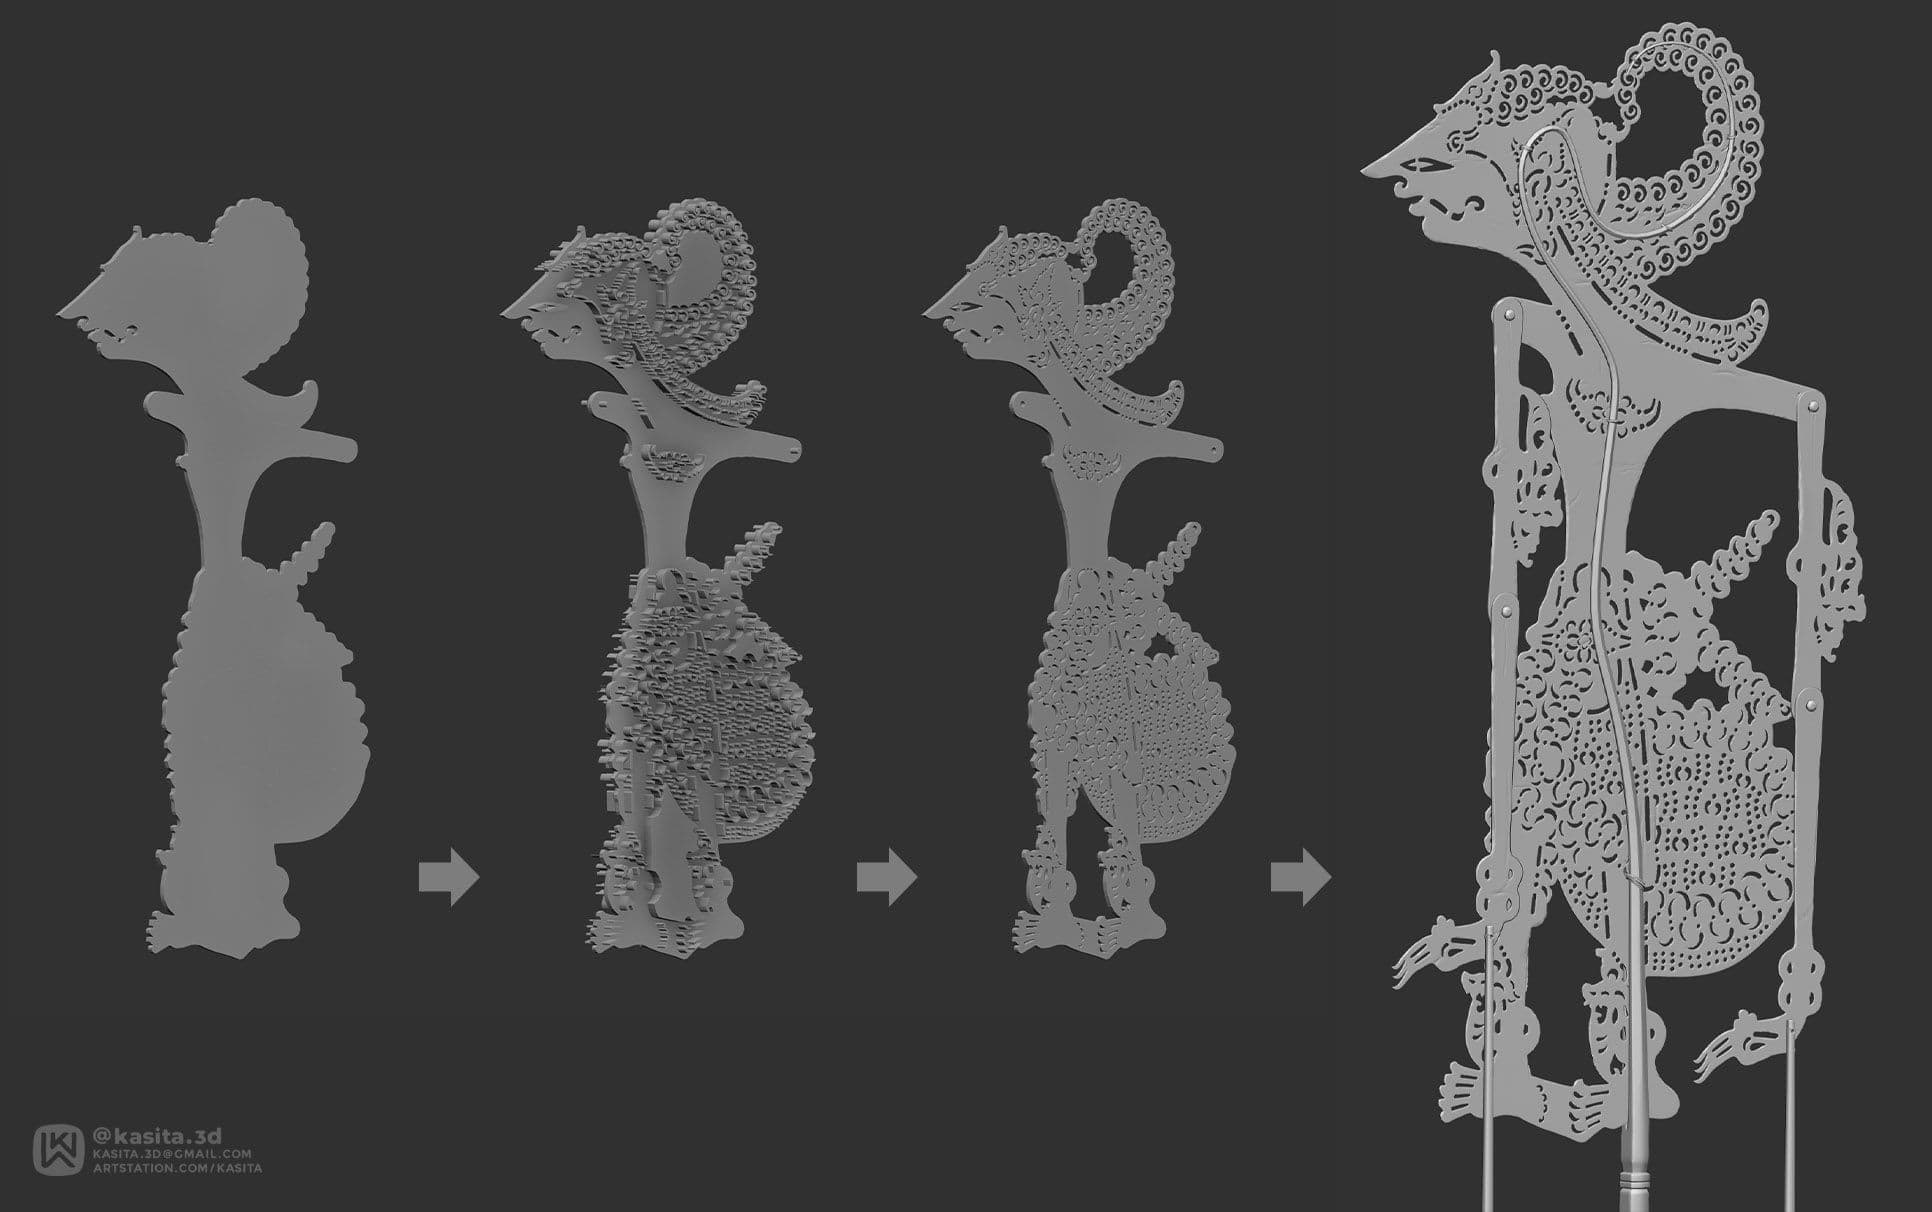
I modeled the silhouette of the puppets in Maya, then the holes were booleans in Zbrush. Giving this flat item some volume allowed me to add dents and wear in Zbrush for displacement maps. Providing a more organic realistic quality to the puppets.
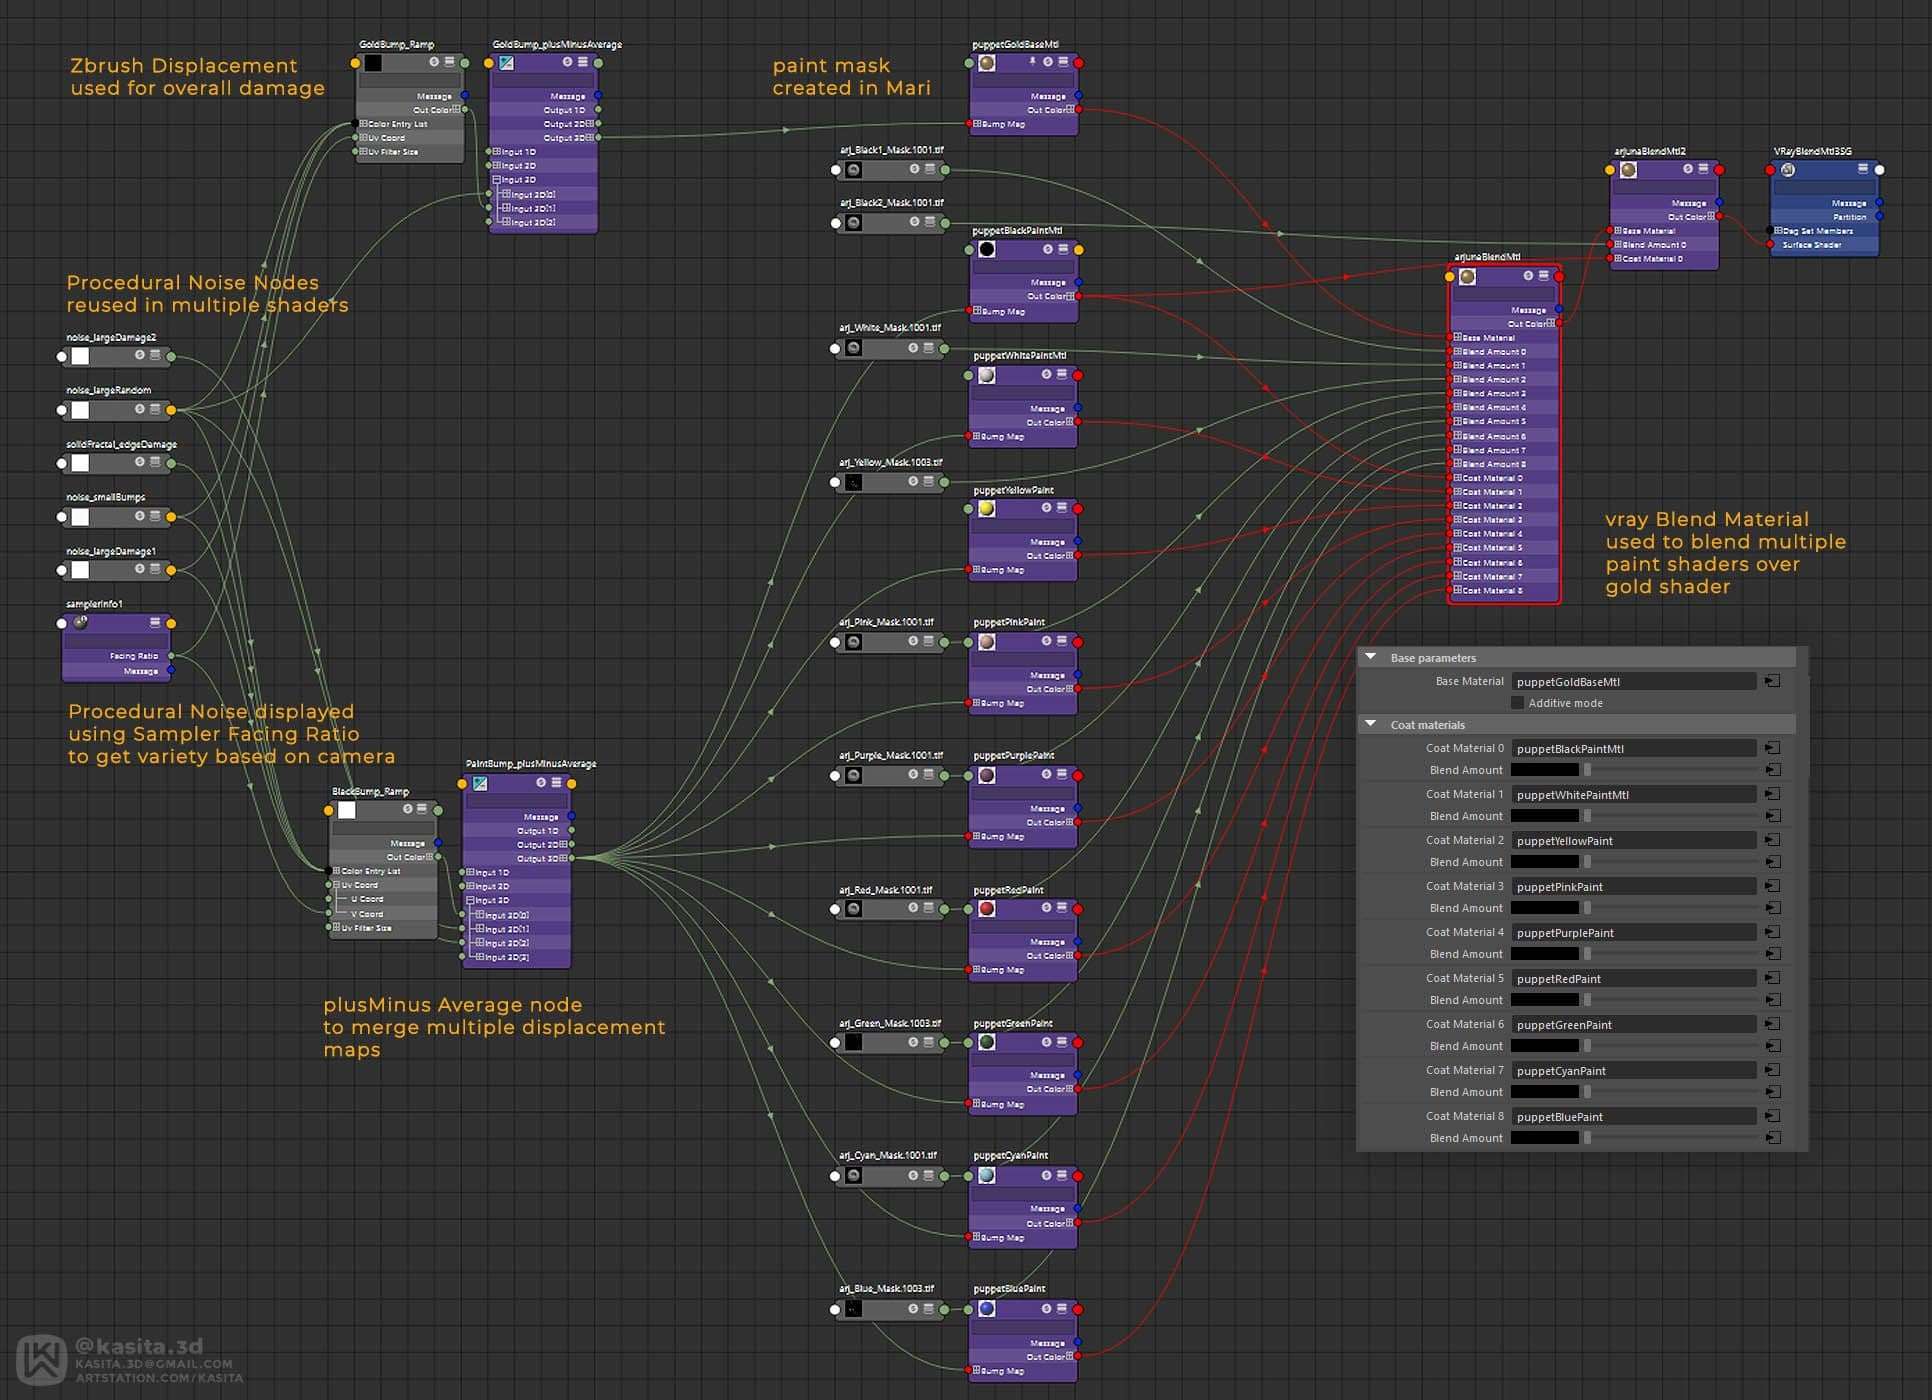
I wanted to approach the shaders in this piece procedurally. I created the material for the puppets in Maya using noise nodes to create any type of bump texture. These were reused when creating different paint materials for the puppets.
The scanned references were my guideline to create masks in Mari for the different paint materials on the puppets. These masks were then used in a V-ray Blend Material to achieve the final look of these puppets.
I've been so used to creating my textures using other software that building them procedurally like this was new and exciting for me. It allowed me to understand Maya's texture nodes for future look development processes.
Adding environmental features can help ground the piece. It gives viewers context on where the character is, and create a better presentation.
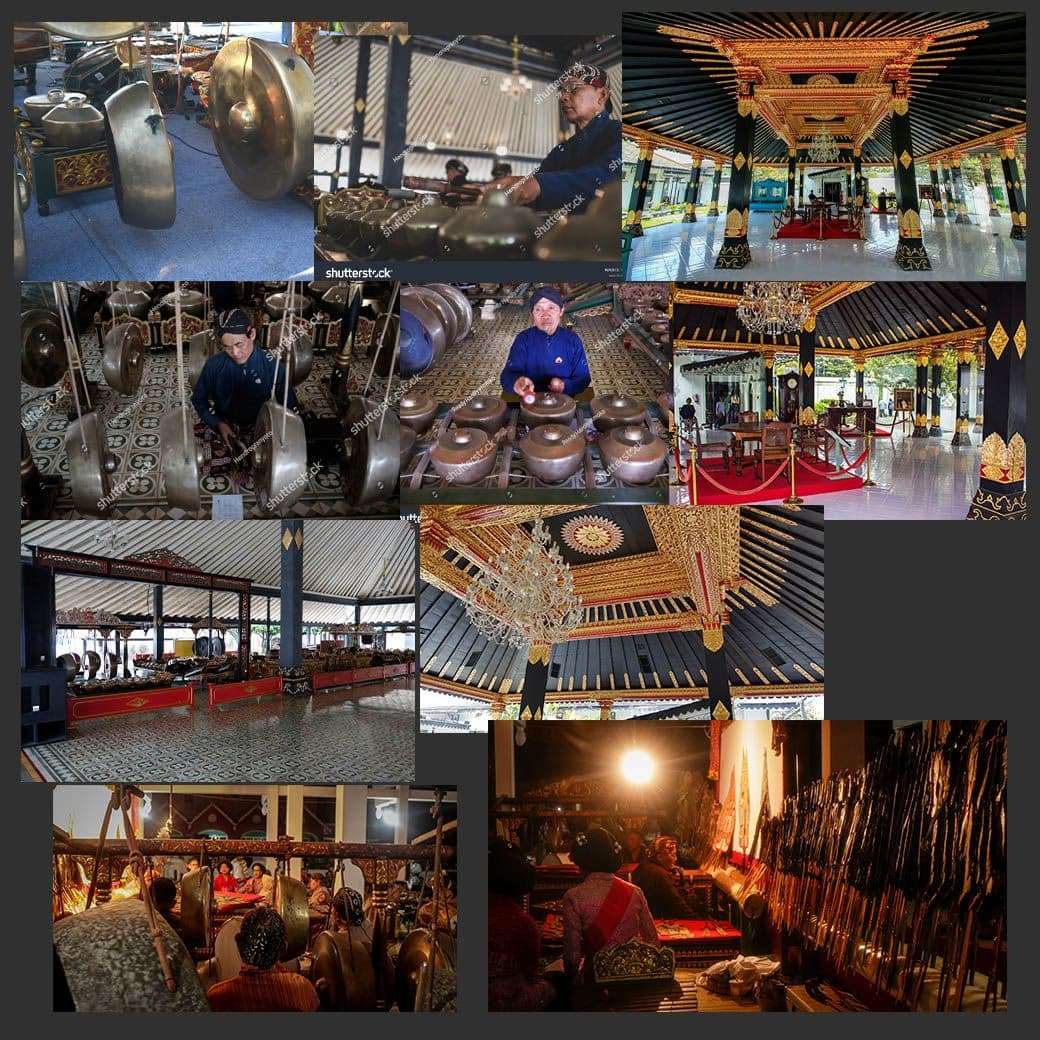
I created several elements I could reuse in the scene that fits the story. Gamelangs are musical instruments played in Wayang shows. I didn't need to focus on how accurately these were made since they were fillers, so I focused more on silhouette and repeatability.
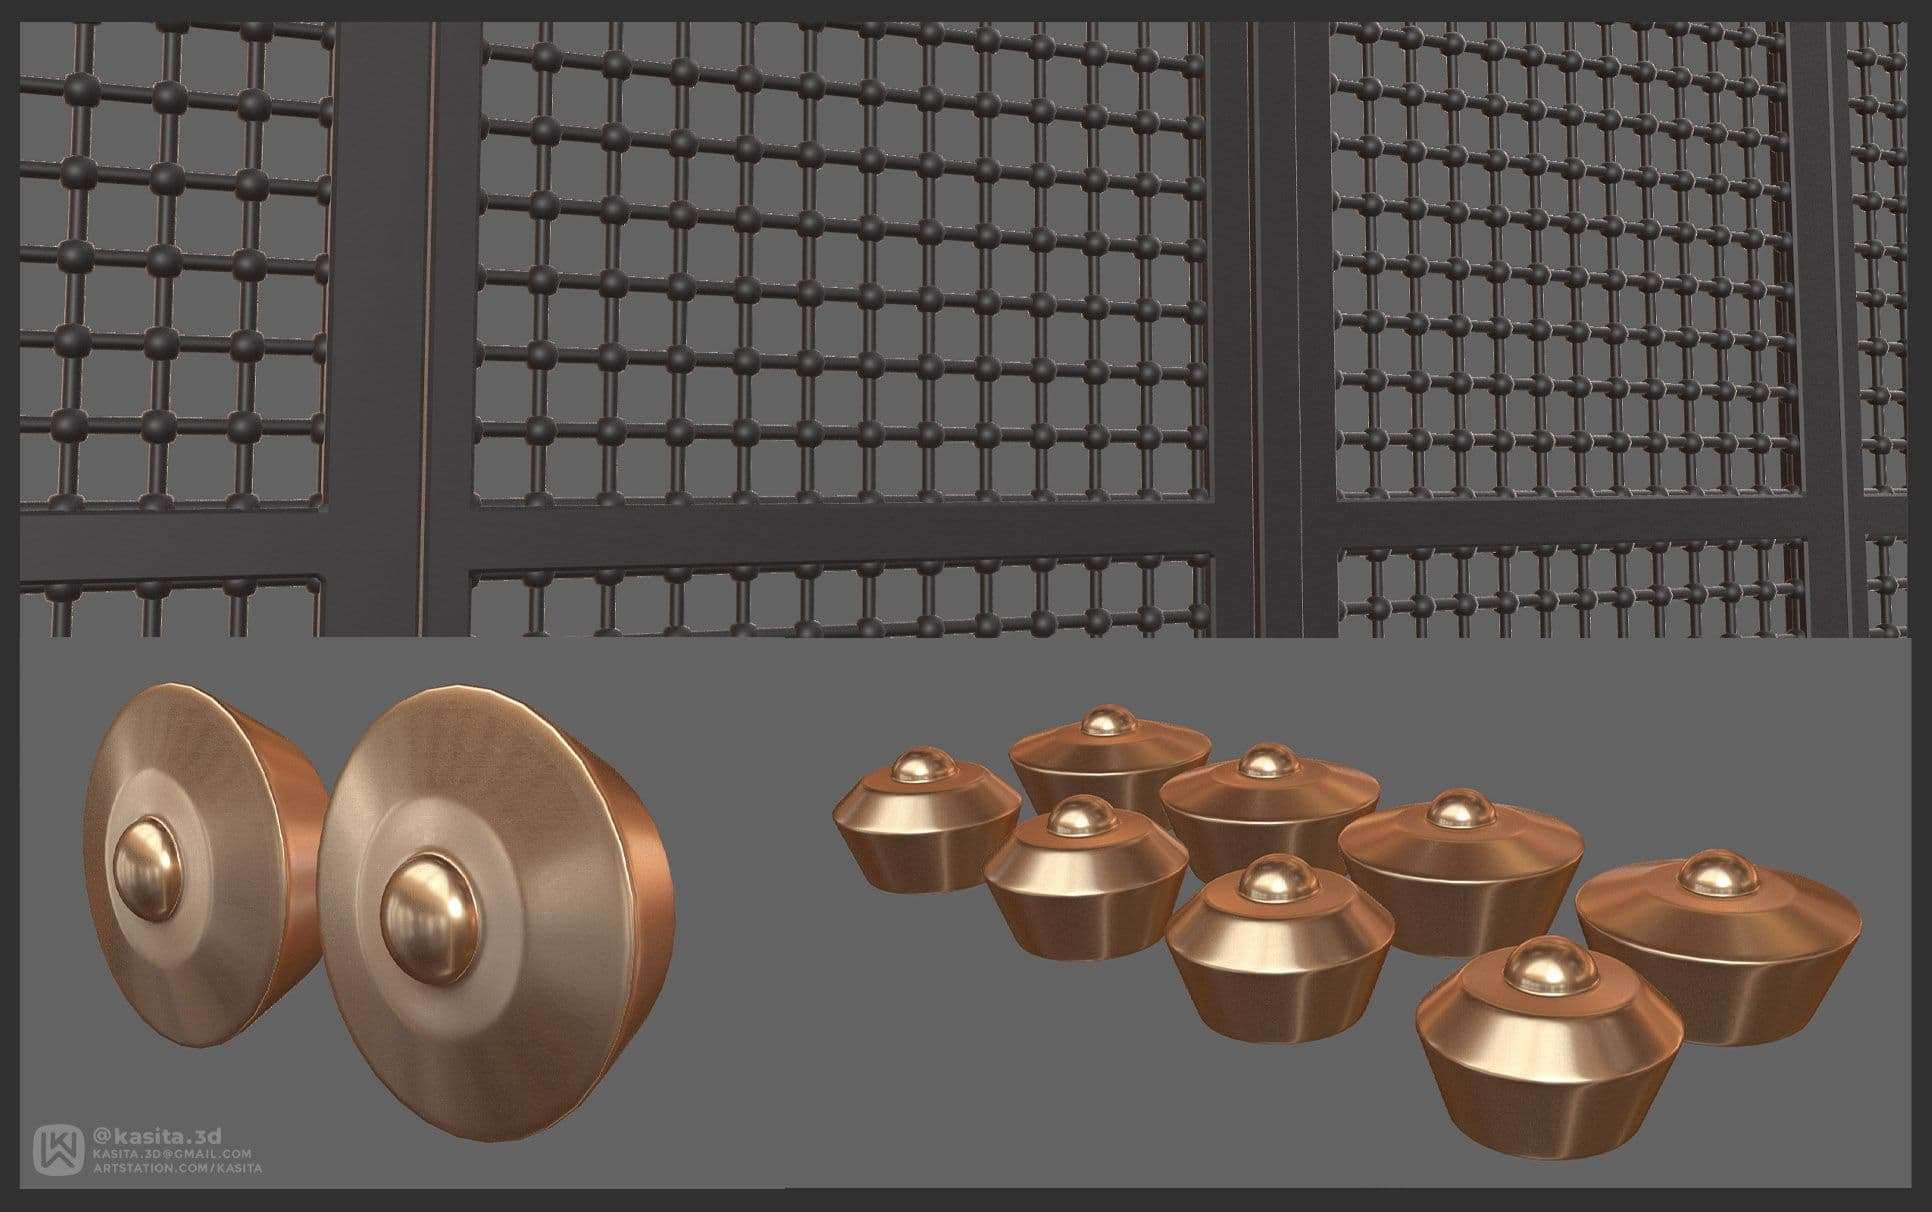
The columns and windows were made using repeated simple primitives.
Repeating simple primitives makes an object feel more intricate than they actually are.
Lighting is crucial for any character piece, it adds to the story and helps sell your vision across. I learned portrait lighting through my past experience with photography.
If you are interested in understanding more about lighting, Ian Spriggs has a talk with Nvidia as well as Gnomon detailing the different portrait lighting options for CG portraiture.
For my piece, I used several lights for the environment and character but the main shadow shapes on my subject were using a V-ray Rect Light. This is my main key light. I experimented with different options before settling on a Rembrandt lighting style.
I often use a clay pass to focus on how the lighting is working for the scene, to see where the eyes focus to when only lights are a factor.
I finally rendered my image with each element separately. This gives me the most control when I composite in Nuke.
Compositing is really where the entire image comes to life. As much as I do heavy compositing on my work, I like to rely on my models and textures to do the bulk of the work, and compositing to enhance.
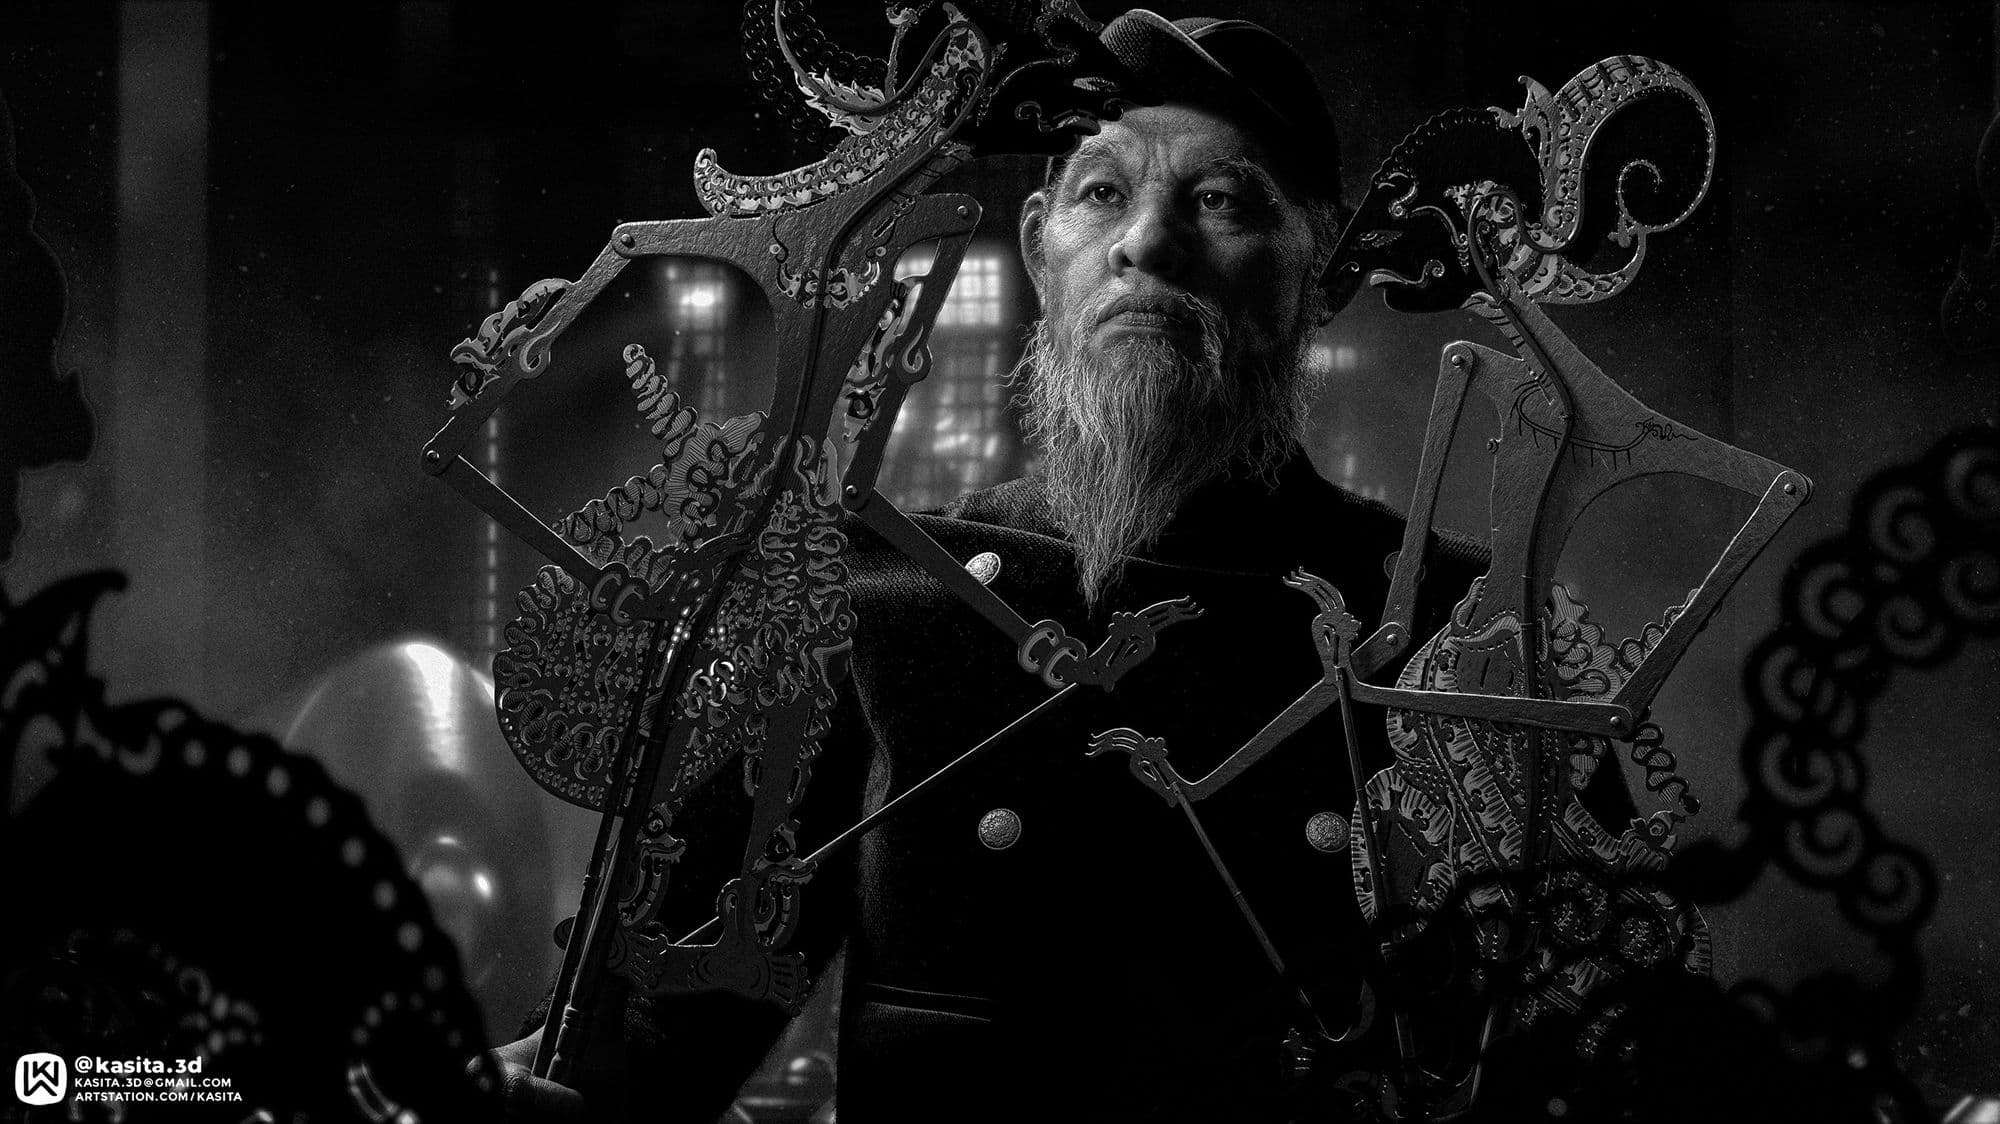
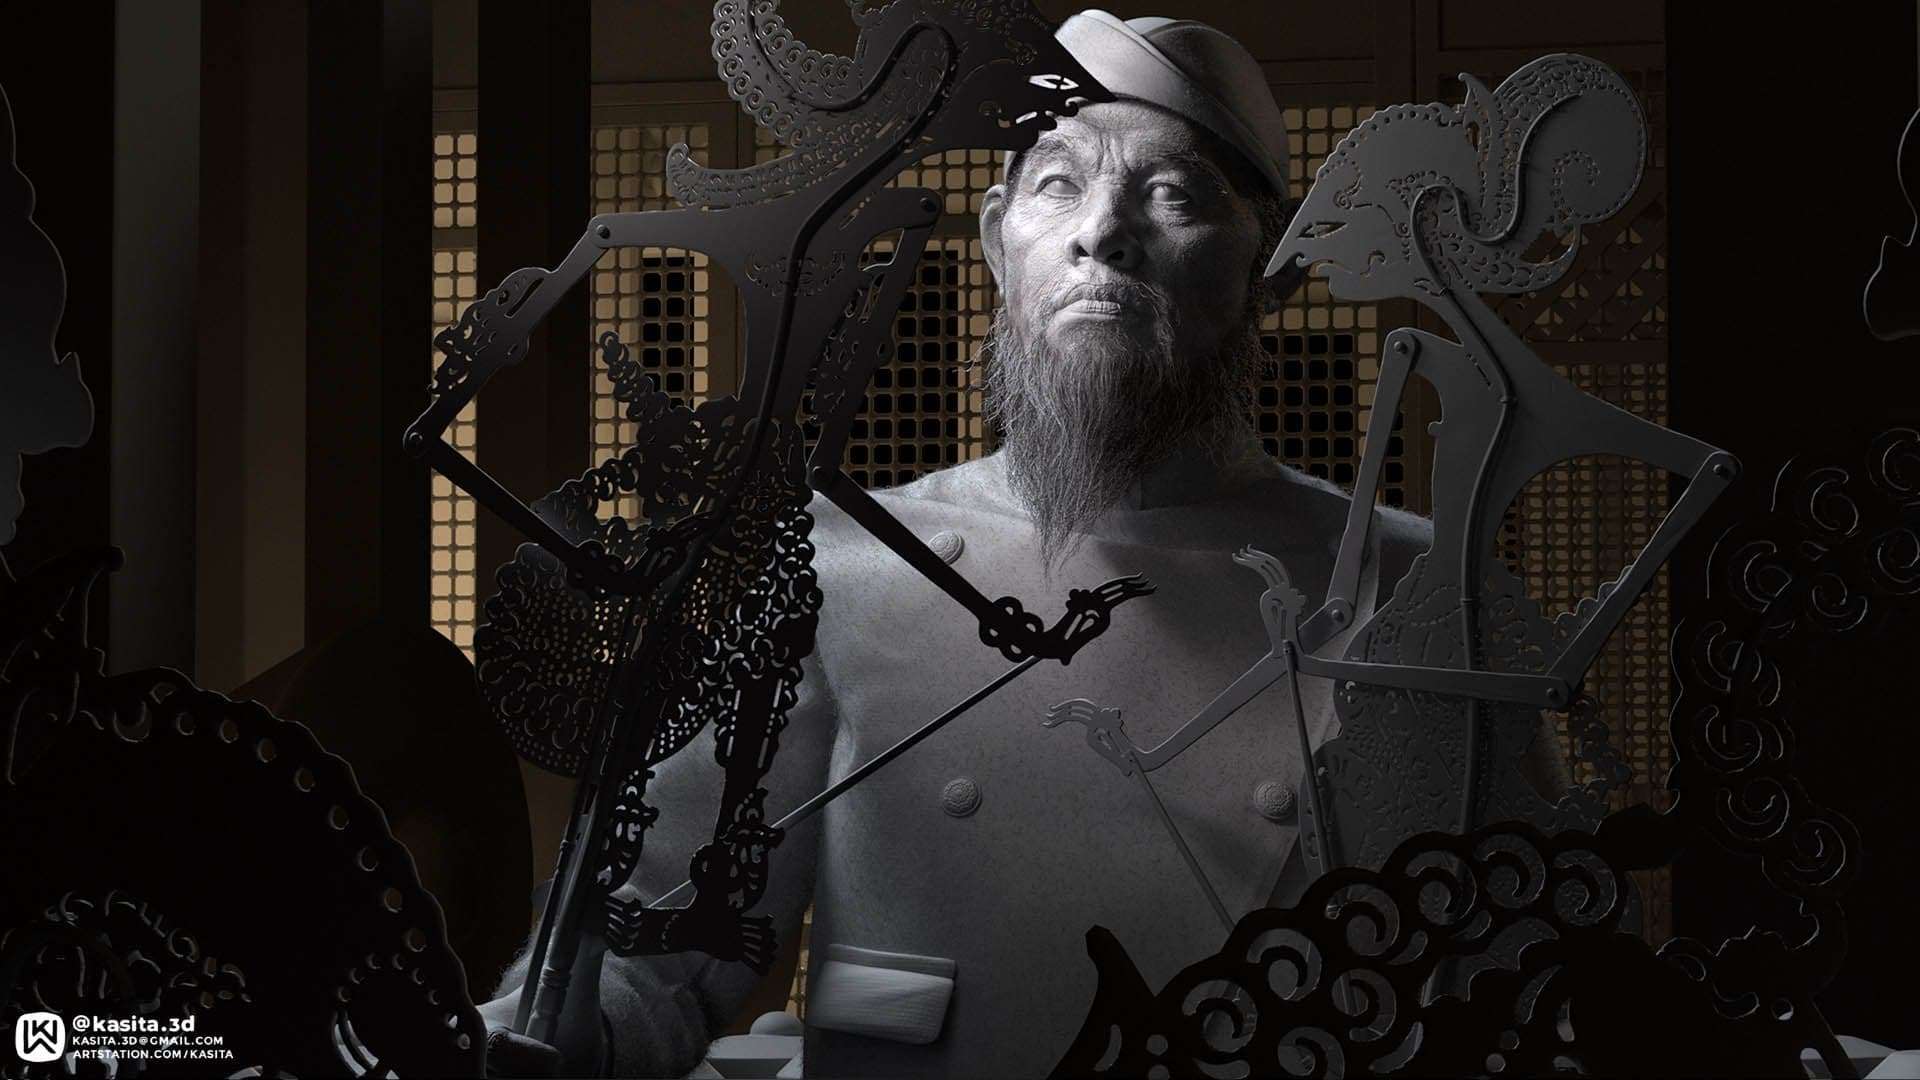
I always like desaturating my images to see how the values and contrast work in grayscale. This helps me understand which areas draw my eye the most and ultimately improves the final image visually.
I added fog elements in Nuke versus rendering an environmental fog to be more efficient with my time. Having atmospheric effects help break the character from the background, giving more emphasis to the image.

This project has been a journey for me, it solidified my understanding of the workflow. This piece was where I honed in on the technical skills Gnomon instructors have taught me. I'm incredibly grateful to dedicated professors like Tran Ma and Miguel Ortega, who have helped me with finishing this project.
Through this project, I'm more in touch with my roots. Understanding that even though I'm in a digital landscape, the traditional arts and crafts culture I was surrounded by only enriches my experience as an artist.