How to Create Inspirational Archviz Renders with V-Ray
Juan C. Hospital, a Spanish architect, has always been interested in the visual aspect of architecture and decided to train and learn everything related to new 3D visualisation and architectural animation technologies.
Juan C. Hospital, is a Spanish architect, working for years creating 2D plans and developing technical architectural documents. Juan has always been interested in the visual aspect of architecture and decided to train and learn everything related to new 3D visualisation and architectural animation technologies.
Here Juan shows us how to create archviz renders with V-Ray.
Inspiration & Reference
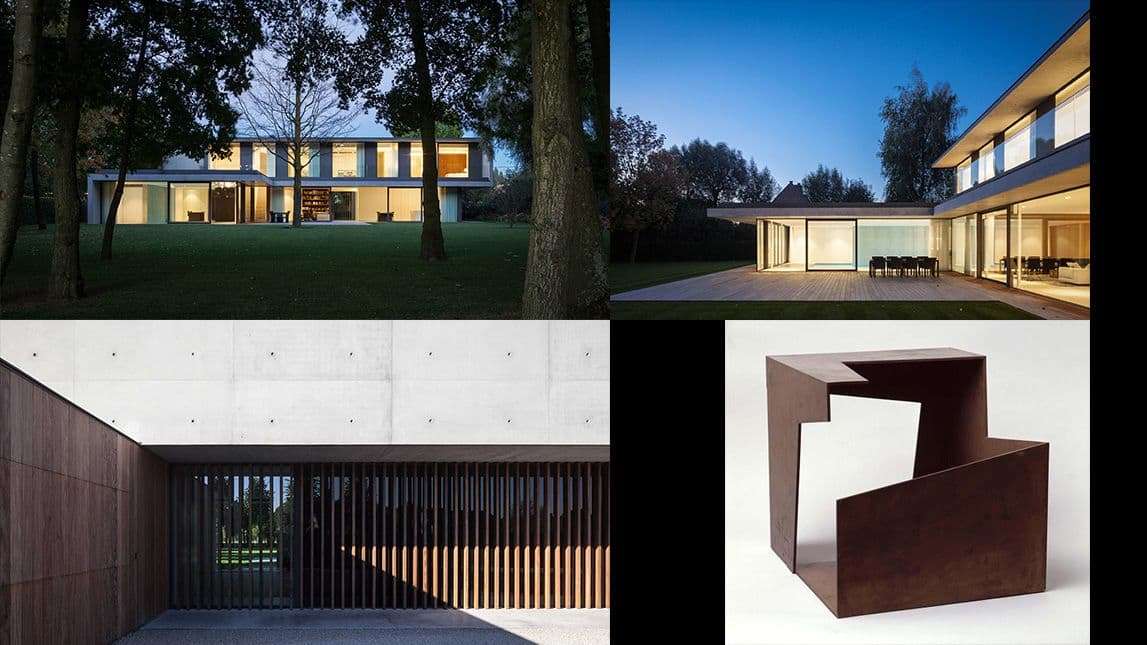
The configuration of the building I created was inspired by the PSW Residence, designed by Belgian architects Govaert & Vanhoutte, which reproduces its exterior volume, incorporating some elements of my own creation, such as the interior layouts and use of the upper floor as an exhibition space.
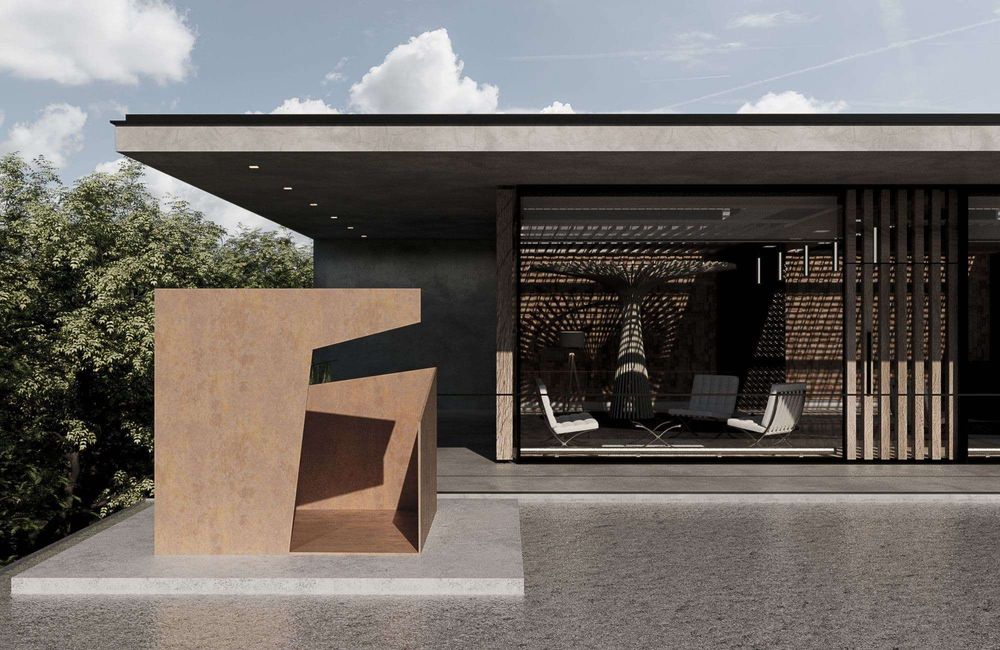
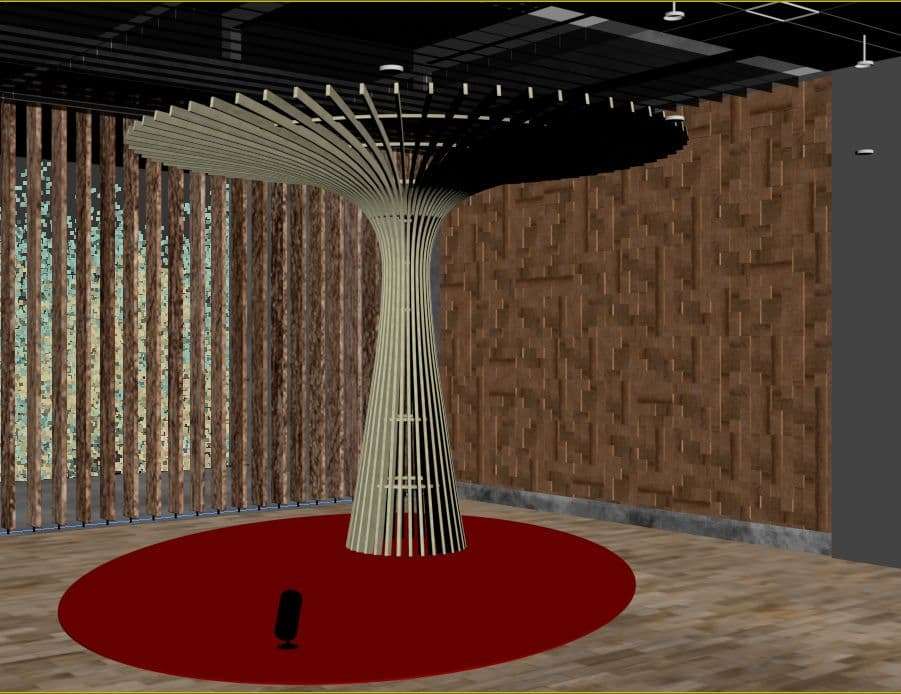
The image that I will talk about, and that I am showing at the end of the article, belongs to the exhibition area of the building. For this area I was especially interested in the study of the light and, therefore, I have incorporated skylights on the ceiling of the room, screened with slats. The back wall of the room has a low relief in wooden pieces that produces a particular effect when the light, filtered by the slats, is projected.
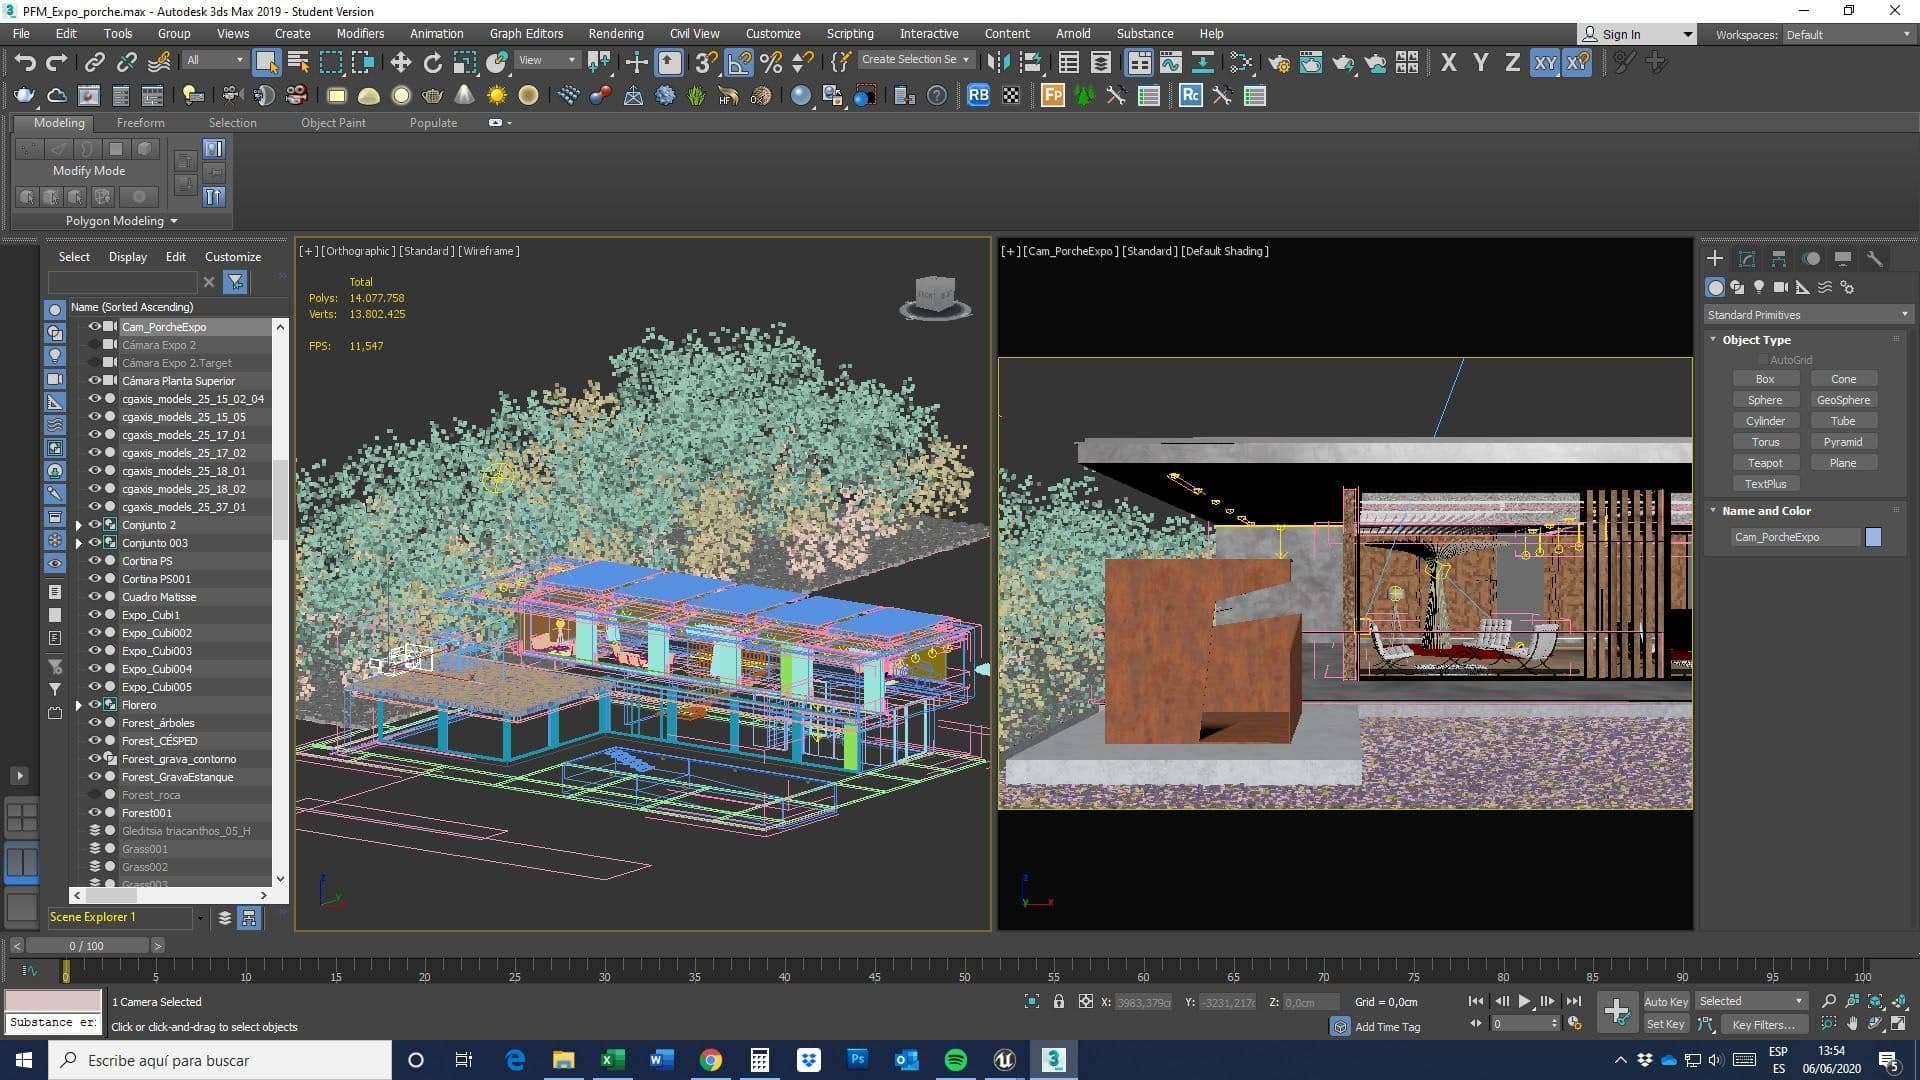
I have done the building modeling in Autodesk 3DMax. The sculpture that appears in the foreground reproduces the work of the basque sculptor Jorge Oteiza exhibited in the Reina Sofía museum in Madrid. It has also been modeled in 3D Max, and the material, a rusty steel, has been created with Substance Designer.
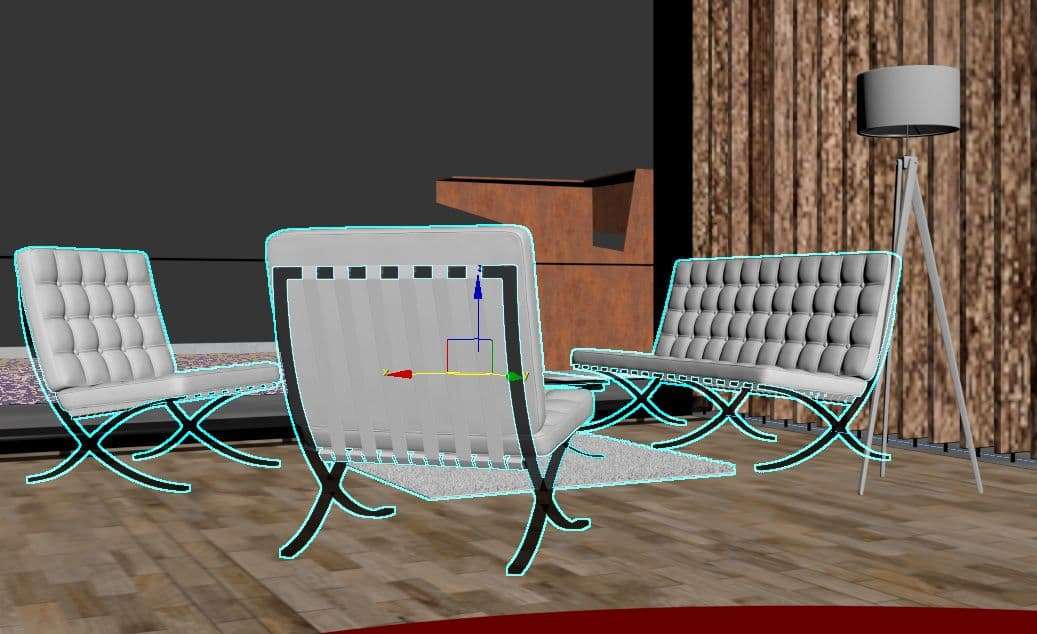
The furniture that appears behind the glass, some leather sofas, a lamp, a carpet and a wooden sculptural object that recalls the top of a tree, are downloaded from a CGAxis bookstore.
The chair is known as the "Barcelona chair", designed by Mies van der Rohe and Lilly Reich, for the German Pavilion at the International Exposition of 1929, hosted by Barcelona, Catalonia, Spain. The exterior gardening of the building has been made with Forest Pack. For rendering I used V-Ray and the post-production work has been done with Adobe Photoshop.
Objectives
In this article, first of all, I would like to show you how I have configured the V-Ray parameters to achieve a photorealistic result, secondly, how to make the Forest Pack vegetation cropped correctly if you look to change the sky in post-production, and finally, how to work with the V-Ray Render Elements to be able to adjust the light in the final image.
V-Ray setup
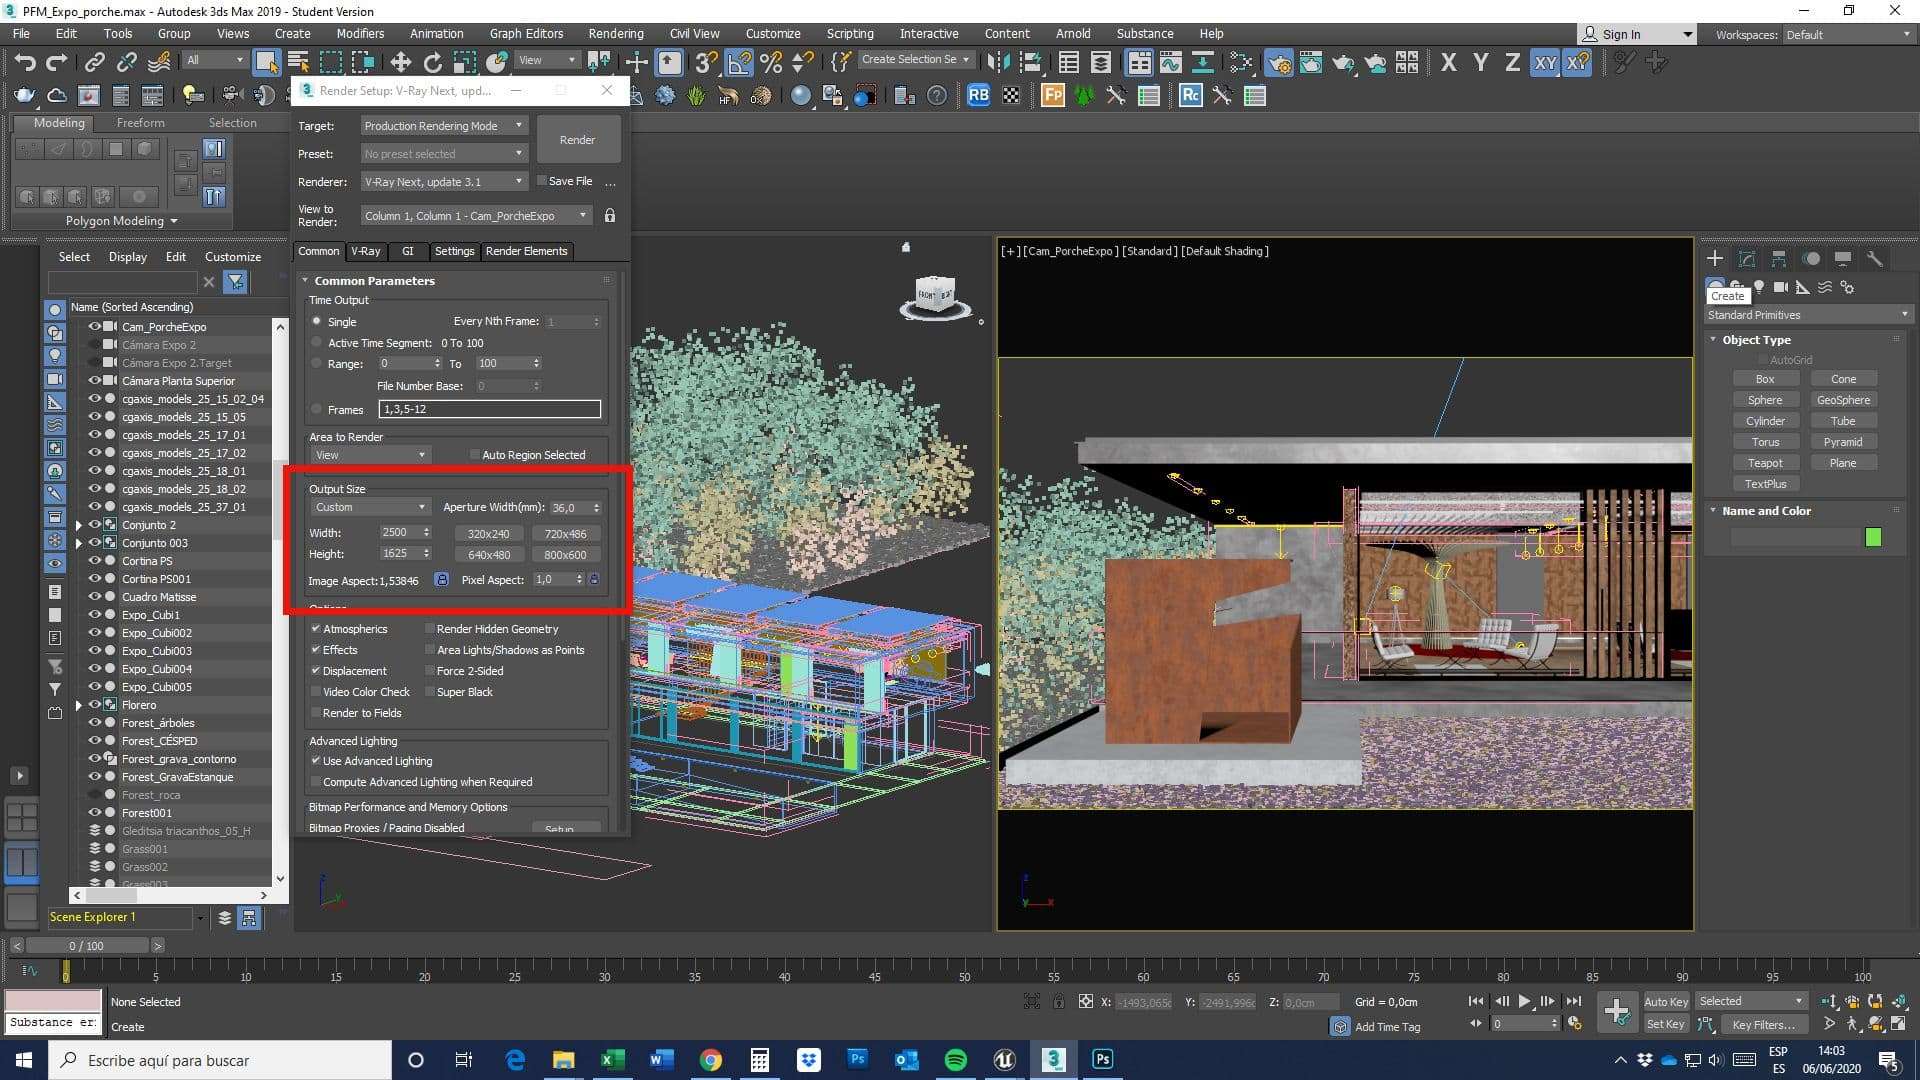
I used a custom Image Aspectratio of 1.54. I adopted this value based on the composition of the objects in the scene and in the Focal Length of the camera, in this case 40mm. I adjusted the Image Resolution to 2500x1625 (Width x Height) pixels, to achieve a correct display in a slightly larger size than the standard A3 format.
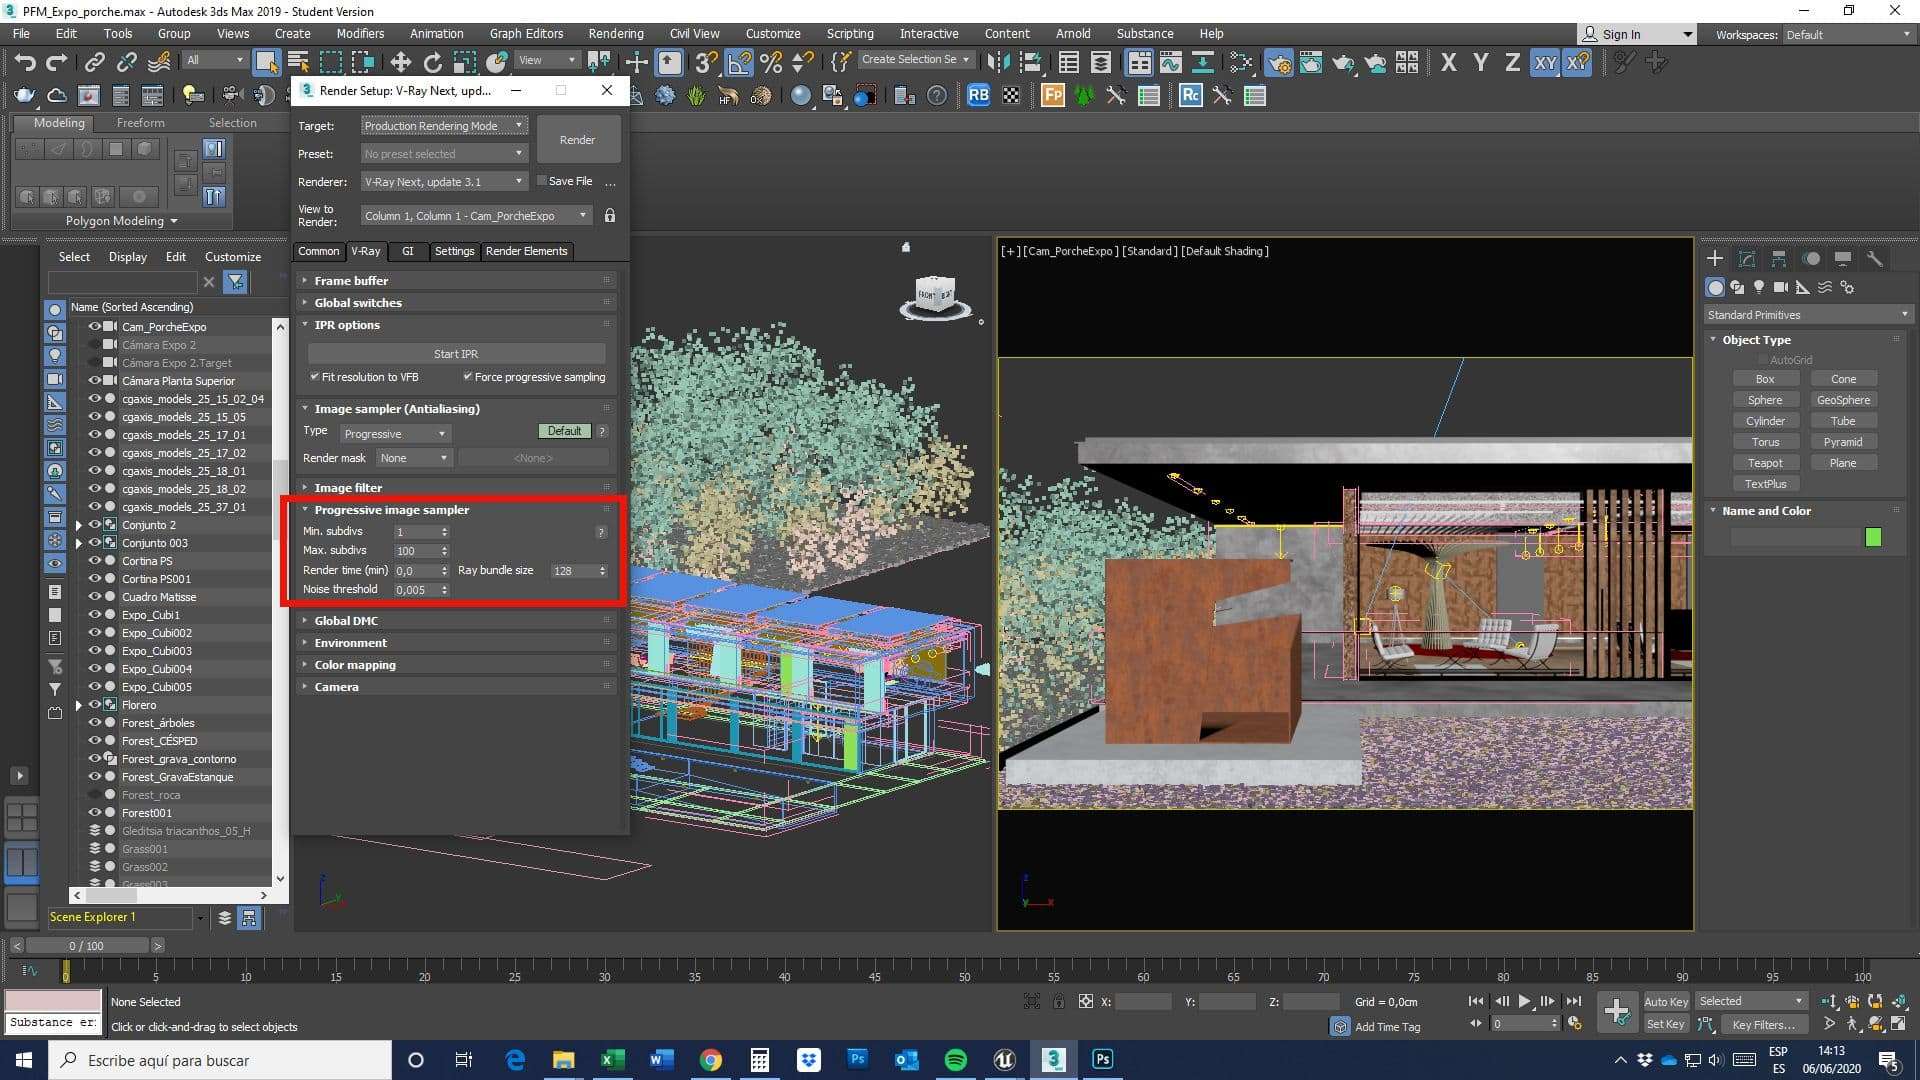
I adjusted the Noise threshold to 0.005 to get a very sharp image. In order to achieve that low noise level, it is necessary to set the rendering time to 0.0 minutes. But instead of that, I adjusted the Render time to 180 minutes, a time with which I reached an acceptable noise level that I could correct in post-production using the Render Element VRay Denoiser.
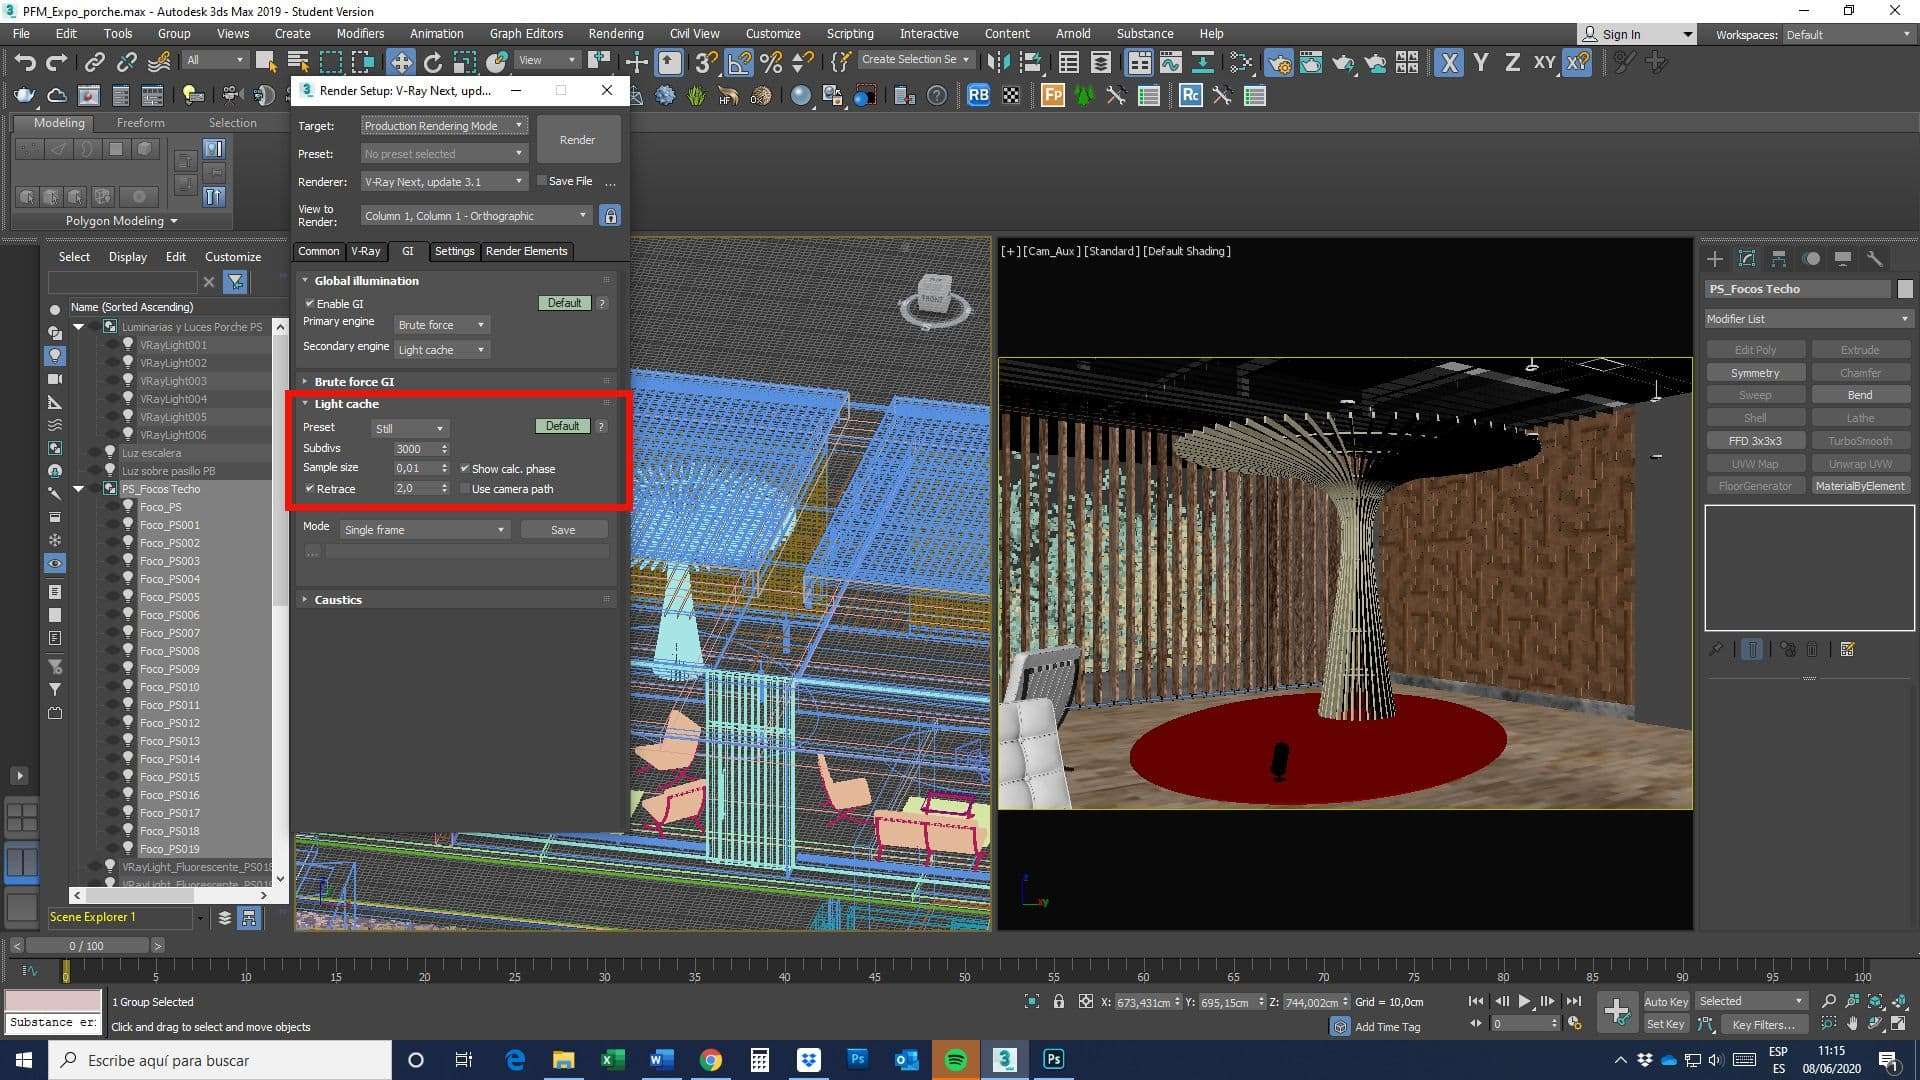
In order to control the number of rays that are shot into the scene and the noise quality of the light cache samples, I have adjusted the Subdivs parameter to 3000, a correct number for final images.
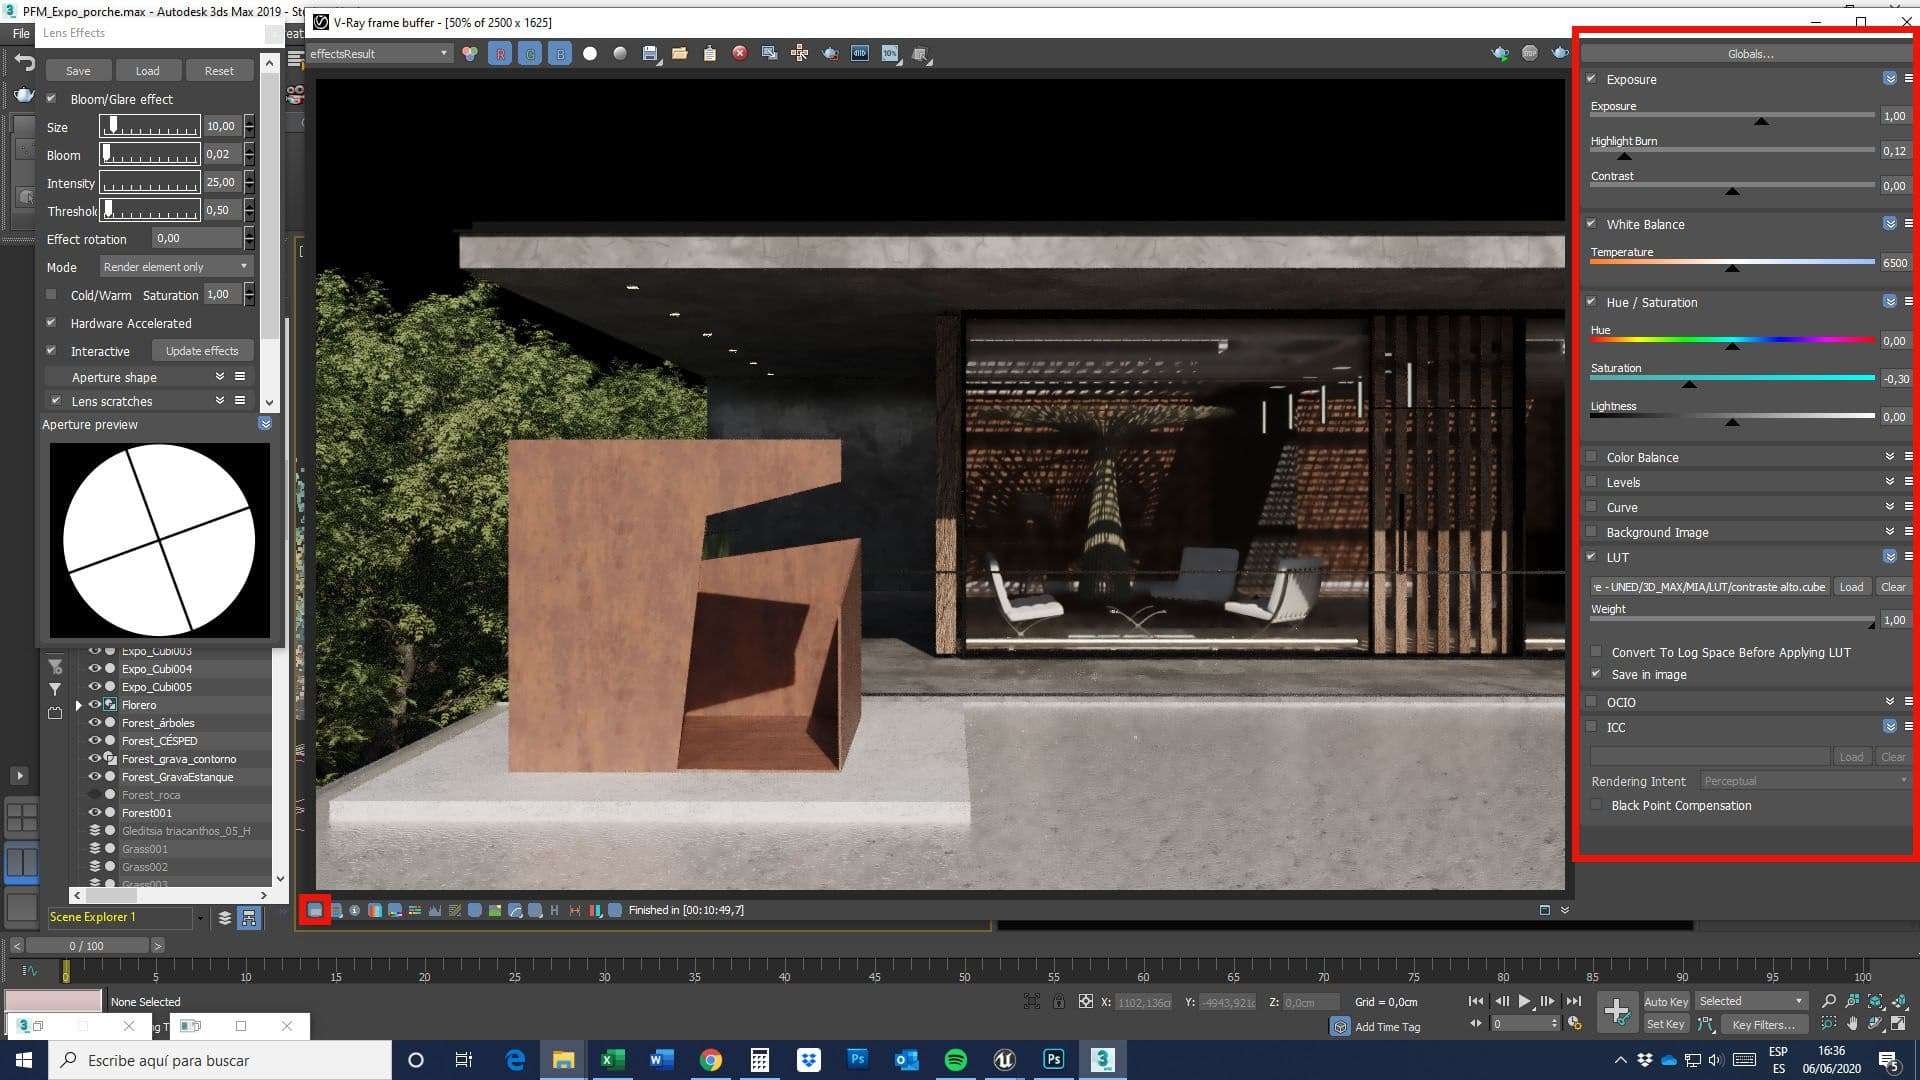
Before saving the images, I made some adjustments in the Color Correction Panel. I increased the Exposure value of the image by one point (+1.0), so the brightness is twice as high as the original and the result is closer to the desired effect. I also applied a correction of the highlights exposure to avoid burned areas in the image, and for that purpose I adjusted the Highlight Burn value to 0.12.
Since the colour tone was too saturated for me, I also reduced the Saturation value to -0.30 to move the overall colour of the image to grayscale. There was no need to change the White Balance. The image did not require a warmer or colder appearance. Finally, I used a LUT (Look-Up Table) file, with high-contrast colours to enhance the image aspect, and I did not forget to enable the “Save in image” box.
Color Correction Panel
Vegetation Profile
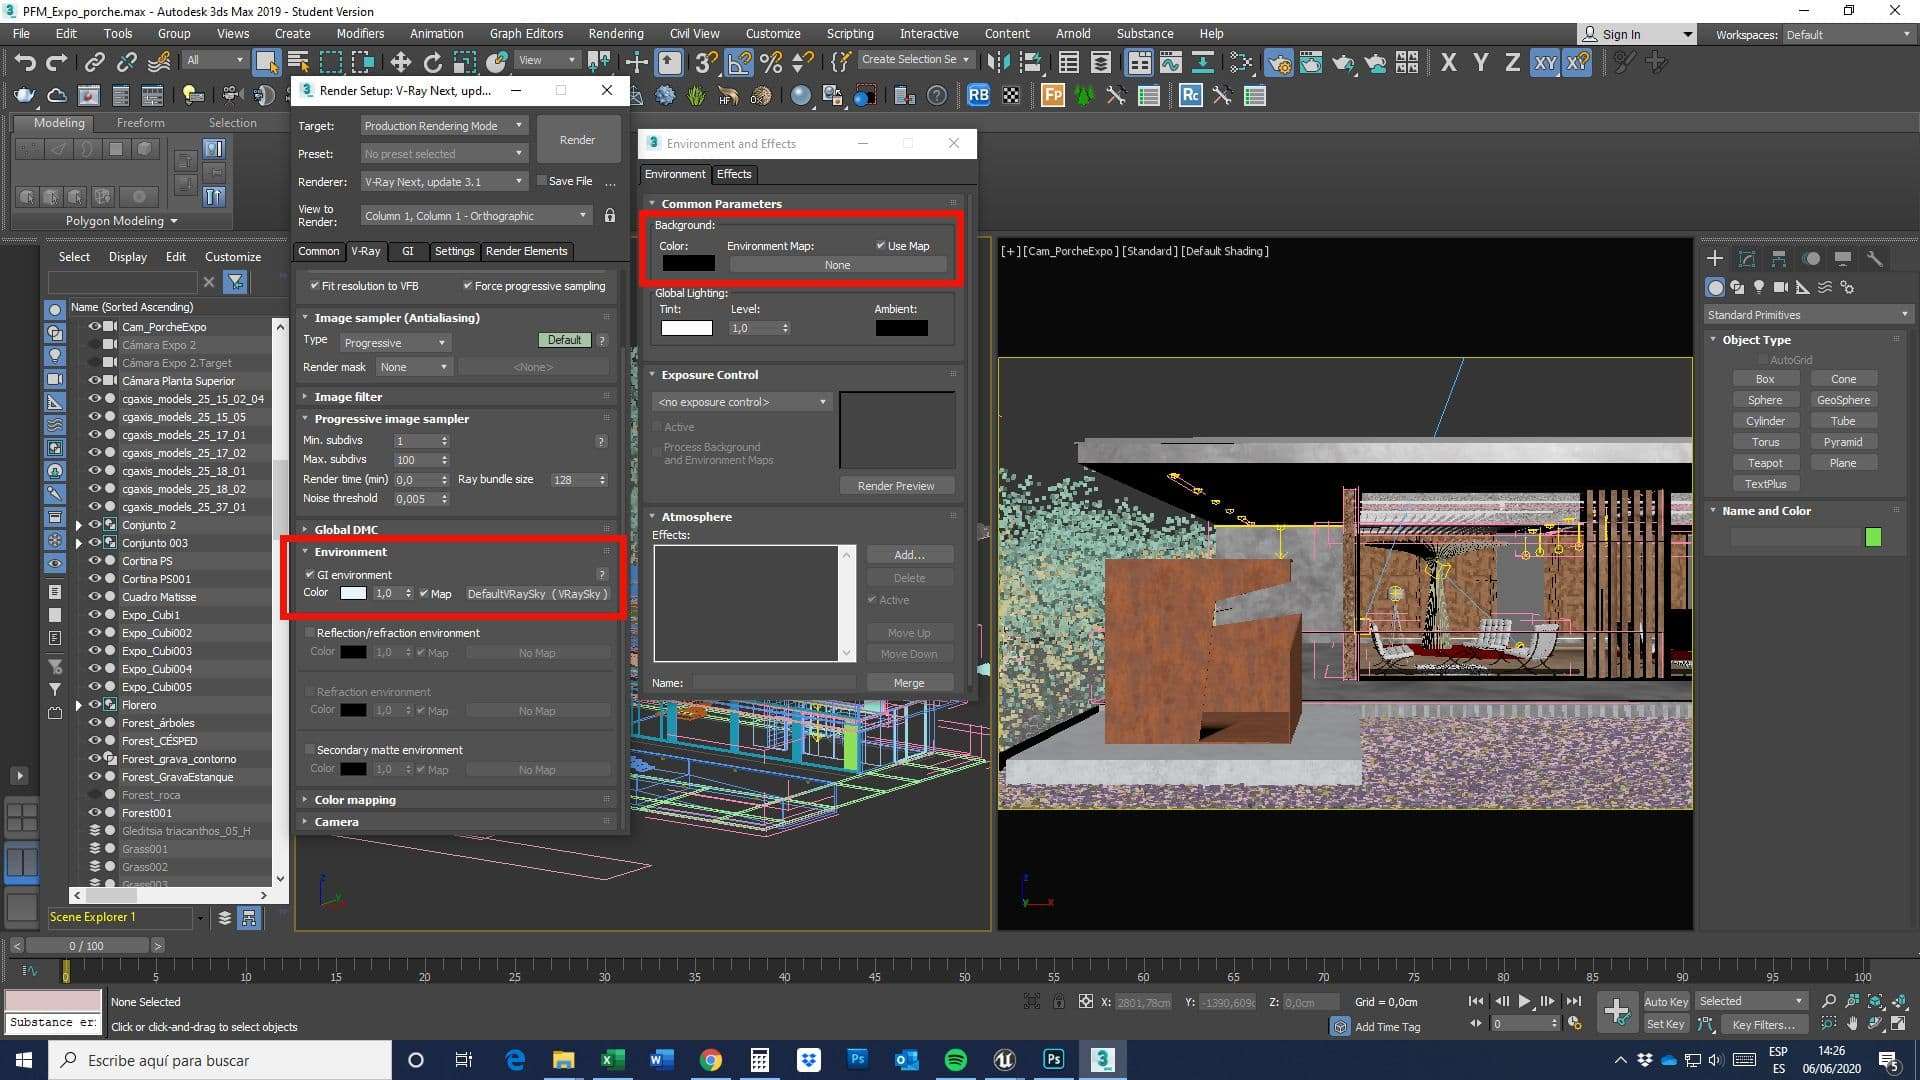
When we illuminate a scene with an HDRI (you can find some here) and we want to replace the HDRI background with a different sky, whether we save the image in “.png” or “.exr” format, it is common for the vegetation profile to not be perfect. The solution to this problem is simple: just make the HDRI invisible and the vegetation will be trimmed perfectly well, and we will be able to put the sky we want in post-production.
The scene that I am presenting is not illuminated with an HDRI, in this case it is illuminated with V-Ray Sun and with the sky that, by default, can be included as Environment when placing the Vray sun, I mean the DefaultVRaySun. My idea was to replace the VRaySun sky with a post-production sky and get the Forest Pack vegetation trimmed correctly. For this purpose, I had to make a couple of adjustments.
Firstly, in the Environment & Effects panel, I cleaned the DefaultVraySky, so that the image in the rendering did not include the sky, and secondly, in the V-Ray Set up render I included the DefaultVraySky map, so that in global illumination´s reflection and refraction calculations the sky map was taken into account. I saved the file in “.png” format and incorporated the sky in Photoshop. This way the vegetation was trimmed correctly.
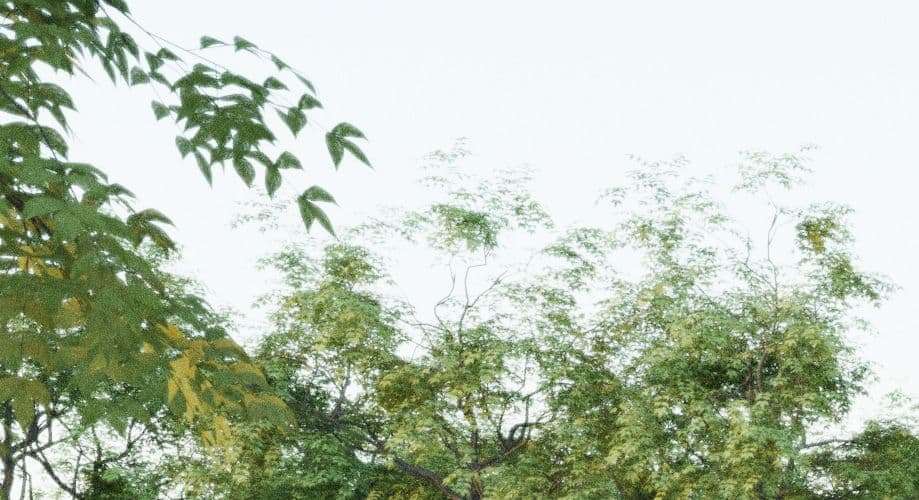
As a summary, I will show you three different aspects of vegetation and sky trimming:
Image on the left:
Environment map: DefaultVraySky
.jpg file without postproduction
Central image:
Environment map: DefaultVraySky
.png file with postproduction
Image on the right:
Environment map: None
.png file with postproduction
V-Ray Render Elements
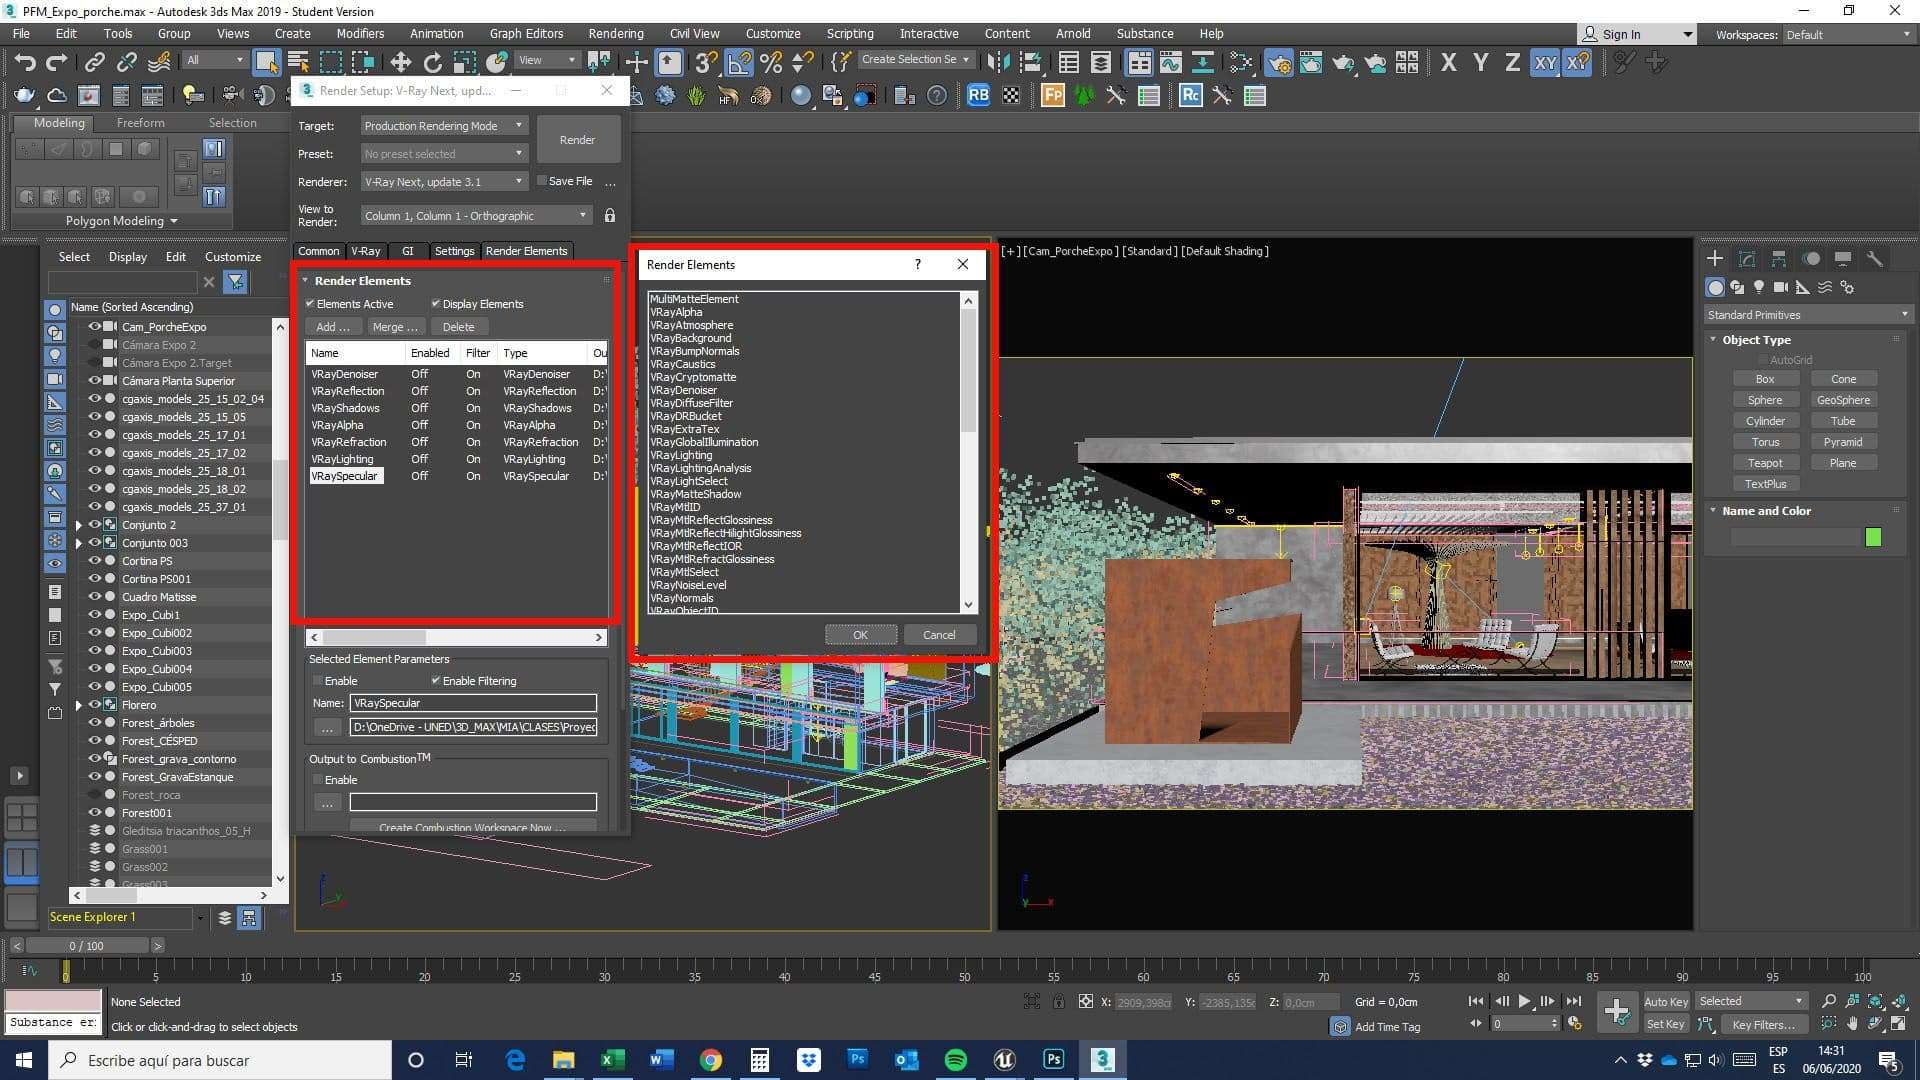
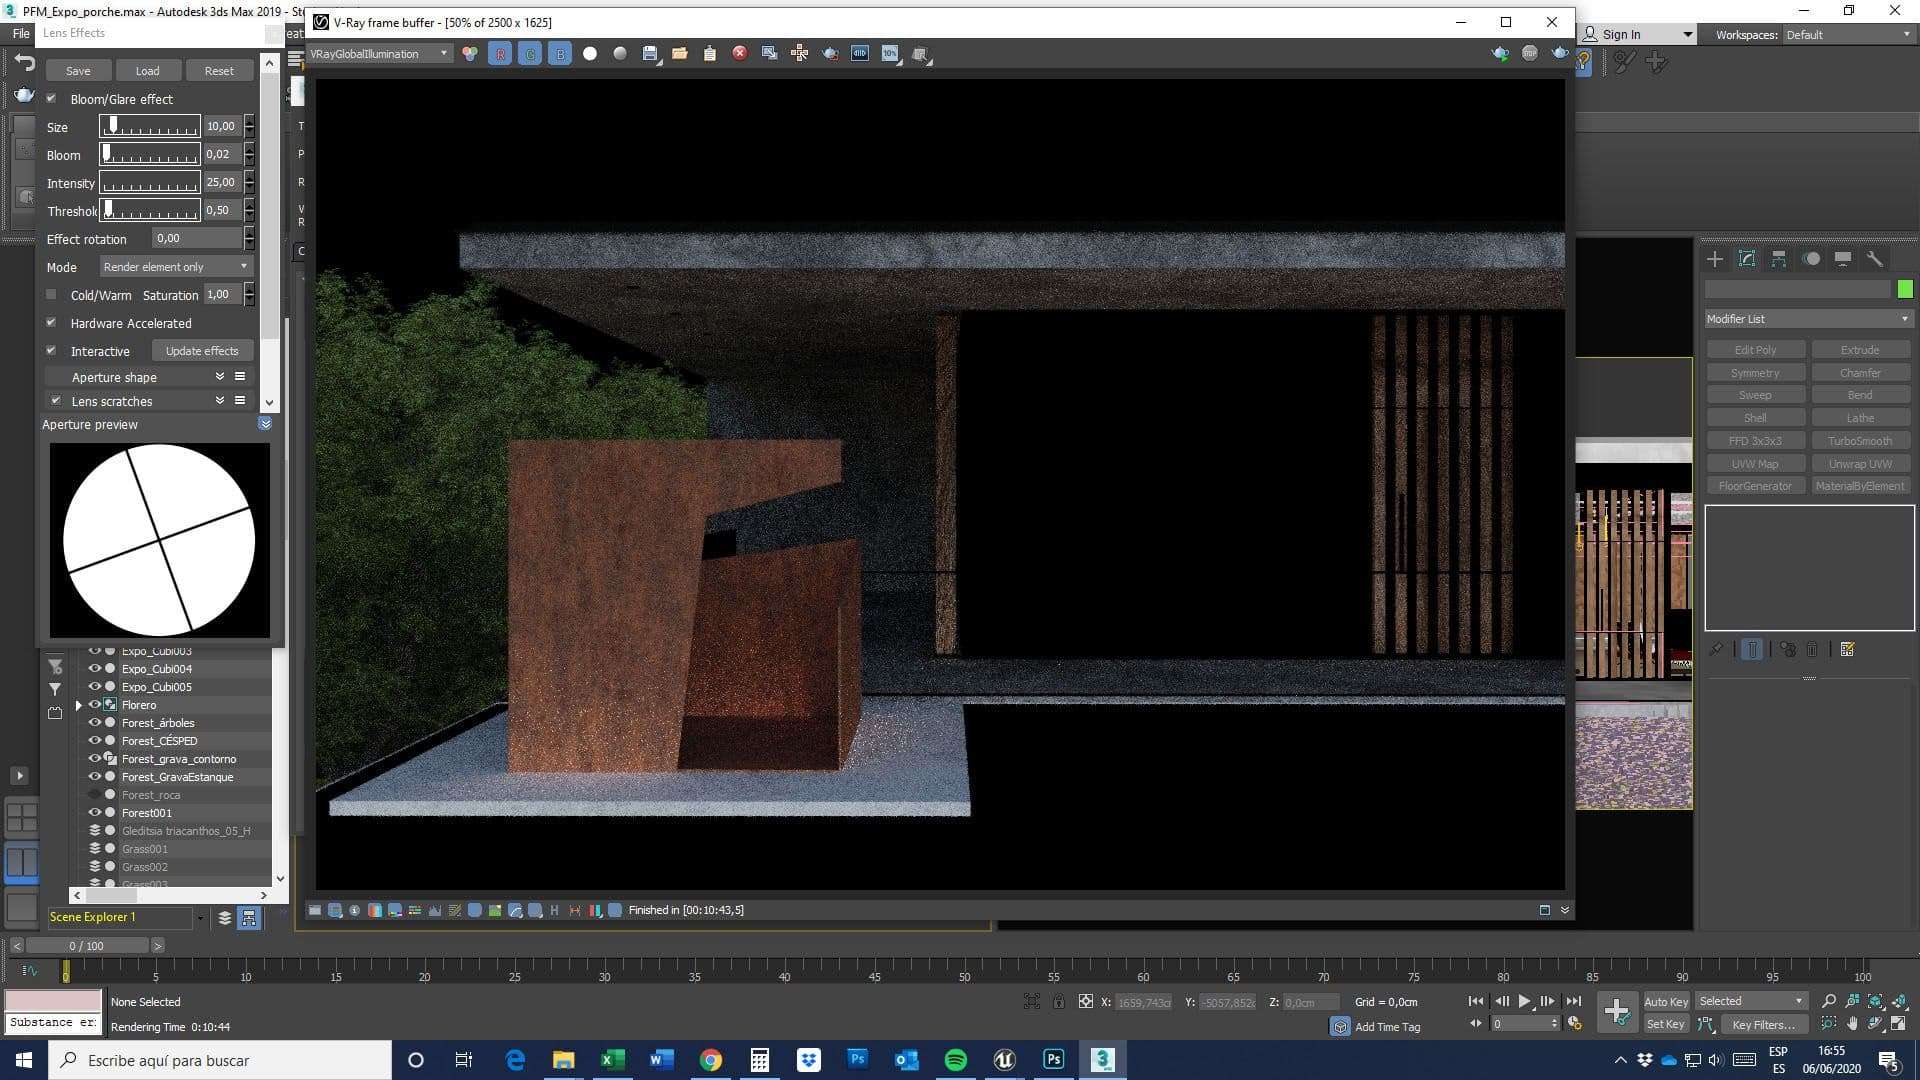
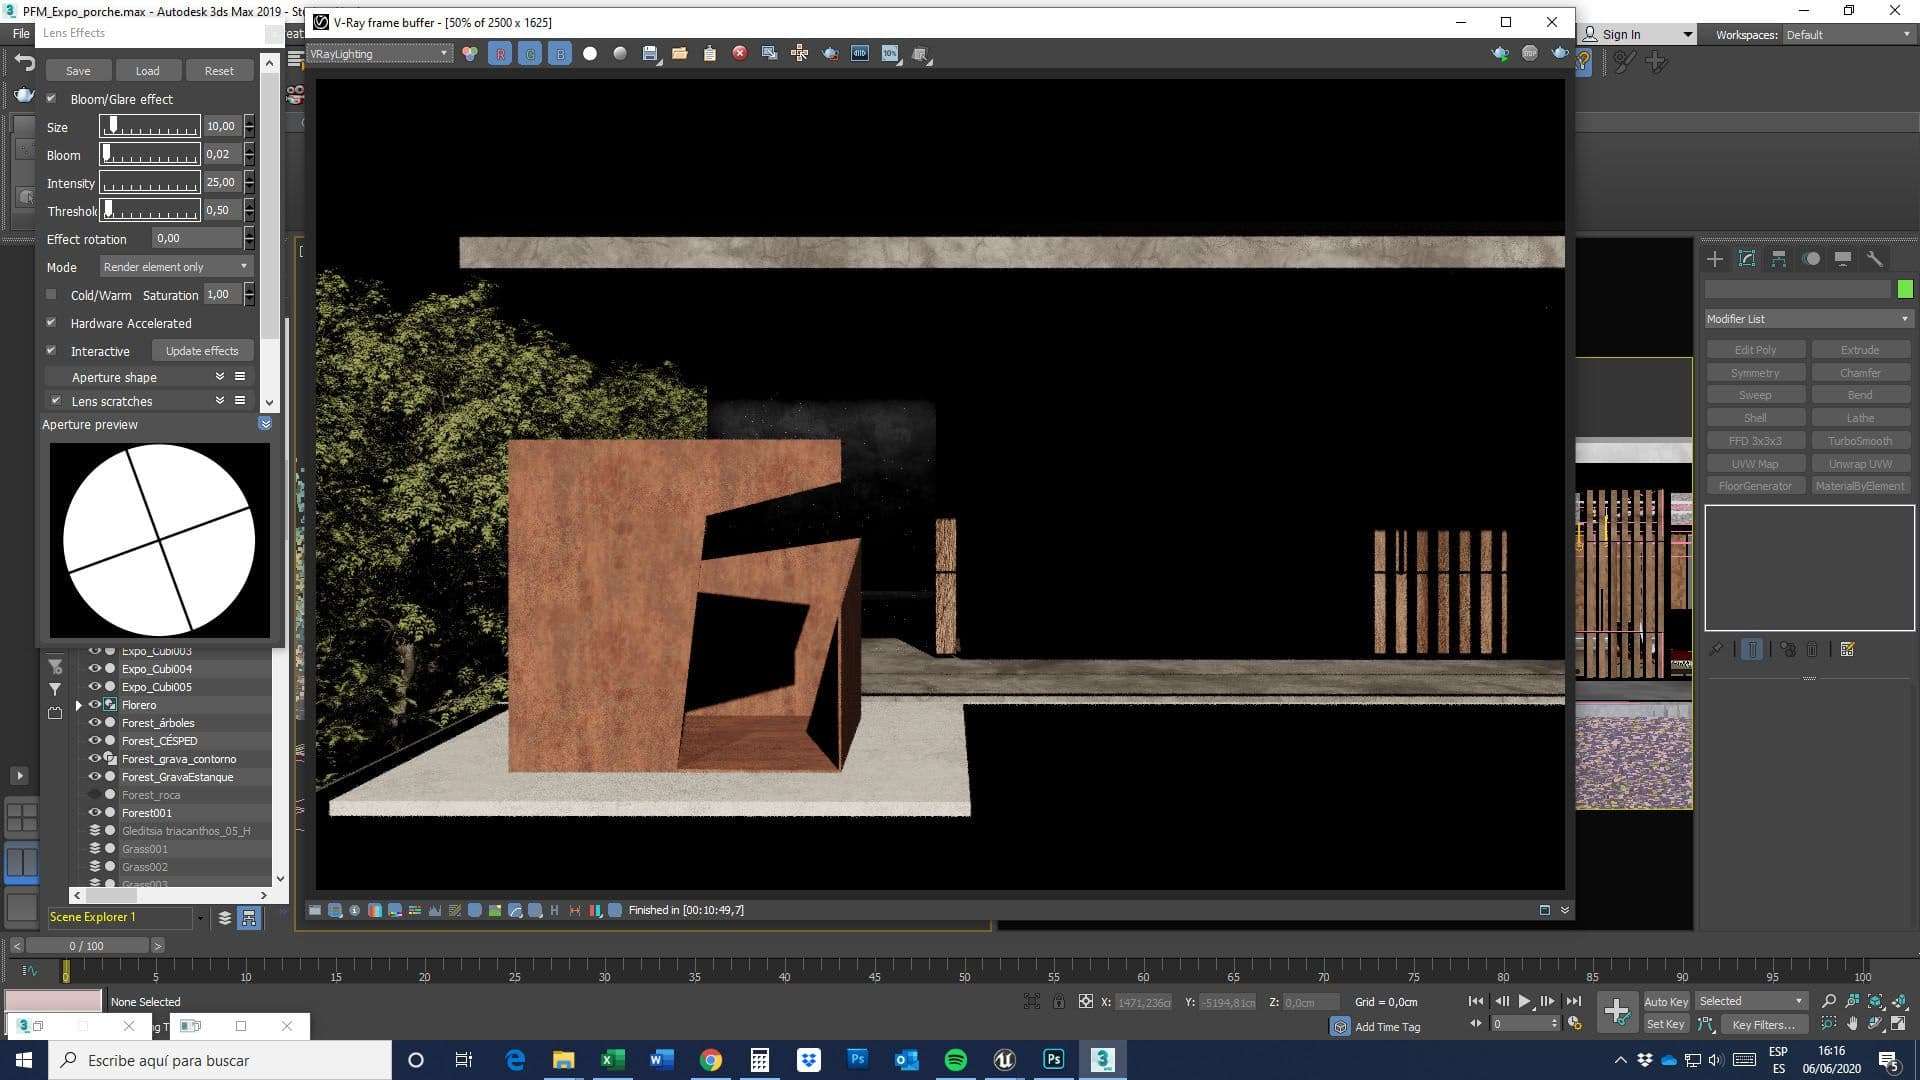
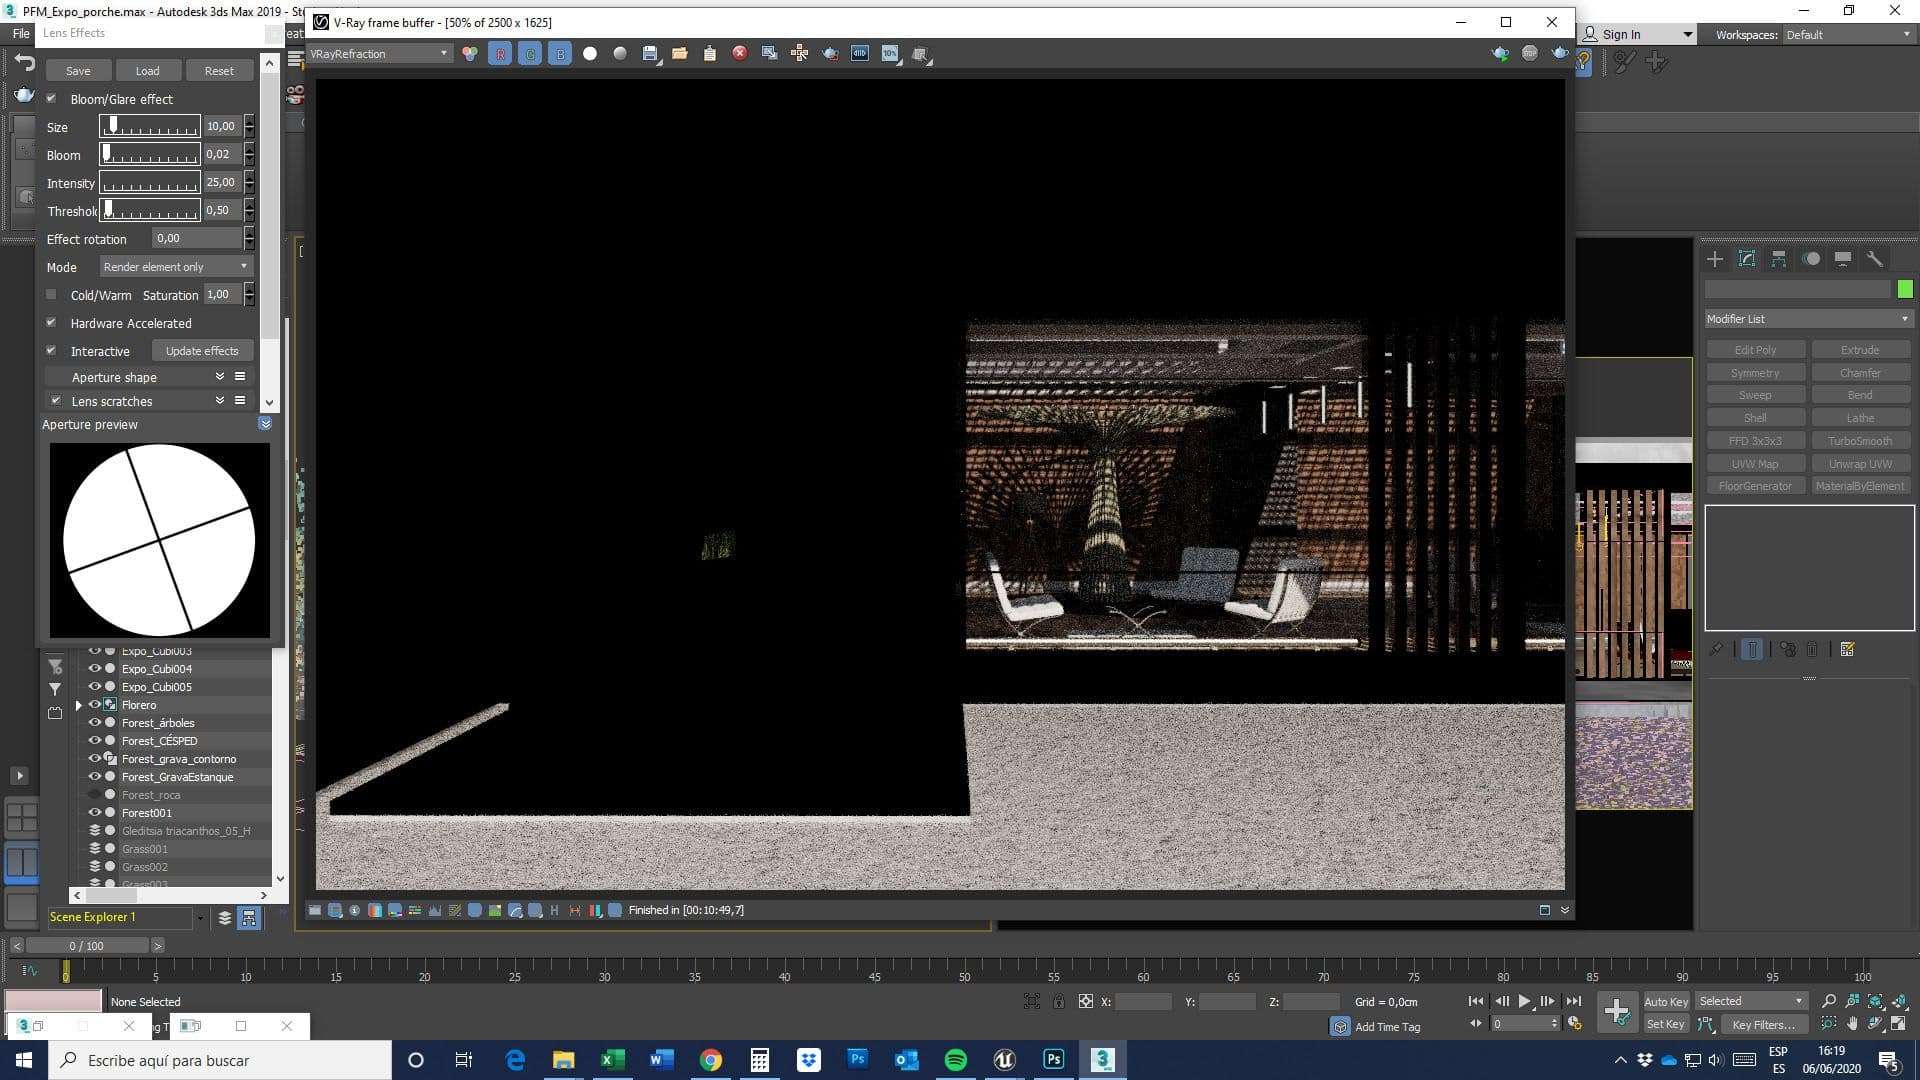
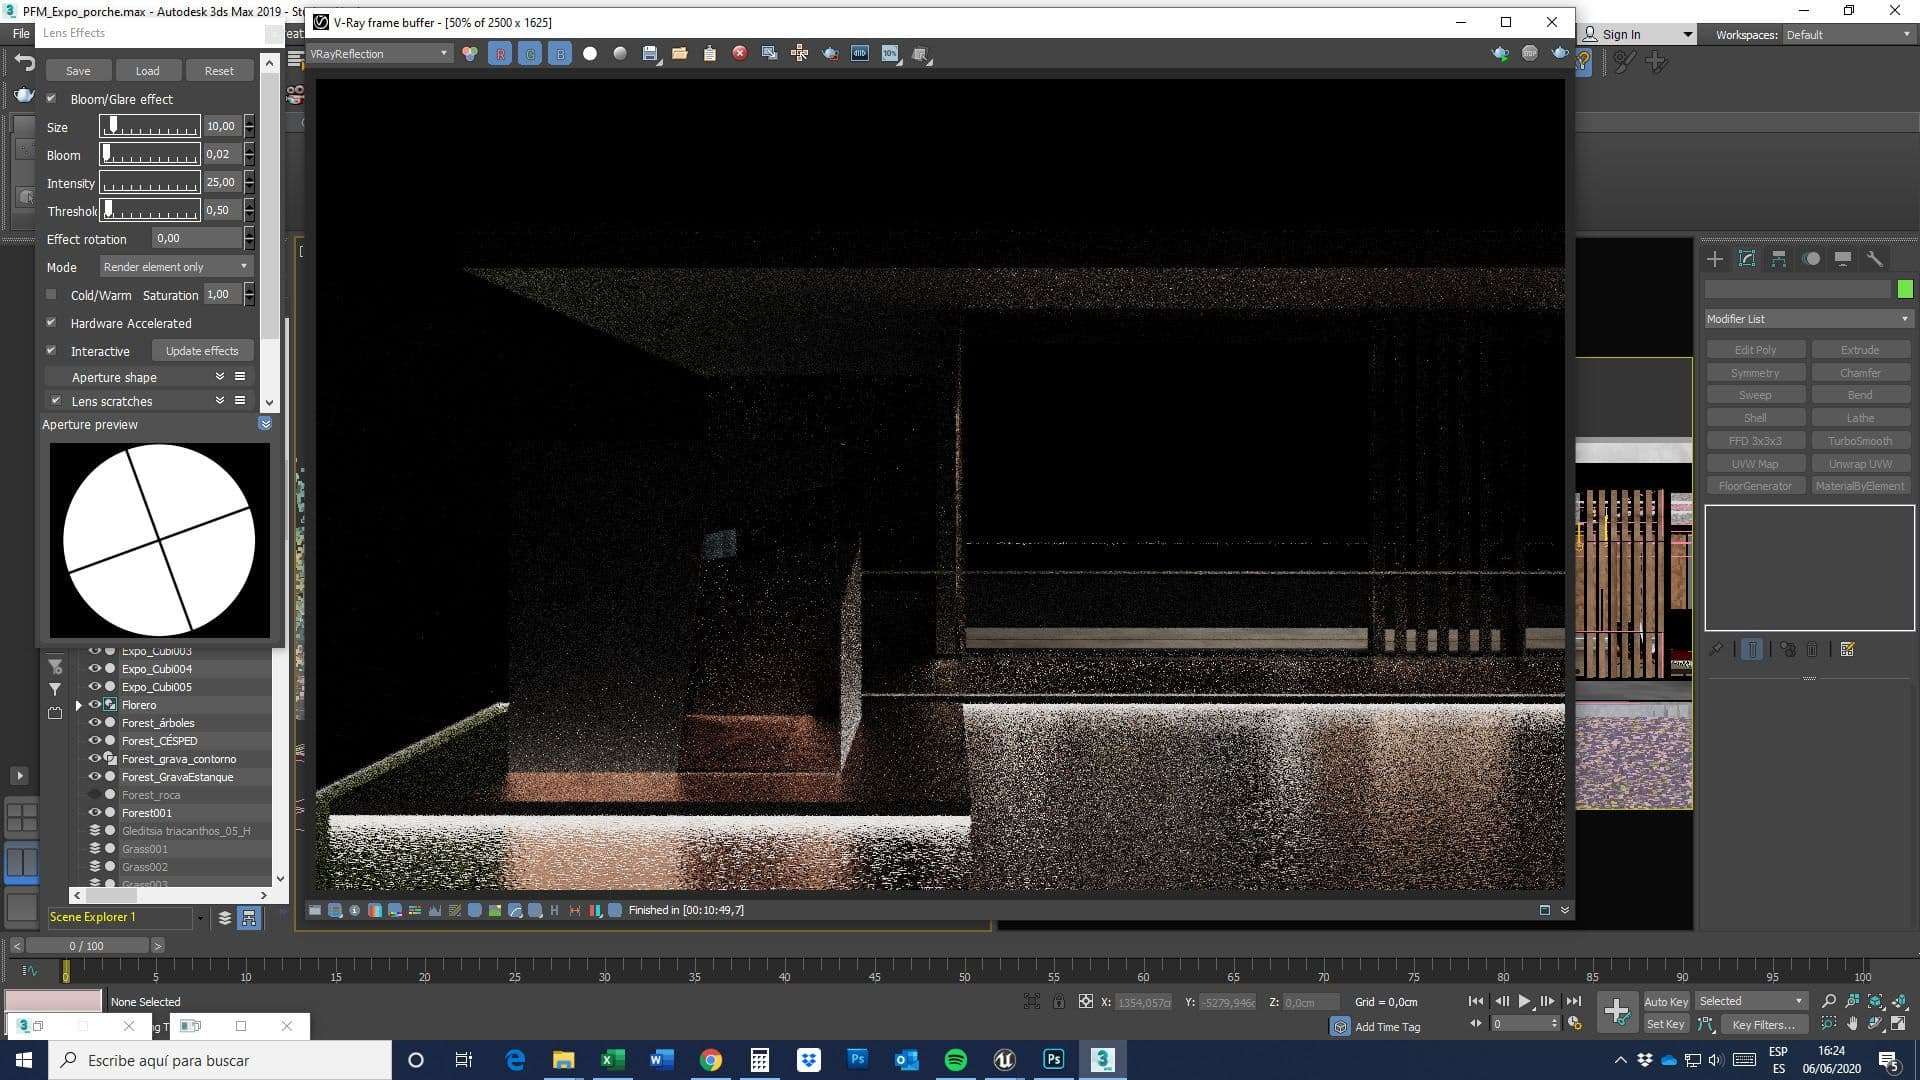
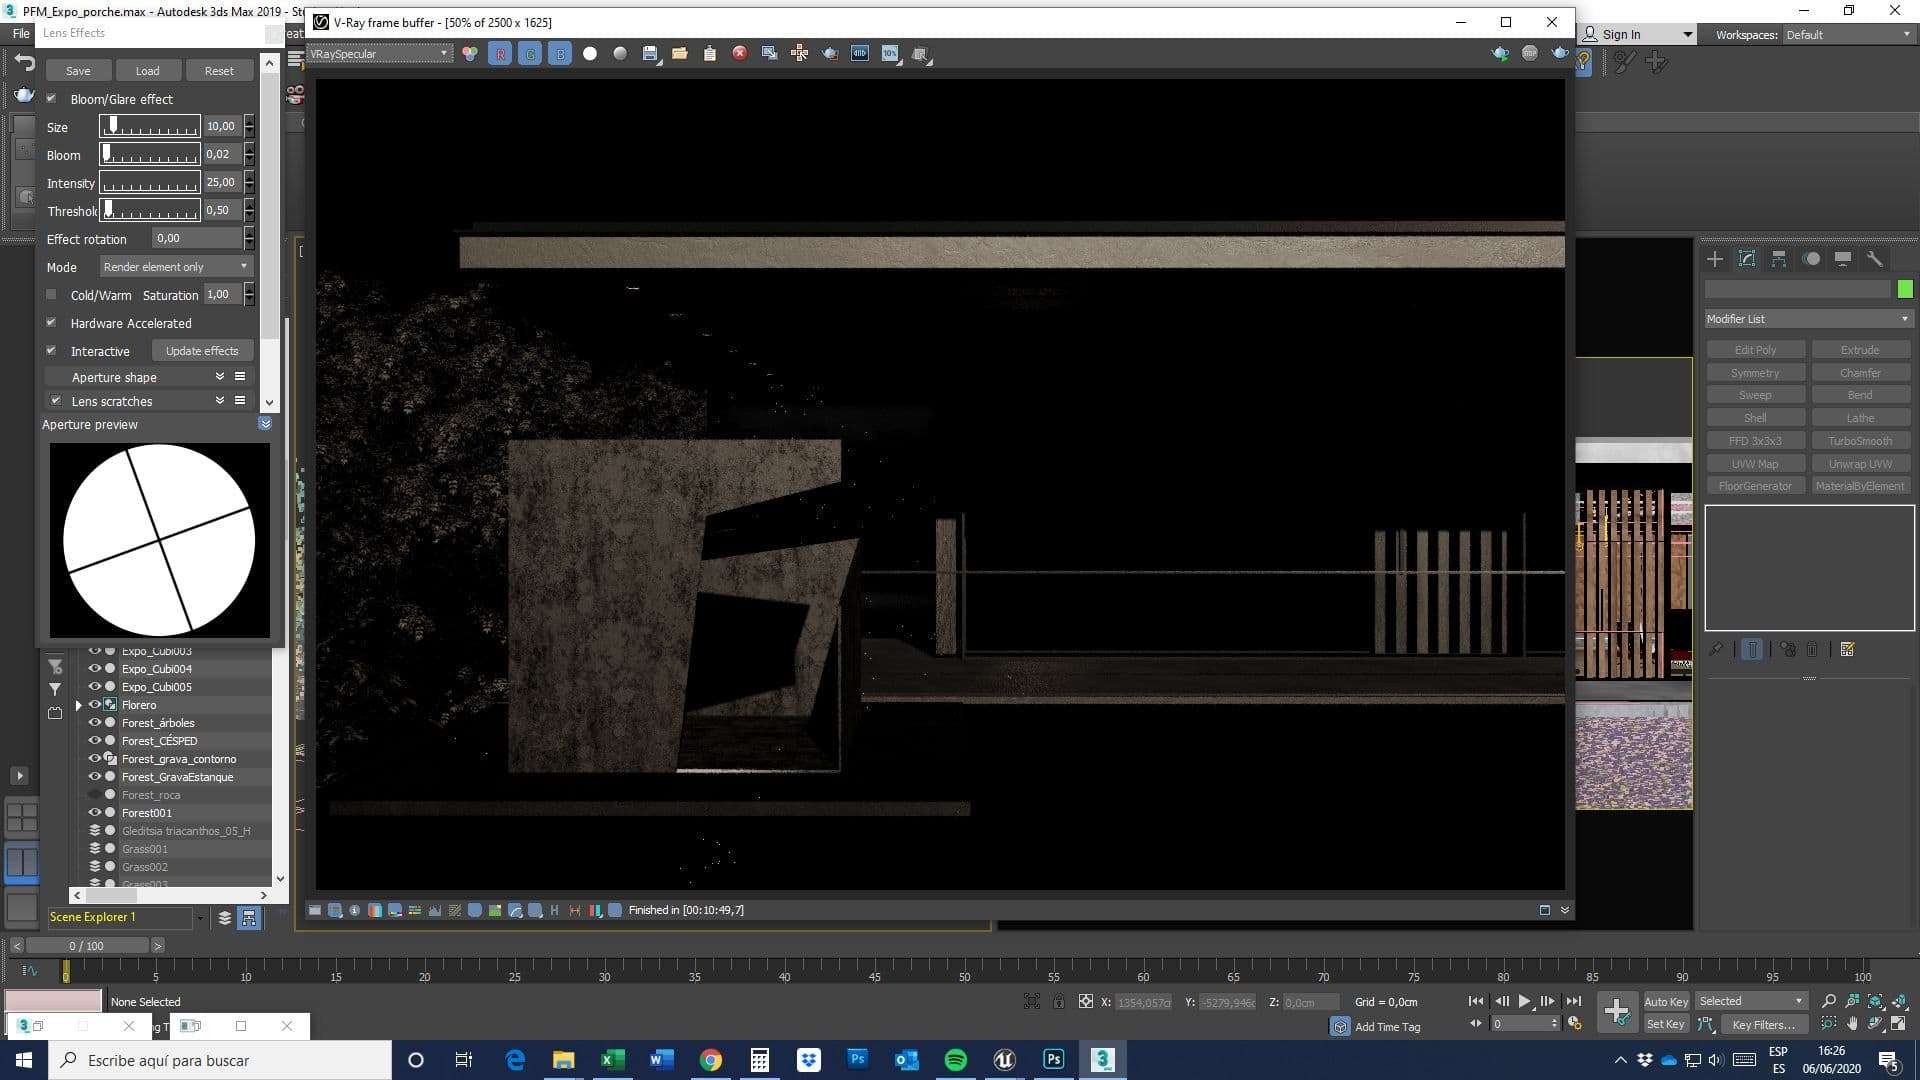
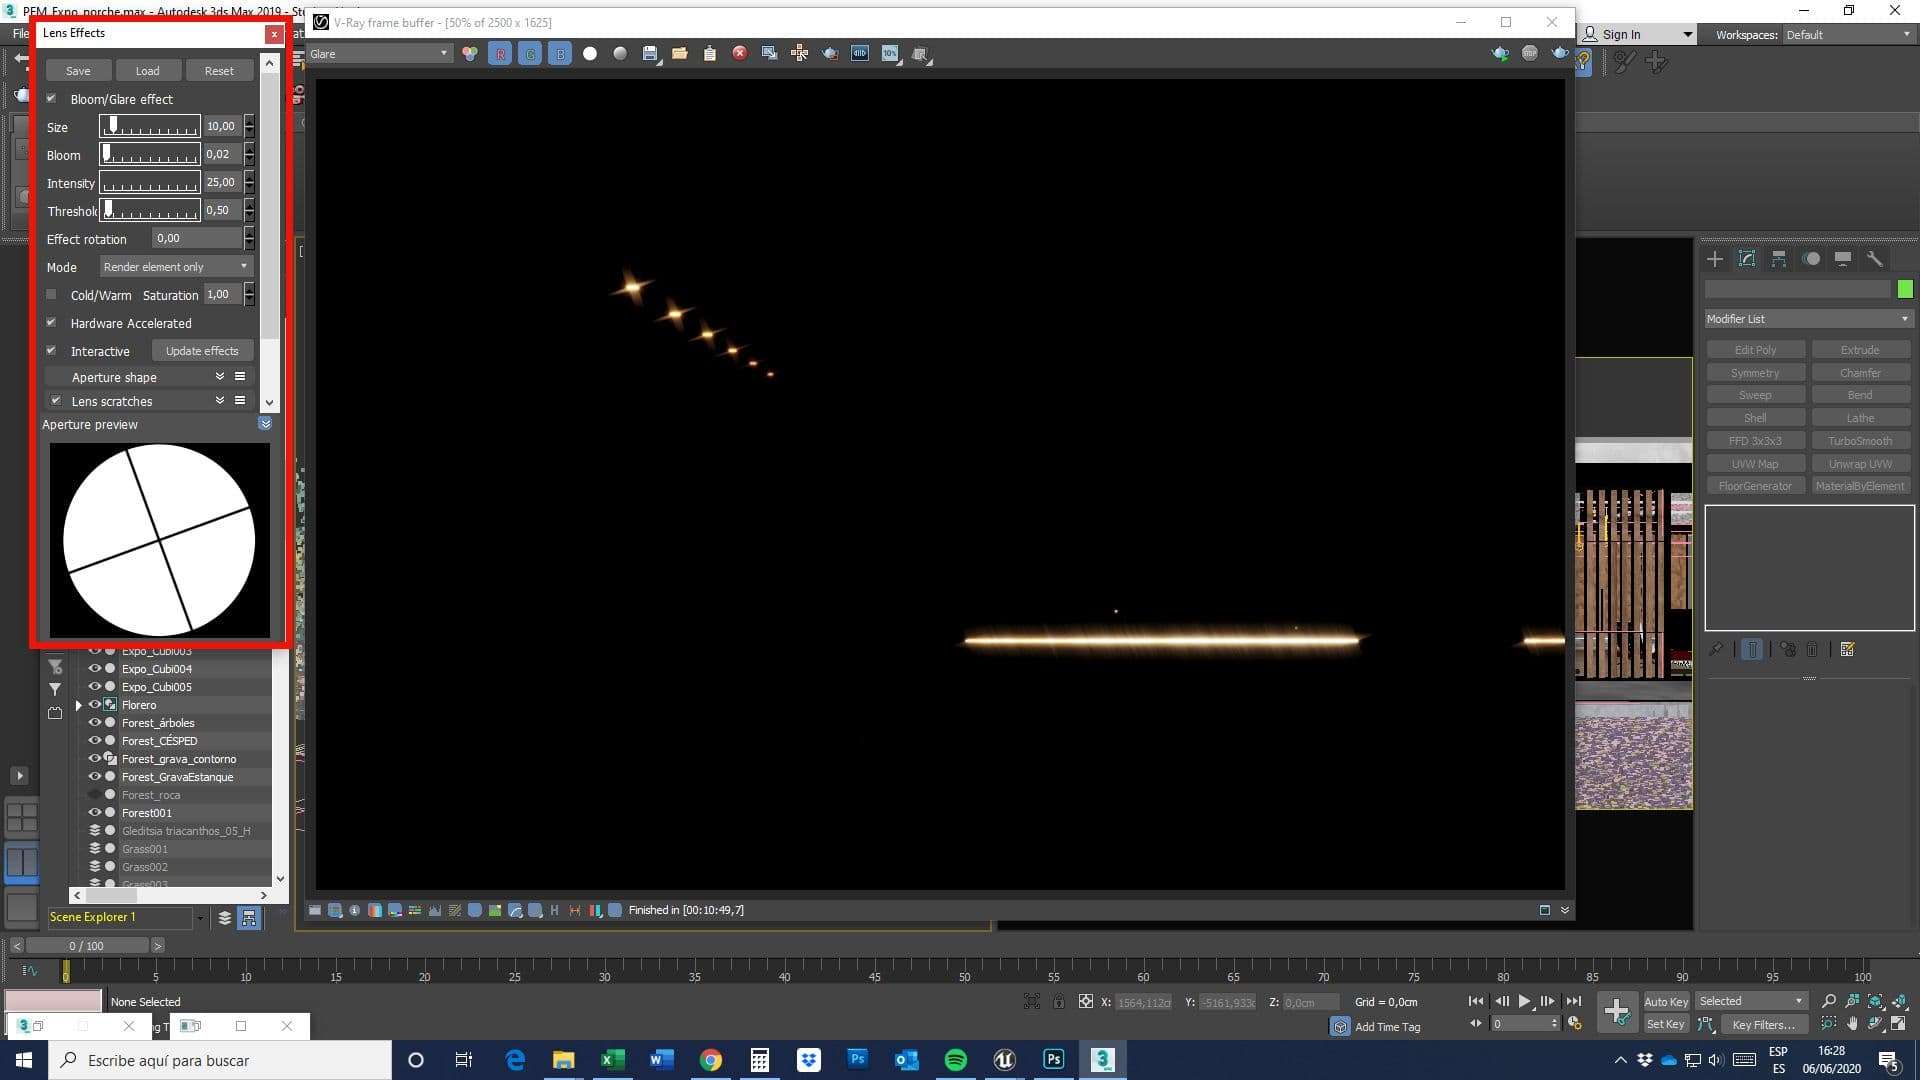
V-Ray Render Elements can be very useful if you want to have light control in the post-production of the image. They allow you to have independent images, such as: indirect lighting information coming from reflected diffuse light in the scene (VRayGlobalIlumination), direct lighting information - in this case the sunlight- (VRayLighting), refraction information calculated from glass or water materials (VRayRefraction), specular reflection - the reflection of light from a surface in a single particular direction- (VRaySpecular), or glare effects made with the Render element included in Lens Effects (Glare).
All these elements can be adjusted separately in their contrast, luminosity, hue, saturation, tint, blur, filters, masks, etc., and compounds in Photoshop, or in another postproduction program, in order to achieve the desired effect.
Final Render
And this was the result!
The work that I am presenting is the result of several months of learning at CICE"The Professional School of New Technologies", a study center located in Madrid that teaches a Master's Degree in Architectural VisualiSation.
I hope you enjoyed this article and found some valuable content.