Creating Props for Games Using Maya and Zbrush
Rogelio Magaña gives us an easy to follow process for creating games for props, using Maya and ZBrush.
Rogelio Magaña gives us an easy to follow process for creating games for props, using Maya and ZBrush.

Rogelio Magaña has always loved games and movies, and had a passion for creating what he saw on screen. As luck would have it, he met a teacher who was opening a small school in the town he lived in, offering courses in 3D modeling. Rogelio started at that school, and since then he has been practicing his modeling skills, learning, and improving. His dream is to work as an Environment Artist in Games.
Rogelio has taken the time to share his processes when creating games for props using Maya and ZBrush. Read on!
First of all you need to plan the project and gather as many references as you can, from as many angles as you can. In my case, since I recreated an existing object, I was limited to the references I could find of the actual object. If you decide to make an original design, gather different references to get inspired.
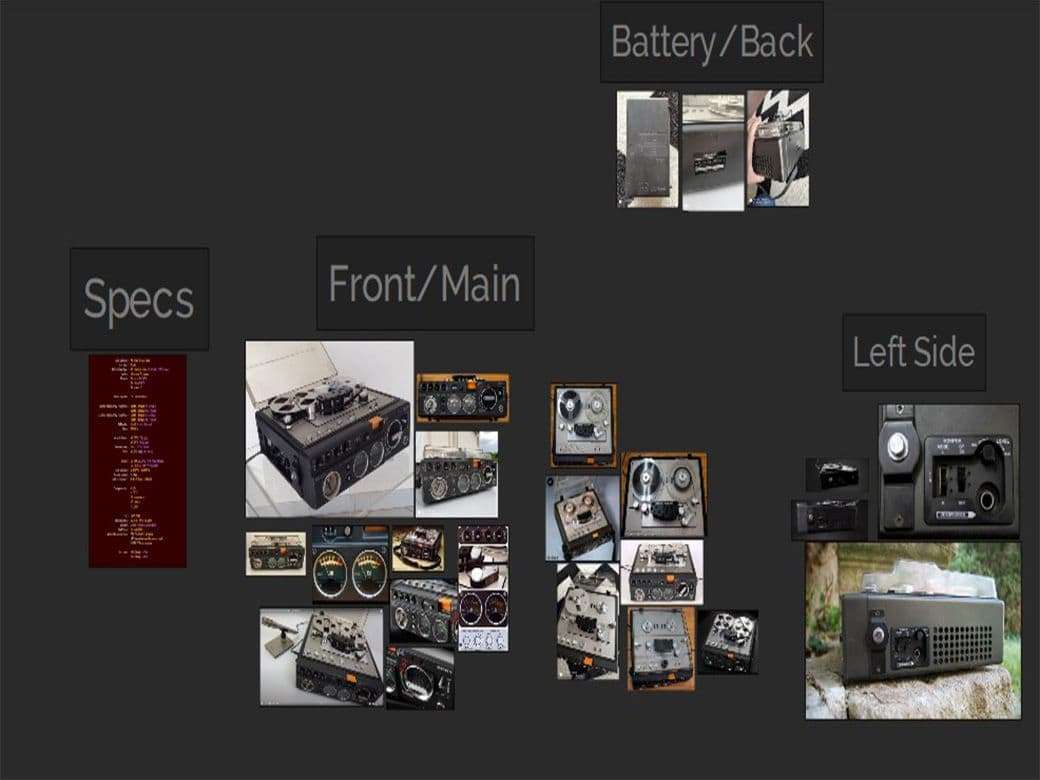

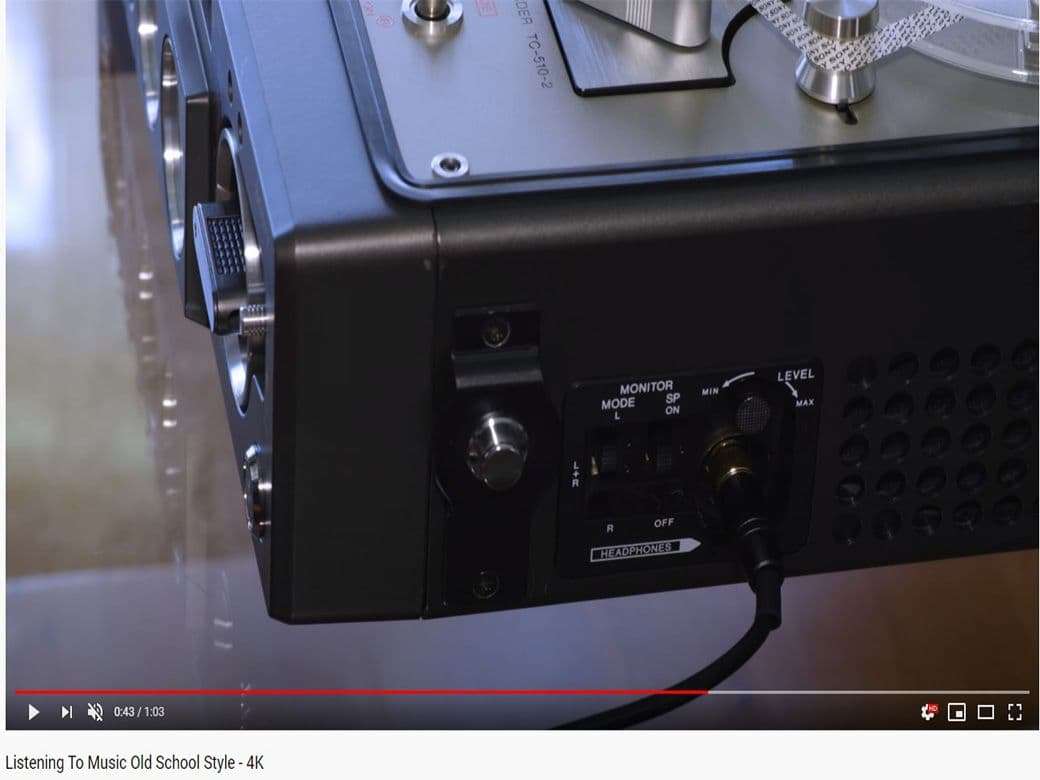
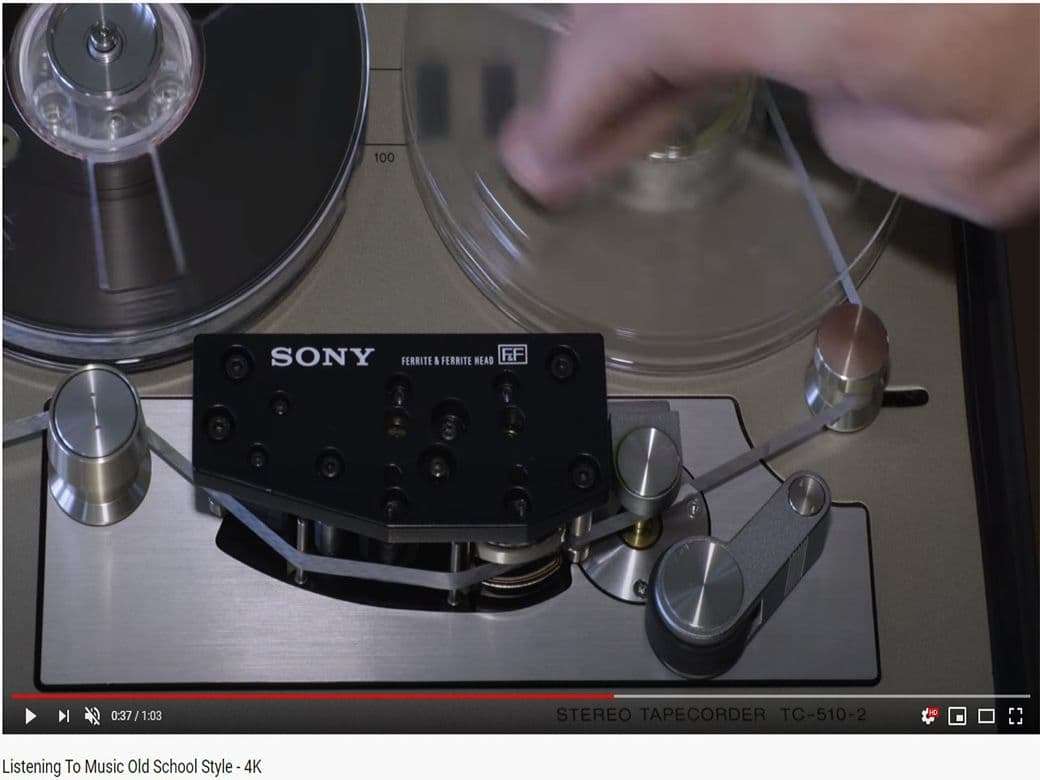
An important part of gathering references is to not feel limited to only looking in Google and Pinterest for images. You can search on youtube, blogs, articles and many more sites. For the recorder prop I worked on, my main references were two Youtube videos. The guy using the recorder used a very good camera, and took good shots of the recorder.
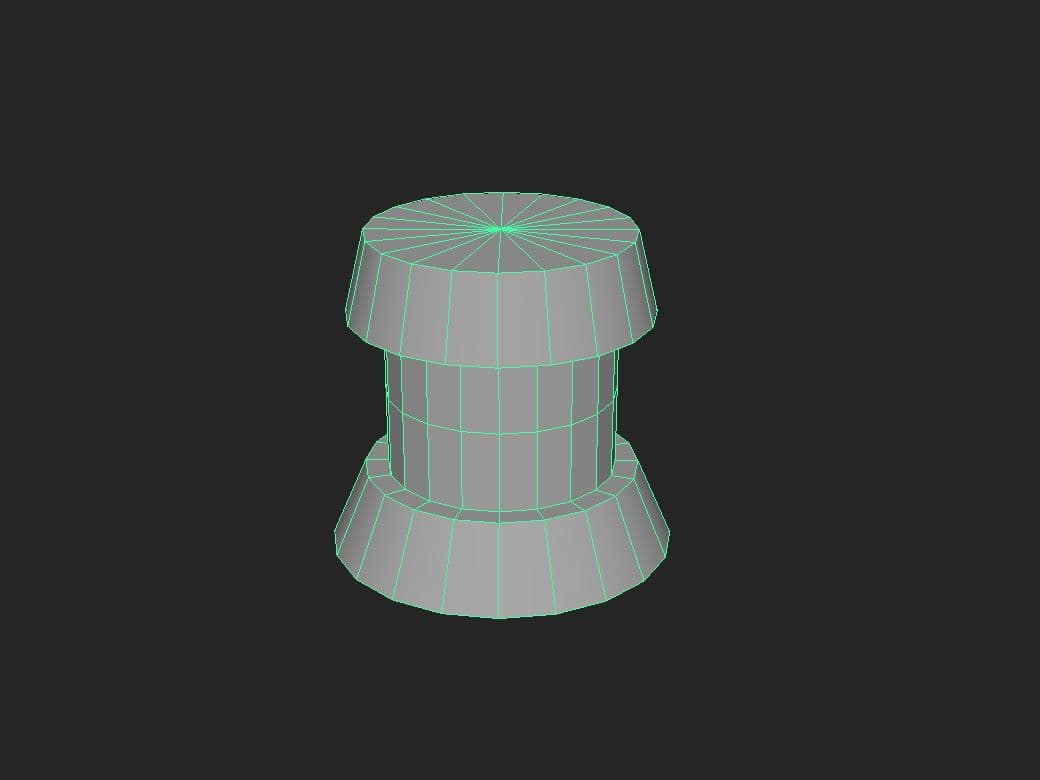
Blocking is the most difficult/important part. This is the most important part of the process because if you make a mistake or start with a wrong base the whole project could crumble. Spend a lot of time messing with your blockout until you are happy with your result. I decided to start with the actual measurements of the object since I didn't get a close to orthographic image to match it.
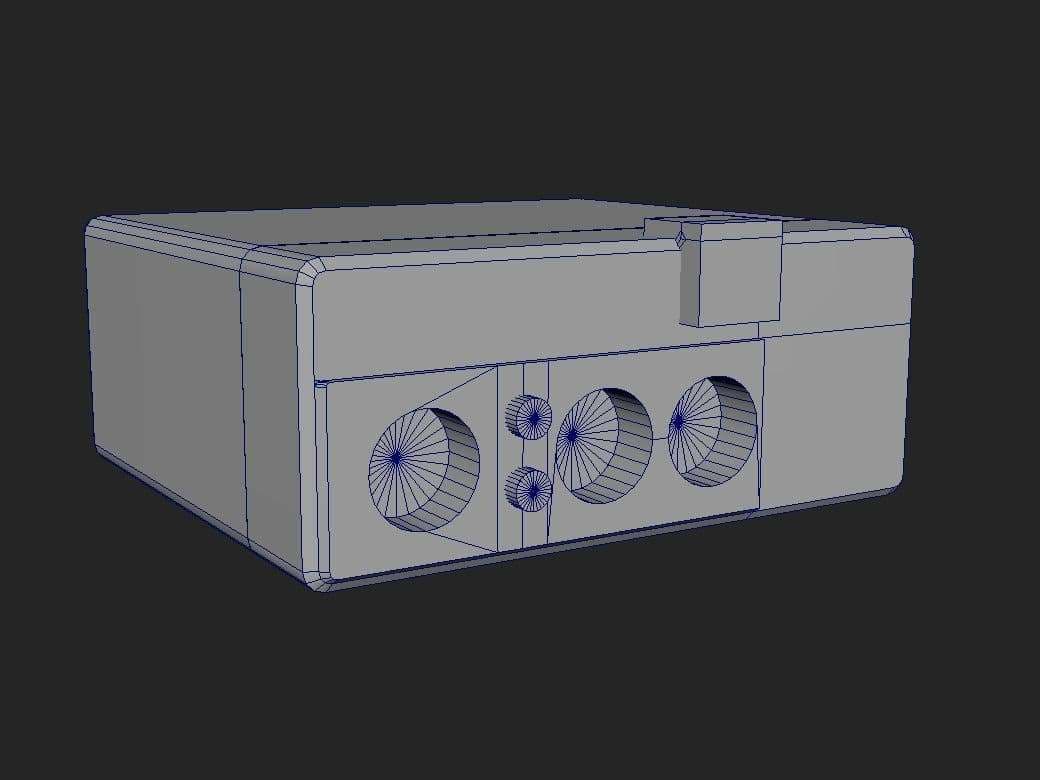
Once I had a feel of the proportions, and where the pieces were going to be placed, I started doing some simple boolean operations so I could get a complete feel of how the object was looking, and if I needed to make some changes. A BIG tip I can give you is not to be scared of messing up. This is the perfect step to make mistakes and fixing them. I always end up deleting geometry and starting again until I’m completely happy with what I’ve got to keep going.
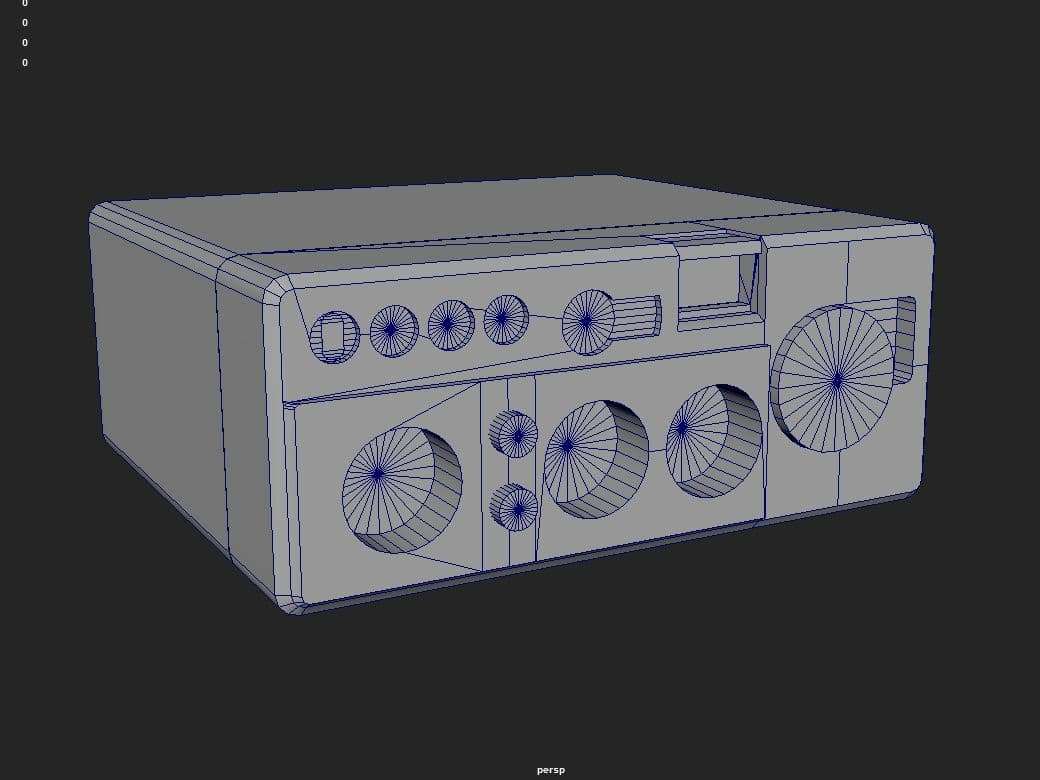
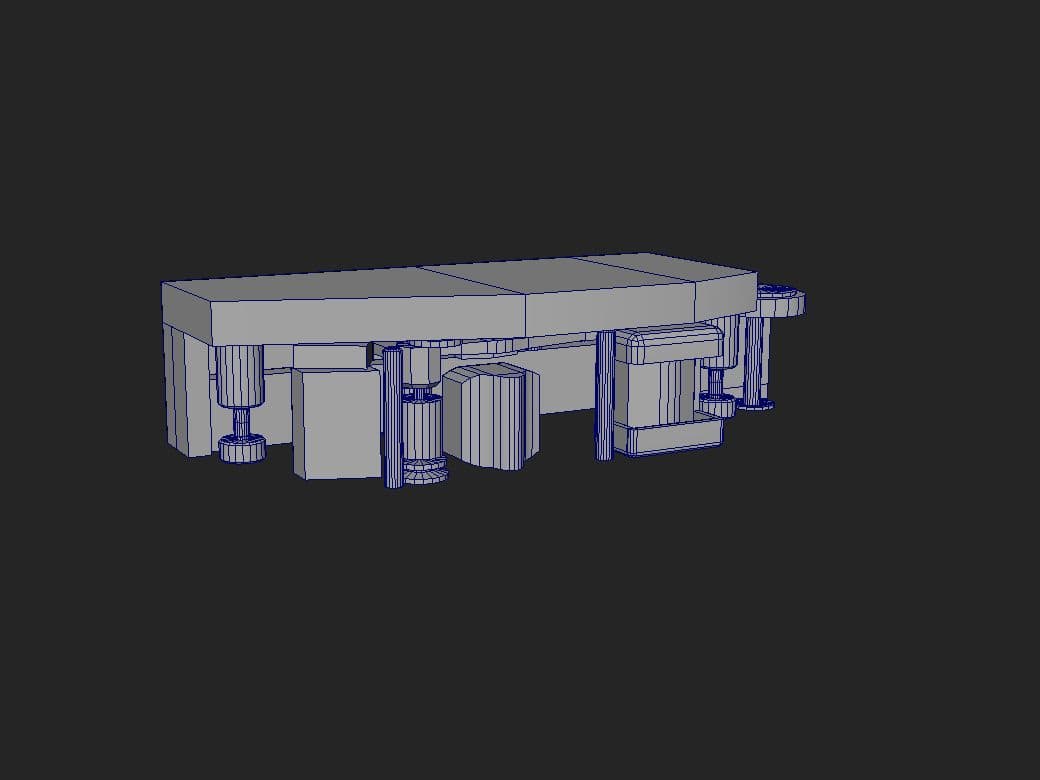
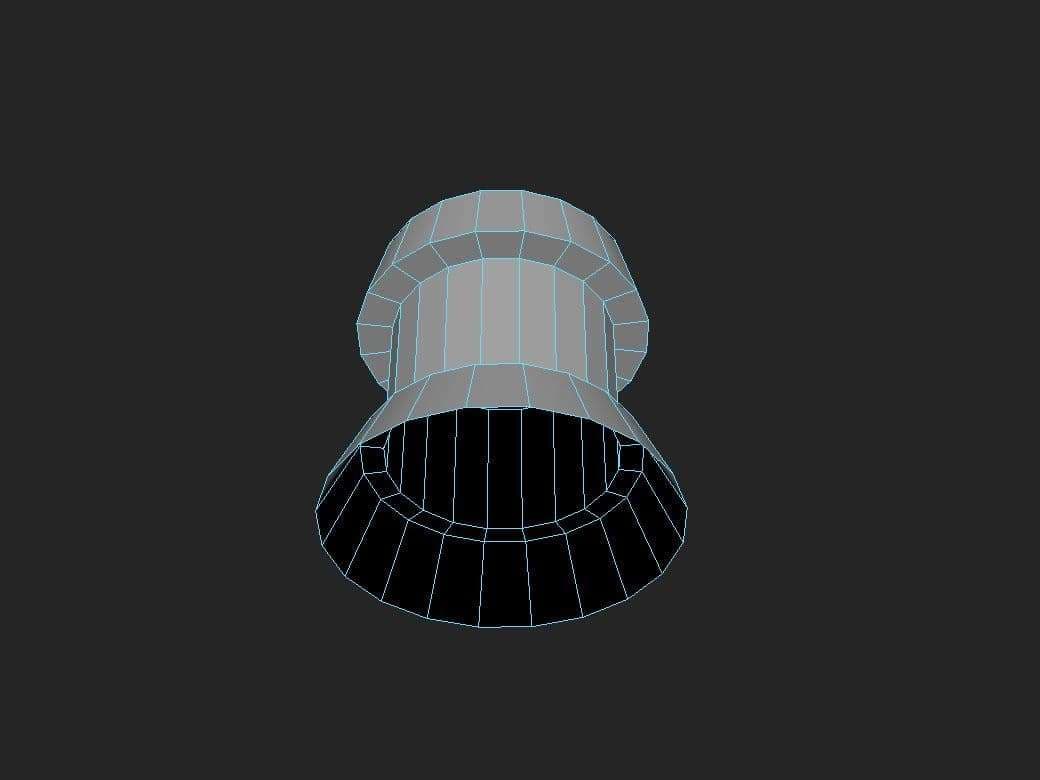
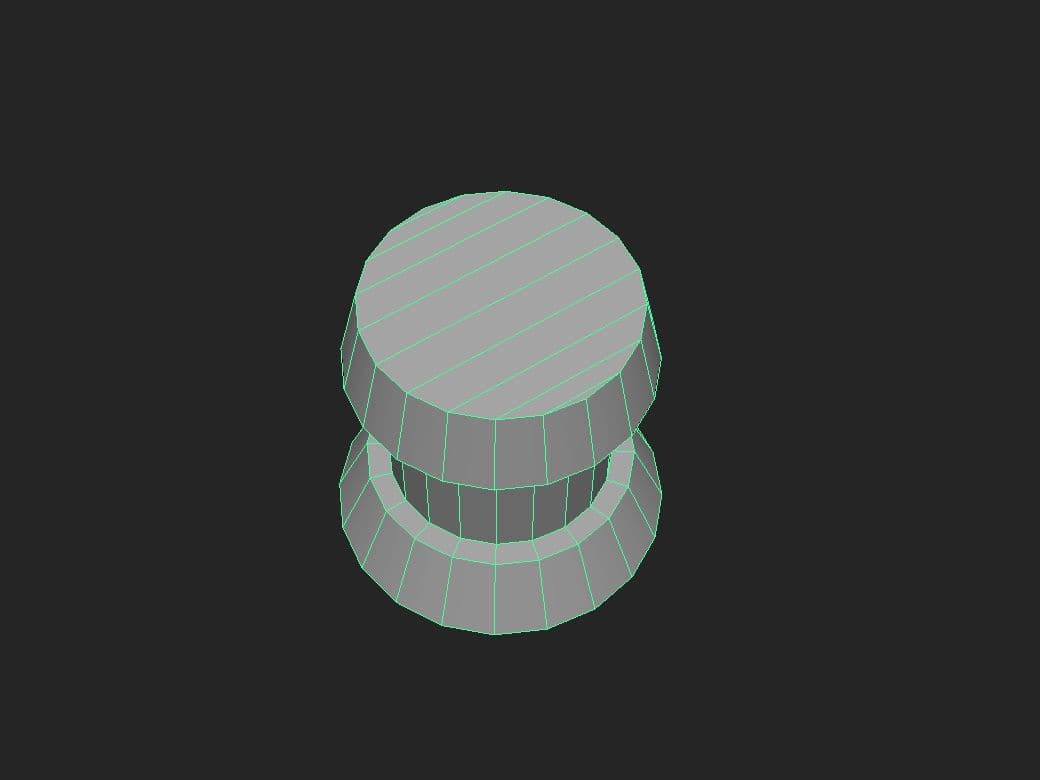
If I’m happy with the proportions and where things are going I keep adding the smaller pieces to keep seeing how the full object is going.
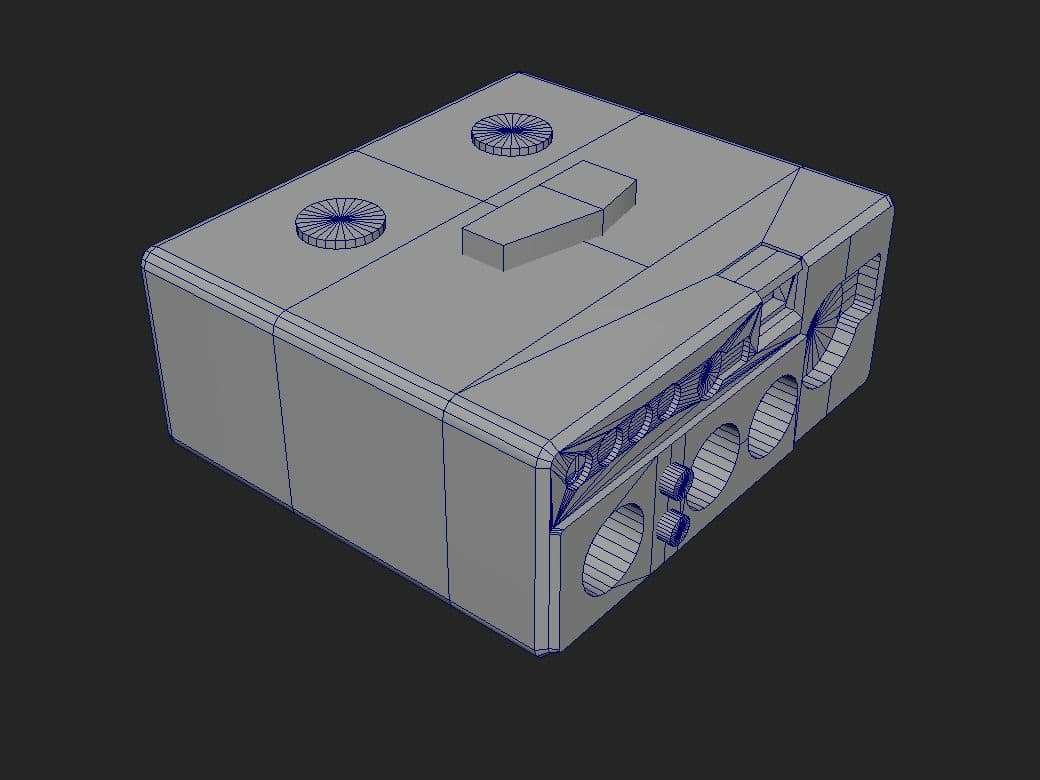
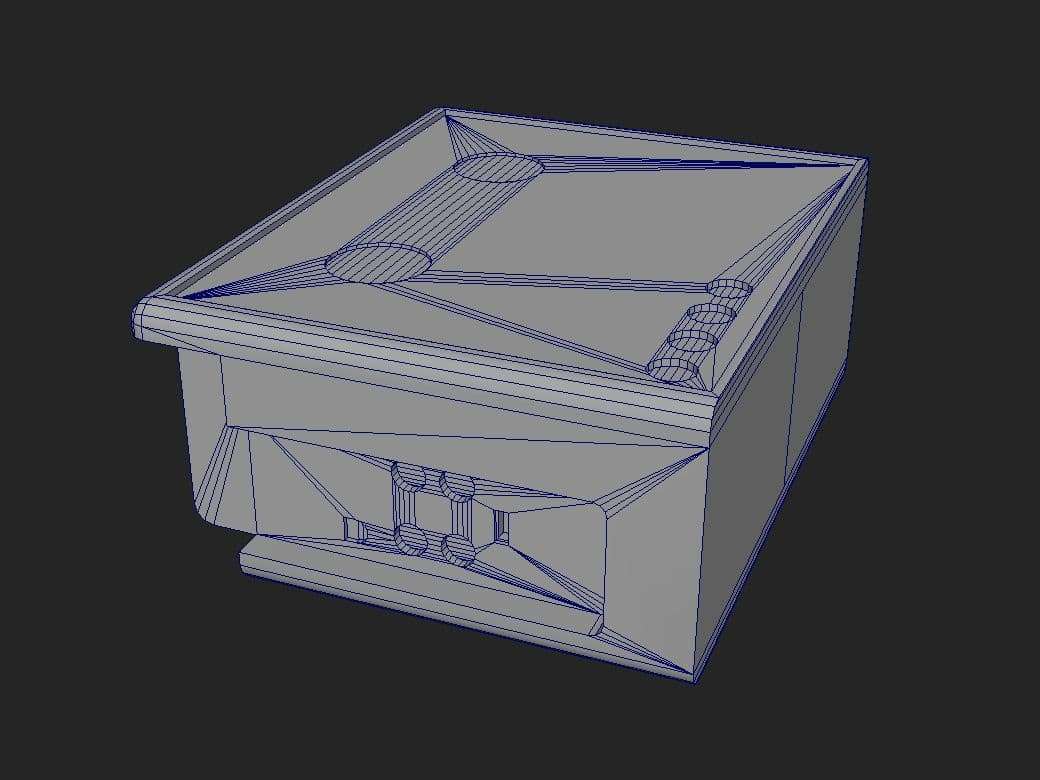
Now that the blockout is done, and we are happy with what we have, it starts getting fun! This is where I started modeling each piece to resemble how it was going to look in the end. Another tip I can give you in this step, is to work as clean as possible so that the low poly step is WAY easier.
I kept adding details and booleans where I needed them...

Blocking is the most important part of the process because if you make a mistake or start with a wrong base the whole project could crumble.
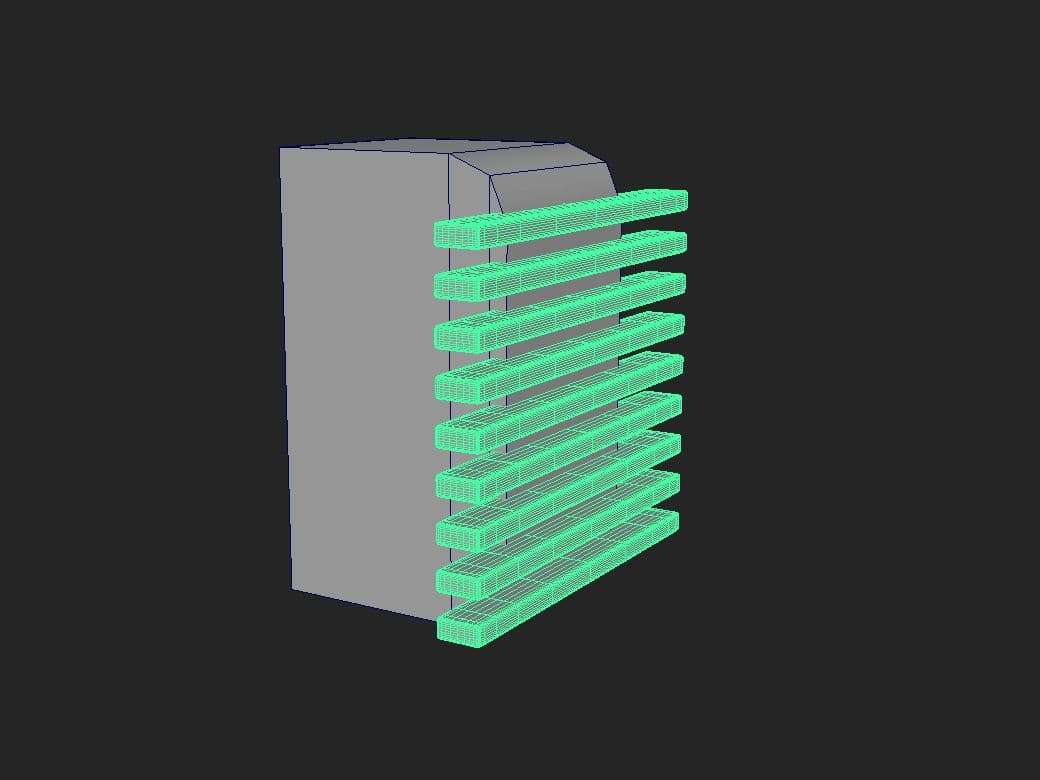
While you are modeling, you should always be thinking about the next steps, and how you are going to make your life easier by preparing for them. I always like to prepare the pieces I’m going use later in Zbrush for carving. If I know for example that a button is going to need detailed lines, I prepare the objects I will use for them.
Once modeling is done we are ready to go to the high poly object.
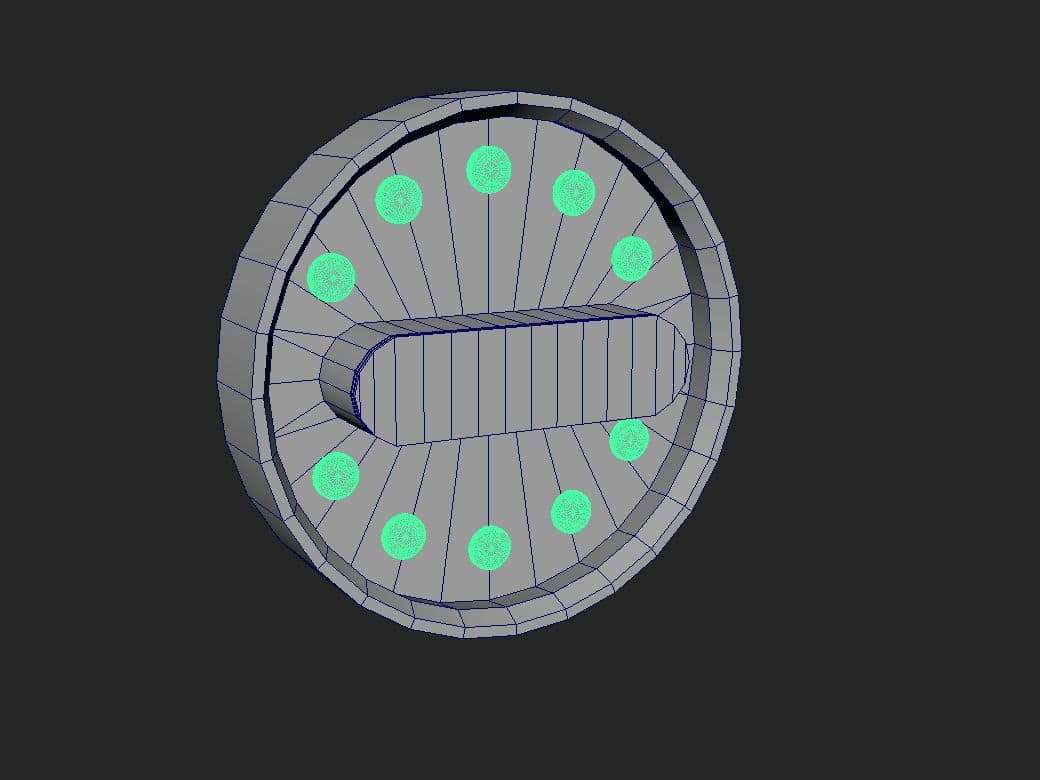
With the modeling step done, I was ready to start with the high poly. I used a Maya to Zbrush workflow so I will show you the steps you need to be able to use this workflow. I’ll first use as an example, the magnet piece. The first step is to do a "soft/hard" on the object to try and set the smoothing groups correctly.
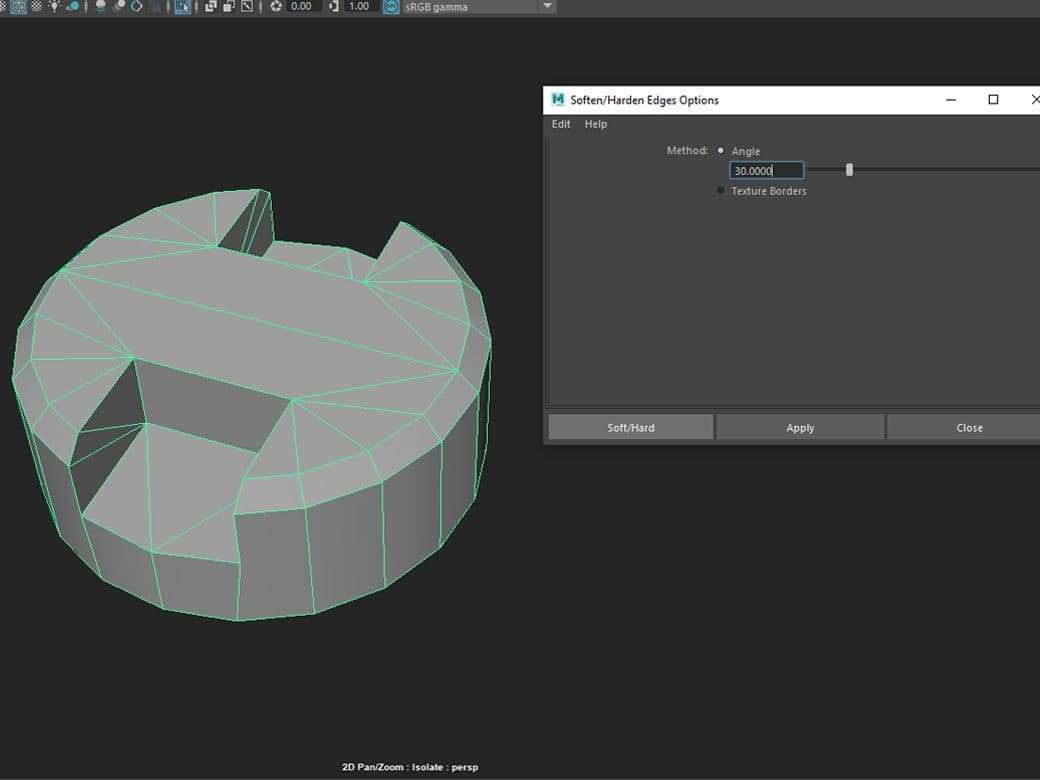
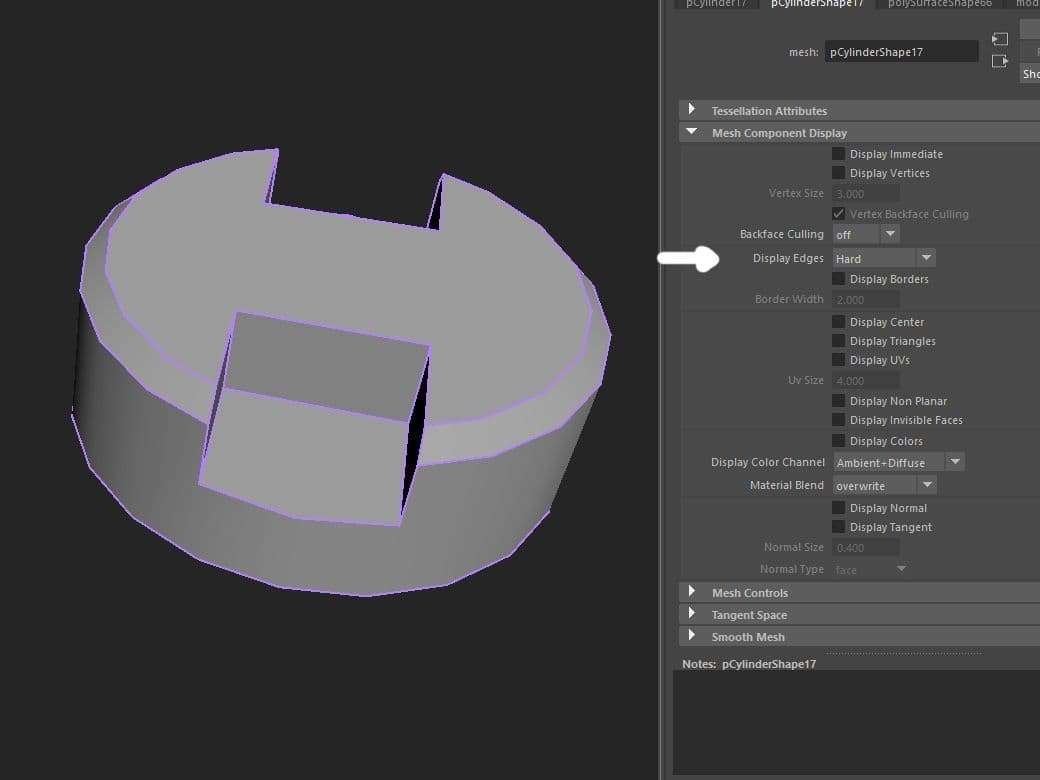
I then checked that the smoothing groups were set correctly, and for that you need to display the hard edges of the object.
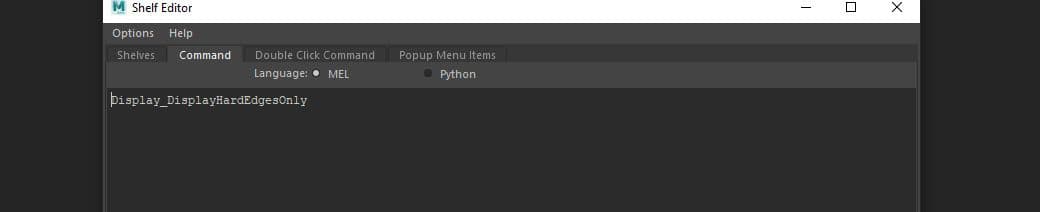
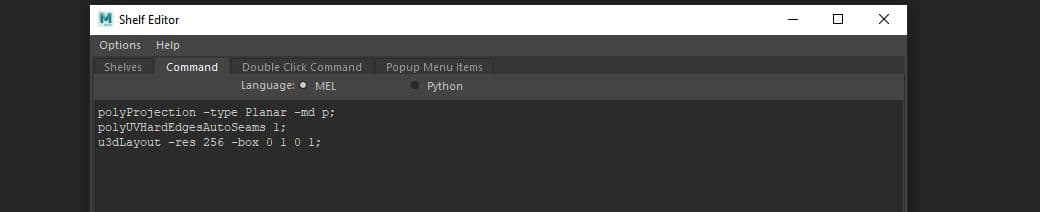
You can create a shelf button for it, but you need ZHCG polytools for that. You can download it from here and these are the commands for the button:
“Display_DisplayHardEdgesOnly”
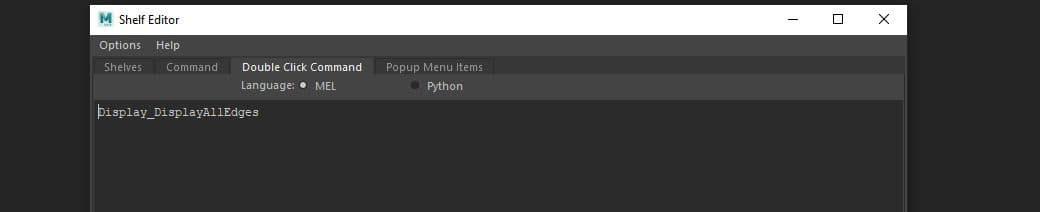
And for the double click that removes the display color is: “Display_DisplayAllEdges”
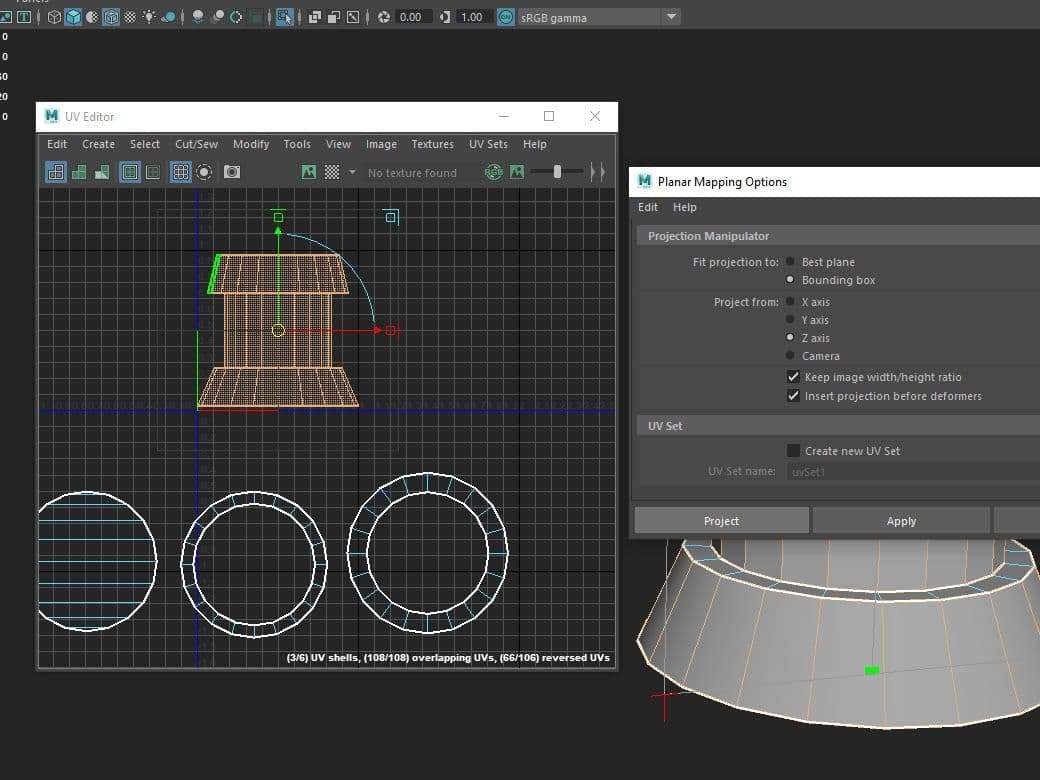
If the hard edges were incorrectly highlighted you just need to click on the edges that were set wrong and soften them. Once you have every smoothing group set correctly, you are gonna need to make a uv out of every hard edge. You can do that manually or you can use this script for it:
polyProjection -type Planar -md p;
polyUVHardEdgesAutoSeams 1;
u3dLayout -res 256 -box 0 1 0 1;
And create a button for it.
Select every face on the object and click the button or run the script.
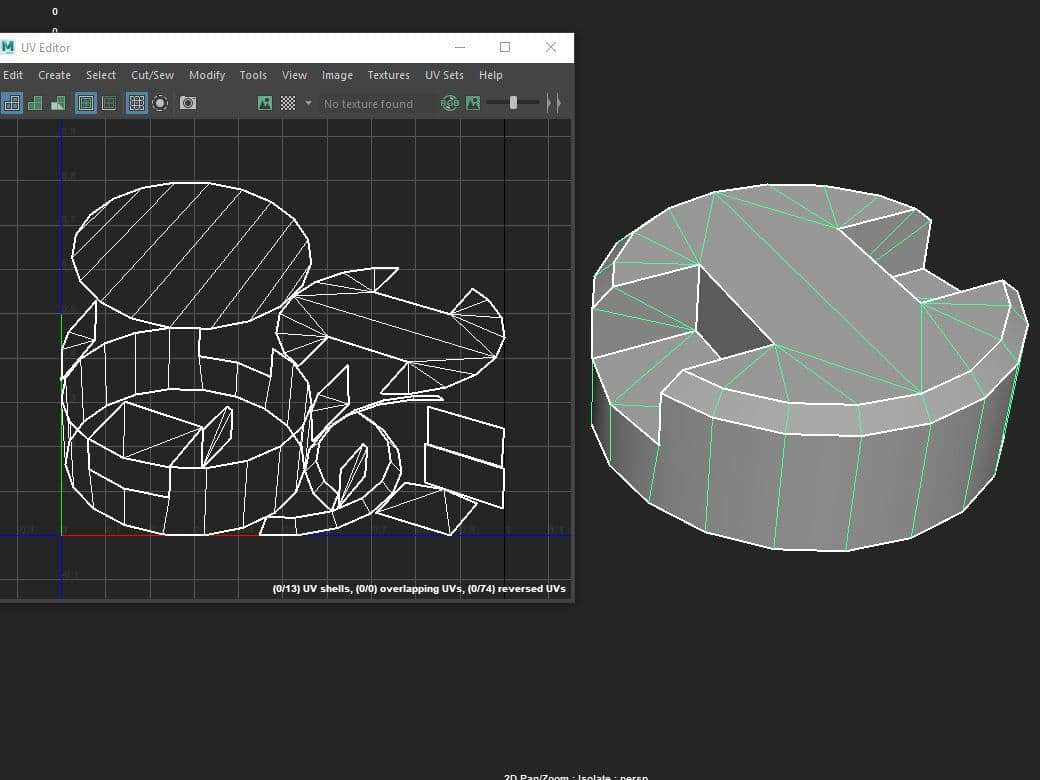
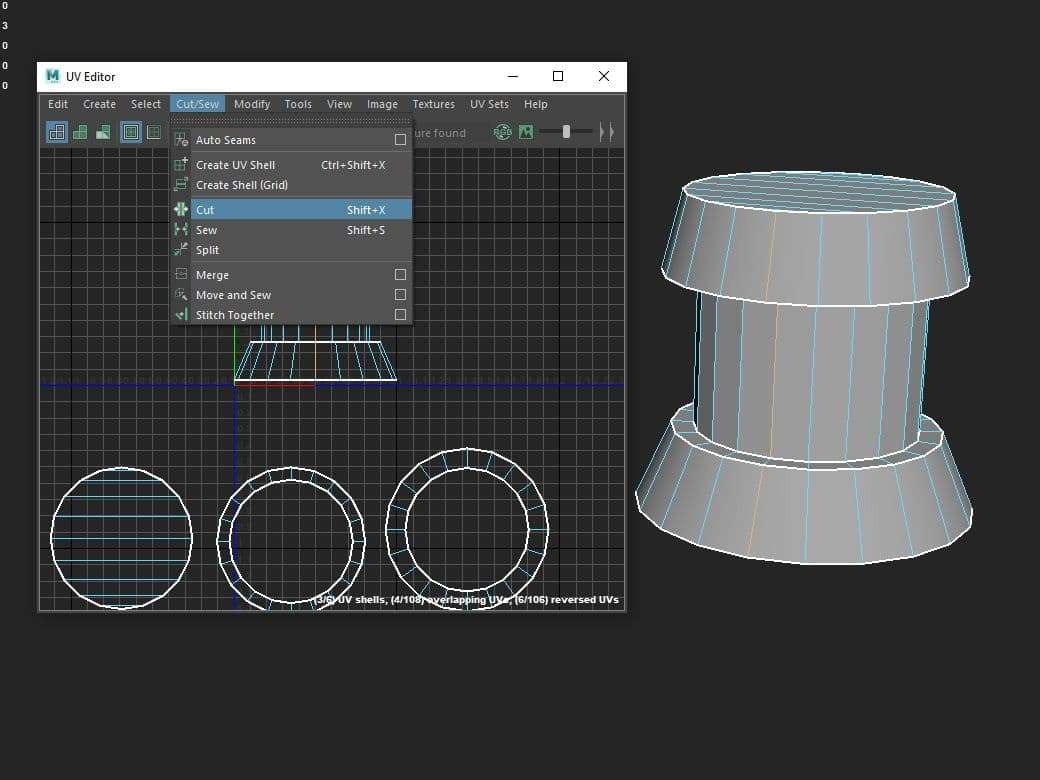
After that you need to triangulate a version of your object, export it, and delete the triangulated version of the object from your Maya scene to keep it clean. That’s the object that will be taken into Zbrush.
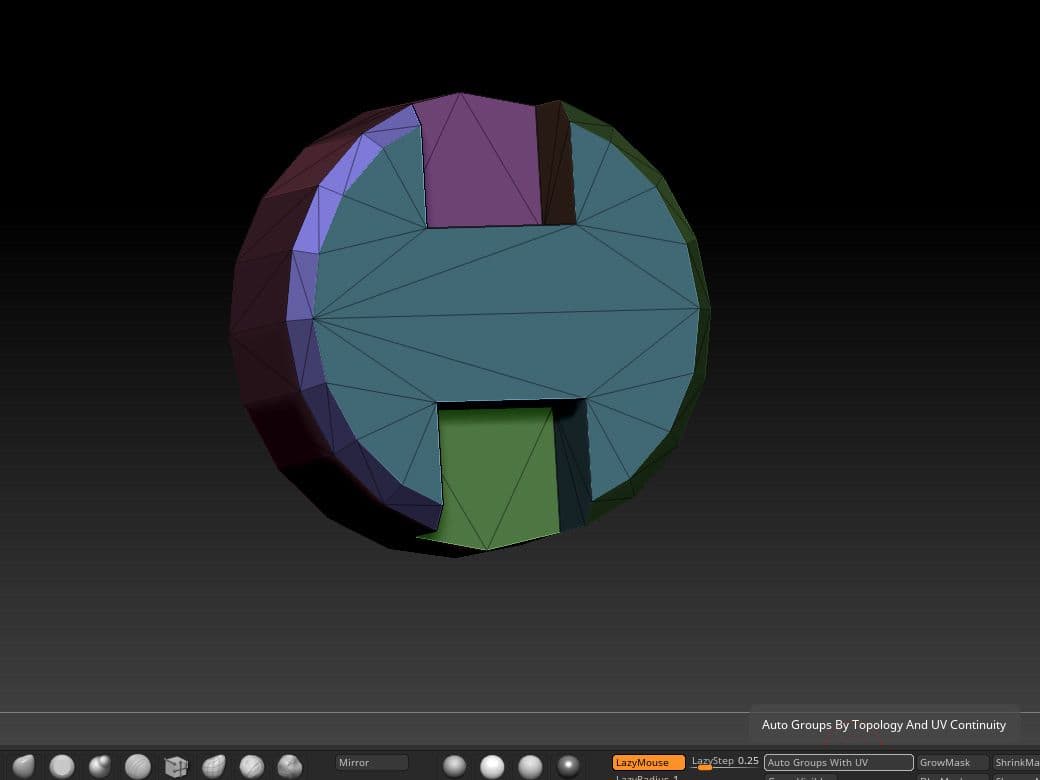
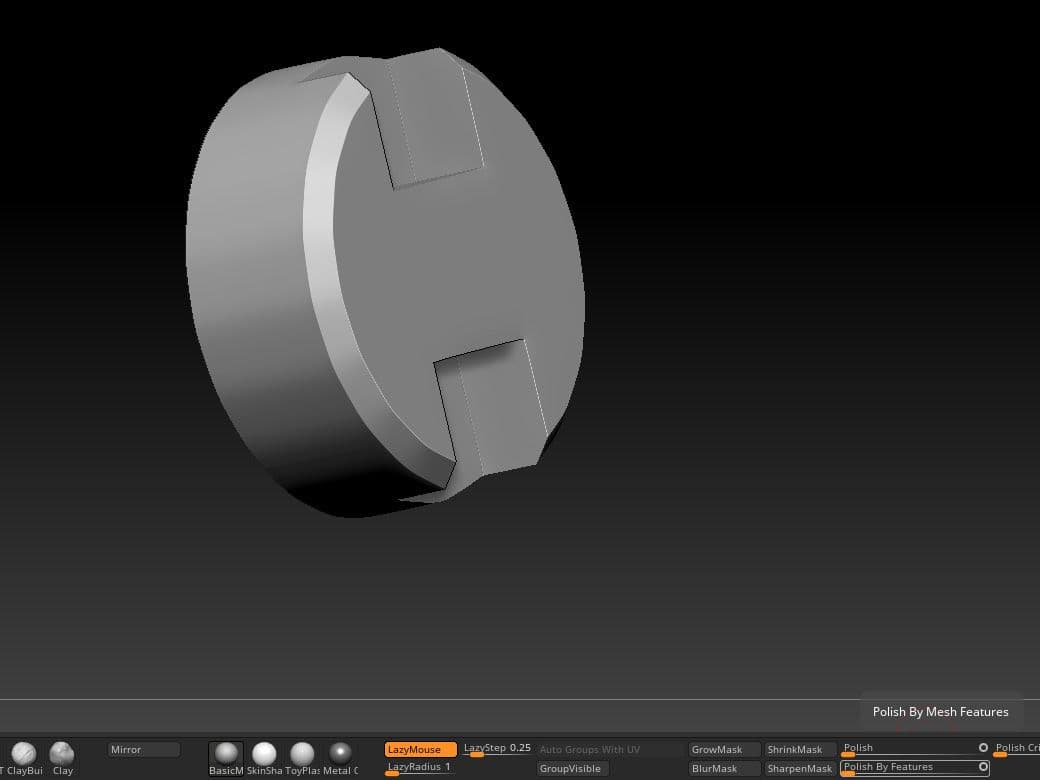
Once in Zbrush, use the autogroup with uvs function so that Zbrush separates the polygroups using the uvs that were made earlier, and then dynamesh it.
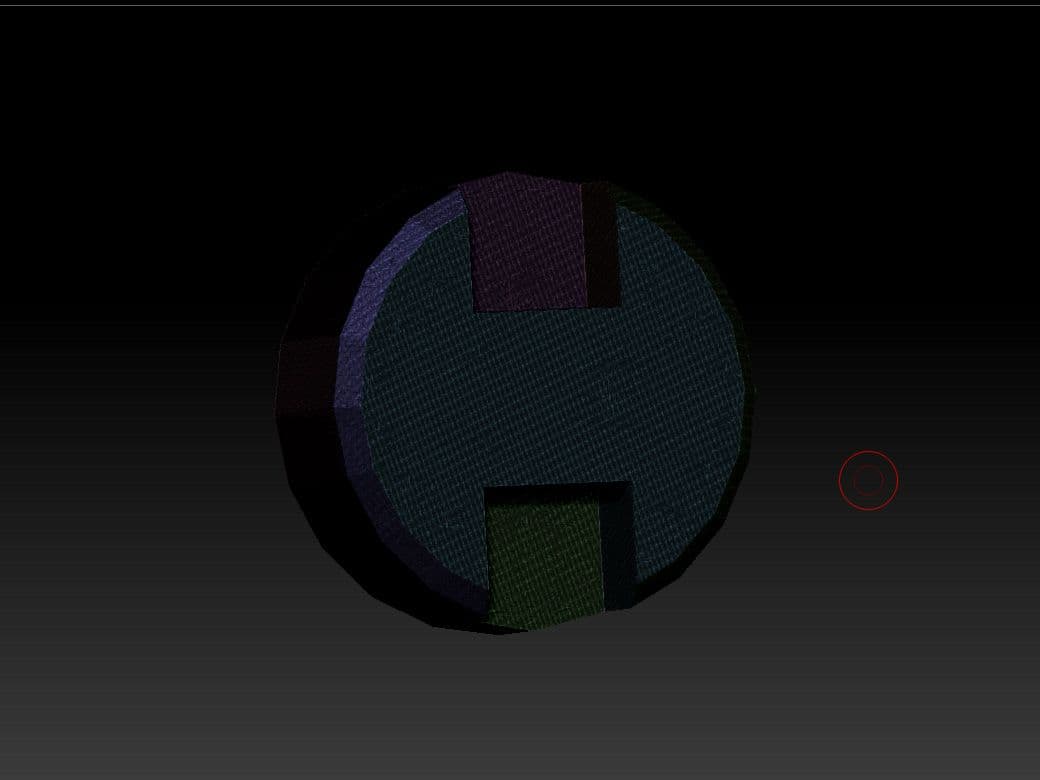
Use the polish by features function with the dot in the centre until you have a smooth object.
Then use the mask by features with only groups selected, and grow and sharpen until you get the desired bevel size. Then, invert the mask and apply the polish function without the dot in the centre until you get the desired bevel.
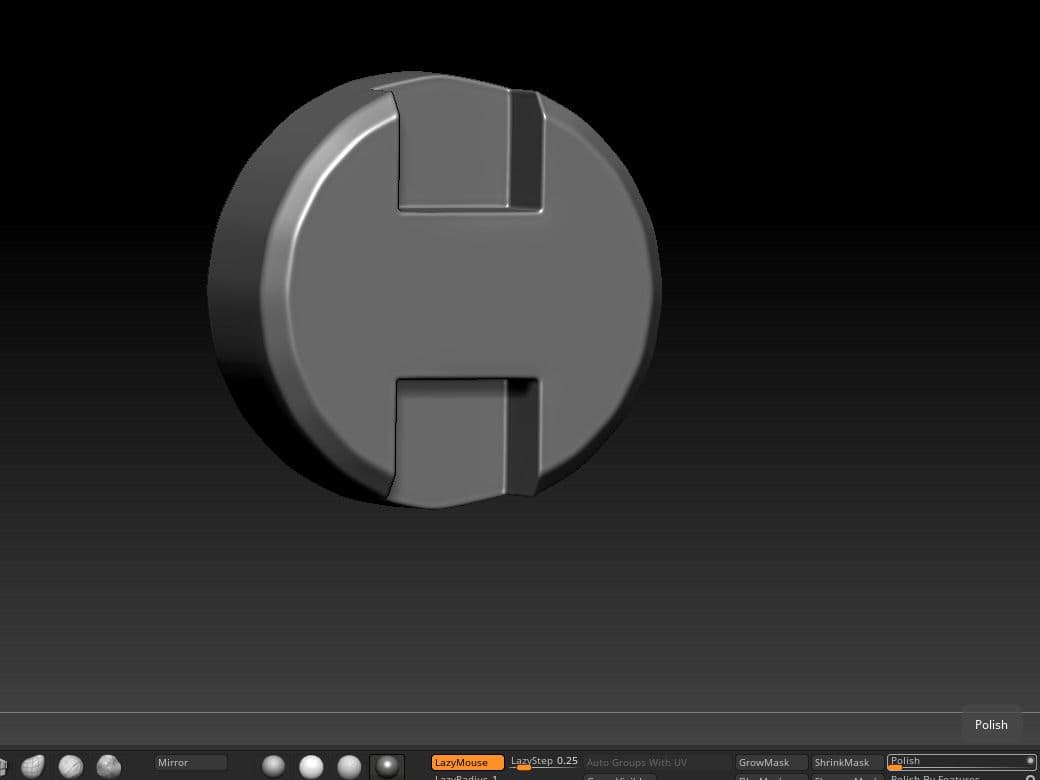
That way, you now have a high poly version of the object you started with. Now you need to repeat that process with the rest of the objects that require it.
If you are happy with the high poly that you have, it’s time to take it back to Maya. For that you need the decimation master function in Zbrush. First, you pre-process current.
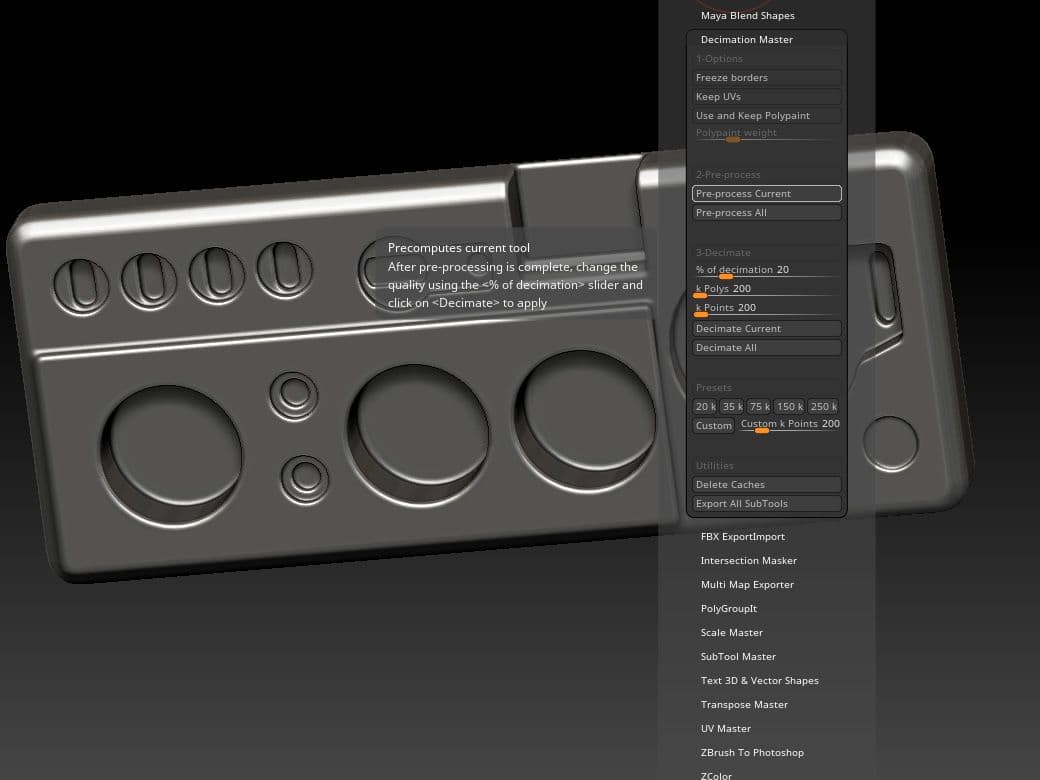
And after the pre-process is over, you then proceed to decimate the object you have with the percentage you desire. The percentage you choose will depend on how important the piece is to the overall object.
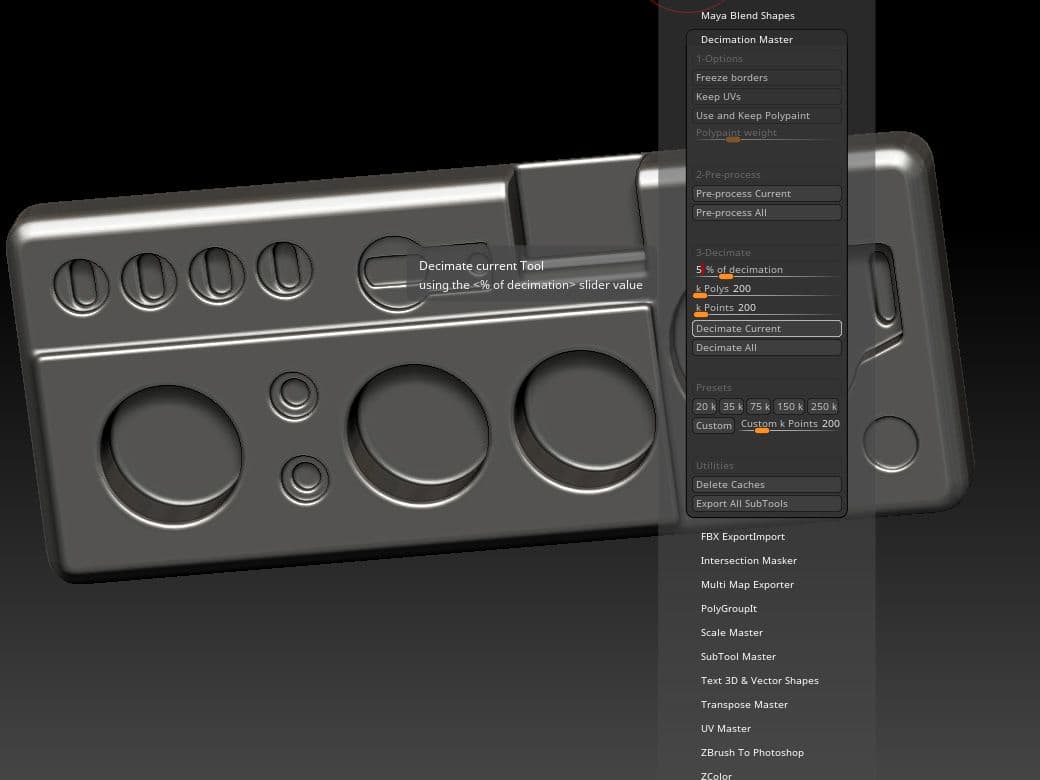
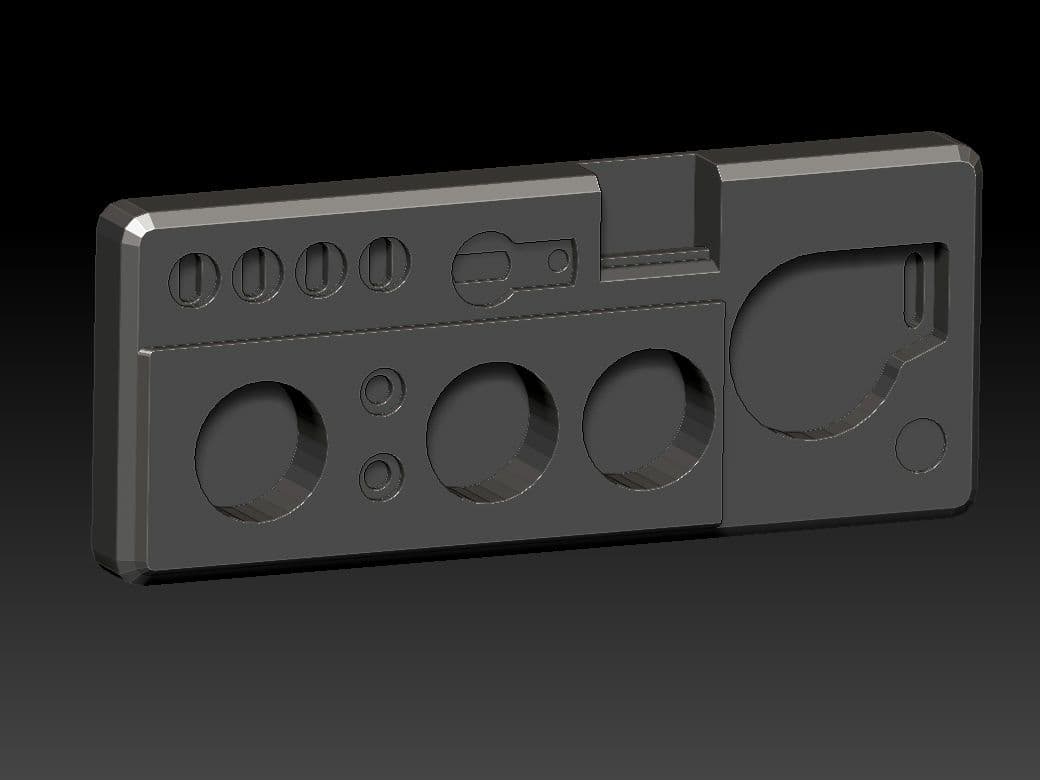
And this is the decimated object that you are going to be taking back to Maya:
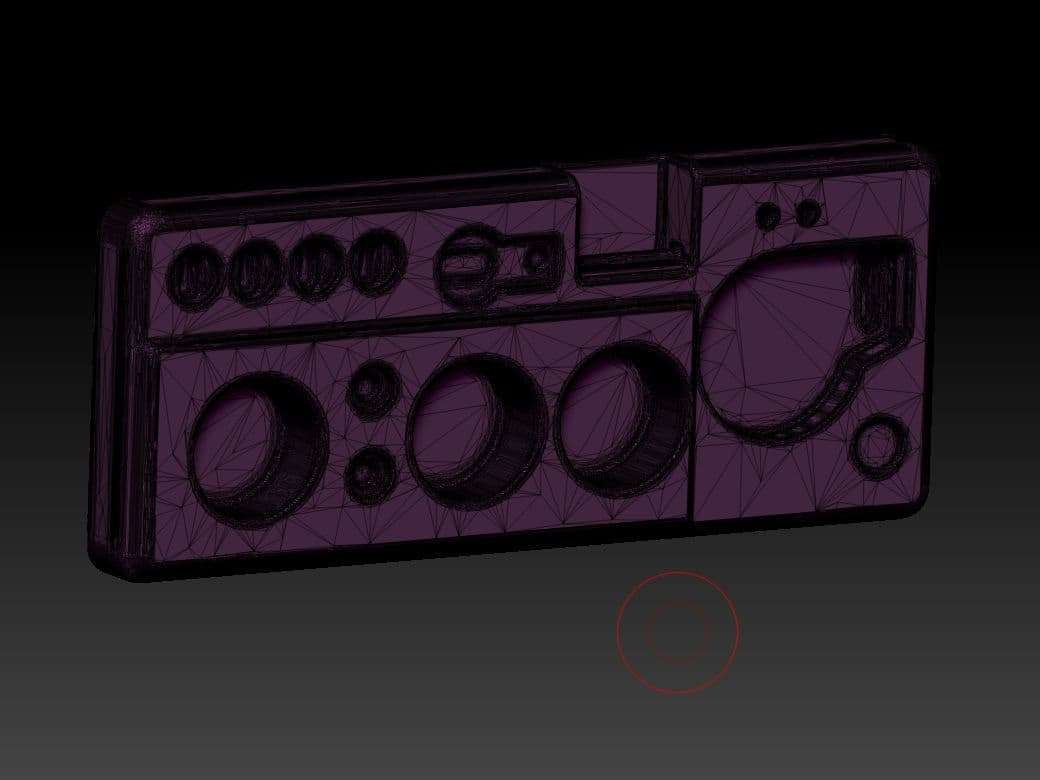
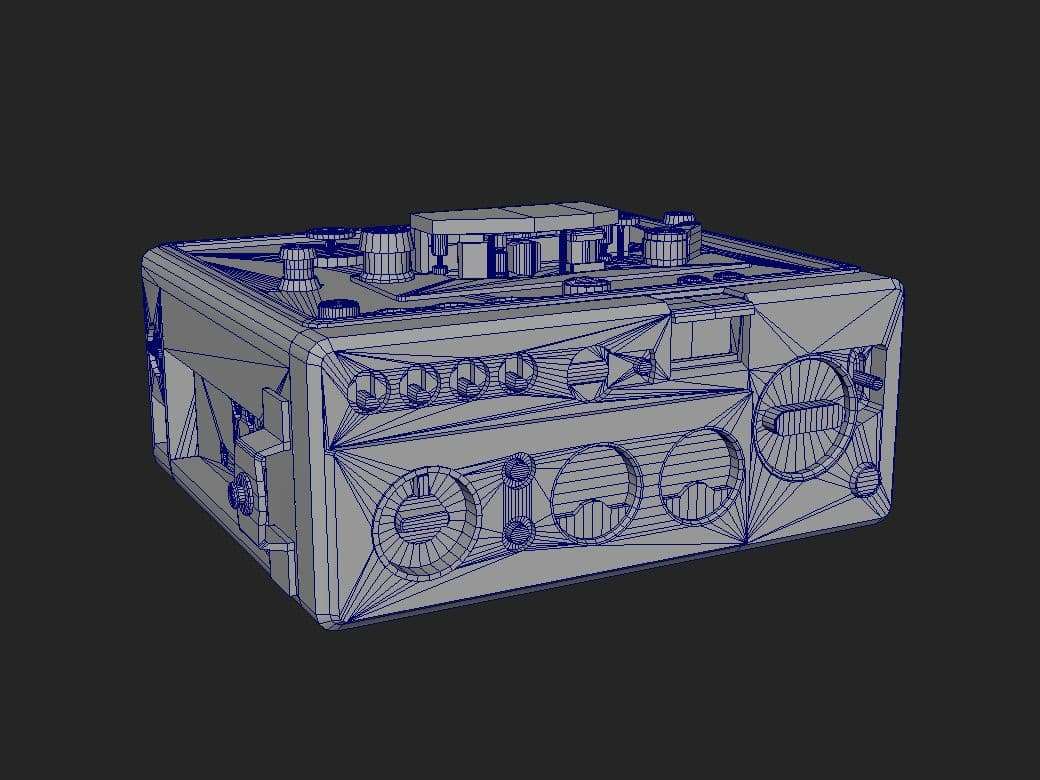
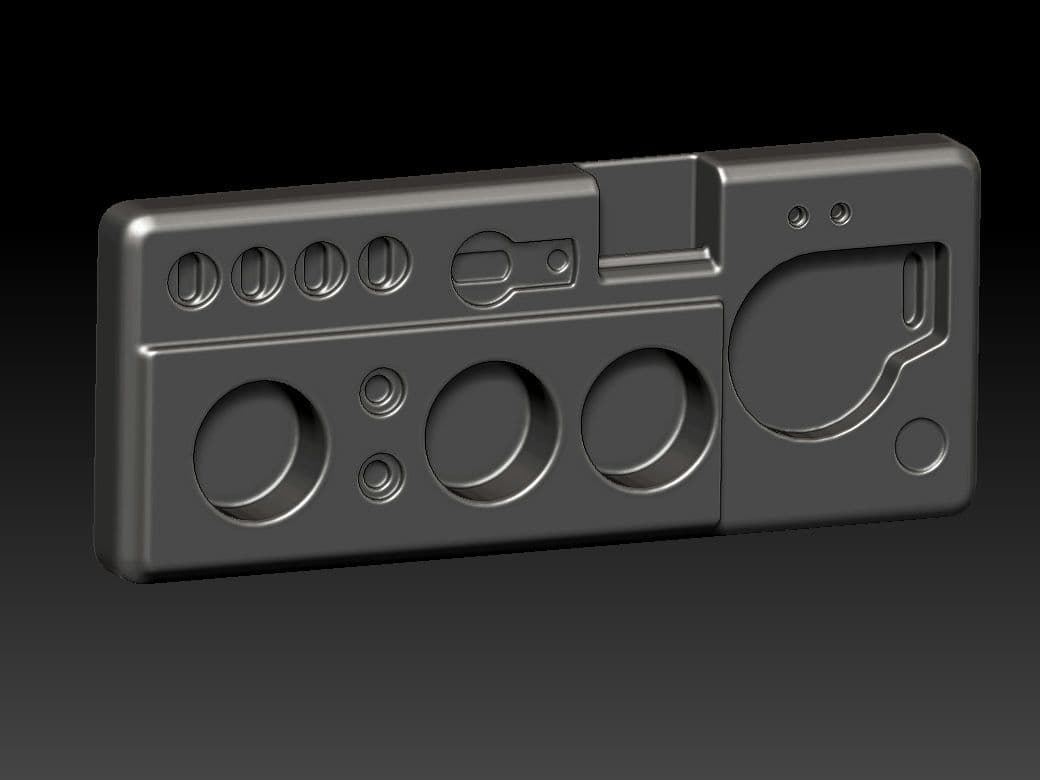
Now in Maya with your high poly, it’s time to start with the low poly.
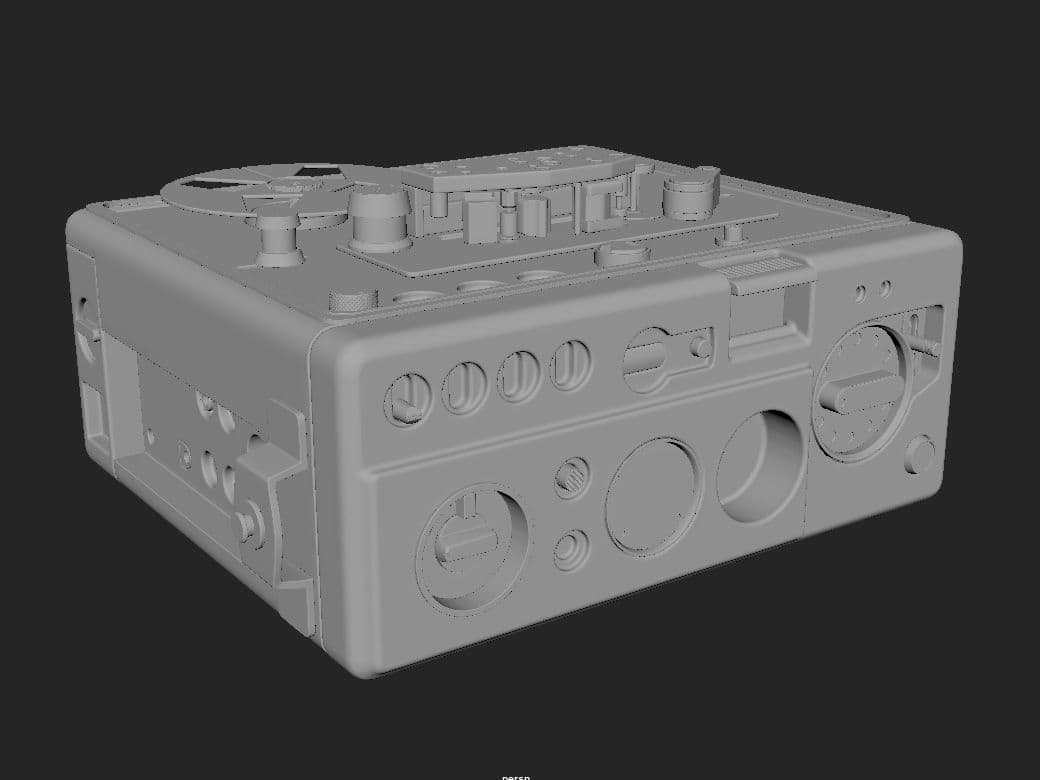
Once back in Maya with the decimated high poly, remember to keep it in a separated layer, the modeling mesh in another, and a third layer for the clean low poly.
The low poly is pretty straight forward. You just need to observe your mesh and see which edges you don’t need, and start merging and deleting the ones that are extra. Also start thinking of which meshes could be repeated so you can also get rid of those.
If you are never going to see the bottom faces you can delete them.
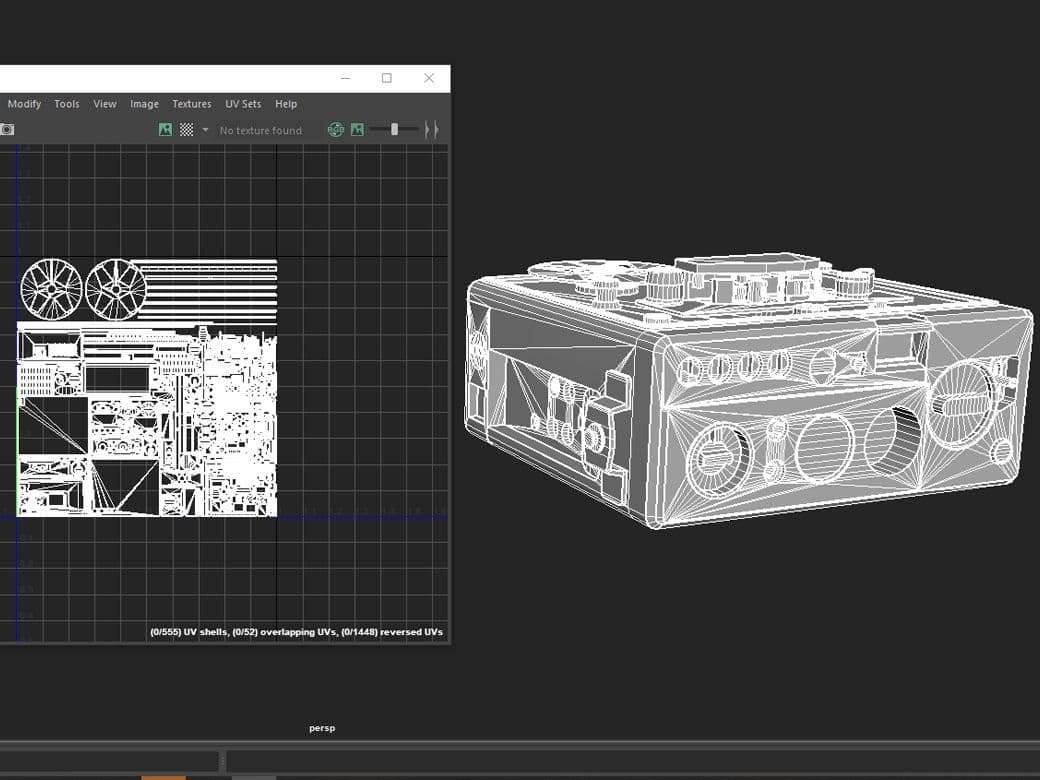
After that, you can start doing the Uvs on the piece. Uvs are also a little bit tedious, but with some music and determination you can finish them really quick!
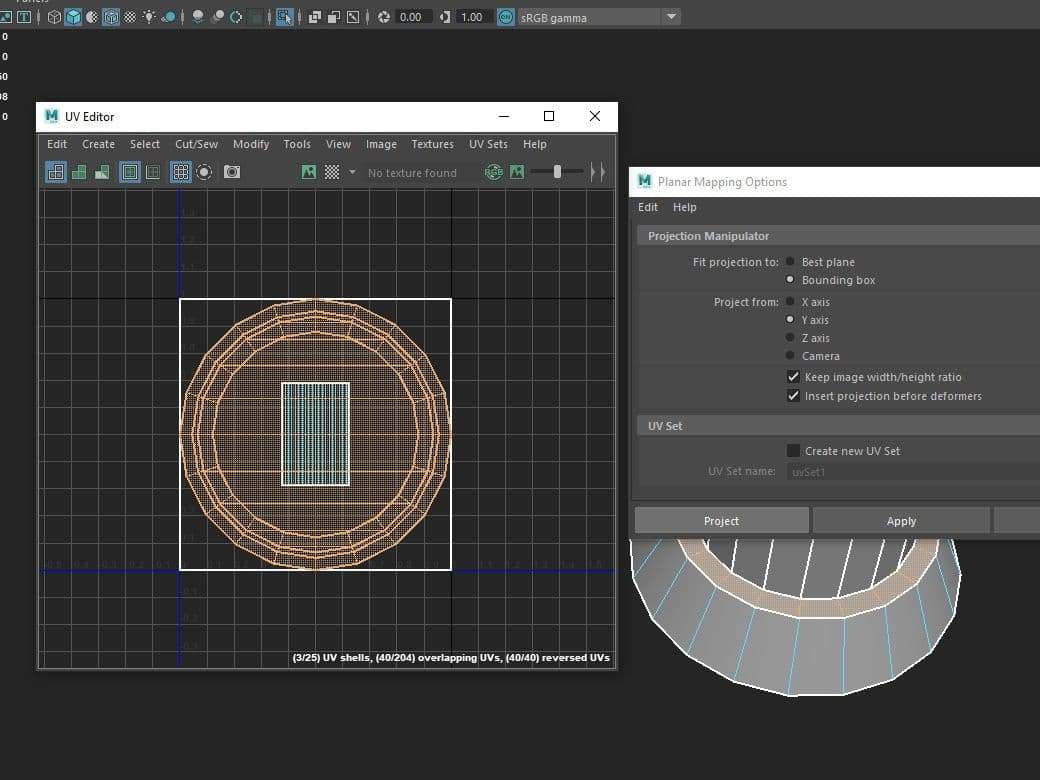
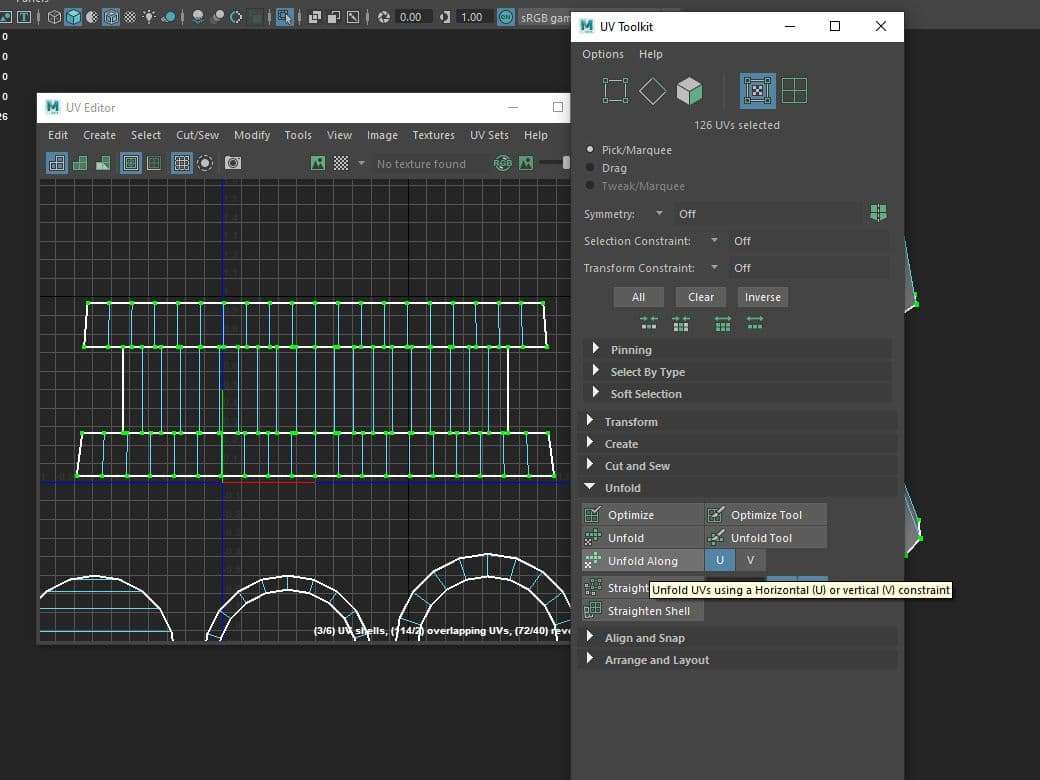
For games, it's really important for UVs to be straight. For that you can use the align tool in the uv editor.
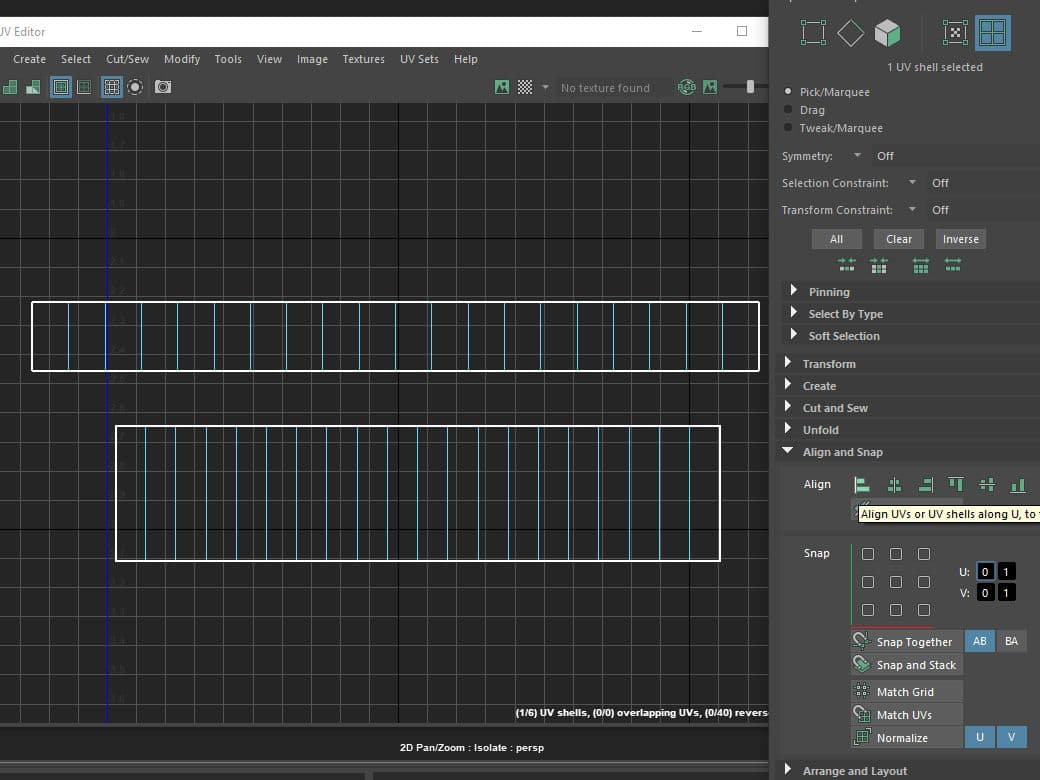
And with that process you are gonna optimize every piece until you are done with the full low poly version of the object.
Once you have all your meshes with uvs, it’s time to start naming everything. Also, now that you have the high and the low poly in the same scene, it’s time to get rid of everything else to keep the scene clean. You can now delete all the carving objects, and even the modeling pieces since you already have the clean version. The good thing about saving incrementally is that if you ever make a mistake and want to go back, you can easily open an older file.
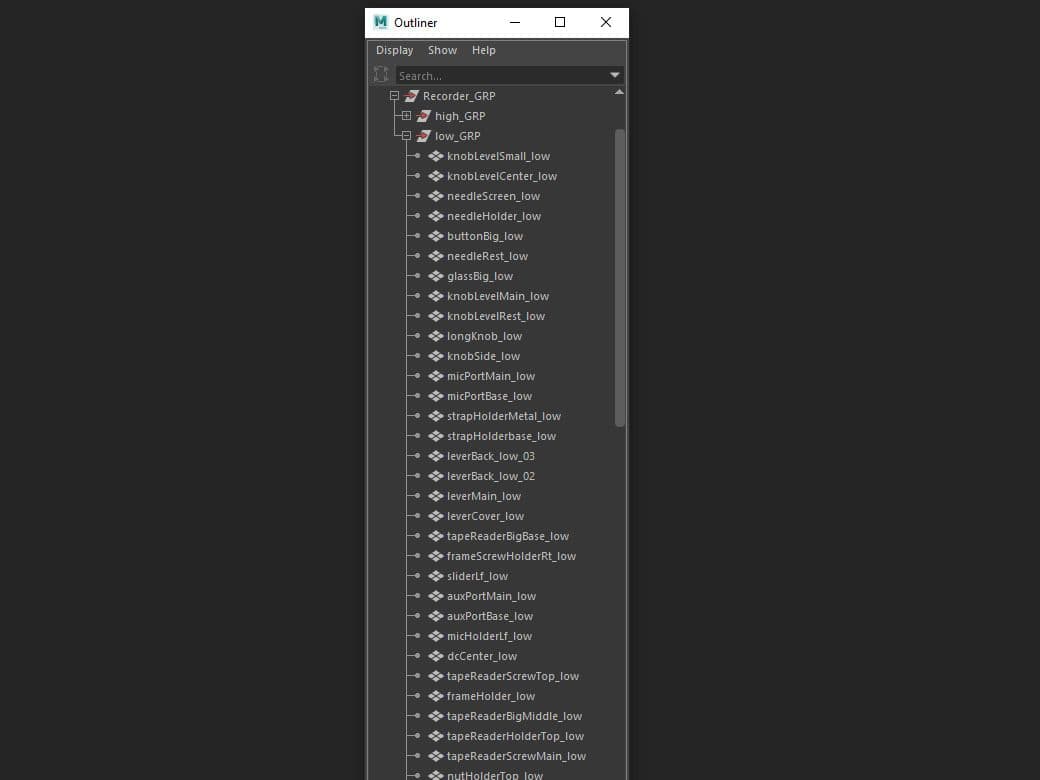
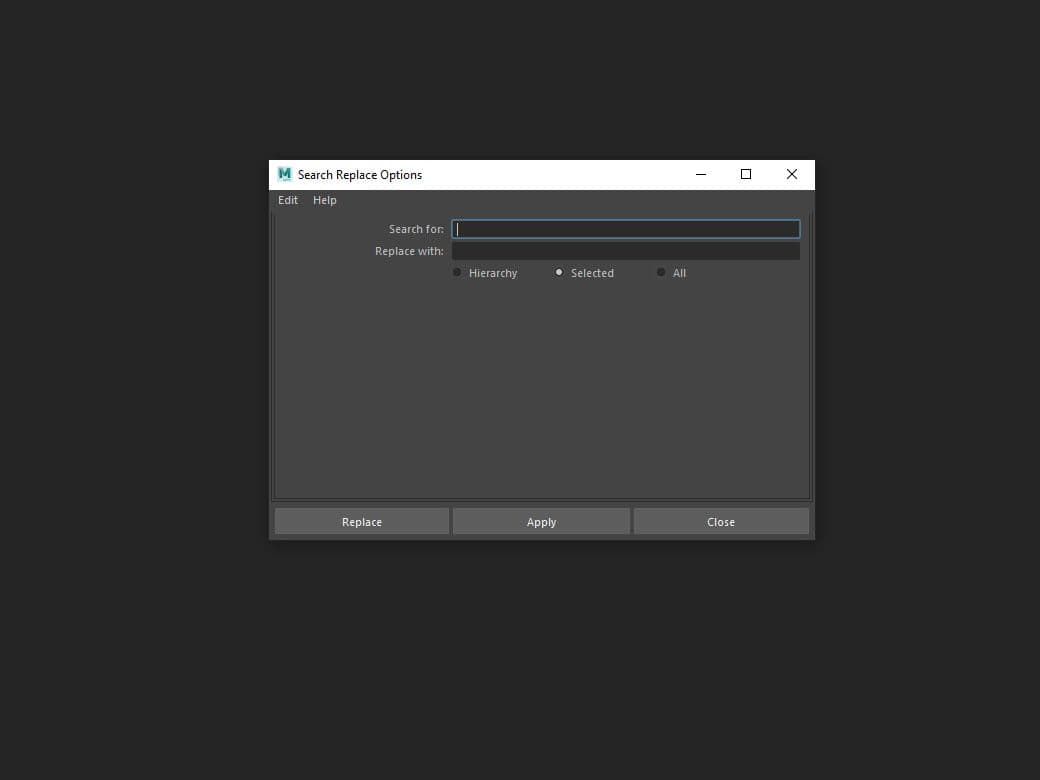
A good tip I can give you about the naming process, is that you always name every piece in the low poly, and then just copy and paste the name into the high poly. I used to name them at the same time and used to take twice as long, so don’t make the same mistakes I did. Remember you can use the search and replace function if you have multiple objects that are supposed to bake into the same _low version.
Now that we are done with uvs and low poly, you are ready to go into baking. The baking step is more of a problem solving step more than anything. It’s where you will realise if you have misplaced uvs, wrong topology, or if you are in need of some supporting edges.
With regards to texturing, have fun and experiment. Try to imagine what you think happened to the object and build it from there.
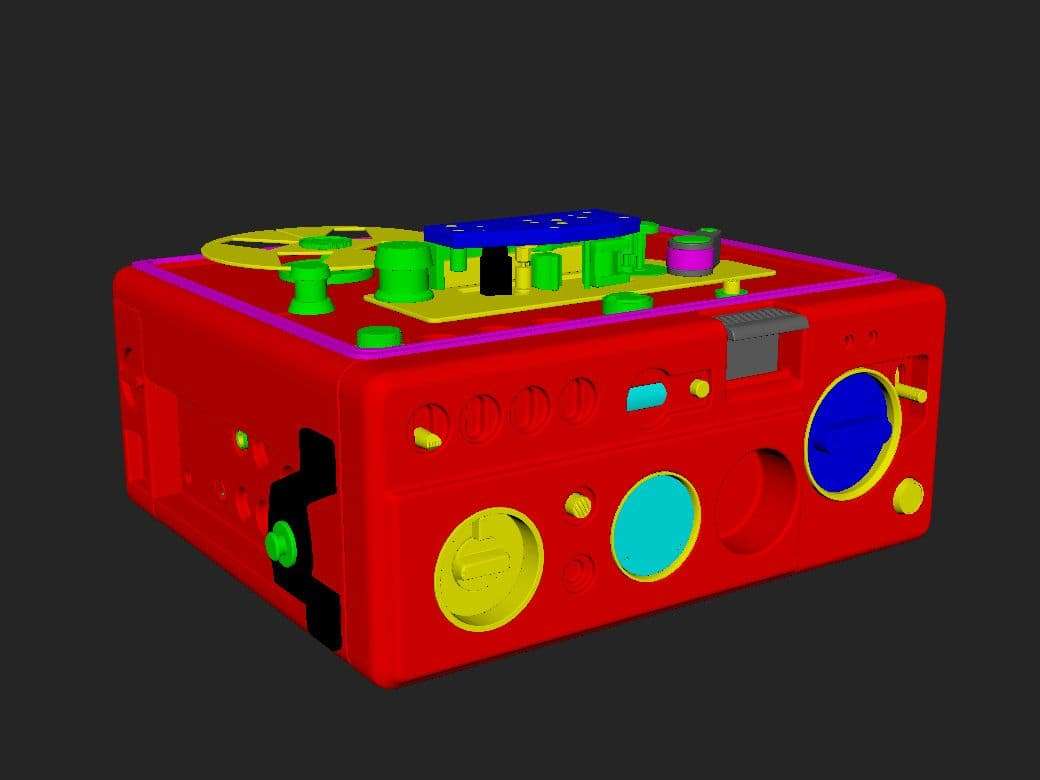
I decided to do the baking in substance painter. Before I went into substance painter for the baking, I added a different colour to the different parts to the high poly. This way I could separate the materials once in substance painter.
Now in Substance Painter these were my settings for the baking:
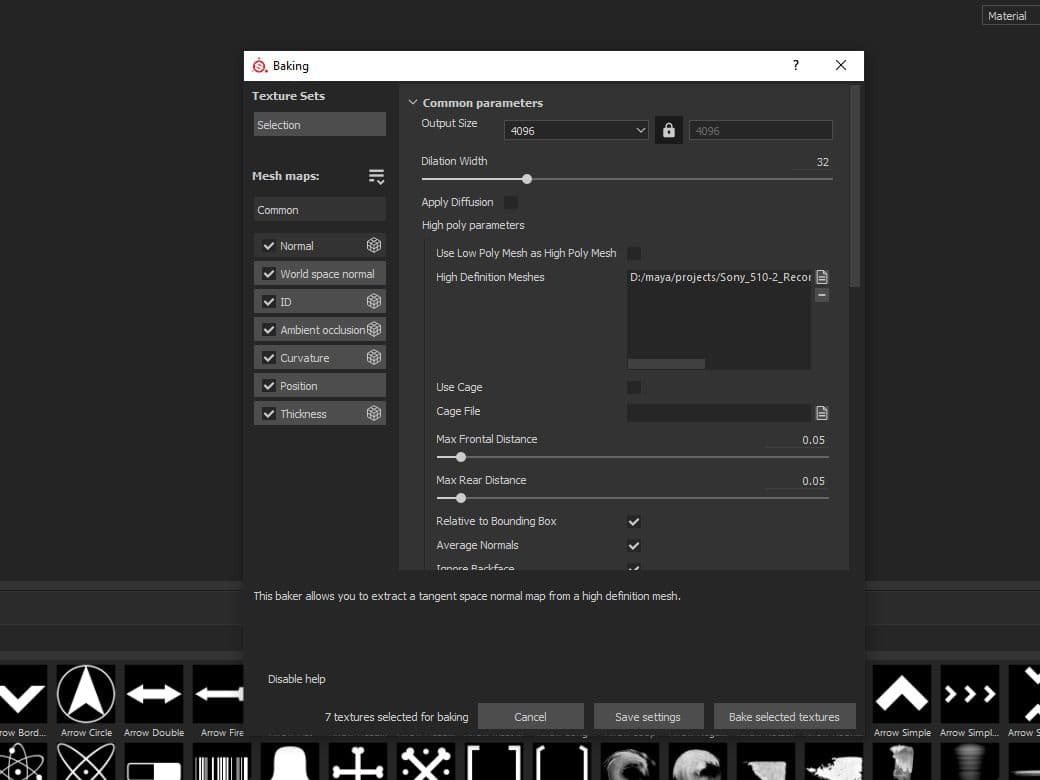
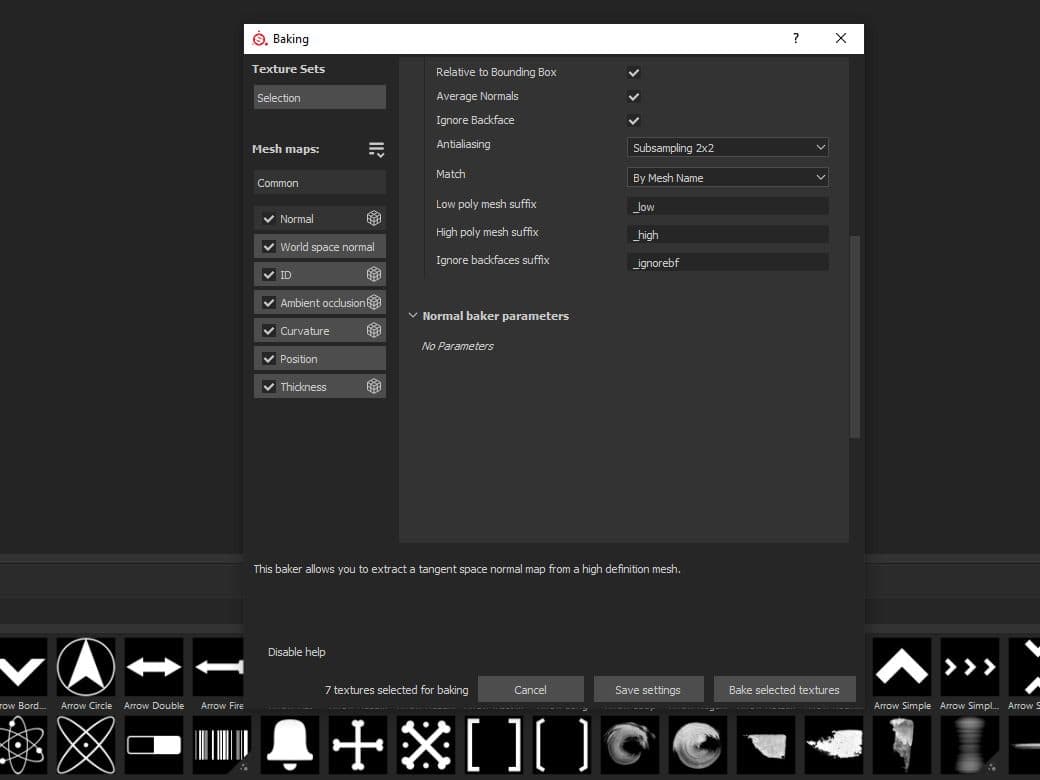
For the ID remember to use “Material Color”. For “ambient occlusion” and “thickness” crank them up to 128 for the final bake, and with that the baking is done.
Remember how I said modeling was the most fun out of everything? Texturing is also up there. With my recorder I decided to go for a really used one - in my imagination the recorder had been sitting in a corner and gathering dust and dirt. So with that in mind, I started with the base main material and started working from there.
The main tip I can give you in regards to texturing is to have fun and experiment. Try to imagine what you think happened to the object and build it from there.
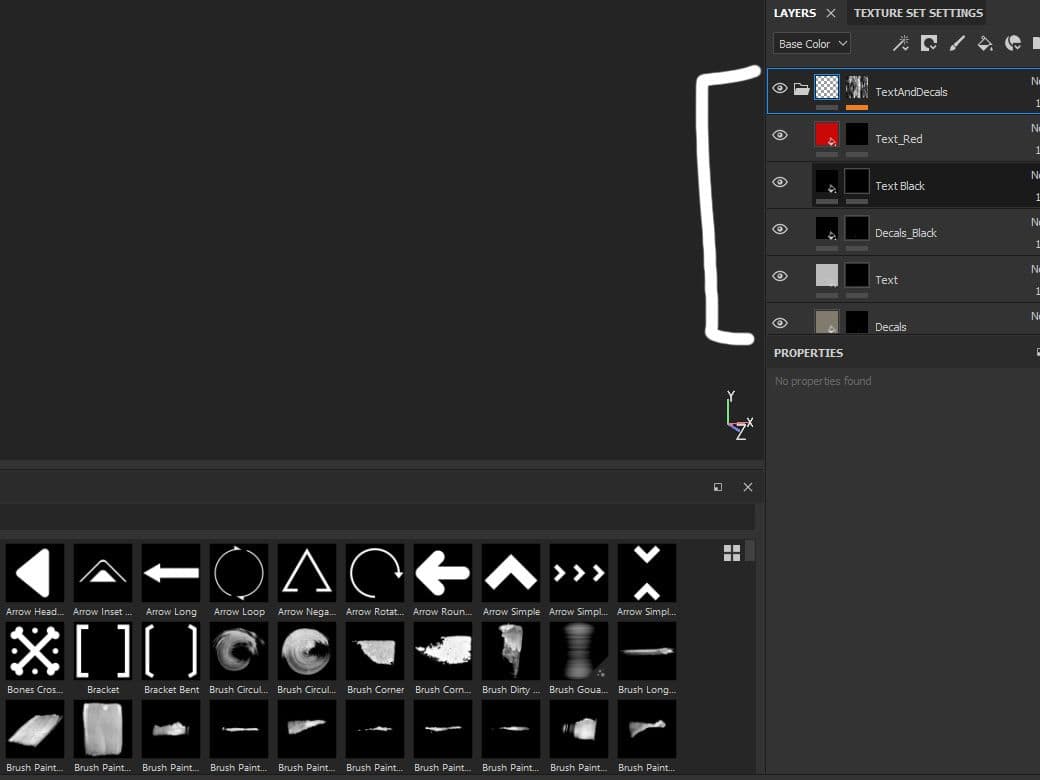
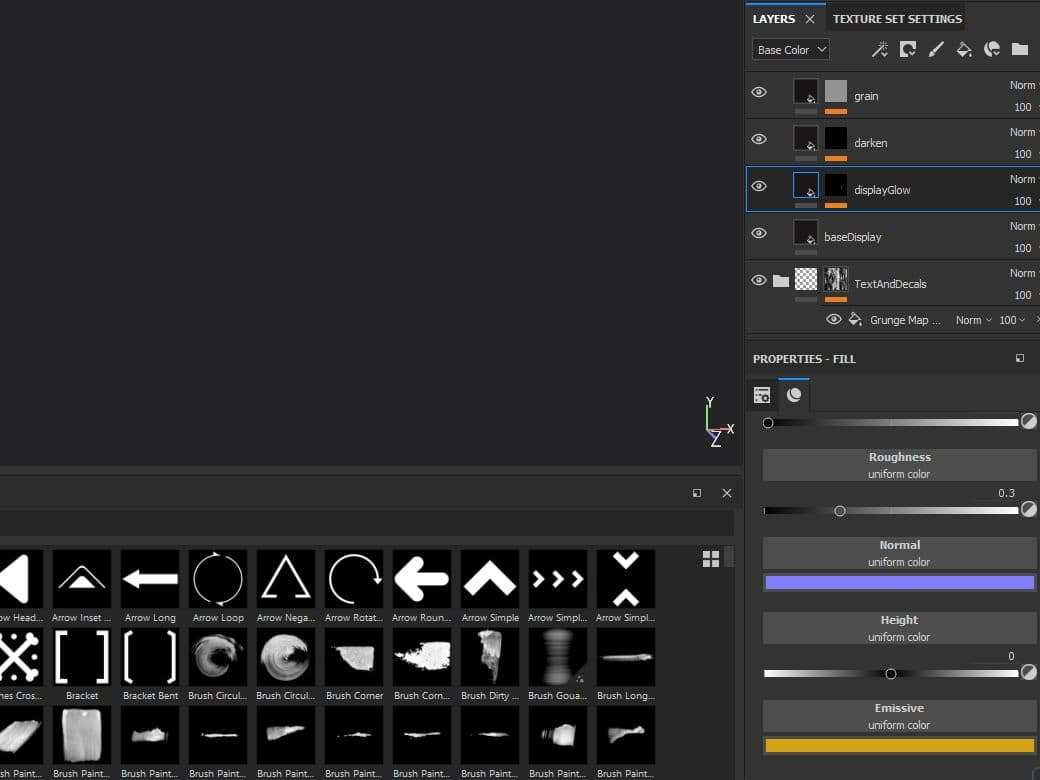
Also for the text and decals, which I think are really fun, create a separate layer just for them, and group it. This way you can create some wear effect just for them.
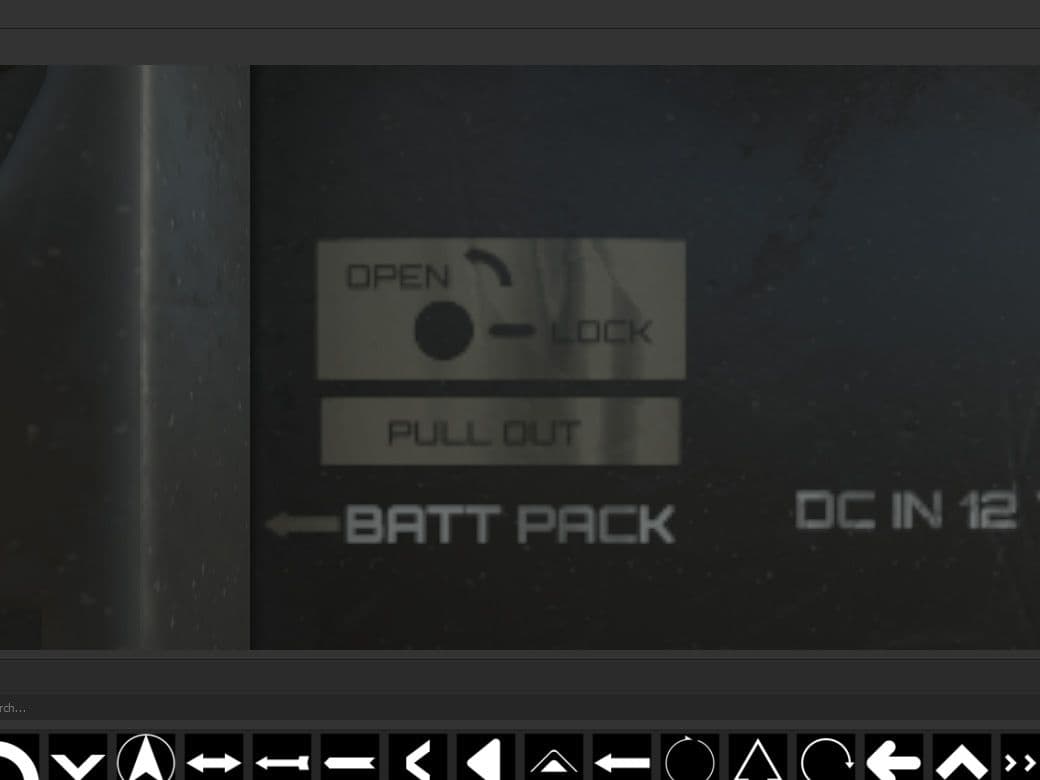
For the lines and signs on the object I used a combination of the basic hard brush and multiple figure alphas. For example for the label. I used the square alpha to make the main shape. I subtracted with a circle, the arrow, and the basic brush to make the shapes, and then subtracted with the type brush to add the text.
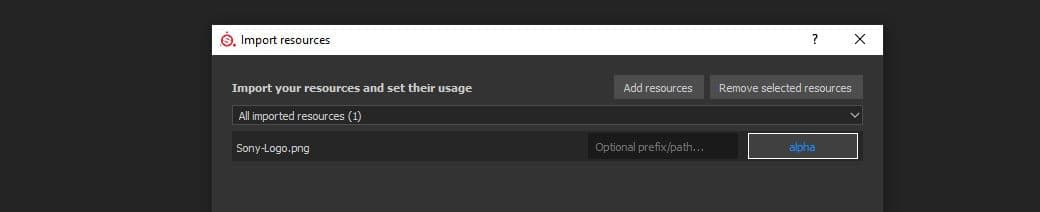
For the Sony logo, since it is a well known logo, I just decided to search for a PNG of it. In Photoshop I gave it a black background, and kept the letters white so I could use it as an alpha. Then I imported it into Substance Painter. Drag it into the main shelf, and this window will pop up.
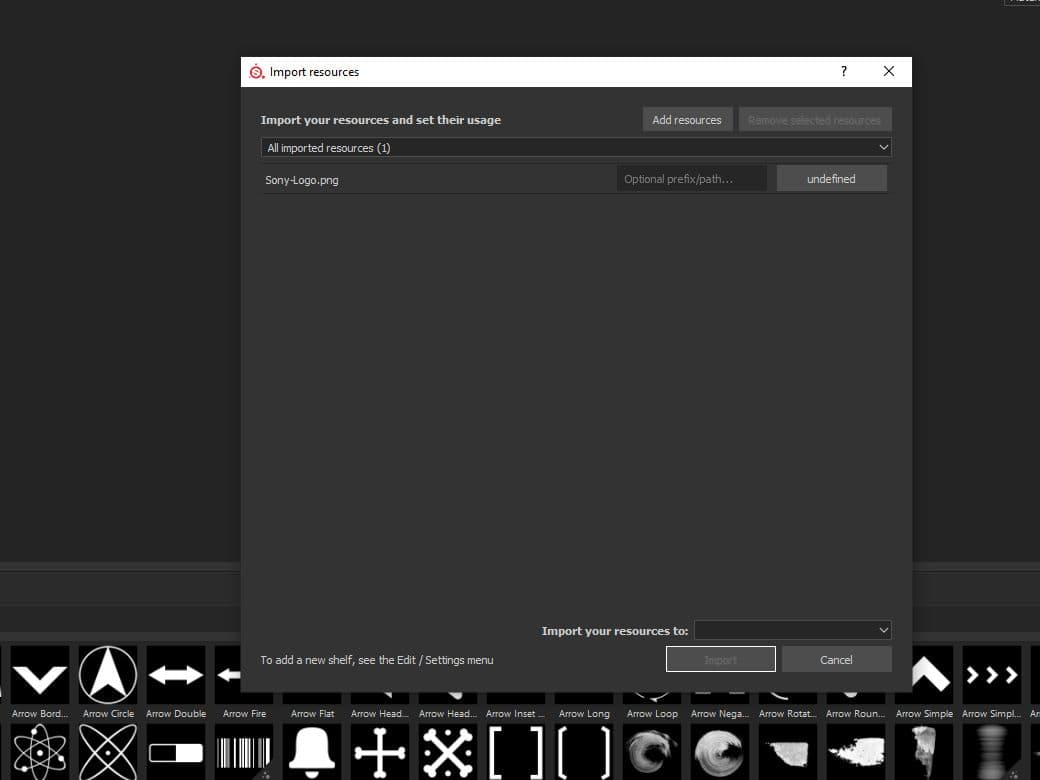
Change the type to alpha.
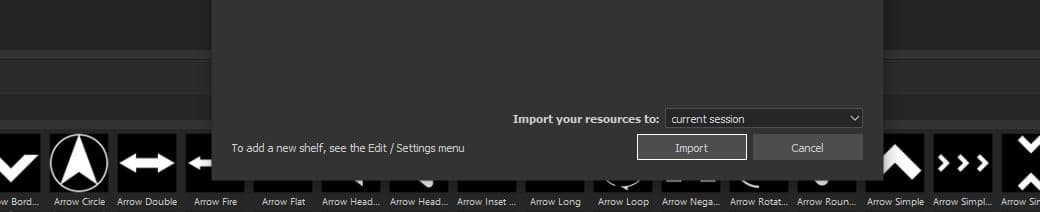
And then click either current session or current project (I usually leave it in the project.)
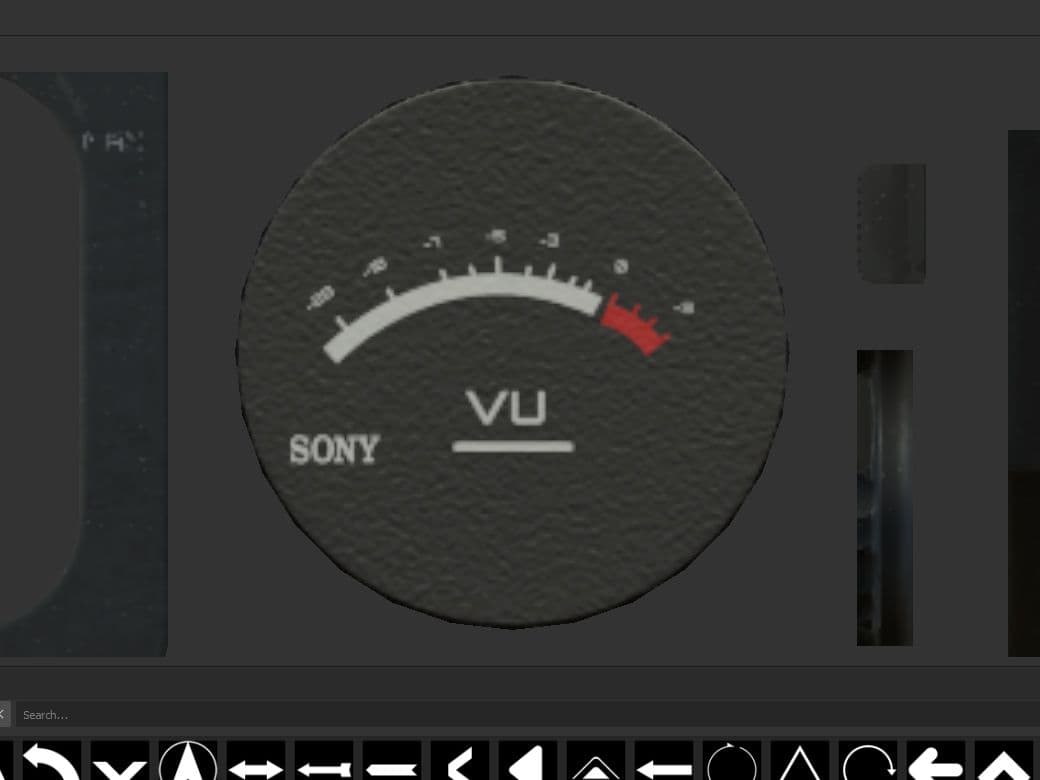
Another way you can use alphas is by creating your own in Photoshop. That’s what I did for the VU meter. I created two simple curved lines and added them into the layers I wanted them to affect.
This one goes into the white decals layer:
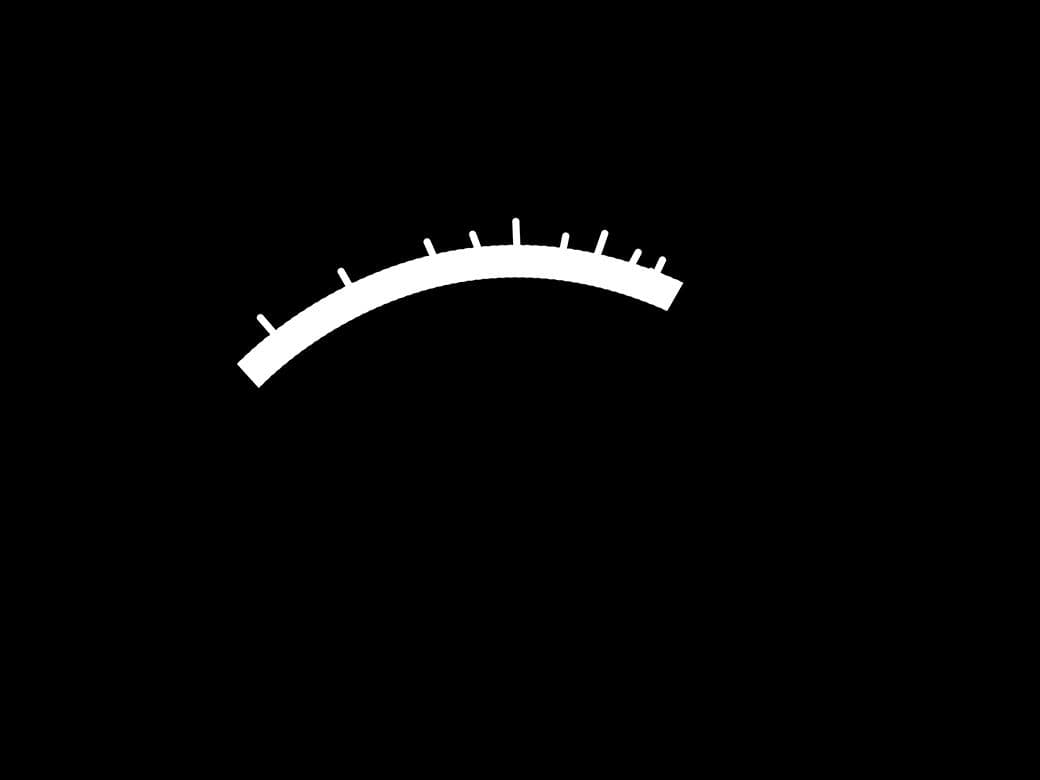
And this one into the red decals layer:

Final result of the meter decals and text:
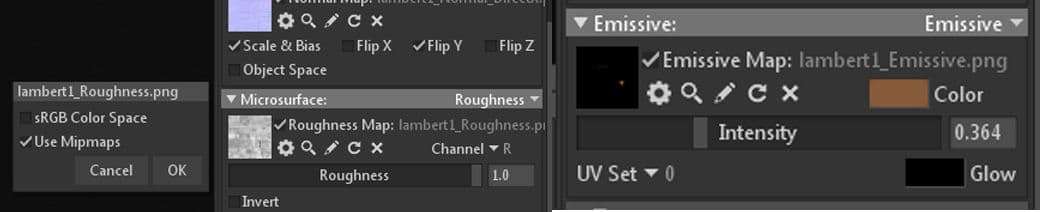
The meter also has an emissive channel. To be able to use the emissive channel in substance painter, you first need to add it back in the texture set settings.
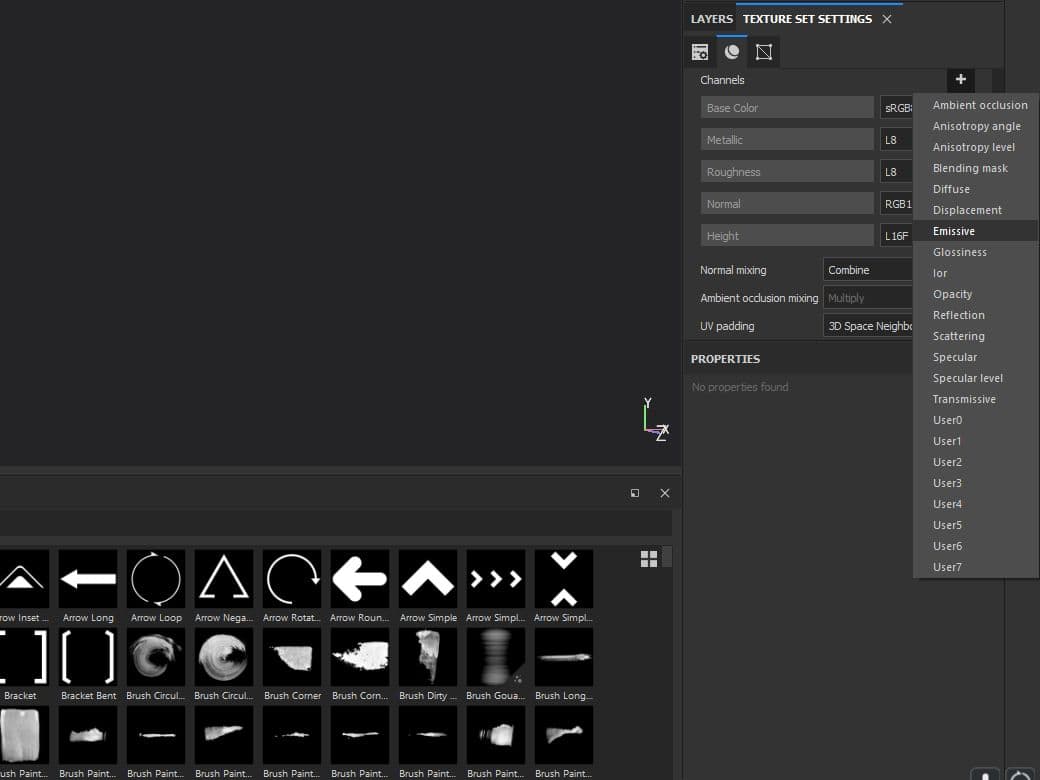
In the rendering section I’ll show you how I set the emissive channel inside Marmoset toolbag.
A last little trick in Substance Painter is how to make holes seem deeper than they are. It’s a really simple one, but an effective one. Just create a new layer with full blackness, metallness, and roughness. Then paint the holes with the basic hard brush and that’s it!

Now comes the last part! We are gonna be rendering inside marmoset which is really straight forward. First thing is to drag your object into the scene and plug in the textures.
I like to set the background to a dark colour, like dark blue or even almost black so the main focus is the object I’m rendering.
Remember to most likely turn the “flip Y” box in the normal map.
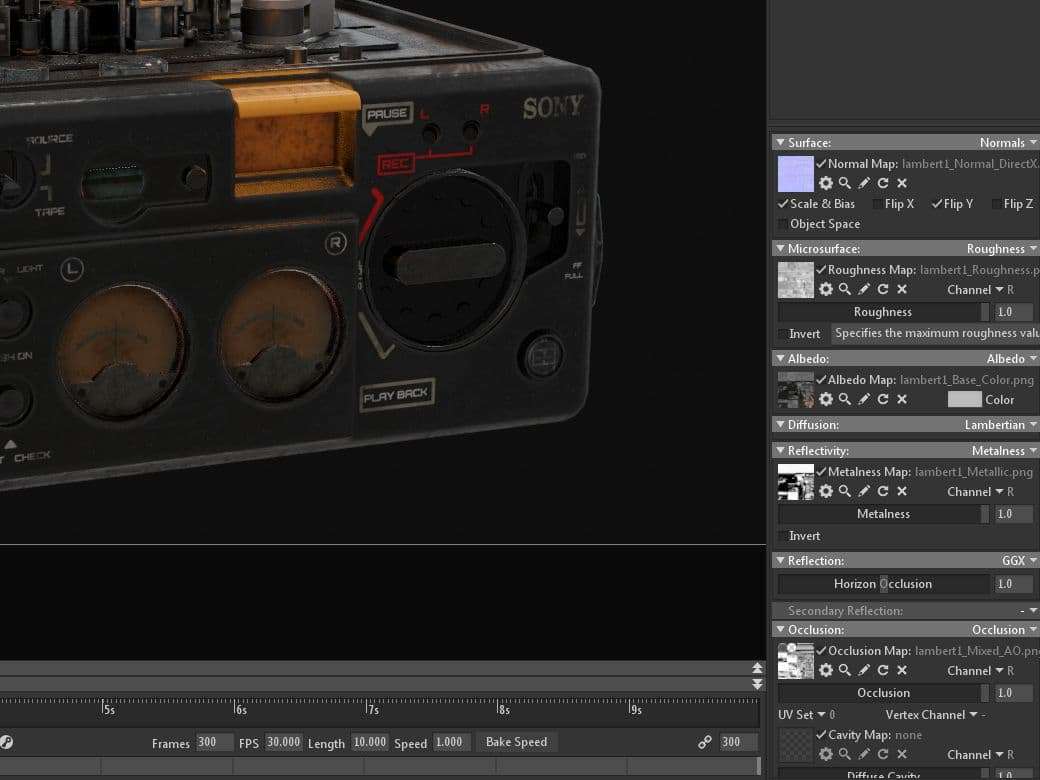
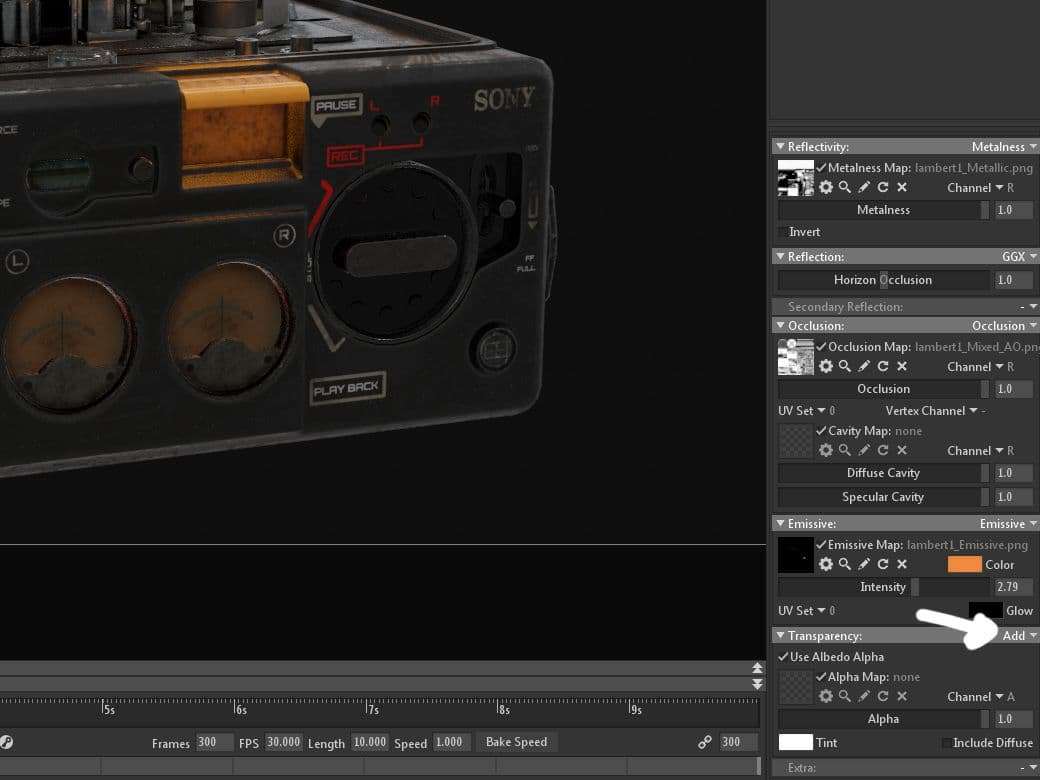
Also on every channel except on the albedo map you need to turn off “sRGB colour space” box. And this is the way I set up my emissive map:
For the glass material add the same texture to the respective areas and then change it to “add” and that’s it.
Once everything is set up on the maps and the geometry, it is time to start changing the lights and render settings. First thing I always do is change the HDRI to one of the presets I like.
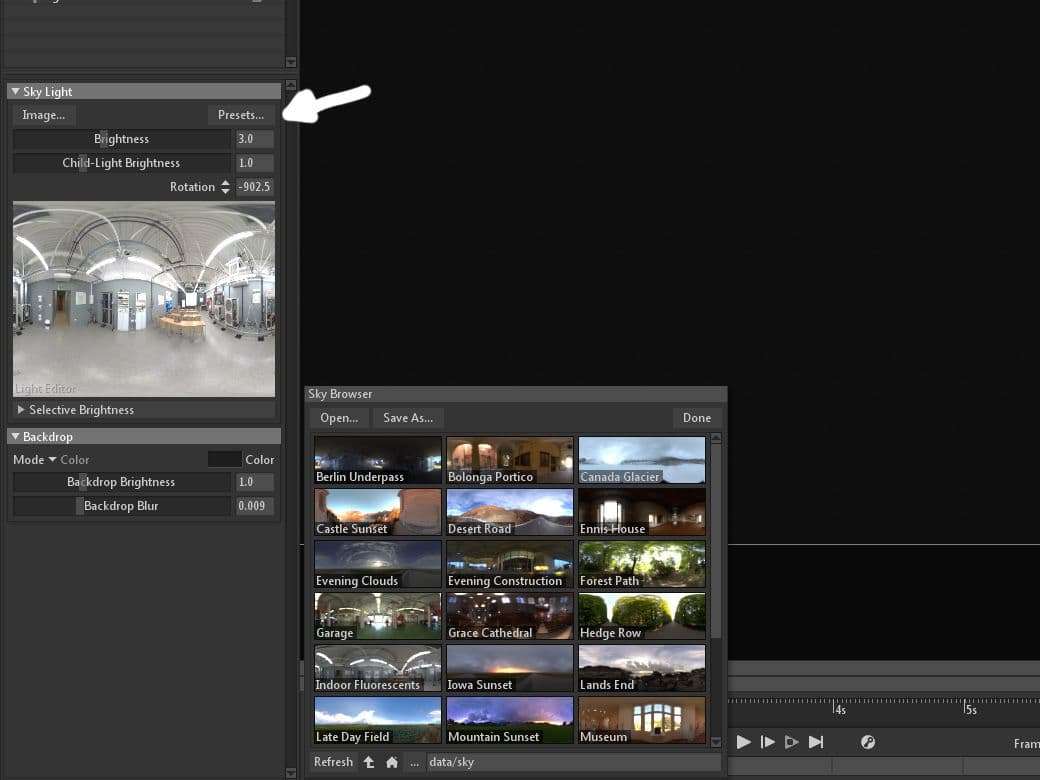
Then I change the mode from any of the skies to colour. I like to set the background to a dark colour, like dark blue or even almost black so the main focus is the object I’m rendering.
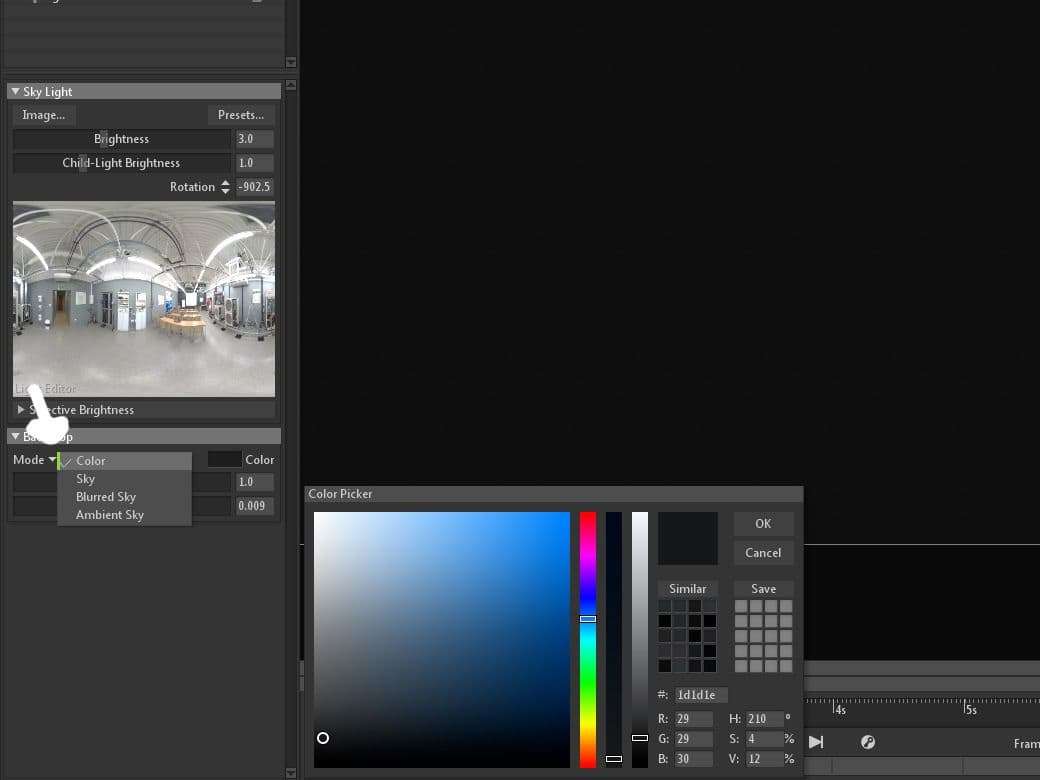
And I play with the intensity until I have something I like. In this case 3.0.
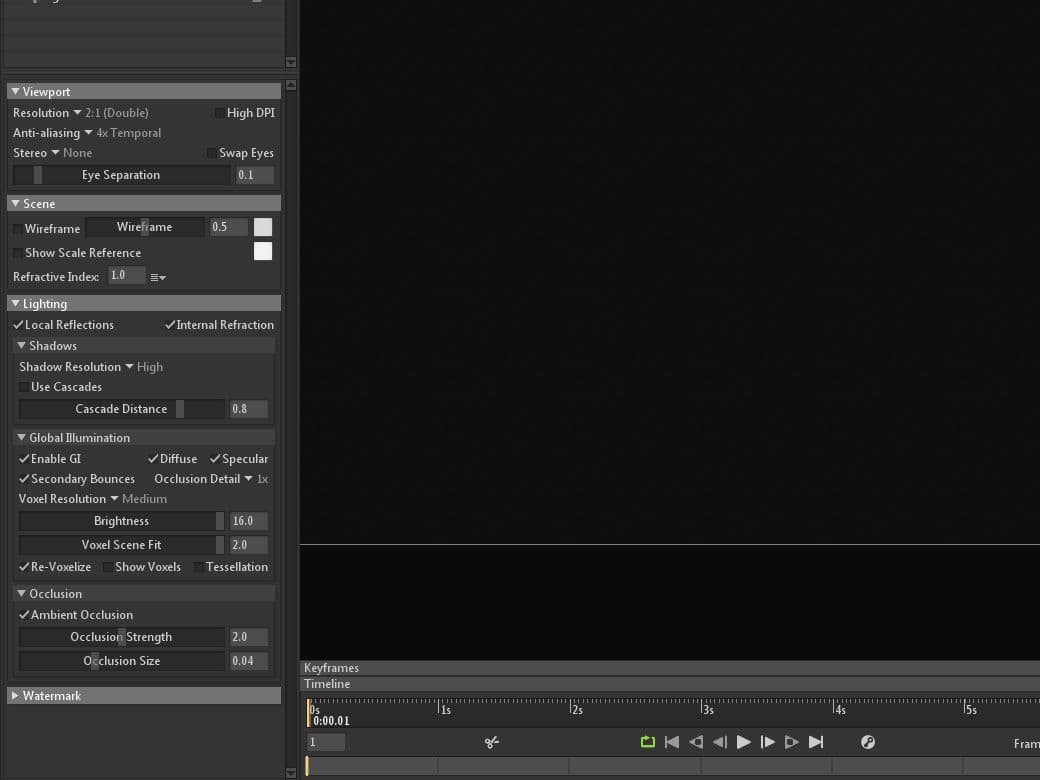
After setting my main light set, I started playing with the render settings. First I set the resolution to double, and then enabled local reflections and internal refractions, then I also enabled GI and ambient occlusion.
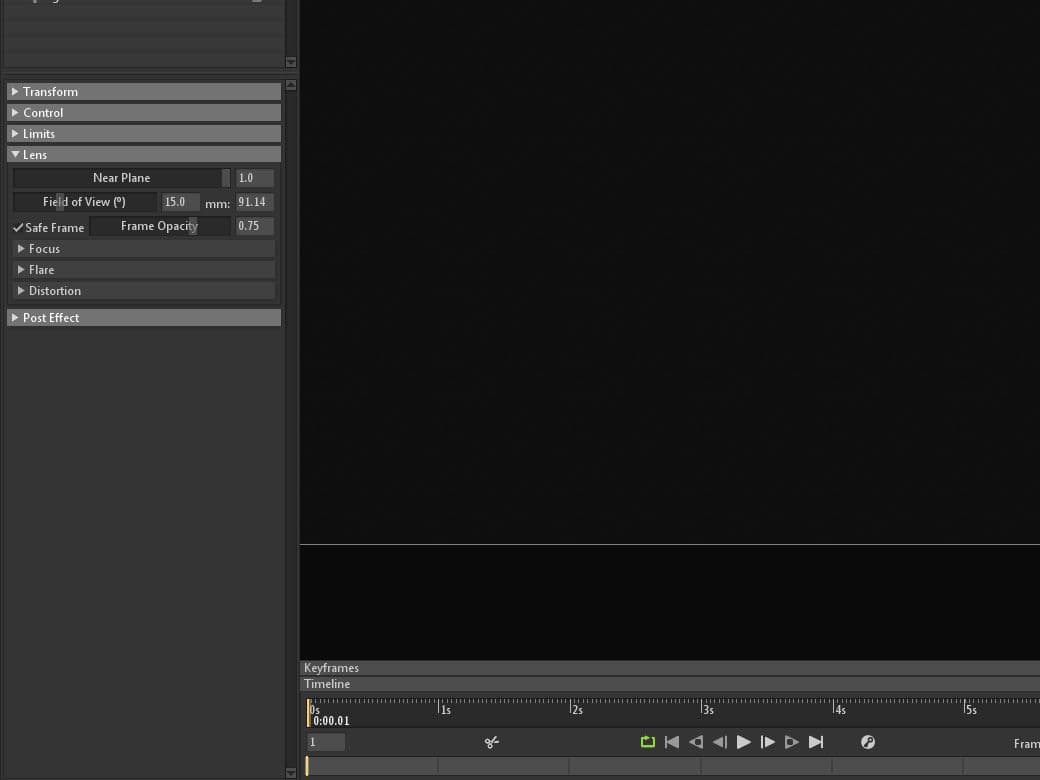
Moving onto the camera settings, I normally don’t mess that much with it. Just the limits in case I’m thinking of exporting a marmoset viewer file, and the field of view, which in this case I used 15.
You can also play with the post effects if you want to add some vignette or flare, but you can also do that in Photoshop - this stage is a personal preference.
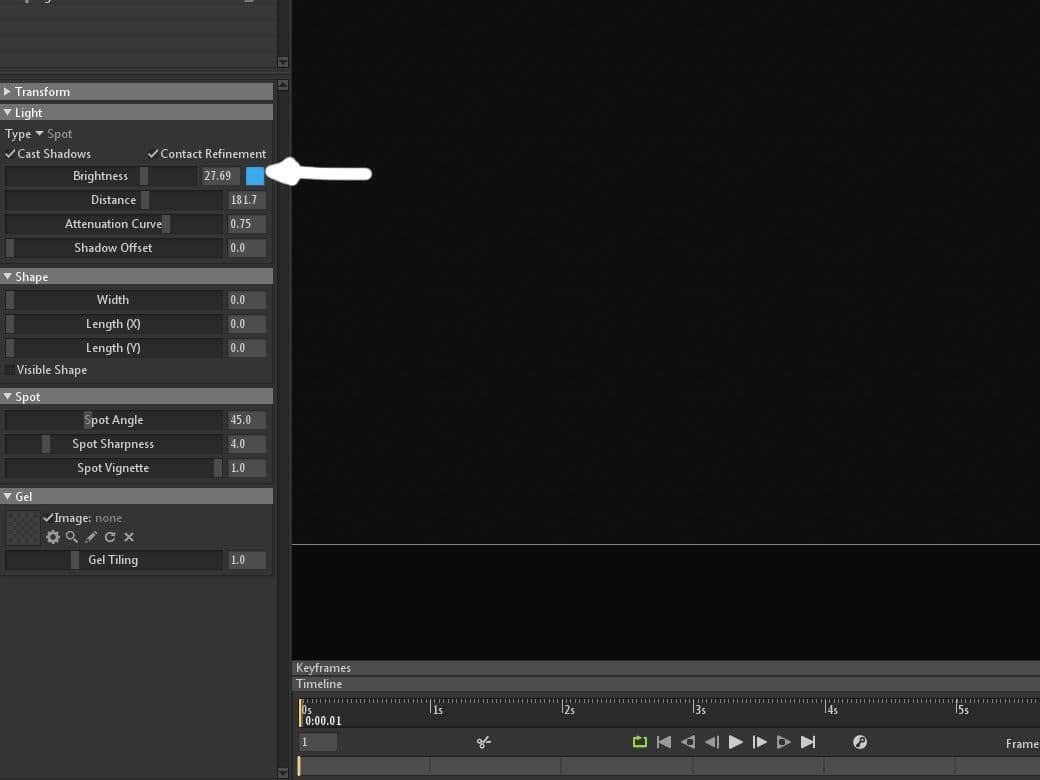
For this project I used a simple 3 point lighting, and then for other shots I added some lights so it was easier to see the other details. Adding lights in marmoset is super easy. My favourite way of adding lights is to point the camera I’m looking through to the place I want lit, and hit “Ctrl L”. The light will be created where you were pointing from.
Then you can select the light and start playing with some of the parameters and even change the colour. I like to check the box “Contact Refinement”, play with the spot angle and brightness.
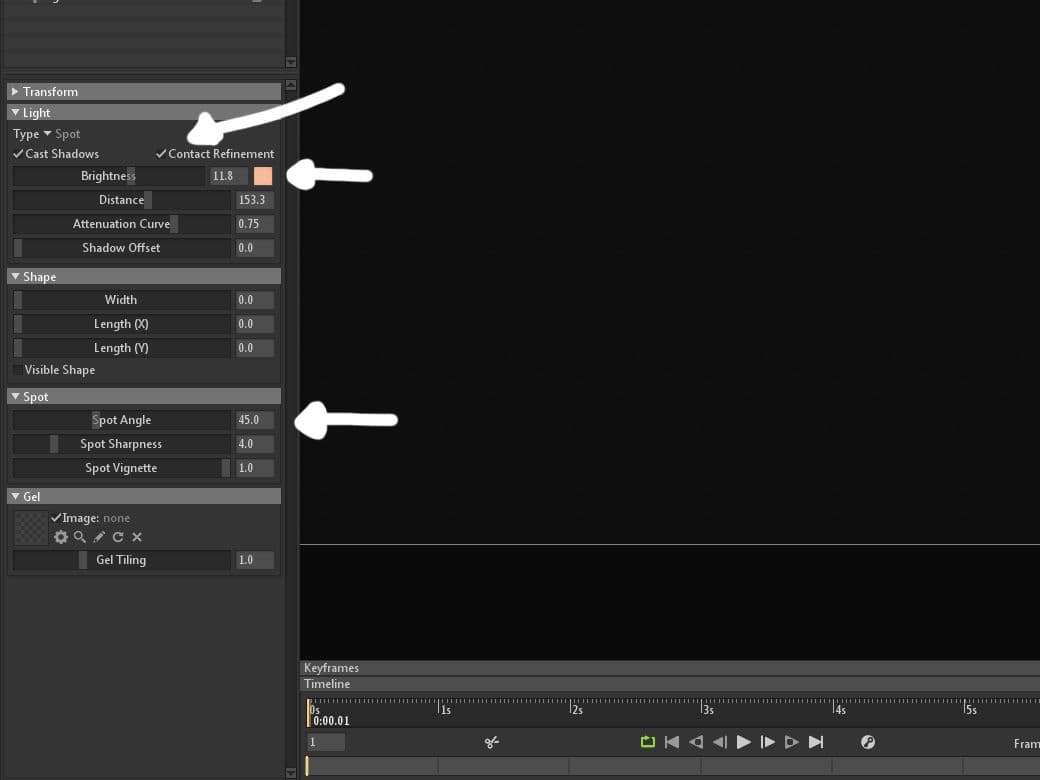
For the back light I added a light with a bluish tint, because I like the way it looks.
Last thing you need to do is to click on capture. Open the settings and change it to the resolution you like, bump the sampling to x100 or whatever you like and hit “ok”. Just remember the higher the samples, the higher the render is going to take. I think that for some single images it’s worth the wait, so keep it in x100. If you are planning to do some post work in Photoshop export it as a PNG with transparency and you’ll be set.
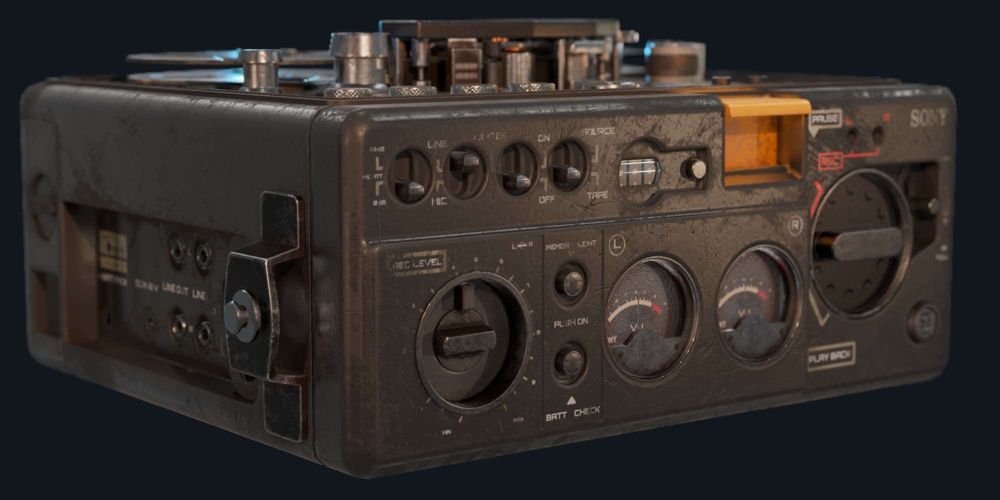
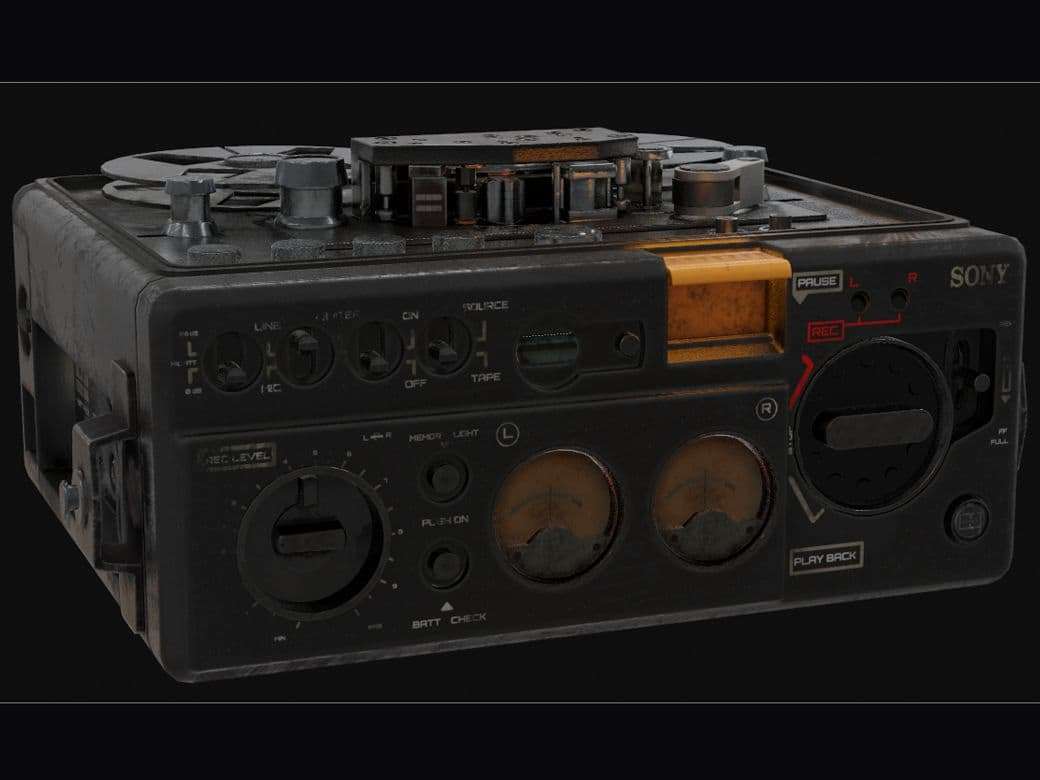
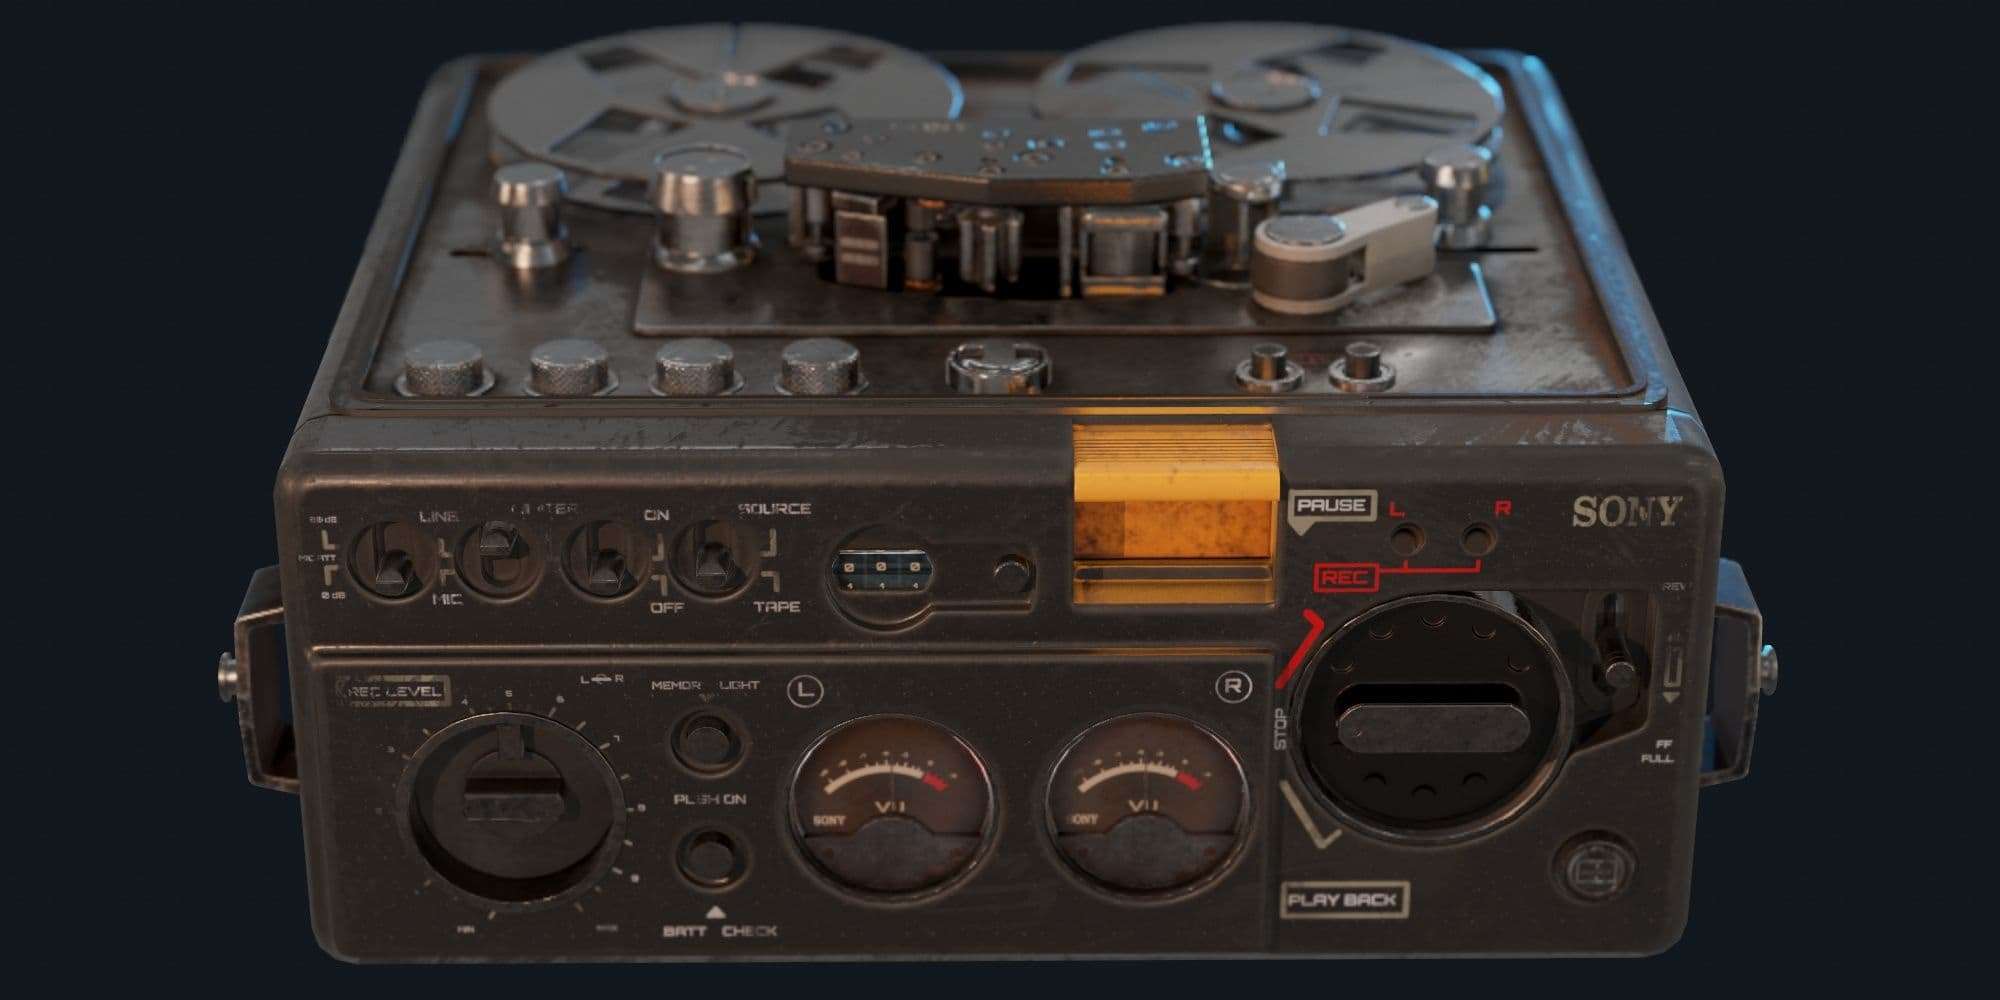
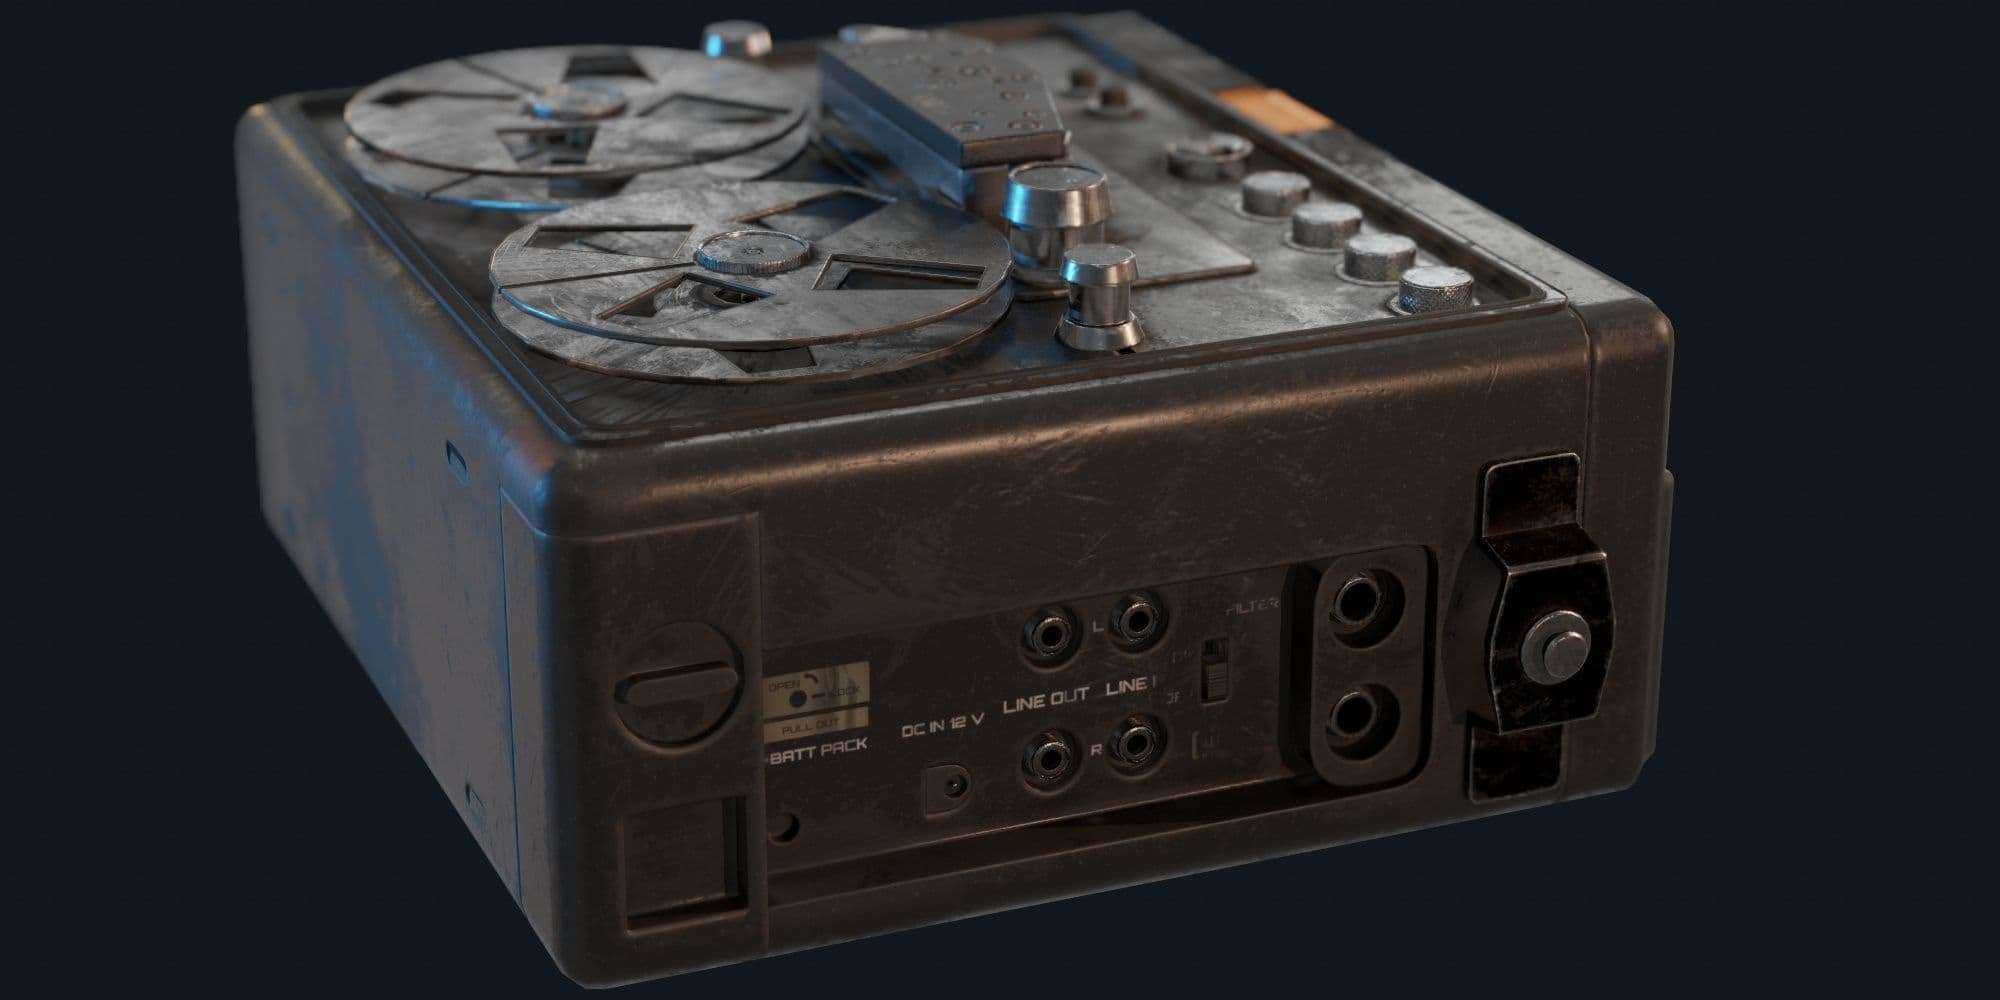
Here are my final renders, thanks for reading!

You can find more of Rogelio's work on The Rookies here.