Achieving Realism in 3D Portraits Using ZBrush and Substance Painter
ArtFX student Rishikesh Nayudu shows us how he achieves realism in his 3D portraits using ZBrush, Maya, and Substance Painter.
ArtFX student Rishikesh Nayudu shows us how he achieves realism in his 3D portraits using ZBrush, Maya, and Substance Painter.
Rishikesh Nayudu is a 22yr old currently in his 4th year at ArtFX school in Montpellier, France. An avid illustrator, Rishikesh's interests shifted to 3D Characters after discovering software like Zbrush and Maya, back in 2016.
Over the years Rishikesh kept discovering new things, new tools, new ways to create both stylised and believable 3D Characters. In this article he shows us how he achieves realism in his 3D portraits using ZBrush, Maya and Substance Painter.
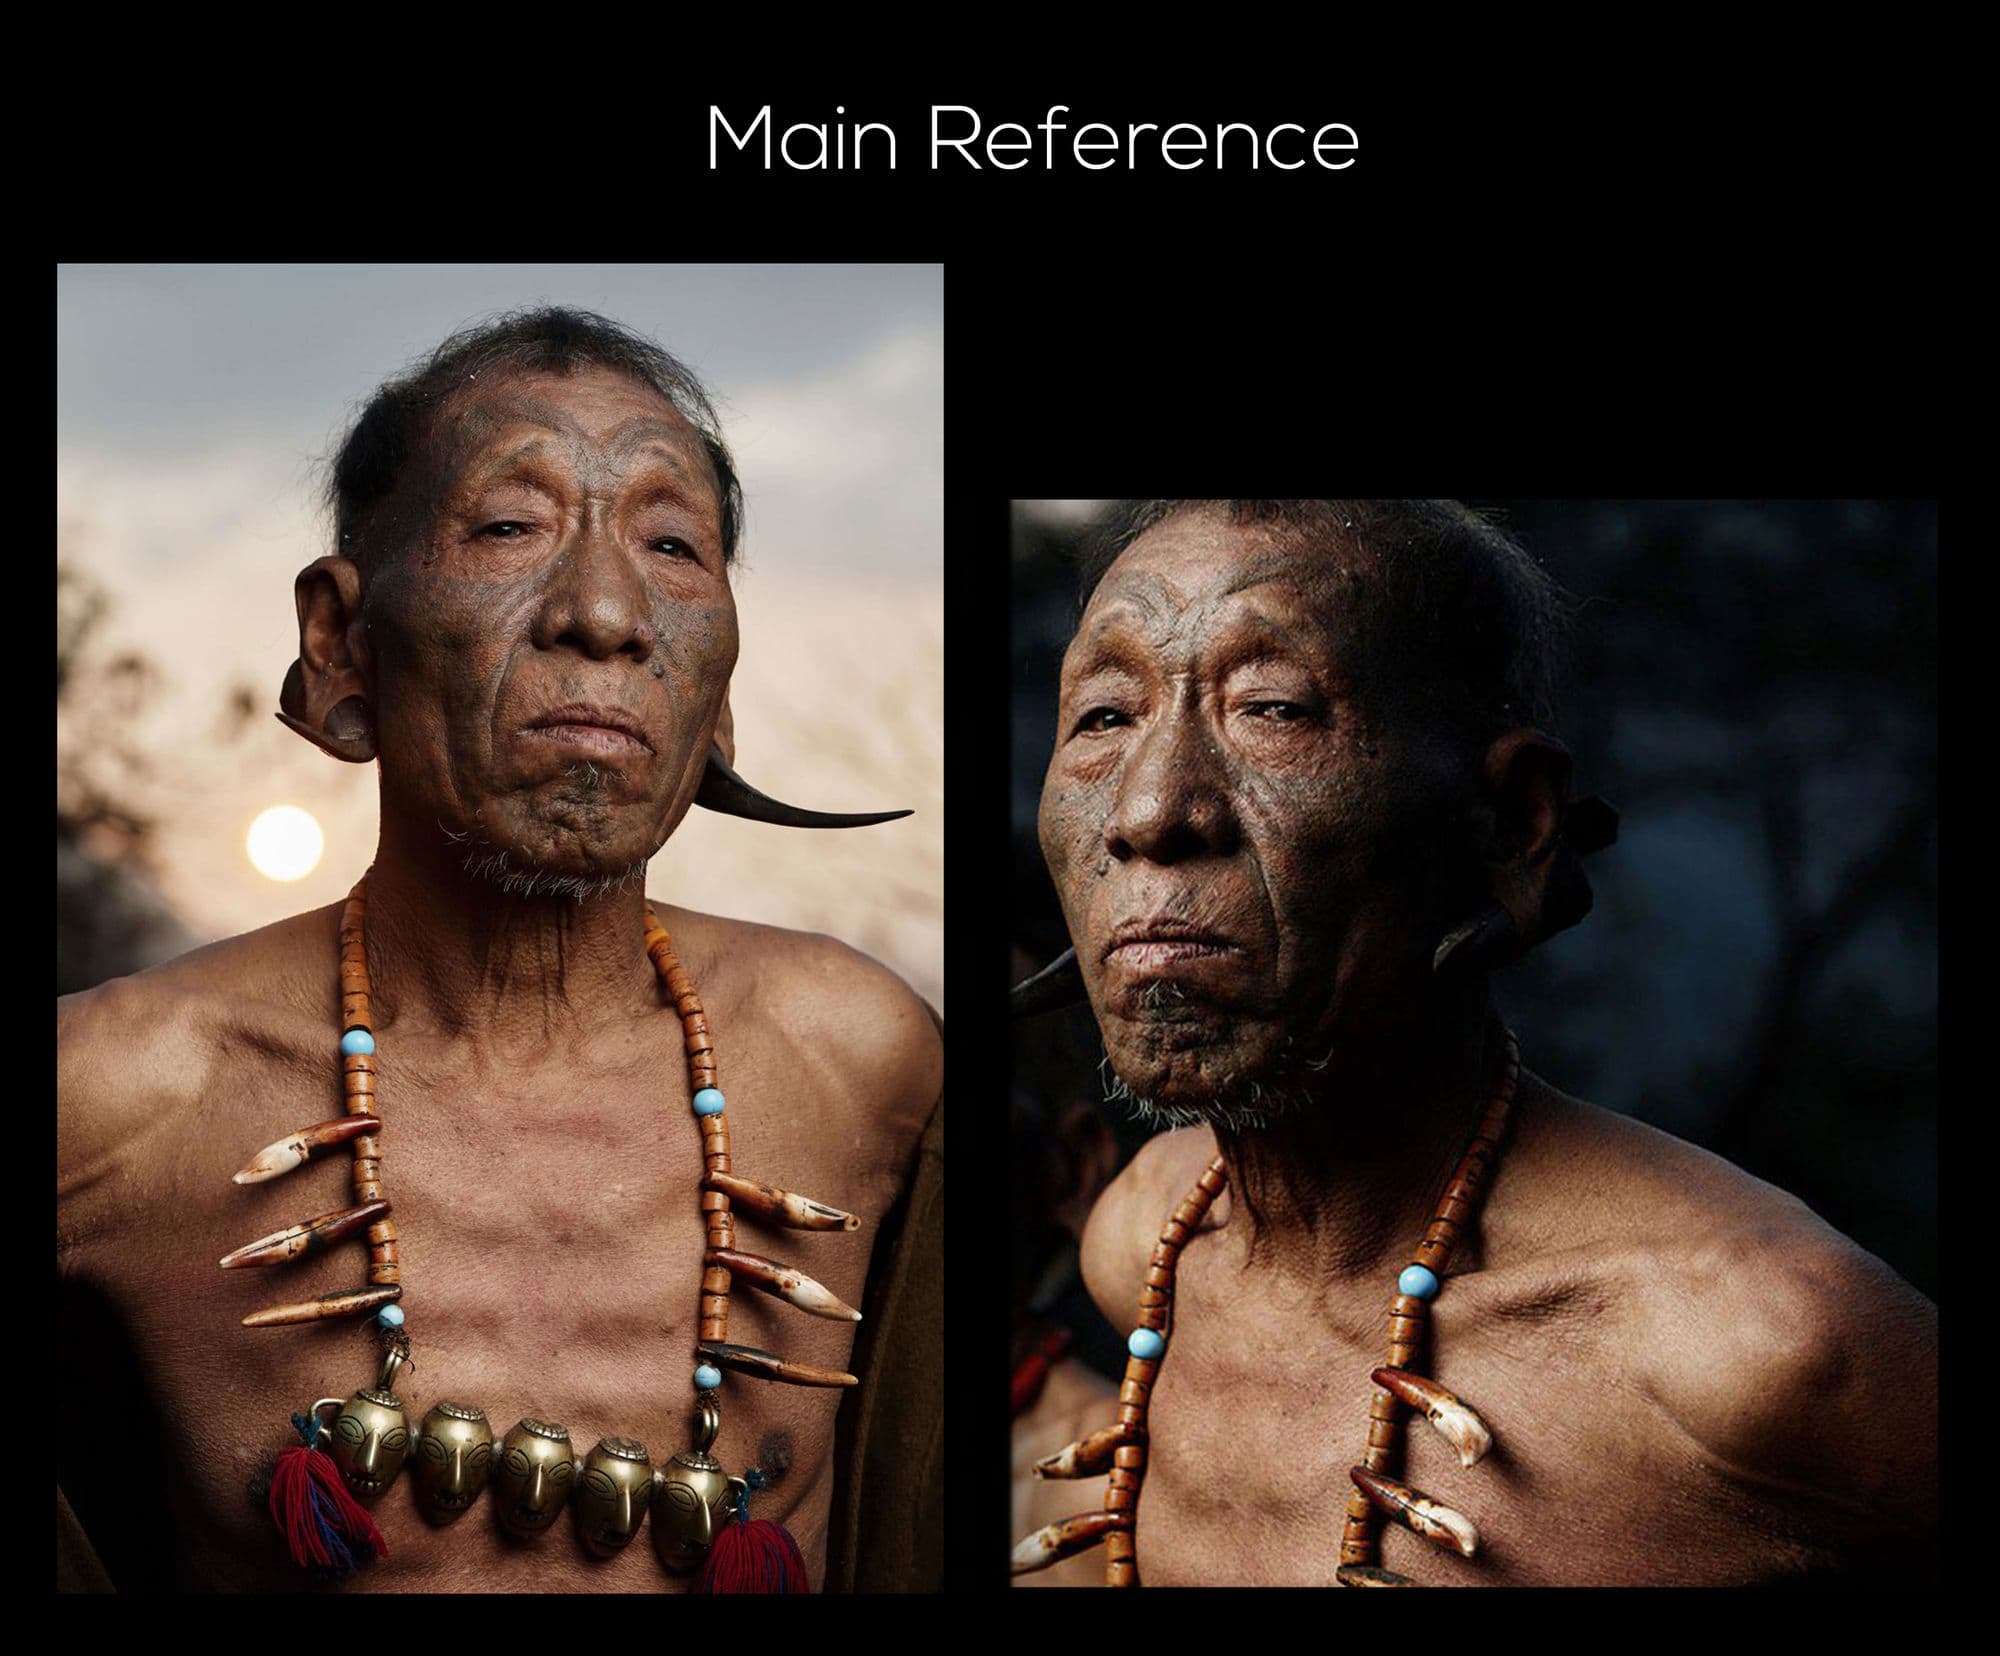
There are a lot of artists that I follow on Instagram, youtube, and twitch. I discovered a lot of new things by watching their presentations at ZBrush Summits and live streams. In particular, I came across Kris Costa's recent work of an African warrior and lady from Nagaland. I was like, "I want to try something like this!" I watched his ZBrush summit presentation and his other youtube videos and after that, I attempted my own project. The result of that is the project I present here today.
I looked for references with a back story. I discovered the Konyak tribe. I stumbled across these beautiful portraits by Adam Kozioł. I picked a few of the pictures from his collection.
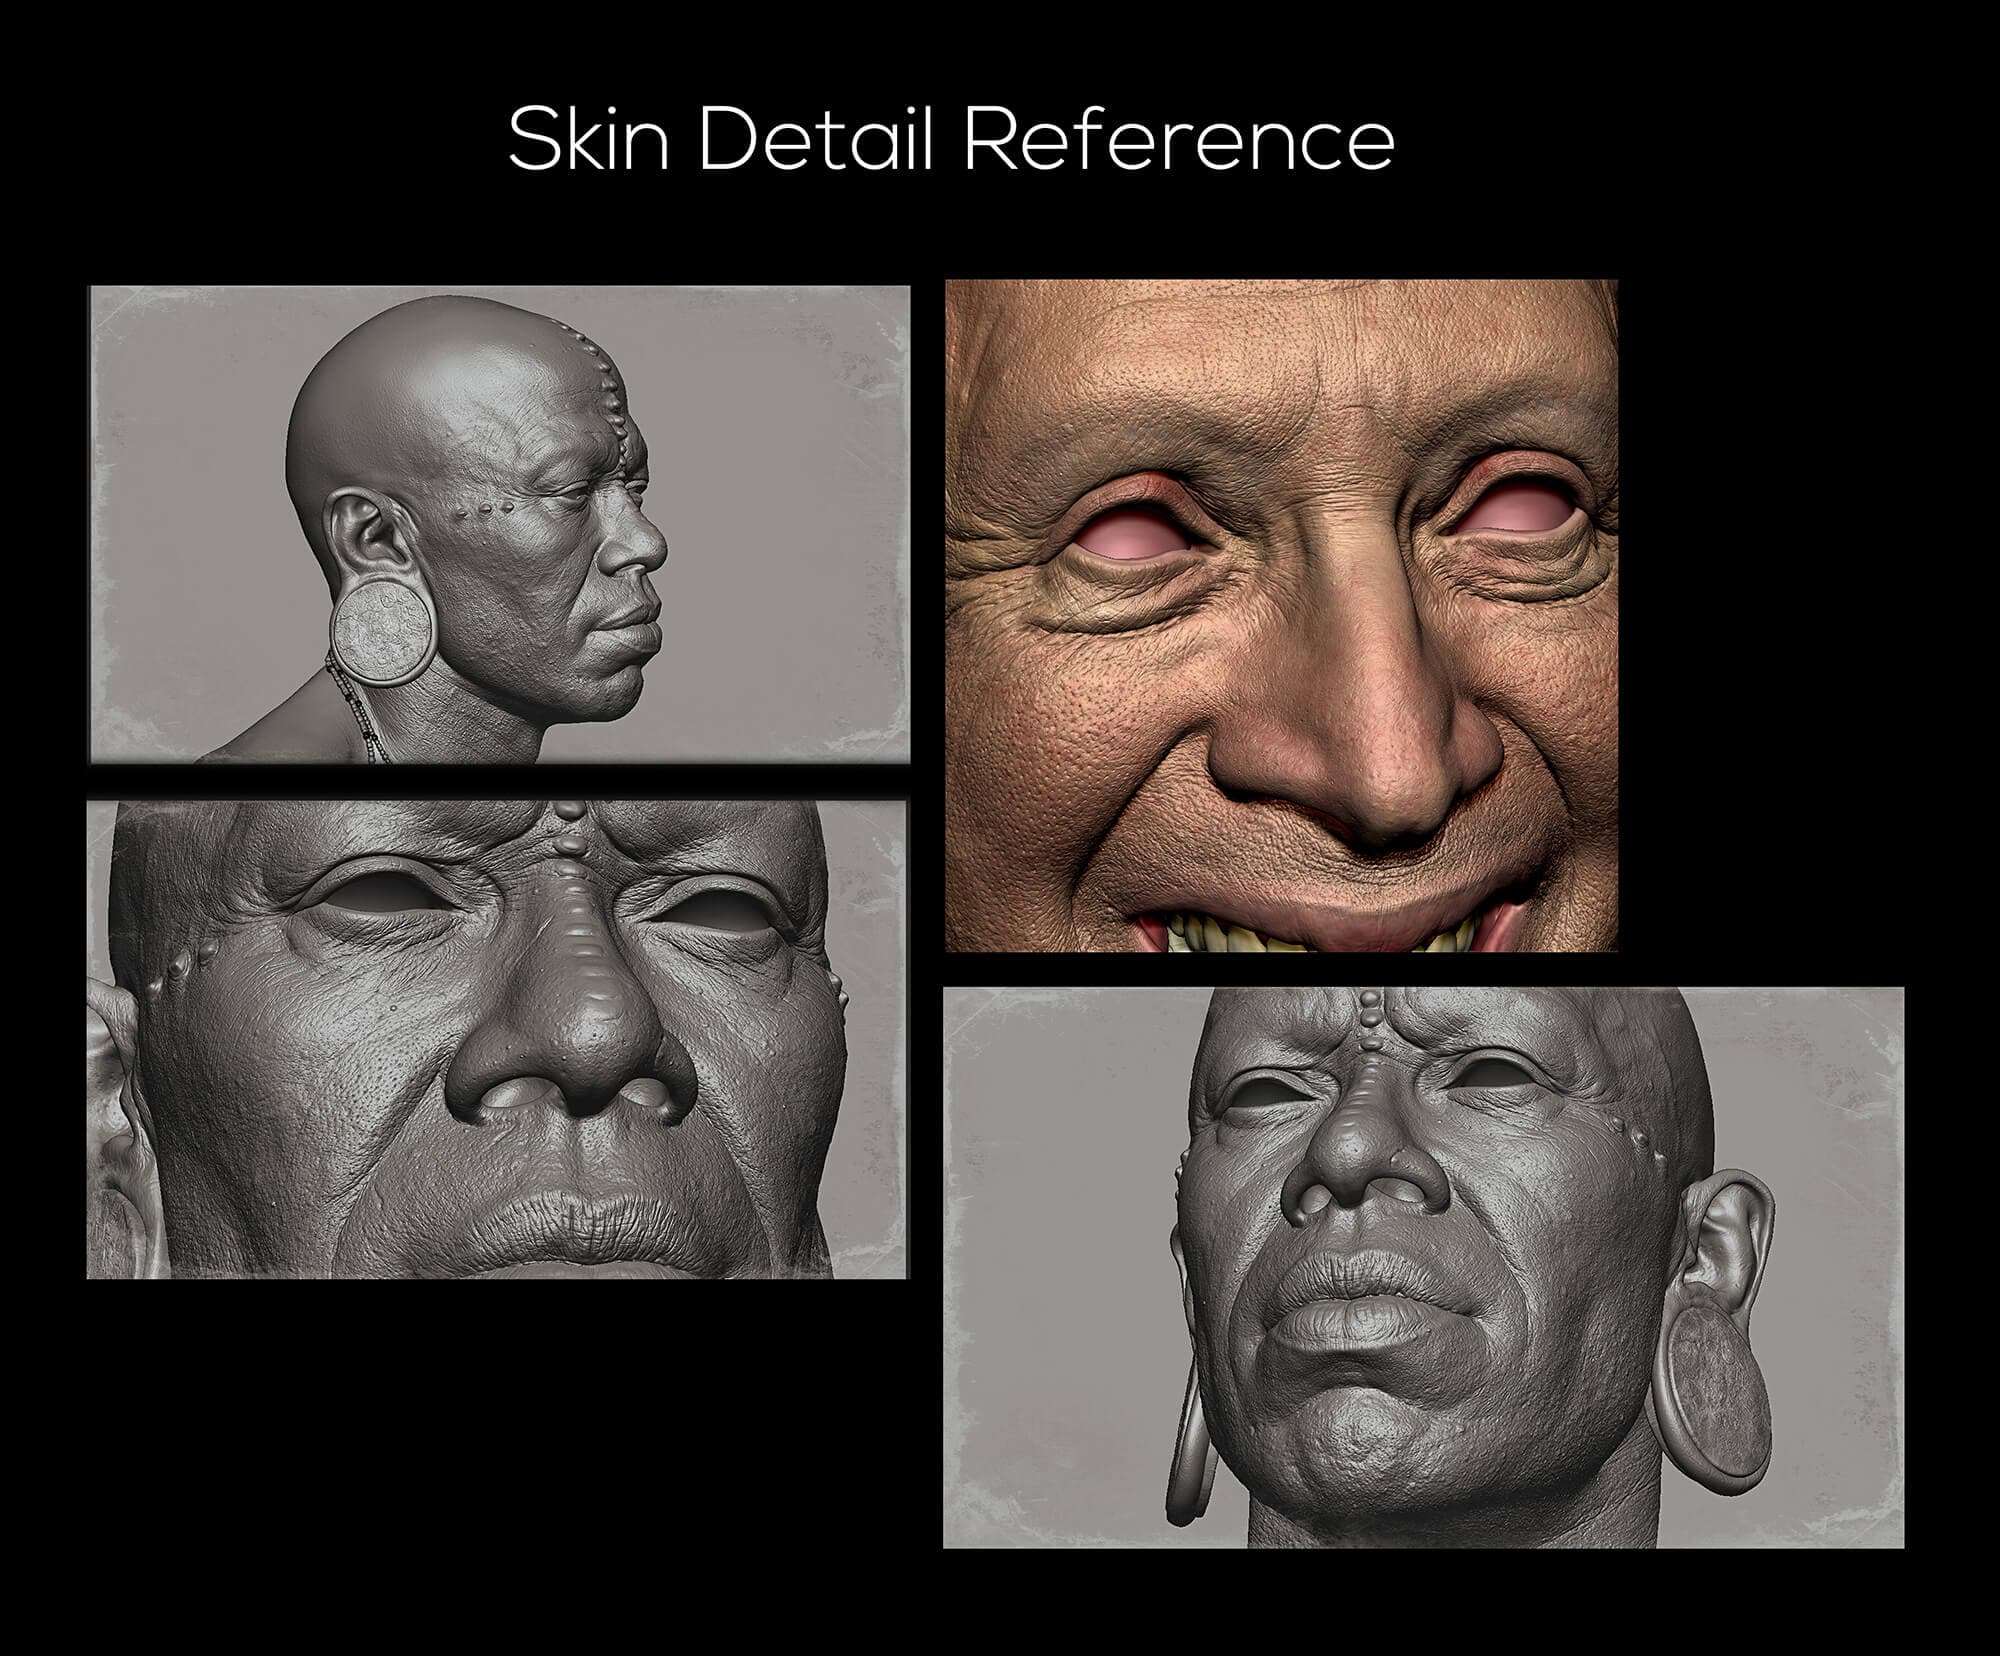
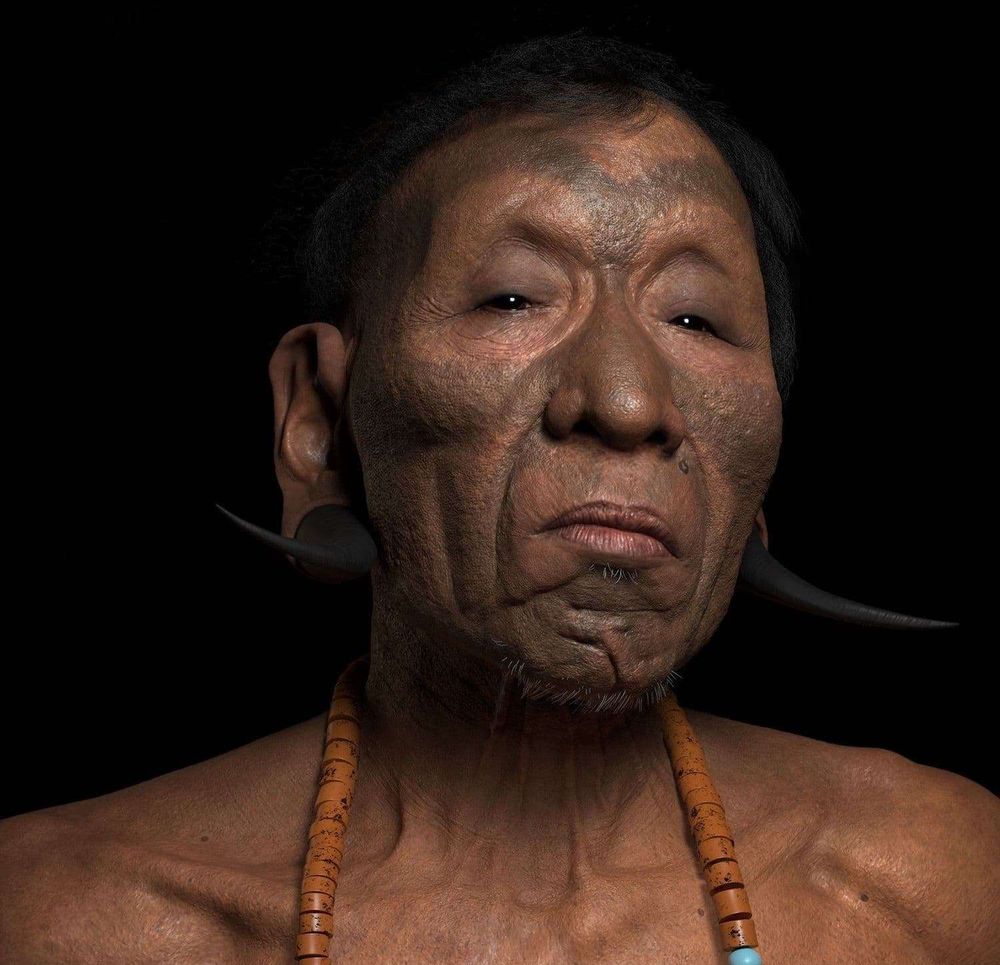
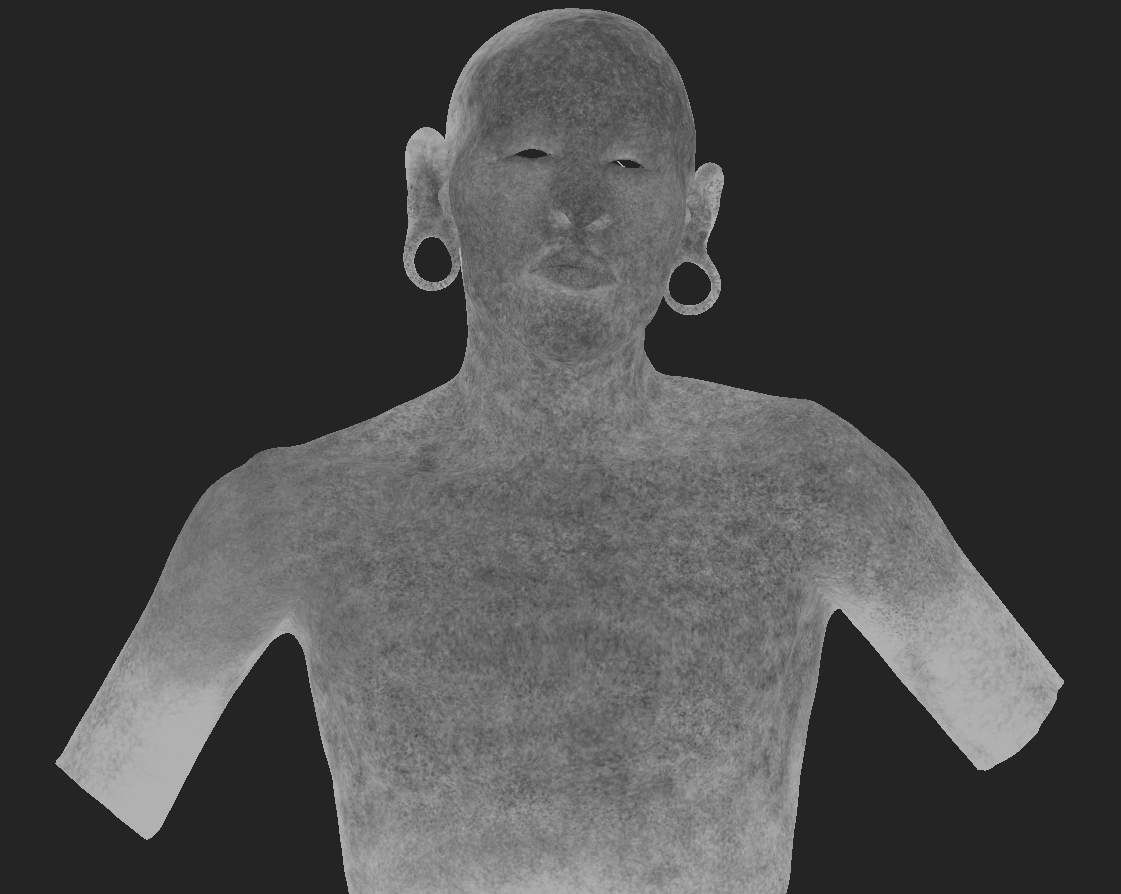
I started with a Sphere and after establishing the basic anatomy, I then exaggerated his distinctive features, like the tapered jaw, protruding cheekbones due to his age, and the shape of the eyes to match his ethnicity.
Focusing on the primary forms helped to get to the essence of the character much faster.

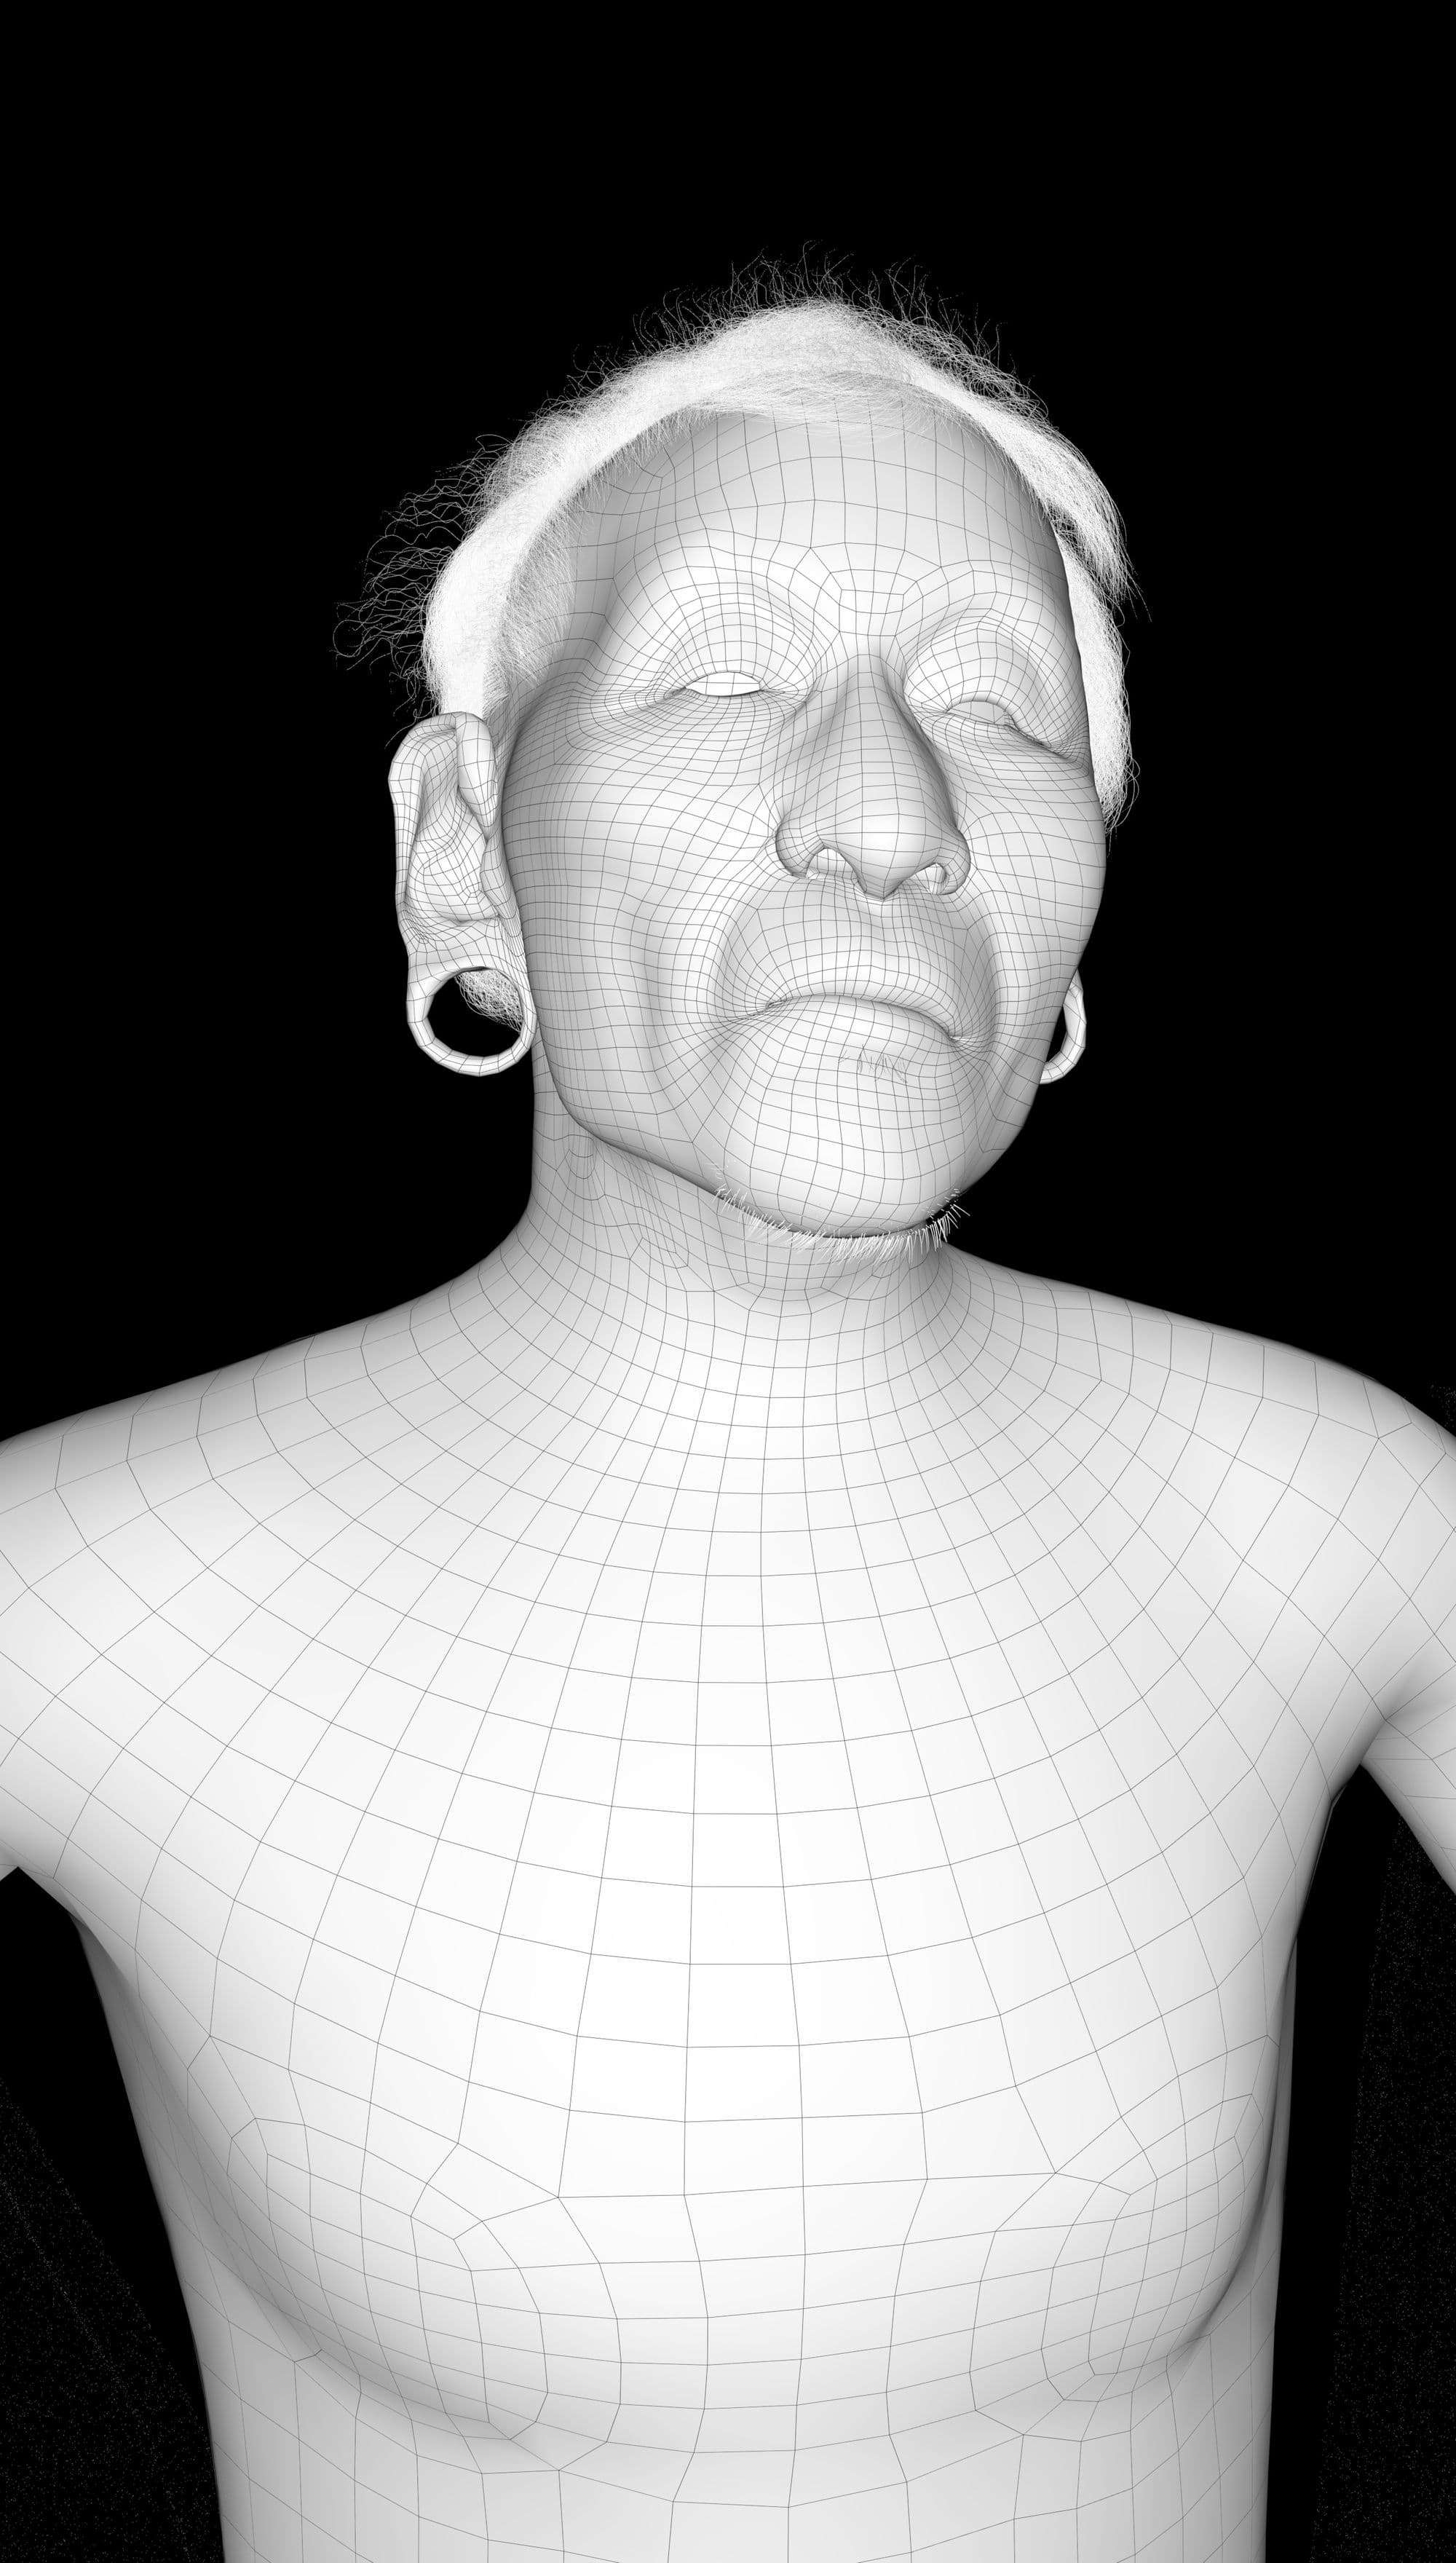
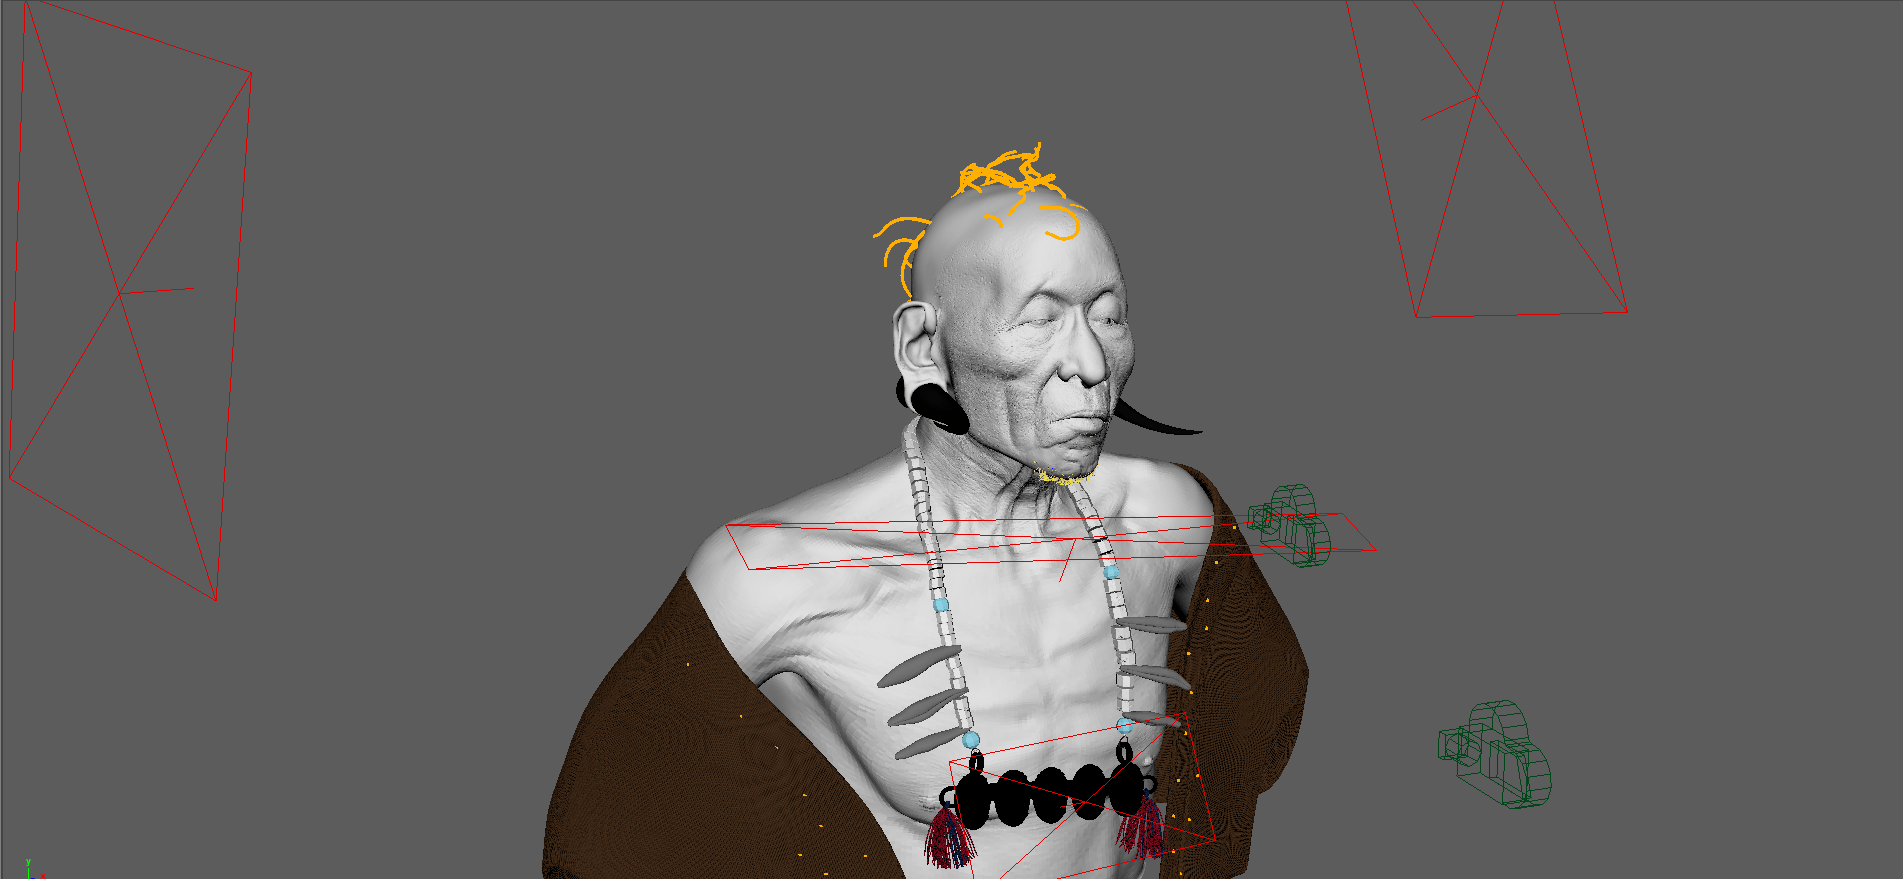
Once I had the base structure in, I exported it to Maya for retopology and UVs. Always get a clean topology reference before you start. Danny Mac 3D has a good Youtube video on how to perform a clean retopo. Later, I projected the details back in Zbrush.
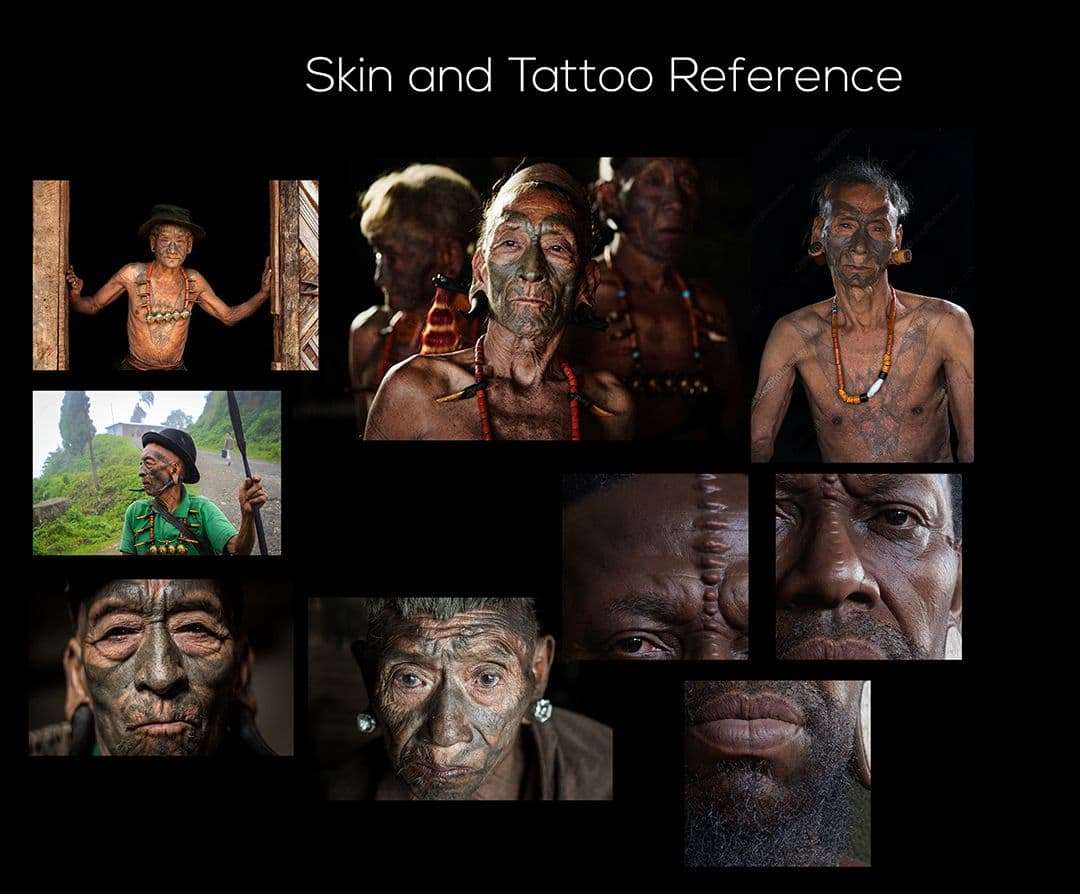
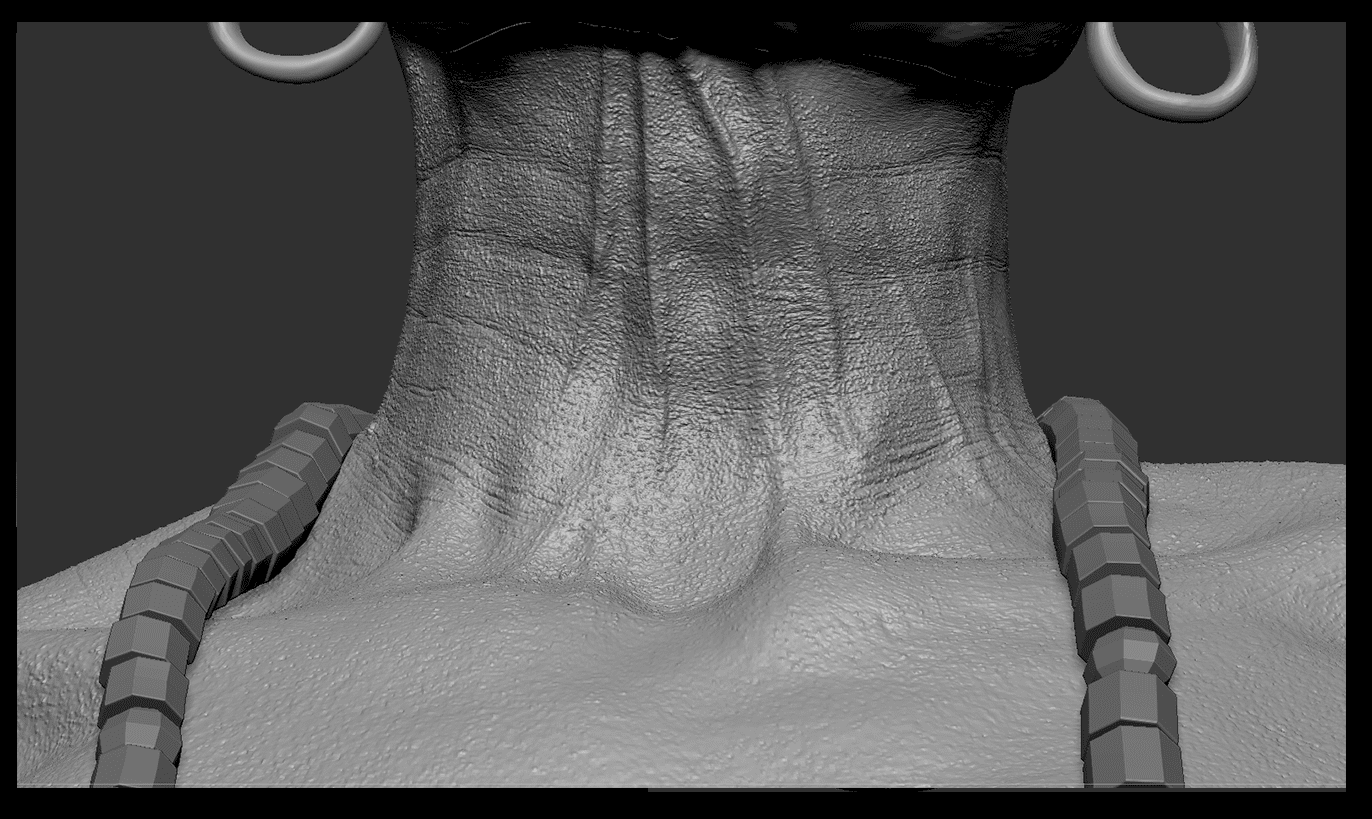
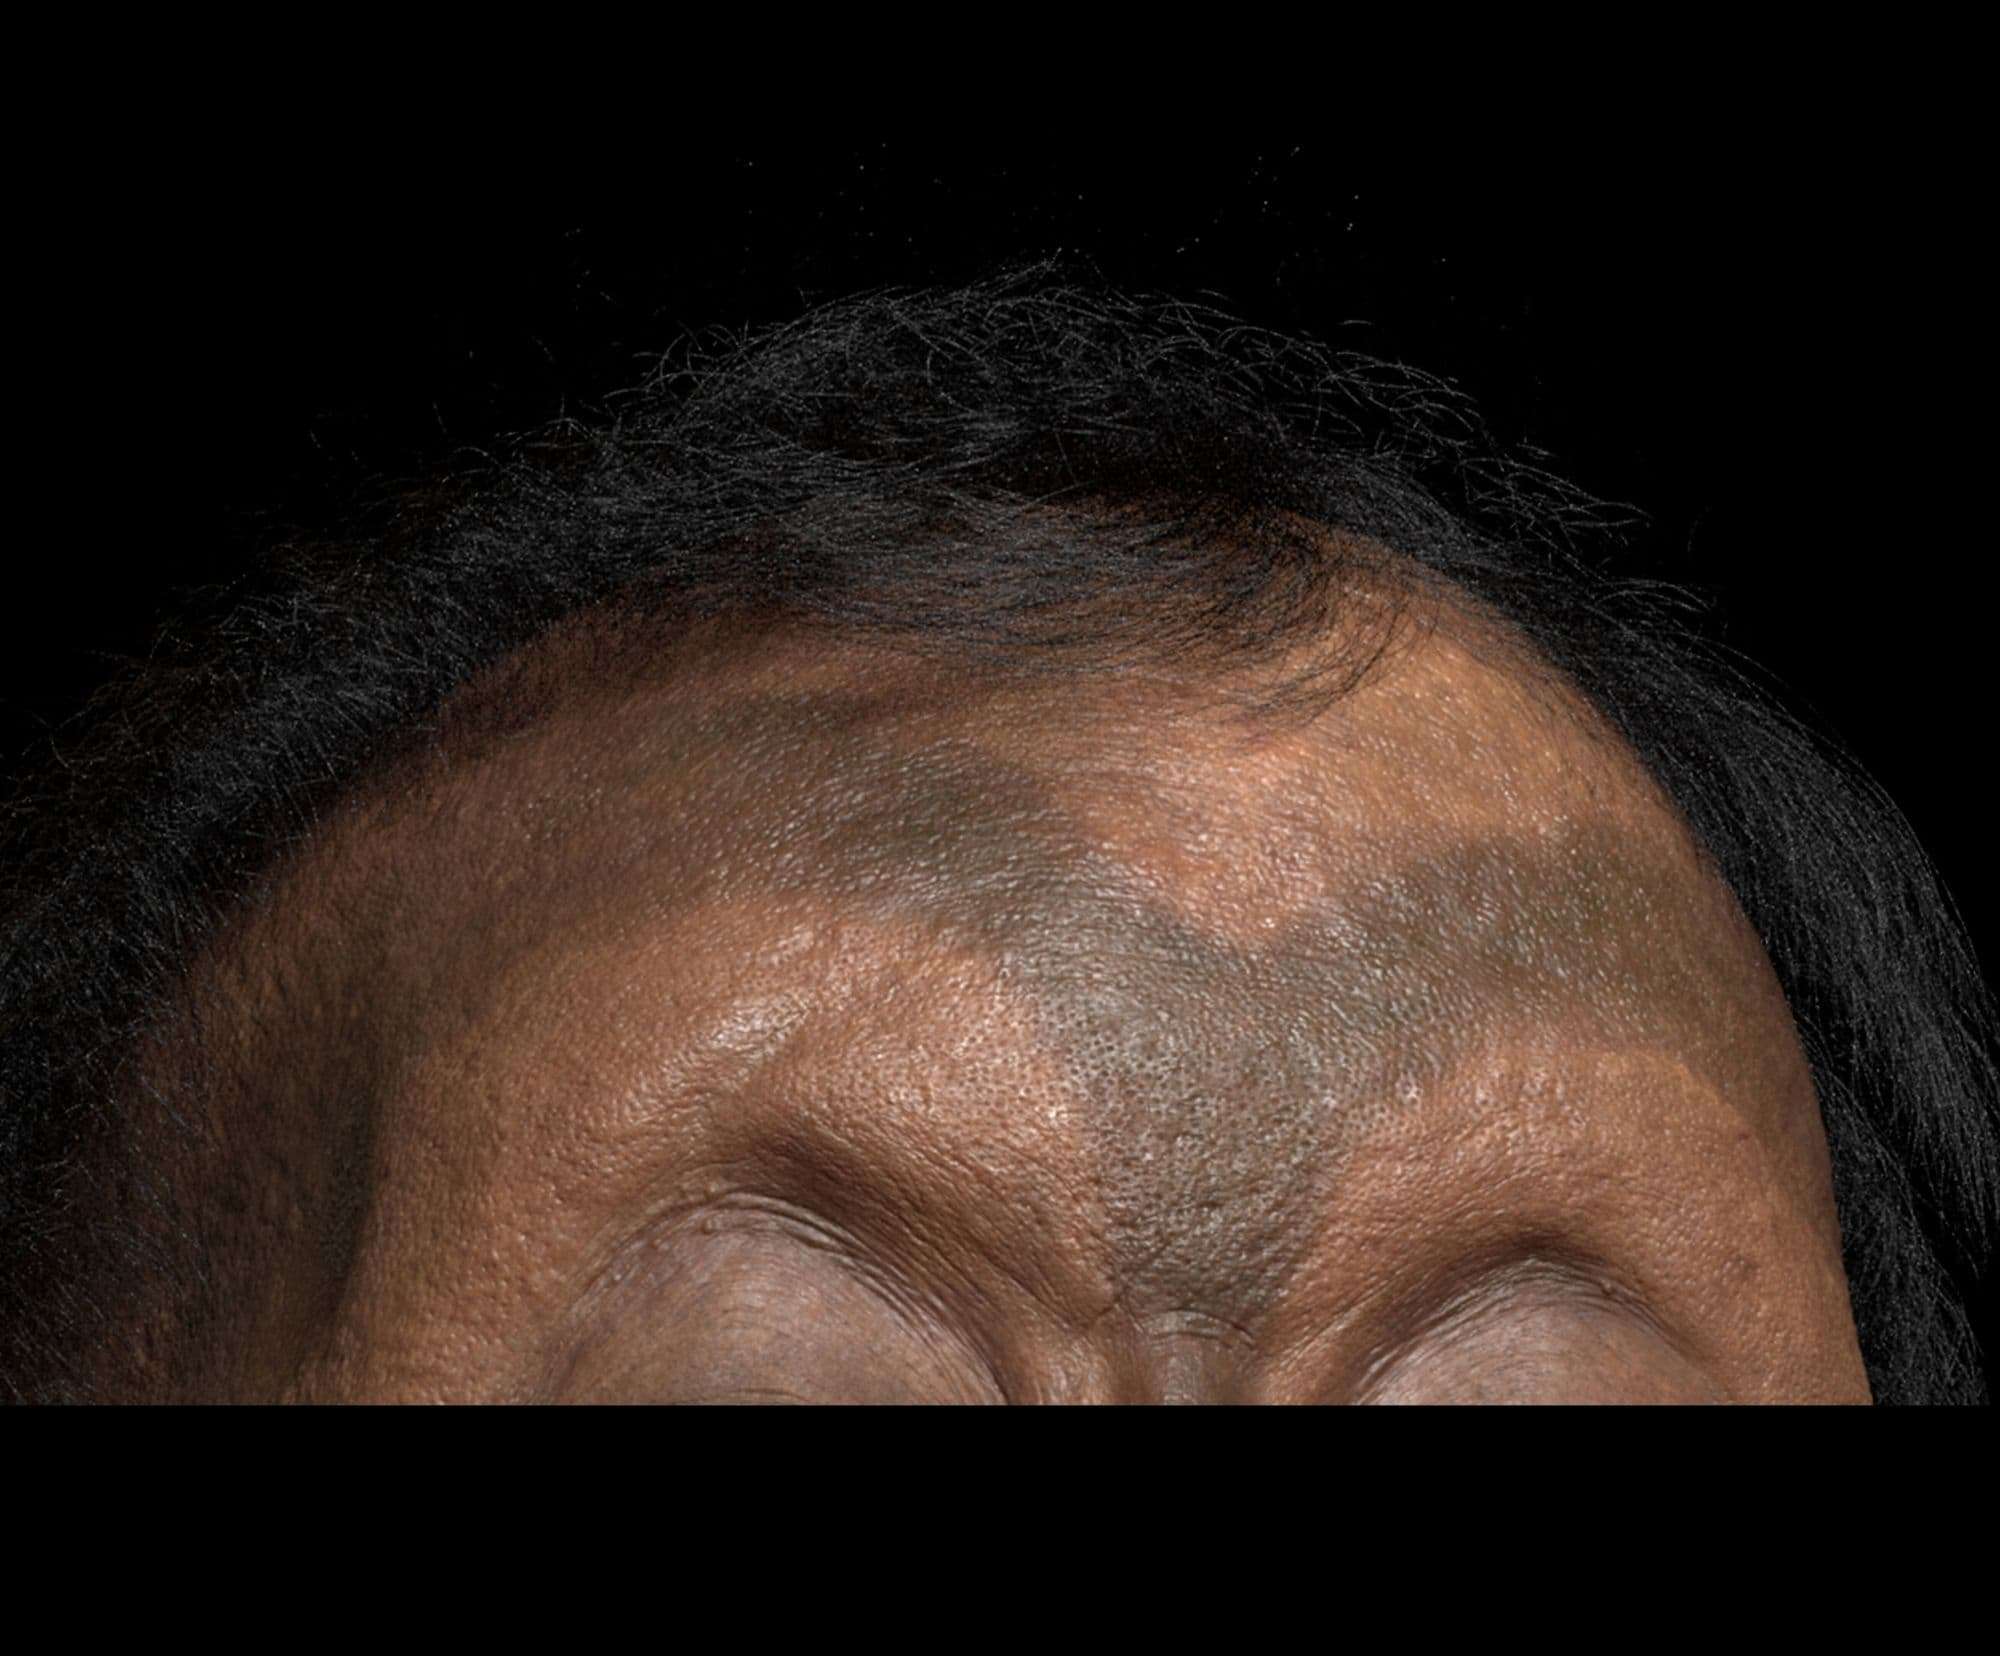
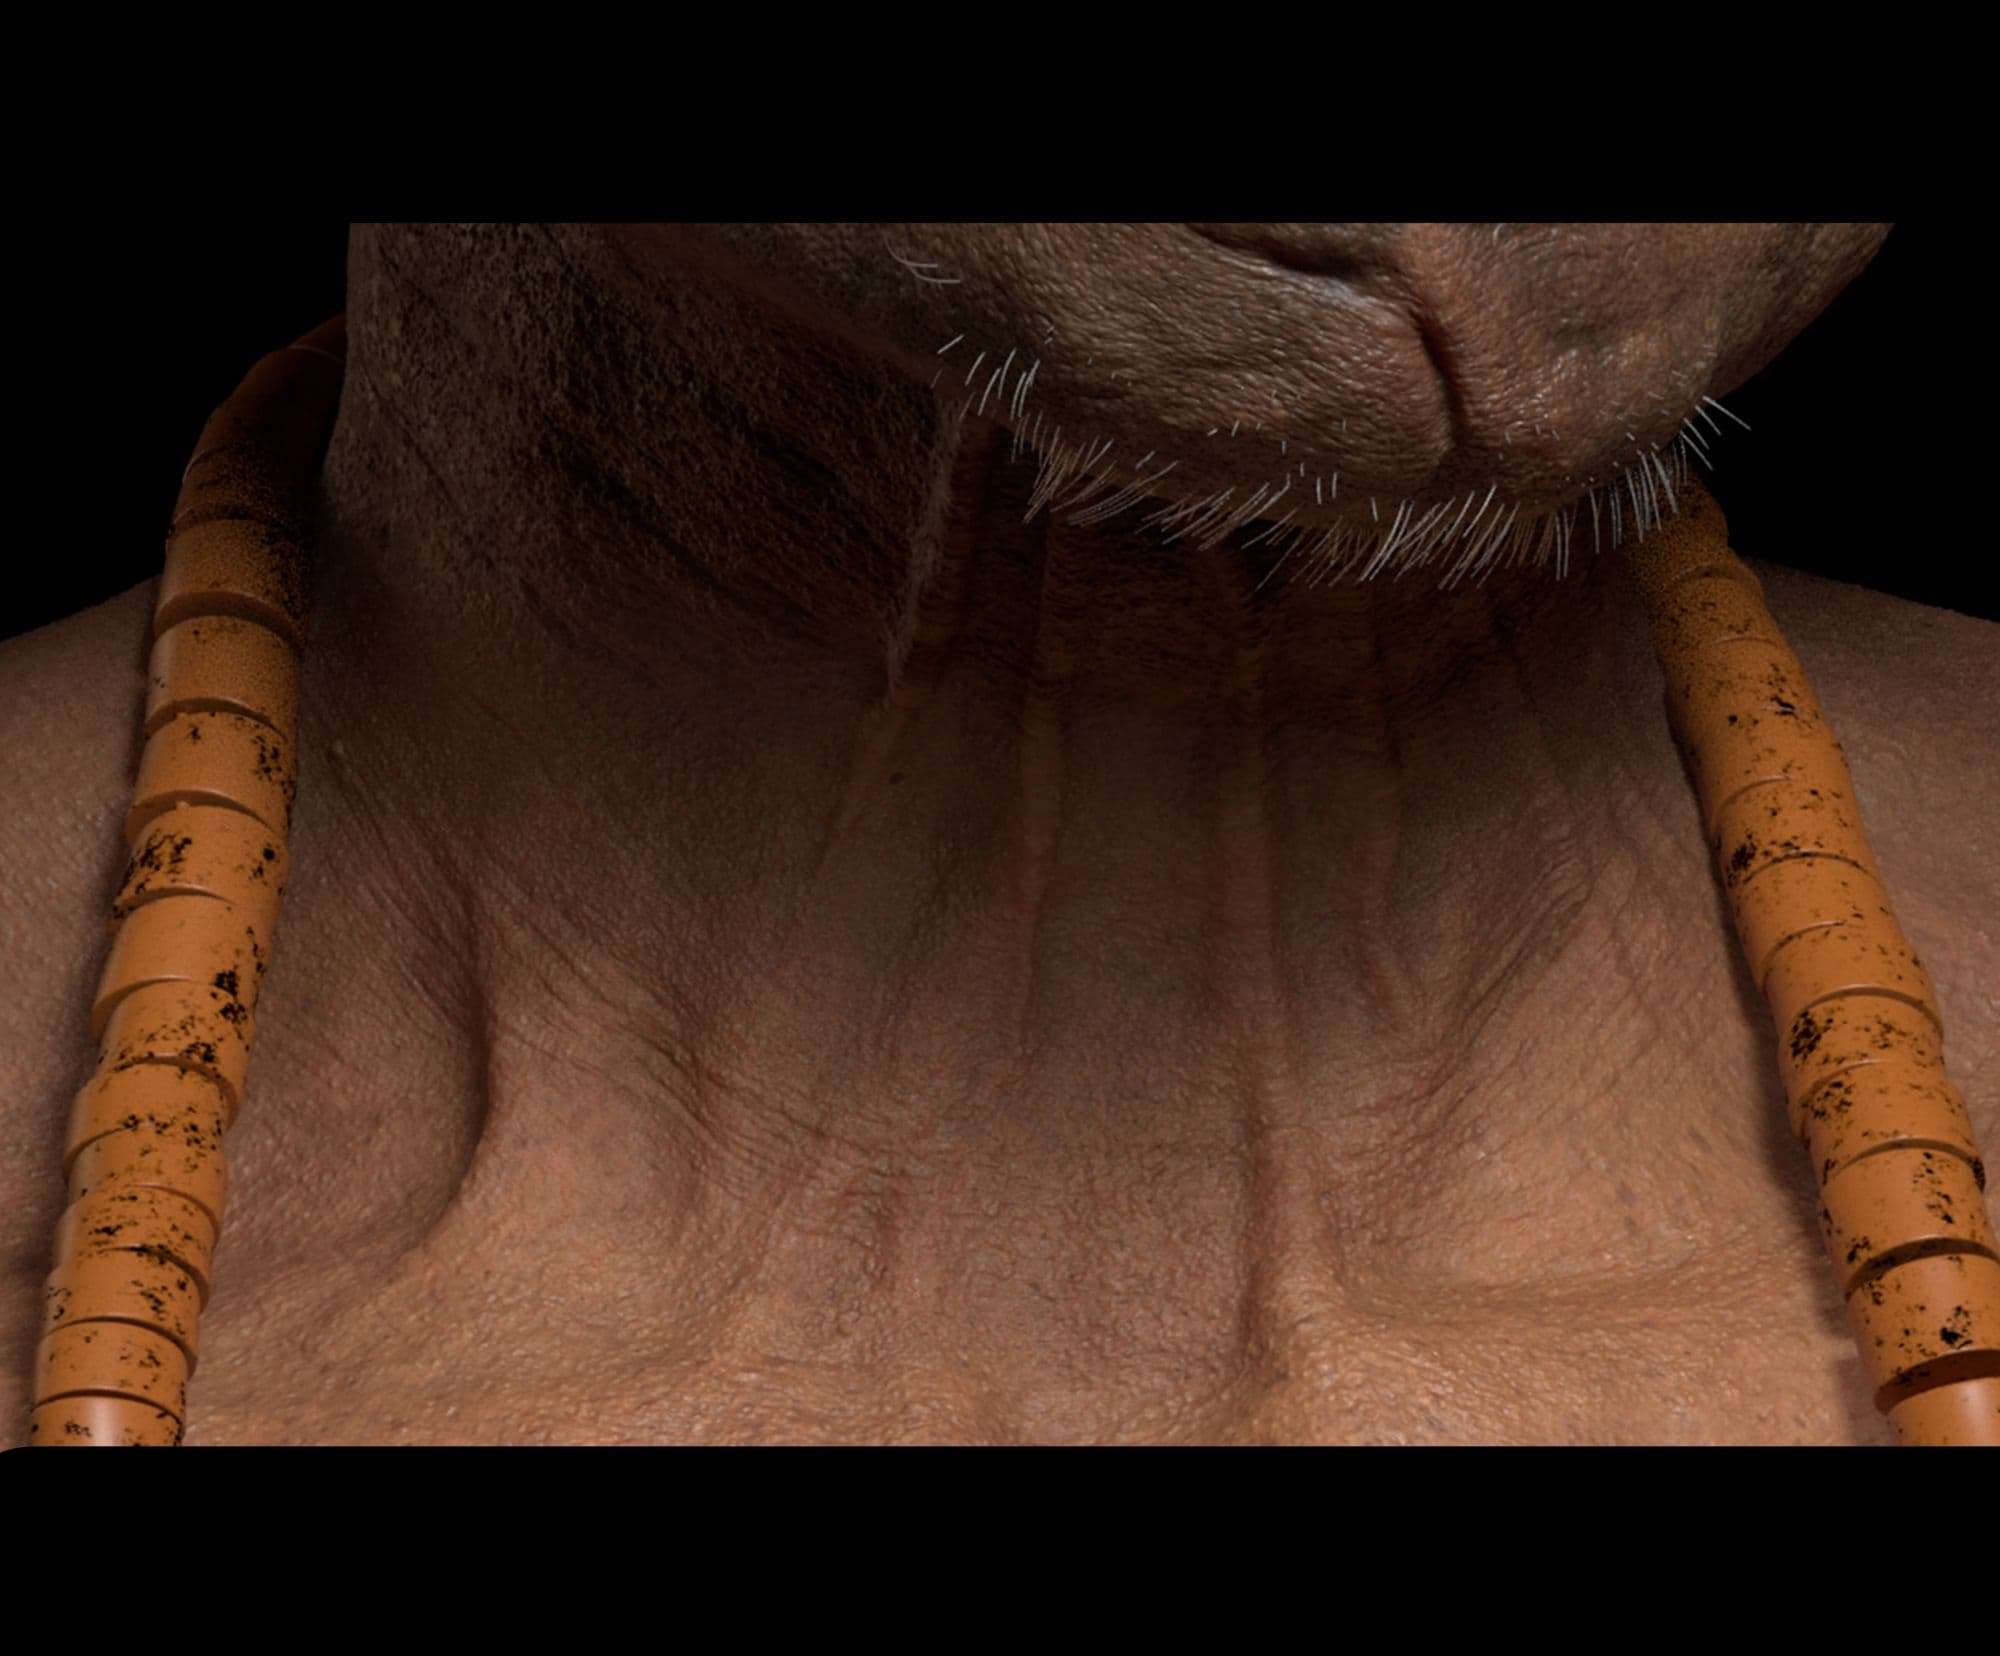
For the skin details, I sculpted everything by hand (inspired by Kris Costa). I created multiple alpha brushes for pores, wrinkles, and pimples within Zbrush and then tweaked them a bit in Photoshop. I used the HD geo feature in Zbrush for higher subdivisions to accommodate the detail for believable skin. There are pros and cons to using HD Geo.
Pros:
Cons:
Sculpting is all about observation and understanding forms caused by the underlying anatomy. While traveling on public transport, I kept observing faces, their wrinkles, eyebrows, and other features of the faces (if you are going to do this, look away when they are about to look towards you, or else things might get awkward!)
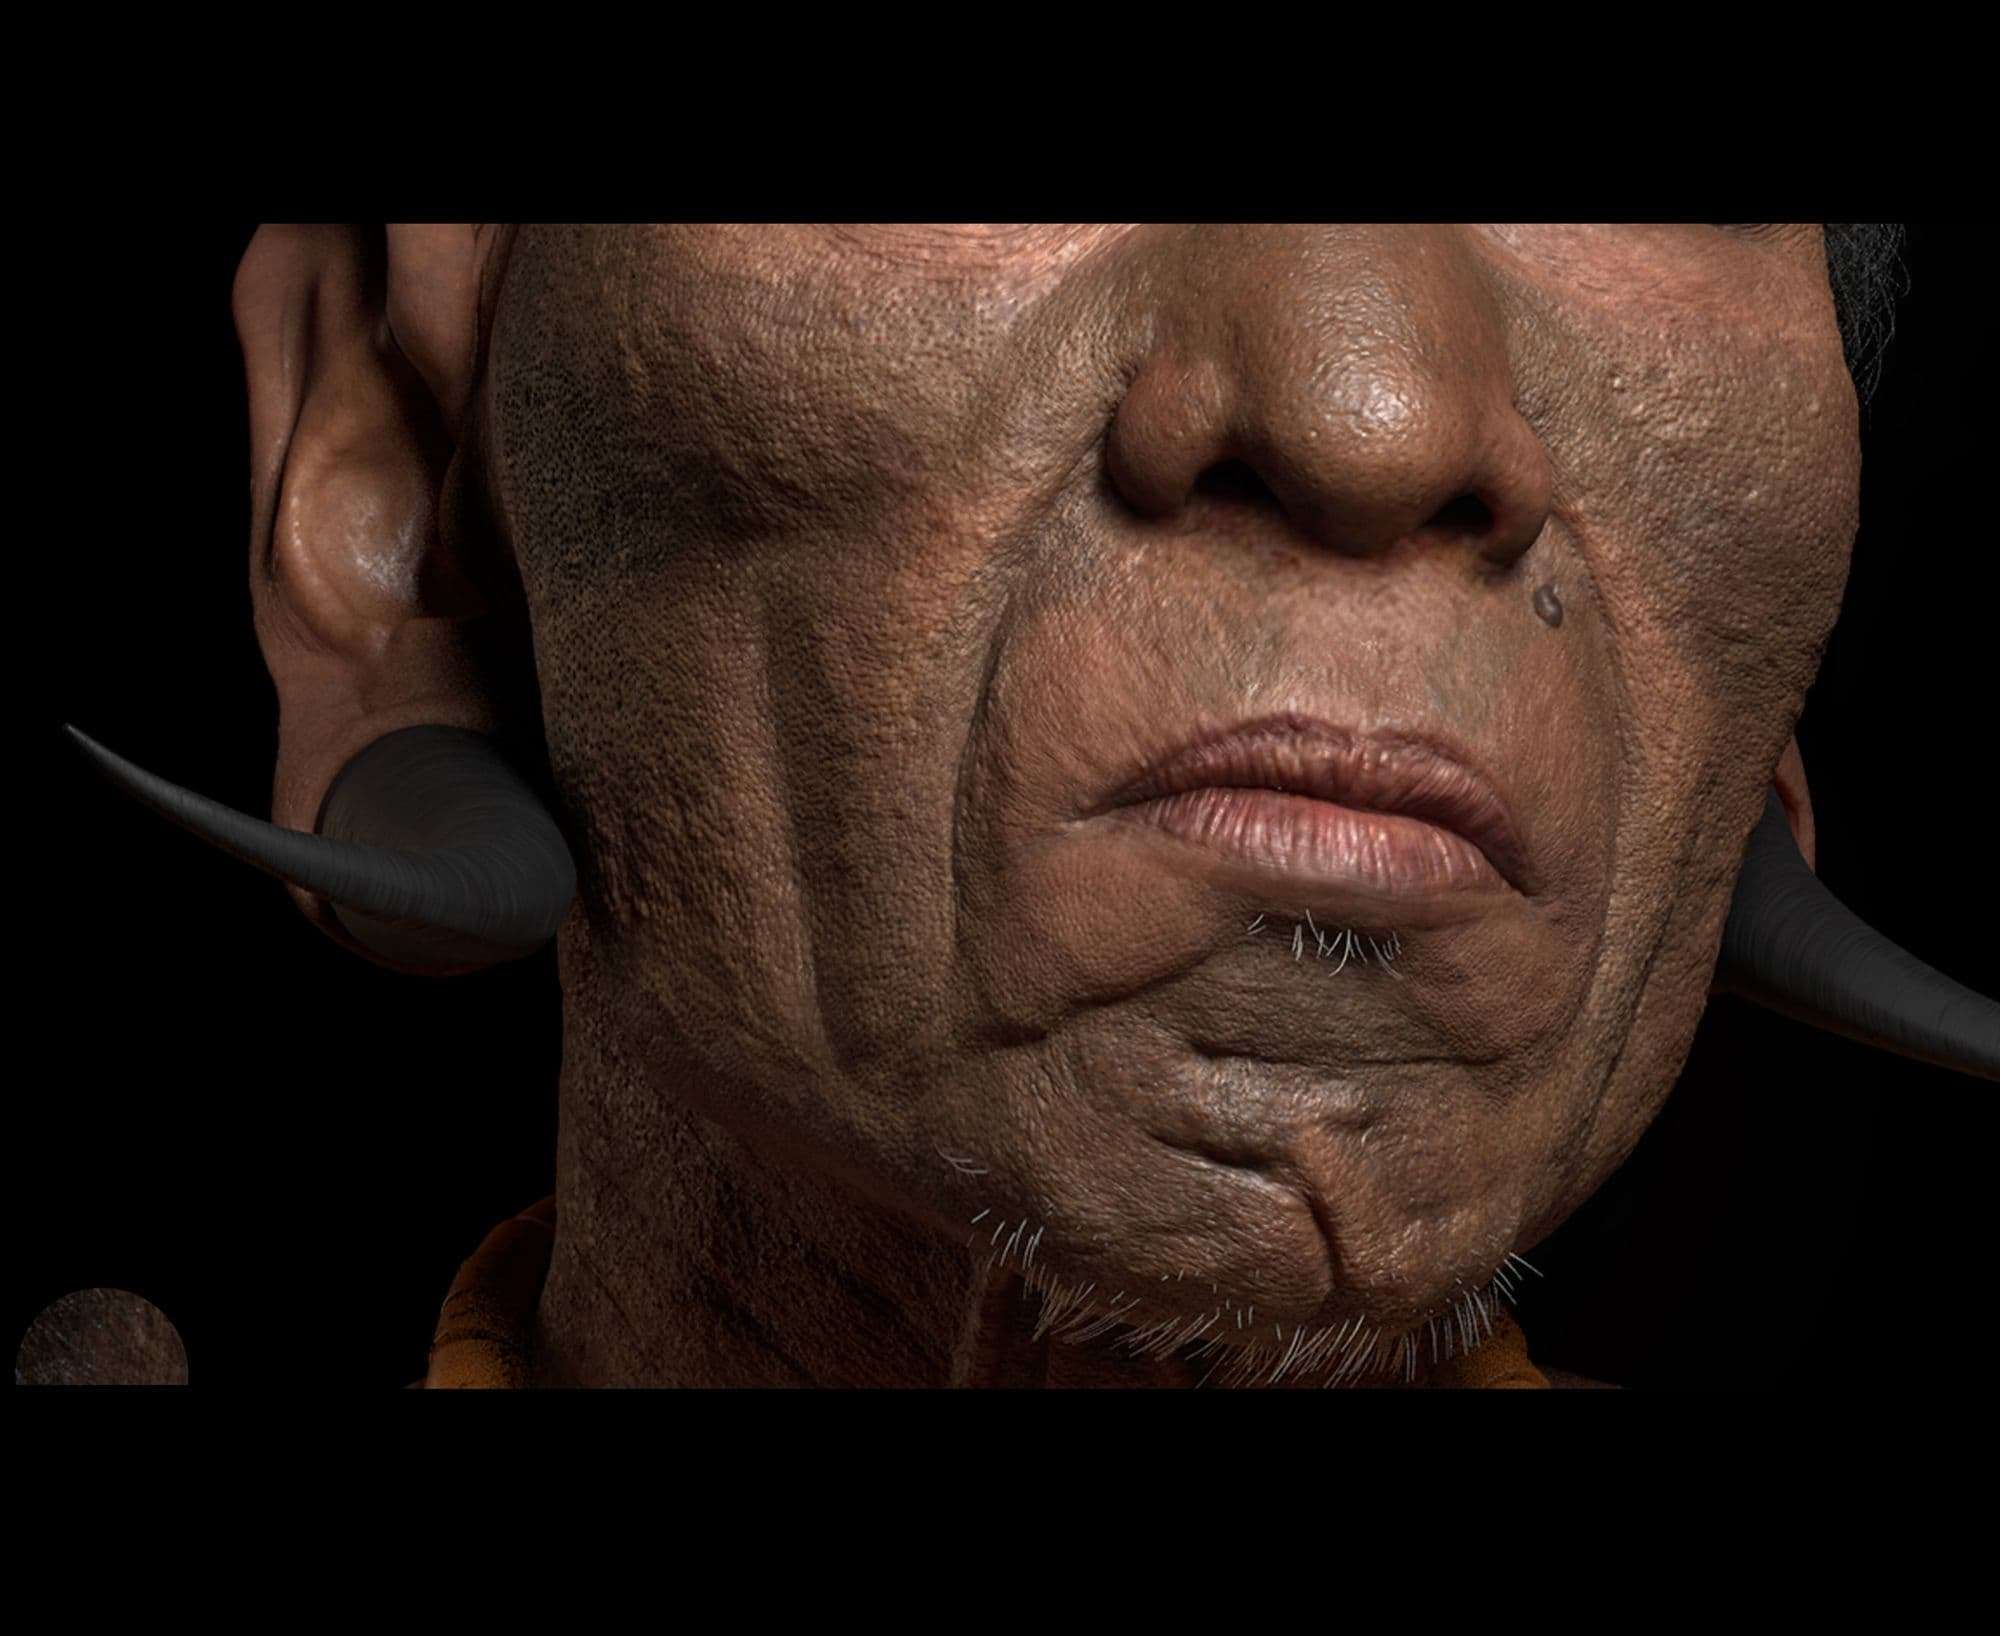
I used Substance Painter to texture this Character. First, I went with the textbook approach by adding the reds, yellows, and blues. That did not work in this case because it is not a caucasian face.
So I tried a different method. Adding a darker base colour and then adding lighter and darker tones wherever required. I did add small amounts of reds, purples, and yellows, but with some blend modes.
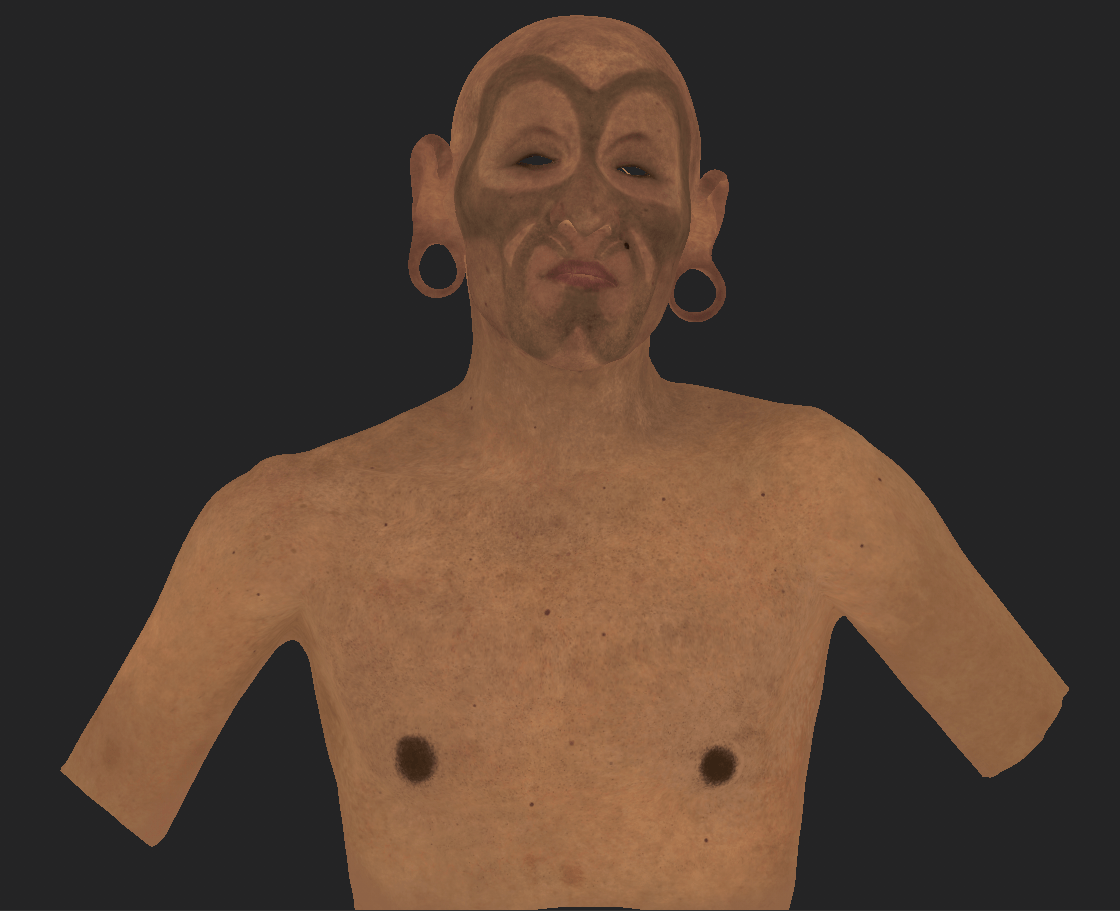
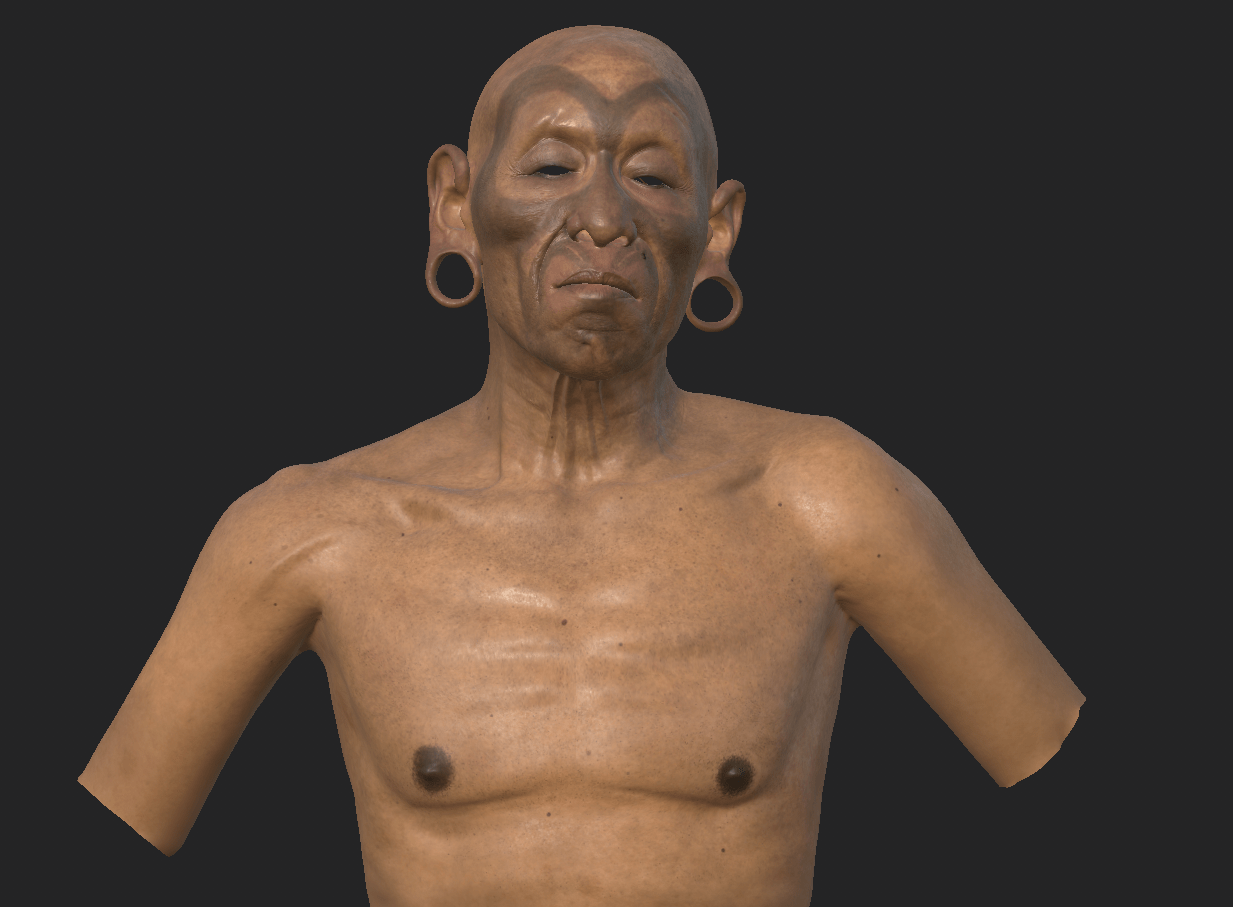
I used a spray brush and then a soft brush at various opacities to blend them.
The face tattoo was a challenge. Tattoos are small injuries caused to the skin injecting paint under the top layer of the skin. The ink is in the deeper layers of the skin. It becomes more blurred out because of this.
To replicate that in Substance, I used a soft brush with a lower opacity to blur them out. Painting a tattoo by hand is a better option because tattoo artists do them by hand, which leads to slight imperfections. I tried to do the same. I used multiple layers to keep the tattoo separate from the main skin, which in turn gave me control to tweak the textures easily.
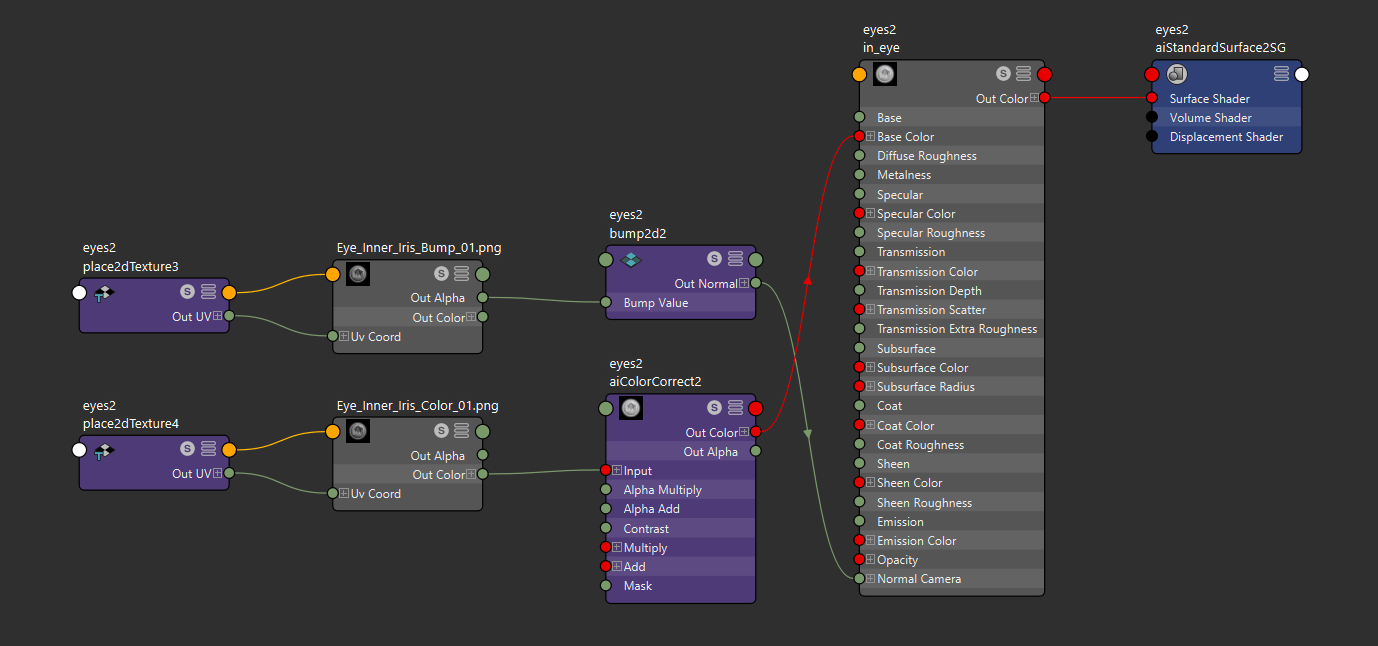
Once I had my diffuse and specular maps from Substance Painter, I used ai-colour-correct and ai-range nodes to control diffuse maps and roughness maps. The displacement map is from Zbrush and is 8K, and the rest of the maps are 4K. I also tweaked the diffuse and subsurface colour maps with ai-colour-correct node to play around with contrast, gamma, etc.
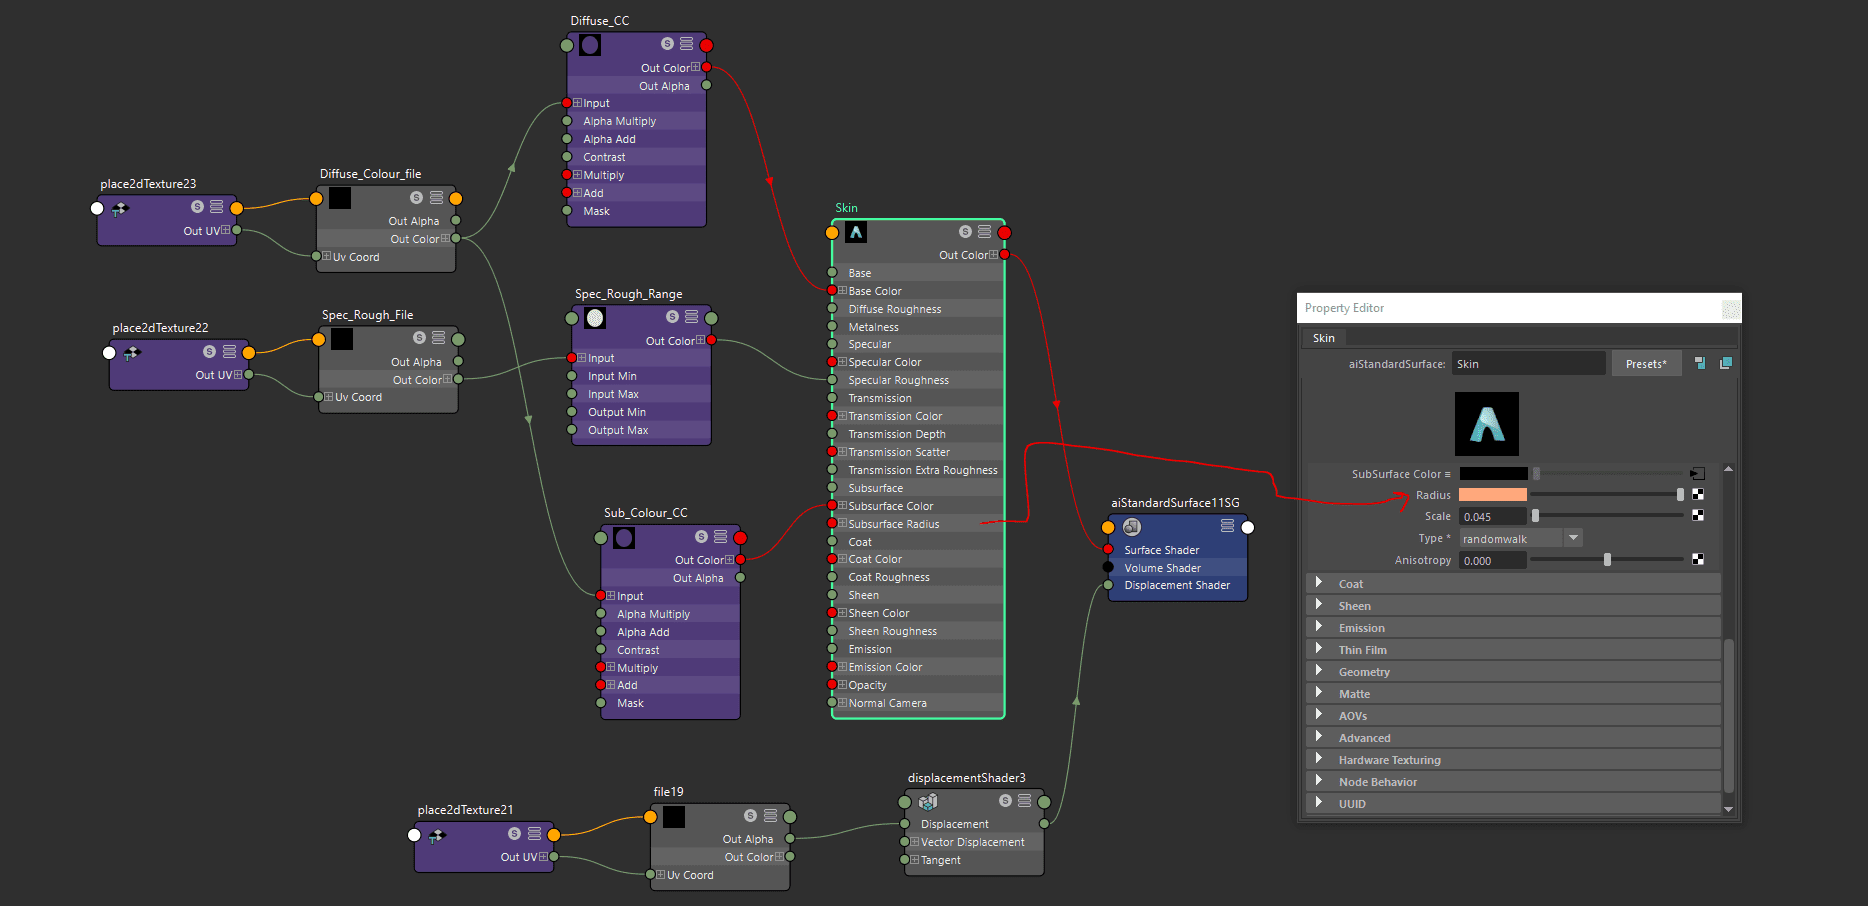
For the Displacement map, I exported 8K maps from HD geo in Zbrush (as given in the image). I used Catclark subdivisions in Arnold to recreate a high res model in Maya.
I used the diffuse map as the subsurface colour map to give the colour from Subsurface Colour and a little from diffuse. Finding a perfect balance between diffuse and Subsurface Colour maps is paramount to get a better output.
For hair I used X-gen. I had 3 layers of x-gen guides for hair on the head - One was for the centre of the head, second for the sides and the back of the head, and the third is for stray strands of hair.
This project helped me to learn, understand, and try out new stuff without fear. I went through the 'trial and error' phase before getting to the end of this project. I guess being fearless and trying out new things and failing at them will make you much better. That's one of many things I learned during this summer project.
You can find more of Rishikesh Nayudu's work here, Artstation and LinkedIn.