Creating a Procedural Autumn Leaf Covered Floor in Substance Designer
Emily Bisset, a recent Portsmouth University graduate and current intern at P&G in Gillette’s visualisation team, shares with us how to create a procedural leaf-covered floor in Substance Designer.
Emily Bisset liked computers and performing, so she thought she would combine her interests by learning 3D animation. She soon found she gravitated to wanting to create 3D characters. Emily achieved a first in BSc Computer Animation and VFX (Class of 2020) from Portsmouth University.
Emily is currently an intern at P&G in Gillette’s visualisation team. After graduating, she started using Substance Designer and now loves creating procedural materials in her free time. She has taken the time to share with us how to create a procedural leaf covered floor in Substance Designer.
This project was created as part of Nodevember, 100% procedurally created in Substance Designer. I wanted to create this seasonal piece to get me in the mood for the chillier British weather! I love taking long walks through forests during the autumn season which inspired me to create this material for the ‘Forest’ prompt for day 16.
Nodevember is an awesome daily challenge that (as you can guess) takes place in November. During this month, artists can challenge themselves to create a procedural piece of art based on the daily prompt. This challenge is run by Jonas Dichelle and Luca Rood, more information on this can be found here.
Challenges like Nodevember are a great way to stretch your skills and practice making things within a time limit. It is also good for newer/junior level artists like myself to create a range of work they perhaps wouldn’t think to make without the prompt’s inspiration. Even though I couldn’t do every day, taking part in this has helped me experiment with new techniques and improve my material creation skills.
I created the original version of my maple leaves material in around 4 hours - I work during the day so only had the evening free. I later revisited it and spent a few more hours on it making small adjustments as I was pleased with how it had turned out so far—I was enjoying working on it and so wanted to refine it a little. There are still a few tweaks I would like to make so I’m sure I will go back to it again as I further discover more of Substance Designer’s capabilities.
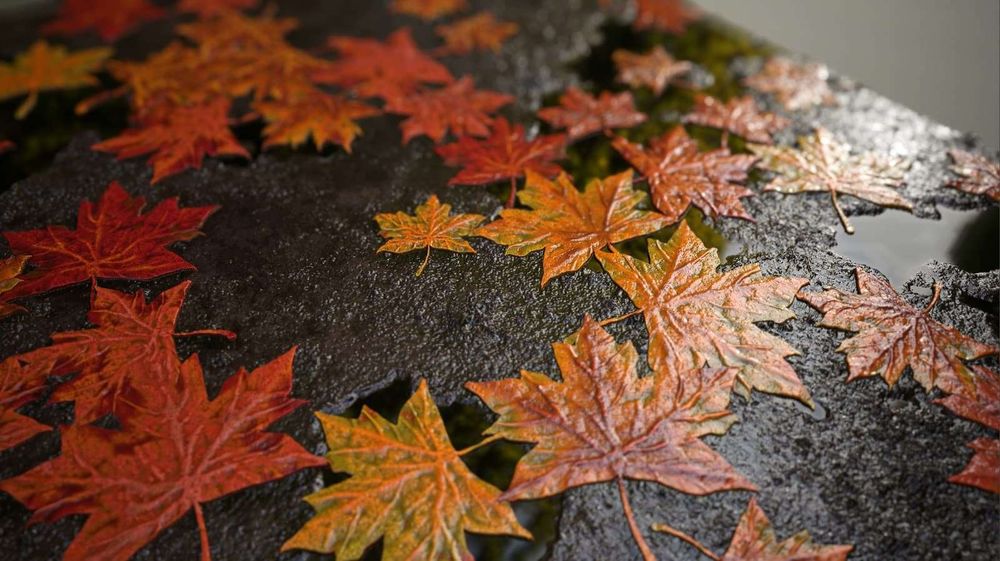
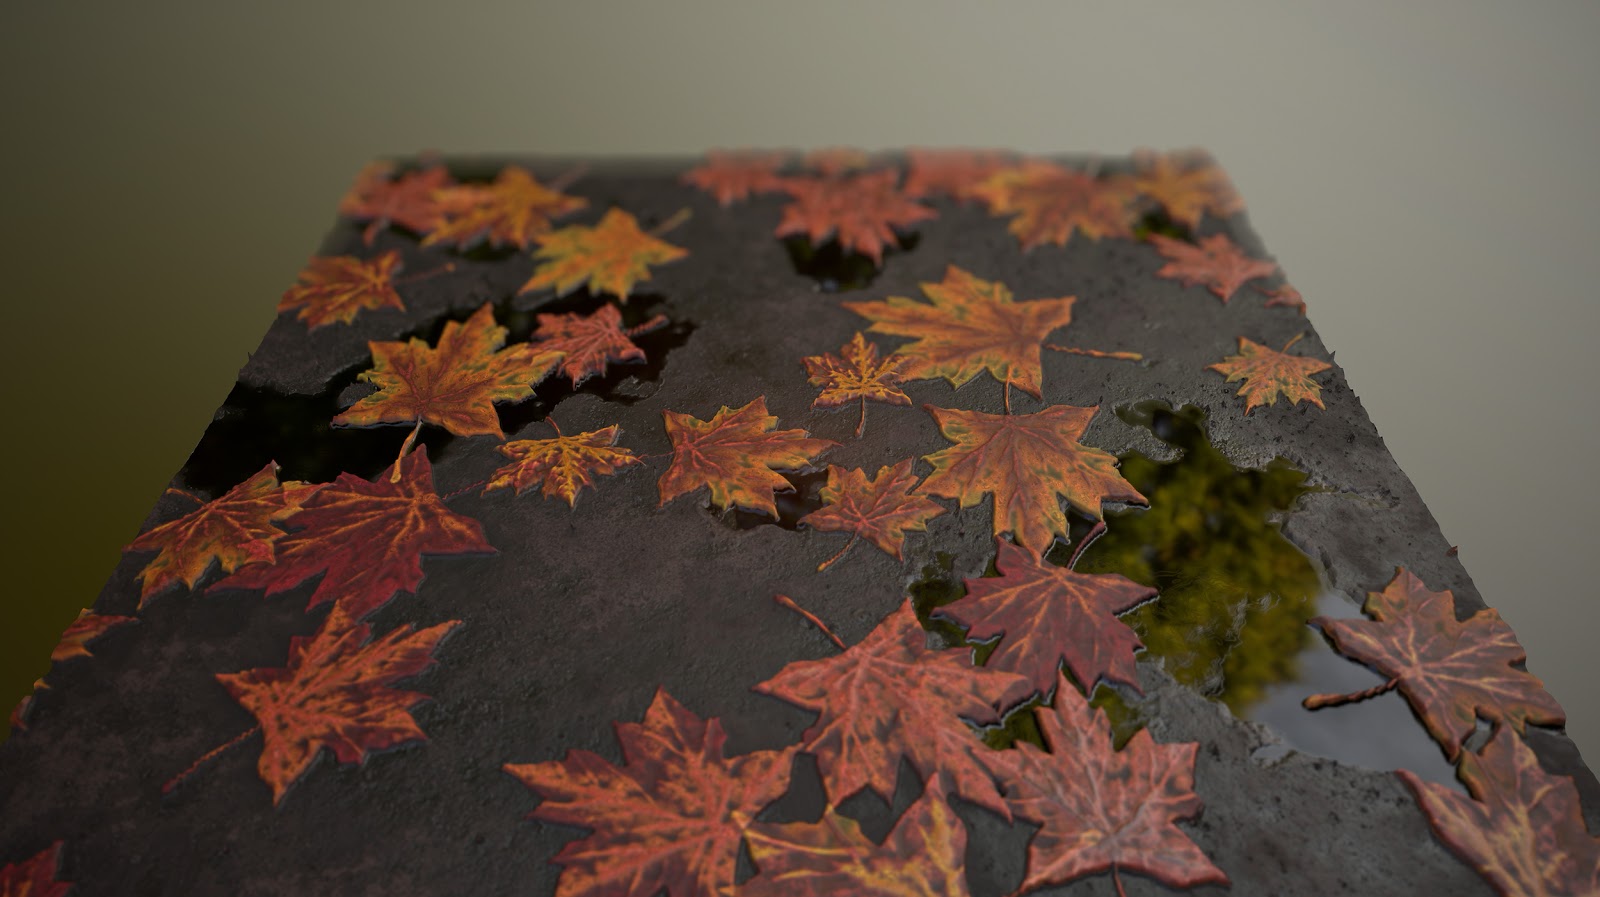
This was an earlier render but possibly still my favourite? I think even though the leaves are too uniform, compositionally it works well. In the later renders I had changed how many leaves were in one tile and so their random position had changed which I think made it harder to find a good angle when rendering up close. I also think the lighting in this particular shot really compliments it.
Planning and Collecting Reference
Like many CG projects, the best way to approach this was to break it down. Essentially, what this material was going to consist of was leaves, a dirt ground, and a few puddles.
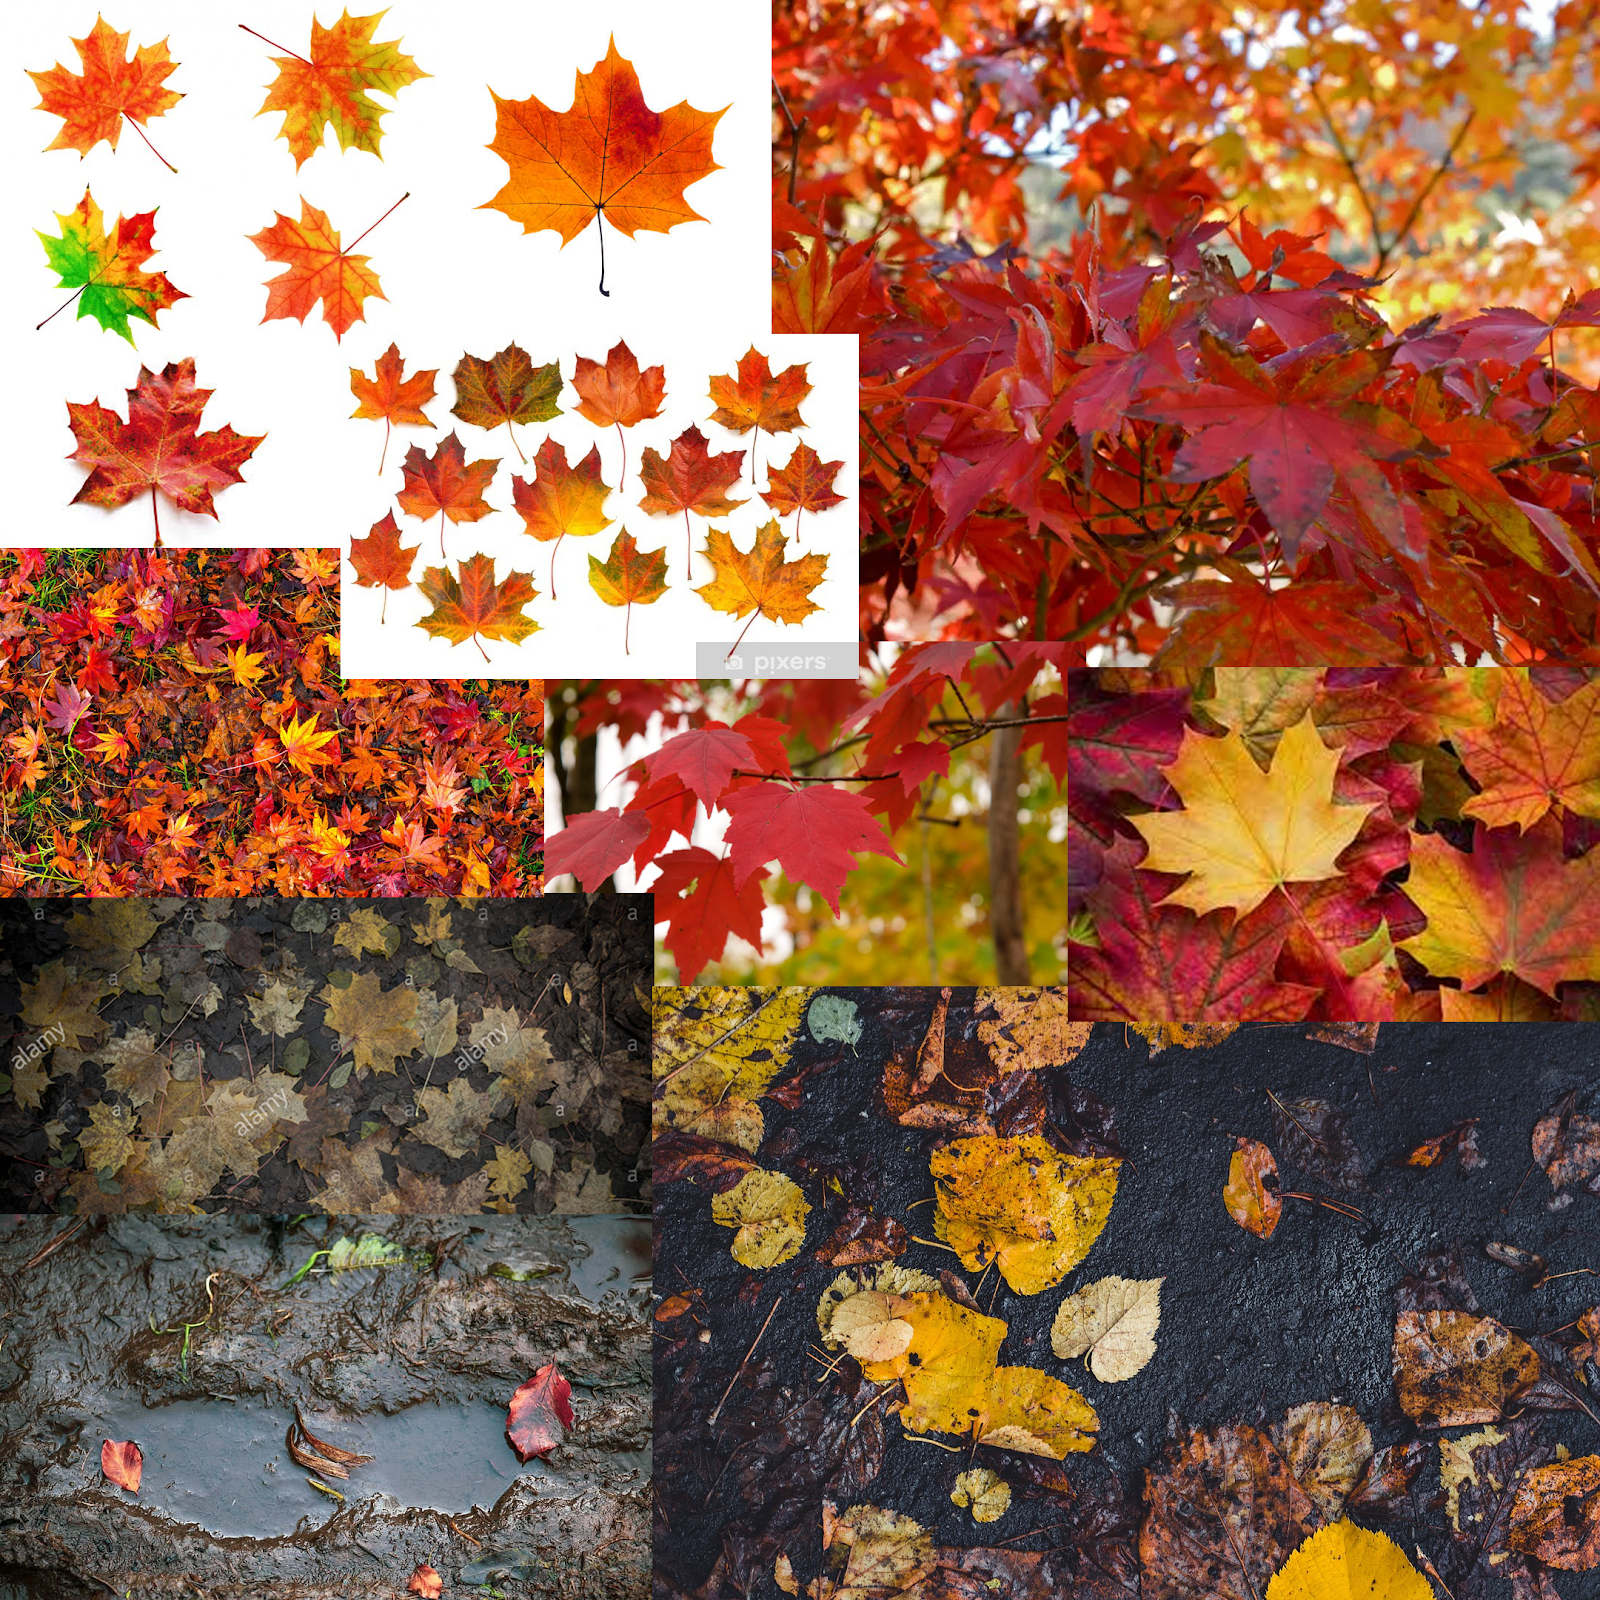
I began with looking up some reference images. I knew I wanted to do maple leaves not just because of my love for Canada (and maple syrup) but also because they have an interesting shape. I’ve been wanting to attempt to create a maple leaf shape procedurally for a while now. They also have that unique, beautiful, red colour to them which I wanted to mix with the yellowy-green colour of leaves that are just starting to turn.
The ground took some decision making as the terrain can vary a lot depending on what kind of path you’re on. I decided on a fine dirt—relatively firm but still collected pools of rainwater in certain areas (much like the bottom right photo on my moodboard). Yet, I did experiment a bit with the roughness and height maps to see what looked best during the creation process.
When adjusting the roughness it made the ground look a little bit like tarmac rather than fine dirt. However, I still prefer it to the drier renders, but this will be something I work on in future. To be totally honest—I created this moodboard at a later date. For challenges like Nodevmeber where I only have a couple of hours to make something I usually just have loads of tabs open with lots of different images and so I can flick between or refine searches easier. Only later did I create this and make my reference-finding process look a lot more organised!
Building the Leaf Shape
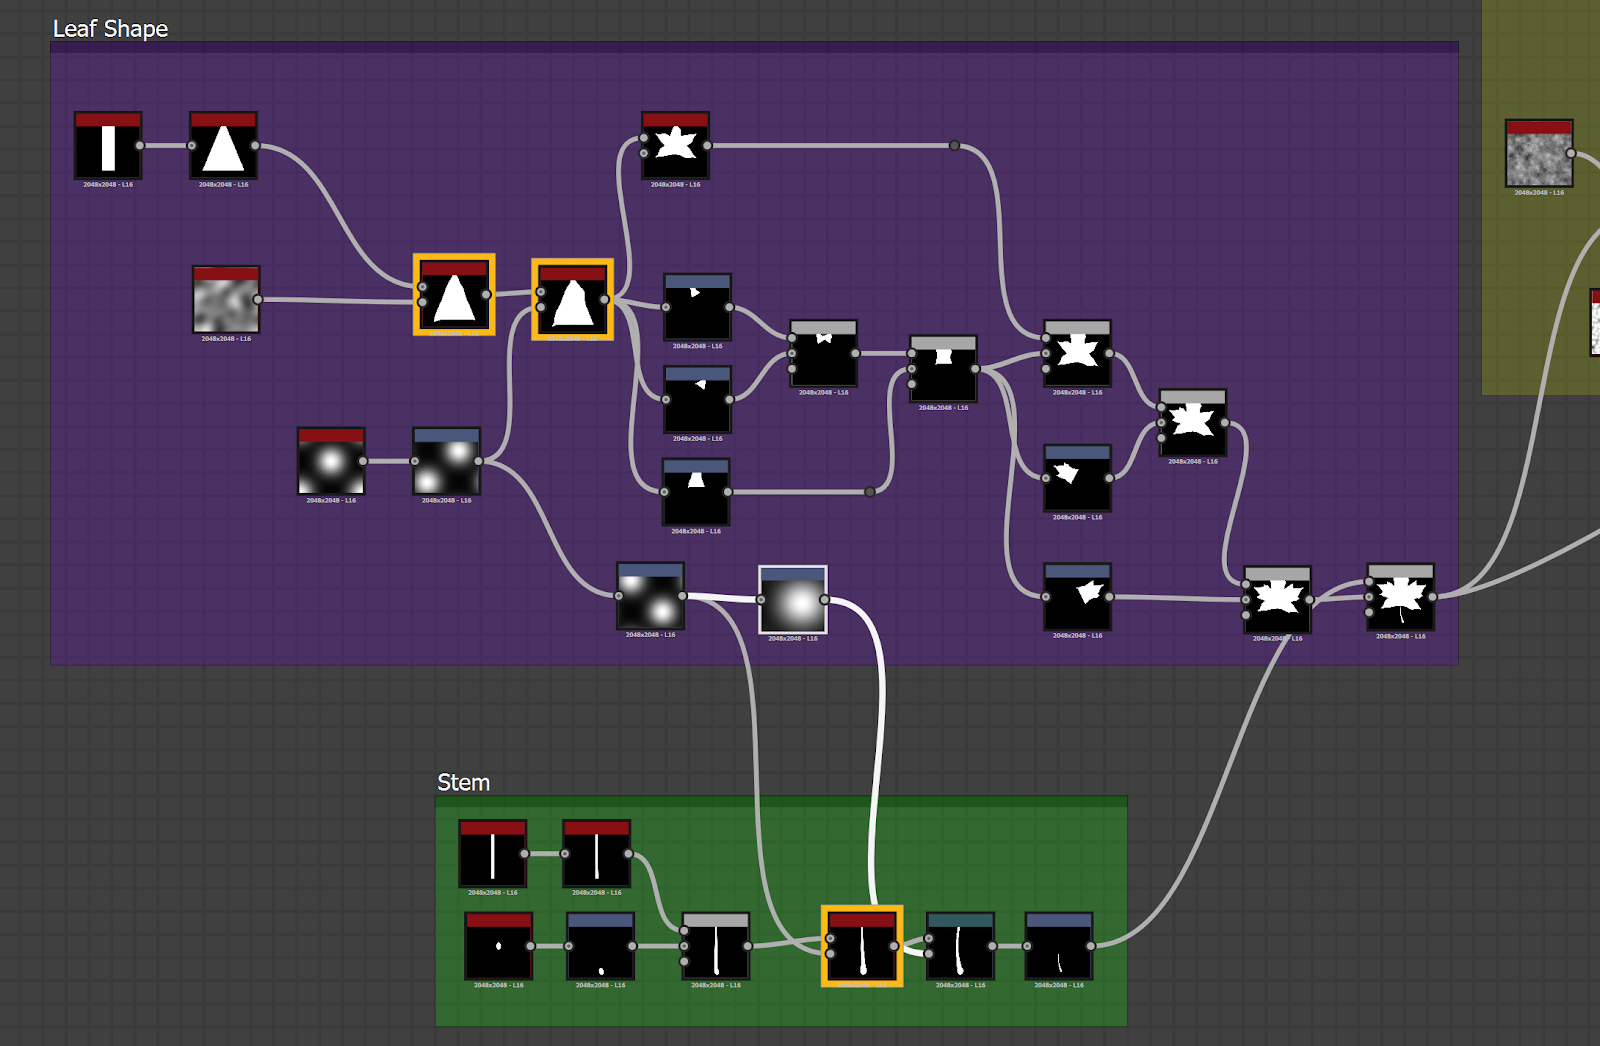
For the basic shape, I used triangles made from the shape node to create the leaf’s well known silhouette. This process included a mixture of warping the triangles to get some variation in the shapes, then using the splatter circular node for the basic shape. Then after that, using the transform 2D node to manually place the smaller shapes that add more detail. The stem was just a simple manipulation of two shapes and then blended together and warped slightly.
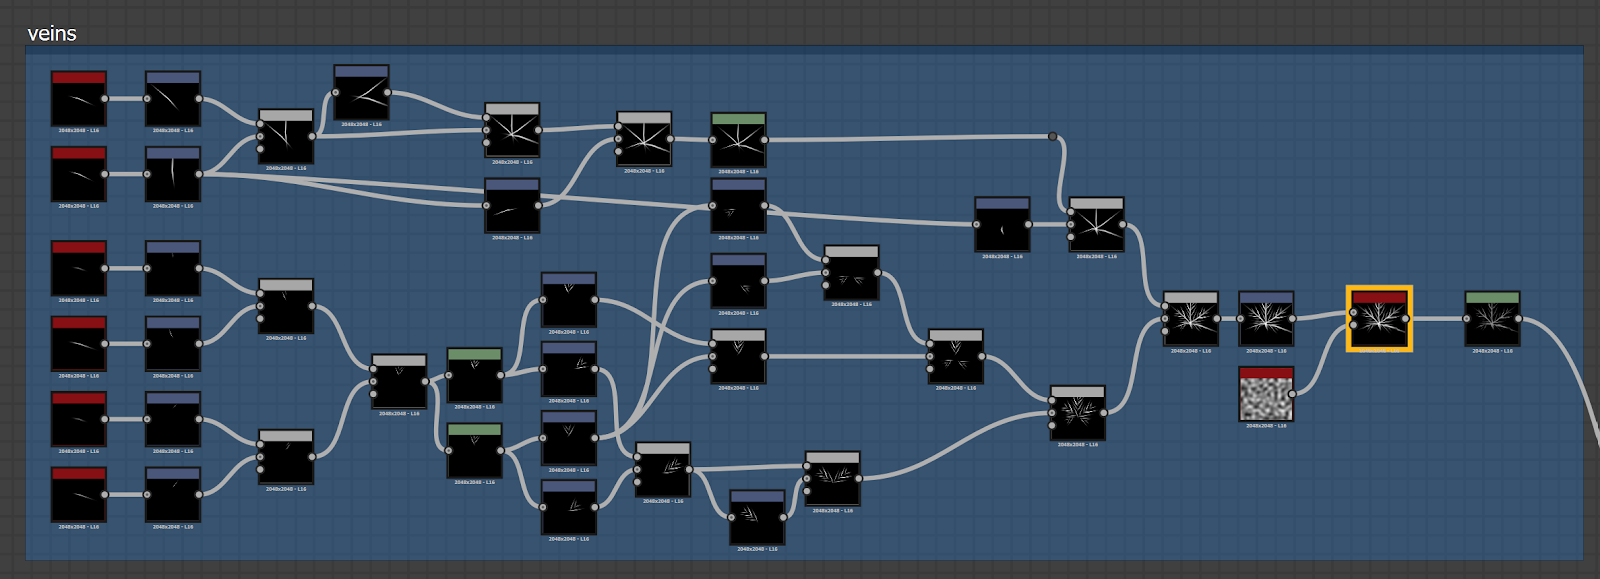
The veins of the leaf could have been done in a lot of different ways. It was essentially placing thin lines so that they looked like they were branching off from each other. If I’d had a little more time to plan my approach, I probably could have made the graph more streamlined or the veins neater, but, I quite like the outcome of it as leaves aren’t perfect so it makes for a nice effect.
The truth of it is that it takes a lot of going back and forth and experimenting with different techniques and ways of doing things to create the final product.
I could also add a different warp node on the end and then have 2 variations of veins to mix it up a bit. However, since I warp the entire leaf later on in the process to create variations, this didn’t matter too much.
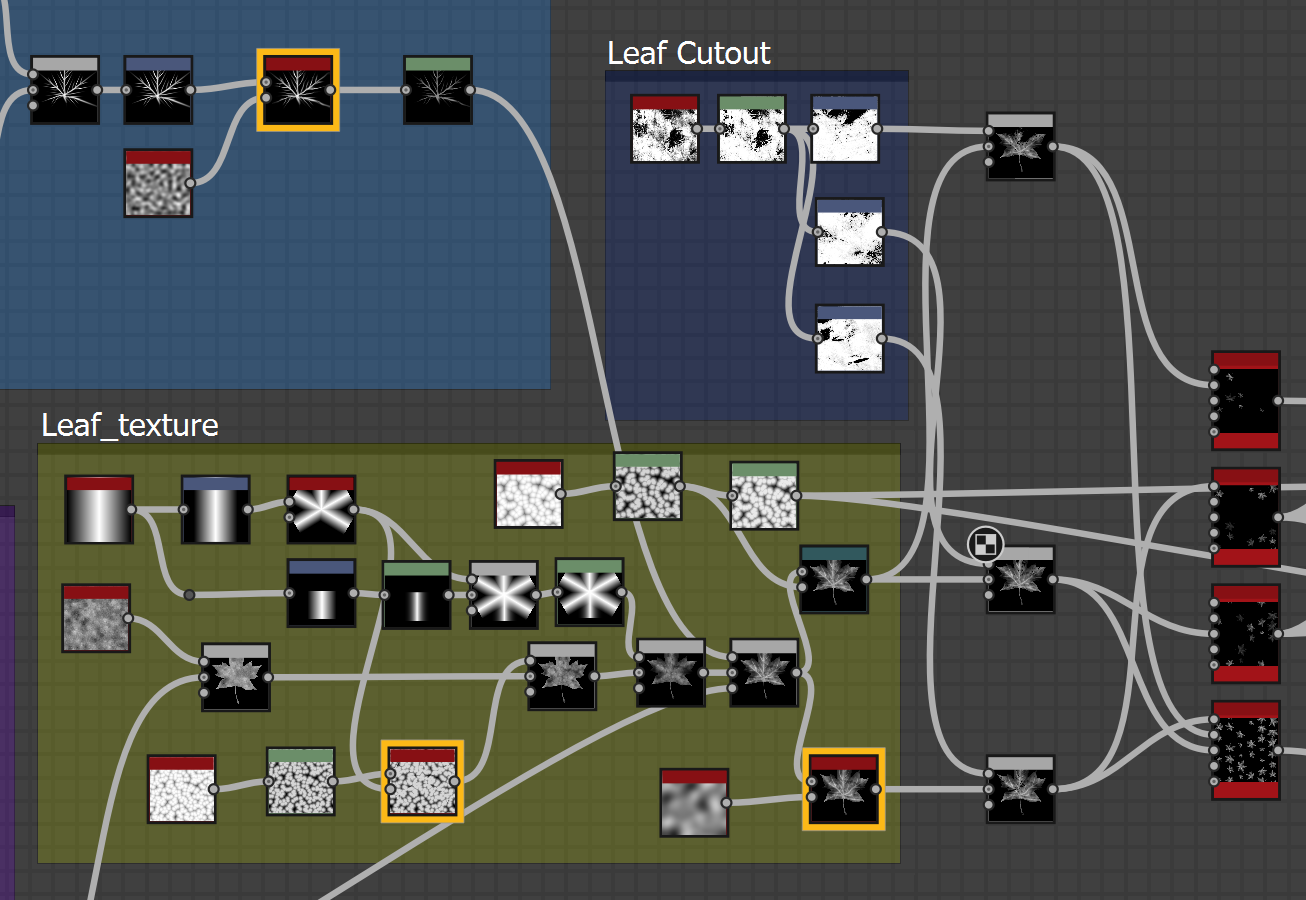
Next was to give the leaf some texture and add in some variation to the shape. This process mostly involved adding various grunges and noises until I got the desired effect. The circle of gradients was to try and break the shape up a bit. It also brings out the central parts more (where the veins are positioned) but this is only very subtle.
I then made 2 more variations of the leaf by warping it and then multiplying it with one of the cloud maps that I had transformed. This was so different parts of the leaf were cut out for each variation to show the leaf being torn or decomposed slightly. Originally, none of the leaves had cut outs but this was something I later added to break up the shapes more. Due to the procedural nature of this material, it was relatively quick to add in.
I then used the Tile Generator node to splatter my final leaf shapes. There is always the option of adding more variations but I stuck with three this time. I used one tile generator with identical parameters to create masks for all the leaves so that it could be layered on top of the mud and water. Again, this may not be the best way of doing it but it worked well for me this time. It meant I could fiddle with the levels for each leaf variation without worrying that it would affect the mask I had created with it.
From there, it was then tweaking the levels and blending modes for each map output to achieve the desired effect for my leaves. As some of the leaves overlapped each other, I had to make sure that the colours and alphas blended properly so that one variation was on top of the other. This initially took a bit of trial and error. However, I’m sure knowing what to do will come quicker the more experience I gain in this software.
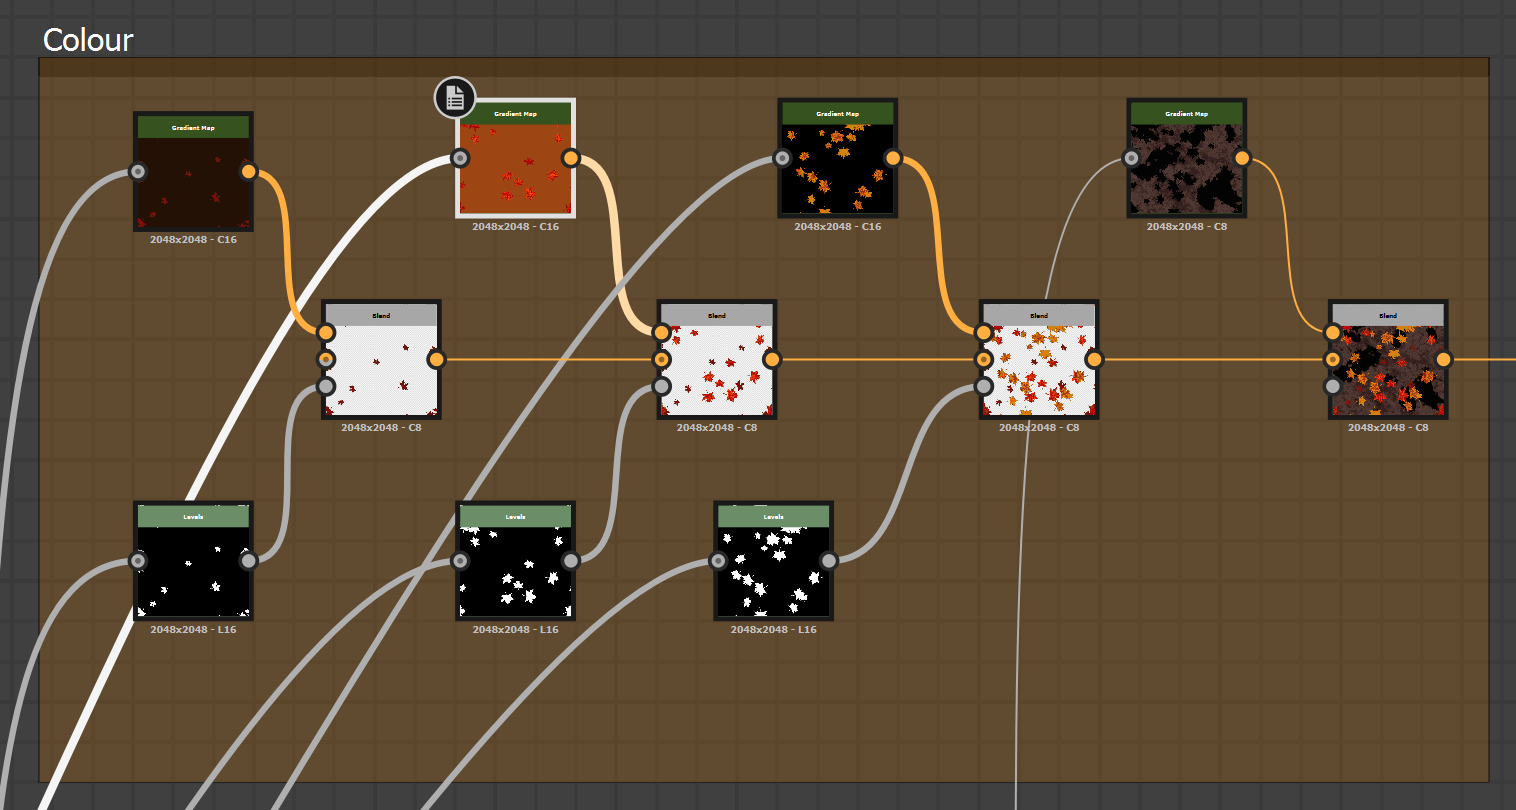
Next was colouring the leaves, I did this by using gradient nodes and sampling from photos of maple leaves online. I find doing this helps me get a basic colour palette to use. Usually, I then simplify the gradient a lot as using the ‘pick gradient’ tool results in a lot of different colour intervals. This can sometimes be detrimental when trying to achieve a certain look.
I divided my groups into a basic yellow, red and dark red knowing that the oranges would come through somewhere in between. I then went through removing any unused/unwanted colour intervals from each gradient. Also fine tuning the colours so it looked more realistic while still making the autumn colours pop.
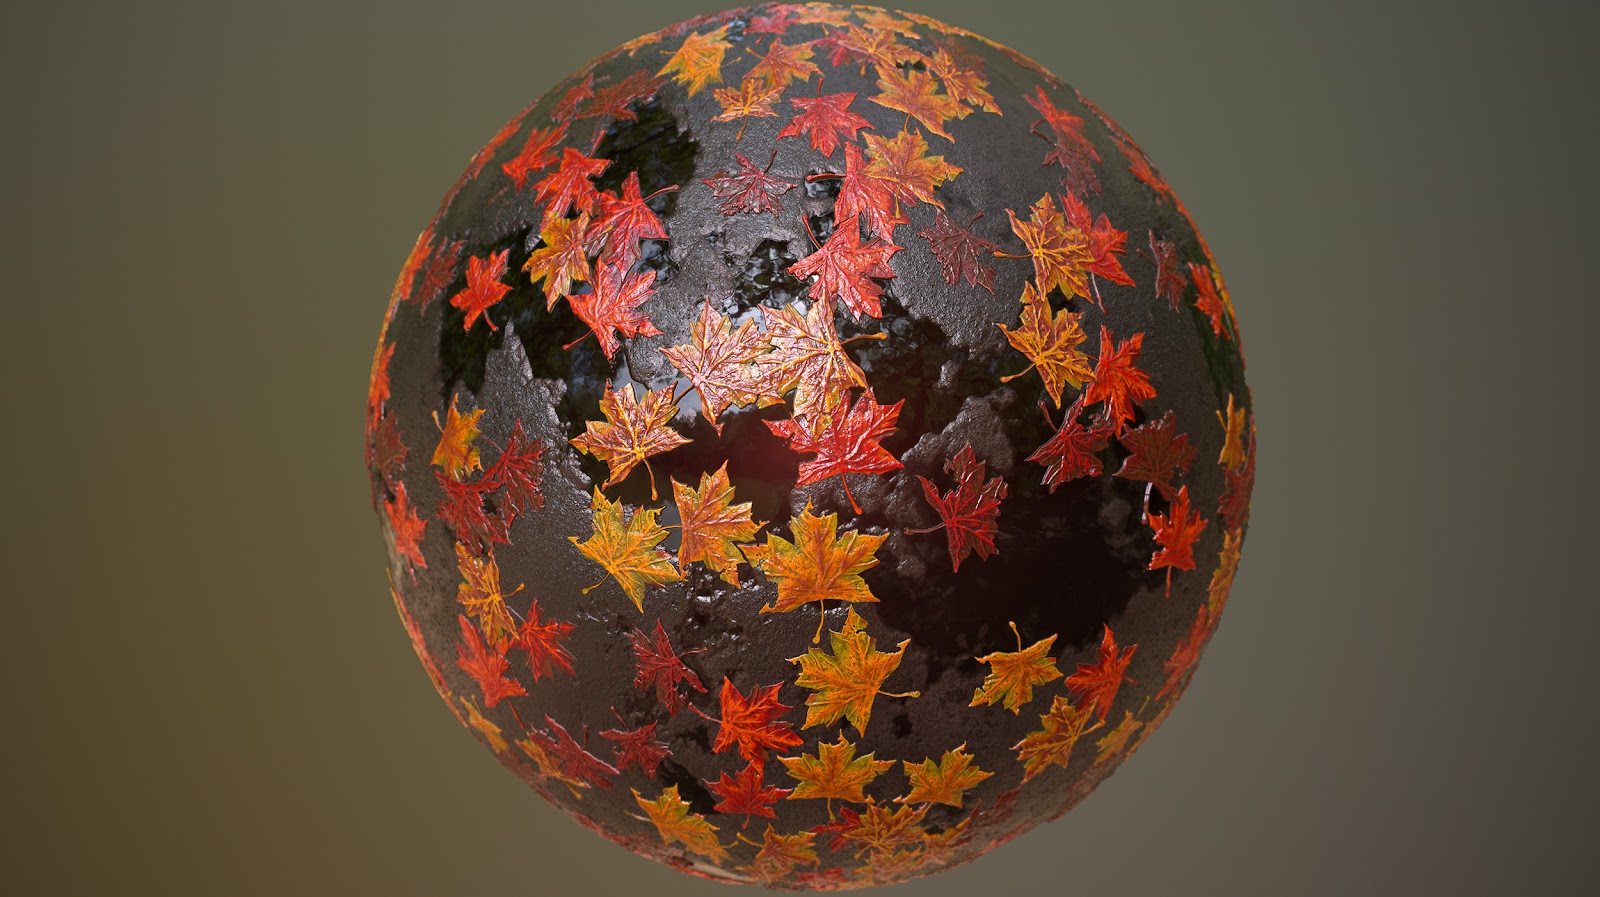
That was basically it for the leaves. When I write it down it makes it sound very chronological, but the truth of it is that it takes a lot of going back and forth and experimenting with different techniques and ways of doing things to create the final product. Here’s an early render when I had just imported my first pass into Marmoset Toolbag 3 for rendering:
As you can see, there are many improvement opportunities. These include; tessellation issues with the height of the leaves, not enough height noise on the ground, and the blending of overlapping leaves is incorrect. The roughness values for the leaves and ground are off - even if it was a dry ground the leaves would still be slightly more reflective, as well as other minor improvements needed too.
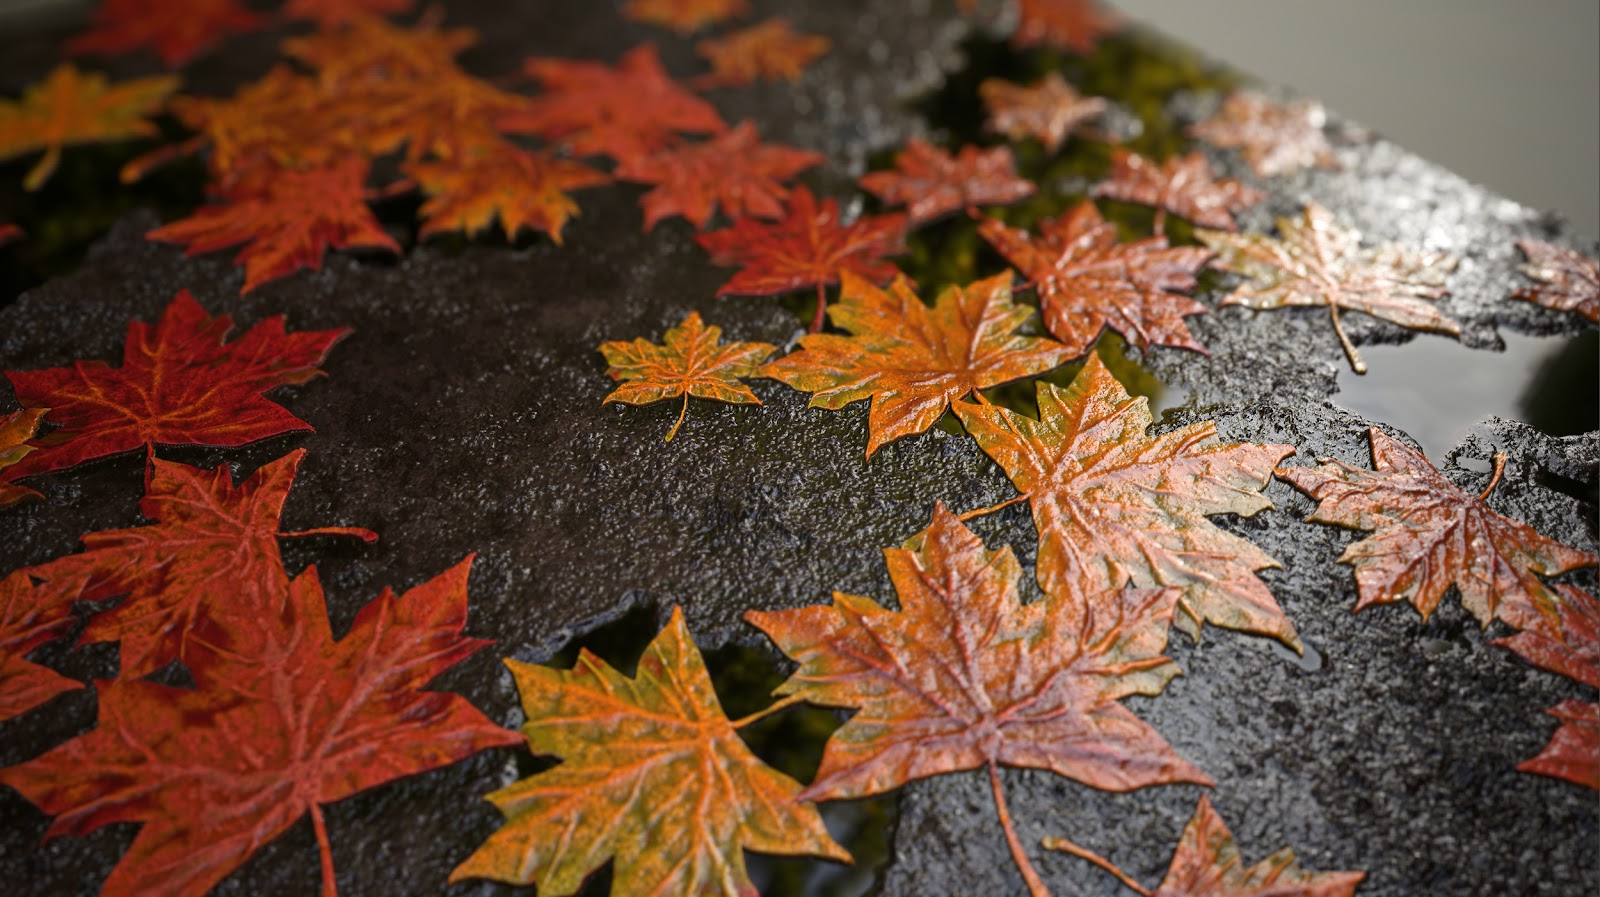
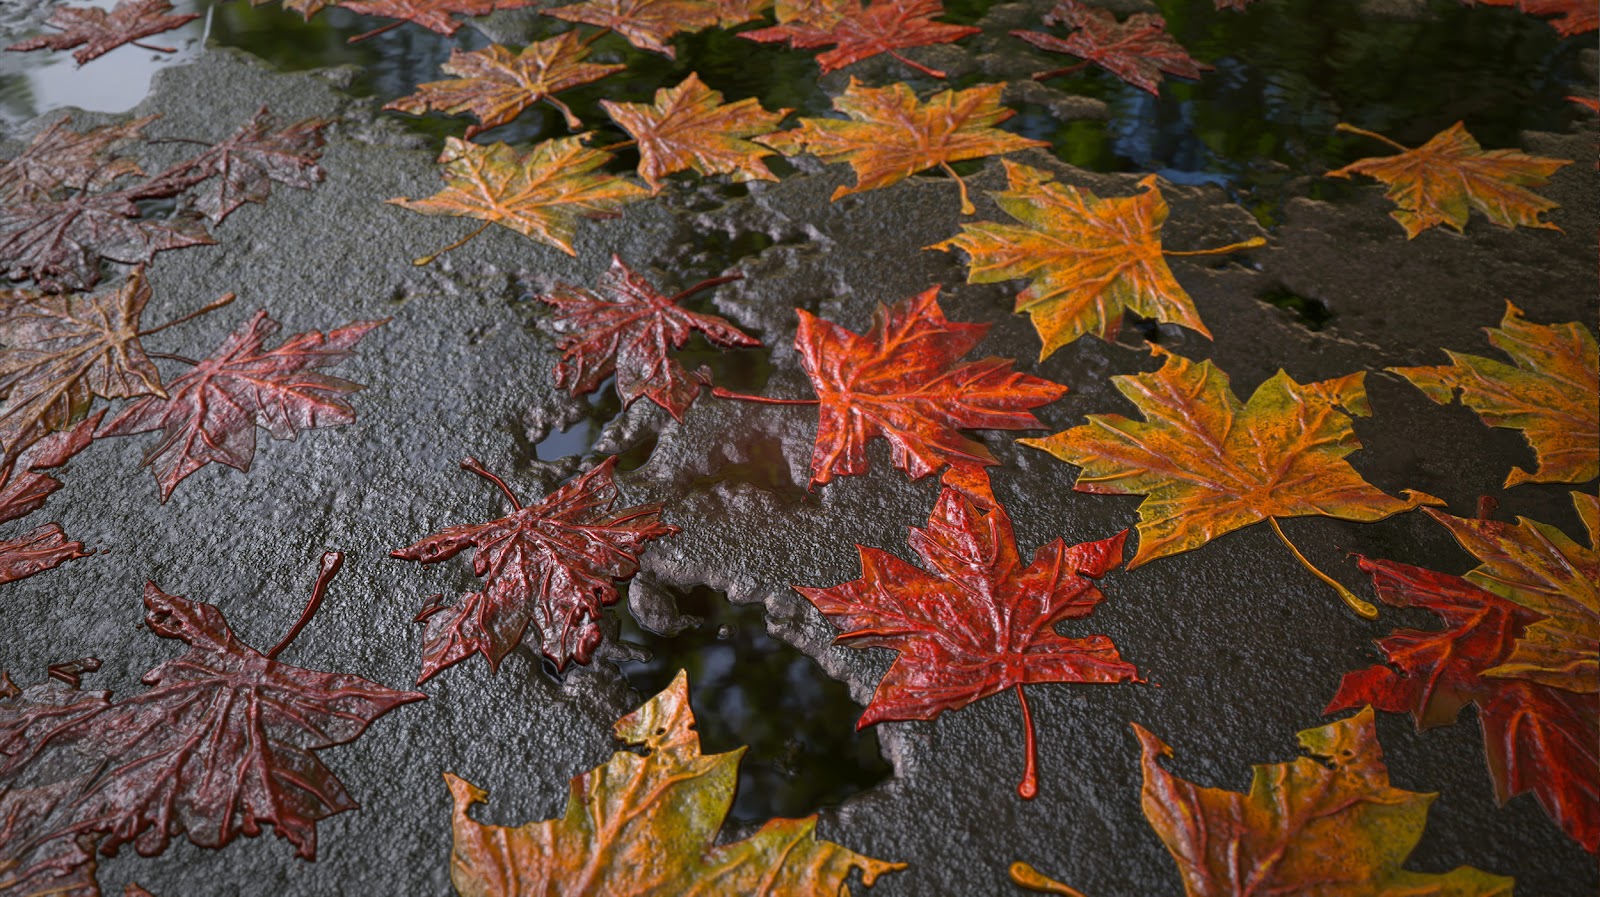
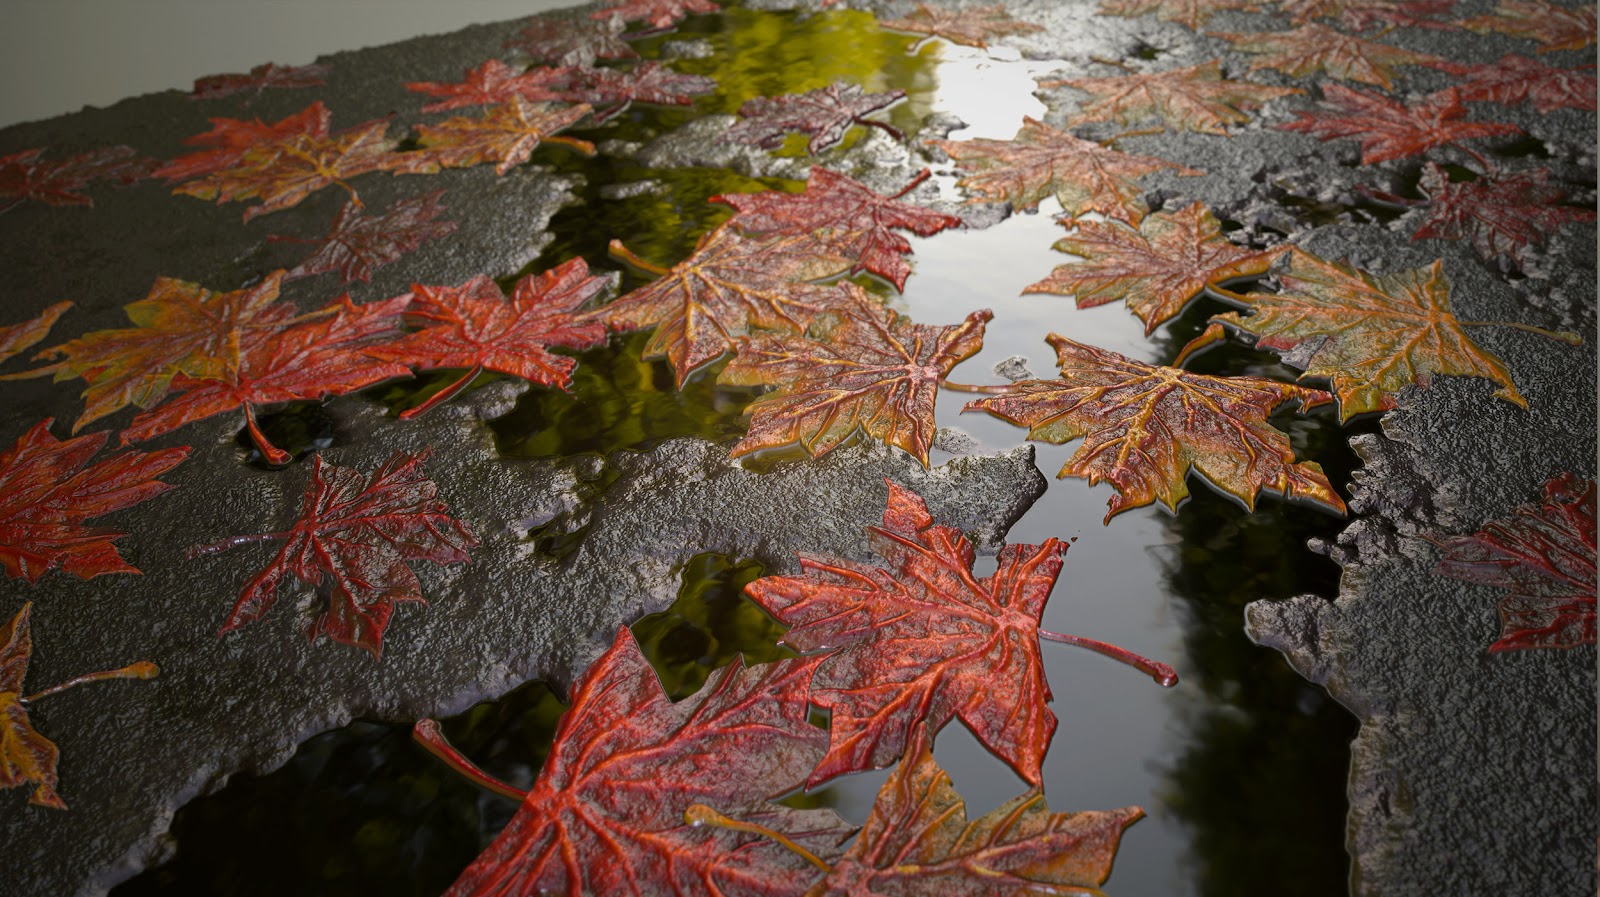
However, I am glad I kept this render and wish I had taken more at earlier stages too. I believe looking back on our own work is a great way to realise the areas of opportunity to work on next time (or when we revisit old pieces). This allows us to grow as artists. Here’s a more recent render for comparison:
Creating the Dirt Ground and Puddles
Having done the leaves, creating the ground was a much simpler node structure. Essentially, It consisted of a lot of different noises compiled together. Plus, a few level adjustment nodes to control the amount of noise and ensure the leaves still fitted nicely over the top.
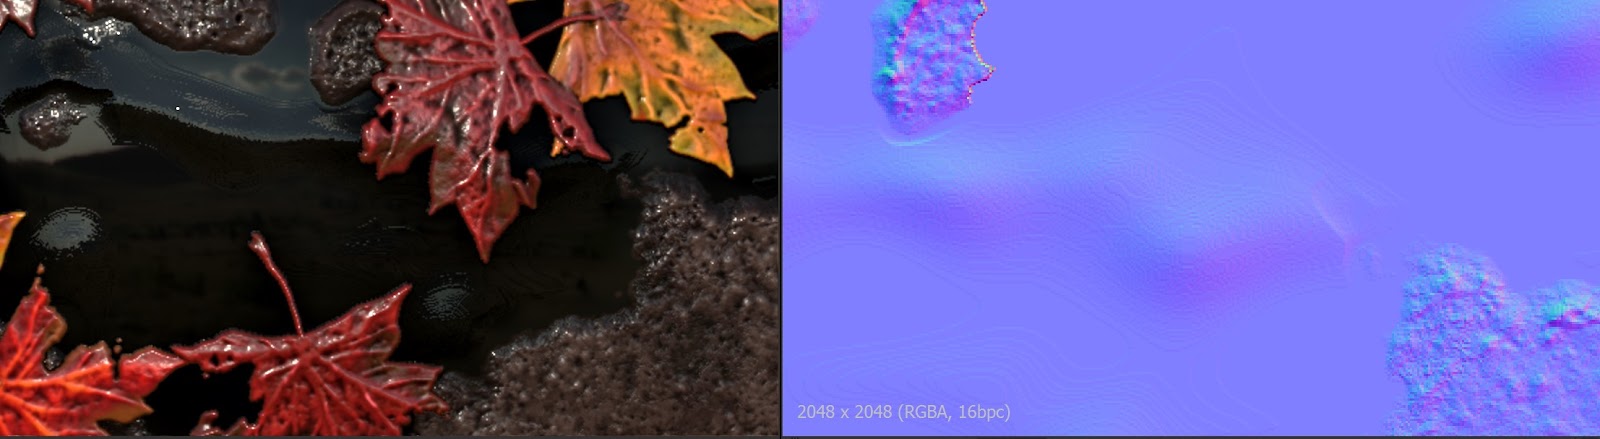
Creating the puddles was harder, as I didn’t want them to be completely still. I wanted to add in some very subtle movement to the water which proved to be quite a challenge. I had a persistent problem where the noises I was trying to use would come out as wobbly/aliased lines in the normal map. Thus, creating an unnatural pattern on the water. I thought this could have been to do with the output format and so I tried converting the nodes used to 16bit but that wasn’t the case. In the end, I blurred the normal map of the puddles and then blended it together with the mud and the leaves. This seemed to do the trick.
I believe looking back on our own work is a great way to realise the areas of opportunity to work on next time (or when we revisit old pieces).
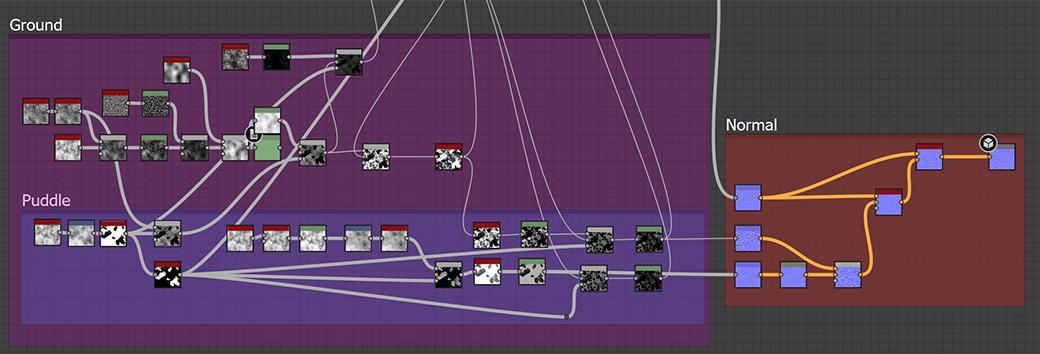
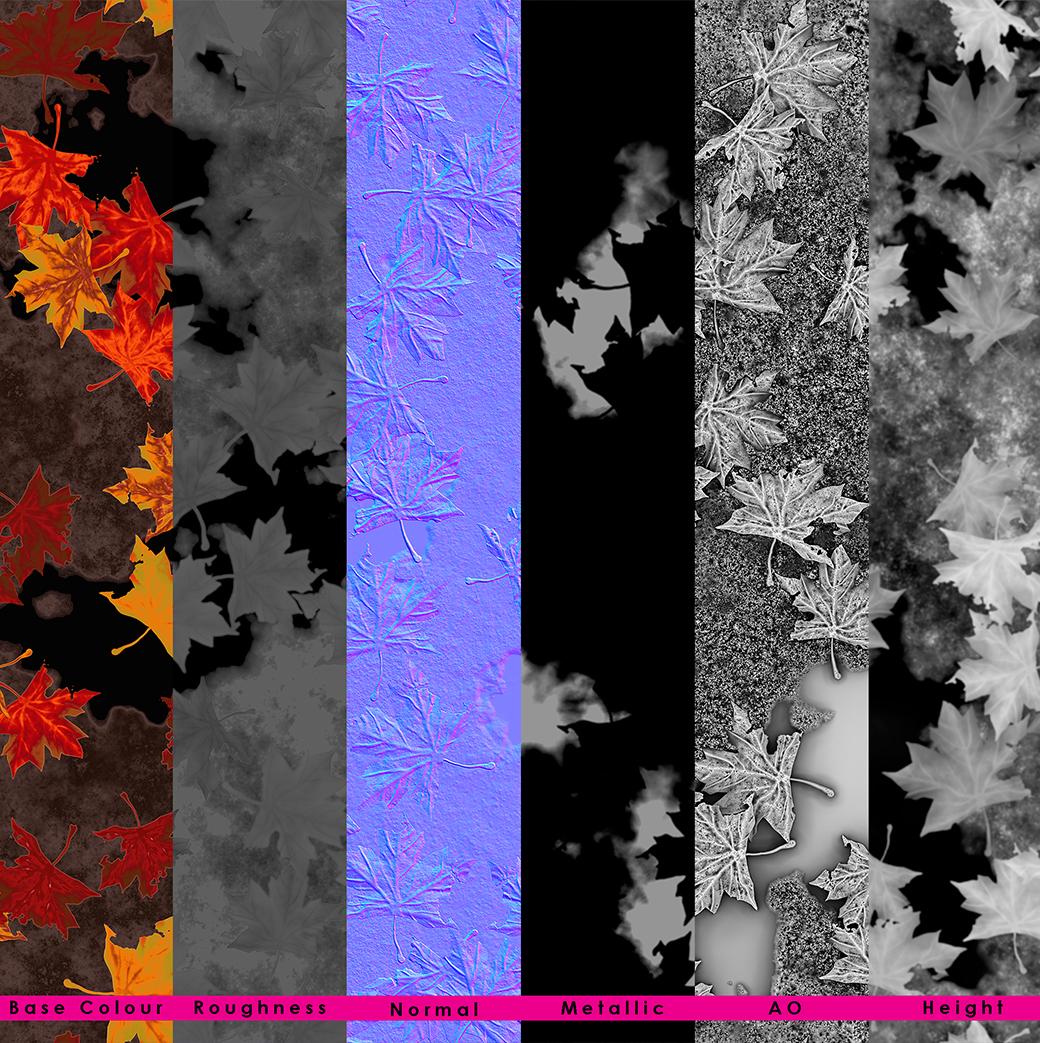
This is the final map breakdown:
As well as putting the roughness value for the puddles to zero. I also added metallic values to them to get the nice reflectivity and make it appear more water-like. You can see it better in this render:
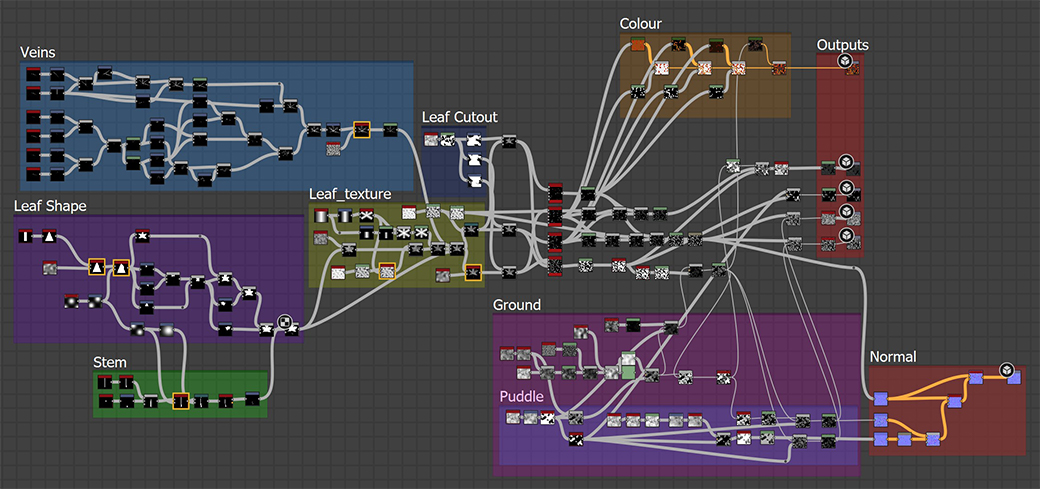
For colouring the ground, I used the same technique as I did with the leaves. Finding a gradient from a reference image and then tweaking it until it was something I was happy with. Here is the full node graph:
Rendering and Presentation
To render, I used Marmoset Toolbag 3. I find this a really quick and easy way to get great renders from. Loading in texture maps, setting up HDRIs and adjusting camera settings is fast and efficient. This works really well when showcasing materials.
I like to try lots of different lighting/colour setups just to see what looks better for the particular material I’m showcasing. I made a lot of warm renders for this. But I also made some cooler/darker ones as I thought the blue tones helped bring out the yellow/oranges of the leaves.
Most of the time I use Marmoset’s preset HDRIs but for some of my renders I used this cool autumn forest HDRI from HDRI Haven.
This was because, in some of my earlier renders green leaves can be seen on the trees in the reflections of the puddles as opposed to yellow/red. This is a small detail but one that bothered me when looking at the first passes! Though I continued to use it as it provided the better lighting for most angles.
After taking renders in Marmoset, I then import them into photoshop to enhance the images by making small level and curve adjustments.
Reading this back makes this process sound very organised and systematic...but rarely do projects run like this. I believe this is most true for young artists like me that are still experimenting. Indeed in every project I attempt, I am constantly learning new and more efficient ways of doing things.
I am happy with the result I created while working on this material. Also I am pleased that I could improve on it each time I revisited it (even if I could only spare a few hours each time). It will be interesting for me to return back to this in a year with the new knowledge I will have learnt and see where I can improve this further.
If you had asked me to produce something like this 6 months ago, I wouldn’t have even known where to start and so I am excited for the new material creation discoveries the future holds for me!