Modelling a 3D Kombi Van Ready For Production
Having worked directly with many models I do have a good understanding on how to identify a good model and what makes it suitable for texturing.
Having worked directly with many models I do have a good understanding on how to identify a good model and what makes it suitable for texturing.
Following the success of the Kombi contest, we have decided to keep the model online as a learning tool for the student community! We kindly ask that if you use it in your portfolio, you credit myself Christina Ryan and mention the Rookies.
If you're interested in the making of the van, read on! Id also love to include some handy tips, and talk about my favourite entries.
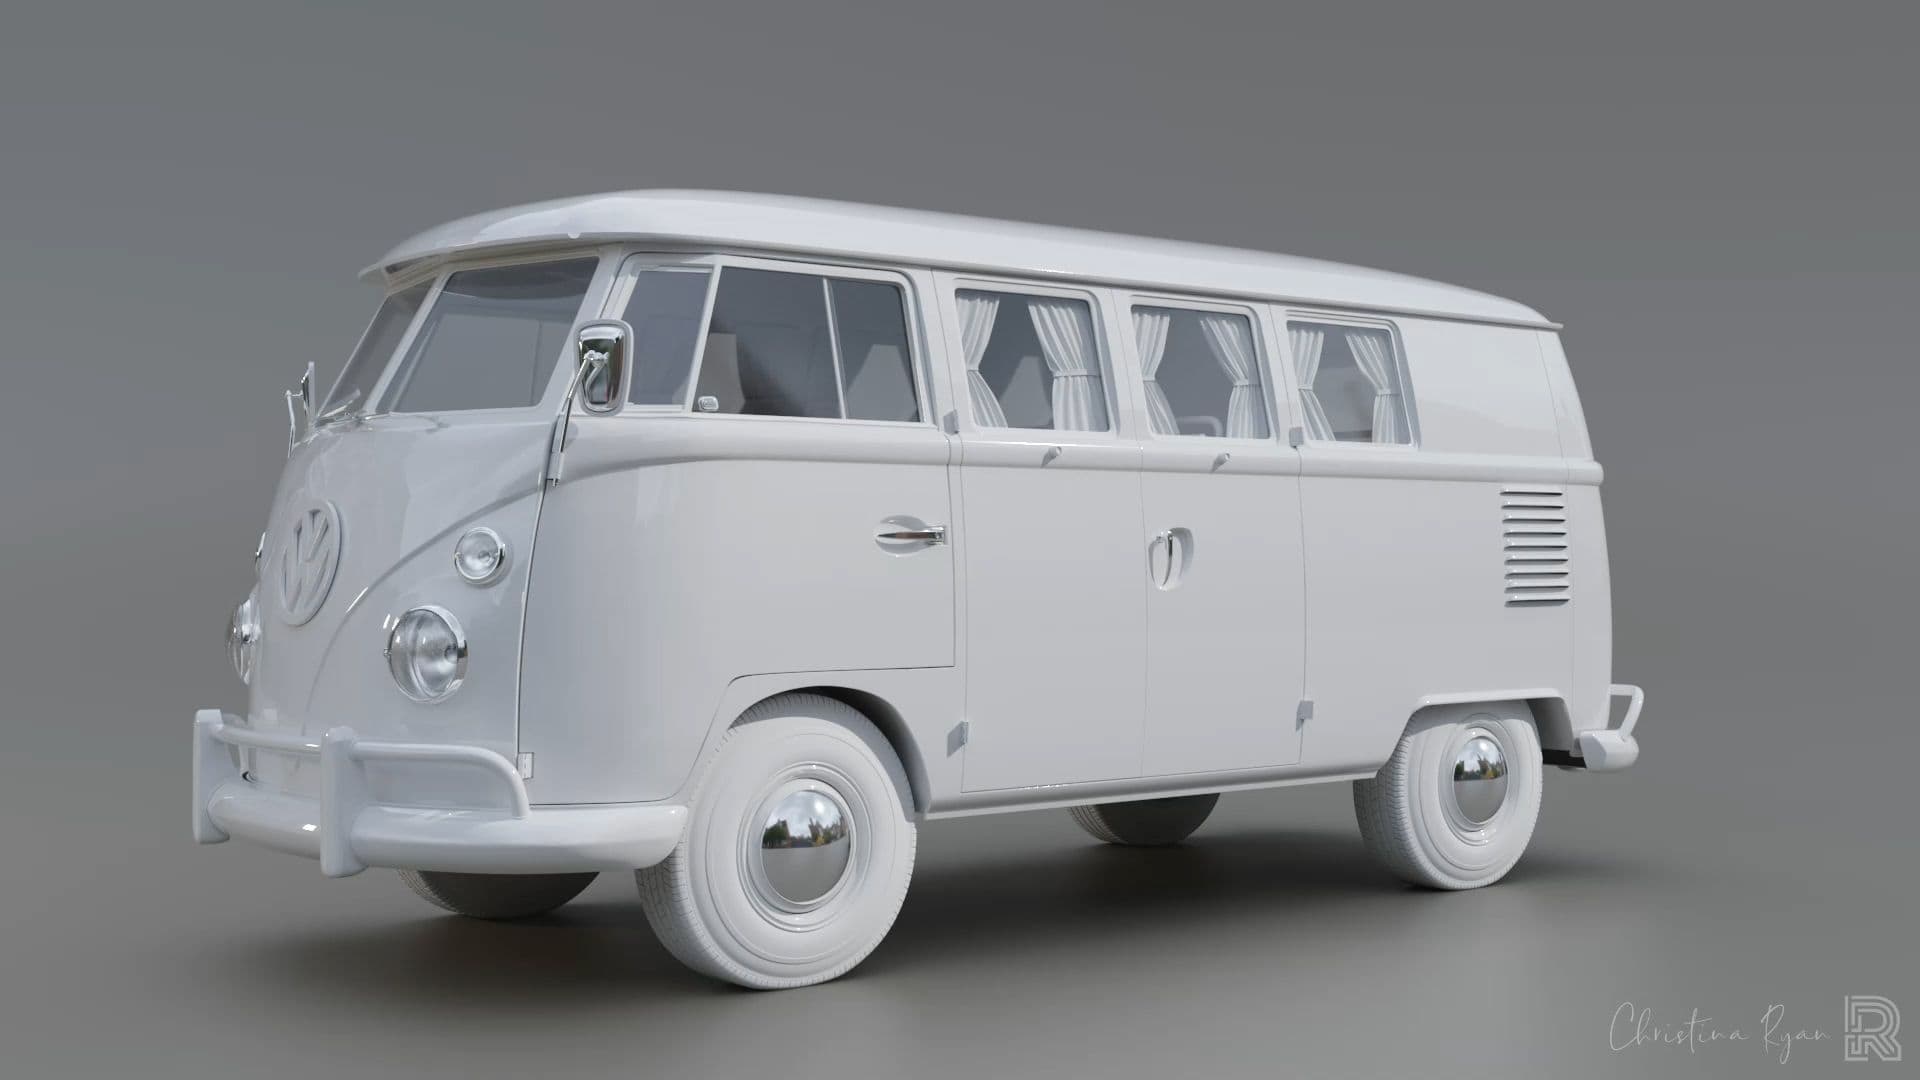
The Kombi Van model was originally developed for my students to work on. Quite often I would find students lacked the tools needed to succeed in the texturing process - and this included professional models to work on. I wanted them to focus their energy on texturing, without being first burnt out by the model process, or having to purchase assets online.
At first, I found it hard to settle on a particular design. To assist in the process I wrote a list of things I hoped to achieve. This included an asset that was fun to design and texture, and would challenge and engage students in a way that was challenging yet achievable. It needed to suit both advanced and beginner students, be made up of multiple parts and materials, and ideally have a large blank canvas space for their creativity to run wild. I found that with Eddie the Robot, what worked was leaving fine details out of the model so that students could fill in the gaps with texture.
I settled on a hard surface model pretty early. It meant that beginners could get a nice result using Substance without too much complex shading knowledge.
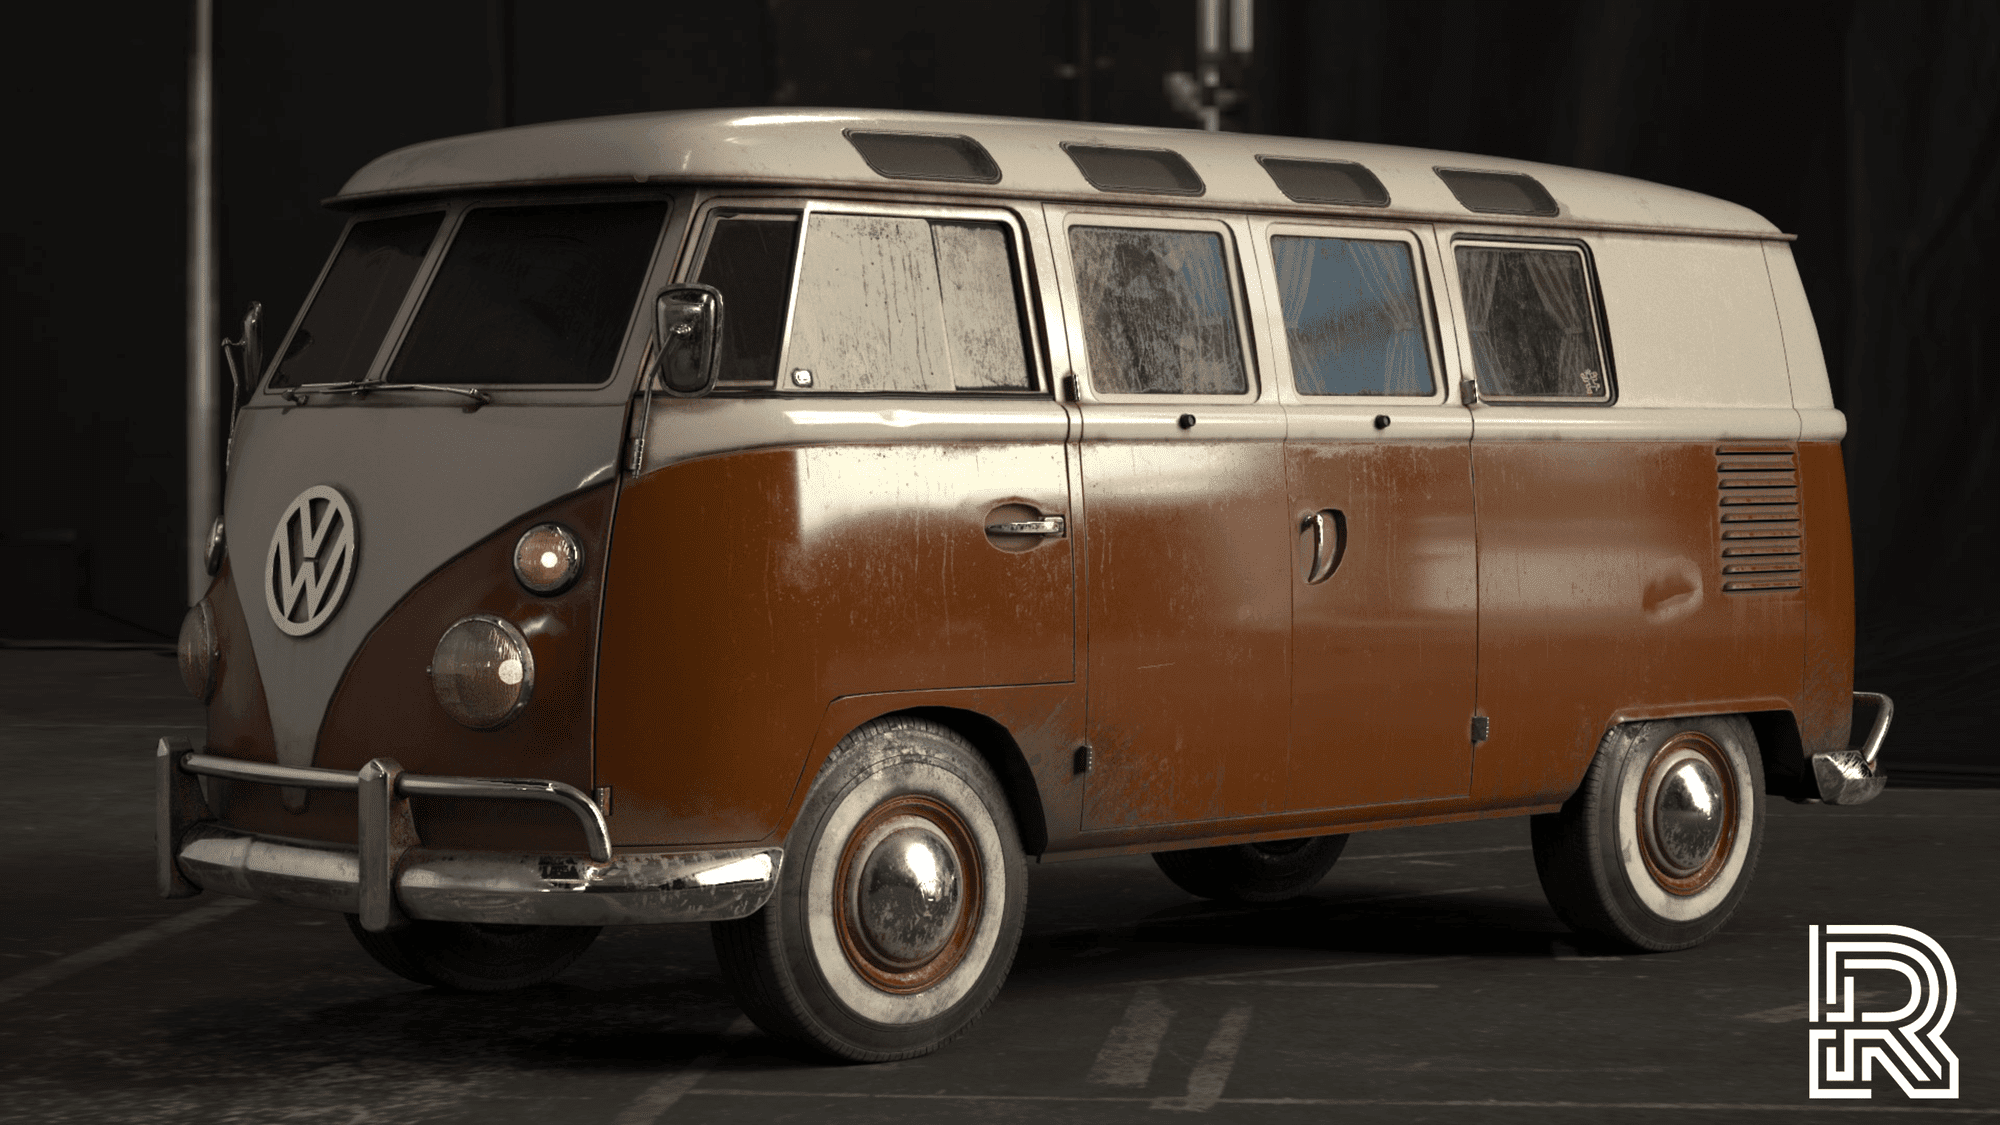
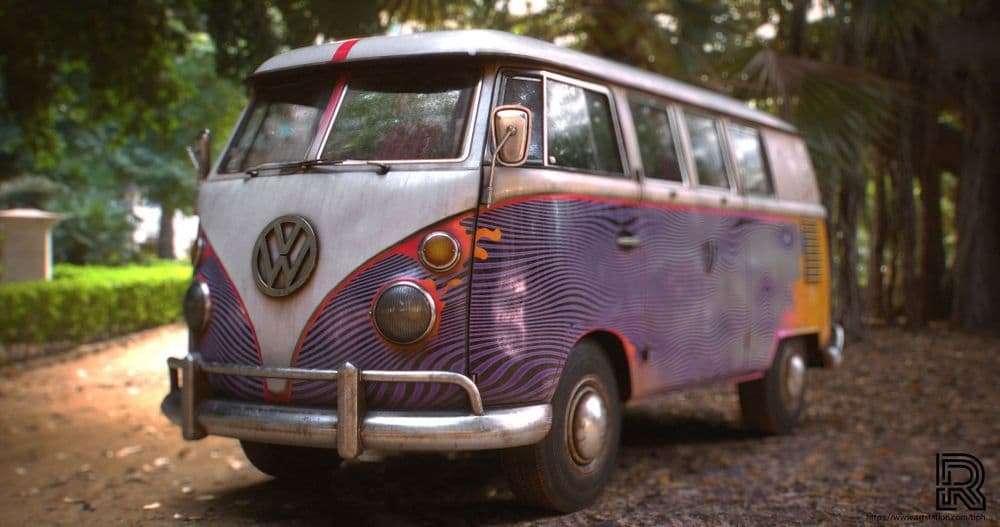
Combining all of the above, I started searching for references of vehicles - trucks and vans in particular. As soon as I saw a picture of a Kombi, I knew it would be perfect.
"Being the People's Choice at my first ever challenge means a lot to me. It means that I succeeded in transmitting and sharing the passion for my native land, its traditions and colors.
For a Rookie like me, it is an amazing goal and I can't wait to show you more!"
Just a disclaimer - I'm a look development artist and model mostly as a hobby these days - My process is what I've learnt works best in my experience, and I appreciate that there are many different ways to achieve the same result!
Having worked directly with many models I do have a good understanding on how to identify a good model and what makes it suitable for texturing. It's especially important to be able to communicate your needs to the model department to achieve the best possible result in the time given.
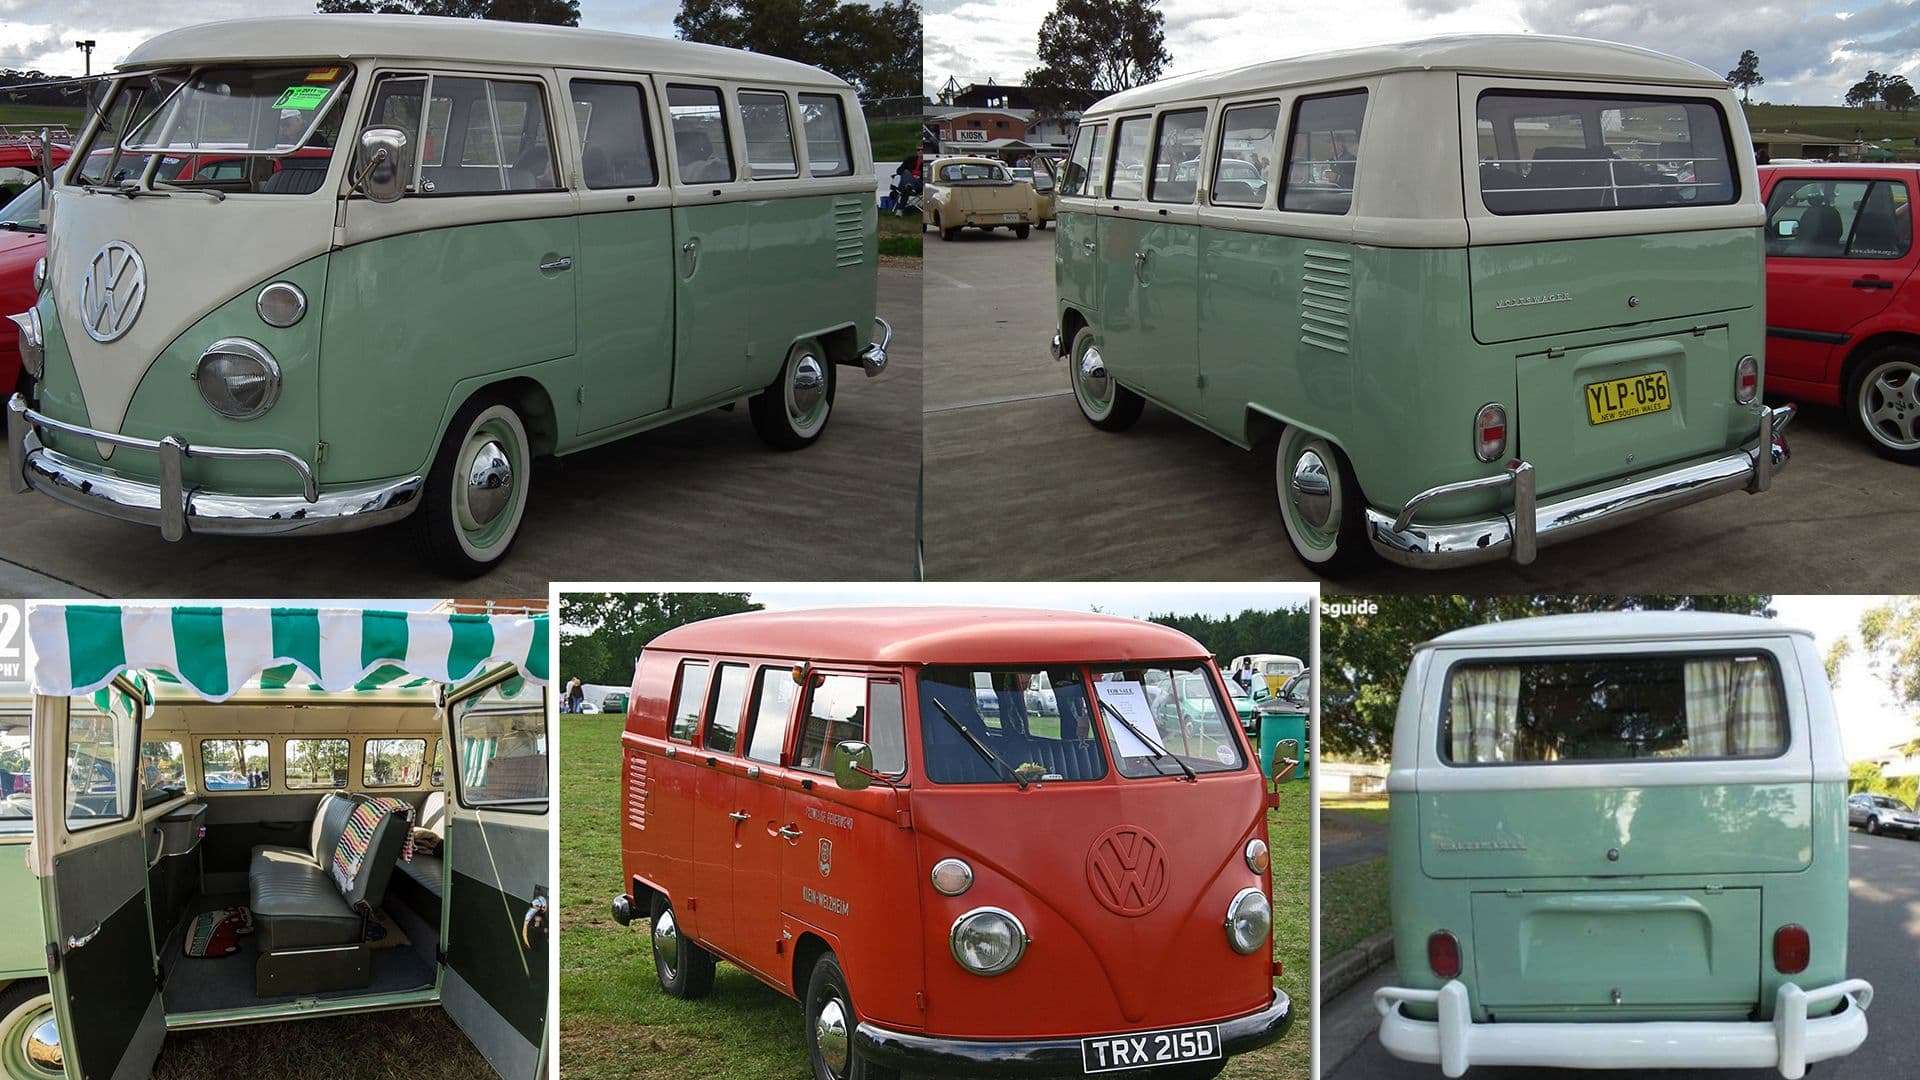
Before commencing any creative work, it is considered good practise to conduct some research. I like to start by reading up on the object, and collecting as many high quality images as possible. I learn about its construction, materials, and history, before deciding on a particular model I want to replicate. Once I settled on the type of kombi van I liked (an 11 window 1964 camper) I cut down my reference images and organised them into folders based on camera angle (front, side, closeup etc). Also if you can find them, orthographic blueprints with some form of reliable scale/measurements will make the modelling process so much easier.
" Winning a contest held by "The Rookies" is awesome! Because if you go for it, you'll have a lot of fun during the process and your skills will definitely improve... and if you win, that's the bonus. ;)"
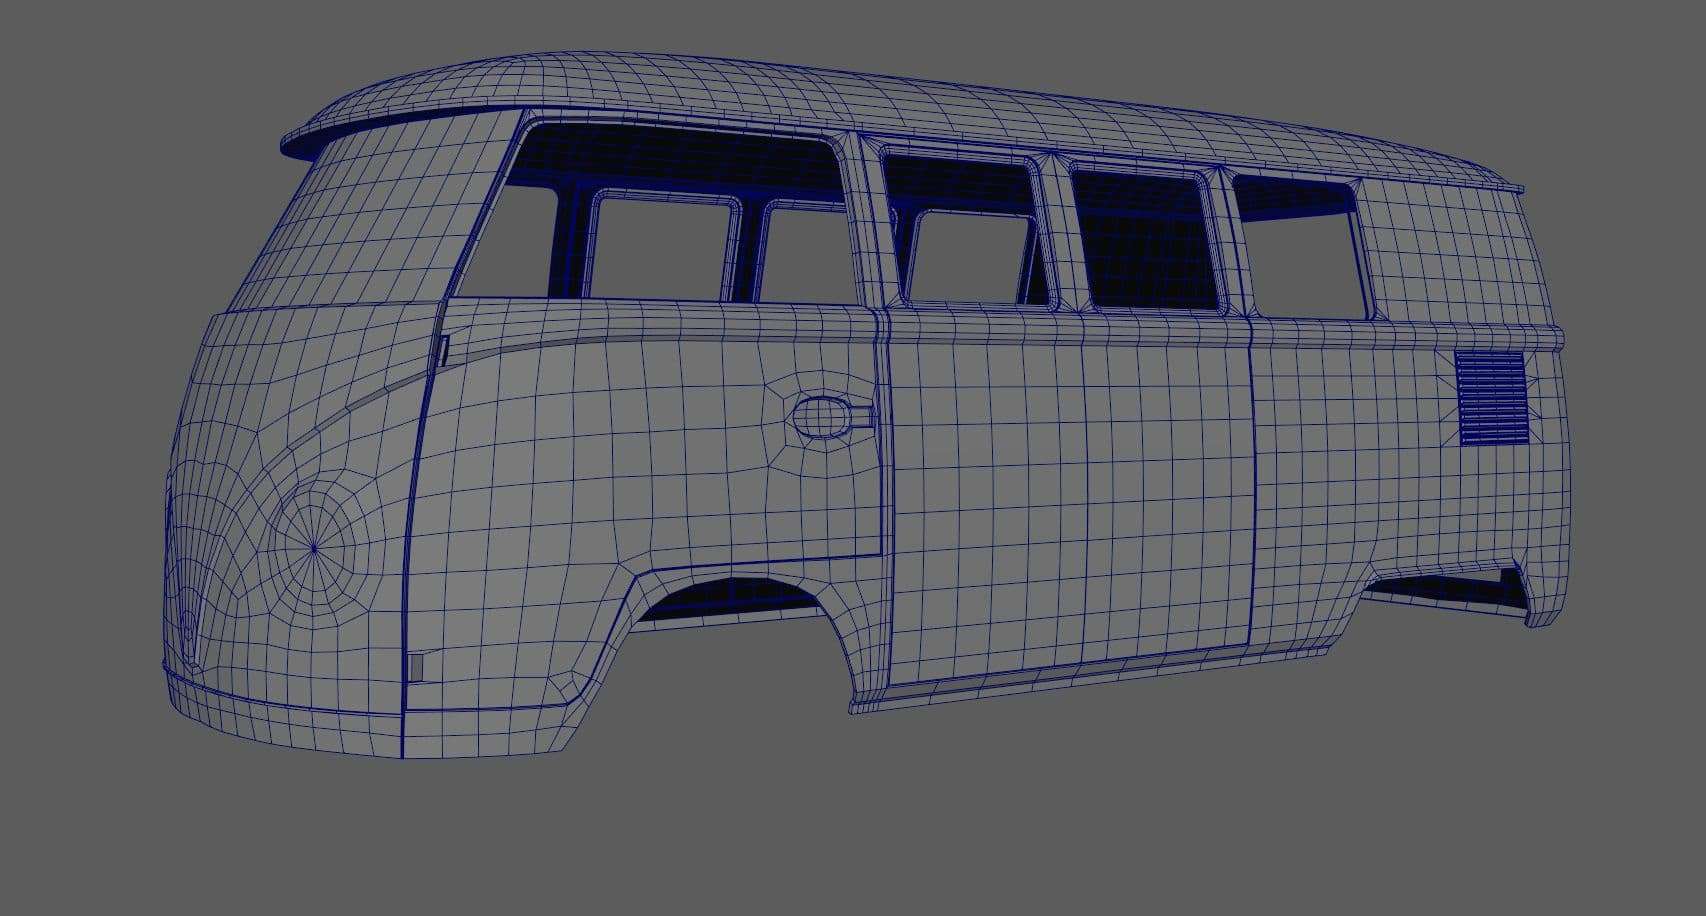
The first thing I did was setup my image planes using blueprints I found online. I made sure to line them up as best as possible, and scale them to real world dimensions. Then began the blocking/layout phase.
The idea of the block out phase is to form the largest shapes, focusing on the curves, size, and volume of the mesh. I also ignore any details like windows, door handles, panels etc. for now. Whether or not you choose to think about topology early on is a personal preference. For simple predictable shapes like the tyres, I went ahead and started high poly to ensure I had the faces needed to support my extrusions. For larger shapes like the body, which would grow in complexity over time with panels and curves, I decided to start simple with the mindset of needing to retopo it later.
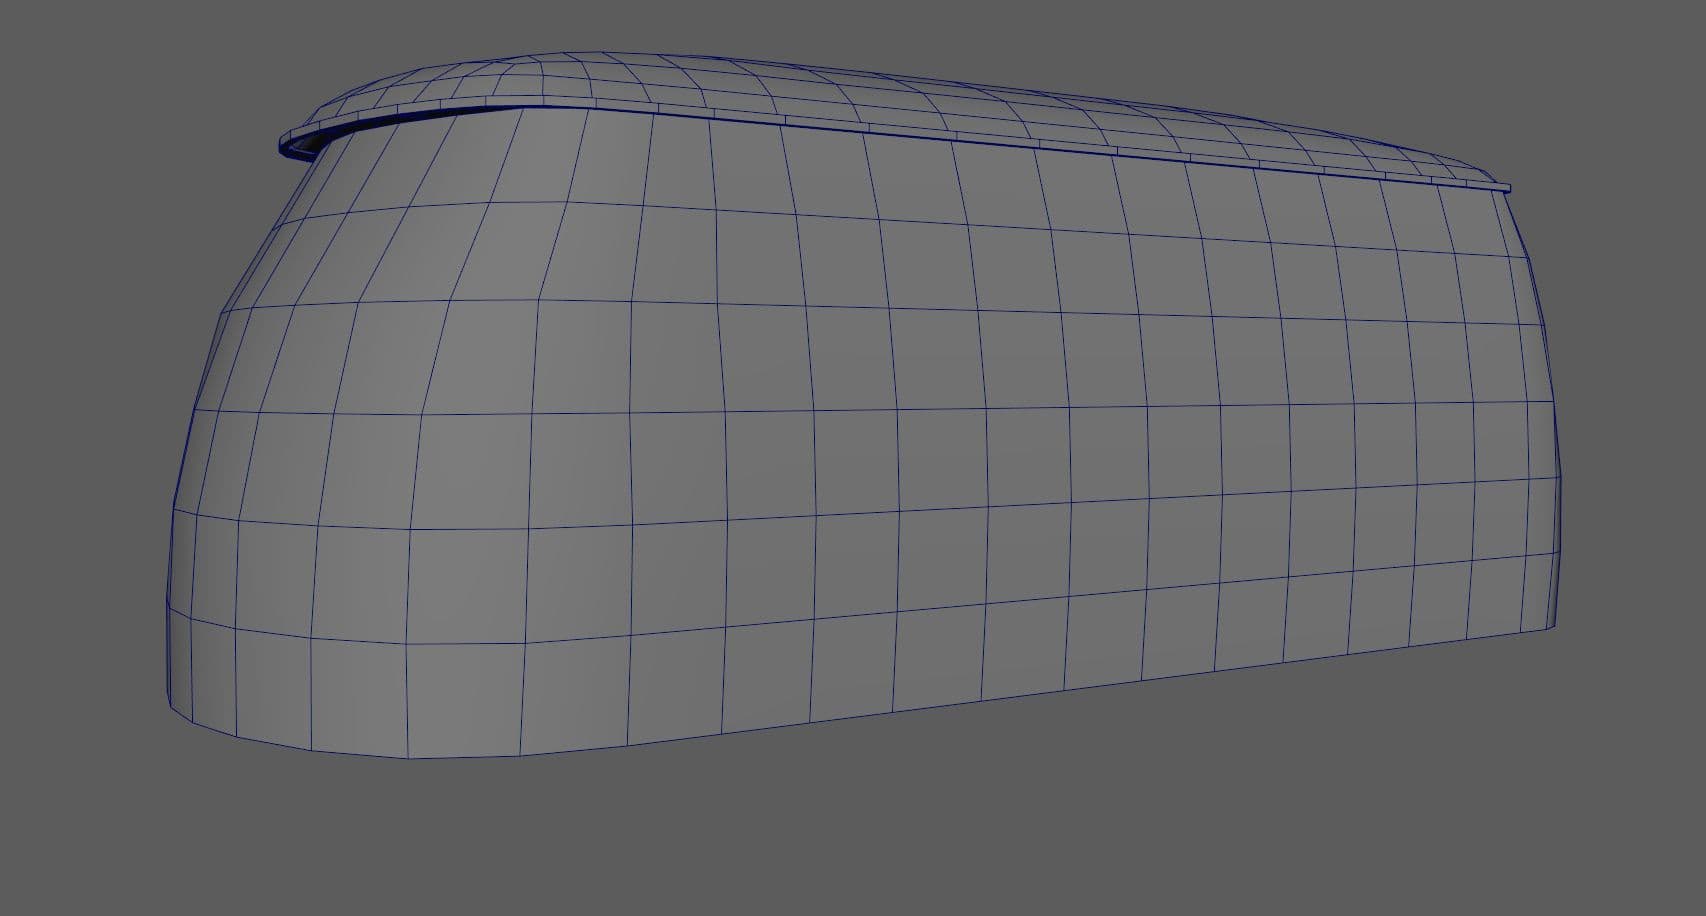
Starting with a low poly representation allowed me to focus on the shape/form without the added complexity of topology/too many vertices.
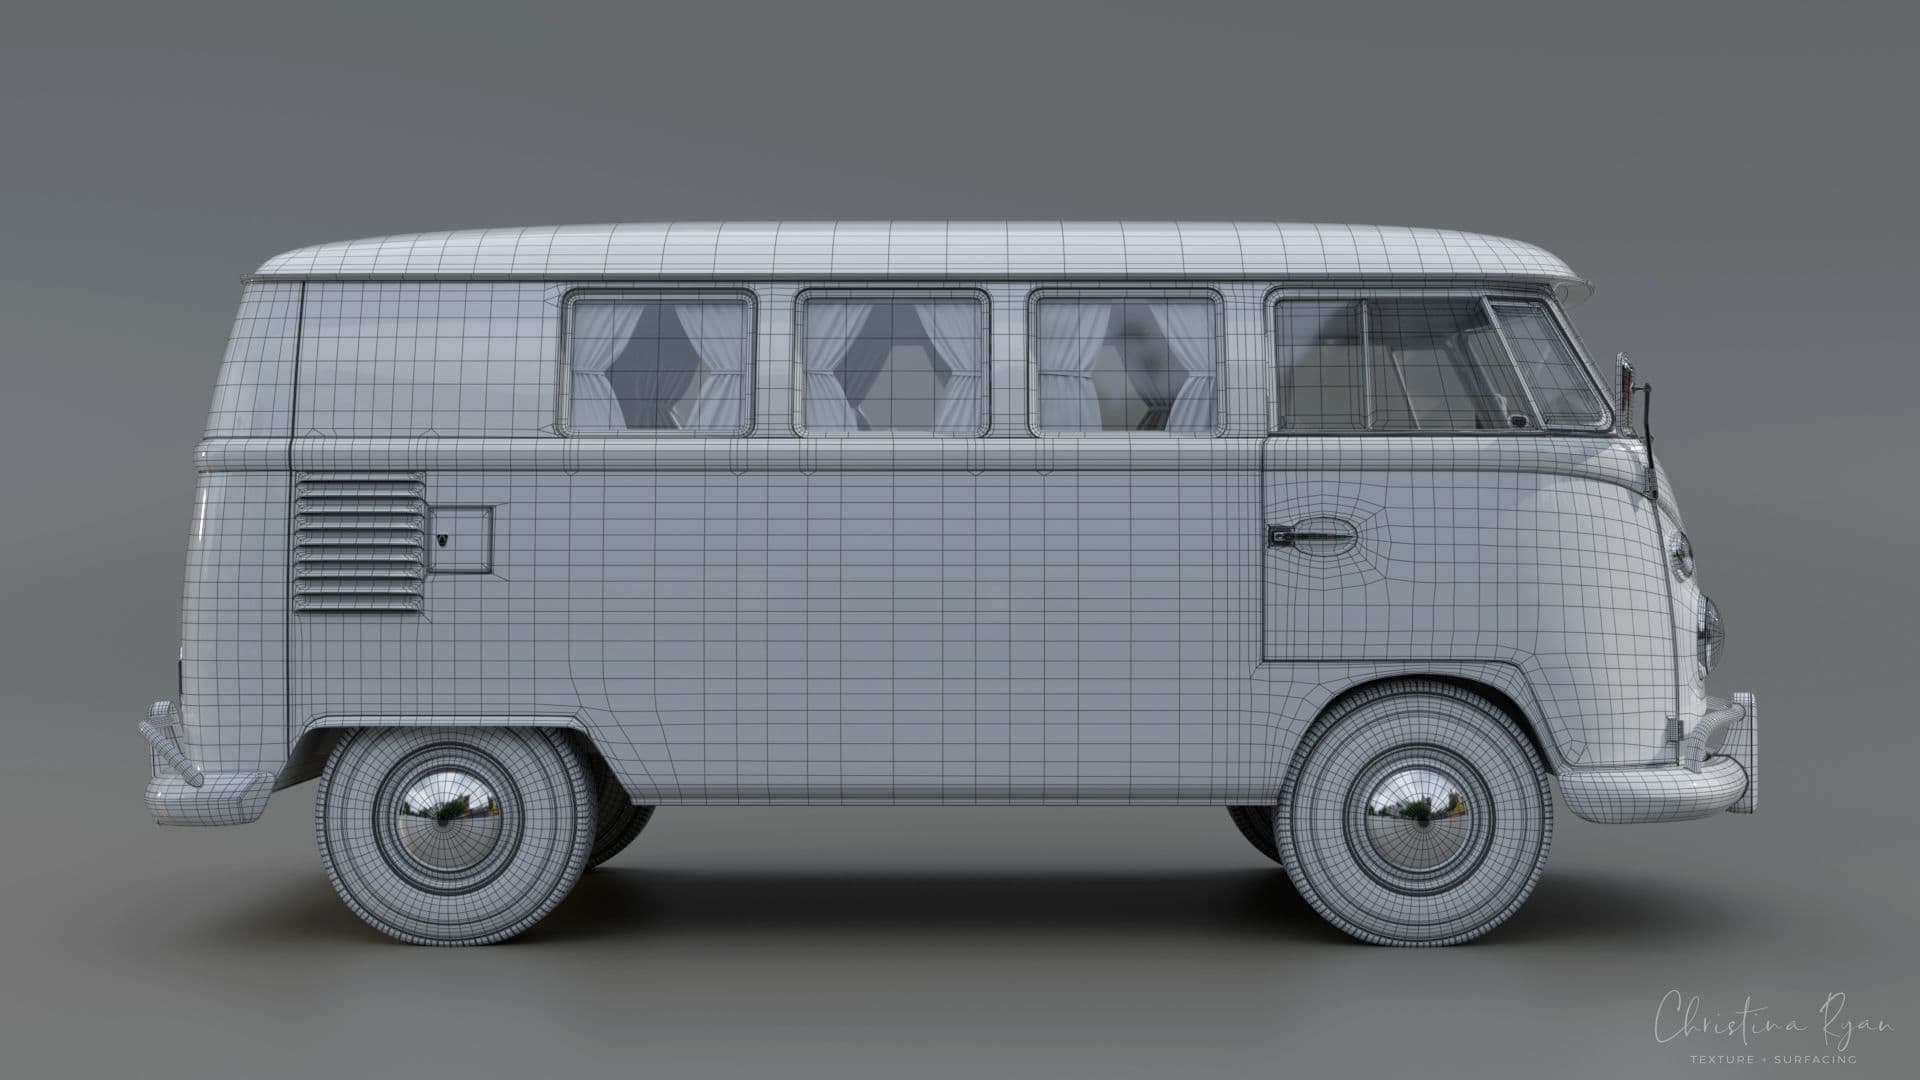
Rather than take you through each stage (because lets be honest you'd be reading for hours), I thought I would instead share a few modelling techniques I found useful.
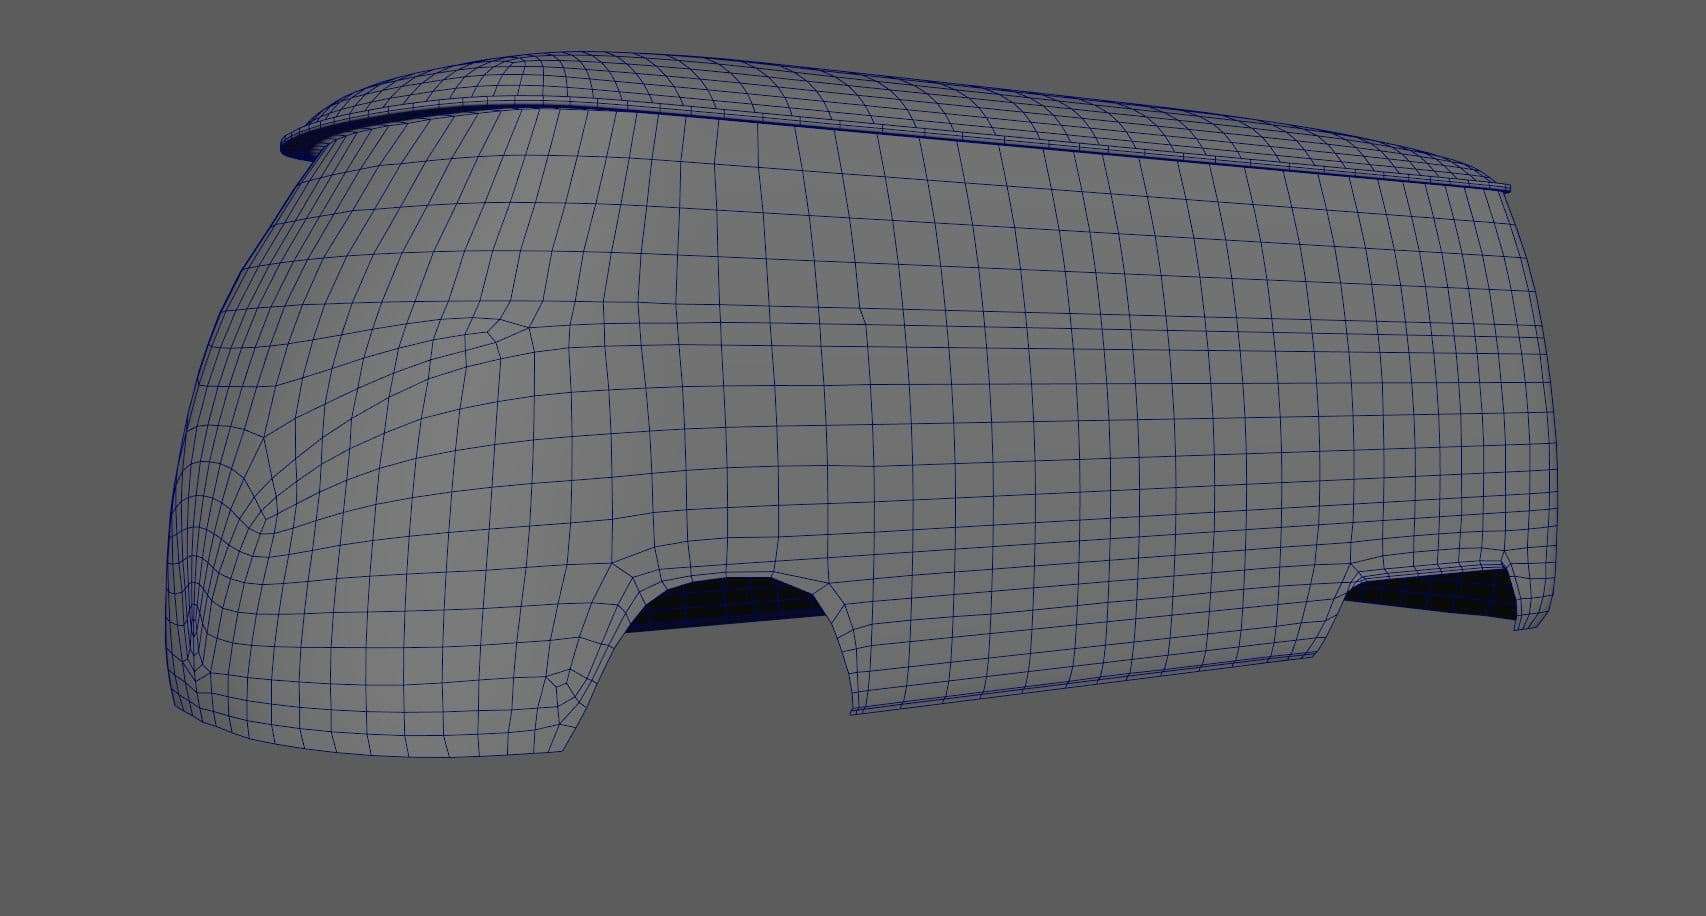
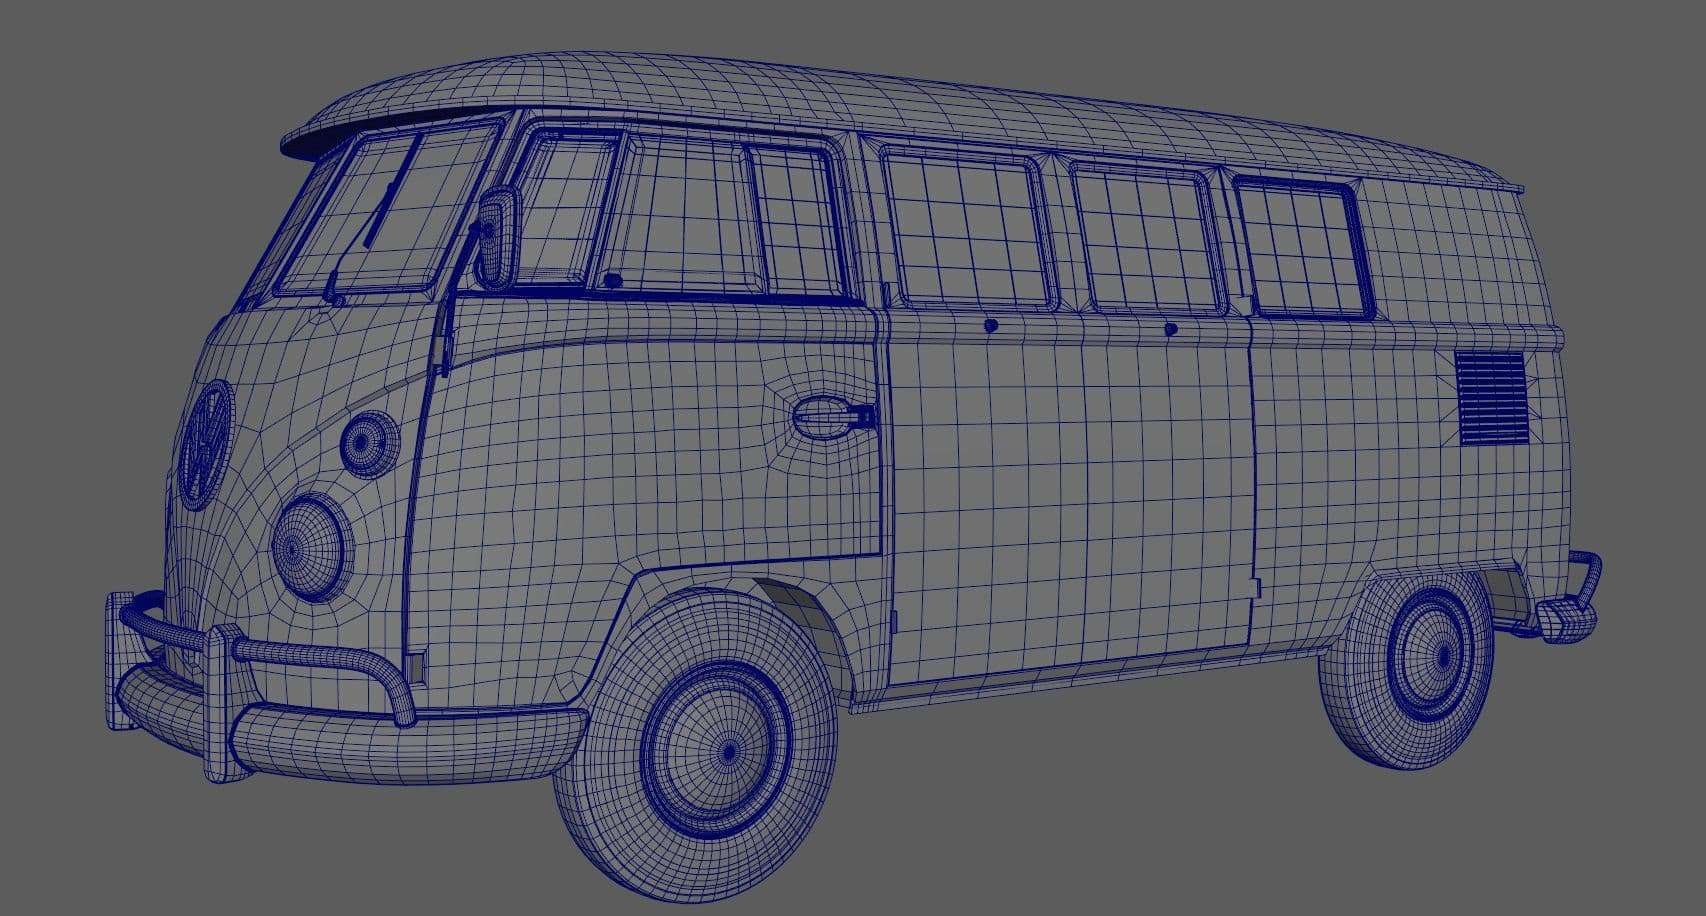
Later on when things became a little complicated and topology became uneven (we've all been there) I also used quadraw to smooth/relax the mesh without losing volume. I'm a sucker for a pretty wireframe!
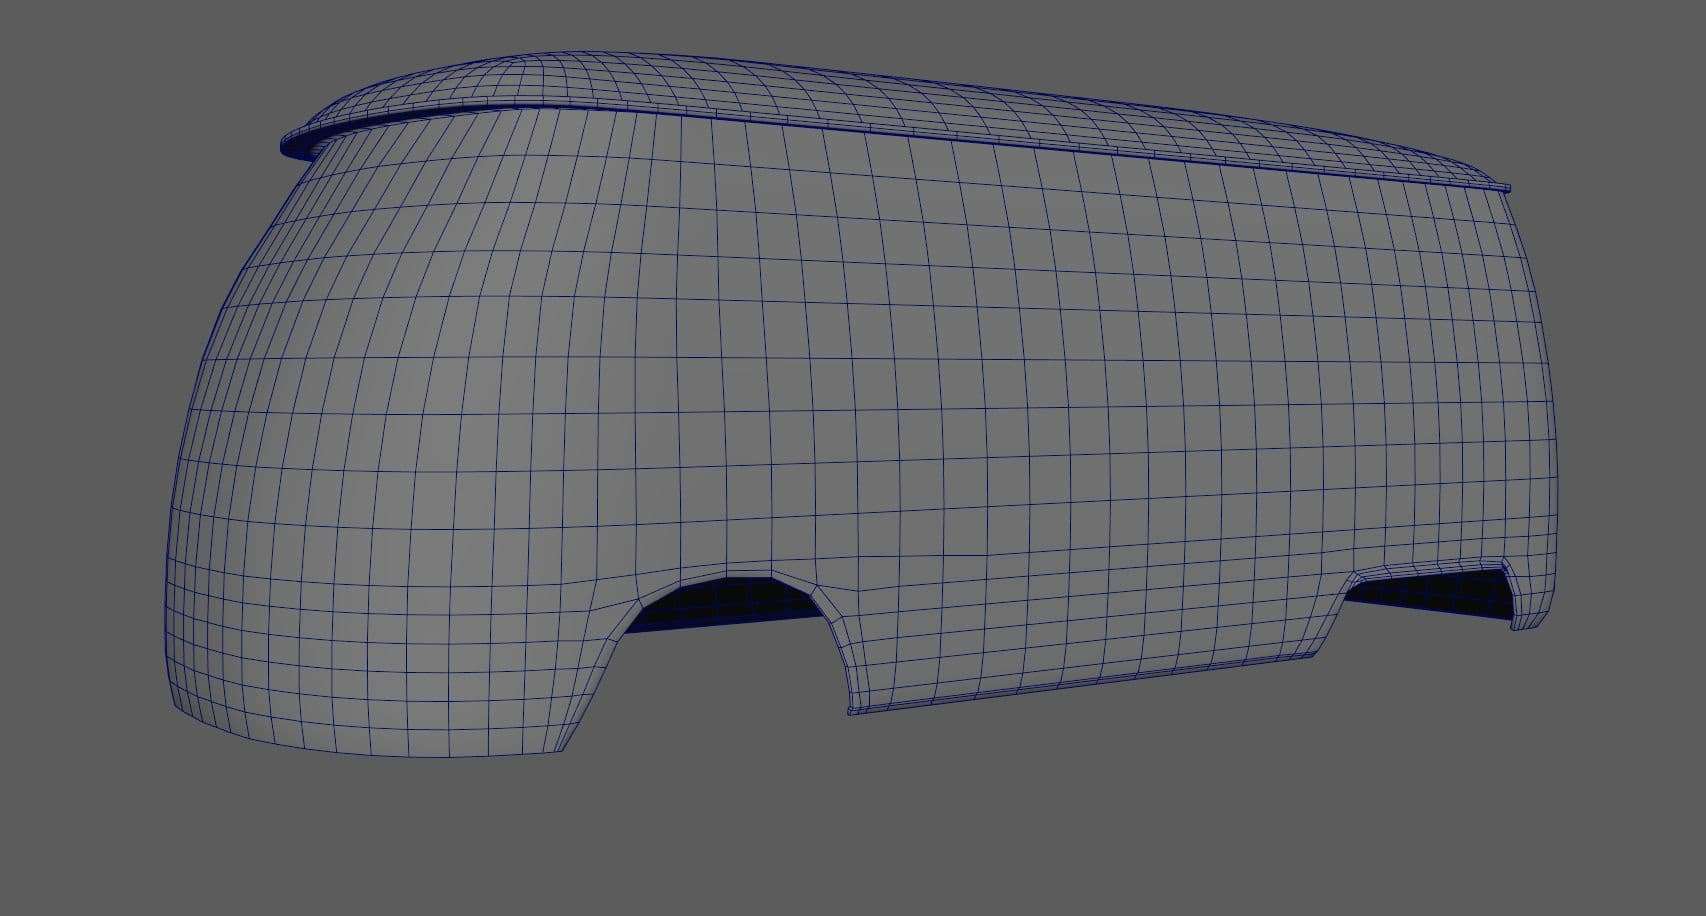
2. Modelling for subdivision: You know the drill, add supporting edge loops to all the edges you want to stay crisp. However this can honestly be a bit of a pain - avoiding pinching, stretching, and unsightly corners upon subdividing can be a nightmare if you don't know how to properly resolve those tricky shapes in your topology.
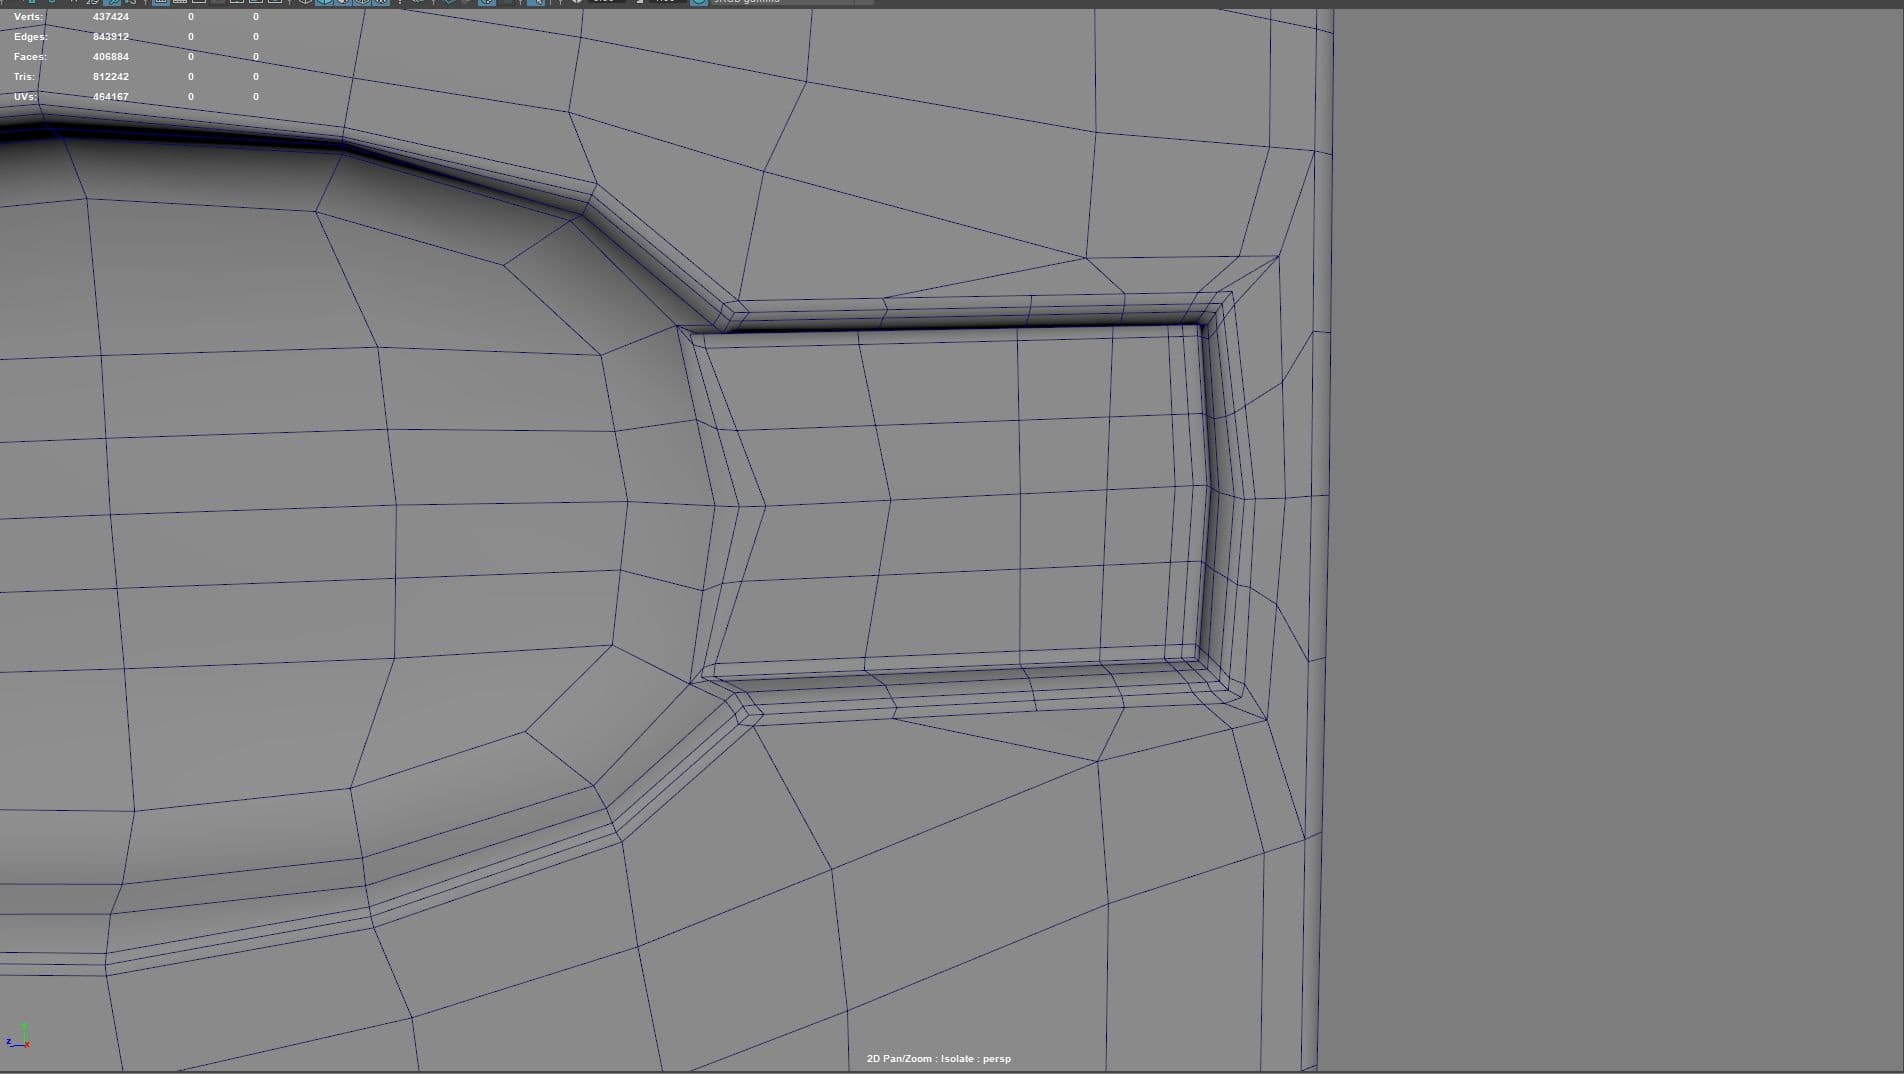
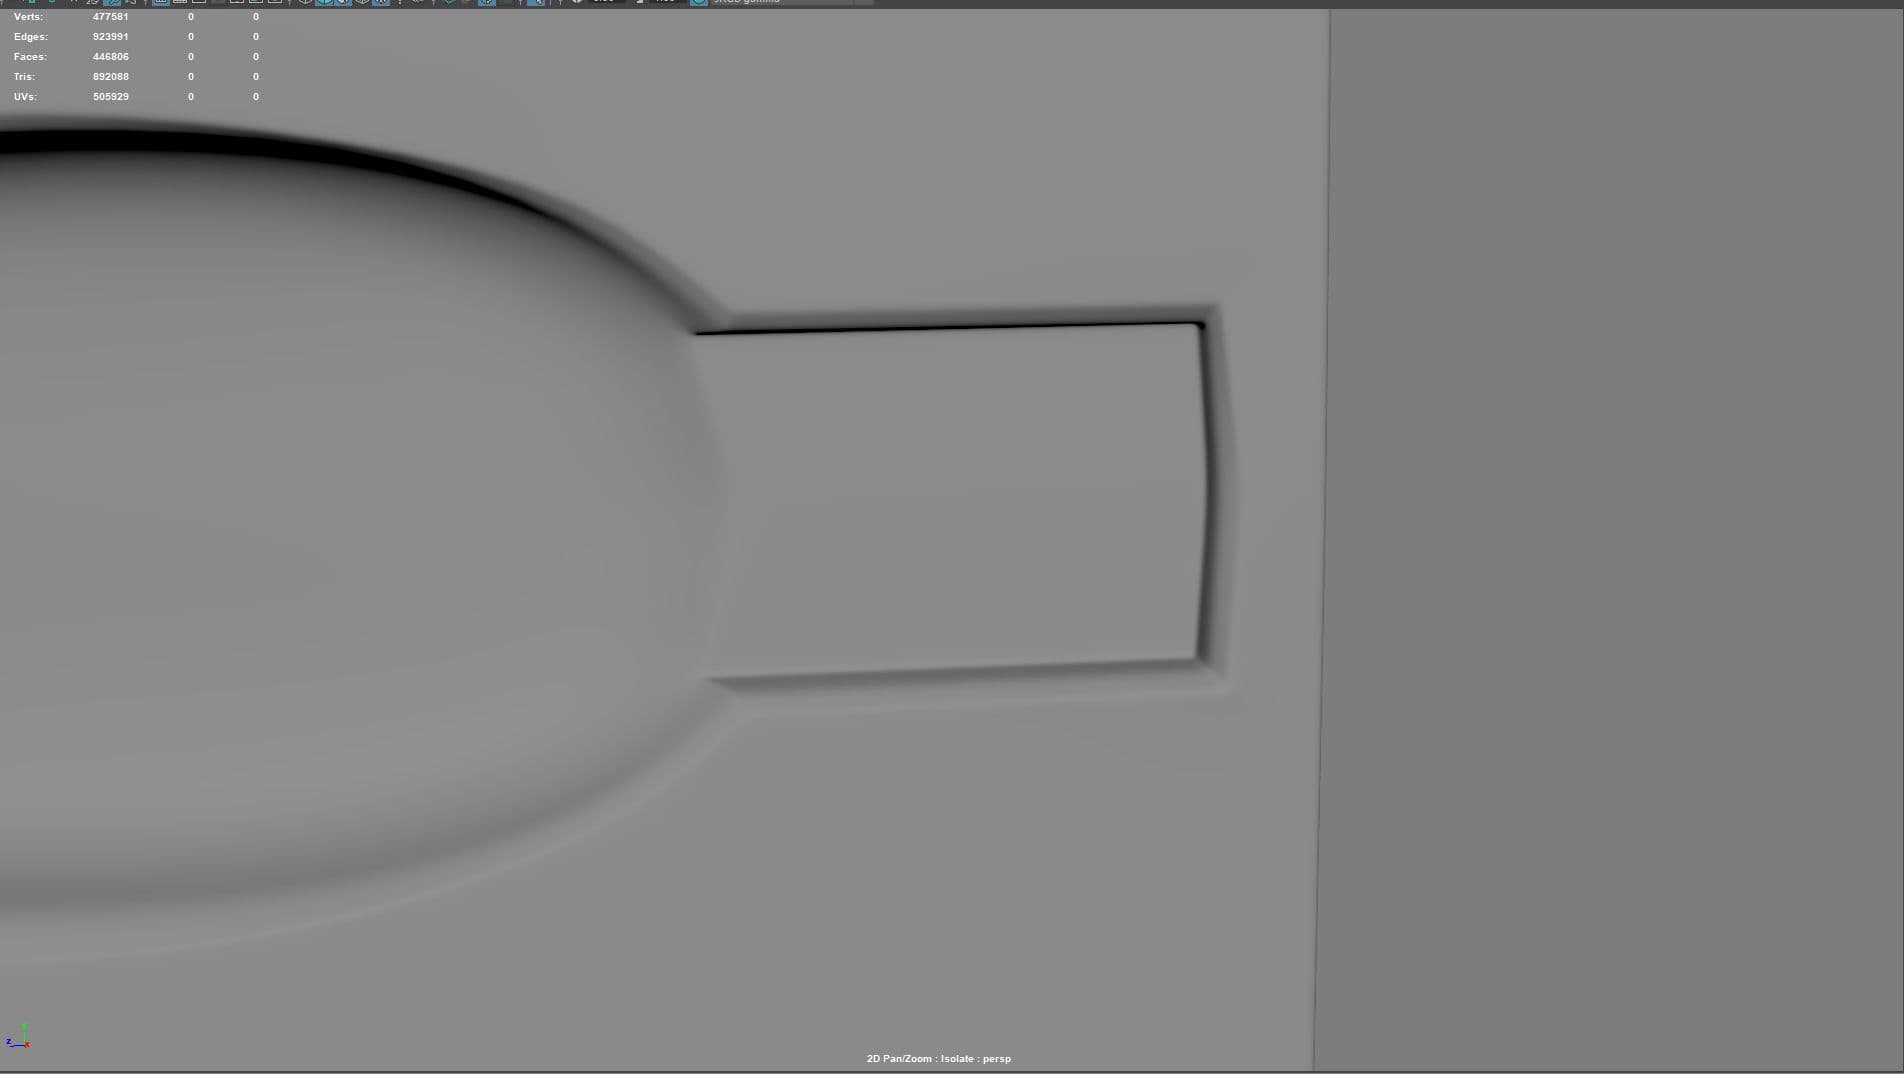

When working through each shape and adding supporting loops, I would constantly check the smoothed preview for pinching and movement of edge loops (causing texture stretching). Something I learnt early on was to leave this step till the very end. This process is destructive and makes it hard to adjust shape/form later on if required.
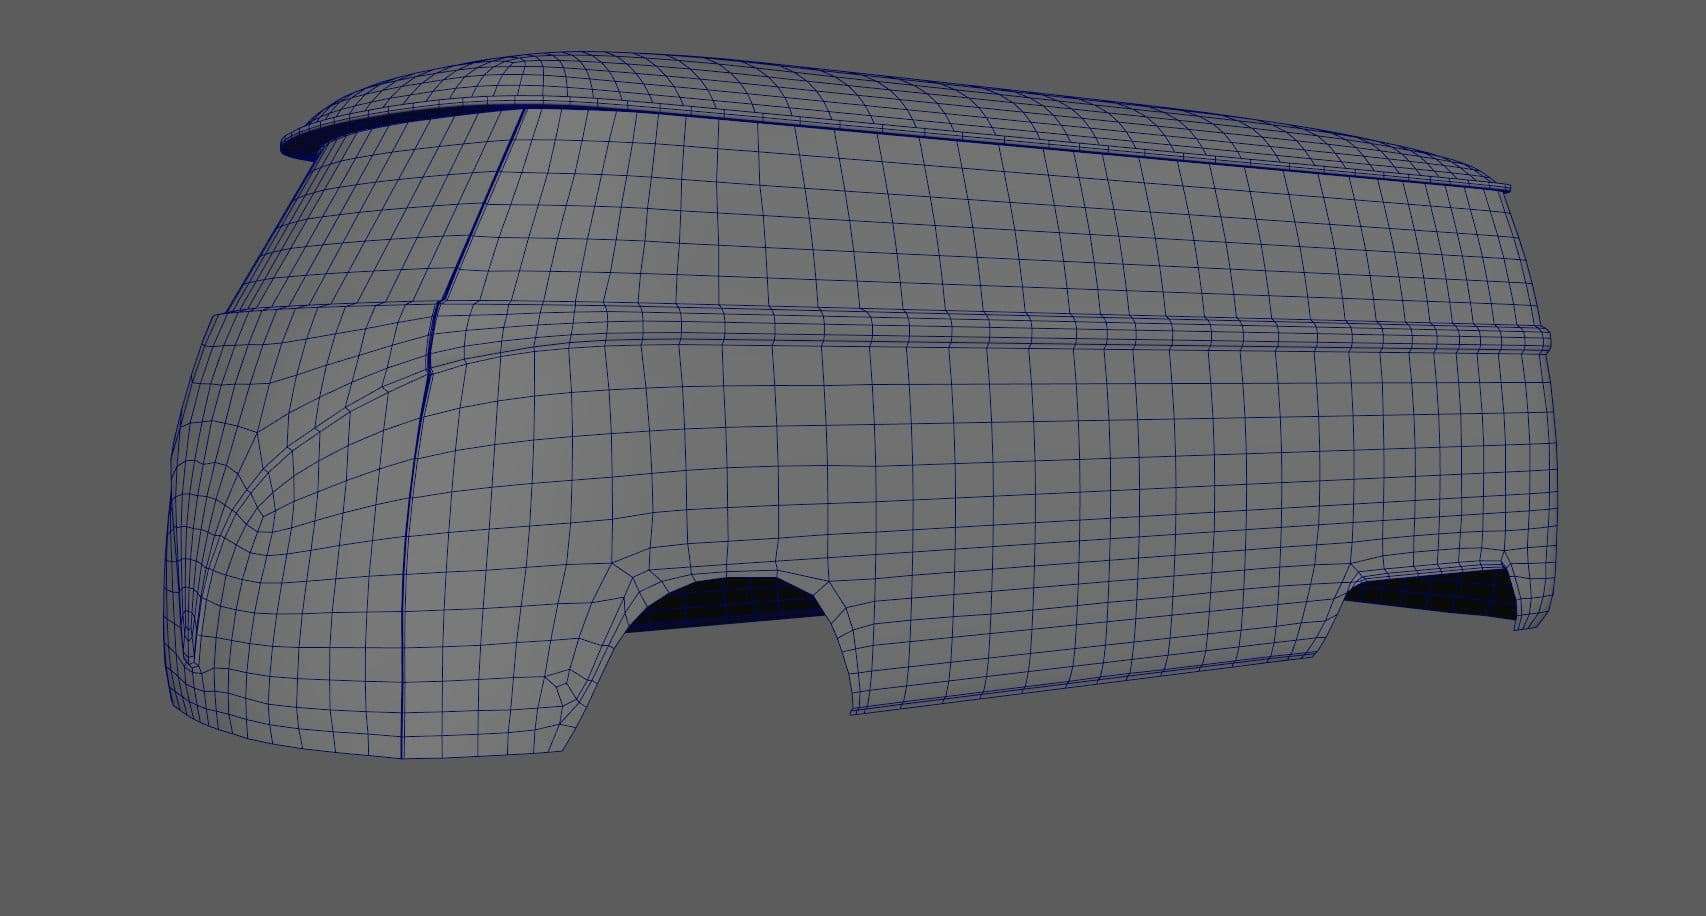
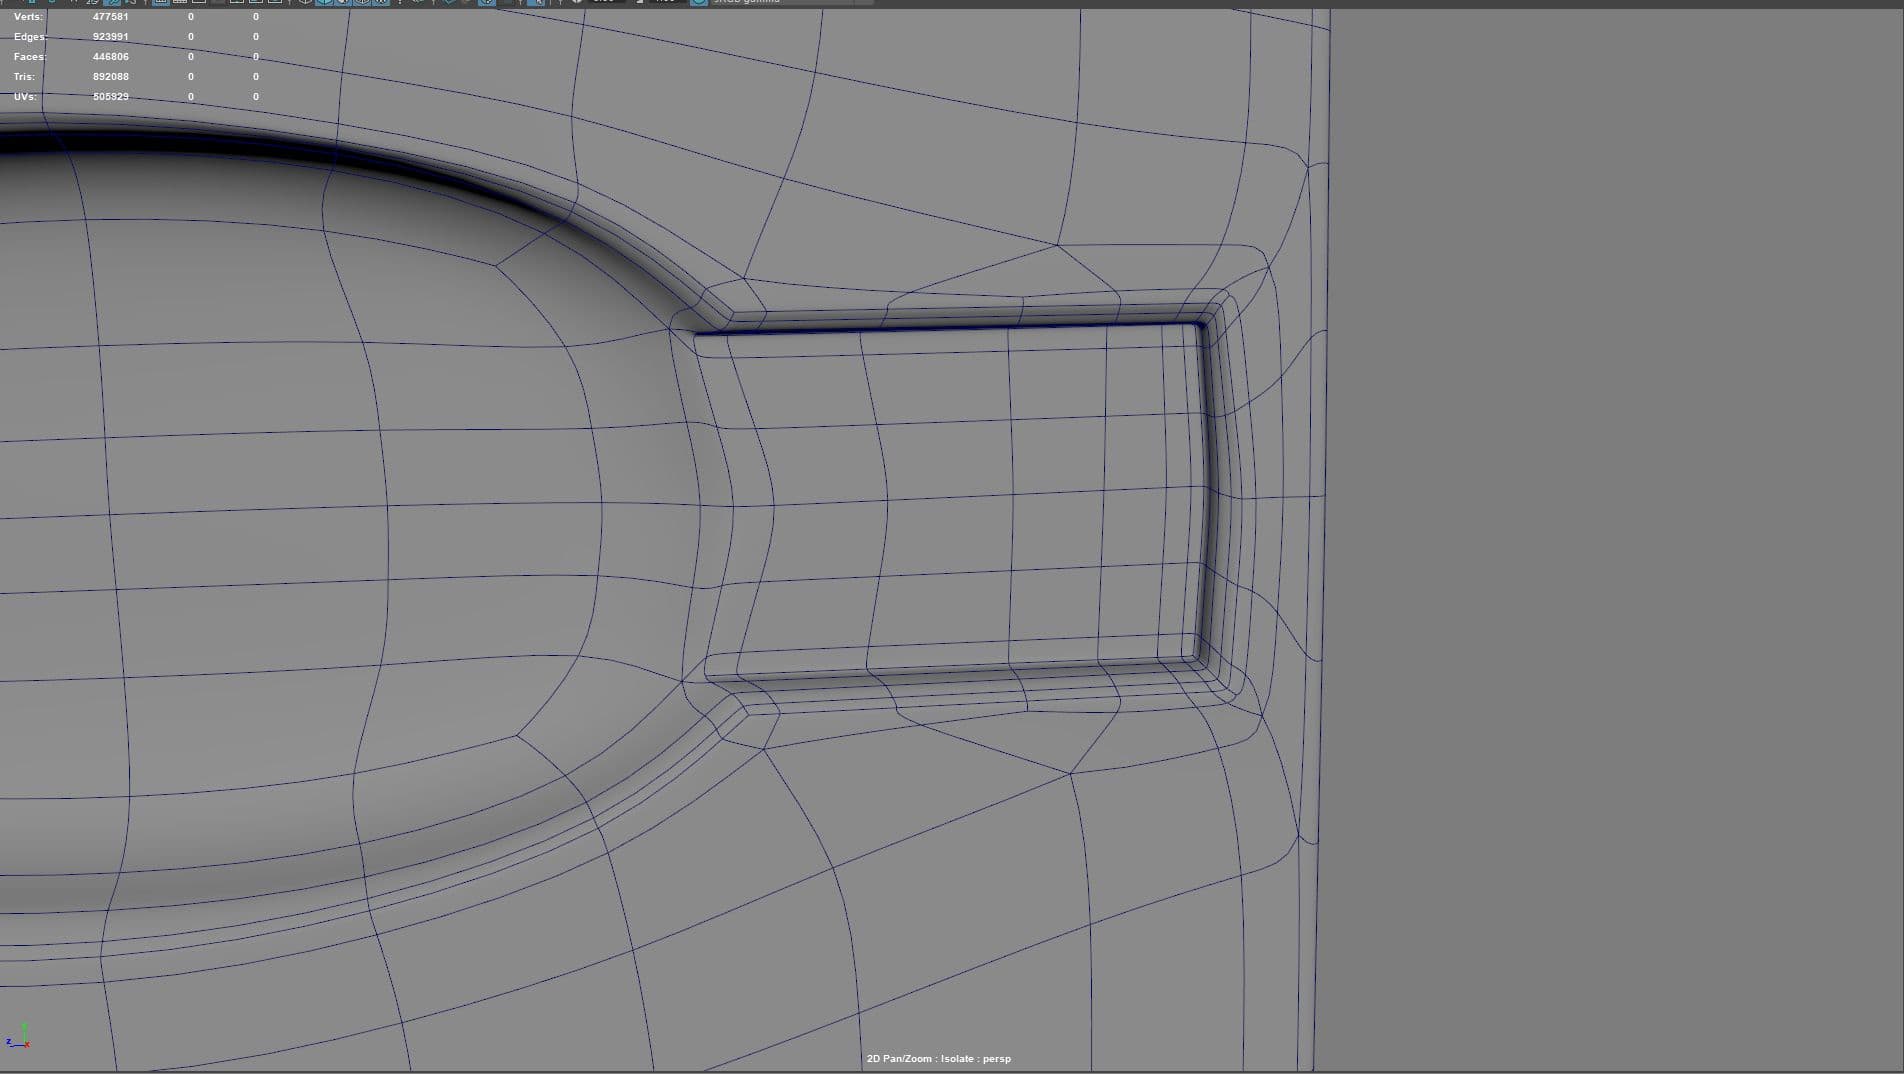
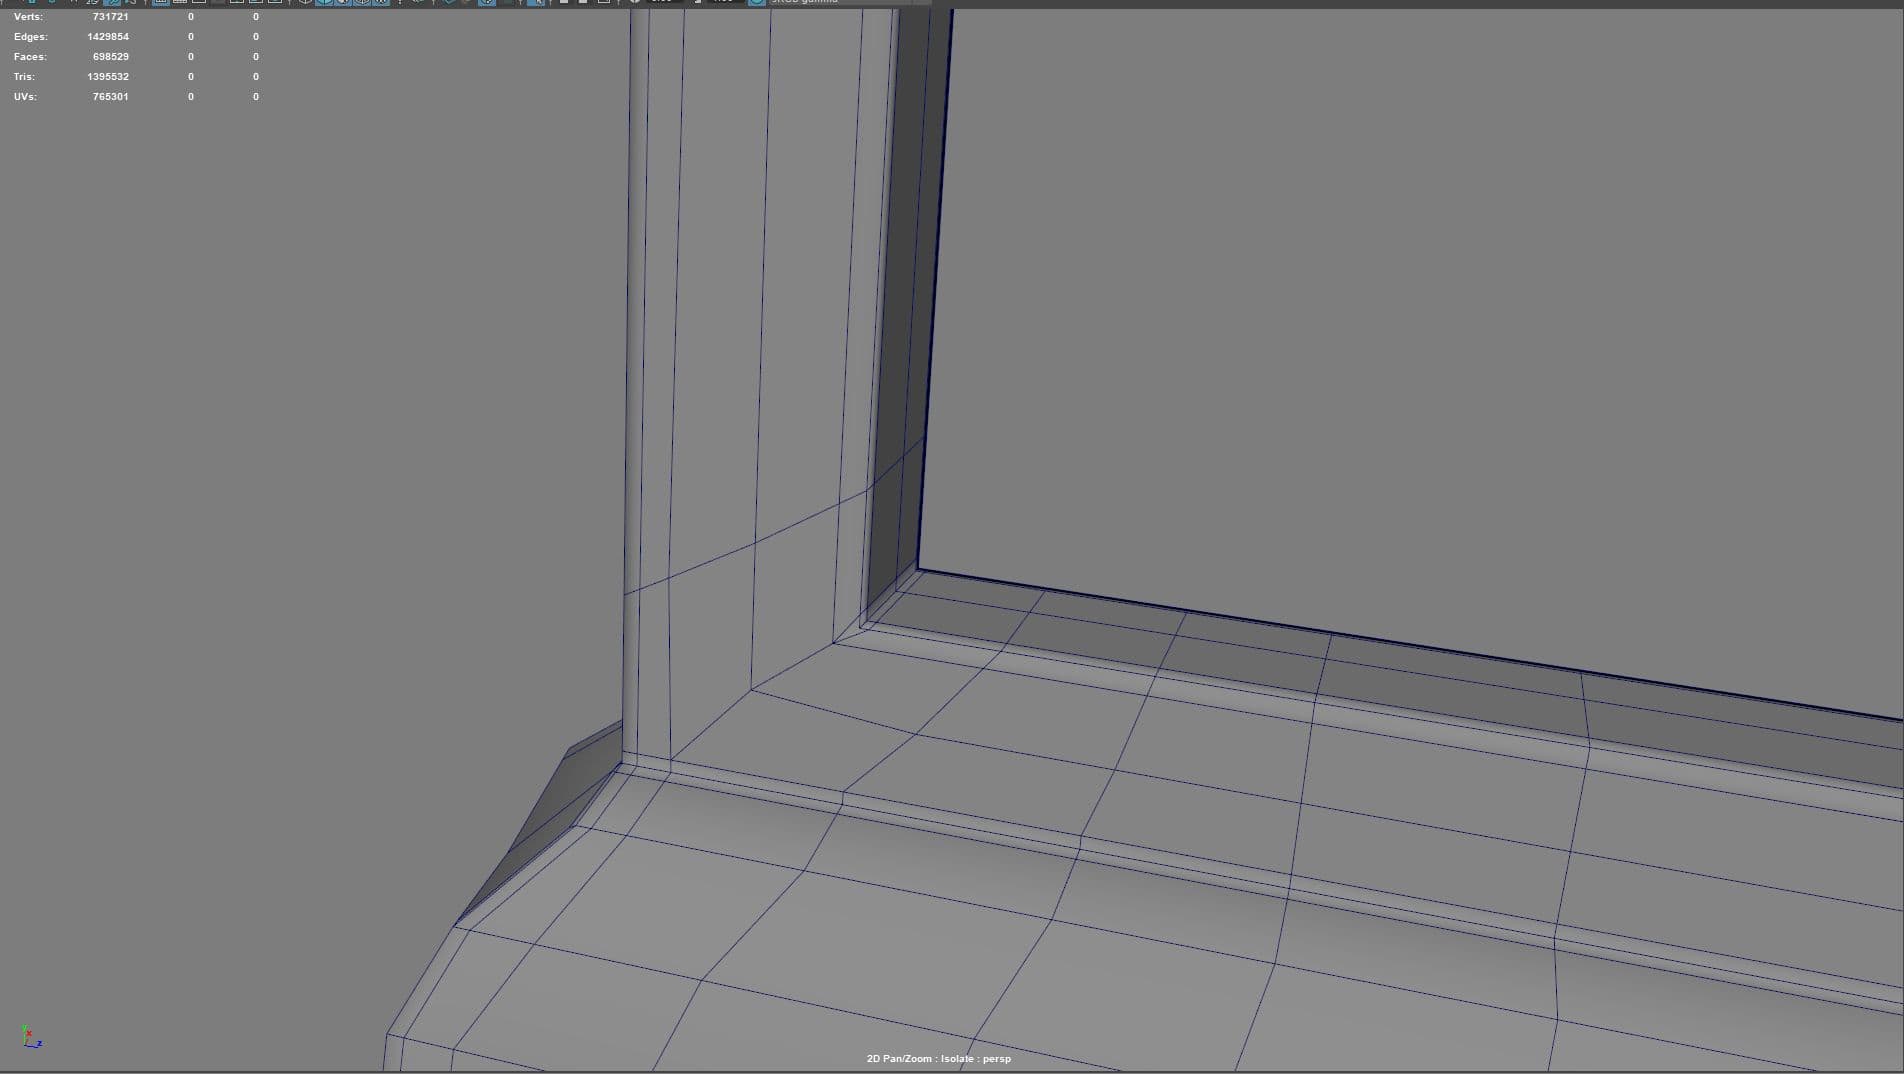
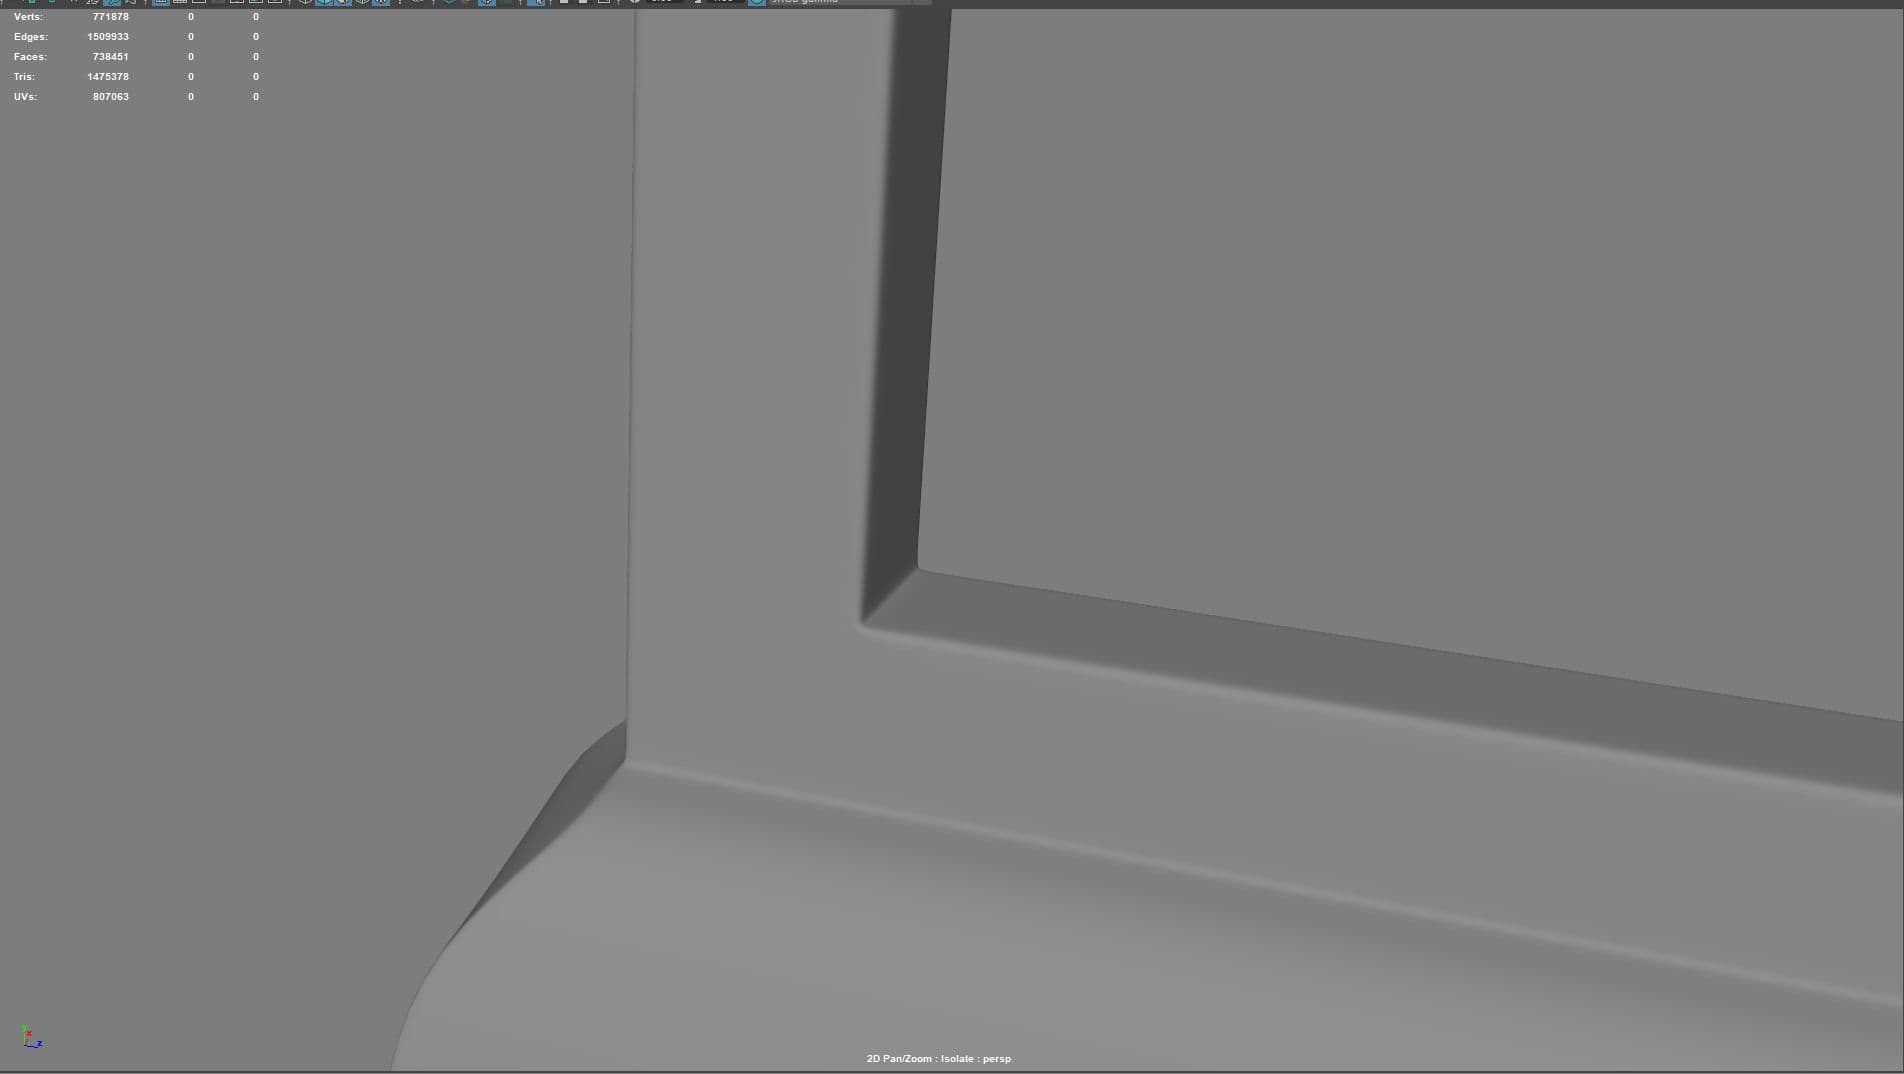
3. Creasing: Sometimes, the only way to get nice shapes and reduce texture stretching is to simply have enough topology to support the shape - and for film, we can be quite generous. Once I'm done with a lower poly shape, I will 'crease' the edges, and then subdivide it once. The creased edges will retain their shape/volume after subdividing, neat hey! Now at this higher subdivision level, I will add my supporting edge loops. This is by far much neater than adding your supporting edges straight to a lowpoly mesh.
I'm really proud to be the runner up of this contest, it was really great to see other students work and skills, everyone worked hard. It was a real fun challenge! It helped me to improve my skills a lot and get to know more about substance painter and the Rookies community.
4. Only model what you see: The Kombi has no base structures and very little interior details. This applies for texturing too!
5. Make a plan for finer details: Really think about what would be easier to achieve in texture with height/displacement maps instead.
Good topology is so important! Sure, hard surface models can be more forgiving, but the the best results come from the following:
Texturing an asset with bad UVs ain't fun guys. I didn't want my students to waste time wrangling poor UVs, so I spent a great deal of time getting them as texture ready as possible. I probably went a little far and tbh many production models will not be this clean due to time constraints. But I felt it was important to set students up for success, especially if it was their first time.
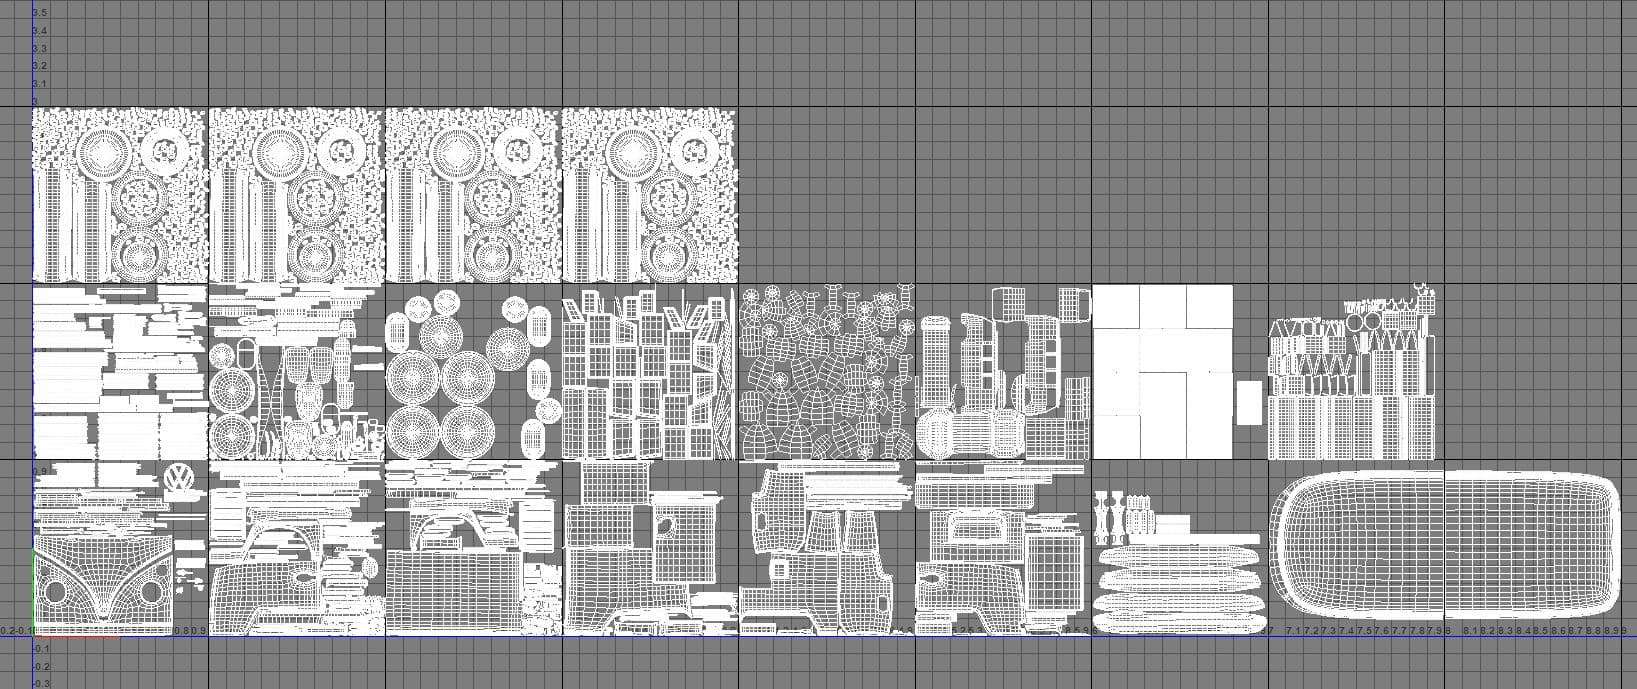
Things I kept in mind included:
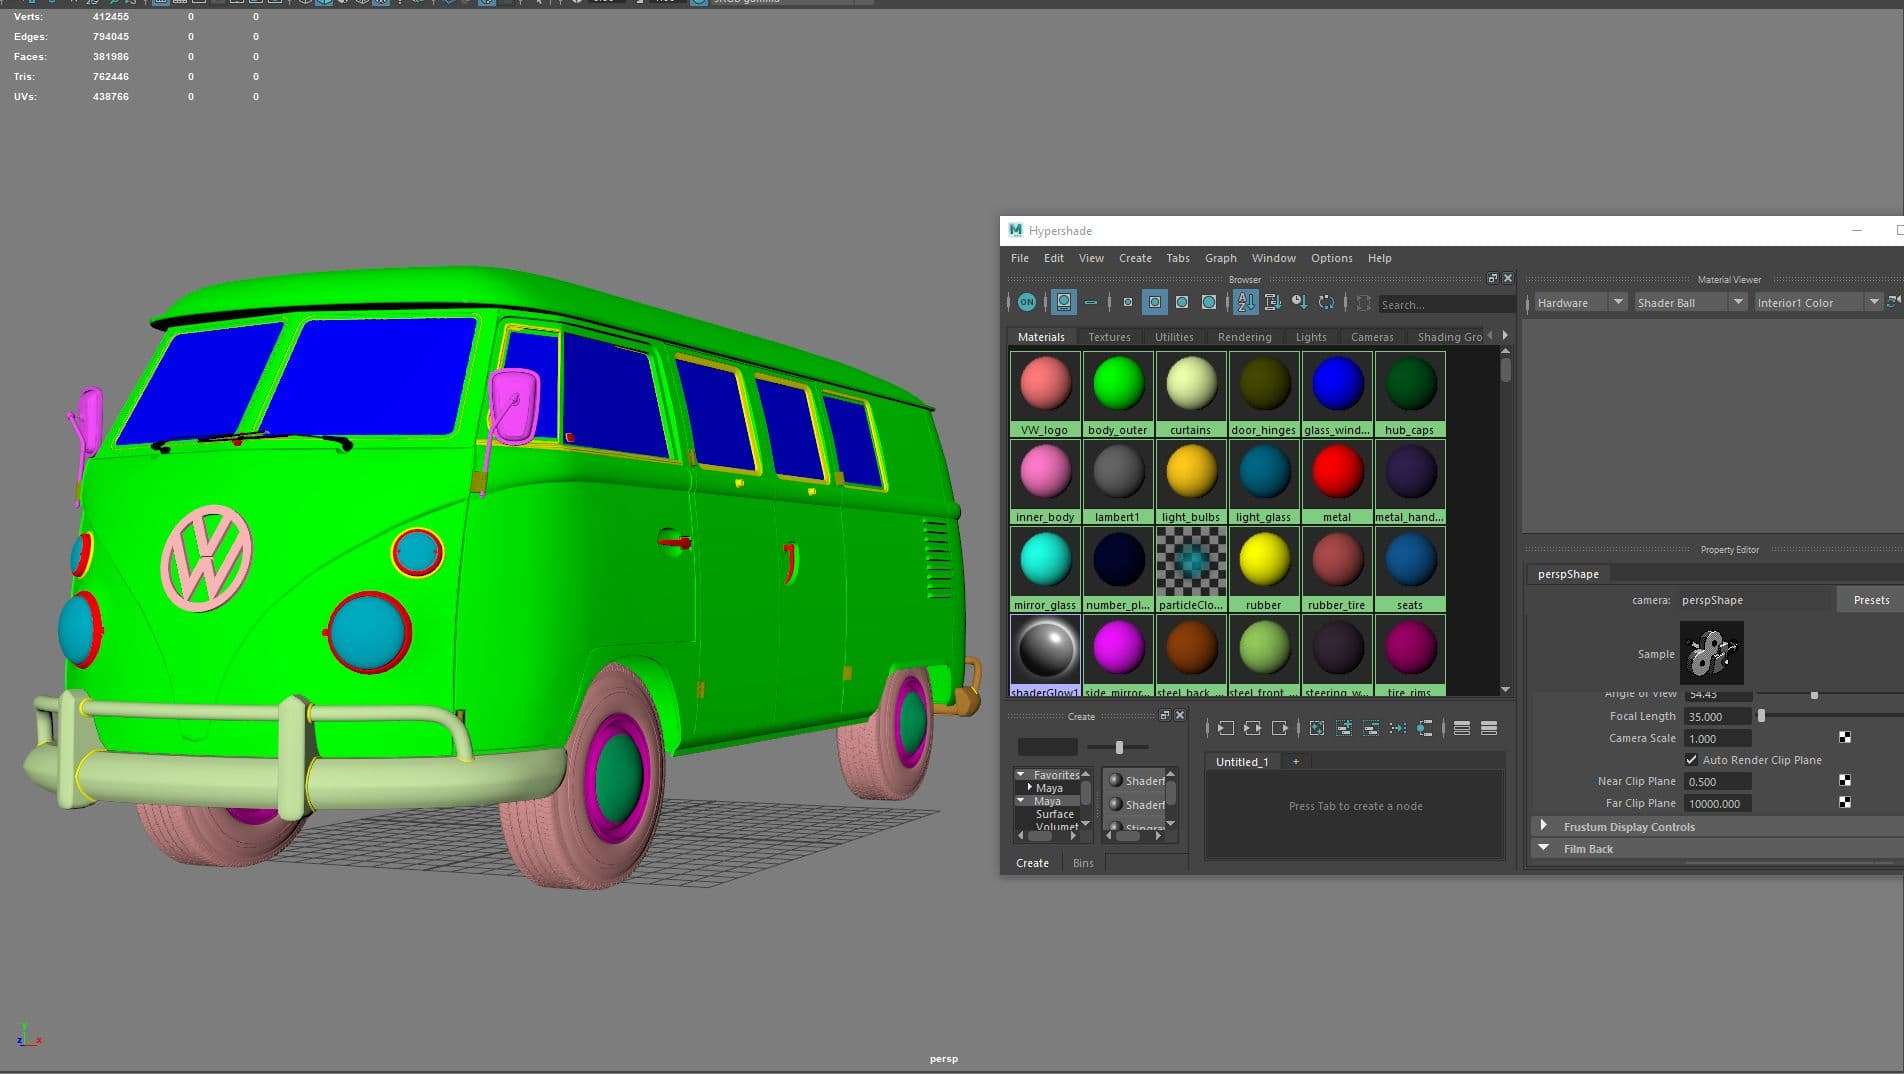
When exporting the kombi for the contest, we decided to set up some simple material ids to make your lives easier. To do this, we simply assigned each part a separate material in Maya, and exported as an fbx.
Loading the mesh into Substance is relatively straight forward - simply match the following settings:
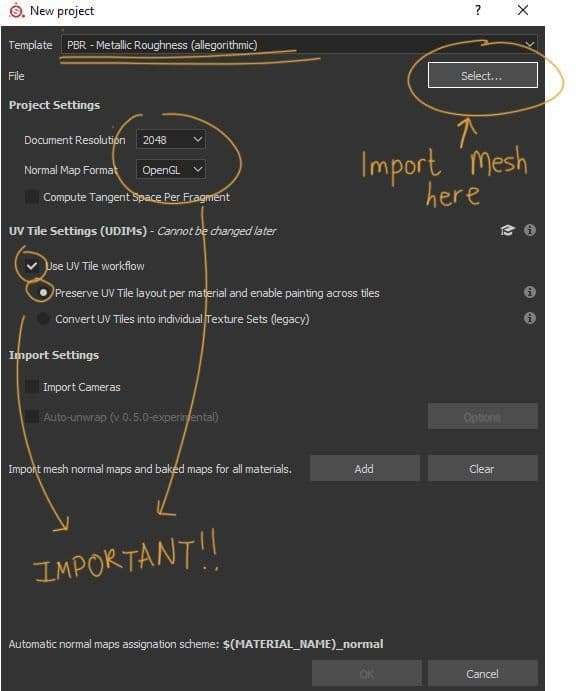
Each material will come in as a different texture set with its own layers, allowing for quick material separations. Also by enabling UDIM tile workflow, you will be able to paint across UDIMs and use Substance Painter to its full potential.
If you have a good computer, 2k resolution is a good start. Otherwise, bring everything in at 512 and only uprez one tile at a time as you work. Substance is great because it recalculates each stroke as you change resolution - meaning you can work lower, and export higher without losing data.
Don't forget to use Iray to preview your work!
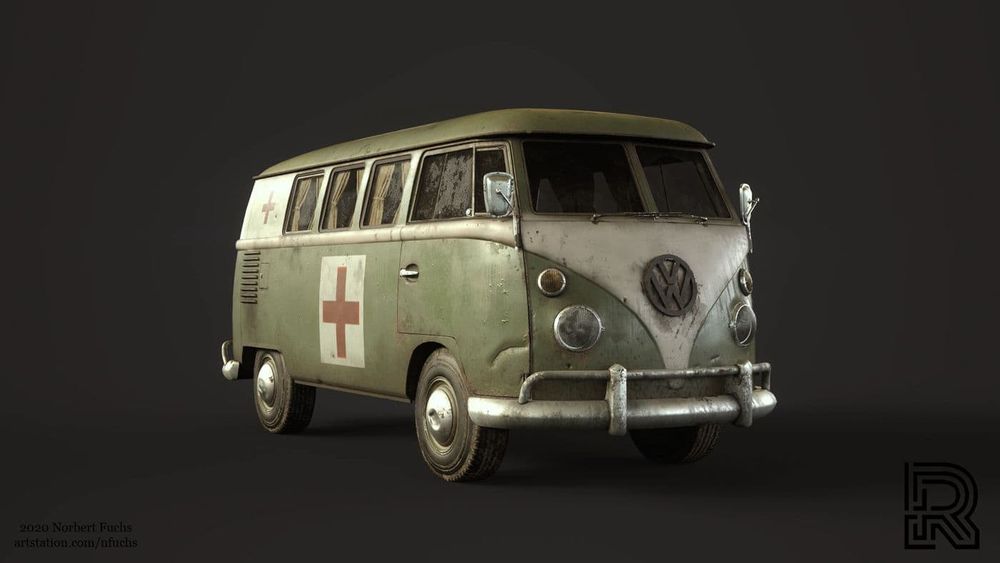
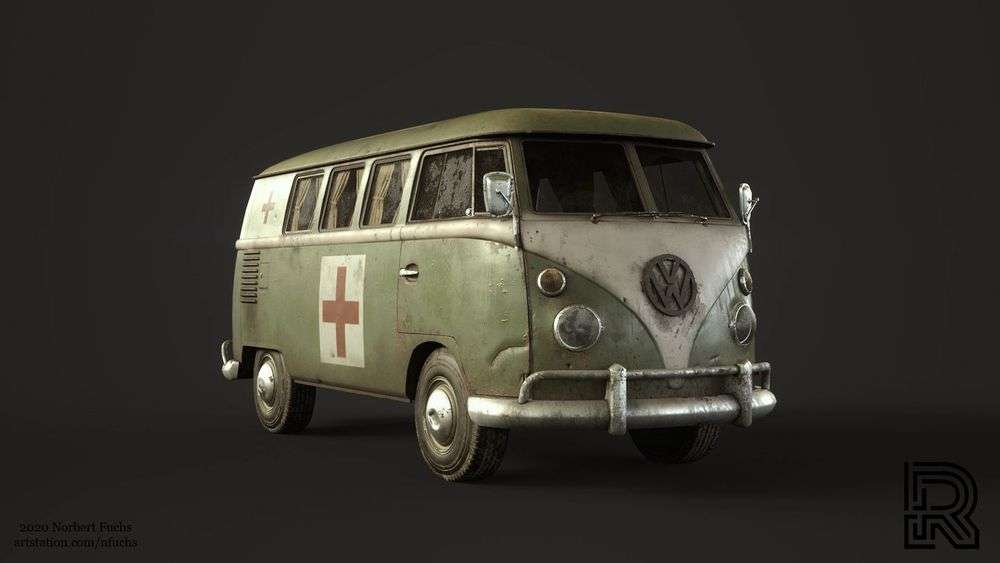
I was absolutely blown by the student community and their participation in the contest. It was honestly so cool to see my model textured in so many different ways. I was so excited that I would constantly check the page for updates and show off your work to my co-workers!
It was a challenging task to pick just a handful of winners - each entry was so unique and wonderful in its own way! We used the following criteria to help separate out our winners:
1. Creativity: Did the entry stand out?
2. Materials that were sensible and realistic: respond as they should to lights and their environment.
3. Presentation: Background HDRI/colour that complements the theme.
4. Breakdown: Guys it is SO important to show your steps and thought process. We want to know how you achieved the final result!
5. Quality and execution of secondary details: Think dirt that accumulates in sensible areas, windows with subtle scratches and smudges, roughness values that made sense for each material type. Even clean materials have some level of secondary interest.
6. All submission criteria met (i.e. correct cameras, rendered with Iray, made using substance software). This shows us you can follow directions.
Many more competitions I suspect!! In the meantime, download the kombi and get practicing. Not a texture artist? Why not try and rig/animate it instead! Or how about scrub up on your lighting skills and composite it into some footage? The possibilities are endless. And most importantly, don't forget to stay connected and reach out to us on Discord for advice and feedback.
I look forward to many more Kombi projects in the future!
Get the Kombi model. Download from here. Cameras are included in the .fbx file.