Layering Details in Substance Designer to Achieve Realistic 3D Props and Environments
Dagmawi Tsegaye is a self-taught 3D artist currently developing his technical and artistic skills using procedural tools. In this article he shows us how to layer details in Substance Designer to achieve realism in 3D art.
Dagmawi Tsegaye is a self-taught 3D artist from Ethiopia, aspiring to be a texture and environment designer in the game industry. In the long run, he is pursuing Art Directing.
Dagmawi is currently developing his technical and artistic skills using procedural tools, as they are versatile for multiple usages, fun to use (since they offer creating anything from ground up) and they are the future. In this article he shows us how to layer details in Substance Designer to achieve realism in 3D art.
Inspiration
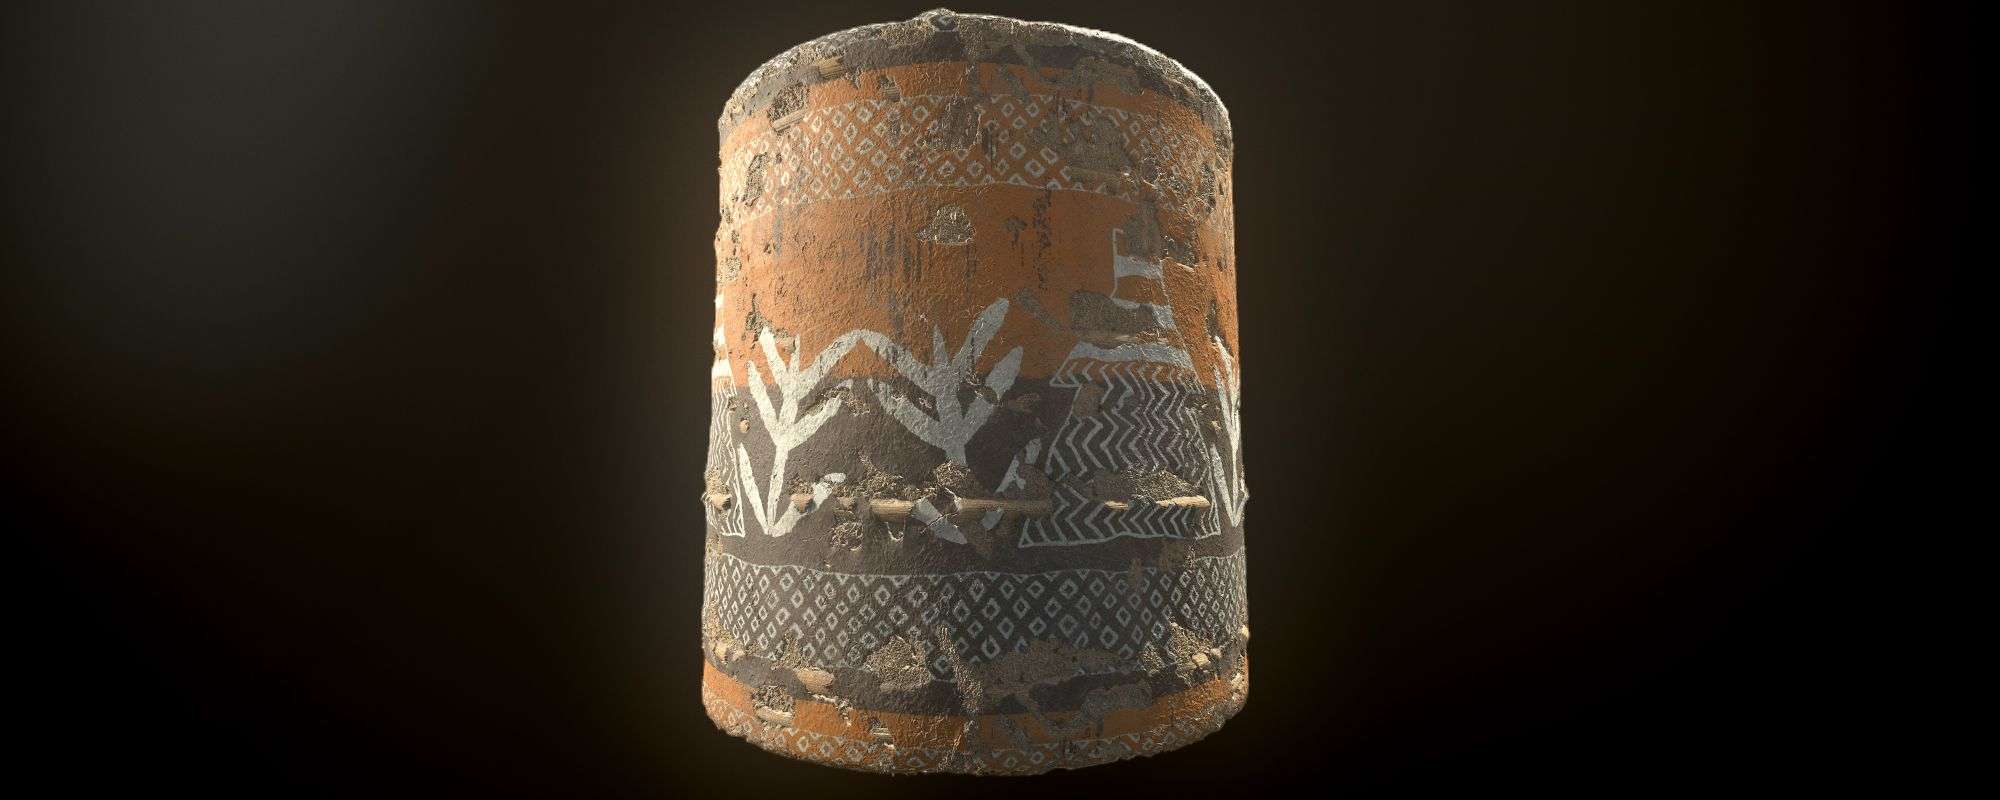
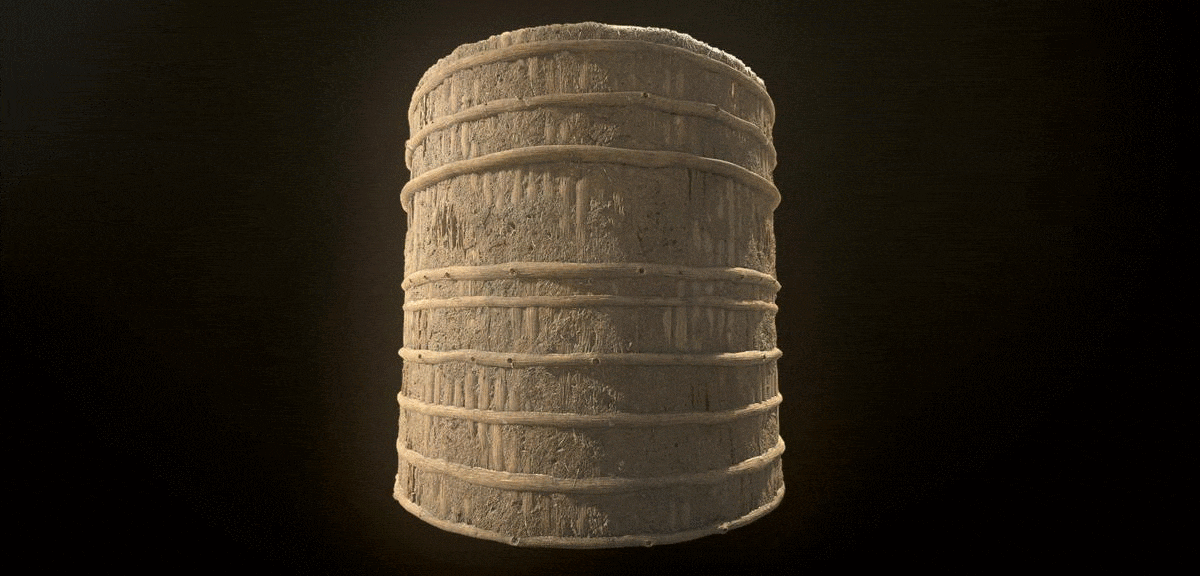
I never thought the next door's house wall, which is pretty common where I live, would one day be this interesting. Ever since I picked up Substance Designer, everything inspires me to create. I started my journey with Substance Designer by creating surfaces with artificial yet beautiful properties, such as tiles with different materials and ornate patterns. I wanted to blend in the skill of creating natural materials without overwhelming myself. This project is an interesting hybrid of these. After multiple experimentations and failures I’ve made this texture, let's get into the steps I followed to create this material.
Gathering References
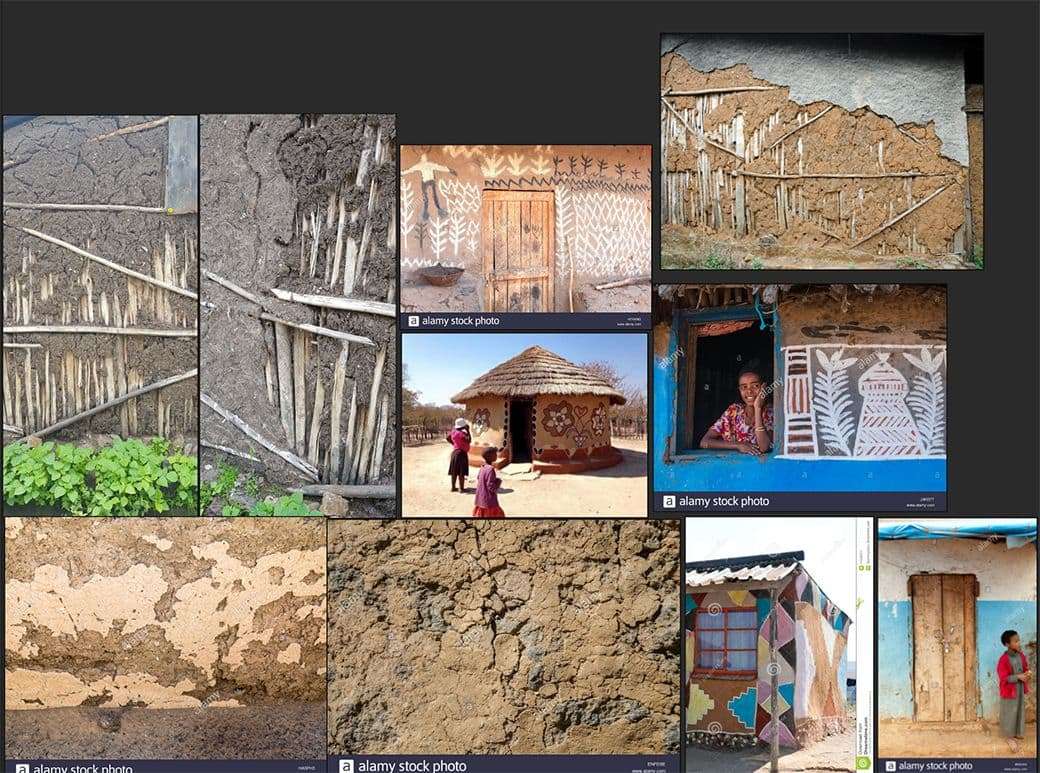
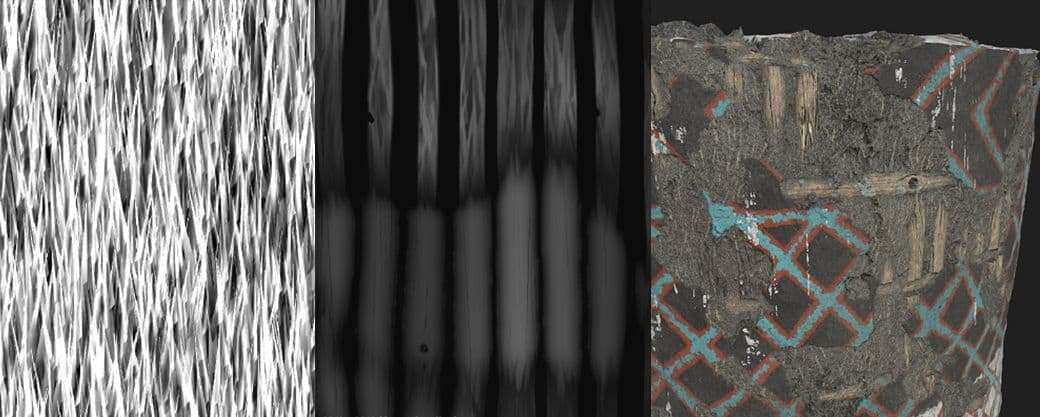
Of course, I began taking pictures of that wall for reference sake, and got into a bit of trouble with suspicious owners - I guess I’m bad at acting like I'm casually playing with my phone. Nevertheless, since that wall didn’t have anything past wood and mud, I started browsing around for detailed walls. My intention was to create a variety of walls so later on they would come in handy if I decided to create a whole village. I categorised my search by the wall’s distinct features that change across these walls. For example, wood has it’s own alignment, details and type, mud details, which were my focus points.
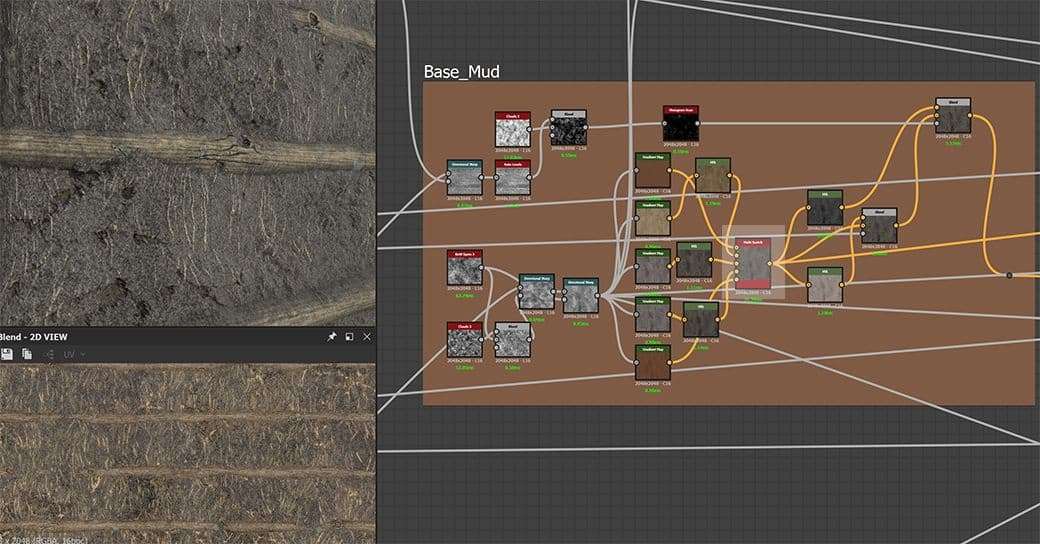
As seen from the reference, the wall has a complex layering. This is where, in my workflow, thinking ahead in technical terms helped the RnD process. I've seen these walls get made, and they're all constructed from wood, to then get slapped or coated by a mixture of mud and painted once the mud has dried.
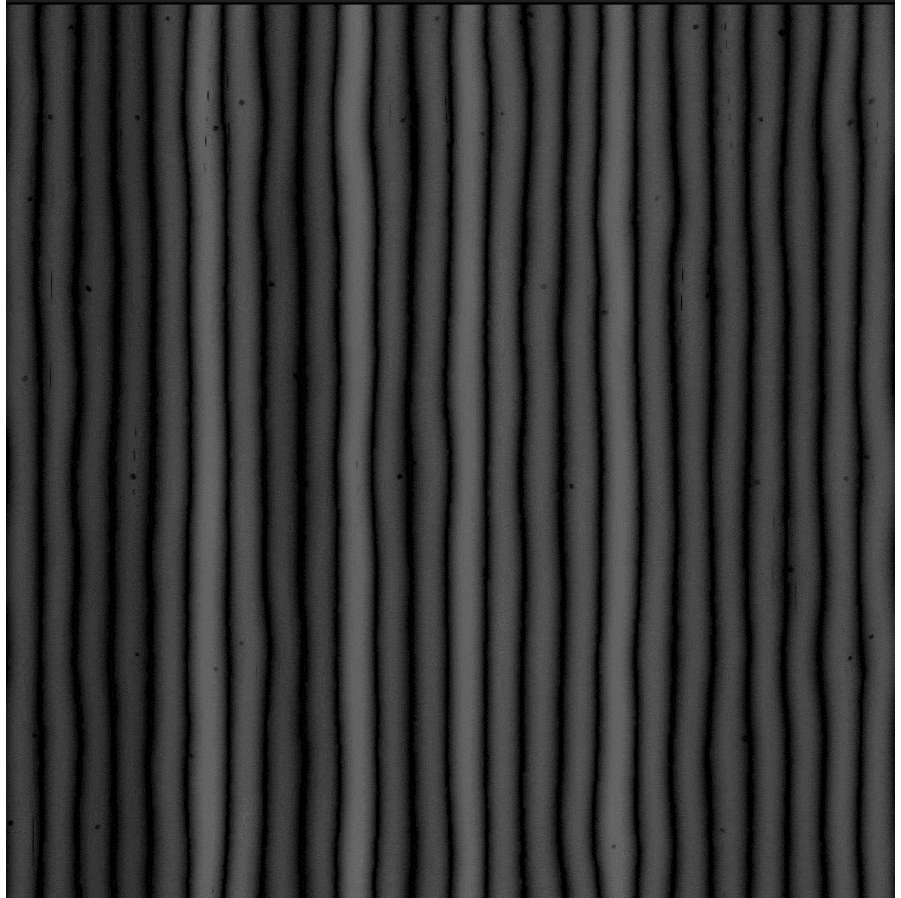
Understanding actual layering helped me organise some of my steps. So, I began by creating the wood planks, layering horizontal on top of the verticals after applying individual details.
Assembling the Wall
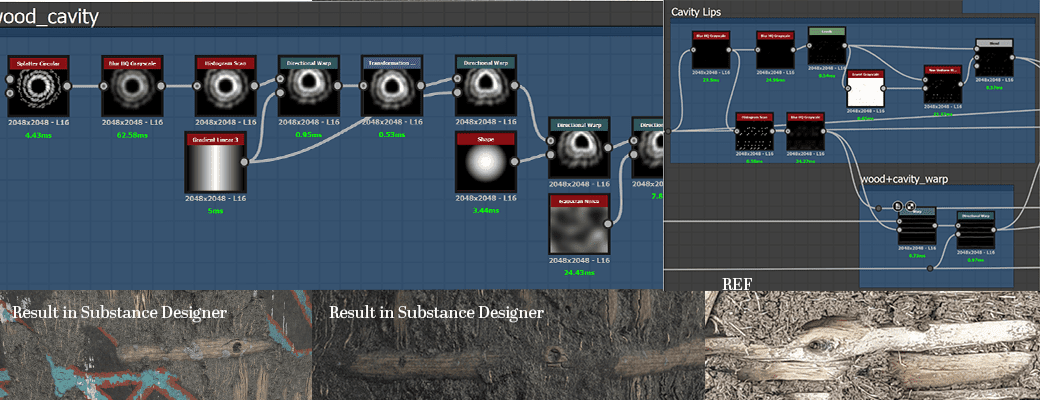
Creating tiled wood, knots, and cavities
After tiling the wood and creating a few random warping across them, I later proceeded to create the knots. Besides natural irregularity, these pieces of wood have knots warping the wood outwards - subtracting these knots from the wood and later on adding cavity lips can give a good output.
I created these knots using a simple splatter circular with paraboloid shapes squashed randomly, so I could get a bumpy interior detail. Since no cavity is perfectly circular, randomising the radius of splatter and adding extra warping in different directions can give a varied, more realistic look. Once that’s achieved, making them blurred until they appear unified will give a rounded appearance to the knots, with less sharp detailing when they’re added to wood. I proceeded to add the lips to the knots for a smoother blending with the wood surface.
Most of the wood has cavity/knot, splits and/or chopped layers exposing mashes of tall splinters.
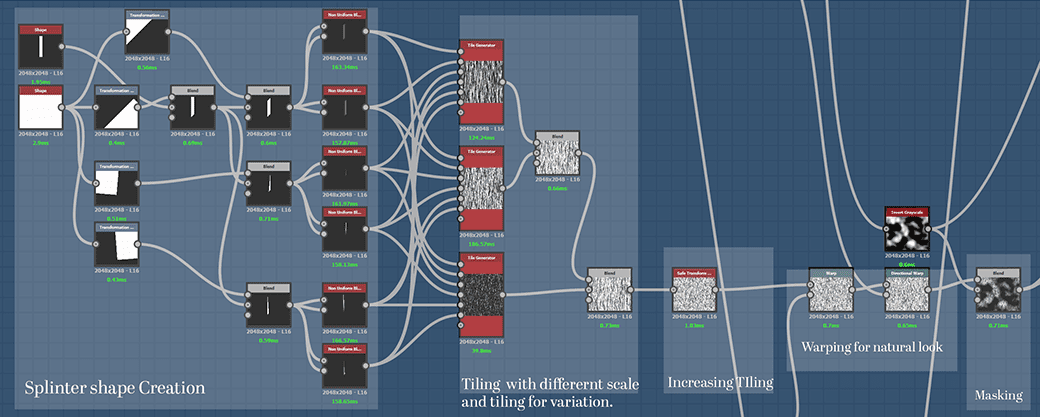
Creating splinters
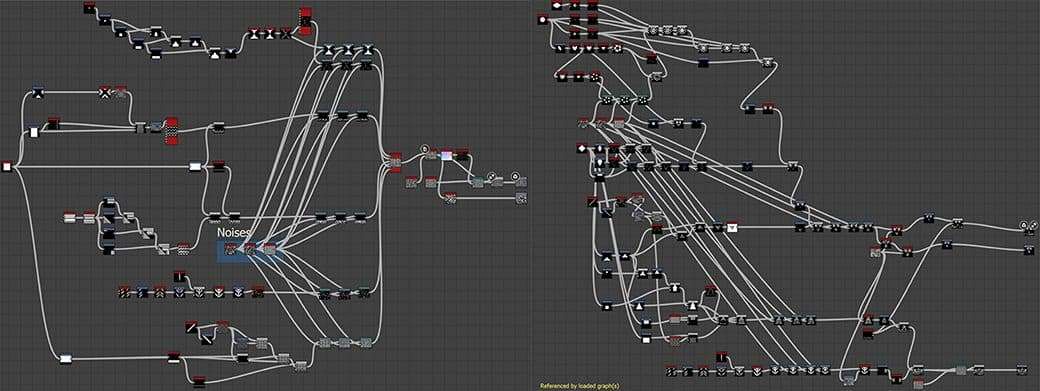
As you can see from the reference, there is a wearing off effect on the wood. After multiple experiments with directional patterns and noises, I created this effect using a series of tile generators with custom made patterns as you can see below.
For those patterns to have different directionality, I used the non uniform blur node. This node provides blurring using input values. Besides that, it can also contain parameters to control the blur directionality as well. Once I blurred and tiled them up, I masked them using the wood tiles and later, to create variation, I masked them using a combination of noises.
Creating the mud layer
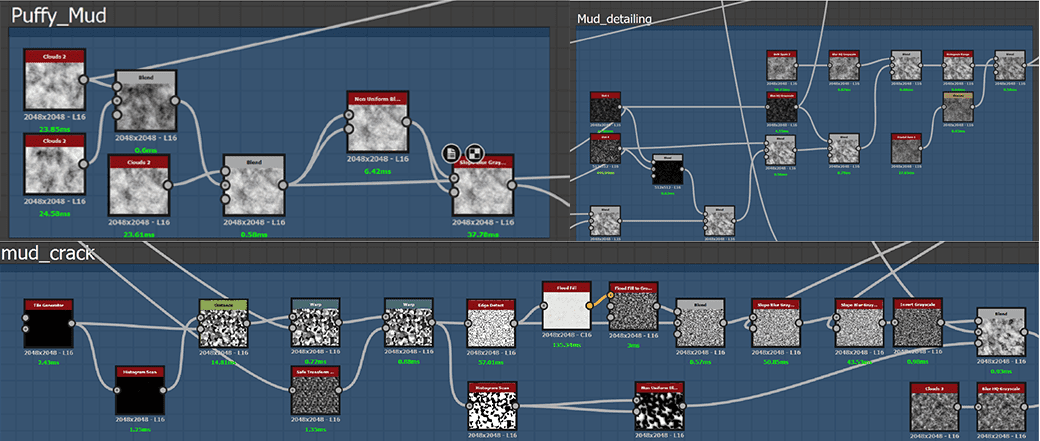
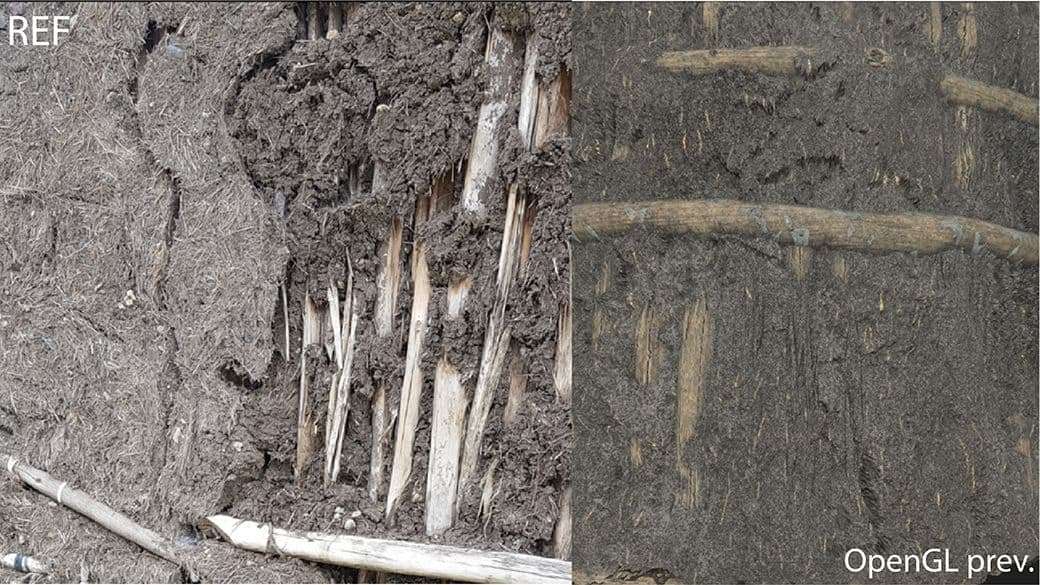
Dry, cracked and weathered mud. That’s what I gathered from the references, as a general detail. Later I had a deeper dive to add another layer of detail, such as grasses (a little tip, grass is used to hold the mud together for durability) and holes.
You can see the mud layer has a bubbly quality, puffing out from the wood gaps and the layer completely covering the wood has a rather flatter and noisier look. I used noises with few micro details such as Clouds 2 (with different seeding) and later on used a non uniform blur node to get a little directional bulbing form, then later slop blurred it slightly to gain a little more deformation and roughness on it’s form. I then proceeded on to more micro details using noises with a wider variation of values rather than having an overall balanced cloudiness.
While adding the cracks, I didn’t want to go crazy, as this is a material to hold every characteristic of the wall. So later on I included it as an exposable attribute so whenever any project insists on that detail inclusion, I can get a quick result from this material.
Adding the mud hole dents and grasses was a routine step, it involved tile generators and different warps for a natural look. The only difference between these two is the slope blur node used to warp the edges of the circular holes, and few other noise blendings for an interesting variation in height.
One thing to not, is that the grass is visible but never pokes out (check reference). Since it’s dry, it only reflects light, it only adds visual interest as long as the mud is exposed. So, I decided to include it only on the normal map, so that later on I could have control over its blending opacity with the rest of the layers. Since it has a strong presence at random areas, it won’t cause any harsh displacement results since it’s limited to the normal map.
Once I completed these details, I proceeded to exposing parameters based on qualities that are prone to changes. I used references to distinguish which property changes across these kind of walls.
Creating a Flat and Paintable Surface
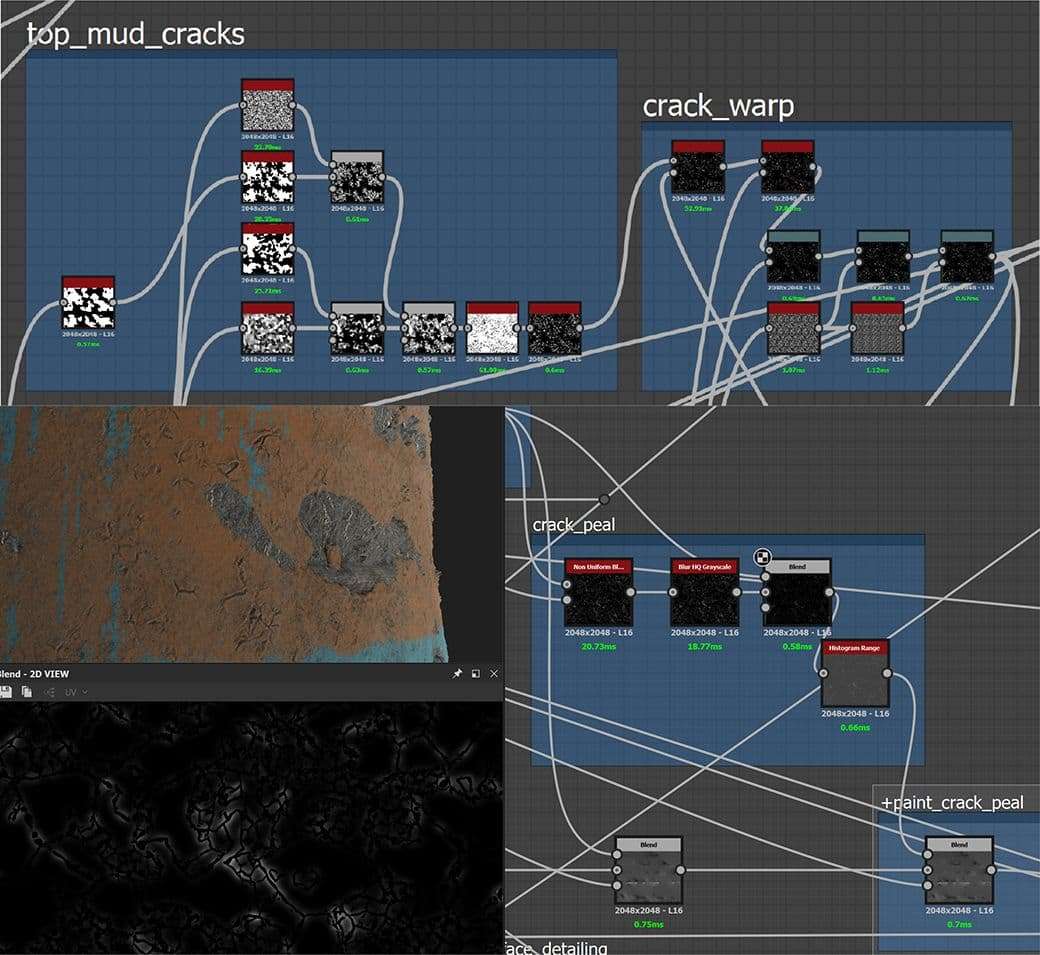
I used the height blend node to combine the mud and wood so later I could also get a quick and accurate mask for both. But the problem was that it gave a way too accurate mask for my work, since that would cover up all the mud.
The mask by itself is needed to represent aging and wearing off at the same time - if we paint every remaining pixel from that mask it would look off. Guess what? It's a non uniform warp node to the rescue! By plugging the mask on both inputs, it blurred it from within. This later could be used along with the histogram scan to sharpen it down for the paint layer readable separating it from the damaged parts.
I can stop here, but the reference shows there is some cracking and peeling on both paint and at times a bigger break when there is no paint and it remains dry and flat aka in a “ready for paint” state. Using the created mask, I masked cell 4 maps with different scales and blended them. Later on I blurred it a bit for a less sharp cut and slop blurred for a less geometric shape to the surface.
I used a blur node and subtracted it’s input to create the peel effect. It catches light in an interesting way and really gives the eyes something to nibble on.
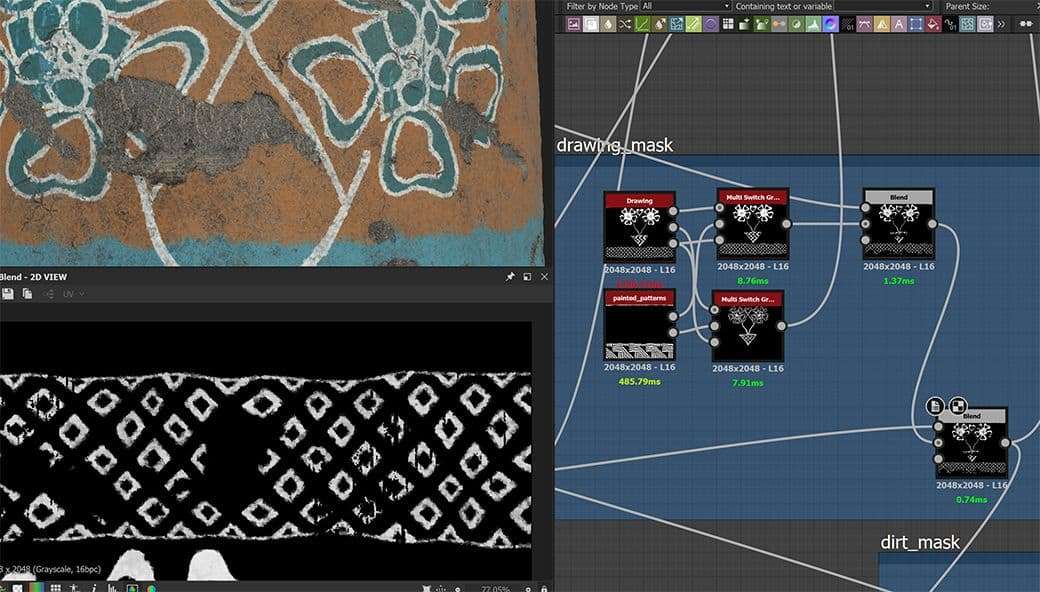
Creating the Paint Patterns
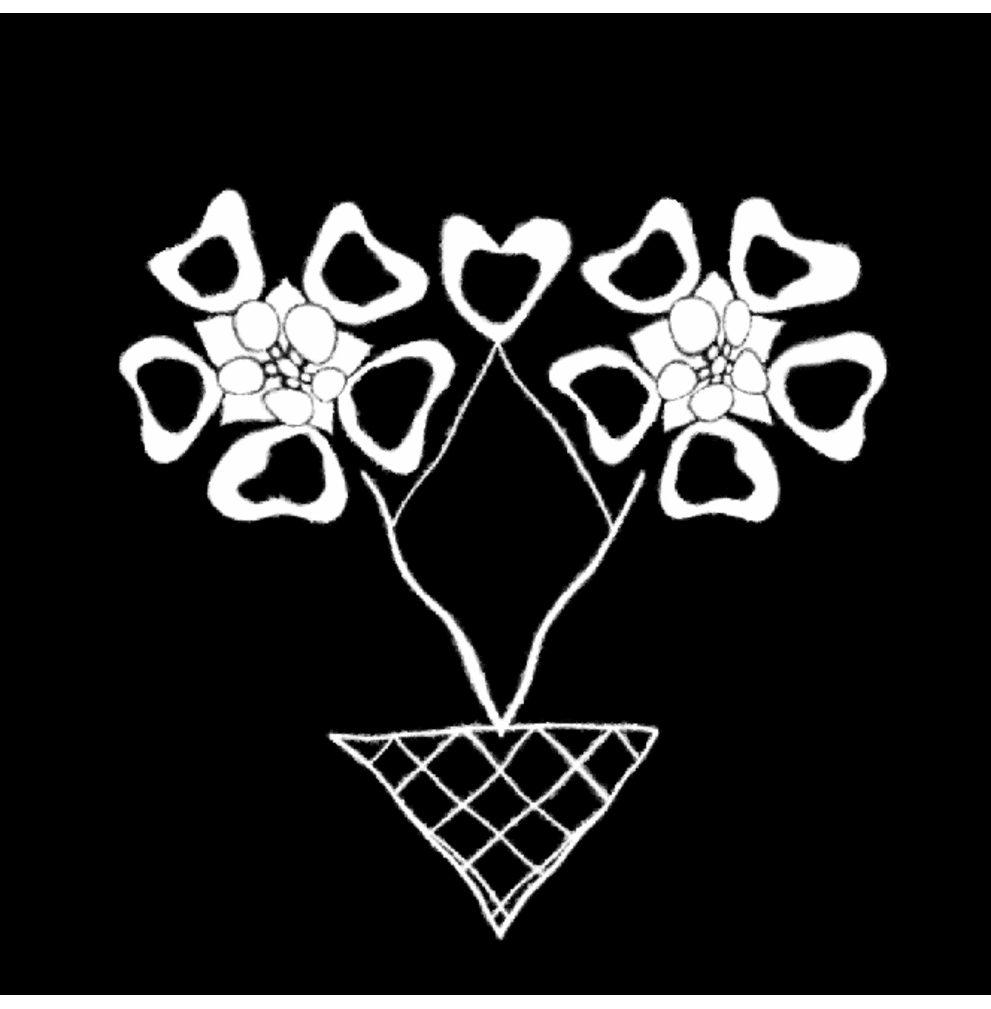
Surprise, surprise! I got another layer! It’s common for these houses to have their own character. It can be a small traditional pub or grocery shop but hey often have paints on them. After gathering some references of interesting patterns and paintings, I managed to recreate most of them and some created by myself after playing around with pattern creation nodes.
I created a couple of utility nodes based on the scale of the paintings. And had their fill and border separately available for output, which allowed the paint to have 2 different colours as seen from the references.
These patterns are created using simple nodes such as splatter circular, transforms and blend nodes.
Since these patterns are painted on with a brush, they have their borders warped and jittery. To create that I also used slope blur and subtracted a directional noise to fake a brush texture. These might not be very visible, but they do add more variation over the paint.
You can see I’ve used different black and white values for the patterns. This gives me more flexibility later on to either create a mask or create random pattern colours when using the gradient node.
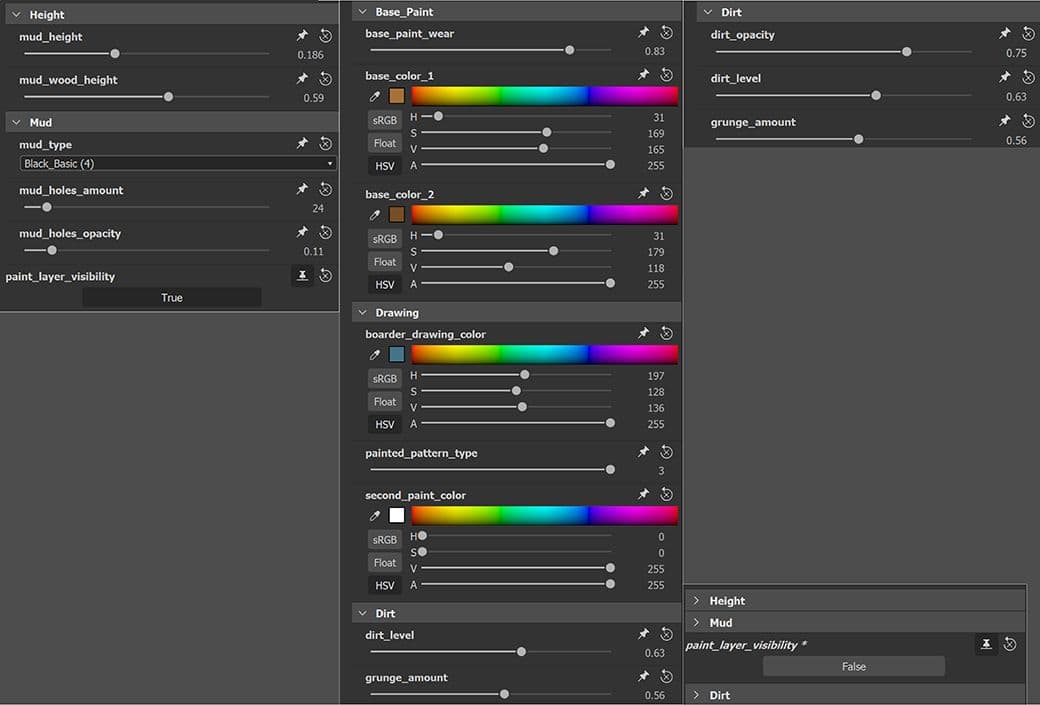
Exposing Parameters
By utilising multiple features of Substance Designer, I was able to expose properties I found desirable. For example, I created 4 colours, each for different mud colours, and later I want to change it as I go on creating my huts. I can use the multi switch node to take all colours and output just one from them, by exposing the selection option.
You can easily get carried away for the sake of absolute control over the texture you created, but the whole idea of texturing is to follow context. In mine, I have a traditional painted mud wall. Given that, it’s much more sensible to have the freedom of changing paint colour, pattern type, damage amount, height control for the wood and mud, and/or dirt amount accumulated over the wall. Here are properties I chose to expose. An overview over general properties, nothing too detailed yet:
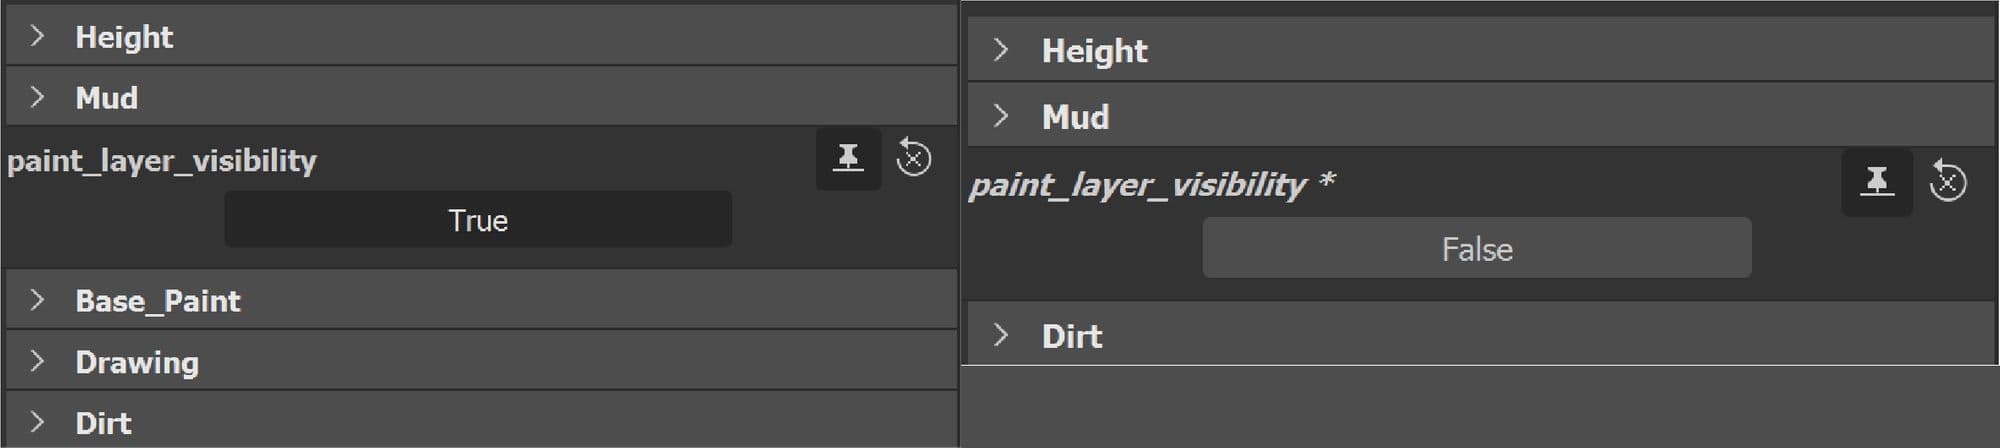
As you can see, the whole base paint group’s accessibility is dependent on whether or not base colour is on or off. Once it’s switched off only dirt that interacts with the wood and mud will remain active. And if colour is enabled, base paint properties are visible for further adjustments.