
A Guide to Detailed 3D Mech Character Modeling
Andrei Le Mézec, a VFX student at Isart Digital Paris, shares his guide to building complex and detailed mech characters from scratch.
Andrei Le Mézec, a VFX student at Isart Digital Paris, shares his guide to building complex and detailed mech characters from scratch.

Andrei Le Mézec is a 20 years old VFX student at Isart Digital Paris. Andrei started as a self-taught 3D enthusiast at the age of 16. He has always been attracted to art and cinema, and joining the VFX world, was the perfect combination of his two passions.
In this article, Andrei outlines his guide to building complex and detailed assets from scratch - especially his 3D Mech Character inspired by 'Bumblebee' and the Transformers franchise.
Time...time would be the most important part of such a project. And time goes with motivation. Modeling a transformer can take up to several months. We all know how tricky it is to keep focused on one project for that long, even more, when it’s only about the modeling stage. My tip here would be to have side projects or even do it as a side project.
Working on many pieces at a time helps with motivation. It may take longer to finish one piece, but you’ll finish it. Jumping from a project to another helps to get a fresh look at your work once you get back on it. Taking a break from a project gives you more pleasure returning to work on it. Keep your motivation going!
Gathering references is key before starting anything. Gather all the references you can find online as they will help you achieve a precise model. The more references you have, the faster you’ll be able to work. You’ll have to study your asset and understand how each piece is built and works. Look at movies, take screenshots, look for concepts arts on different art platforms. Some people may have already modeled that robot you plan to do.
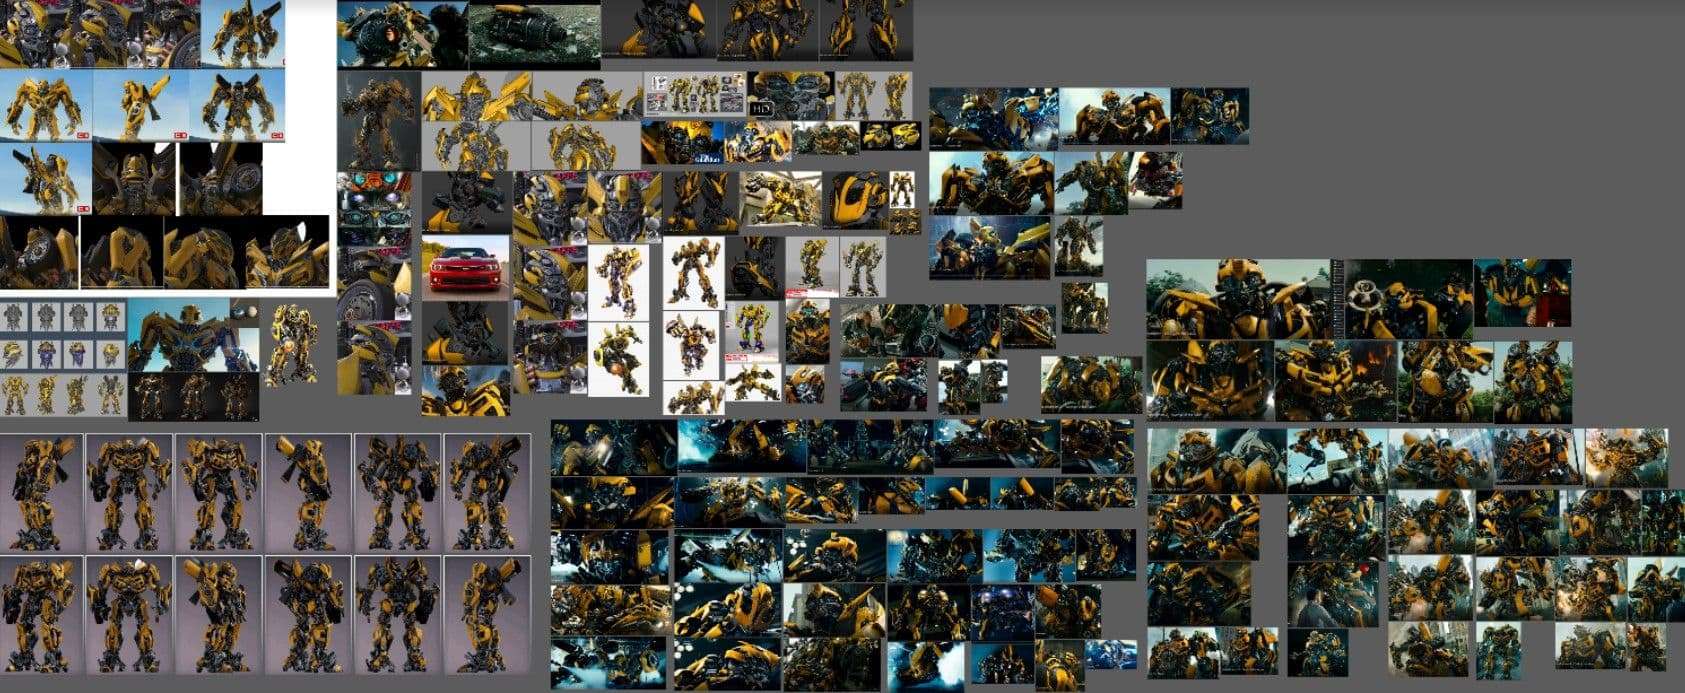
I used the software called Pureref to organize all my references. It's a great tool to arrange images in groups, so you won't get lost while searching for a specific reference.
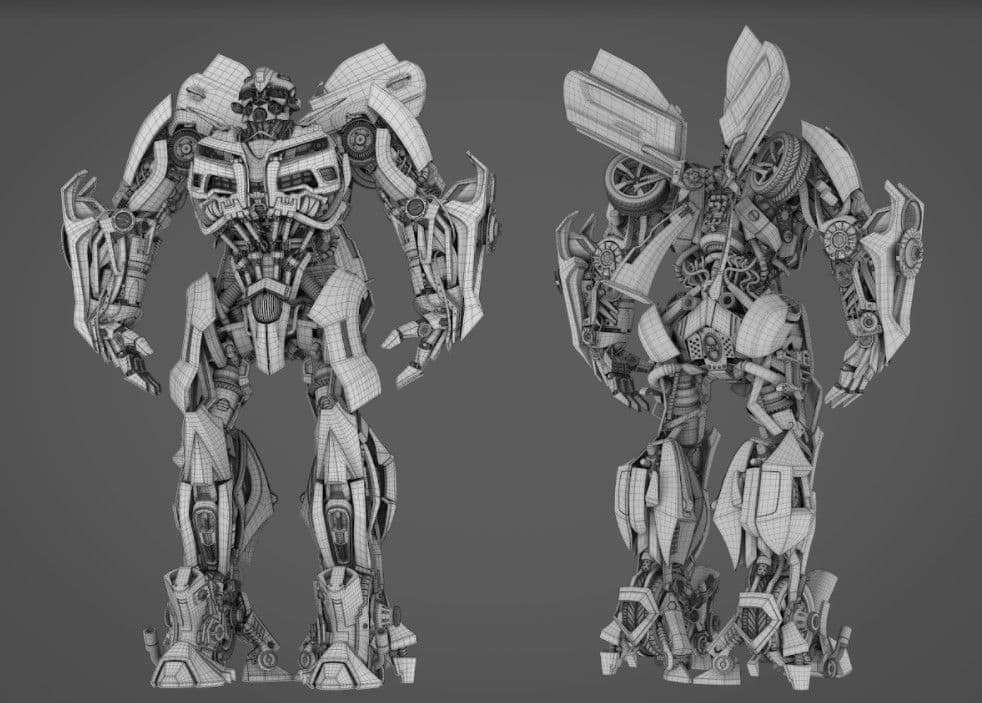
One of the most important references to gather, are orthographic views, also called blueprints. They are side, front, top, and back views of your model. Setting them up in the orthographic views of your 3D scene is a must, to get perfect proportions.
You can be sure they are rightly positioned by placing basic 3D shapes for the body and the head. Make sure they fit the front reference, then arrange and place the other references to match your 3D blocking.
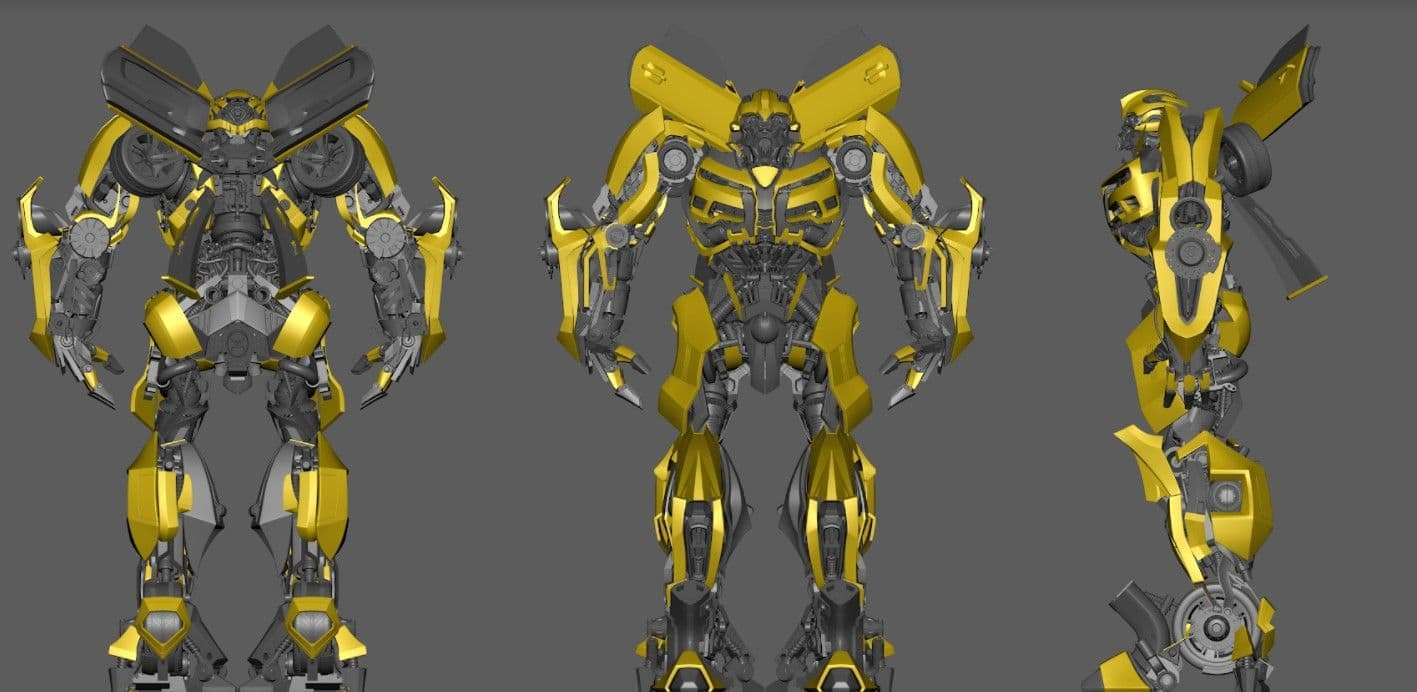
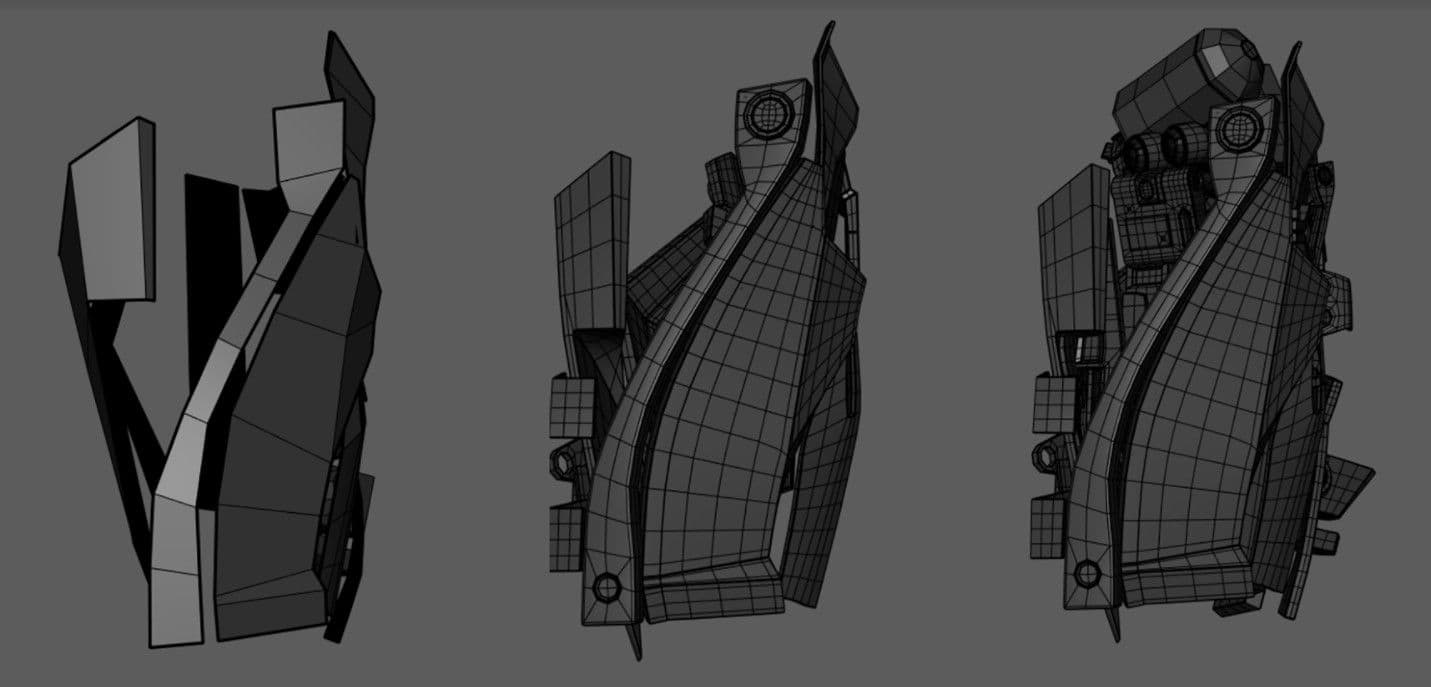
One more step before getting into the main subject! Blocking out your model is crucial before you start detailing your asset. Even if you do have blueprints, blocking is quite handy when it comes to placing small parts of your asset.
Without blocking out your asset, you might get good proportions by using blueprints. Yet, when it comes to details, you will notice that small pieces from your references will not be well placed on your model. I like to call this part detailed blocking: placing down all the main shapes of a body part but keeping them very low poly. This allows you to make changes in the way they are shaped and placed. Do not underestimate this step!
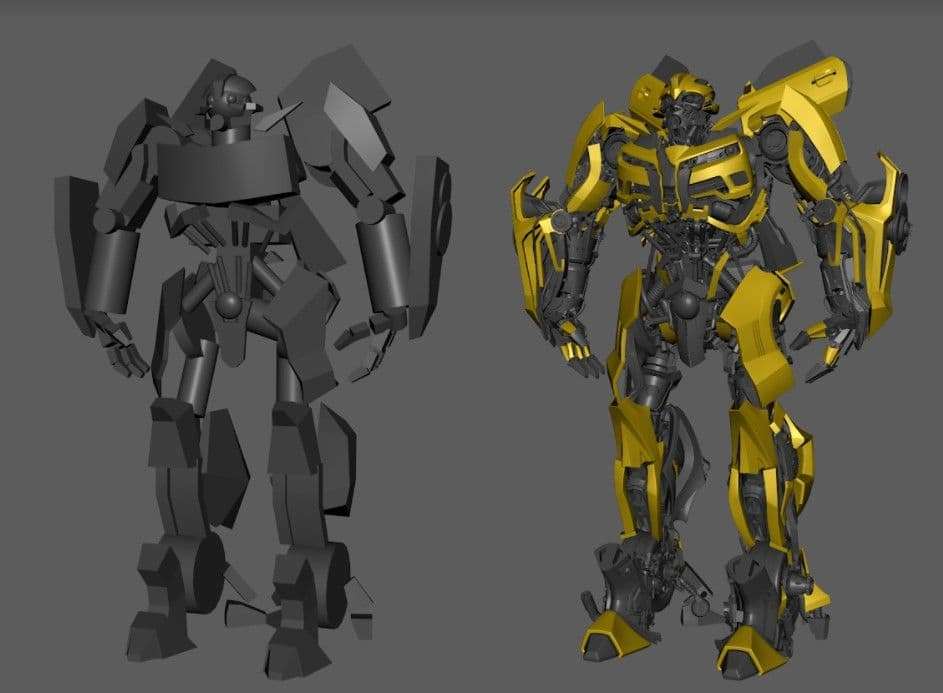
If you studied your asset well, you should know where all the joints are. Plan ahead how different parts of your robot will be moving.
Otherwise, it will be tricky to rearrange pieces later to create your joints. Place down cylinders to mark your bone joints and make sure you don’t obstruct them with other pieces, so they can work smoothly.
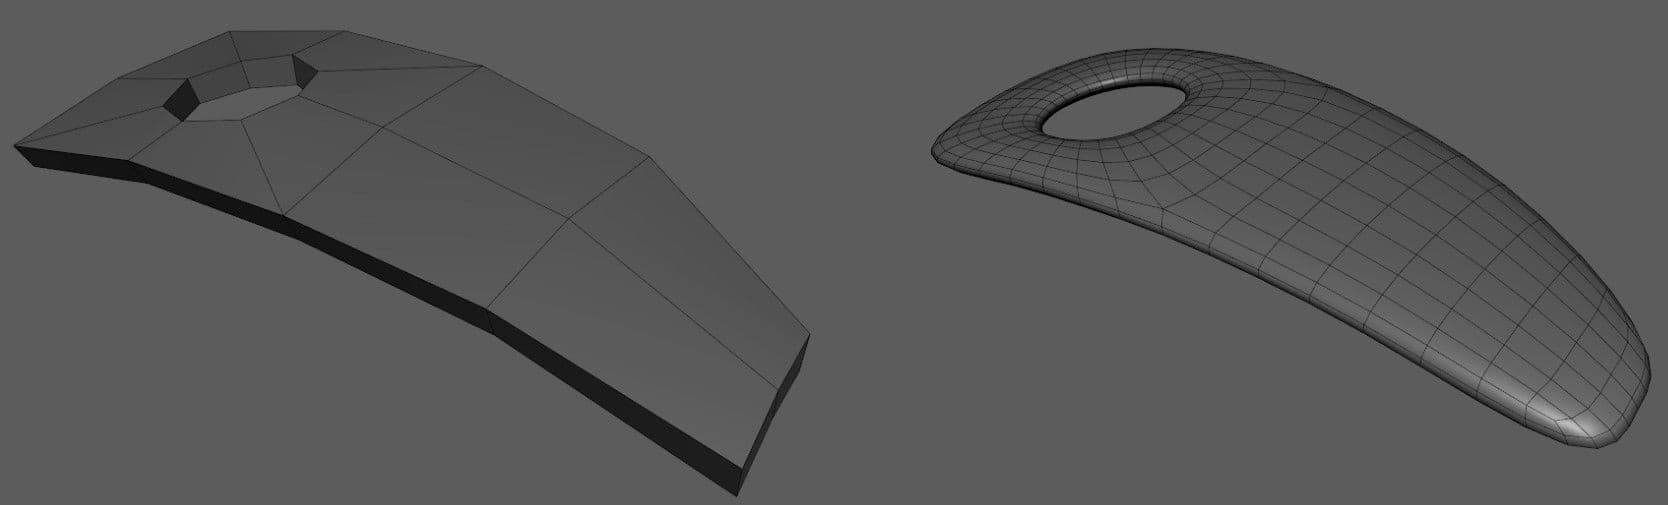
Now the fun part begins! If you don’t know where to start from, use your detailed blocked pieces. I generally like to start from the head and work my way down. Extrude your pieces and start subdividing your mesh so you can work the shape better. If you are working on rounded shapes, avoid adding edge loop cuts by hand, as it won't adapt to the shape.
The best way to add definition is to actually smooth your mesh. But before doing so, check your hard edges. There are edges on your mesh that you want to keep sharp. Add bevels once you’ve got the shape right and a balanced amount of polygons. What I mean is, to keep polygons as square as possible to avoid texture deformation after unfolding UVs. If you are working in Maya, the Crease Tool is an amazing tool to keep your edges sharp without having to bevel them. That means you can preview your smoothed mesh with sharp edges.
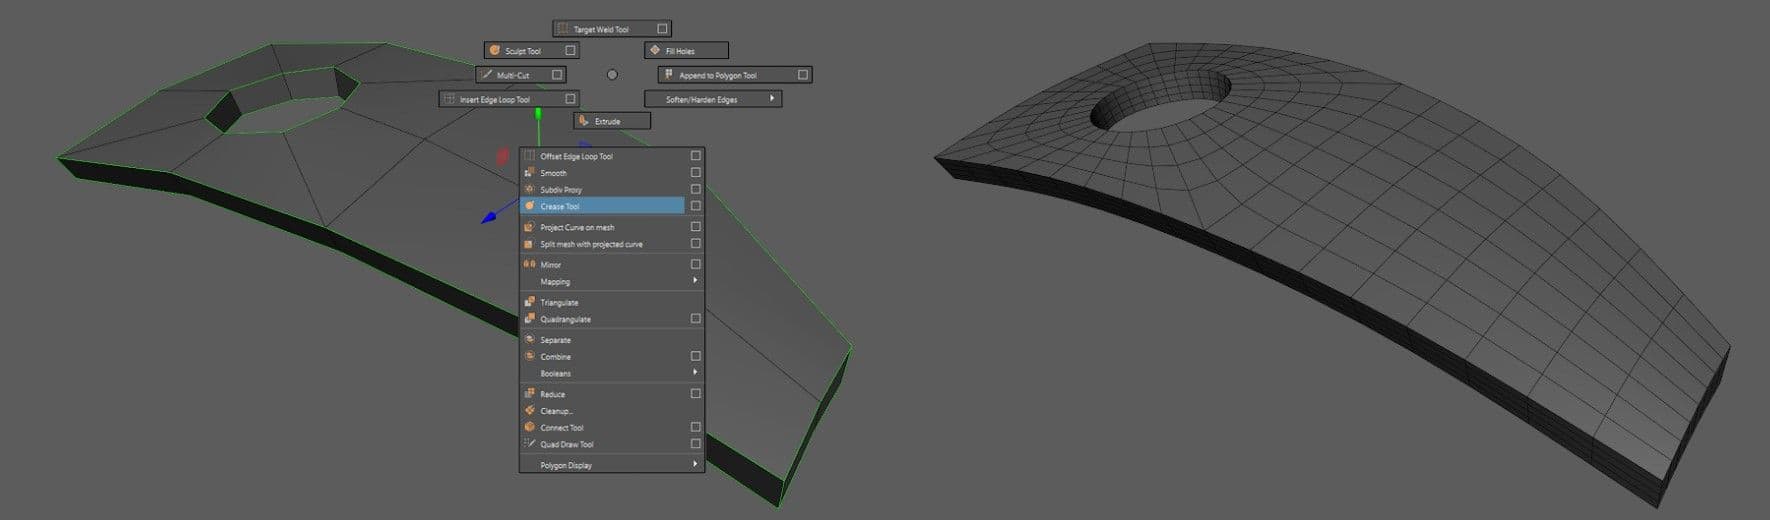
Don’t forget to remove the creased edges, so you can finally bevel them. This should be the process for each of the main shapes. Working with a very low amount of polygons at the start is very helpful for complex shapes.
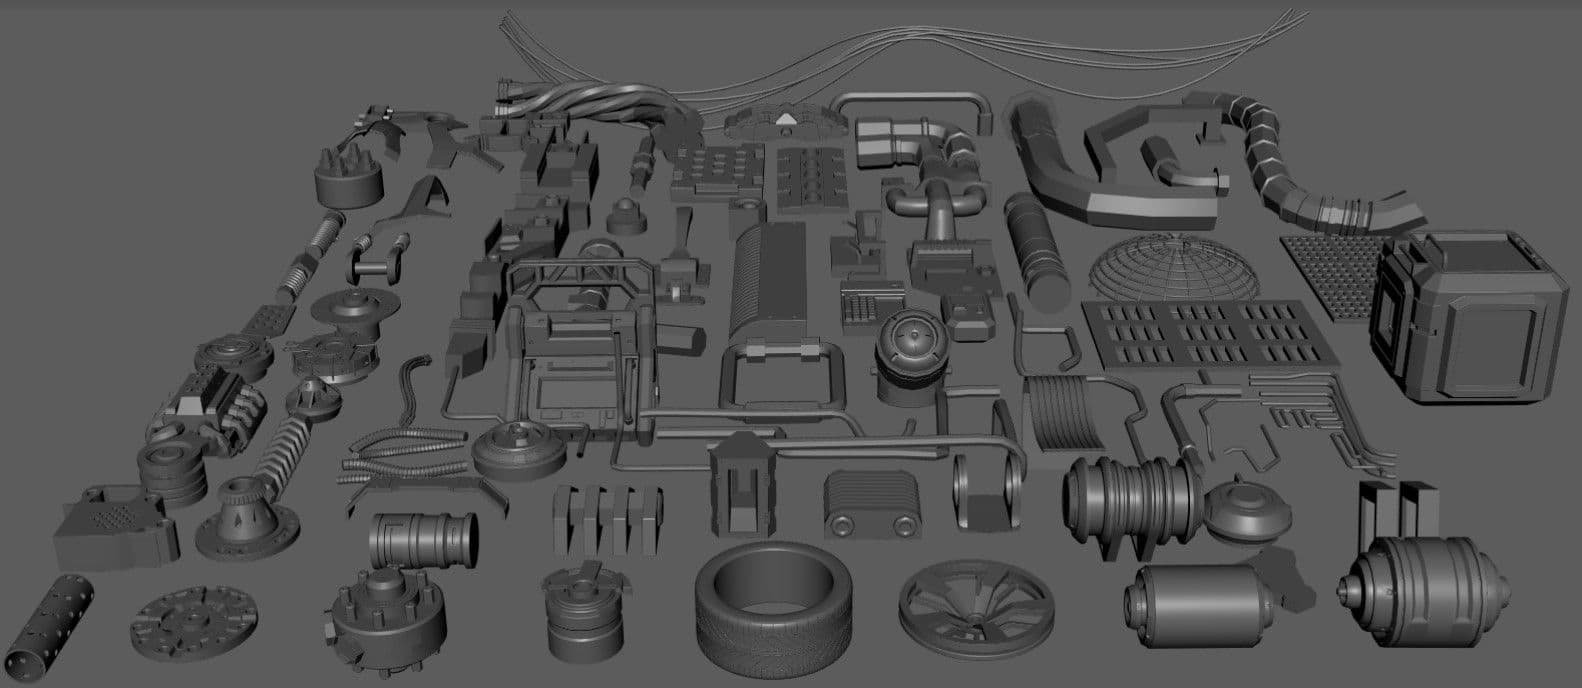
Do not hesitate to reuse complex pieces to fill out empty areas of your asset. By building a complex model, you are expanding your kitbash library. You can use for example, detailed cylinders a couple of times in an asset. At the end of the modeling stage, put aside all the pieces that could be used in another asset. Use kitbash to speed up your next modeling project.
In this article, I am not going to talk too much about UVs. I am focusing on the modeling process, but a tip I would like to share with you is to think ahead when modeling. People have different workflows; some like to unfold UVs after each piece, some like to unfold them once they’ve finished the whole asset. Some pieces are used many times in your model, especially the ones that fill out empty spaces, so make sure you unfold those UVs before duplicating that particular piece a bunch of times!
Depending on your computer, you might struggle or not, to run your scene. Even if it looks nice, turn off the subdivision preview in your viewport. Anti-aliasing and other fancy things can also make your scene run slower.
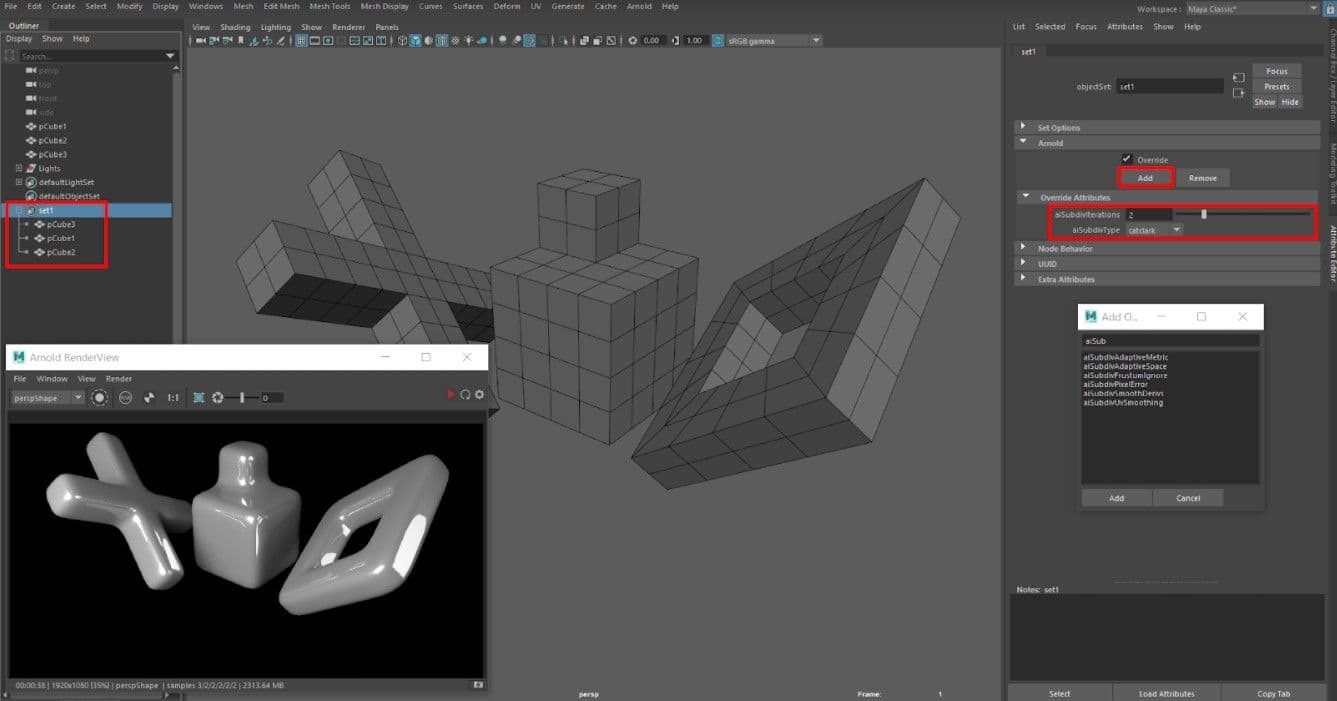
If you want to throw some nice AO renders, you still shouldn’t smooth preview your asset. Your scene may crash depending on the final number of polygons you have, trust me I speak from experience! For the Maya and Arnold users, what you can do is create a Set. That way, everything is on the lowest polygon count in the viewport but will be subdivided for the render.
Select all your geometry, go to Create > Sets > Set. In the attribute editor of your set go to Arnold > Add. Type in aiSub, then select aiSubdivIterations as well as aiSubdivType. You can then change the Subdiv type to catclark, and increase the value to 2 or 3 depending on what you plan to render.
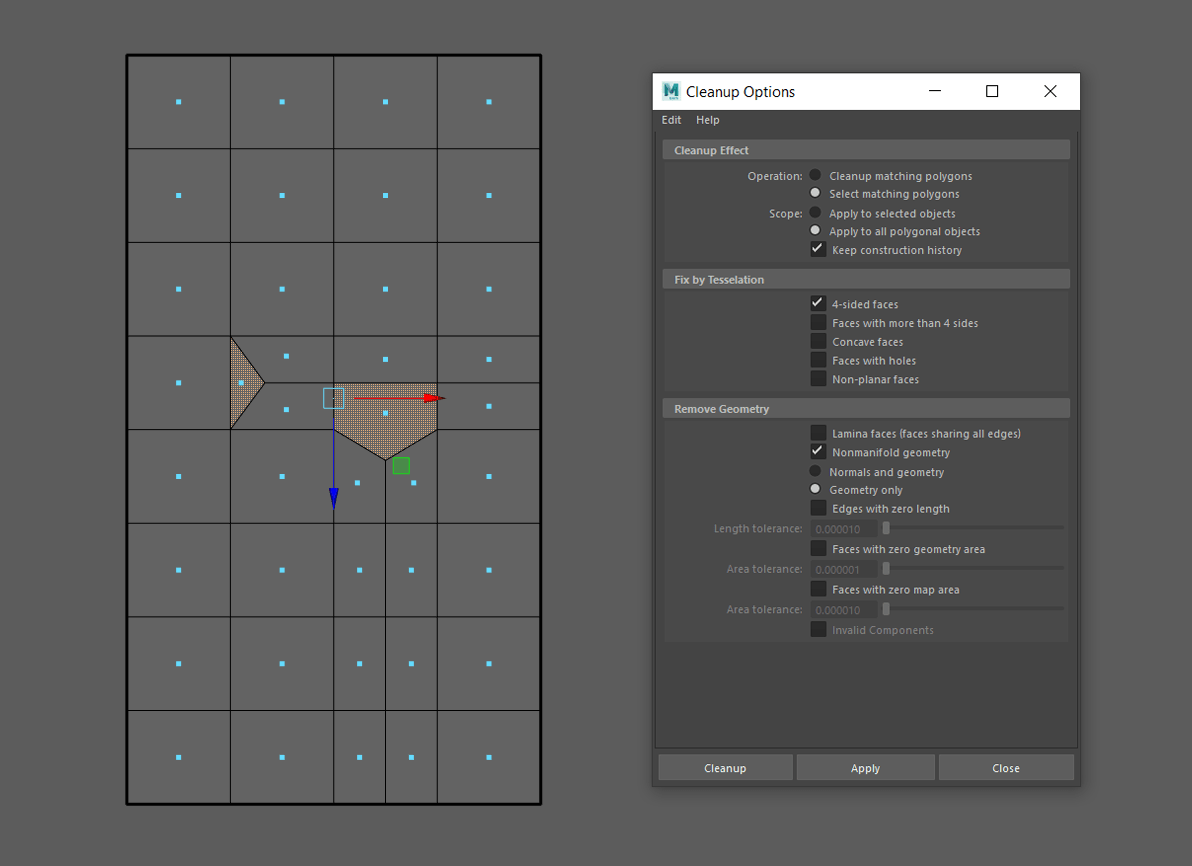
If you plan to work in the VFX industry, take the habit of always modeling in quads. Yet it sometimes happens to forget a couple of triangles or N-gons, it’s always good to double-check once you’ve finished your asset. You can do so by selecting your geometry, going to Mesh > Cleanup. Check 4-sided faces, invert your selection and all the triangles and N-gons will appear! Check for other nasty stuff such as Non manifold geometry, Lamina faces, or edges and faces with zero length and zero geometry area.
Deleting the history of your meshes when modeling is also very important. Glitches may happen when reopening a scene with non deleted history. Some meshes can be completely destroyed.
You can also check your model for Double Shapes. Each mesh should only have one shape in the attribute editor. But it may happen that even after deleting the history, a couple of double shapes do not get deleted. Double Shapes are also dangerous as they can completely delete some of your meshes. I have lost two to three days of work because double shapes were not deleted. Before deleting them, make sure you rename all your meshes. We do this because double shapes are called “polySurfaceShape”. Your meshes may share the same name but when you rename a mesh, the double shape doesn’t follow.
You can then type in the search bar “polySurfaceShape*” and press enter. This will select all double shapes. You can delete them by pressing delete on your keyboard. Keep an eye on the polycount to make sure there aren’t any actual shapes being deleted. To do so, go to Display > Heads Up Display > Poly Count.
Don’t be hasty, as Master Treebeard would say! Patience is the key. At the end of this project you will have gained not only technical skills, but also learnt about yourself, and about what you do and don’t like.


I hope this blog helped you in some way with your workflow and that you learnt a few tips and tricks. If you have any more questions, feel free to send me a message, and good luck on your modeling!
You can find more of Andrei's work on The Rookies, ArtStation and Instagram.