Making a Game-Ready Grand Piano using Maya, Substance, and Marmoset Toolbag 4
Think Tank Training Centre student Shakhzaman Kasteyev, was set a challenge: to create a low-poly, detailed game-ready hero prop. In this article he describes how he created his stunning Rookies portfolio piece, 'Steinway Grand Piano', using Maya, Substance Painter and Marmoset Toolbag 4.
Shakhzaman Kasteyev is currently studying Environment Art for Games at Think Tank Training Centre. His course instructors set him a challenge: to create a low-poly, detailed game-ready hero prop. In this article he describes how he created his stunning Rookies portfolio piece, 'Steinway Grand Piano', using Maya, Substance Painter and Marmoset Toolbag 4.
Introduction
One of the main projects at Think Tank Training Centre Online was to create a game-ready hero prop. I chose to do a Grand Piano since I thought it could be a special and unique project. The challenge was to model some of the details on the inside but keeping it low poly enough.
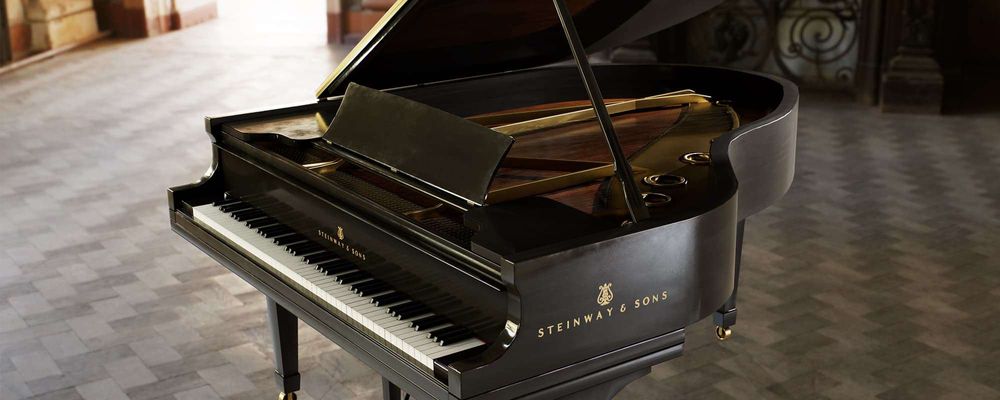
I decided to base the piano on the Steinway & Sons models. Their website and catalogue was a great place to get references.
From the Steinway & Sons' website
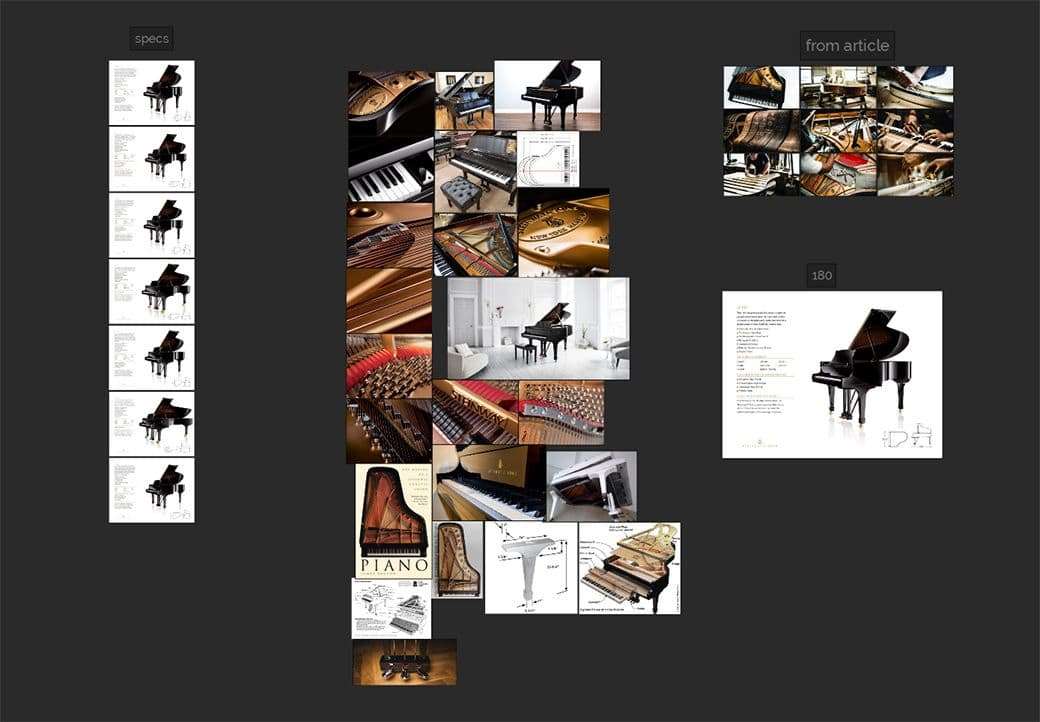
A couple of documentaries helped me learn how they were made. It was important to get enough images for the inside parts, as well as close-ups for the materials. Other 3D versions of the piano made by other artists were a great help, as well as a quality target.
Reference Board
For some general mood I looked into The Pianist and La La Land. Both movies have scenes where the piano plays as a conduit for the character’s emotions. This really struck me and made me feel what the characters were feeling.
Modeling
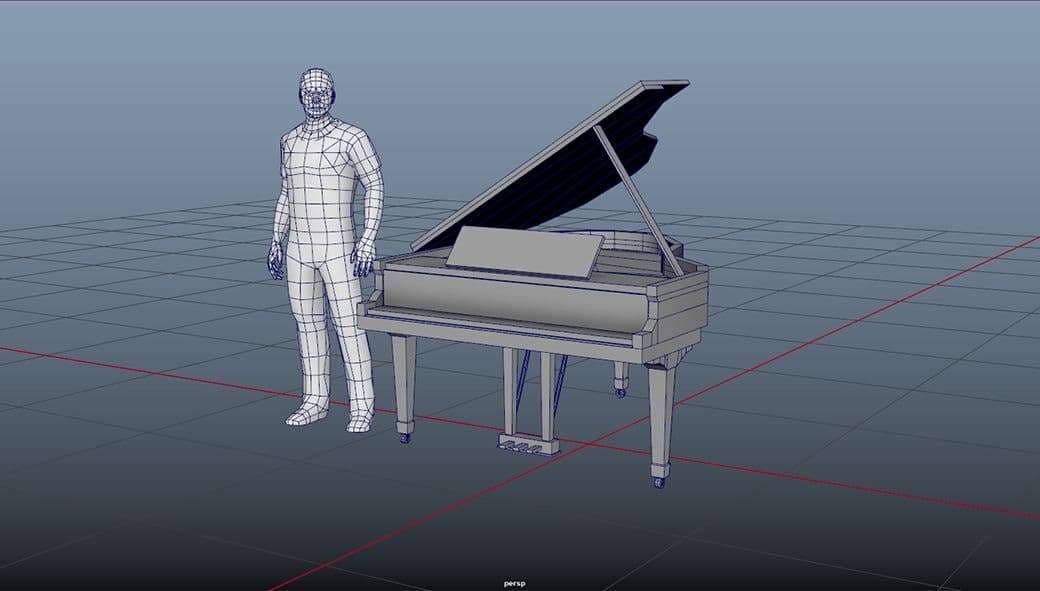
To make sure the piano would be correct in size, importing a human base mesh helped a lot. There are tons of free ones all over the internet, but if you don’t have one at your disposal you can make a cube and scale it 180 cm vertically.
Basemesh and the blockout
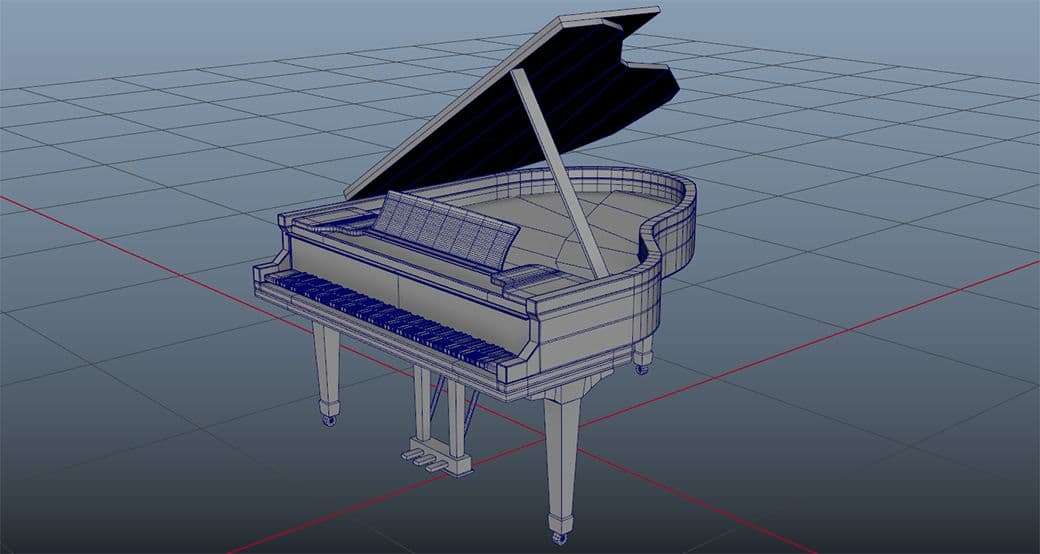
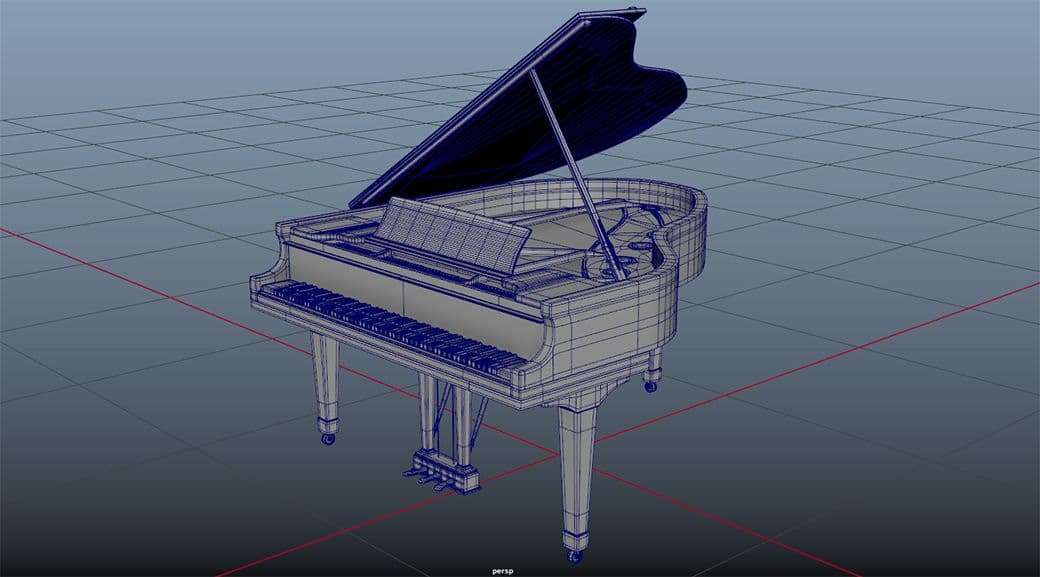
I started loosely blocking out the basic shapes, like the rim, legs and lid. It was important to me that the overall silhouette was correct before going into detailing. The topology and polycount at this point wasn’t important. This is called the high-poly phase. There were several objects that could be duplicated or mirrored, like the legs and the keys. I was also using Maya’s smooth preview (pressing the number 3 on the keyboard would activate it, and number 1 would return it to normal). This will not actually smooth the object, something that I had to actually do before exporting the high poly versions.
Stages
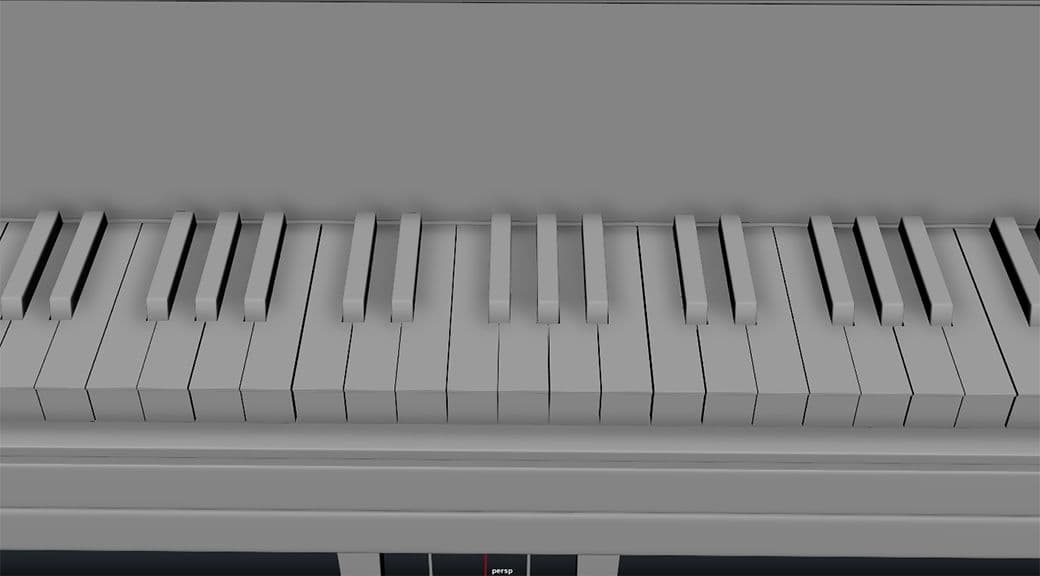
The piano’s keys are divided into octaves. Each octave consists of 7 white and 5 black keys. This allowed me to model just one section and duplicate it until I had 7 octaves. The only exceptions are the first keys on the left and the last one on the right side.
Keys
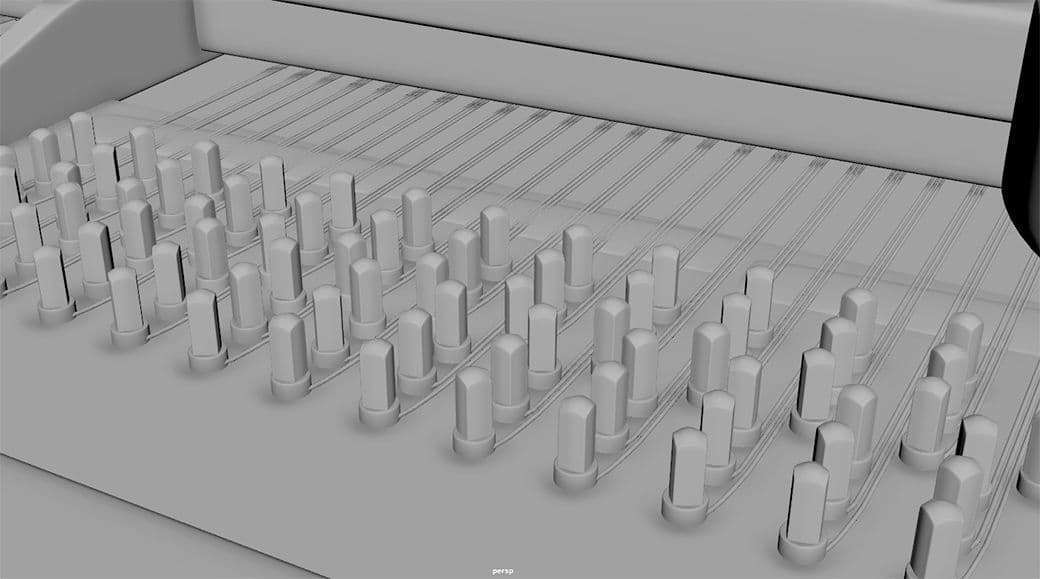
The inside took most of my time, mainly the pins and the strings. I started by modeling one pin and duplicating it to where I needed it. Then duplicating the whole set and bringing that to the next position. When I finished placing them, I used a script that I found online to randomly rotate all the pins instantly. This saved me time so I wouldn’t have to rotate them all one by one. The strings, while easy to model, needed to be placed accurately. They were made of a cylinder that I duplicated and positioned one by one. I’m sure there’s a better way to do this, but this worked for me.
Pins and strings
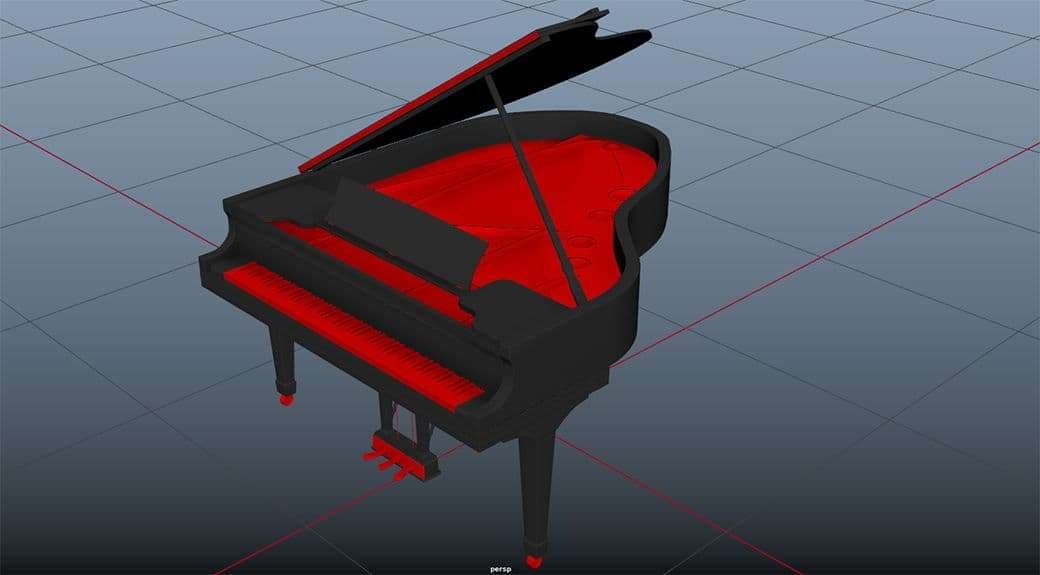
Now was the time to start doing a low poly version. After I made sure that every object was named properly, I duplicated the entire piano and moved it to the side. I disabled smooth preview and started simplifying the topology, as well as fixing it and making sure I had quad faces. The white keys became one long cube and the strings were made into planes. Because of their high topology, I had to delete the pins, but they were baked later into the soundboard.
High (left) and Low (right)
Lastly, the UVs. I divided the objects into two UV sets at 4K resolution by assigning two different materials. I used a texel density of 10.24 for all of my objects. This video will explain texel density if you’re not familiar with it. Afterwards, the process was pretty straightforward. I made sure my seams weren’t visible and hidden.
Two materials for different UV sets
Baking
Before starting the baking process, I had to make sure that all my high poly object’s names finished with “_high”, and my low poly with “_low”. This way, I could export all of the objects as one as FBX.
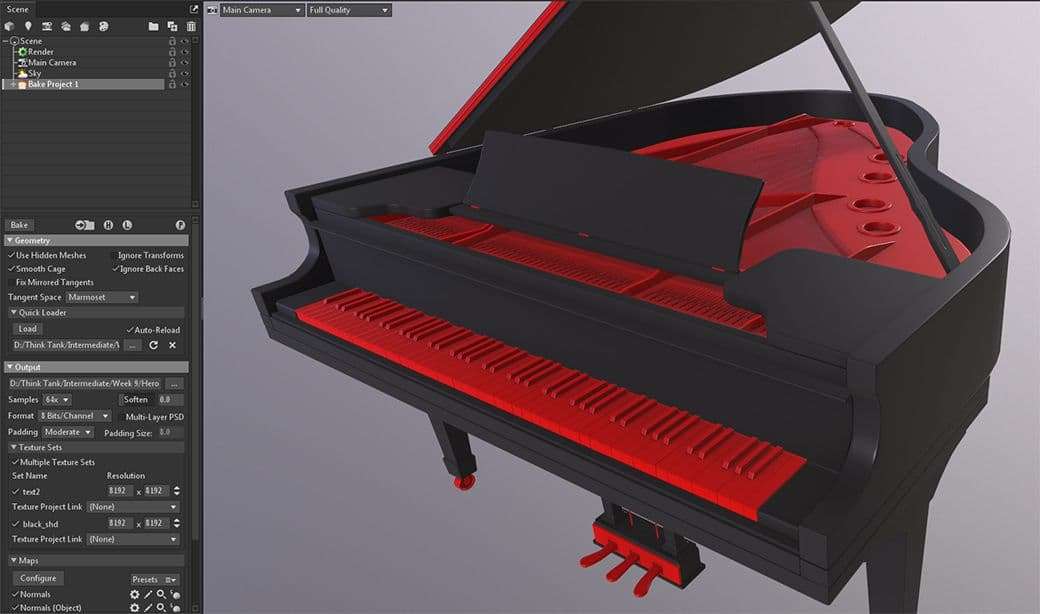
In Marmoset, I started a new baking project by clicking the bread icon. I then clicked Load under Quick Loader to import the object. Under the Output tab I increased my samples to 64x and set the export as a Targa format. PNG is good too but avoid saving as JPEG, as this is a lossy format. I always set my texture resolution to double the size I want to texture. In this case I chose 8K, or 8192 x 8192.
Marmoset
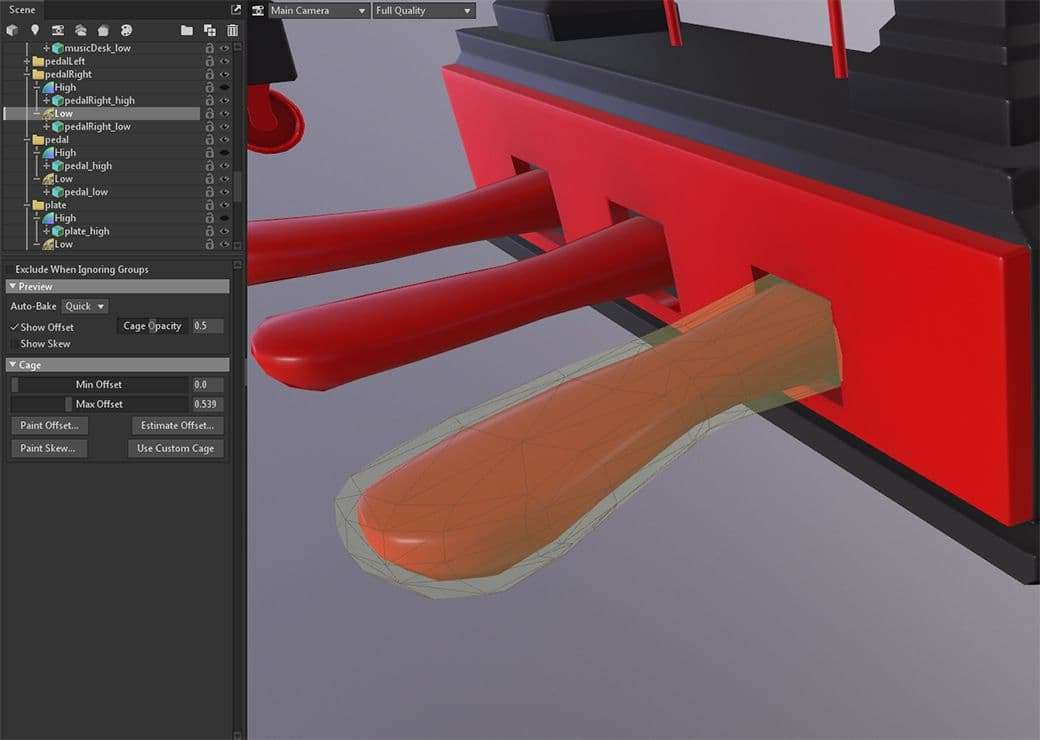
Before exporting all the maps, I deselected all of them except for the Normals. This way I could check for any baking errors quickly. I clicked Bake and when it was done, the P button, which is preview. It usually gives very good results but if you have any errors, you can select the Low folder in the Scene tab, and expand or reduce the Cage thanks to the two slider offsets. Marmoset has a nice feature that lets you preview that. When done, bake again.
Cage (not the actor)
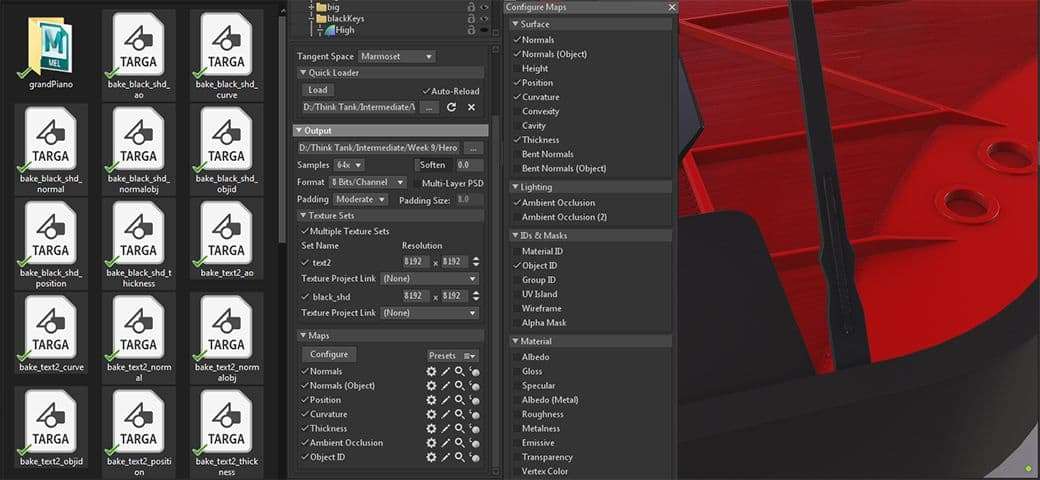
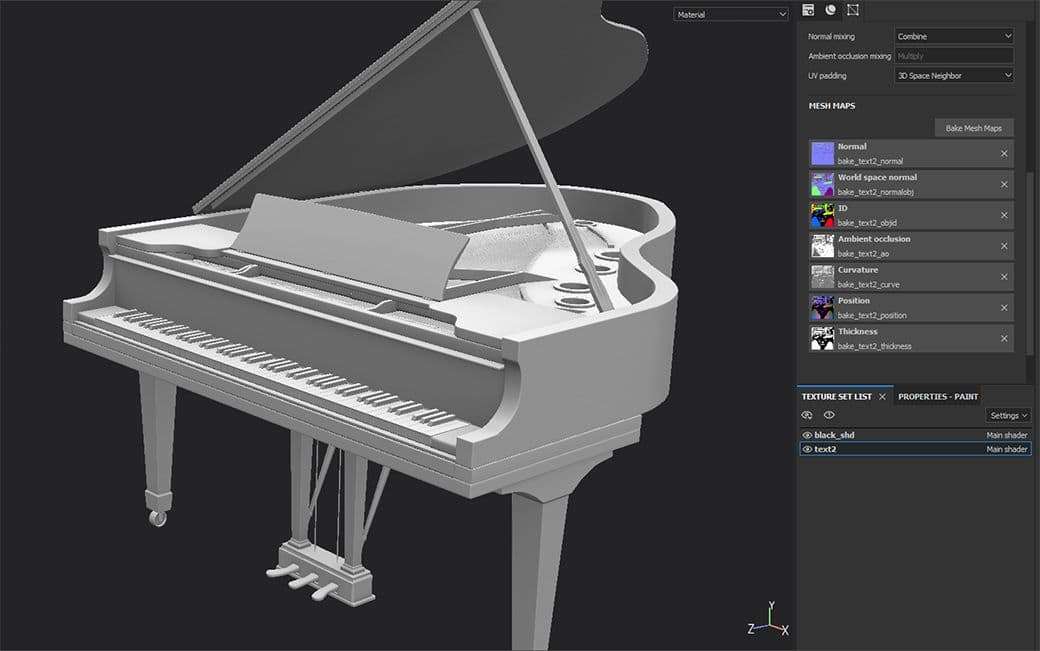
With my Normals now correct, it was time to select which maps I wanted to export. Since I was going to texture in Substance Painter, I chose Normals, Normals (Object), Position, Curvature, Thickness, Ambient Occlusion, Object ID. If you can’t see all the maps, make sure to click Configure and select them there. Since I had two materials and seven maps, I was about to export 14 maps at 8K resolution. I made sure to save, and then it was time to bake. It took me 2-3 minutes but it might be longer depending on the PC. It is also important to have enough space, as one map of mine was around 256mb in size.
Texturing
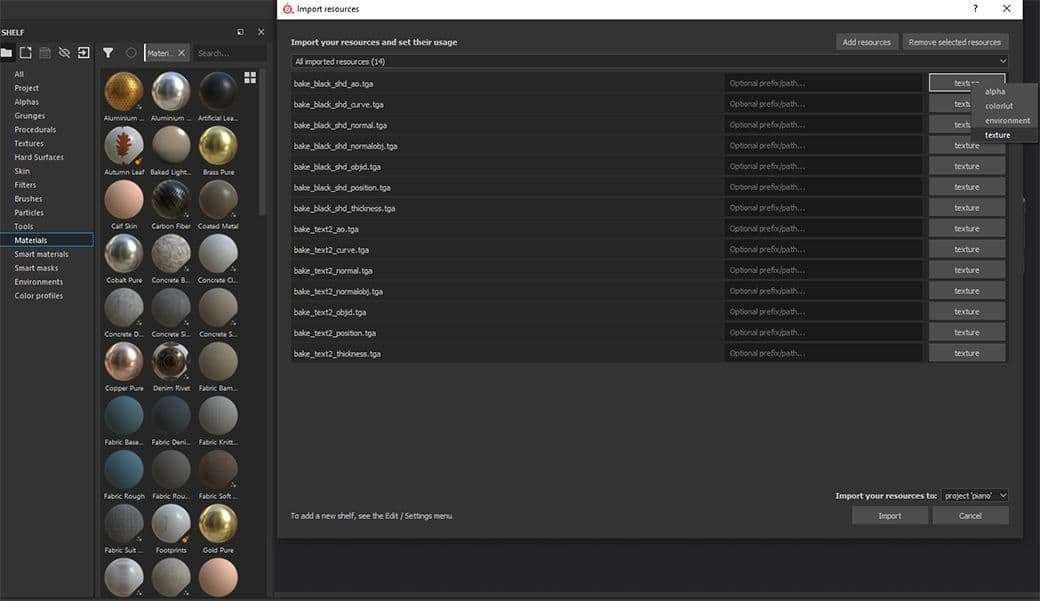
For texturing, my goal was to have a clean look, but at the same time dusty. I started by creating a new project in Substance Painter, using a PBR - Metallic Roughness template and a 4K resolution. Next, I imported my baked textures, just by dragging them from my folder to the Shelf. In the window that popped-up, I made sure to set the bakes as Texture and import them to the project. Painter has three options to where to import the textures:
“Current Session”: will save the textures until you close the program.
“Project”: will remain only in this project and not others and you can close are re-open Painter.
“Shelf”: will be always available regardless of what projects are open.
Importing
In the Texture Set Settings and under Mesh Maps, I started adding my maps. The process is pretty straight forward. For example, I click Select Normal Map and I select the map I want to assign. Since I had two texture sets I had to do this process one more time. You can select your sets under the Texture Set List.
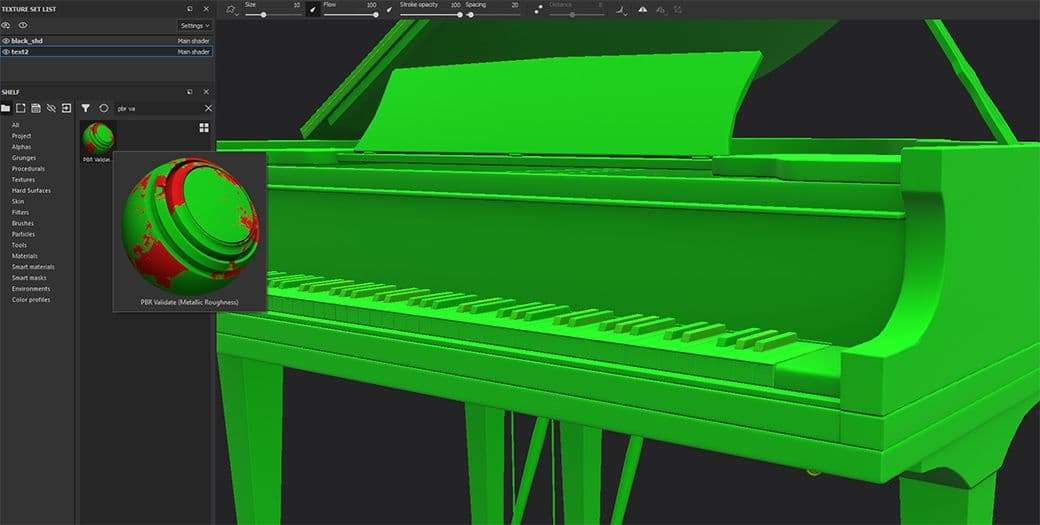
First, I usually add a PBR Validate, remove its visibility and leave it on top of all layers. This material lets me check if my diffuse values are in a good PBR range. I activate its visibility at the end to highlight issues.
I began texturing by adding materials that closely represent the ones in my reference. I wanted to fill all the empty spots before adjusting the colors and details. Once I was in a good spot, I went through each material and adjusted the settings to fit my needs. As much as I carefully did the UVs, sometimes I had to use the Triplanar Projection. This will project the material instead of using the UVs, it can be a time saver.
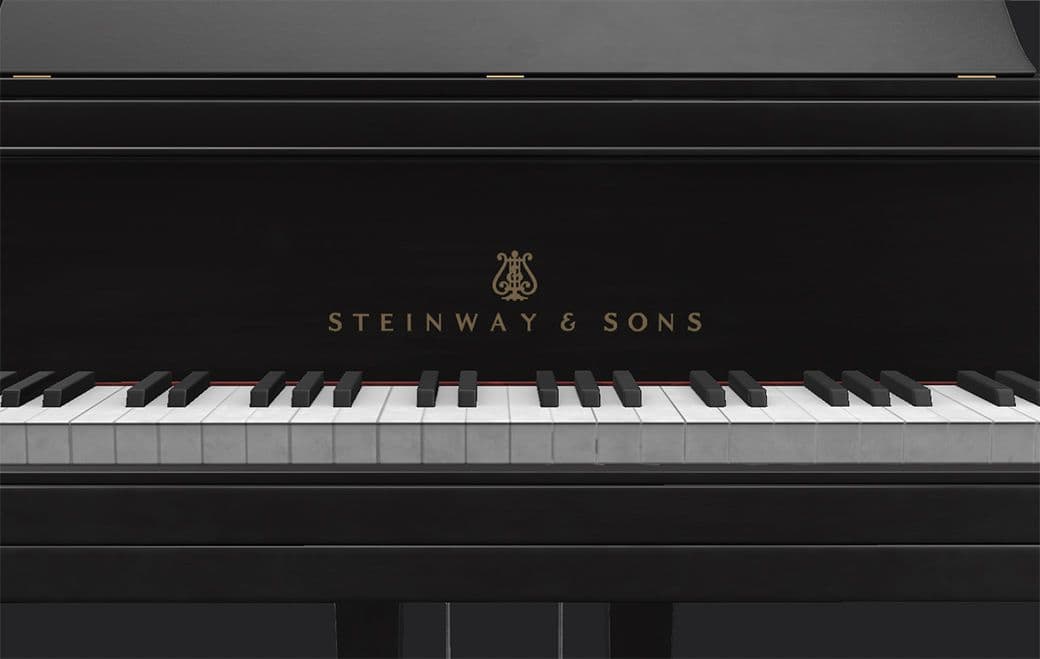
Soft dust, dirt and stains were very helpful in adding little details without ruining the “clean look”. They were visible only when light was reflecting on the surface. Two decals were used for the Steinway & Sons logos. I found the one for the rim on the internet, while the decal for the gold plate was made in Photoshop.
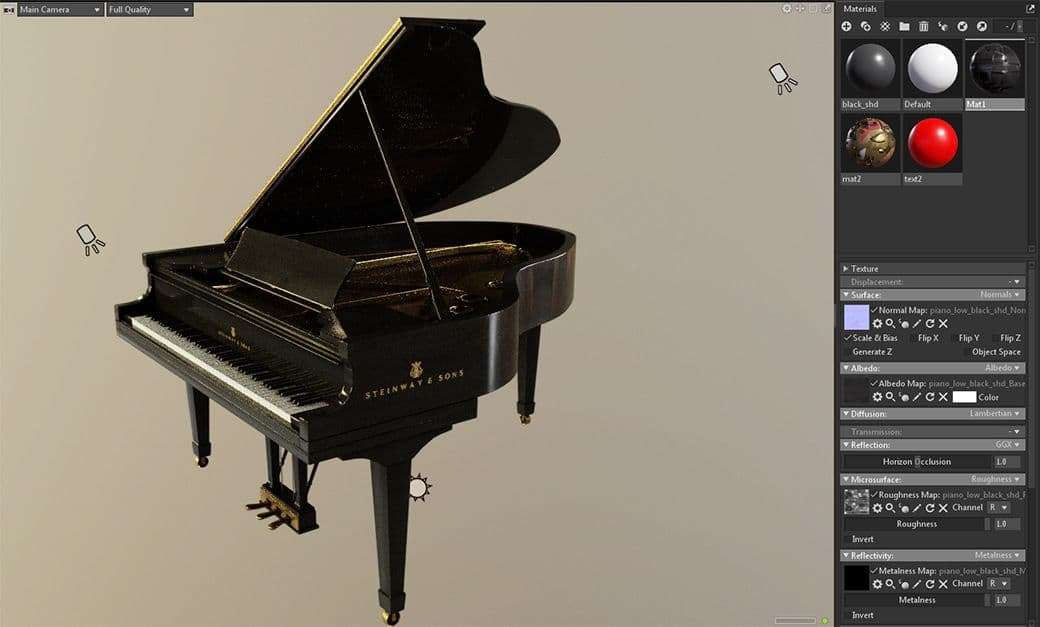
I’ve found it pretty useful to use Iray to better check my materials. Iray is more of a realistic renderer than the one in the viewport. I could also switch between the HDRIs to see how the object holds up in different lighting conditions. I would say this is something that’s very important to do.
Iray
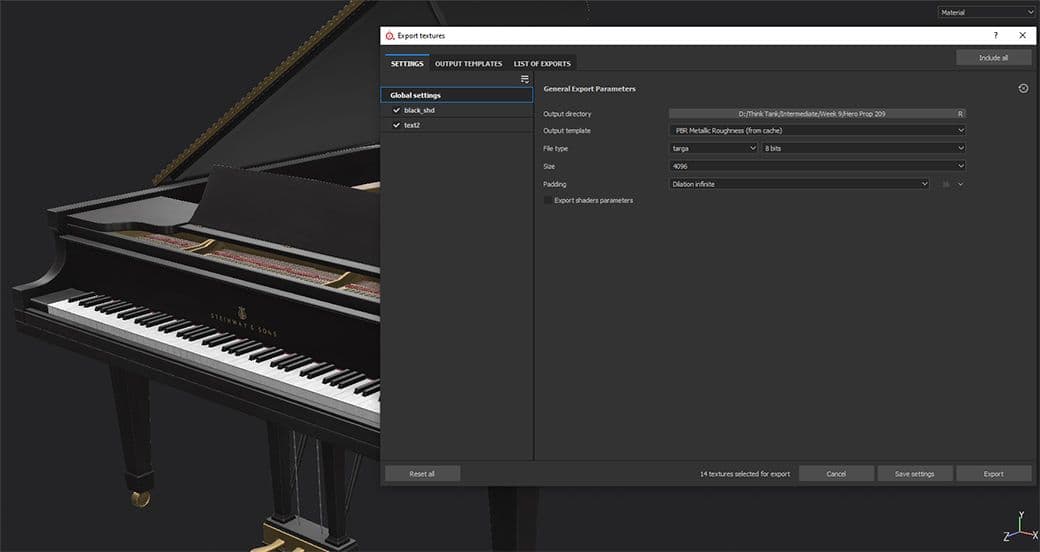
At the end I enabled the PBR Validate and fixed the values if they were red. When I was ready, I started to export the textures. I clicked Export Textures under the File tab. In the new window, I chose the PBR Metallic Roughness template, Targa type and 4K resolution. The template you need might depend on where you want to render, or you can even make your own under the Output Templates tab.
Output Tab
Rendering
Back in Marmoset, it was finally time to render. This time, since I wasn’t baking, I simply imported my model by dragging it from the folder. Two materials were created and I dragged the maps into their boxes.
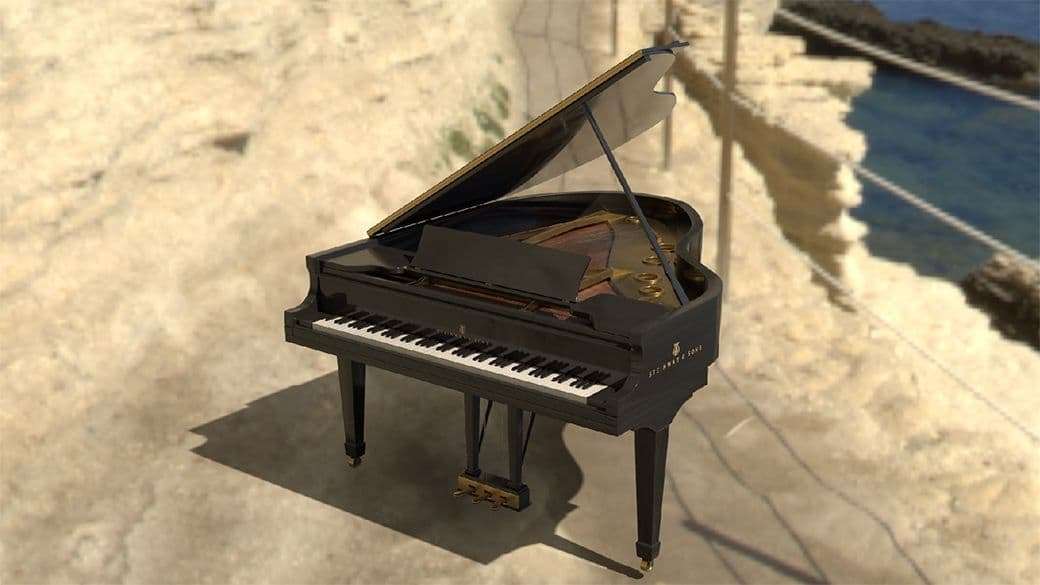
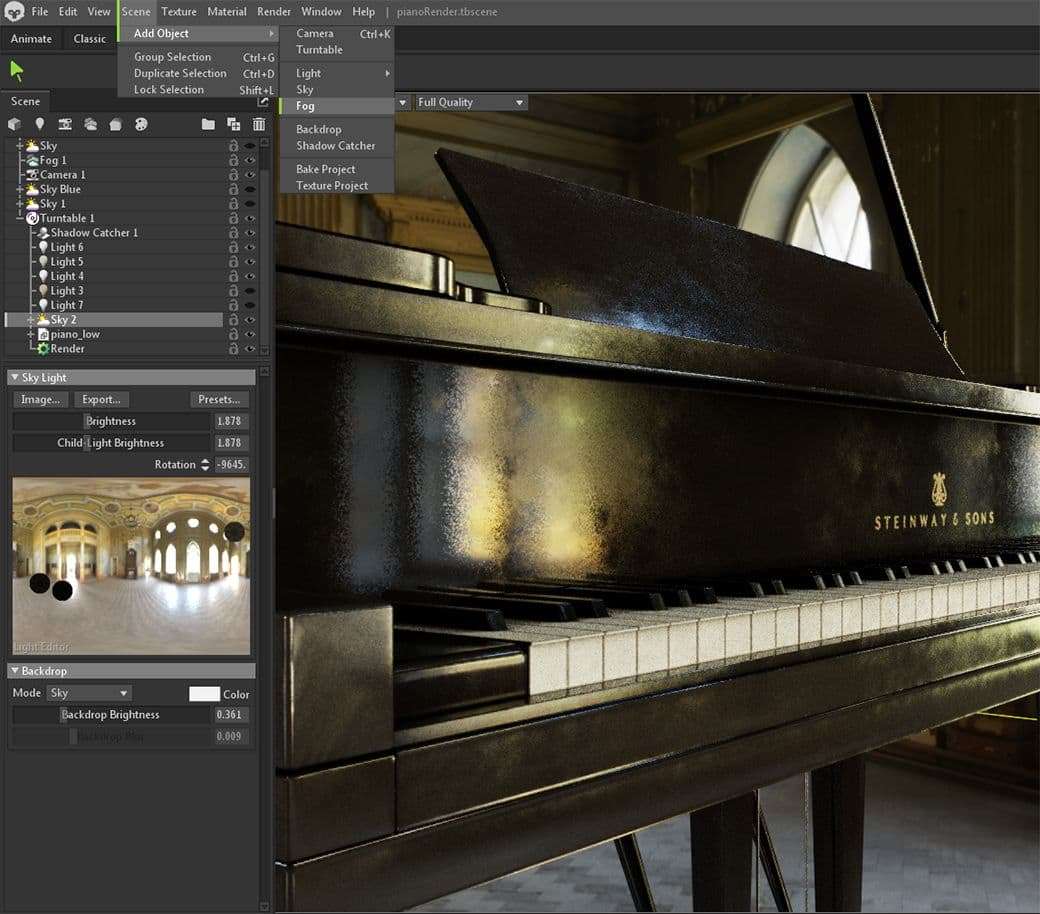
To start, I went into the Sky tab and clicked on Presets. I tried different ones to see which gave me good results. I really liked Lagoon Coast but ultimately decided to get an HDRI from HDRI Haven. This is a great place to get HDRIs up to 16K resolution.
Instead of creating new lights from scratch, I could click and drag in the Light Editor to create them with a color similar to the one clicked. I also changed my backdrop to Sky to remove the blur effect. To add more realism I added Fog and a Shadow Catcher. They’re located in Scene > Add Object. Fog needs only a very low amount, around 0.005 worked for me. The Shadow Catcher will add shadows under your object to make it blend with the background.
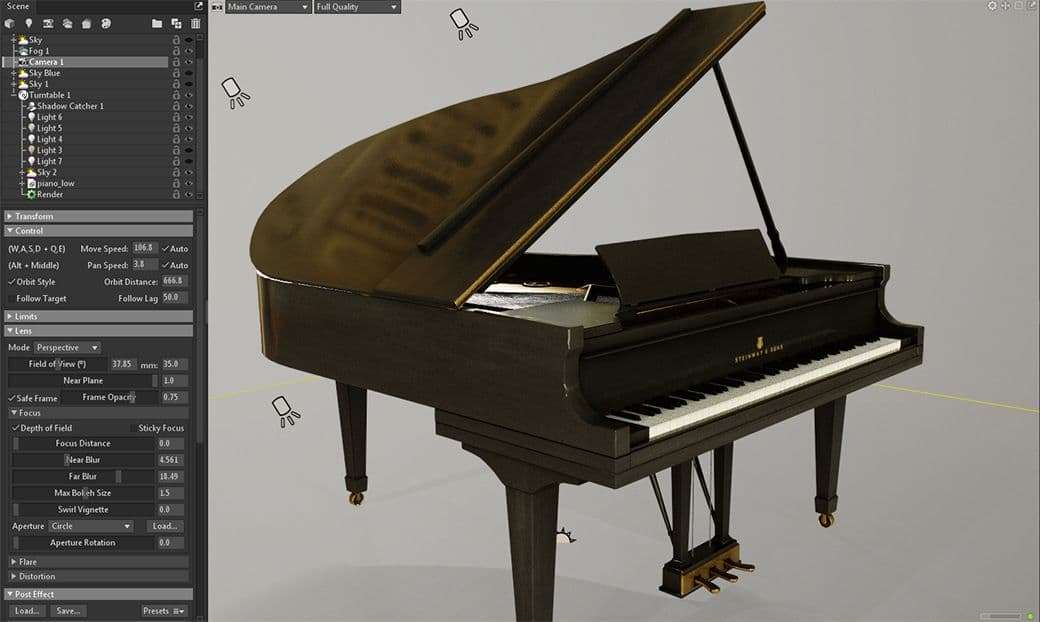
Next, in the Main Camera I changed my focal length (or field of view) to 35mm. If you aren’t familiar with photography this is how wide or narrow the view is. You can check this great explanation by Saurav Sinha, or just play with the setting. Personally, I usually use 35mm, 50mm or 85mm.
I enabled Safe frame so I could frame my shot and most importantly I enabled Depth of Field. It made my shot look more realistic. There are other effects like Chromatic Aberration and Grain that can be great, but can ruin the picture if used too much. If you need multiple shots from various angles you can duplicate the camera and move it into place, then you can switch between them in the viewport.
Lastly in the Render Settings, I decided to use Ray Tracing. It works pretty well with default settings but if you need better quality you can increase the Bounces. I then enabled pretty much everything else: Shadows at Mega quality, Ambient Occlusion and Reflections. Under the Output tab, I set my resolution at 4K, and chose PNG as the format to have a good quality final image. I also increased my samples to 2048 to reduce any noise in the image.
Conclusion
This was a fun and challenging project for me. I had the chance to learn new workflows and experiment with various techniques.
Don’t be afraid to push for projects that are harder and uncomfortable because you will grow very fast. I want to thank The Rookies and Think Tank for the on-going inspiration and support.