The Environment Design Process: Translating 2D Concept Art to a 3D Render
A recent student at Think Tank Training Centre Online, Jonni Zhang transitioned from Game Design in to Character Design. In this article he shares his character and environment design process when translating 2D concepts into 3D Renders.
Jonni Zhang is a Character Artist in training. A recent student at Think Tank Training Centre Online, Jonni transitioned from Game Design to Character Design. In this article he shares his character and environment design process when translating 2D concepts into 3D renders.
Introduction
At the beginning of every journey, it is probably a good idea to have at least a vague plan of what it is that you want to do. Now, one thing I set my mind to early on during the process, was that I wanted to make, whatever I might create, my own.
When translating a 2D concept into 3D, a lot of artists take the word “translate” a little bit too literally in my opinion.
The concept should never limit you, but instead, we as CG artists should ask ourselves how we can contribute to the idea of the concept art to enhance it even further.
It is often just about finding a good balance between staying inside the given boundaries and following your own artistic instincts at the same time. In the following article, I want to provide an insight into my personal way of including both of these aspects.
First things first, here is a list of software I have used during the project:
While being at the stage of selecting a concept for my final project, I already had an idea of what I wanted it to have included. Preferably, it should:
contain an interesting theme/story;
be framed from a dynamic camera angle;
include at least one character in the foreground;
combine multiple elements from different disciplines of 3D modeling (Hard Surface & Organic Shapes);
inspire me to approach new techniques (Hair Creation & Environment).
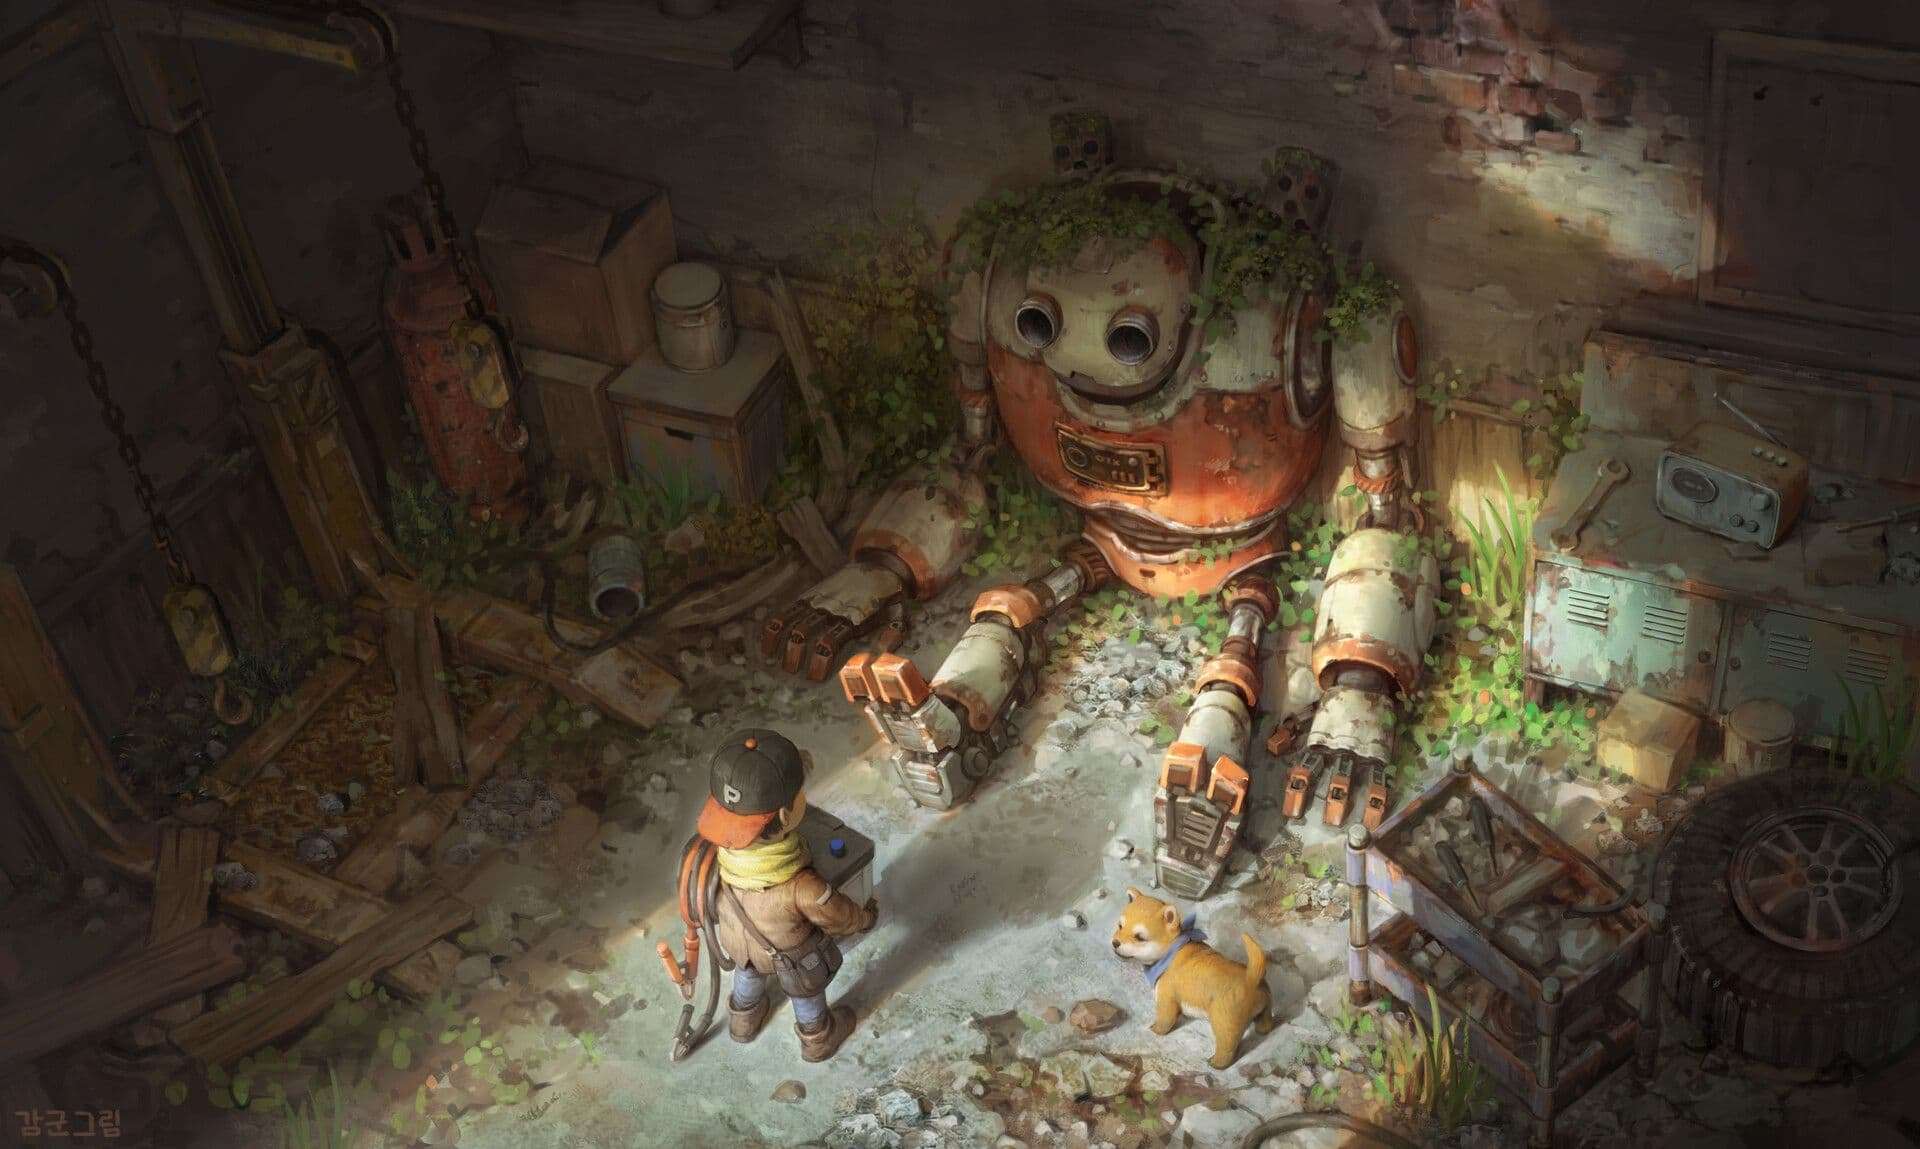
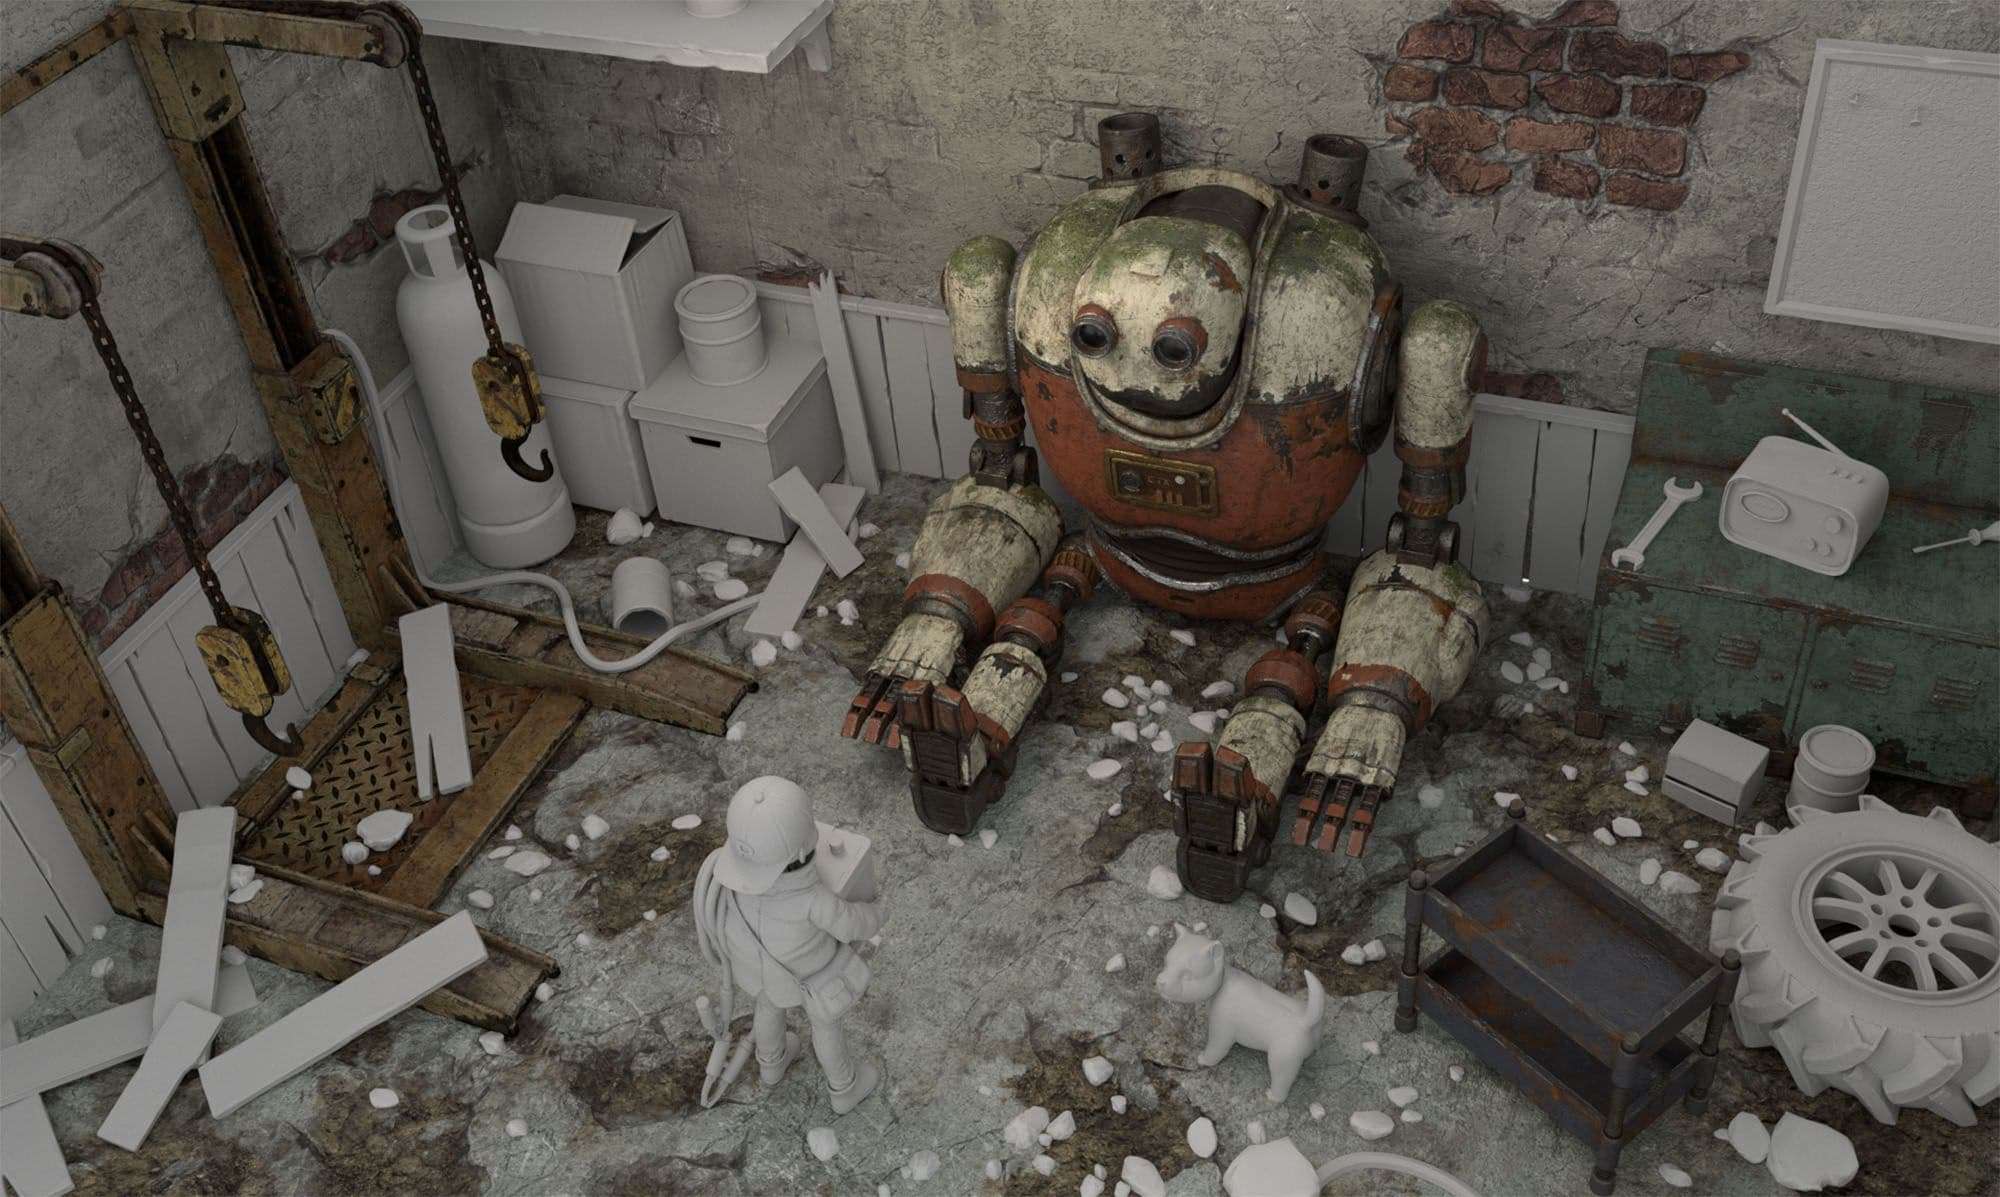
Finding a concept that checked all these criteria surely took some time. Until I stumbled upon the amazing work of Sanghyun Kam. It covered my desires right on the spot, but what struck me the most was the amount of storytelling you could feel by only looking at their artwork.
Time Management
Planning any kind of project is immensely difficult. Not only a good understanding of the complete pipeline is crucial, but of course, you also have to be able to follow through with everything in the given time, always hoping you will not encounter too many major issues along the way.
While planning, I created two timetables: a detailed one and one that was more general. In the more specific version, I broke down every stage of the project into smaller subtasks and estimated the amount of time to finish each of them, e.g. 2 days to create every base mesh needed to fulfil the block out phase.
The second timetable simply summarised a schedule for each stage, hence to be able to deliver before the deadline, e.g. 1.5 weeks to finish the modeling stage.
Structuring your time is beneficial for quite obvious reasons: you know exactly what needs to be done each day of the week but you’re still flexible enough to compensate for particular daily targets you missed, as long as you stay within the time frame of the overall stage.
Being under a lot of pressure constantly might harm your mental and physical health tremendously. This approach is supposed to help you relieve some of this kind of stress.
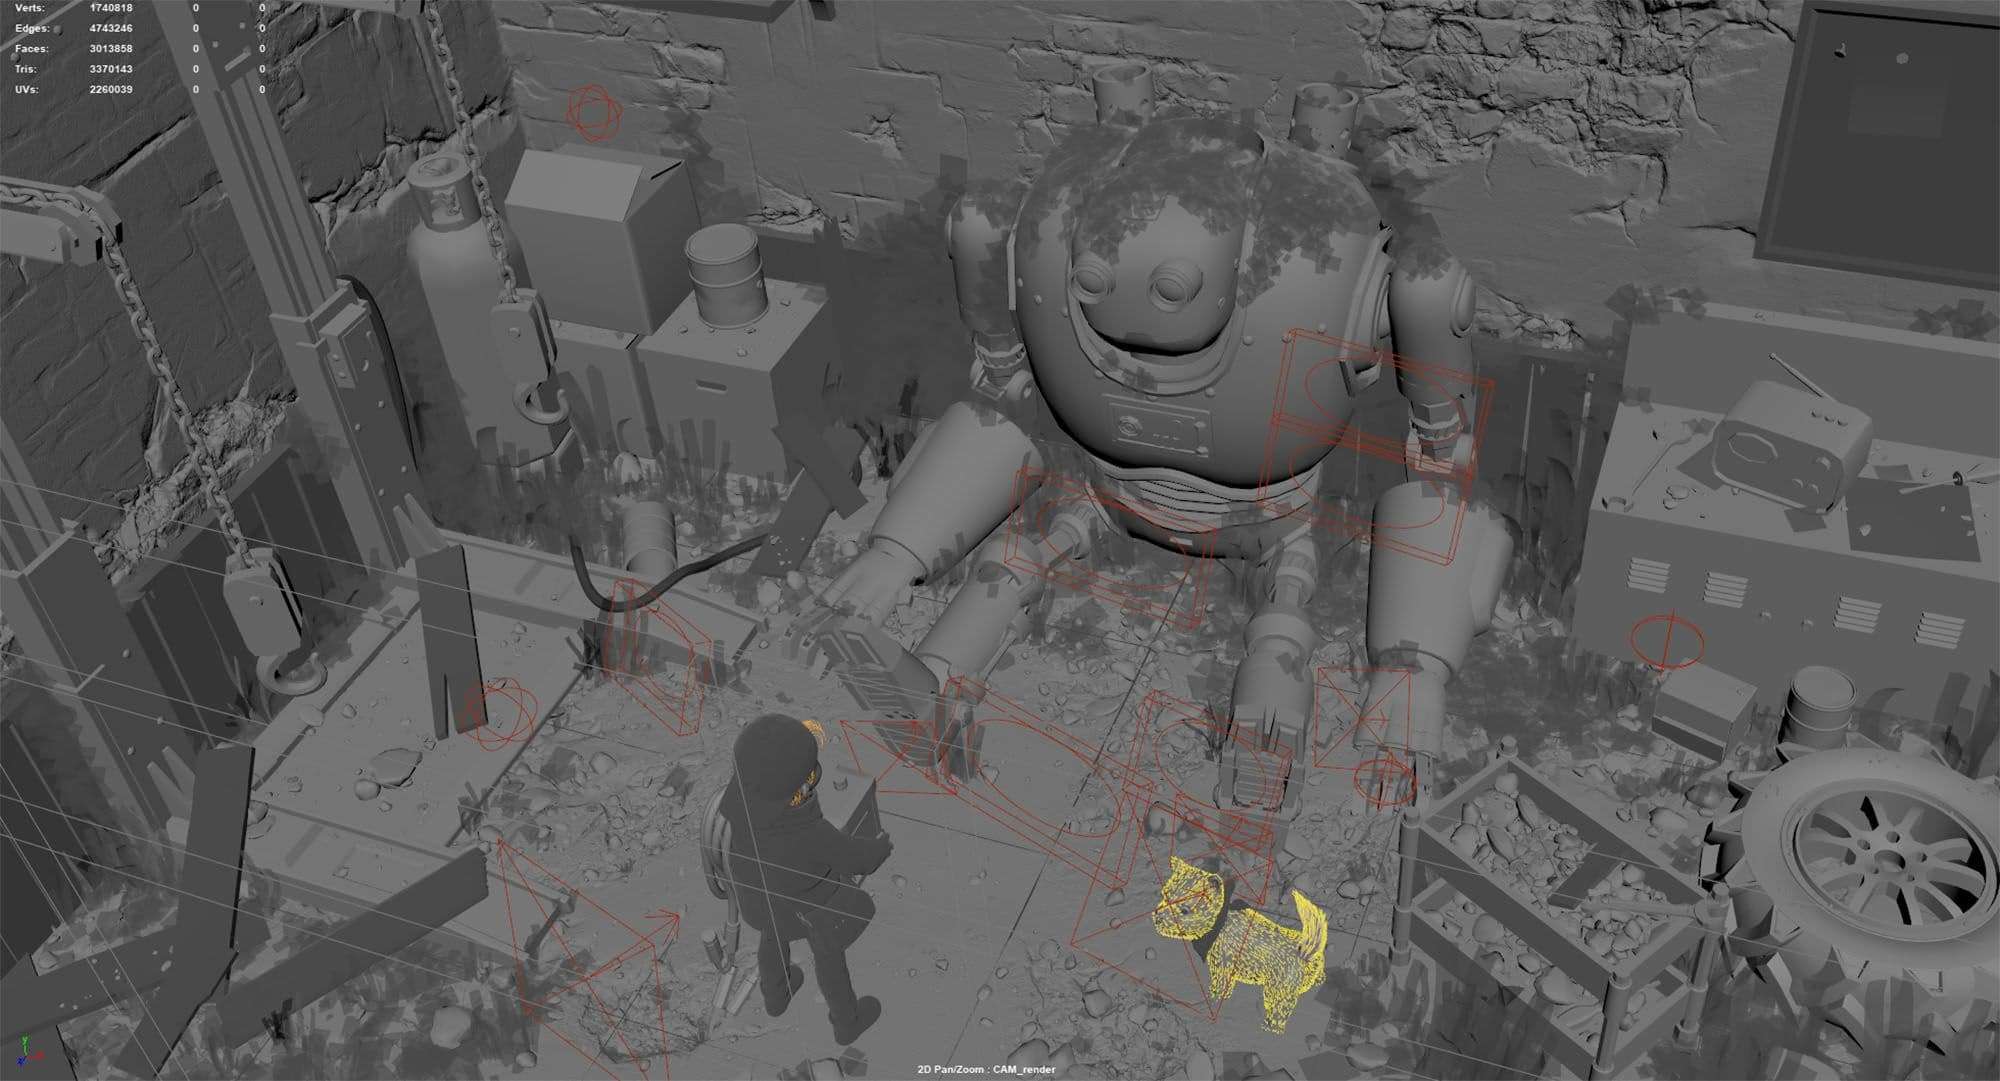
Block Out
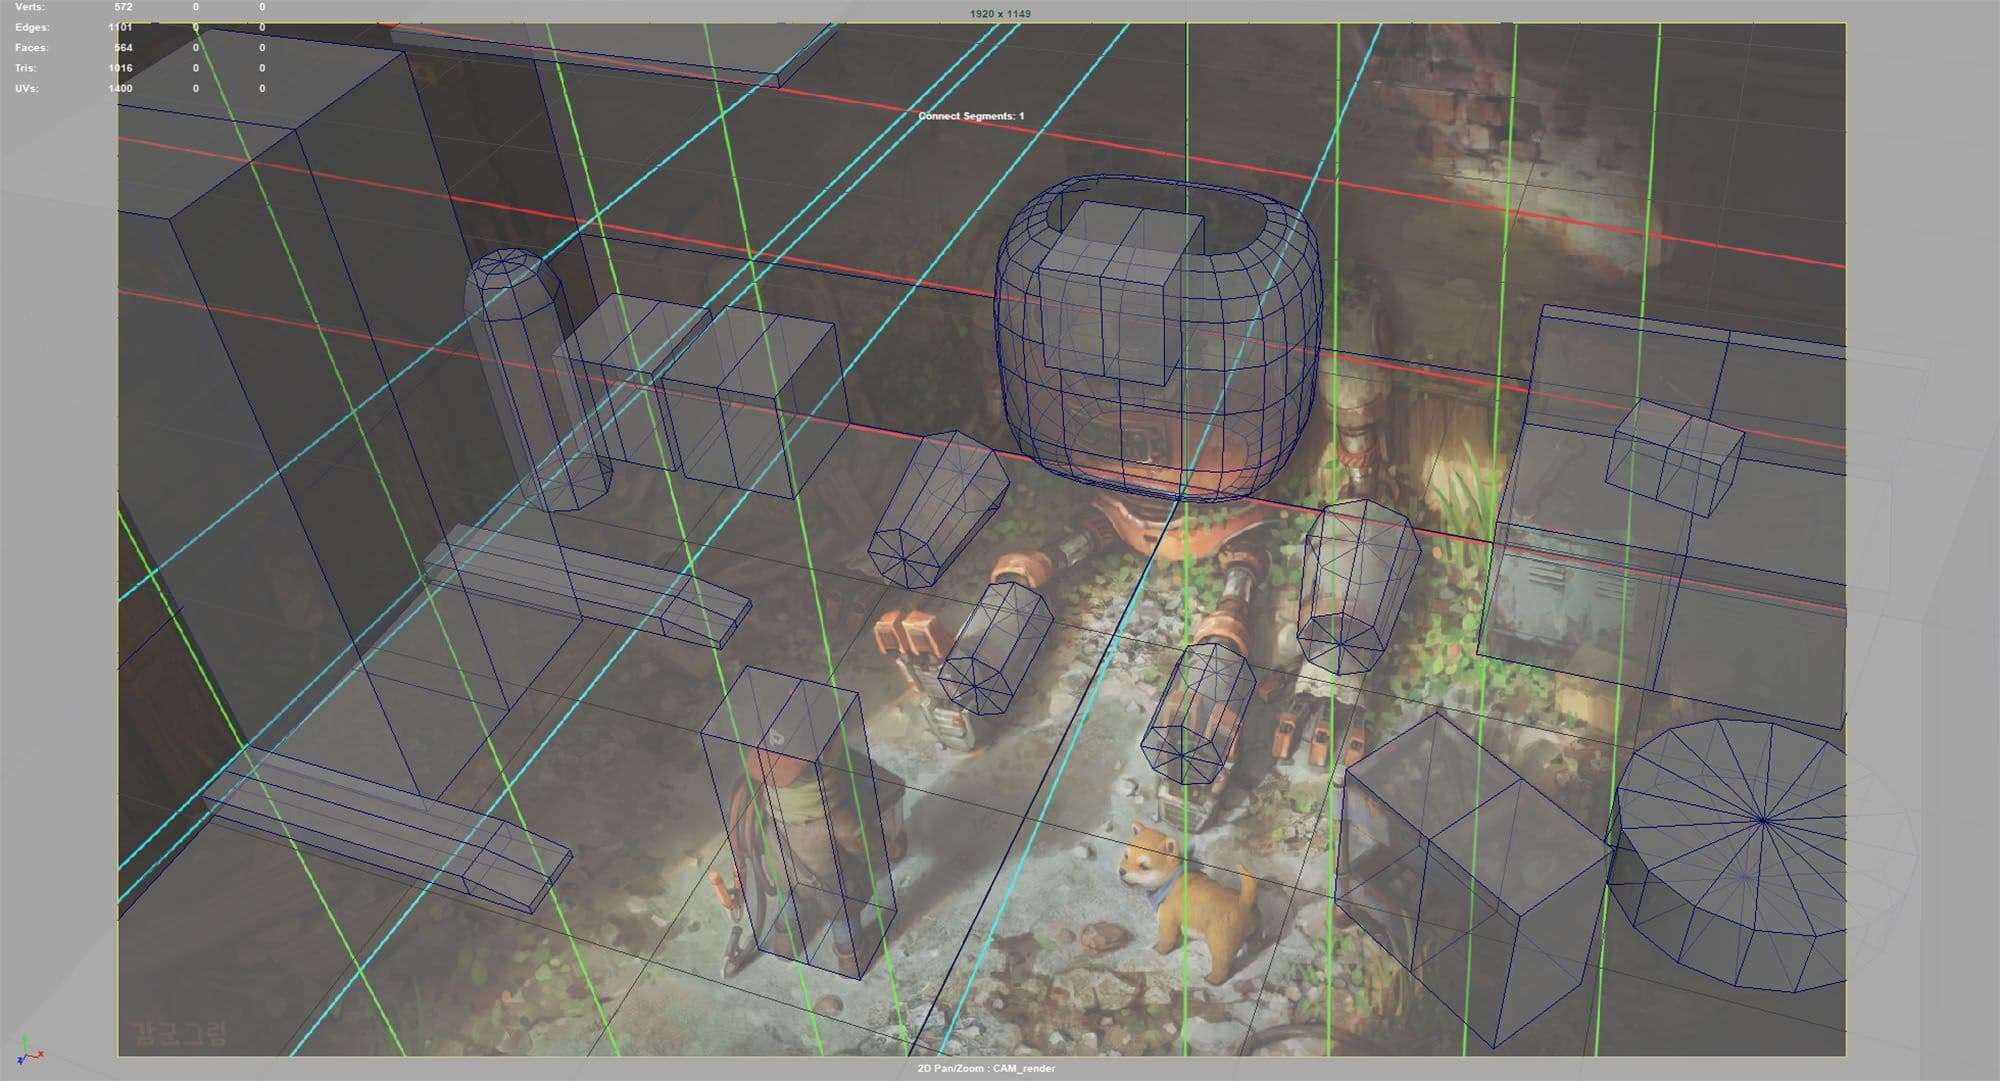
The first issue you are confronted with during this stage is to find the correct camera angle. Therefore, it is recommendable to set the unit system inside your 3D modeling software to match real-world scale better. In this case, I set the scale to “meters'' since my concept had very grounded dimensions. When adjusting the camera to find the right perspective, one might get carried away easily, e.g. objects may be scaled way too small but are positioned close to the camera to appear bigger and match the concept. Working with the correct scale helps you prevent this since you will easily be able to spot what “makes sense” inside your scene.
As for the block out itself, I tried to keep things extremely simple. Instead of blocking out every single object in detail already, I simply scaled and placed primitives which represented the bounding box volume of an actual object around the scene. If the bounding box fit into perspective, I could be assured the finished model, later on, would fit as well.
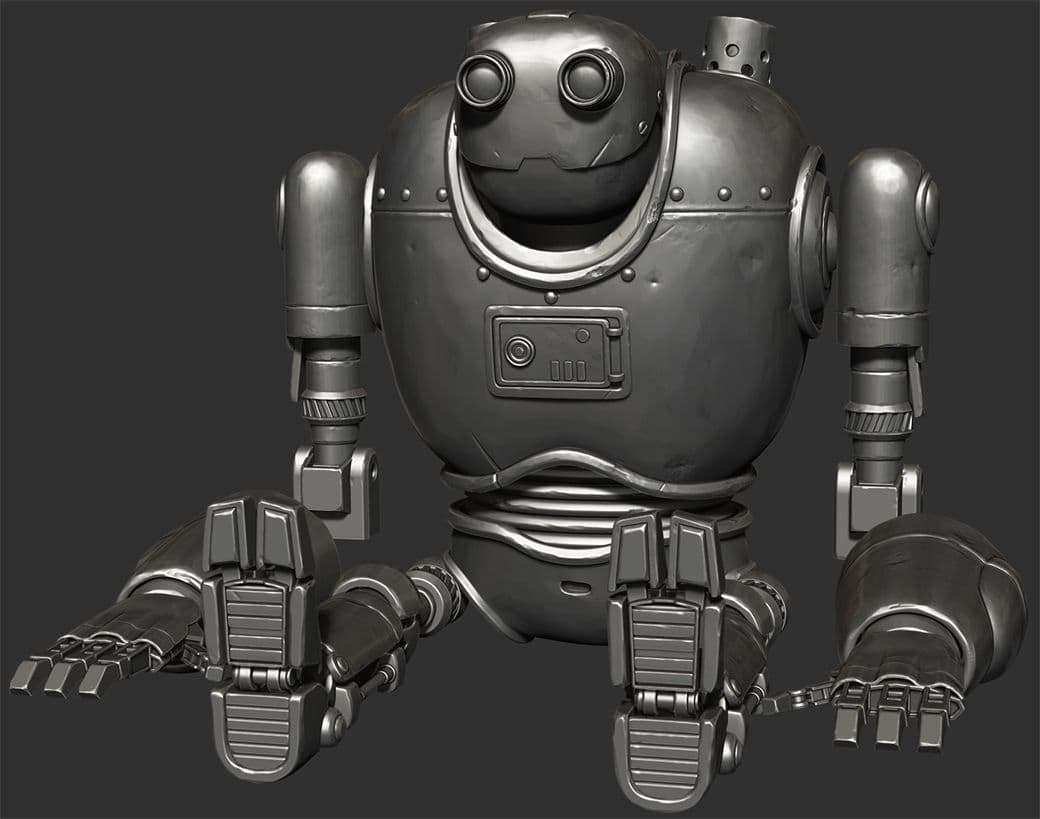
High Poly Stage
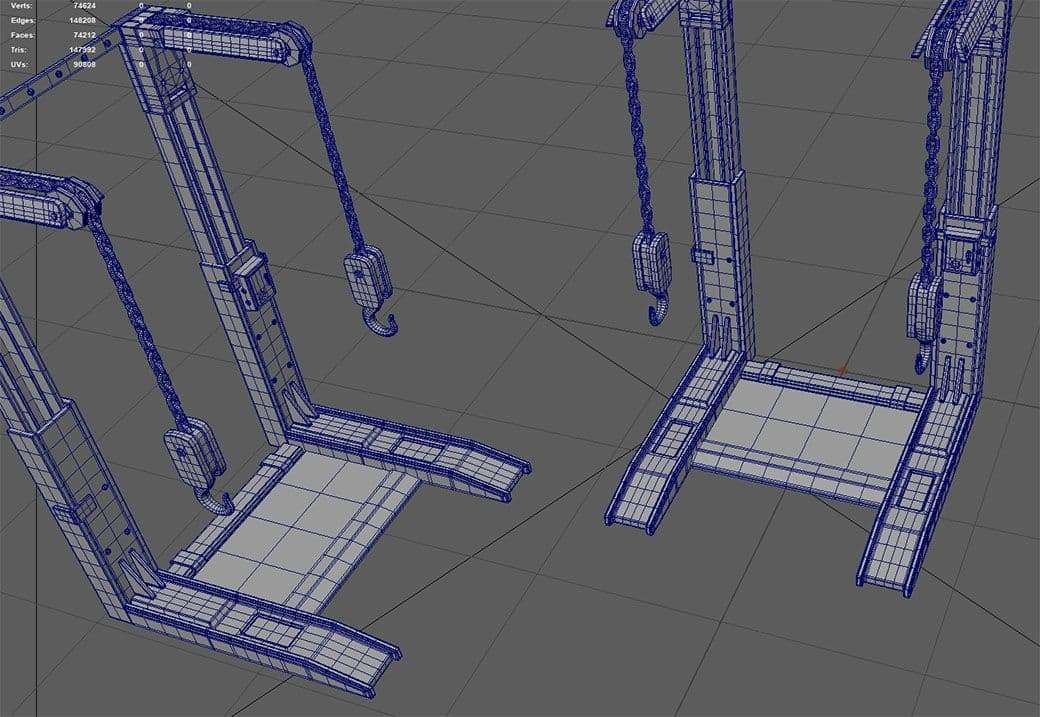
When refining objects, you should try to keep volumes and proportions as accurate as possible. To save time, make sure to use symmetry a lot. Usually, I would block out the shapes of an object at the location in the scene the model will be placed in the end. After marking every important detail/landmark, I would create a copy of that model, move it back to the centre of the world and continue working with symmetry. As long as the pivot of the object stays the same, I will be able to transfer its position and rotation quite simply to match the low poly version in the scene. Refining objects solely depends on your general poly modeling skills.
Make sure to stick to the basics and keep your meshes as simple as possible. Also, try to apply a more reflective material to your objects while modeling them, such as “Blinn”. This way, it will be easier for you to observe the surface of your meshes.
UVs and Details
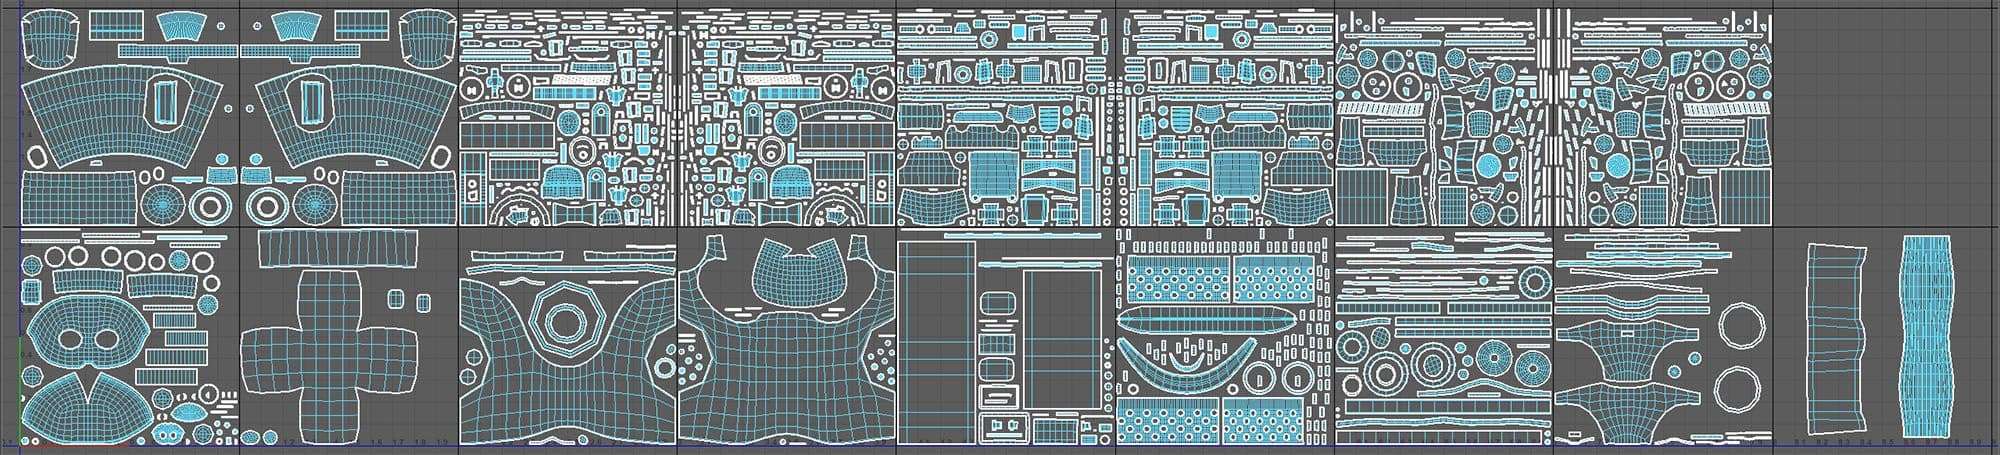
I highly recommend creating the UVs for all of your objects before importing them into Mudbox or ZBrush to add further details. First of all, it facilitates selecting parts of your meshes by using functions such as “Group by UVs” in ZBrush to create poly groups. Secondly, if you plan to apply any kind of tileable texture on your model, e.g. fabrics patterns, you need your objects to be UVed to project them correctly. And most of all, you need to UV your meshes eventually, so why not just do it before your sculpting passes and get it out of your way?
You can keep your UVs simple. Most things don’t need to be extremely optimised, since you can spread your islands over multiple texture sets. Try to group UV islands in a way that makes sense for you during the texturing phase later on. For example, split your model into different pieces and group all the islands of one part in the same texture set, while using symmetry again to save you some time. Most importantly, you should plan how big your objects' Texel Density should be to support your render resolution. Increase the density of objects depending on their distance to your camera as well as their visual relevance in the image.
You can import your models into your digital sculpting software of choice if you want to add another layer of details to your objects. In my case, this stage was useful for applying some surface damage and edgewear to my models, since my scene contains a lot of mechanical objects. For these details, I mainly used the standard brushes in ZBrush such as “Trim Dynamic”, “HPolish”, and ”Dam Standard”.
It is advisable to spend some time on your sculpting pass. Not only because it will add up to the level of complexity and visual storytelling of your models but also helps you a lot during the texture stage, in which you bake all the additional height information onto your mesh maps.
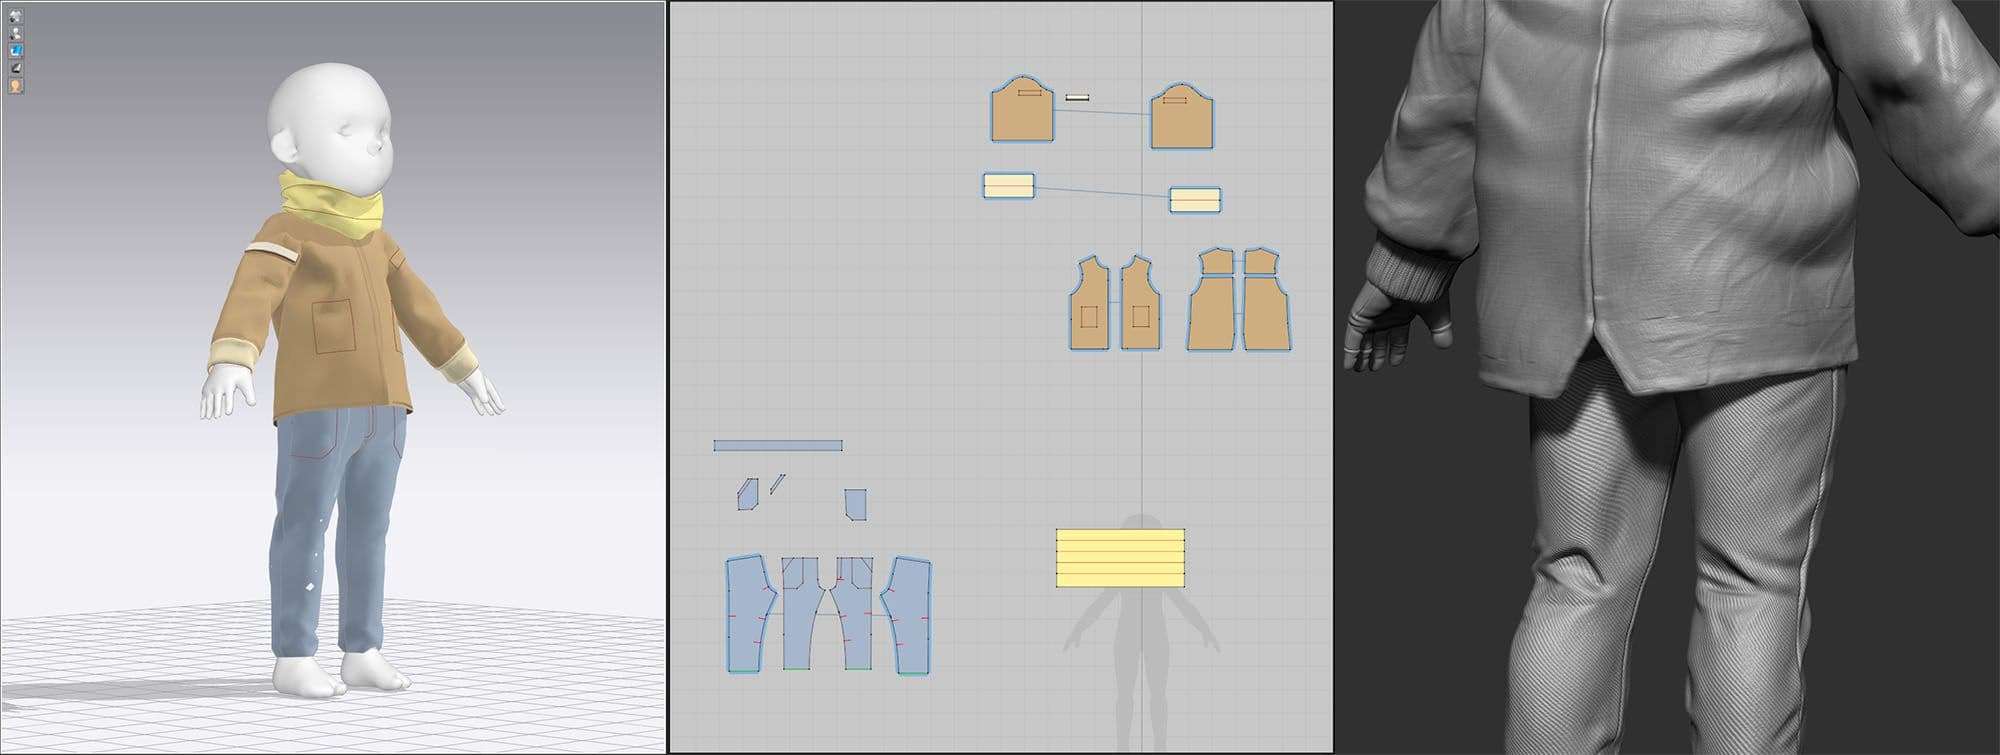
Garment Creation
Creating garments in Marvelous Designer is a quite convenient and fun process. The software is fairly straightforward and intuitive to use. Simply bring up some pattern references of the type of garment you want to create ,and trace them in the 2D View of MD. Then you need to sew your patterns together and simulate them in the 3D view.
There are a lot of tutorials available online, providing assistance to create whatever suits your project. I used Marvelous Designer to create the clothes of my characters, not only because it saved me a lot of time, but also because of the generated UVs. See, any garment that is being created in Marvelous will automatically include perfectly unfolded UVs since they are based on the exact pattern you defined at the beginning. The only thing that needs to be done is to retopologize these garments to use them in ZBrush.
As mentioned before, having nice UVs will make it easier to project tileable alphas onto your high poly meshes. This is one of the reasons why working with Marvelous Designer enables such a powerful workflow.
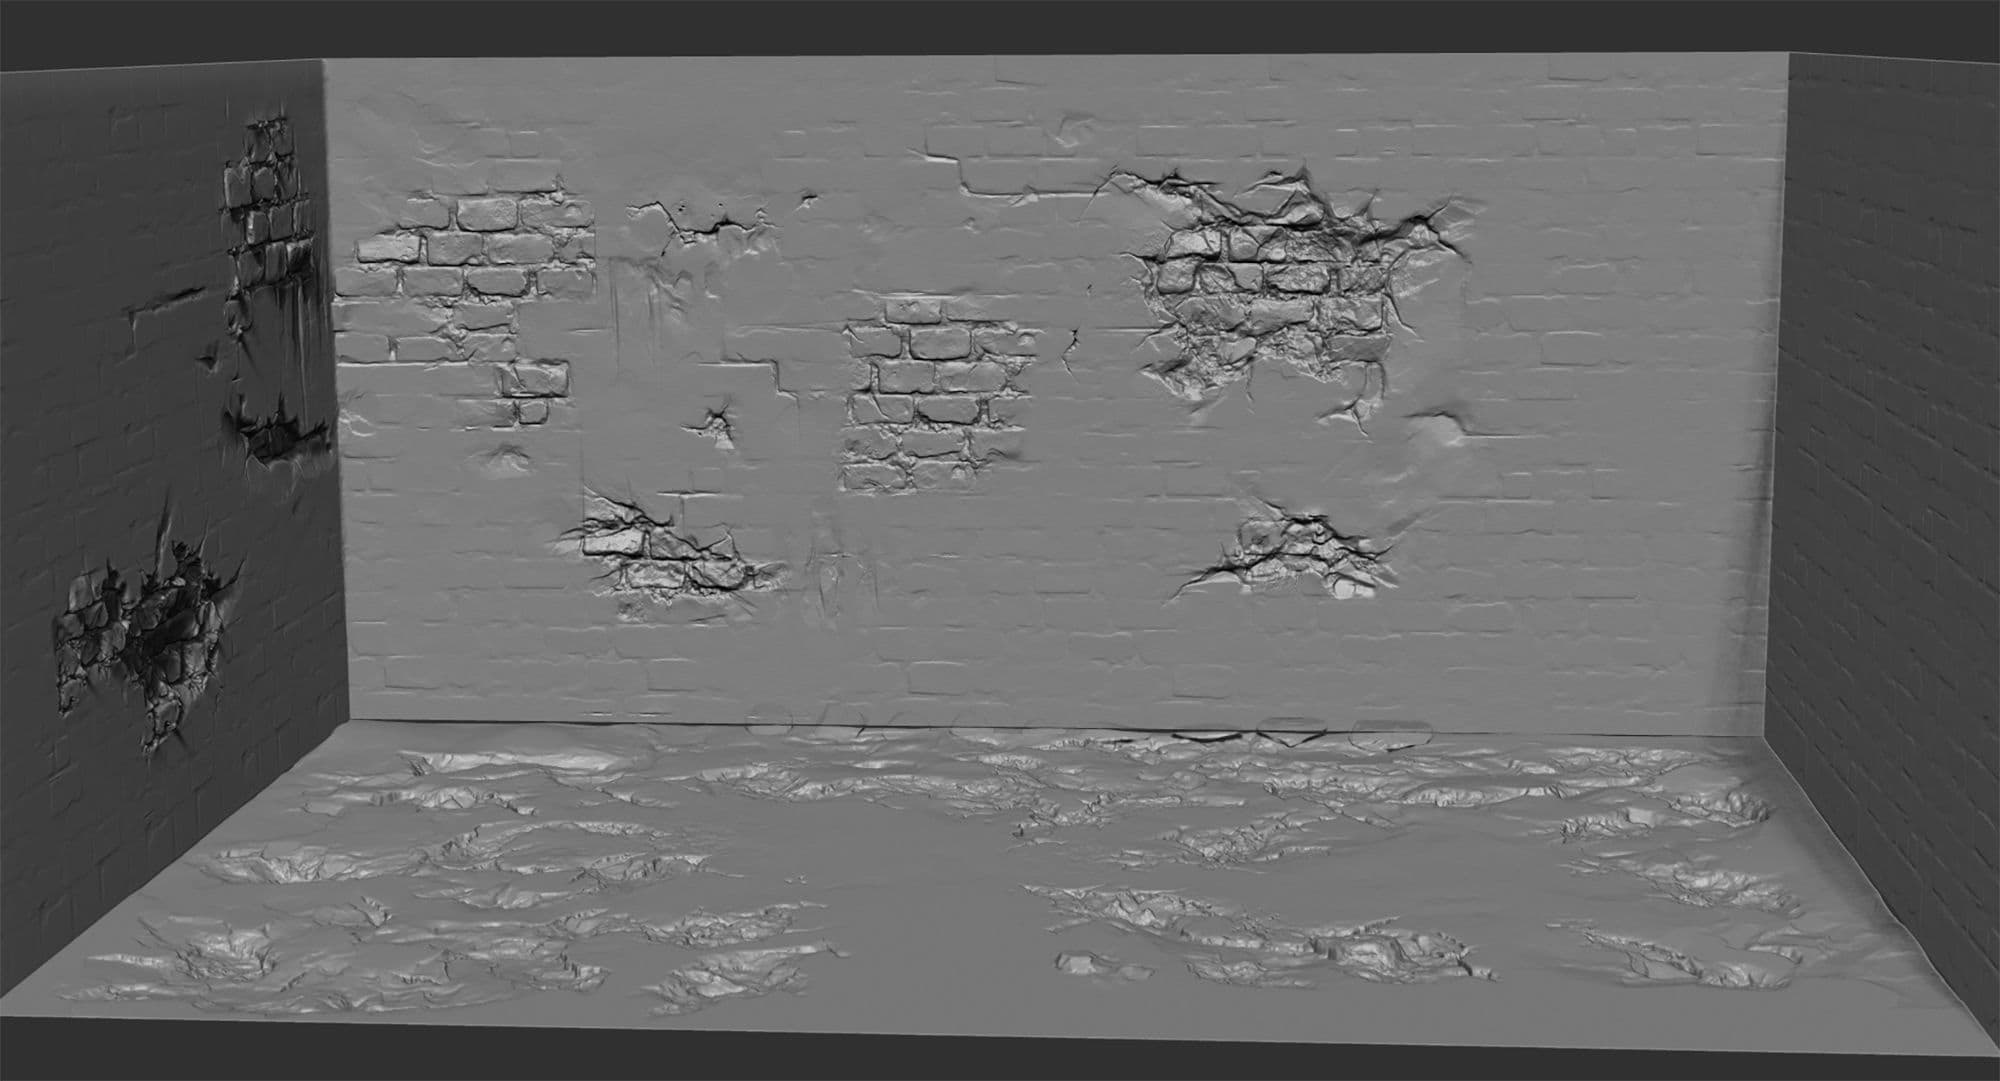
Environment Modeling
Even at this point in the process, after modeling most of the props and characters, I still had the feeling that the scene looked empty. I think, only after providing a visual context for all of your objects, you start selling an image to your audience. Therefore, I have put a lot of care into the environment for this project. For the brick wall of the garage/shed, I created my own tileable texture in ZBrush. I want to emphasise that it is not necessary to go to the lengths of doing so since you can easily achieve a similar effect with brushes and textures that are being provided online. The reason I wanted to create my own displacement texture was to gain more control over all the shapes and patterns of the bricks.
In addition, I still used several different alphas to accomplish all the cracks and holes you might see on the walls as well as on the ground. There is no need to create everything from scratch. Use the tools that are available to you! Just make sure to integrate all your external elements well into your scene to keep things consistent.
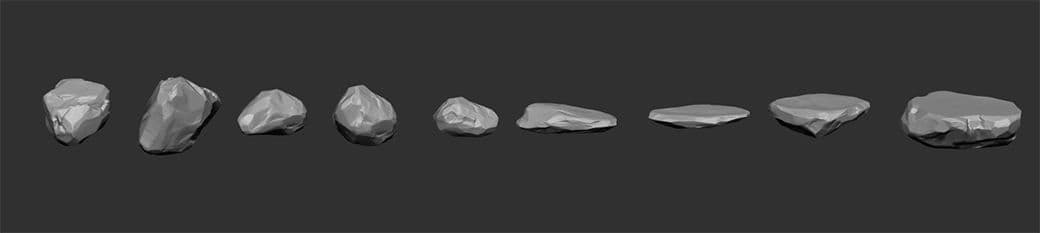
Creating repetitive elements such as wooden planks or pebbles is fairly simple. Just create a couple of unique objects and unwrap and texture them beforehand. Afterward, you can copy and place them all over your scene.
Texturing and Look Development
The texturing stage truly enables you to add plenty of storytelling elements to your objects. There is so much history in everyday objects and being able to reflect that through your textures is a very effective way to fill your scene with life.
For creating convincing materials, one important rule is to layer them in a way that resembles real-world materials.
Start by defining the base material of your object and progressively add details such as paint, dirt, and rust on top of it. In order to save some time, it is advisable to work with masks as much as possible. This very non-destructive approach allows you to reuse a lot of your work. When adding details, try to imagine what could have happened to your object. Has it been used frequently or was it exposed to a certain kind of force? It is not only very fun to think about these questions, but also highly beneficial for guiding your artistic choices.
One tip: Sometimes you can also think about how different objects in the same scene might interact with each other. For example, in my scene, I have added a little bit of paint to one of the card boxes since I knew a paint bucket would be placed on top of it.
Approaching Grass and Hair Creation
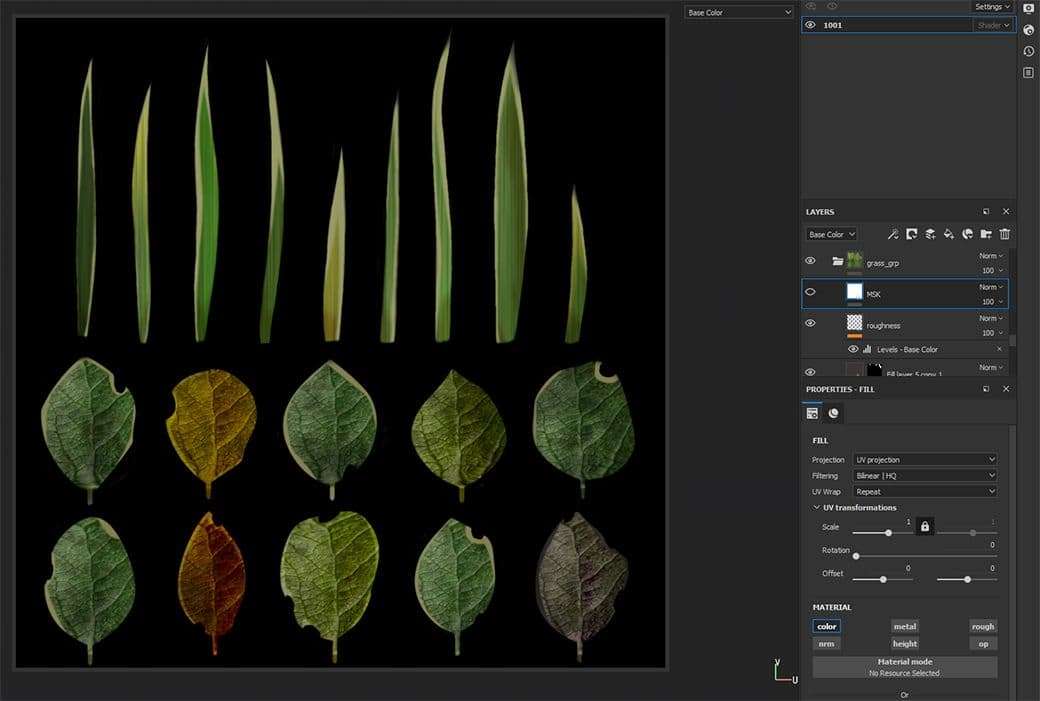
I personally had no prior experience in creating grass and hair in 3D. Therefore, approaching these subjects was quite daunting at first. When learning new skills or techniques, I like to break down the topic in my mind to its very core principle. This way I prevent myself from feeling overwhelmed. For instance, for the kind of grass that I wanted for my scene, I assumed that it would be necessary to create some polygon stripes which I would arrange in certain clumps and unwrap them afterward. Modeling and unwrapping objects are simply fundamental skills. So, the only new thing that was new to me was creating a grass texture.
I decided to design my custom grass texture in Adobe Substance Painter since the program allows me to make use of its extensive grunge library and other tools. After adjusting the general look of the texture to my ideas, I just needed to paint an opacity mask that would define the shapes of the grass blades and leaves.
I kept the process of creating hair for my character rather simple as well. I looked up some tutorials online to learn about the basics of XGen and just tried to replicate what I had seen.
Keep the flow of the hair and the shape of hair strands in mind as you place your guides and only place hair in areas that are visible to the camera to save valuable time. For the fur of the dog, I decided to keep the hairstyle very subtle and low density. Only for the tail, I increased the hair density again to enhance the silhouette. Sometimes less is more.
Telling a Story Through Your Environment
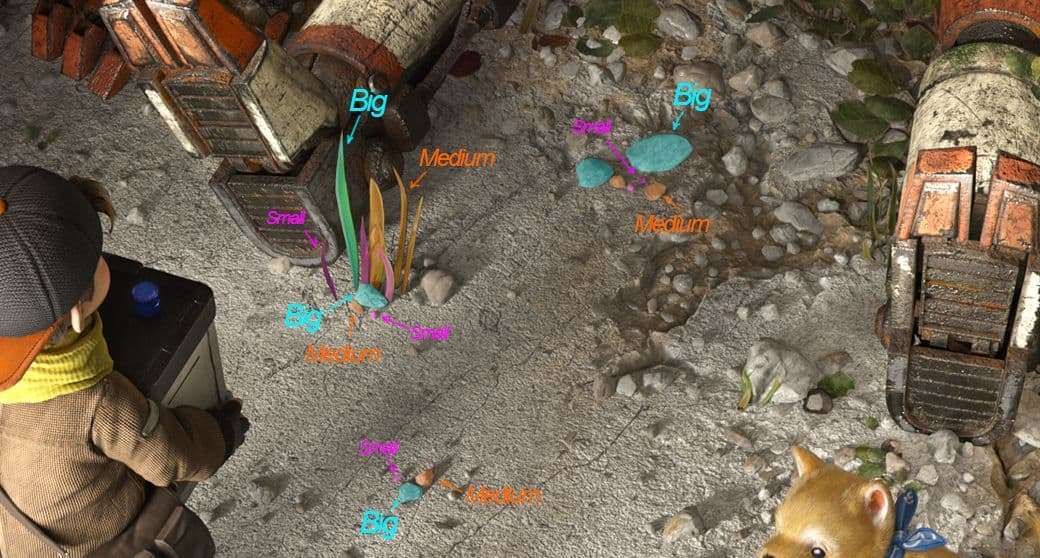
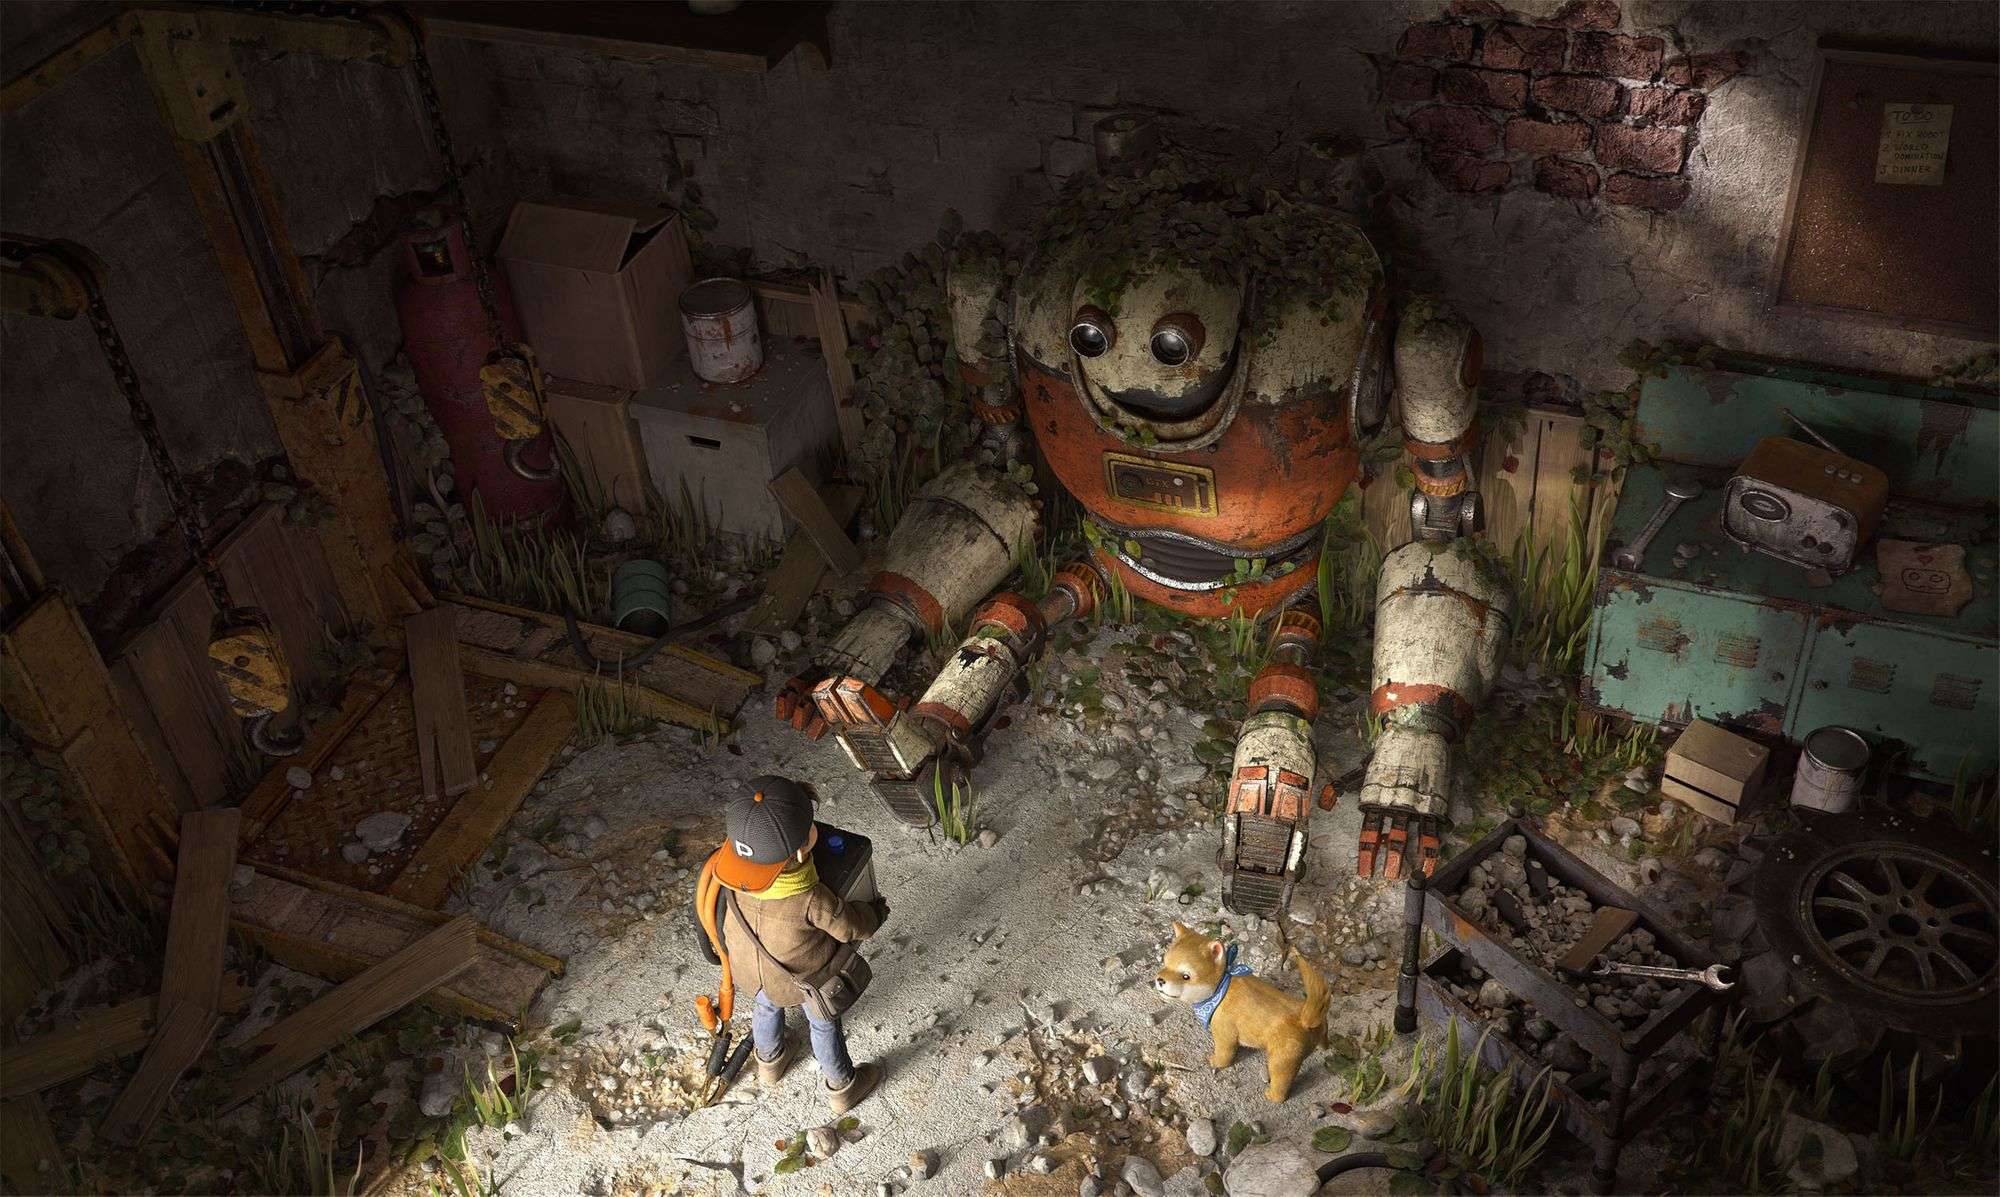
I already mentioned how sculpting and texturing can enhance the aspect of storytelling in your image. Another method to make your scene more believable is by using the arrangements and layouts of your objects. Therefore, we can apply a couple of principles that are common in the field of graphic design. One is the rule of creating hierarchy. You do not want to draw the same kind of attention to every object at once. Instead, it is recommendable to group and arrange them in a way that creates a visual hierarchy. The principle of “Big, Medium, Small” is a good method to establish this sort of hierarchy and make it look visually interesting at the same time.
Another approach to creating interesting-looking groups is by combining different kinds of objects and let them interact with each other. You can see in my scene how many of the objects have different smaller elements placed closely around or on top of them, e.g. grass, pebbles, vines, wood planks, etc. And even these smaller objects are grouped with other elements. This way, none of your objects will look isolated, since everything is visually connected harmoniously. These principles may not always reflect real-life 100% accurately, but they can help us artists to create a level of diversity that might resemble the vast chaotic beauty of nature at least in some way.
Lighting
Creating a lighting setup for your scene is a super fun stage! You can easily alter the mood and focal point in a very quick fashion. This stage allows you to truly experiment and be creative. Similarly, as I have approached anything else so far I recommend you to keep things simple at first. It is very easy to get overwhelmed when you place a bunch of different light sources around your scene.
Start with your key light that will draw the most focus in your scene. Afterward, you can place additional lights that either enhance your focal point or illuminate your scene as a whole. Depending on the kind of scene that you are creating you can introduce more contrast to increase the dramatic effect. Also, do not get frustrated if you struggle to recreate an exact lighting setup. There is still a lot that can be done during the compositing stage!
Rendering & Compositing
It is advisable to render your scene multiple times during the various stages of your project. This way you can check your progress and also have an estimate of your render time. Do not just create your final render on the last day in case you need to fix multiple things, forcing you to rerender!
If your render time is high you should look up how to optimise your scene or maybe lower the quality of your render a little bit. If your render time is extremely high (16h+) you might even want to consider using an online render farm. After you have created your render and all your different passes you can edit them with the compositing tool of your choice. I simply used photoshop since I wanted to keep my adjustments simple. During the compositing stage, you can refine your lighting some more, add interesting effects, or adjust various levels of your render.
I like to refine my focal point in this stage since I have more control over the light’s intensity, shape, and colour. Try not to overdo it though, since your render could quickly look very unnatural if you crank up your values too much!
Closing Words
Thanks so much for sticking around up to this point! I hope I could provide some useful tips and techniques on how to tackle this kind of project. There certainly is a lot to learn and a lot to know about every single topic mentioned above. And the workflow I presented here is just one of many different ways to approach things.
Personally, I think it is utterly crucial to stay calm and not to get overwhelmed.
Anything new can be scary at first, therefore it is important to simplify things as much as possible at the beginning. Take a deep breath and keep in mind that every journey starts with a single step.
At this point I want to thank Think Tank, my supervisor Matt Dicken, my classmates, friends, and family for supporting me and providing valuable feedback.
I would also like to thank The Rookies for giving me the opportunity to share my process of this project with all of you. Hopefully I was able to present you some useful information that will contribute to your next project.