Raphael Pfyffer, a 3D Modeler and Alumnus of Lucerne School of Art and Design, practices his craft by creating unbelievably realistic 3D characters.
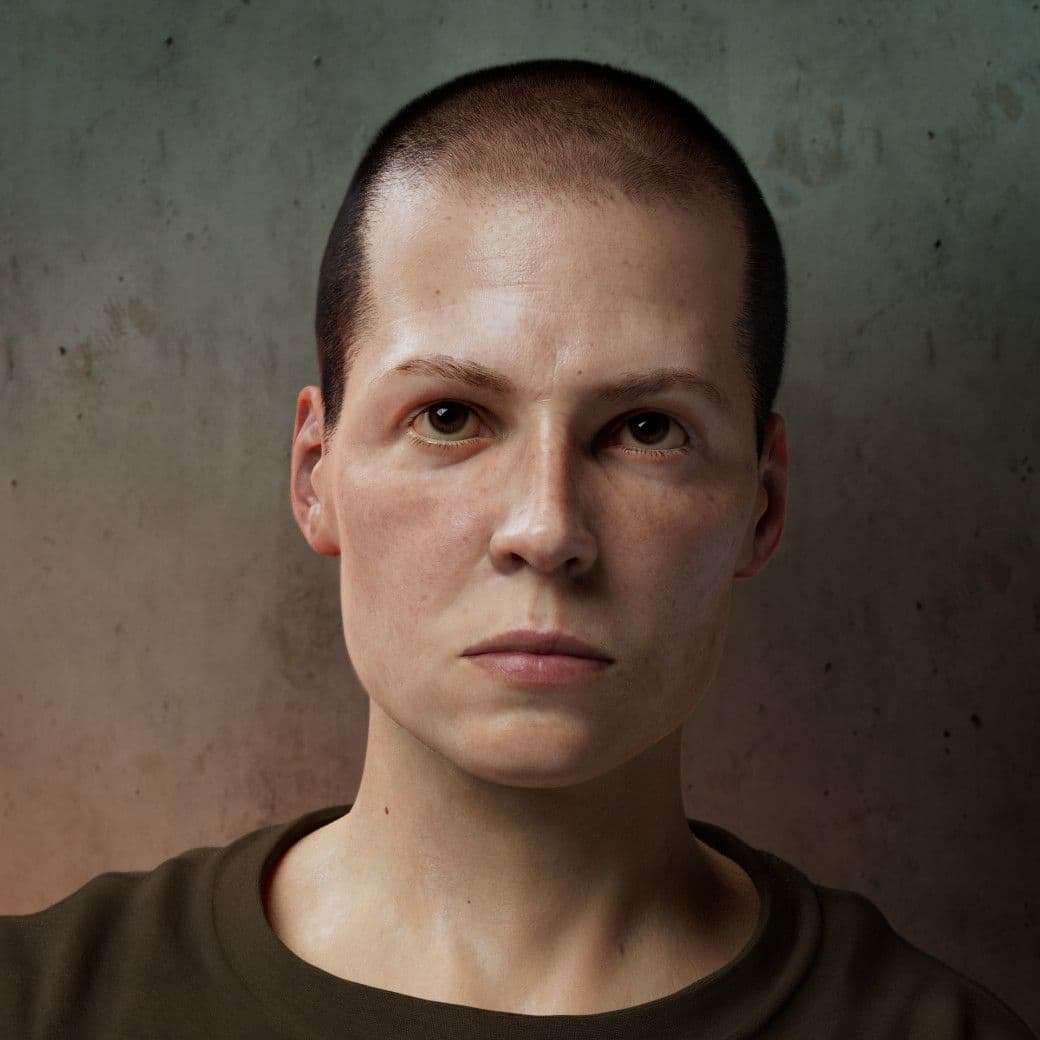
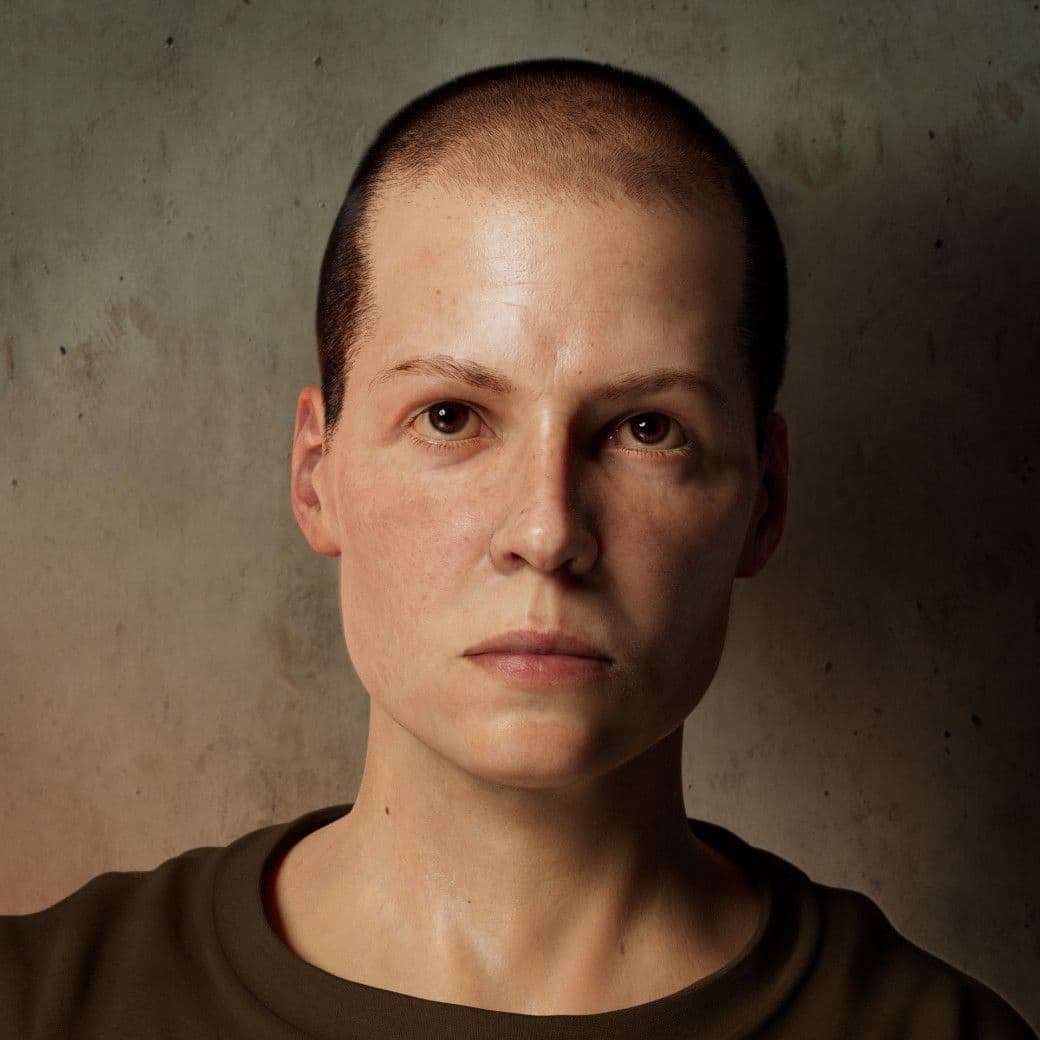
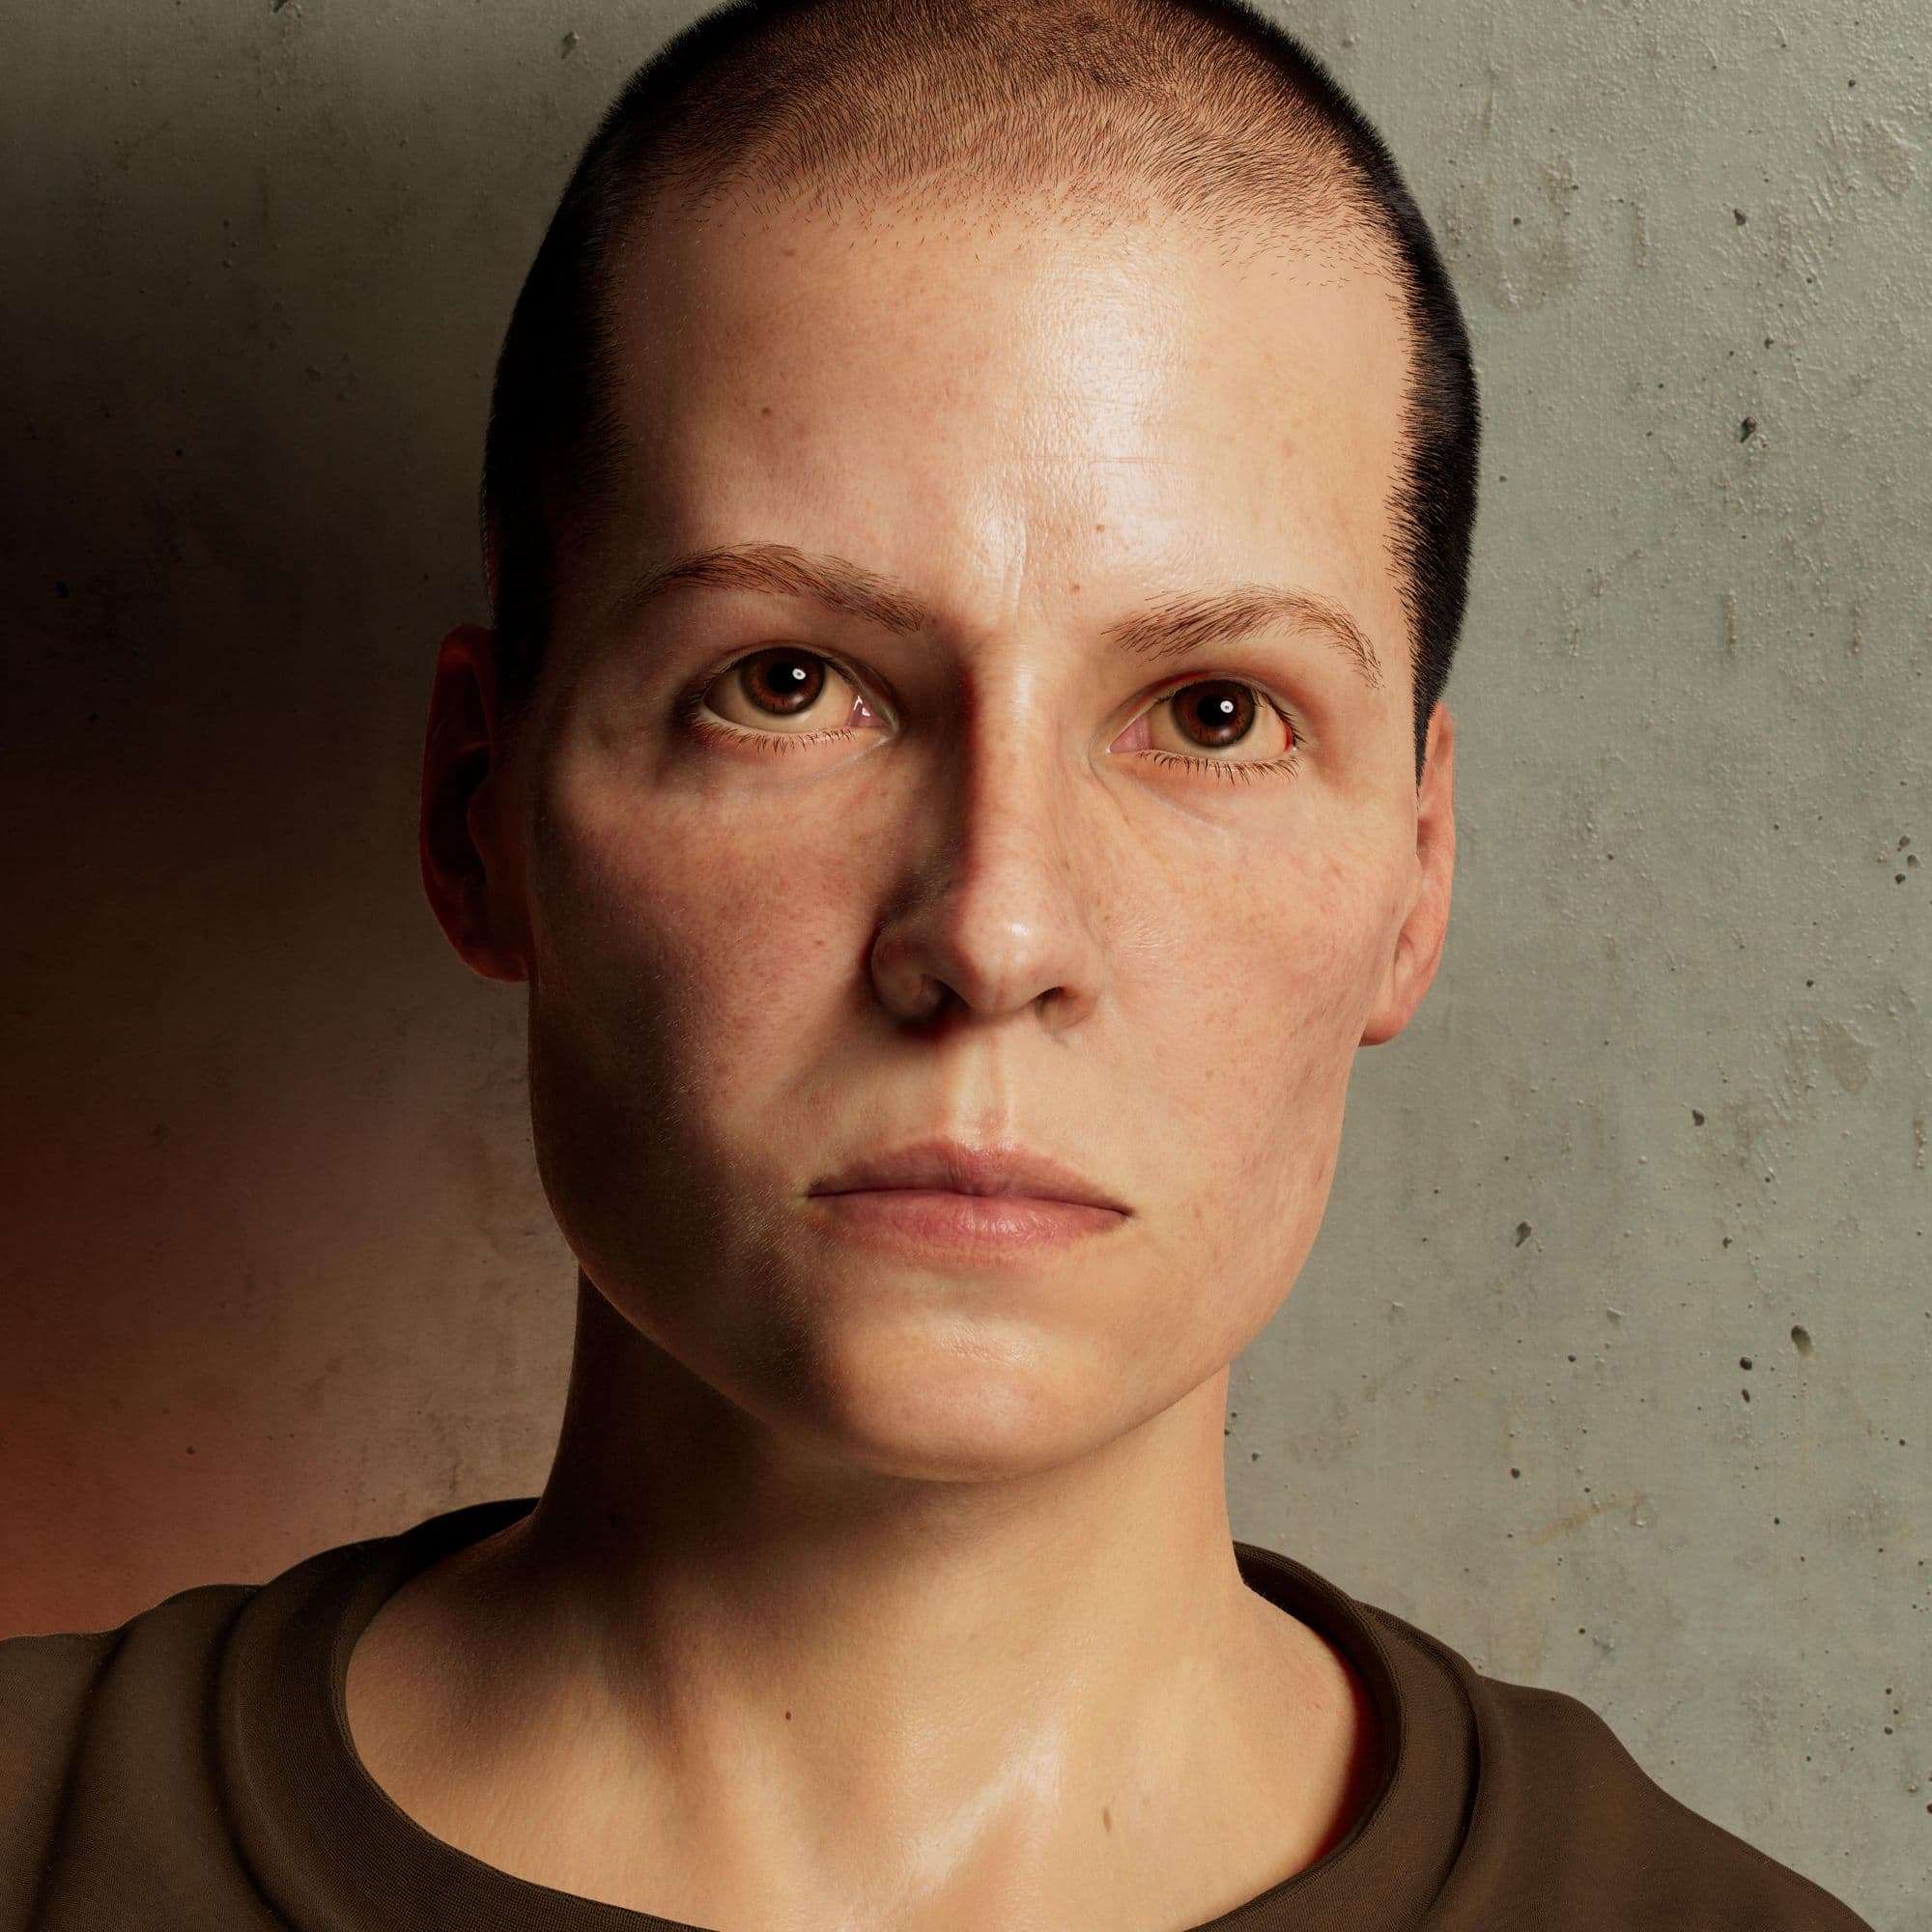
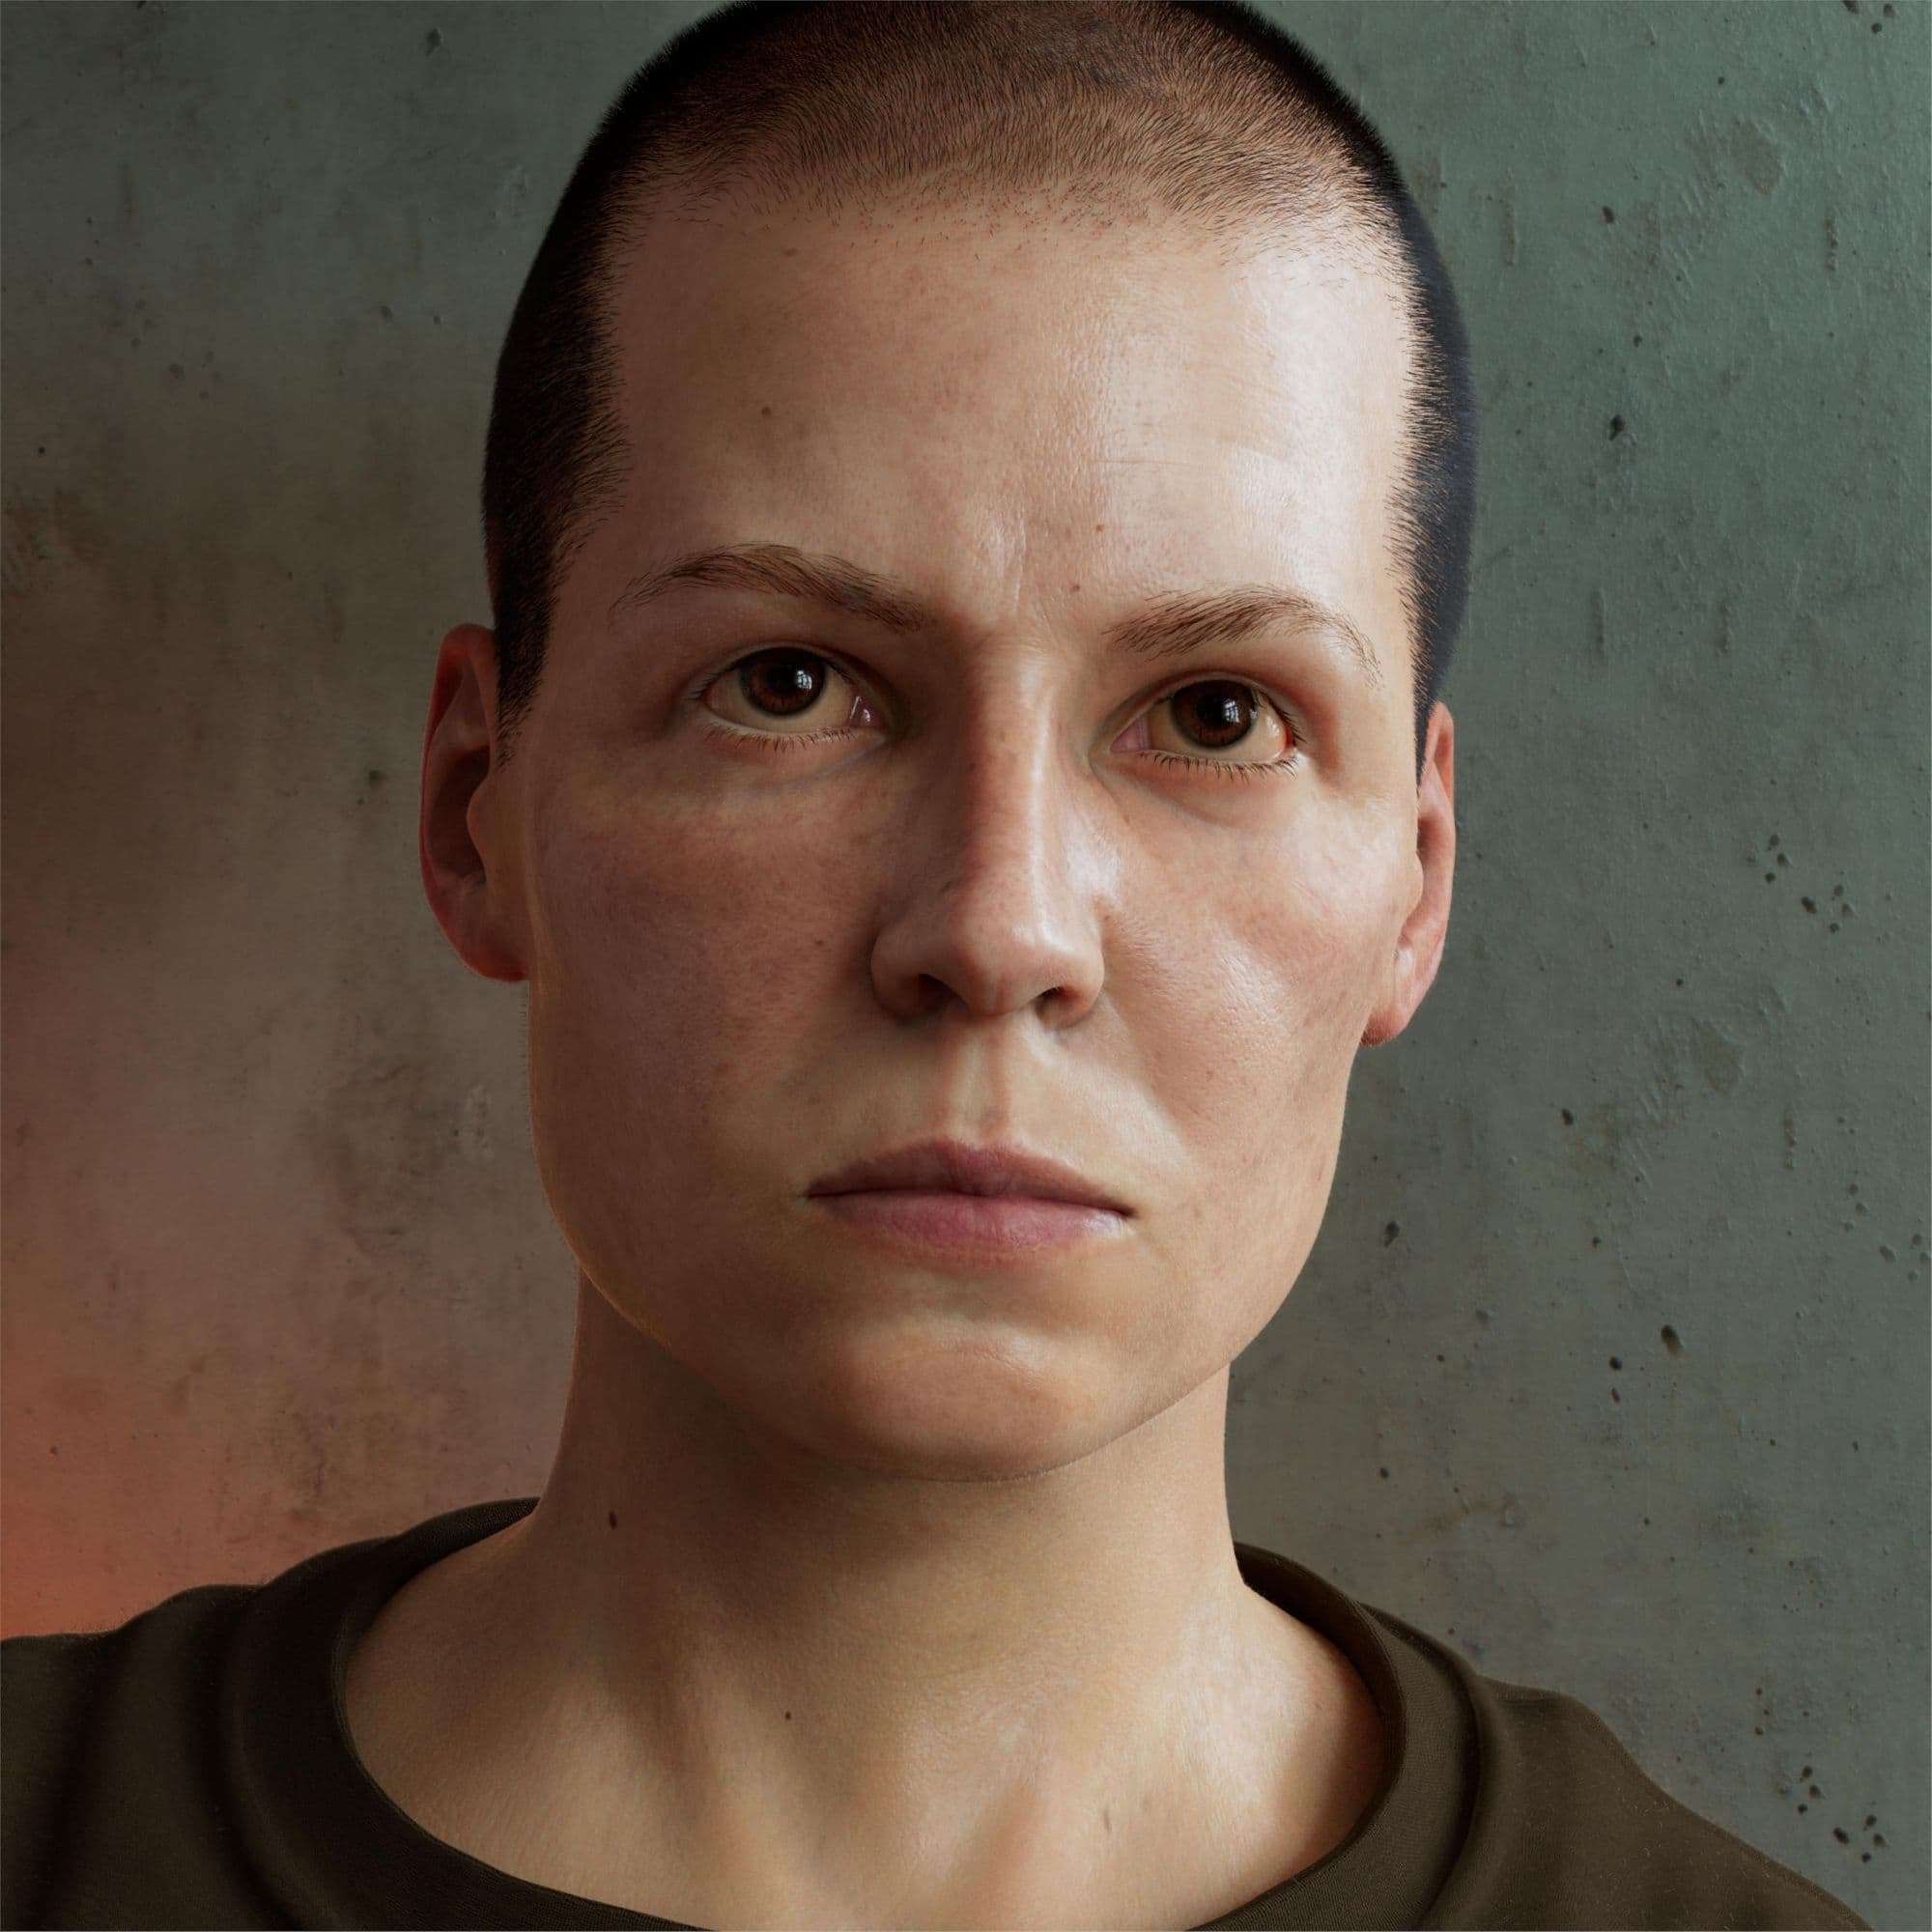
In this article Raphael shares with us how he created this digital portrait of Ellen Ripley, character and protagonist of the Alien film series.
Raphael Pfyffer is a 3D Modeler and Alumnus of Lucerne School of Art and Design. Raphael is eagerly looking forward to starting in the industry and in the meantime, practices his craft by creating unbelievably realistic 3D characters.
In this article Raphael shares with us how he created this digital portrait of Ellen Ripley, character and protagonist of the Alien film series.
Getting Started
At the beginning of this year, I took an online course at Fly On the Wall Studios, from Kris Costa. This course is specifically for creating digital portraits. After doing one of Buster Keaton some months ago, I wanted to try my hand at a female portrait this time. As someone who loves the Alien movies and is a huge fan of the character of Ellen Ripley, the decision was an easy one.
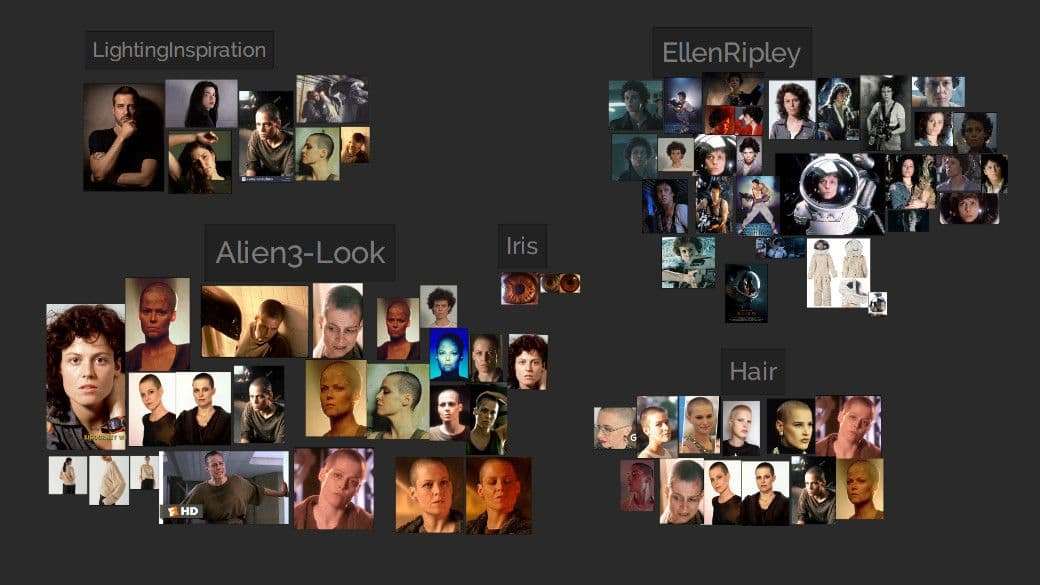
As soon as it was clear what my next project would be, the reference gathering began. I collected as many photographs in as many different angles of her as possible. In the process, the collection got bigger and bigger.
Finding the Forms
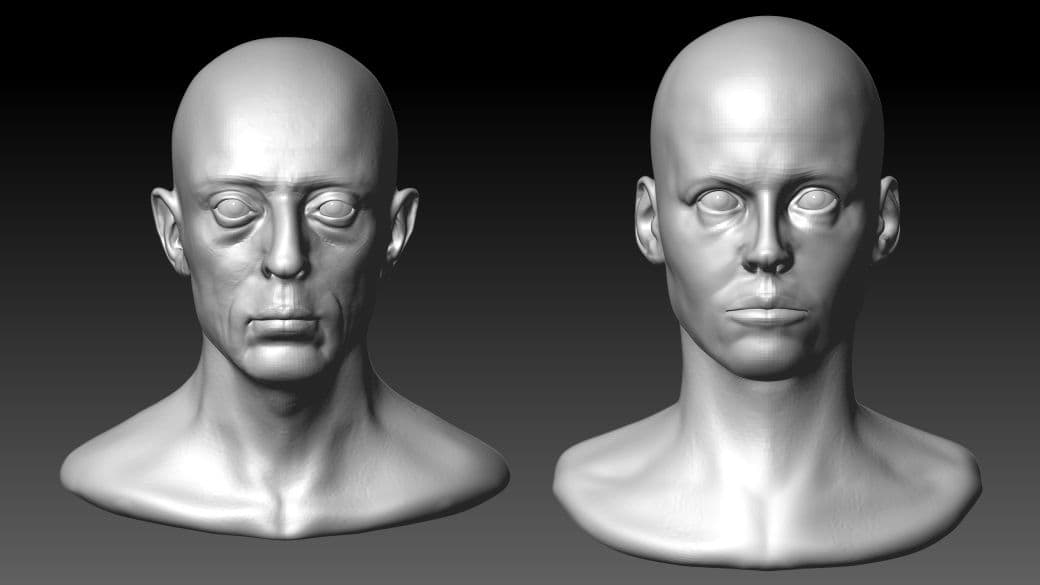
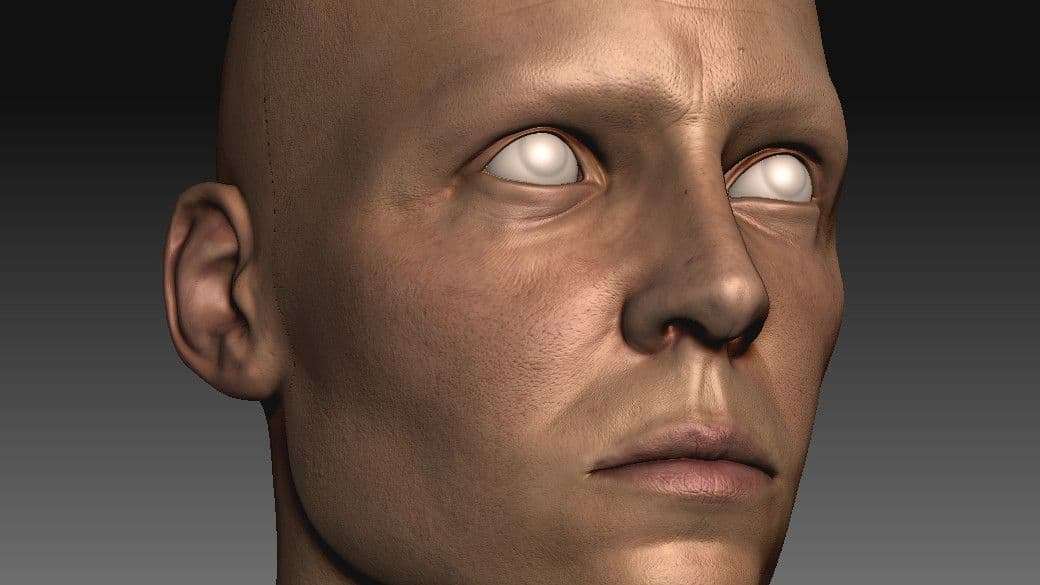
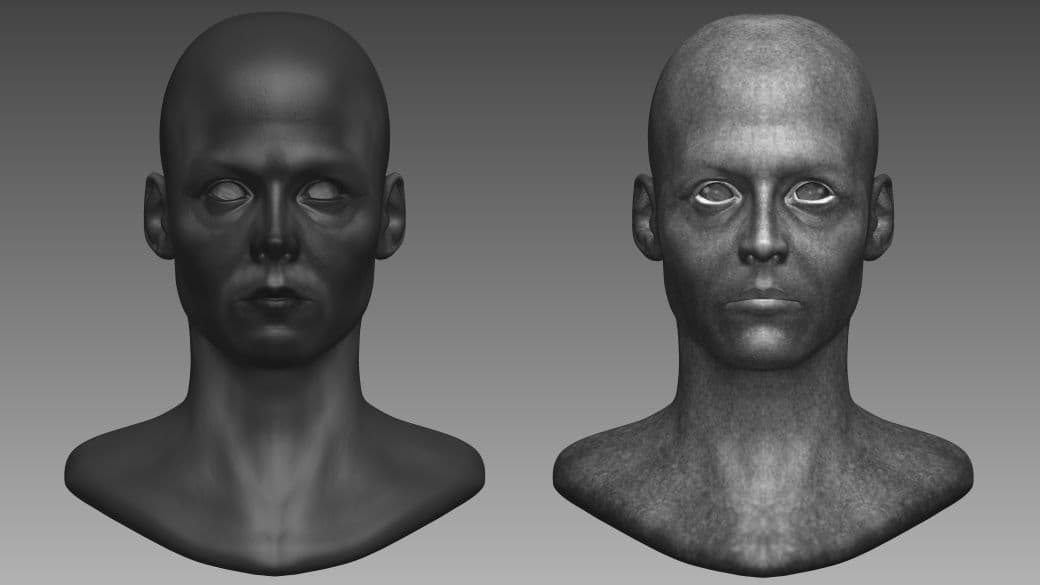
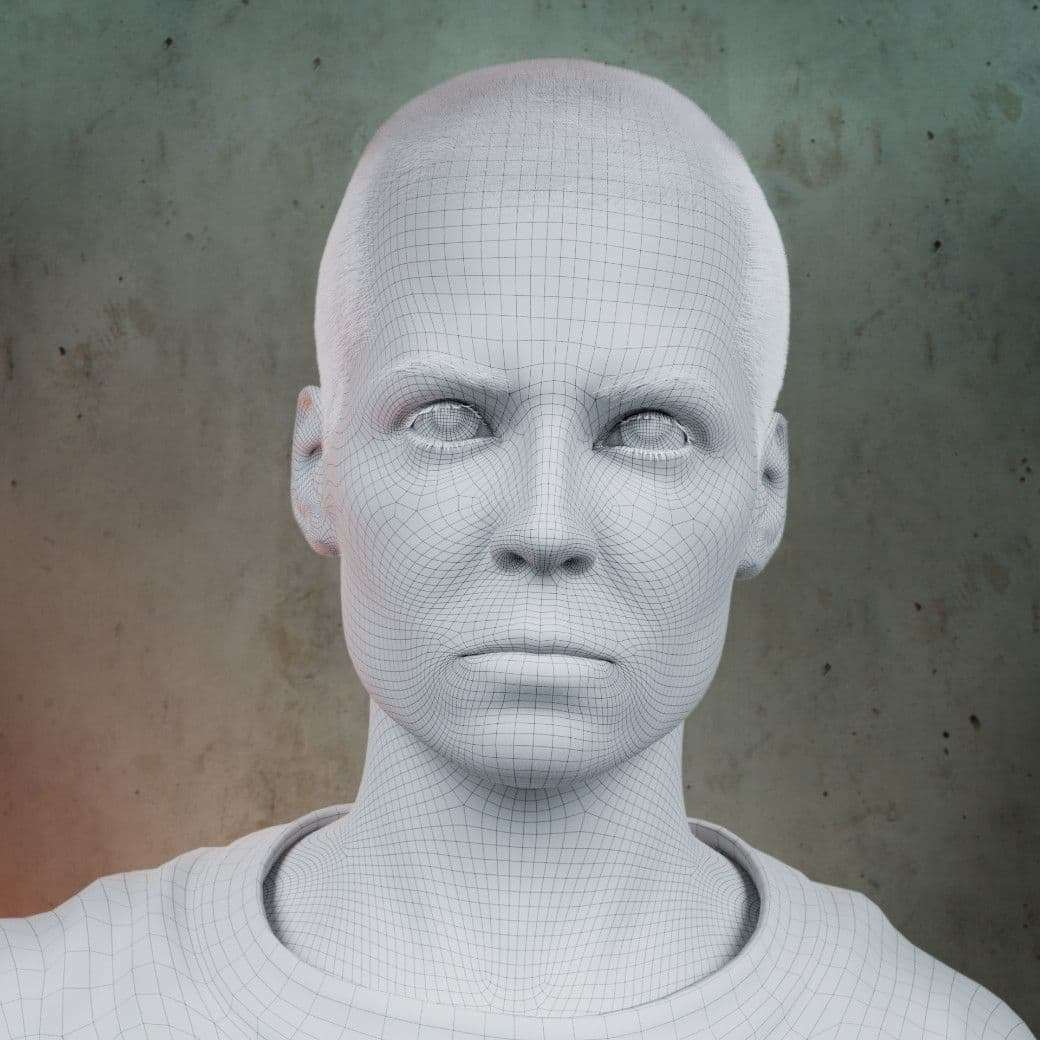
To speed up the process, I used the previous portrait I did as a Basemesh. Although the model is vastly different it still gave me a good ballpark for the proportions and topology. In the beginning, it was all about getting a feeling for the facial structure and trying to find the primary forms while checking back with the reference material. It was important to move the forms carefully around with the underlying topology in mind.
When I got some pinching or stretching of the topology, I made a Morph Target for my highest subdivision. I then switched to the lowest subdivision, smoothed the problematic areas, and moved the topology slightly around to space out the Topology more evenly.
Next, I projected the Morph Target back. The details of the model on the higher subdivision remain but the topology is now cleaner. This technique only works if the changes are not too big. Otherwise, they are affecting the higher subdivisions.
On the left: The Basemesh I used. On the right: The model after some adjustments. Both displayed with the second Subdivision.
Matching the Reference with Blender
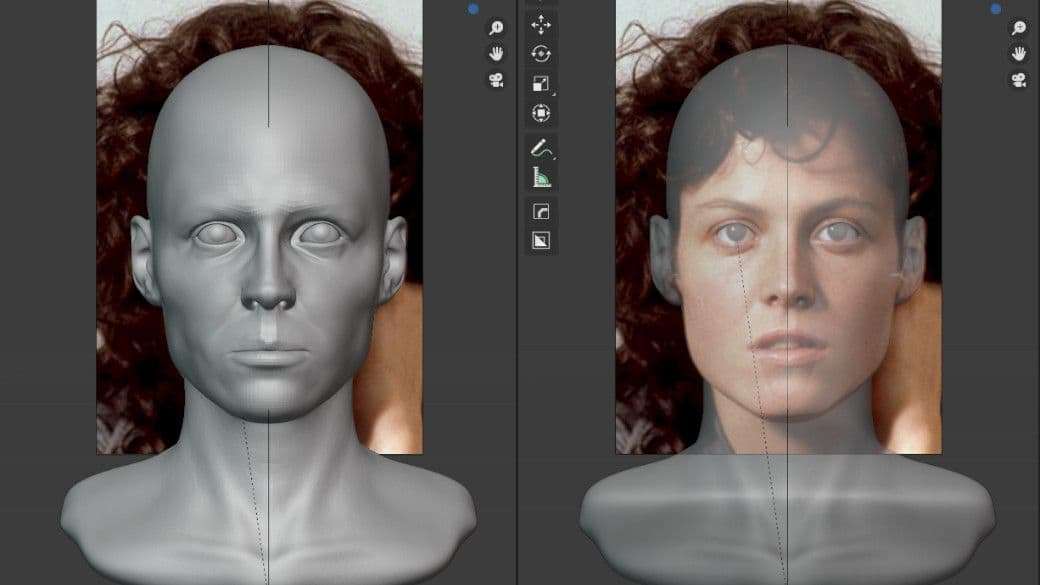
When it comes to modeling characters based on references I do not fully trust the camera in Zbrush. Because of that, I set up a scene in Blender where the main reference is parallel to the camera.
Then, I imported the second-lowest subdivision of my model and positioned it with an empty so it matched the reference. I spent some time doing research and testing to find out which focal length worked best. With the sculpting tools in Blender, I matched the proportions with the underlying reference.
The reason I imported the second-lowest Subdivision is, to still have enough resolution to sculpt the main forms but without getting lost in the little details. Because of the empty, I could now always import a new model, parent it to the empty, and it would always be in the right spot.
The reason I didn't do this step in Maya is simply that I prefer the sculpting tools in Blender.
Quick tip (I had to learn the hard way): When you have the empty, reference, and the camera placed in your scene, don’t forget to lock them so you do not move and change them accidentally.
After doing some adjustments, I imported the model back into Zbrush and projected it onto the first two subdivisions of my main model. I used this back and forth between Zbrush and Blender till quite late in the process. Because I would only project the model from Blender onto the first two subdivisions, details on higher subdivisions like wrinkles or even pores would remain intact.
Setting up UVs
Because I used Geometry HD on my previous Model (the one I used as Basemesh) and planned to do so for this one too, I knew I would need high resolutions for the UVs.
The Model with Geometry HD would have around 104 million Polygons in total. I went with 4 UDIMS with 8k resolution each. That would allow me to display 256 million Polygons with 100% usage of the UV space. Even with a low space utilisation of under 50%, I would be able to display all the details.
In the end, four UDIMs are for sure overkill, and could be easily reduced to three. Especially because I used at least 70% of the UV space. But it is what I had on my previous model and I knew it would work just fine so I went with four UDIMs.
Texturing XYZ
Unfortunately, there is no proper way to use Texturing XYZ with UDIMs. I had to make a duplicate of my model, delete the Geometry HD, and make new UVs with no UDIMs. I subdivided the model 6 times up to around 26 million.
I wrapped the Texture Map as a plane—according to a tutorial by Şefki Ibrahim - with Zwrap around my model. After that, I masked the parts that didn’t wrap correctly, smoothed them, and projected the plane back onto the model.
After the Texture map was wrapped correctly around the Model, I baked the Albedo map and the Displacement map with Zwrap into the Model. I then took the Albedo Map into Gimp and filled the uncoloured parts with the stamp tool to get a skin texture over the whole head.
Back in Zbrush I converted the Texture to Polypaint and overpainted the transitions to make them seamless. Then I split the RGB Channels of the Displacement map in Gimp.
Finally, I applied each R, G and B Channel in Zbrush separately to the model, again according to the Tutorial from Şefki Ibrahim. It took me quite some testing to find the right displacement intensity for each channel. After the Displacement was done, I projected it and the Albedo Map onto my Model with Geometry HD.
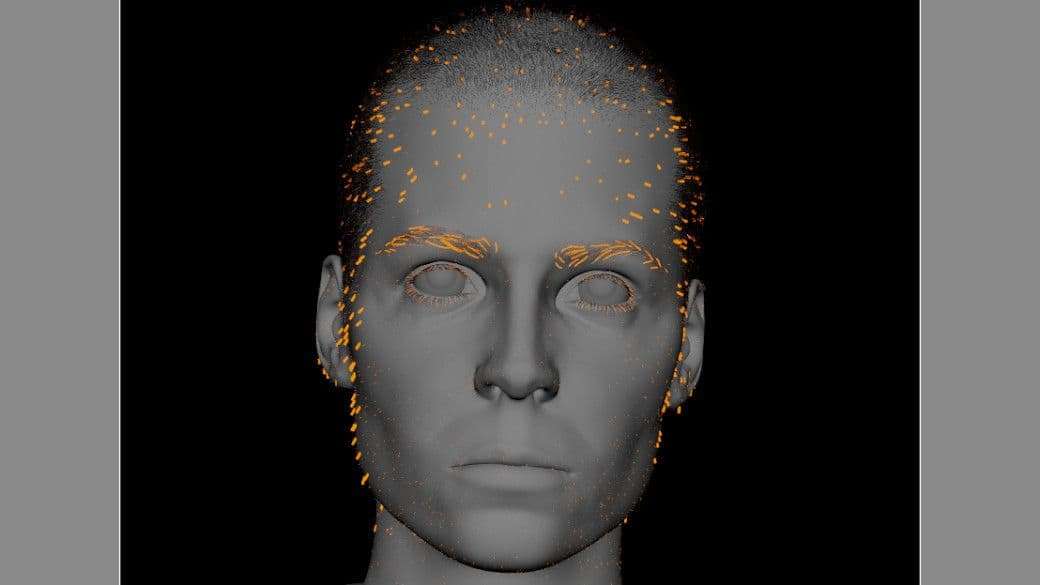
The line in front of the ear indicates where Geometry HD is displayed.
Why the extra Step with Geometry HD?
First of all, one of the downsides of Geometry HD is that you only can display parts of your model with the full polygon resolution at the time.
But with Geometry HD the model can have an additional subdivision (26 million vs. 103 million) which is helpful for hand-sculpted details. Because the model is never fully displayed with the full polygon resolution, the overall work experience seemed smoother and more stable. Another big benefit is that the map export out of Zbrush is a lot faster compared to a model that has a lot of traditional subdivisions.
Clean Up / further Adjustments
The only Texturing XYZ texture I had was a male one that I used for my previous Buster Keaton project. Because of that, I had to do a lot of cleanup. I had to paint out beard stubbles, eyelashes and some skin blemishes. Overall I softened the skin a bit so that it wasn’t too rough. I then added more skin details manually like pores, freckles or additional wrinkles.
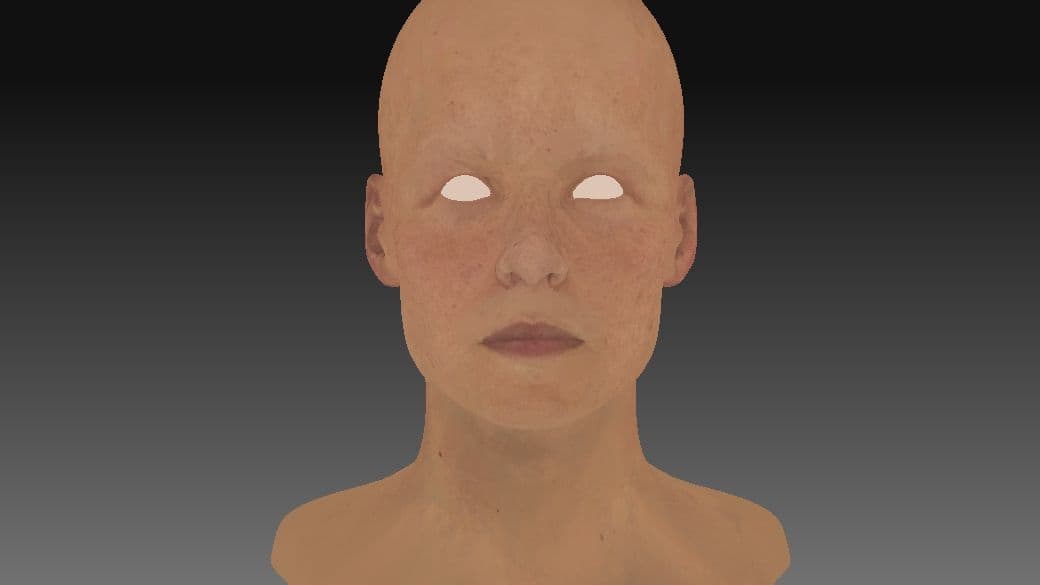
For painting the skin texture, I used the flat shader to see the colour variations better. At this stage, I started to really like the model without hair. That is why in the end, I decided to base her more on the third Alien film. I made some adjustments to make her look a little bit older and more exhausted.
The Iris
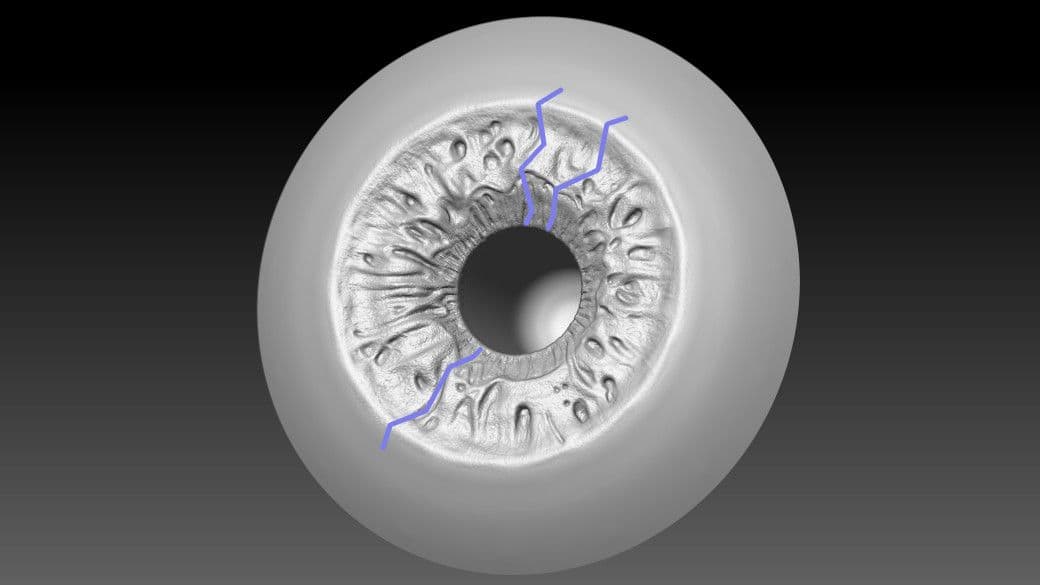
In the beginning, I modeled the iris with radial symmetry to quickly get some details in place. Then I broke the symmetry and tried to match a reference I found as close as possible.
As with the blue marks indicated, the iris is not just a half-sphere that is going inwards. Especially in the middle of the iris, it goes outwards again.
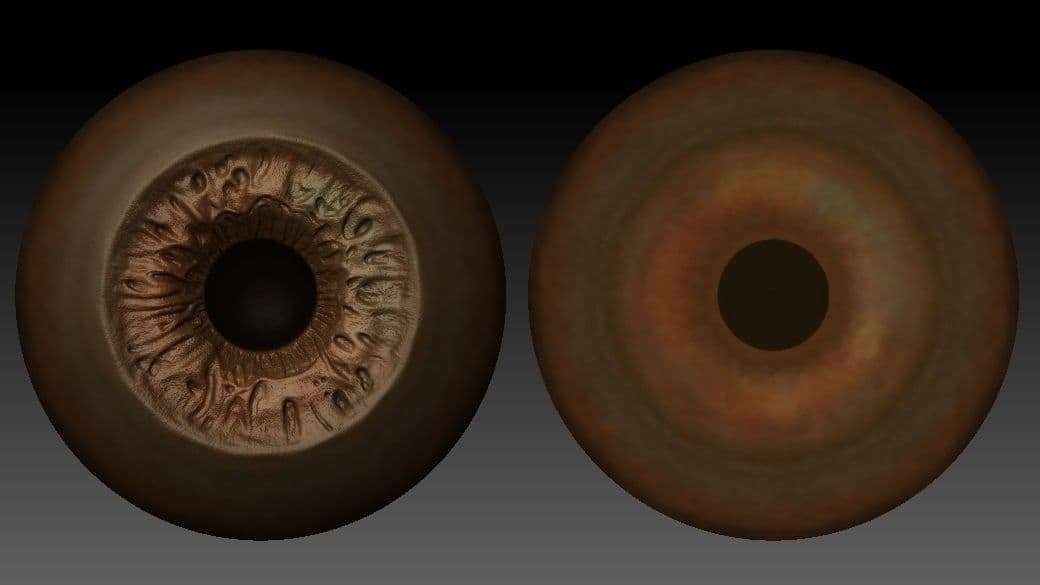
Because I knew I would make further adjustments to the colour texture with colour Nodes later on, I just painted some rough colour variations to make the iris texture not too flat. Notable is that the middle part is lighter in colour.
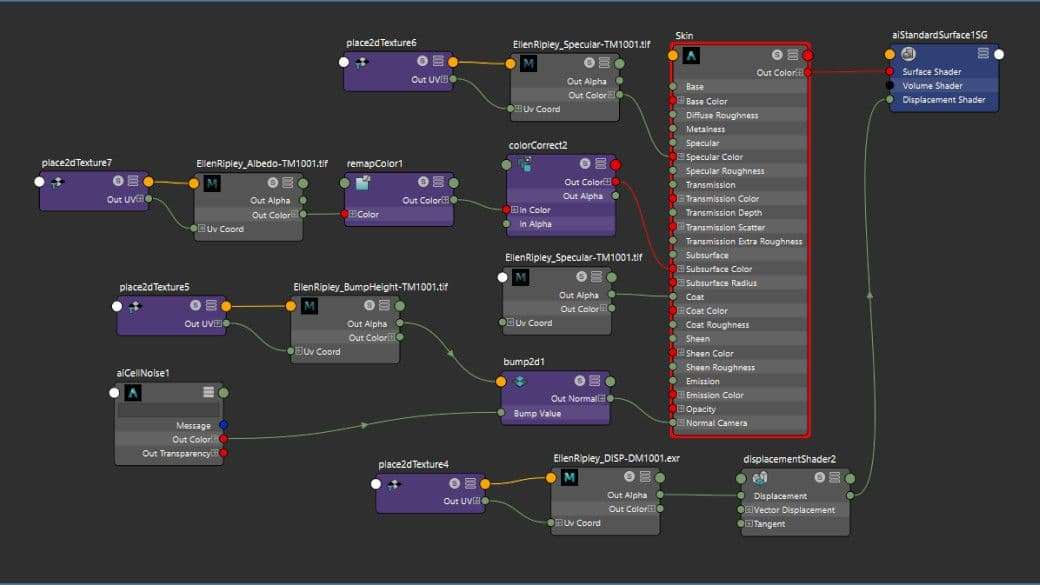
Shading
As I mentioned in the introduction, I did this project as part of the Digital Portraits course from Kris Costa. His step by step guidance through the shading process was immensely helpful.
Head
The Albedo map is plugged into the subsurface colour. The base colour has zero weight to not override the subsurface colour. With a remap and a colour correction node I adjusted the Hue and made the skin colour a bit lighter.
For the Displacement map, I added 4 catclark subdivisions to the model.
Then I painted a Bump Height and a Specular map in Zbrush.
Left: Bump Height map, right: Specular map
I used an aiCell Noise with the Alligator pattern to give some micro details. The Bump Height map is plugged into the Depth Value of the Bump Node to make sure some parts of the face like the lips or the inner of the ear do not receive any or less Bump.
The Specular map is used for the Specular Colour and also for the Coat to give it a secondary broader specular.
Eyes
For the sclera and the iris, the Albedo map is plugged into the subsurface colour and the subsurface radius. The sclera has an aiRamp Float to make the cornea transparent and I used a Displacement map for some veins I sculpted in Zbrush.
For the iris, I used a Bump Noise for more micro Details. With a Ramp Node for the Caruncle, I made the part to the inner Eye transparent. Plus I made sure that the Edges are not visible with a second Ramp Node for the geometry opacity.
XGEN
For the hair, I used XGEN Interactive Groom. A hair density mask that I painted in Zbrush determined where the hair grows. It also gave me good control over the hairline and transitions.
With guides, I shaped the hair in place. On top of that, I used several modifiers to clump the hair and to add a bit of noise. With a sculpt modifier I refined the hair a bit more to achieve the look that I wanted and to match the reference better. To make the hair look less artificial I tapered it quite a bit.
Modelling the Clothing
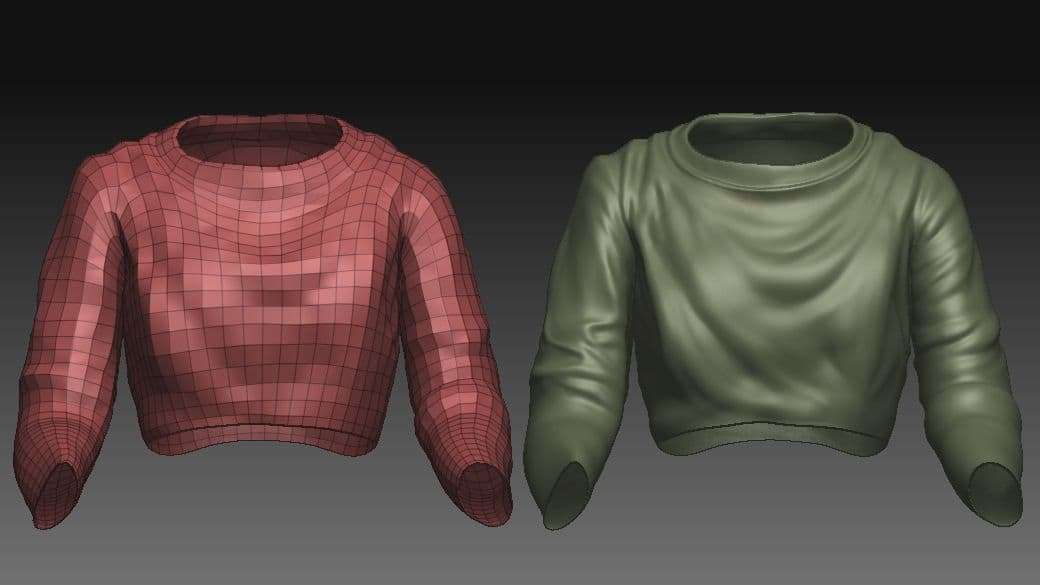
I started modeling the shirt with a low resolution and enabled dynamic subdivisions. I blocked out the forms with the ClayBuildup brush. Then I masked out some parts and pushed them outwards or inwards to give the shirt a loose fit. With added subdivisions and the Clothbrushes, I finalised the forms.
On the left is the lowest subdivision with around 2000 polygons.
For the material, I used the velvet preset as a start, tweaked some parameters, and added a Bump Map with the cloth preset for the cloth texture.
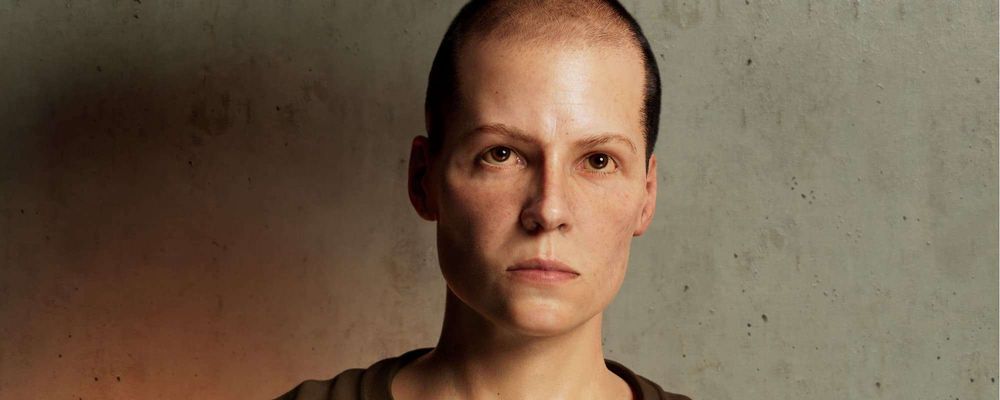
Presentation
I added a background plane with a simple Concrete Material from Substance Painter.
Both of the Light Setups are HDRIs with an orange light on the right side of the model to make the image more interesting and to break up the concrete colour. Additionally, I used a rim light in the same orange tone. Overall the lighting was heavily inspired by the works of Ian Spriggs.
The final images were rendered with 10 AA Samples with everything else left to default.
Finally, I added a second shadow pass to the image in Gimp to integrate the portrait better. I then blurred the background a bit more to make the depth of field stronger.
Thanks to The Rookies for this great opportunity. And I also wanted to thank Kris Costa for his incredibly insightful online course. All his tips and tricks helped me a lot in creating this project and I can not recommend his courses enough.