Look Development, Lighting and Compositing of a Photorealistic Still Life Scene
Thomas Eckstein is a Lighting/LookDev Artist at TRIXTER. In this article he shares his tips to creating a photorealistic still life scene fit for your lighting and compositing portfolio.
Thomas Eckstein is a Lighting/LookDev Artist at TRIXTER, one of Germany’s leading VFX studios for feature film and television. Always fascinated with virtual worlds and how to create them, Thomas embarked on a bachelor's degree in virtual & augmented realities, deciding to pursue this passion and start his journey as a 3D artist.
After watching countless breakdowns and behind the scenes footage, Thomas shares his own breakdown of how to create a photorealistic still life scene by pushing the boundaries of look development, lighting and compositing.
Introduction
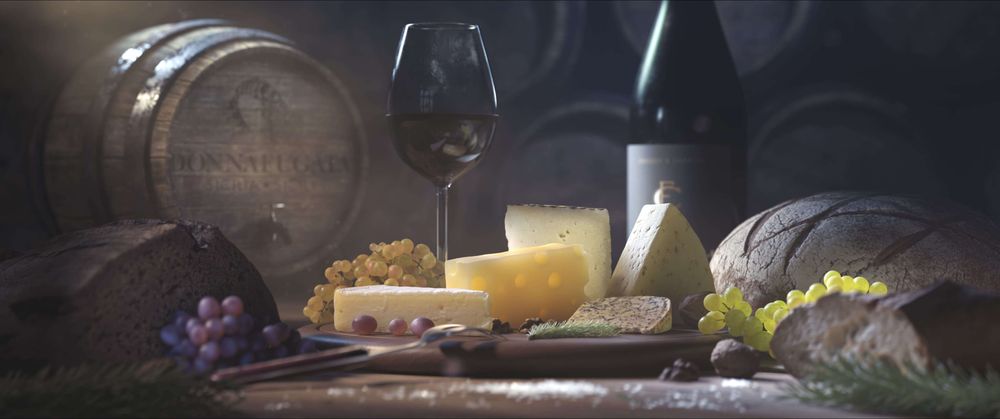
As a Lighting Artist I wanted to create a realistic environment where I could show off my Lighting and Look Development skills for my Demoreel. A Still Life project immediately came to mind, as it allows for moody lighting and is very unique in its look. After inspecting a lot of references I decided on a cheese platter, as this was a nice combination of organic and hard-surface objects, which would let me challenge myself and learn even more.
Software used:
Lighting & Look Development: Maya - Arnold (ACES Colorspace)
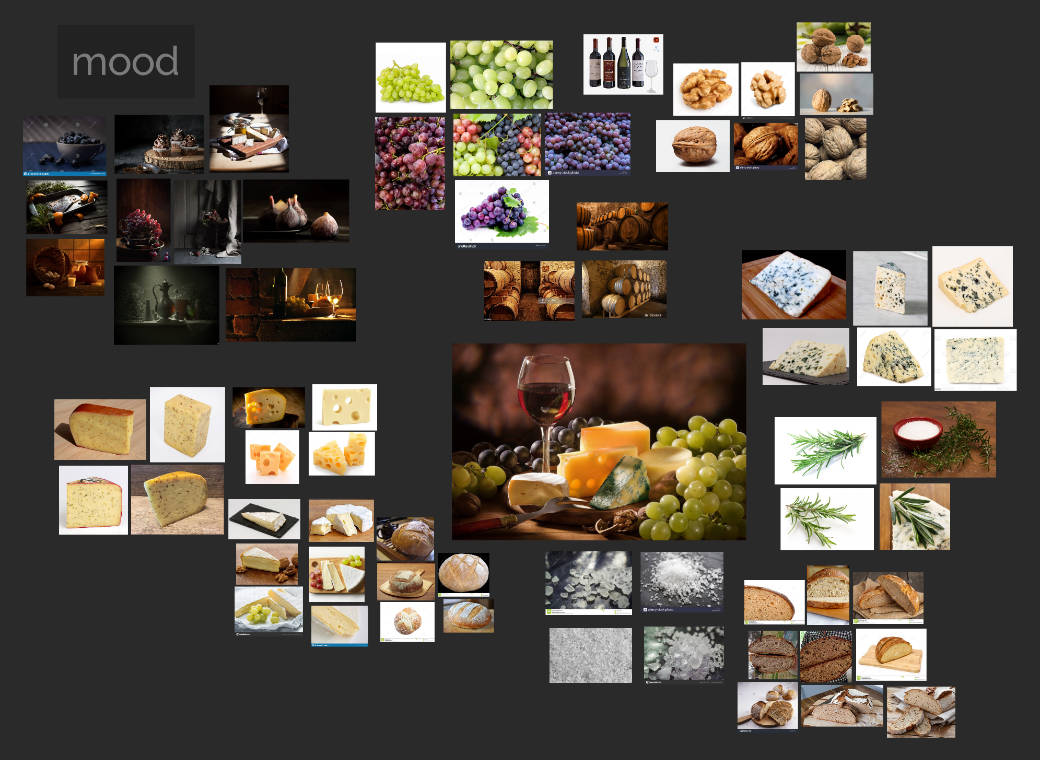
Having enough references for this project was important to me, since I had to do the shading for many different organic objects in the scene. I also found a nice reference, which served as the foundation for my layout. All of these were laid out in PureRef for better visualisation.
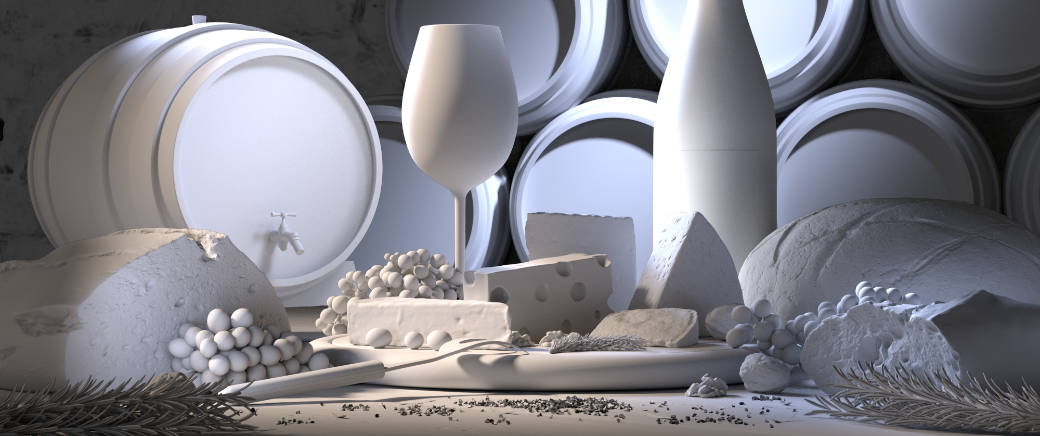
Since I knew that the cheese platter was the focus of my scene, I based the rest of my layout around it. This took me longer than expected, since at this point I not only had a couple of different lighting scenarios in mind, but I also wasn't completely sure which other objects to place in the scene. After a lot of testing and moving things around I finally had something satisfying.
Most of the models used were either Megascans or bought on CGTrader. I did the modeling and surfacing for the fork, table and the platter. The swiss cheese in the center was made using a Houdini script by Carsten Baars and shaded in Maya.
Look Development & Lighting
I created a separate dedicated LookDev scene to dial in the look of each object in a neutral environment. All my collected references paid off for this process, as they really helped to get all the little details of the organic objects right. The trickiest objects to shade were definitely the grapes, since I had to get their interaction to light just right to make them look real and believable.
I tried adding the subtle look of seeds inside some of the grapes for that extra touch. The shader of the Swiss cheese in the centre consists purely of subsurface - no diffuse. A few textures also required minor re-texturing/fixes, which I did in either Substance Painter or Affinity Photo. Finally I rendered a rough turntable for individual objects to make sure they reacted correctly to different lighting scenarios.
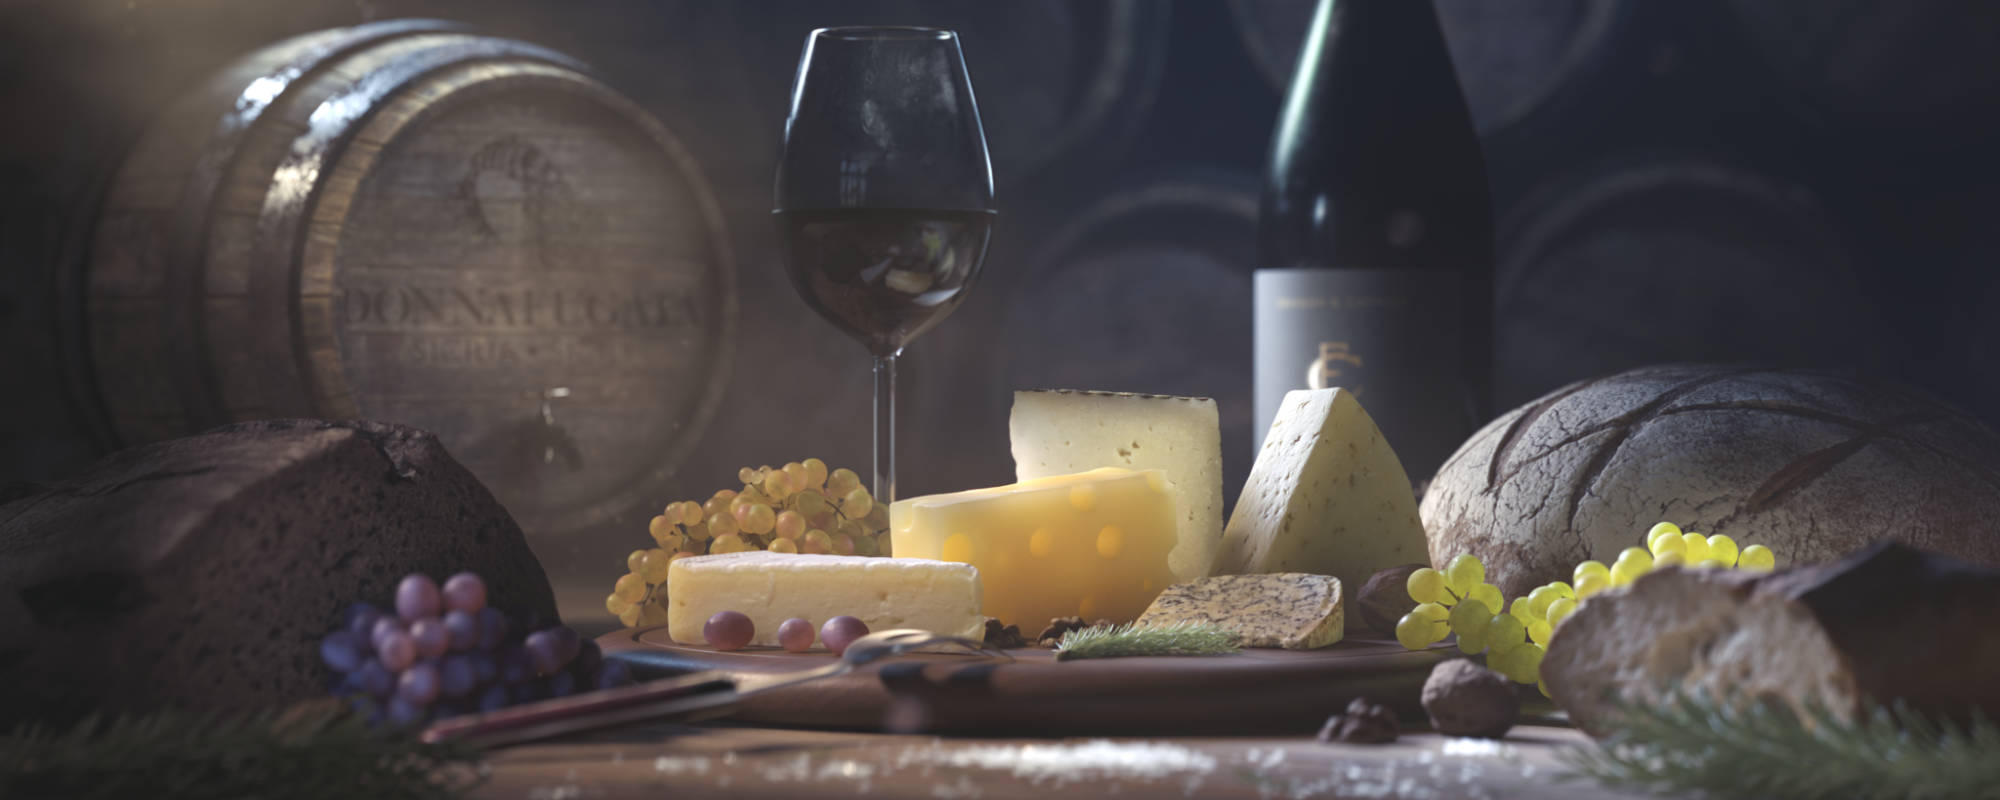
After finishing up the LookDev for all the objects I could now tackle the lighting of my scene. For this I had two main guidelines to follow. Firstly, I wanted the focus to be on the Swiss cheese in the centre and secondly, to keep the scene a bit moodier to convey more of a painterly feeling (just like in most Still Life photographs and paintings). It really helped that I already had some different lighting scenarios in mind to test. To direct the focus even more I added a subtle spotlight with atmosphere from the left onto the cheese platter. Even though this is a fairly small detail, it aided in selling the look and the mood I wanted to create (you will see this later in the compositing section).
Here are some early preview versions:
Overall, I ended up having 10 light groups that I could later tweak in Nuke.
Here is the setup of my light rig:
Looking at the Outliner on the left, you might be able to figure out which light does what. If you have any questions or want to know more, feel free to reach out to me.
Compositing
The first thing I did in Nuke was to balance out my light groups to have the focus on the platter even more. I also exported two atmosphere passes from Maya which I added to my Composition. Firstly, the subtle spotlight mentioned before and secondly, an overall atmospheric pass. With the help of Cryptomattes, I was able to tweak the lighting on individual assets, especially the bread on the left side. Finally I added some particles in 3D space. For this I generated a point cloud of the scene to make sure they were placed in the right spot.
It was at this point that I learned the importance of render layers: when wanting to create some depth of field (ZDefocus node), I noticed a lot of artefacts on the top of my wineglass and some of the cheese. Because of this I had to re-render the whole scene and ended up having 5 layers.
Conclusion & Takeaways
I learned a lot from this project, as this was my first big Demoreel scene that I worked multiple weeks on. There are a couple of things that I would recommend to you when starting a similar project as this one:
Collect references. You probably heard this way too many times before (as have I), but it never hurts to repeat it. It will help you in all stages during the creation of your artwork.
Do all of your Look Development in a separate file. Not only can you easily set up turntables and lighting rigs to inspect all of your assets, but it also helps to keep everything more organised. It is also good practice, as this is how it is done in the industry.
Use render layers. Once you are done with and happy with all of your look development and lighting, divide your scene up into separate render layers. For example: Foreground, Midground and Background elements. This will help in Compositing and will save you a lot of pain down the line. I learned this the hard way.
Here is a video sequence of the artwork including all breakdowns
Thank you for reading this article, I hope I could give some insight into the creation of my artwork! If you have any questions or just want to connect, don't hesitate to reach out to me.