Realistic Vehicle Modeling and Texturing Using Unreal Engine 5
Romain Maistre-Bazin is a Vehicle Artist for Ubisoft Ivory Tower in Lyon, France.
In this article he will show you his process of creating a realistic vehicle using Maya, Substance Painter and Unreal Engine 5.
Romain Maistre-Bazin has a background in Applied Art and 3D Art. His passion for drawing architectural buildings and vehicles has materialised by becoming a Vehicle Artist for Ubisoft Ivory Tower in Lyon, France.
I have been passionate about vehicles, especially cars, for a long time. During my studies, I wanted to try to realise them in 3D - accepting that depending on the shape of the car, each knew project would offer a new challenge.
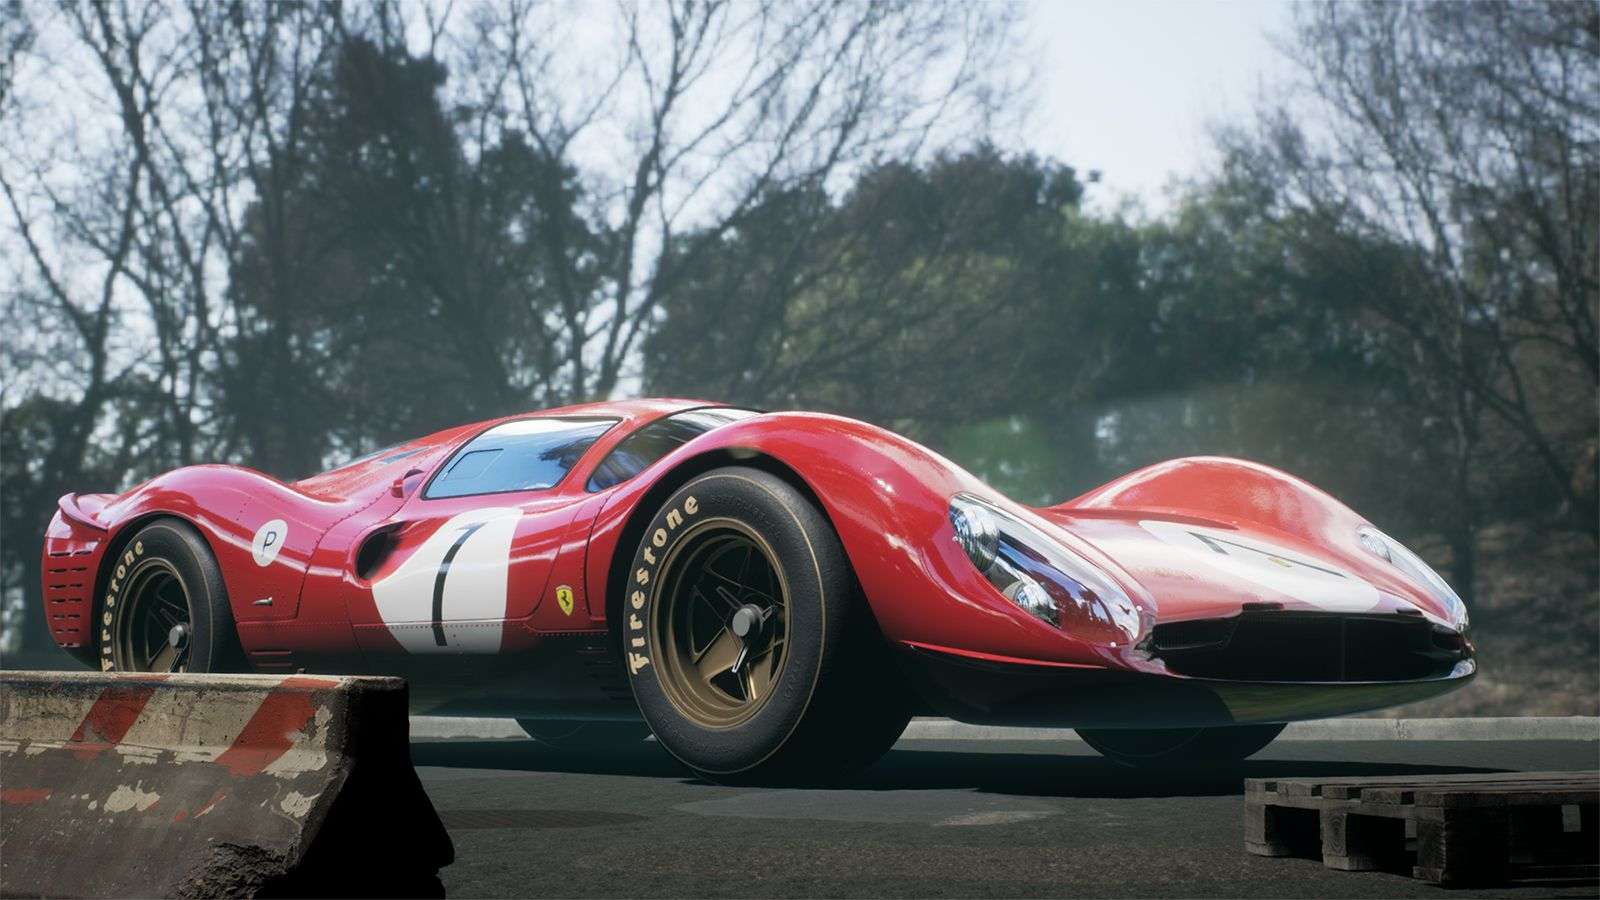
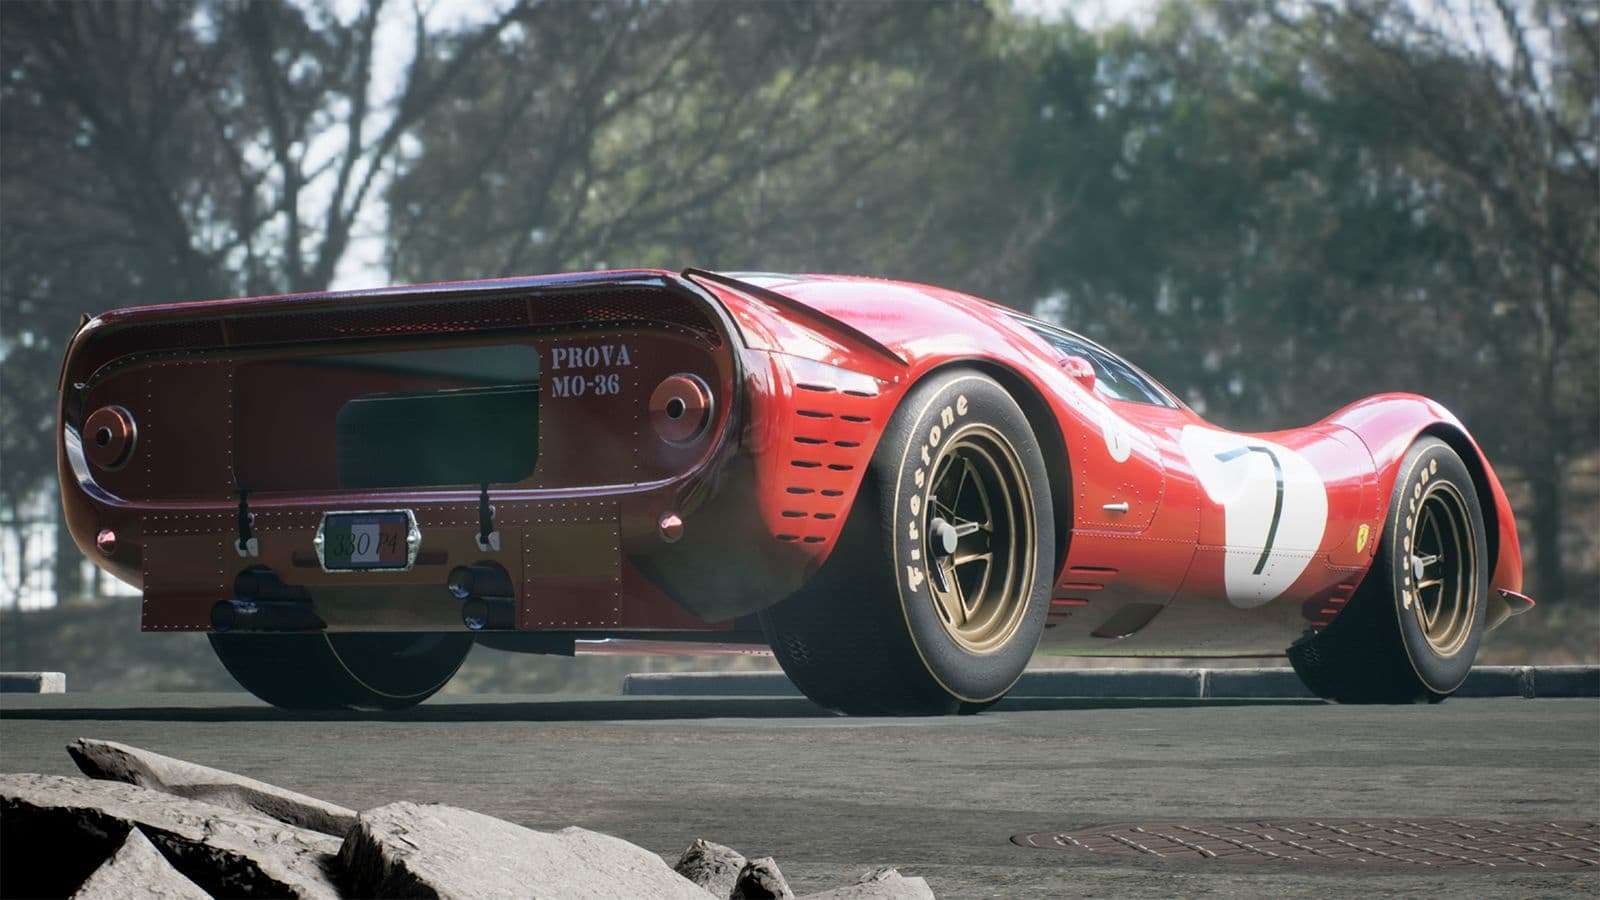
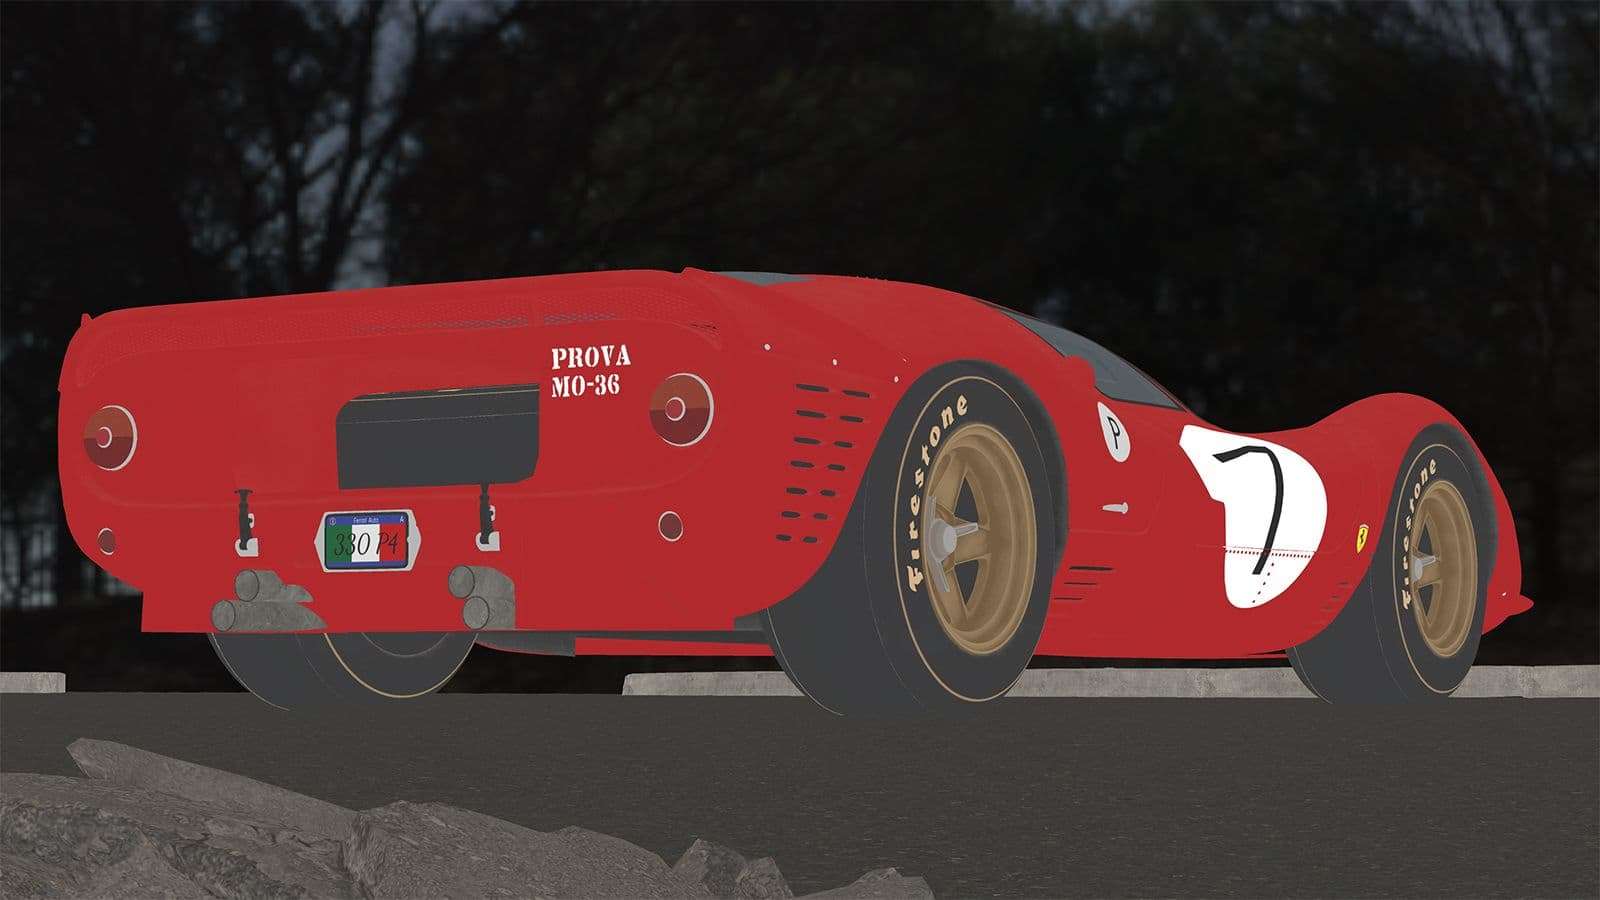
This Ferrari 330 P4 was my second vehicle project and a kind of tribute to the movie “Ford v. Ferrari.”
Inspiration
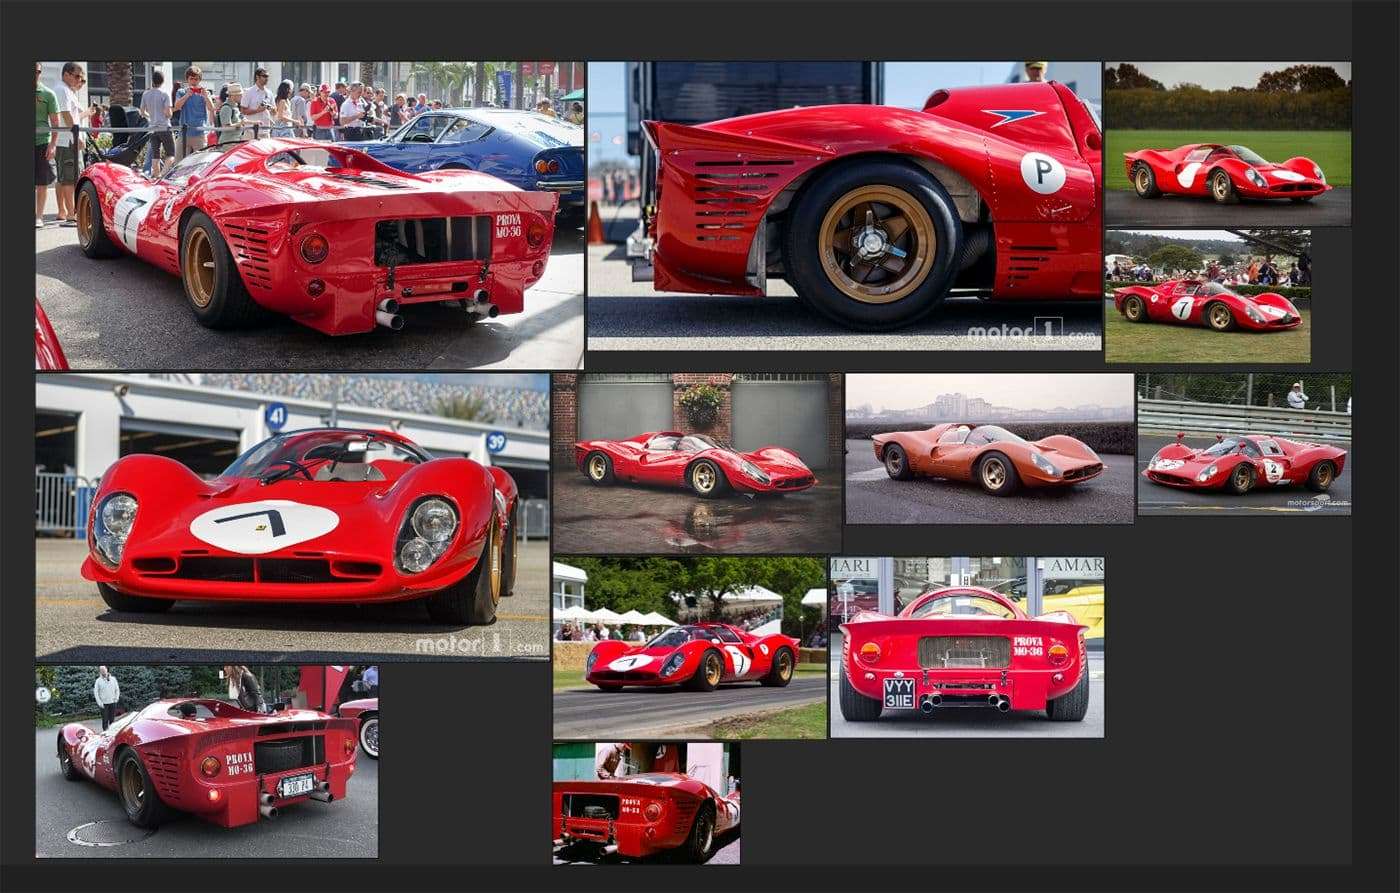
I chose a specific model of Ferrari to feature, integrating it in a nice setting. So, I did some research on the internet. First of all I searched for images of the model of the car, gathering everything I found in PureRef.
Searching for the background was very simple for me. Having already done a 3D render of a garage/studio, I wanted to showcase this model in nature/ the outdoors. I imagined you could find this car near a golf course or a park in Monaco.
Modeling
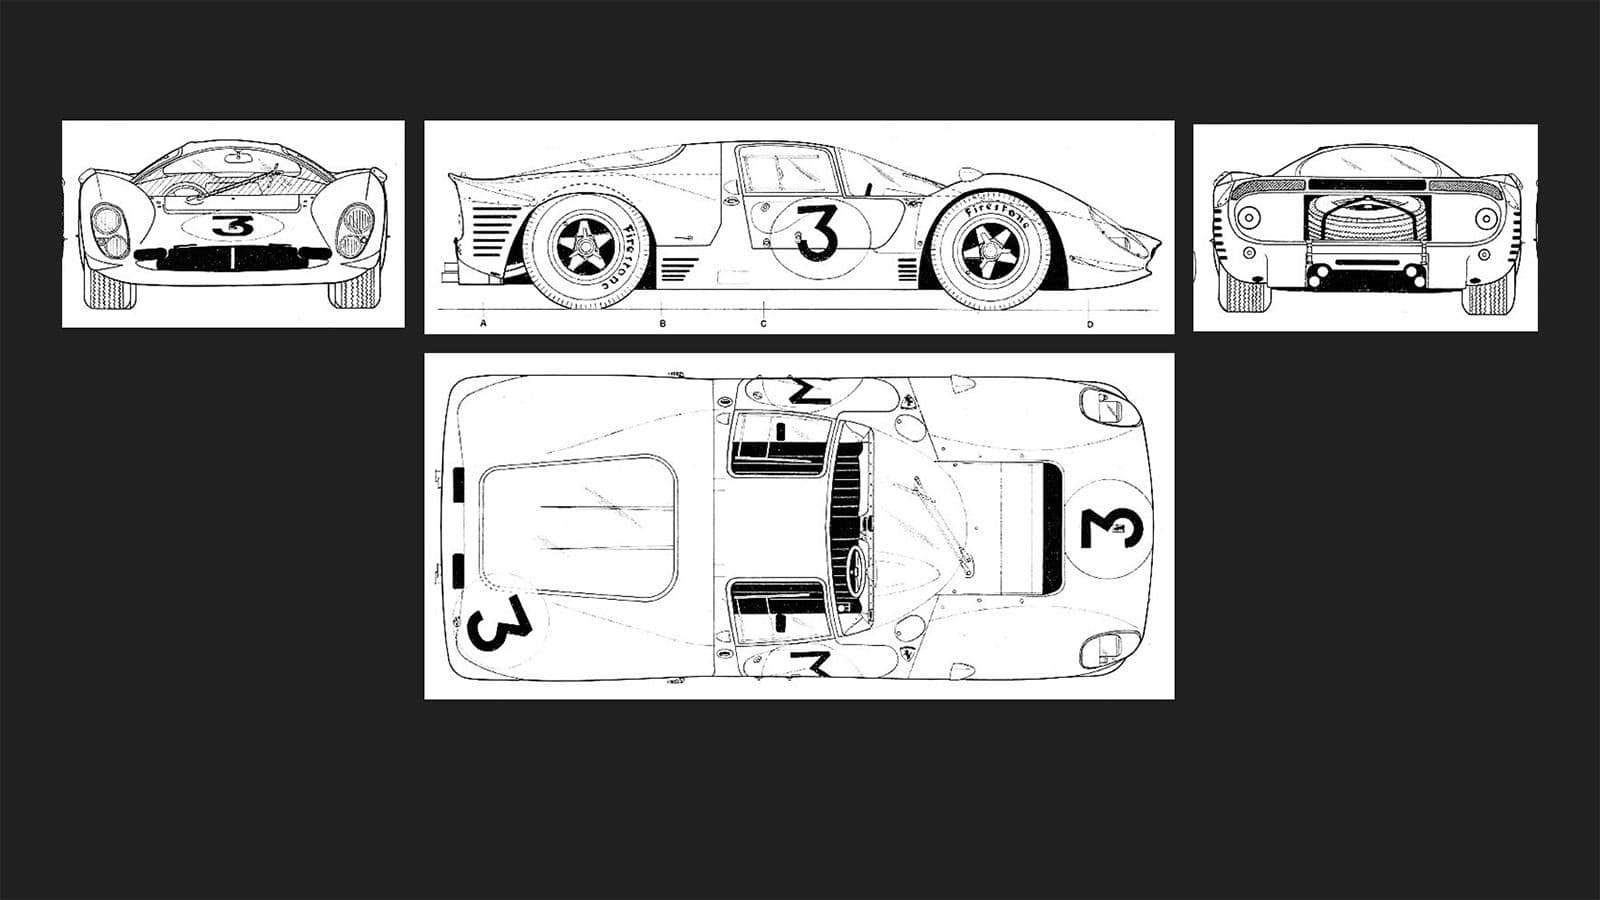
For this kind of project, modelling is the more tricky part of the process because you have to create a complex asset from scratch. Most of the time, you don’t have an official brand CAD tp work from, so you have to use blueprints and your eyes.
If I could create this model in 3D again, I think I would probably not work with blueprints like the ones above. I would use CAD, it's very easy to misjudge the shape of a car, so I might as well use the best tools possible. If it's not possible or available, working with blueprints is still a good thing, and can improve your observation skills.
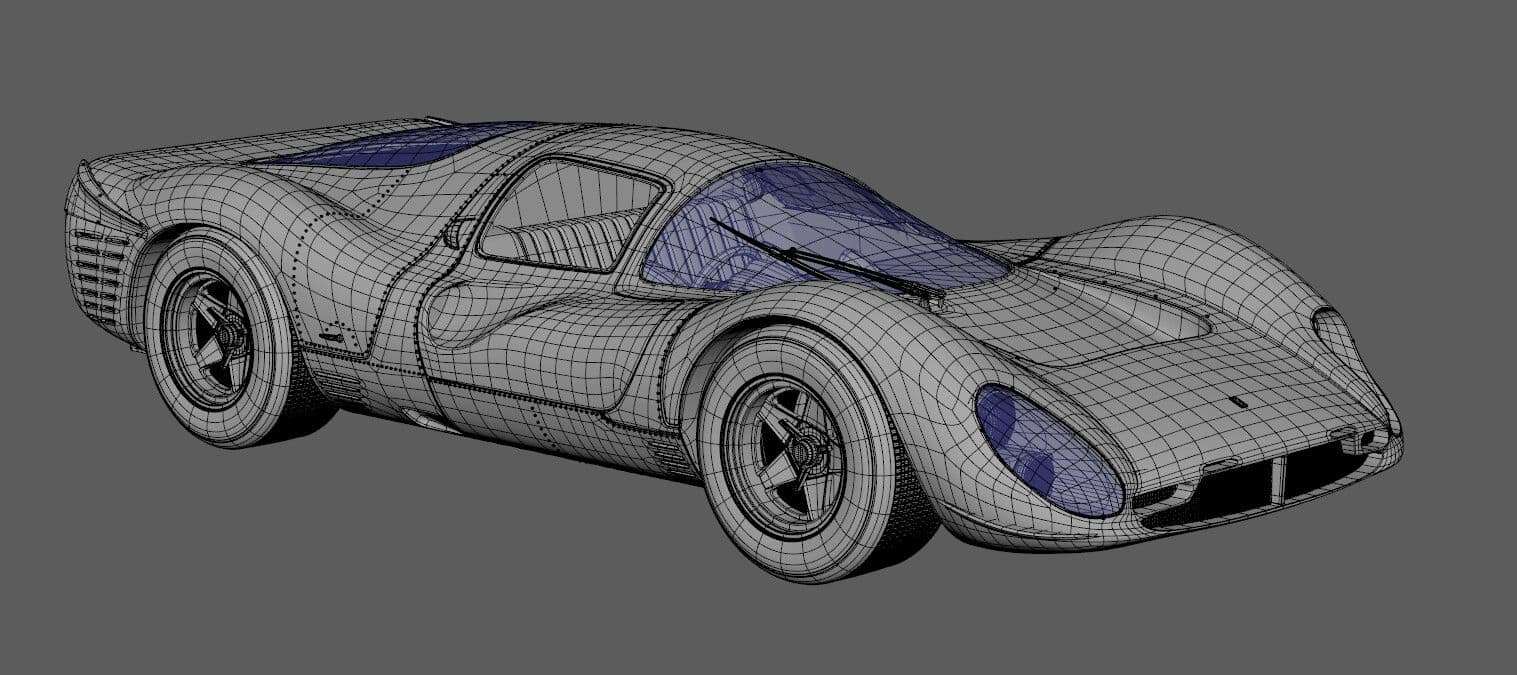
I modeled this car using Autodesk Maya because I learned 3D with this software. Following the CAD or blueprints, and also the reference pictures available on PureRef, I had to create the model from scratch, ensuring a clean and triangle-free mesh.
It may seem strange while I work in video games and triangles are not a problem, but at the time of the project, it was a goal for me to create a clean asset close to what is done in the film industry in terms of mesh.
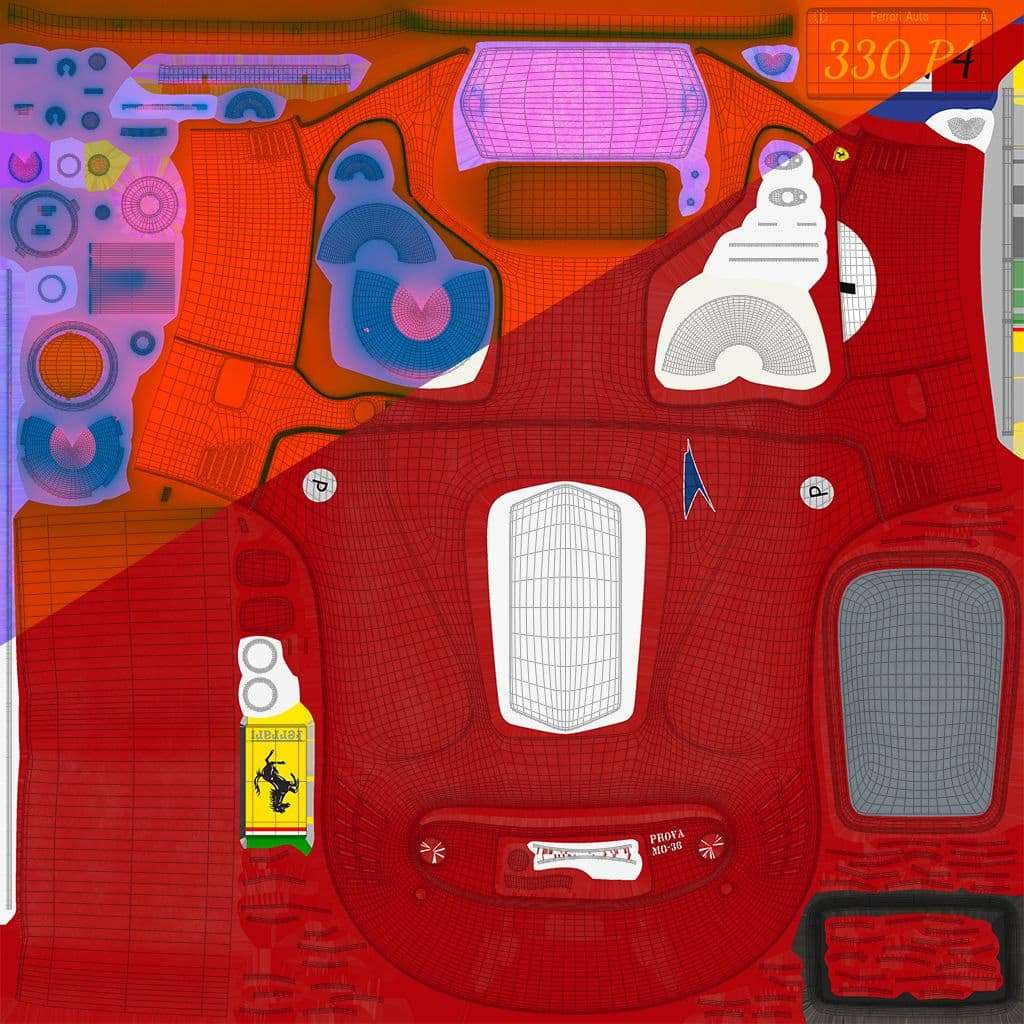
Texturing
Most times when I am texturing vehicles for games, the textures are quite clean - requiring a lot of shaders and few materials. As I wanted to have a bit more fun, I chose this particular Ferrari model so I could include stickers and logos - in short, everything that reminded me of a car that was going to compete in the 24h of Le Mans.
So naturally, I used Substance Painterto start my texturing.
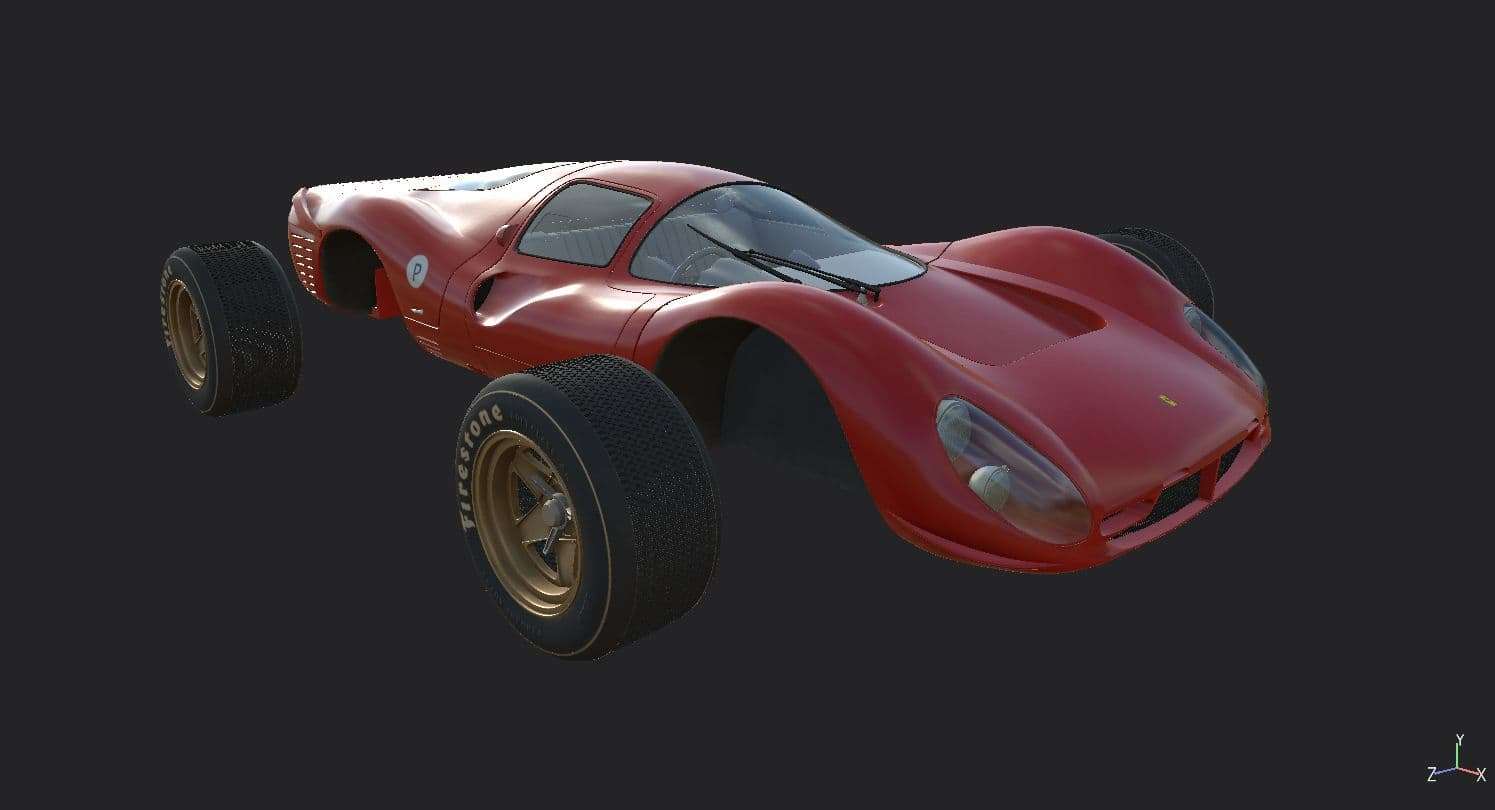
The wheels are separated for the rest of the car to ensure a good baking of AO.
Not necessarily in a concern of optimisation, I divided my car into 5 materials, and I used 4K maps following the Unreal Engine preset : an Albedo, a Normal Map and a Map with AO, Roughness and Metalness.
I finally added the texture details, like for example the numbers 7, in Photoshop for simplicity, following the uvs.
Rendering in Unreal Engine 5
The next step is to bring everything into Unreal Engine. The first time I created this vehicle I used UE4 however I wanted to test the same model in UE5.
Before rendering in Unreal, I created a plane with a lot of subdivisions in Blender to be able to create a slightly deformed road effect, from a Quixel height map.
After importing this into Unreal, I placed some decals on the ground, to give it some detail.
I started with a basic Unreal scene, with a light source : a directional light. I wanted my light to be movable, and to also tweak the intensity and colour.
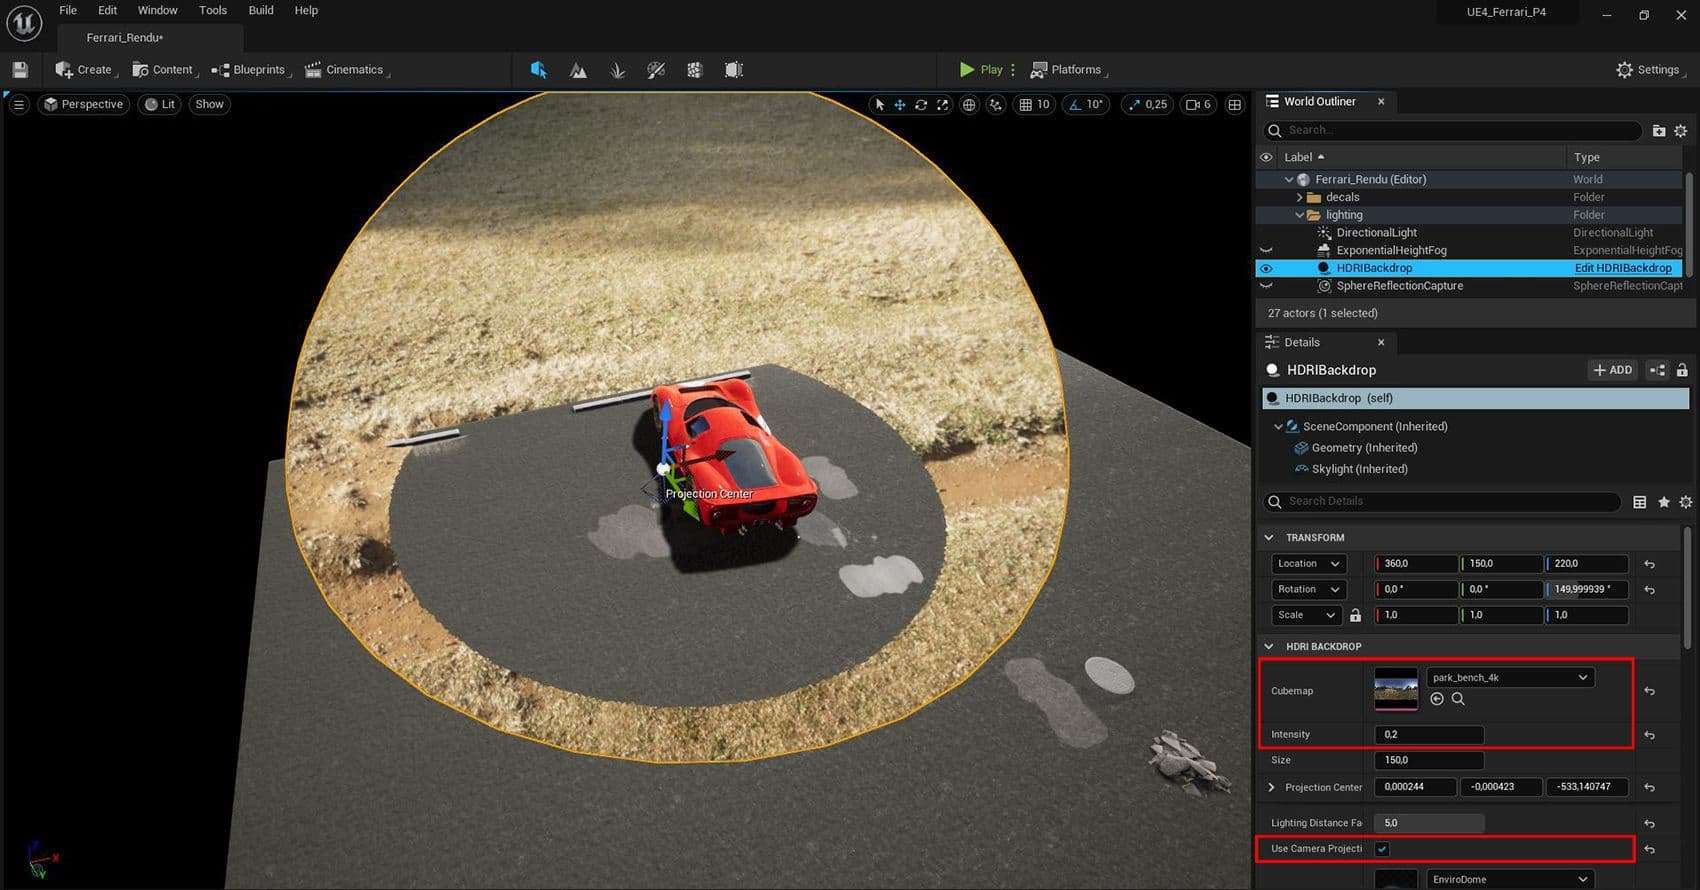
I then added an HDRI Backdrop: it's a very useful plug-in that allows you to place an asset (a car for example) in the background. Don’t forget to download it in the Unreal plug-ins if you don’t have it. Create a new empty level and click and drag the HDRI Backdrop into the viewport.
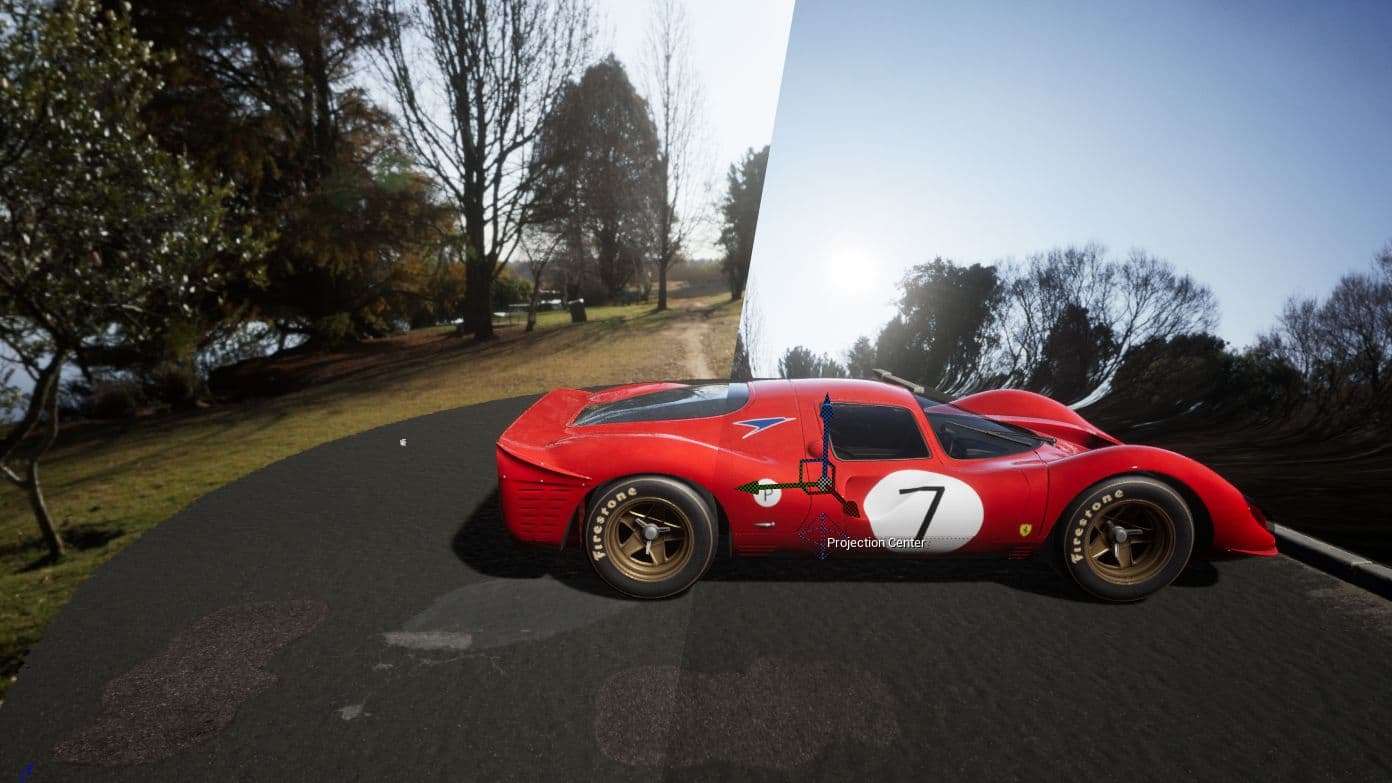
Cubemap, Intensity and Use Camera Projection are very important features to start with. If you disable the last one, it can create a weird effect like the picture below. Concerning the Cubemap, you can change it by choosing another one from HDRI Haven for example.
Use Camera Projection enabled / Use Camera Projection disabled.
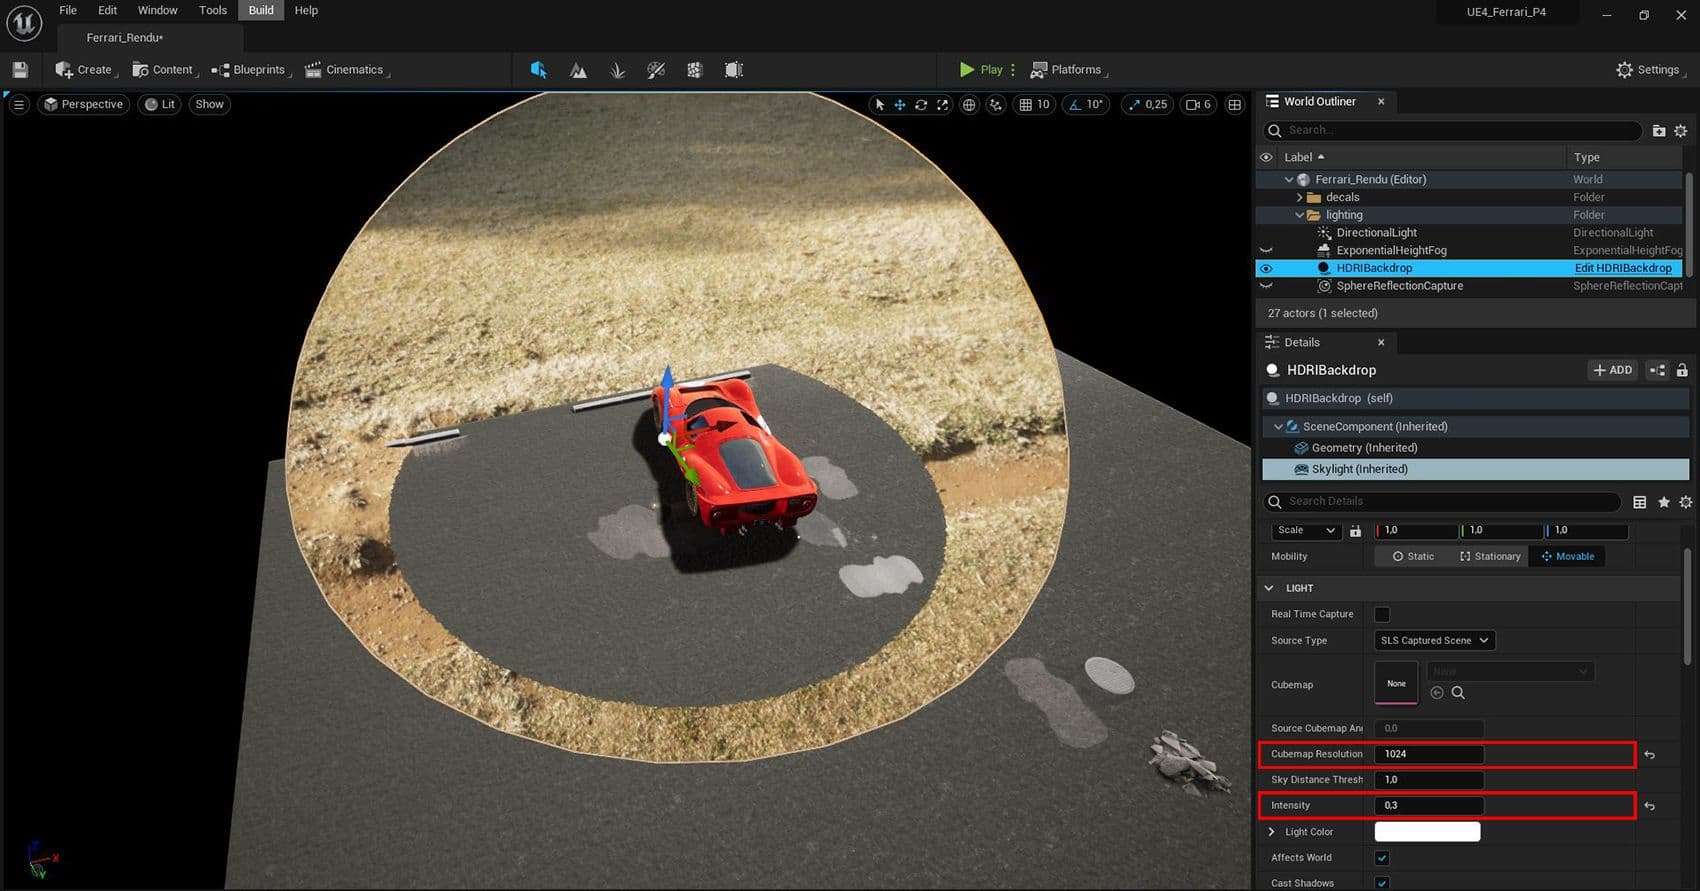
Inside the HDRI Backdrop, there is also a Skylight. It's interesting to have a look at that because you can increase the Cubemap Resolution and play with the Intensity within it.
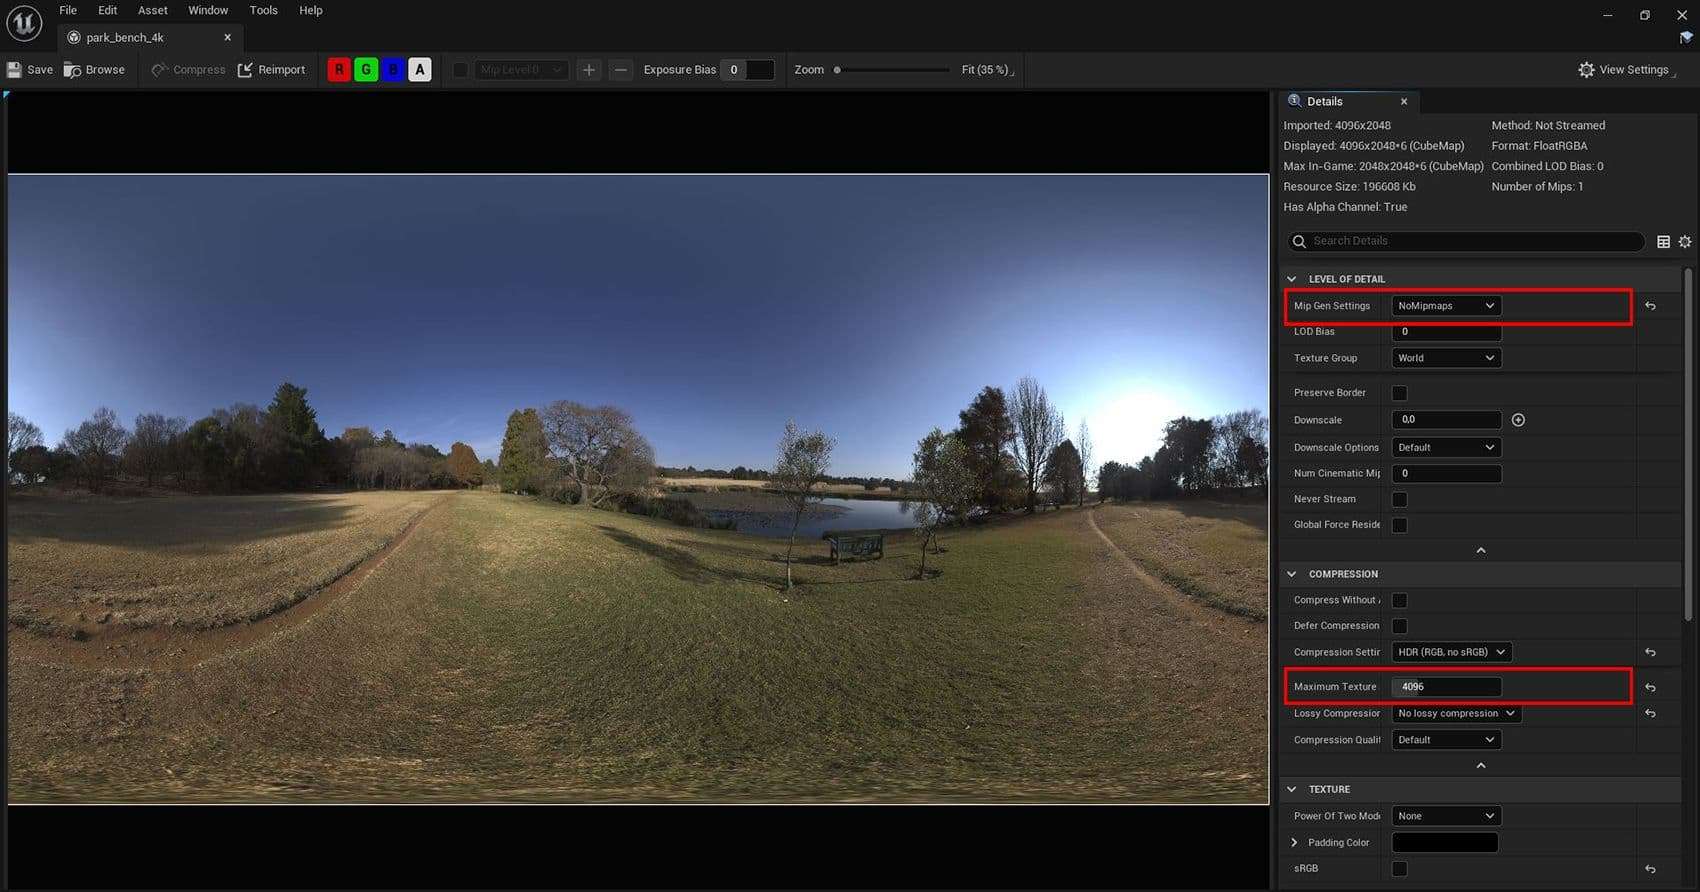
If you do opt to change your HDRI, you will have to go inside the HDRI file, and check some values:
The Maximum Texture Size should match the larger resolution value of the imported HDR image — 4096 in this example.
The Mip Gen Settings should be set to NoMipmaps to use the full quality.
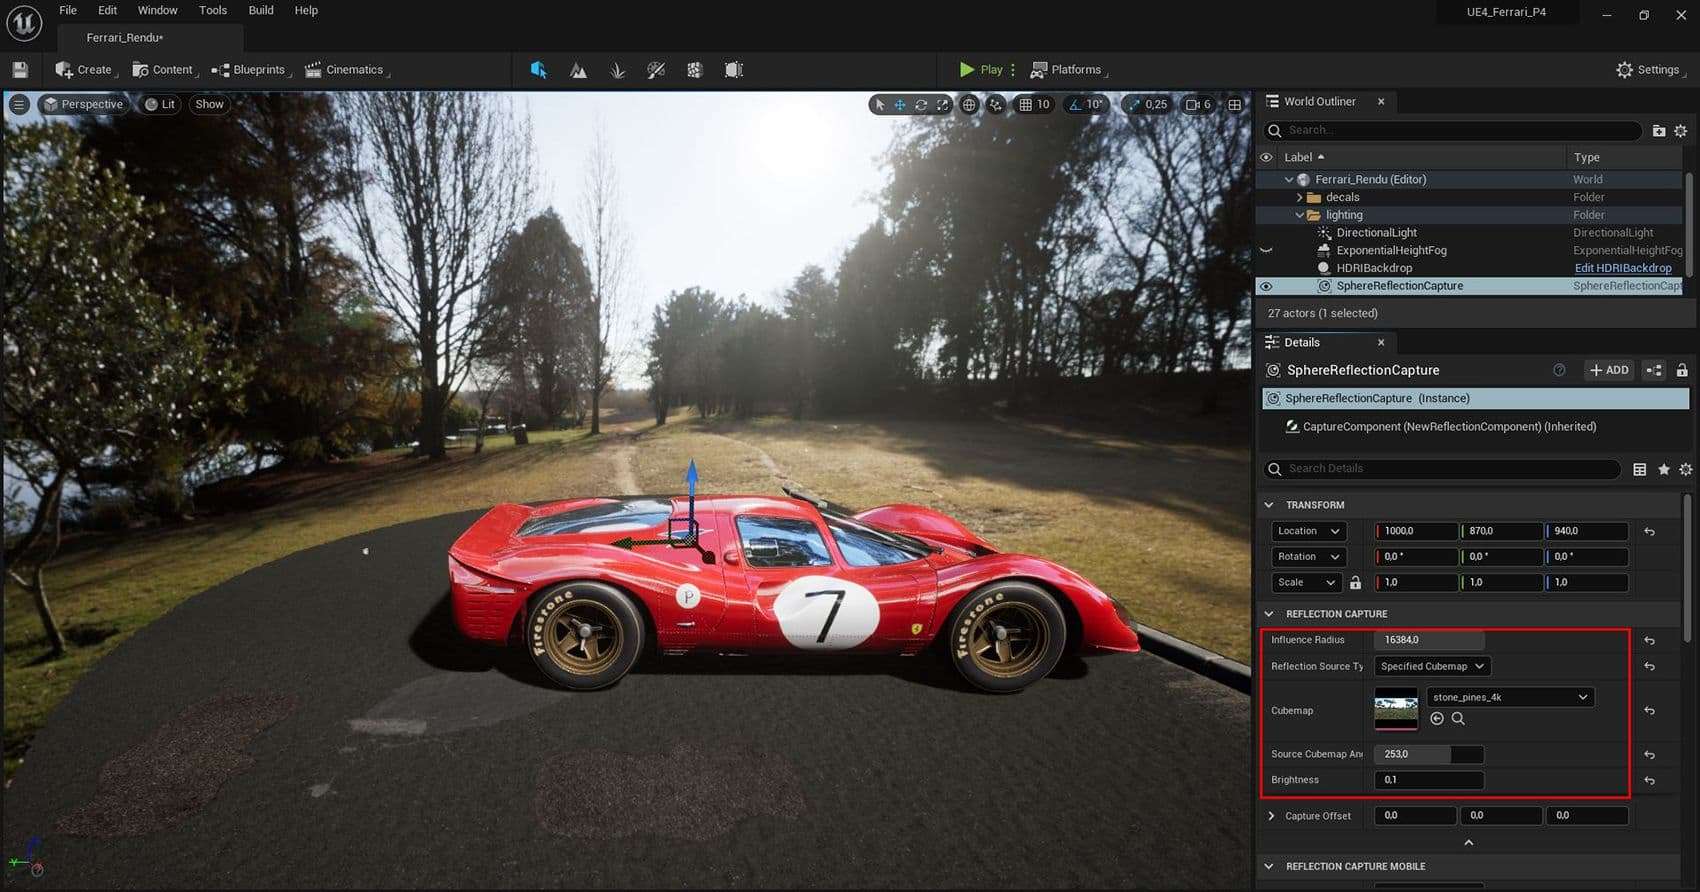
My next step was to include reflections to give realism to the rendering, especially when it comes to the car body.
The Influence Radius is the area influenced by the reflections. By default, the Reflection Source Type is on “Captured Scene". I recommend to change it to Specified Cubemap and choose in Cubemap the HDRI you want.
Source Cubemap Angle will rotate your HDRI at 360° and you can choose at which angle your reflections look the nicest. In my case, I tweaked the Brightness values to limit the amount of reflections coming off the car.
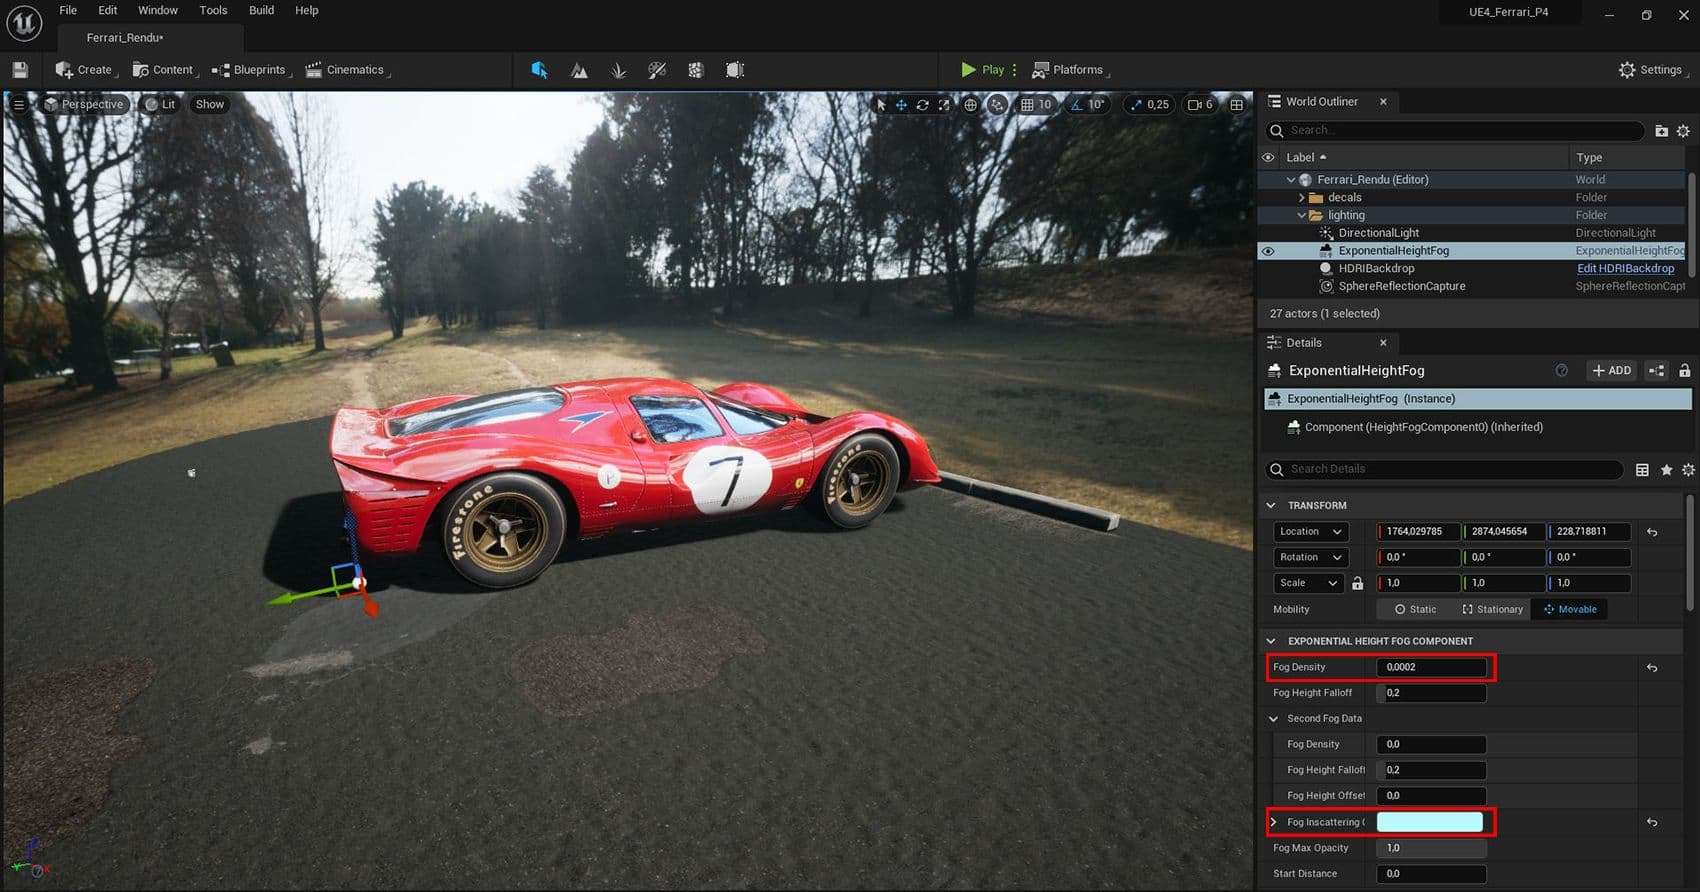
To break the dark shadows and "soften" the image, while creating a nice atmosphere, I tweaked the Exponential Height Fog.You should not abuse the fog values! In this case I added a complementary colour to the Ferrari’s red (so a blue / green) to better highlight the contrasts.
For this example, I just used the Fog Density and the Fog Inscattering Color, as I explained above.
To dress up the foreground, and make it feel less empty, I added some props from Quixel Bridge (directly integrated to Unreal 5).
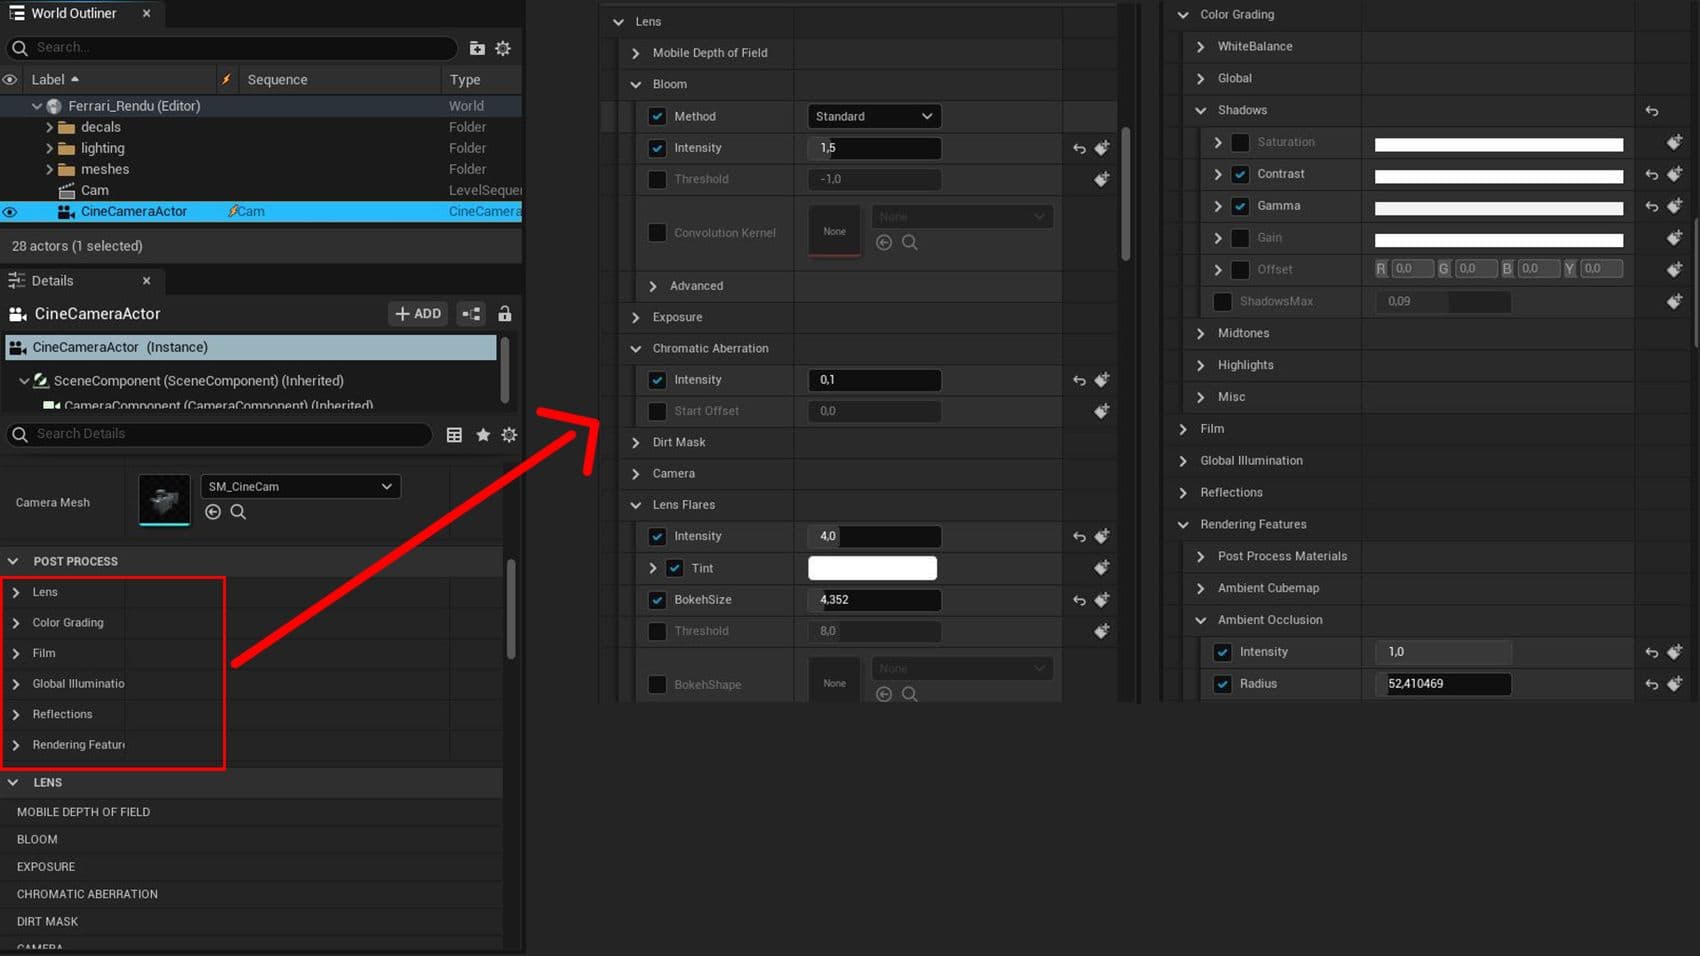
And finally, I did some post-processing directly inside the camera. In my case, I added a lens flare with a bokeh, some bloom, and a few chromatic aberration.
A gif of all the stages I mentioned above:
Presentation
There are so many ways to present your work in Unreal. I kept it simple by taking only screenshots with the high resolution screenshot tool which as its name indicates, gives you the choice on the quality of your future image according to the multiplier you will specify.
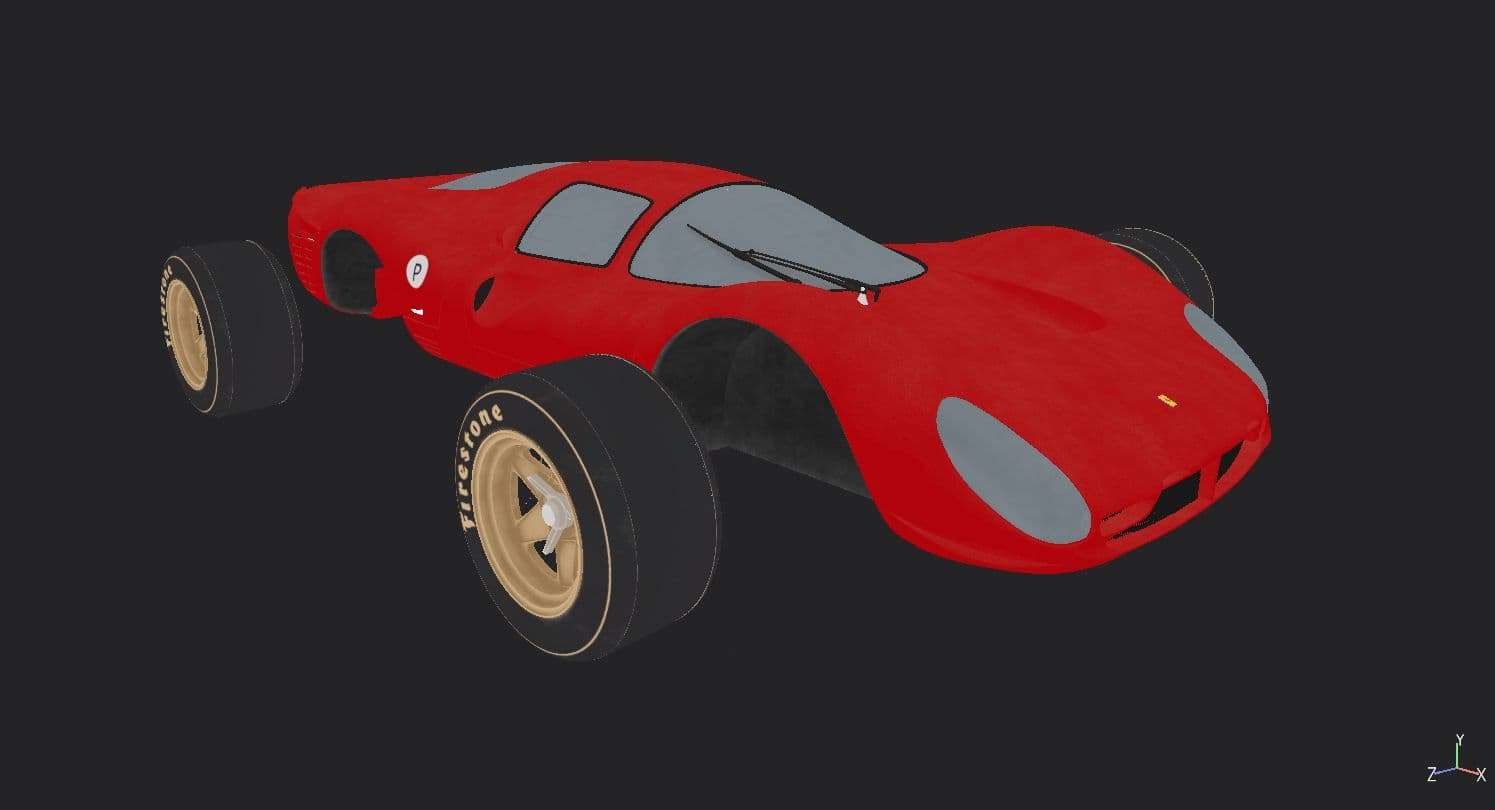
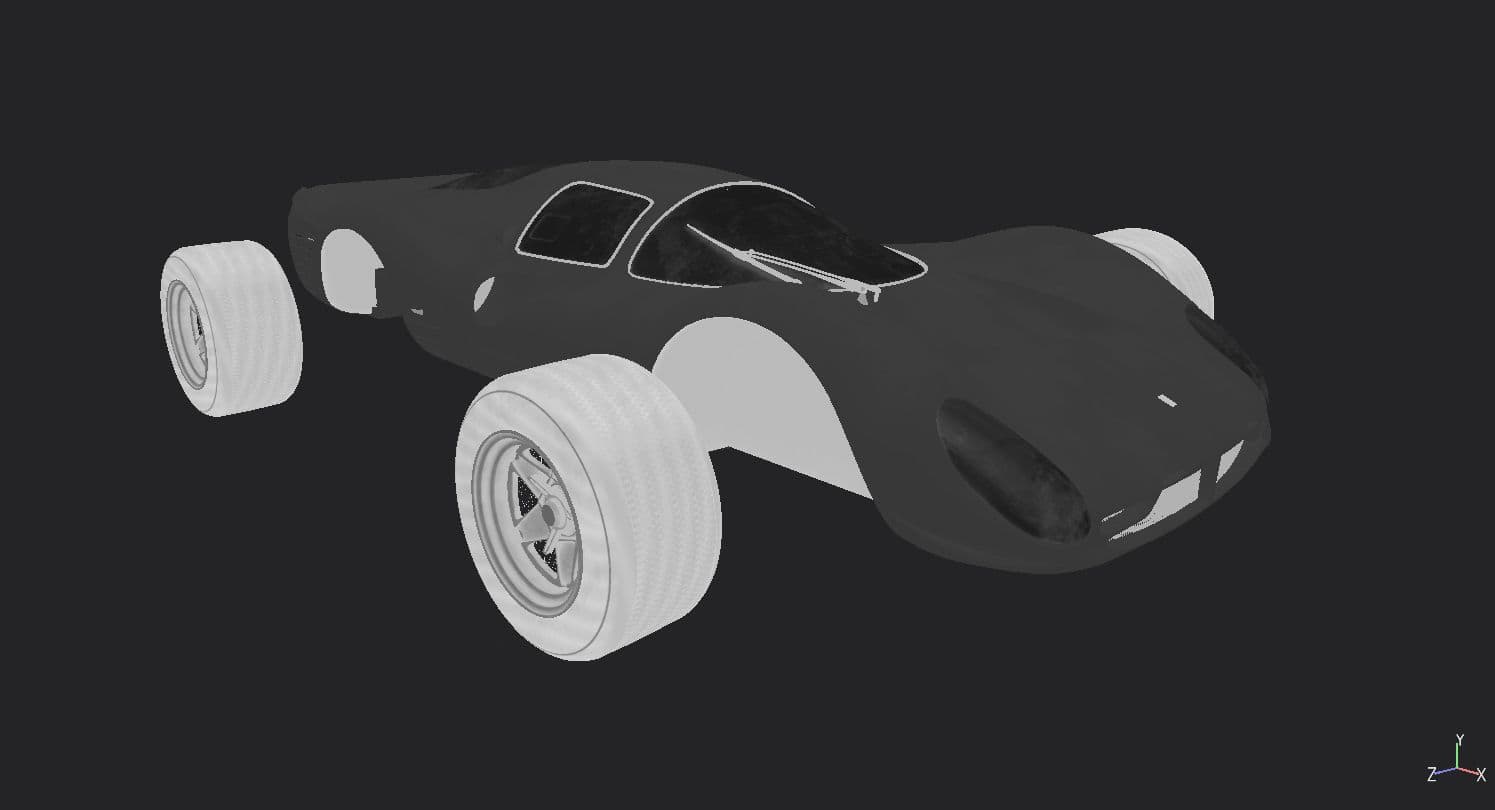
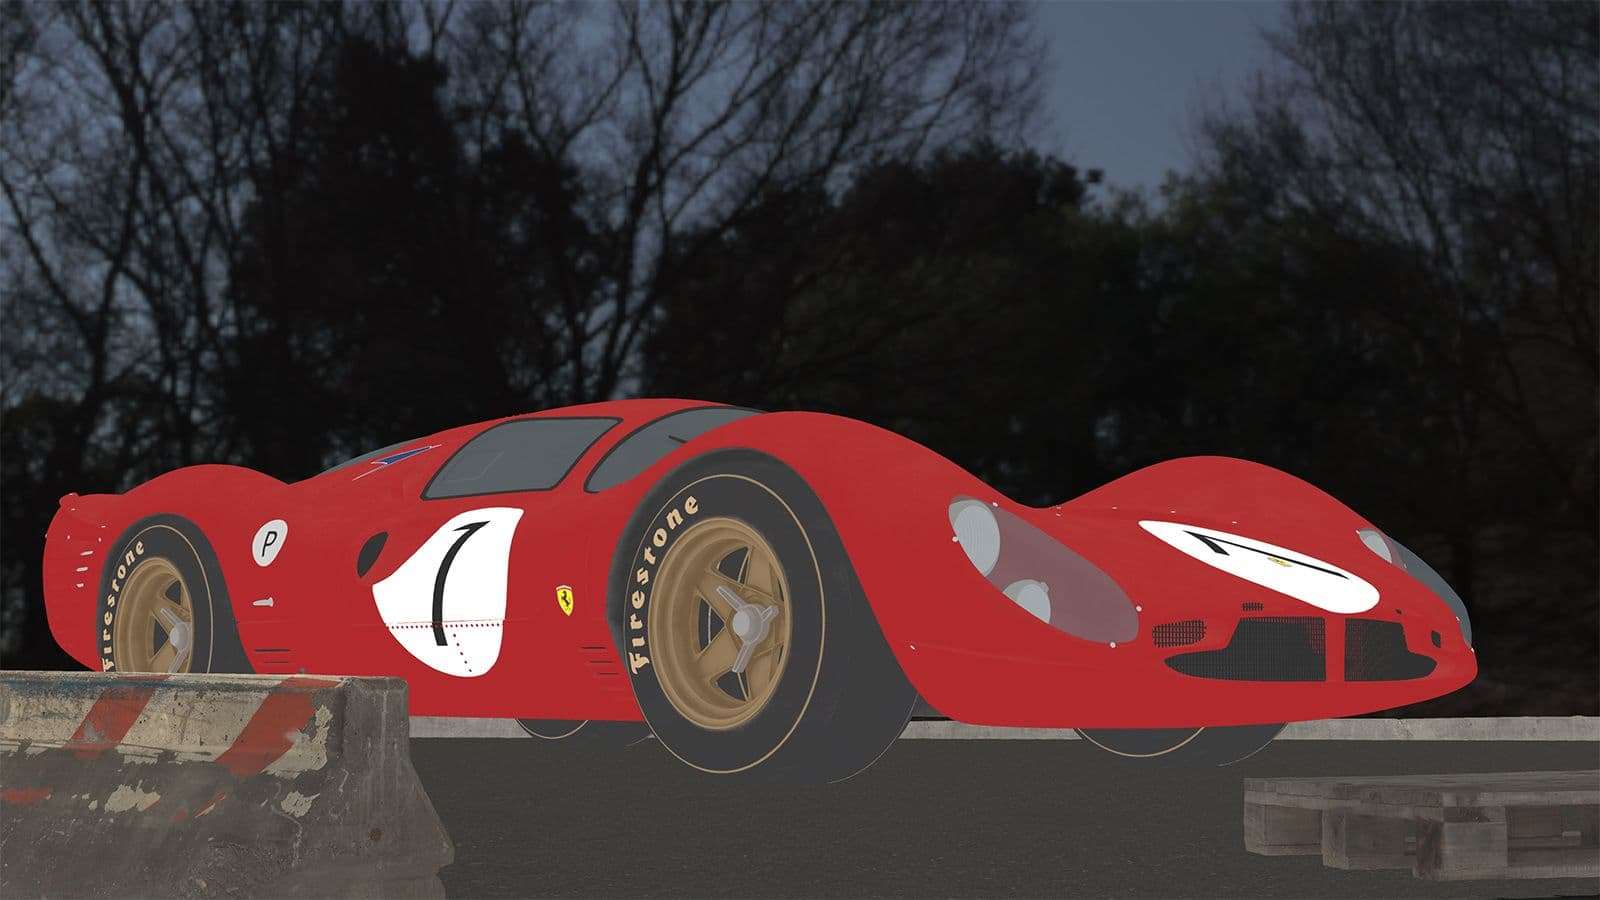
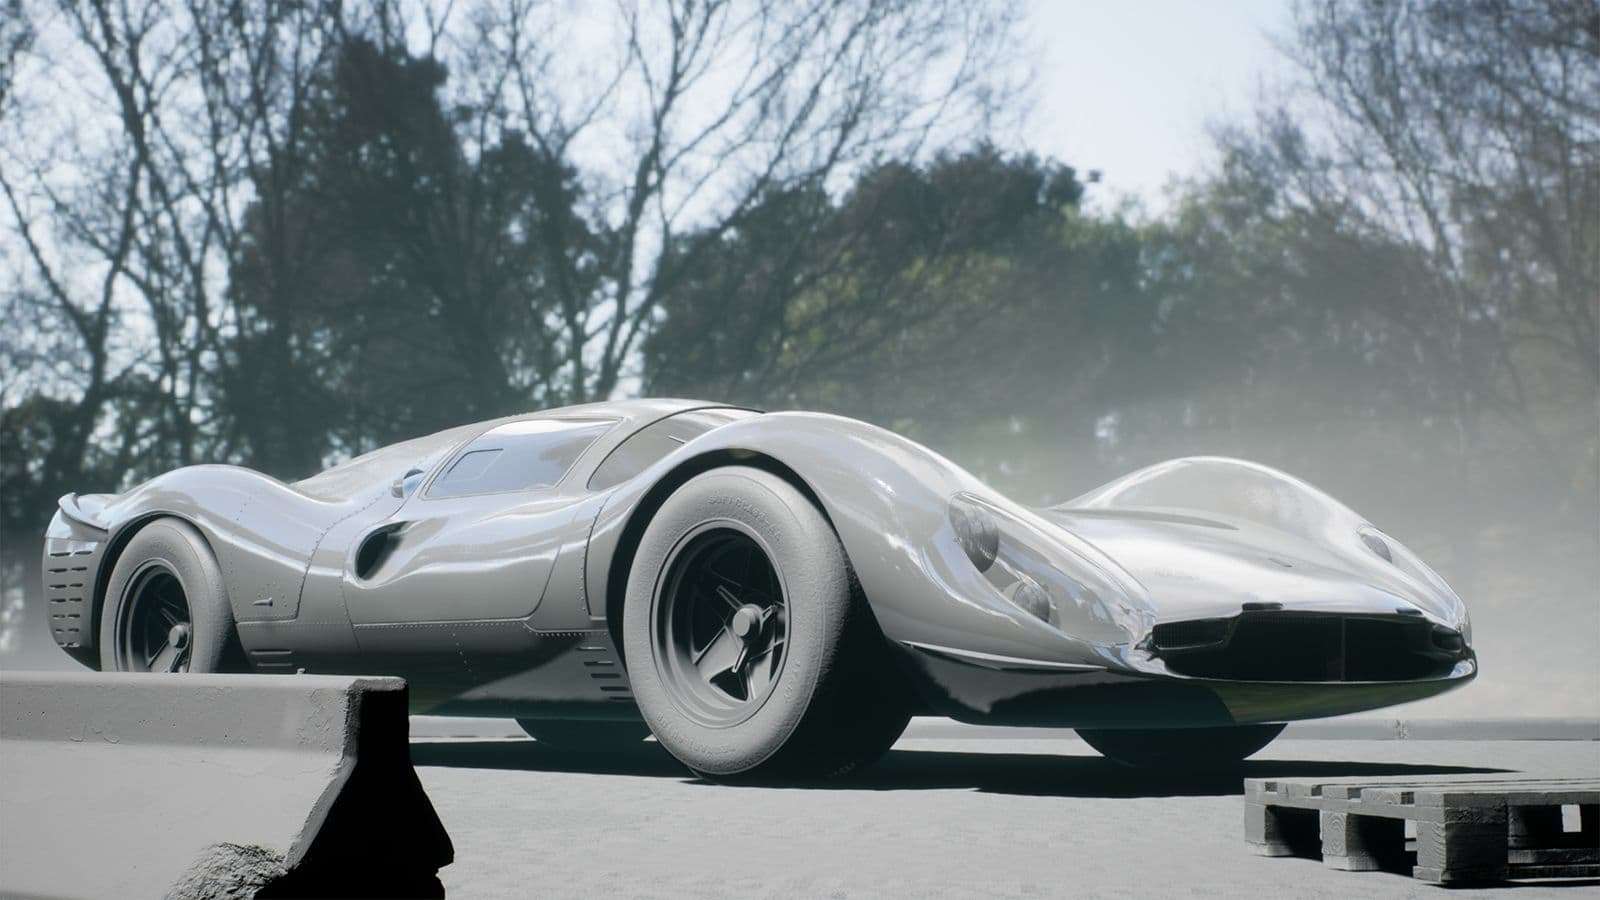
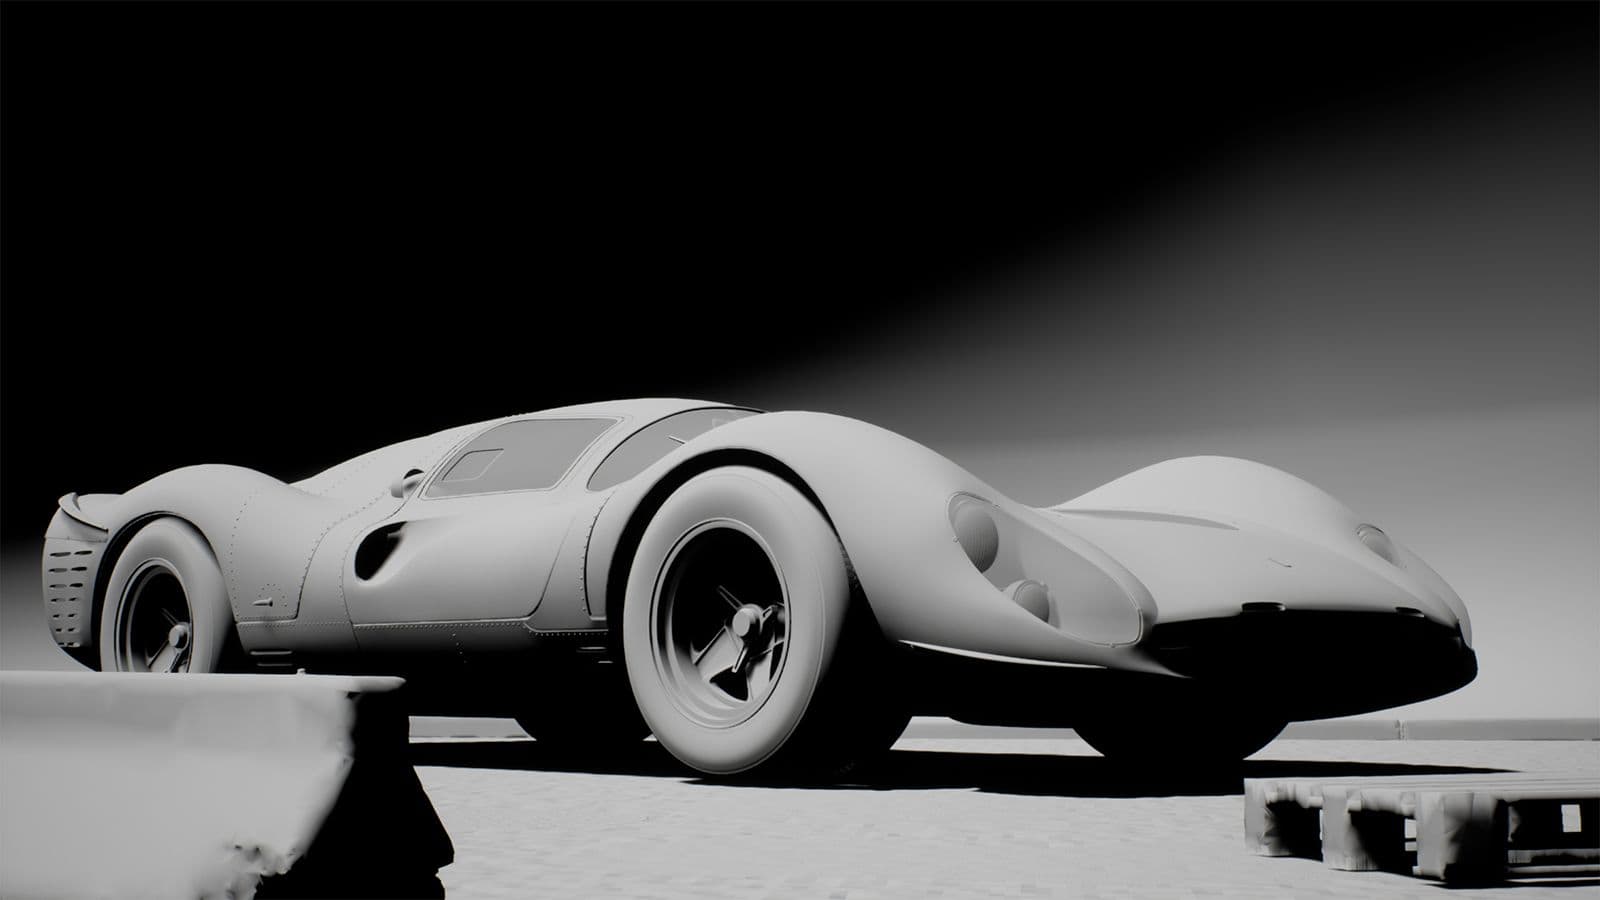
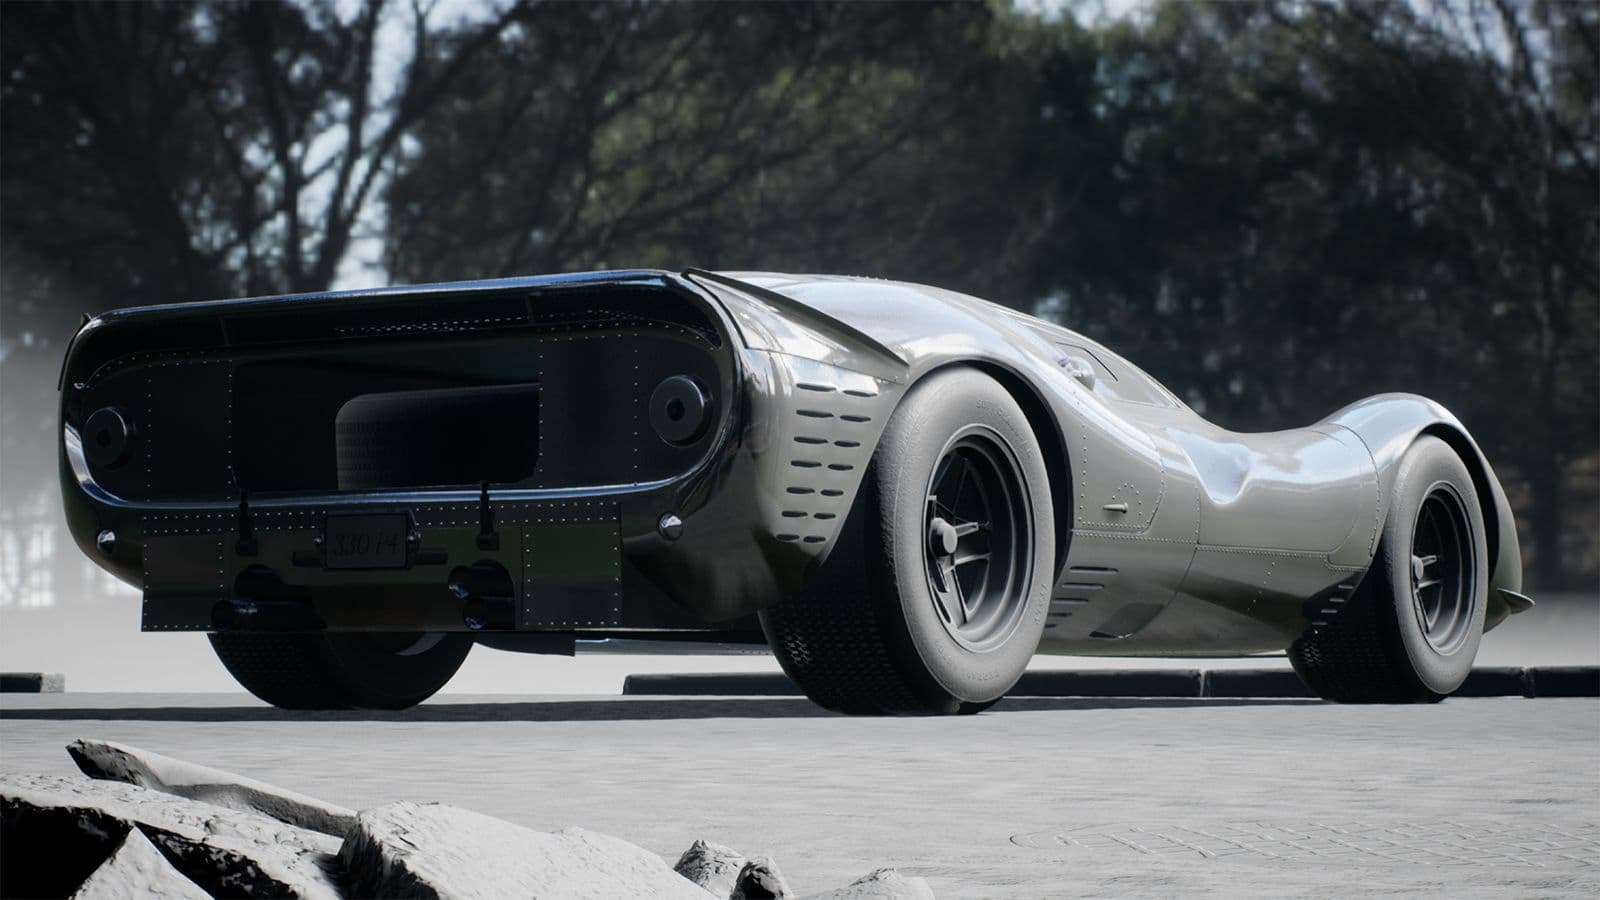
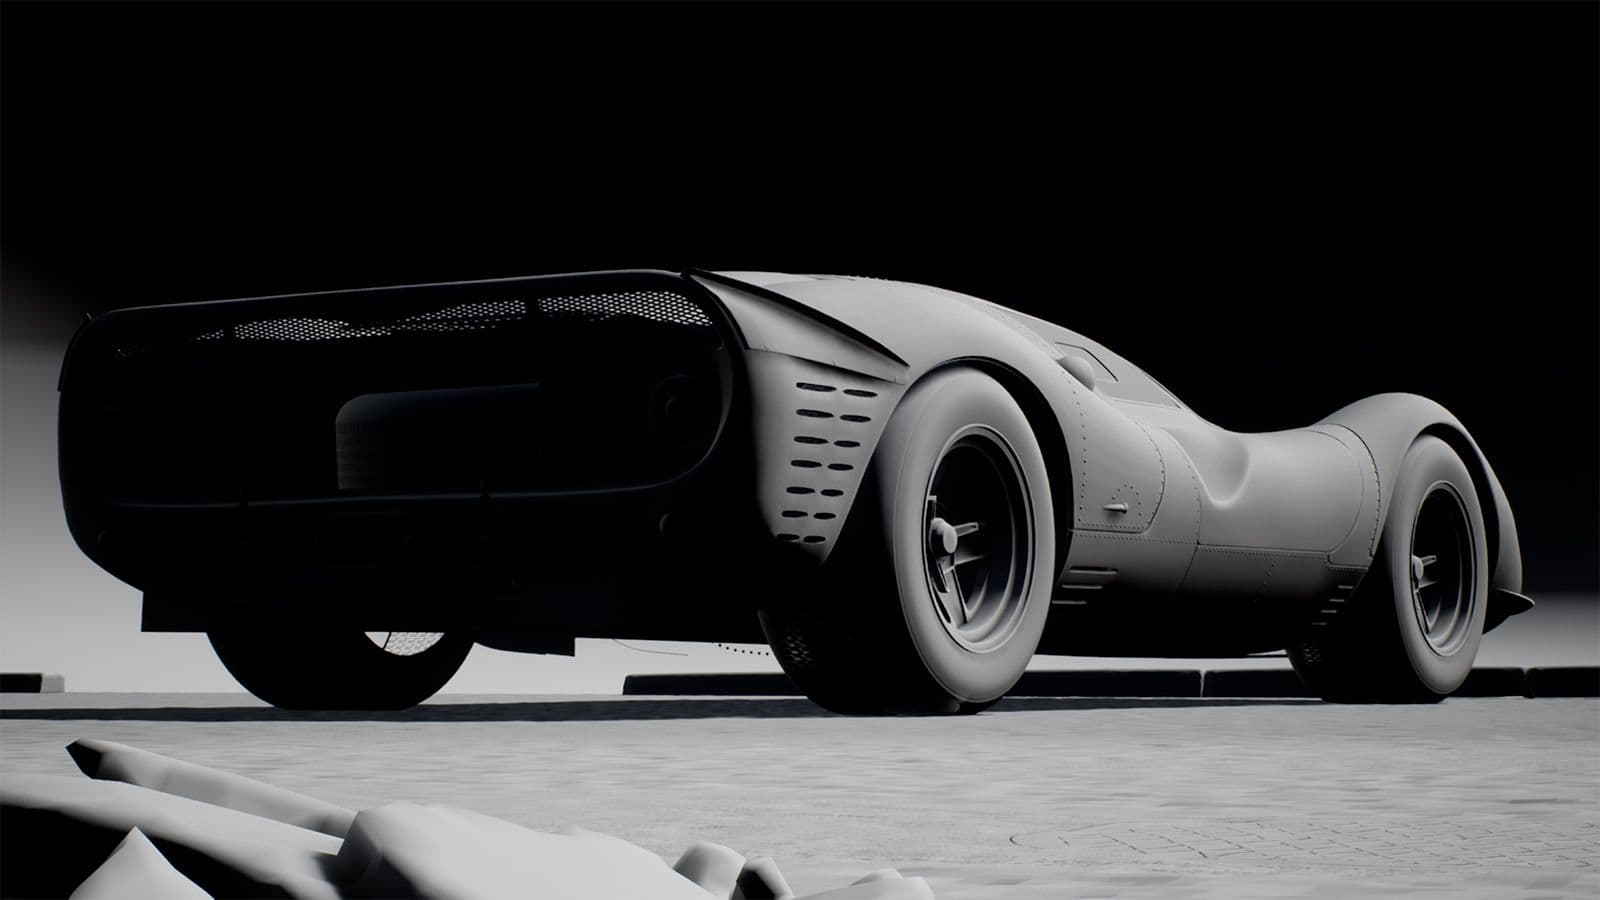
In addition to the two final images, I added views in base colour and with the lighting only. Here are the final renders below: