Modeling and Texturing a Photorealistic Gramophone Using Maya, ZBrush and Substance 3D Painter
In this article, Lightbox Academy alumnus, Nico Ferotti, shows us how he approaches the modeling and texturing of photorealistic props to make your 3D portfolio stand out from the crowd.
Nico Ferotti is a 3D artist based in Spain specialising in 3D modeling, texturing and look development. After finishing his course at Lightbox Academy, Nico has been building his demo reel with awe-inspiring props such as his photo-realistic gramophone.
In this article, Nico shows us how he approaches the modeling and texturing of photorealistic props to make your 3D portfolio stand out from the crowd.
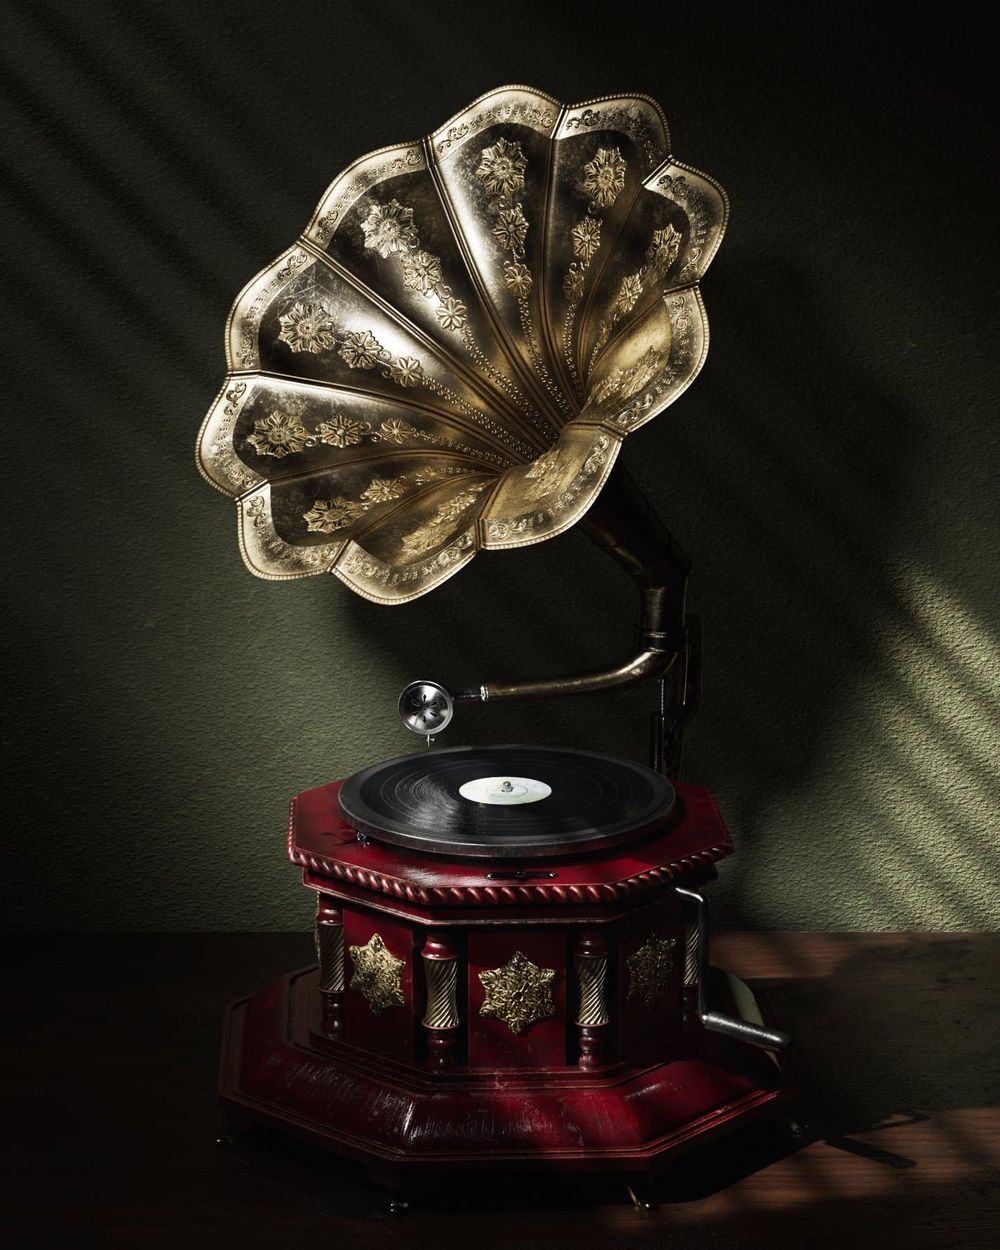
I liked the idea of creating a gramophone because I found it could be challenging for me, especially in the texturing and lookdev process, which is where I wanted to focus more on with this project. And besides, it is a gorgeous prop!
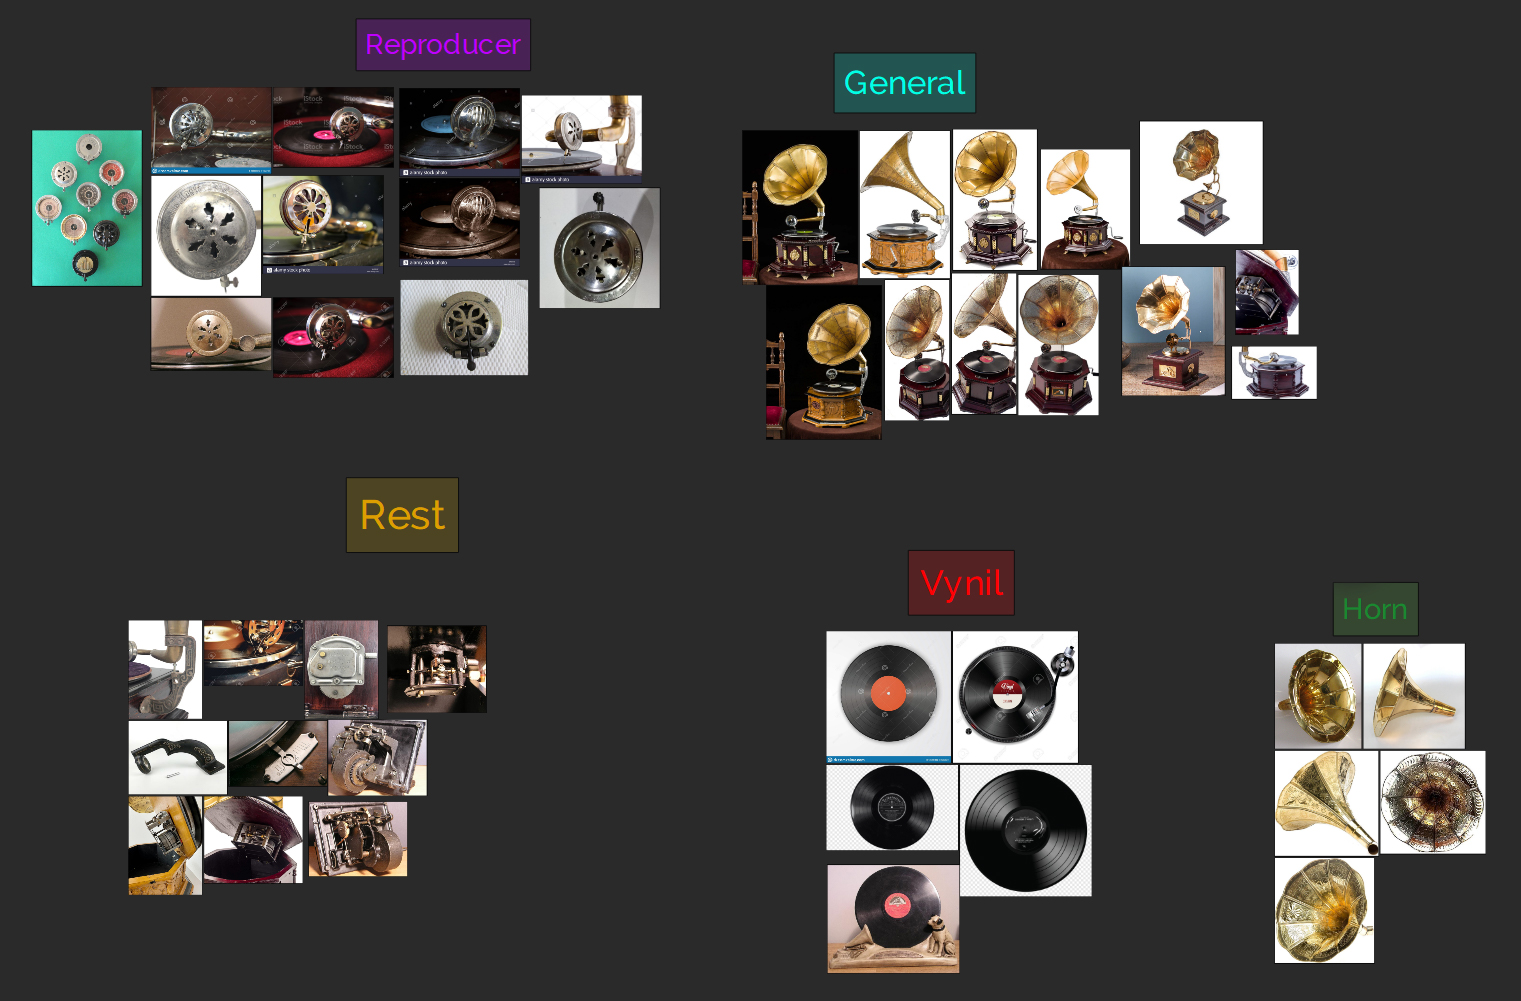
First of all I started by gathering references from all the angles and close ups as possible for each piece, so I can get the proportions right in the blockout process and to get to know the object better.
At the same time this will help me study the materials of each piece. I used PureRef to gather them all and organise them better.
ACES Colorspace
This was the first project for which I used the ACES colorspace. ACES allows us to work with a wider colour range than the traditional sRGB. Part of the process was to search for information about the basics of ACES and how it works with each software that I used.
My experience with ACES was pleasant, it took me a little while to understand the basics but the final result was astonishing. ACES achieved a more natural and a wider range of contrast in the lighting and shadows, which helped me gain a homelike effect and a more intimate atmosphere to catch the spectators view.
To understand more about ACES I recommend Chris Brejon website and as well a tutorial that helped me a lot with the basics and setup of ACES in Maya.
sRGB on the left. ACES on the right.
Blockout
Time to get my hands dirty! I started my blockout with basic shapes to get the proportions right and to get a general idea of how I could approach each piece. I decided to start with the more complex shapes like the horn and the back bracket. The reason for this is because I knew once I got those pieces, the rest of the blockout would flow together. It took a few tries until I got the result that I wanted and that matched the reference.
Take your time with the blockout and start over again if needed, since it's gonna be the foundation of the whole model. It will be easier to revisit earlier steps in your model if you have a good blockout.
Modeling and UVs
Once I finished the blockout it was time to start with the high poly modeling and adding detail to each piece: beveling and fixing topology.
Before starting the high poly modeling I had to plan which details I would do in the modeling phase or which ones I would do in the texturing phase. I ended up projecting in Z-Brush the horn details and the stars that go around the base. I used the Z-Brush model as a high poly mesh that I baked over the low poly one in Substance - this is how I achieved the high poly detail using the low poly mesh.
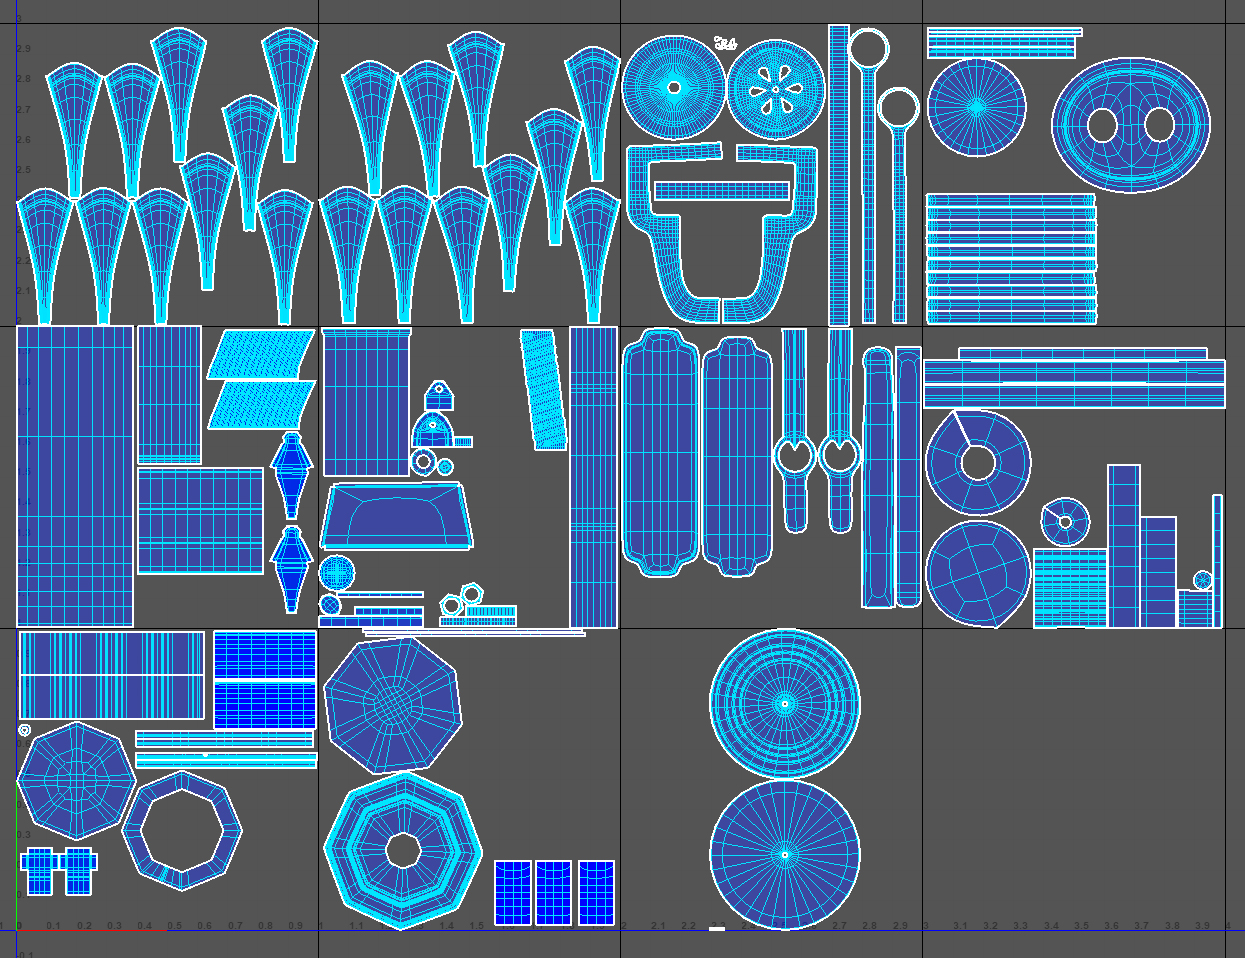
With the whole model finished I started making the UV. Having good UVs is very important for the texturing process. I tried to make the UVs as straight as possible to help me with projections and especially with the pieces that I would have to hand paint with more detail.
After finishing the UVs I had to lay them out, and I decided to separate them into different UDIMS for better organisation.
Texturing and look development
The texturing and look development phases were the ones I spent the most time, since learning more about texturing was my goal for this project.
I decided to separate the gramophone in 5 different materials:
Vinyl
Wood
Engraved metal
General metal
Smaller metal pieces
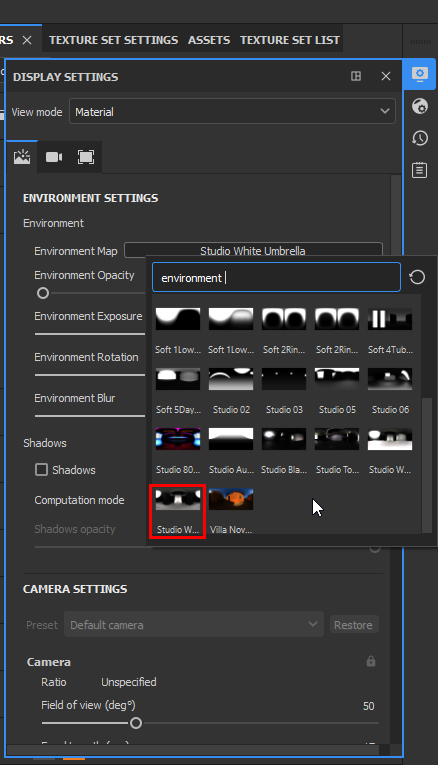
I used Adobe Substance 3D Painter for texturing. The first thing I always do is test if my bakes are correct. Once I see everything is fine I change the environment light. In my opinion, a neutral lighting helps me get a better perception of the colours - the default lighting can tint our colours and confuse us when we export and test them on our render engine.
We can change the lighting in the display settings inside Substance, in this case I used Studio Light Umbrella.
I approached every material with a very similar process. I started with a simple base colour, then started adding some colour variation to break the monotony.
Once I got the base colour ready I went ahead with height and normal map projections and painting. Then, I added a basic roughness map without any breakup. After I got a clean texture, I started adding layers of damage and wear with procedural masking and mixing it with hand painted damage to add some breakup to get the old gramophone look that I had in mind.
To finish, I exported my textures to start the look development process.
The look development process is where I check my textures and try to match them to my references to get the final result that I want by testing them in the render engine.
I tweak the textures either inside Maya or I go back to Substance if I need to add more details or change masks. Inside Maya I usually use a node called “remapHSV” which is very optimal to tweak values like saturation, general values and levels.
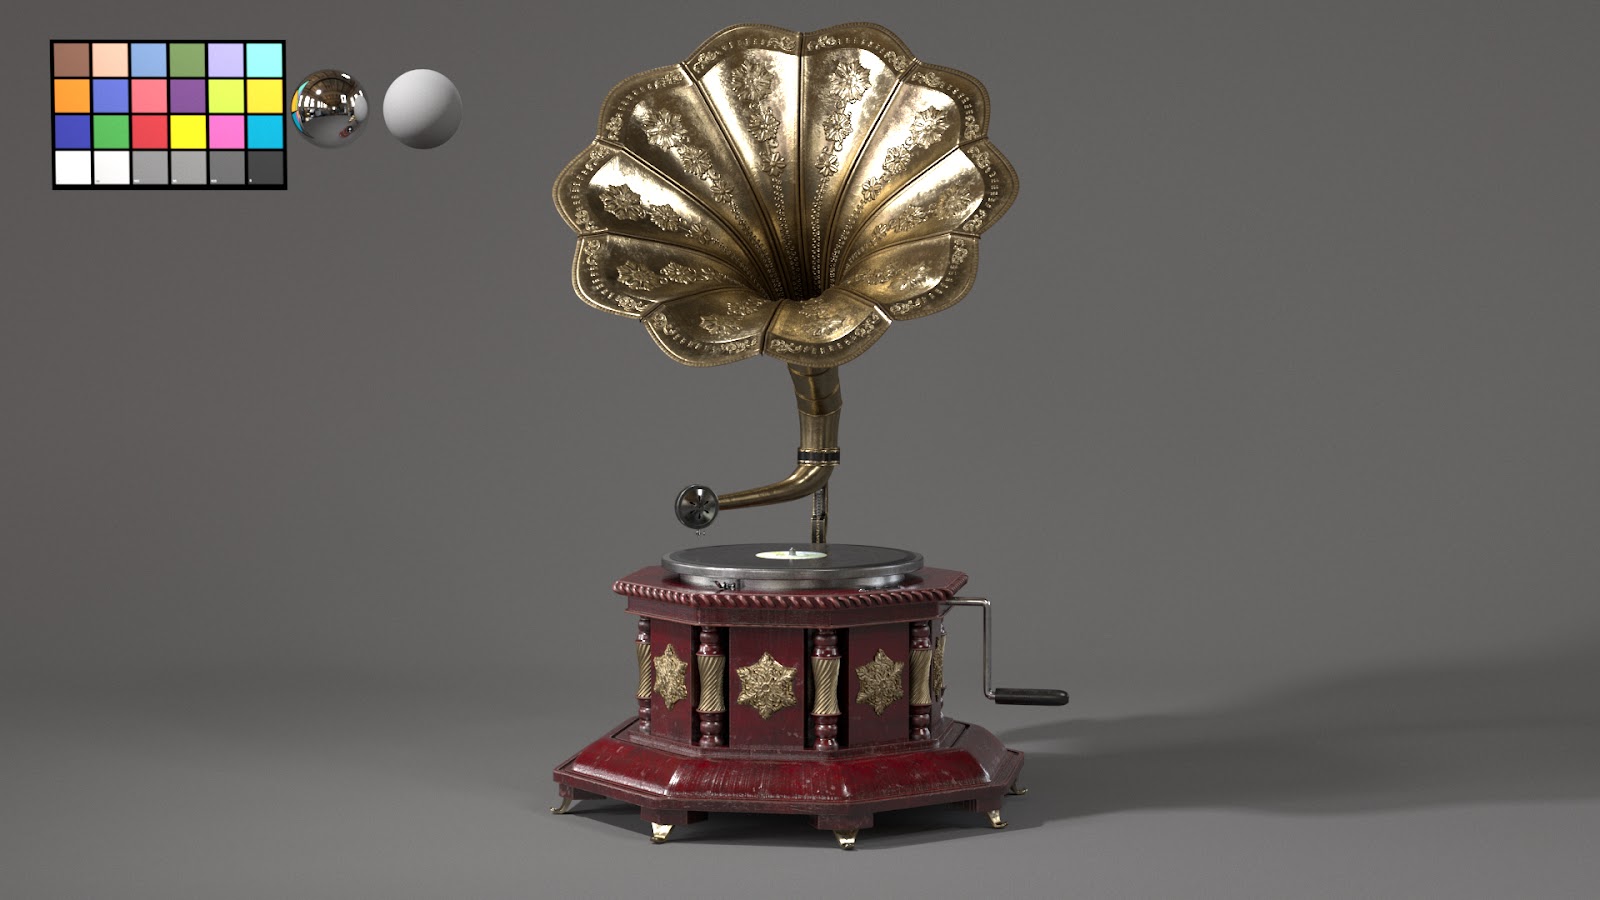
For look development I used a basic neutral lighting set up with the usual key, rim and fill lights, and an extra dome light with HDRI. After tweaking my textures and fixing some maps I went ahead to set up my render scene.
Feedback from friends and colleagues was very important for me especially in the texturing and look development process. They helped me by pointing out things that were not correct or that I could change and also where I could add extra detail to get a better result.
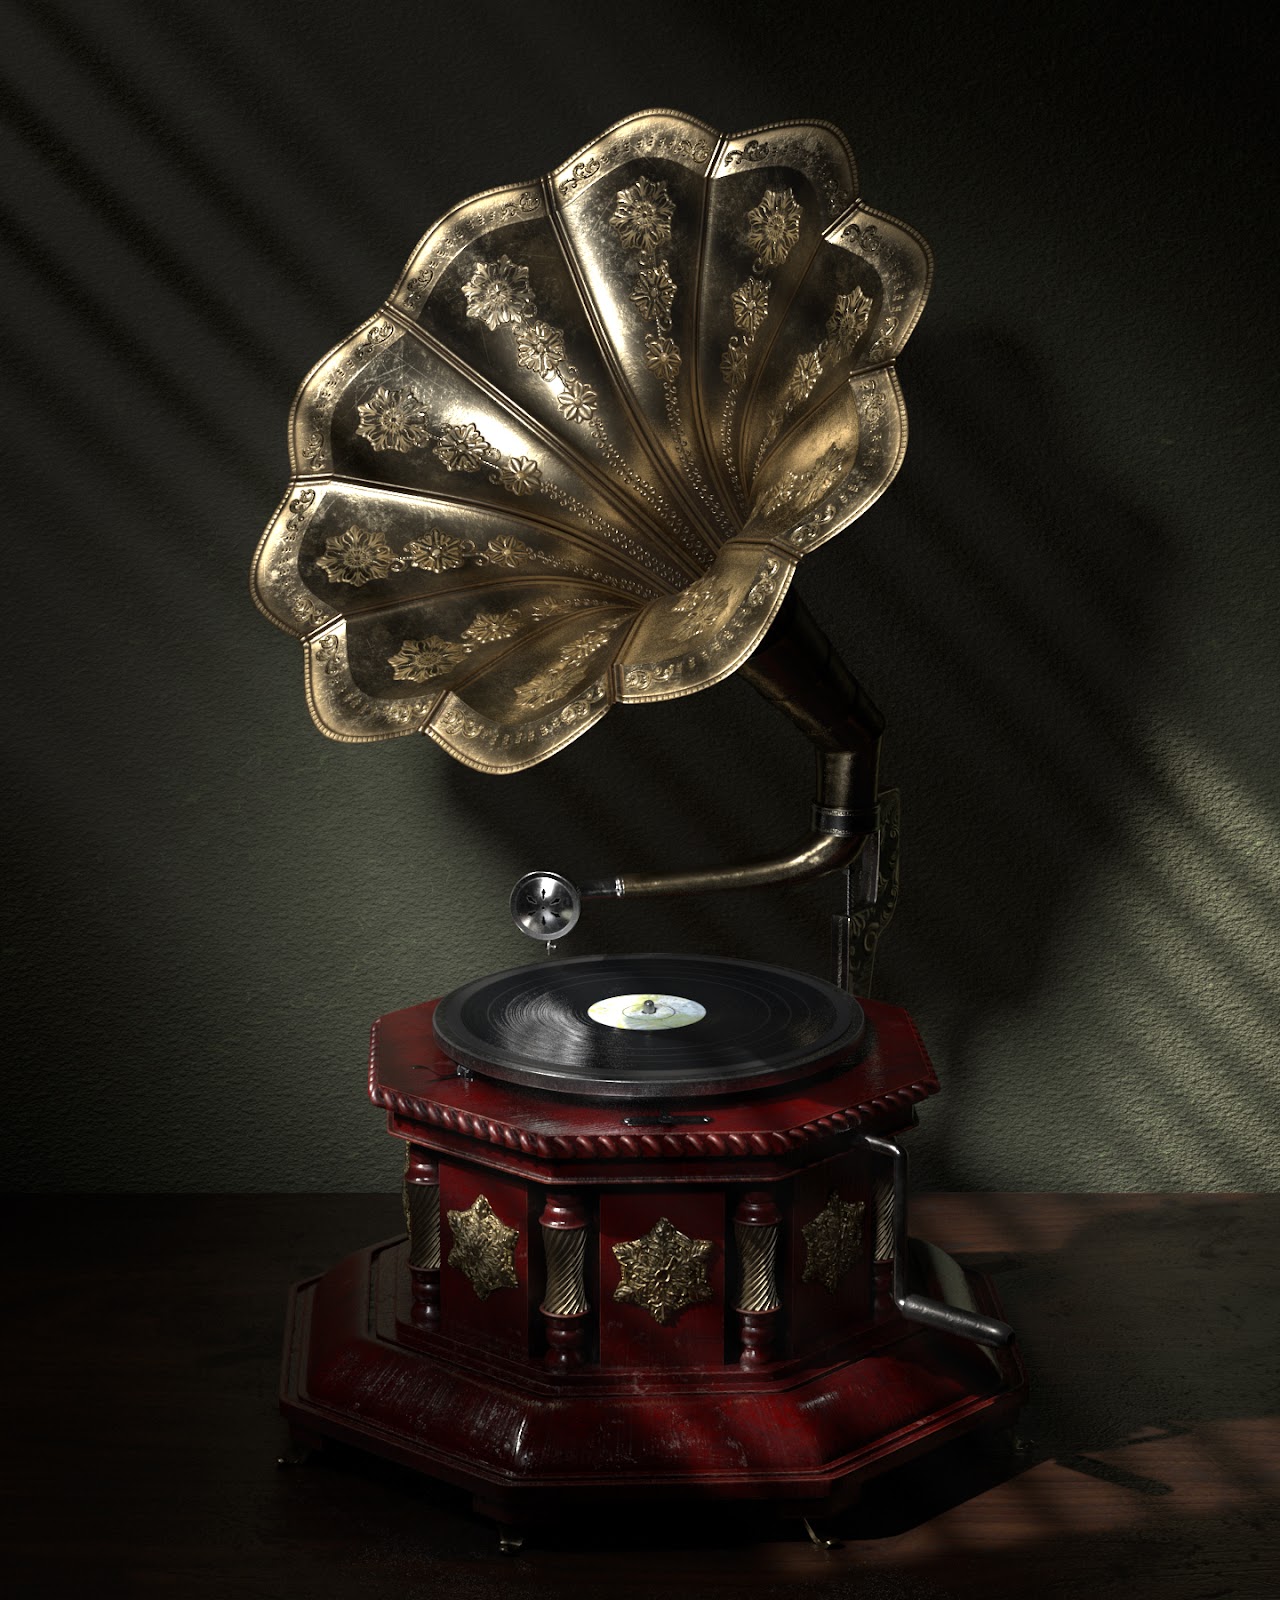
Final render and composition
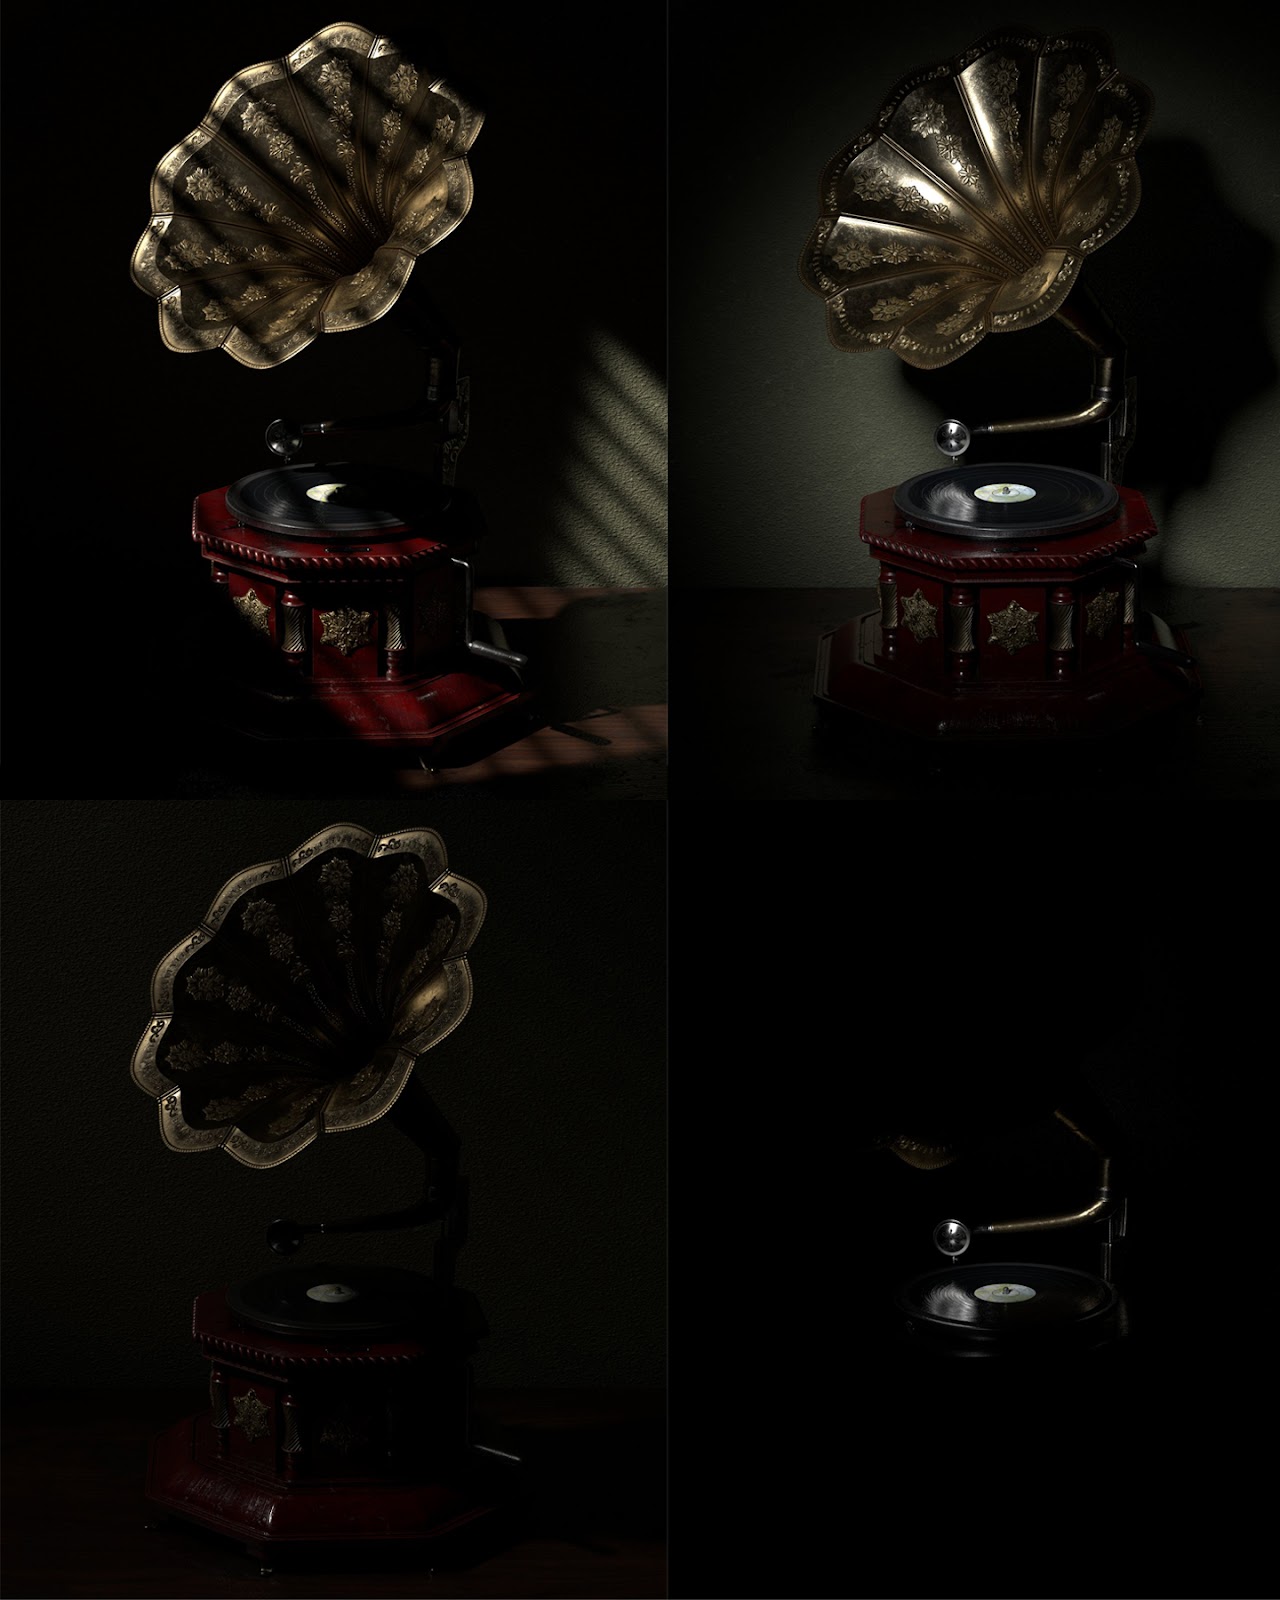
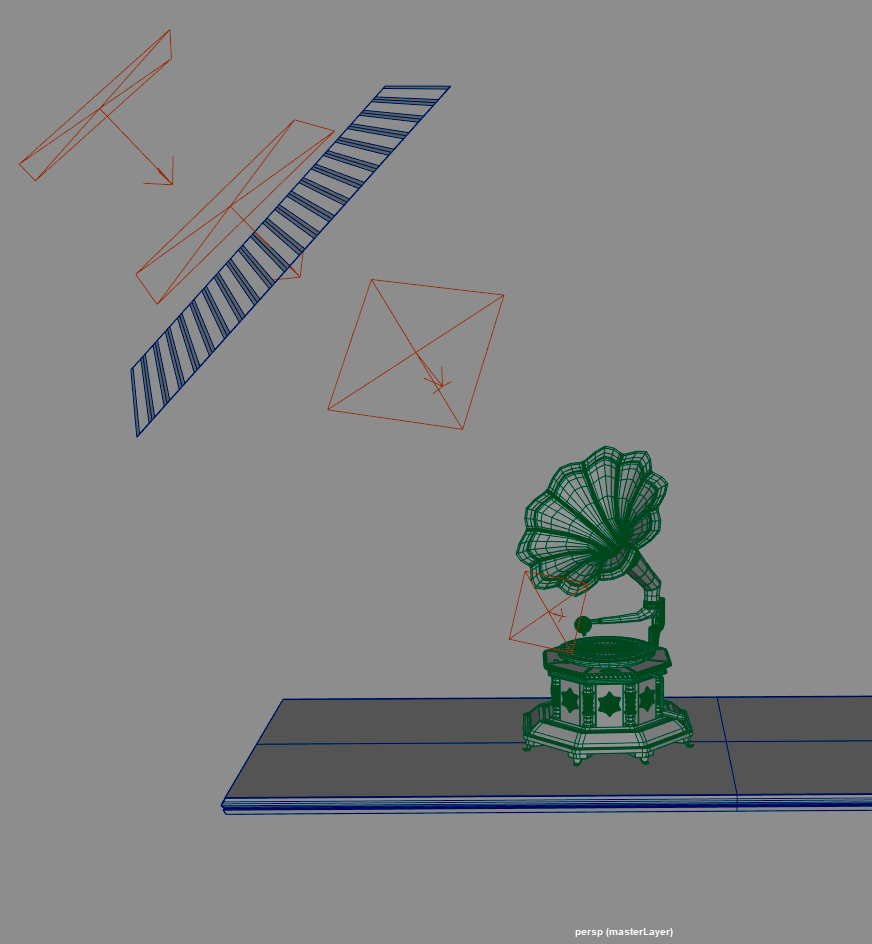
Finally, it was time to set up my camera and lights. I wanted a still life vibe for this scene, so, my main inspirations for this were artists like Robert Mapplethorpe and Juan de Espinosa, as well as Edward Weston, for the metallic contrast and the exaggerated volumes in the lighting.
It was quite a simple set up with a table and a wall which I textured inside Maya. I used 5 lights: the main source of light which was a light with a geometry to help me simulate blinds, then 3 fill lights to reinforce the whole scene and an extra light that I used for volumetrics.
I rendered the volumetric light in a separate layer so it wouldn't contaminate my main scene and to have more freedom over it in the composition stage.
Lighting Passes and Volumetrics (on right.)Scene Setup
The composition part was pretty straightforward, I added the volumetric light over the final render and then tweaked the contrast of the whole image a bit.
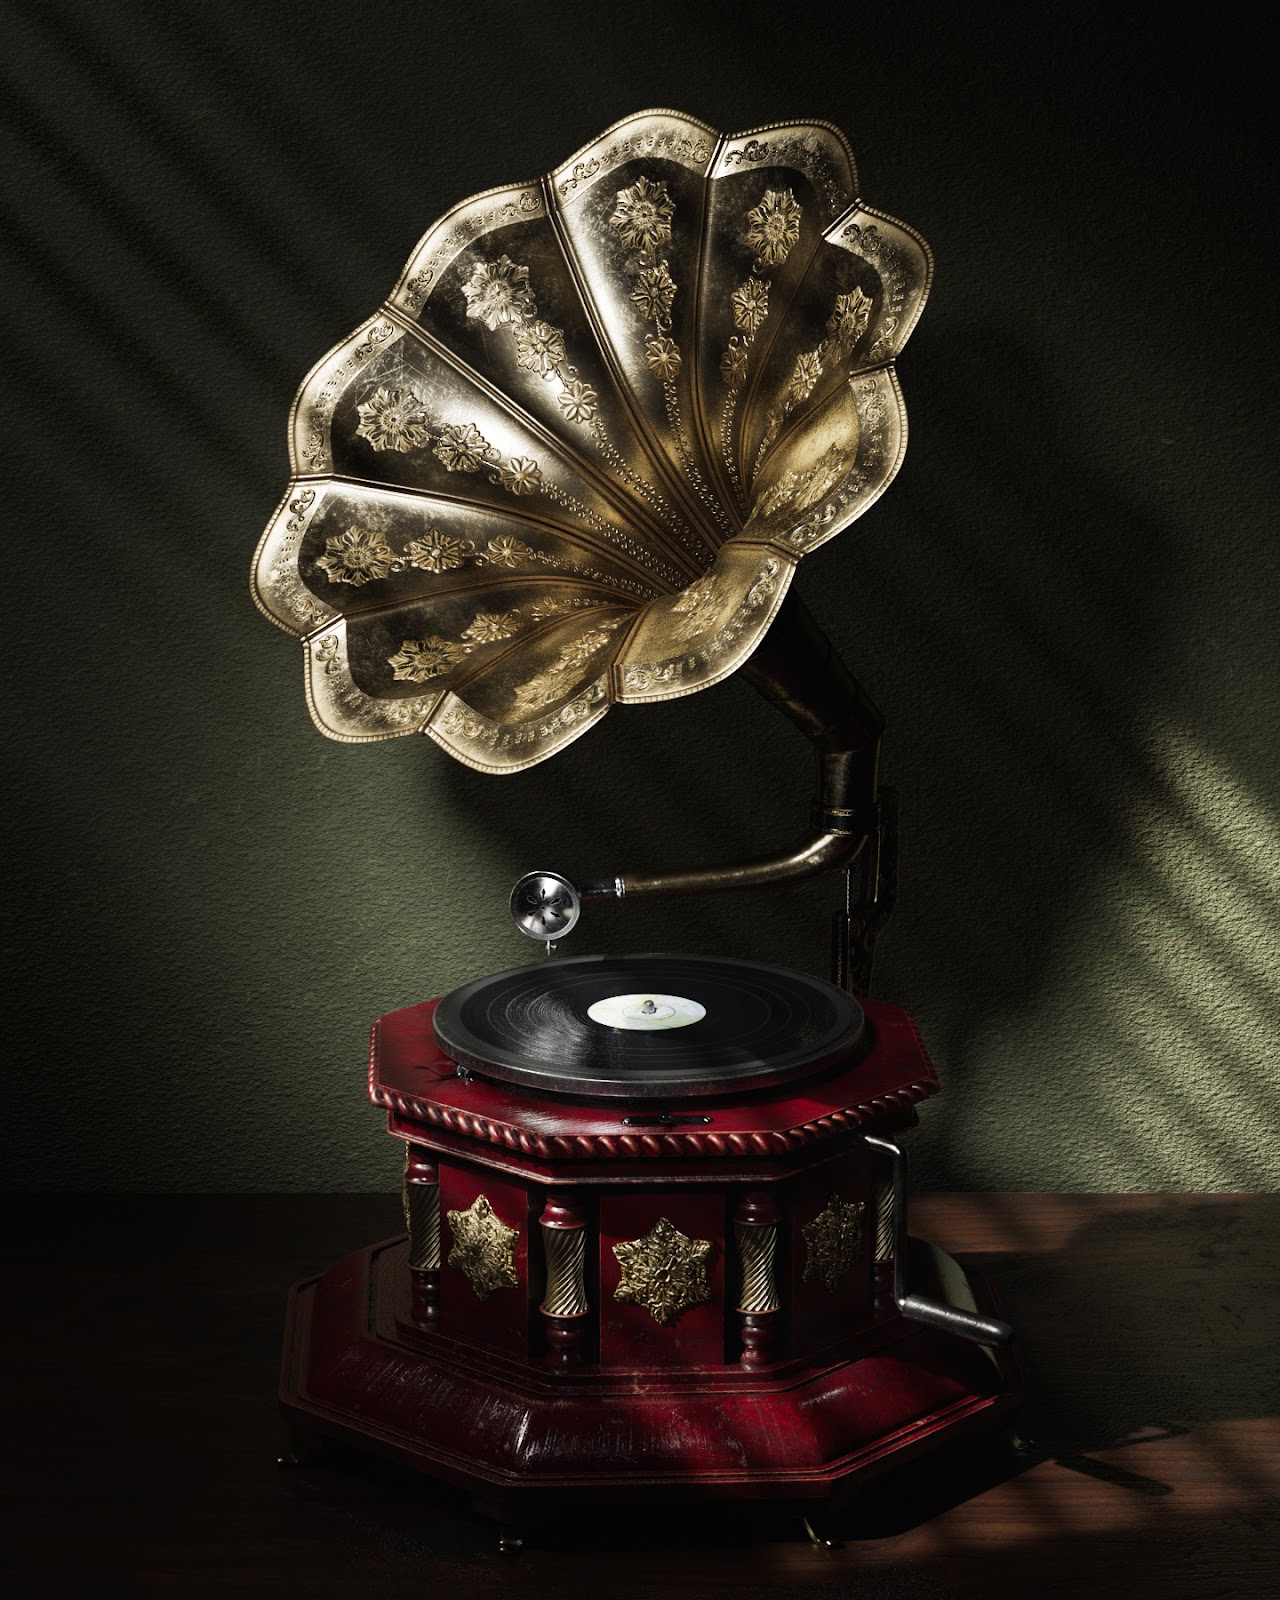
Final Result
Conclusion
With this project I learned a lot about the whole process but especially the texturing and lookdev aspects of the workflow. I realised that this is the part that I enjoy the most. I also learned about the importance of asking for feedback and not being afraid to ask for it. Feedback is always going to help us improve our projects.
I want to thank The Rookies for giving me the opportunity to write this article!