Creating an Environment from Concept in Unreal Engine
Danielle Villacorte, a 3D Environment and Prop Artist from the Philippines describes how she creates 3D environments from a concept, in Unreal Engine.
Danielle Villacorte, a 3D Environment and Prop Artist from the Philippines describes how she creates 3D environments from a concept, in Unreal Engine.
Danielle Villacorte is a 3D Environment and Prop Artist from the Philippines. She enjoys bridging 2D and 3D art to create immersive and engaging environments that tell unique and interesting stories. In this article, Danielle describes how she creates 3D environments from a concept, in Unreal Engine.
During my time at CGMA, I wanted to challenge myself with something new for each project. Because I was still learning the basics of the video game industry pipeline, I thought it was best to follow in the footsteps of artists more skilled than I am and emulate their process—hence environment creation from concept art.
At its core, the most essential part of this process is the reference gathering phase. Because you’ll be working with an established concept, anchoring the concept in reality is the easiest place to start.
If you plan to work solo, PureRef is a great tool for this. As for groups, I would recommend Miro.
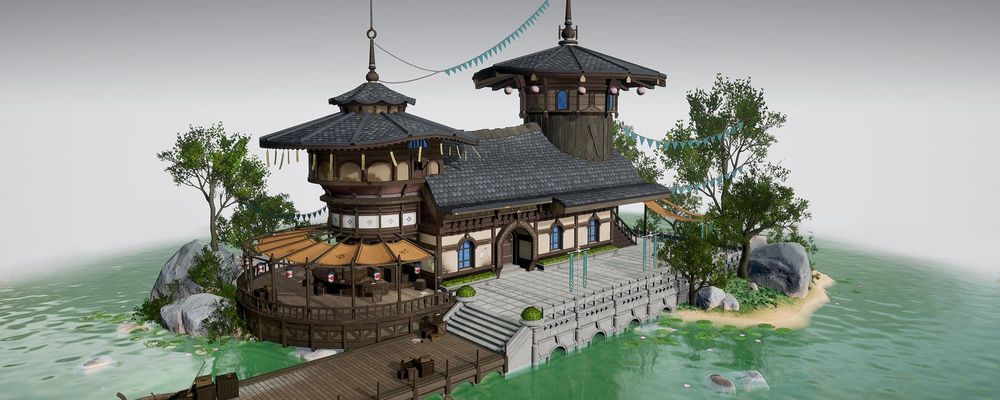
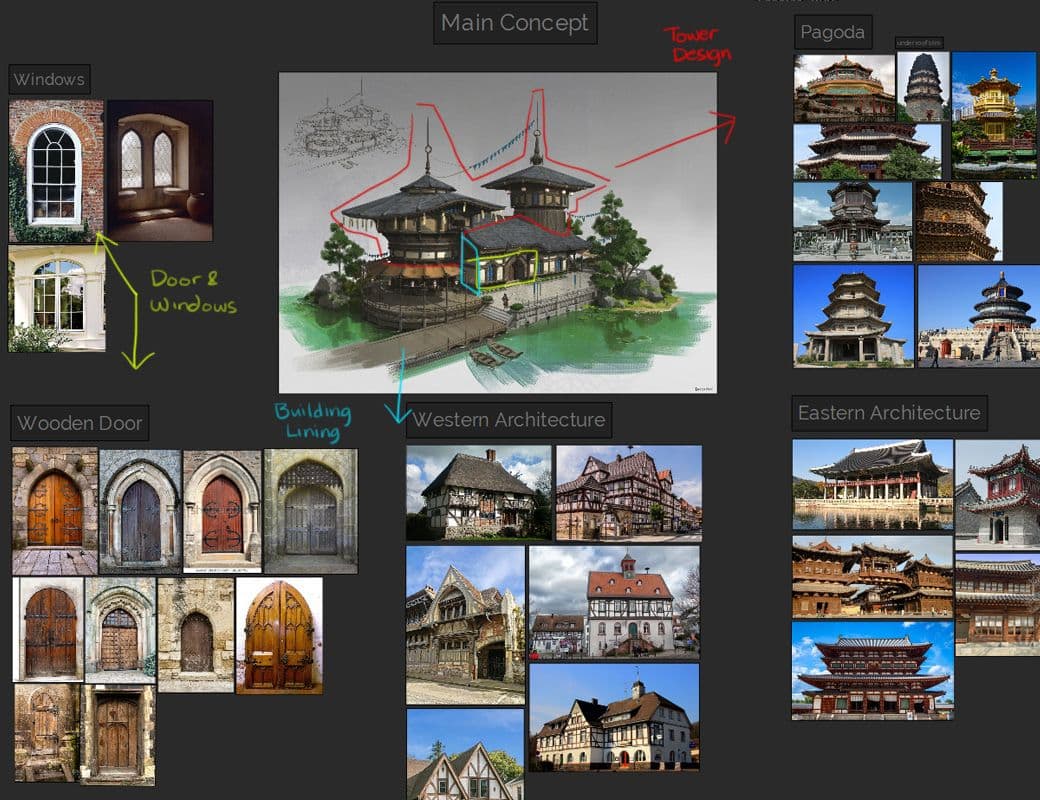
By picking apart the largest forms and connecting them to familiar things in real life, the task becomes less daunting and more manageable. For this piece, the concept made it clear that it was architecture designed to mix the aesthetics of Western and Eastern design. I looked up various trim details, windows, doors, materials, and others to be able to narrow down the final look.
You can also ask yourself helpful questions: How was it built? What is the purpose of this place? When was this created? Where is this architecture inspired from? Who lives in this space?

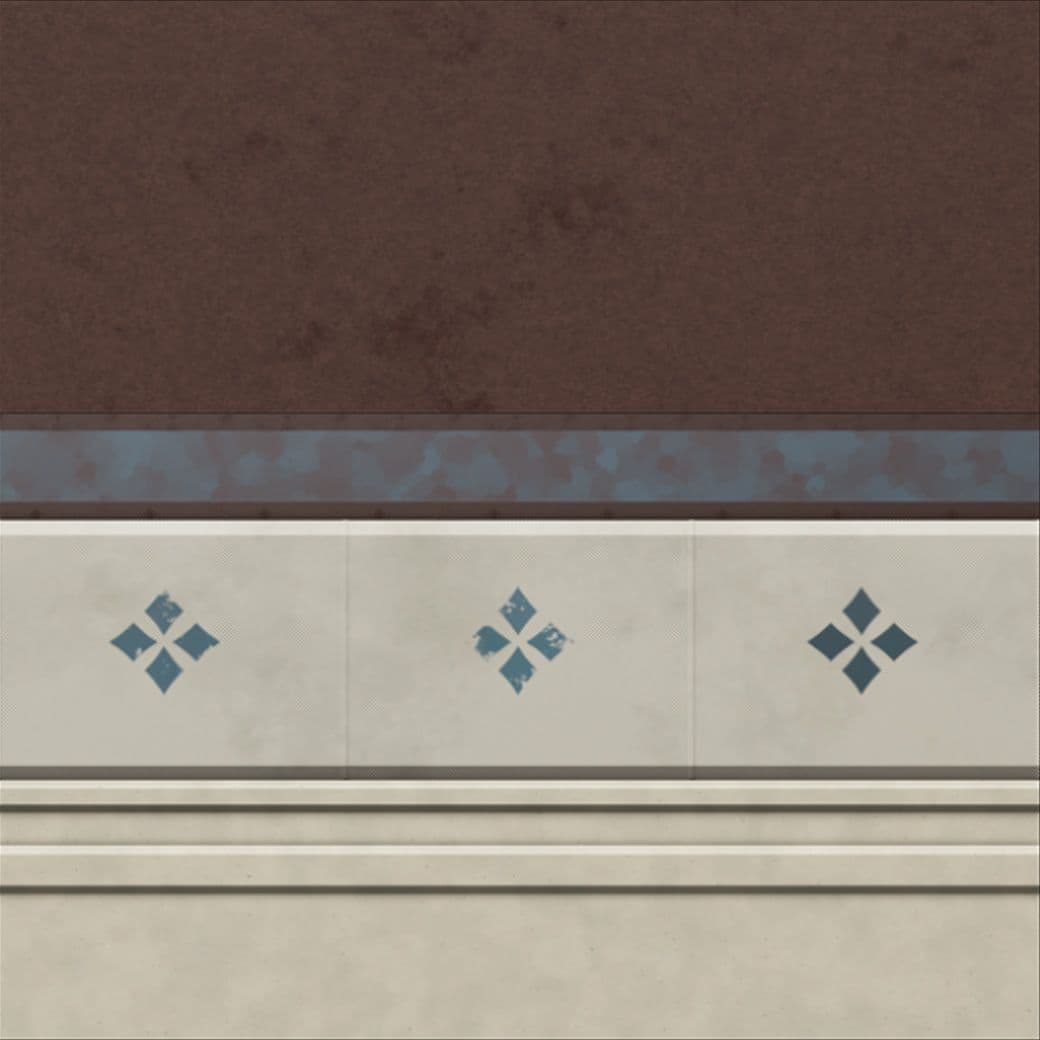
Next is planning trim sheets. Oftentimes, environments can be easily broken down into simpler sets called "trims". This helps to streamline redundant and similar-looking aspects of the environment into more manageable and reusable parts.
Tim Simpson from Polygon Academy discusses this in detail in his video on Youtube. This discusses trim sheets at a complete beginner level. Another fantastic resource I reference often is this blog post from James Ray Cock wherein he blocks out his trims in great detail. This is 1 of those aspects of environment creation wherein the more time you spend on this, the easier your work down the line becomes. Work smart, not hard!
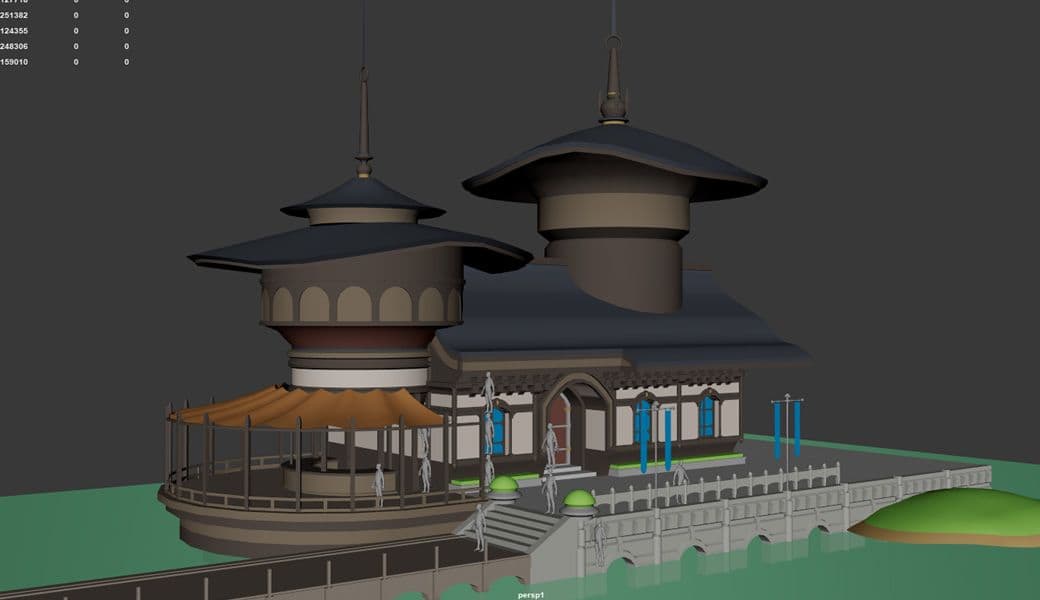
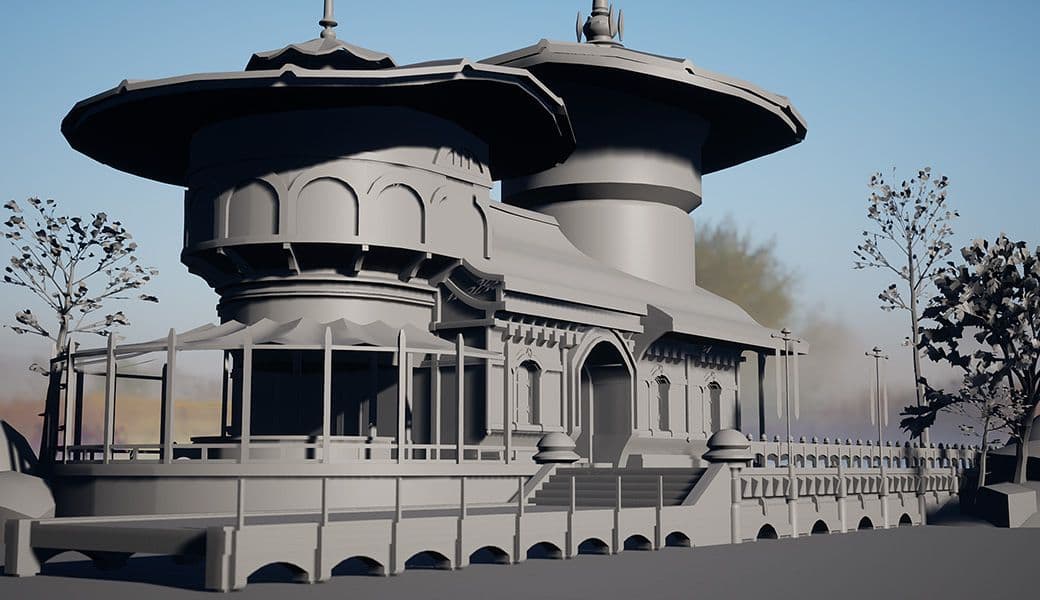
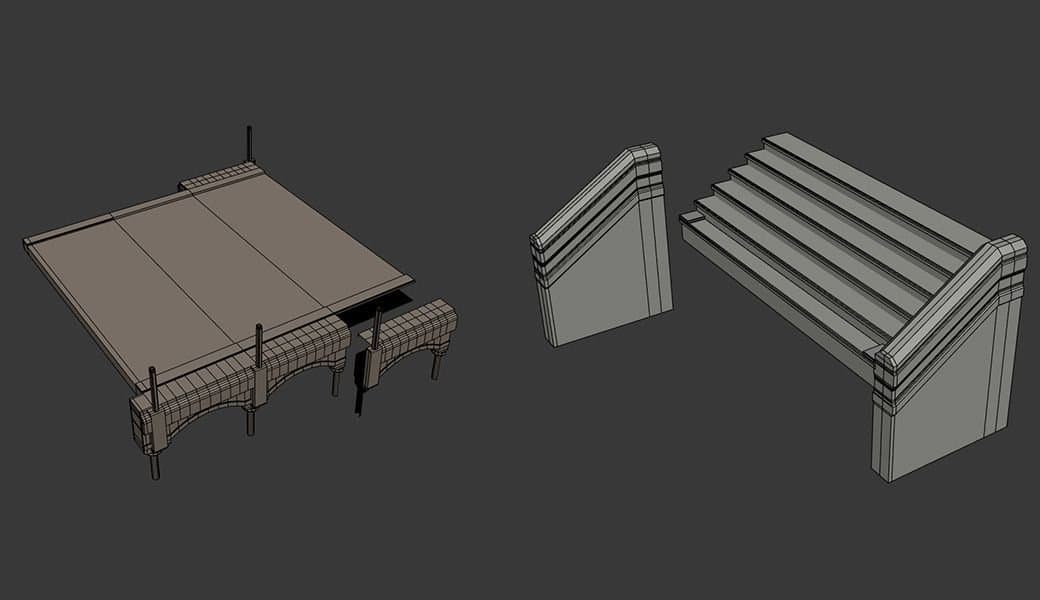
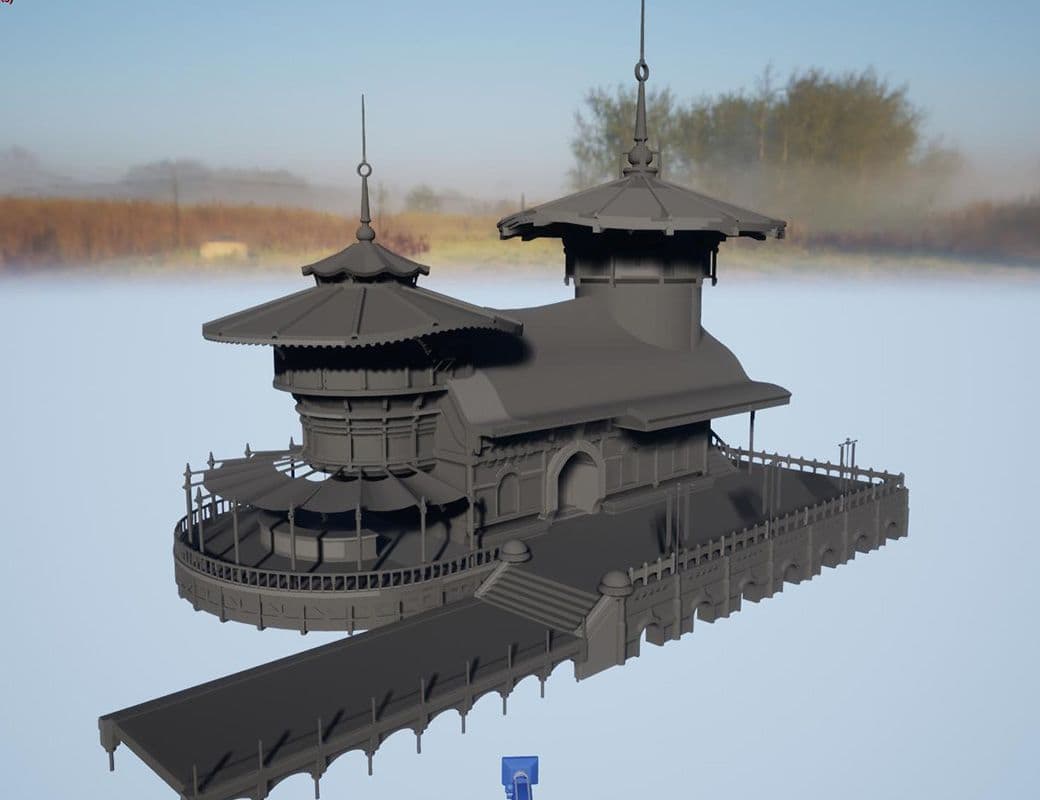
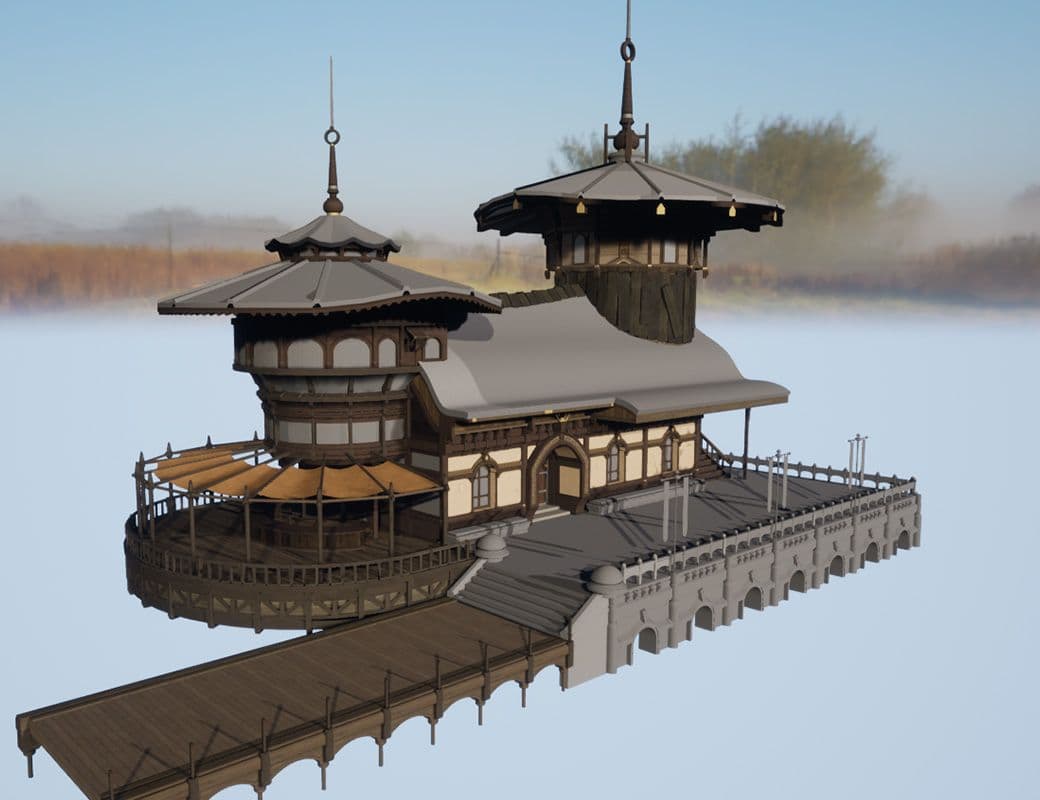
The next step in the process is creating a good block out. Forget the details here first, and focus on nailing down the structure of your concept. I maximise my time here by focusing on scale and seeing how objects measure in relation to each other. If your concept includes a human for scale, then that would be even better. I created this blockout in Maya then placed it in Unreal Engine 4 afterward as 1 combined mesh.
After the blockout is done, try to finalise the camera shots you’d like for your piece. This serves as a guide for how more or less detailed you should be making some objects versus others. This saves you the trouble of going back later and refining or simplifying different aspects of your scene. Remember, the closer to the camera, the more time you need to spend to make that look good.
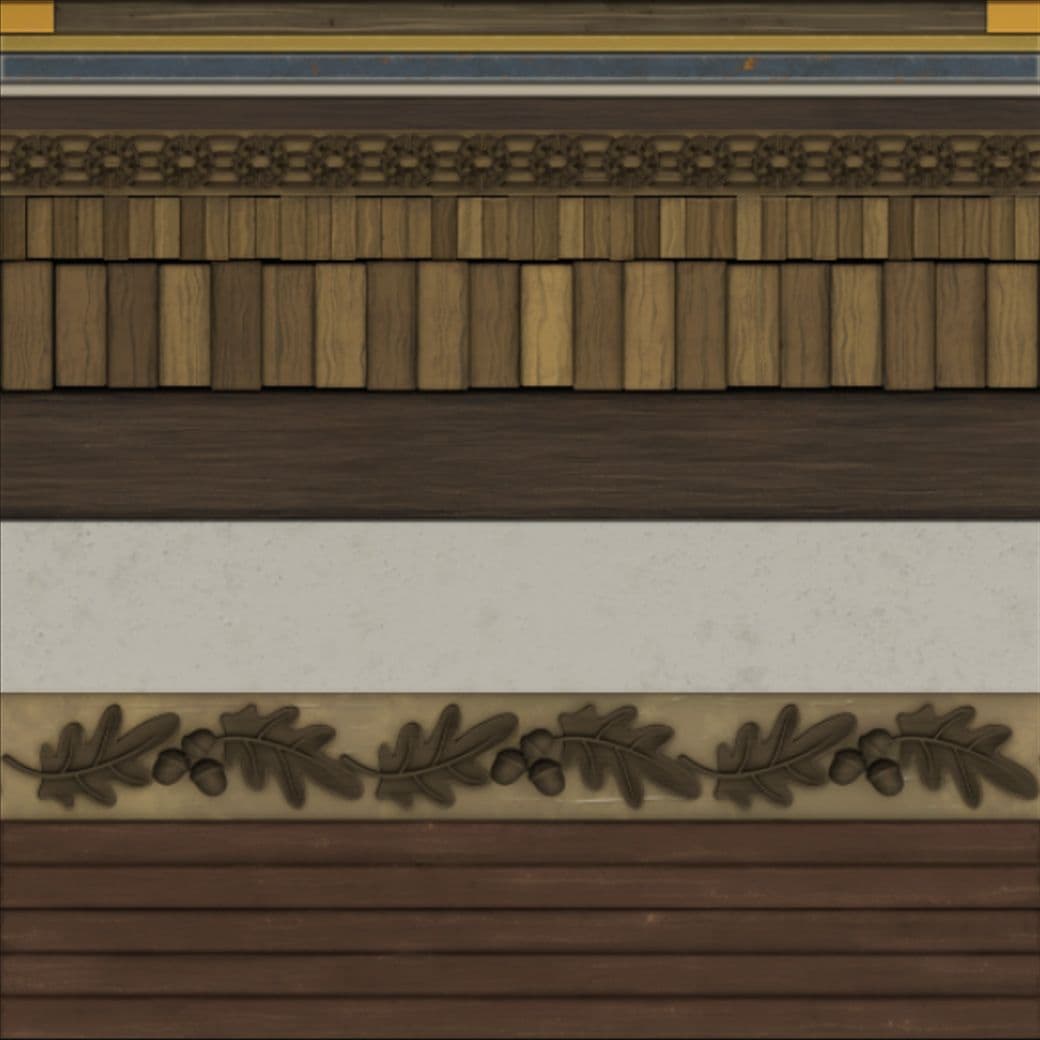
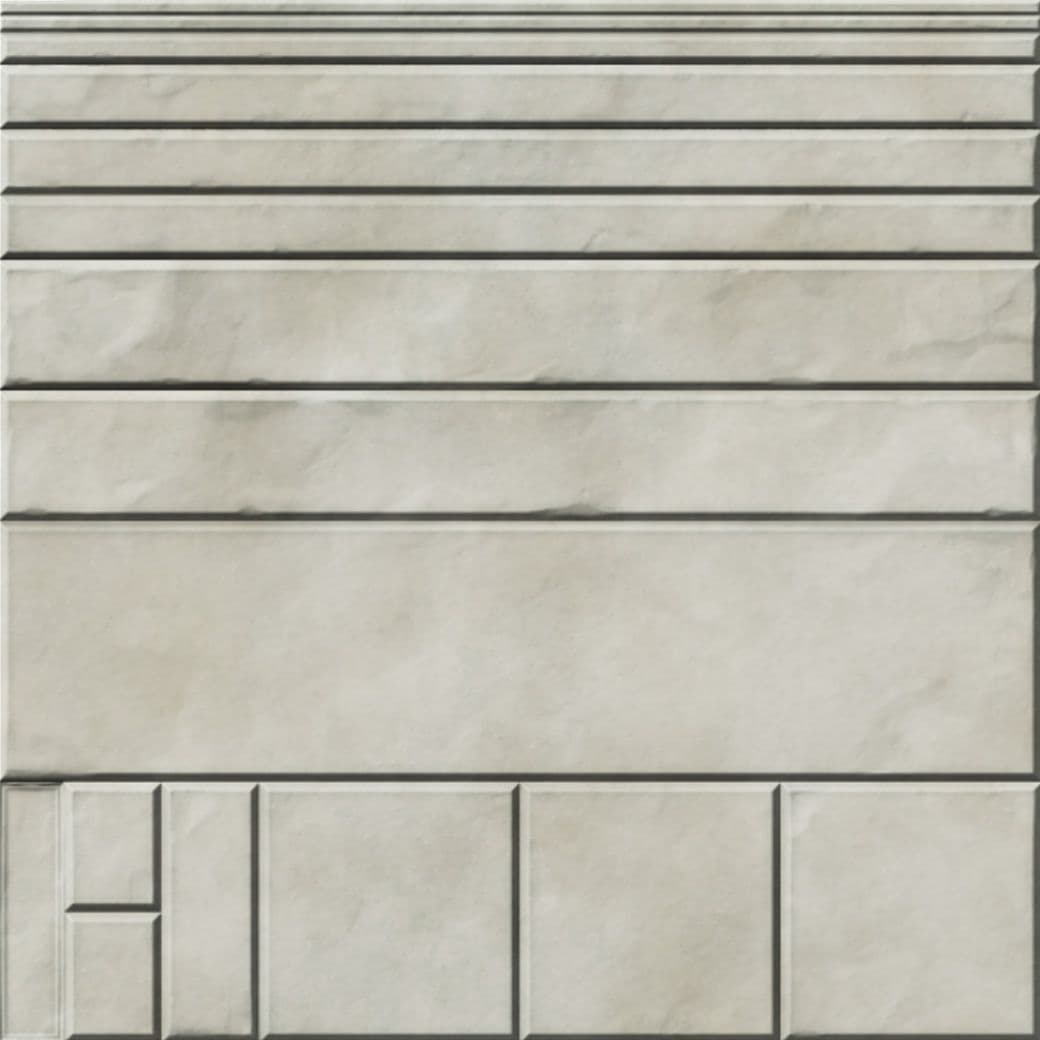
When working with trim sheets, you can save yourself a lot of time as these can serve as the main detail of the piece. No unique baking is necessary. This was my first time creating trim sheets though, so I hybridised a method used by Morten Olsen and his team at Insomniac Games with my ideas. This served me well enough because I was 1 person performing a multitude of tasks. Had I had more time, I would have done Morten’s whole strategy and made a trim sheet for each material.
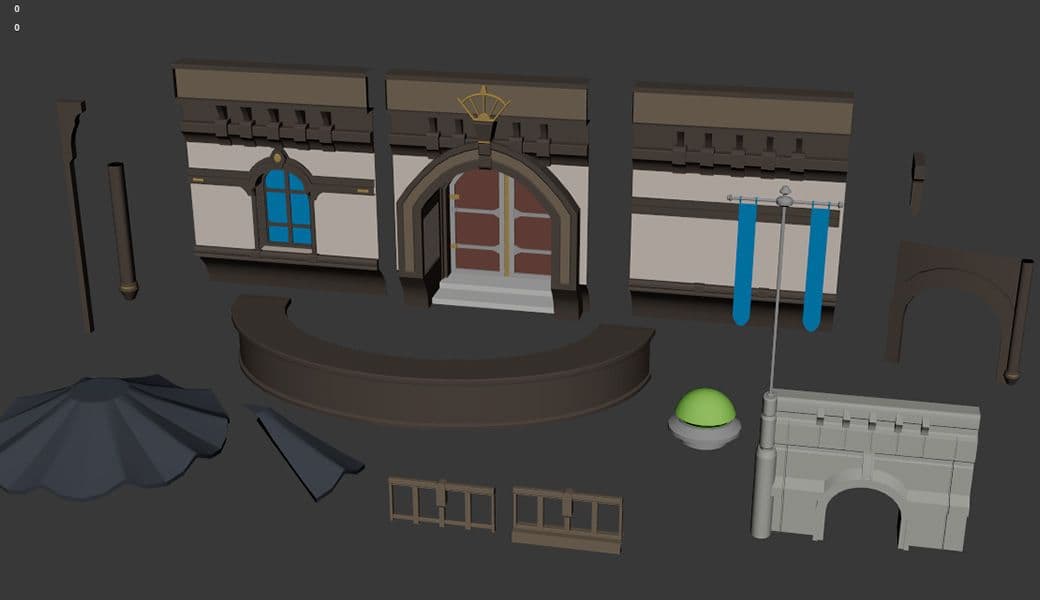
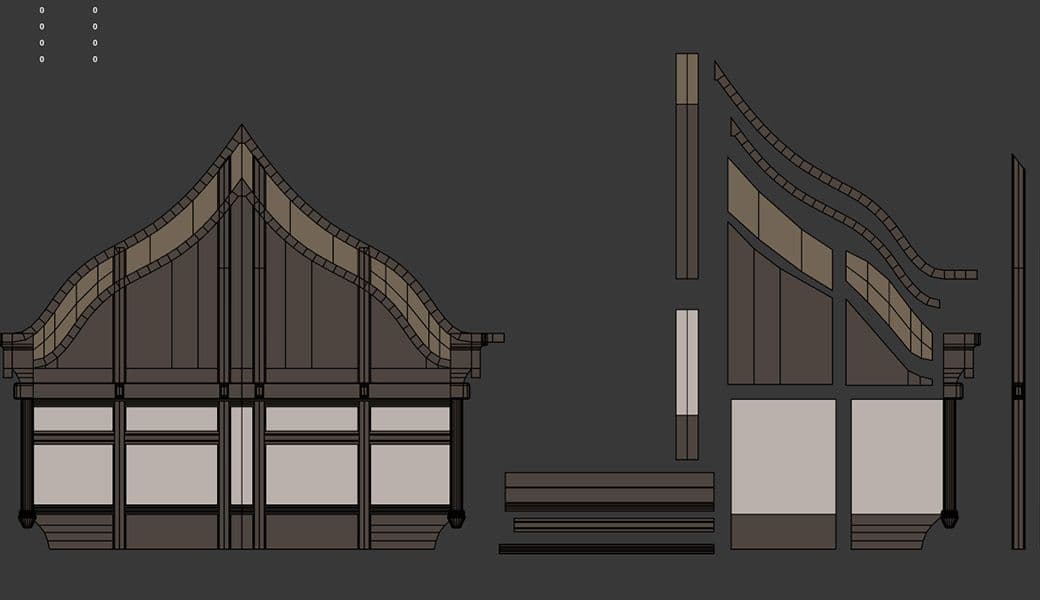
This was my result, and it served me well enough, though I highly recommend sticking to 1 main colour if you will have parts of the trim that share a similar material. In my case, this was wood. Sticking to 1 colour just helps maintain cohesion if ever you decide you need the other parts of the trim that you didn’t plan to use initially.
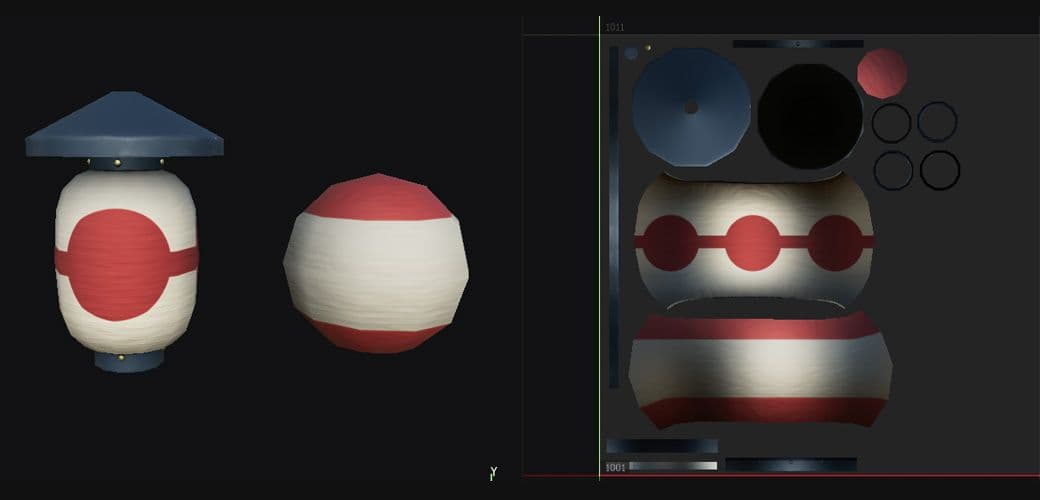
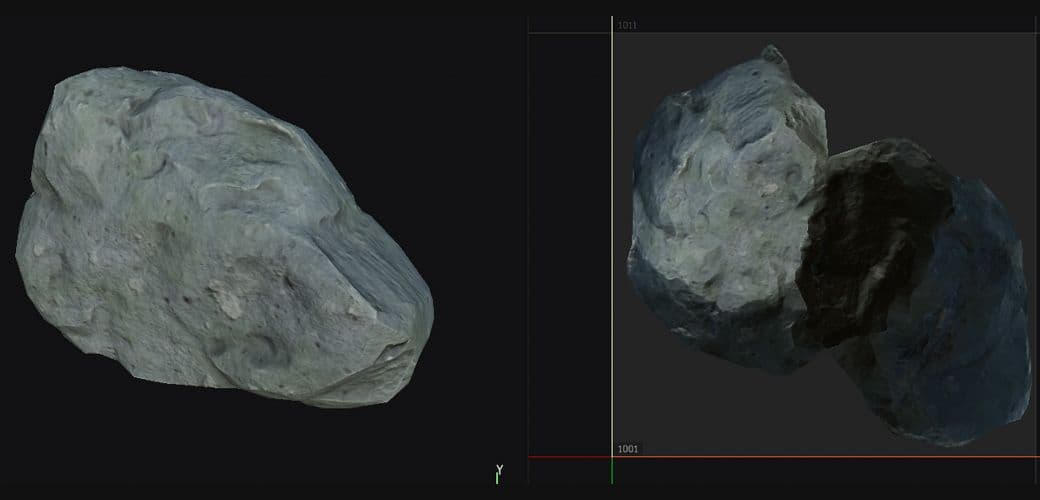
Because of this workflow, the only unique props I had were my lanterns and paper talismans, and my rocks. These were baked together in 1 UDIM to maximise my time.
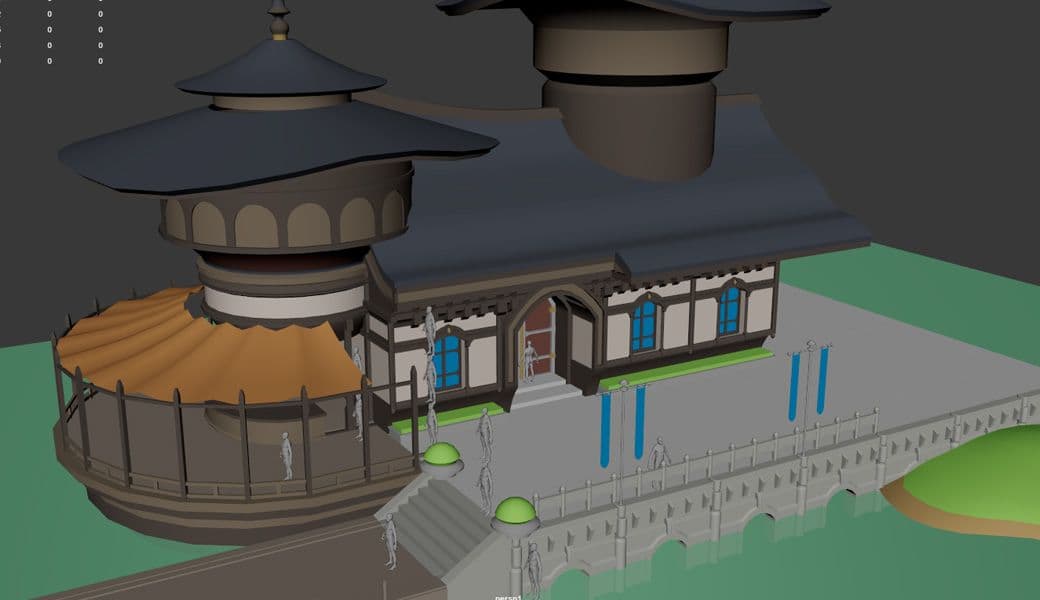
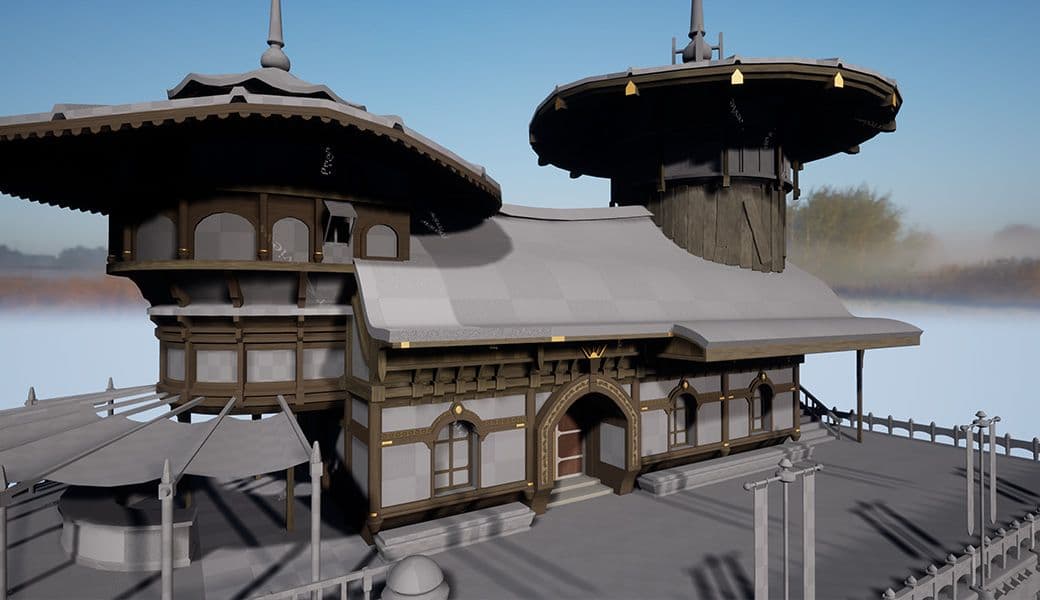
This is where all the planning begins to pay off and where your scene starts to come together. To make this part easier, I alter Unreal’s default material to something more transparent. This way, I can still see the blockout and snap my objects into the correct spots. This part is quite time-consuming but if you planned your trims and models right, then it should still be manageable.
Remember though, your blockout is still a rough guide because it lacks the fine detail represented in the concept. Take a step back and zoom out now and then to see what stands out and edit accordingly.
With the layout done, I also start re-importing the UV’d models with the trim sheet material I assigned in Maya. I adjusted some of the textures inside Unreal as well to better match my concept. This was the point where I regretted making a multi-colored trim sheet that had similar materials, so try to keep it consistent your first time around to avoid creating multiple variations just to get the right colours.
I opted out of adding unique props and accessory objects at this point because I wanted to put my complete focus on the main building and dock area. Those extra objects get thrown in last so I can sprinkle in extra story and detail without compromising the piece as a whole.
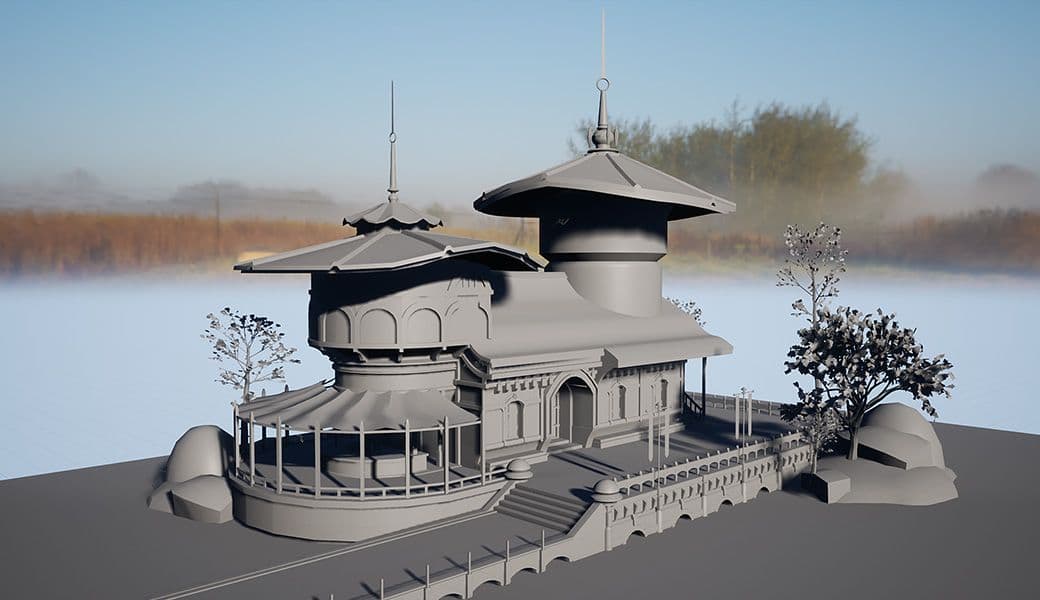
By this point, the majority of my work with the trims is done and I move on to creating my tileables. For all of the tileables, including the bush material, I used Substance Designer. This was more of a personal challenge to me to increase my proficiency in the program and improve my confidence in material authoring.
The lilypads were created using a technique I thought of in a previous project of mine, Vegetation Exploration. The base plane was quickly modeled in Maya then put into ZBrush for sculpting and thickness. I then used ZBrush’s Spotlight function to paint textures I downloaded from Megascans onto the mesh. This allows me to have the same high definition albedo, but my own normal, roughness, etc. And for the trees, I used SpeedTree with Megascans textures.
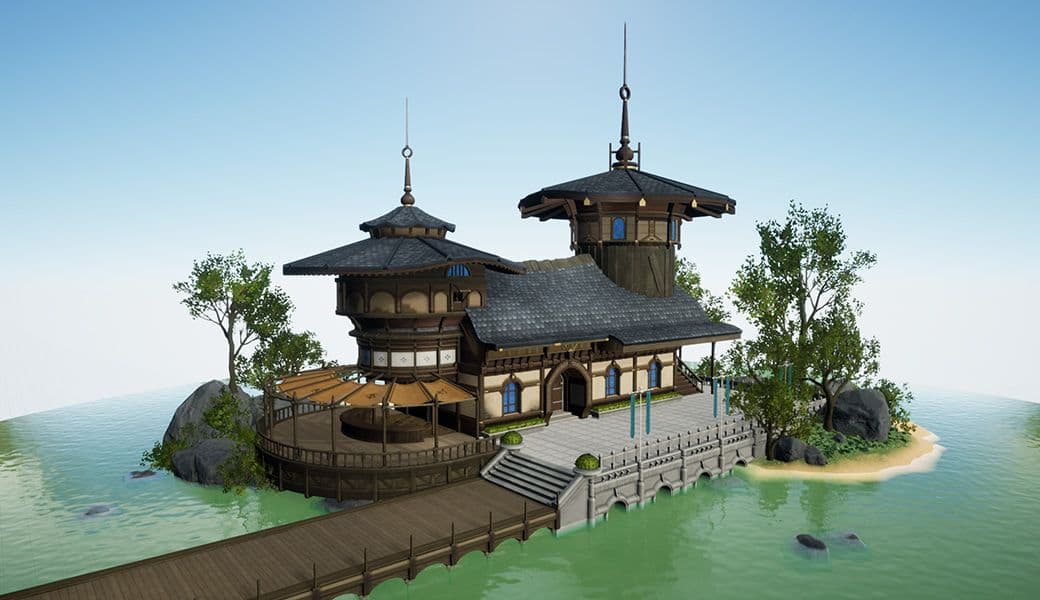
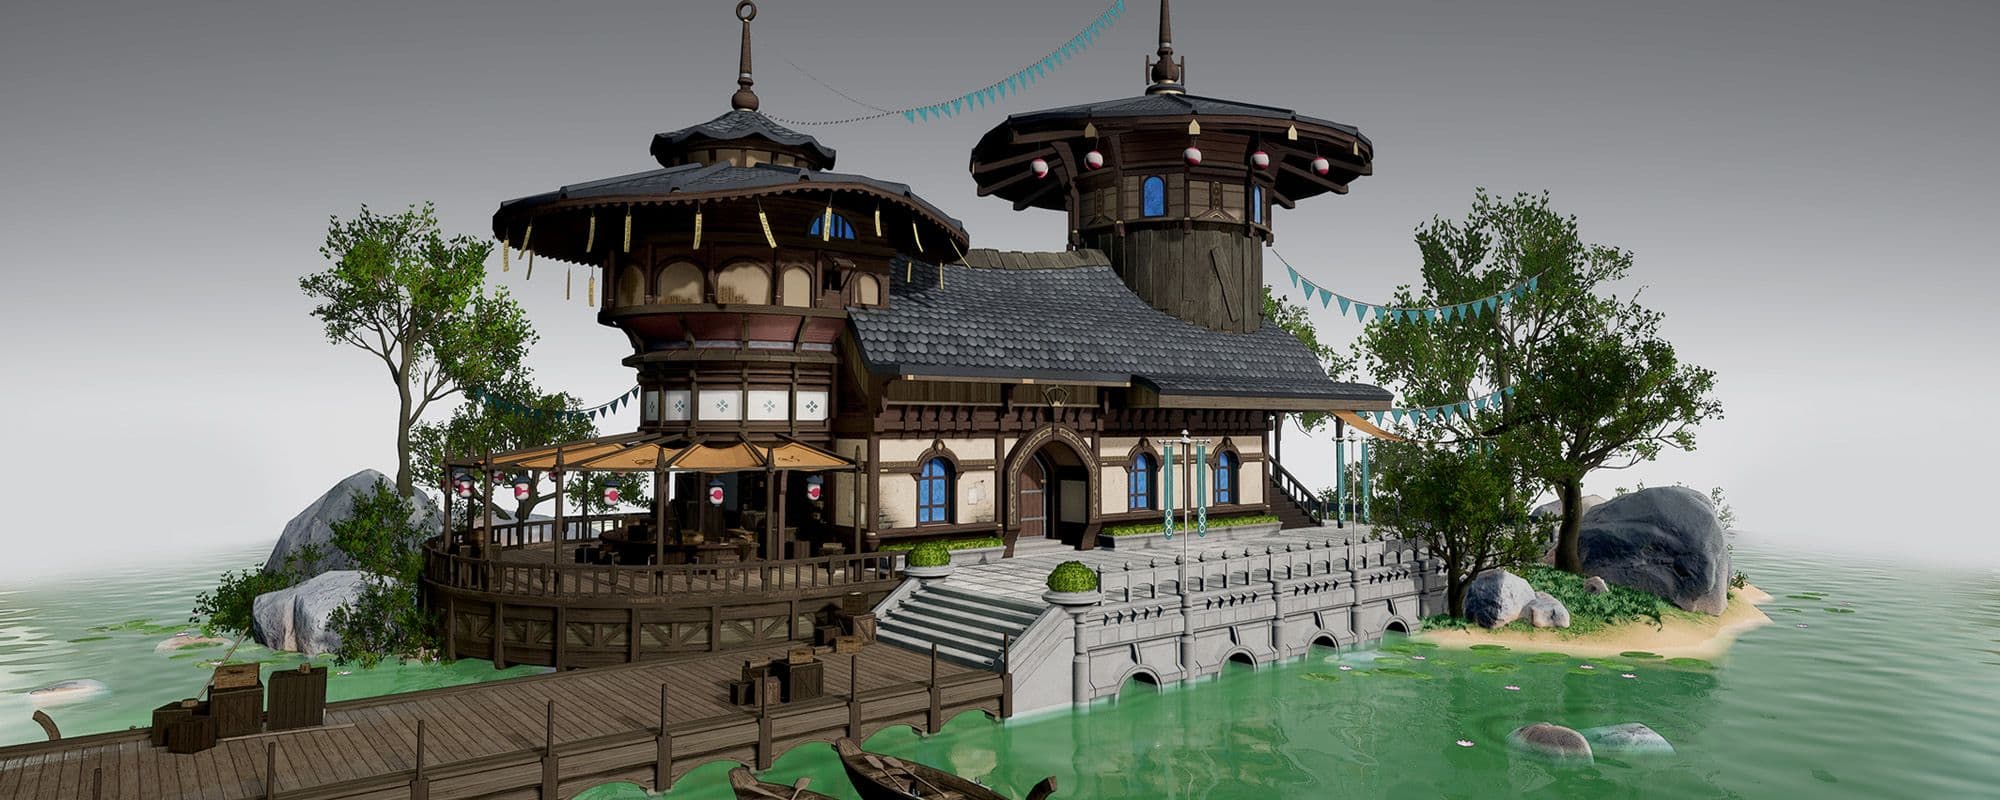
I left this part out until the very end since I had a lot of focus on prior. Nevertheless, I still paid a lot of attention to this since the water is a huge part of the concept and any cost-cutting will show.
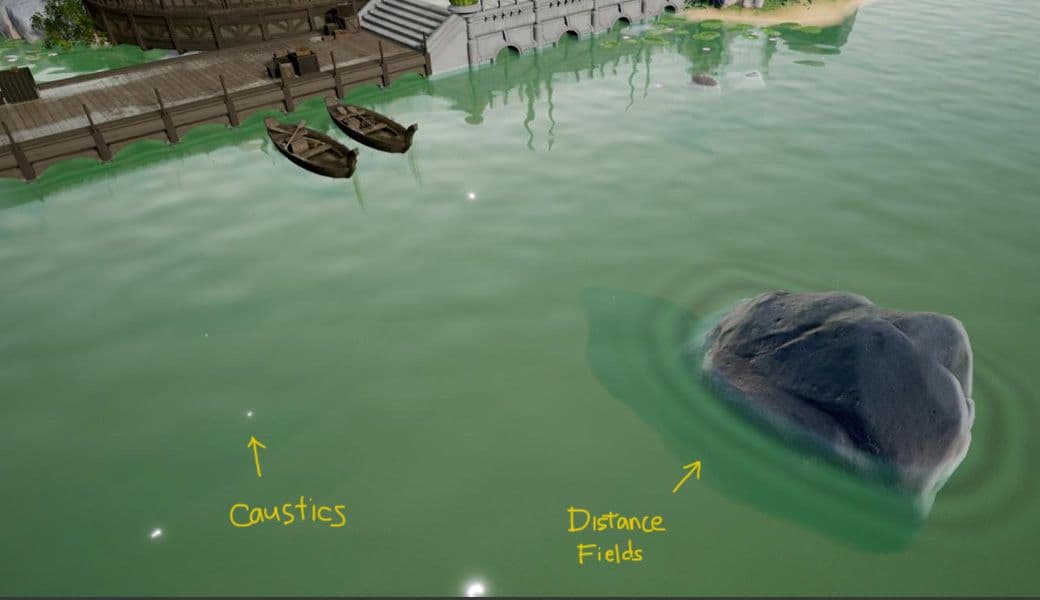
I don’t have much shader experience so I used this video by Dean Ashford as my base. By not utilising Unreal’s new water system, I was still able to manage it well because of its simplicity. The ripples were created by panning 2 normal maps across the material in different speeds and directions, and the fade at the edges was a vertex paint blend for opacity. There’s depth fade in there to create the darker gradient, and I added a distance field to create the ripples where objects touch the water.
To get the final look of the piece, I also created a unique LUT by taking a screencap of the scene and bringing it into Photoshop. The official Unreal documentation breaks this down in simple steps if you’d like to follow along.
After importing the LUT, the colour grade created in Photoshop is instantly applied to the Unreal scene. This can help you narrow down how many lights you need and where they need to be focused. I’m no expert at lighting but I just tried my best at recreating the light and mood of the concept.

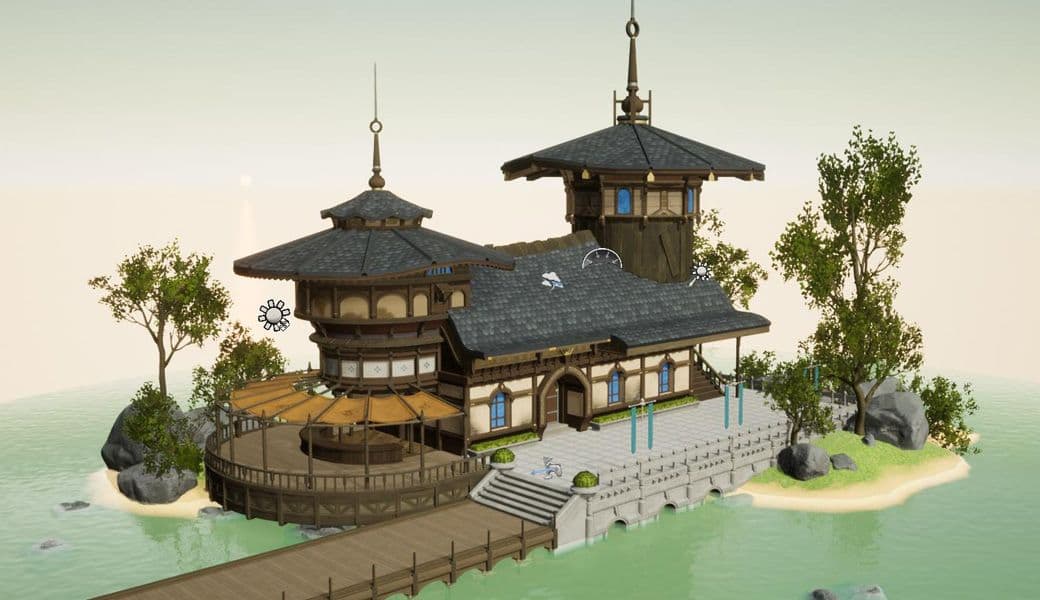
To achieve the gradient in the background, I used an Exponential Height Fog and altered the colours and the blend.
Being satisfied with the final look in Unreal, I exported the videos as a .PNG sequence in a named folder. By exporting as an image sequence, you lessen the risk of corrupting your final video. This works because each frame of your video is exported as its own image so if something goes wrong, you can still start from your last exported image as opposed to re-exporting a corrupted video file.
At this point, I looked at my final videos and I wasn’t entirely impressed because the scene lacked the hand-drawn feel that the concept had. I didn’t have much time to learn how to create a hand-drawn shader either, so I created a simpler and less time-consuming solution. I created a batch automation action in Photoshop that records specific actions and repeats them to all images in a folder.
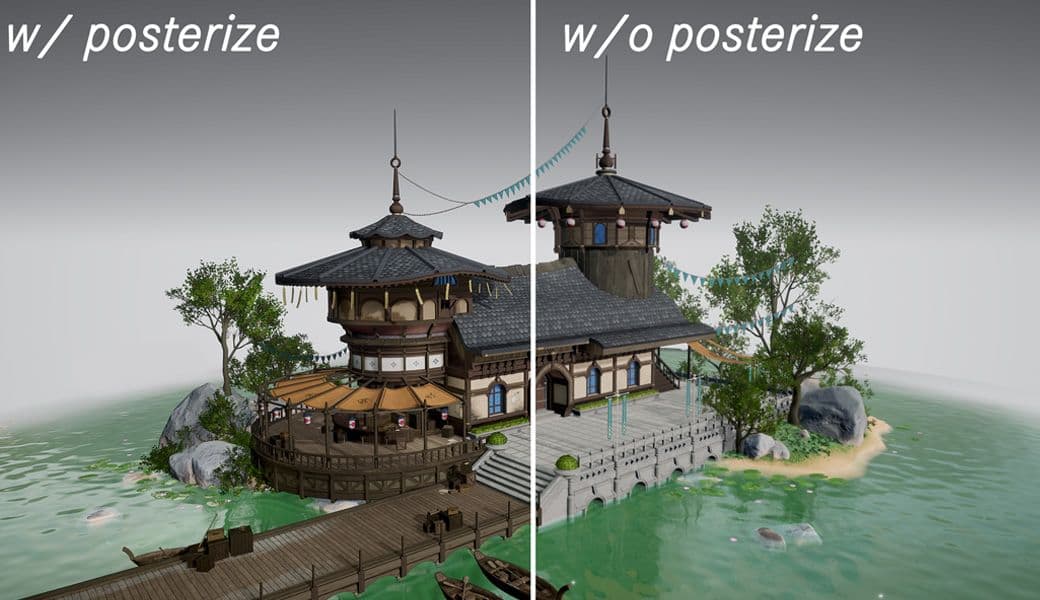
The action I created was to adjust each image’s brightness and contrast, as well as to add a minor Posterise filter. The Posterise filter is what gives the final scene its hand-drawn look because it emulates pen strokes on paper. You can adjust how much posterisation is done and how thick the lines you want to be.
Being satisfied with my batch automation settings, I set Photoshop to work as it milled away at all 1500 images. Happy with the final result, I popped the image sequence into Premiere for it to compile and let it render!

With that, I conclude my project of recreating Lok Du’s original concept in 3D! It was a lot of work but there was so much to learn from it. I encourage any beginner to take this challenge as well and learn from the process of current industry artists.
I hope this breakdown helps any of you who are interested in working from concept to completion, and I wish you luck on your current and future projects!
Thanks a lot to you, the reader, and The Rookies as well for hosting my piece on their blog.
You can find more of Danielle's work on The Rookies and ArtStation.