Creating a 3D Felt Character with Blender
Michael Evangelista walks us through his process of how he used Blender to create these felt characters for our latest Weekly Drills challenge.
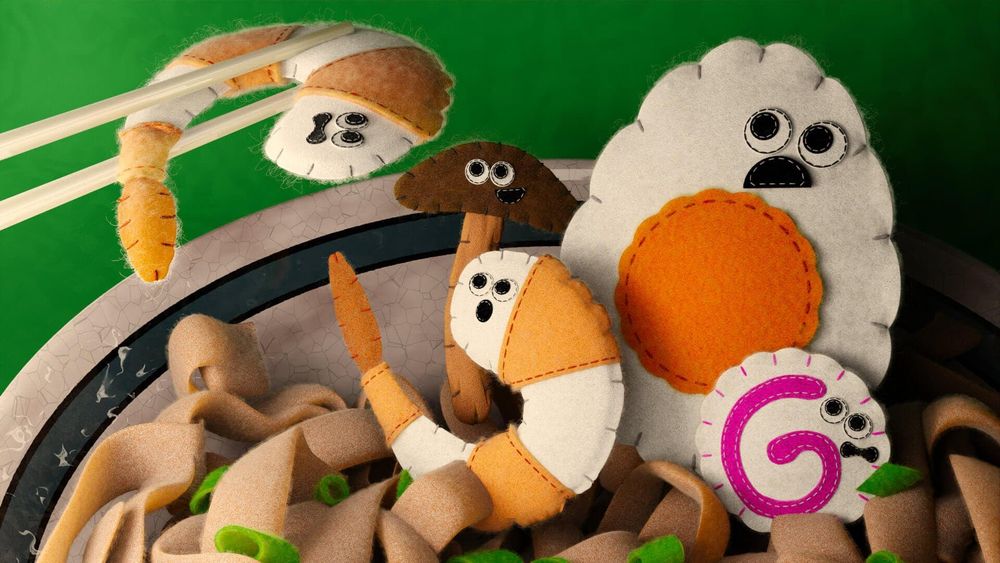
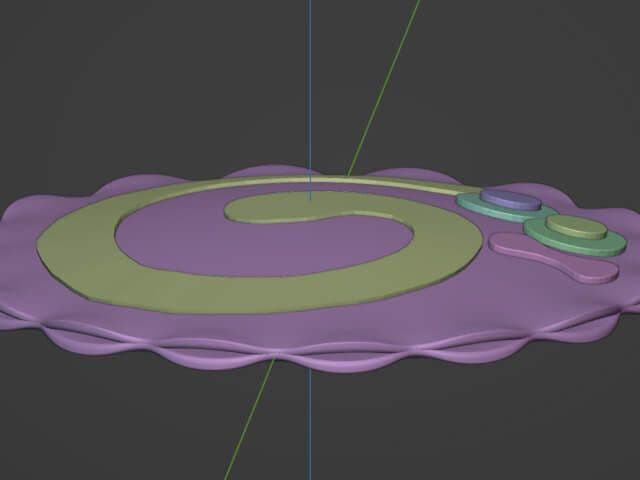
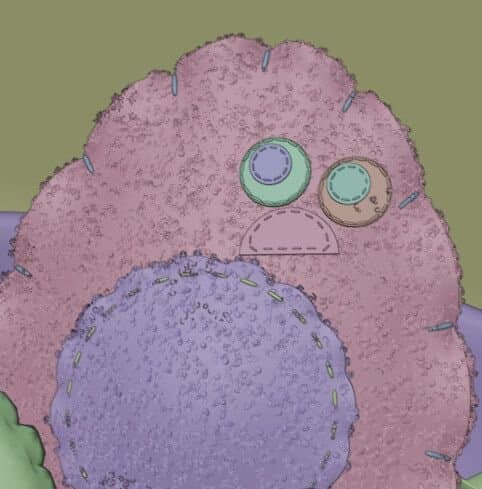
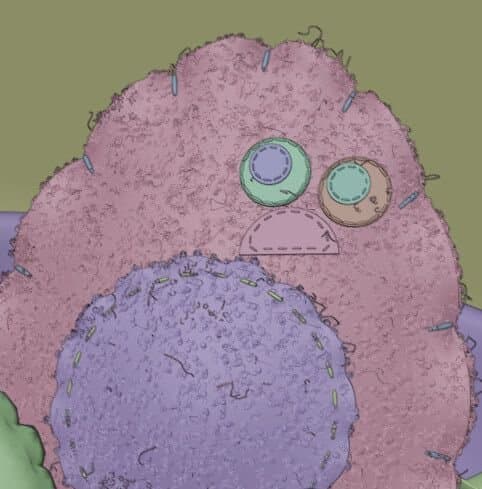
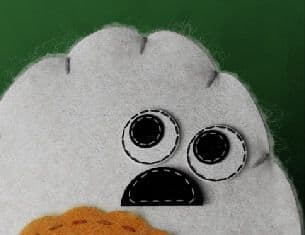
My submission to the the ramen-themed weekly drill #077.
Michael Evangelista walks us through his process of how he used Blender to create these felt characters for our latest Weekly Drills challenge.

Being quite new to Blender, I have a laundry list of projects and styles I want to try. As a kid I loved making stop-motion films with clay, toys, and a Super 8 camera. Producing something similar in Blender has been high on my list. The Ramen Weekly Drill provided the perfect opportunity to model something I intend to animate in a stop-motion style.

In this article, I’ll focus on what I did to achieve the felt look. To make it beginner-friendly, I’ve included a lot of detail and also provide the Blender keyboard shortcuts for the tools to which I refer (in parentheses).
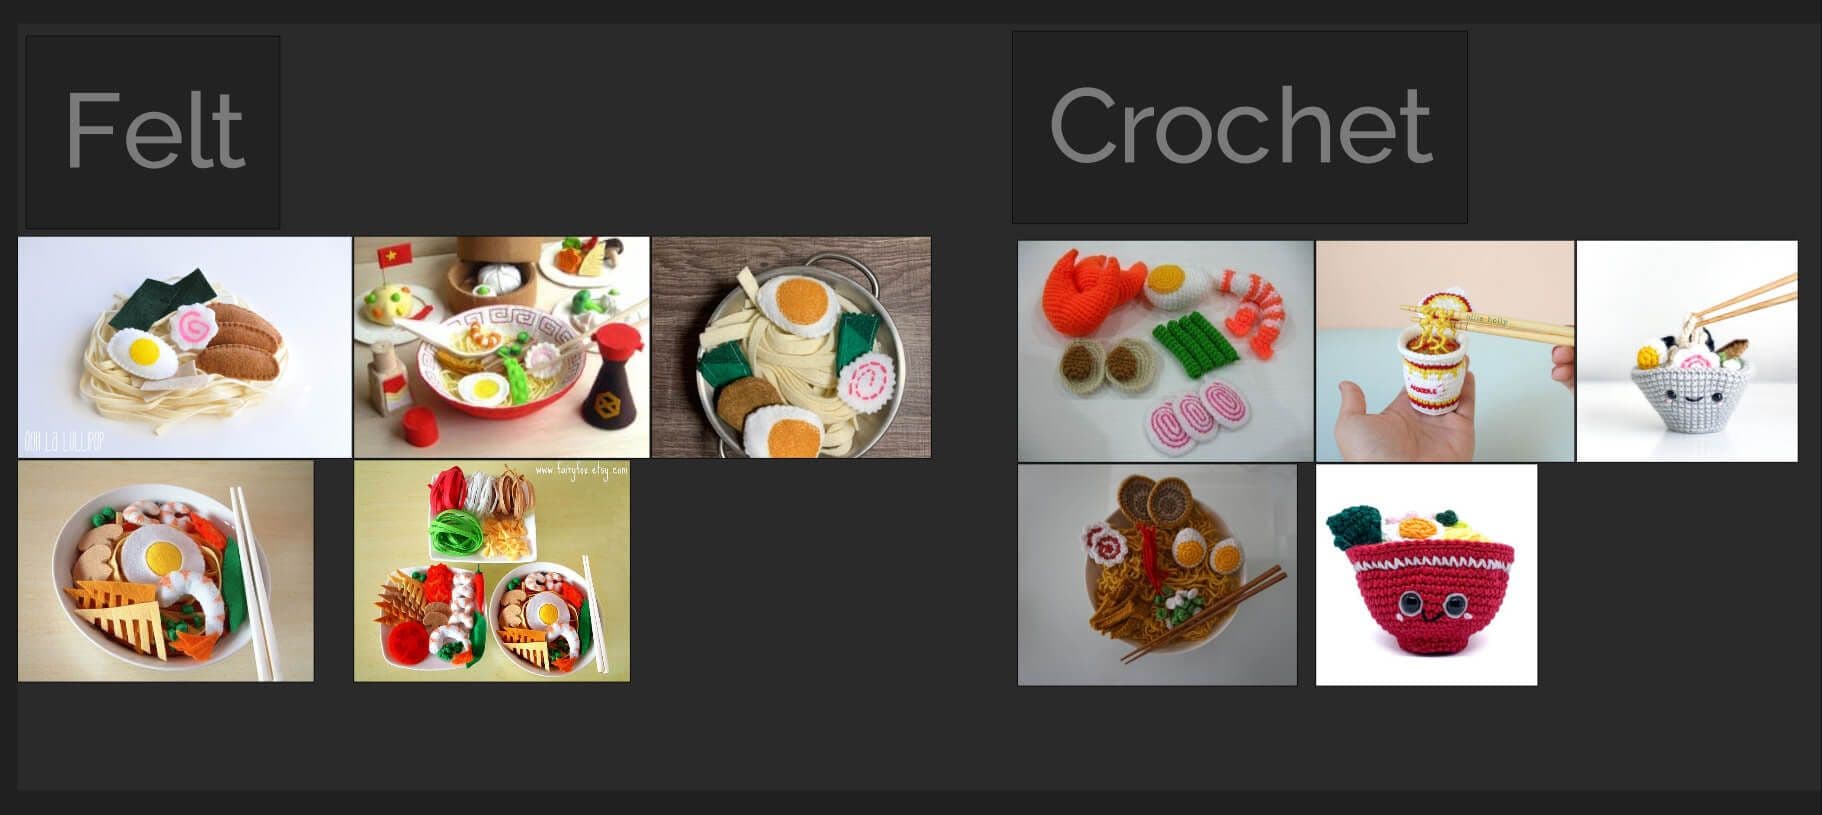
Knowing I wanted to create fabric toy characters, I started by searching for references. I found many felt, knitted, and crocheted toy ramen sets.
Examining the references, I determined that to create convincing felt characters, there are three critical requirements:
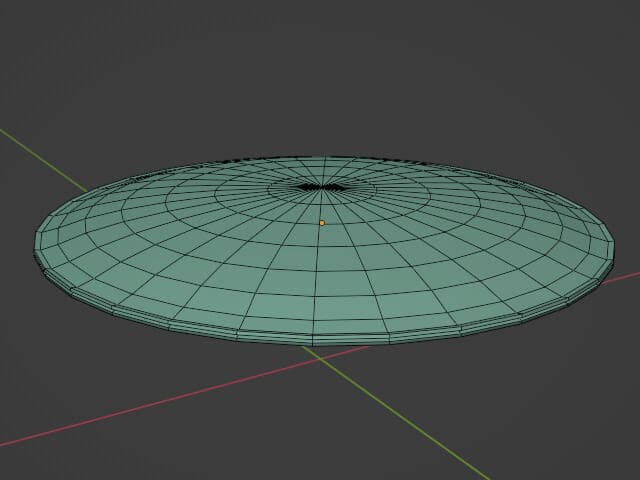
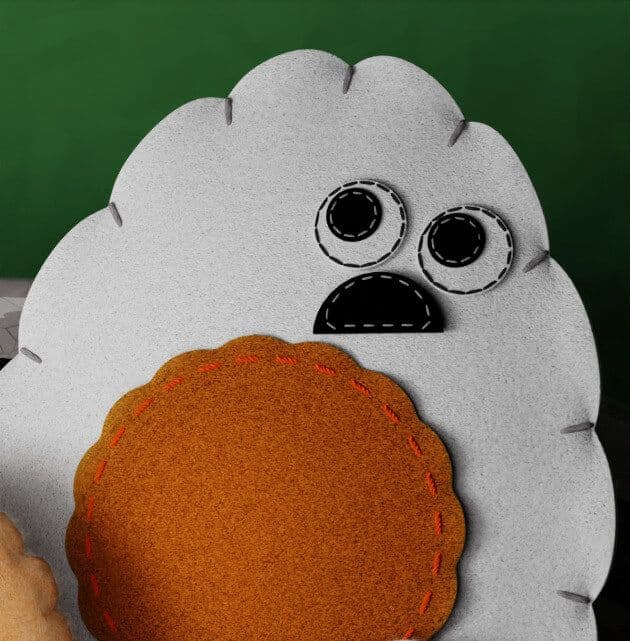
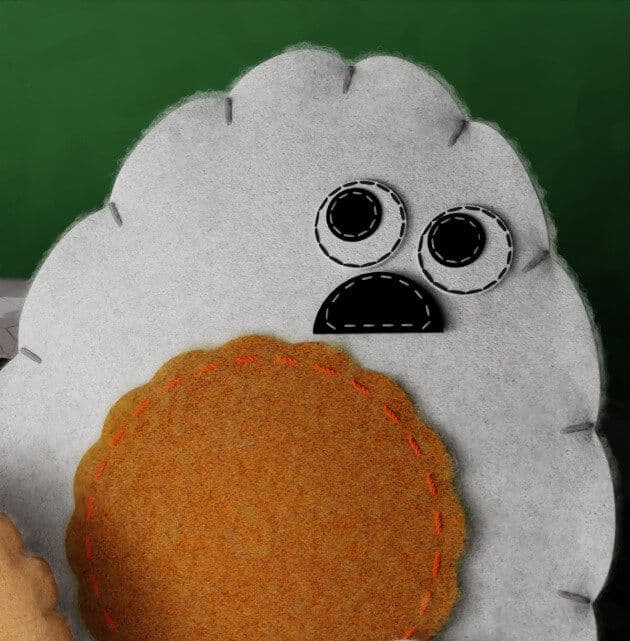
The characters’ shapes are simple. For all the characters except the shrimp, I started with a semi-sphere, scaled almost flat (S, Z), to provide the domed curvature of a single piece of felt making up half a stuffed character. For non-circular characters (egg, mushroom stem and cap) I distorted the semi-sphere using modeling tools. When distorting the semi-sphere to another shape, or to get the right bulge profile, the proportional editing option (O) will be your friend.
I applied a solidify modifier to give the felt thickness, and a mirror modifier on the Z axis to create the second (back) piece of felt that makes up the body. I adjusted the object’s origin using the move tool (G), with the “affect origins” option in the Tool tab of the side panel (N) to control how the object is mirrored.
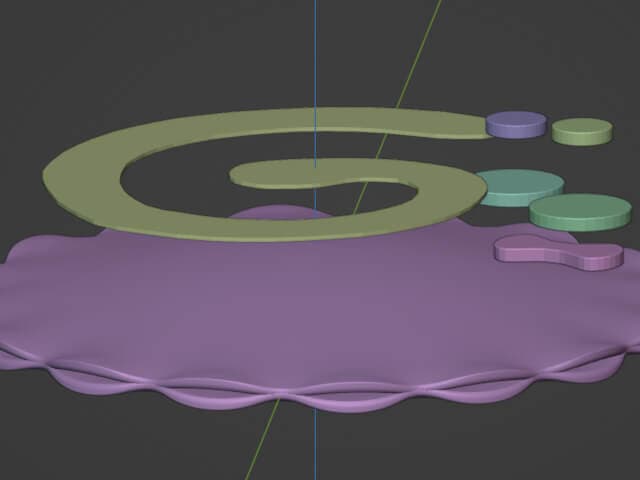
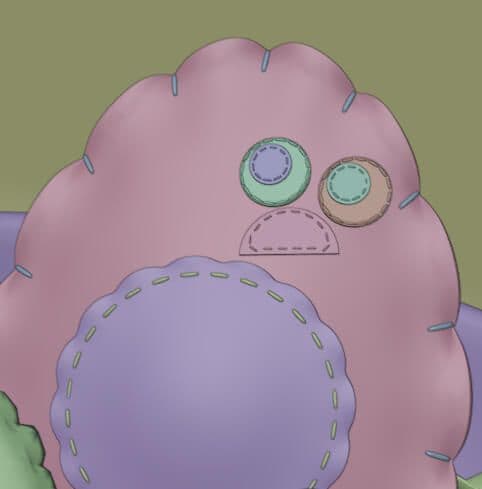
I created the scalloped edge on the kamaboko (fishcake) and egg by first selecting the entire outer edge (alt LMB). Then, using Select→Checker Deselect, I unselected alternating vertices. Finally, I scaled out (S, shift-Z) the selected vertices to create points. To create the scallop, I applied a bevel to the vertices (not the edges) (control-B).
Due to the shrimp’s more complex shape, I first cut a plane into the profile of a shrimp, then used the sculpting tools to “inflate” it. I created the raised orange stripes by scaling (S) up a duplicate (shift-D) of the shrimp, and cutting away alternating pieces.
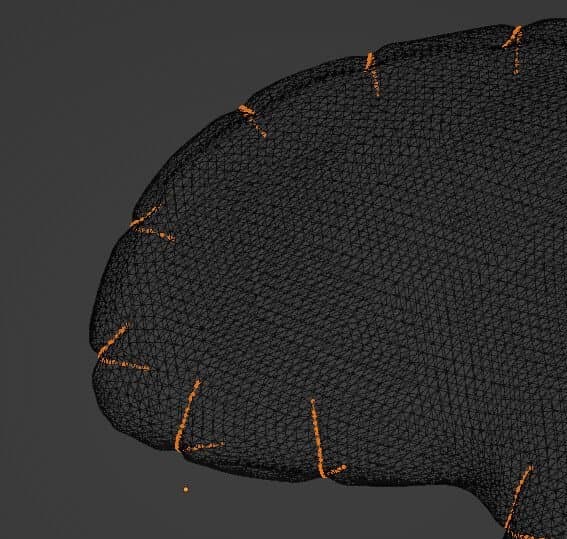
An important detail in the models is the set of indentations, or “pinches” on the edges where the stitches will later be applied. There are two ways to create these.
For the characters that already have edges where the pinches will apply (the egg and fishcake), I selected the appropriate edges, then moved those edges slightly down along their normal Z axis (G, Z) to create an indentation. It’s important to set the transform orientation to “normal” and the transform pivot point to “individual origins.” Also, using proportional editing (O) will create a smoother, more natural result.
Because the shrimp did not have edges in the appropriate places, I created cuts with the knife tool (K) from slightly inside the object out to the edge. When you do this, be sure “occlude geometry” is deselected (so the knife cuts through both sides of the object when looking directly at its profile in an orthogonal view), and “only selected” is not checked. If you make all the cuts in one go and press enter to accept at the end, Blender will leave all the cuts selected and ready to “pinch” in ward as previously described. Use RMB after each cut to initiate a new cut that is disconnected from the prior, and be sure to begin while in edge select mode (2) without any other edges selected. Not having to re-select the edges before creating the pinch saves time.
The appliqué pieces, such as the eyes, mouths, egg yolk, and fishcake swirl are flat circles or are cut out of planes using the knife tool.
While you could hand-place them, I used the shrinkwrap modifier to make the job far easier. The shrinkwrap modifier has the benefit of ensuring the appliqué conforms to the curvature of the body. This is particularly important for the pink swirl applied to the fishcake. Just make sure the appliqué has enough geometry (subdivisions) to allow the modifier to match the curvature of the body, otherwise it will remain flat.
The solidify modifier gives the appliqués thickness. Be sure to adjust the offset value so that the thickness of the appliqué rises above the character’s body, not into it.
The stitches are a critical detail in creating a convincing character. Each stitch is a simple cylinder modelled into a sausage shape by adding some loop cuts, scaling down the end caps and applying a subsurface division modifier.
There are two cases in applying the stitches. For both, I used geometry nodes to place the stitches. The first case is placing them along a path, such as around the egg yolk, the pink swirl of the fishcake, or the eyes and mouths. While geometry nodes are beyond the scope of this article, I’ve included a simplified copy of my geometry node graphs for the two cases. If you haven't been using Geometry Nodes in your workflow yet, I'd recommend learning the basics (erindale on YouTube is a great resource)
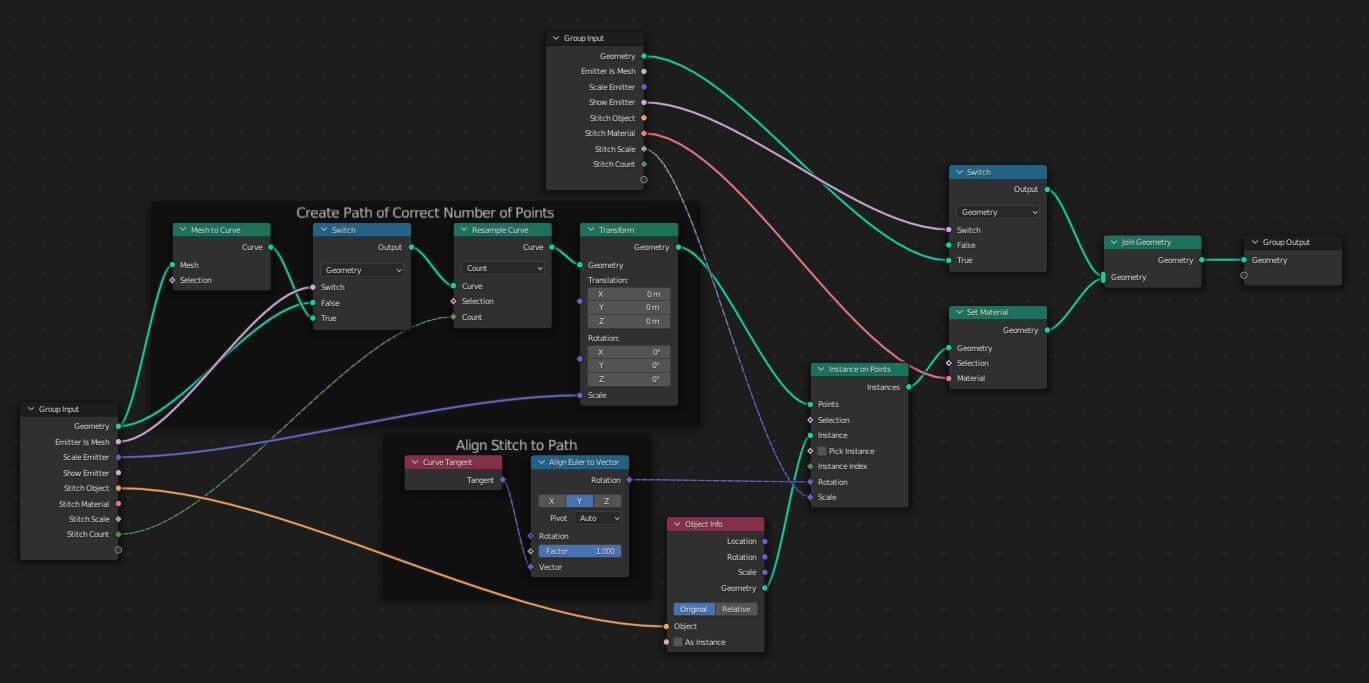
This geometry node graph can be applied to a curve object or any simple cutout appliqué like the eyes or mouth (without creating a separate curve object). In the latter case, set the parameter “Emitter Is Mesh” and “Show Emitter” values to “1” and use the “Scale Emitter” values to inset the stitches a little from the edge. Also remember to add a shrinkwrap modifier before the geometry nodes, so that the stitches lie flush on the object and follow its curvature.
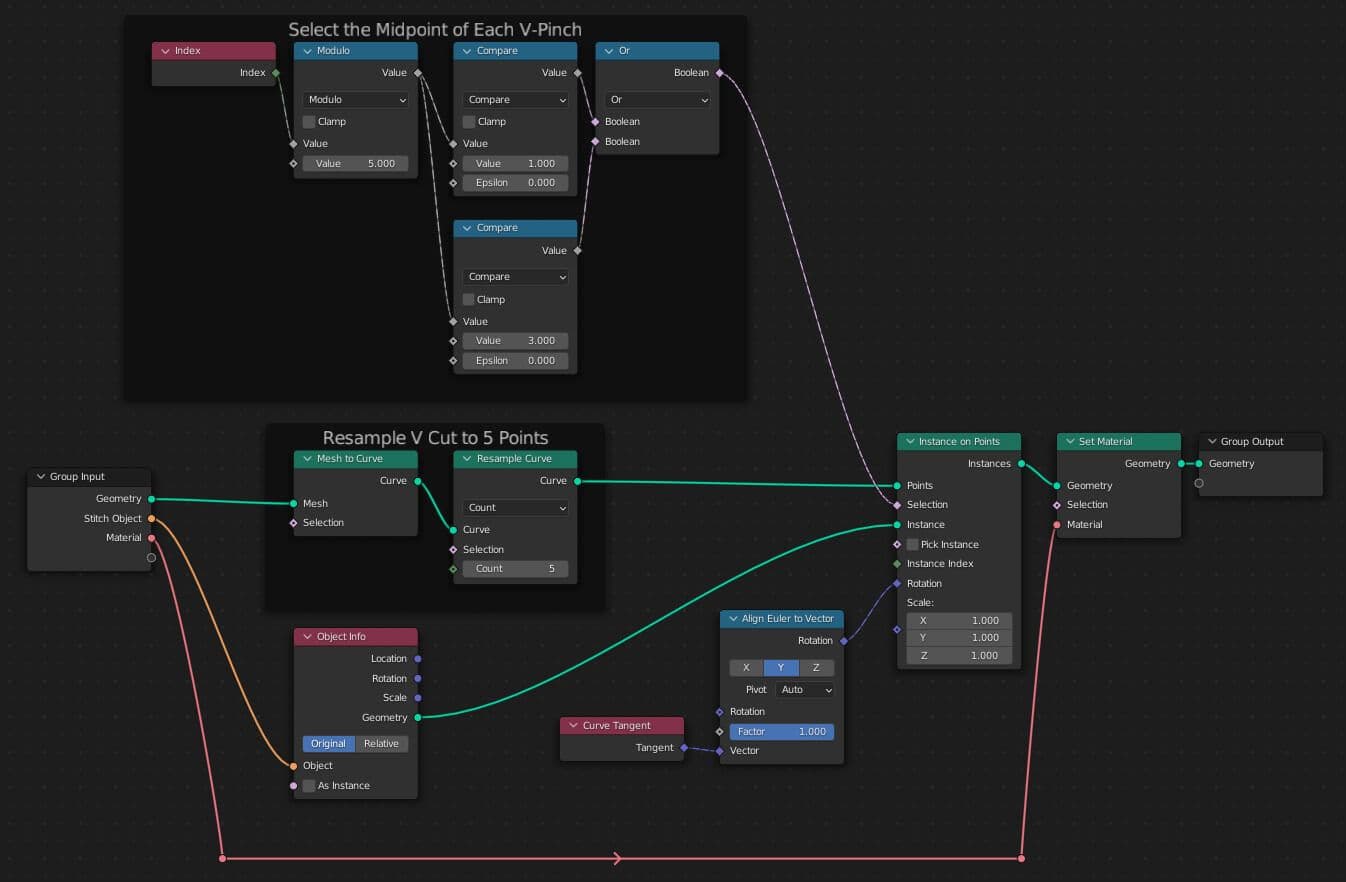
The second case is to add stitches to the pinch points we created earlier. Each pinch is a set of edges that makes a "V" shape (though it may contain more than 3 vertices, such as when we cut into the shrimp edges).
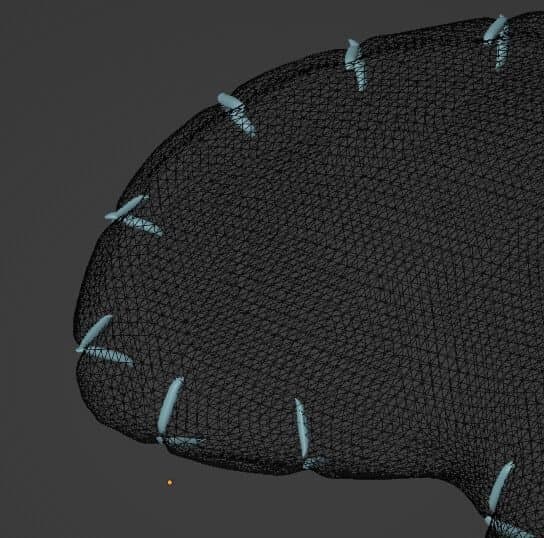
This node graph resamples each "V" into 5 vertices, then places a stitch on the 2nd and 4th vertex of each "V". To apply stitches we need to select all those edges in Edit mode, duplicate them (shift-D), and separate them into their own object (P, separate by selection), and apply geometry nodes to the new object.
I shaded the stitches to be shiny to look like thread and a diagonal pattern to imitate the twisted fibres making up the thread. Since they are so small, I didn’t spend much time on shading detail.
Because the felt material is critical to the render, I sought out some tutorials on creating a realistic felt material, but none had exactly the right look. I ended up spending the better part of an afternoon experimenting and combining ideas from a few different sources to come up with a look I liked.
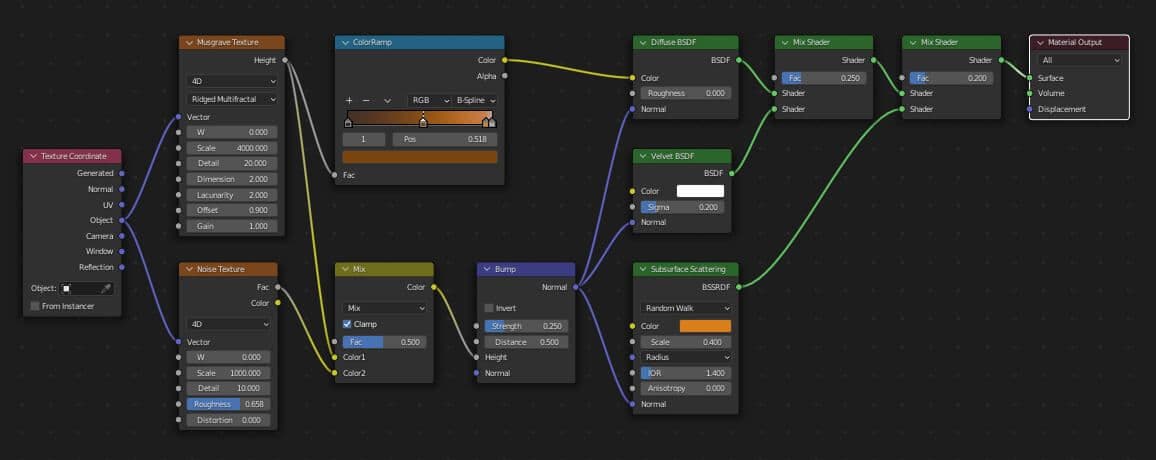
The felt consists of two types of hair particle systems layered atop a base material. The base material node graph is below and is primarily a small-scale Musgrove texture.
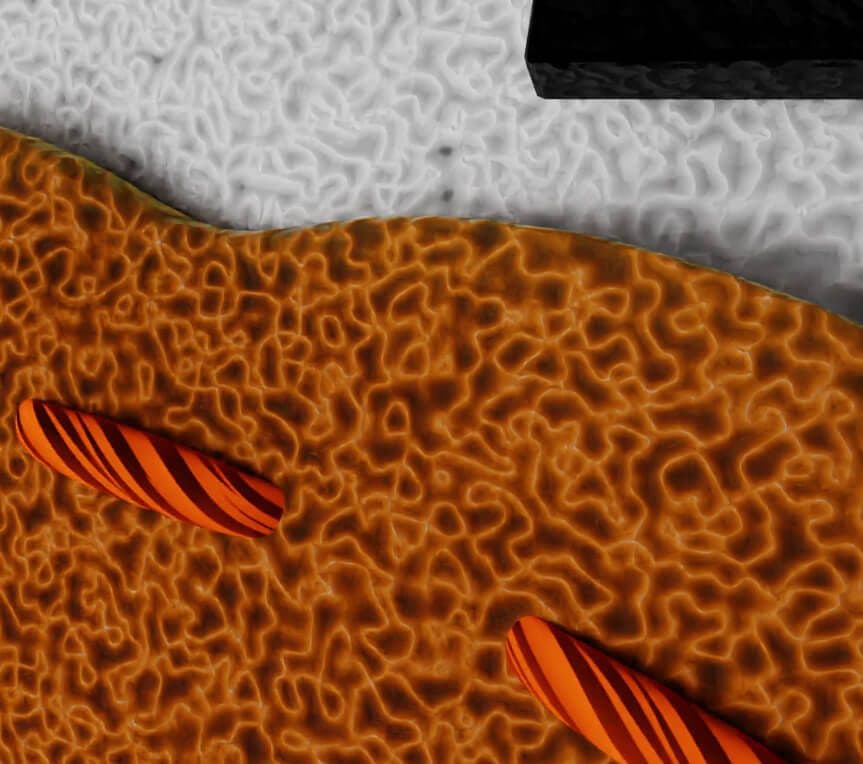
I applied two hair particle systems to each piece of felt. The first generates a lot of very short, curly hairs that remain close to the object. The second produces fewer long, random fuzzy hairs that stick out. The settings I use for both types are below, but you should play around with the amount and myriad of settings to find what works best for you. I also used weight painting to control the density of hairs, for example, to prevent placing hairs on the body under the appliques (because they would pass through the appliqué).

|
Setting (make sure advanced settings is enabled for the particle system) |
Short Curly Hairs |
Long Fuzzy Hairs |
|
Amount (depends on the scale of your object) |
Lots |
Fewer |
|
Length |
.001 m |
.001 m |
|
Segments |
5 |
5 |
|
B-Spline Path |
Yes |
Yes |
|
Children |
Interpolated |
Interpolated |
|
Random |
.002 |
.013 |
|
Kink |
Curl |
Nothing |
|
Kink Amplitude |
.0005 m |
|
|
Kink Frequency |
7.0 |
|
|
Diameter Root |
.001 m |
.001 m |
|
Diameter Tip |
.001 m |
.001 m |
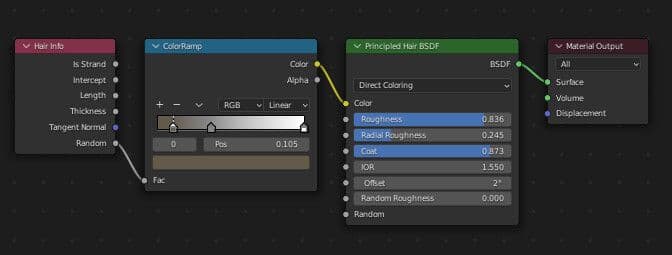
To give the hairs some colour variation, I used a Principled Hair BSDF shader that randomly assigns a colour per strand, using the hair info to randomly assign a colour from a colour ramp.
The bowl and chopsticks use simple procedural materials (a little subsurface scatting gives the chopsticks a bit of a translucent plastic look). I created the noodles by running a cloth simulation on an array of subdivided noodle-length planes dropping into the bowl. After running the simulation, I applied the cloth modifier and also added a solidify and subdivision surface modifier.
The lighting is simply a few point lights to create the mix of light and shadow I wanted. I also added an area light to backlight the scene to highlight the fuzz around the characters.


The final render was done in Cycles 3.1 with 2048 samples and the OptiX denoiser.
This is one of my first Blender projects beyond simply following someone else’s tutorial, and I learned quite a bit doing it. The motivation of the Weekly Drill was helpful in pushing me to make it as good as I could, while giving me a cutoff point to prevent me from tweaking it forever. I hope you found this article helpful, and I encourage you to participate in the Weekly Drills to sharpen your skills.