Giving a Studio Ghibli Environment Art a New Look in 3D
Brenda Santos is an aspiring Materials Environment Artist, undertaking her Intermediate year at Think Tank Training Centre. In this article, we take a look at how she gave a Studio Ghibli style environment, a new look in 3D.
Brenda Santos is an aspiring Materials Environment Artist, undertaking her Intermediate year at Think Tank Training Centre. We contacted her about her project 'Kiki's Family Porch', because we wanted to learn more about she gave a traditional Studio Ghibli style environment, a new look in 3D.
[...] the image that first came to mind was of a young girl flying through the night sky over a city. There will be lots of sparkling lights below, but these lights would not warmly welcome her…
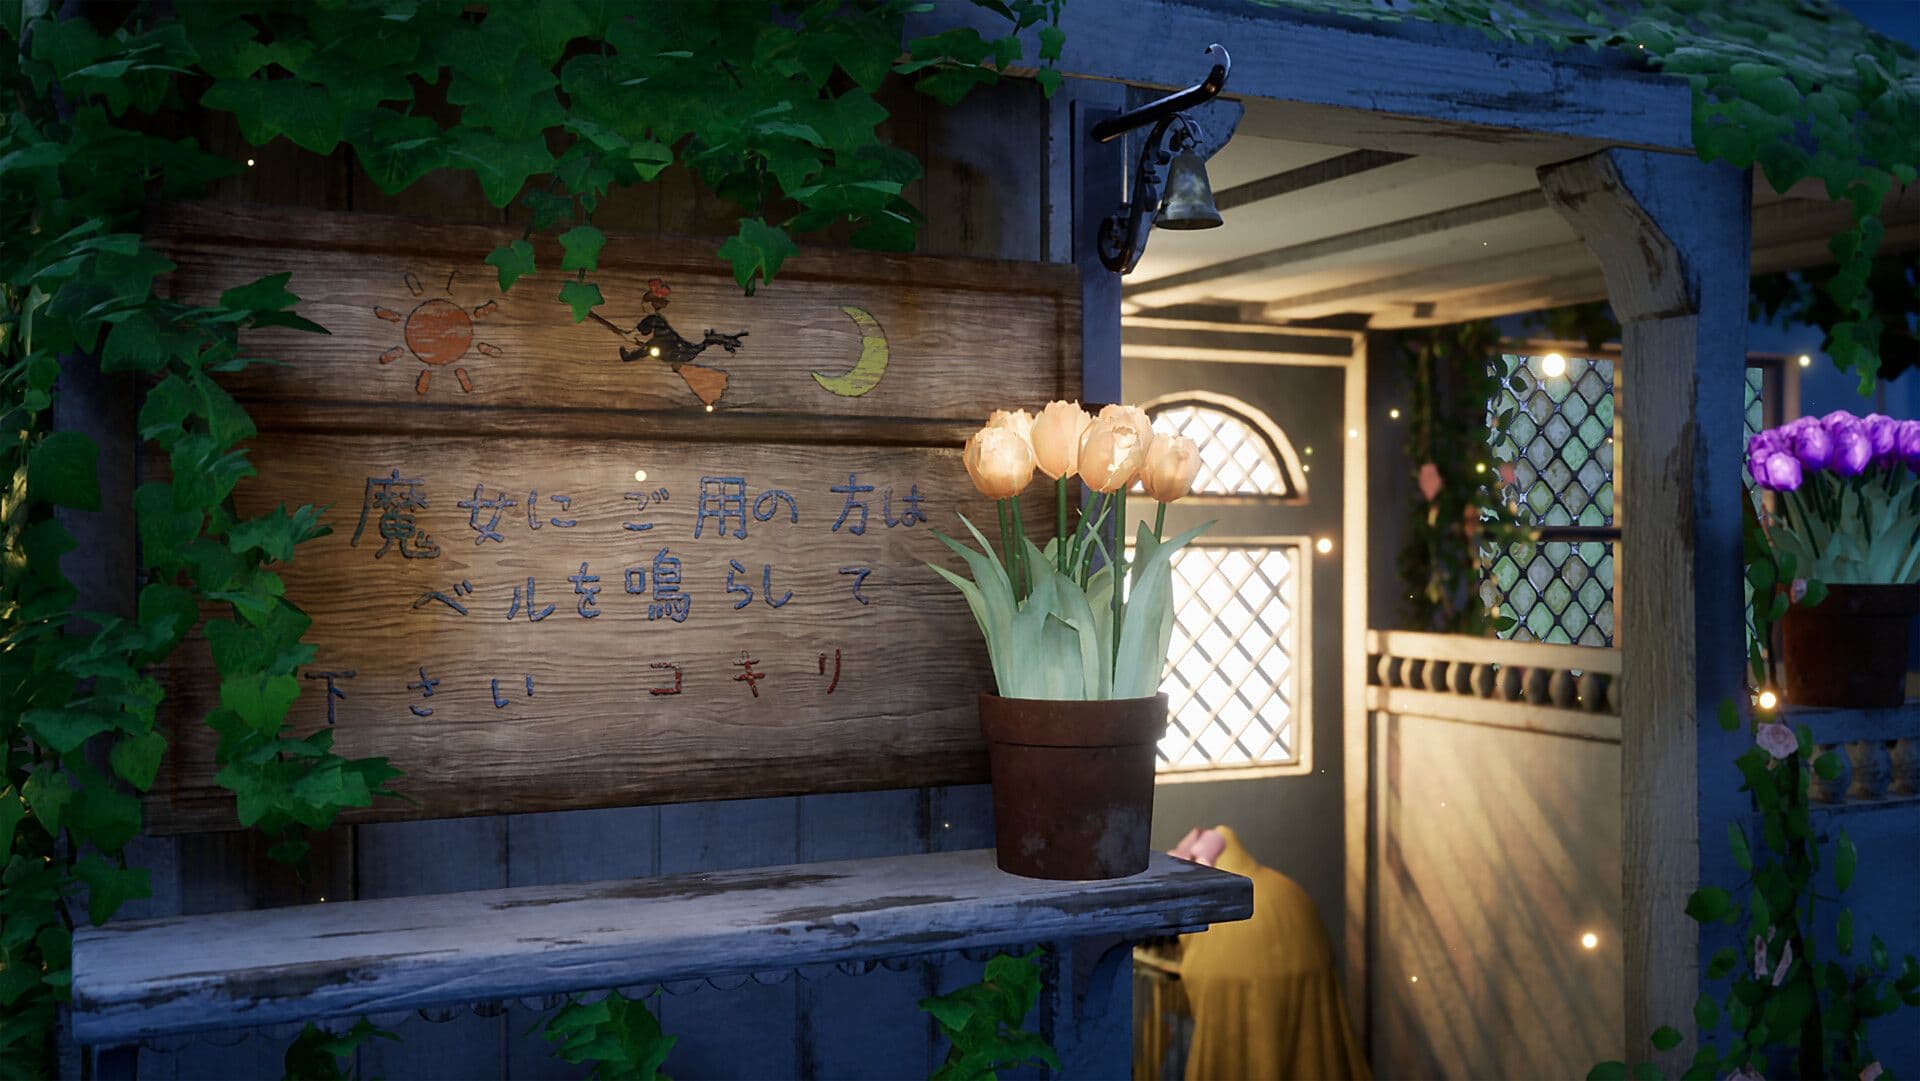
This is how Hayao Miyazaki describes the arrival of Kiki to the big city in his book Starting Point (2009). Kiki's Delivery Service is a novel about freedom, both material and spiritual. This has been a recurring theme for me recently, so this project means a lot to me. From the start I knew I wanted to convey the polar opposite of this quote: a welcoming and pleasant vibe.
Getting Started
First, I began by recalling many real-life and film references. I knew right away that I wanted to go for a realistic look rather than a Ghibli-style look. I attempted to bring Miyazaki's beautiful world into ‘ours’.
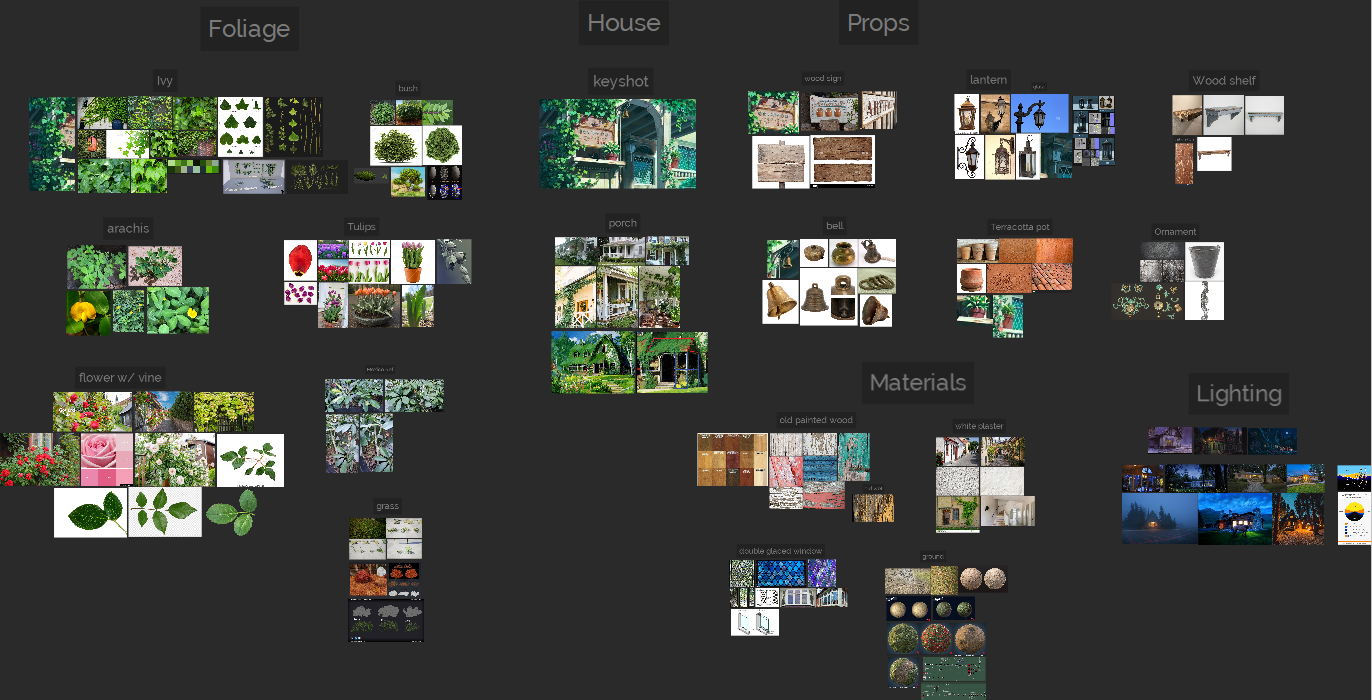
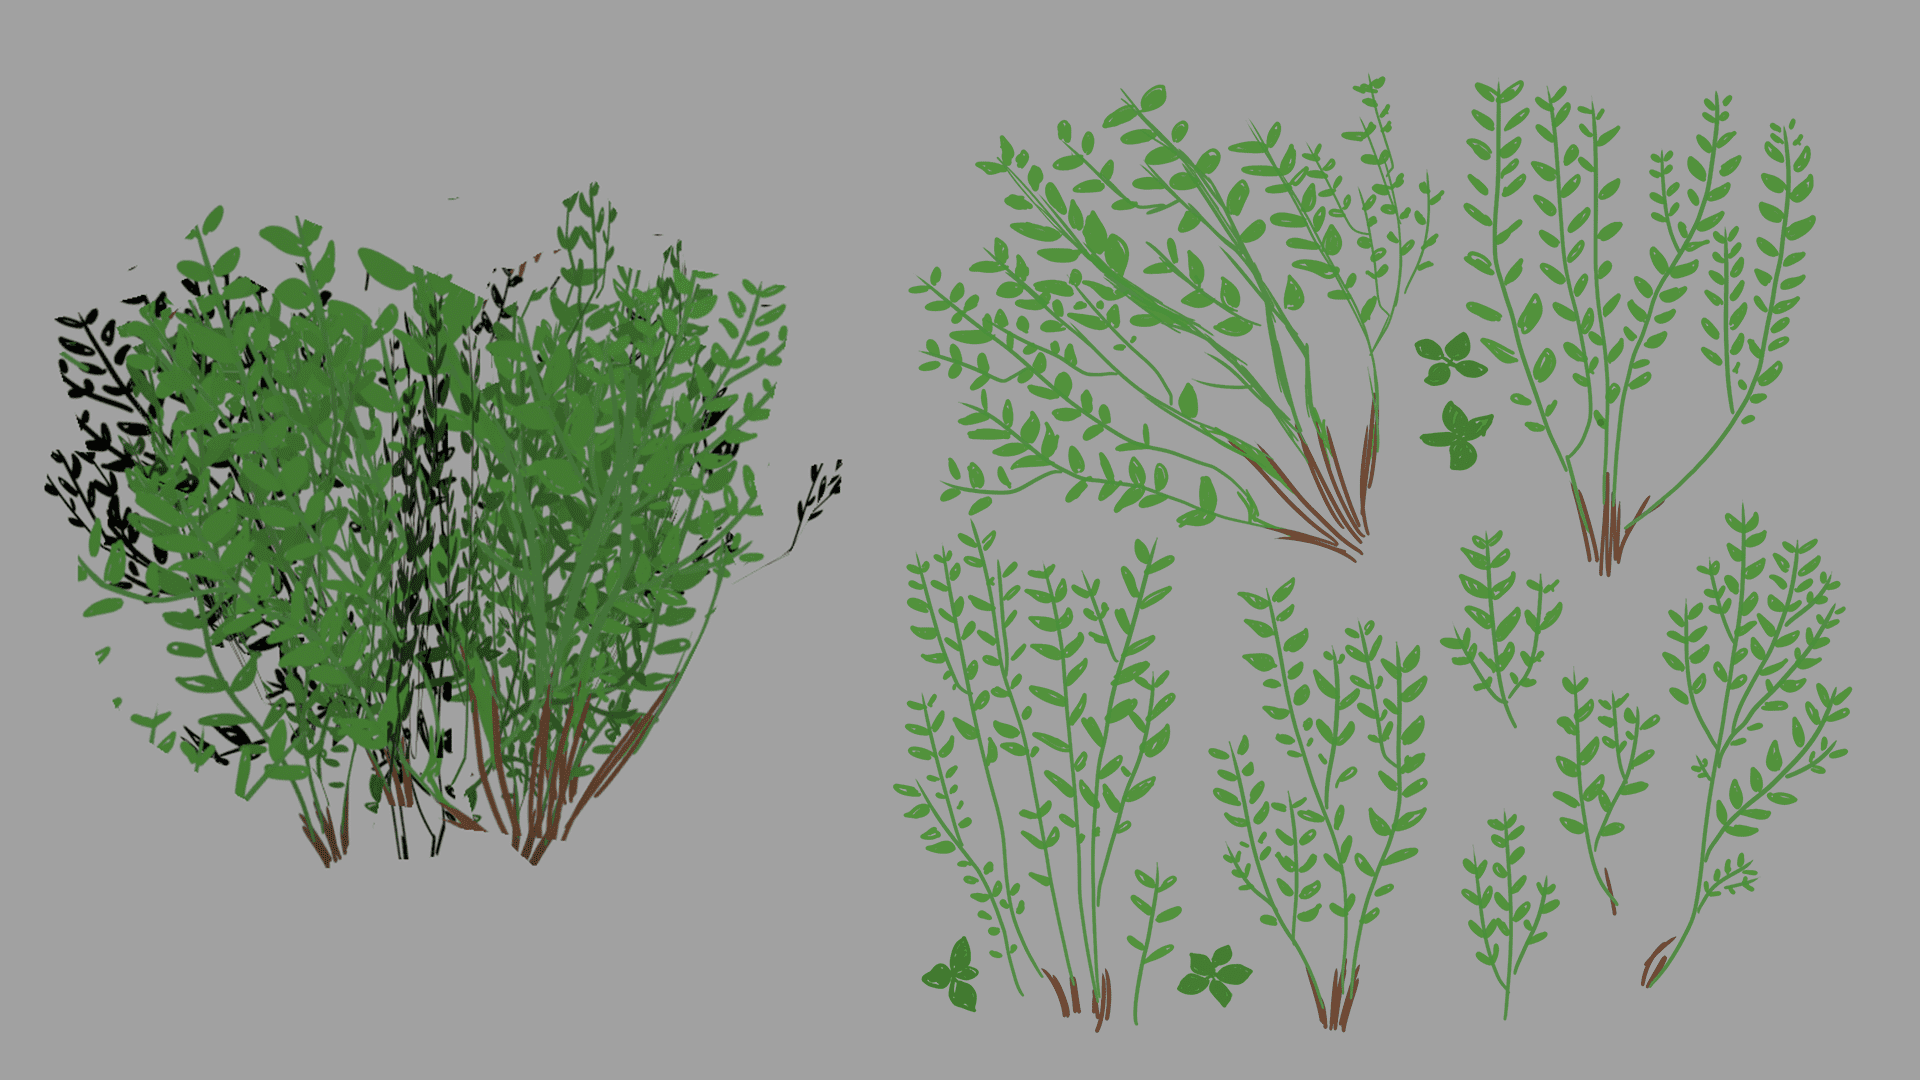
I started to block the foliage with spheres, but that didn't help me visualise the forms needed for the scene. So I drew the plants and constructed an atlas out of them; it evolved over time, of course.
The modeling of everything was straightforward, nothing new. For the modeling of the fabric I created a plane in Blender with some sub divisions and I applied physics to it. I know I can do the same thing in Maya, but I prefer Blender for this. The modifiers in Blender offer me a lot of control between iterations. Then, I used Zbrush to add some sculpting to the fabric's edges to give it that folding appearance.
The majority of my time spent in this project was creating the foliage. The only plant I sculpted was the ivy leaf. I intended that the leaves would be near the camera so I wanted them to have a little more detail. When it came to making the vines, I was hesitant, so I created a particle system in Blender for both plants. This allowed me to make quick changes while also giving it a more random look.
Texturing
My favourite part of the whole process was creating materials with Substance 3D Designer. When I looked at my scenario, I realised that the majority of the objects have wood. I wanted my scene to be consistent without relying on Substance Painter's materials. So I created my own tiling textures.
First I made a mid-damaged wood material. After texturing the shelf in 3D Painter, I realised I needed a little more control over the wood. So I went back to 3D Designer and exposed some parameters that I would be able to manipulate in 3D Painter. This is how I made the wooden props:
After that, I made two layers in 3D Painter, one with a newer version of the wood and the other with the older. Then I started painting in and out of the areas where I wanted the older or newer wood to appear.
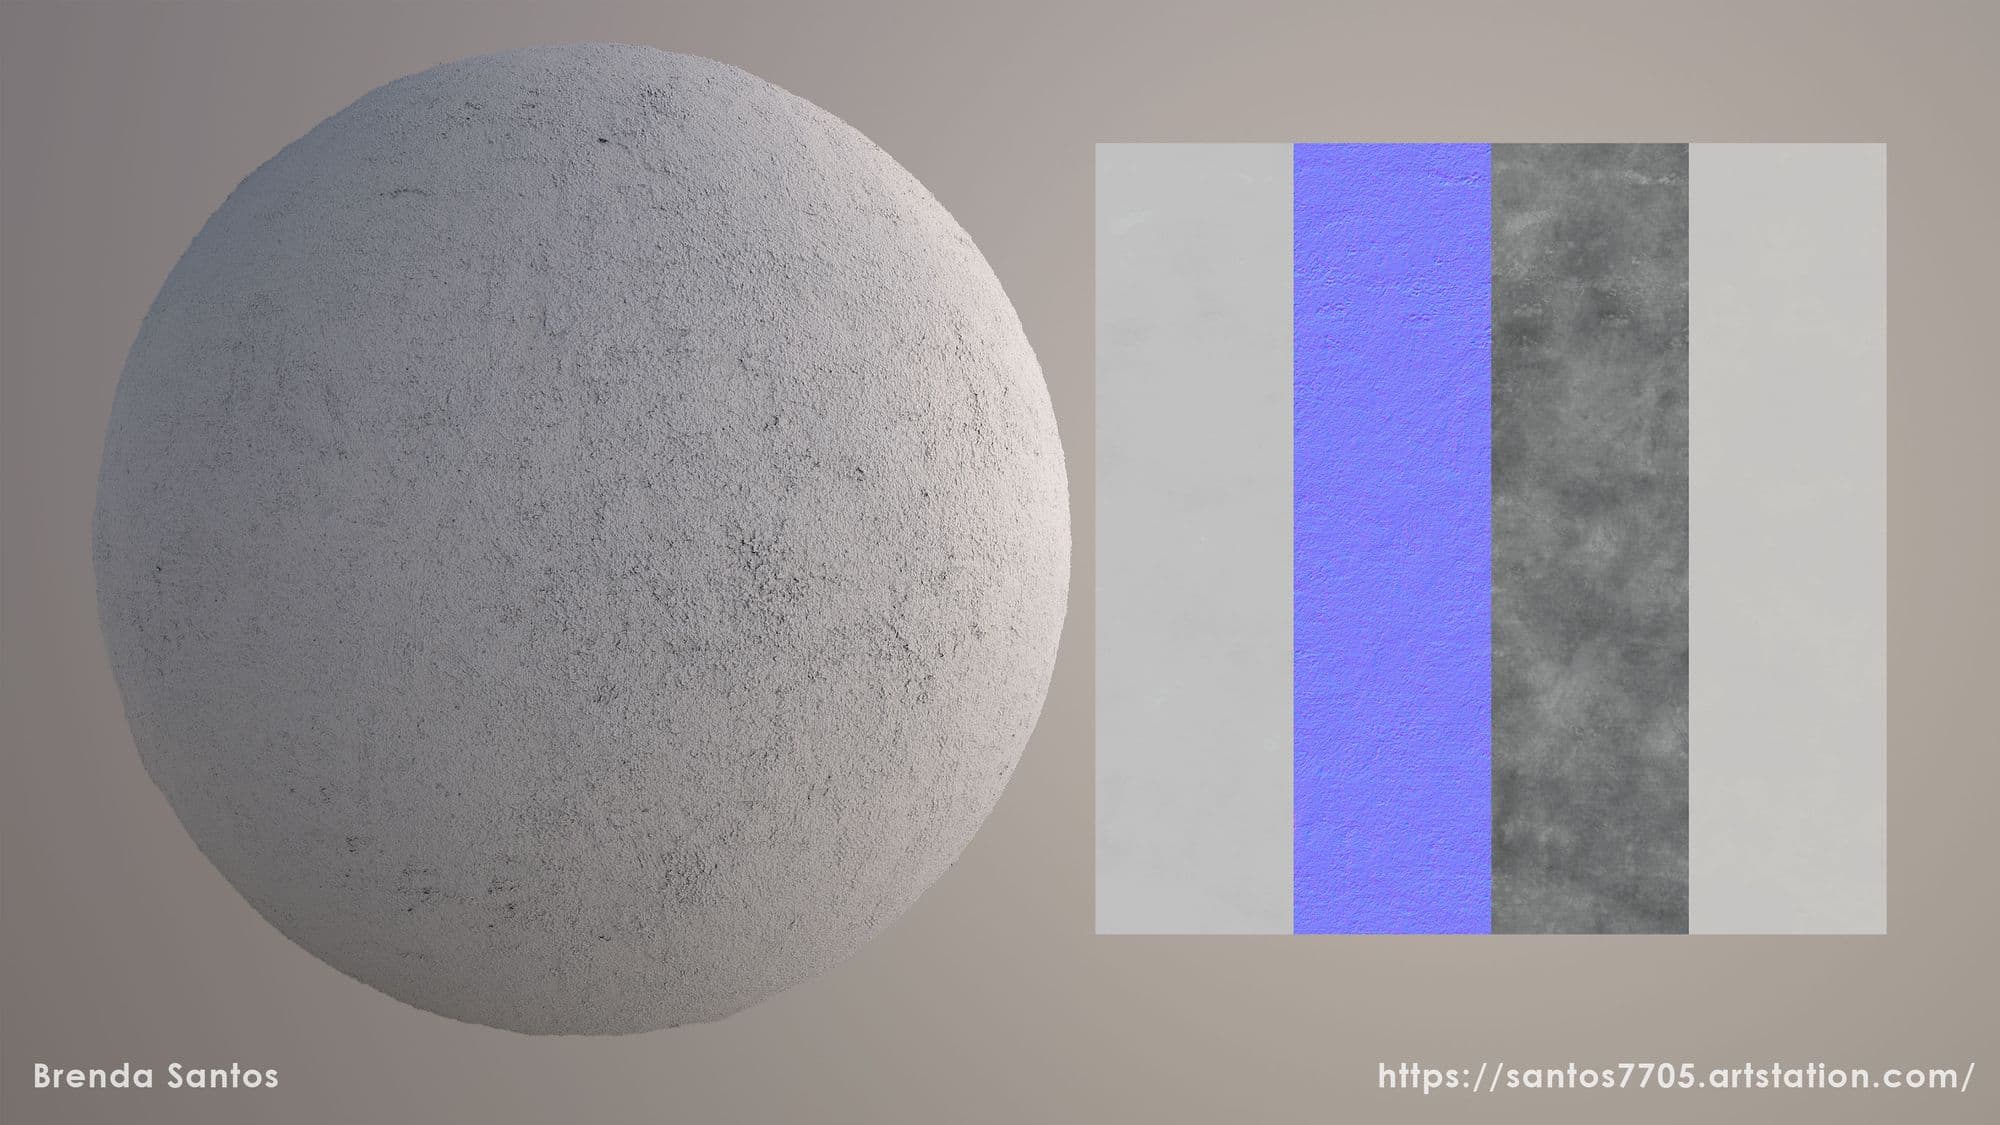
The stucco walls' tiling textures were then created. The first variant is rougher than the second. Later on, I used these 2 textures for the vertex painting on the walls.
Finally, I built the stained glass tiling texture. I first made the glass blue, but it didn't help with the goal of creating a warm atmosphere, so I changed it to warmer colours.
I didn't want to deal with transparencies, so I created an emission map in 3D Designer. Later on, I created a shader in UE4 which gave me more control over the emission.
I started texturing the porch with vertex blending at first. I created a vertex blending material with 3 layers: the new wood, old wood, and the white paint. Yet, I was not obtaining the desired results. As a solution, I decided to create a 'hero prop' version of the porch. So I used Substance 3D Painter to finish texturing this version. I wouldn't recommend that - now I know that decals would have been a better option.
Implementation
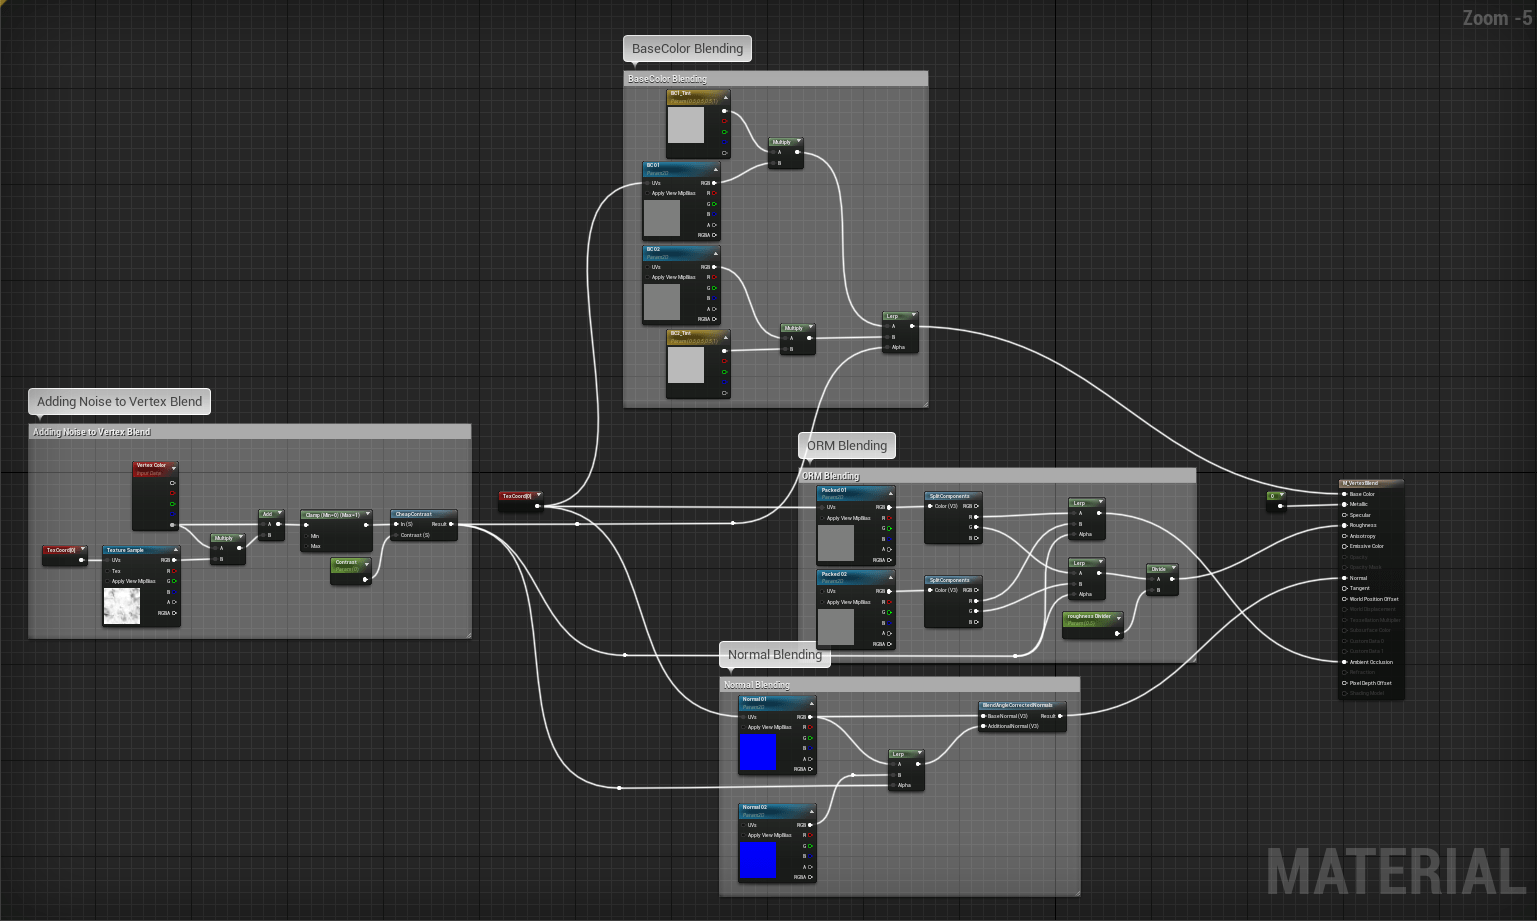
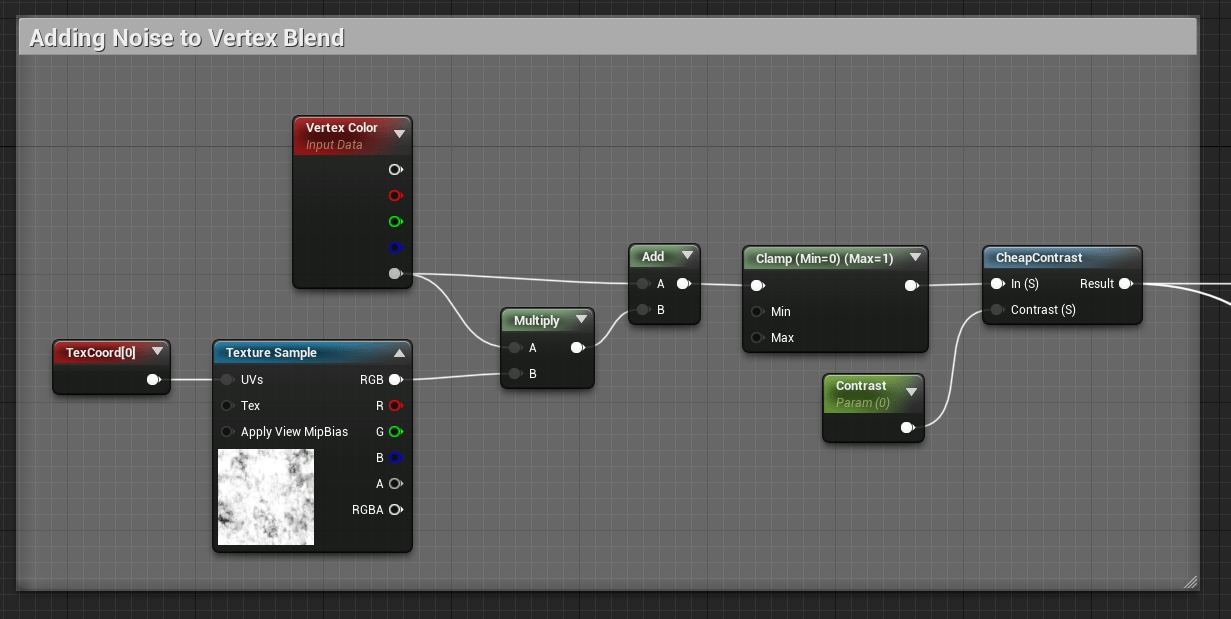
Miro Vesterinen, one of my amazing supervisors, taught us a way to get more natural vertex painting across materials. What he suggested, was adding a noise texture to the vertex colour and then he multiplied it with the original. Finally, he added a cheap contrast. The cheap contrast acts like Photoshop’s level adjustment.
Lighting
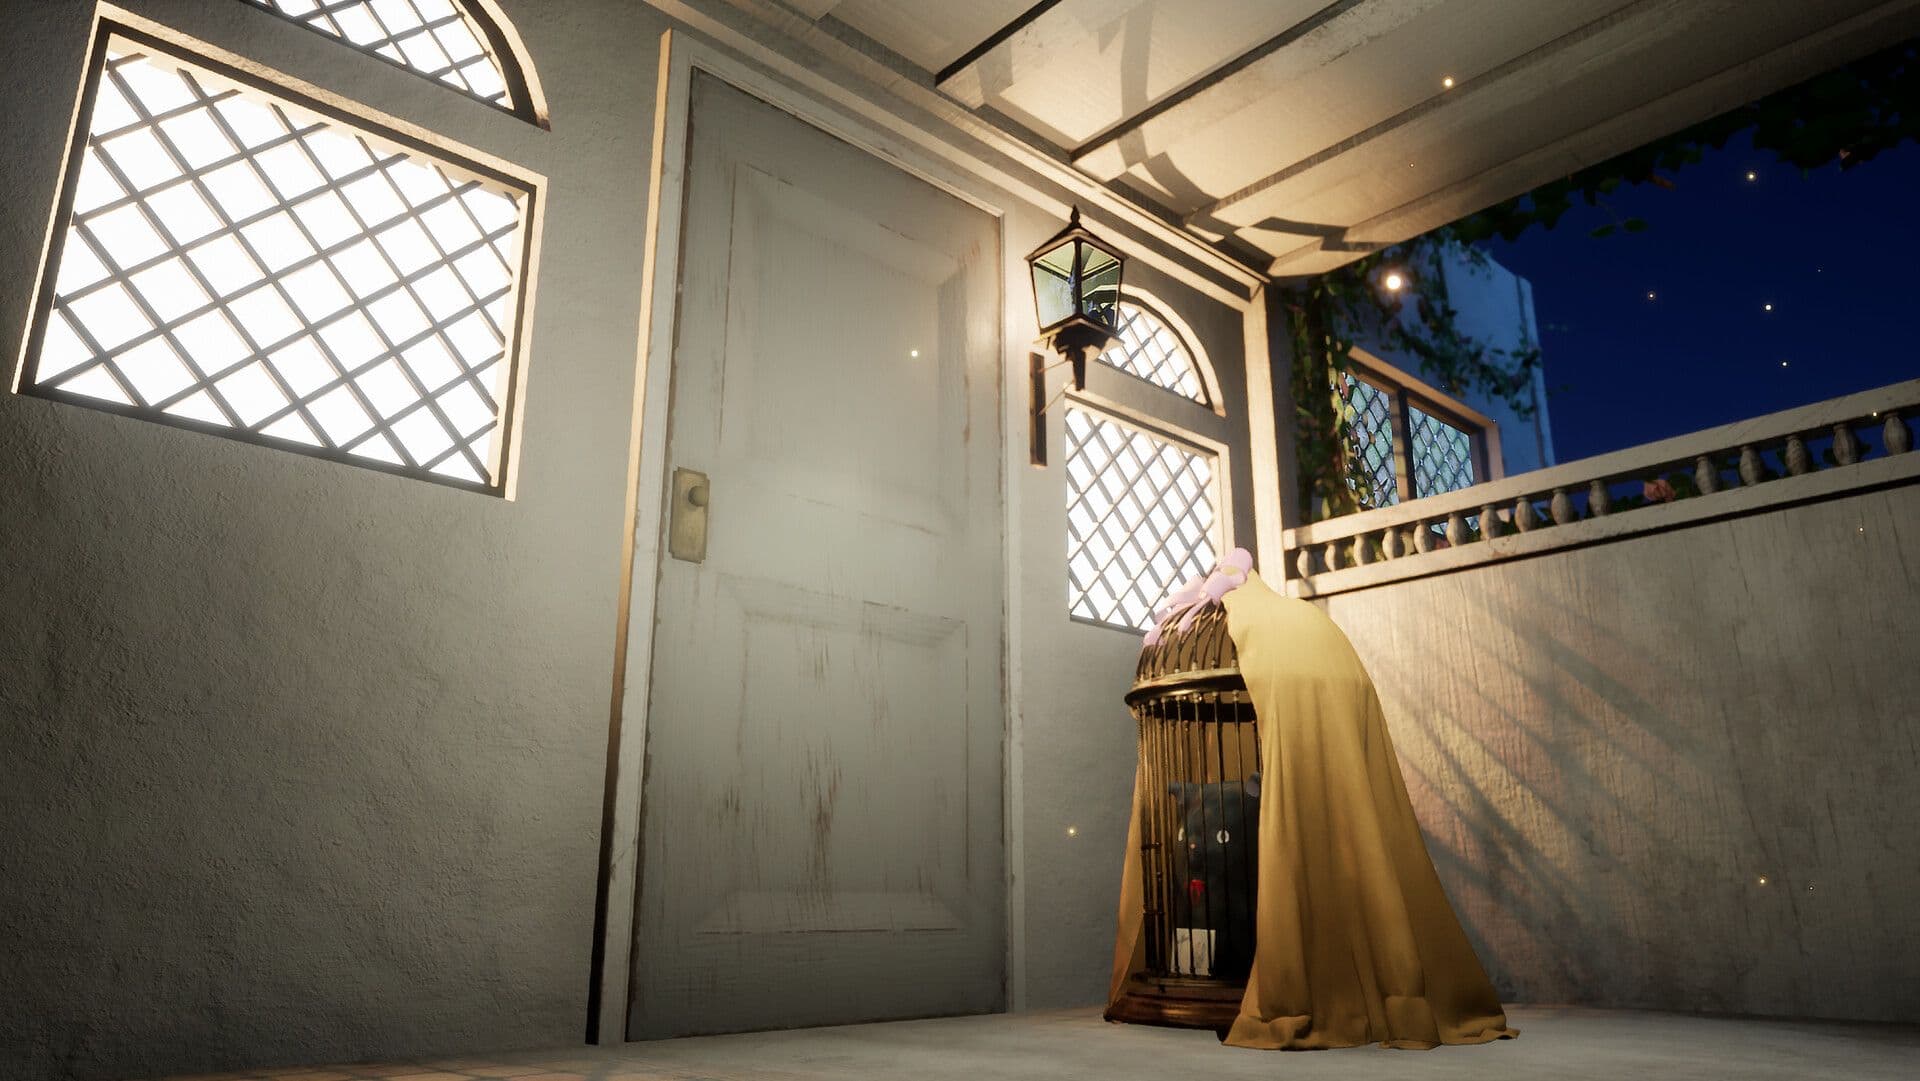
The lighting was a journey. It started like a midday scene and it ended like a blue late afternoon scene. Once again, Miro provided me with feedback about using lighting to create a focal point.
At first my scene didn't seem to be directing the audience's attention to anything - it was too dark but the sky was bright (?).
Before and After feedback
After I decided on the main focal point, I used Niagara to make some simple fireflies. Just to bring the scenario to life a little more. I created a blueprint for the stained glass rays to push the light a little further. Thanks to DefaultSound for creating an excellent tutorial on how to do this.
Final thoughts
One thing I learned from this project is that you should always exhibit your work. There is a significant difference between the work I did share, and the work I did not.
Ask for comments, and take a break, for a few hours or a day or two. This will help you in noticing things that you were before unable to see. I'm not excellent at constructive criticism, and there are a lot of details I'd like to keep twitching around. Yet, the fact that some people liked my project makes me very happy!
Thank you for taking the time to read this, and please be safe.