3D Environment Creation: Steampunk Videogame Level
Álvaro Garcia gives us a behind-the-scenes look at his final Master's Degree project: A Victorian Steampunk style Video Game level in Unreal Engine.
Álvaro Garcia gives us a behind-the-scenes look at his final Master's Degree project: A Victorian Steampunk style Video Game level in Unreal Engine.

Álvaro Garcia is a 3D Environment Artist and recent graduate of the Universal Arts School with a Master's Degree in Video Game Art.
Today he shares a behind-the-scenes of his final Master’s Degree project, a Victorian Steampunk style Video Game level in Unreal Engine.
The aim of this project was to create a fully playable 3D environment, taking into consideration artistic features but also technical aspects, such as optimisation techniques for the proper development of video game level, trying to maintain an optimal FPS while in game.

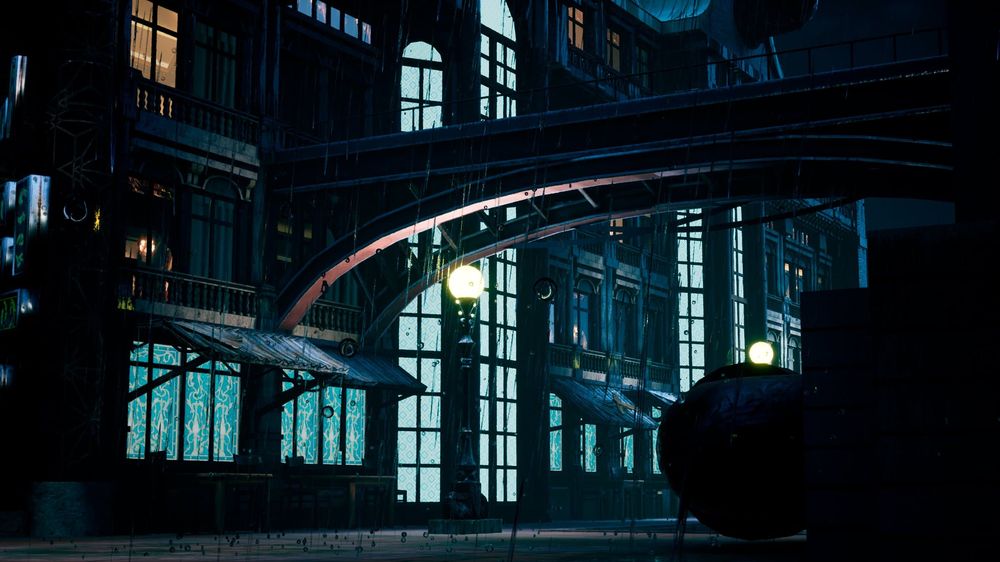
Gathering references is the beginning point for any of my projects. Considering the importance of good storytelling, I decided to create an environment based in Liverpool, the place where I have been living for the last 4 years, but also adding some steampunk style features due to the actual style and history of the city. This is why the first references I found, were actual emblematic buildings that I wanted to include into my scene, but also some other important references about the overall look of the scene (composition, lighting, feeling).

Once I was happy with the references the next step was starting with the blocking of the level in Unreal Engine. Using some level design techniques and also taking references from actual games, I started playing around with very basic shapes to determine the size and position of each building and element that I wanted to include in the scene.

As you can see in the image above, I also created a small landscape to determine the dimensions and background of the environment. You can also notice that I used colour code in the blocking to let myself know a bit more information about the scene, such as where I would place hero assets, materials or style.
The first thing that I implemented in the environment was the buildings, due to their importance and size. Because I wanted to add a lot of detail to the buildings, I decided to make them following modular assets techniques. I started modeling modular sets for each building in Autodesk Maya, that later would allow me to arrange into Unreal Engine with many possibilities.
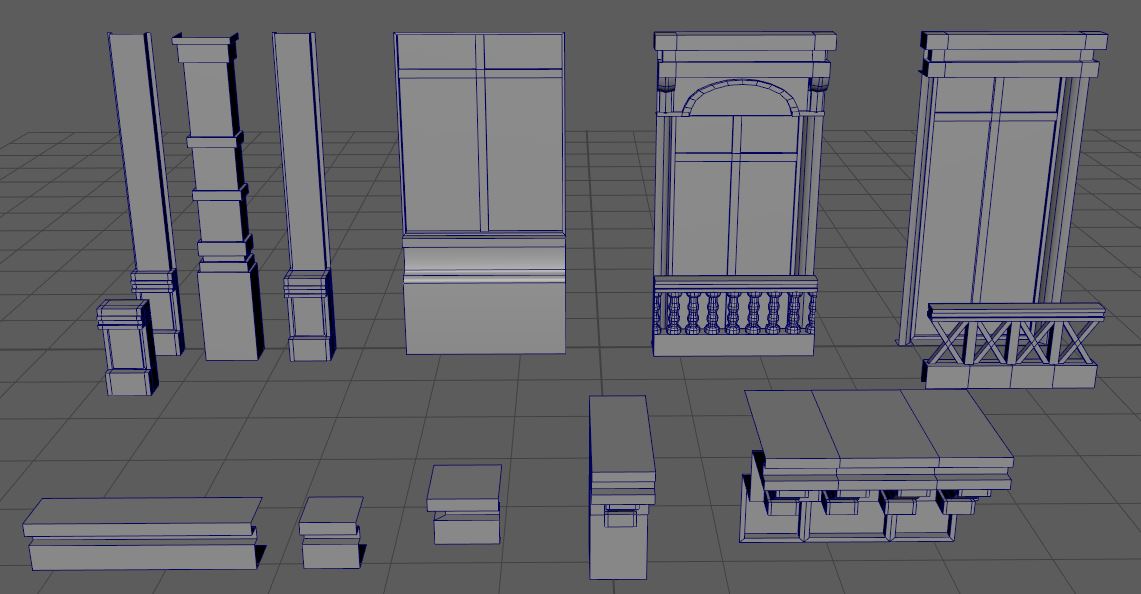
One of the most important things to consider when modeling the modular sets is the optimised use of the UV space. That is why small pieces such as the pillars and the roof borders were packed into the same UV space, so they use the same material and textures inside of the game engine.
For the windows, I exported the assets with 3 different materials to have the chance of working further in Unreal Engine in terms of emissive and parallax techniques to fake the inside of the building, but always creating a second UVs set for lightmaps.

Please note that the images above are only showing an example of one of the modular sets, but same techniques were used for the rest of the buildings.
Below is the result of the main buildings before texturing:


Due to the high amount of assets and the size of some of them, many different materials were created in Unreal Engine. This was primarily done to implement certain optimisation techniques, whilst always maintaining the best visual quality possible.
Vertex painting was essential for the implementation of certain assets into the scene, especially for the floors and some background buildings. That is why I decided to create a vertex painting material with three different channels to allow me to work with different textures.

As you can see in the image above, I added some features such as tilling and rotation to adjust textures when necessary, plus extra Color, Normal and Ambient Occlusion nodes to be able to change hue or add extra details with Normal and/or Ambient Occlusion maps.
Below is the result of some vertex painting (especially in roughness) added to the scene with the use of different textures created in Quixel Mixer:

Very similar techniques to the ones used for vertex painting were also used to generate a landscape material, but this time adding tessellation and displacement features in case I needed them in the future.

For the props and hero assets I decided to create two different materials, one Master Material that allow me to work on every texture independently:

And, a second material with a specific texture node that by using red, green and blue channels allowed me to use combined texture maps for secondary assets, reducing the number of textures used in the scene supposing a huge increment in the performance of the gameplay:

I would also like to mention the addition of an extra texture node in the roughness channel, something that allowed me to use black masks to change the roughness of the asset as I wanted to create the wet effect due to the rain.
Last but not less the emissive material, which I specifically created for the windows of the buildings, allowing me to implement parallax techniques to fake the interior of the buildings as mentioned before in Figure 4:

Here you have an example of what I could achieve thanks to the combined use of the materials mentioned above, especially with the use of different instances of the emissive material to generate different interiors, and with the use of the extra roughness node in the combined material, to create a more realistic wet effect over the buildings.

In terms of textures, I wanted to mention that the entire project has been texturised following a PBR workflow either with the use of Substance 3D Painter for texturing some of the assets, plus some tileable textures and Decals obtained from Quixel Megascans.
I also used Quixel Mixer to modify some of the tillable textures used to obtain high quality results at the time of vertex painting. Adobe Photoshop was also a really important tool to generate the combined Roughness, Metallic and AO textures and certain black masks.

It is time to dress up the environment and especially to give it the desired steampunk style. For this task I repeated the first steps mentioned before: References and Blocking. After gathering information, I decided to create the next sets of props.
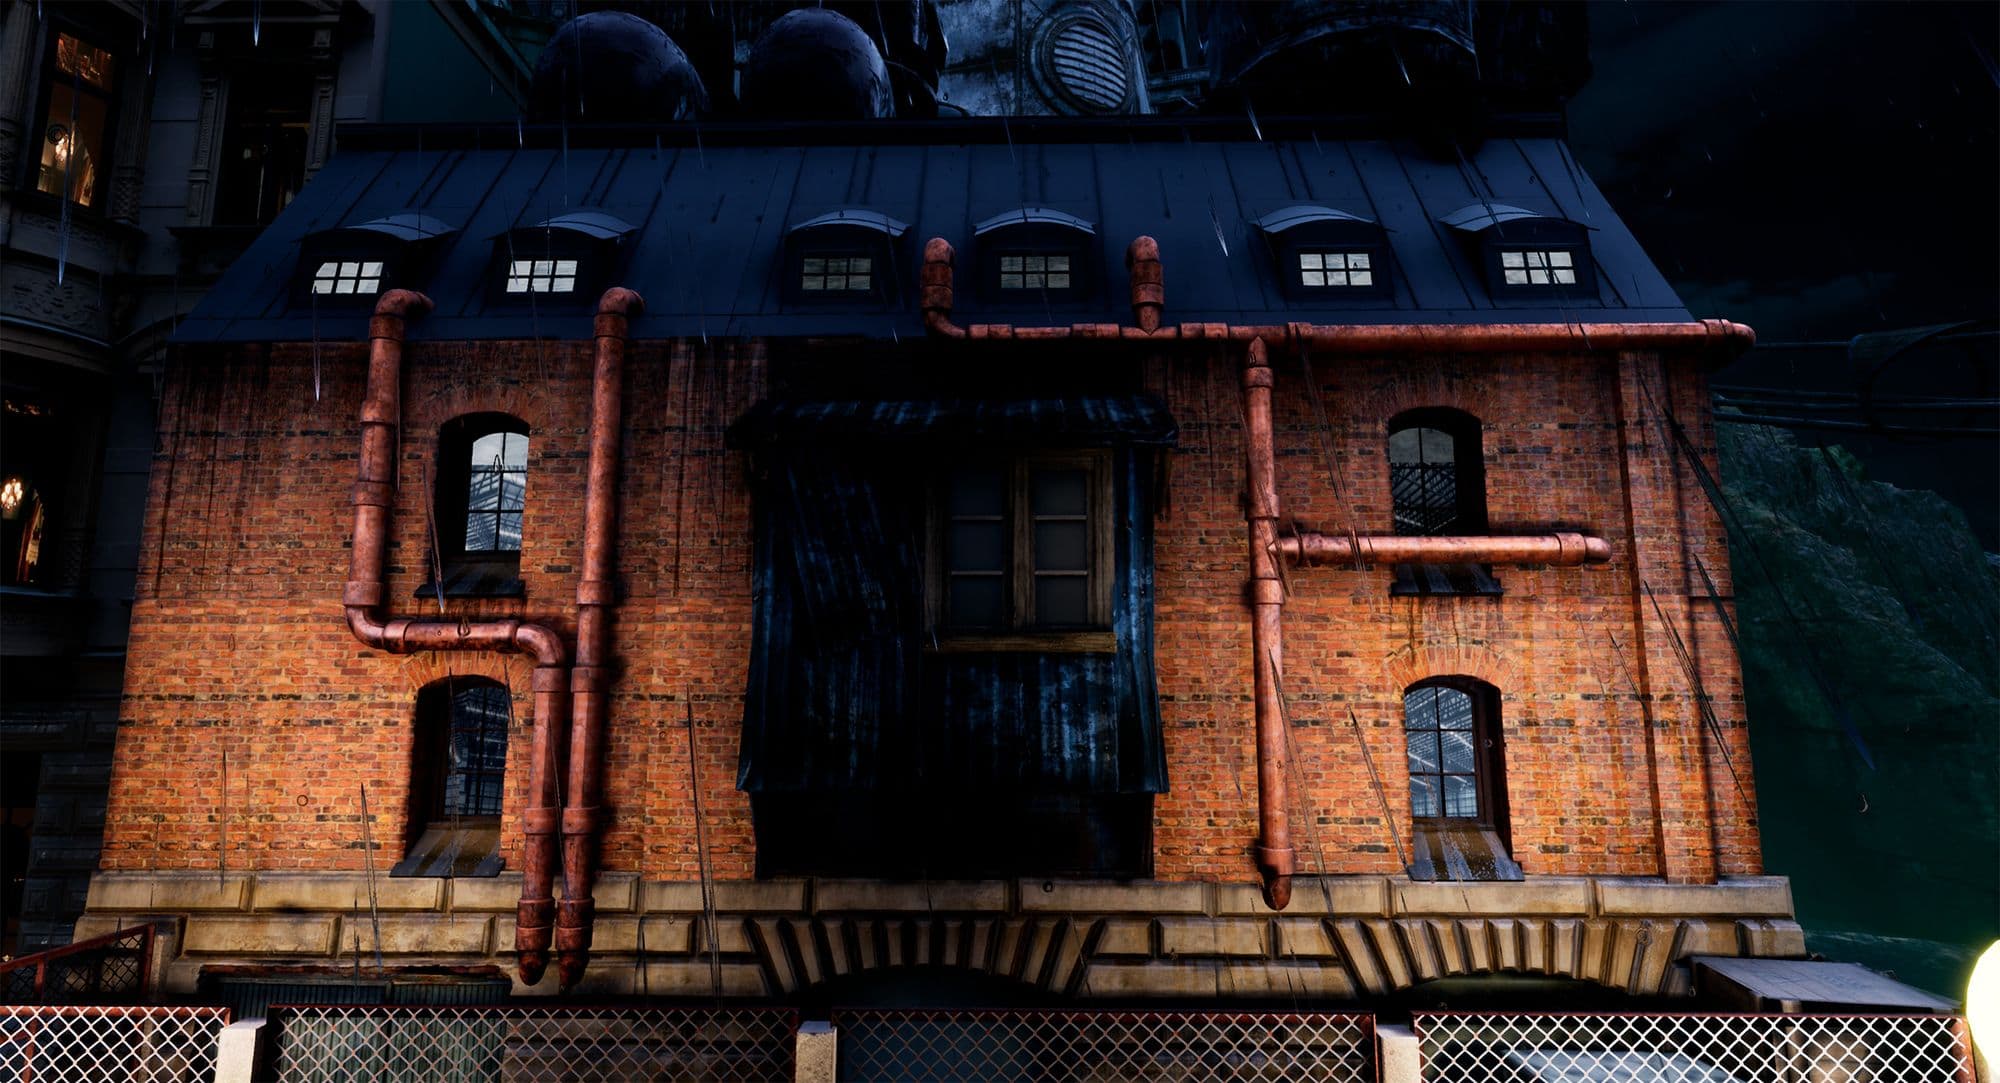
For the pipes I decided to create two different types of pipes, big metallic pipes and small copper pipes. These two sets of pipes helped me to dress the building and produce the steampunk style that I was looking for. Both were created as modular sets in Autodesk Maya with different pieces that allowed me to build them into unreal as I wanted.

The texturing process was done in Substance Painter by following a PBR workflow. Here you can see their final look.
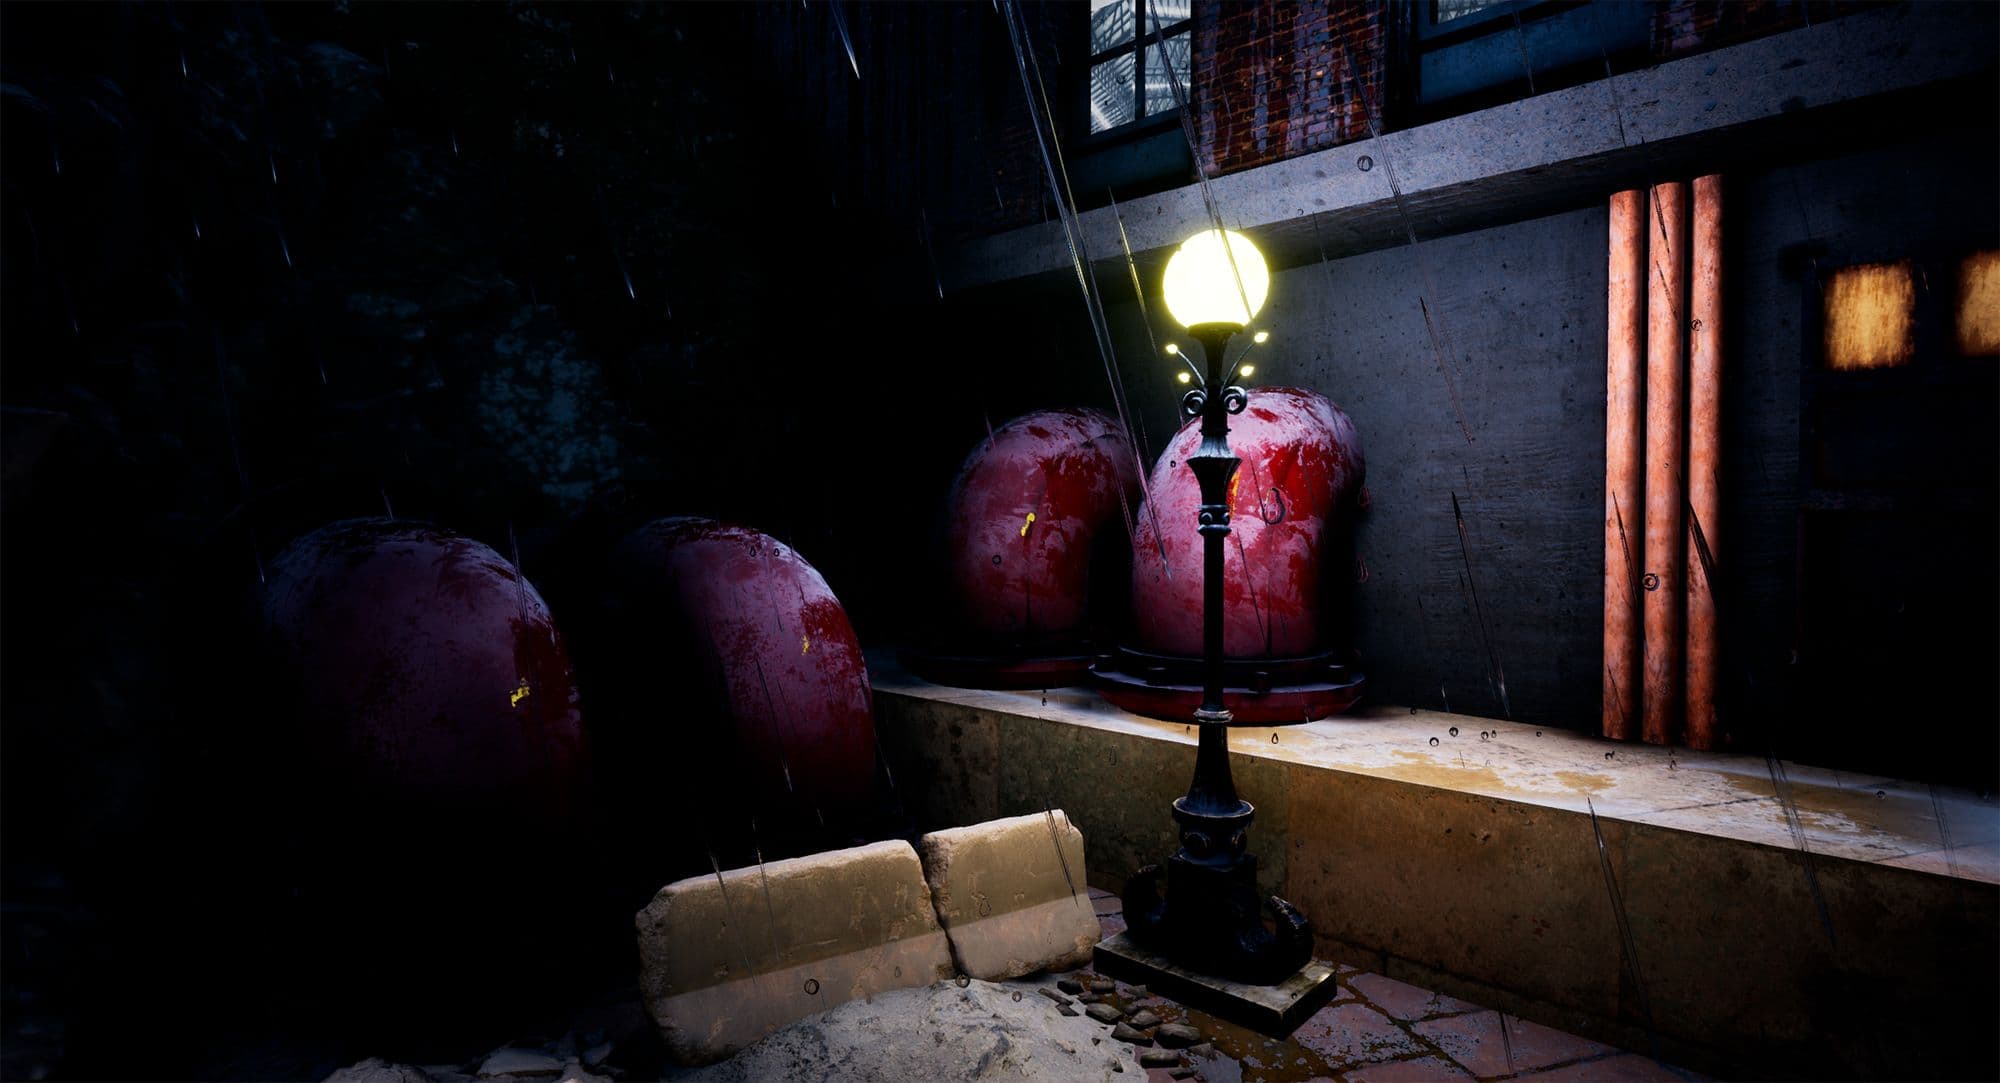
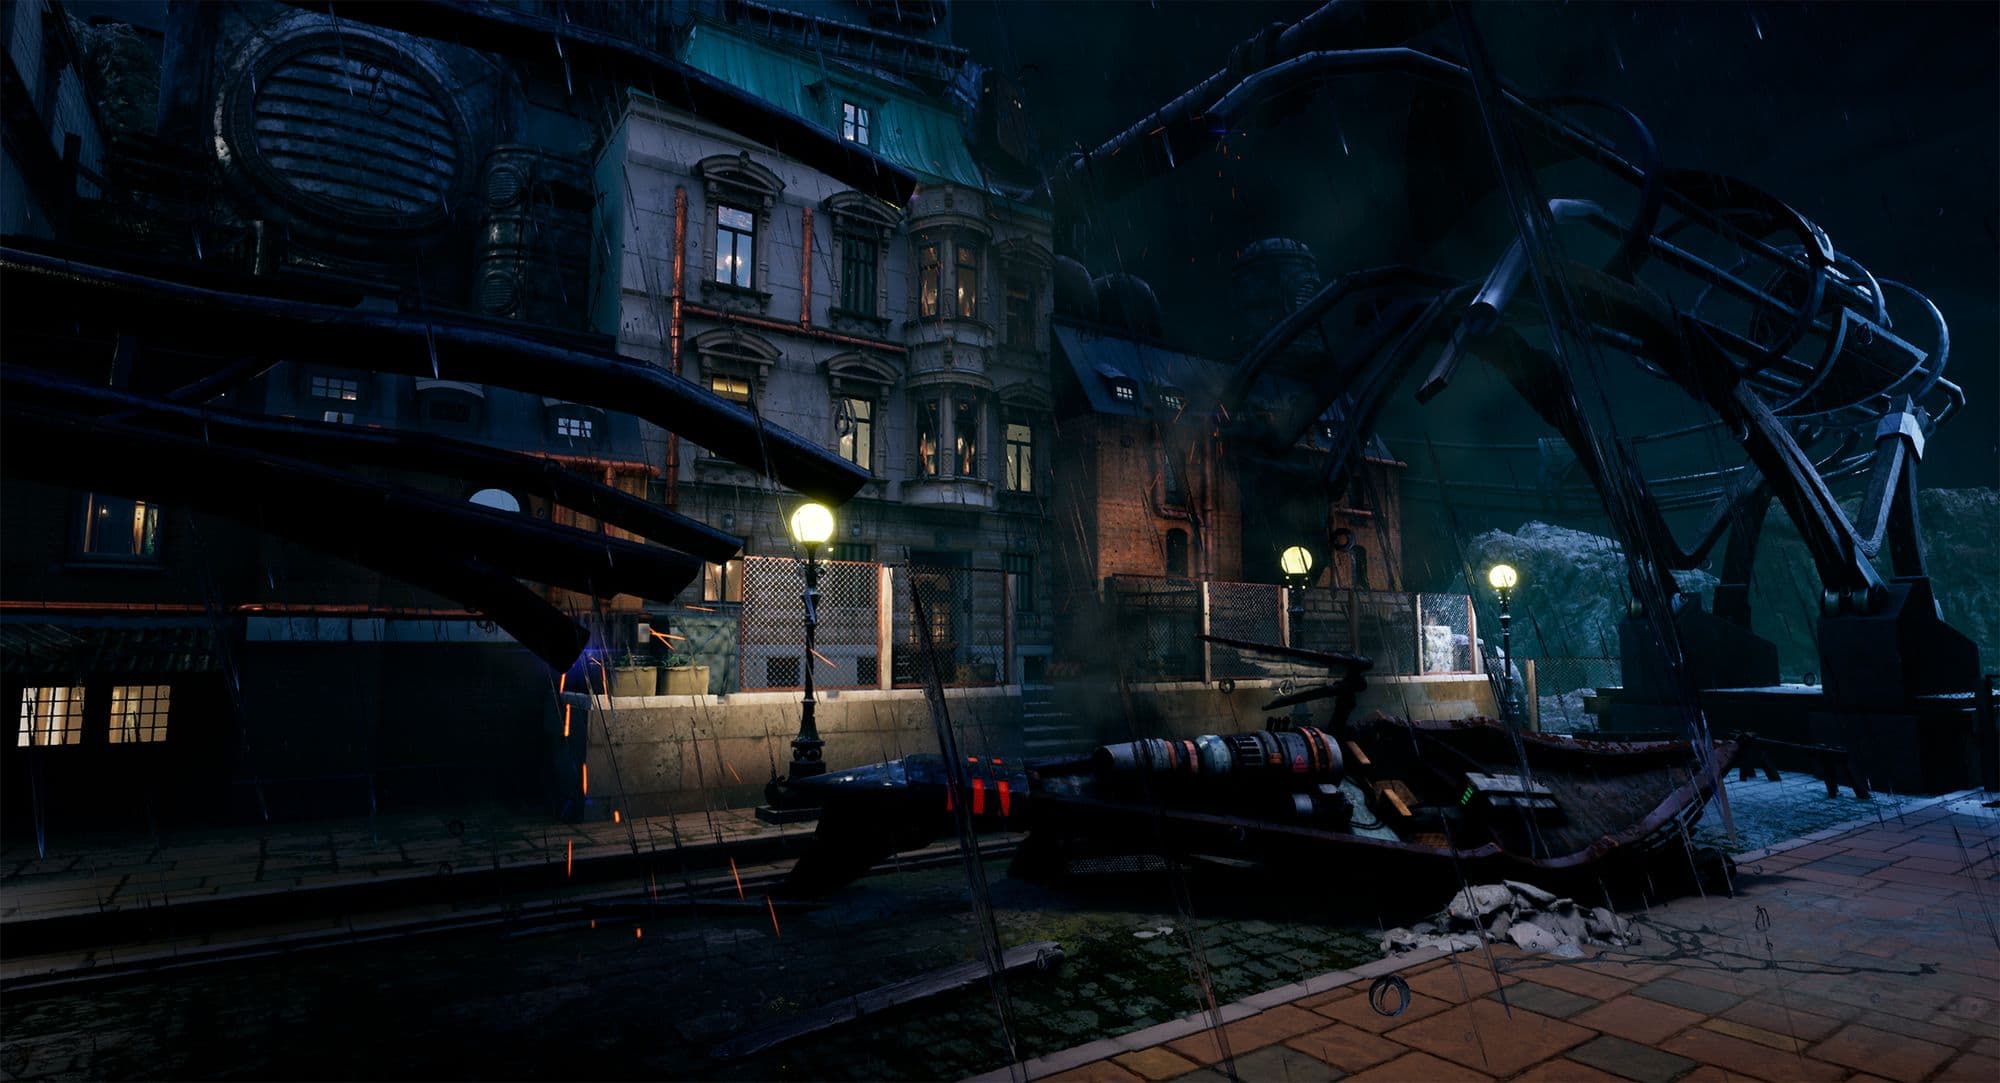
The street lights are another very important prop for the scene because they are repeated many times, and also because they produce the main source for lighting in the scene.

To work more comfortably with the lighting, what I did was to create a blueprint where I combined the street light mesh with the point light used to illuminate the scene, allowing me to change each instance of the light at once instead of going one by one.
The bridges are also a main part of the scene because they break repetition along the building faces but also cover empty spaces between the buildings generating feelings of foreboding, creepy streets and dark alleyways.
As with every prop, they were modeled in Autodesk Maya and textured in Substance 3D Painter. Two different bridges were created, one thinner and let’s say less important, and the main controller bridge that connects the Police Station with the Theatre in front of the Controlled passage (main buildings of the scene).

As you can see in the image above, I decided to model just half of the bridge to duplicate later by using symmetry, something that made me save UV space and increase the texture quality.
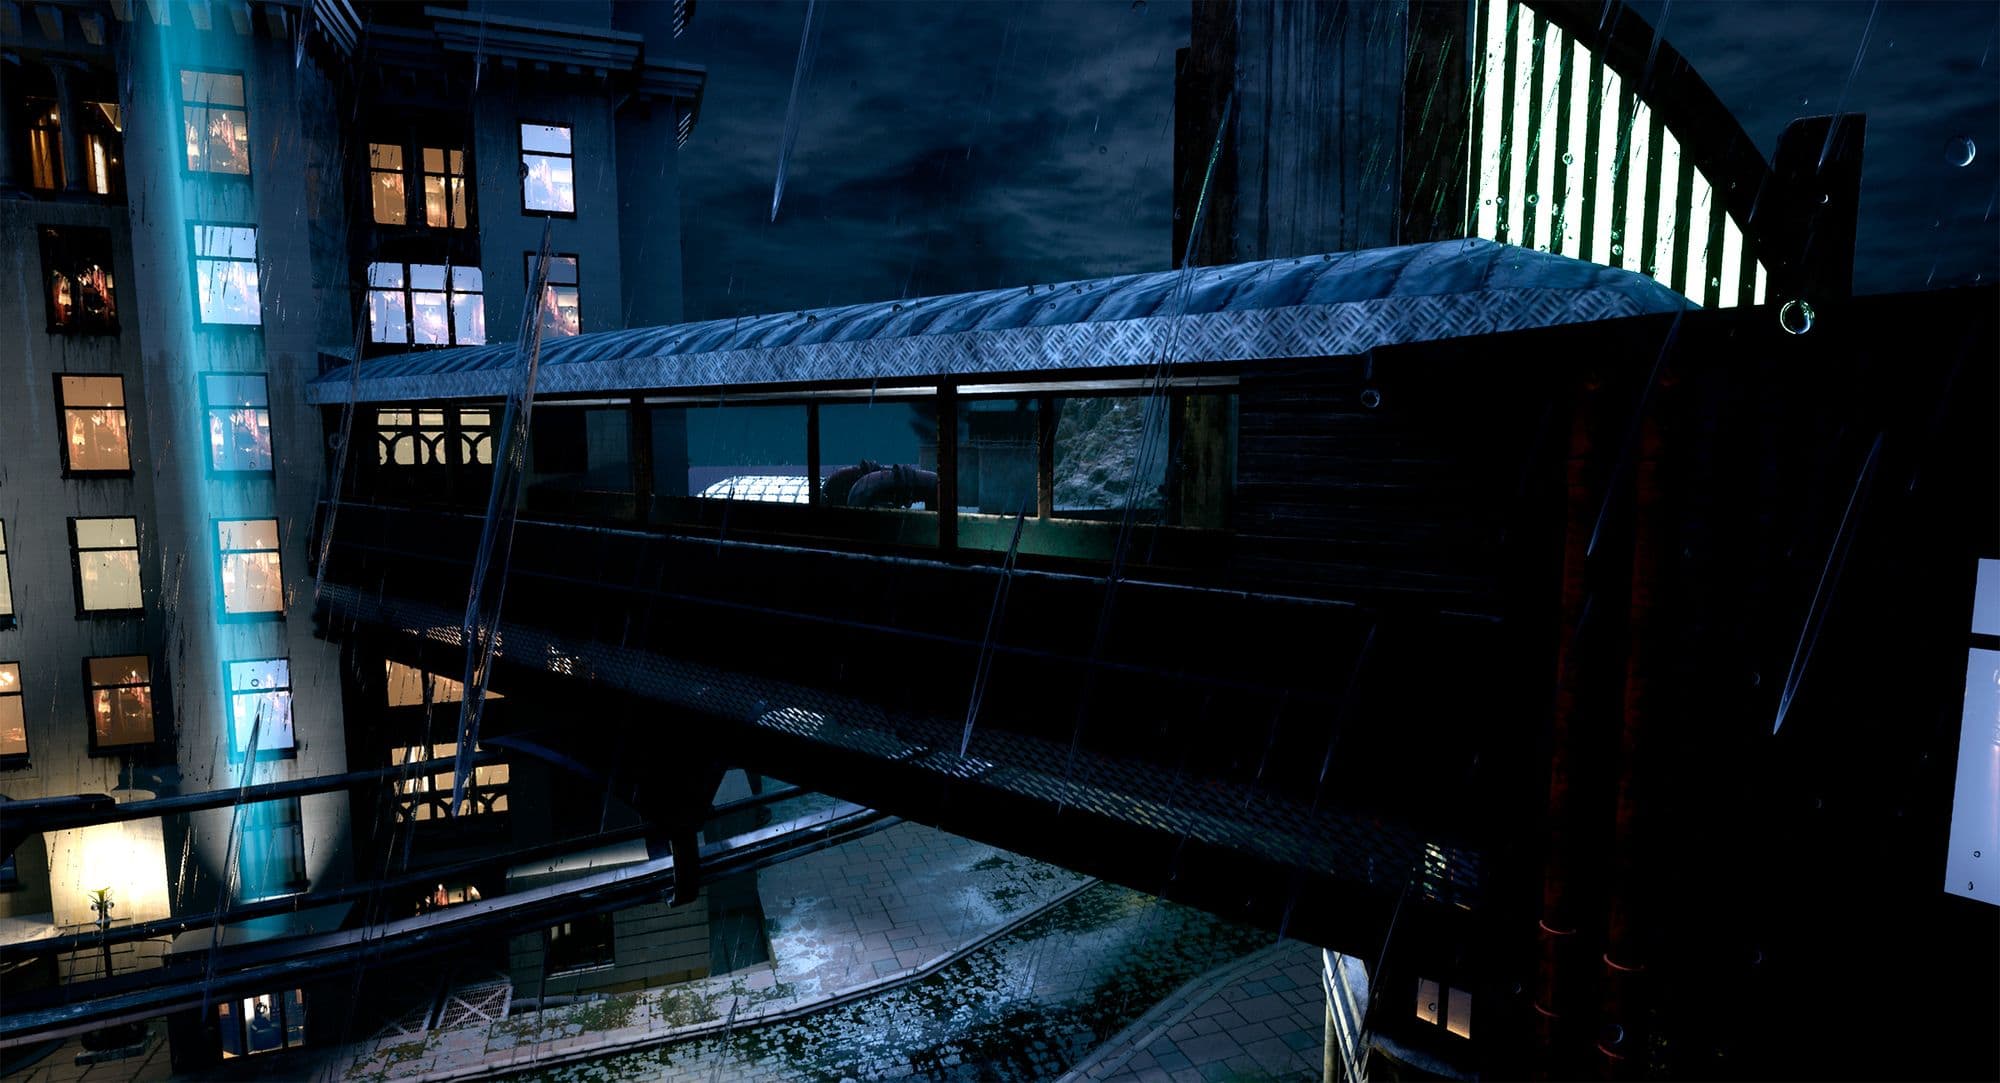
This main bridge was designed to be like a control bridge, where I like to think that police officers used it for vigilance purposes, that is why I made it with a roof and I decided to add some light inside.
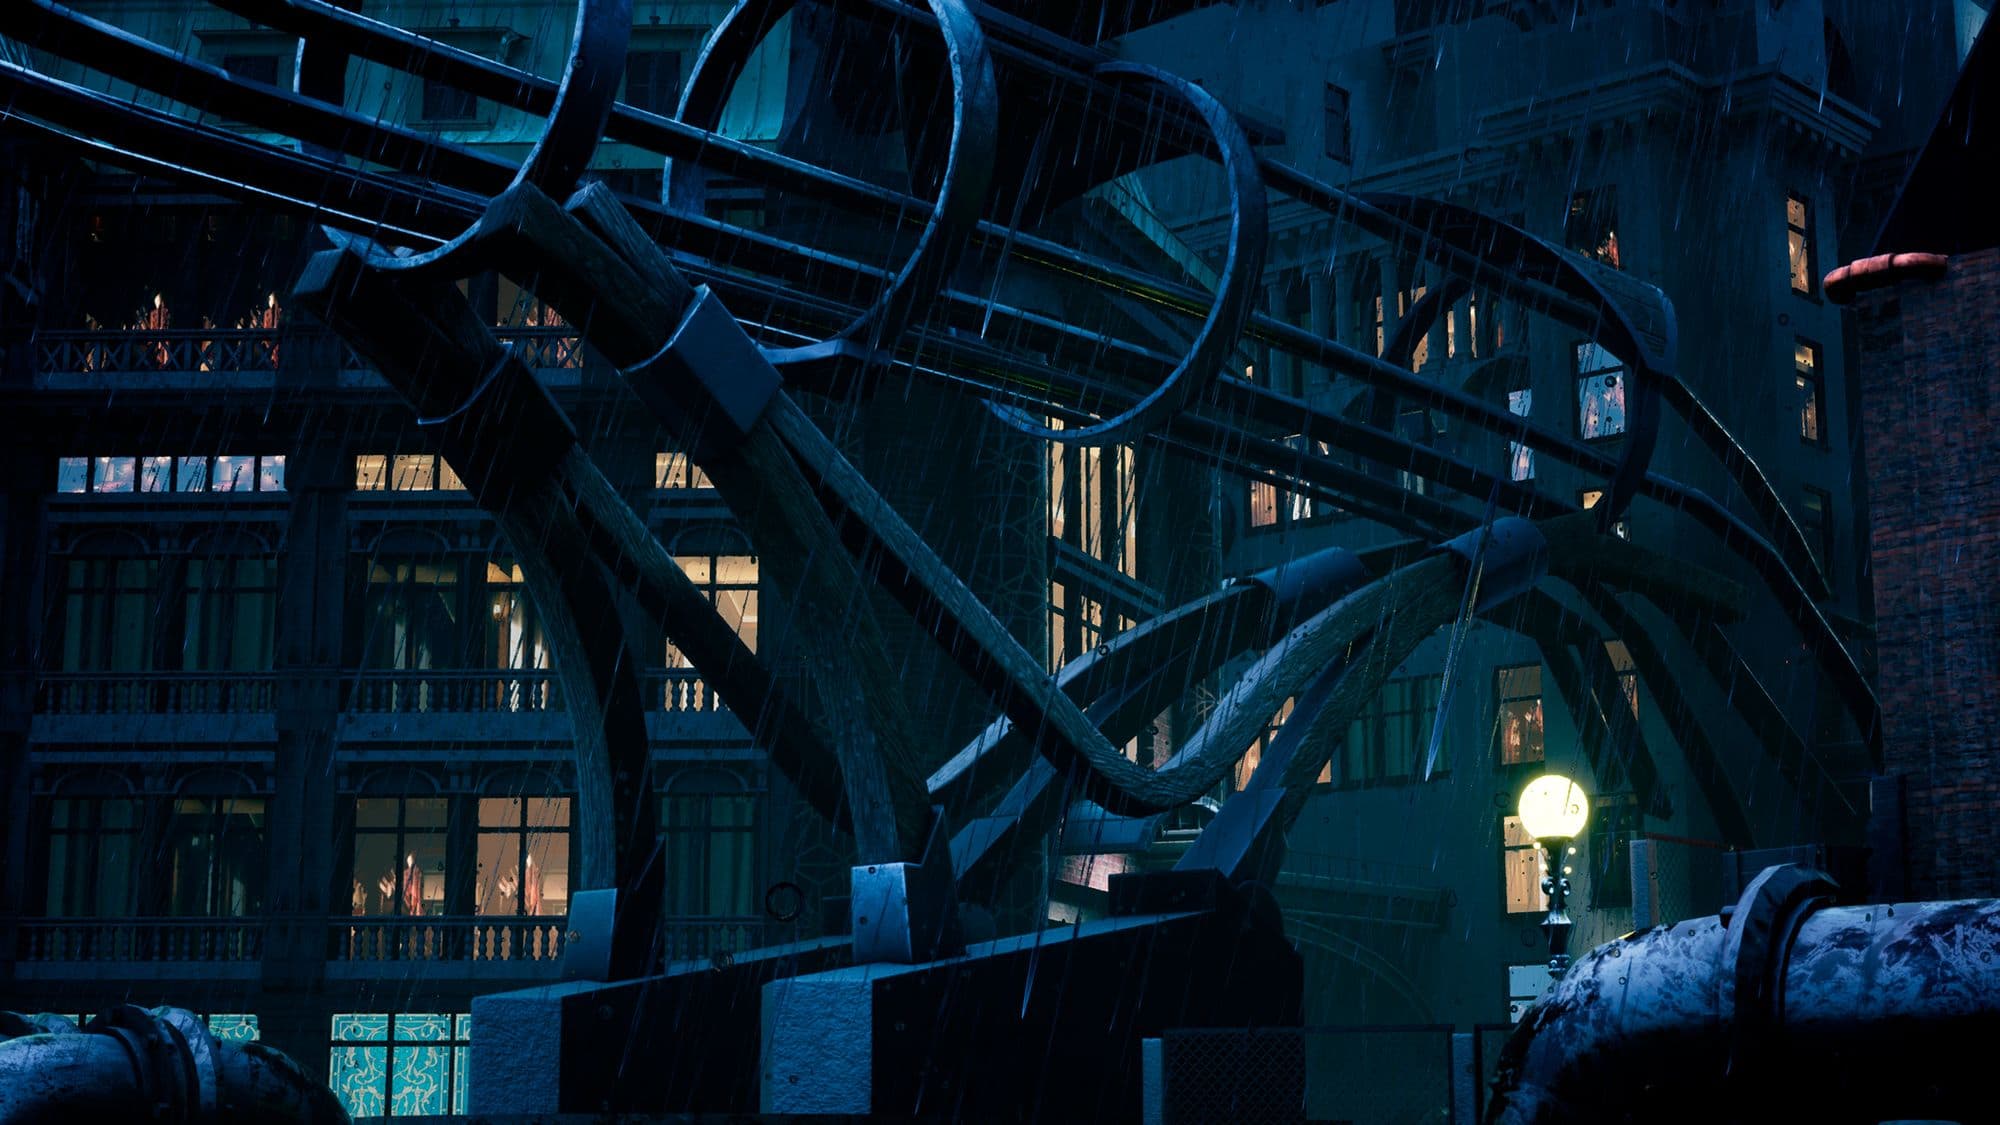
Following the steampunk style, I decided to implement a system of floating rails that cross the environment. For that I modeled the floating rails in Autodesk Maya as one big asset with the right dimensions and position over the scene that was texturised later with tillable materials.
Because we don’t want to have magically floating rails suspended in the air, I decided to also model a structure to hold the rails at one side of the scene, plus the idea of introducing the rails through one of the buildings on the other side.
Once the entire structure of the rails was finished, I started working on the vehicle that would run over the rails. Before starting modeling, I decided to simulate an accident so the vehicle would be on the floor making it more visible, to enhance the story telling. I also chose to create broken rails for this reason.
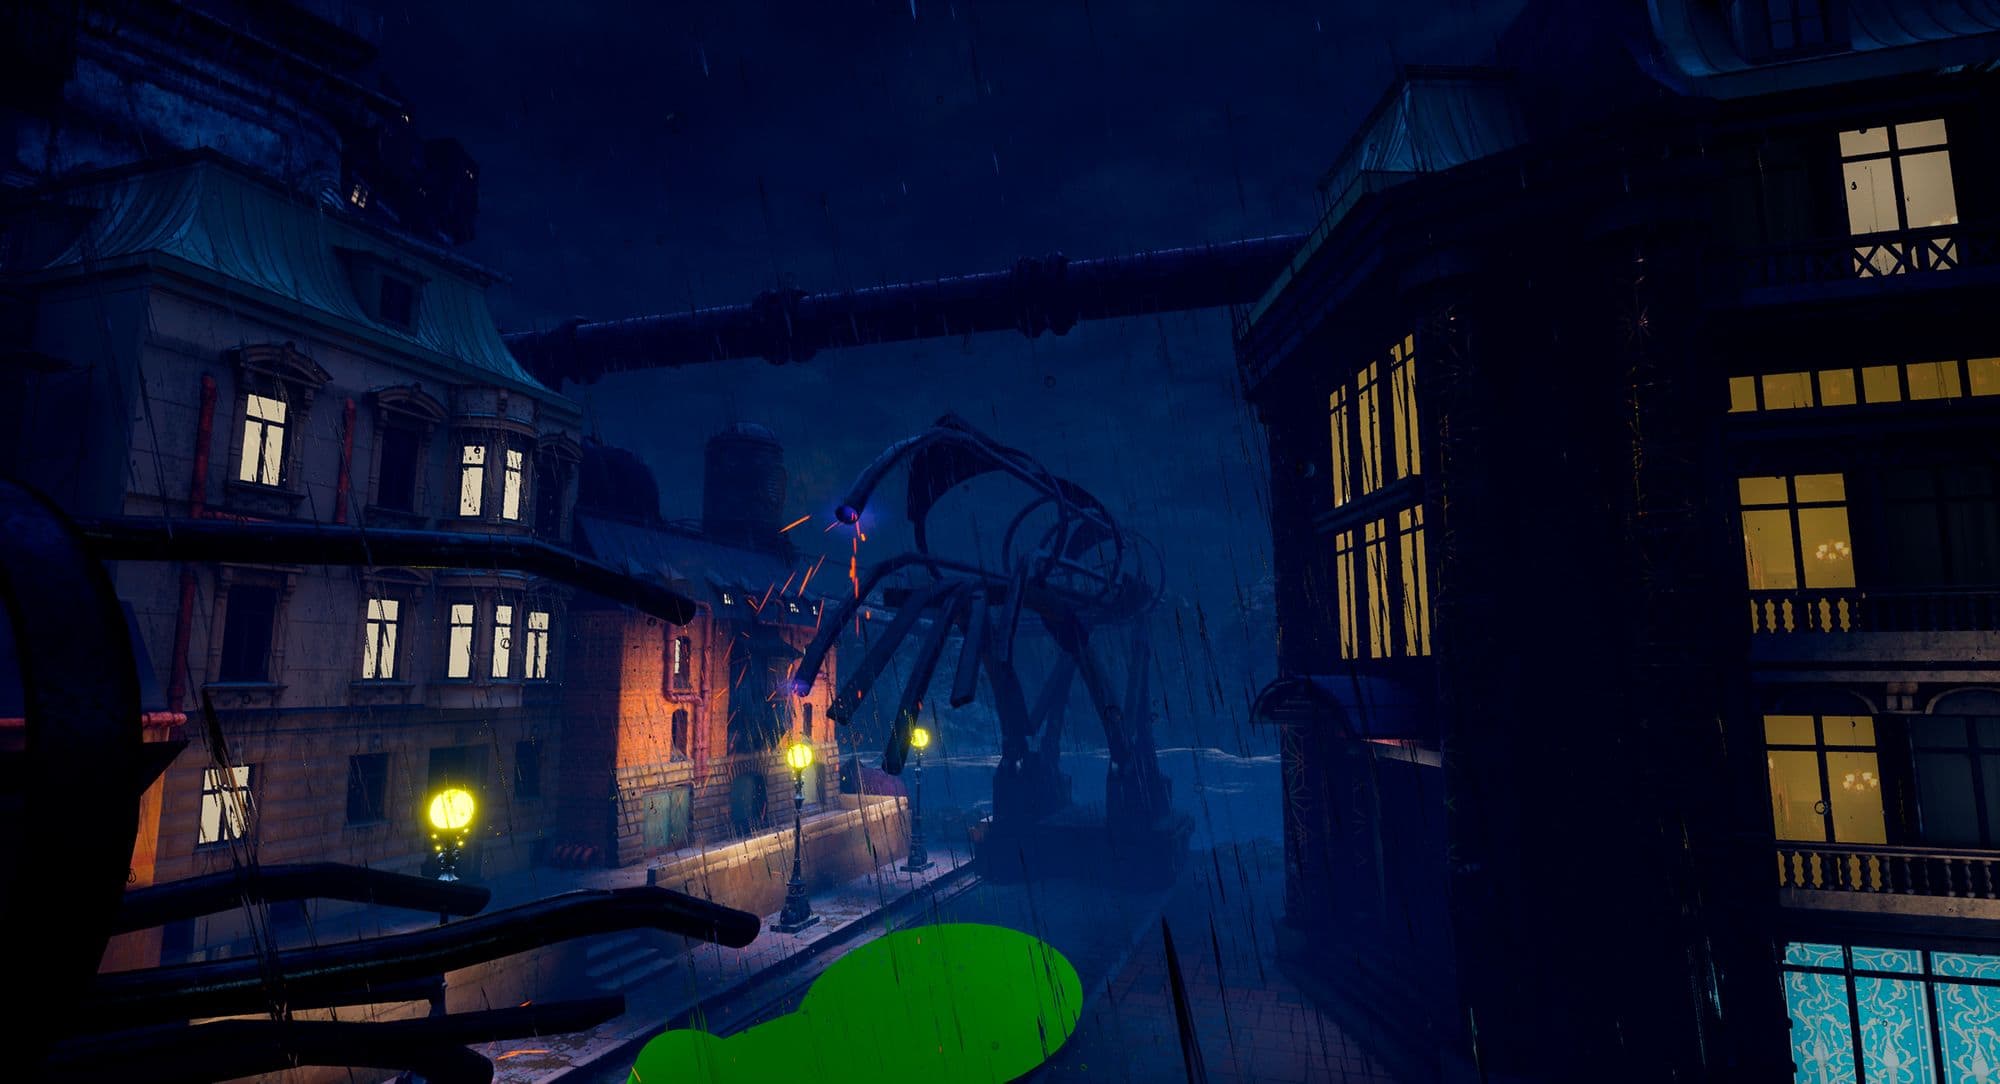
I wanted to create a unique design for my vehicle, however I gathered references as I always do. Due to water being an important element in the scene, I wanted to simulate a boat shape but endowed with wheels to be able to run over the rails.
The vehicle was modeled first as a low poly model in Autodesk Maya but I did also model a high poly based on the low poly model:


Once I was happy with both of the models, I divided the different pieces into baking groups to ensure a correct map generation on the baking process.
The baking process and texturing was done in Substance Painter where I used 6 different UDIMs.

Please note that all the materials used were entirely created by me from scratch, thanks to the use of generators, filters and smart masks.
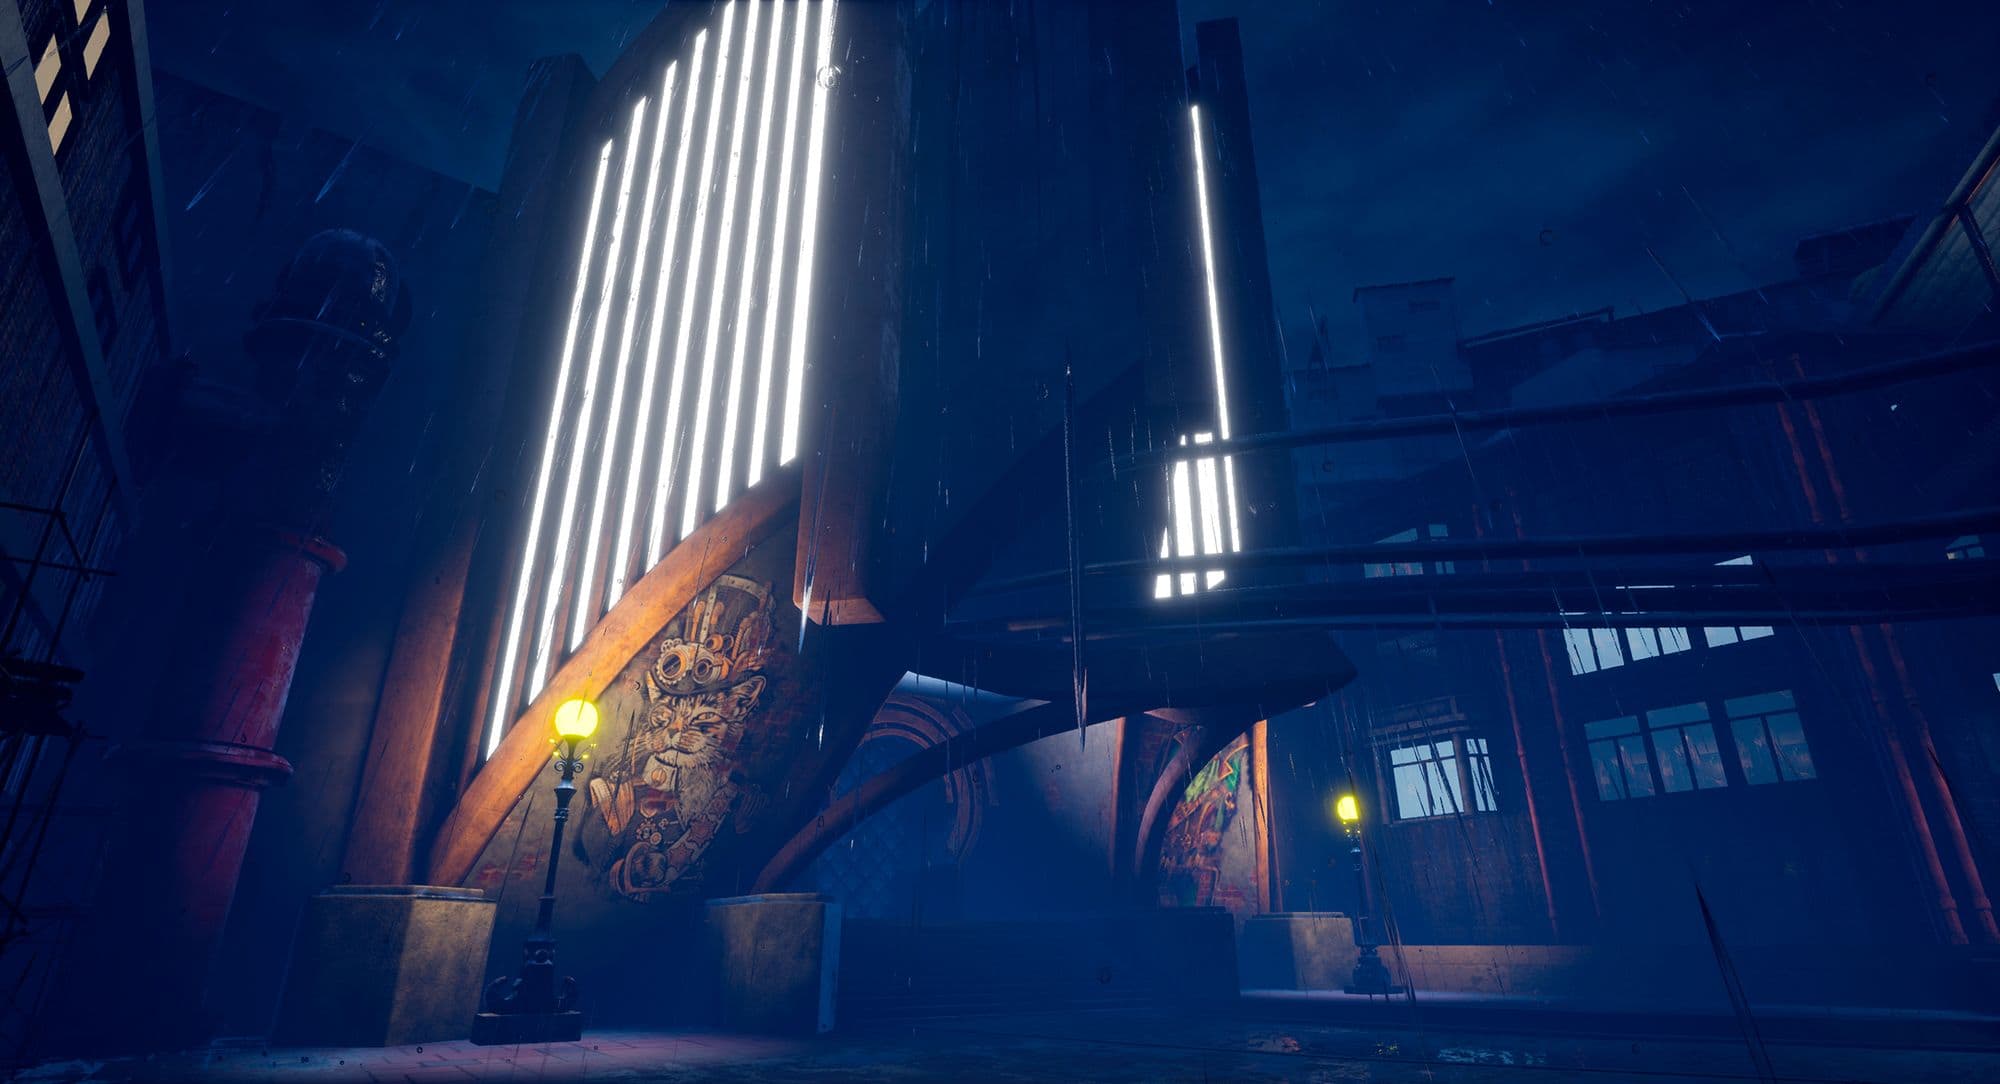
As you may have noticed at this point in the process, illumination was a time-consuming process for the development of the environment due to the fact that I wanted to make it at midnight.
The first step was to create a sky sphere that gave me a proper night sky, for that I used The Good Sky package that you can find to download for free in the Unreal Engine marketplace. This package allowed me to set a night sky sphere within a few clicks but also allowed me to create a storm-like effect that fit perfectly with the rain.
I also used a directional light but very faint, to simulate the moonlight, and a sky light that allowed me to avoid very dark (or completely black) areas over the scene.
The final look would not have been possible without the use of a Post Process Volume, the one that helped me to get the desired illumination, saturation and contrast by also letting me work with high lights, medium tones and shadows.
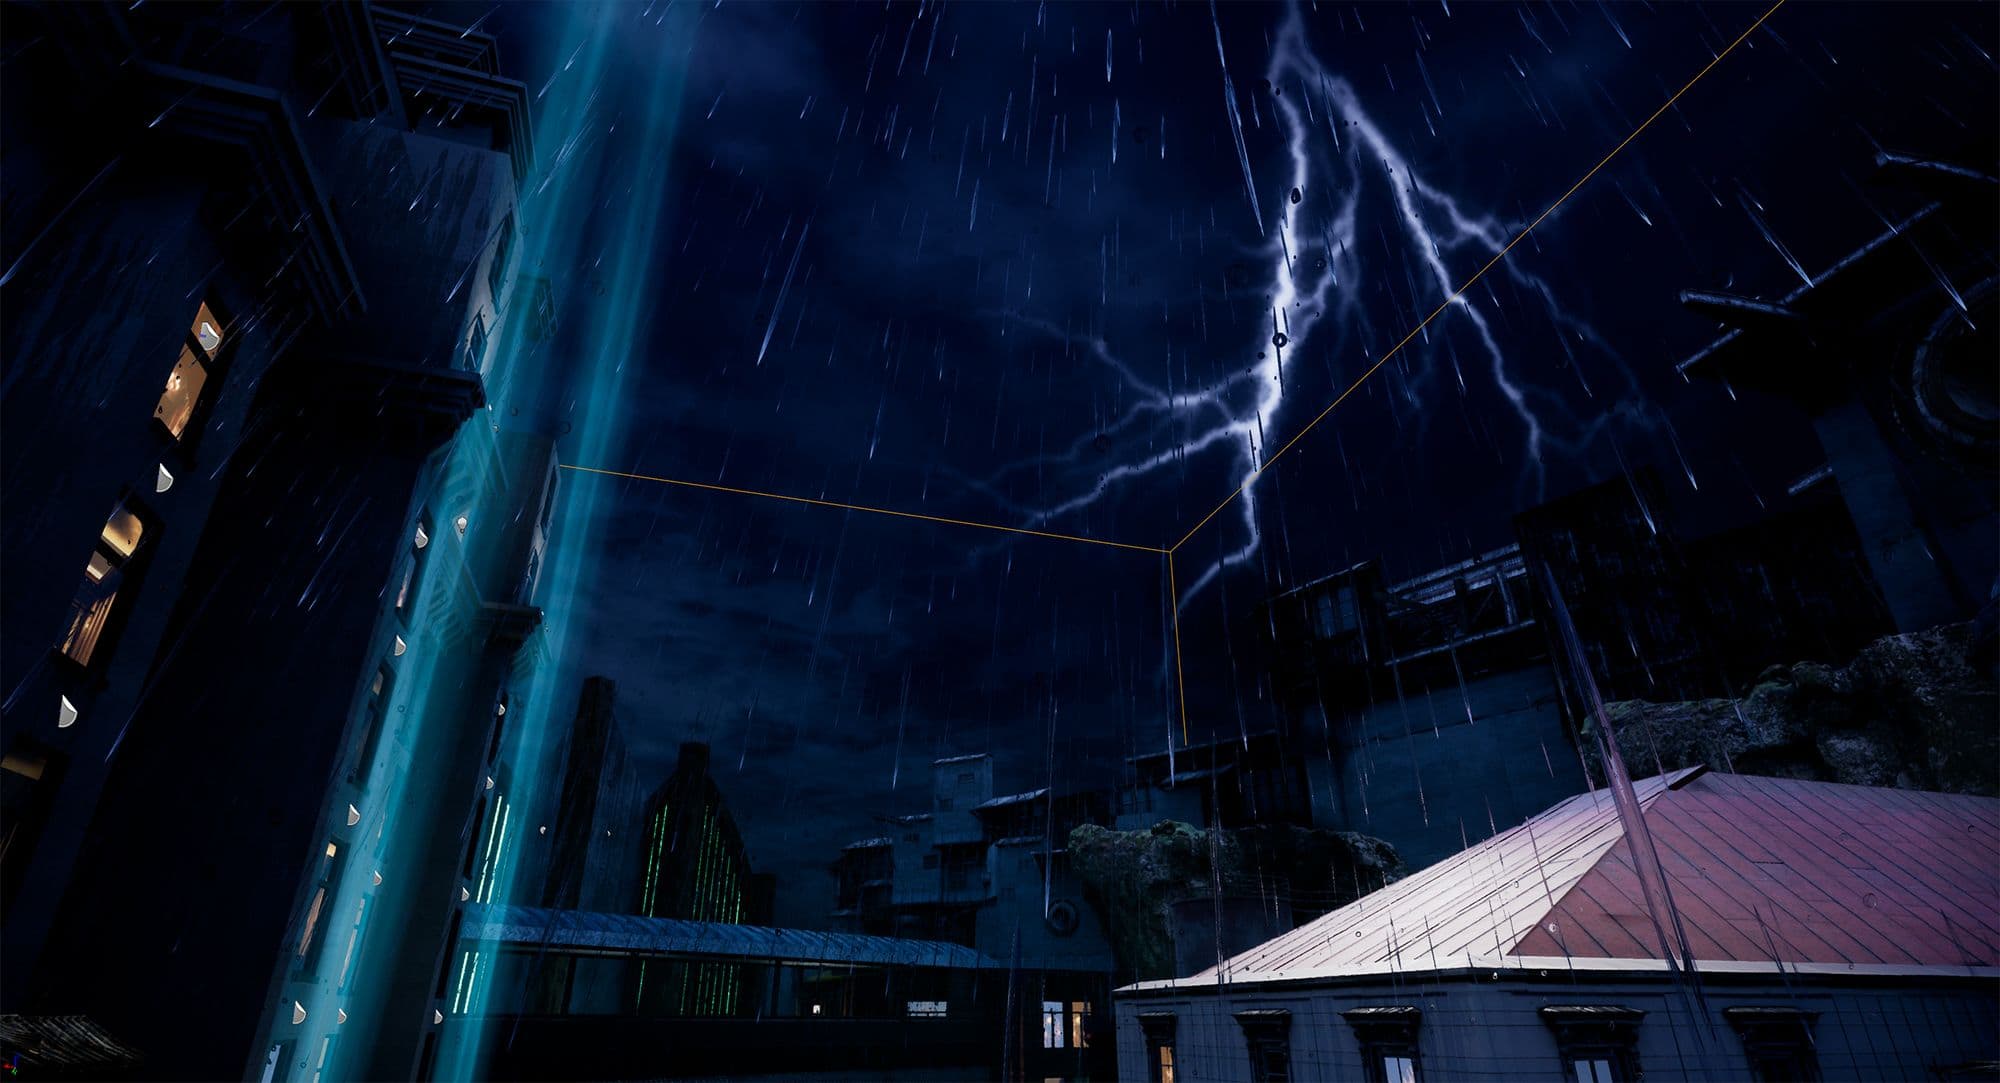
Finally, I also wanted to mention the use of particles over the scene to bring life to the environment. The most important particle systems used in the scene are the rain, the sparks on the broken part of the rails, and some other smoke columns positioned all over the environment. All of the particles were obtained from different sources from the Unreal Engine Marketplace.

At the end, I created the final video with the use of the Unreal Engine Sequencer exporting frames and rendering them into Adobe Premiere after some editing.
I hope you enjoyed reading this post and you have learnt something new for your future projects!
You can see more information about the project on The Rookies. You can also find more of Álvaro's work on ArtStation.