Using Unreal Engine 5 to Design and Create a 3D Environment
In this article, Think Tank Training Centre student Shakhzaman Kasteyev, describes how he created this stunning Rookie Awards entry using Unreal Engine 5.
In this article, Think Tank Training Centre student Shakhzaman Kasteyev, describes how he created this stunning Rookie Awards entry using Unreal Engine 5.
Think Tank Training Centre student Shakhzaman Kasteyev, set his sights on learning Unreal Engine 5's new features and the outcome is a 3D Exterior and Interior Environment with amazing detail. In this article he describes how he created this stunning Rookie Awards entry using Unreal Engine.
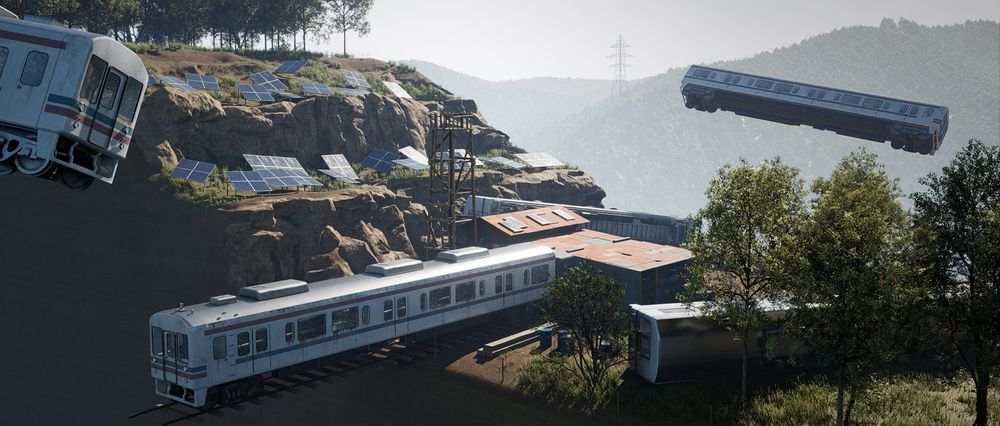
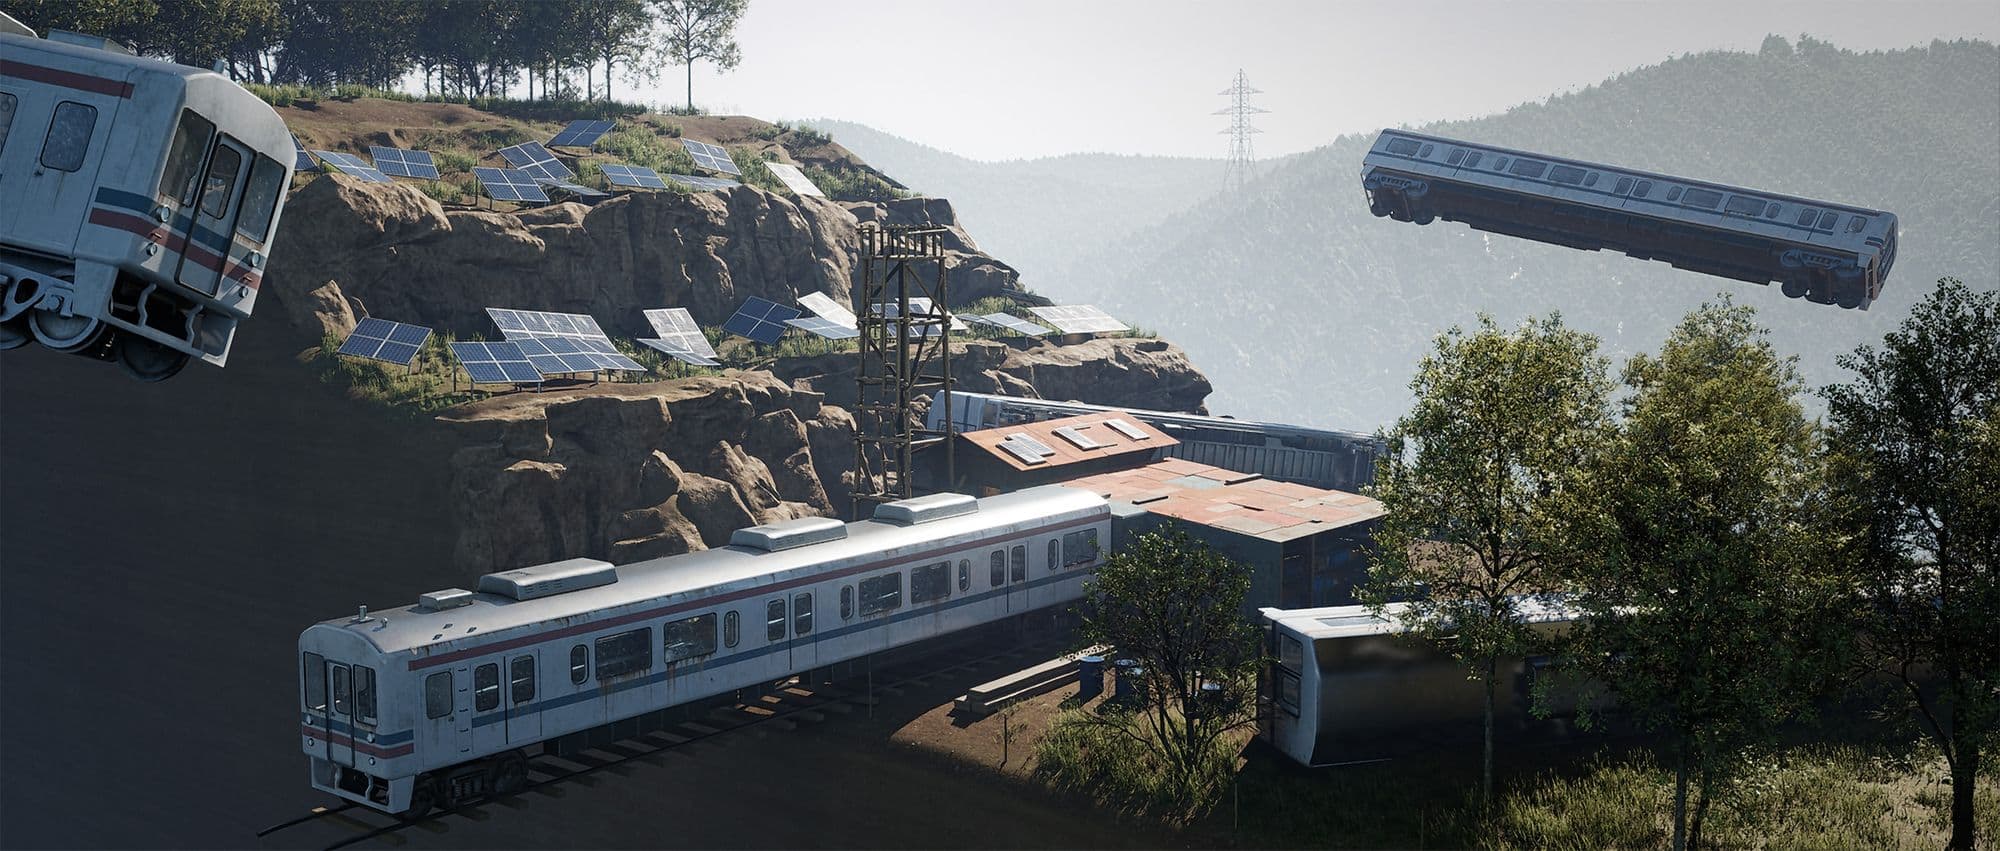
When Evangelion: 3.0+1.0 Thrice Upon a Time was released, I instantly had the desire to recreate one of the locations as a 3D environment. Specifically Kensuke’s house, to which we are introduced in the beginning of the film. Also, I wanted to use Unreal Engine 5 and try its new features, like Nanite and Lumen.
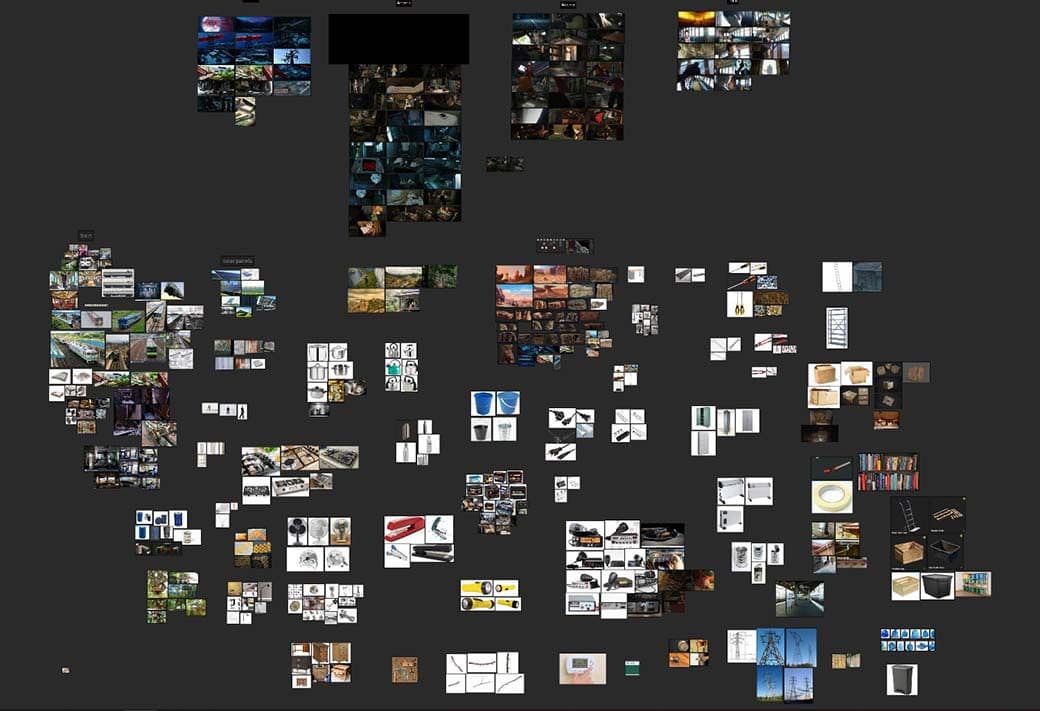
It is always good to gather as much reference as you can. Whenever you feel lost you can take a look at them and get the answer you’re looking for. This also helps with pushing the details further and catching things you might miss.
I use PureRef as my main tool to organise any reference I need. It lets me put images on a board that always stays on top of the screen. I try to gather both real and 3D images, as well as any camera shots or lighting inspiration.
Pinterest, ArtStation and Instagram are great websites to search for what you need, as well as the usual Google Images. I also sometimes go out and take pictures of various things and put them on my board as well.
I always take a look at The Beauty Of channel whenever I can. They edit various media into one video and perfectly captures the feeling and the mood of the original inspiration, and Evangelion was there of course.
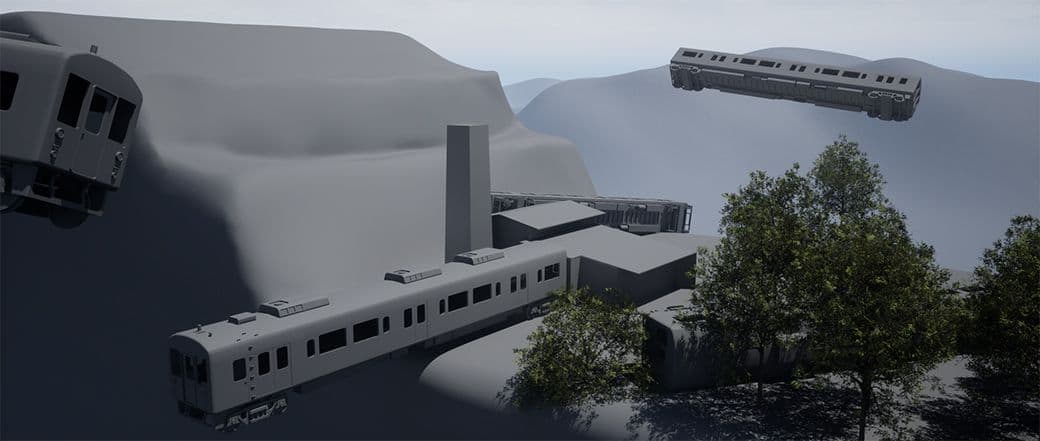
I began with blocking out my objects in the scene with simple cubes, starting with the big ones. It is important to have a base mesh of a character to get the proportions right. A cube to scale can work too. Ideally at this stage you want to block out both your camera shots as well as the lighting. They don’t have to be perfect, but just enough to get an idea.
In my case, I quickly assembled with simple shapes the train and house in Maya, and brought that to Unreal as one mesh. I grabbed some trees from SpeedTree and put them in as well. Once I was satisfied with the placement and size of my objects, I began modeling very simply the rest of the remaining objects to scatter them around.
For most of the objects it was just straightforward modeling and sculpting but I am gonna go in-depth with some of the main ones as well. I also started using one of UE5’s new features: Nanite.
Nanite allows millions and millions of polys to run real time and be optimised as well. I believe this will help push video games' quality even more. You can enable it when importing a mesh or in the object’s settings. I ended up using it on most of my meshes but it had some limitations. At the time of writing this article, it can’t be used on animated objects and it can’t work when vertex blending, so it mostly runs on Static Meshes. Despite this, there are workarounds. Here you can watch The Matrix Awakens tech demo from Epic Games, where they built a city using Nanite meshes.
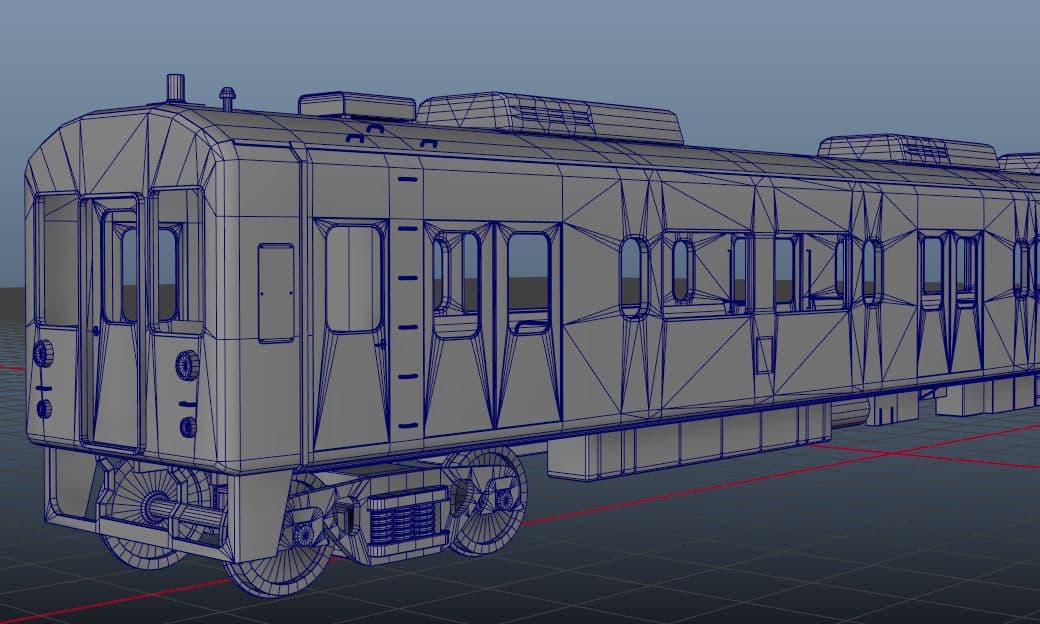
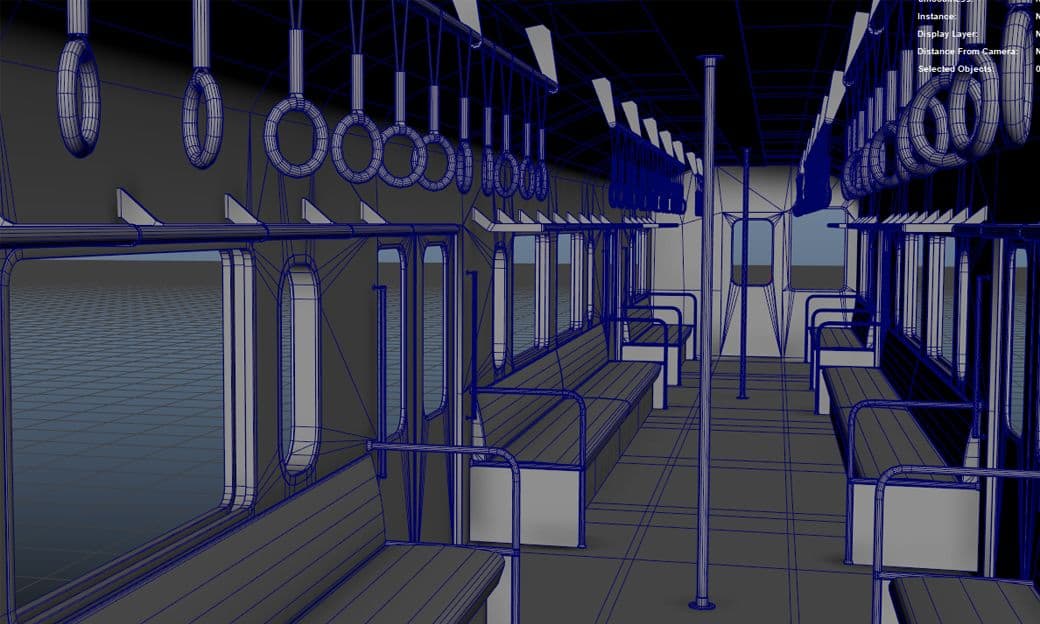
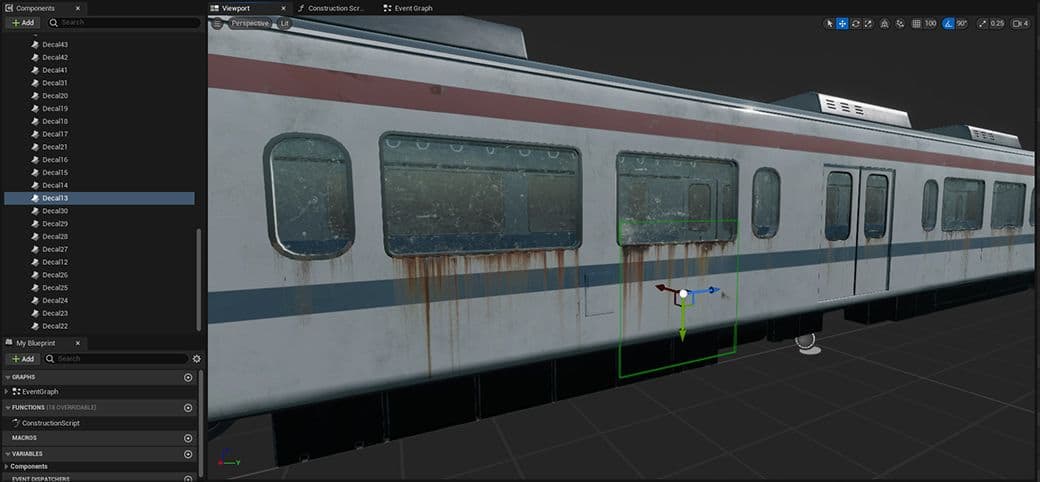
The first thing I focused on detailing was the train. In my reference board I had various images of Japanese trains as well as blueprints, to give me an idea on how the train is constructed. Short documentaries about the fabrication were helpful with that too.
I started by dividing it in sections: interior, exterior and the undercarriage. I wasn’t planning to showcase the interior, as I needed it just for the silhouettes, so I detailed it less. Because it consisted of many repeating parts, for example the handles, I could model a specific object once, UV it, and duplicate it around. This really saves up time when making big scenes.
Outside, it was a similar process for things like the windows and the doors. Overall I was looking to break up the main train body with panels, handles and similar stuff. For the undercarriage it was just making one set of wheels and other objects then duplicating them around.
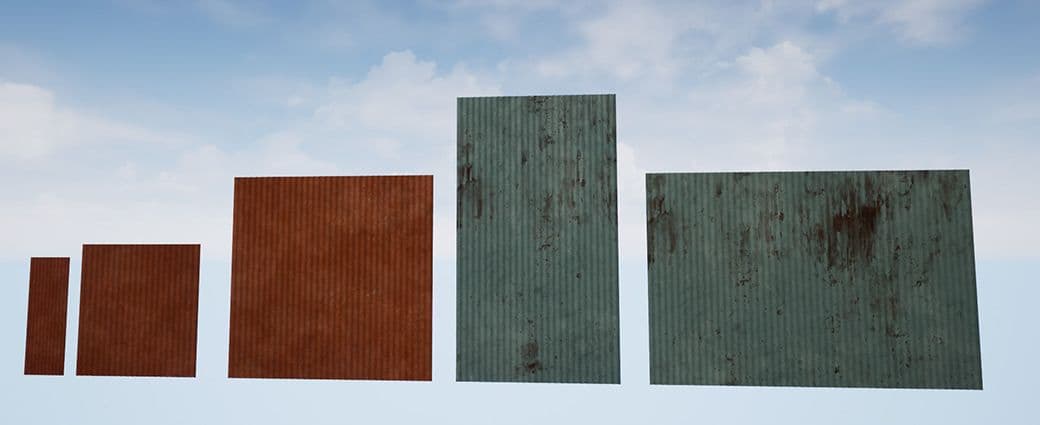
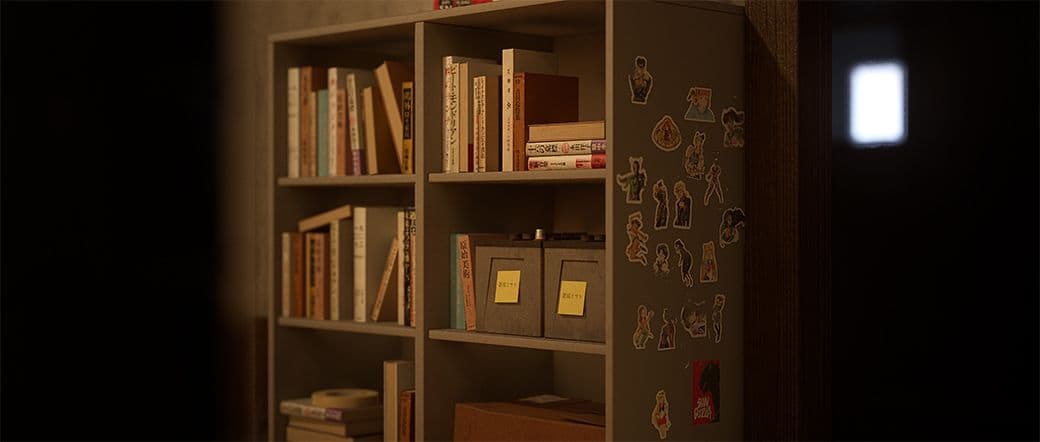
Once I was sure about the proportions of the house and had the wooden columns in place, I made a few metal sheets in different sizes. Because they were individual pieces, I could stack them together in layers and get that “patched” look.
There were many props inside the house, and I tried to re-use as much as I could to speed up the process. For things like the books, I made nine of them in different sizes and later used different textures to create even more variations. Other objects were just being scaled and rotated slightly to make them seem different.

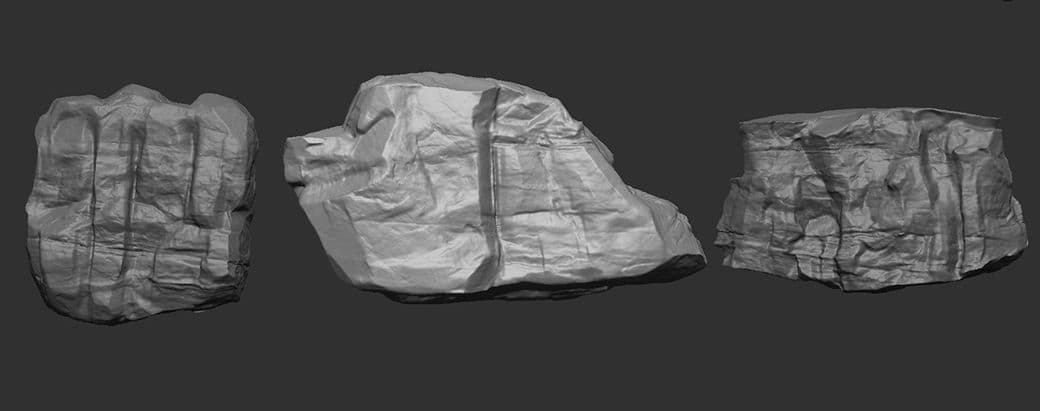
I first tried to sculpt the rocks in the actual ground mesh but it didn't really work, so I made a few individual rocks and jammed them together. In ZBrush, you can make a sphere and take something like the TrimSmoothBorder brush, put a square alpha and just start destroying the mesh until you get the rock shape you need.
Also to get some detail in, I downloaded a couple of Height Maps from Textures.com and projected them around the rock with the Displace brush.
The foliage was a mix of different tools. As I mentioned before, I used SpeedTree for some trees in the foreground. I wanted to have 4 different variations and that can be easily done with the program. There’s a button called “Randomize” which, for example, changes the location of the foliage or branches.
Around this time, Quixel released “Megascan Trees”, featuring season, health and wind parameters. They look great and are very optimised. I mixed them with my trees from SpeedTree, and used them in the background to create the forest.
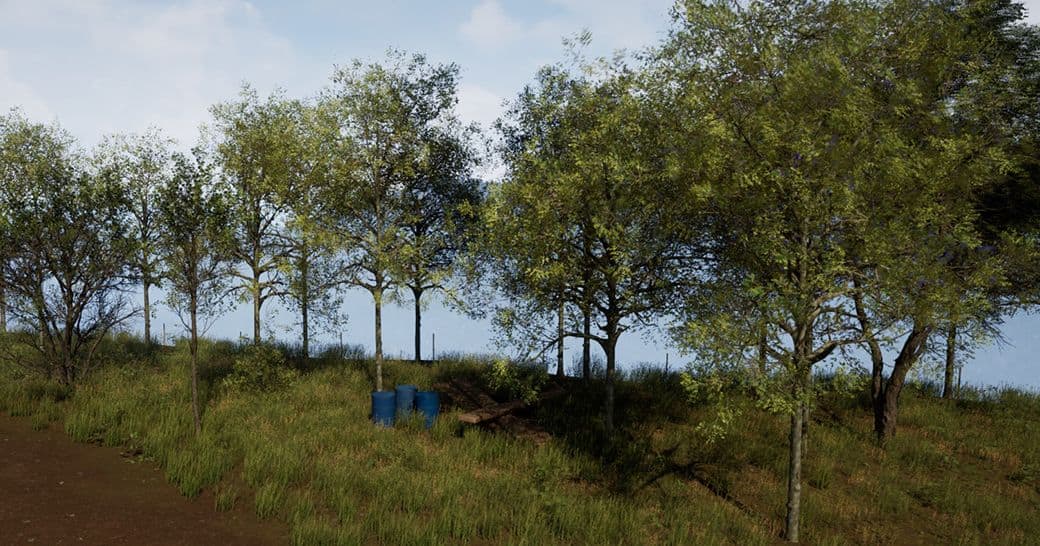
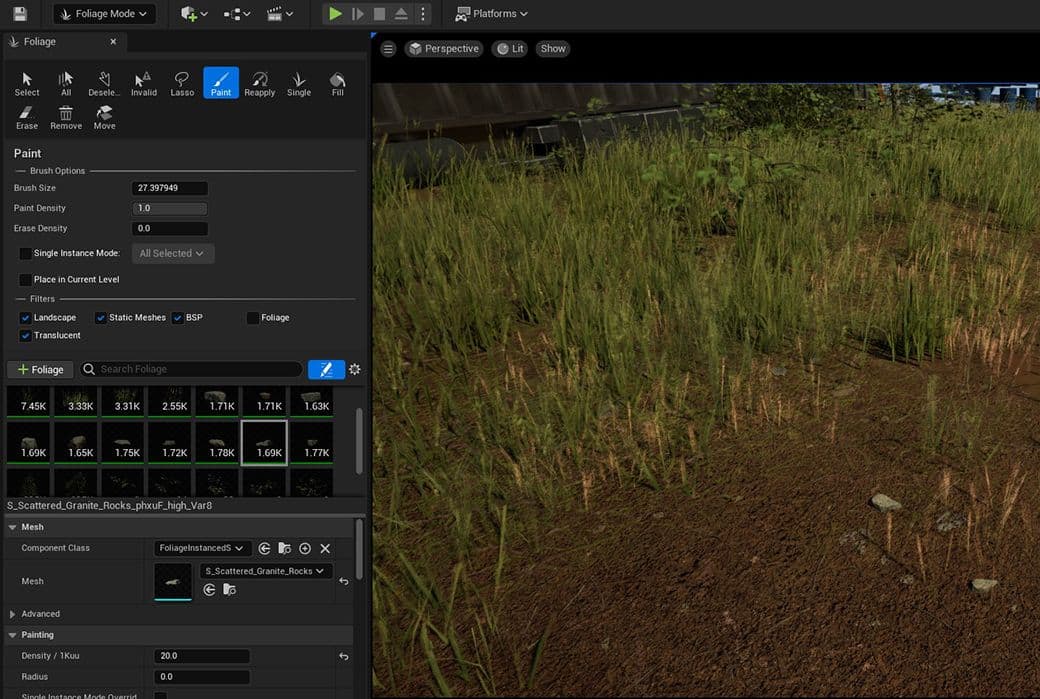
Instead of placing plants one by one, Unreal has a Foliage mode that can add everything quickly. You can customise things like the density, scale and rotation. This also works for other meshes and it’s not restricted to foliage, but anything you want to scatter. For example, I wanted to have small rocks and branches lying around on my ground, so I grabbed them and used the Foliage tool to place them around. You can even select multiple meshes at the same time!
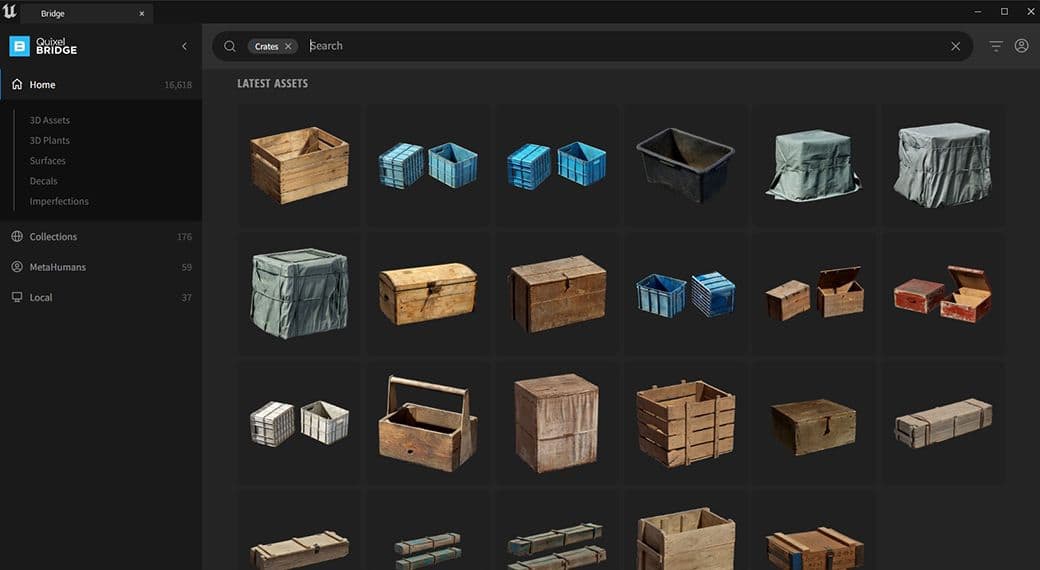
When I was done modeling my main pieces, it was time to add additional objects to fill the empty spaces and add variety. I did model some, but also used Quixel Bridge to add a couple of crates. Also known as Megascans, it’s a big collection of photo scanned 3D objects and textures. Usually I aim to model everything I can, but if it’s not the main focus of the scene, then I think it’s totally fine to use tools like Bridge.
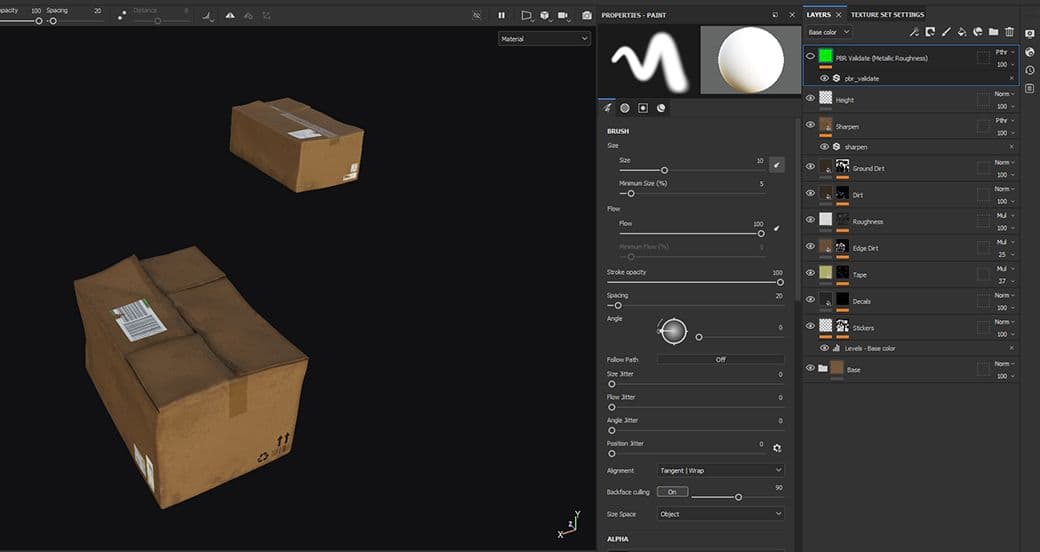
For almost all the objects in my scene, I ended up using Adobe Substance 3D Painter to texture them. It is a powerful program that can achieve great results in no time. I will explain the general process of how I texture an object.
To start, I apply the ACES LUT to match Painter’s colour space to the one in Unreal. After that, I usually bake the maps that I need in Marmoset Toolbag, but that can be done in Painter too with the Bake Mesh Maps button under the Texture Set Settings. I usually don’t change any settings in it apart from making the Output Size double of my project size (if the project is 2k, I bake at 4k).

You can start from an existing Material or Smart Material, if you find any that matches your needs. But I mostly started everything from scratch in the project. After putting a solid colour and changing the Roughness and Metallic to what I need, I create a new layer just for additional roughness. This could be fingerprints, smears and dust among other things. Then, I use the same process for height and repeat everything until I’m done. To add dirt, I make a solid colour and use a smart mask from the many ones available in the program. And as a final touch I use a Sharpen filter to make the details more clear.
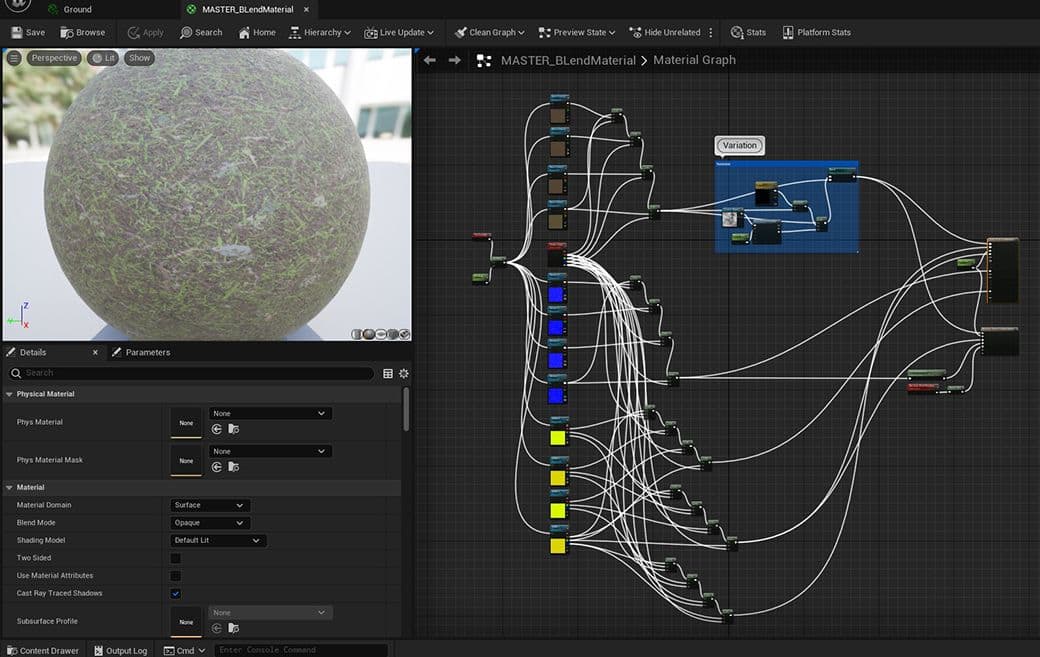
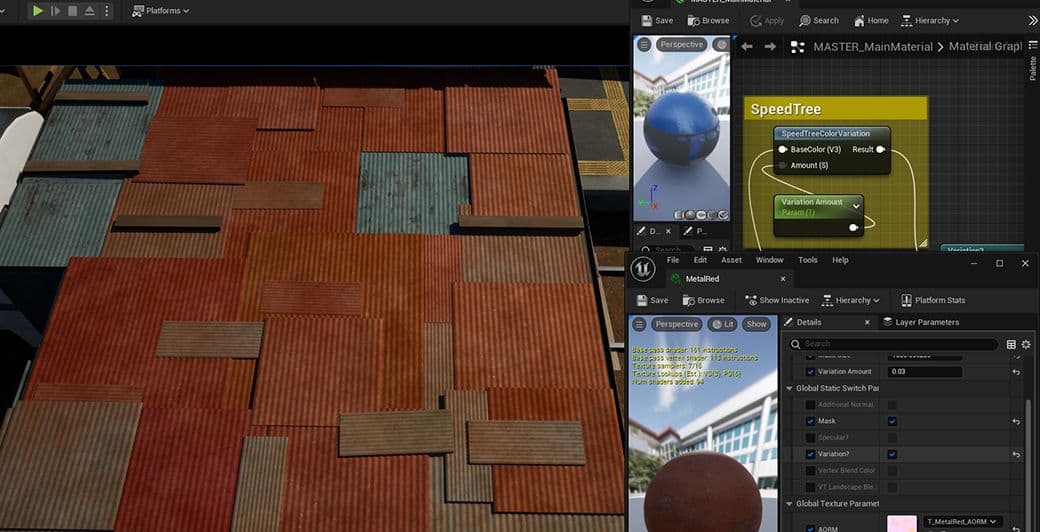
When using a texture on a giant object, you will see it repeating a bunch of times and this doesn’t look good. To avoid that I usually use a Vertex Blend, which lets me blend between two or multiple textures on one object. You can import two textures and plug them into a LinearInterpolate node, and plug a Vertex Colour into the Alpha. Unreal Engine's website has some information on it as well.
Additionally, I can add more variation with decals. They don’t have to be constrained to one model and can be repeatedly used on different objects. With them I added rust to my train, and dirt in some other places.
To have some subtle colour variation between multiple instances of the same object, you can use a simple node called SpeedTreeColorVariation. It slightly changes the hue, so make sure to have a very low amount.
Since I was having multiple shots in different settings, I had to do multiple lighting scenarios. Lumen allowed me to do that quickly and dynamically. My exterior was only lit by the default sky, and no additional lights were needed. Same thing with my interior scene, where without counting the small lamp, I had one light filling the room as well. Lumen does bouncing and indirect lighting without needing to bake.
When I was planning my shots, I often looked back at my reference. I really wanted to retain the same style of the movie, and recreate this “chaotic calmness” in the scene.
Usually when showcasing a 3D environment, having a camera that moves around will greatly help present your scene. I decided to go against that, where the camera was mostly still but had movement in the frame (train spinning, tree moving …). I noticed that the director and creator Hideaki Anno often does this. I was unsure about it, but it worked perfectly for what I wanted.
I greatly recommend William Faucher’s channel. He has plenty of videos about making Unreal look cinematic.
Ultimately what drove me forward was experimentation. It allows me to stay creative and discover new things. Taking big challenges seems daunting but it's always rewarding. Also never forget about feedback from mentors, colleagues and friends, it's very valuable and helps you push your work forward.
Special thanks to both The Rookies and Think Tank. You can find more of my work on: The Rookies | ArtStation | LinkedIn | Instagram