
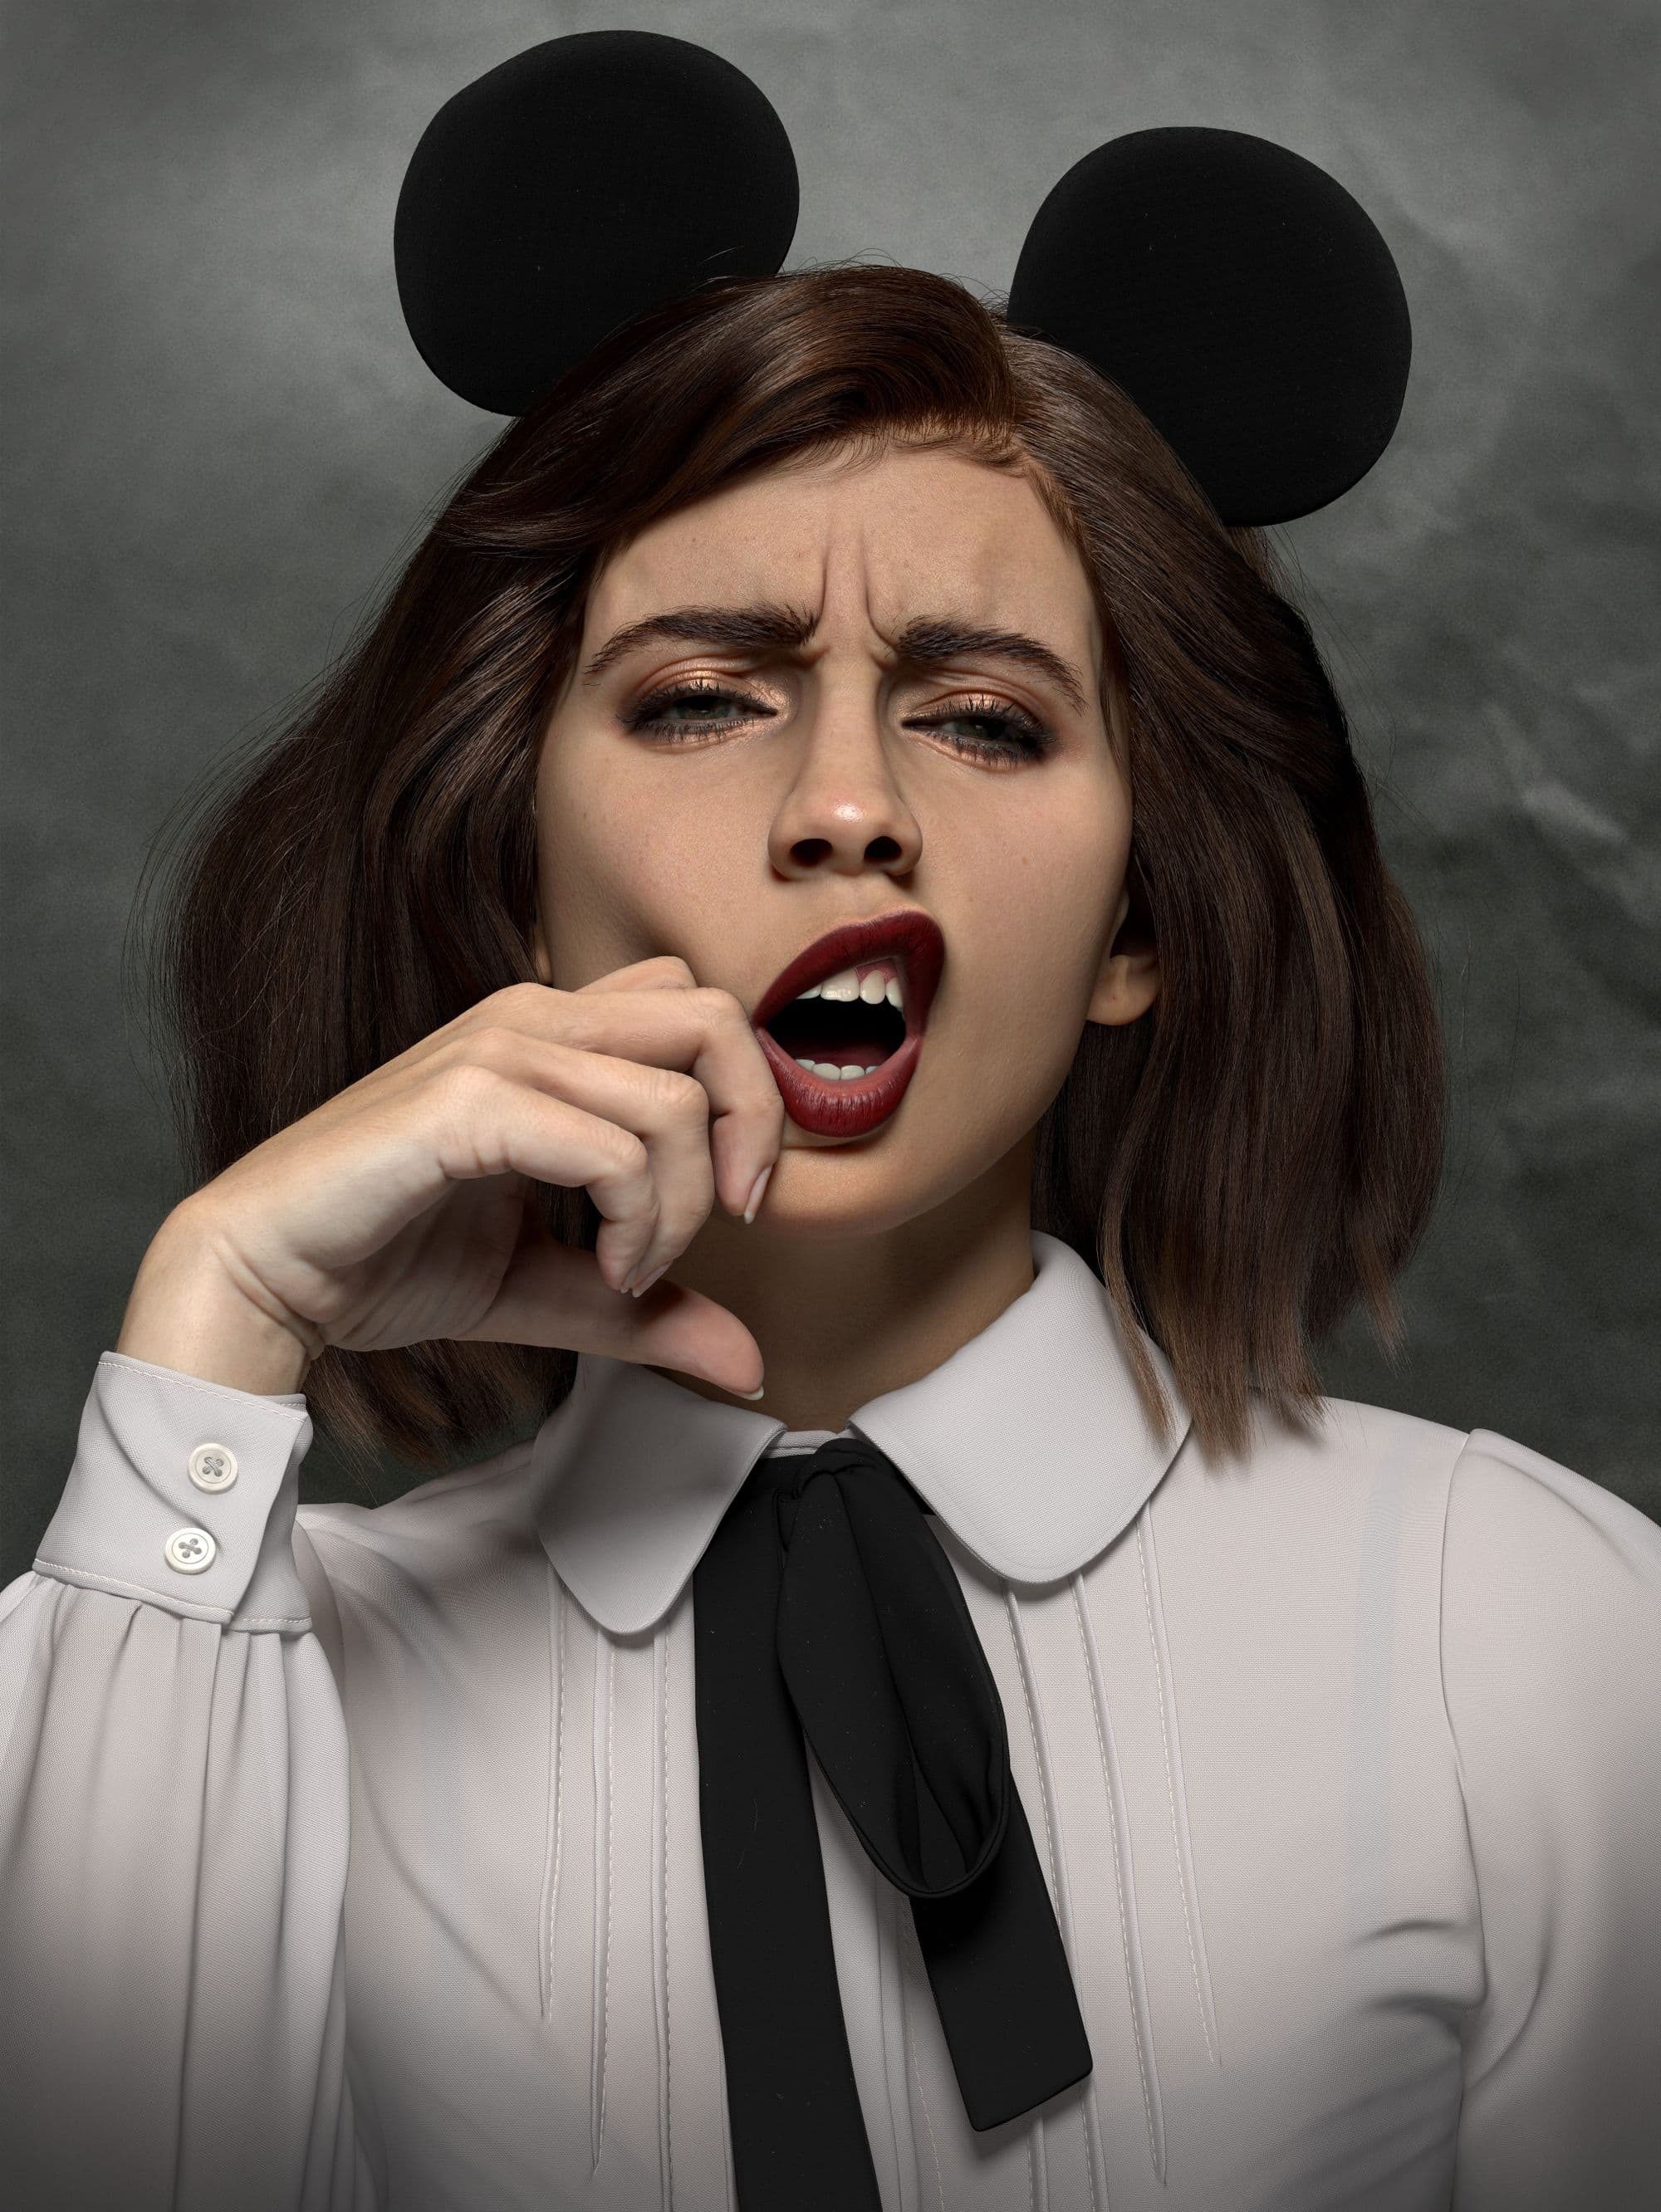
Creating a Realistic 3D Character from Photography
Nayoon Levitin is a Freelance Graphic Designer and Student at Think Tank Training Centre. In this article she shares how she approached the creation of a realistic 3D character from a photograph.
Nayoon Levitin is a Freelance Graphic Designer and Student at Think Tank Training Centre. In this article she shares how she approached the creation of a realistic 3D character from a photograph.

Nayoon Levitin is a Freelance Graphic Designer and Student at Think Tank Training Centre. We were so impressed with her character "Mad Mouse", and asked her to share how she approached the creation of a realistic 3D character from a photograph.
In this article, you will learn how to sculpt realistic details whilst also learning how to study anatomy and facial expression.
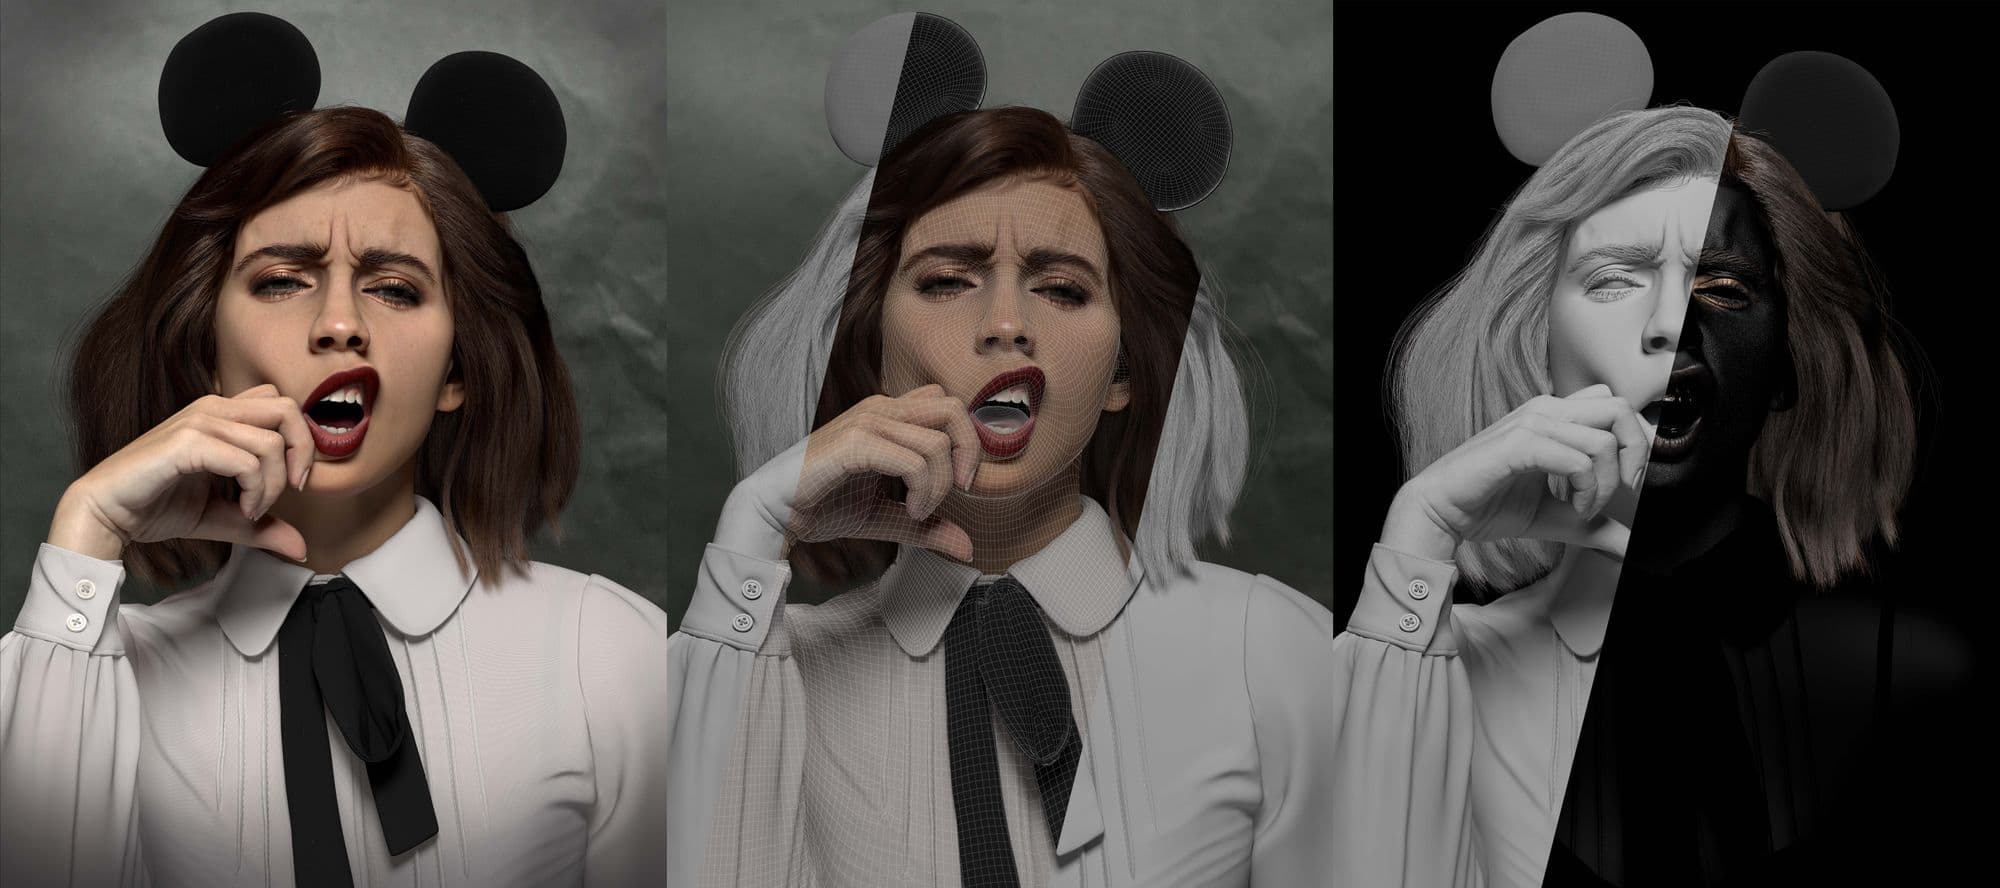
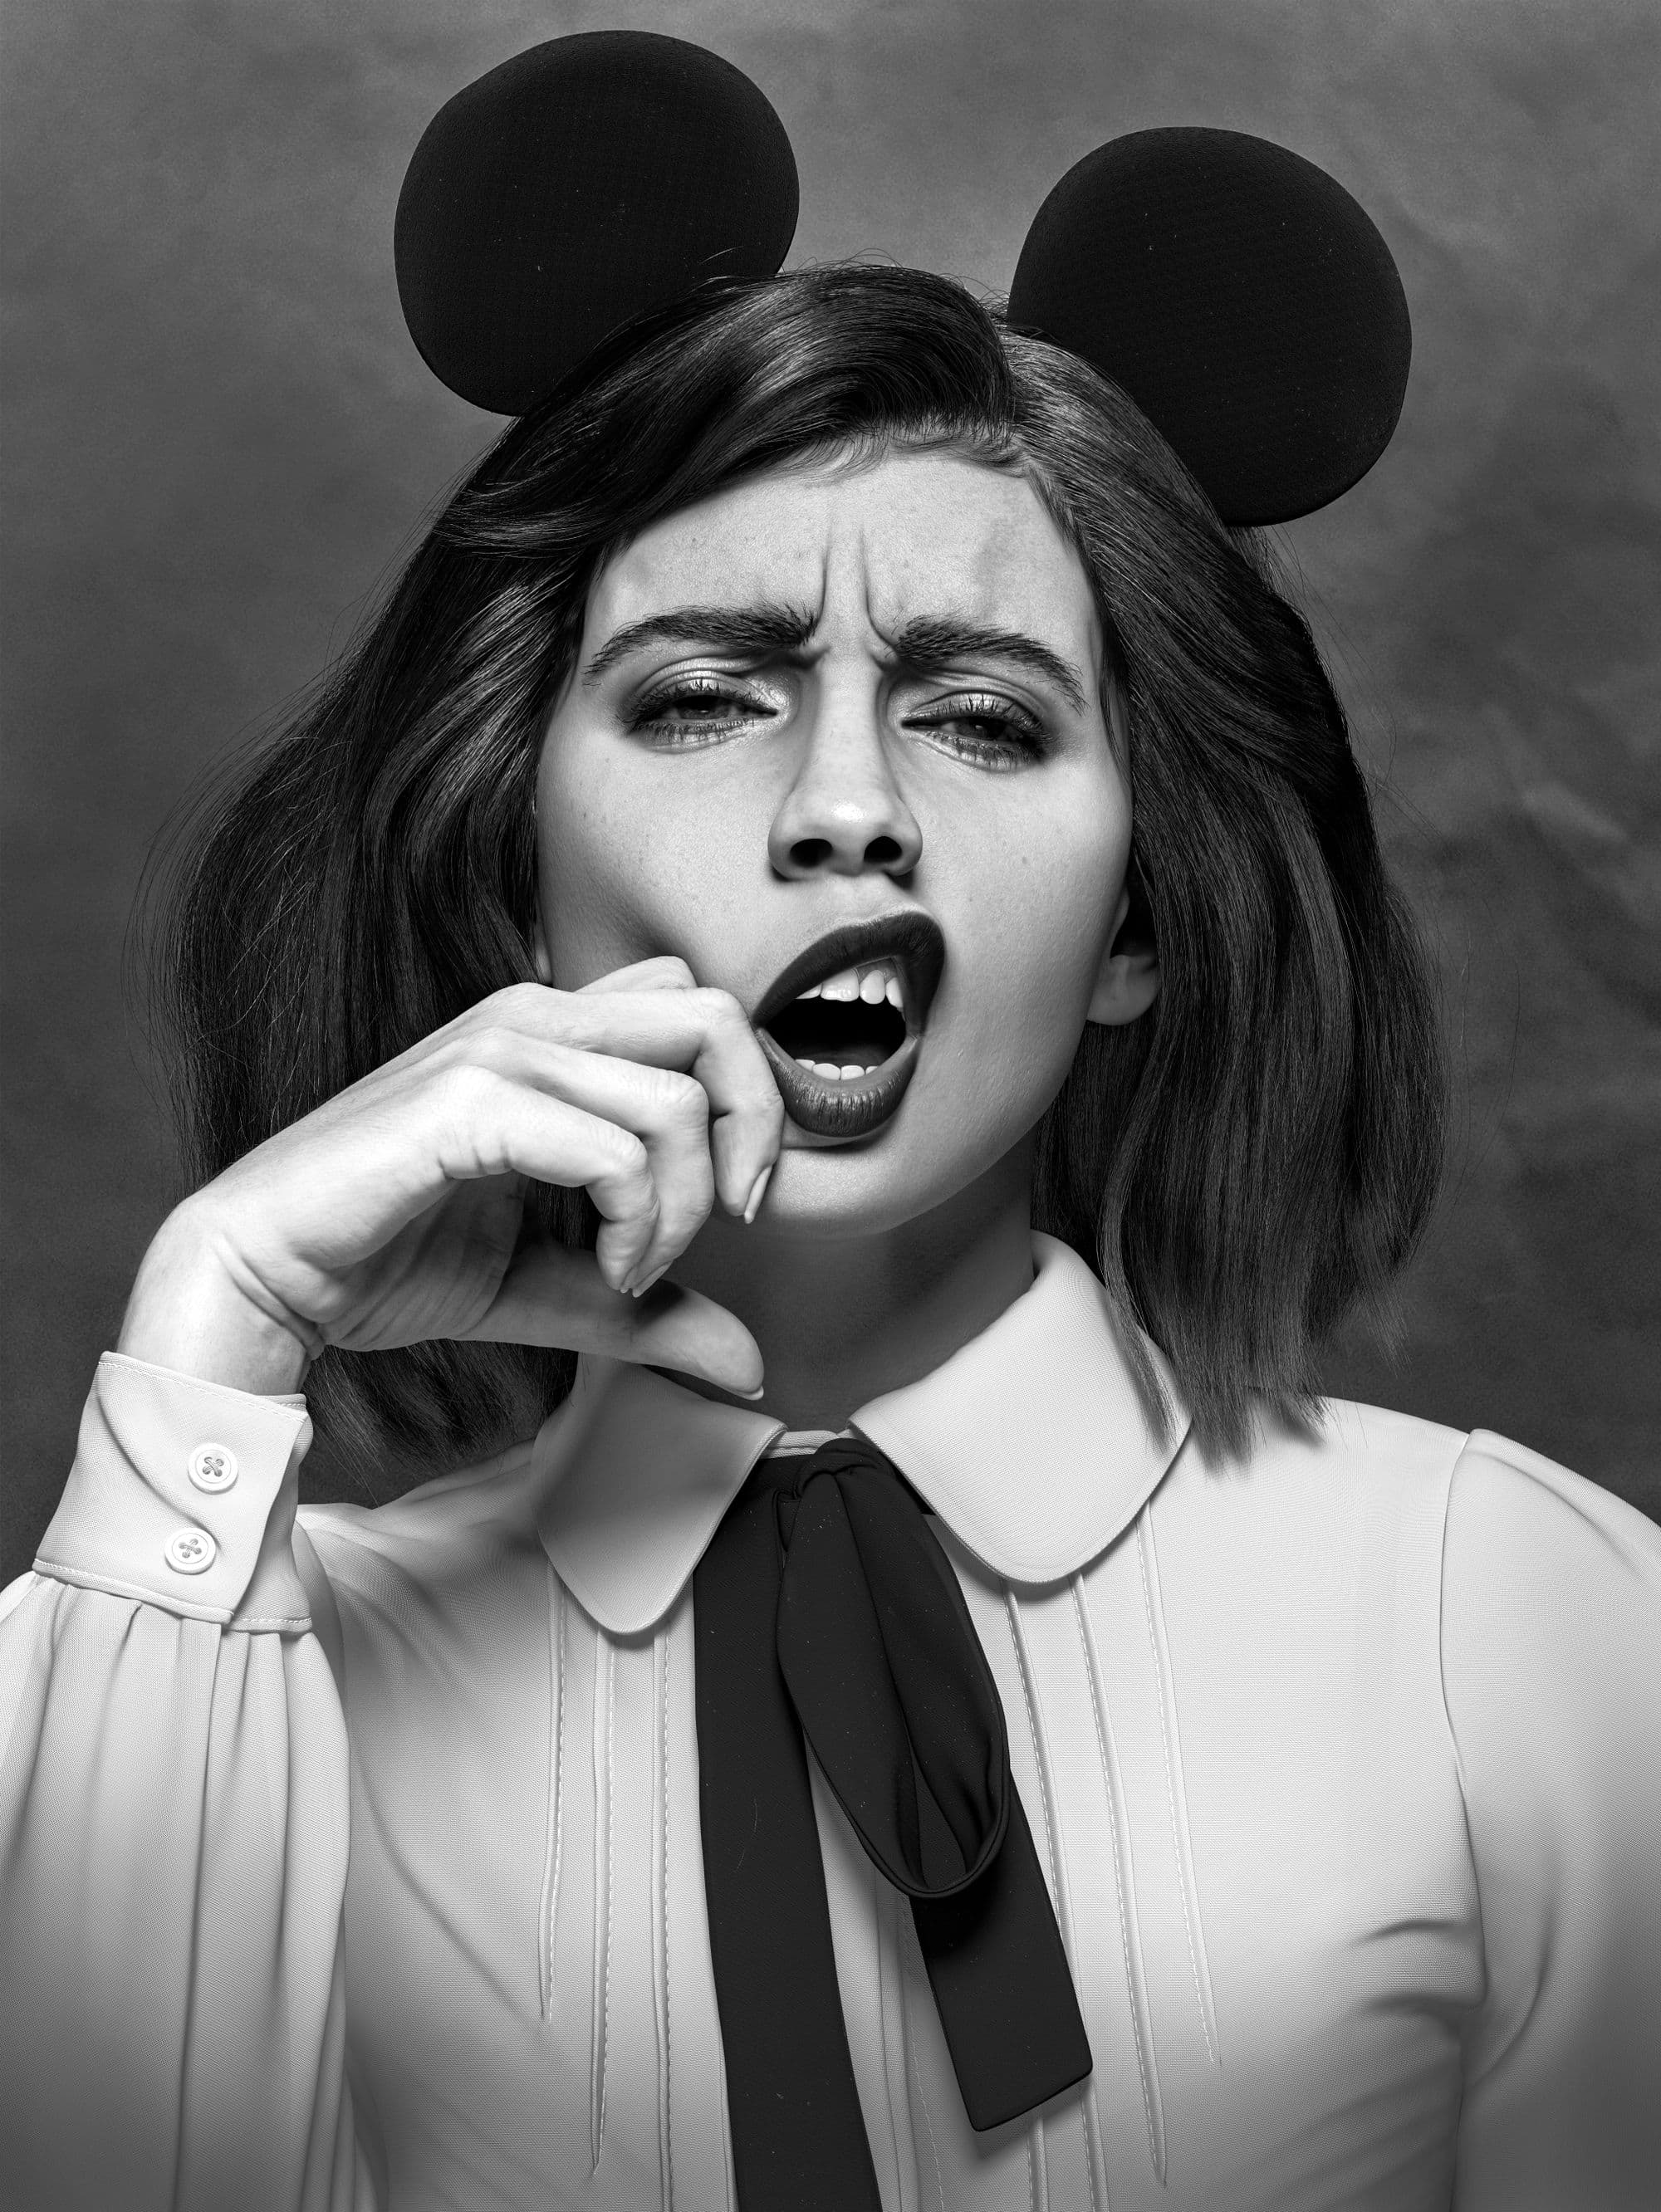
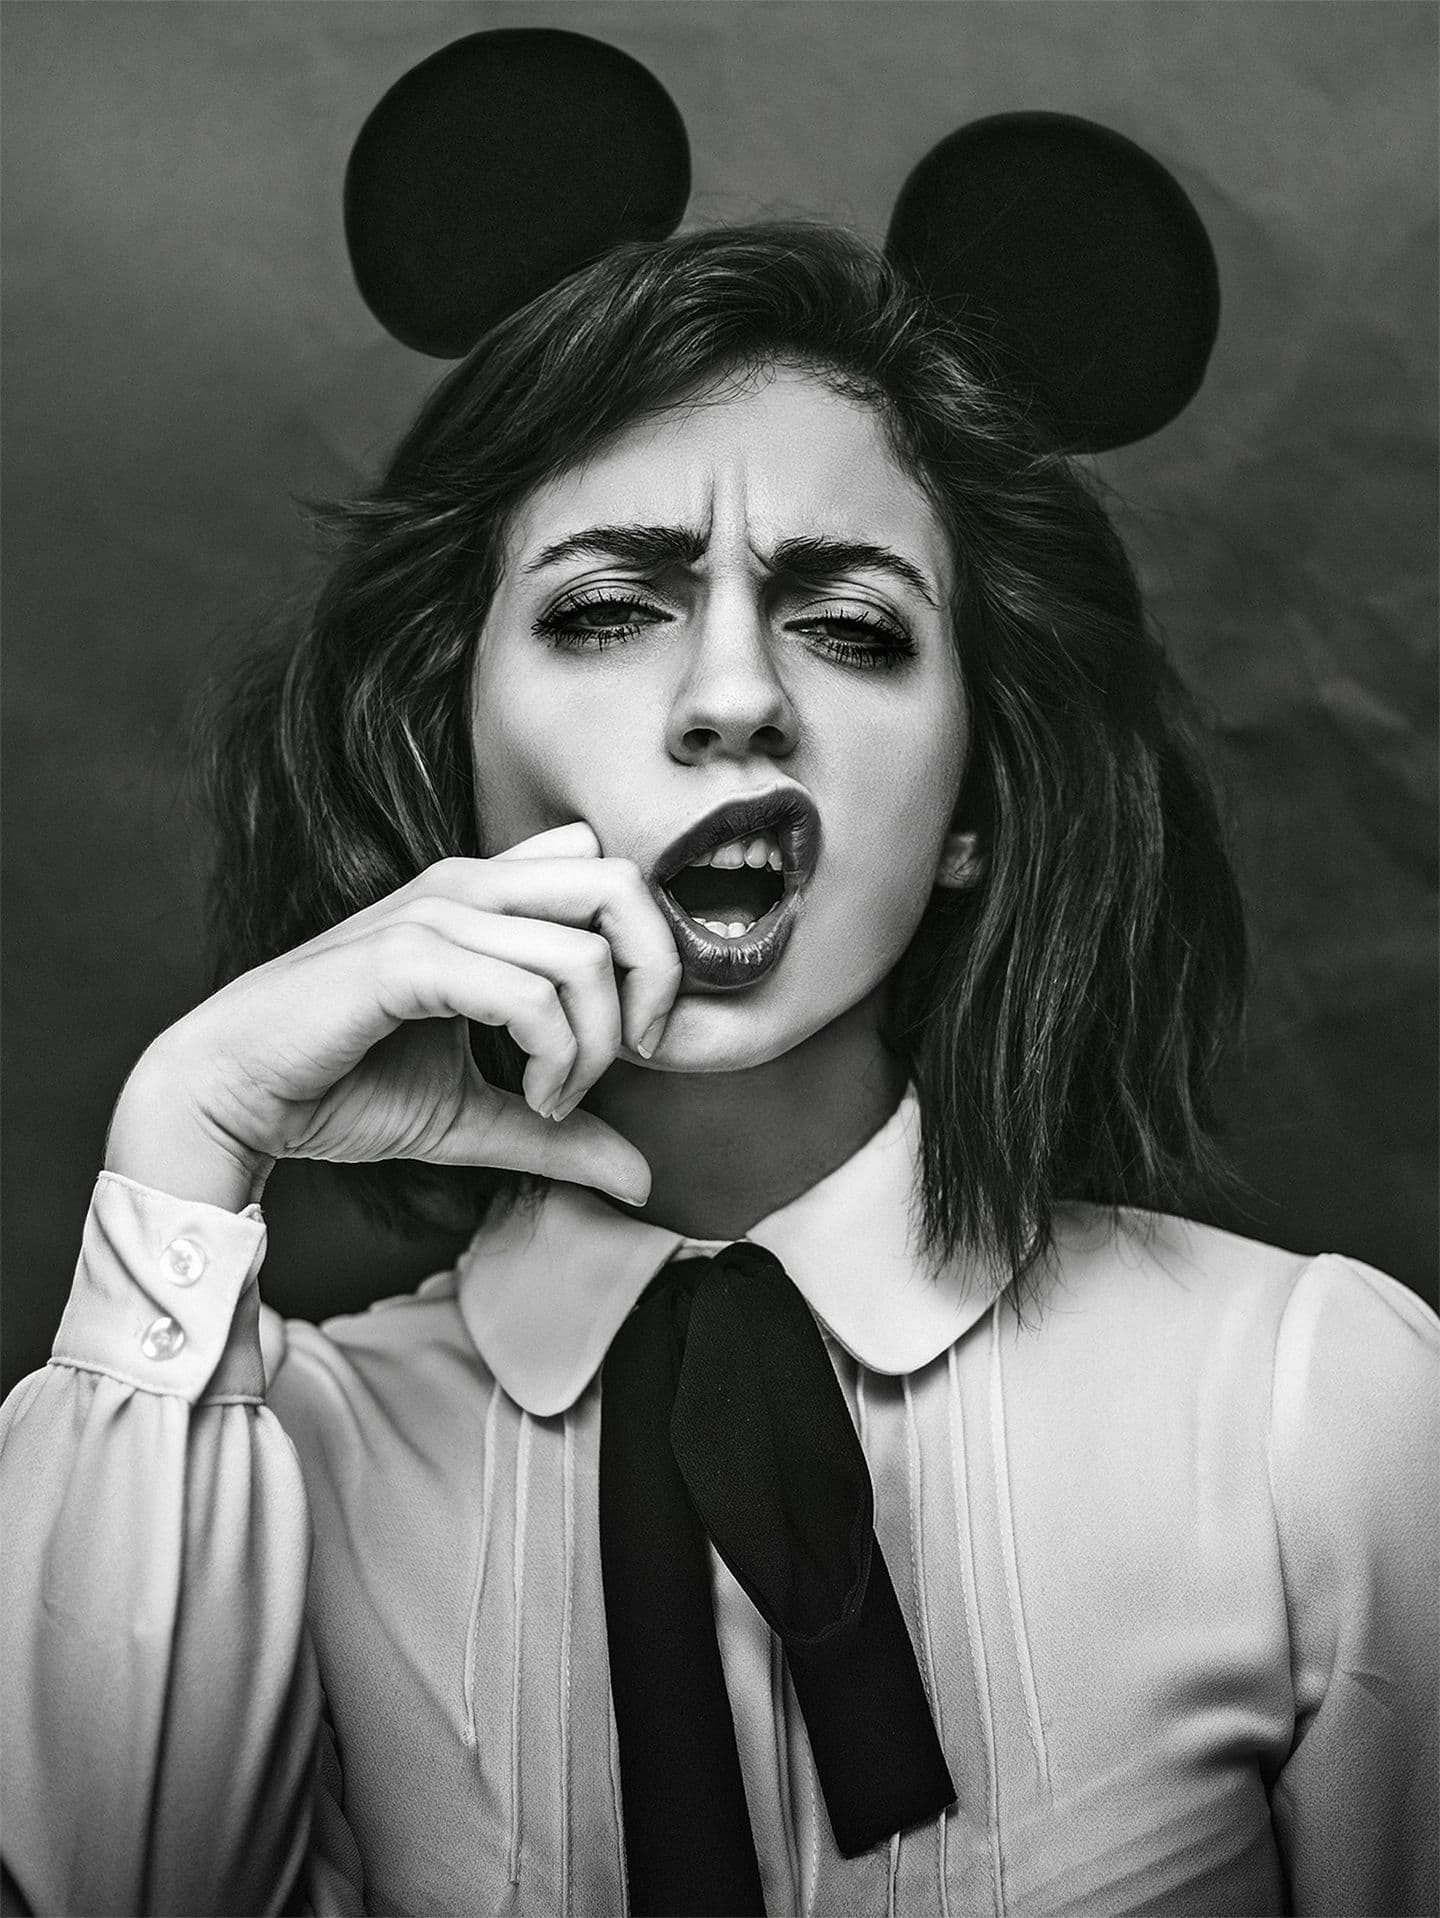
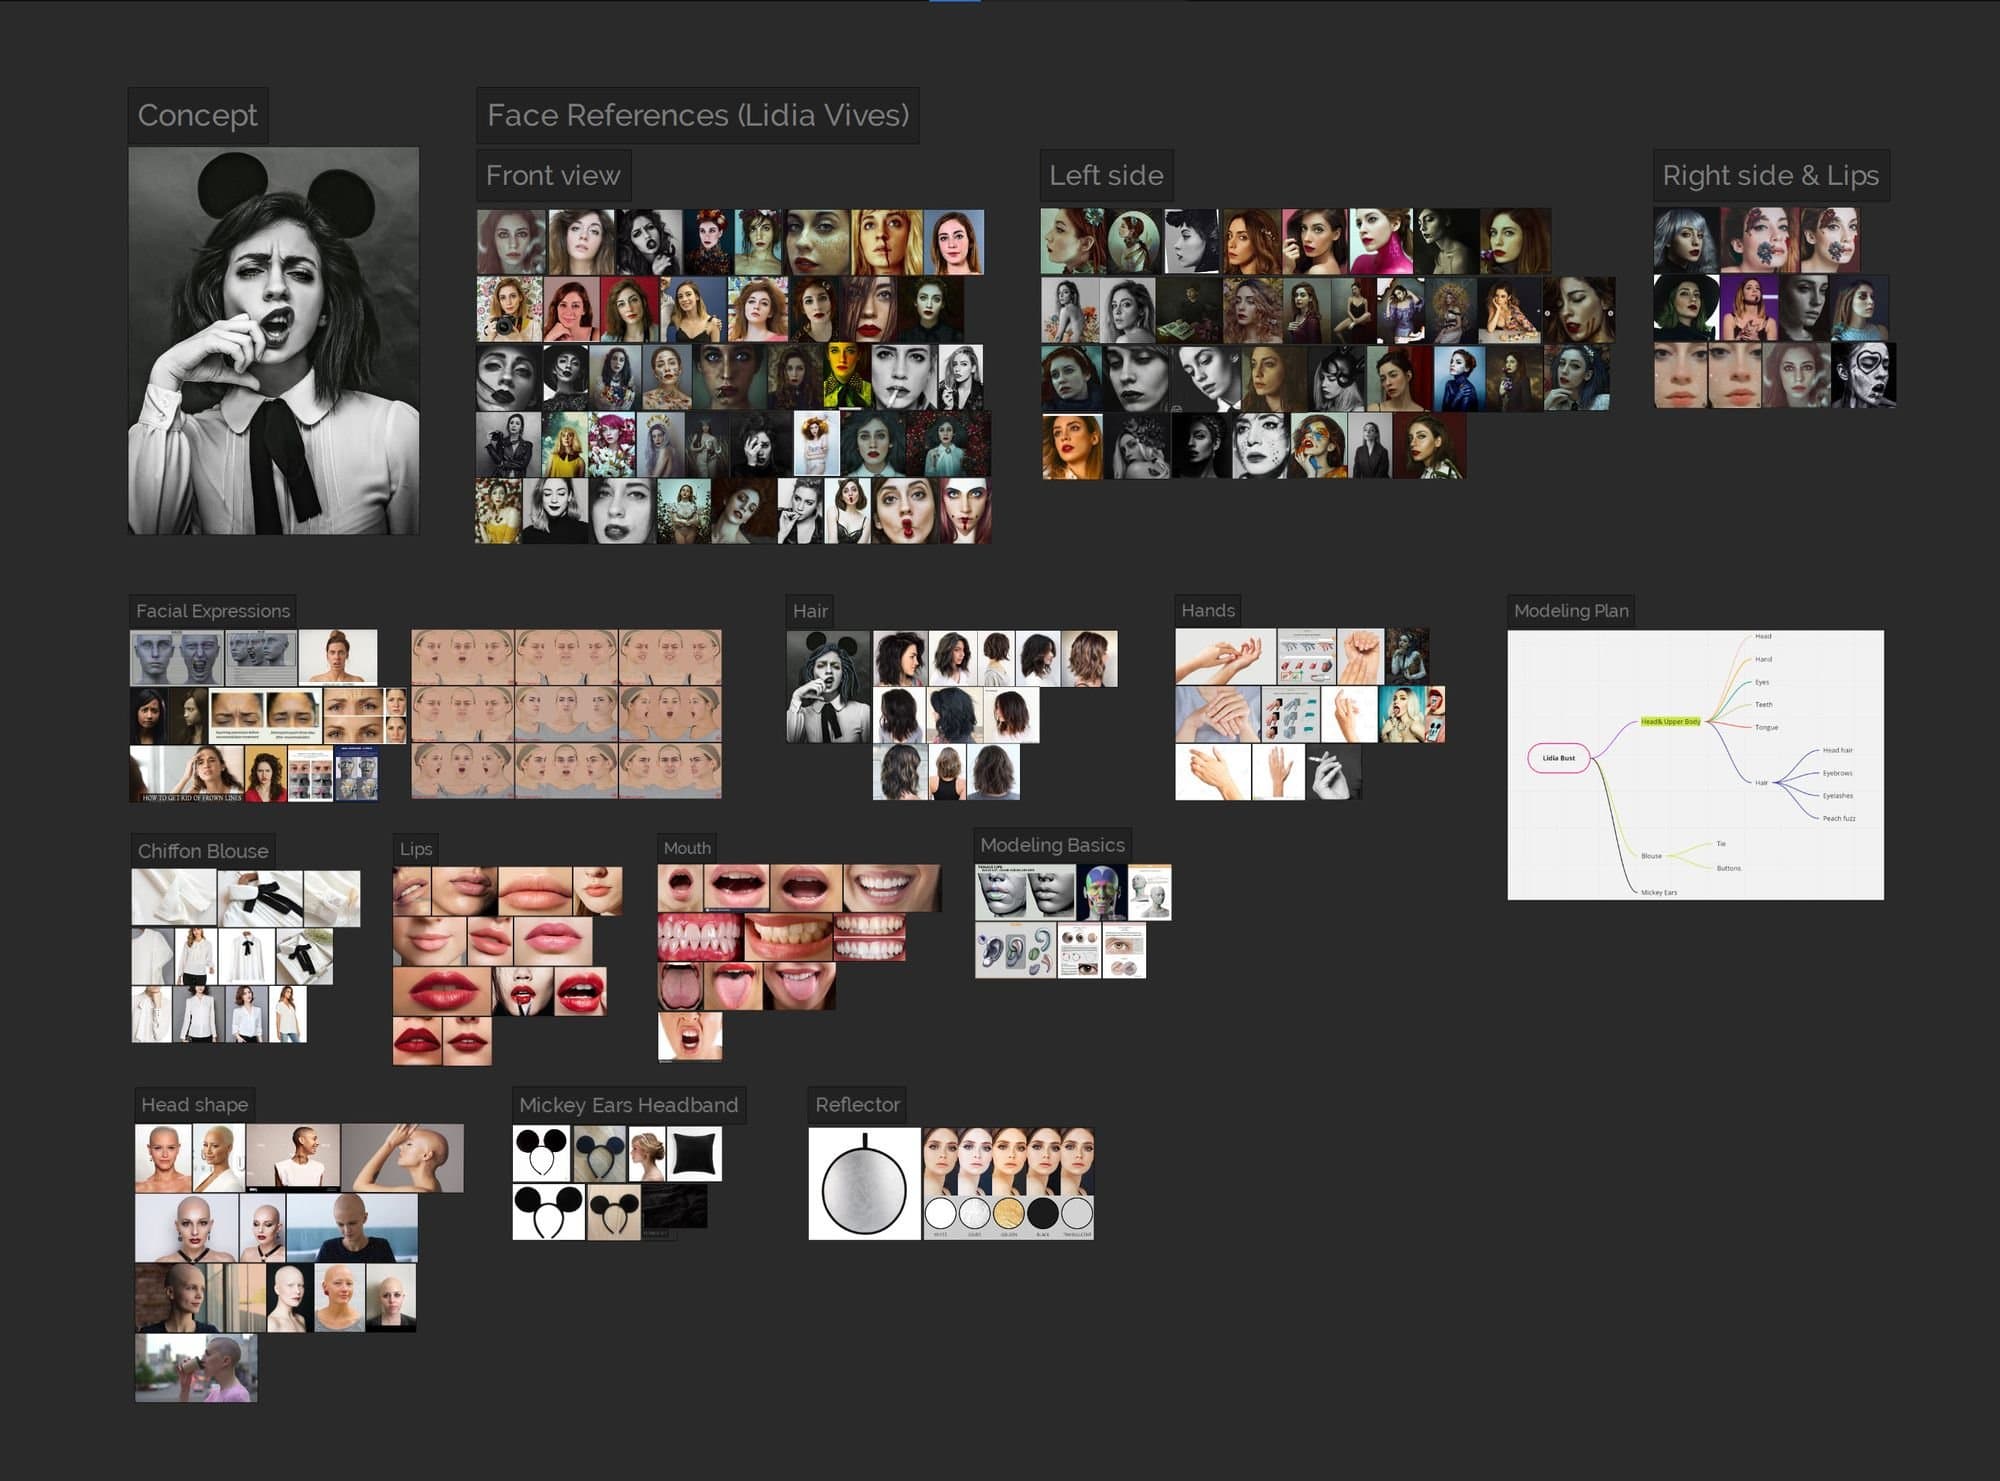
The concept was inspired by Lidia Vives work “Mad Mouse.” She has many creative photographs on her website.
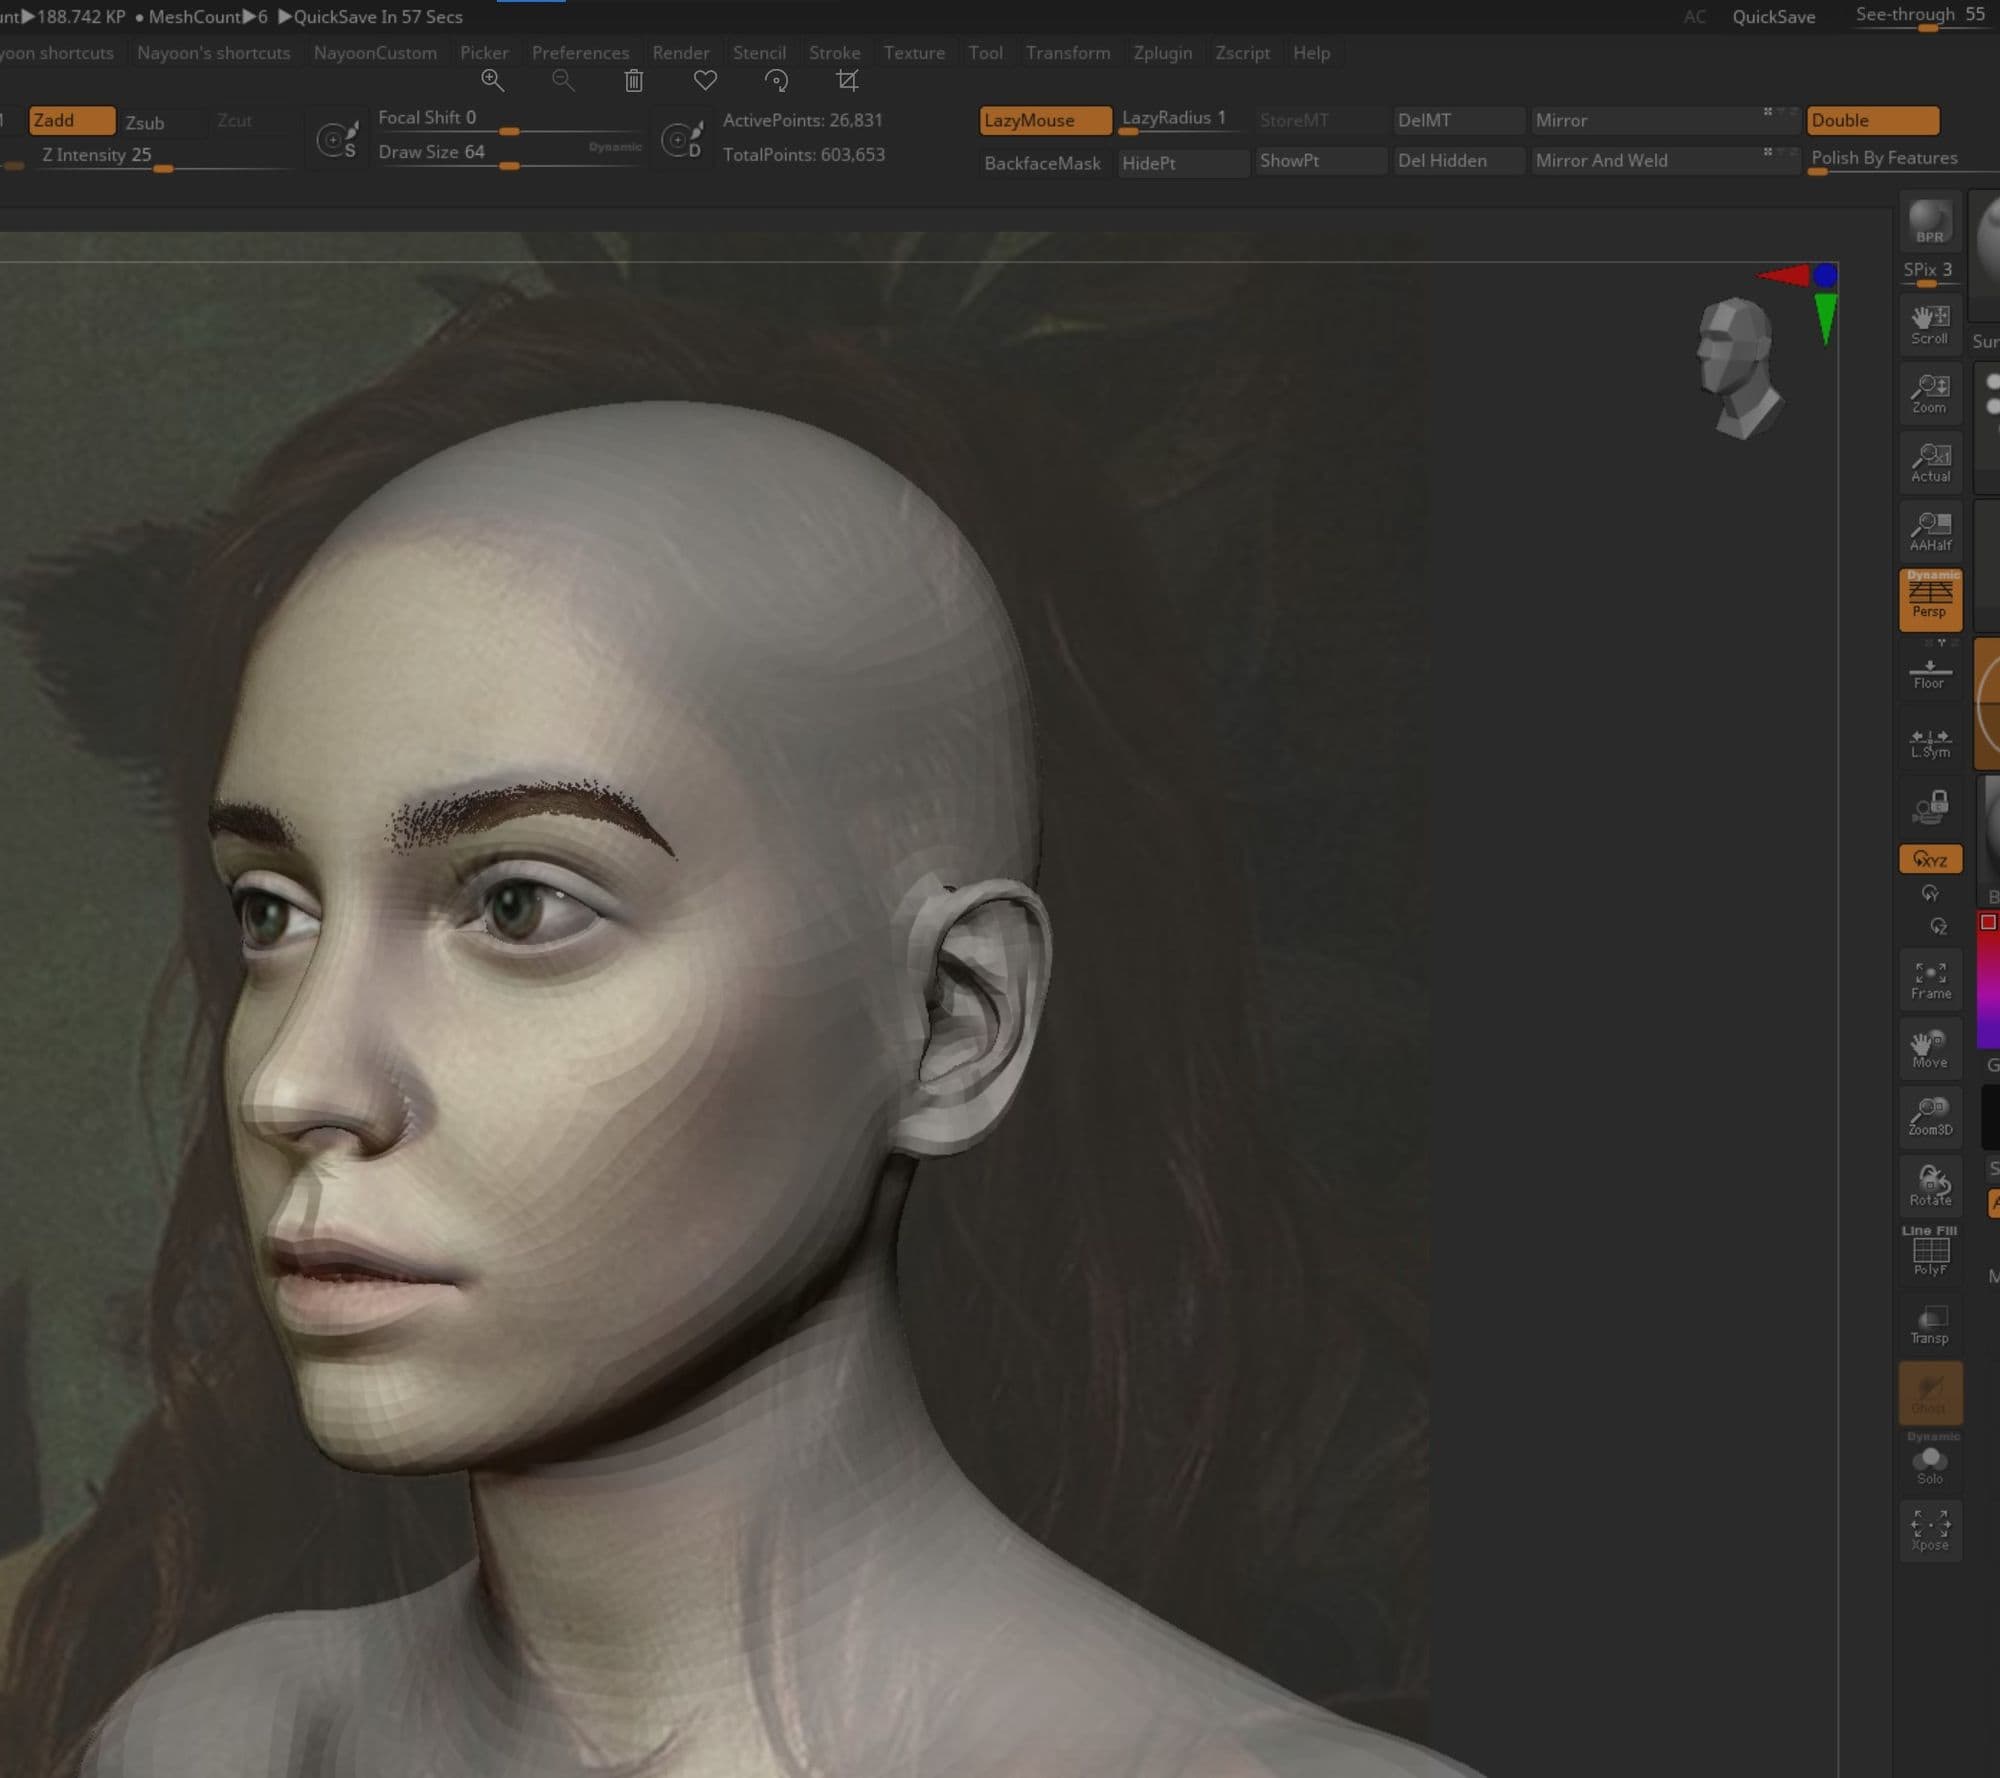
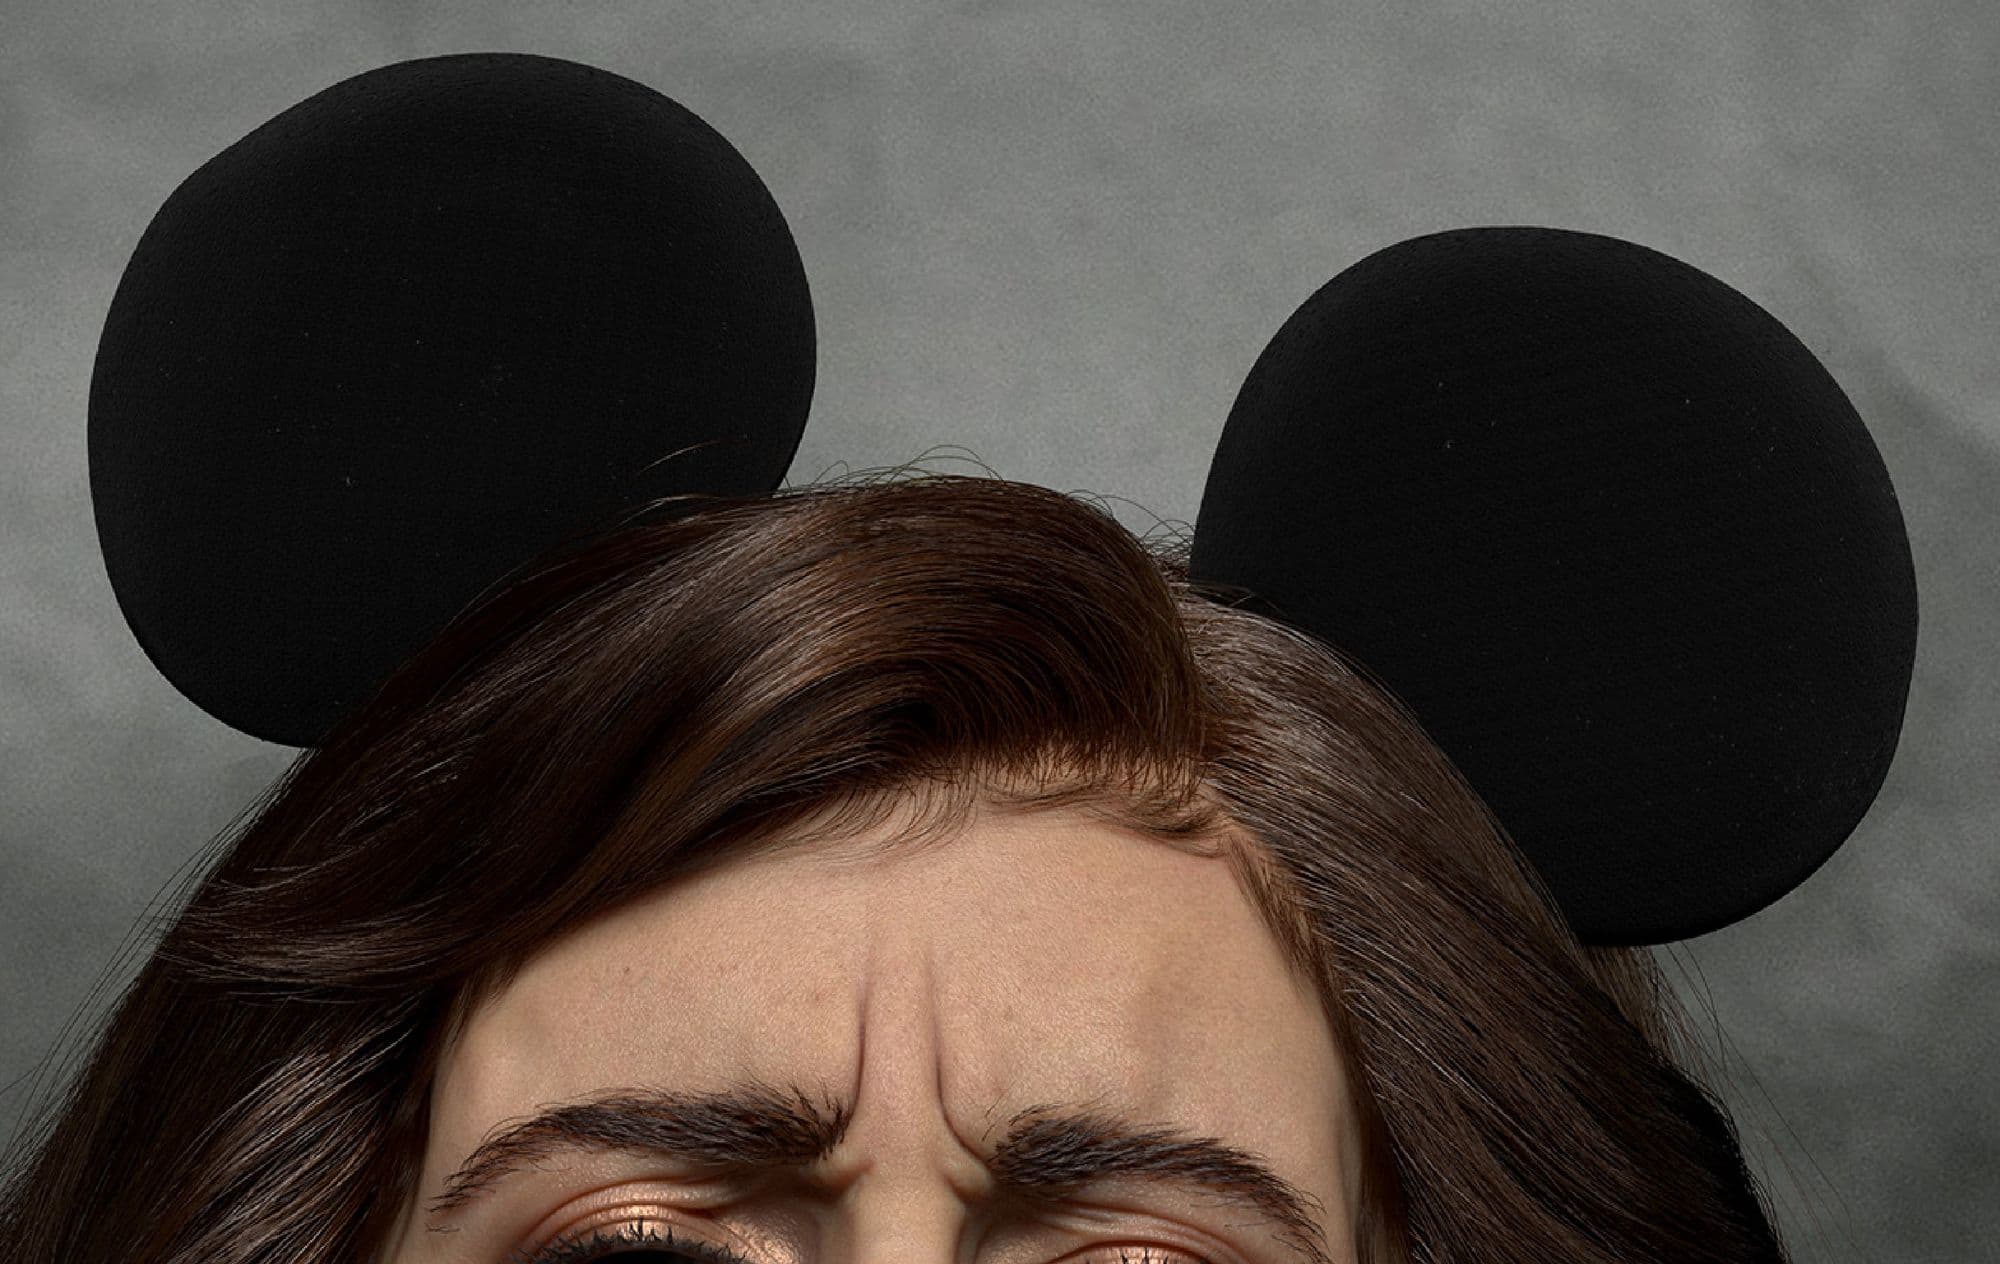
The most challenging part of this project was capturing the likeness. Since the concept has a very strong expression and the pose is not neutral, it can be hard to get the likeness and maintain the correct anatomy.
When tackling a project like this, make sure to do the following:
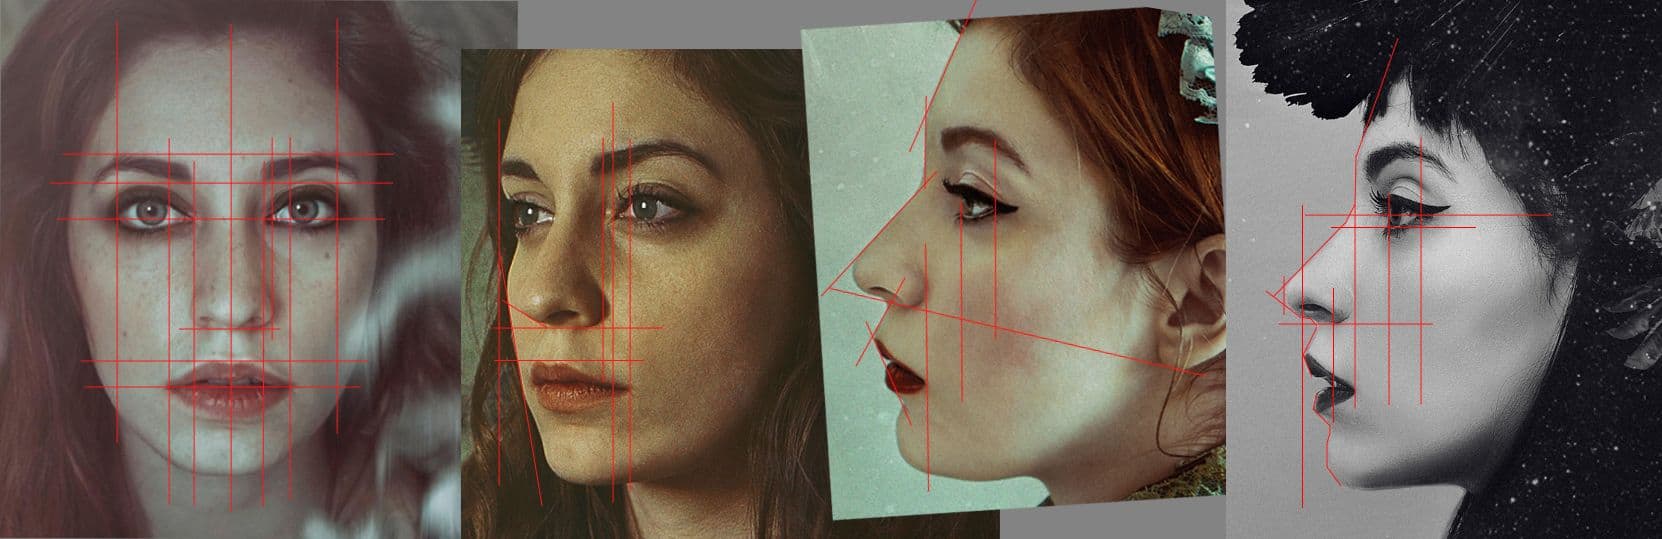
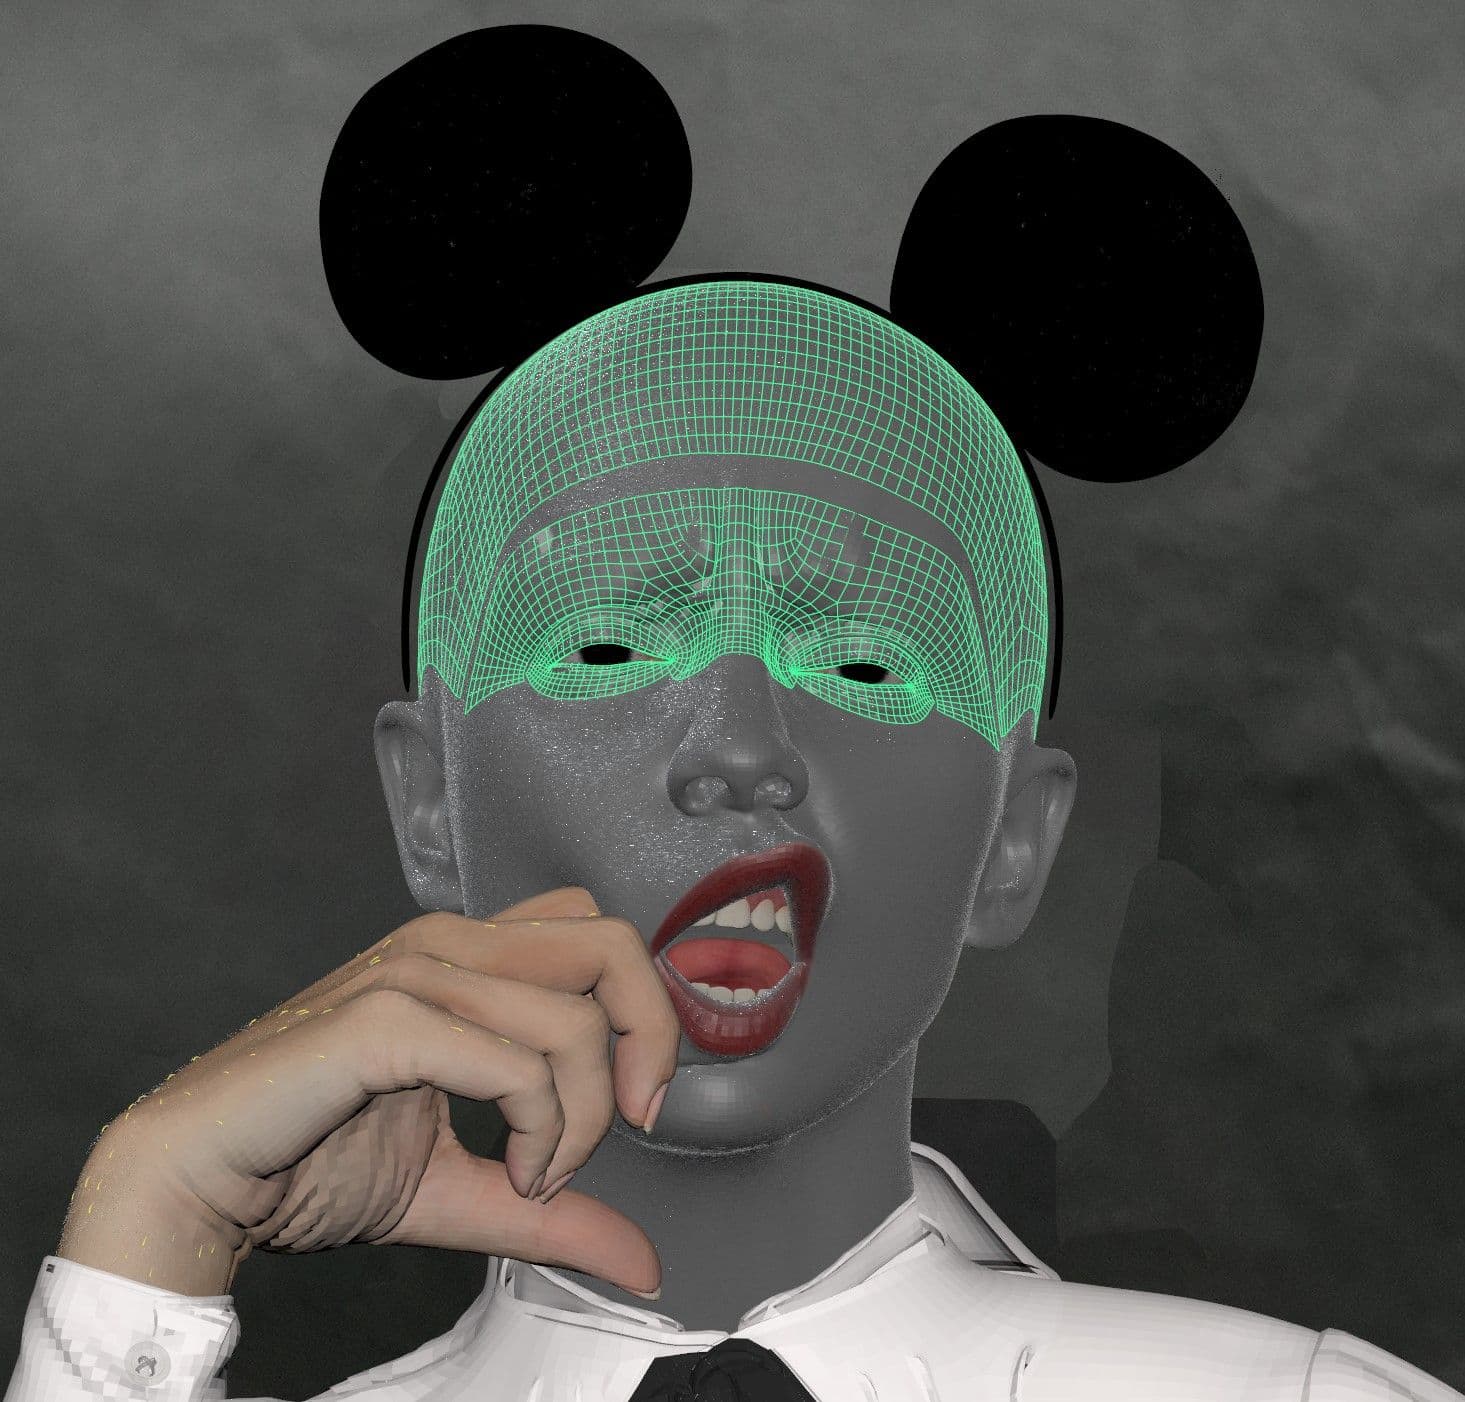
It is important to study the facial structure before the setup of base mesh in ZBrush. Line up the reference images using guides in Photoshop. Draw a few lines to see where the plane changes occur and where the face features line up. Pay attention to negative spaces on the profile views.
You can start a base mesh from scratch in ZBrush or purchase one online. However, if you purchase a base mesh, make sure the topology is clean. Since Mad mouse has a strong expression, it was necessary to modify the topology.
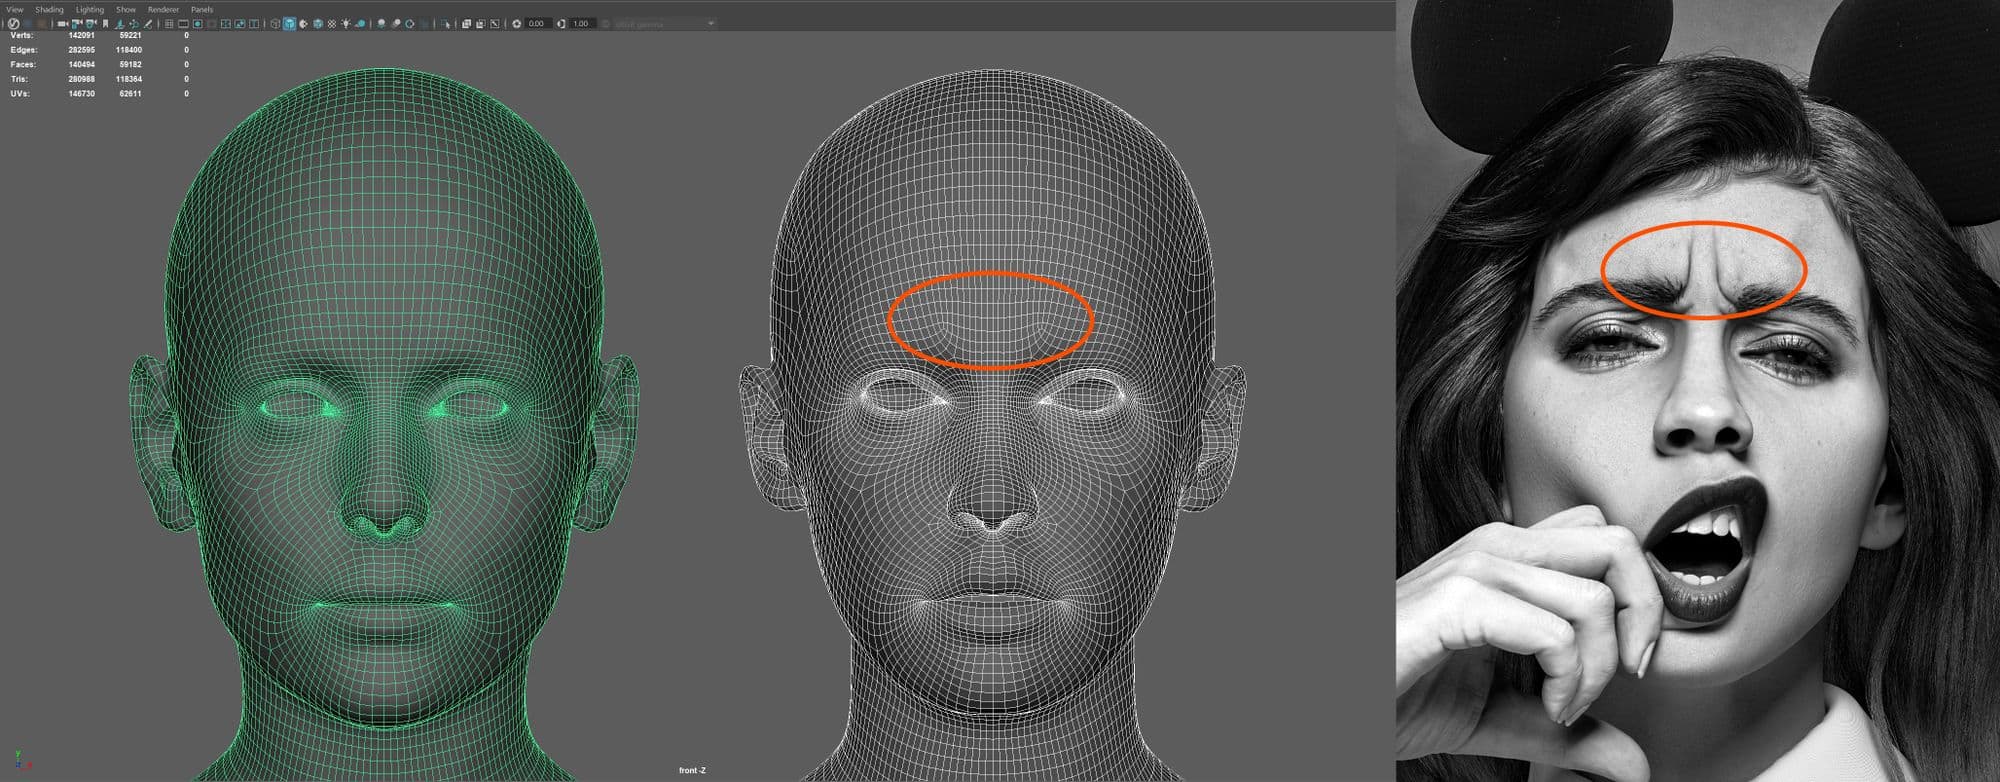
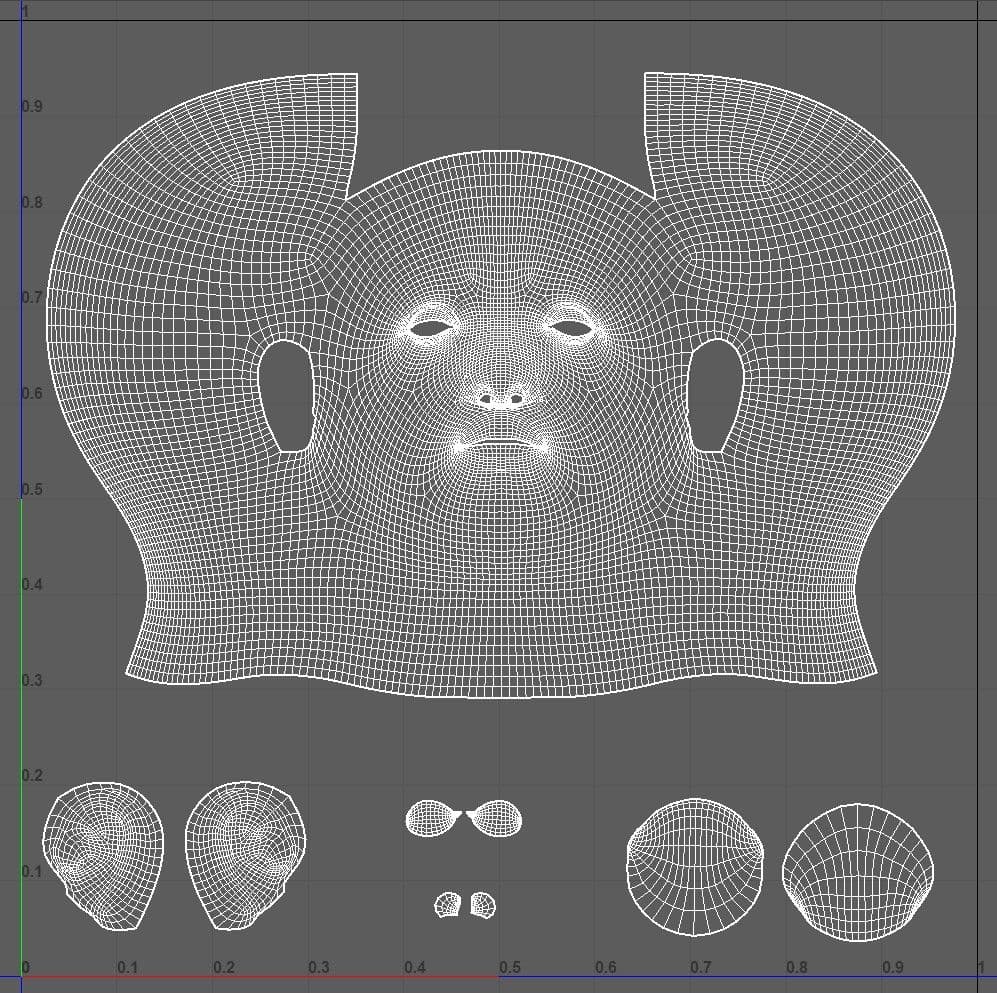
Change the topology on the forehead to support the expression. Import the head mesh to Maya and retopologise using Quad draw tool.
I recommend that if you are a beginner, try to retopologise from a ZBrush sculpt head you made from scratch. Learning how to retopologise will help you better understand the flow of the topology.
When setting up ZBrush scene, make sure the focal length is 85 or higher and sculpt in perspective mode.
There are two different methods to line up the base mesh with the reference images.
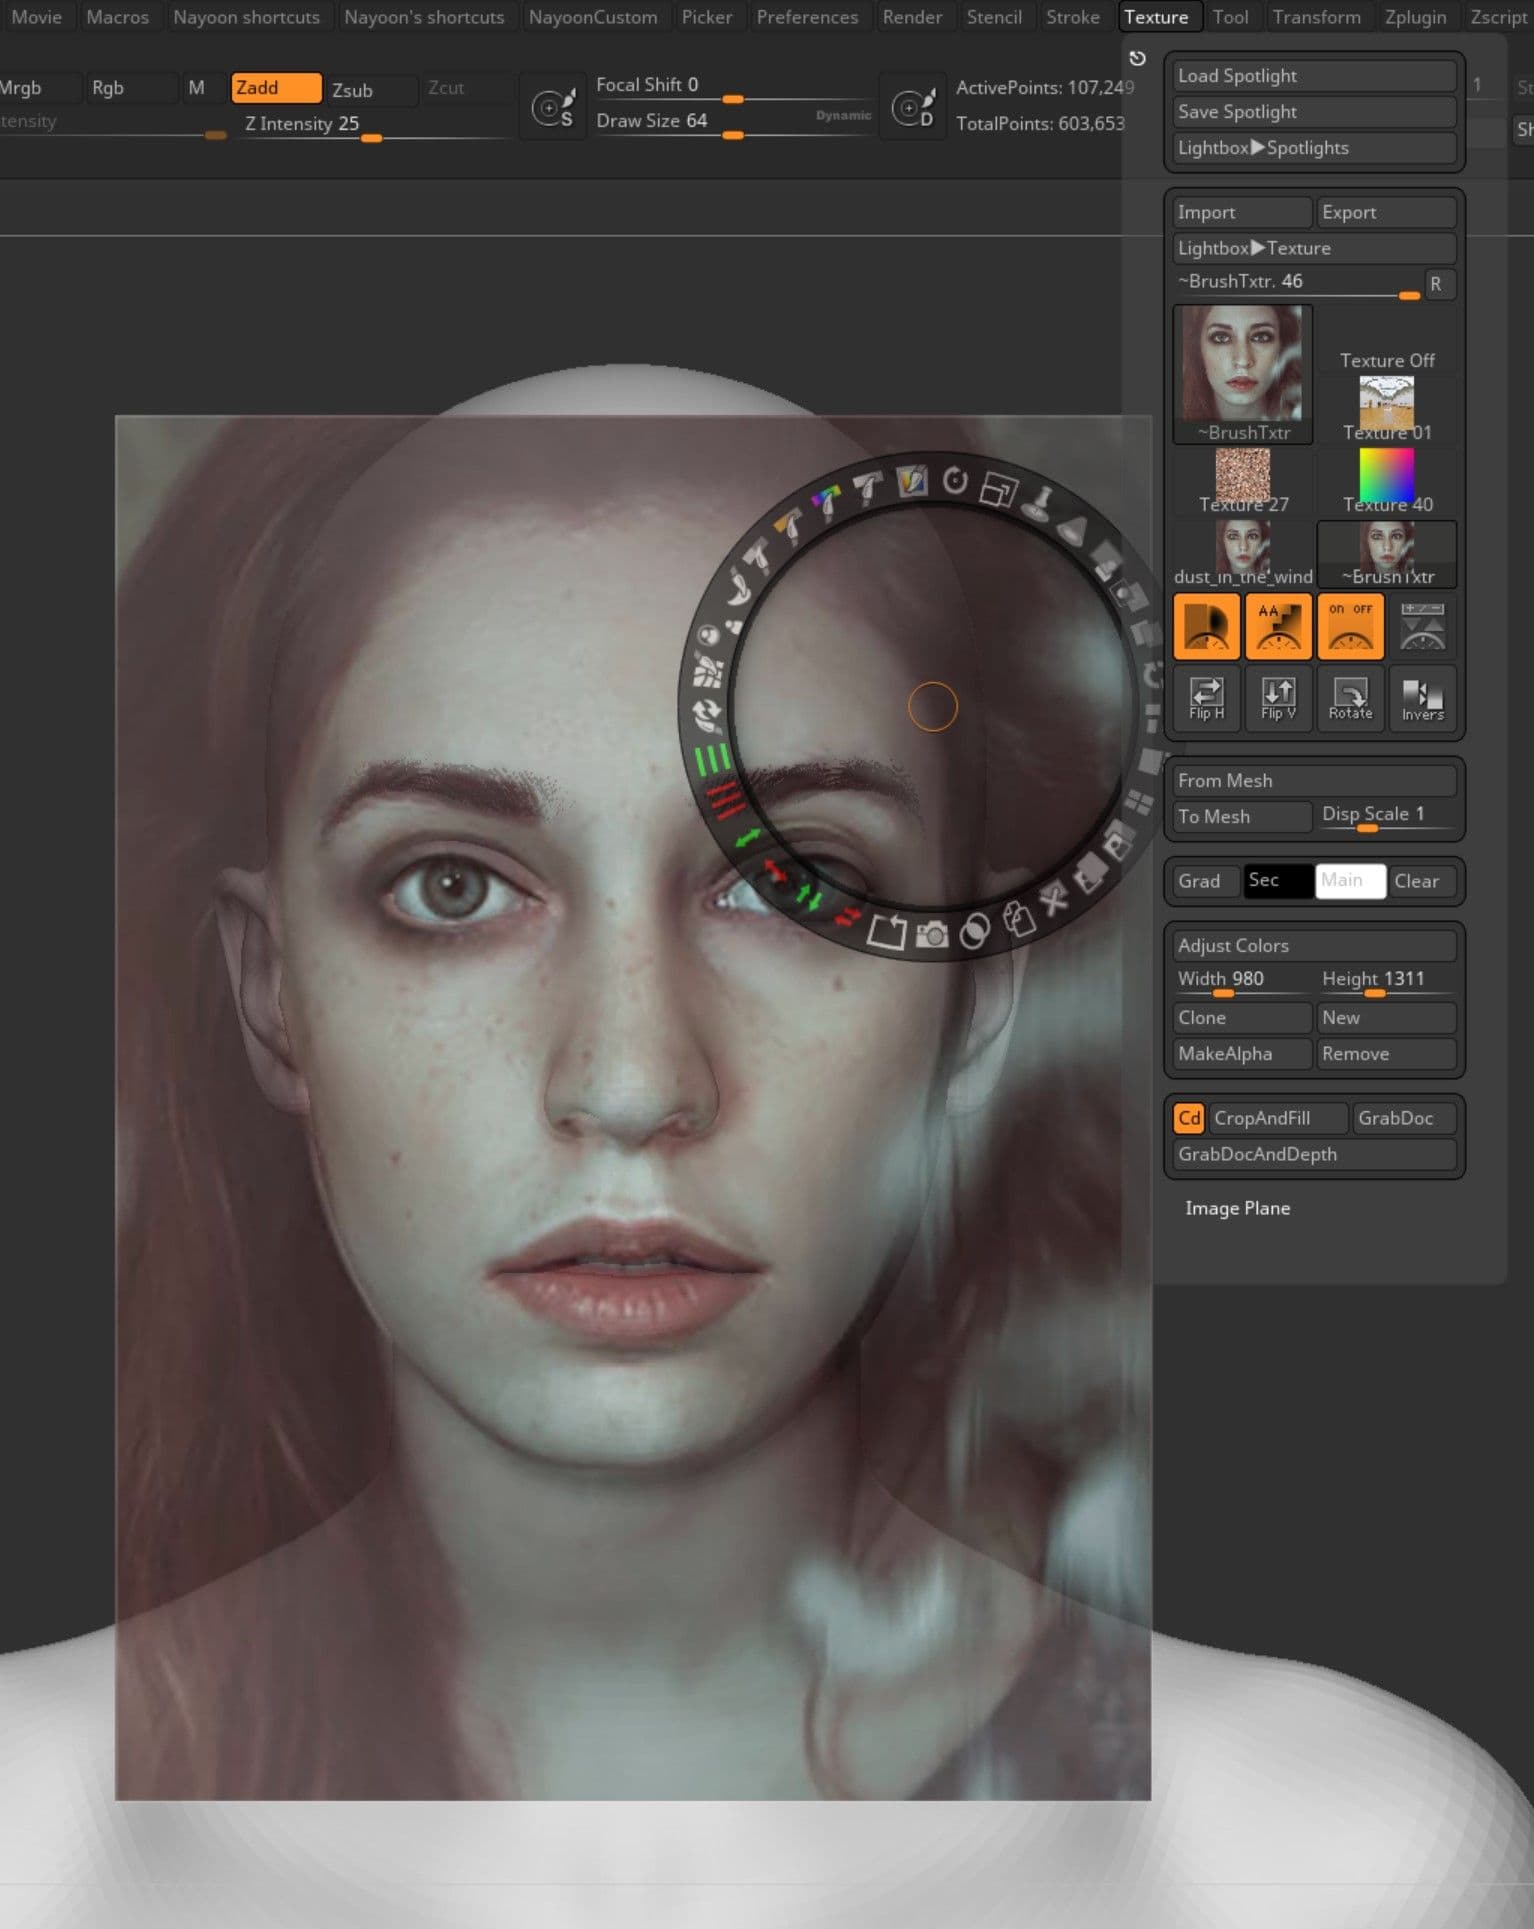
The first method is to use Spotlight in ZBrush. Import the image in texture and turn on Spotlight. Adjust the size of the reference image to match the base mesh. Once the alignment is done, save the camera.
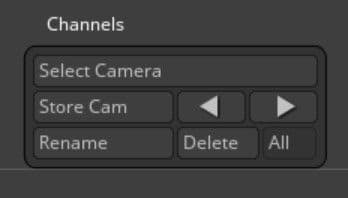
To save camera views that are aligned with the reference image, Draw>Channels>Store Cam.
Tip: Save as project in order to save the cameras. Saving as Ztool will not save the cameras. However, once alignment is done no need to save as project.
The second method is using See-through tool in ZBrush. It is located on the top right. Place an image behind ZBrush and scroll See-through between 1 and 100 and line up the base mesh with the image behind. Use this method to do a quick check while sculpting. Save the camera with this method using Store camera if needed.
The base mesh should stay at the lowest polycount while lining up. Be aware that everything looks absolutely terrible for awhile and it is perfectly normal. The goal at the beginning stage is to get the shapes and silhouette of the mesh to look like the reference image, so check all the angles. You will be able to tell if the base mesh matches the concept image by zooming out far throughout the alignment process while working on different angles.
The base mesh will not line up perfectly so think about the location of the eyes, nose, mouth and ears. Don’t worry about matching them exactly to the image. Nobody’s face is symmetrical. You will eventually break the symmetry to add details.

Placing the eyeballs and painting in iris colour using polypaint in ZBrush will help to tell if the face is looking the way it is supposed to.
Import an A pose base mesh to Marvelous Designer as an Avatar. A good way to speed up the process of creating clothing is to use a shirt from Modular configurator. Use a base shirt and modify to fit the concept blouse.
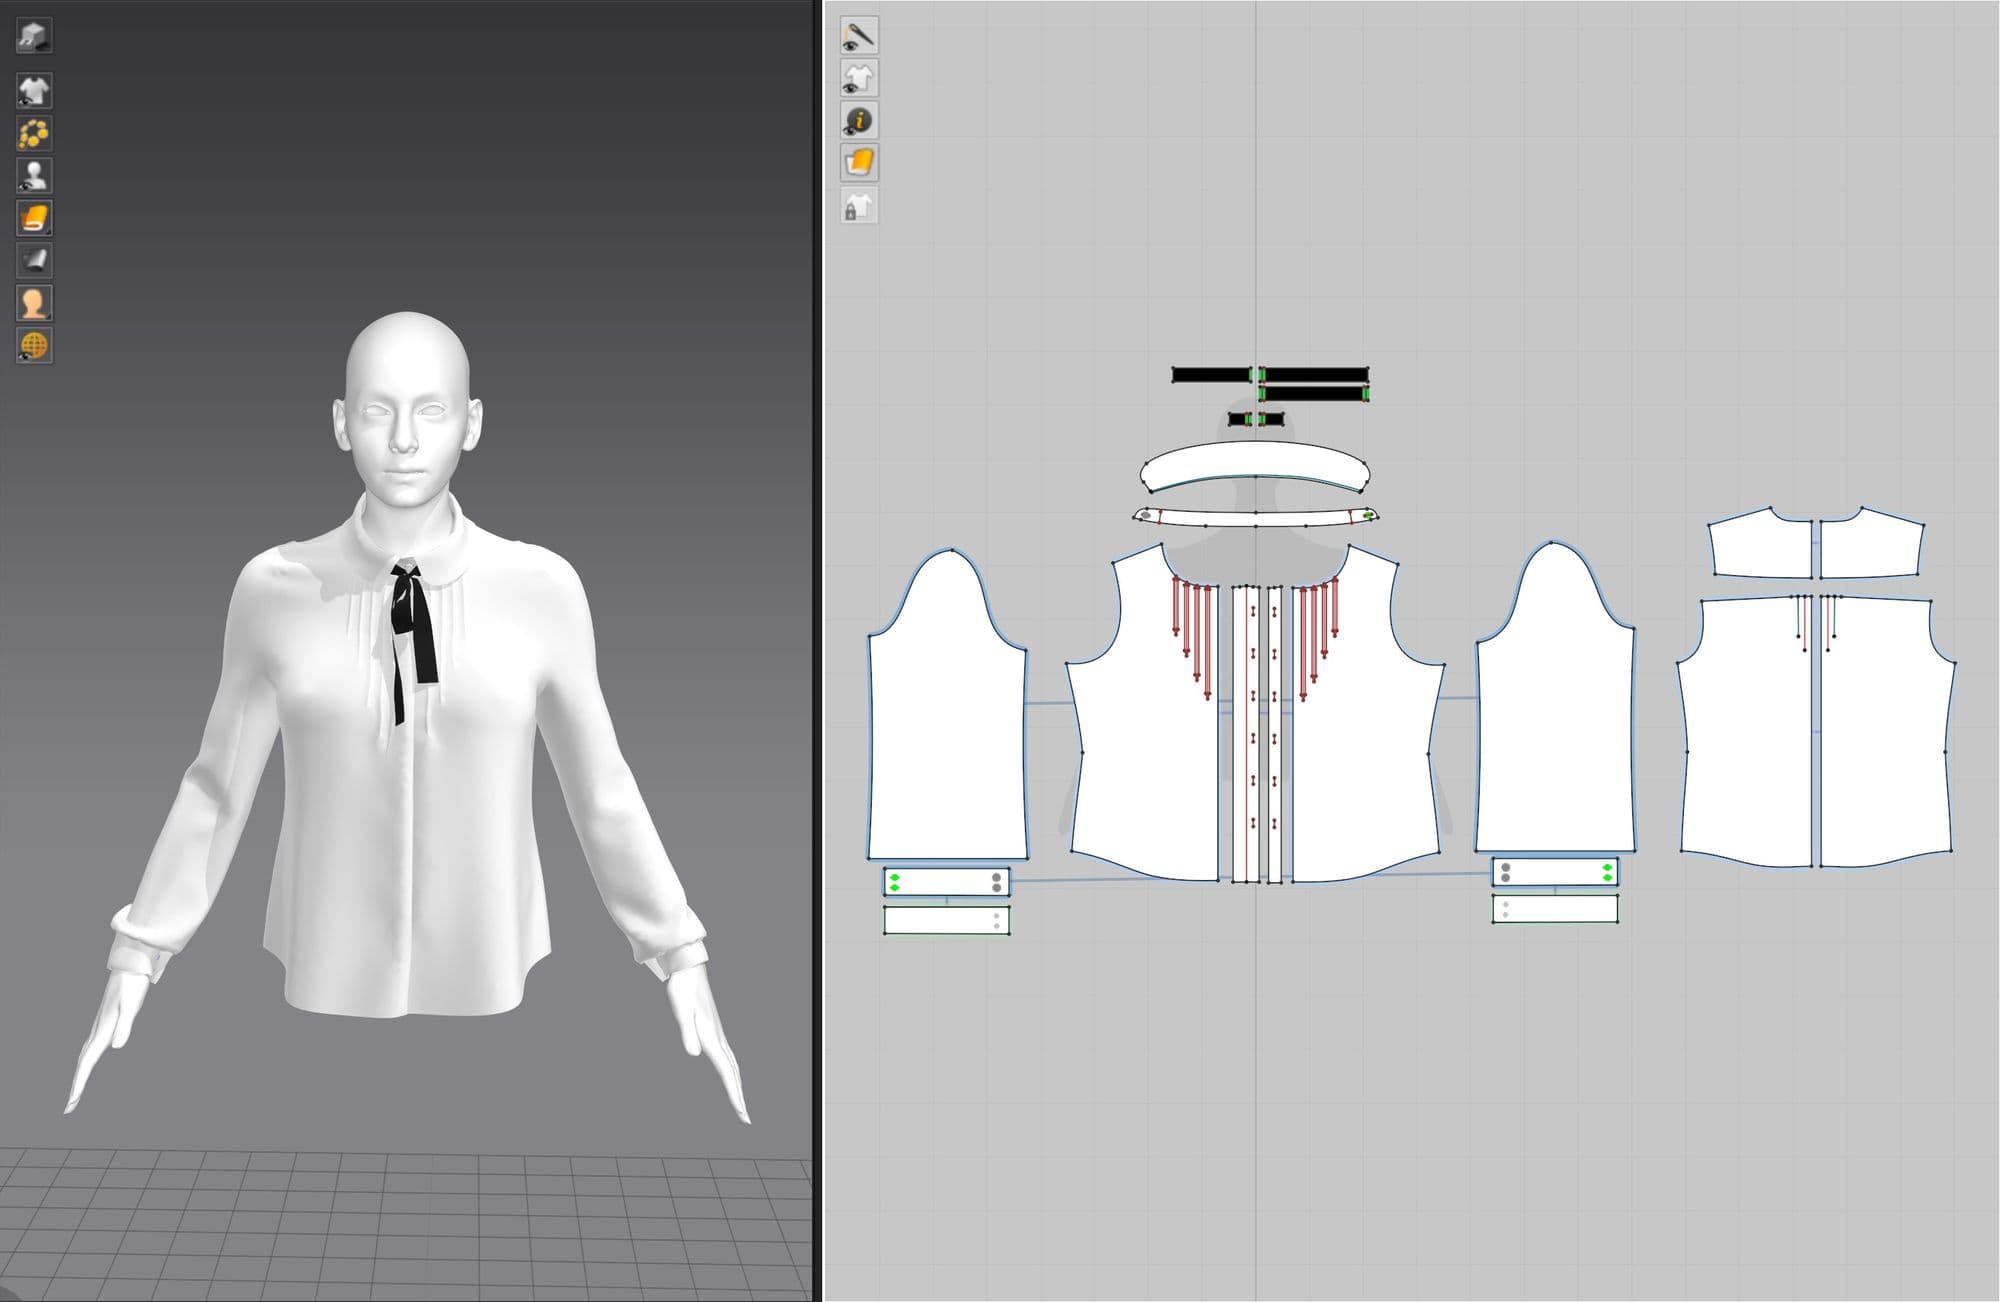
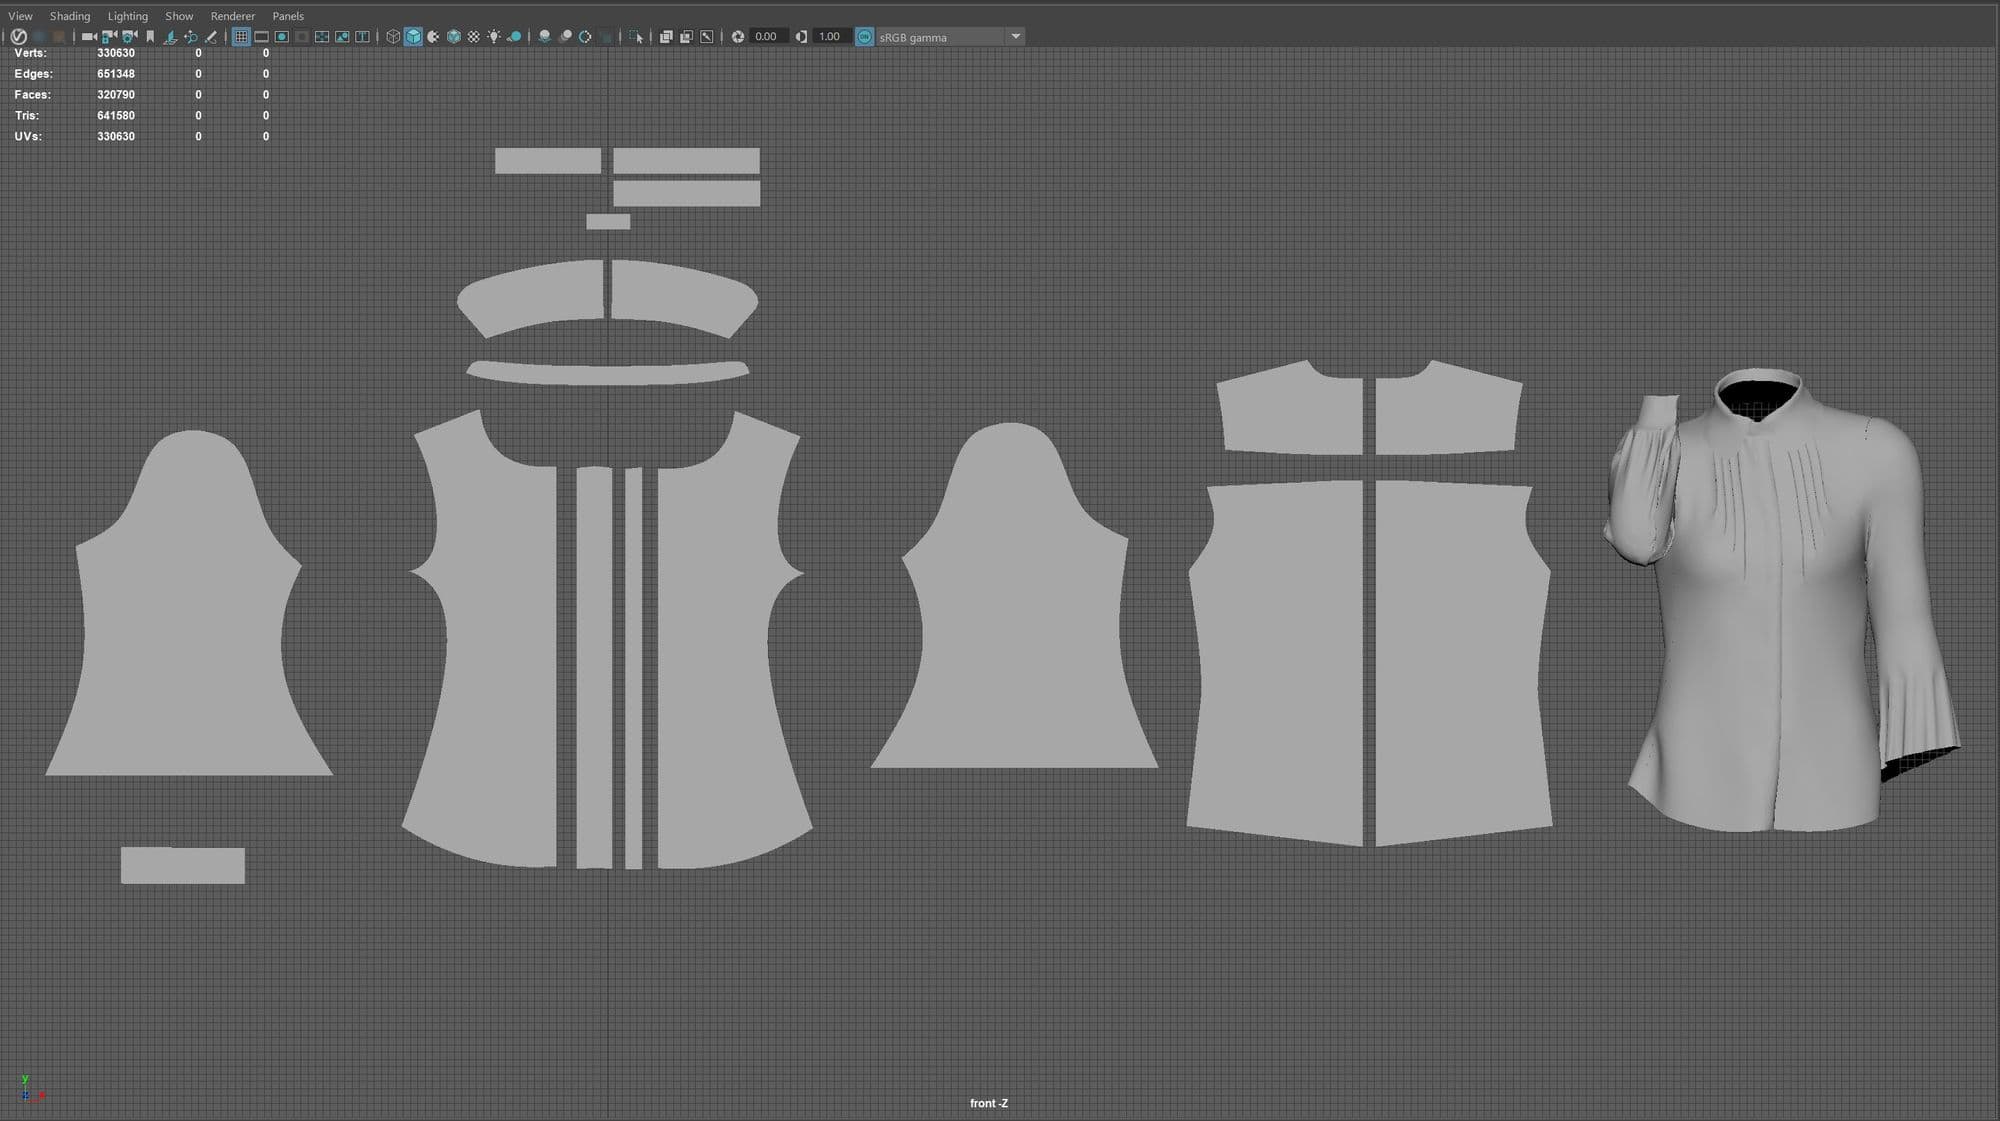
Once the head base mesh is in a good shape in ZBrush, export the head to Maya and retopologise if needed and then UV the head. To UV clothing, you can use a great tutorial on Artstation by Derrick Sesson. This tool is helpful with retopologising the clothing that are imported from Marvelous Designer.
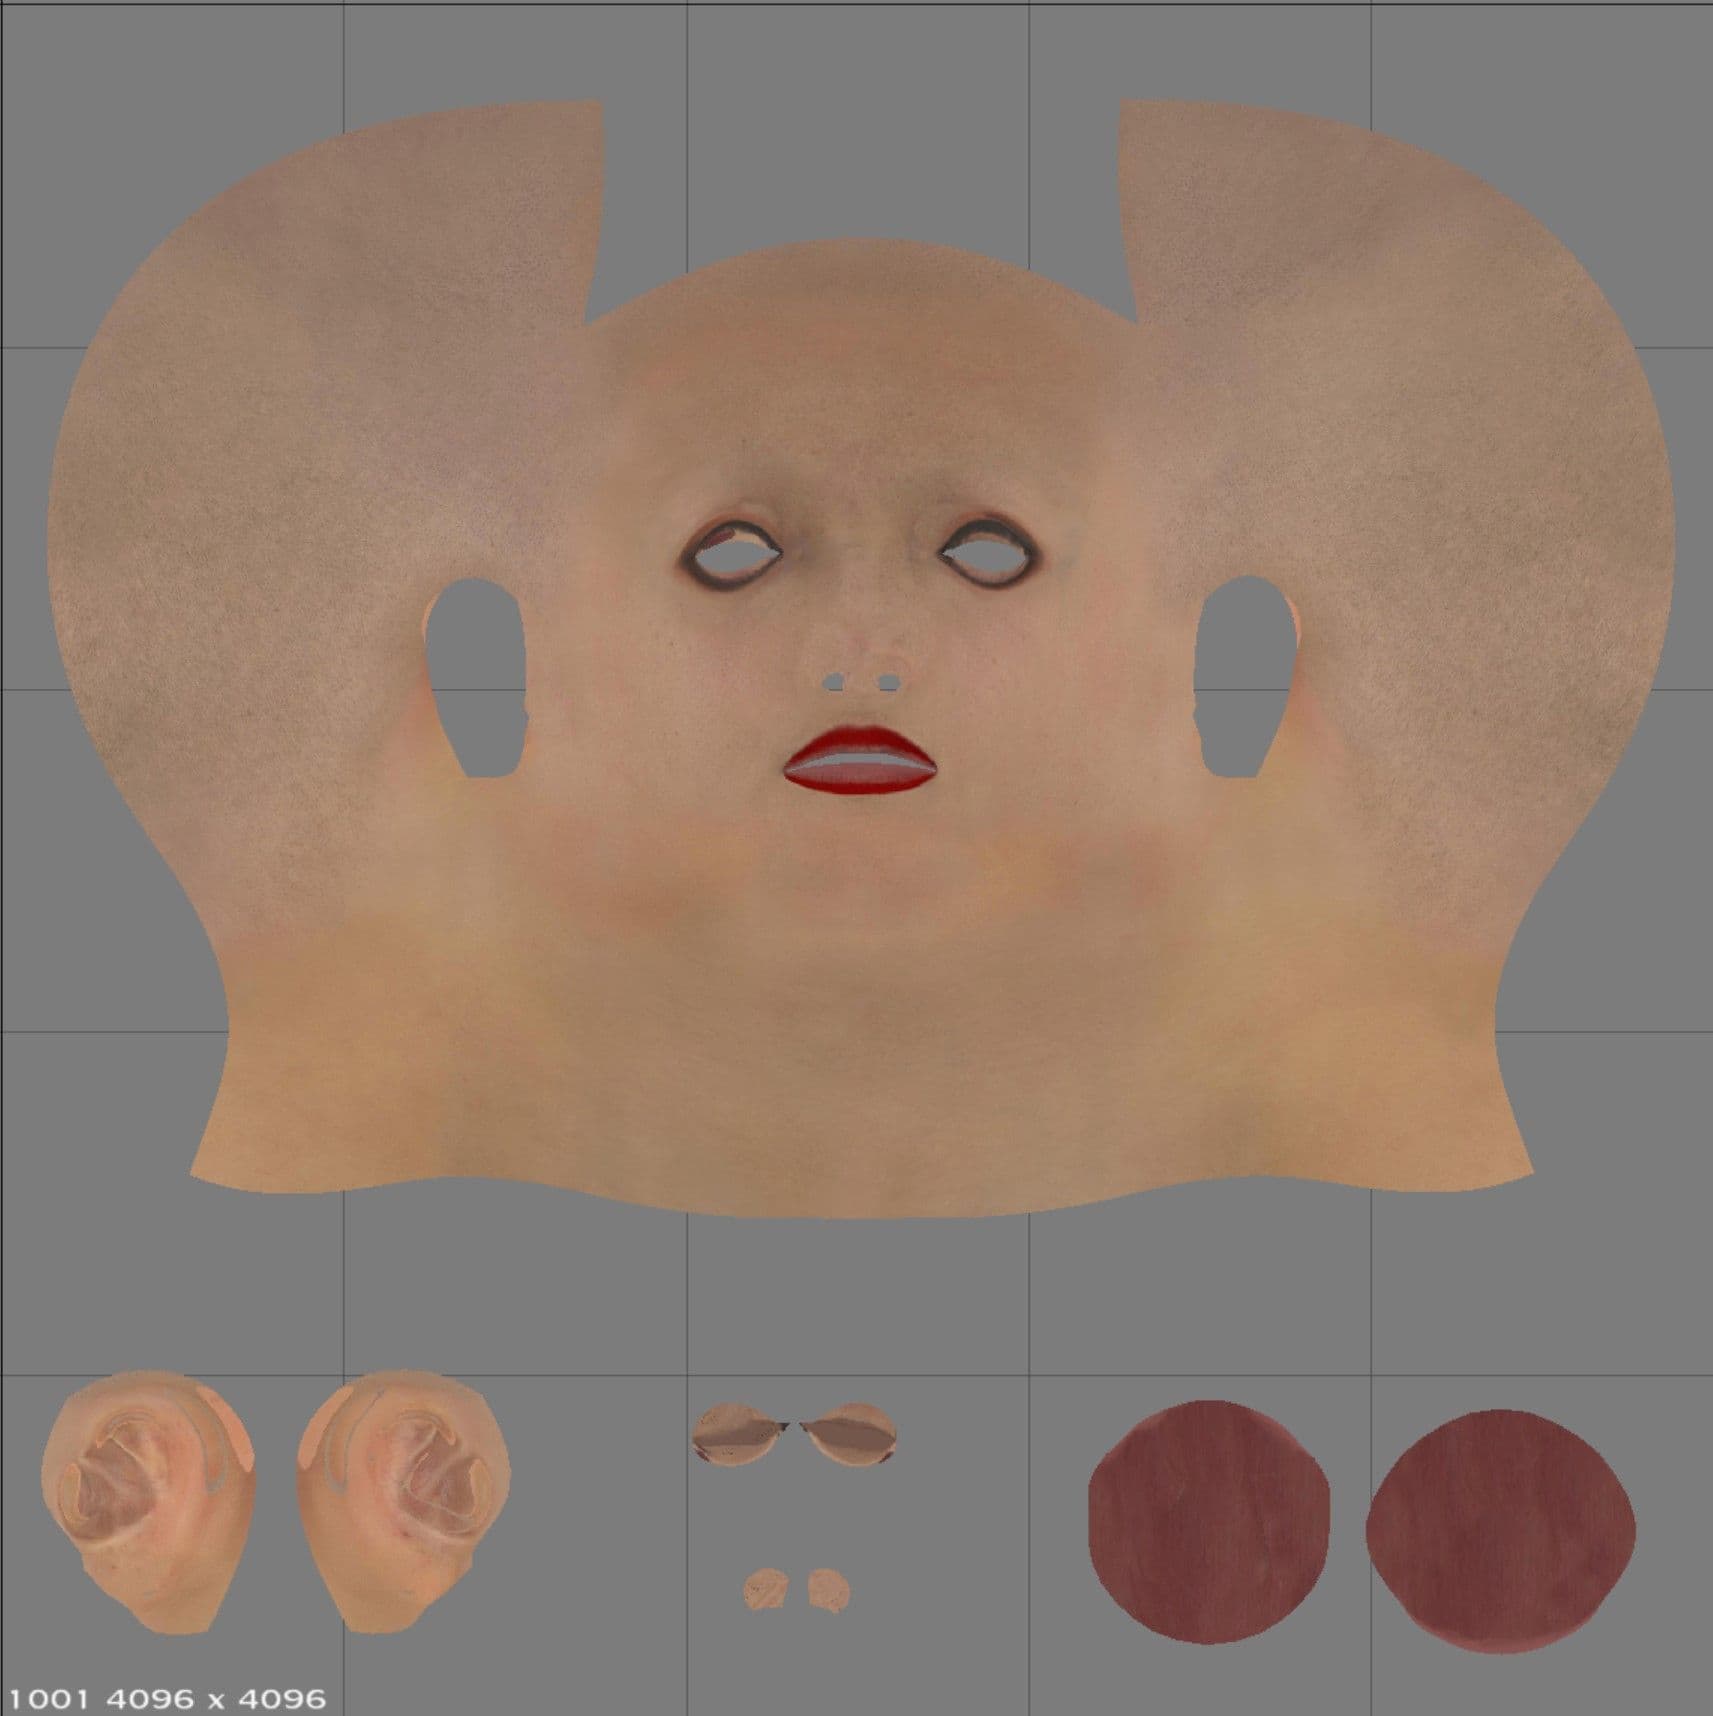
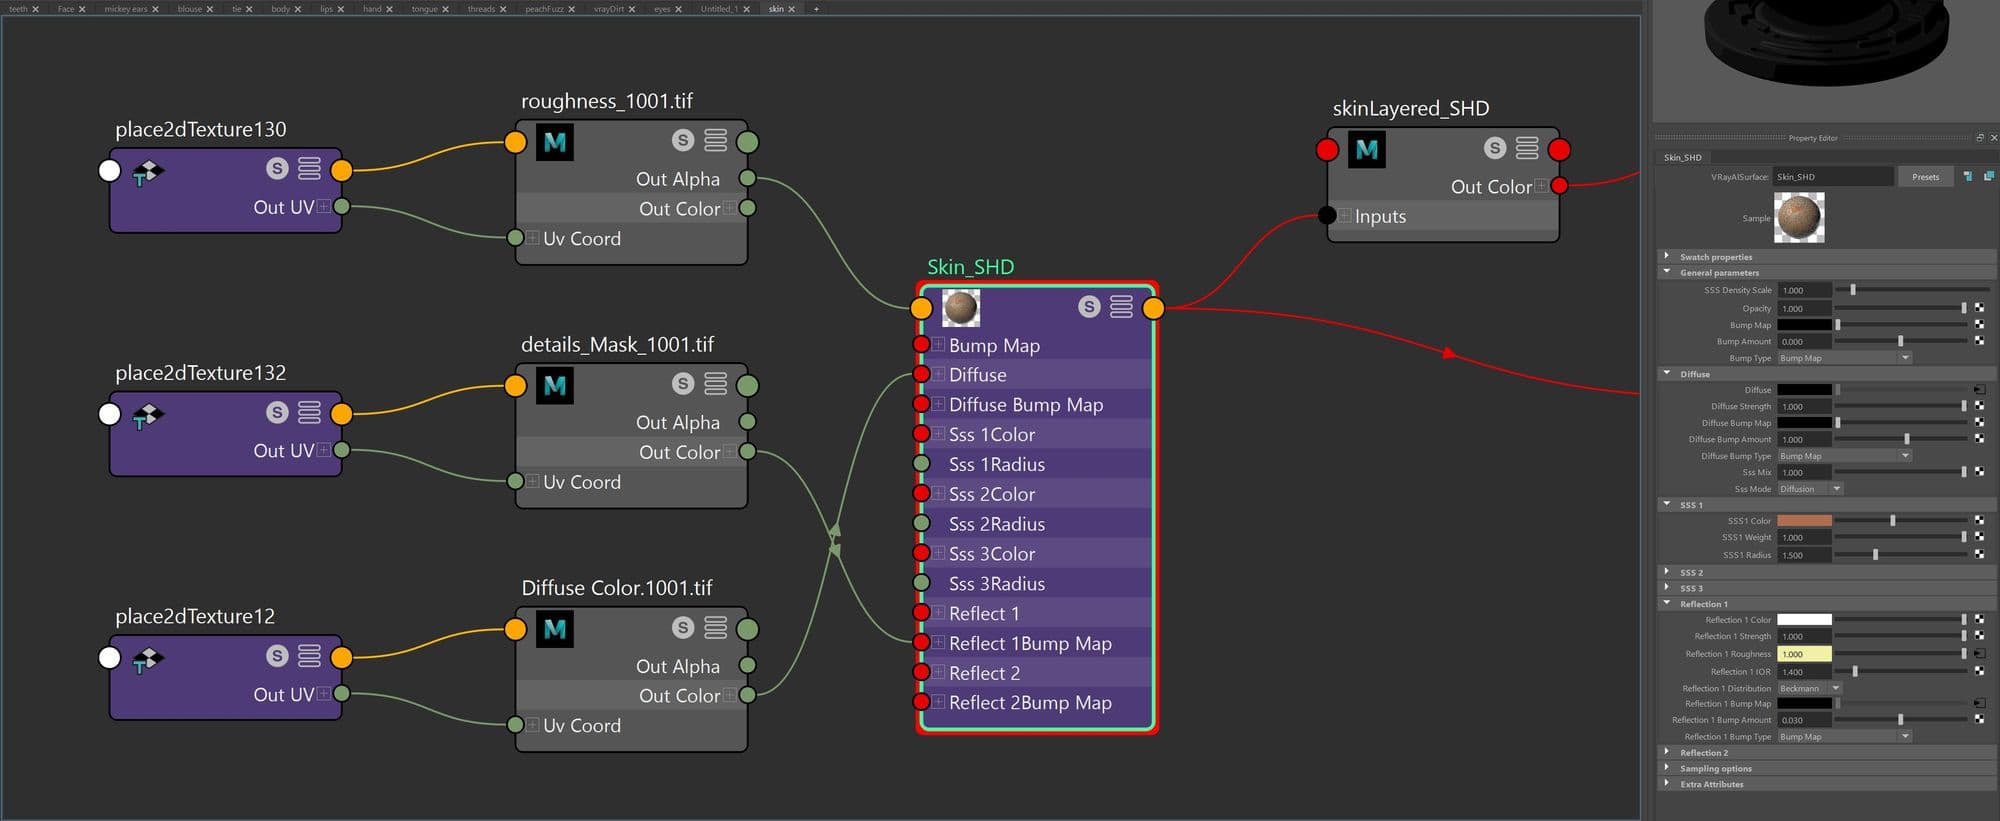
R3dS Wrap was used to transfer the skin details . Textures were purchased on 3D scan store website. Their textures are scanned from human models so the skin looks realistic. When picking a texture, consider the skin colour and age of the person, so that it will match the look of your concept.
Tutorials on how to use R3dS Wrap is found here. If you are a student, they offer a free student license (Buy>Student).

Mudbox was used to transfer all the maps.
Select UVs & Maps > Extract Texture Maps > New Operation
Target Model is the one that was sculpted in ZBrush and Source model is the one that was wrapped in R3dS Wrap.
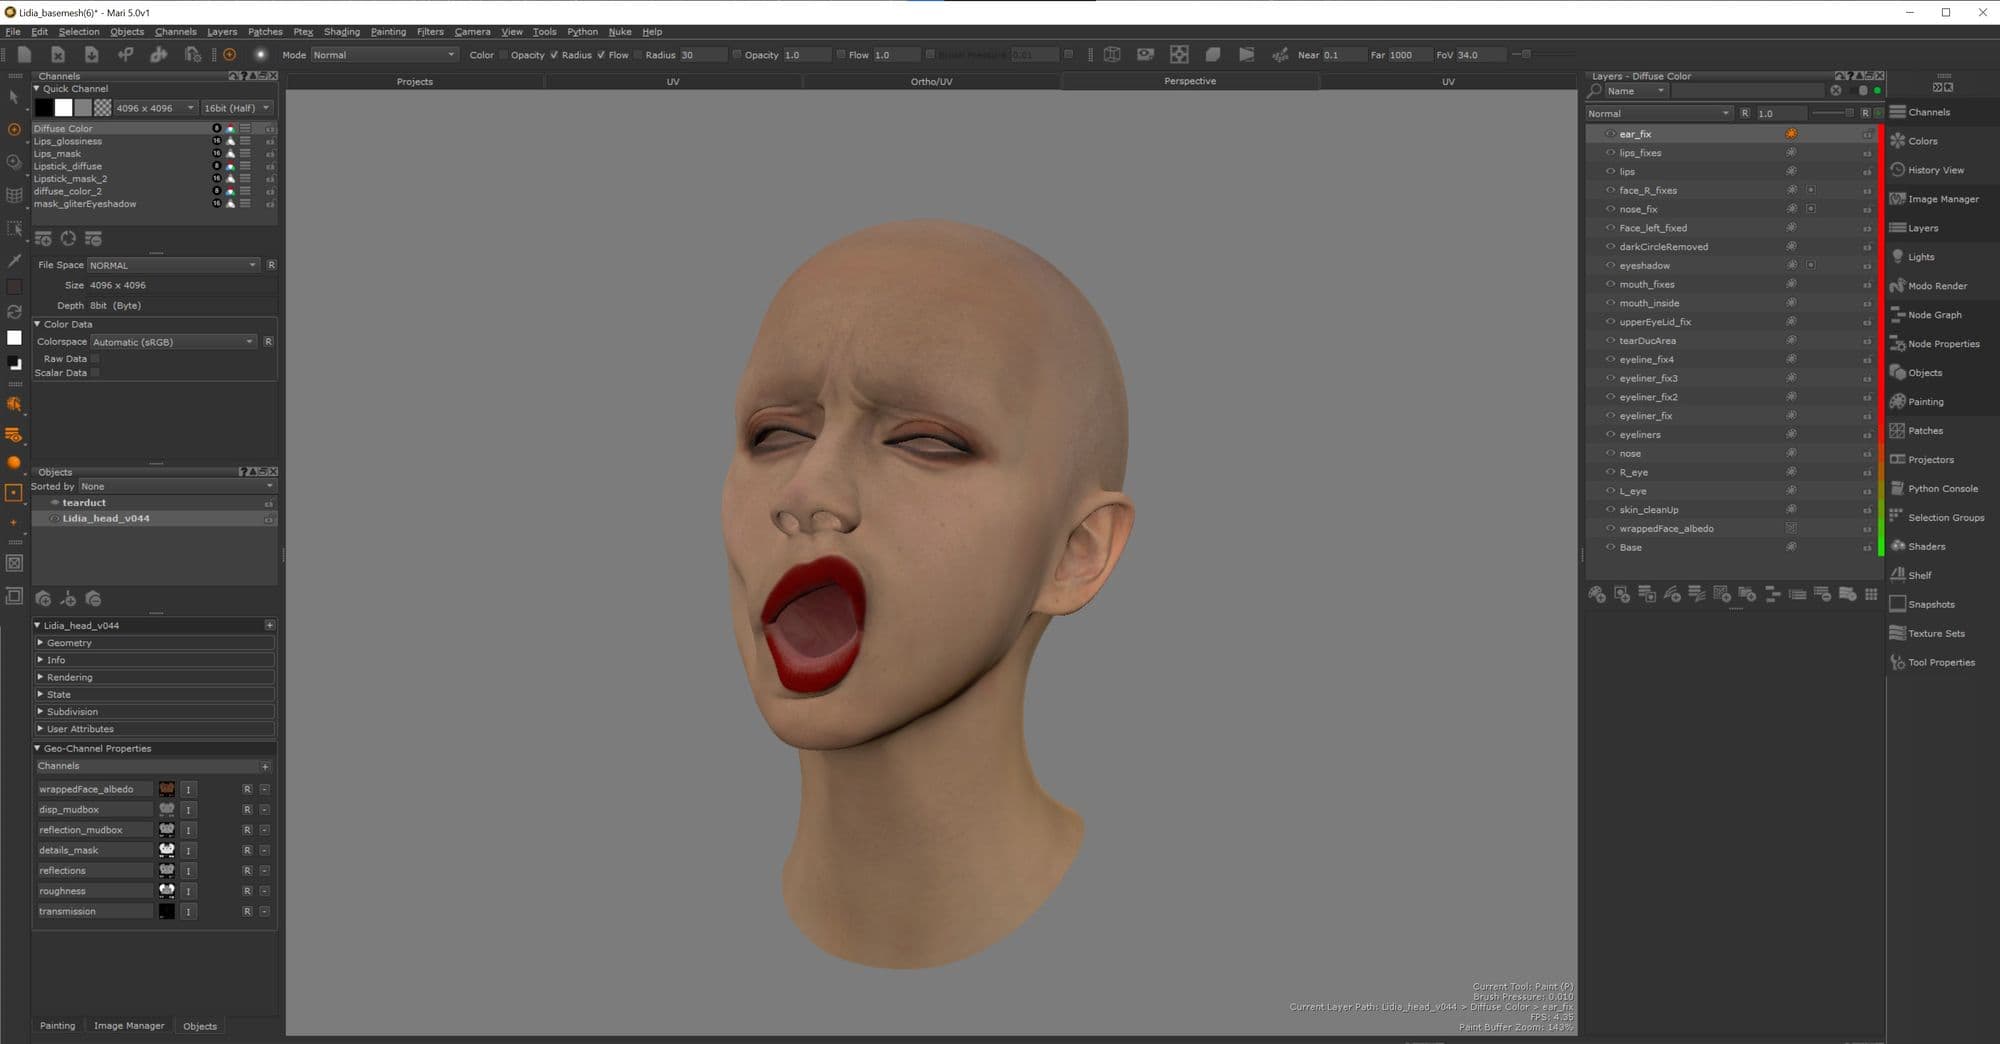
After transferring the maps, make corrections on the skin in Mari. Some pore details around the eyes and nose area can get messy. Use Paint Through Tool to make the changes.
There are many ways to pose a mesh. However, the simplest and quickest way was to do it in ZBrush.
Polygroup the mesh. Up the resolution of the mesh before posing. Mask and move using the Rotate Tool and the Move Tool. When you are moving body parts, make sure to place a pivot on joints. Think about how the body parts move. Use anatomy references to see where the joints are. It doesn’t have to be accurate but it will help you to retain the overall shape of the mesh.
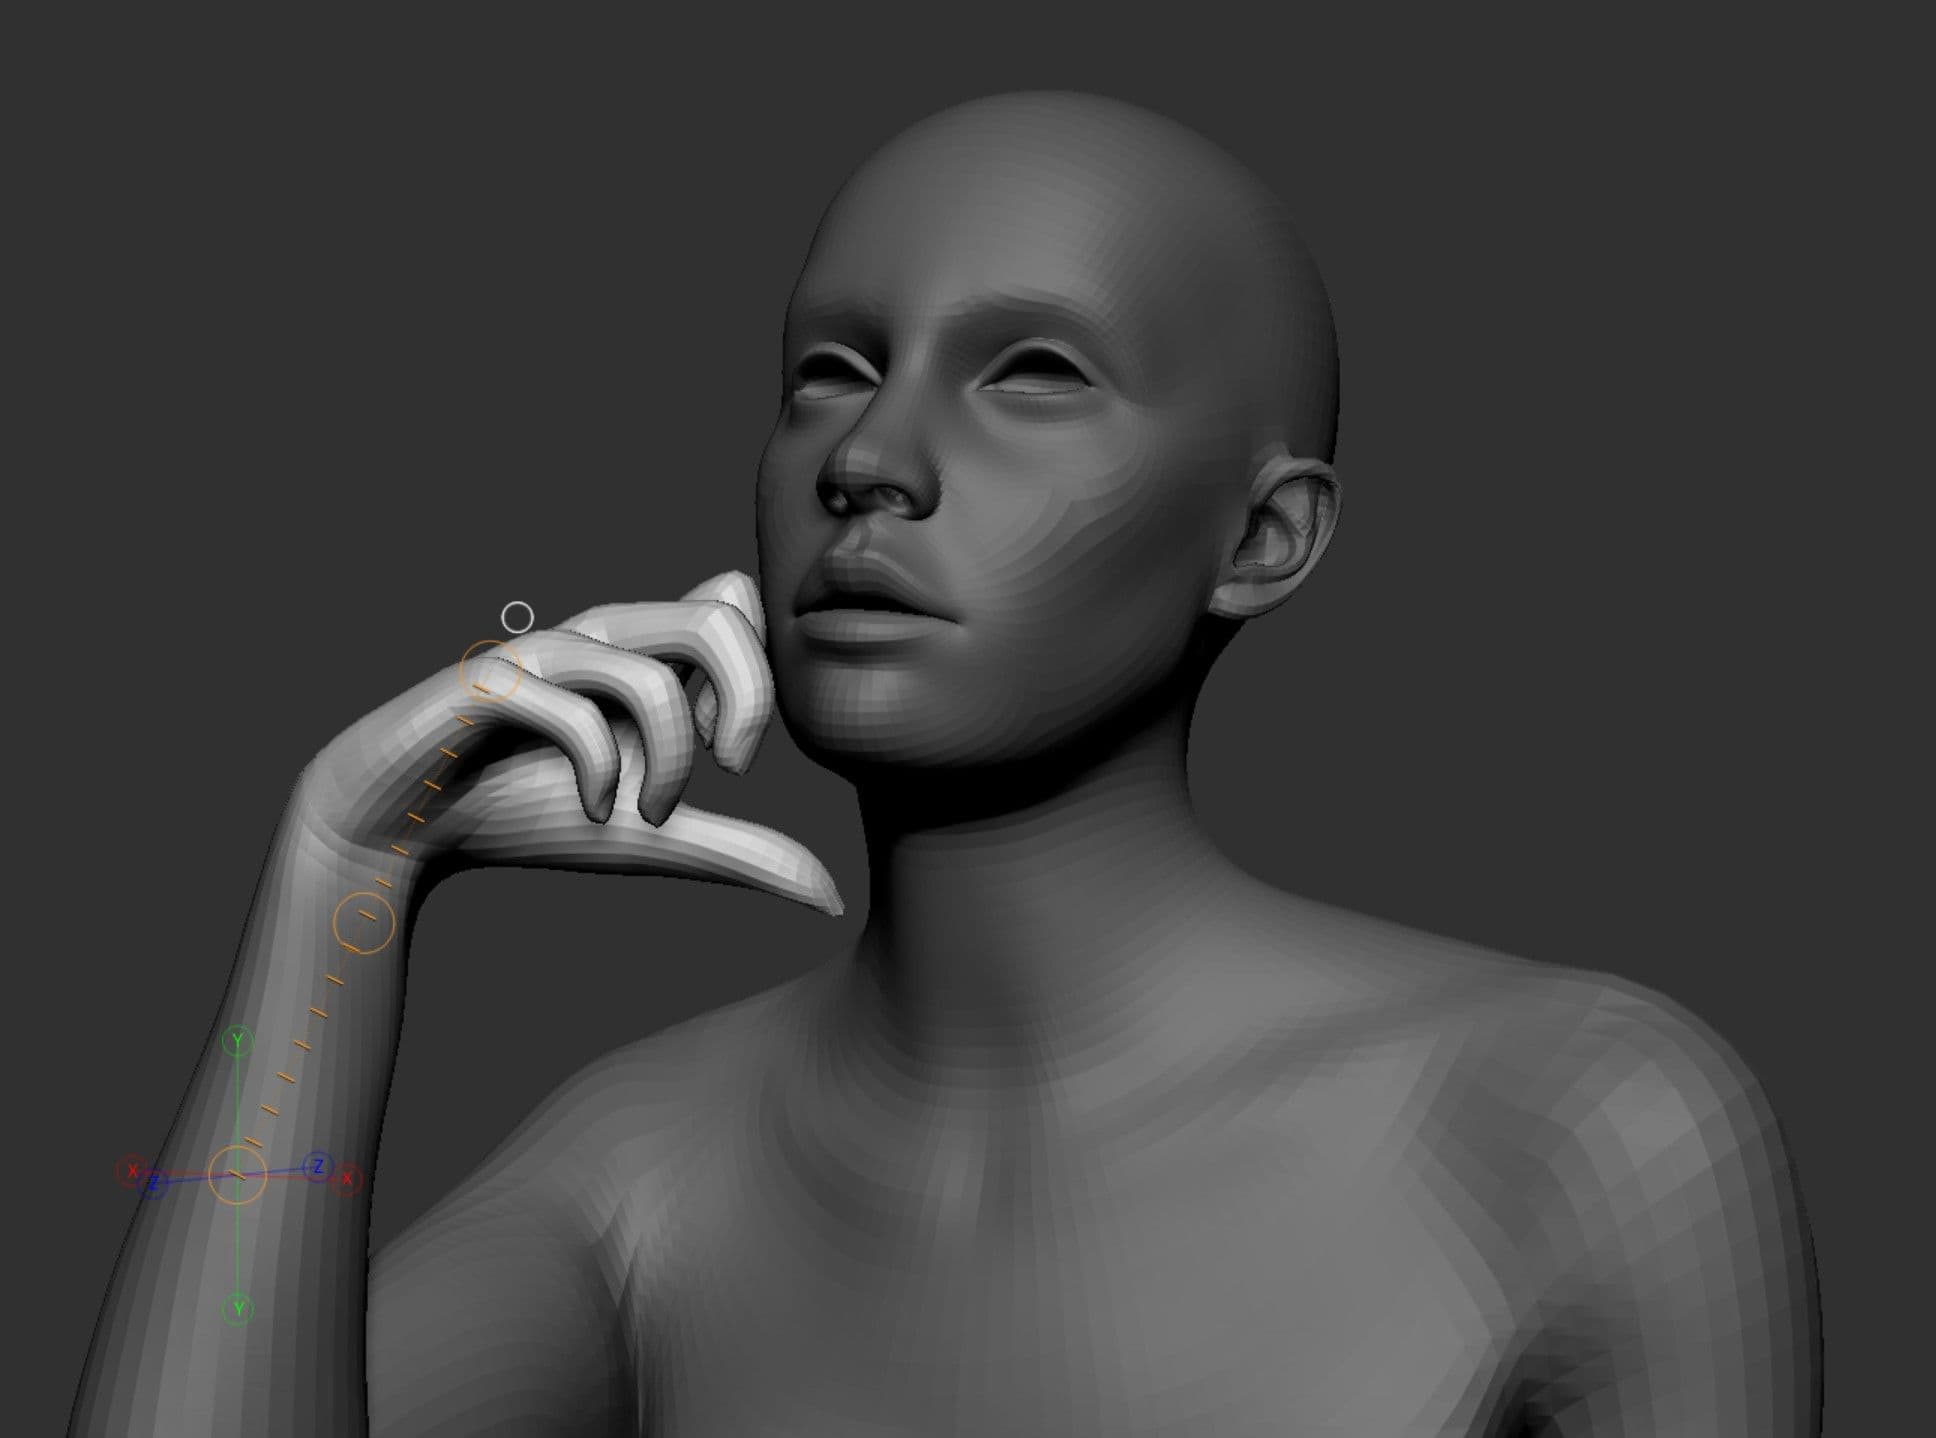

Don’t worry too much about messing up the mesh. You will have to fix it anyway in Maya and ZBrush, so focus more on matching the pose as much as possible. Once the pose is made, export the mesh to Maya and use Blend Shape and Delta Mush tools to fix the volume and shape issues caused from posing.
Steps to using Blend Shape and Delta Mush:
Fix further in ZBrush any issues caused from posing and continue to sculpt and refine the details.
There are a few brushes you can use to sculpt an organic mesh: Clay build up, Standard, Move, Dam standard, hPolish, Elastic and I nflate. However, these are basic brushes, so explore different brushes and alphas as well.
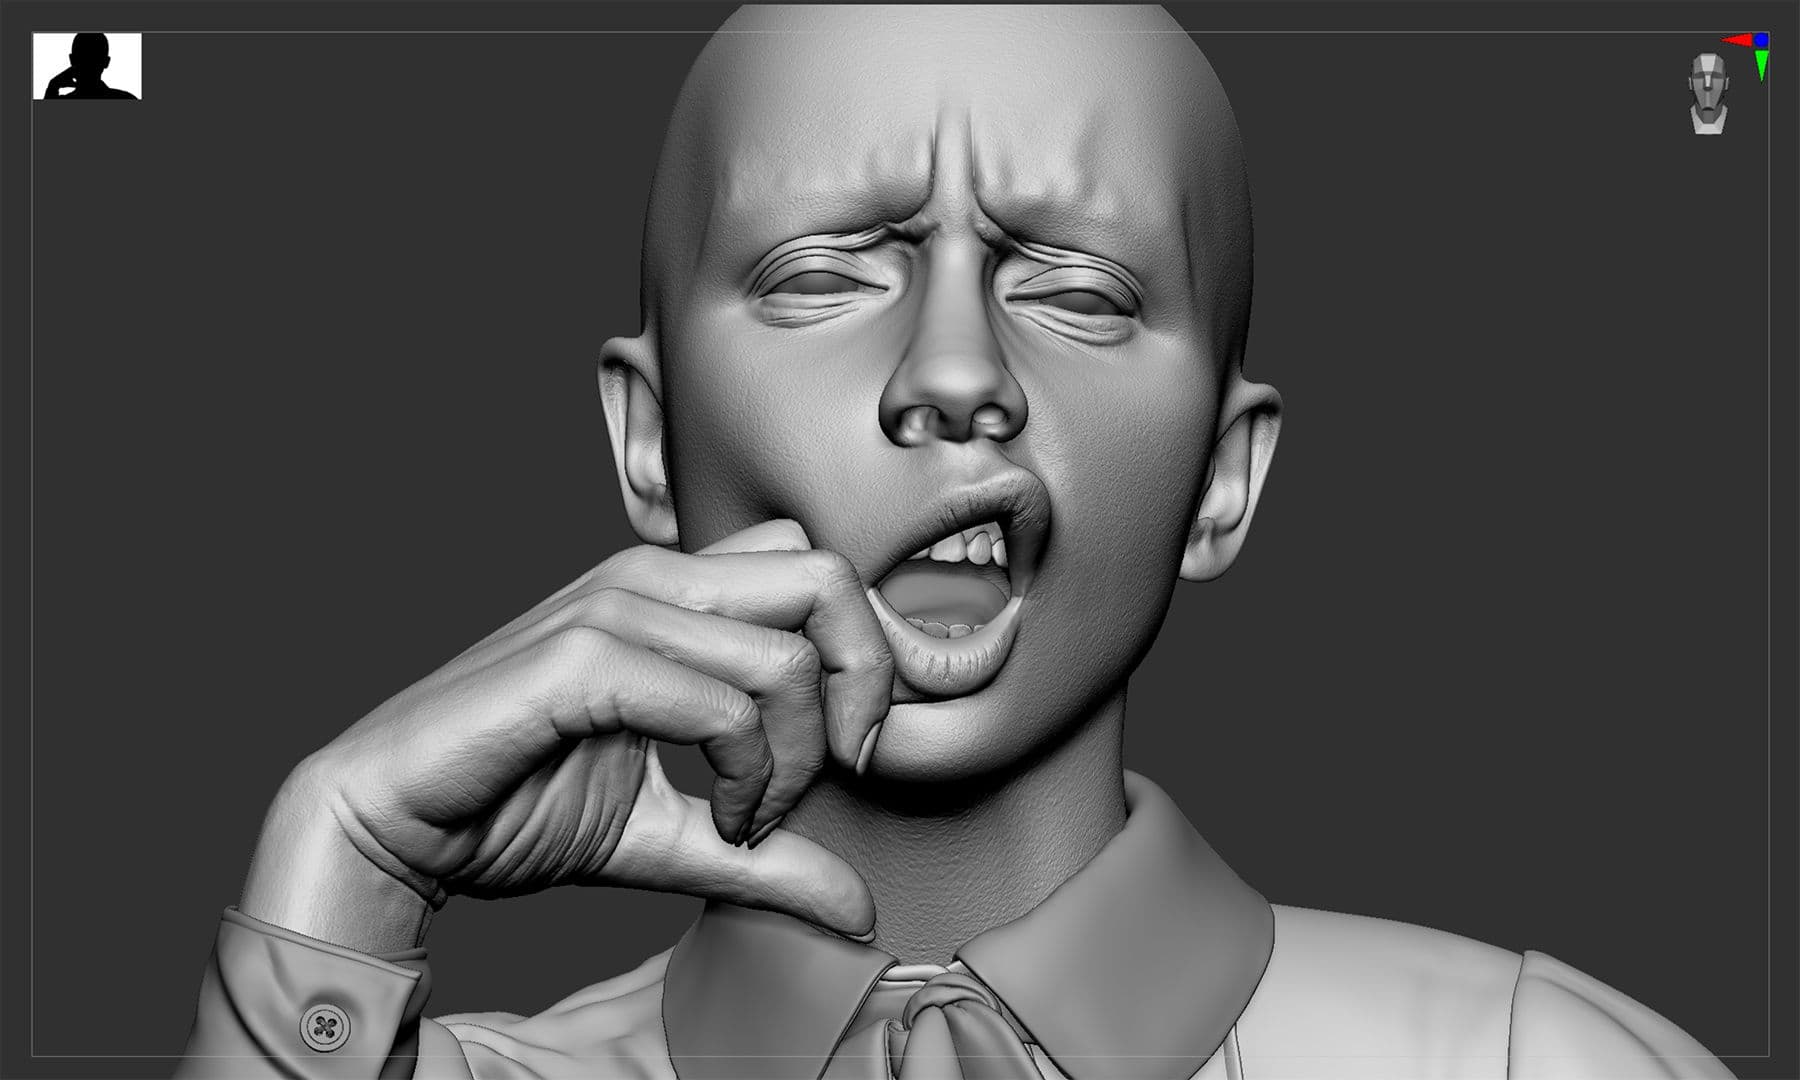

Dam standard brush is great for folds and wrinkles. The most important thing to remember while sculpting a head and hand is that the skin is quite bumpy and uneven. The skin is sitting on top of bones, muscles and fat, so try not to make the surface too smooth.
Daniel Boschung has a website that shows close up skin details of different people. The great thing about his website is that you can zoom in very close and be able to see micro details. It is very helpful to see how skin texture is in different areas and also see directionality of pores and wrinkles.
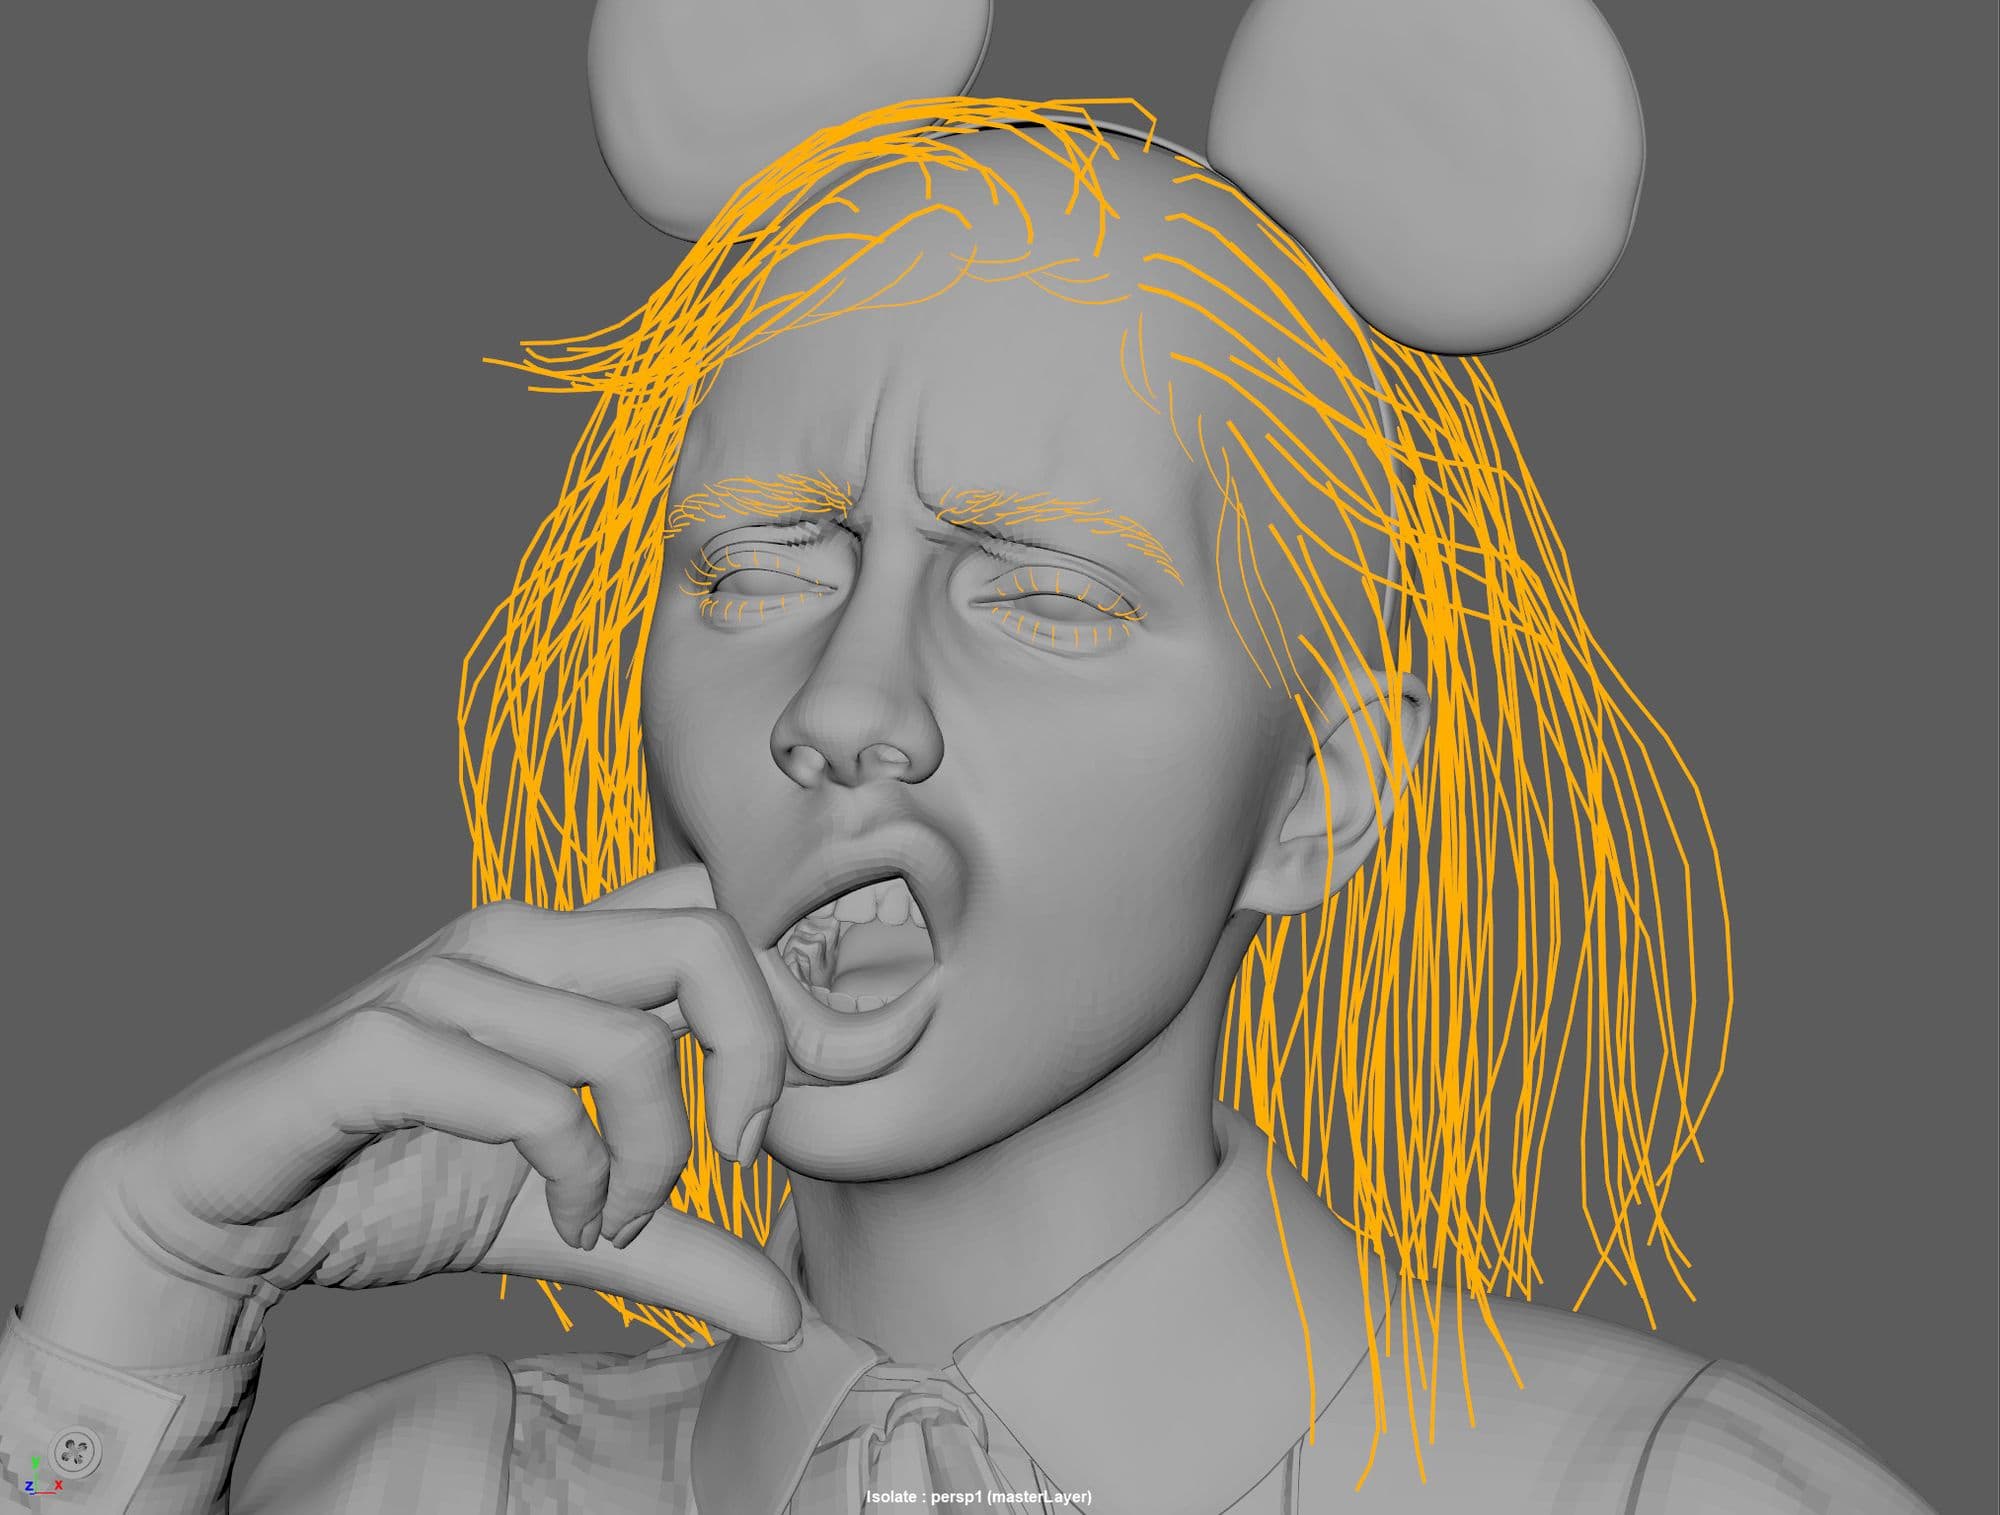
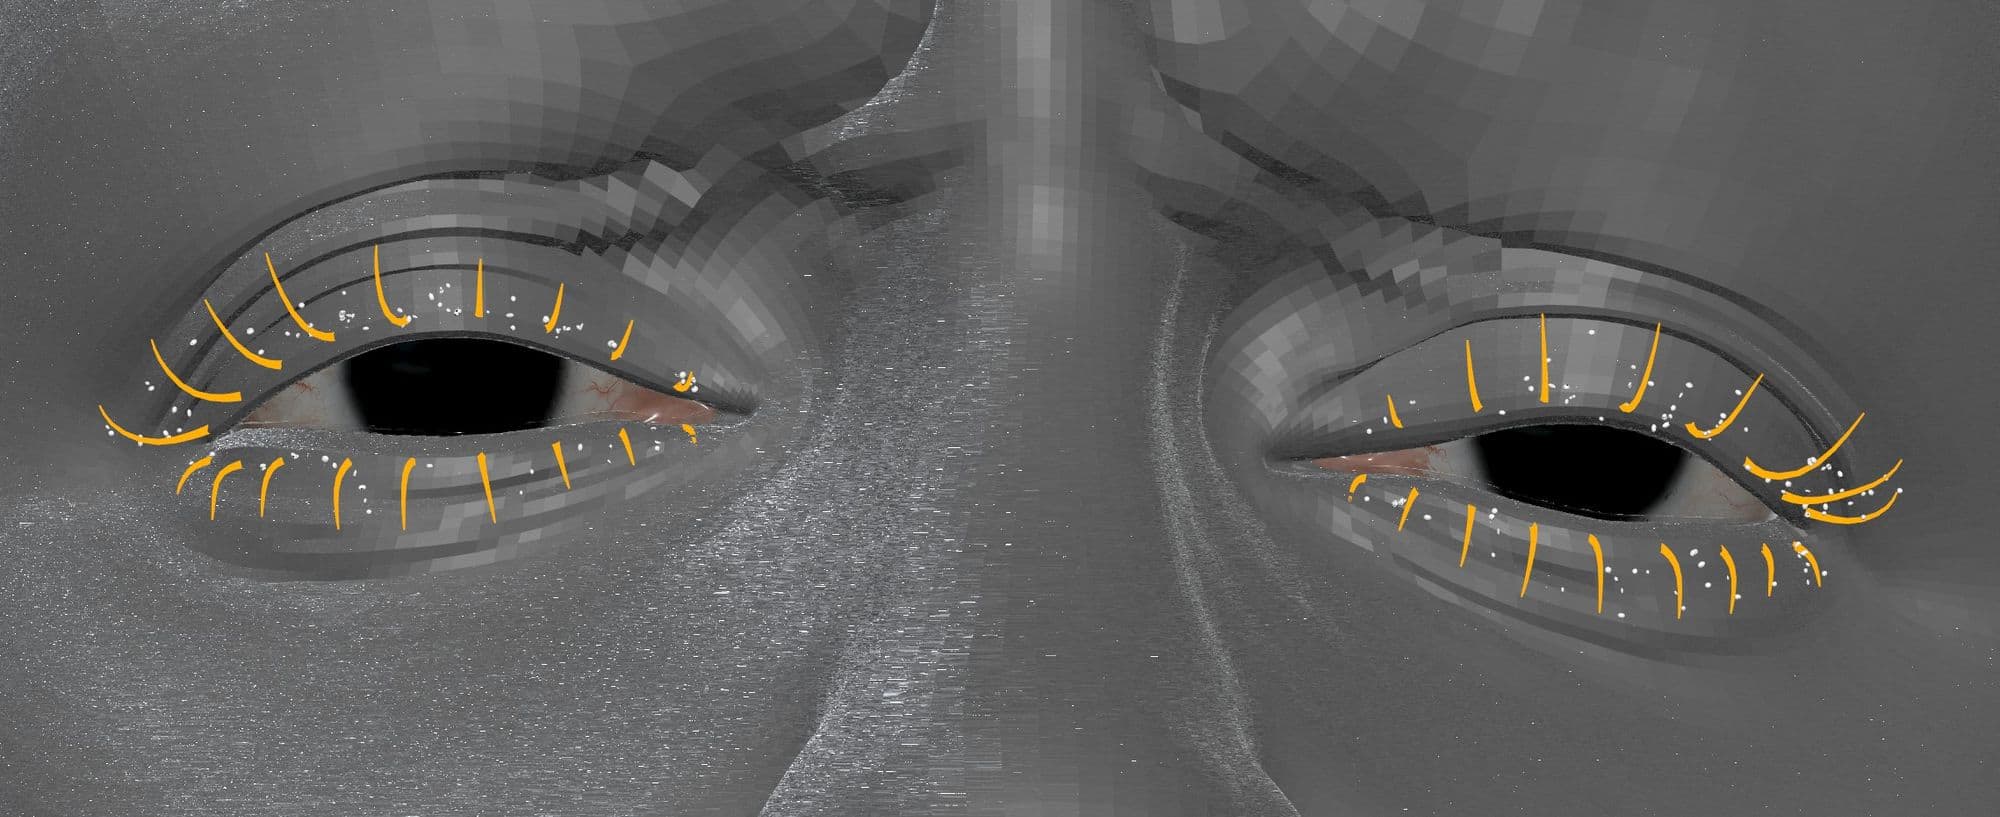
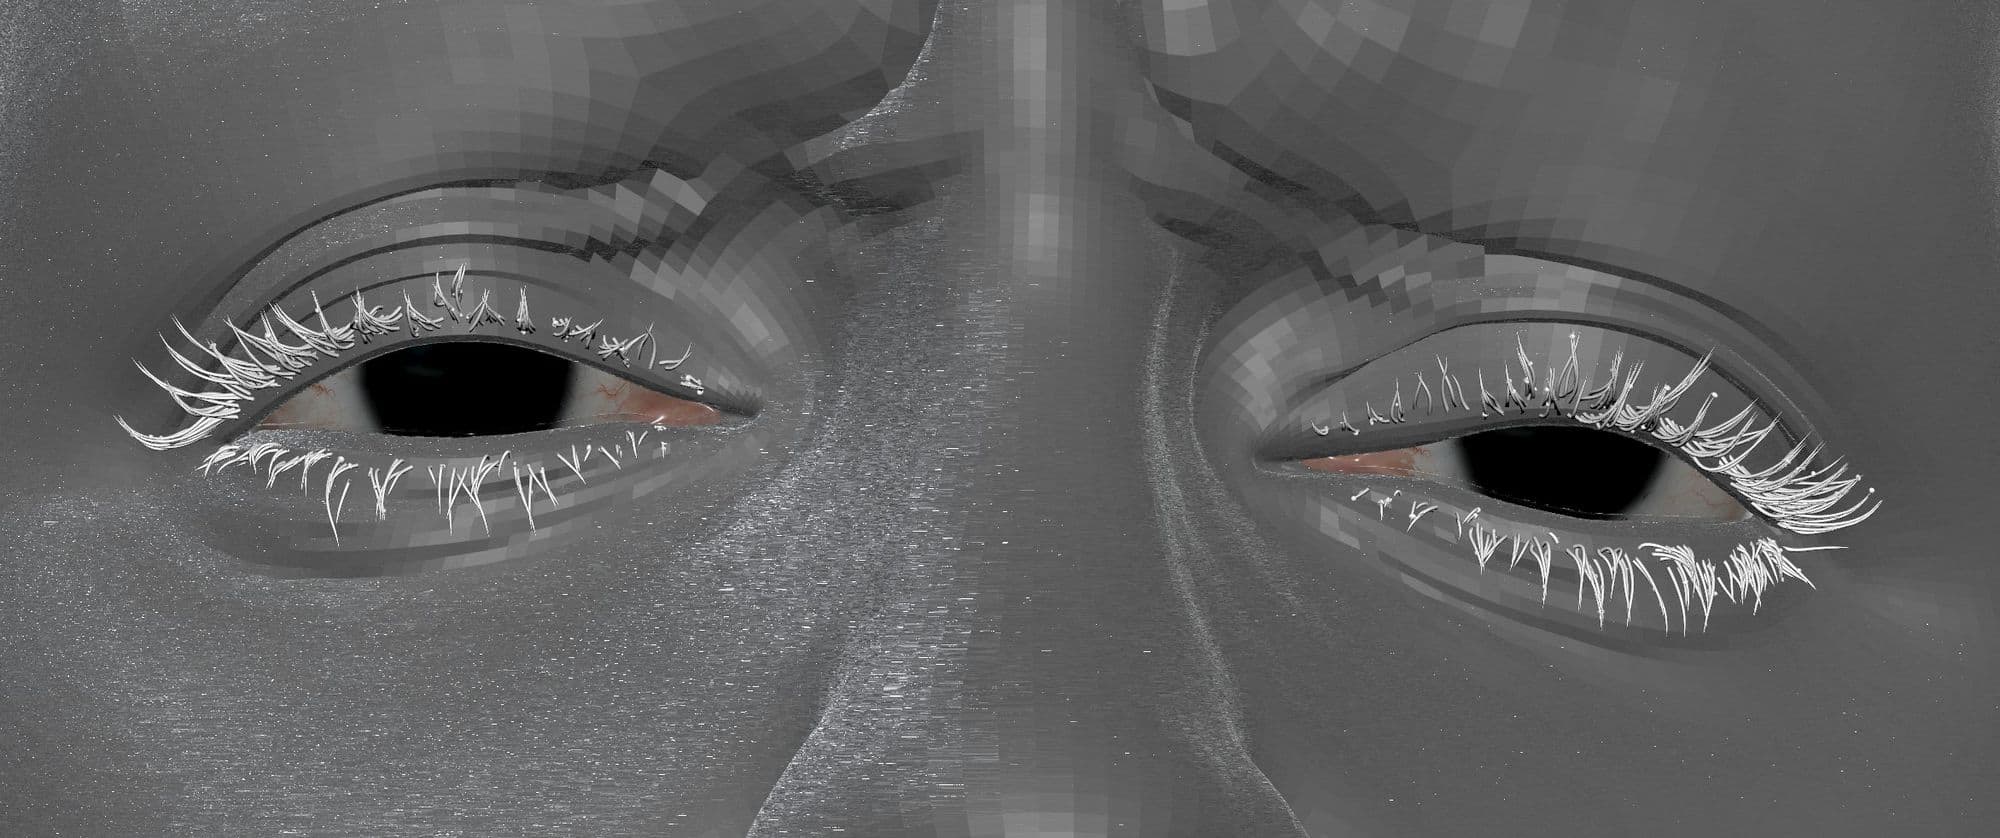
Draw lines of the hair flow on the concept image. This will help with where to place the guides in XGen. Once the shape of head mesh is good, duplicate faces in 3 sections; Head Scalp, eyebrows and eyelashes. Separating them will give you more control over making hair in XGen. Make sure the UV is in 0-1 UV space. Freeze transformations. Apply Lambert shader. Use the guides to generate the first clumping map. Add at least two more Clumping modifiers to refine the hair. Once Clumping is working, add Noise and Cut modifiers to change the texture of the hair. Explore other modifiers if necessary for your character.

After adding hair on the eyelashes, add mascara crumbs by creating a small geo and use MESH network in Maya to scatter over the eyelashes. You can also manually add the geo on the eyelashes.
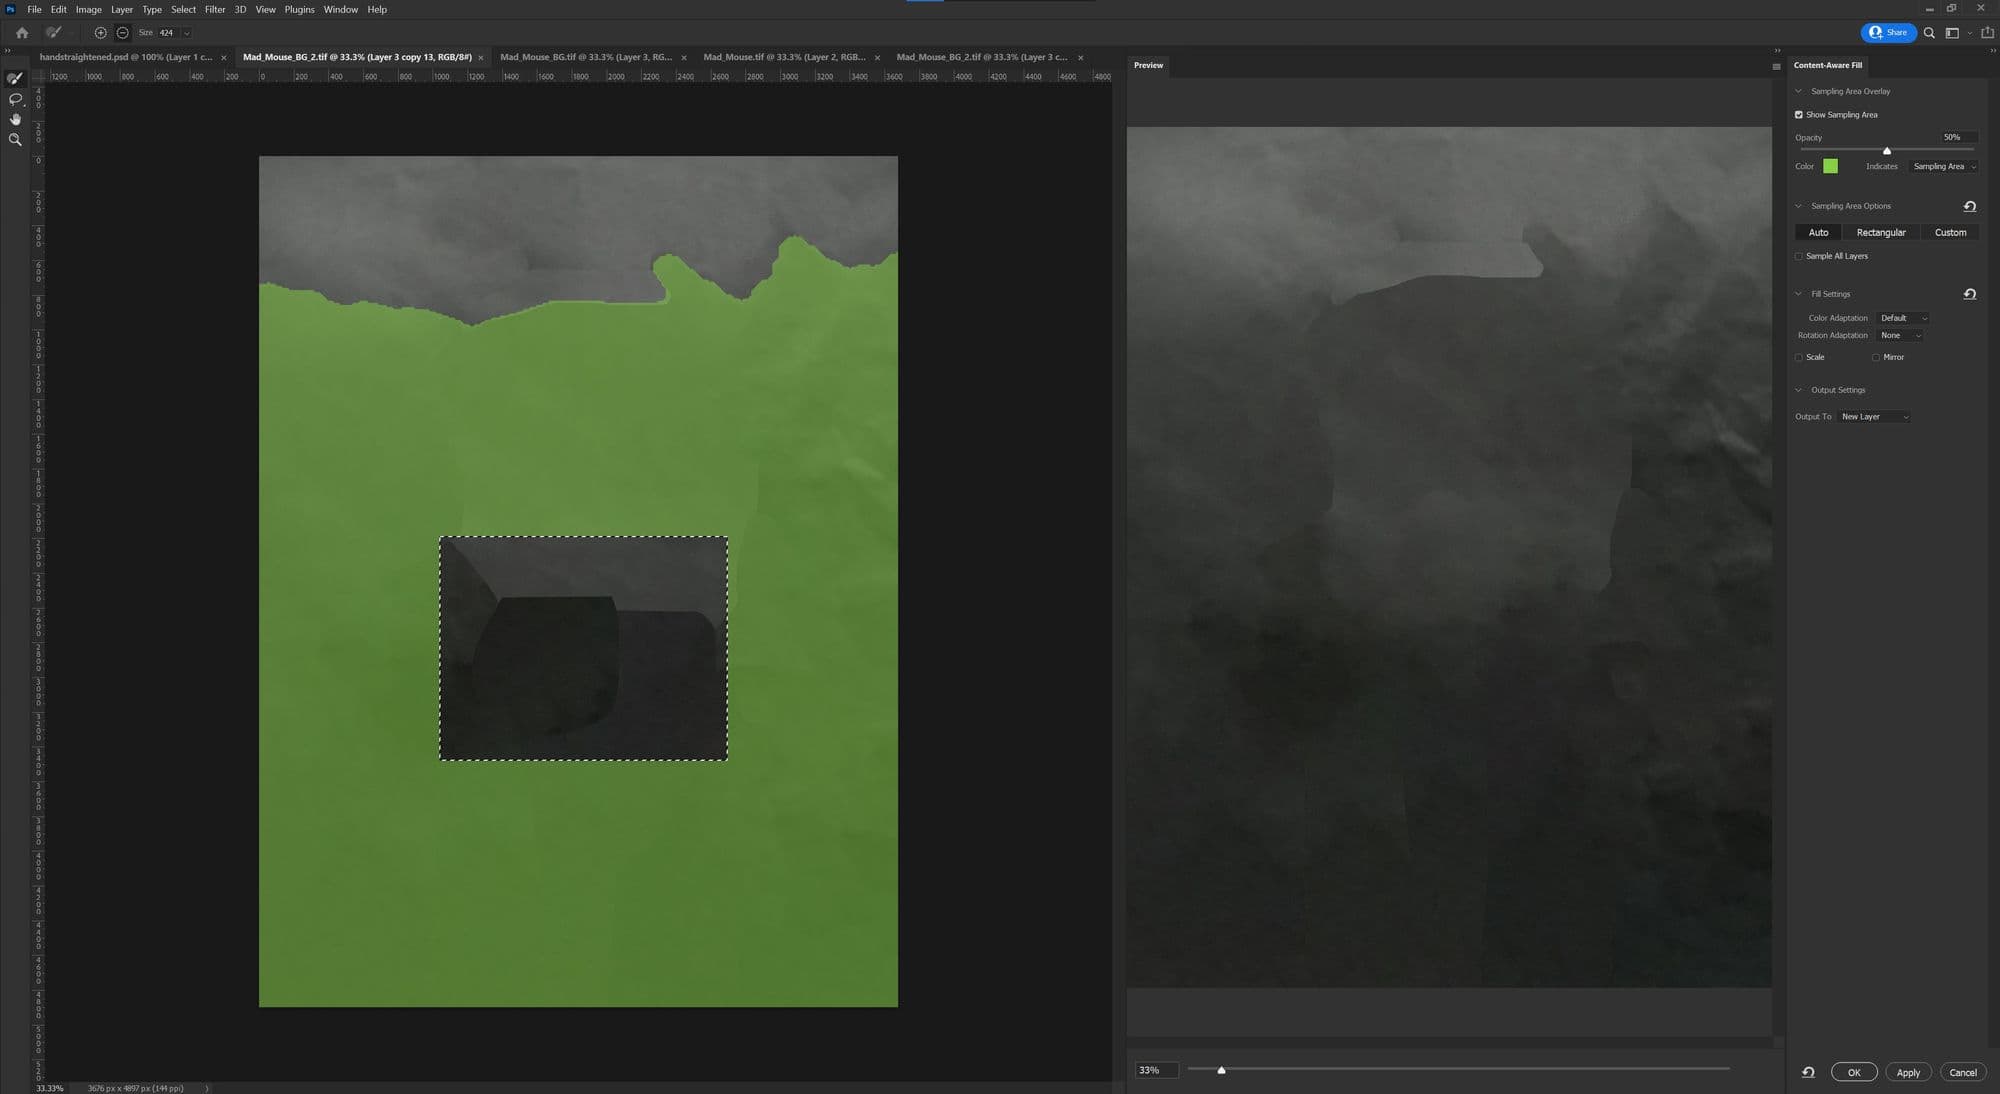
A few backgrounds were created during the process. However these background didn’t feel right with the concept, so the background from the photograph was used to composite the renders together. Remove the model using Content_Aware Fill under Edit in Photoshop. It doesn’t have to be perfect in the middle since the mesh will cover the area.
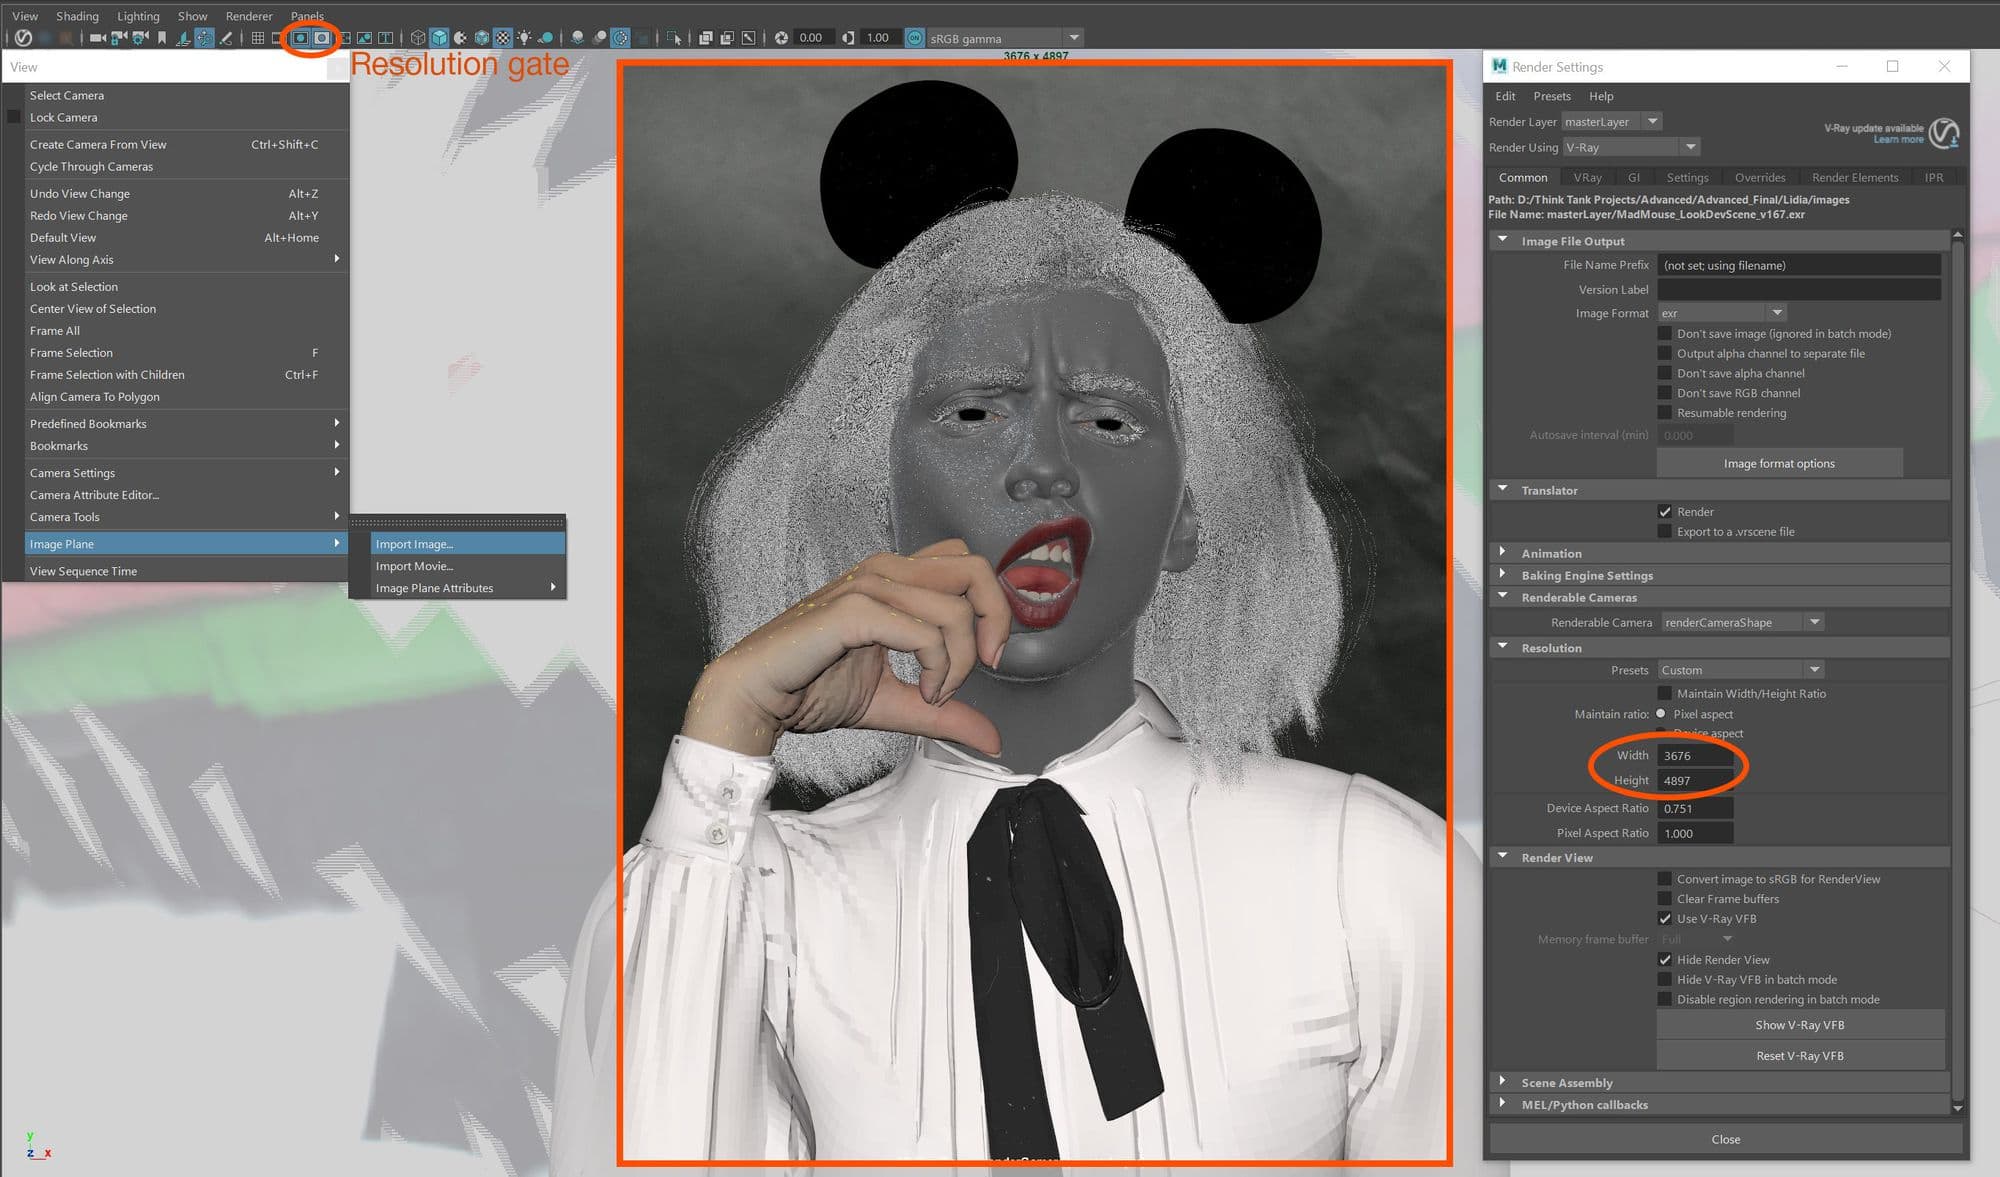
In Maya, create a render camera and set up a resolution that matches the concept photo (width & height) and turn on the Resolution gate. Insert the background image using Image plane (View>Image Plane>Import). Line up the mesh to the concept image by moving the camera. After setting up the camera, make sure to lock the camera (View>Lock camera) and move the view port by holding \ on the keyboard.
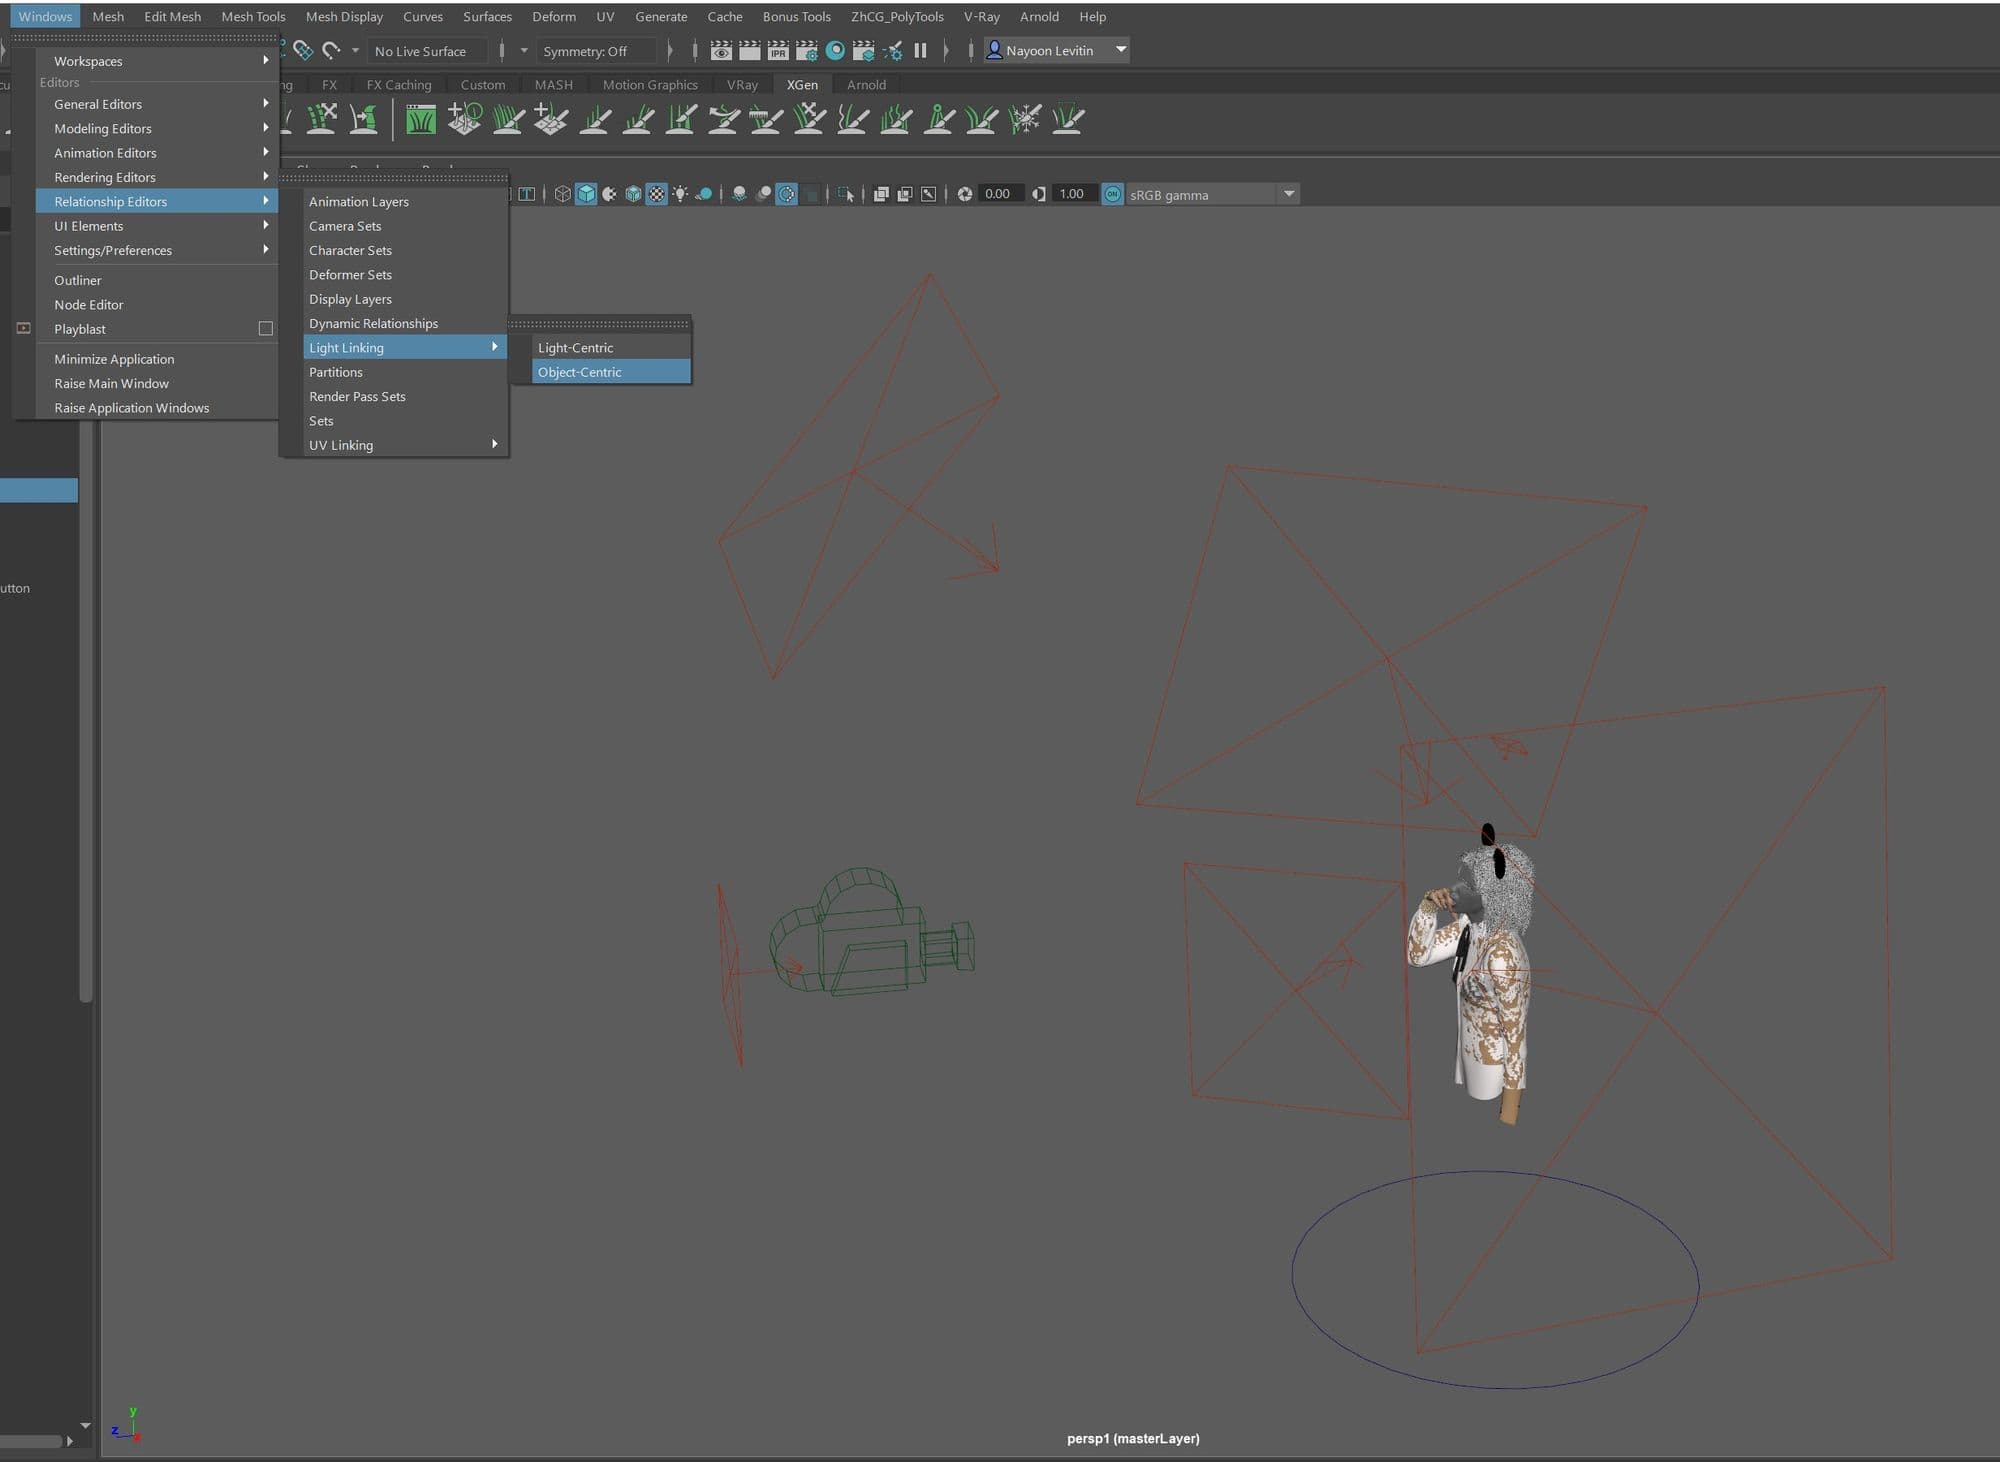
Due to the complexity of the lighting, 3 different HDRI are used to achieve the look of the photograph. Several V-Ray rect lights were also added. Each light was linked to individual mesh to give more control over brighter and darker areas.
Light linking can be found under Windows>Relationship Editors>Light Linking>Object-Centric
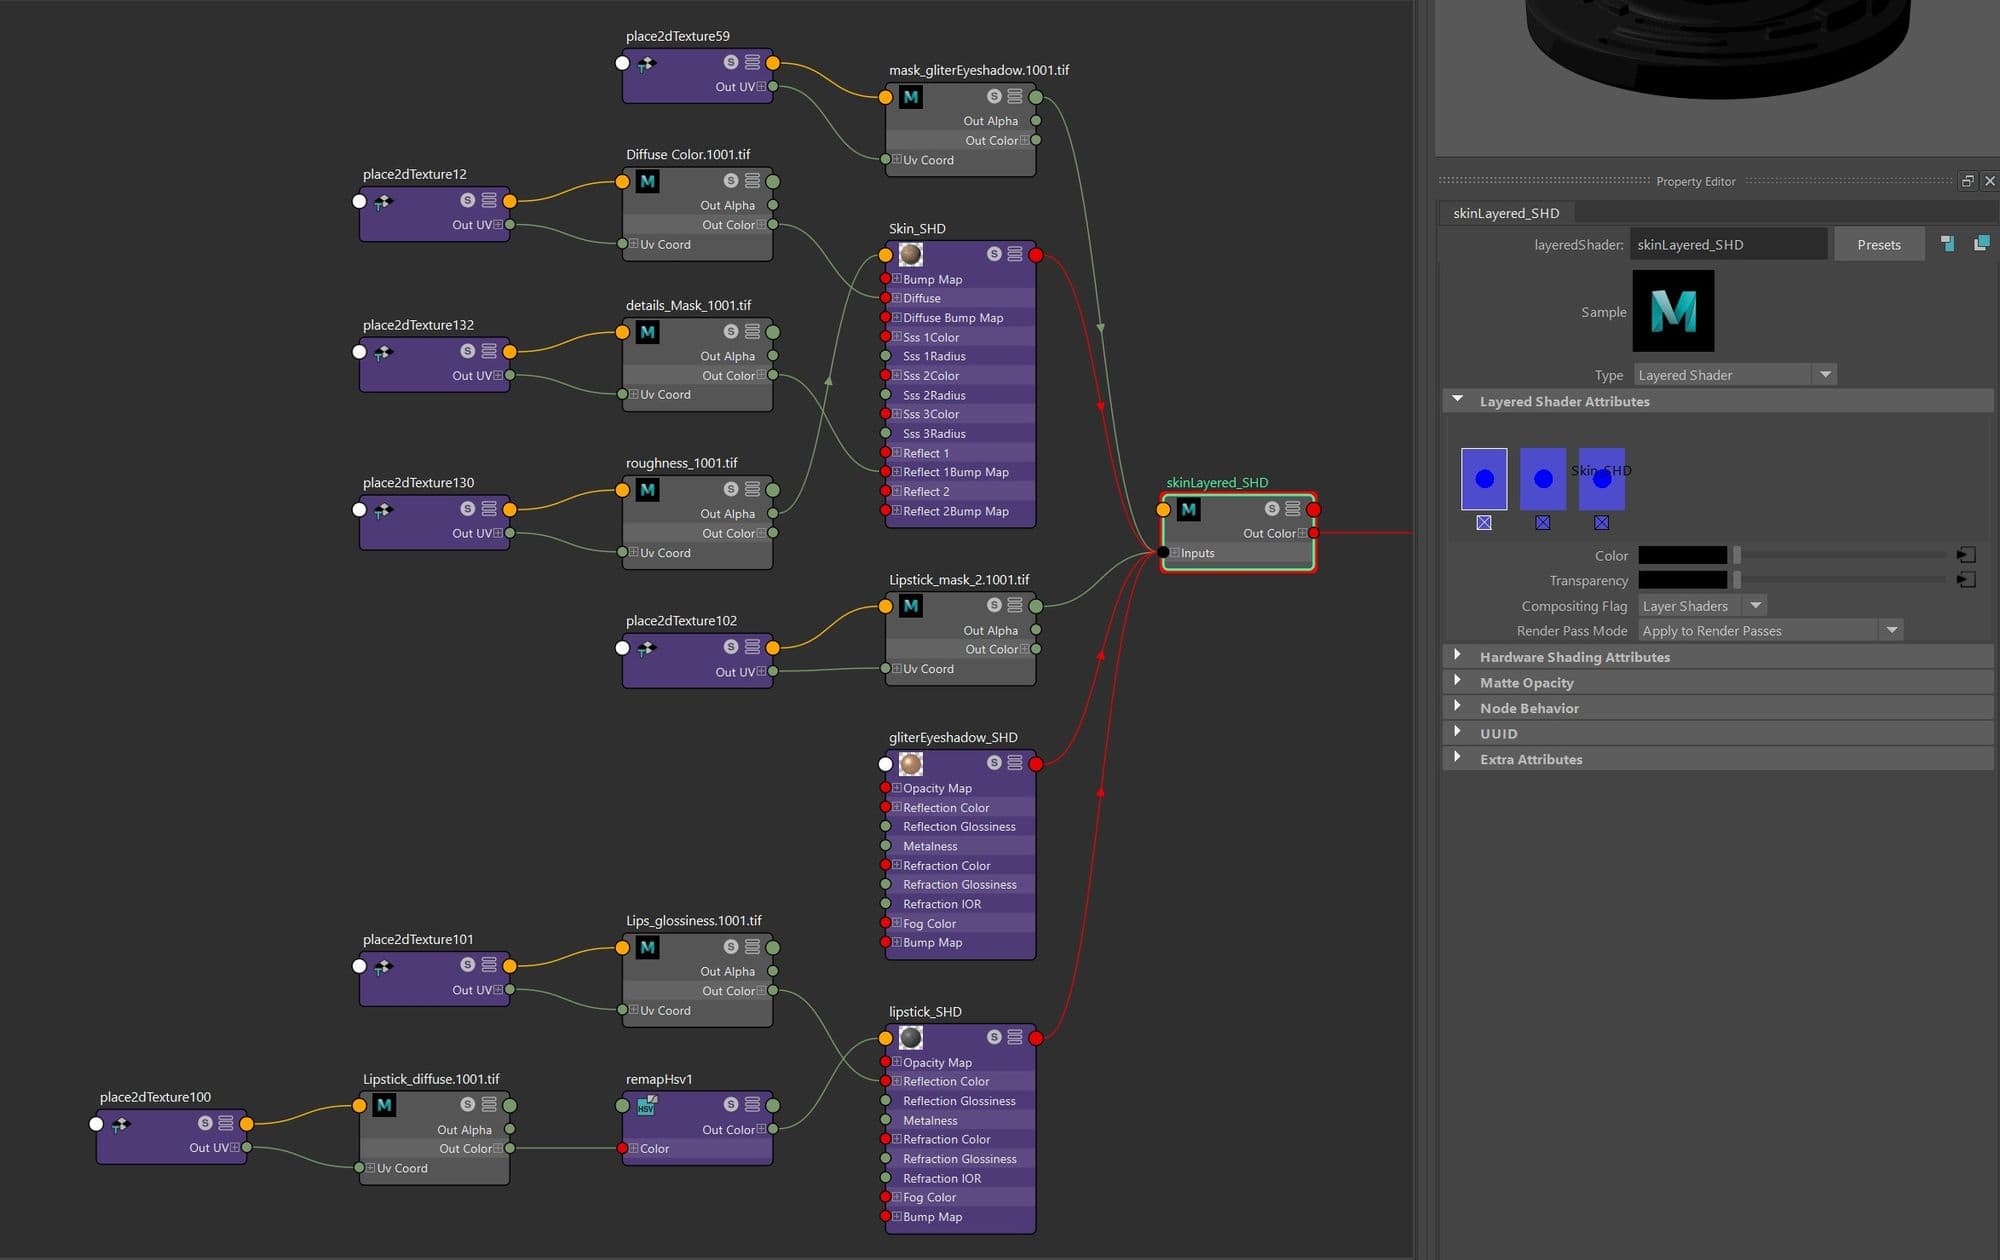
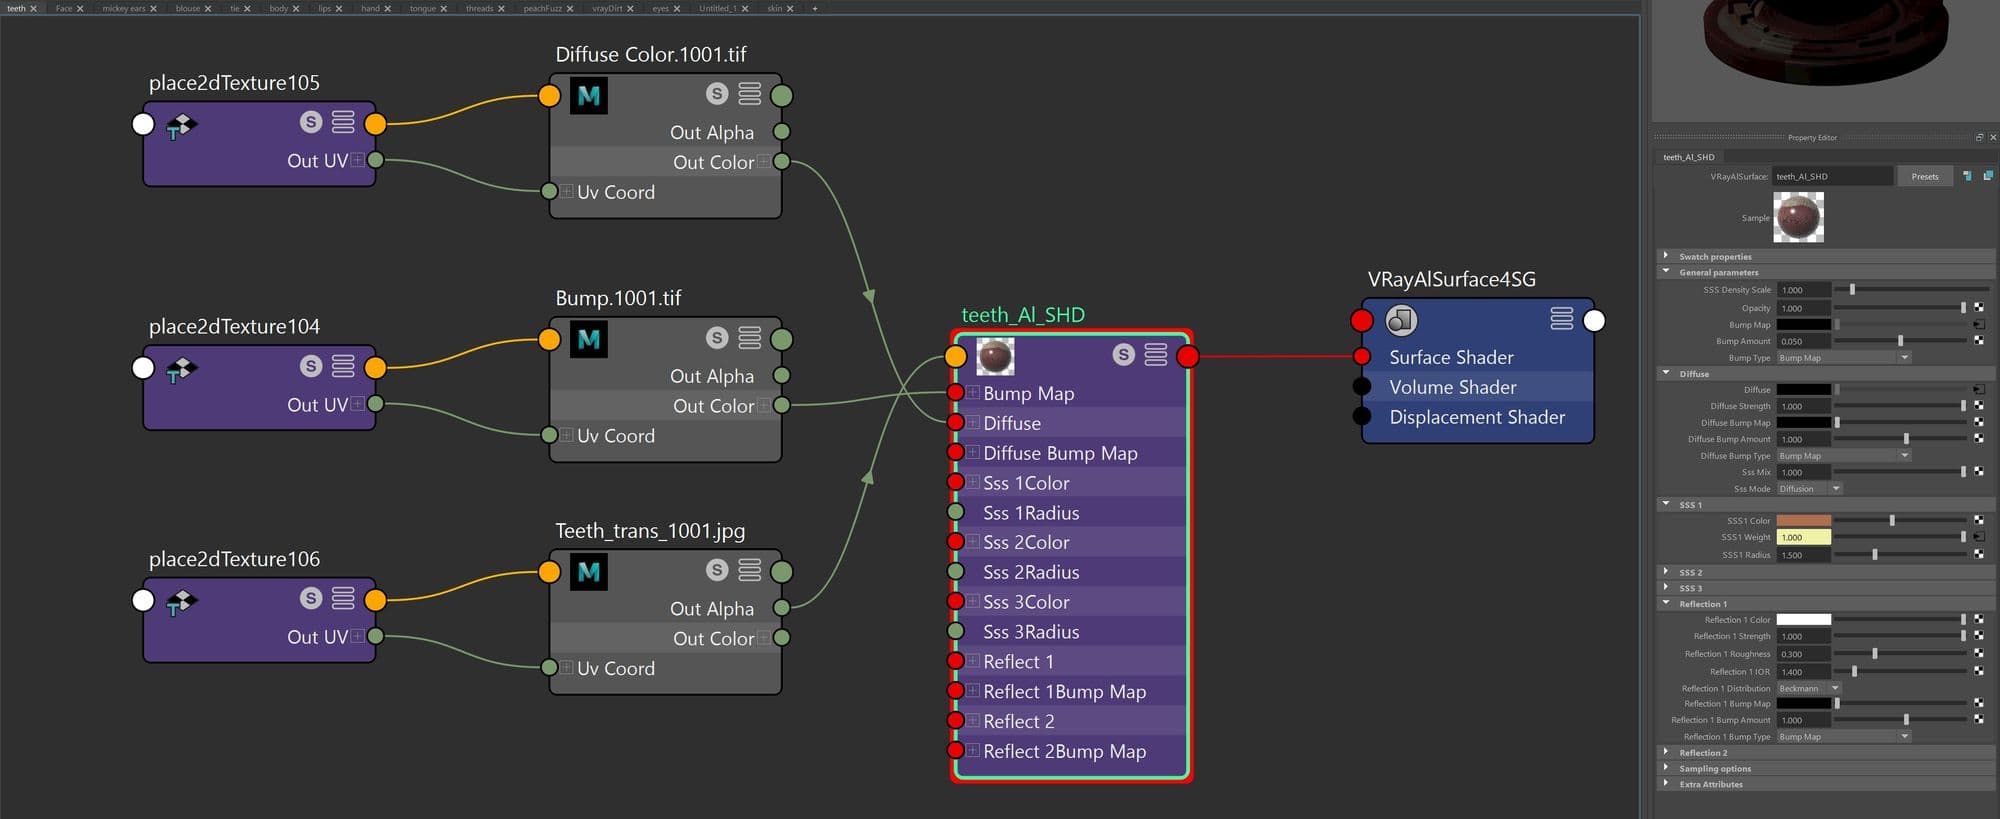
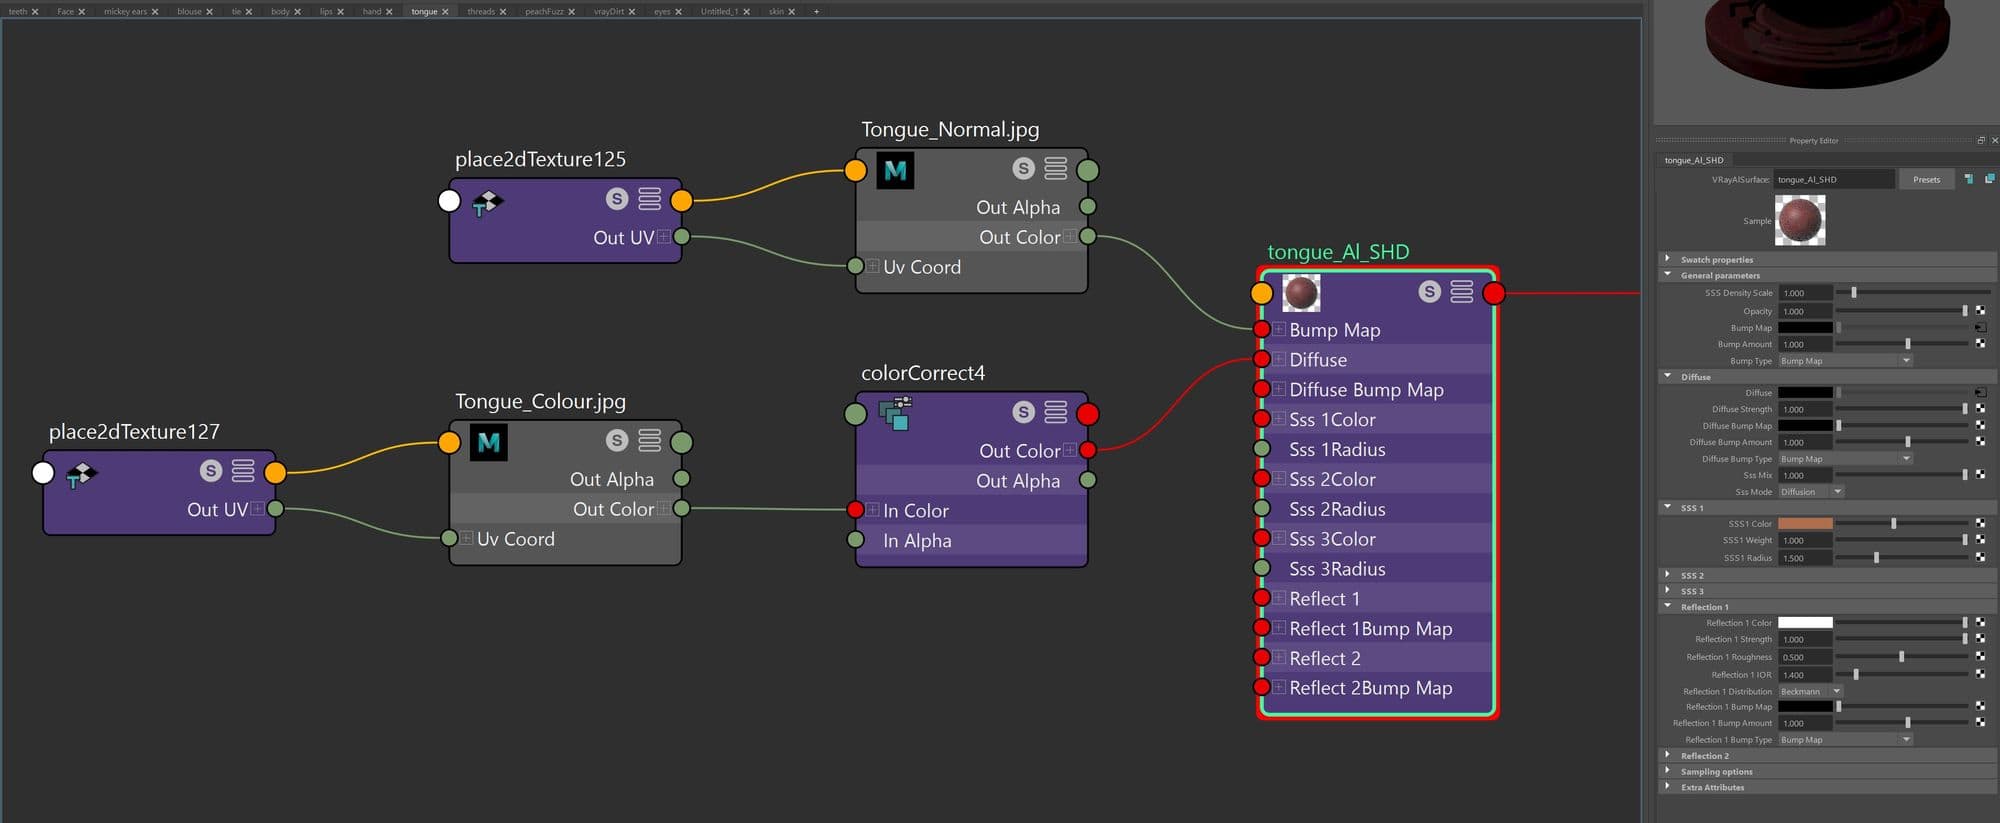
Vray was used to render the scene, however Arnold can be used which is free. To achieve a natural look of the skin, VrayAlSurface was used.
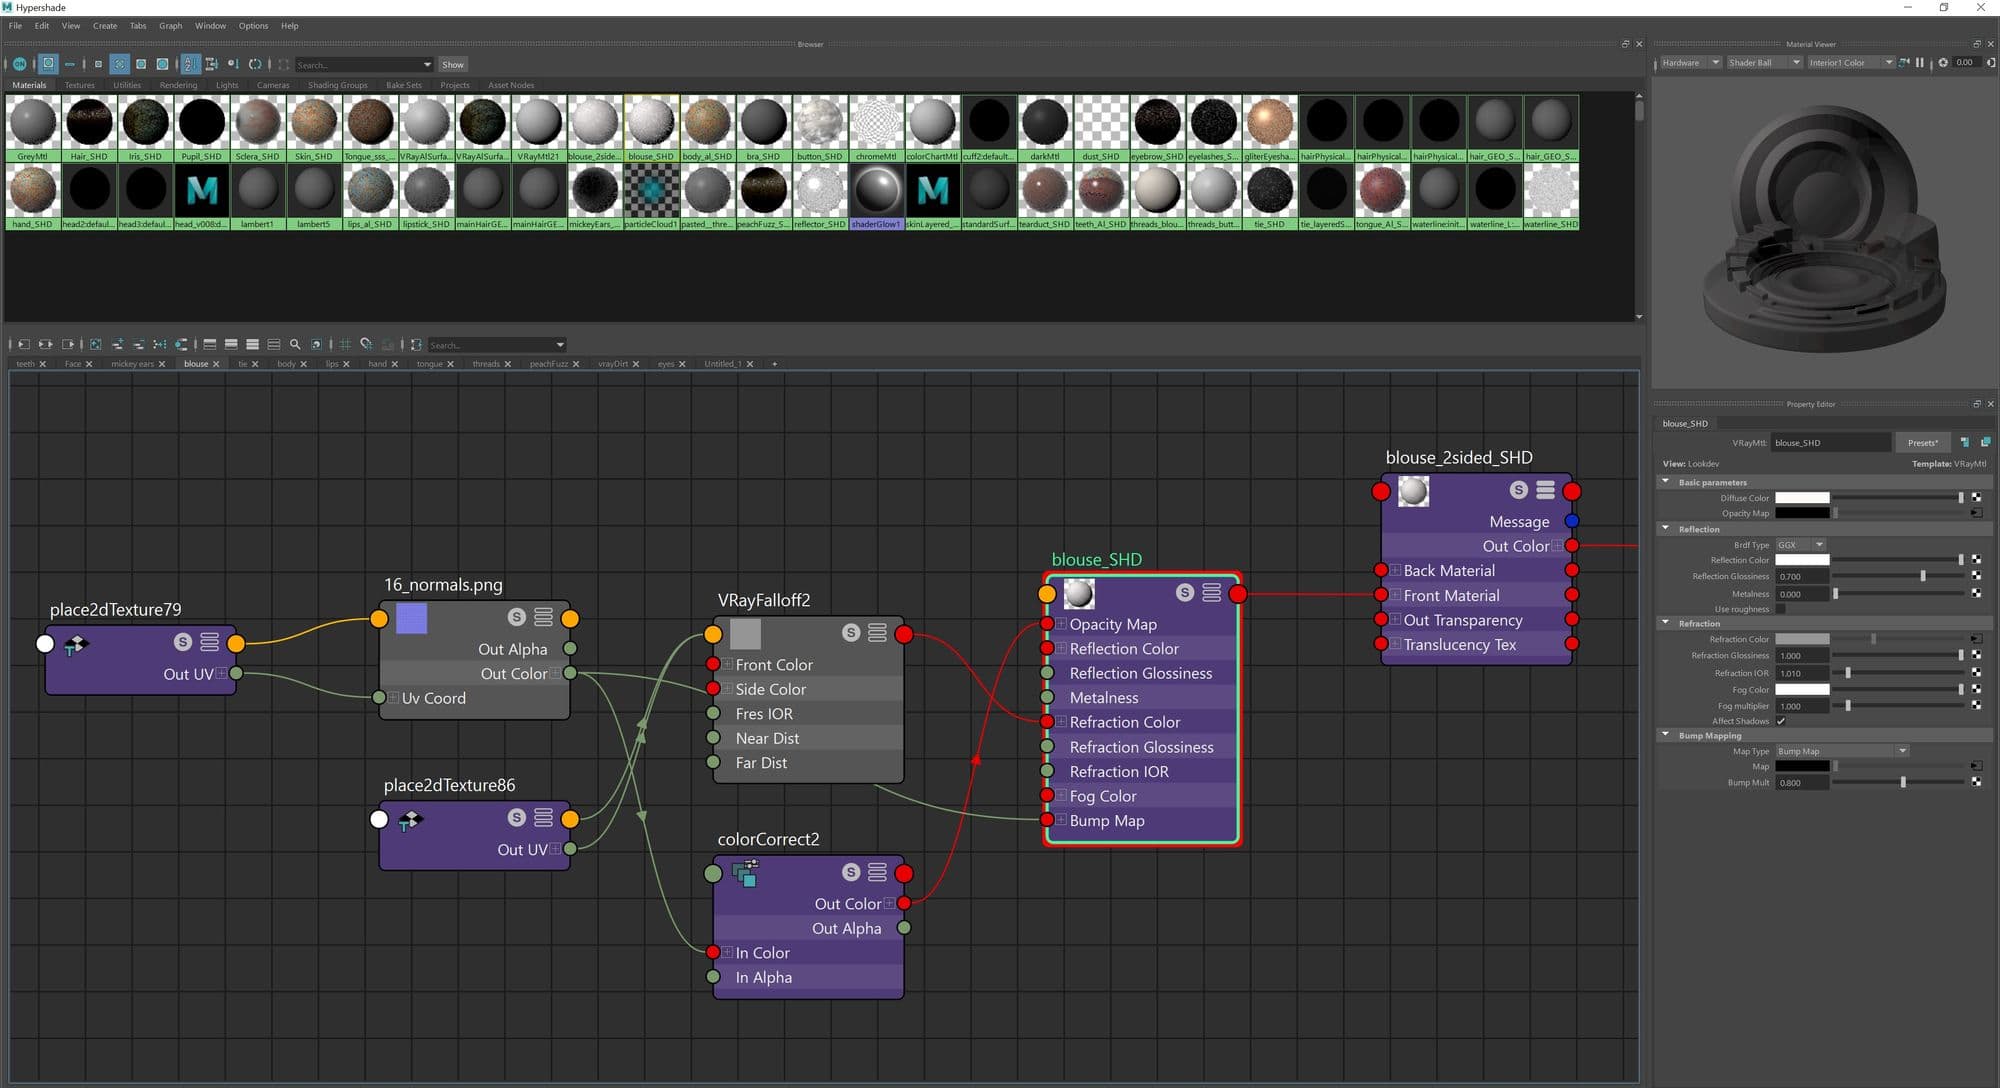
Create textures in Mari and use VrayAlsurface to add textures for head, hand, teeth, tongue and body. Use VrayMtl for the rest. The face is made with 3 different shaders and they are layered by lipstick, eye shadow and Skin in that order.
In vrayAlsurface, make sure to change the SSS mix amount to 1 for a proper light scattering to work.
Since the blouse is see through, model a bra and use Vray2sided material to make the blouse transparent.
Not having enough details will make the 3D model look CG and not realistic. However, too much detail can overwhelm the viewers and move their eyes away from the area of focus. Remember when adding extra details, they should be subtle and support the hero area/asset without disrupting the focus and storytelling.
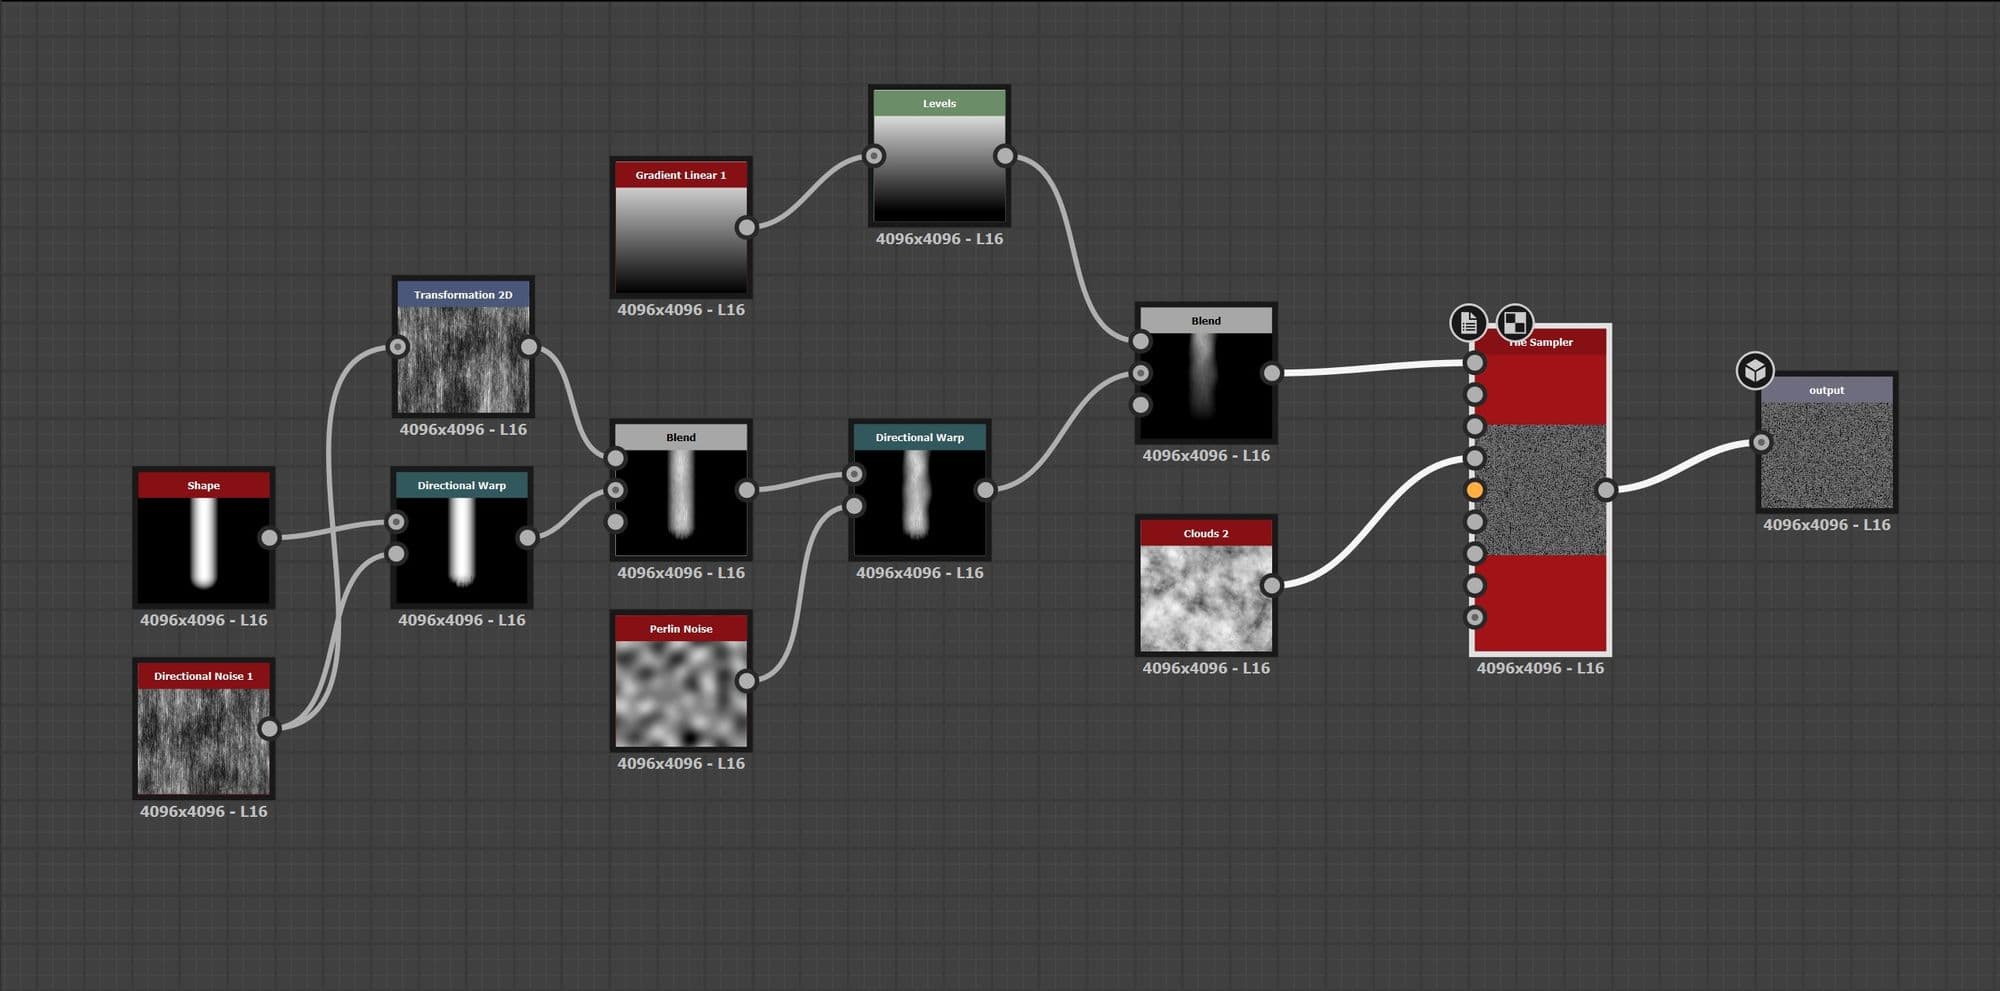
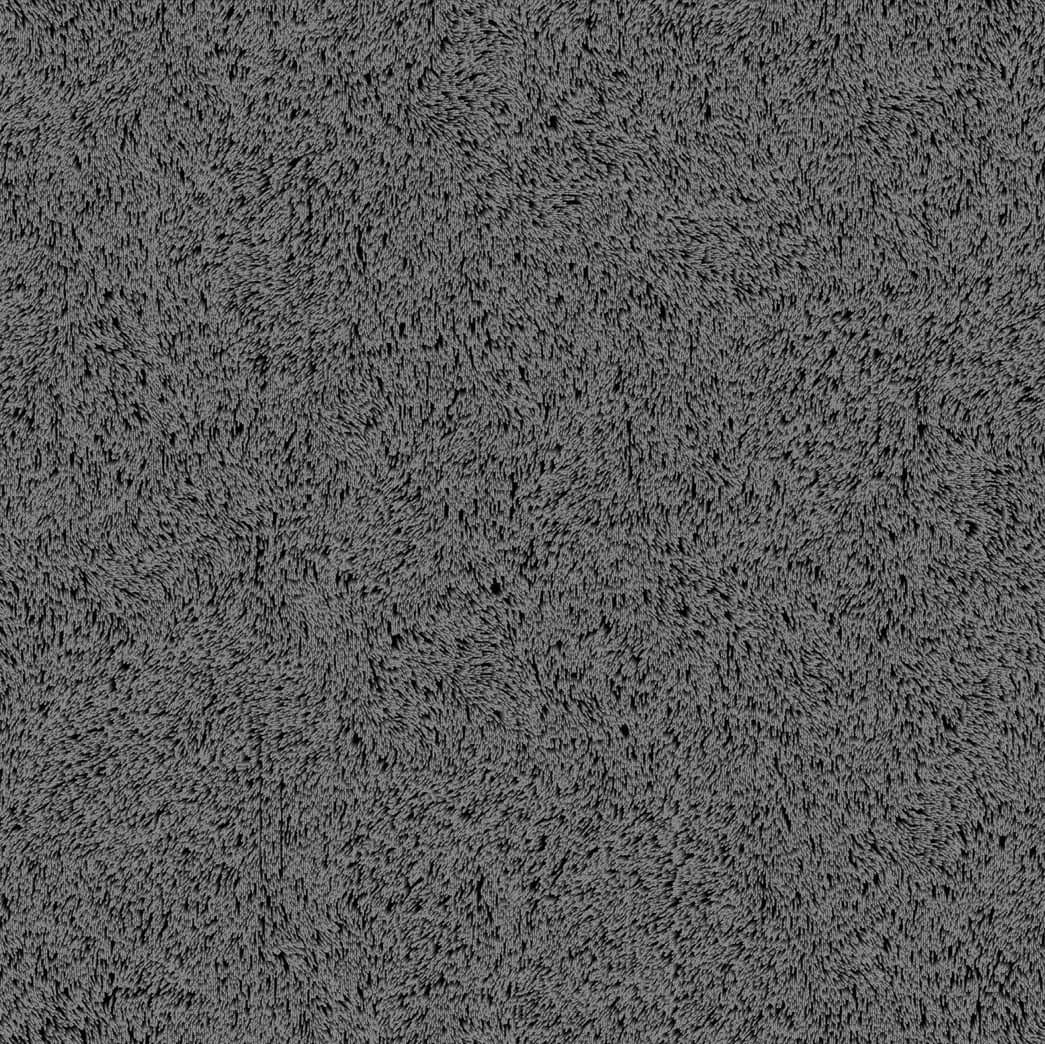
Making the Mickey ears texture:
Create a height map using Substance Designer. How to create the map can be found on tutorial video “Creating Velvet Texture in Substance 3D Designer by Filip Hodas”. Use the height map in Maya as V-Ray displacement.
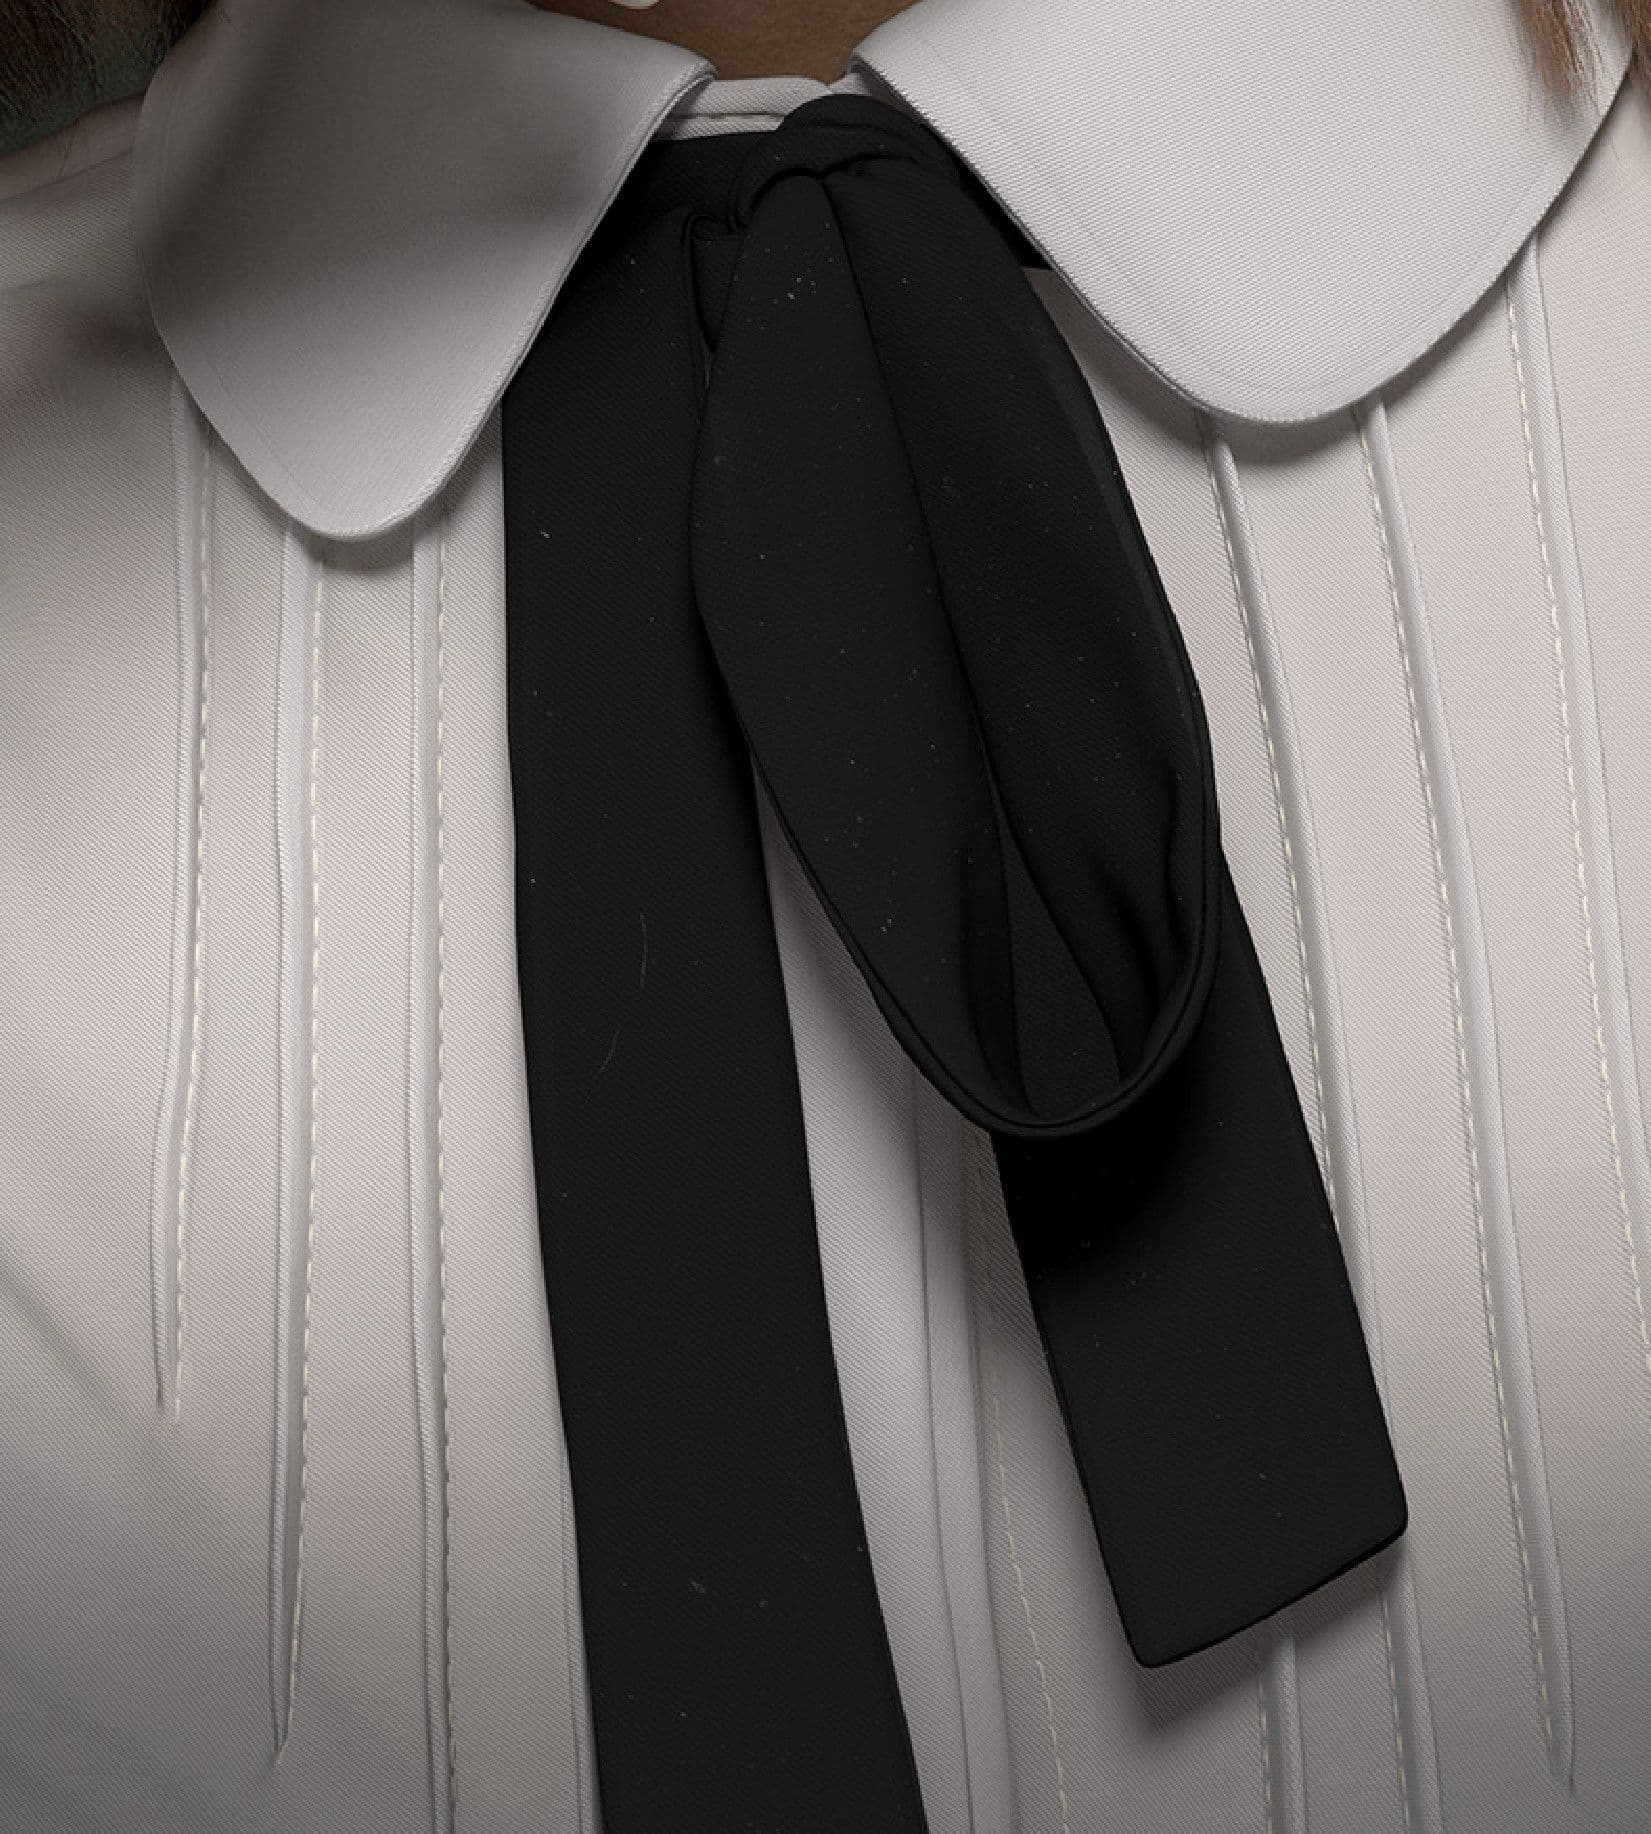
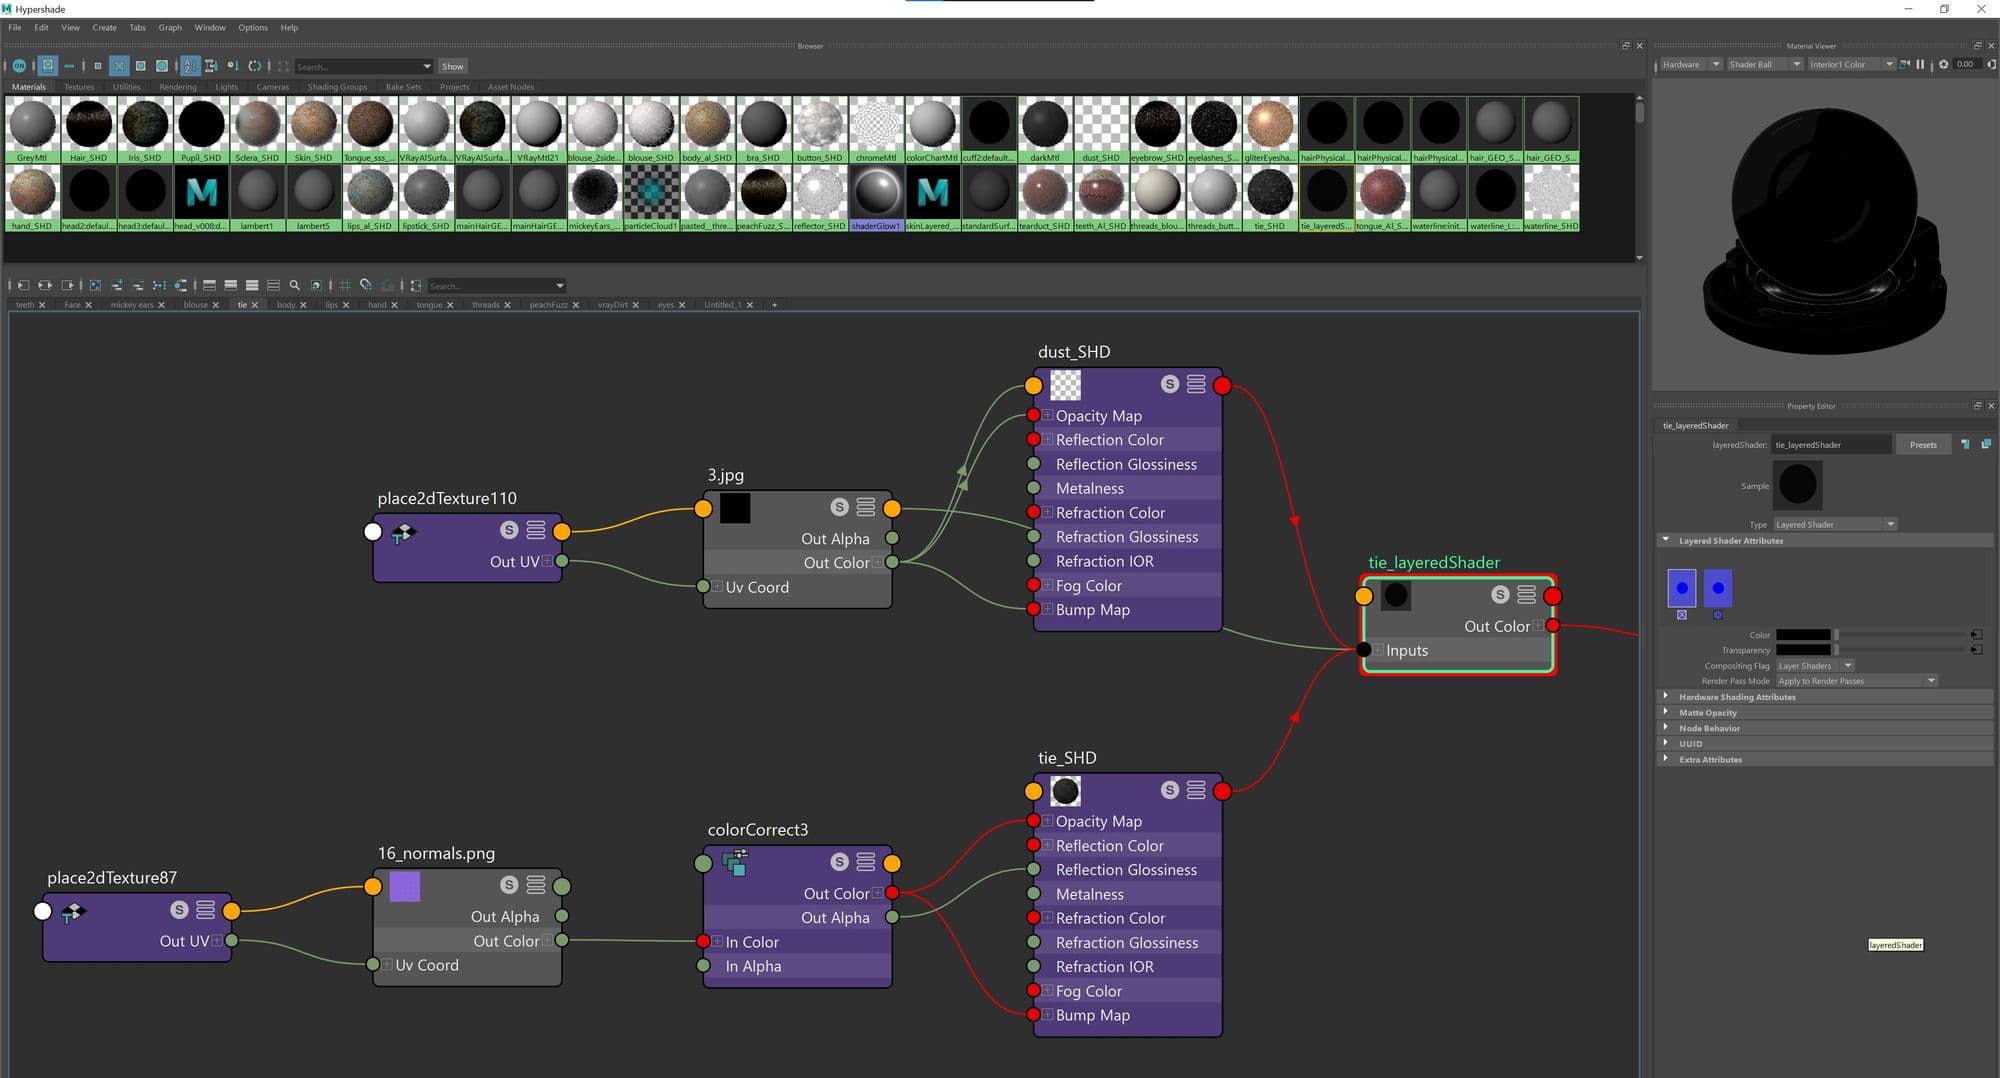
Adding dust:
Use Layered shader node to add the dust on top of the tie shader. Make sure to lower the intensity of the dust colour so it is subtle on the black tie.
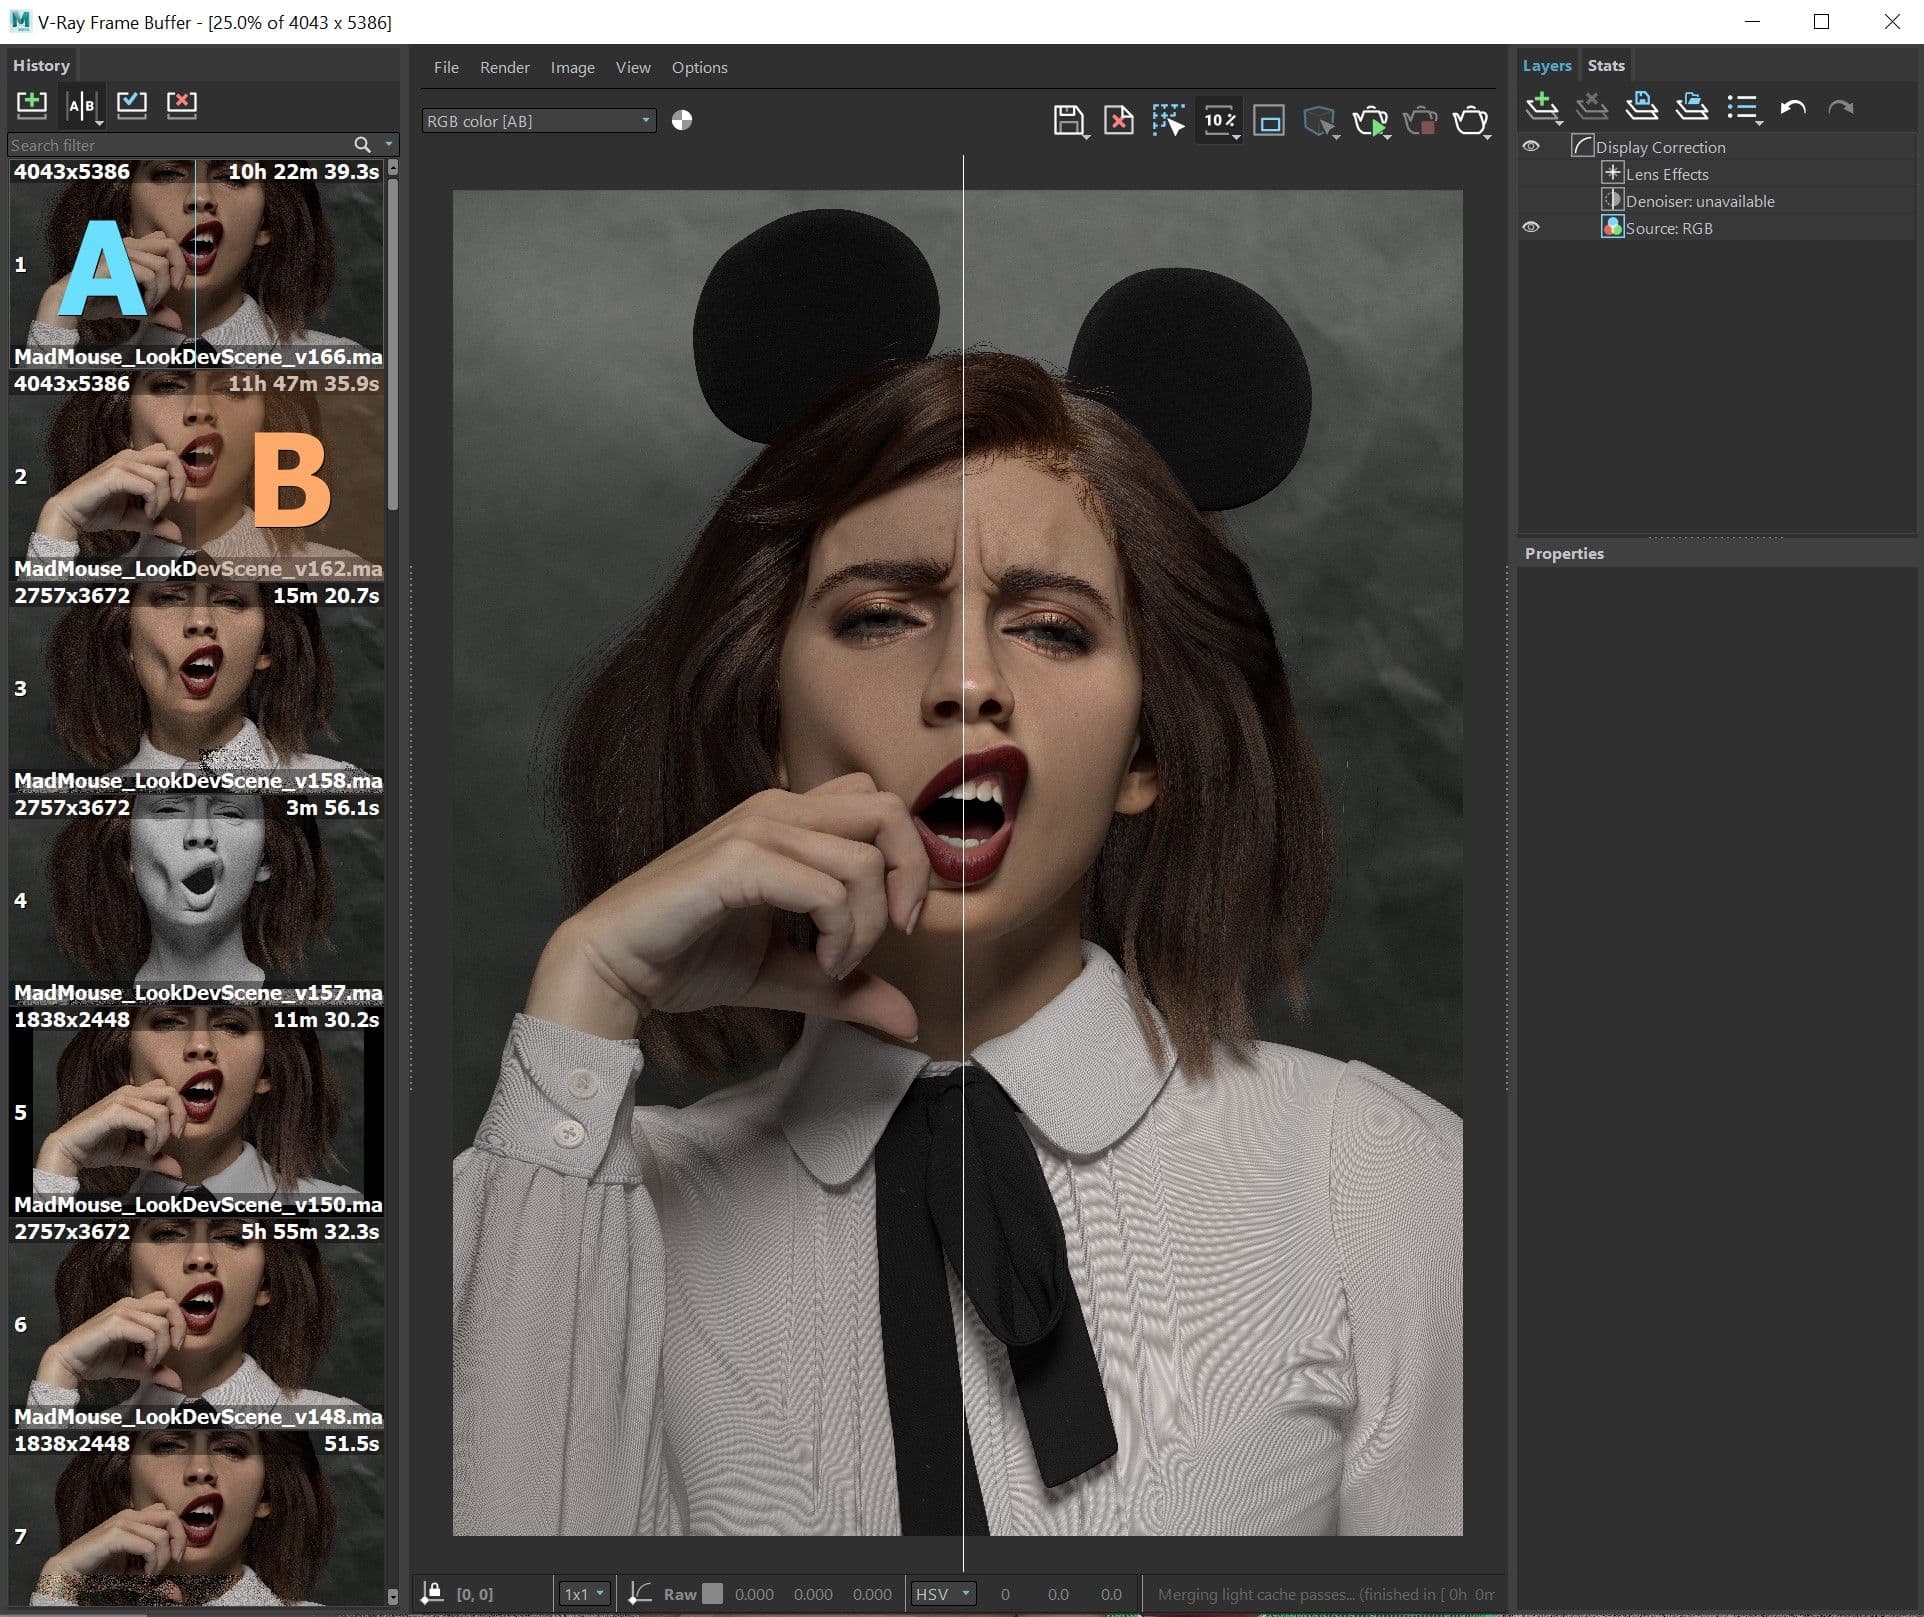
When the project is close to the end stage, it requires minor fixes. Don’t underestimate this crucial step. Even tiny changes can make a huge difference. Use the History section A|B in V-Ray Frame Buffer window to compare the current rendering and the previous ones.
Tip: right click over the saved image to note the changes you made, so you can go back to the settings that look best.
Making a 3D character is not a linear process.
Once the rendering starts, you will need to go back and forth between ZBrush and Maya to refine details on the face and clothing. ZBrush tends to make the skin details more pronounced. However, Subsurface scattering during rendering will lose some of the details if it’s not sculpted enough in ZBrush. From this point on, you have all basic meshes and setup is done.
Now, it is all about fixing and adding more details and constantly comparing to the concept and real world references. The key to make things realistic in CG is to pay close attention to real world and try to mimic that.
With a background in Computer Science, Fine Art and Graphic Design, I am currently in my final term as a student at Think Tank Online, focusing on VFX 3D character.
I grew up mesmerised by the movies of Steven Spielberg and George Lucas. When you’re a kid, imagination is the only limitation, and somehow those two never grew out of that. I had to be a part of it! After a long and windy road, I found the VFX path by attending Think Tank Training Centre.
Coming in, I had no knowledge of the programs or pipeline. But, with the help of mentors and peers, I am now able to do what I love, and have achieved my dream of becoming a 3d artist. I'd especially like to thank Raffael Frank for guiding me through this project.