Bringing an Everyday Object to Life Using Maya and Adobe Substance 3D
Giulia Greggio has a passion for bringing realism to her work, and in this article she shares how she does that with every day objects, using Maya and Adobe 3D Substance.
Giulia Greggio has a passion for bringing realism to her work, and in this article she shares how she does that with every day objects, using Maya and Adobe 3D Substance.
Giulia Greggio is a 3D modeler and BigRock Institute of Magic Technologies alumna, with an artistic background. Starting in graphic design and then concept art, Giulia took a 3D Modeling course, discover her passion for 3D Modeling and Texturing.
Giulia has a passion for bringing realism to her work, and in this article she shares how she does that with every day objects, using Maya and Adobe Substance 3D.
After some modeling exercises, some started and never finished, I decided to switch from my current exercise, the BlenderGuru’s Donut, to a more serious project. So my idea was to search for a more realistic prop in order to put into practice what I’ve studied during Gennaro Esposito’s course. I also wanted to get serious with my modeling reel, and so create a piece that I would have been proud to add to it.
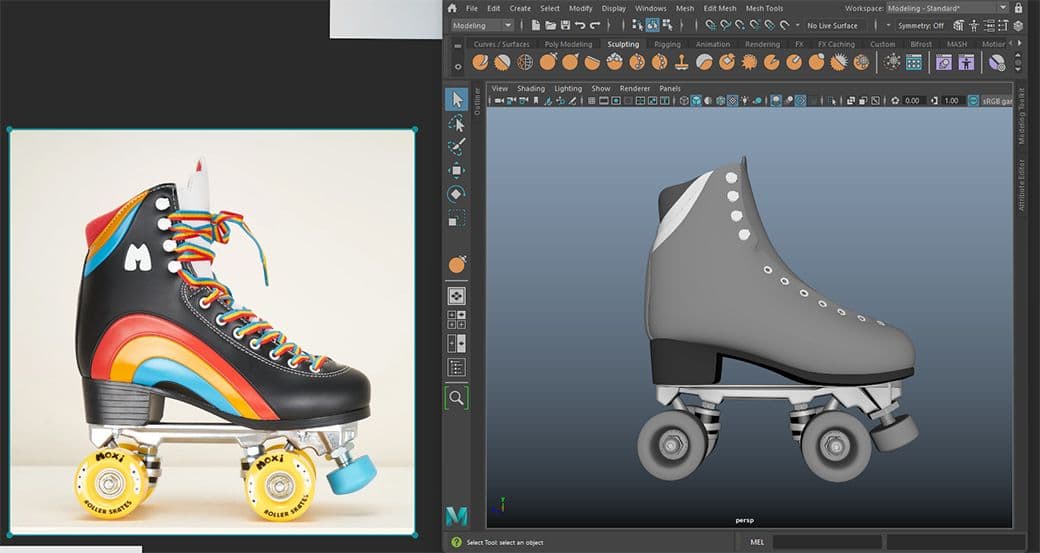
My intention was to recreate an everyday object. I was full of ideas of props saved from Amazon; it's a great database! You can easily find photos of the articles from all views. At the end I chose a prop that was a mix of hard surface and organic shapes, and an object that obviously I liked a lot.
Even if working at the company you can’t choose what to model, so I think that on a personal project, it’s ok to start from something you like, in order to encourage yourself.
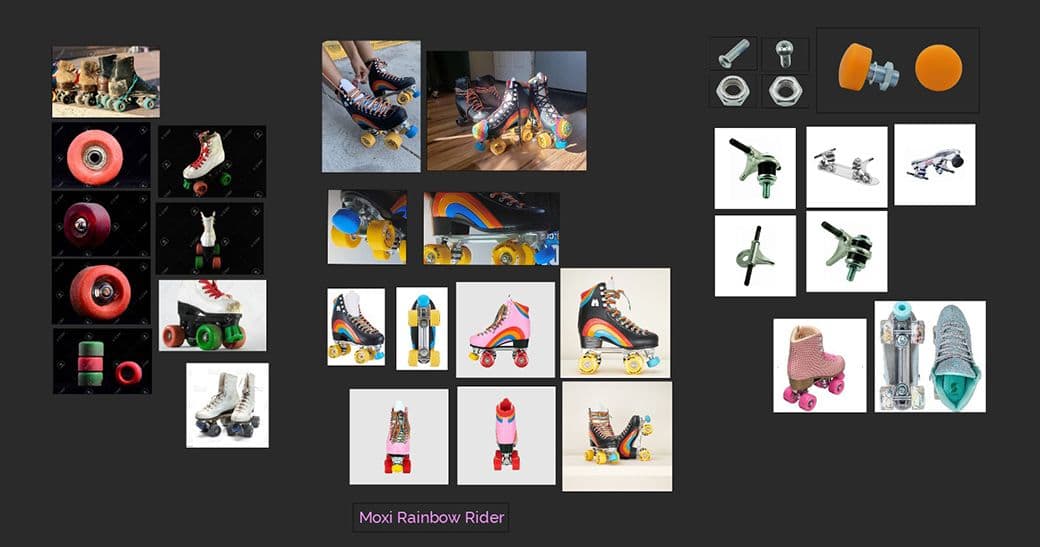
After adding all the references on PureRef, there’s the blockout phase, the most fun in my opinion just because you start to see the object come to life. I have an artistic background so I know how important it is to understand the proportions and how the object sits in the 3d space, therefore, I started with basic shapes looking at my references.
When I was happy with it, I turned on the orthogonal cameras in Maya, to display the photos of the roller in all the views, trying to match my blockout and proceeding with adjustments.
Usually, during this phase I don't focus on the geometry and I don’t lose time on it. I just have fun with the shapes in search of making them similar to the references.
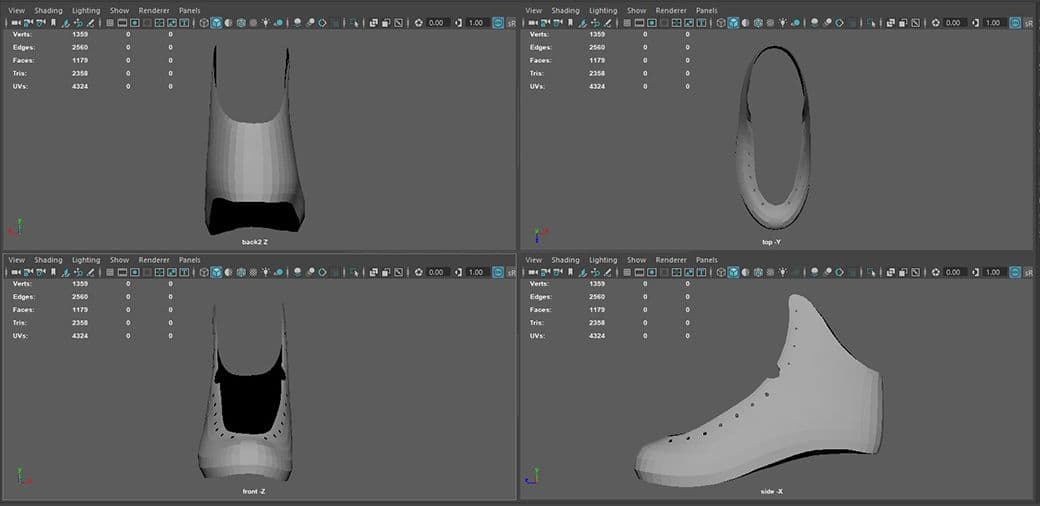
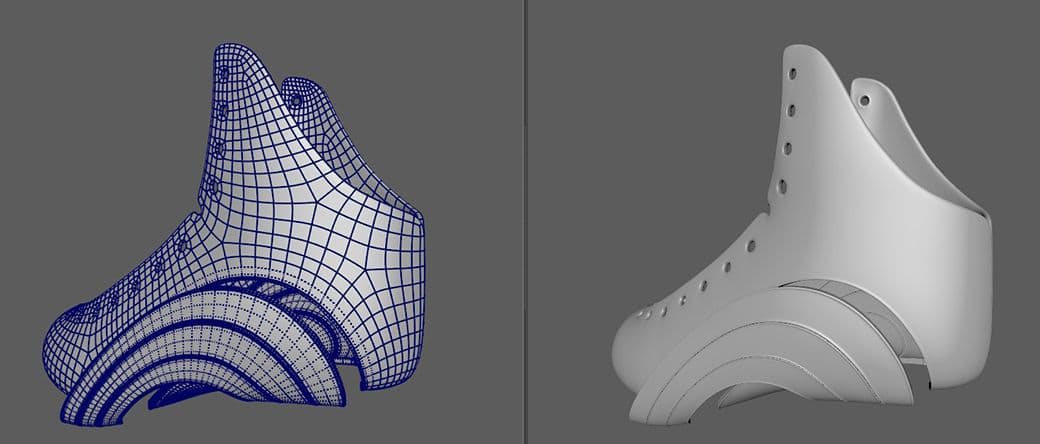
When my roller was born in the 3d space, proportionate and complete with all the pieces, I started to study the geometry of each component. Doing this I tried to avoid pinches and n-gons. So, I retopologised some meshes trying to remain clean and simple with the geometry, sometimes adding a blinn or phong material to it in order to check possible imperfections.
I remember that one of my obstacles was the organic shape of the shoe: with the many holes for the laces, there were some pinches and I had to do many tests, changing the geometry and relaxing it, to get the look I was after.
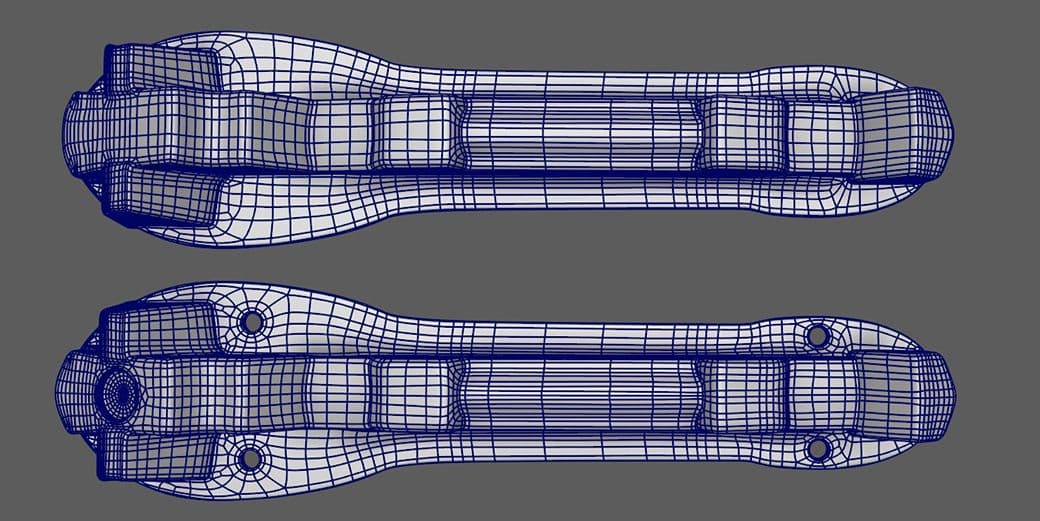
Also, the metal base of the roller was challenging for me because all of the shapes that made it up, it was a long retopology which required a lot of patience. For the screws, I remember having searched on the Internet and the tutorial of Elementza helped me a lot.
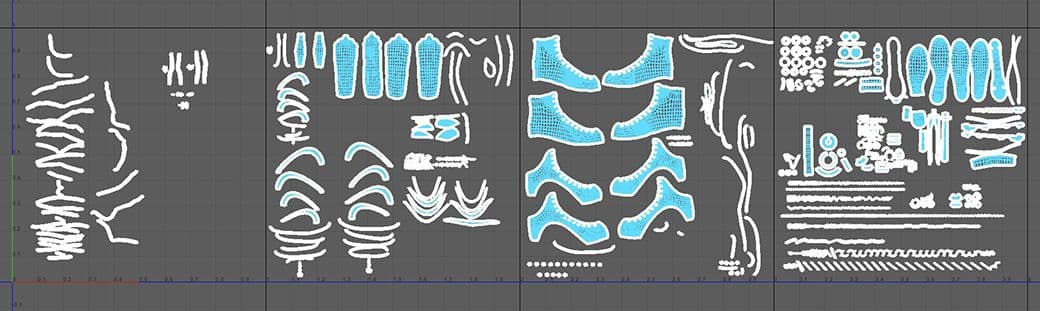
For now, the most cumbersome part of the process was done. I armed myself with music, and I took my time to cut the UVs and organized them in 4 Udims: one for the laces, another for the metallic components and two for the shoe.
I was a novice in the process of texturing so fortunately the intuitive interface of Adobe Substance 3D didn’t discourage me from studying it. I spent days watching Adobe's tutorials to understand 3D Substance’s interface, materials and anchor points. When I was ready to apply this new knowledge, I thought of a possible story for my roller skates and I decided to make them look used, like the roller skates of an enthusiast rider. So, I updated my references by adding some old roller skates.
When I started to texture [with Substance 3D Painter], I discovered I enjoyed this process so much, mostly the aspect of trying to reach a certain photorealism.
The first step was to draw the seams along the roller, in fact I had decided to not model it in Maya so as not to make the file too heavy. Surprisingly (to me), I managed to create realistic stitches with a default brush of Substance called Stitches Straight.
Another powerful tool that I discovered is the anchor point. On the paint level of the stitches I applied an anchor point linked to a level with height, in this way the height was applied only around my stitches. Lastly, with a level of blur I could relax the folds making it more realistic.
For the laces and the logos I helped myself with Photoshop. For the first lace, I created an image with three coloured stripes that I used as texture to apply on my laces. I had to pay attention to the order of the stripes, so it was helpful to use the 2d visualisation tool. To render them realistically I added a Fabric material and a level paint of dirt. When it game to the logos, I took some images from the internet and converted it in Photoshop to black and white creating alphas for Substance.
To remain coherent with the story of the roller skates and giving the idea of deterioration, I thought of “crumpling” the tongue of the shoe and the padding. I created a level of height driven by a mask with the Creases Soft texture applied. Then, I added the usual level of blur to blend the effect. Also I put some dirt on the roller skate and I create variety on the roughness, especially on the black leather to give the sensation of an object that has been touched a lot.

Because of my graphics background, in the phase of lookdev I’ve tried to insert my roller skate in a more aesthetic scene playing with lighting to highlight any shape of the prop and make it more presentable.
Usually I start with a basic lighting, I put a skydome in the scene that acts as a key light, with an HDRI coherent with the story of my object. In this case I used an HDRI called Park Parking with natural lights. Then I added an area light as a fill light and a rim light behind the object to volumise it.
On this object I had more materials, so, to when showcasing the different shapes I had to add some other lights parented with different parts of the roller skate in order to not influence others, especially for the metal and the leather that reacts in different ways to the lights. To parent the lights on a certain mesh I used the Maya’s function of Light Linking on Relationship Editors under the tab Windows.
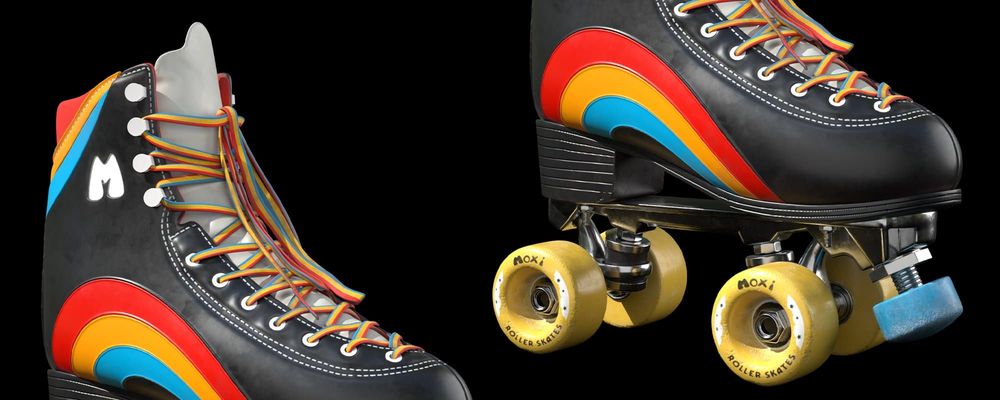
In the end I decided to render my Moxi Rainbow Rider with a transparent background and then, after some colour proofs, I chose a fancy vintage colour.
It took me one month to finish the Moxi Rainbow Rider, maybe it seems like a lot of time but the projects after that will take me less time for sure.
From this exercise I learned that it’s important to not rush to finish soon. It’s a moment of study so it’s ok to use time for understanding some processes or retrying something. Another tip is that when something doesn’t work, maybe it’s better to do it all over again, instead of continuing to add stuff. This is worth it for the modeling part but also for the texturing process.

Speaking about time, I also understood the importance of the order of things. I’m more the type of person that overlooks the order to stay more focused on the process. I used to work with a messy outliner, saving my files in messy folders named “Asjskfdf” or “Finishfinish8”. But just with a little bit of attention on it, trying to stay ordered with the scene, renaming all the objects and organising every project, you can save both time and your mental health!
Another important lesson that I learned is about the anxiety of familiarising with a new program and the utility of Manuals. When it was time to add the textures from Substance to Maya, I was overwhelmed by a lot of tutorials online. Then I discovered that lots of information already existed in the Substance 3D manuals. I found that Adobe Substance's tutorials were more comprehensive than a lot of tutorials out there.
You can find more of Giulia's work on The Rookies and Behance.