Design, Detail and Animation: Creating Custom Clothing with Marvelous Designer
Nina Chernyshenko, a freelance digital artist from Ukraine, gives you the tools and tips to create 3D custom clothing for your portfolio, using Marvelous Designer.
Nina Chernyshenko, a freelance digital artist from Ukraine, gives you the tools and tips to create 3D custom clothing for your portfolio, using Marvelous Designer.
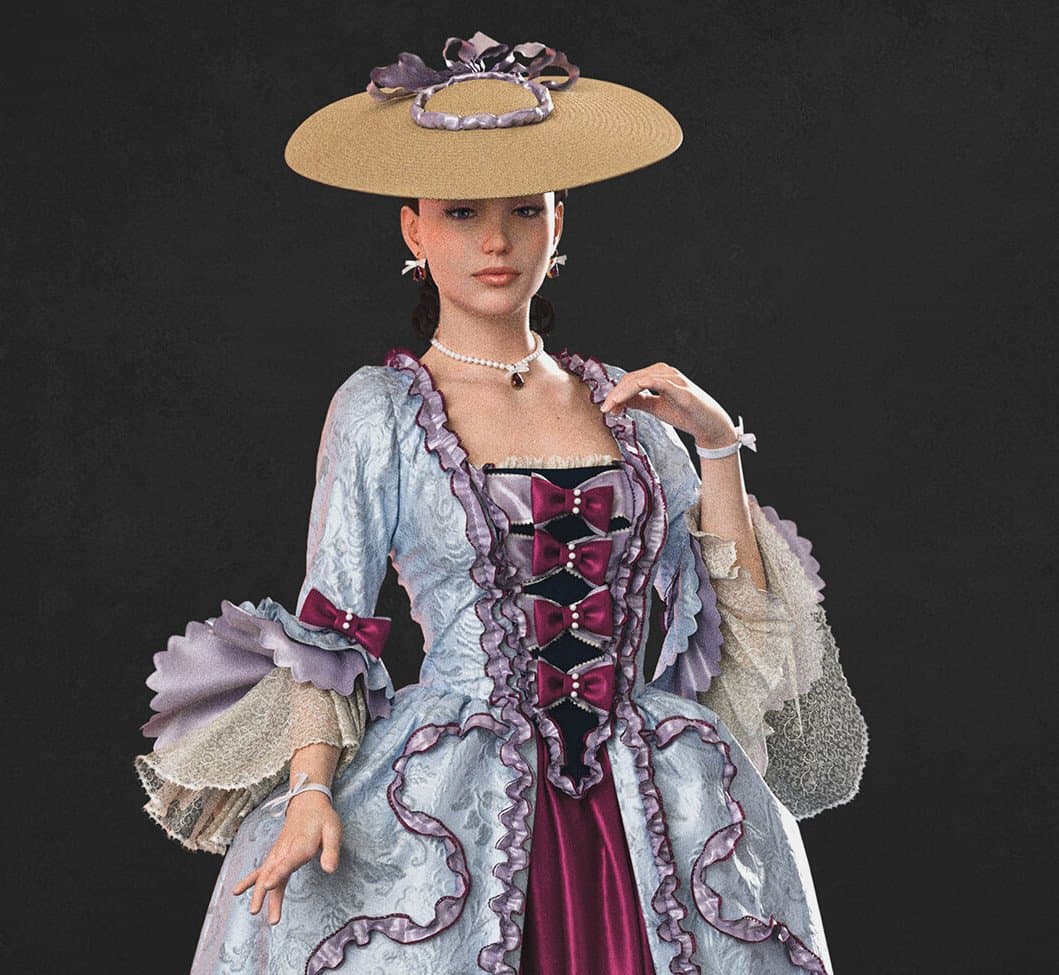
Image courtesy of Nina Chernyshenko
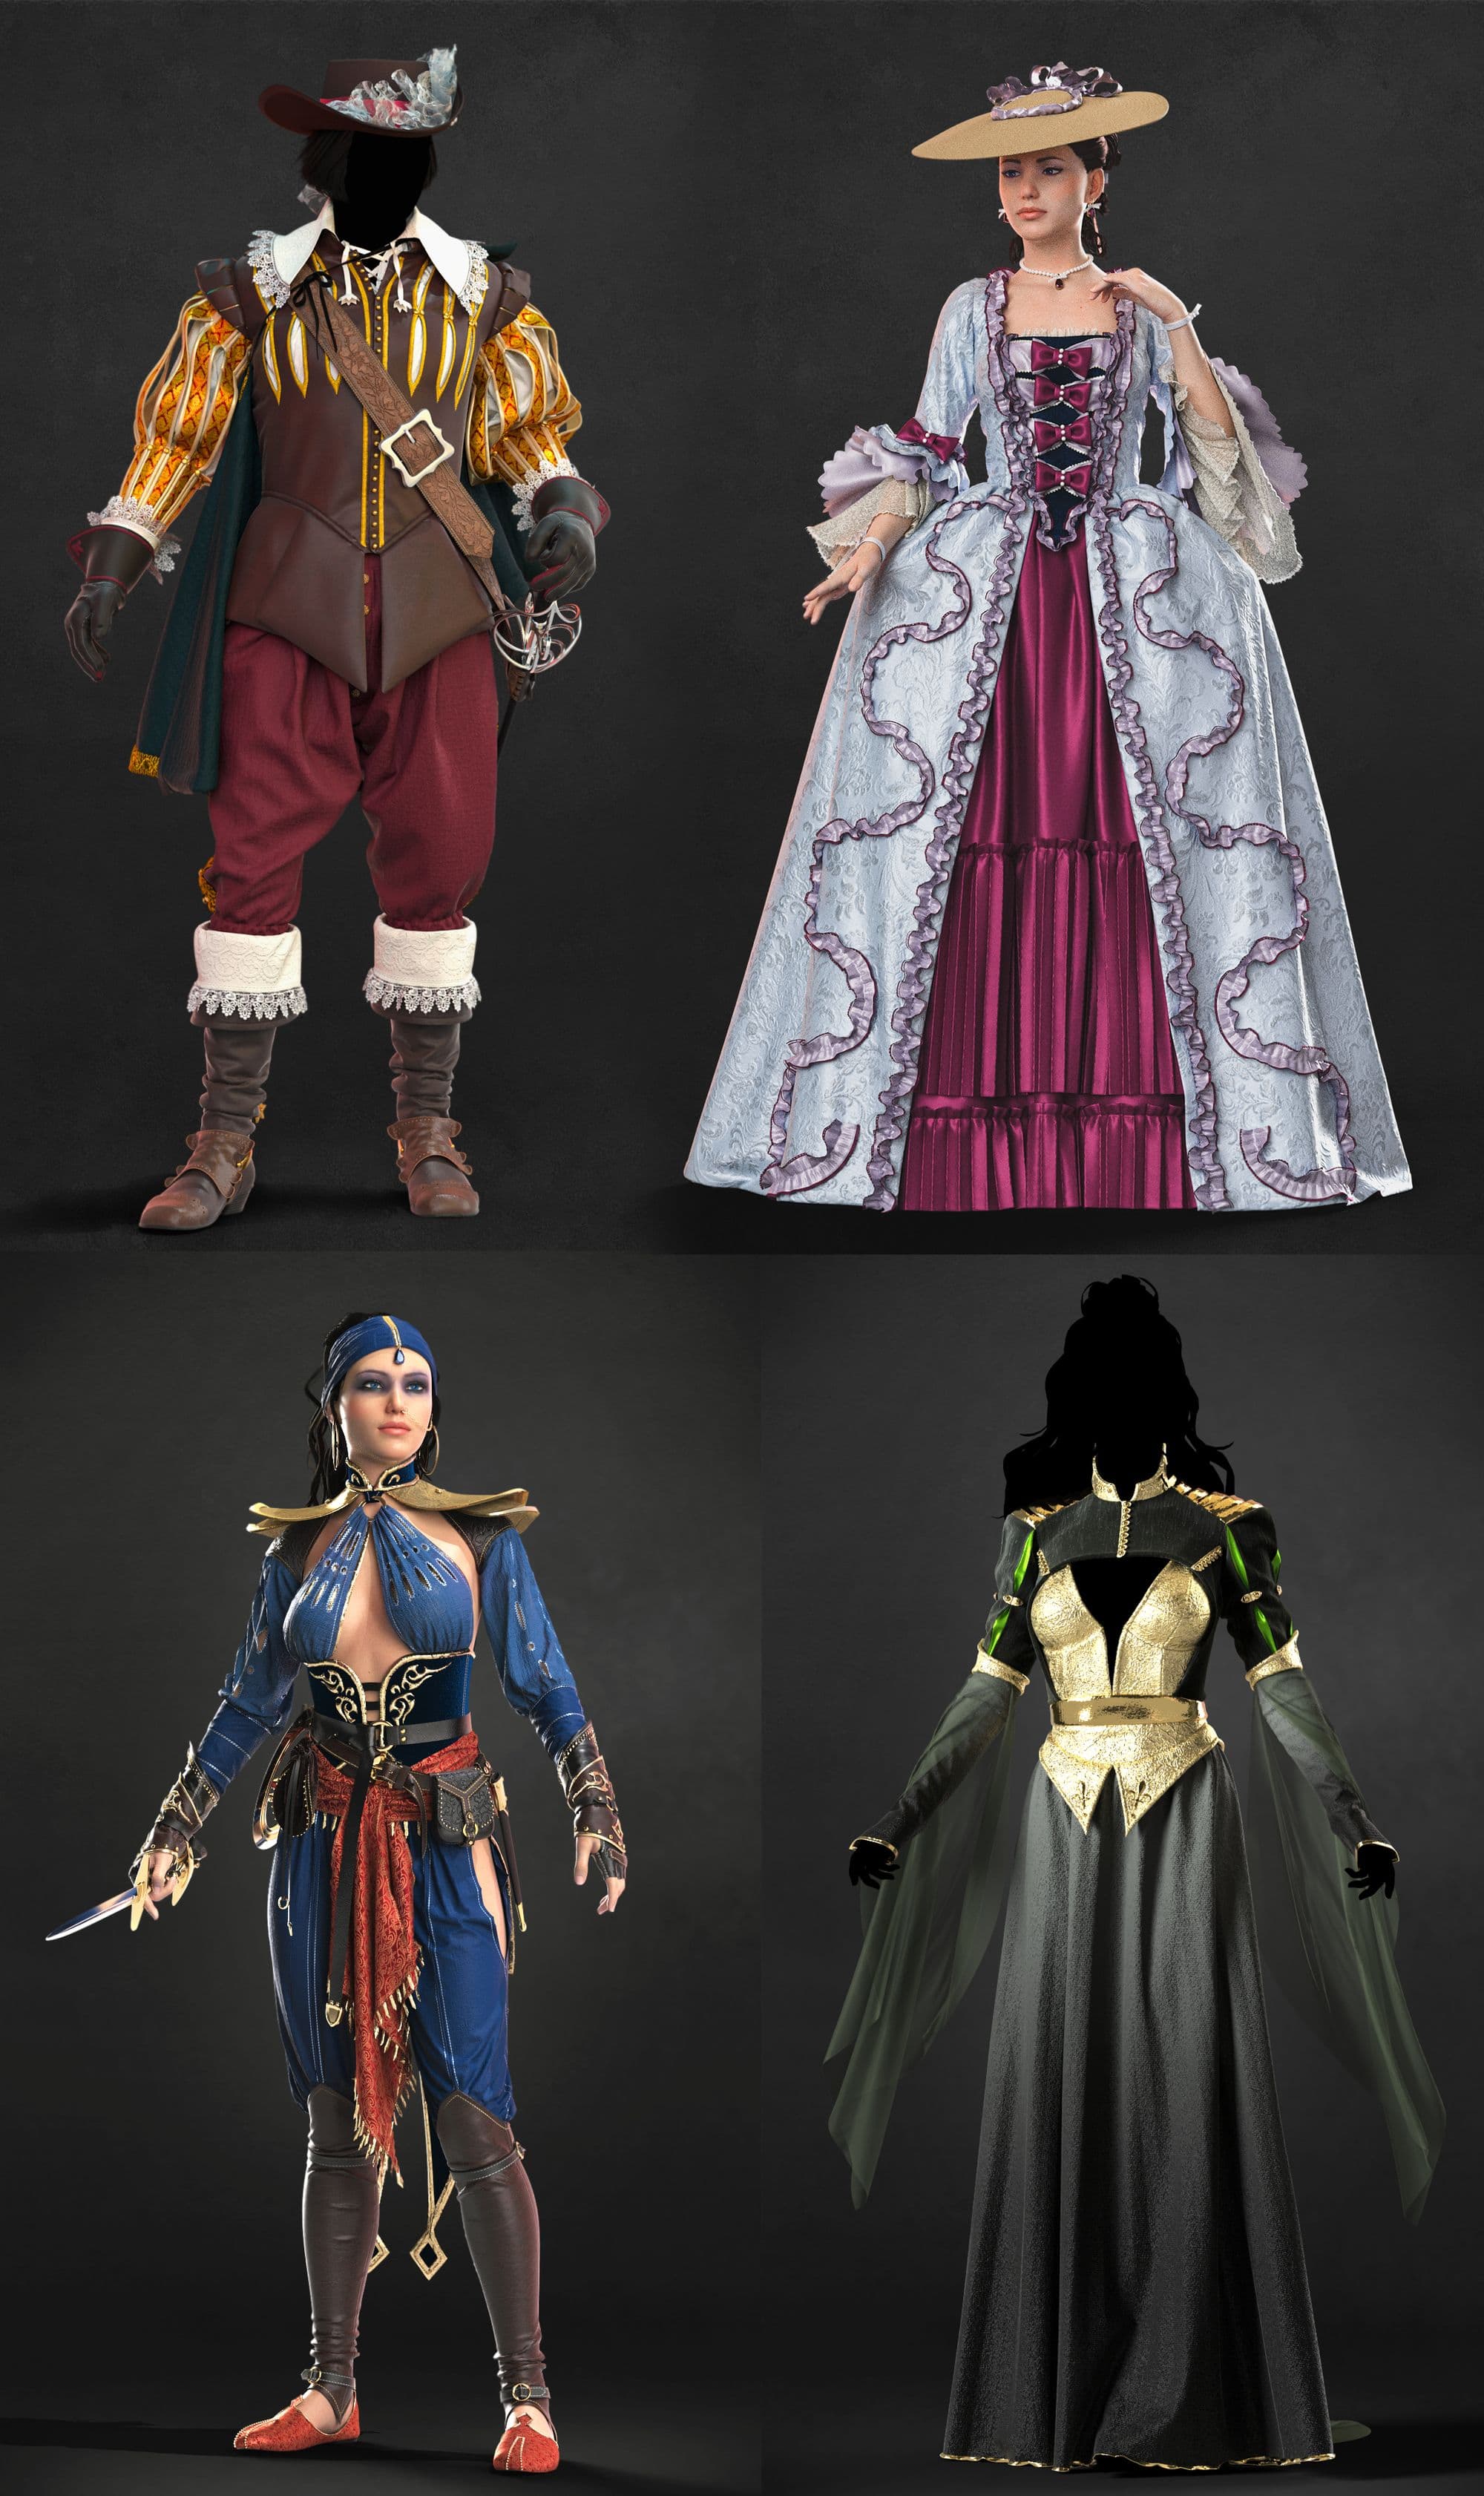
Nina Chernyshenko is a freelance digital artist from Ukraine, focusing on creating digital clothing. Nina especially likes to make historical clothes and clothes from movies, which you will find on her digital clothing store on ArtStation.
In this article she gives you the tools and tips to create your own 3D custom clothing using Marvelous Designer.
I started out with 2D and most of all I liked to draw characters. But then I thought that it would be interesting to see my characters from all angles, and I decided to start mastering 3D programs.
I watched a lot of YouTube channels about 3D, and one day I came across a tutorial about clothes creation in Marvelous Designer (sometime in 2018), and it turned out to be my dream program. I've always enjoyed drawing and sewing clothes and I realized that I wanted to grow in this direction with Marvelous Designer's help.
Before I start creating clothes in Marvelous Designer, I pick up a lot of references and save them in PureRef. I find references on Pinterest, Instagram, or just Google.
In the Marvelous Designer Discord channel there is also a pattern-reference section with links to sites where you can find interesting patterns. If I want to make a garment with a complicated design, I try to find a pattern-reference. If I make a historical costume, I also look for patterns to make the clothes as authentic as possible. And if I find a pattern, I import it into the 2D window and trace it with the Polygon tool.
Even with this method, you have to adapt the patterns to your avatar, especially for historical clothes, since historical clothes are based on people of that time and their body parameters differ from standard Marvelous Designer or DAZ Studio avatars.
You can use Modular Configurator patterns to create modern clothes.
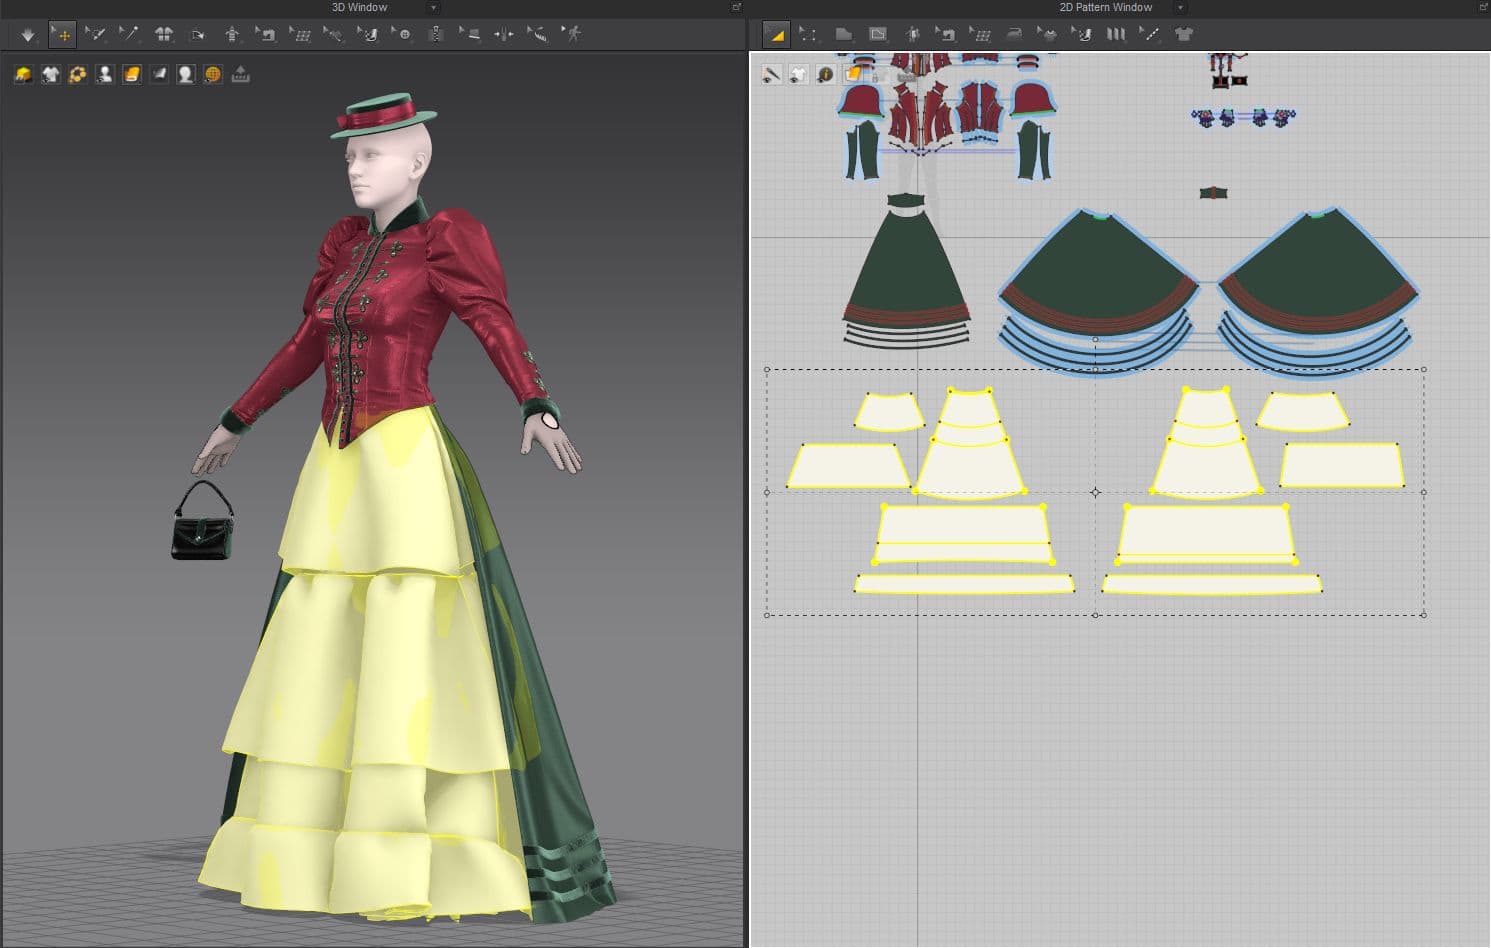
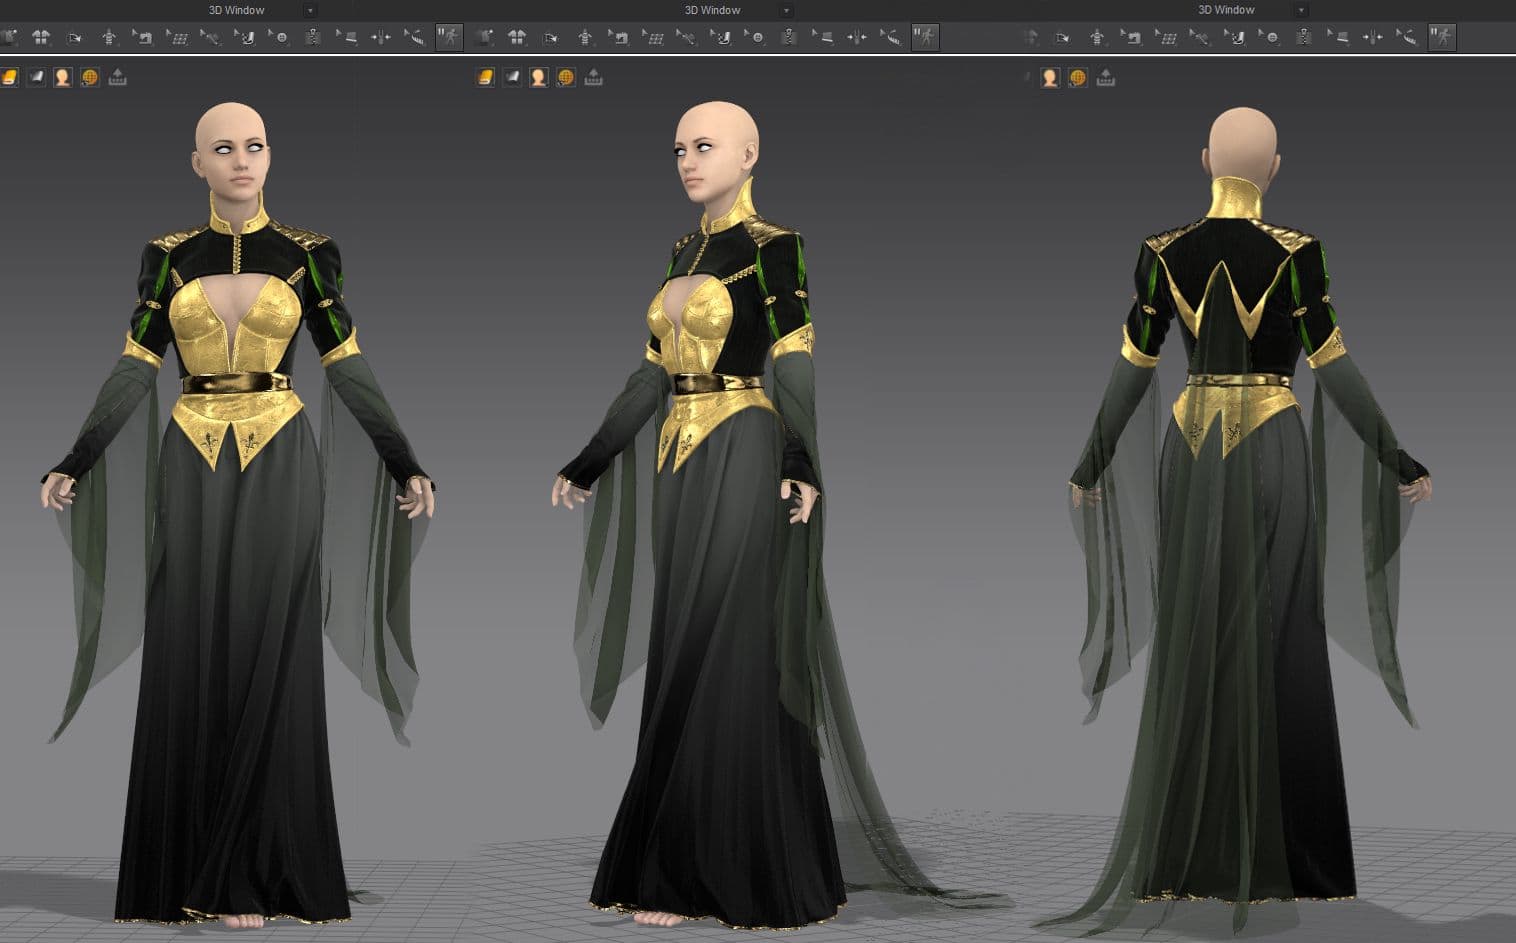
My favourites are, of course, historical clothing and fantasy outfits. It's my passion. There are many interesting challenges in creating historic dresses. For example, how to give the right shape to the skirt.
This can be done in the following ways:
1. Model the frame in any 3D program (Blender, Zbrush) and then import it into Marvelous Designer as an avatar.
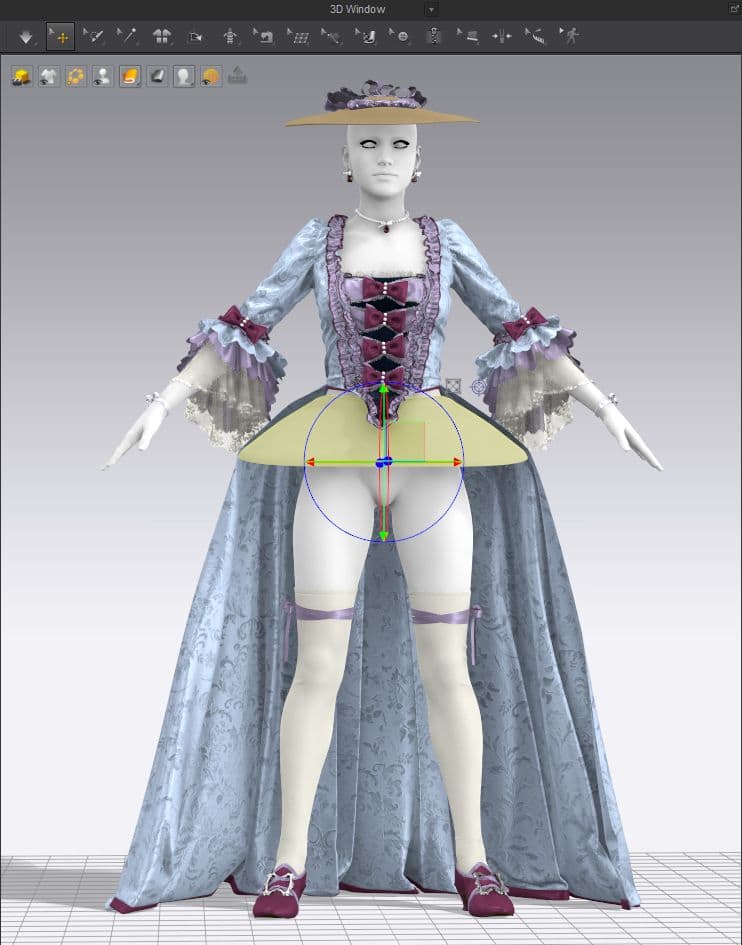
2. Create a frame in Marvelous Designer from stiff fabric (Trim_Full_Grain_Leather) and after giving the desired shape and volume freeze the fabric.
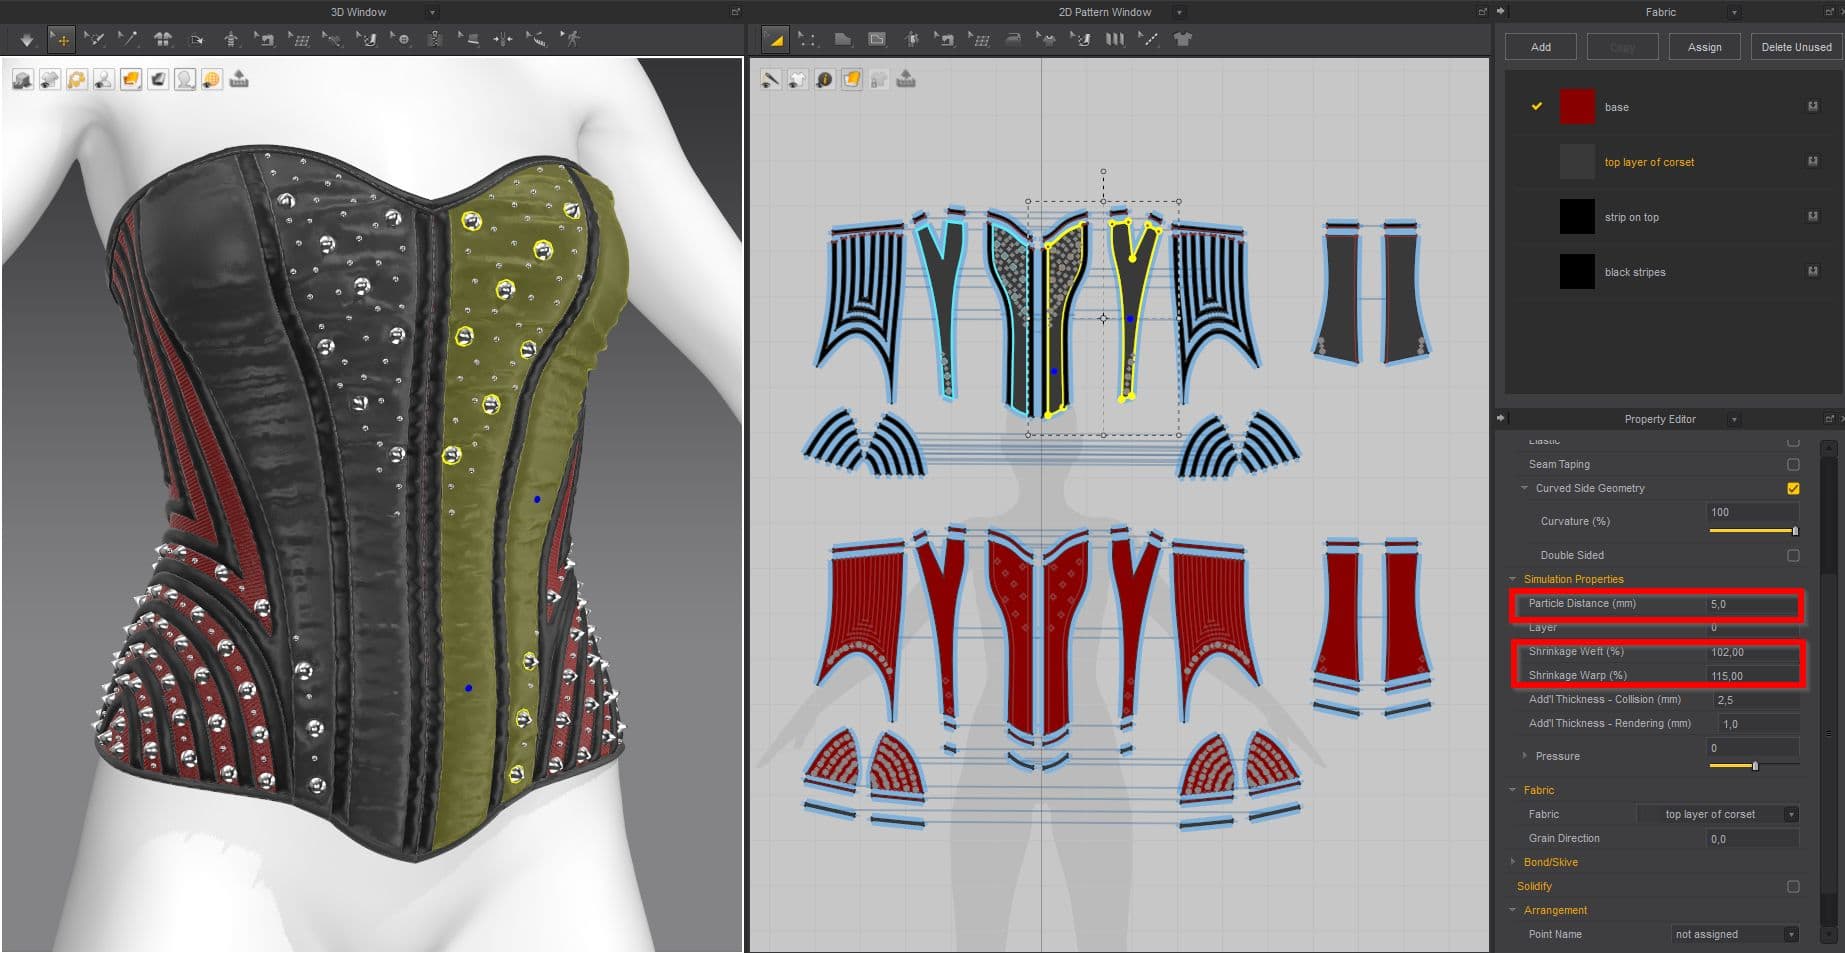
3. Use several ruffled underskirts. Also, an integral part of historical costumes is the corset.
1. I create a base of stiff fabric (Trim_Full_Grain_Leather). And then, using the function Layer Clone (Over), I create another layer and assign soft material to it (Knit_Cotton_Rayon Jersey or Nylon_Featherweight) and set Particle Distance 5.2. To add more realism, for the top layer, increase the Shrinkage Weft and Warp parameters. The simulation will show more folds. You can download the corset file for free here.
Also, in my projects I often add various accessories made in Blender. These are gems that I import as trims or register as buttons, buckles, knives, swords, sabers.
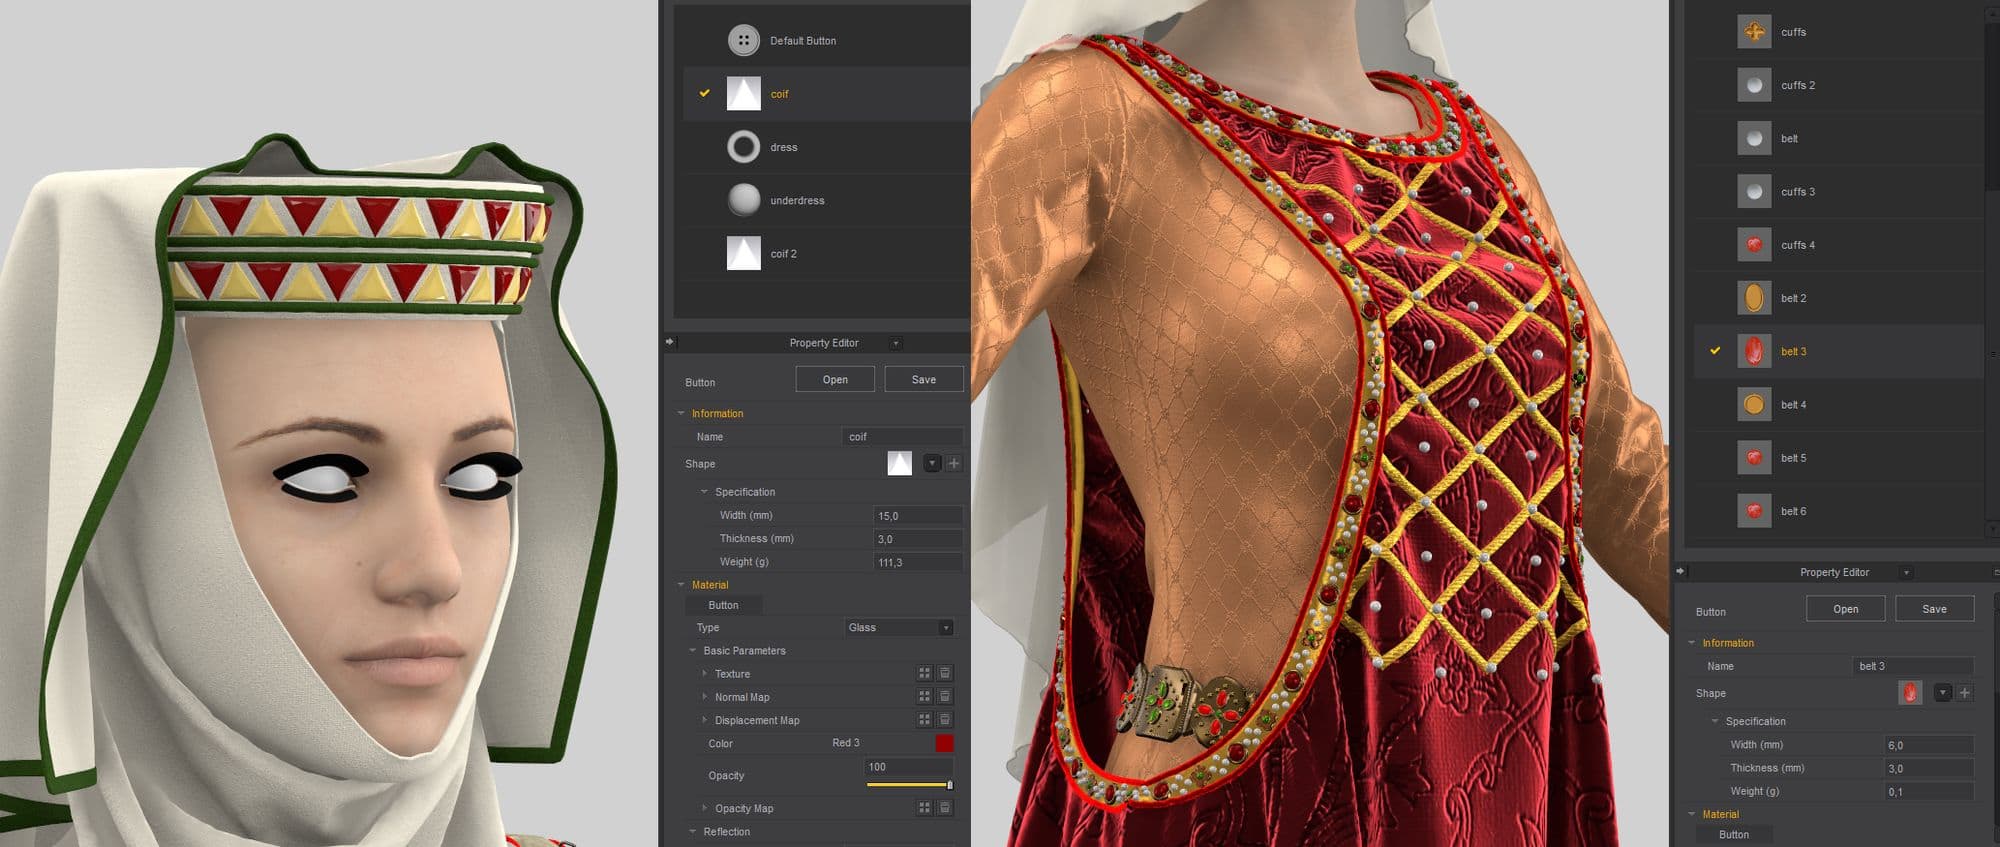
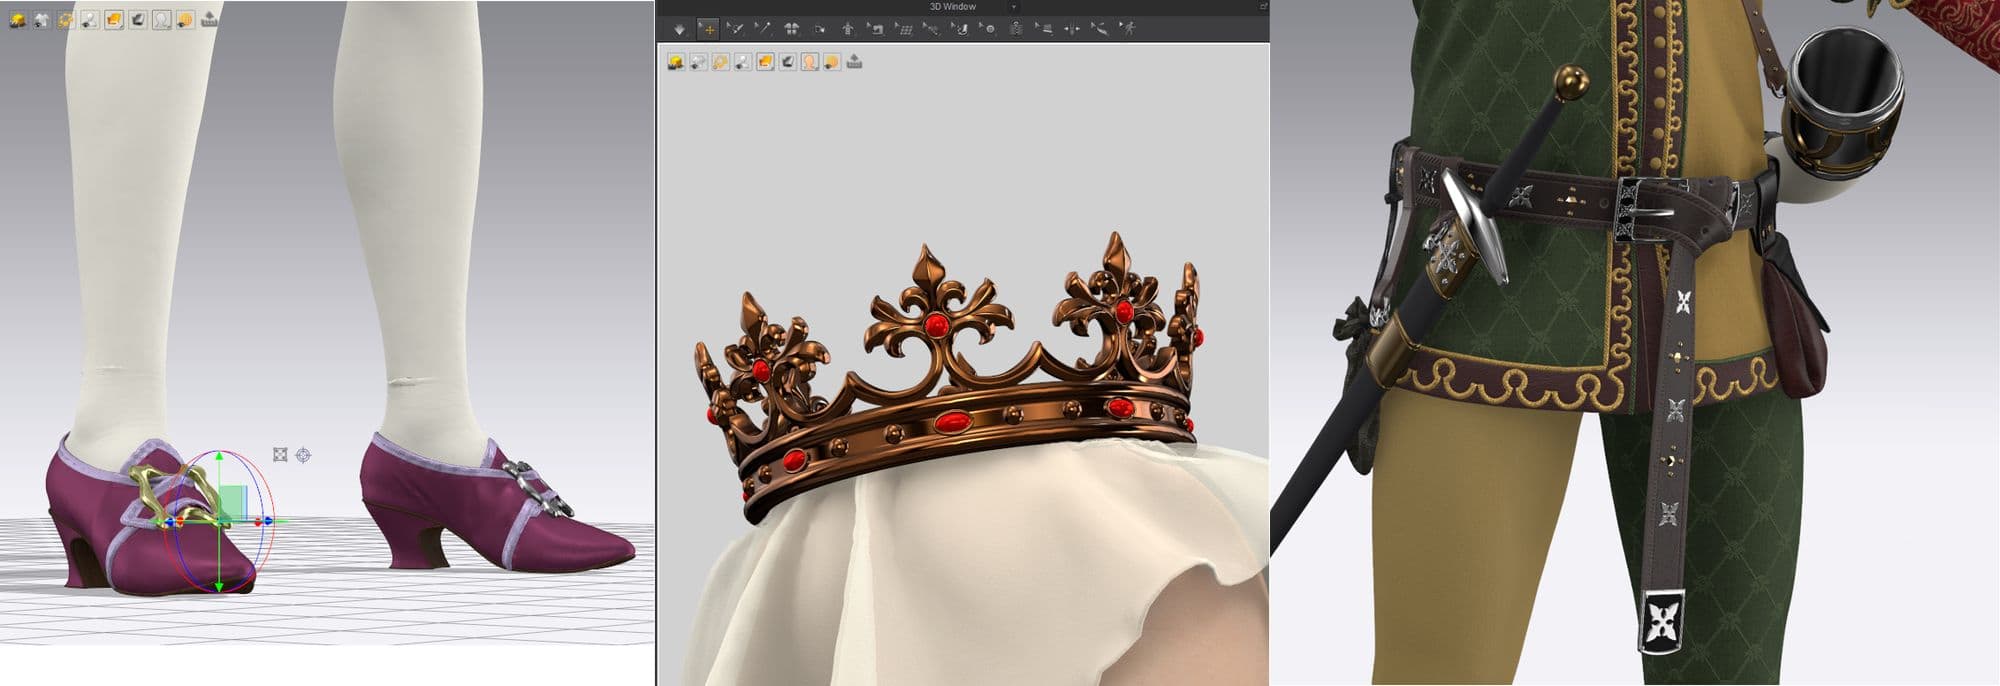
When you import objects into Marvelous Designer as Trims, these objects will move with the fabric when simulating the garment. If you import them as Avatar, they will have to be moved manually.
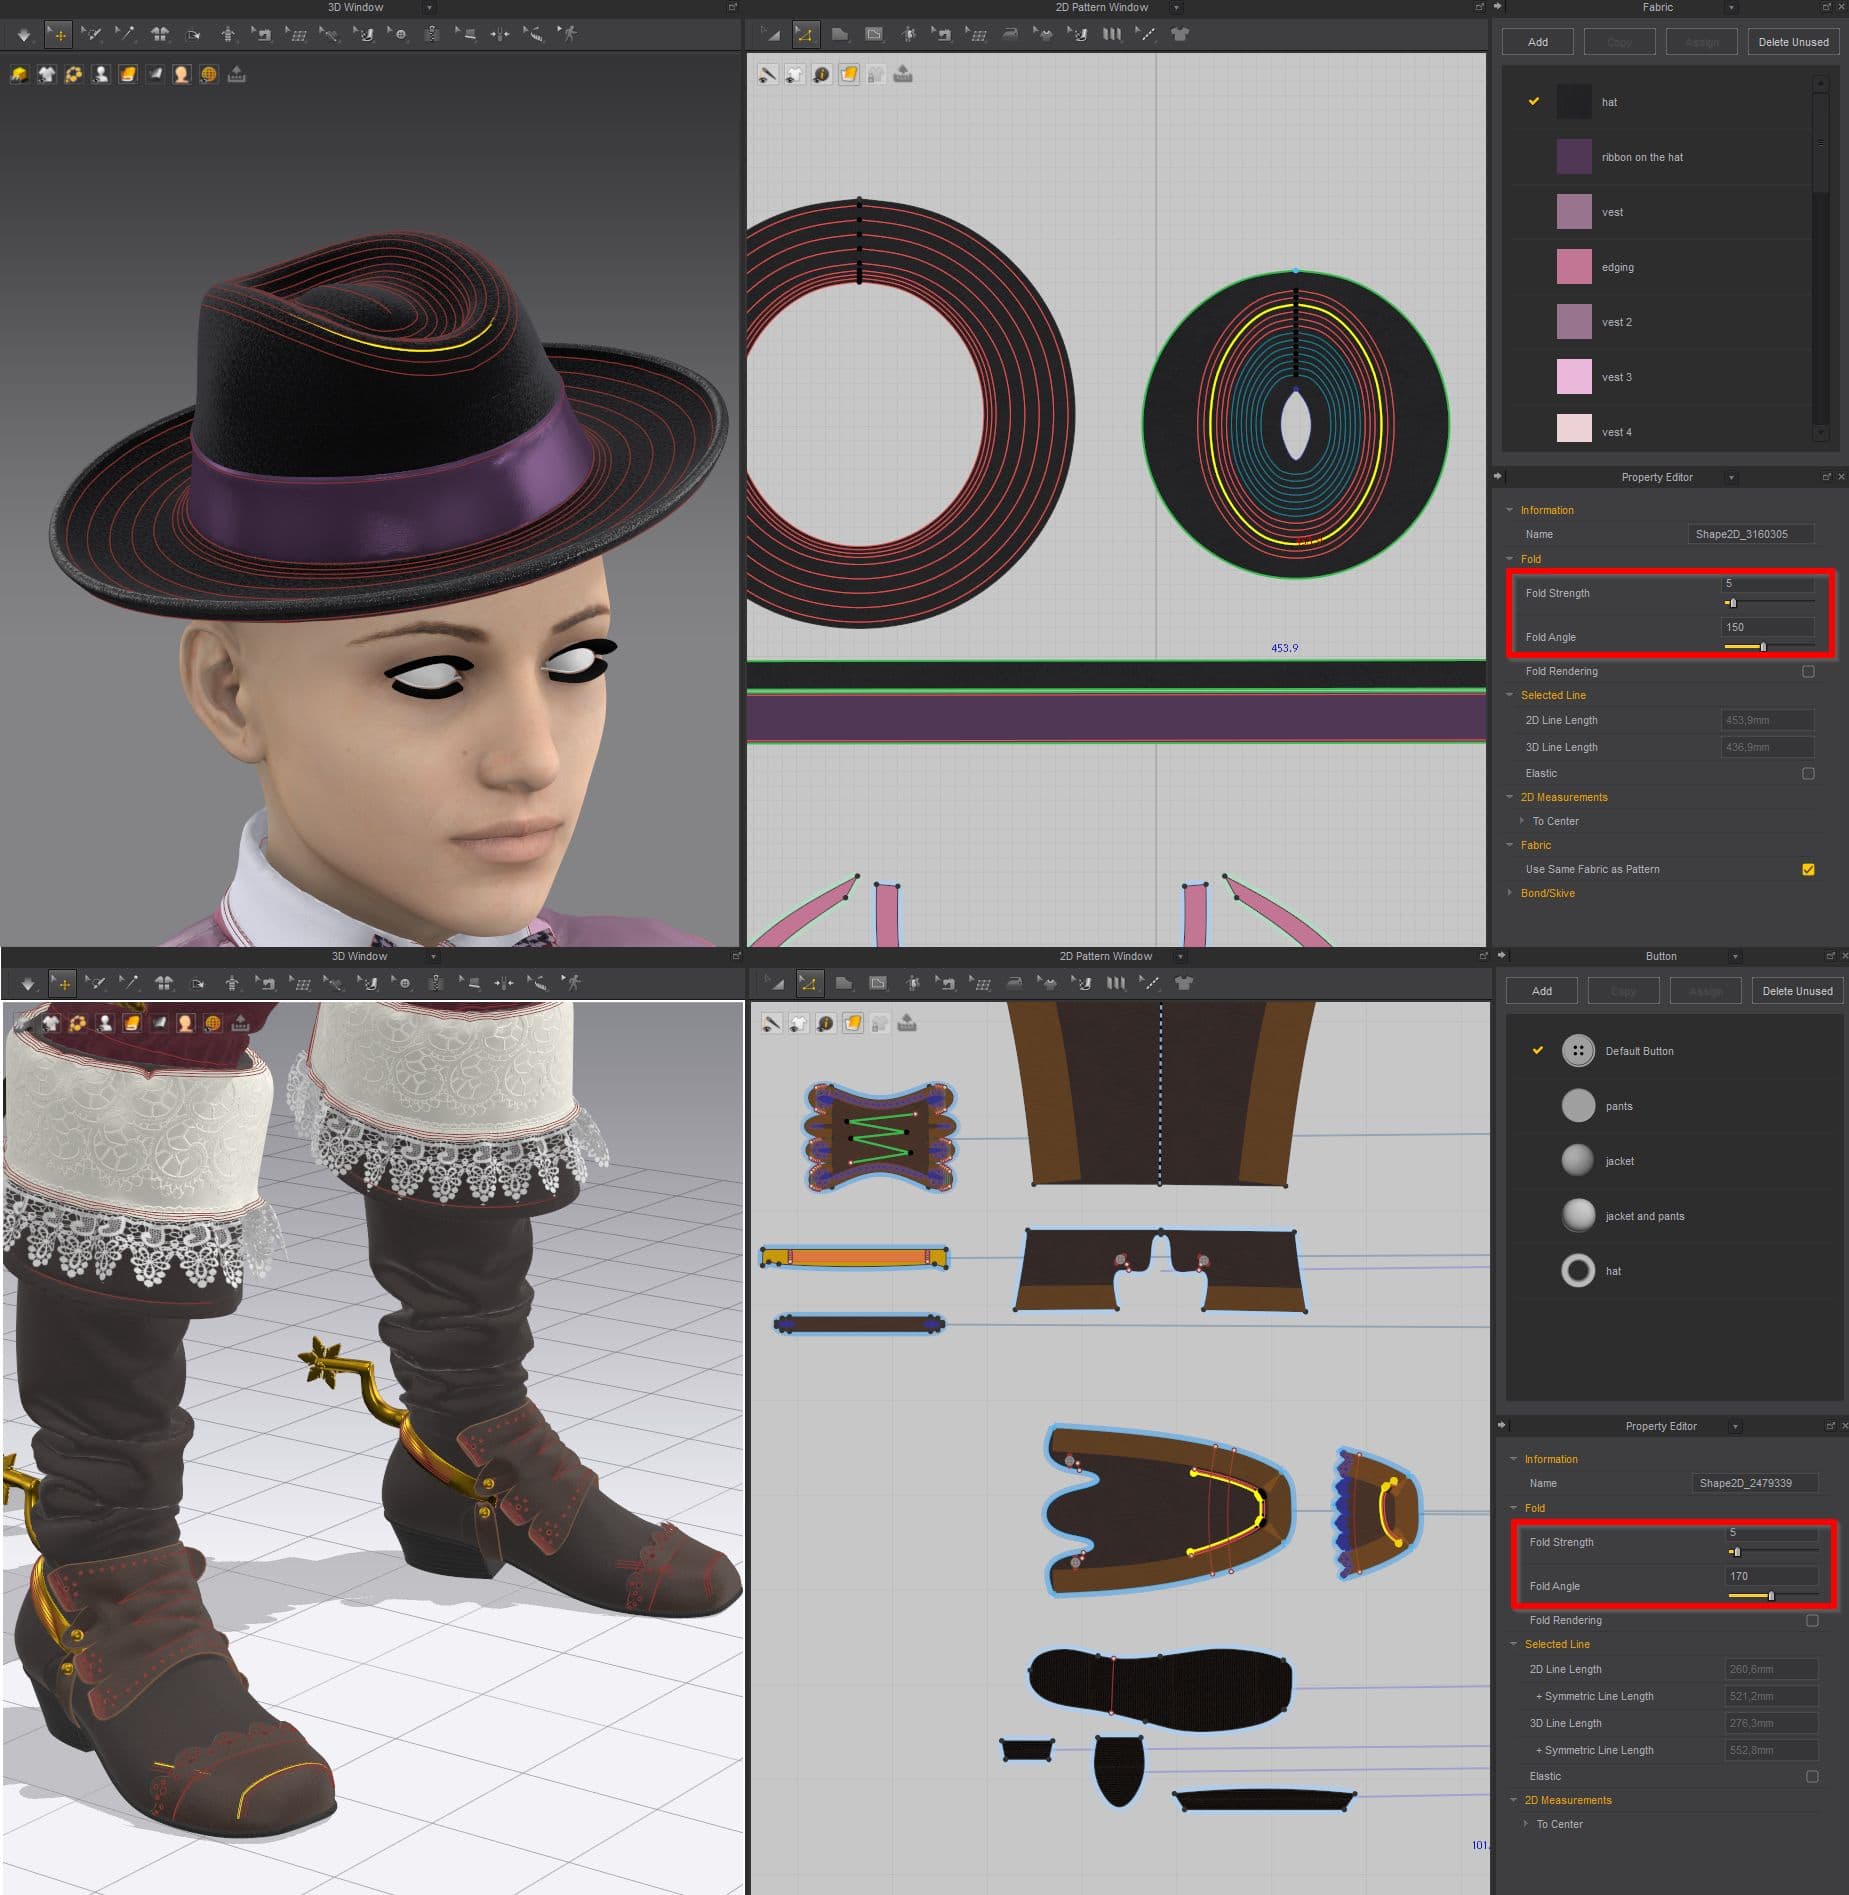
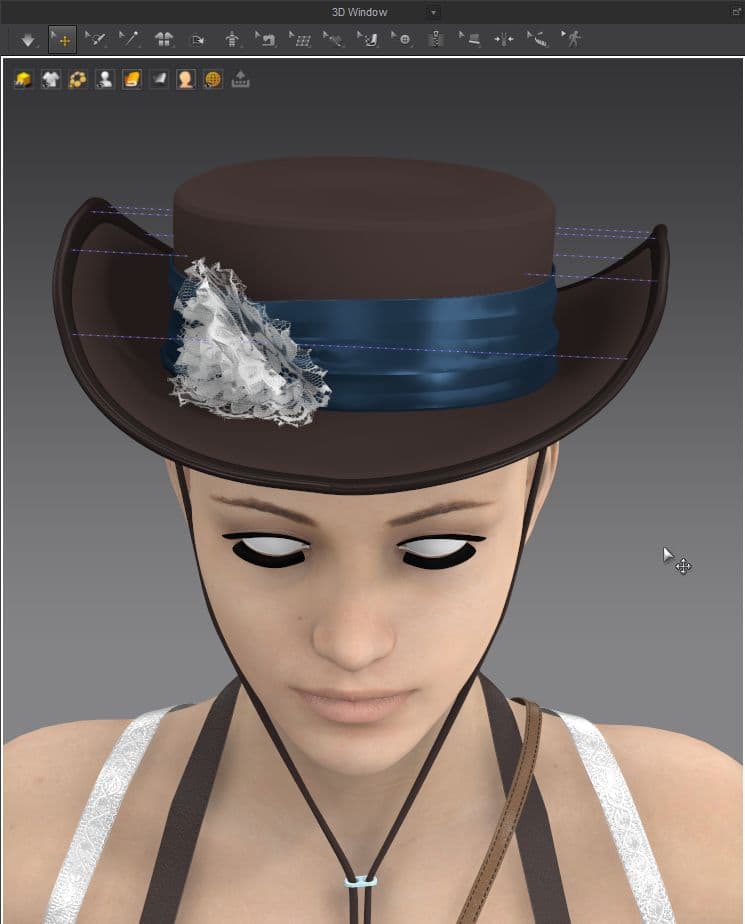
Pay attention to the properties of these objects in the Property Editor, such as Skin Offset, Static and Kinetic Friction, Weight and Collision. I make hats, bags and shoes in Marvelous Designer. For this purpose, I mostly use the Trim_Full_Grain_Leather and Leather_Lambskin presets. To create the curves of the shape help internal lines (indicating a certain bending angle) and Tack. And it's also important to select the necessary angle of stitching patterns.
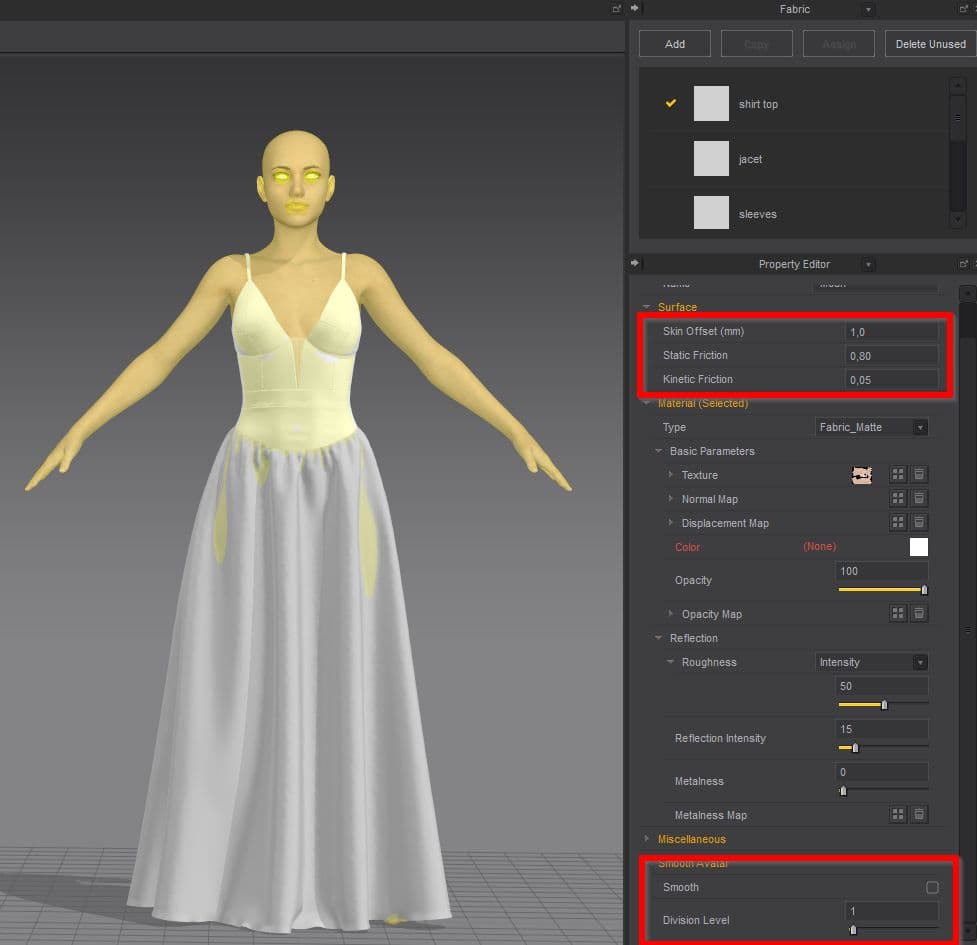
I use standard free avatars from DAZ Studio (Daz_Genesis 8 female, male). I export the avatar in A-pose in COLLADA format (.dae). In Marvelous Designer there are several avatar settings. If you want your clothes to fit more closely to the avatar, set Skin Offset 1 or 0. If you want your clothes not to slide on the avatar, increase the Static and Kinetic Friction settings. I also usually smooth out the avatar.
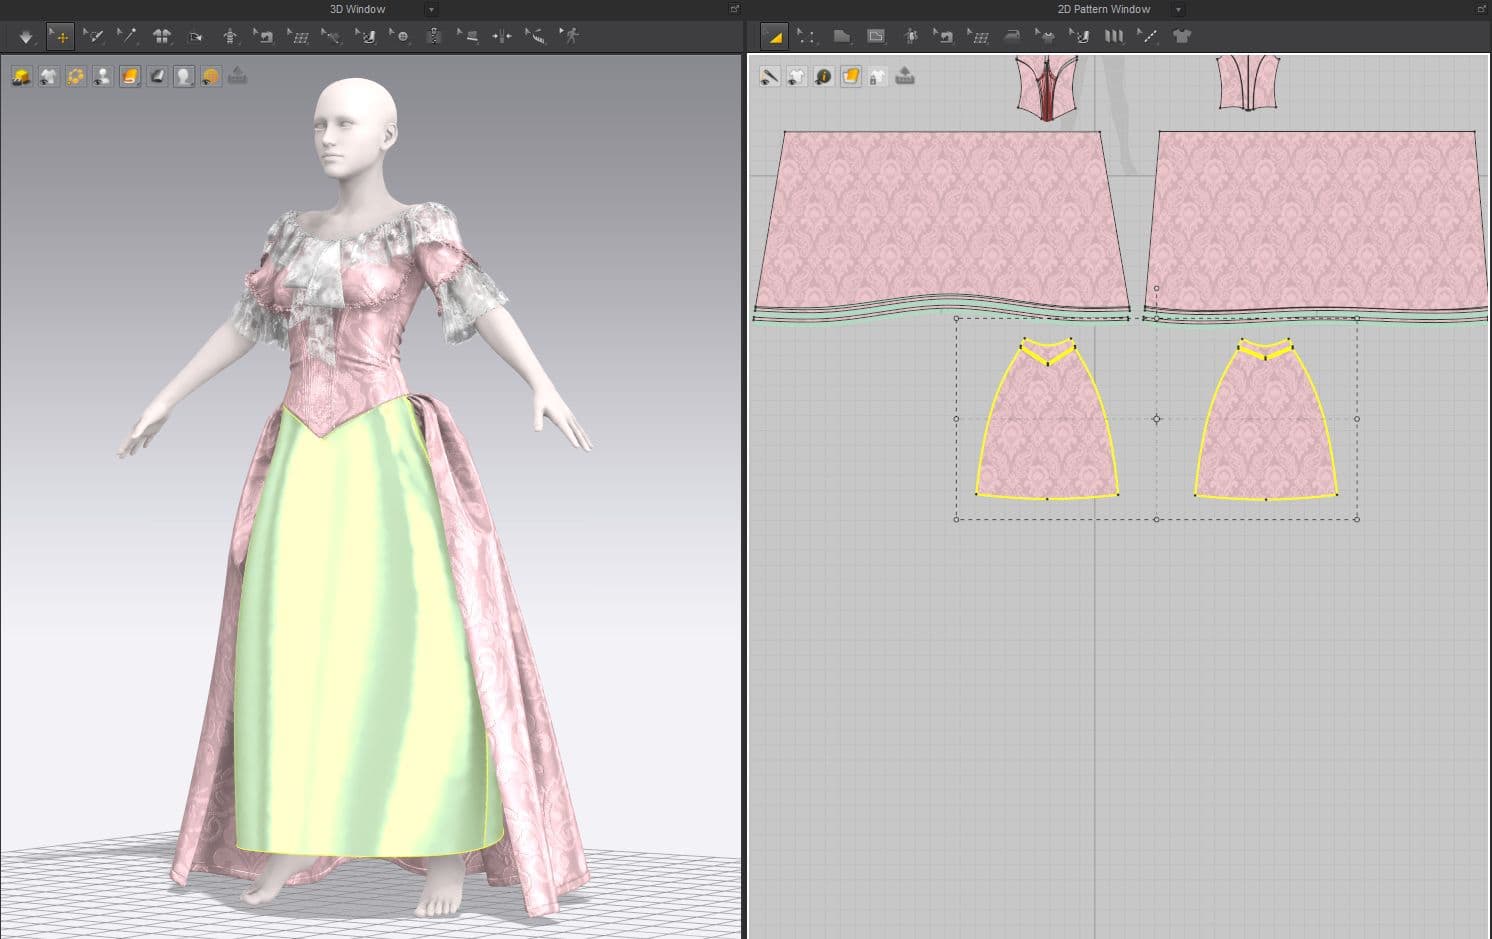
I build basic patterns. I don't use the measurements on the avatar when I build it, I build it by eye. And then I adjust it to the avatar.
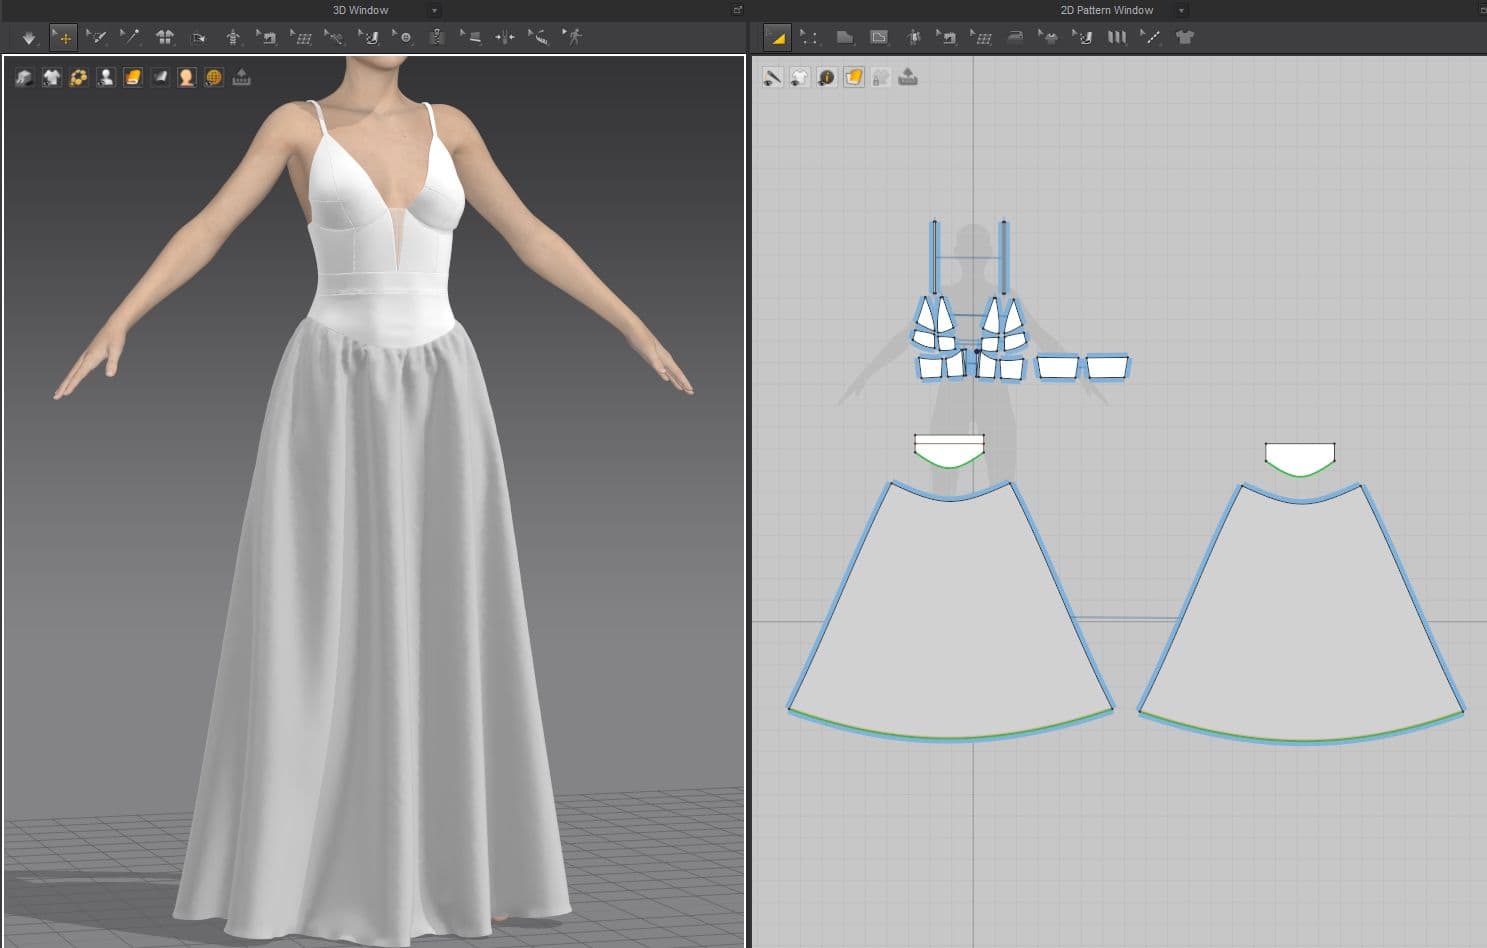
First, I make the base of the corset and the skirt. I use a tack on the avatar in the center of the corset, so the corset would fit better to the avatar. Dividing the bodice into four parts helps to fit the bodice to the shape of the breasts.
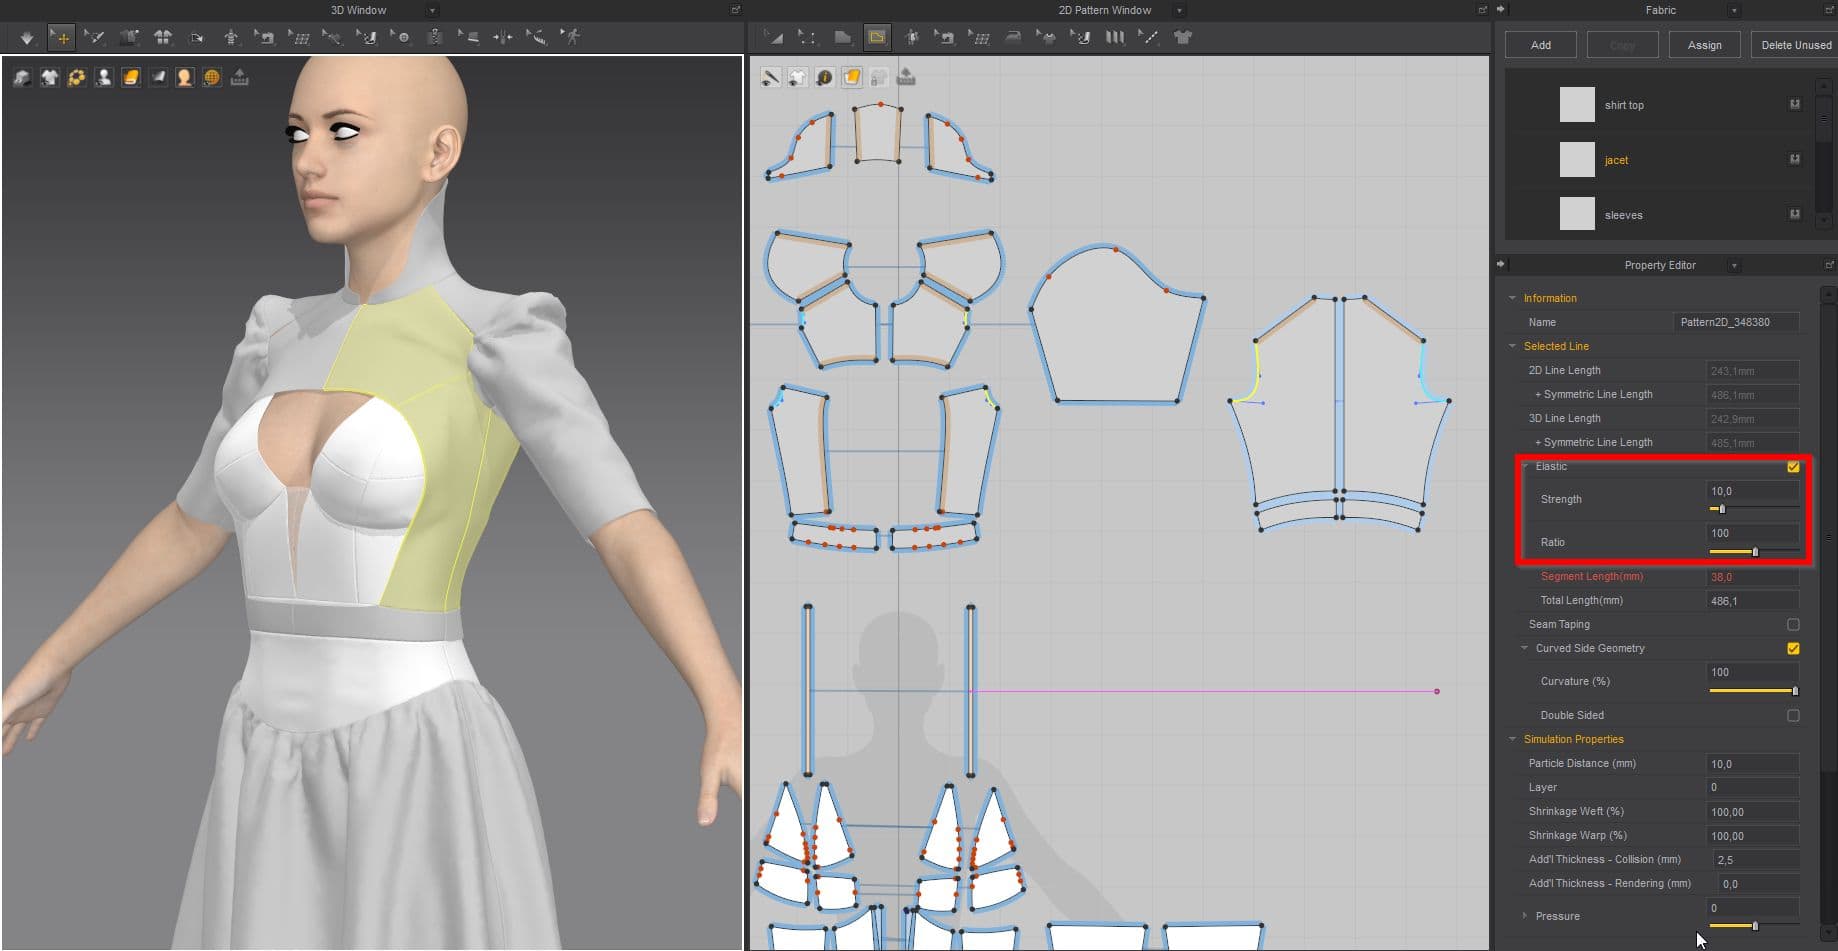
I select the lines where the sleeve is sewn (armhole) and set Elastic Ratio=100 for strength.
With the help of Layer Clone Over I duplicate the shoulder pad. With the help of inner lines, I form the ribs.
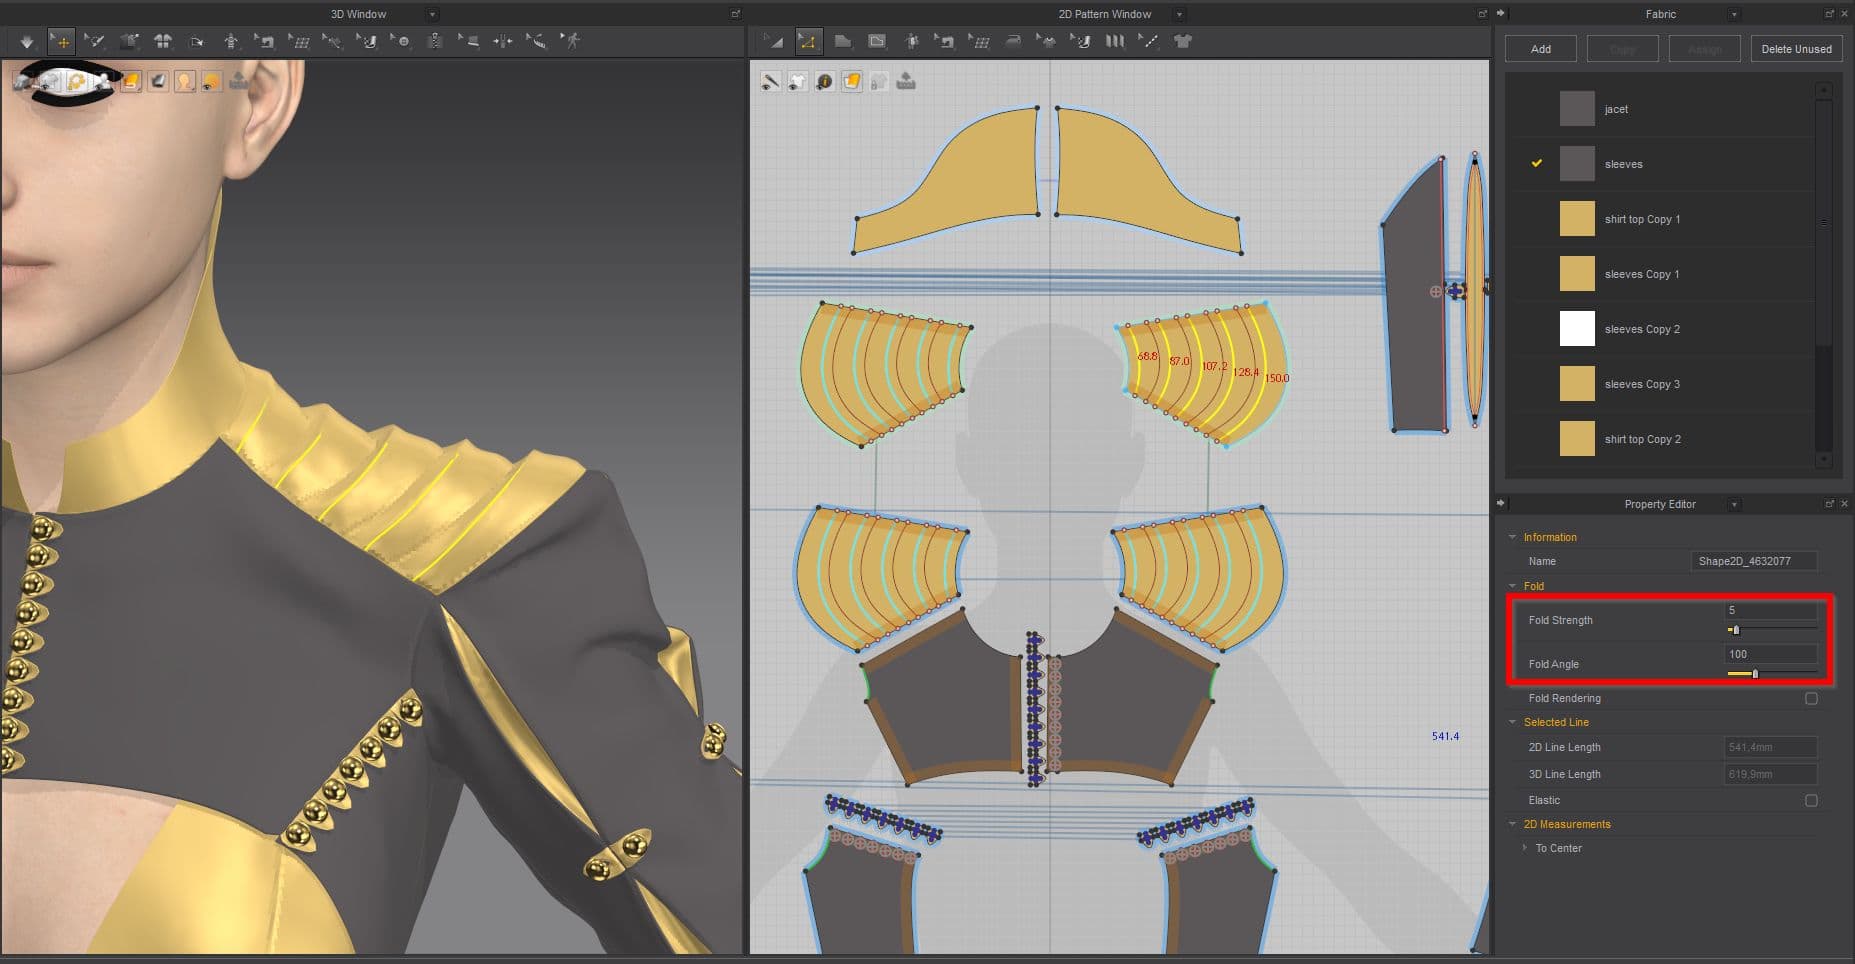
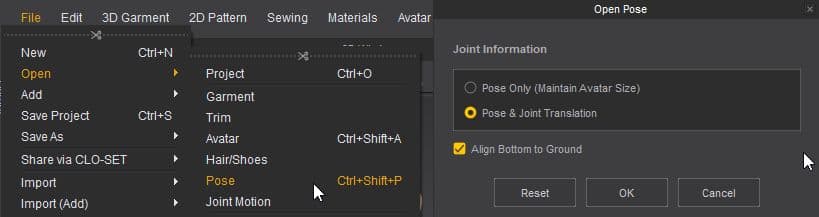
When the dress is ready I set Particle Distance 5 for all parts of the dress, and 3 for the smaller parts (buttonholes and pattern).I pose the avatar in DAZ Studio and export it in COLLADA format (.dae). I import it into Marvelous Designer.
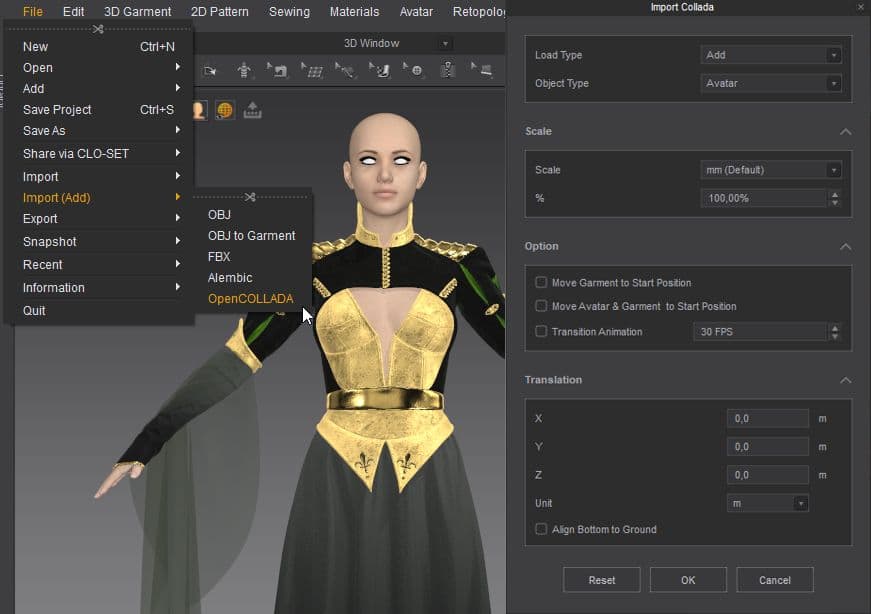
I save it as A pose.

Then I delete the imported avatar. You can set Particle Distance 15 for all patterns, for faster simulation. Then I open the saved pose. You can download the fantasy dress file here.

The Marvelous Designer program is not difficult to master. All the necessary information about interface and functionality is on the Marvelous Designer's YouTube channel. With each new tutorial you watch, it will become easier and easier for you to use the program.
Originally posted here.