Creating a Stylised 3D Diorama Using Unreal Engine
Grace Collet took on the challenge of creating a stylised Voodoo Diorama for a university project using Unreal Engine, and in this article she shares in detail, how she accomplished the final look.
Grace Collet took on the challenge of creating a stylised Voodoo Diorama for a university project using Unreal Engine, and in this article she shares in detail, how she accomplished the final look.

Grace Collett is a 25-year-old game art student at Escape Studios. Grace loves all things stylised, so it was a fun challenge for her to create a Voodoo Diorama for a university project, as it allowed her to explore techniques and styles she loved.
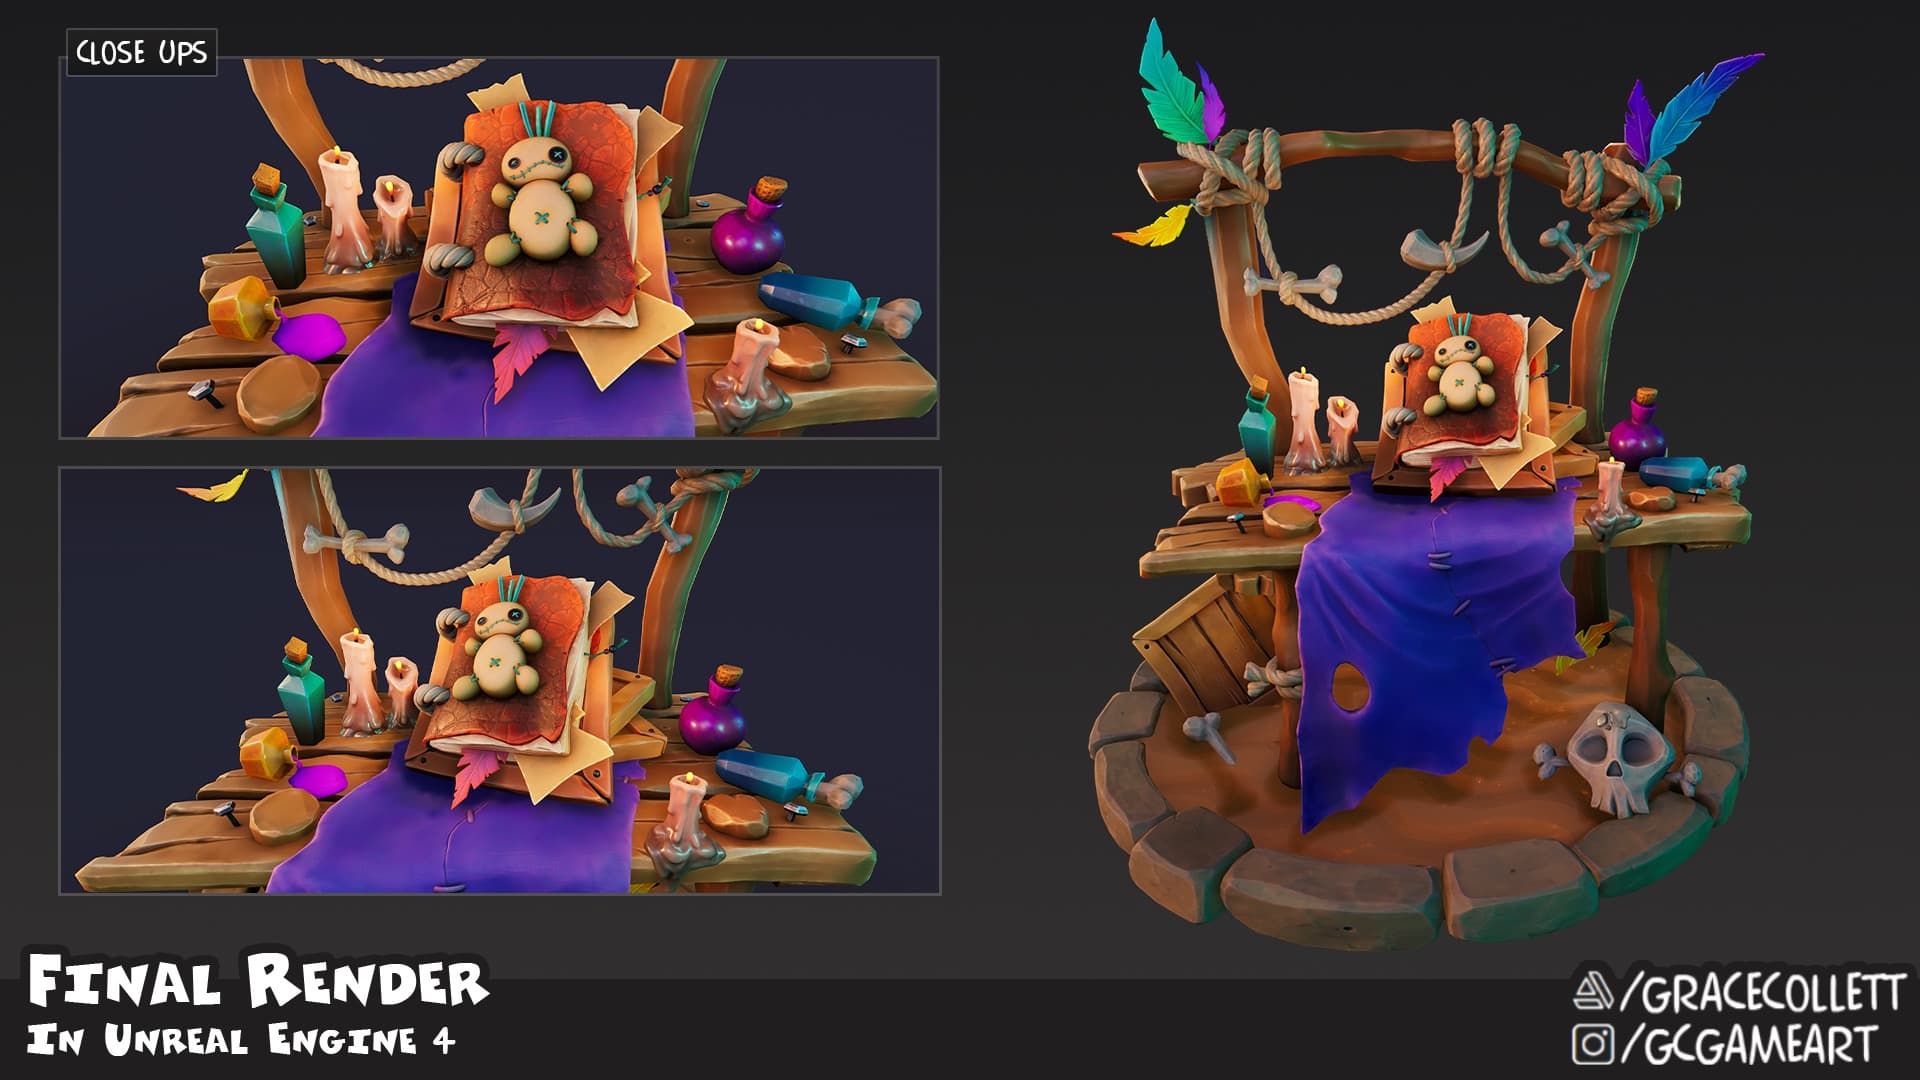
This article is a breakdown of how she created and rendered a stylised diorama using Unreal Engine 4.
I love all things stylised, so it was fun to create this Voodoo Diorama for a university project because I was able to explore some fantastic techniques and styles that I love!
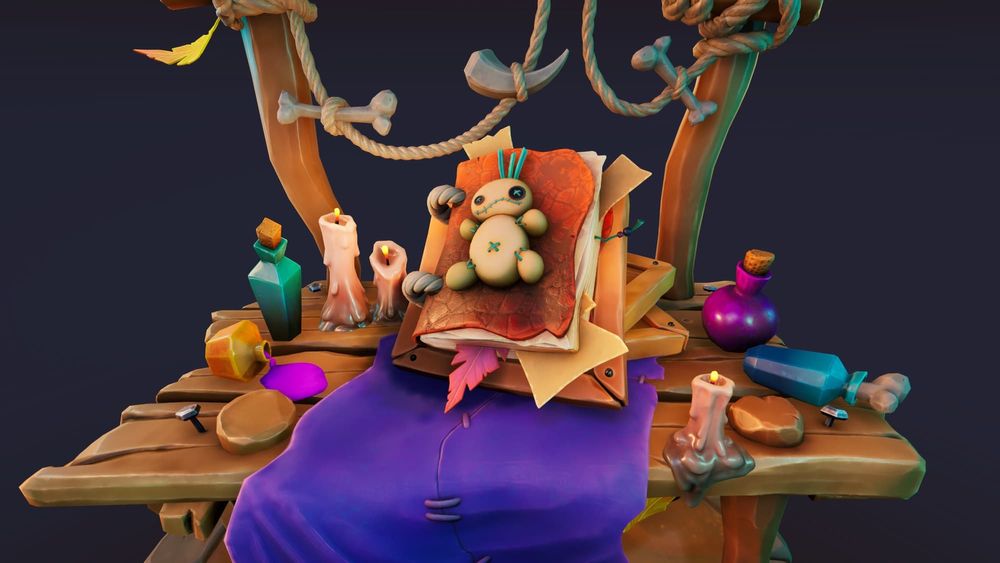
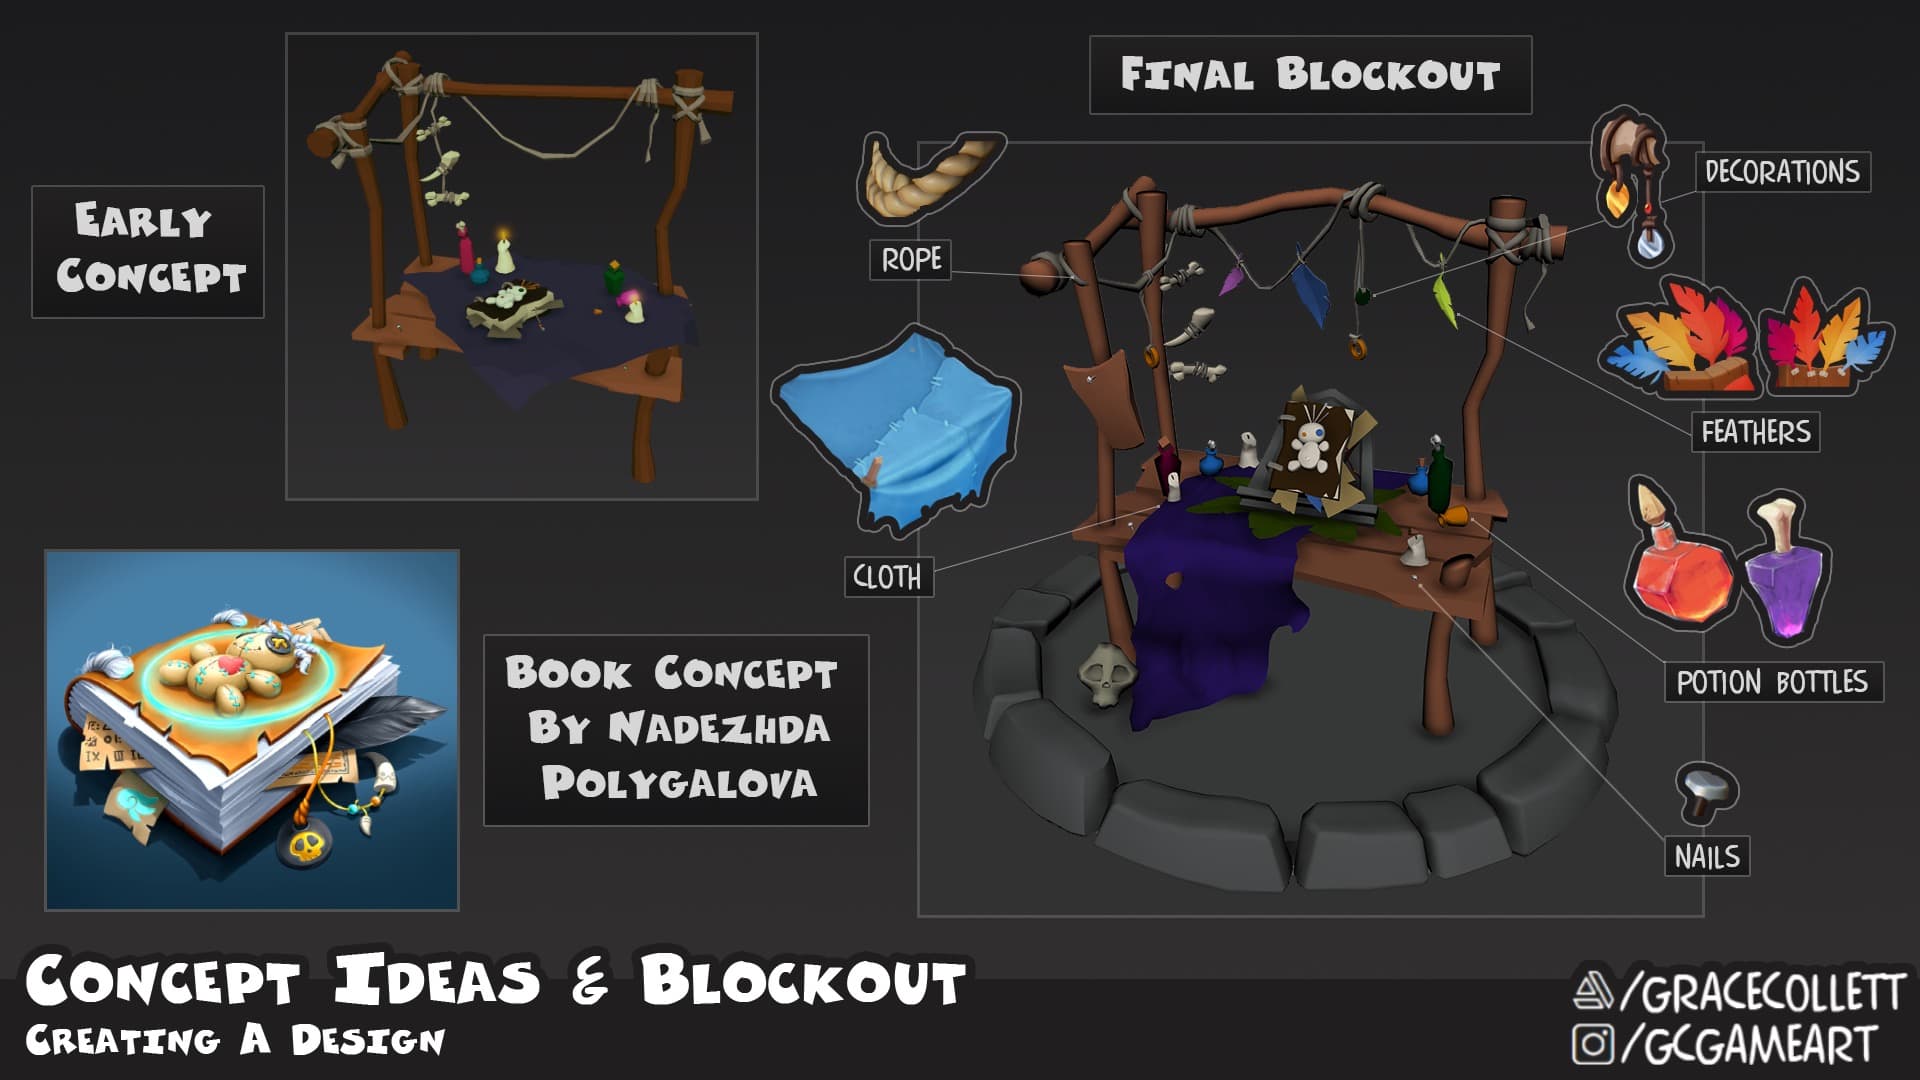
I wanted to create an original design rather than copy a concept, which is always a challenge and a risk. I searched for 2D references and inspiration on ArtStation, when I came across the Voodoo Book concept by Nadezhda Polygalova. As soon as I found this, all of my ideas for this project fell into place!
My main inspiration for this project was the Crash Bandicoot 4 It’s About Time! game. Although, I did also take inspiration from Spyro's The Reignited Trilogy. I have art books for both games, which helped when it came to researching the art style. One part that helped the most was a snippet from the Spyro book, explaining visually the difference between 'wonky' and 'not wonky' by Art Director Josh Nadelberg.
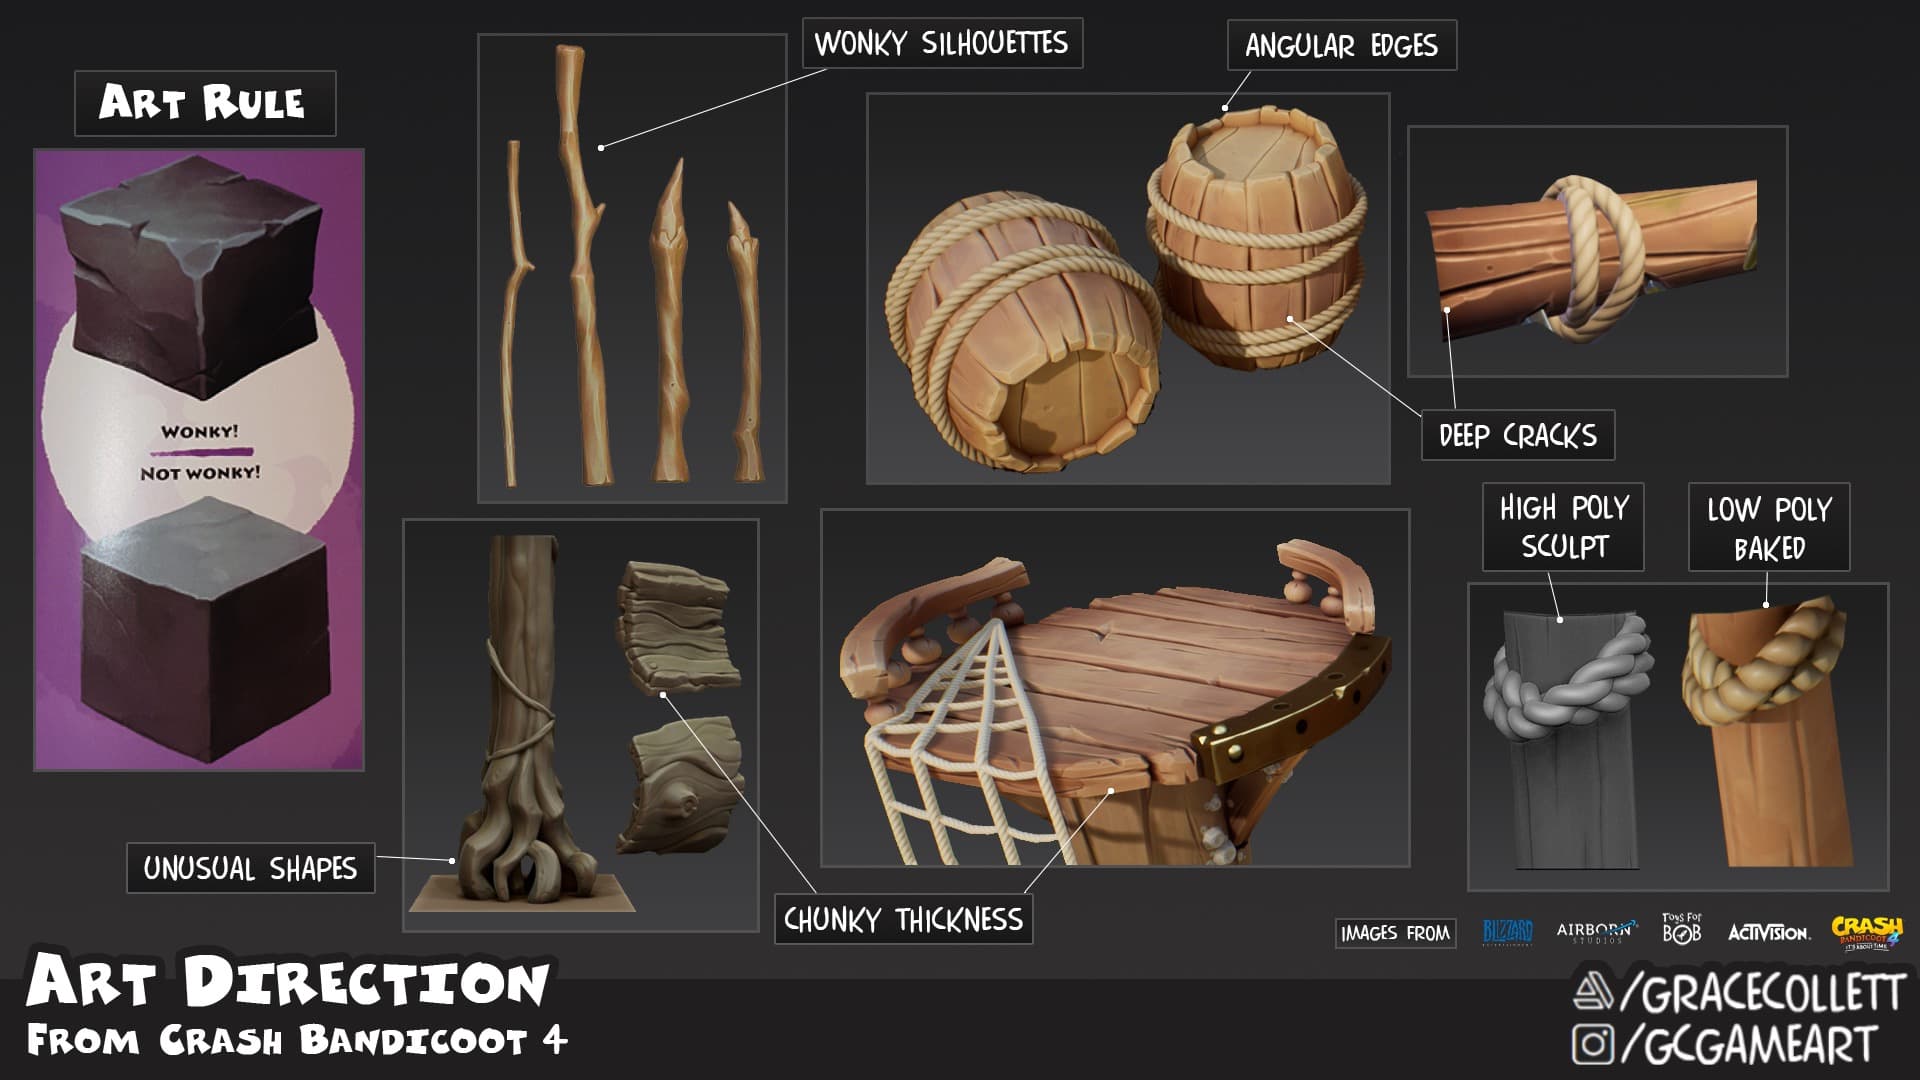
I enjoy creating assets with an unusual and unique finish, chunky thickness and wonky silhouettes. I took the majority of my references from the worlds created for these games.
I did as much research as I could on how the assets and environments were made, to enable me to apply similar techniques to my work.
I prefer to get stuck in with a 3D block out almost straight away. Earlier versions included a simpler design but after feedback and more research, I realised that I needed to exaggerate the design if I wanted to match the Crash style.
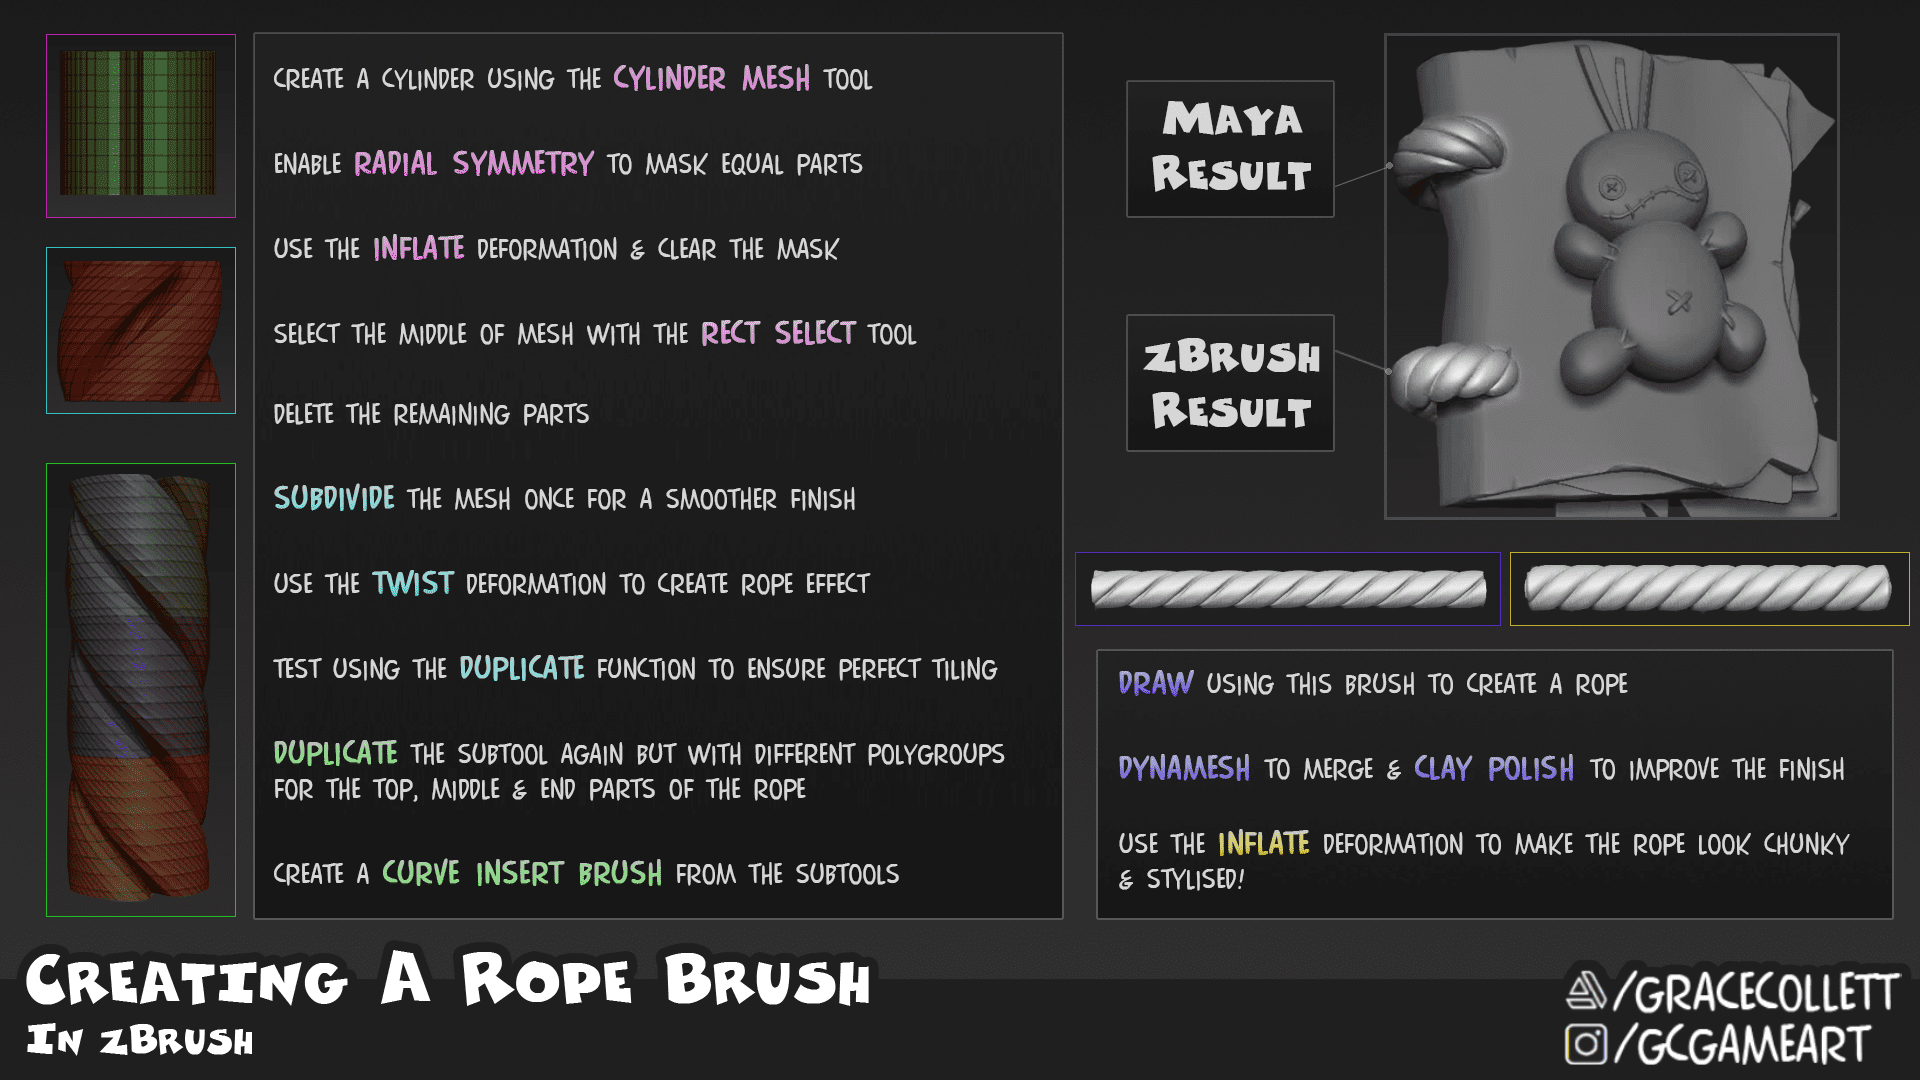
The book was the main focus, so I modelled it first to give me an idea of the quality standard I wanted to match throughout the project. I modelled this in Maya and took this into ZBrush for a sculpting pass, but I was not satisfied with the rope. I decided to follow some advice online and use combined techniques to create an insert mesh curve brush which had a much more desirable effect.
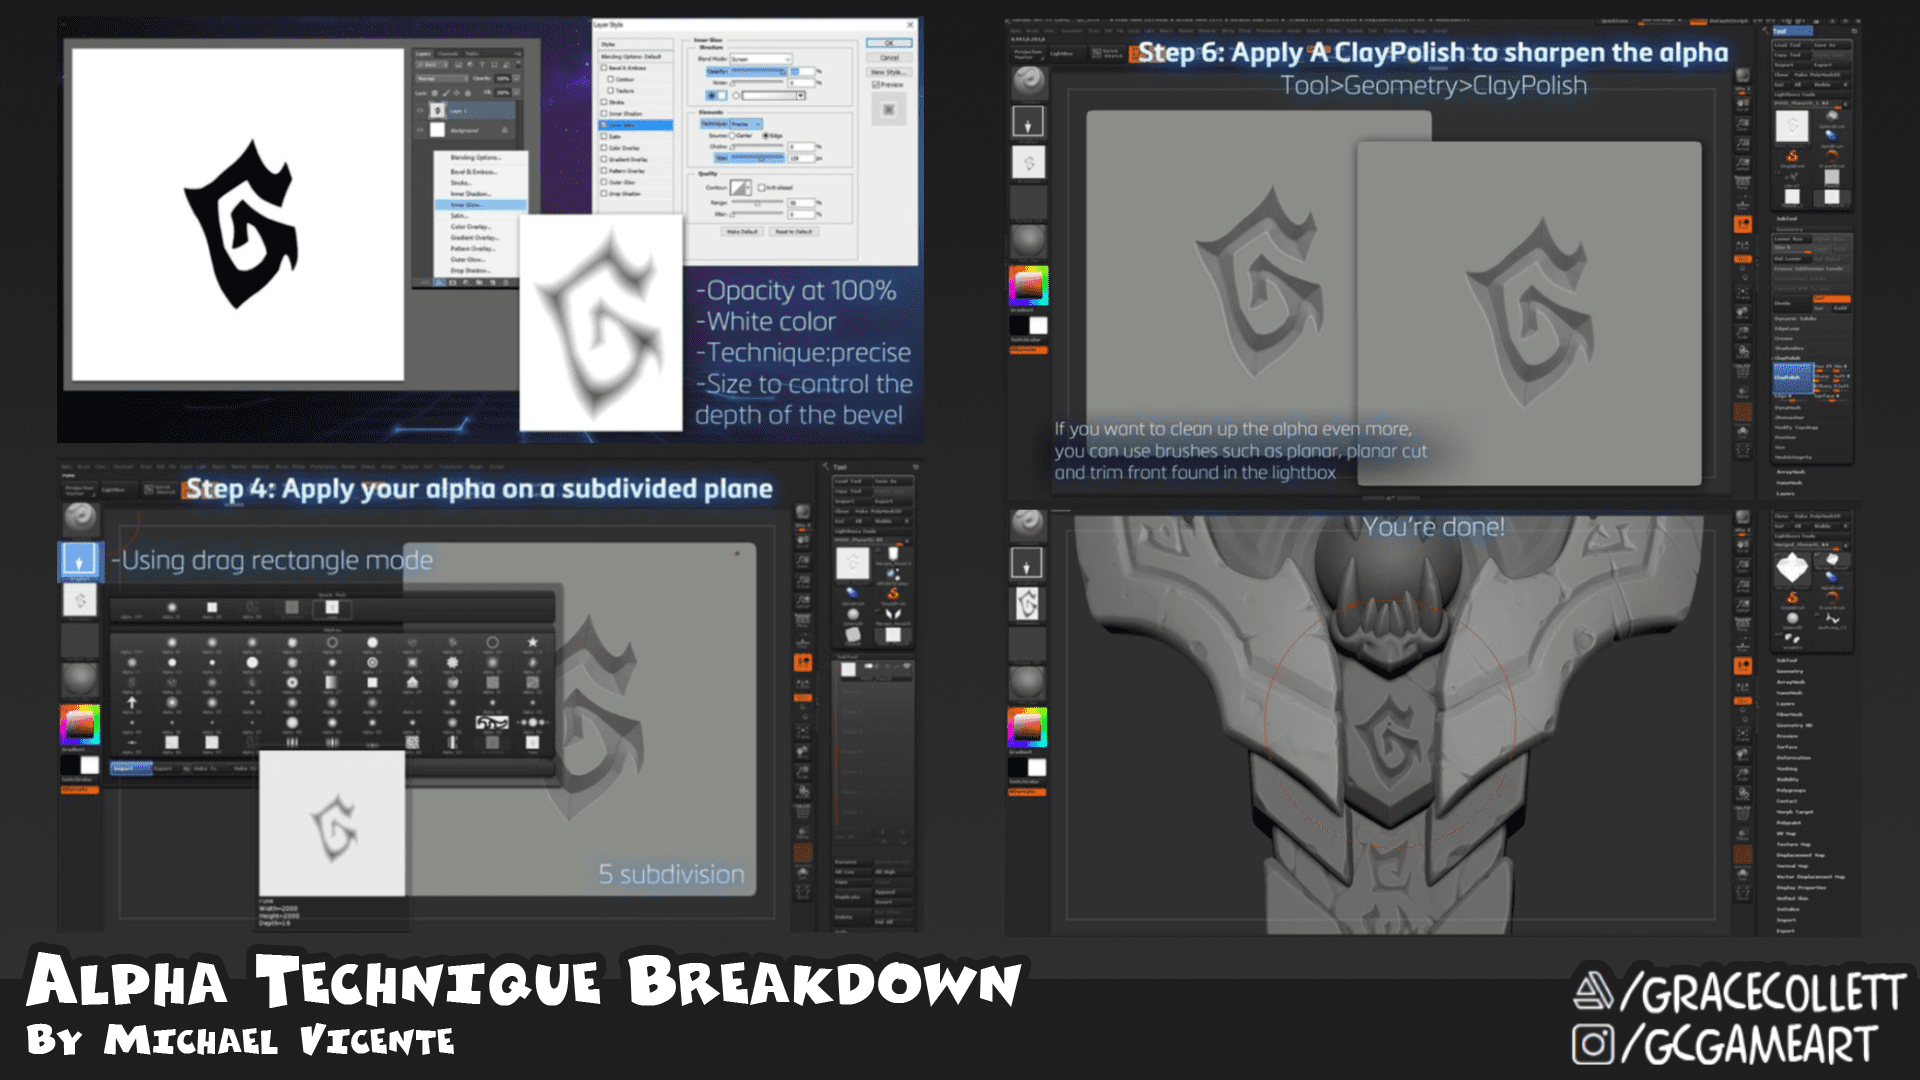
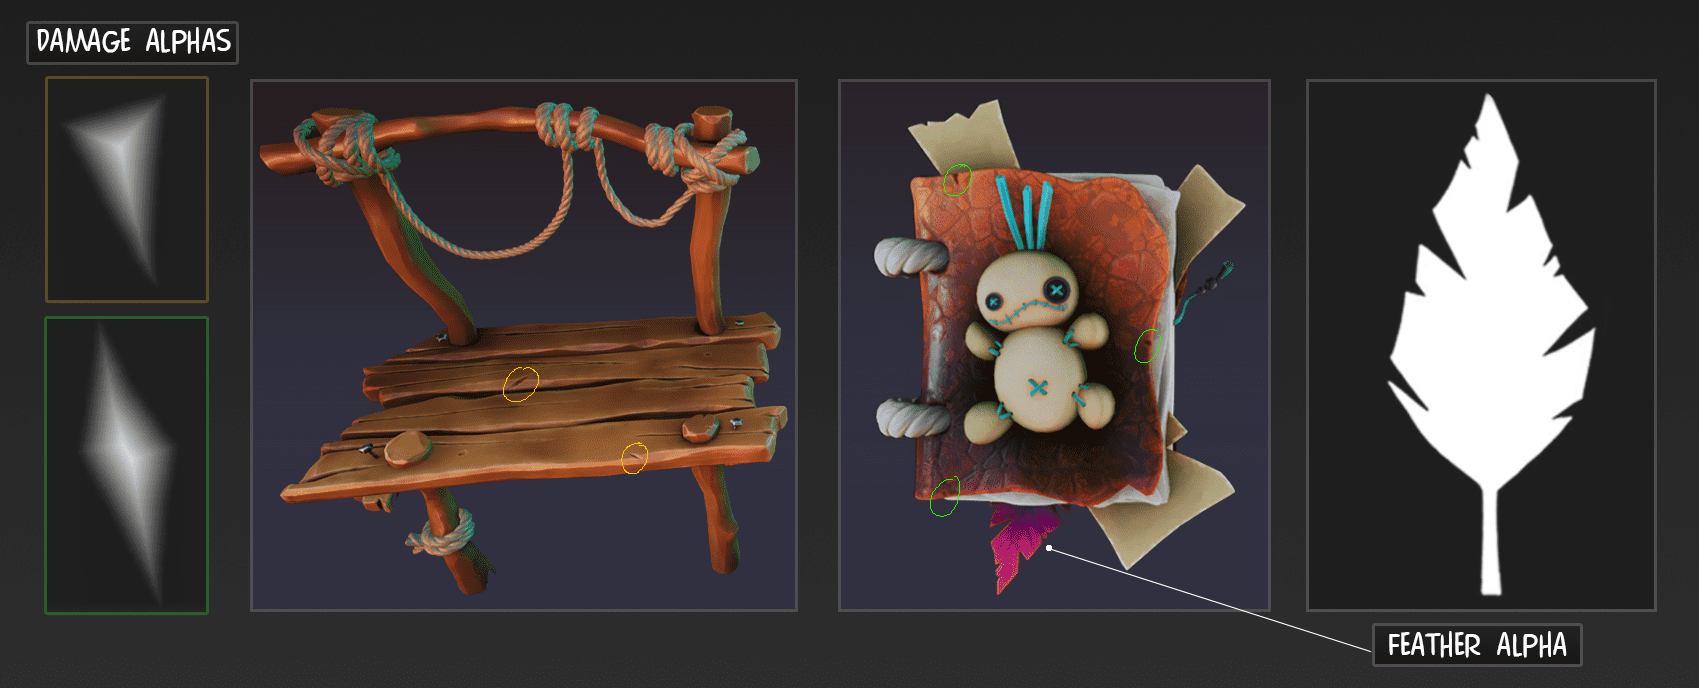
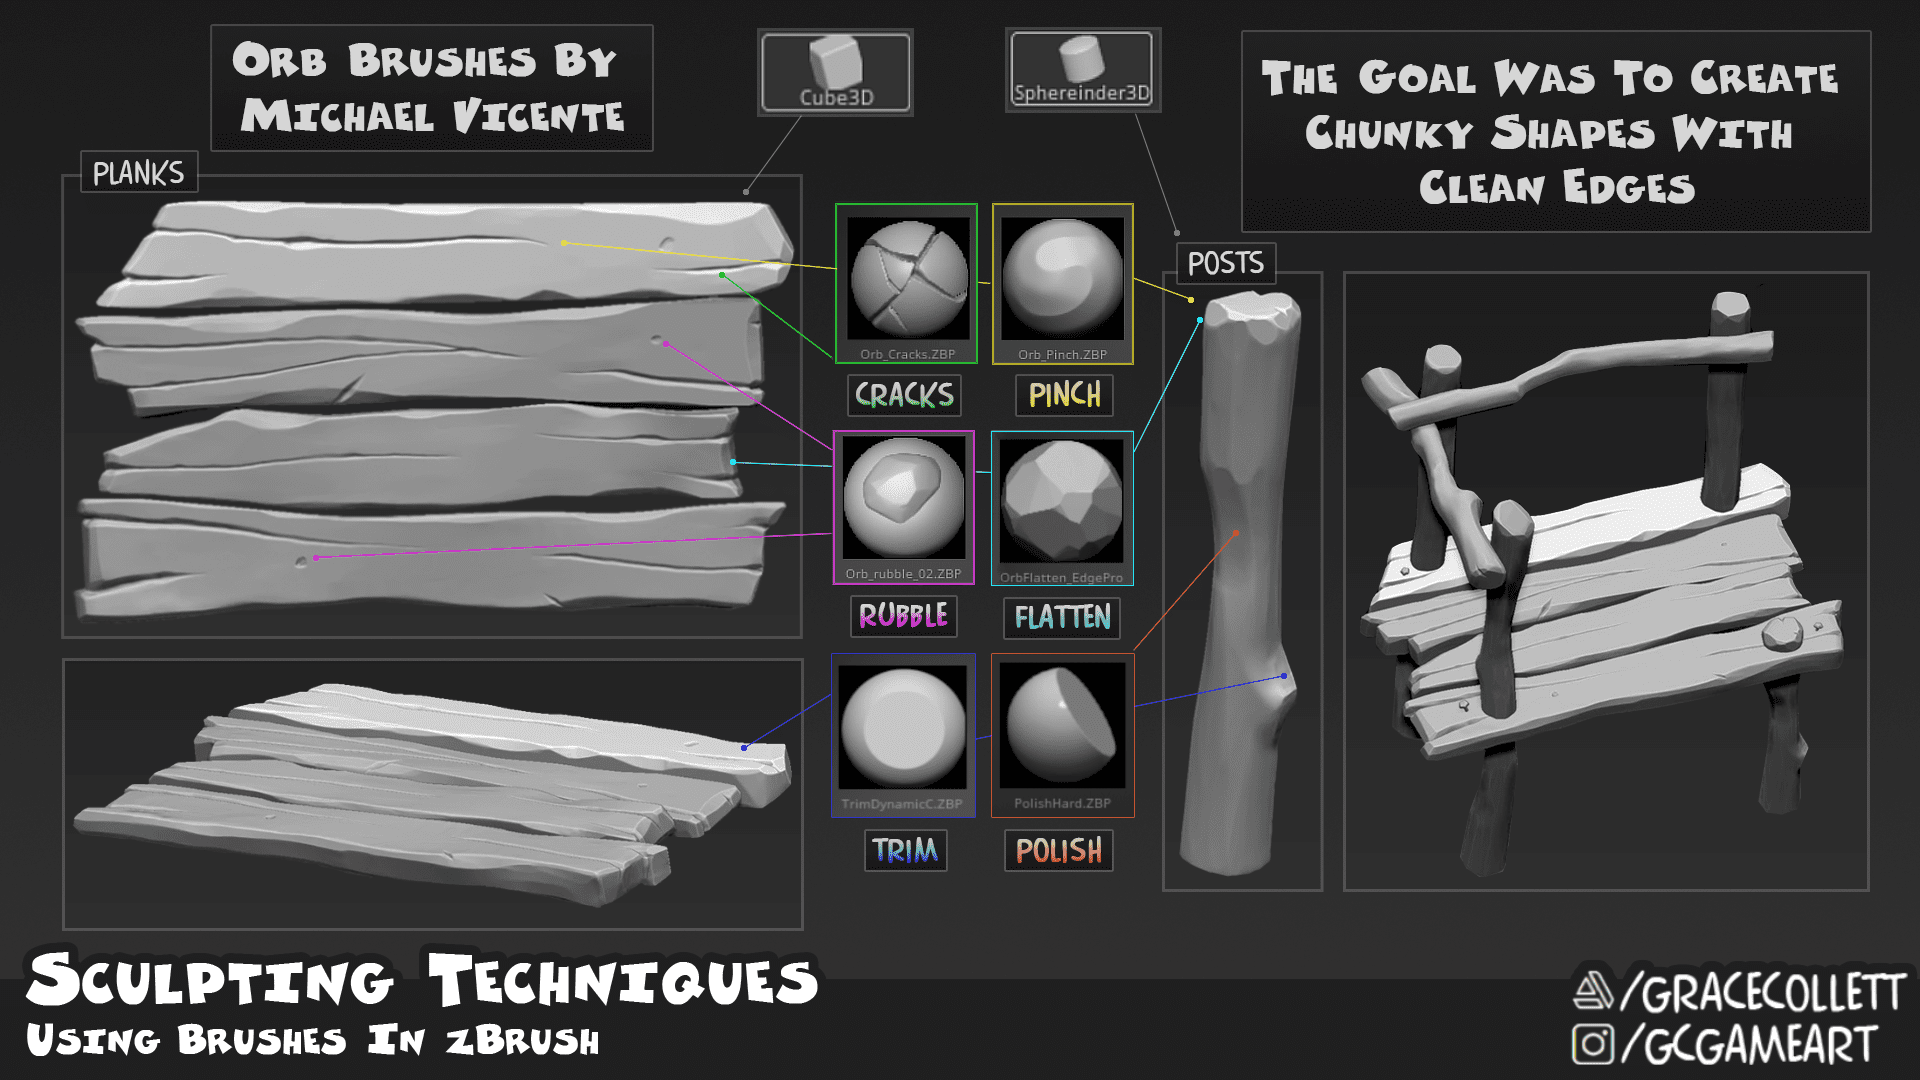
All of my assets were sculpted in zBrush, using the Orb Brush pack by Michael Vicente. I also took references from his alpha techniques post and created my damage alphas in Photoshop. I also used alphas to create meshes in zBrush using the MakeAlpha 3D option.
To get clean cracks on the wood, I decided to mask the opposite side of the crack that I was cleaning up with the Trim Dynamic brush and Orb Flatten Edge brush. I also made sure to use the Polish Hard brush to get a smooth hard edge finish which added to the style.
When sculpting, it is important to go between your lower and higher subdivisions because it enables you to make subtle and smoother adjustments to your mesh.
Another function is the Layers section of ZBrush, working using different layers allows you to have more control over your details and can be changed later on before making them permanent.

Most of the assets that I made during this project were created in ZBrush and then retopologised in Maya using the Quad Draw function. The low poly meshes needed to be optimised but enough to support the high poly meshes during baking, as well as have good topology. I had to use the Decimation Master function to create a low poly version to take into Maya. I made the decimated mesh live and started creating my geometry for the low poly using Quad Draw. This can be a lengthy process, so it can be good to put on some music and get in the zone!
I've learnt to use more polys than needed to help support the high poly bake. Once I have baked this in Substance Painter, I go into Maya adding the texture and tick the Preserve UV option in the Tool Settings. This means that I can go further and remove unnecessary edge loops without disturbing the already-baked details.
When it came to UVing my assets, I kept similar objects (between 3-4 assets) on atlas sheets of 2048x2048 resolution. I used a 512x512 texture for the rocks as the entire platform only consisted of two small meshes used repetitively. I did consider using trim sheets for my wood materials but decided against it as this was a university piece for my portfolio and I could afford to be more generous.

I use Substance 3D Painter for my baking workflow, mainly because that is how I have been taught at university. However, I do know from research that Marmoset Toolbag has some good baking options which I am yet to try out for myself, so that is a different approach!
To start baking I adjusted my settings to bake by Same Mesh Name and ensured that all of my naming conventions were correct in both Maya and zBrush for the low and high polys. Most of my assets were on atlas sheets so I baked them with the Self Ambient Occlusion changed from Always to Self Occlusion to avoid unwanted projections of shadows.
Once I was happy with the bakes, I started the texturing process. My approach to texturing starts with a base of colour and roughness and then building on top of these using different layers:
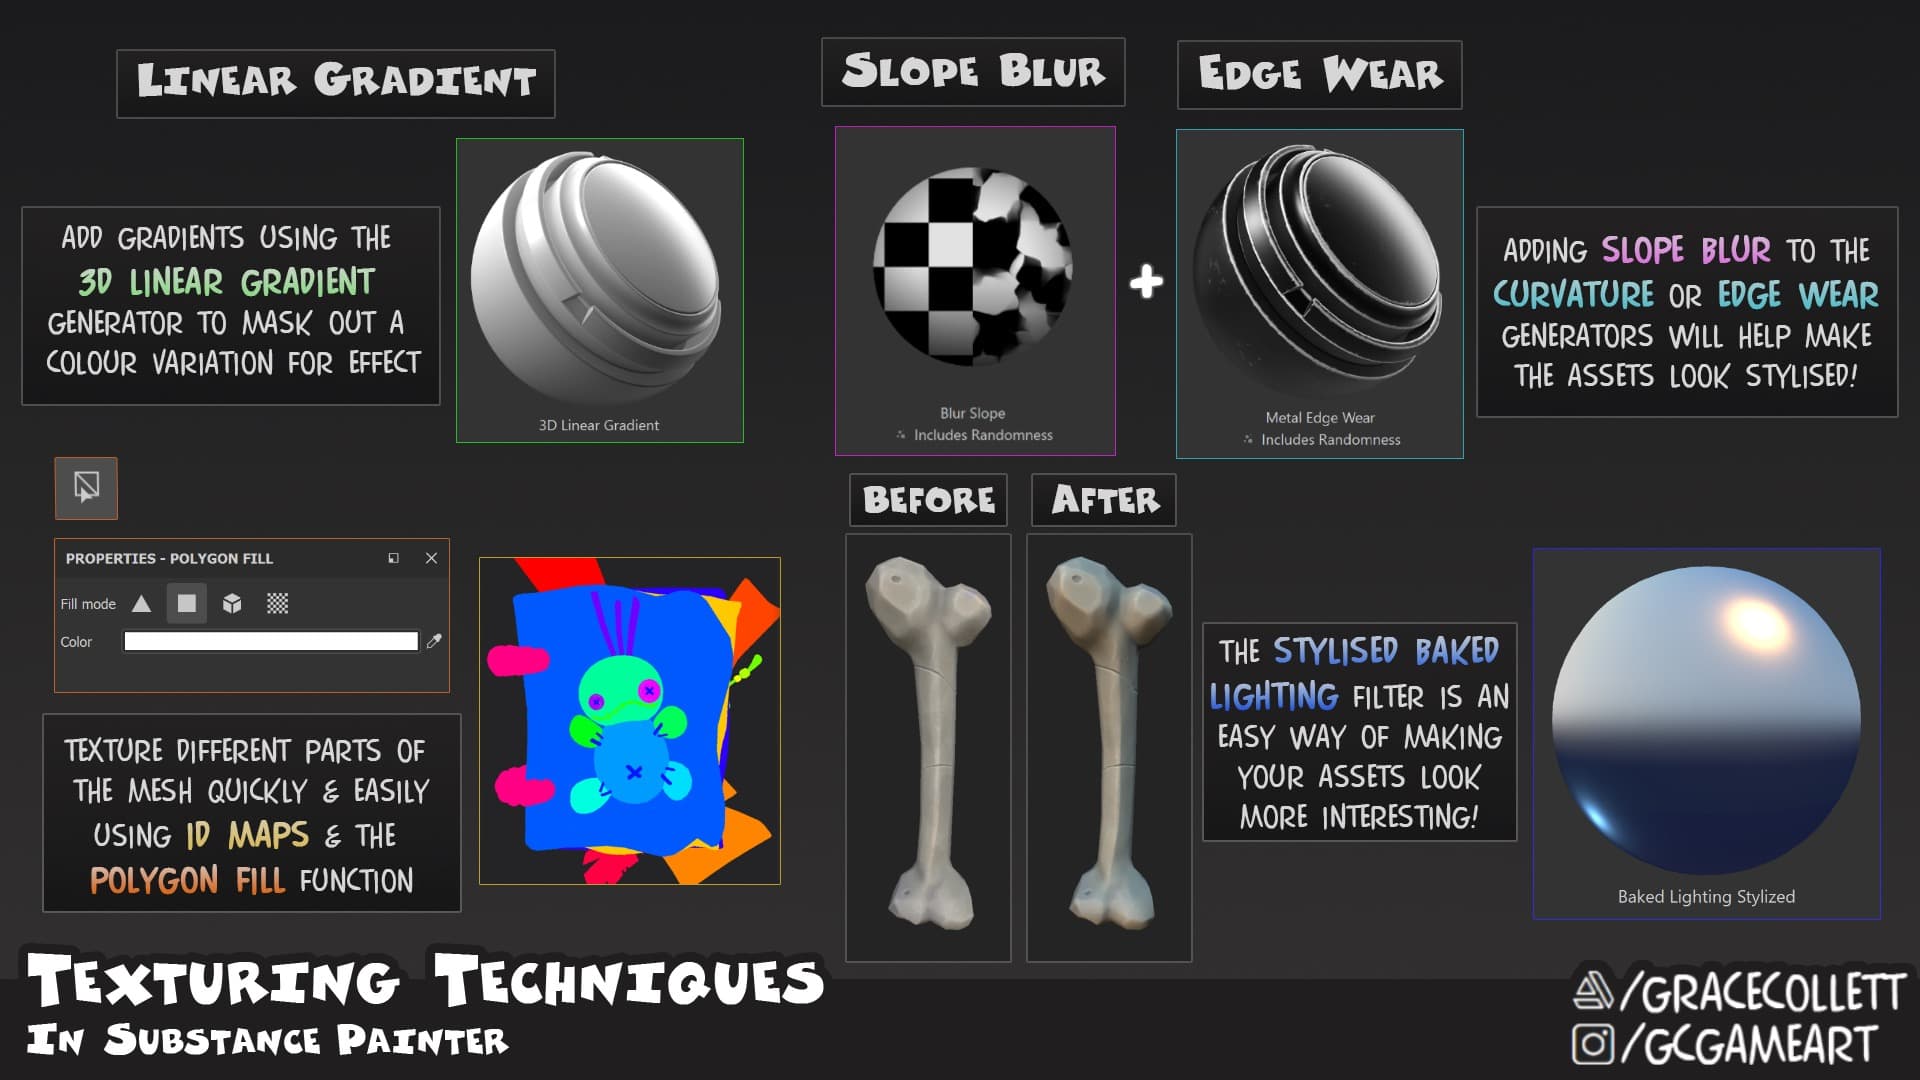
My layers consisted of multiple masks, by using ID masks or the polygon fill tool (this allows you to select parts of your model by the polygons) to give control over texturing without affecting the whole mesh. I made use of the curvature functions to highlight the edges and cavities of my sculpting which is a popular technique for creating stylised textures. I broke these harsh edges by using either the slope blur filter or a fill layer on the blend mode Multiply, adding noise with a procedural texture for randomness.
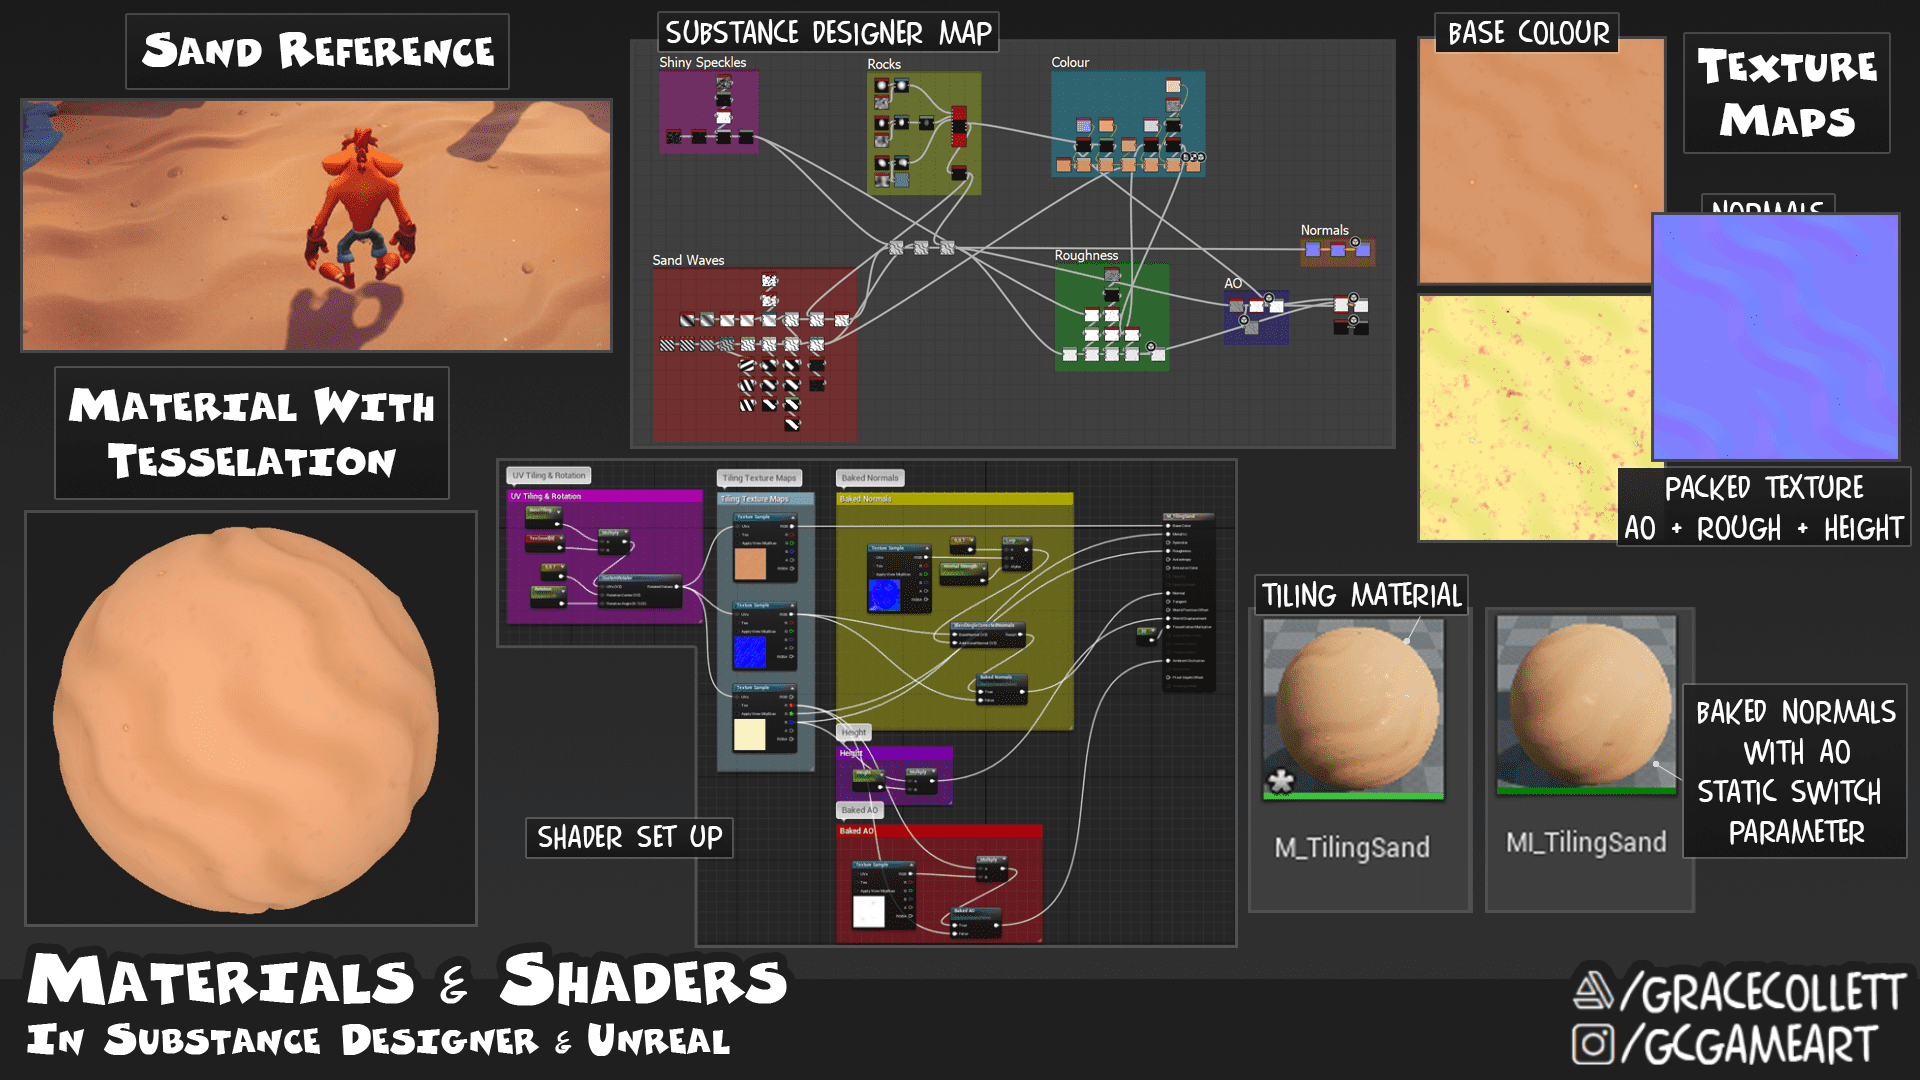
I finished my assets earlier than expected, so decided to create a tiling sand texture for the bottom of my platform which was one of my stretch goals. This was my first time using Substance 3D Designer properly for a project, so I am satisfied with this attempt! Reflecting on this, I would highlight the smaller rocks more, as well as make the sand height less repetitive.
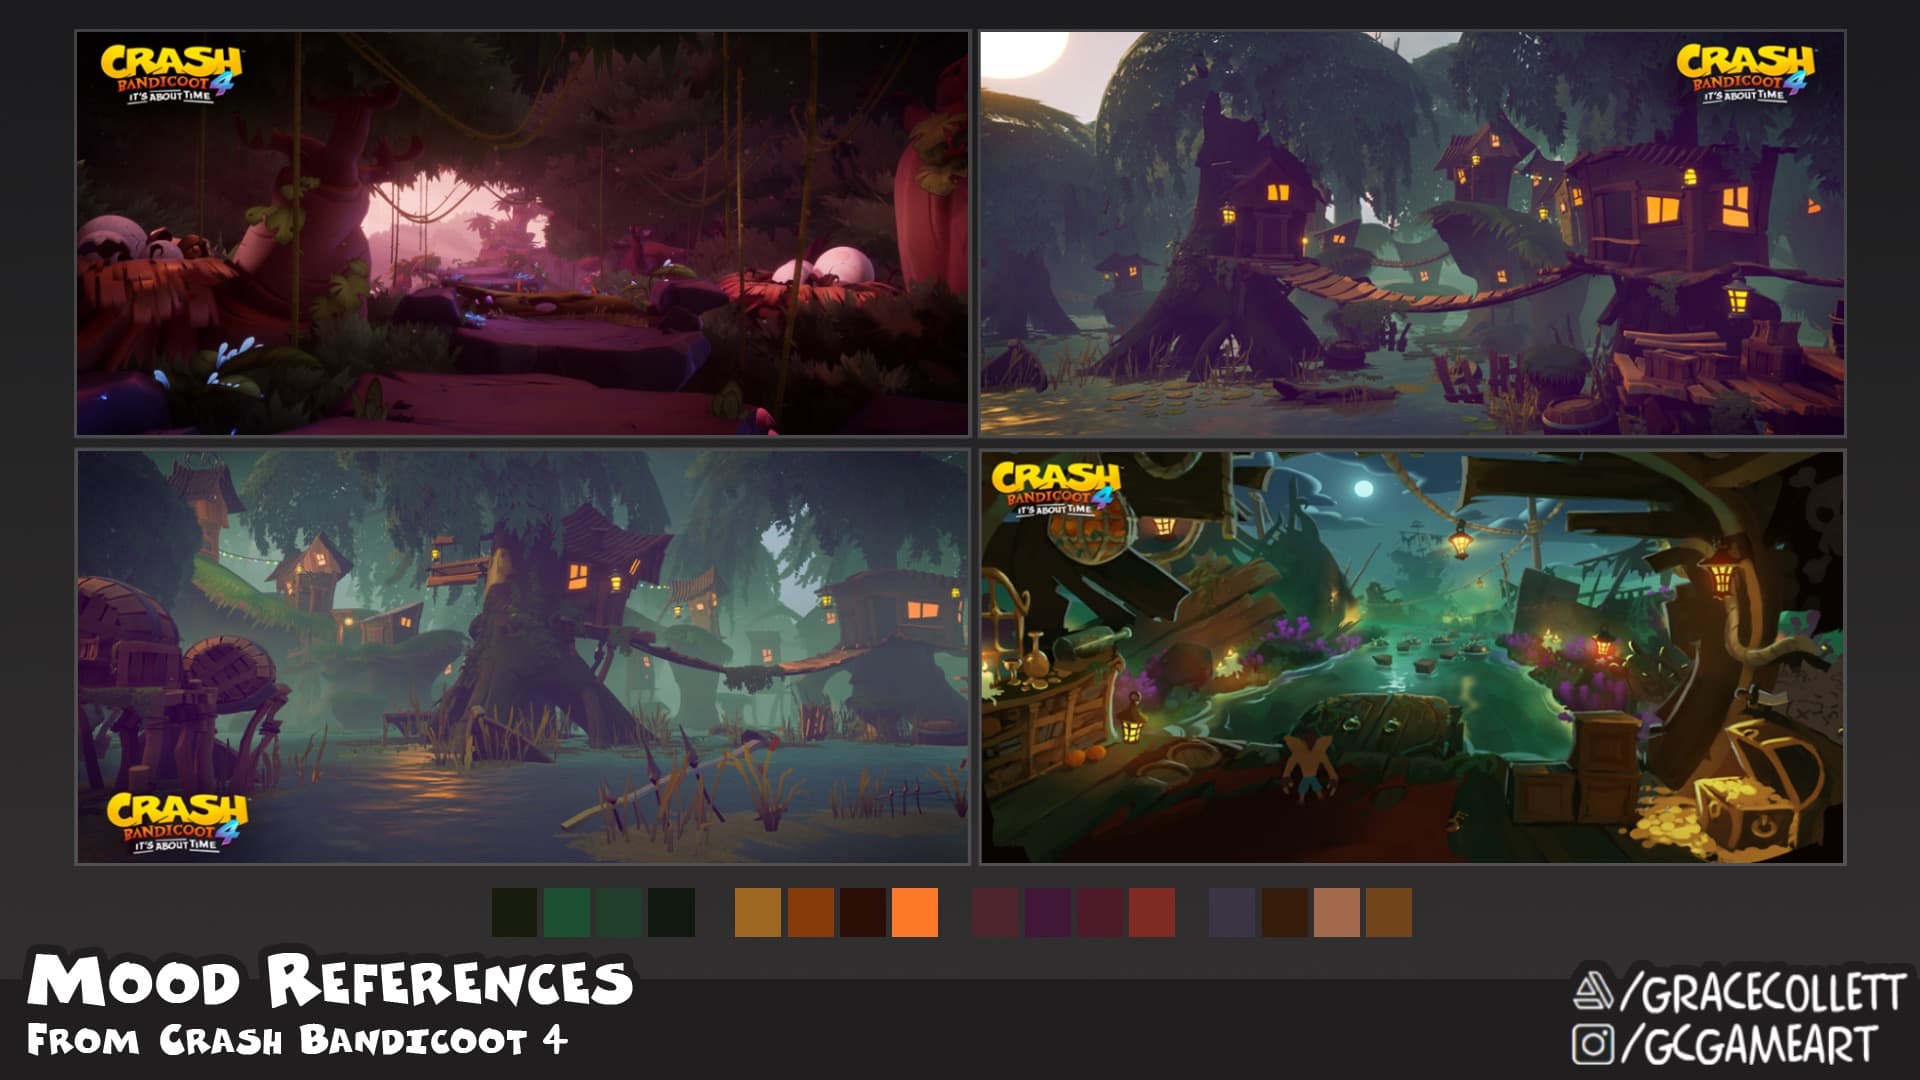
I set up my lighting to highlight a similar mood to the in-game references that I found for Crash. I wanted to use spooky-ish colours but stick with the feeling of it being vibrant and fun!
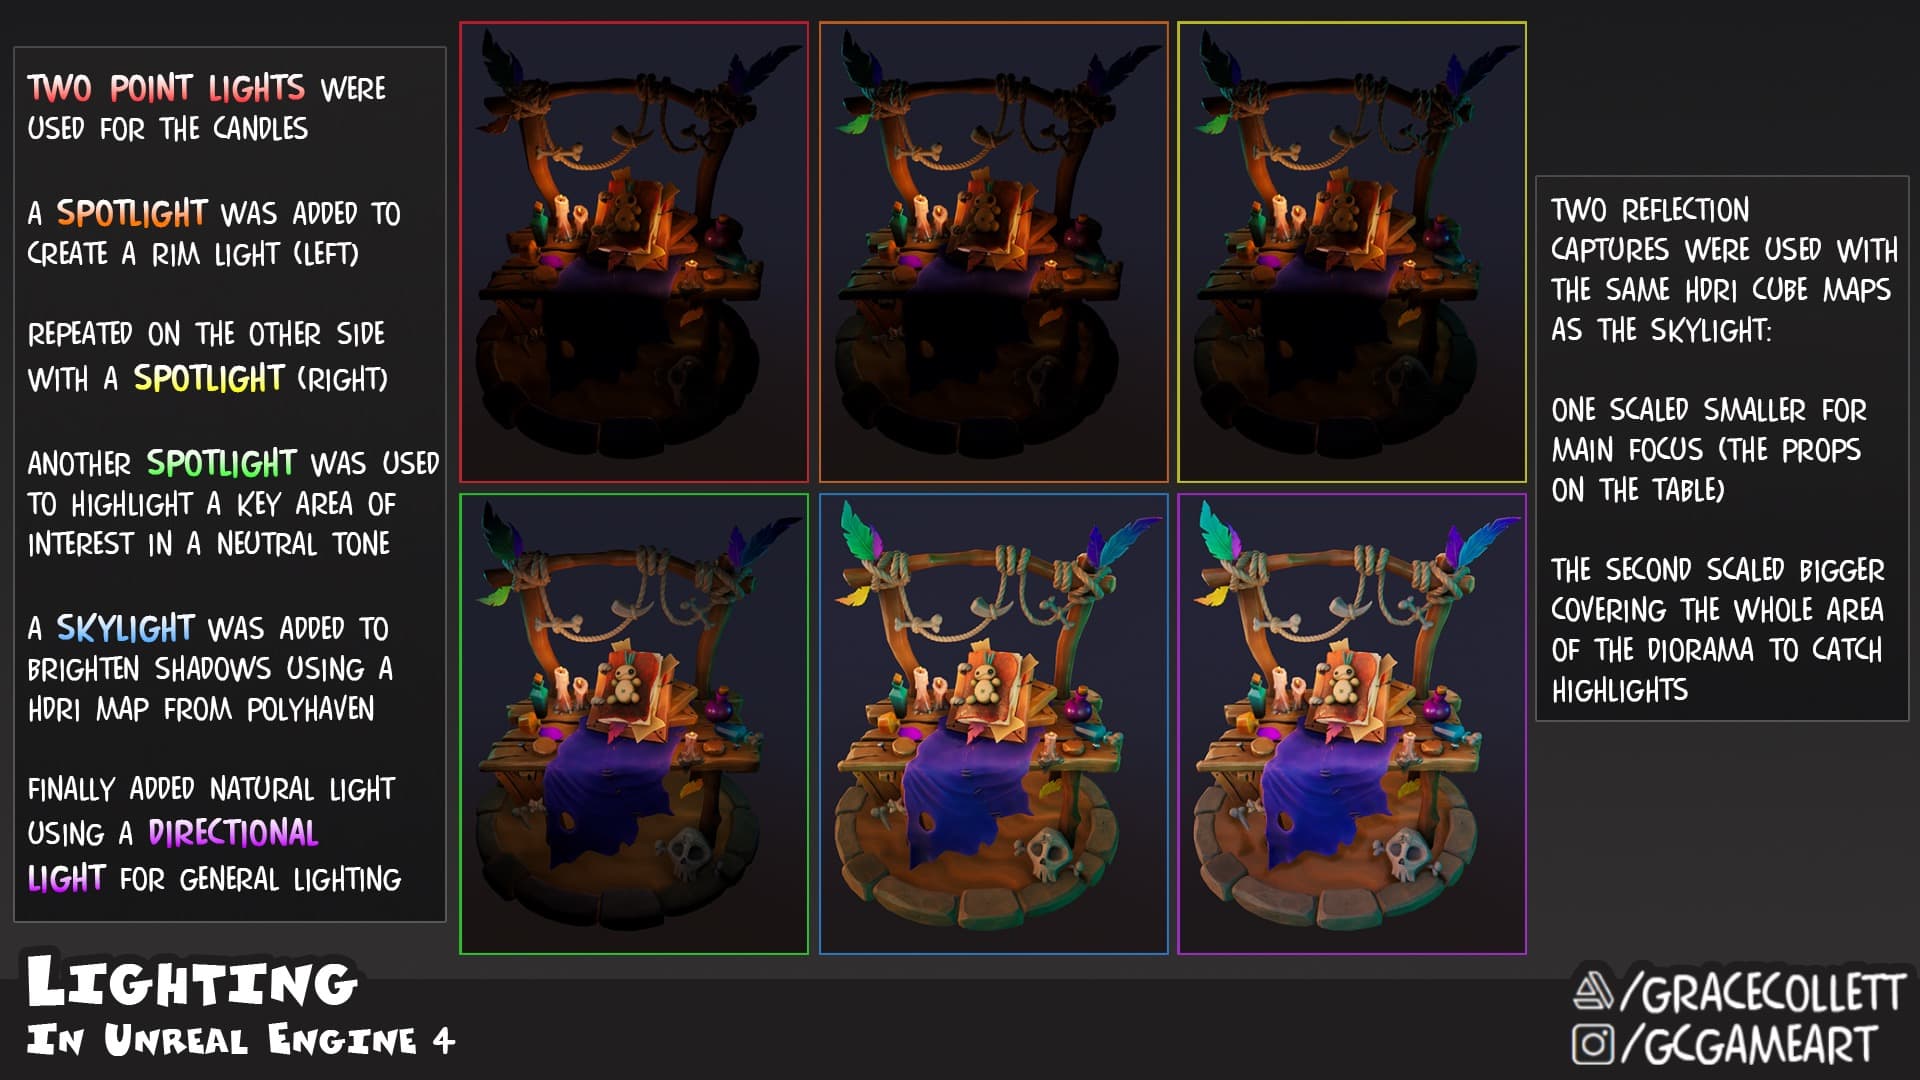
This was my first time lighting a diorama properly and having learnt a lot since doing this project earlier in the year, I understand that this technique is a bit backwards! Usually, you start with lighting your whole scene using a Directional Light and a Skylight, then add your smaller lights where necessary. That said, I do feel that doing it this way taught me a lot about the functionality of each light and the difference they can make!
This project was so enjoyable, and I learnt so much about stylised art along the way. I finished this project at the end of 2021, and since have learnt more techniques and workflows which could have been applied to this work to improve it overall. However, I am satisfied with the result and would like to thank my tutors at Escape Studios, Kevin Nally and Will Brosch for helping me with my development. Also, a big thanks to Alice Hughes from Mediatonic who gave me invaluable advice on pushing the stylisation of this piece. Thanks for reading!
You can find more of Grace's work on ArtStation.