Recreating a Movie Scene Into a Game Ready 3D Environment Using Maya and Substance 3D Painter
Second year Game Art student from Games Academy Falmouth University, Oana Pascari, chose to recreate the Raven Hotel lobby from the ‘Altered Carbon’ series and turn it into a real-time game ready environment. This is how she did it.
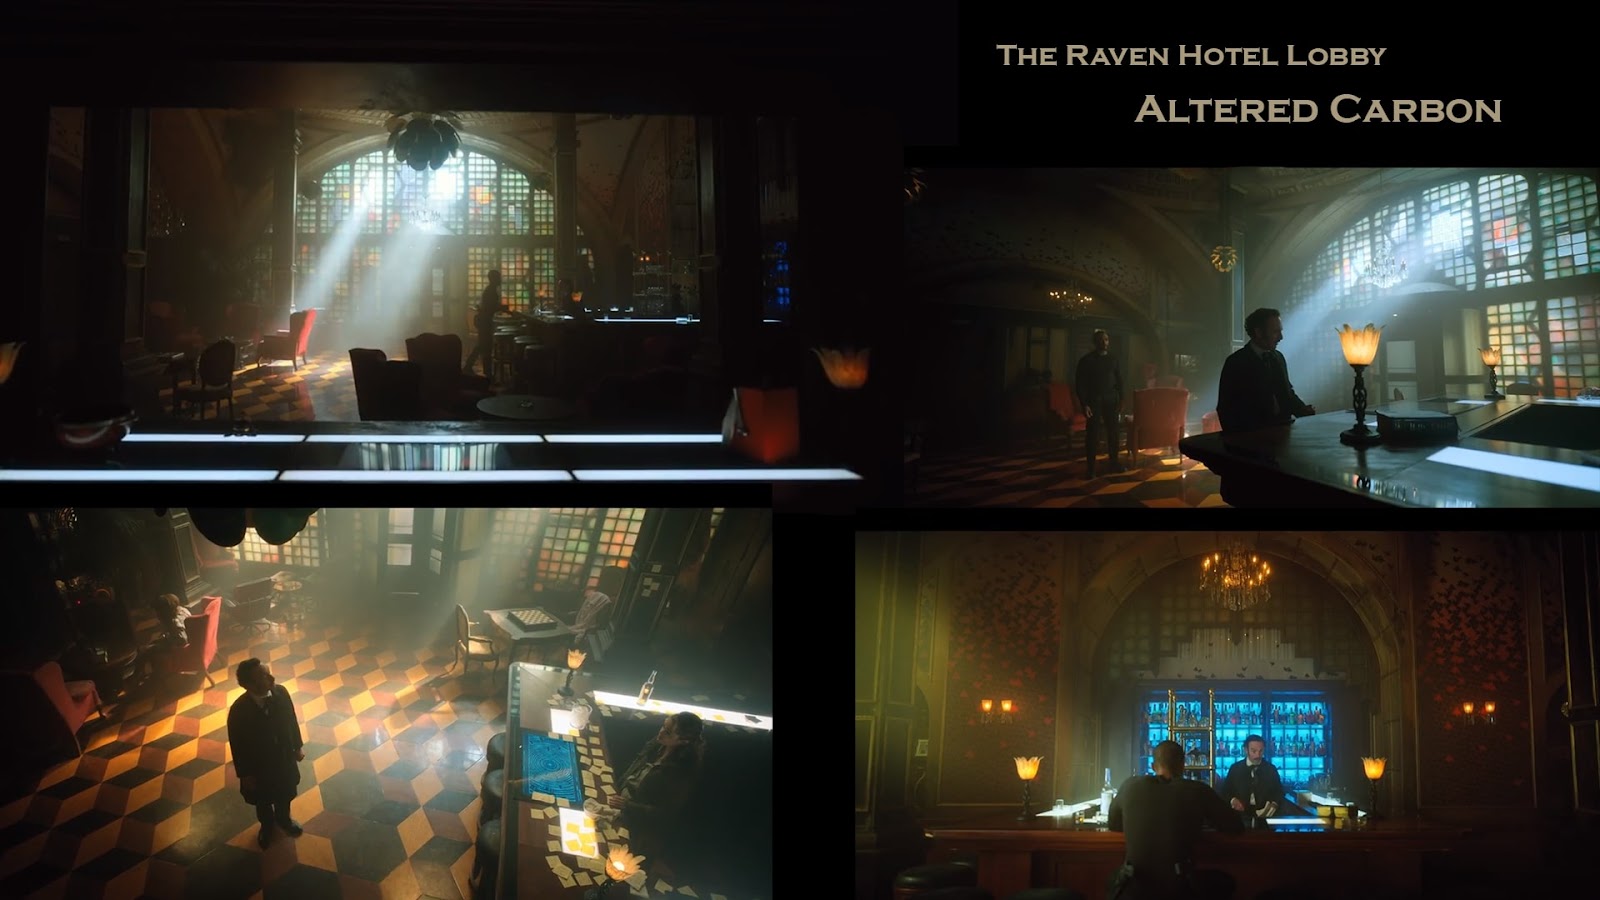
Oana Pascari is a second year Game Art student from Falmouth University. For one of her latest projects, she chose to recreate the Raven Hotel lobby from the ‘Altered Carbon’ series and turn it into a real-time game ready environment.
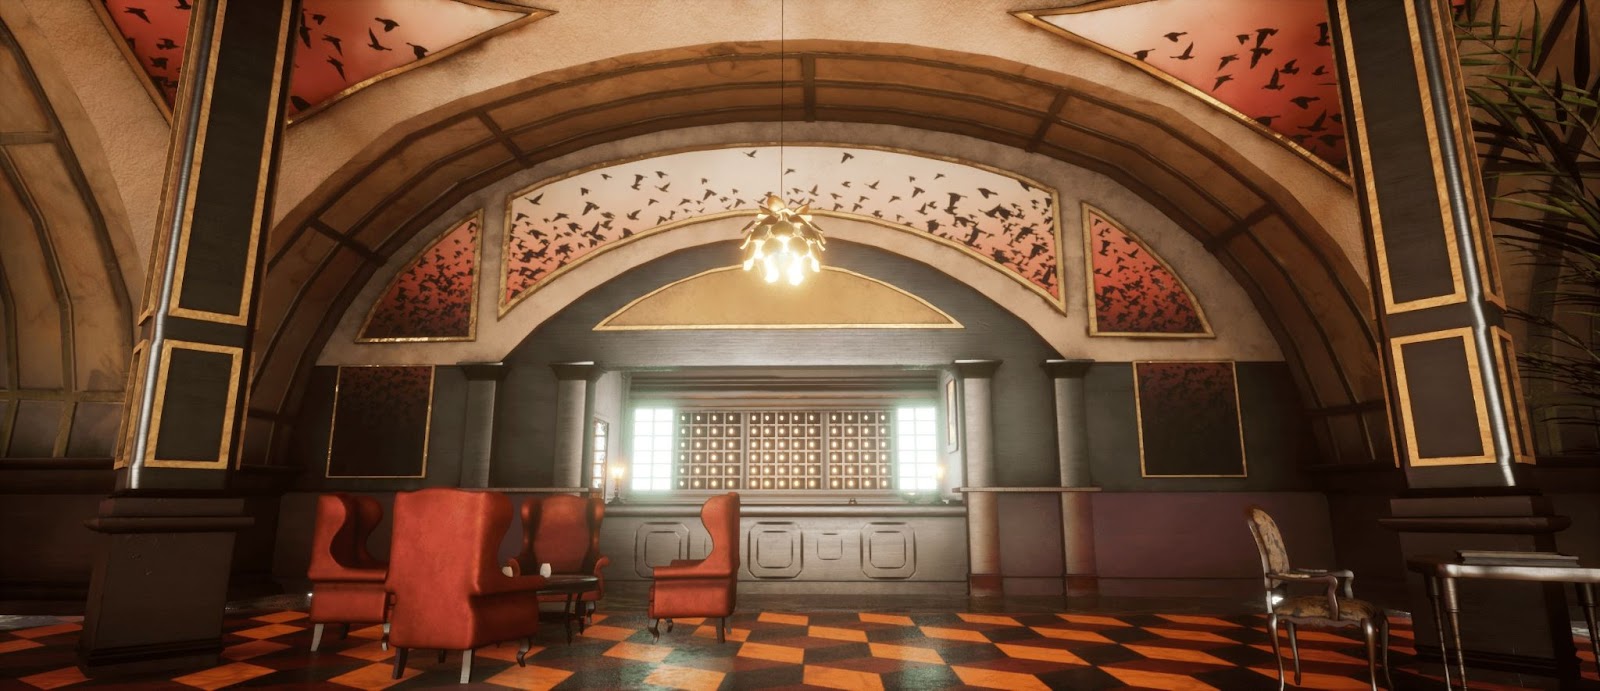
The Raven Hotel is run by Poe, an Artificial Intelligence, patterned after the famous writer Edgar Allan Poe.
-
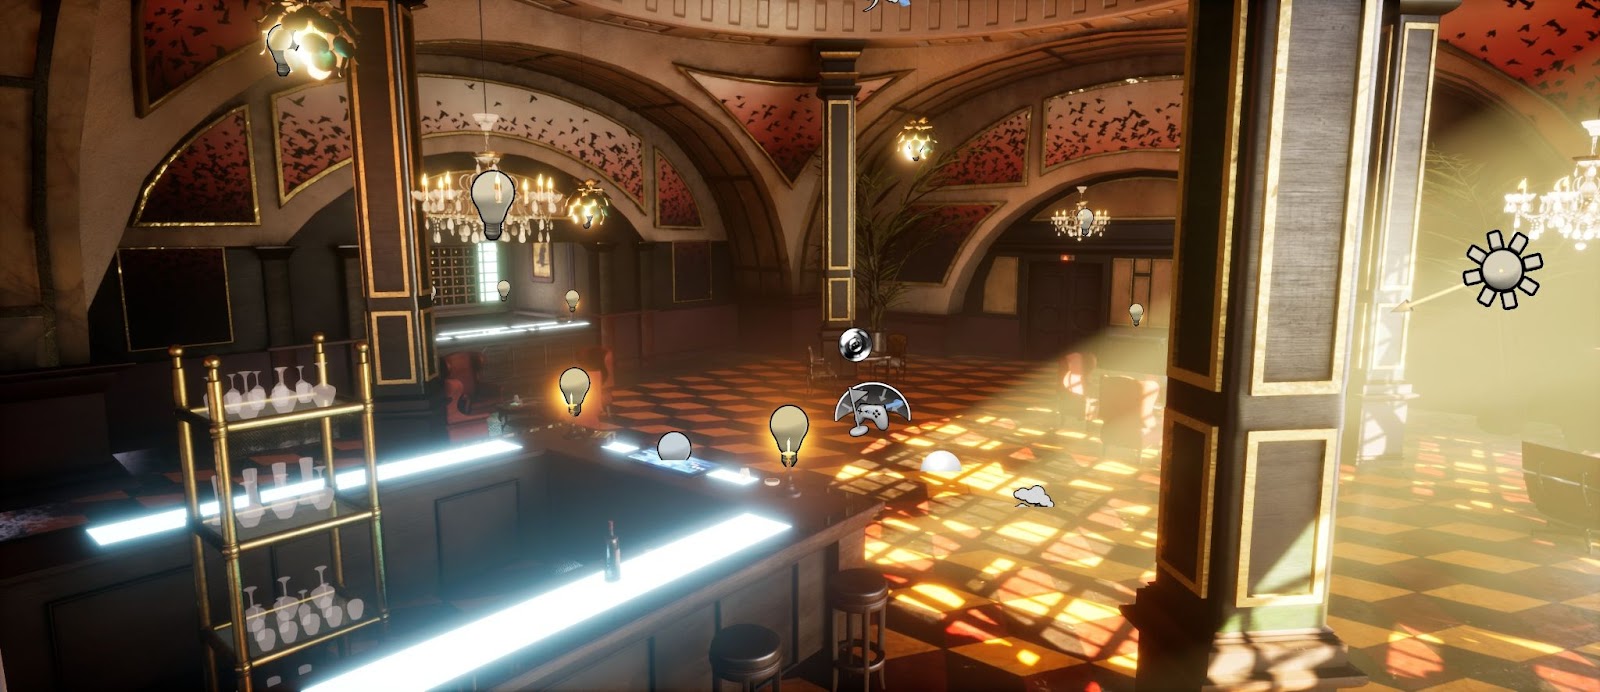
My focus for this project was to get the architectural structure and assets across the room as close as I could to the original, whilst also wanting to play a bit with the light to make the room feel more cosy; turning it into a sunset-like scenery.
The complexity of the architecture/layout and also the mood of the scene attracted me a lot and I knew it was going to be a challenge. I loved the Victorian and vintage influence of the space, combined with the hi-tech elements.
I started by gathering references for my scene by taking screenshots from the series and also looking into what kind of textures I needed to create. The main software I use for this is always PureRef.
In these boards you can find the direct reference from the series, along with texture reference, real-world references for some objects that were less visible.
Here you will also find a planning board for organising what I have to model, best said, a list of modular pieces that were identified across the scene.
Block-out
I started by making sure the grid in Maya matched the Unreal Engine grid. I work closely with the UE4 scale man at every step in order to set my scene size and real world proportions from the block-out stage.
It is really important to have the right measurements that correlate with reality as you don’t want the player to feel like a giant or to feel minuscule in the environment that you create.
I was also looking to get the rough idea of where the things are placed and the overall feel of the scene.
Production
At this stage I started the block-out refinement by finishing the architectural structure and making detailed assets to populate the space.
I think that one of the hardest parts of the project was to get the dome and arched walls right, as they had to connect perfectly while also looking round and smooth. A little mistake here could've easily ruined the credibility of the environment.
I had to search for reference that used the same physics as the structure that I was making, as this information wasn't found in the series itself. I looked into old buildings with arched domes and mostly, I was trying to understand how everything is connected together and how it would work in real life.
As an environment artist, I can say that while working on different projects, you will have a lot of little challenges like this along the way. I really believe that part of the job, beside being able to create nice assets is that you need to be able to overcome those problems quickly by constantly looking for new reference and improvising. You don't want to be stuck for too long looking at the same three images, trying to understand how to make things work when you can actually figure it out an alternate way.
Here are some early assets that I did, again, by making sure they match real life proportions with the help of the scale man:
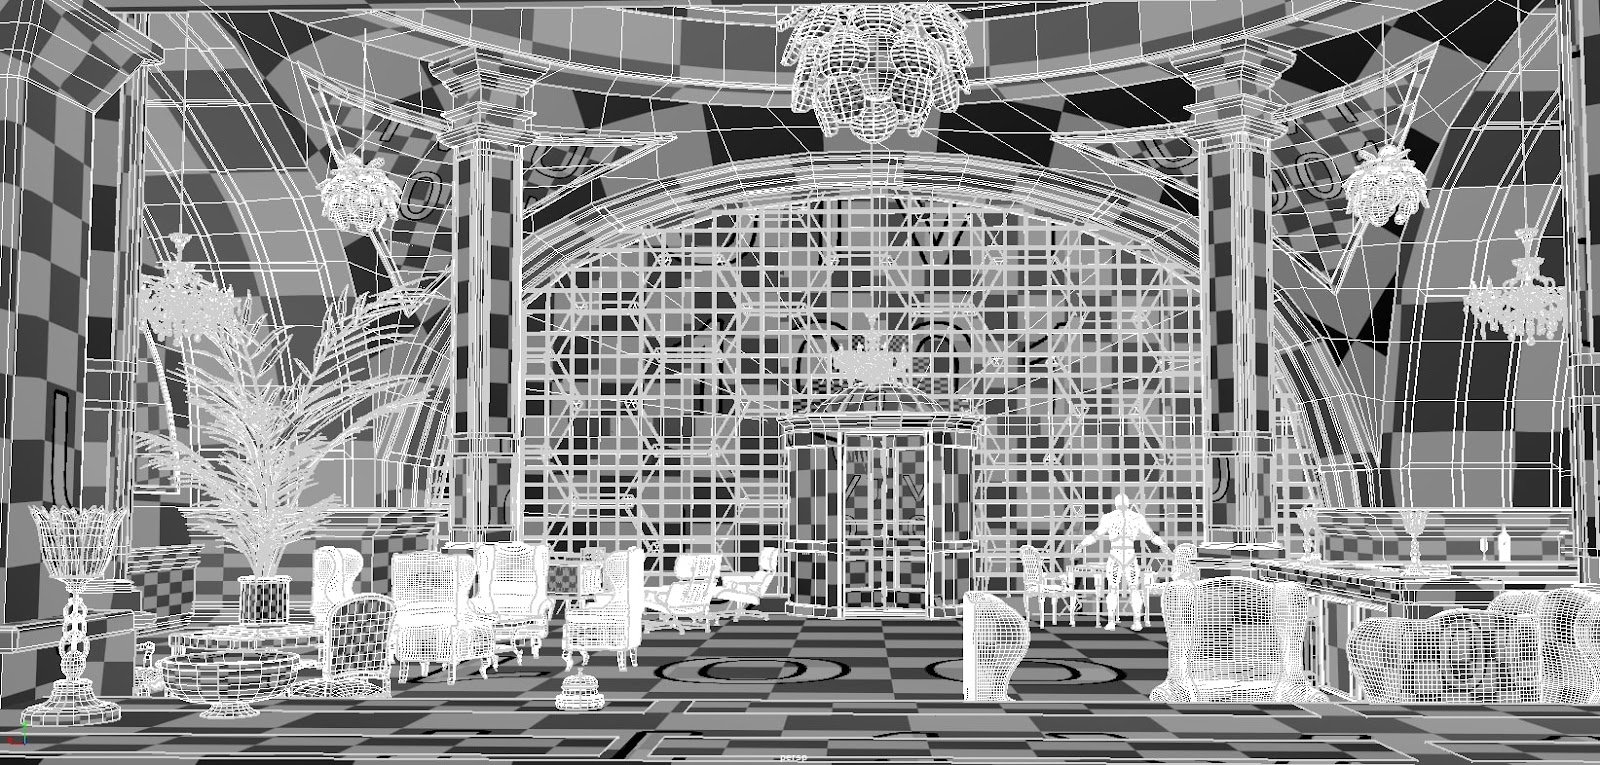
Here is the final environment in AO-Wireframe:
UVs
I prefer to make the UVs for assets after I finished modeling everything. A useful trick while making UVs is to think about textures and how you can improve and make your texturing experience easier with the right UVs.
Here are some examples:
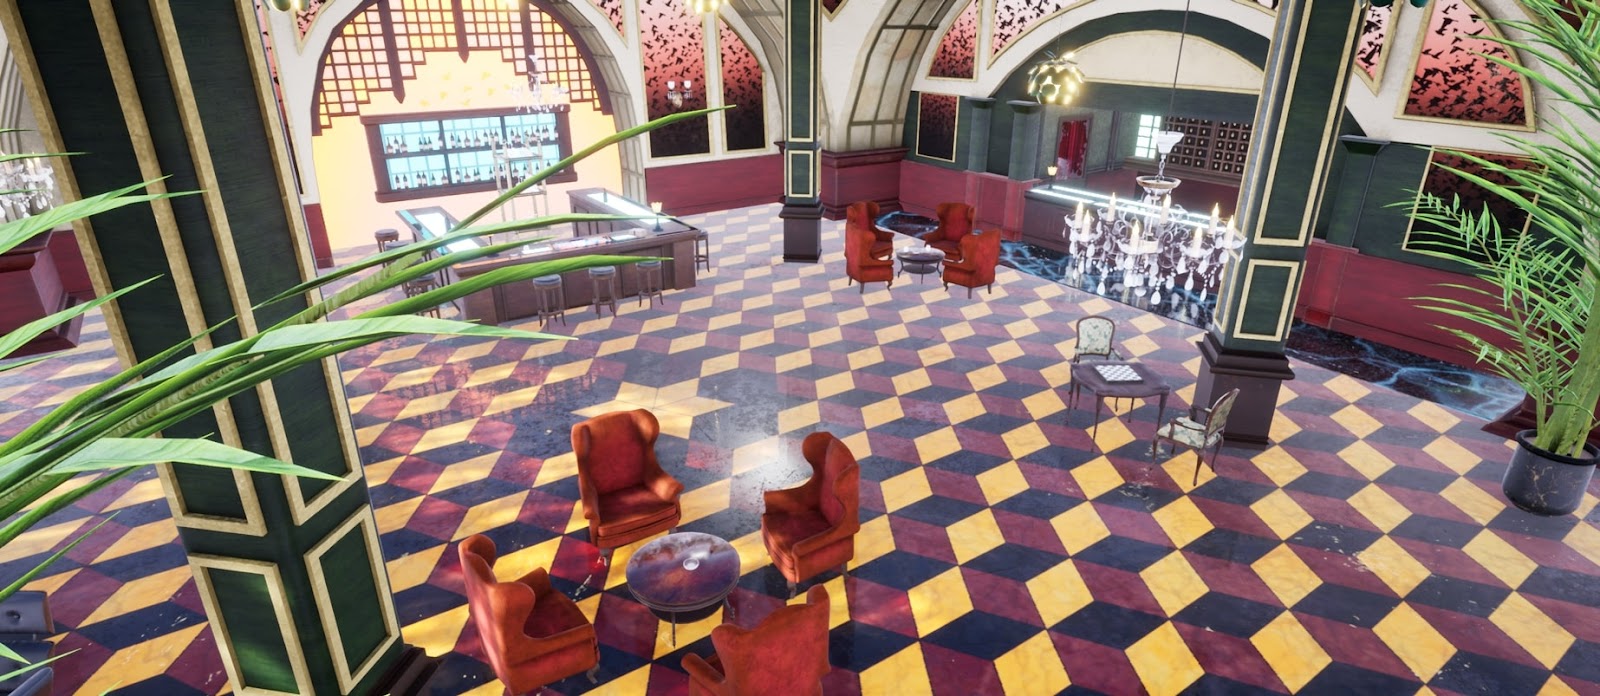
Final environment in UV checker:
Textures
The textures are made using Photoshop or basic materials tweaked with the help of masks, generators etc. in order to make them unique. I used Substance 3D Painter for this. I decided the texture size depending on the asset size and visibility in the scene. Most of the assets here were 2k to 4k.
A key element that plays an important role in the storytelling is the wall paper with the flying ravens print as seen here:
This is my remake of the print:
Another distinct feature of the scene is the floor print:
This is my remake:
Texturing is by far my favourite part of the process so I will include here some close-up renders for some of the props:
As these are just renders for random assets from my environment, I rendered them directly in Substance 3D Painter. When I am rendering something for my portfolio, like a hero asset, I usually go for Marmoset 4 as it gives a wider range of settings and lights that can be used to have an industry standard presentation with a detailed break-down.
Unreal Engine
This is my early stage Unreal Engine scene. No light bake yet and only the basic lights in the scene: a sky dome and a directional light along with some light bulbs. I do my set dressing in engine by duplicating the modular assets, it helps a lot with optimisation.
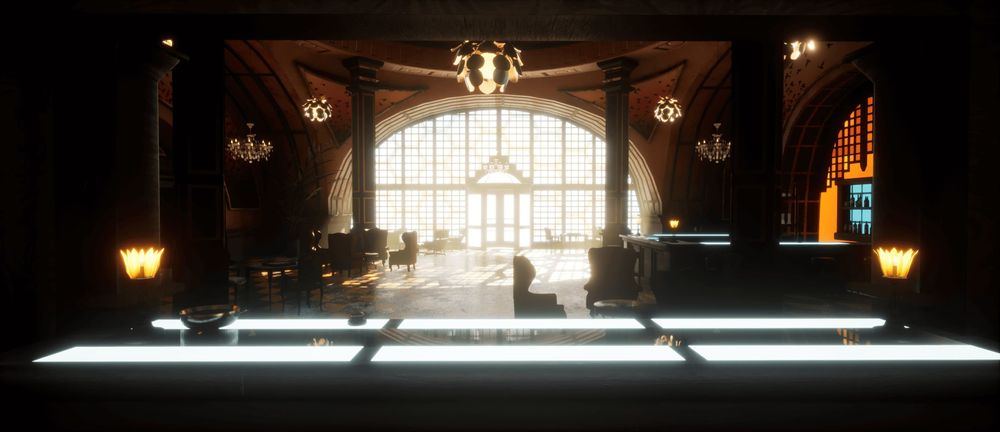
This is how the environment looks after the textures were applied, without any complex lighting set up or bake:
This is the stage were I start thinking about the lights in the scene:
When I start the light process I like to increase the resolution of my light maps.
I started by adding two Reflection Capture Spheres as I want accurate reflections, a really important step that brings the best out of your materials. I made sure the radius covers the entire scene.
I set the Directional Light in the position that I want and I tinted it in an orange tone to recreate a sunset light.
I chose to have Volumetric light for this scene. For this, a fog volume was added, the Exponential Height Fog.
While I work on the lights, I make bakes often with the quality set on Medium. This way I get quick bakes and I can tweak easily whatever I want to.
After getting my overall light right, I added some light bulbs and rectangular lights in the scene to support my emissive materials.
With all of these set, I drag a Post Process Volume in the scene, again making sure the radius covers the entire room. I enjoy the post process stage a lot, as this is the stage where I can play with the settings and give my scene the specific tint, light and effect that I want to. I like to keep the eye adjustment to light as I feel it is really important in the game play and mimics the real world perfectly.
When everything looks like I want it to, I like to drag a Lightmap Importance volume and make sure it covers the entire playable area, set my light bake quality on production, and run the final bake.
Post Production
You can see from the final piece the important role that light plays in a scene, not only for the aesthetic but also for the mood and storytelling too.
This is the modular kit used for building the environment:
I am proud of how this scene turned out. I feel that I improved my skills a lot with this project and this is the most important thing for me. It was a challenging task for its complexity in the 12 weeks time that I had while also working on two other university modules. This was also my first time creating something this big but as I like to remind myself, "The top of one mountain is the bottom of the next, so keep climbing."Hope you enjoyed it, thank you!