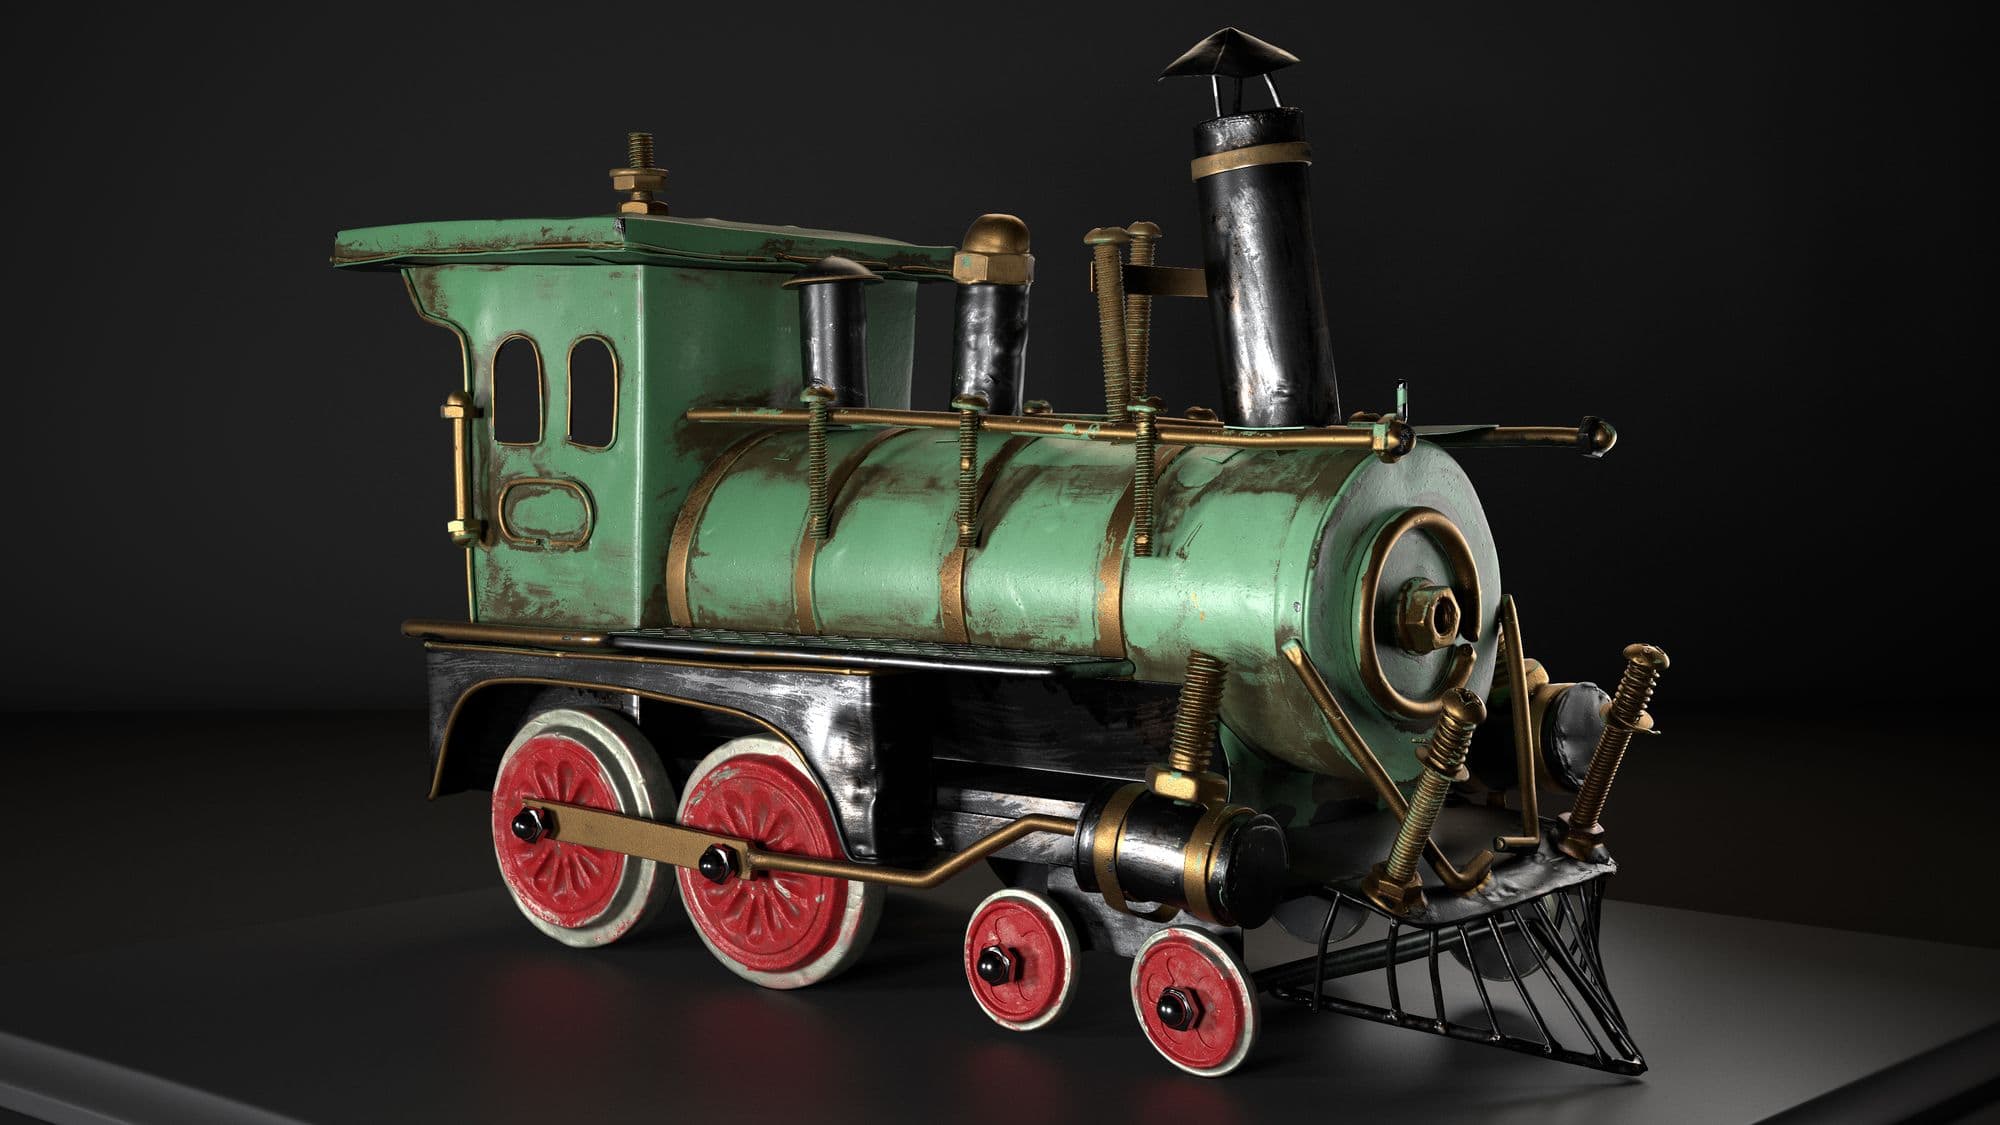
Modeling and Texturing a Photoreal Asset Starting From a Real Life Object
Recent graduate from Think Tank Training Centre, Leonardo Amico, explains how he created this photo-real toy train inspired by a real life object.
Recent graduate from Think Tank Training Centre, Leonardo Amico, explains how he created this photo-real toy train inspired by a real life object.
Leonardo Amico is a recent graduate from Think Tank Training Centre, and 3D Artist specialising in texturing and modelling. Currently living in Vancouver, Leonardo is hoping to explore opportunities across Canada.
His recent Rookie Awards 2022 entry caught our eye, and we asked him to share how he created this photo-real toy train inspired by a real life object.
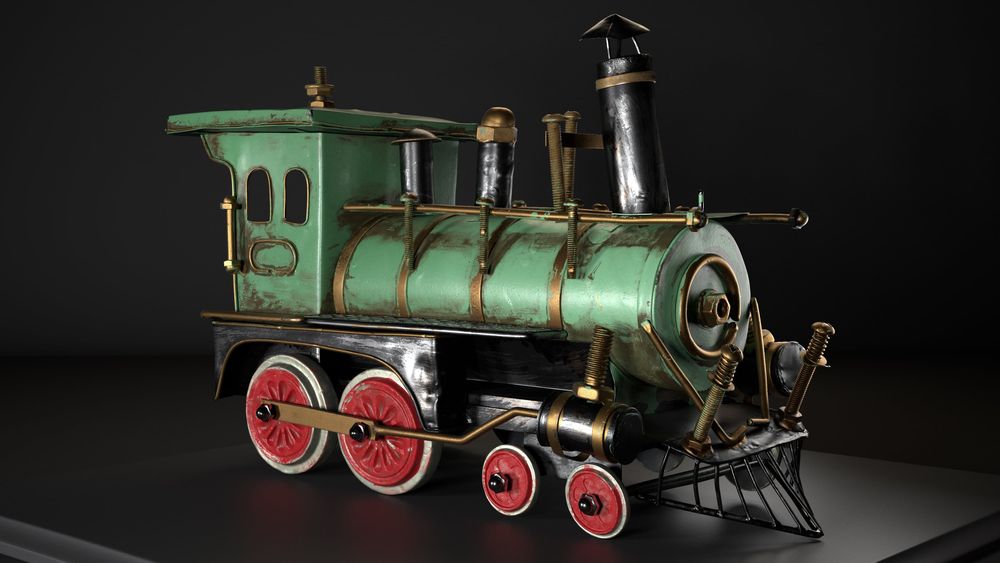
The goal for this project was to create a photo-real asset, using a concept that exists in real life. The choice of the concept took longer than I expected, because I wanted an object with interesting features, shapes and materials, but that also had a reasonable cost.
The main perks of physically having the object were:
The list of software used to create my Toy Train is quite simple:
In this particular case, the process of reference gathering and shooting photos for the photogrammetry coincide.
Together with another student, we took almost one-hundred 8K photos, to cover every angle of the asset; positioning the camera on a tripod and rotating the train itself.
During the shooting, we made sure to spend all the time necessary to achieve a really good result, because, as you are going to see later, these photos were a lifesaver for the outcome of the project.

After shooting the references photos, we also shot an HDRI of the room we were shooting in, plus, we measured the distance of the camera and the lights from the object, in order to be able to recreate the environment in Maya and do an accurate lookdev on the model.
As you can see, before even opening Maya, I was already thinking about lookdev.
Good planning is very important and can save you a lot of time and mental energy during the process.
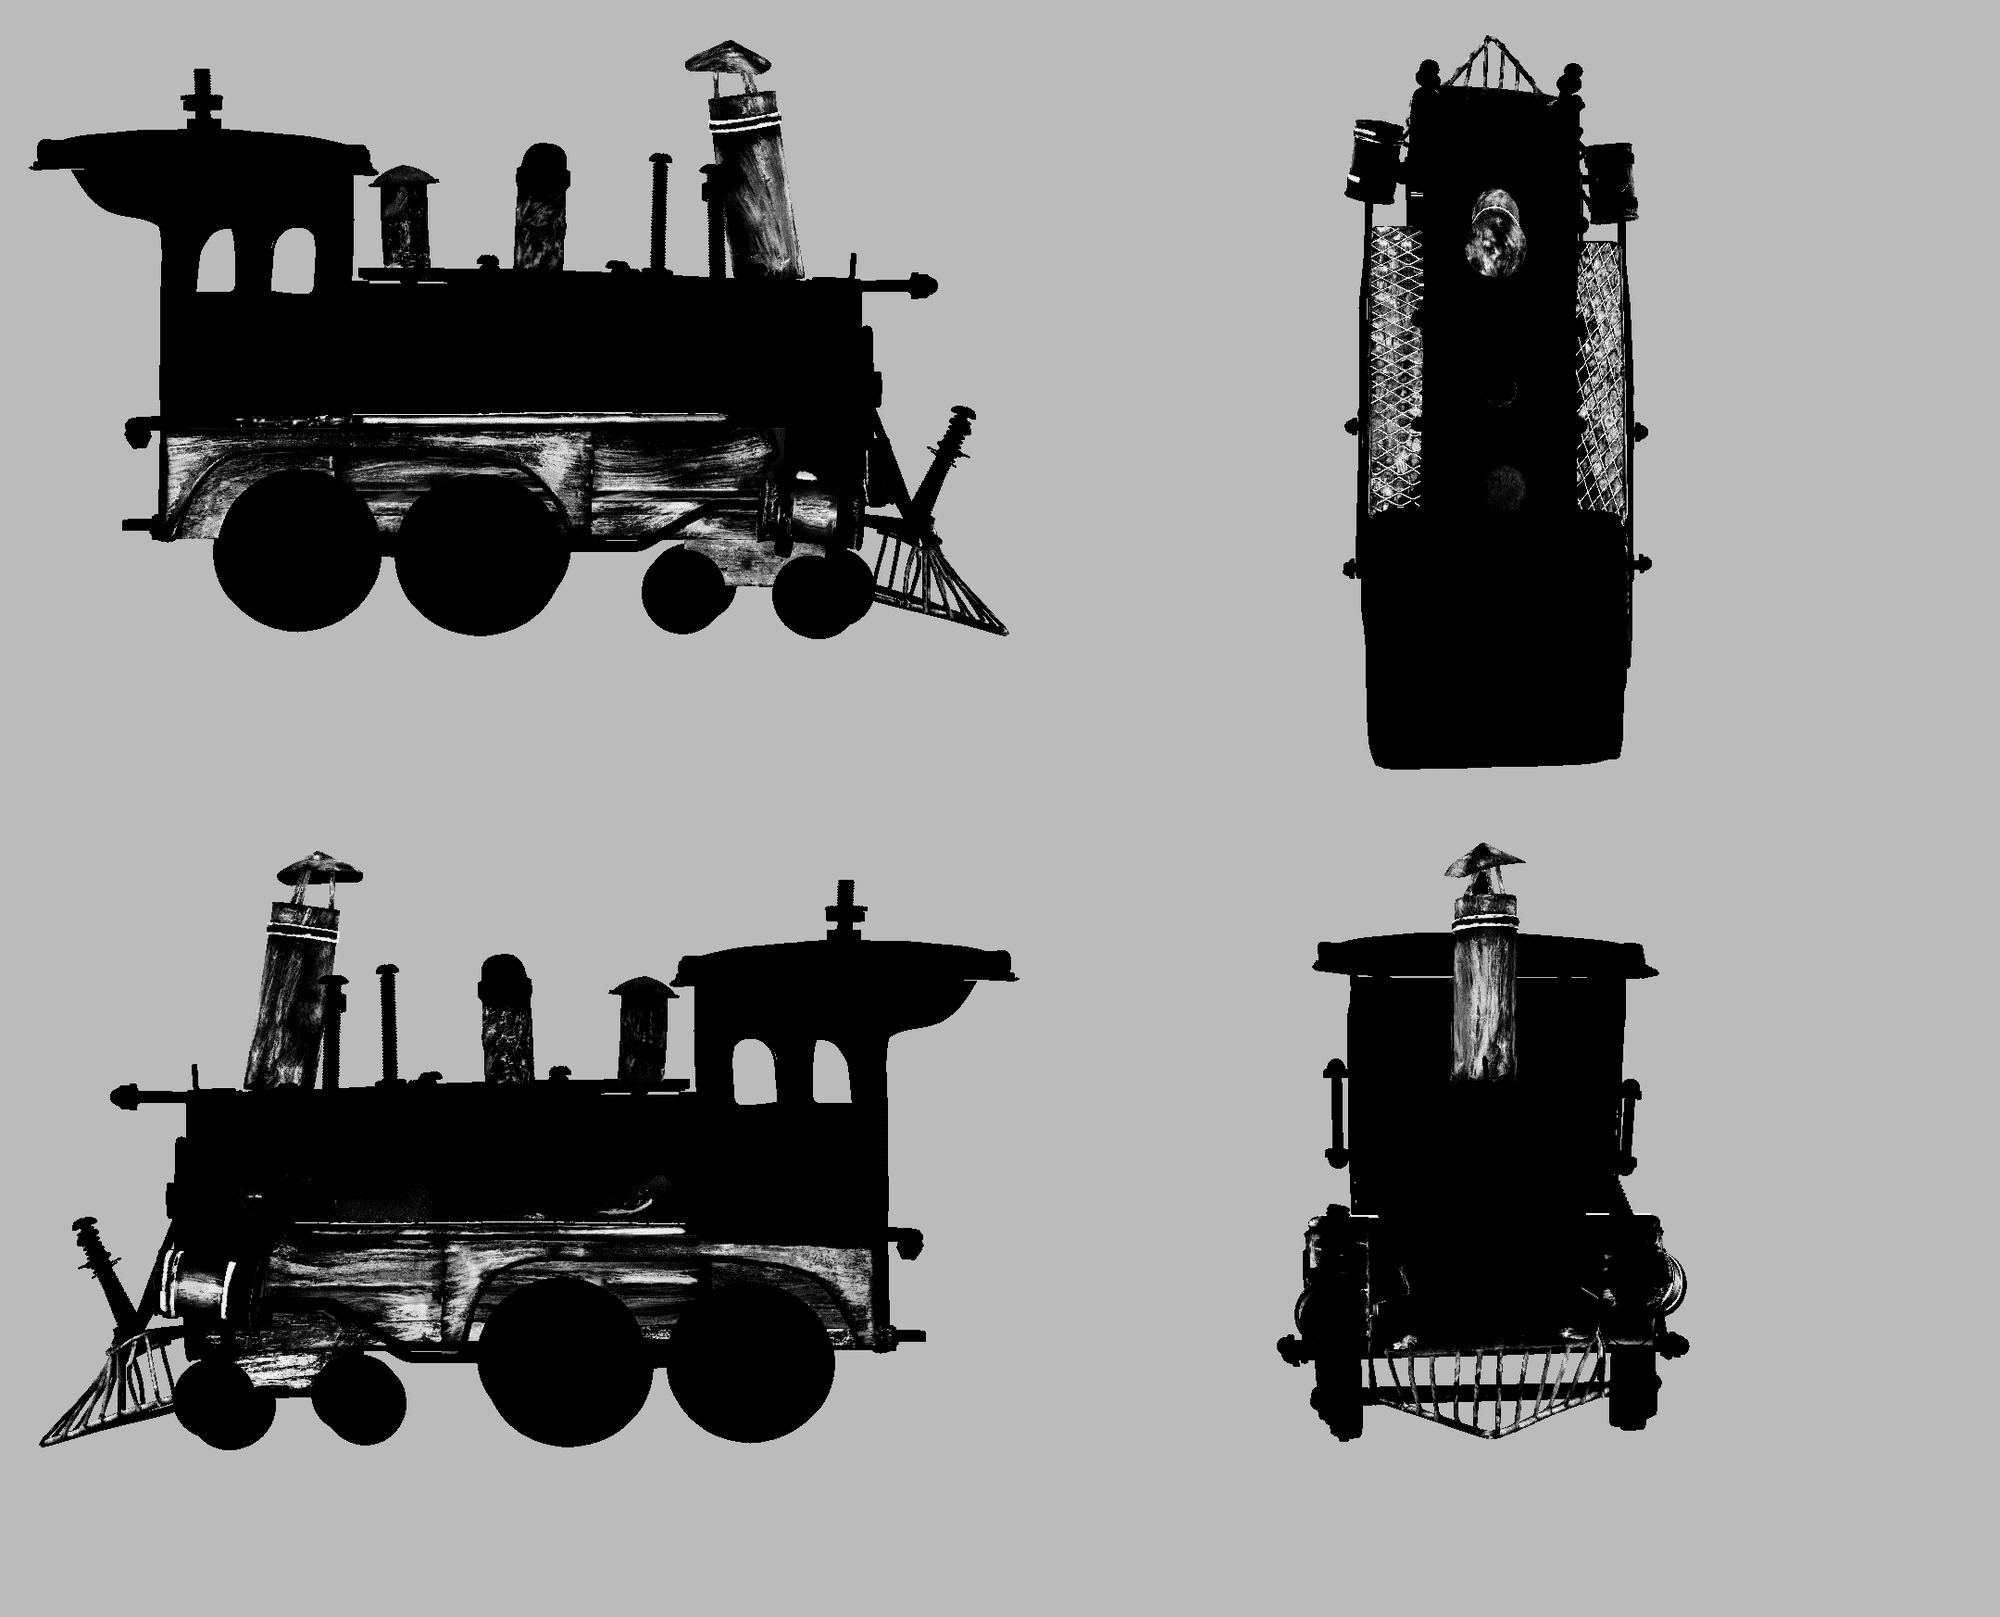
The photogrammetry part was pretty straight forward. I imported the photos into the software, which generated a point cloud of the object from them.
After spending some time cleaning it, I obtained a 3D scanned train that was clean enough for me to start the block out, using it as a reference for the scale and proportions.
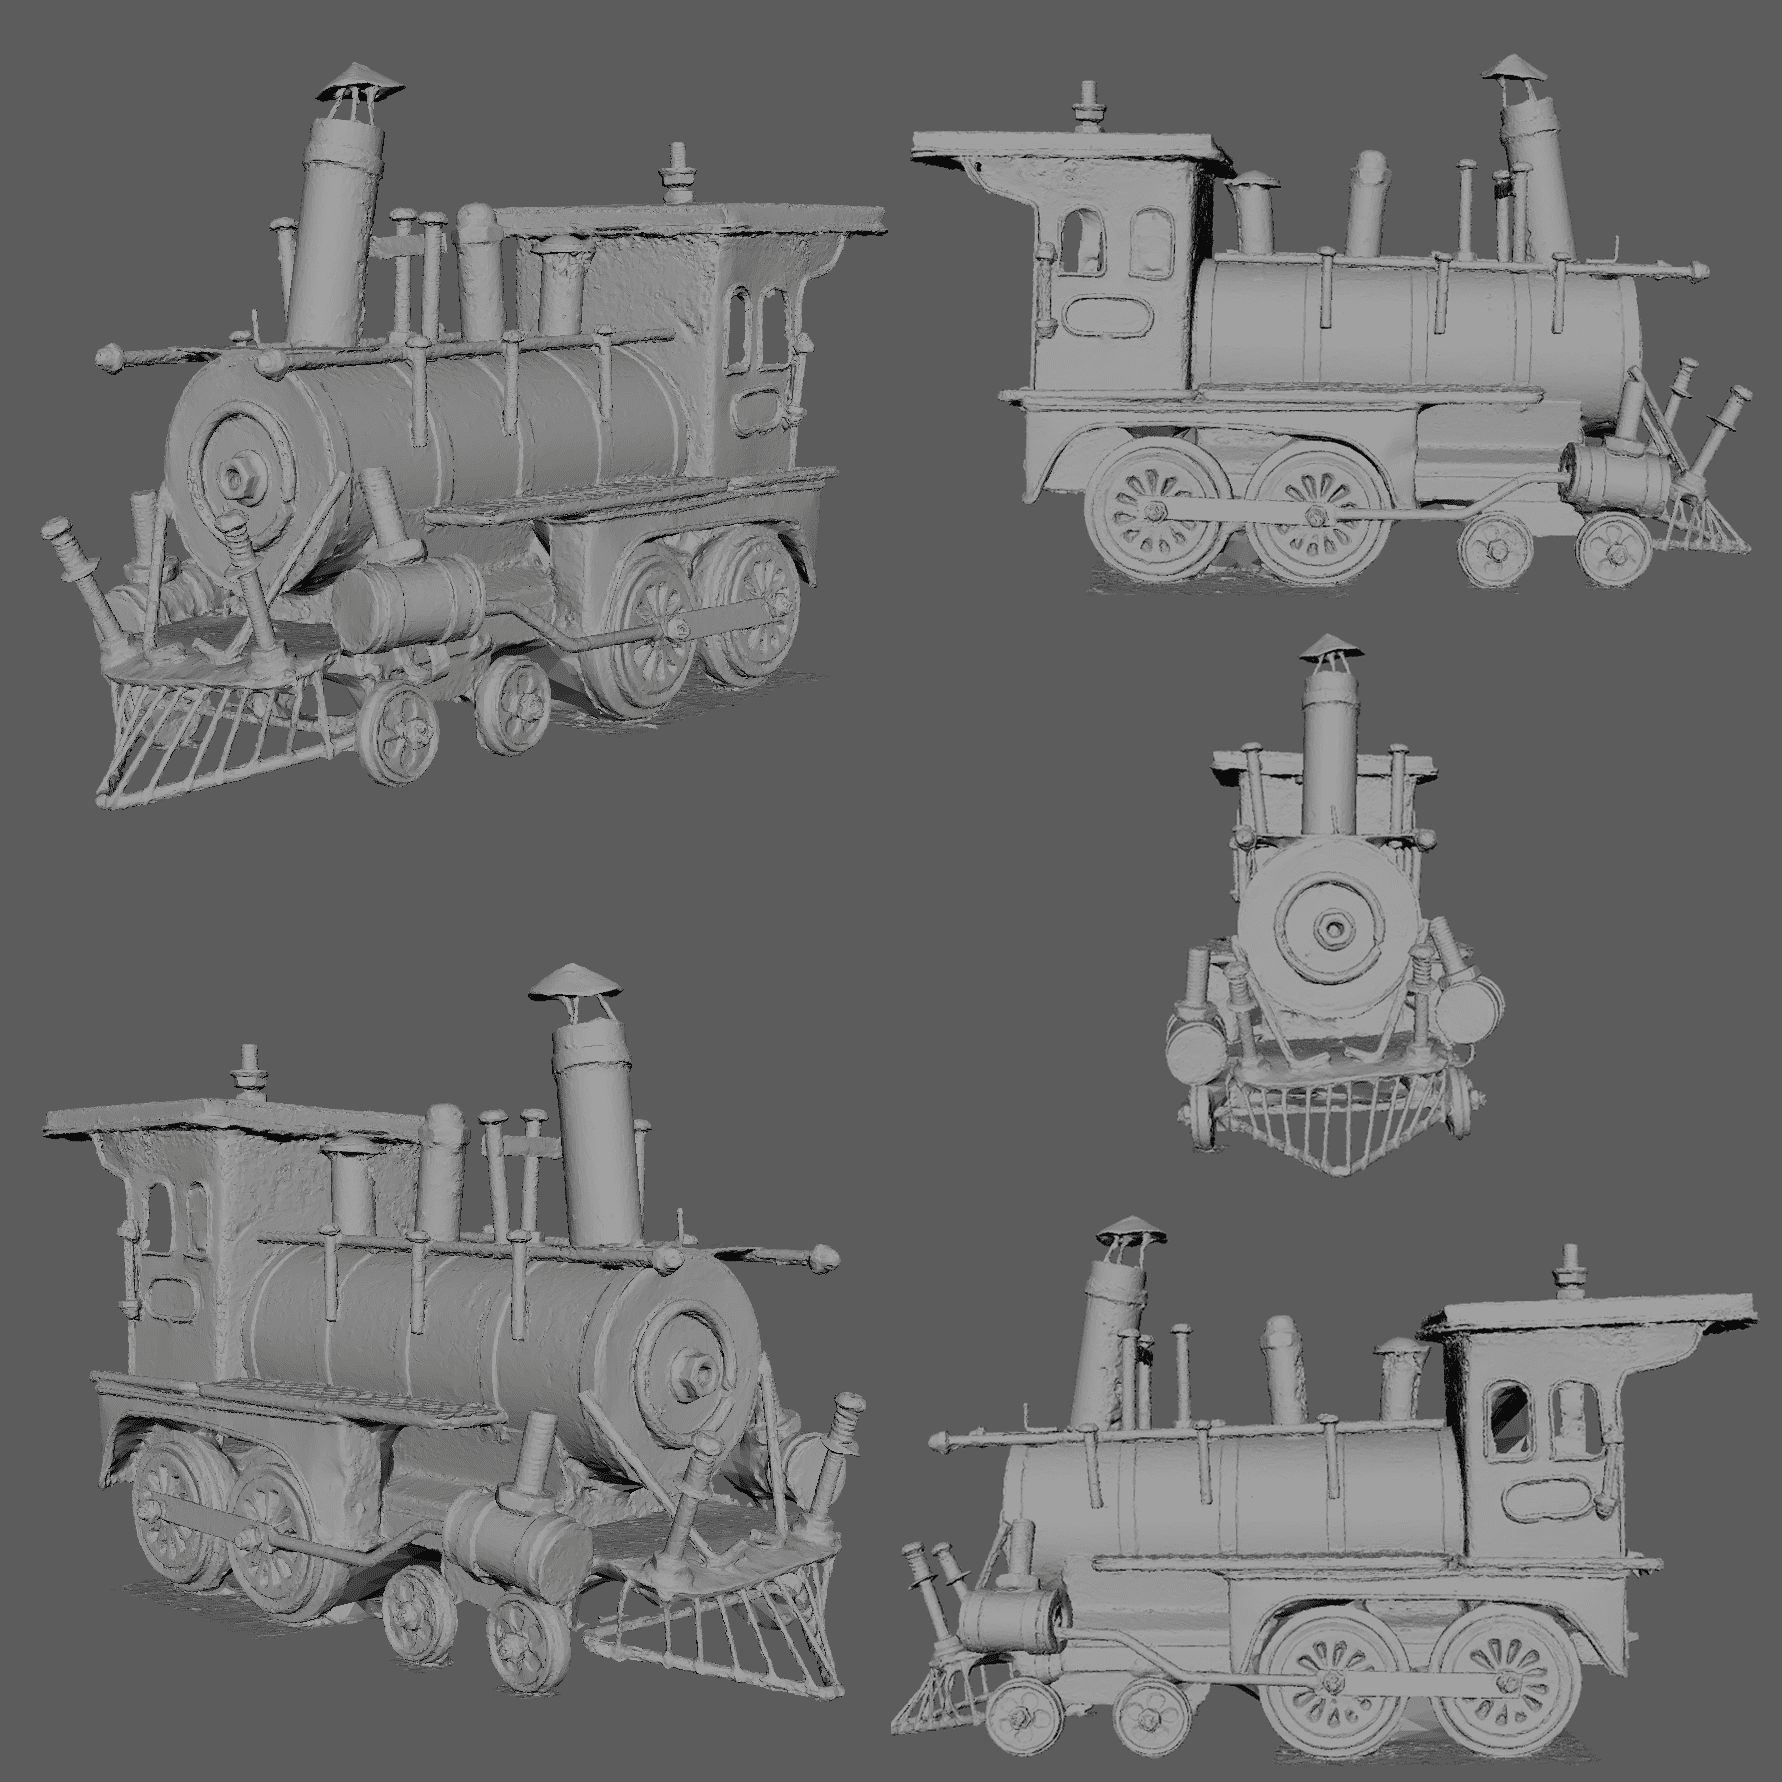
First thing I imported the 3D scanned mesh into Maya and I started building the block out of the train on top of it, keeping the polycount very low, so I could make major changes, fast.
As I was putting more detail into the modelling, I was constantly looking at the photos, to better understand the shapes that were not too well defined in the scan.
Layer organisation in Maya for quicker selections:
As in all models built for subdivisions, an even and clean topology will make UV unwrapping easier and is essential for the sculpting phase.
Once you subdivide in ZBrush, it will avoid edge overlapping, artifacts in the displacement maps, and it will guarantee the same resolution of sculpting details throughout the whole mesh.
Actually, I had some spots where the topology wasn't accurate. That made me spend some time going back to Maya adjusting it and then updating it back in Zbrush. Try to think ahead as much as possible and your future self will thank you!
In ZBrush, I imported every object separately, with an appropriate naming convention and grouped them by areas, in order to be able to hide parts faster and have a more dynamic workflow during the sculpting process.
Again, planning is never enough: I decided which features I would sculpt and which ones I would texture. Having done that, I started from the bigger shapes towards the small ones.
At this point, I set up a really simple scene in Maya to run some test renders with the displacement applied.
For the displacement to work better and to have all the support geometry I needed, I updated my render mesh in Maya, replacing each object with its own level 1 ( or level 2 for the more heavy sculpted pieces) from ZBrush.
For details on the roof I decided to export a separate displacement map, because I wanted to have them isolated, in case of specific changes.
These are the steps to isolate the new details from the ones previously sculpted:

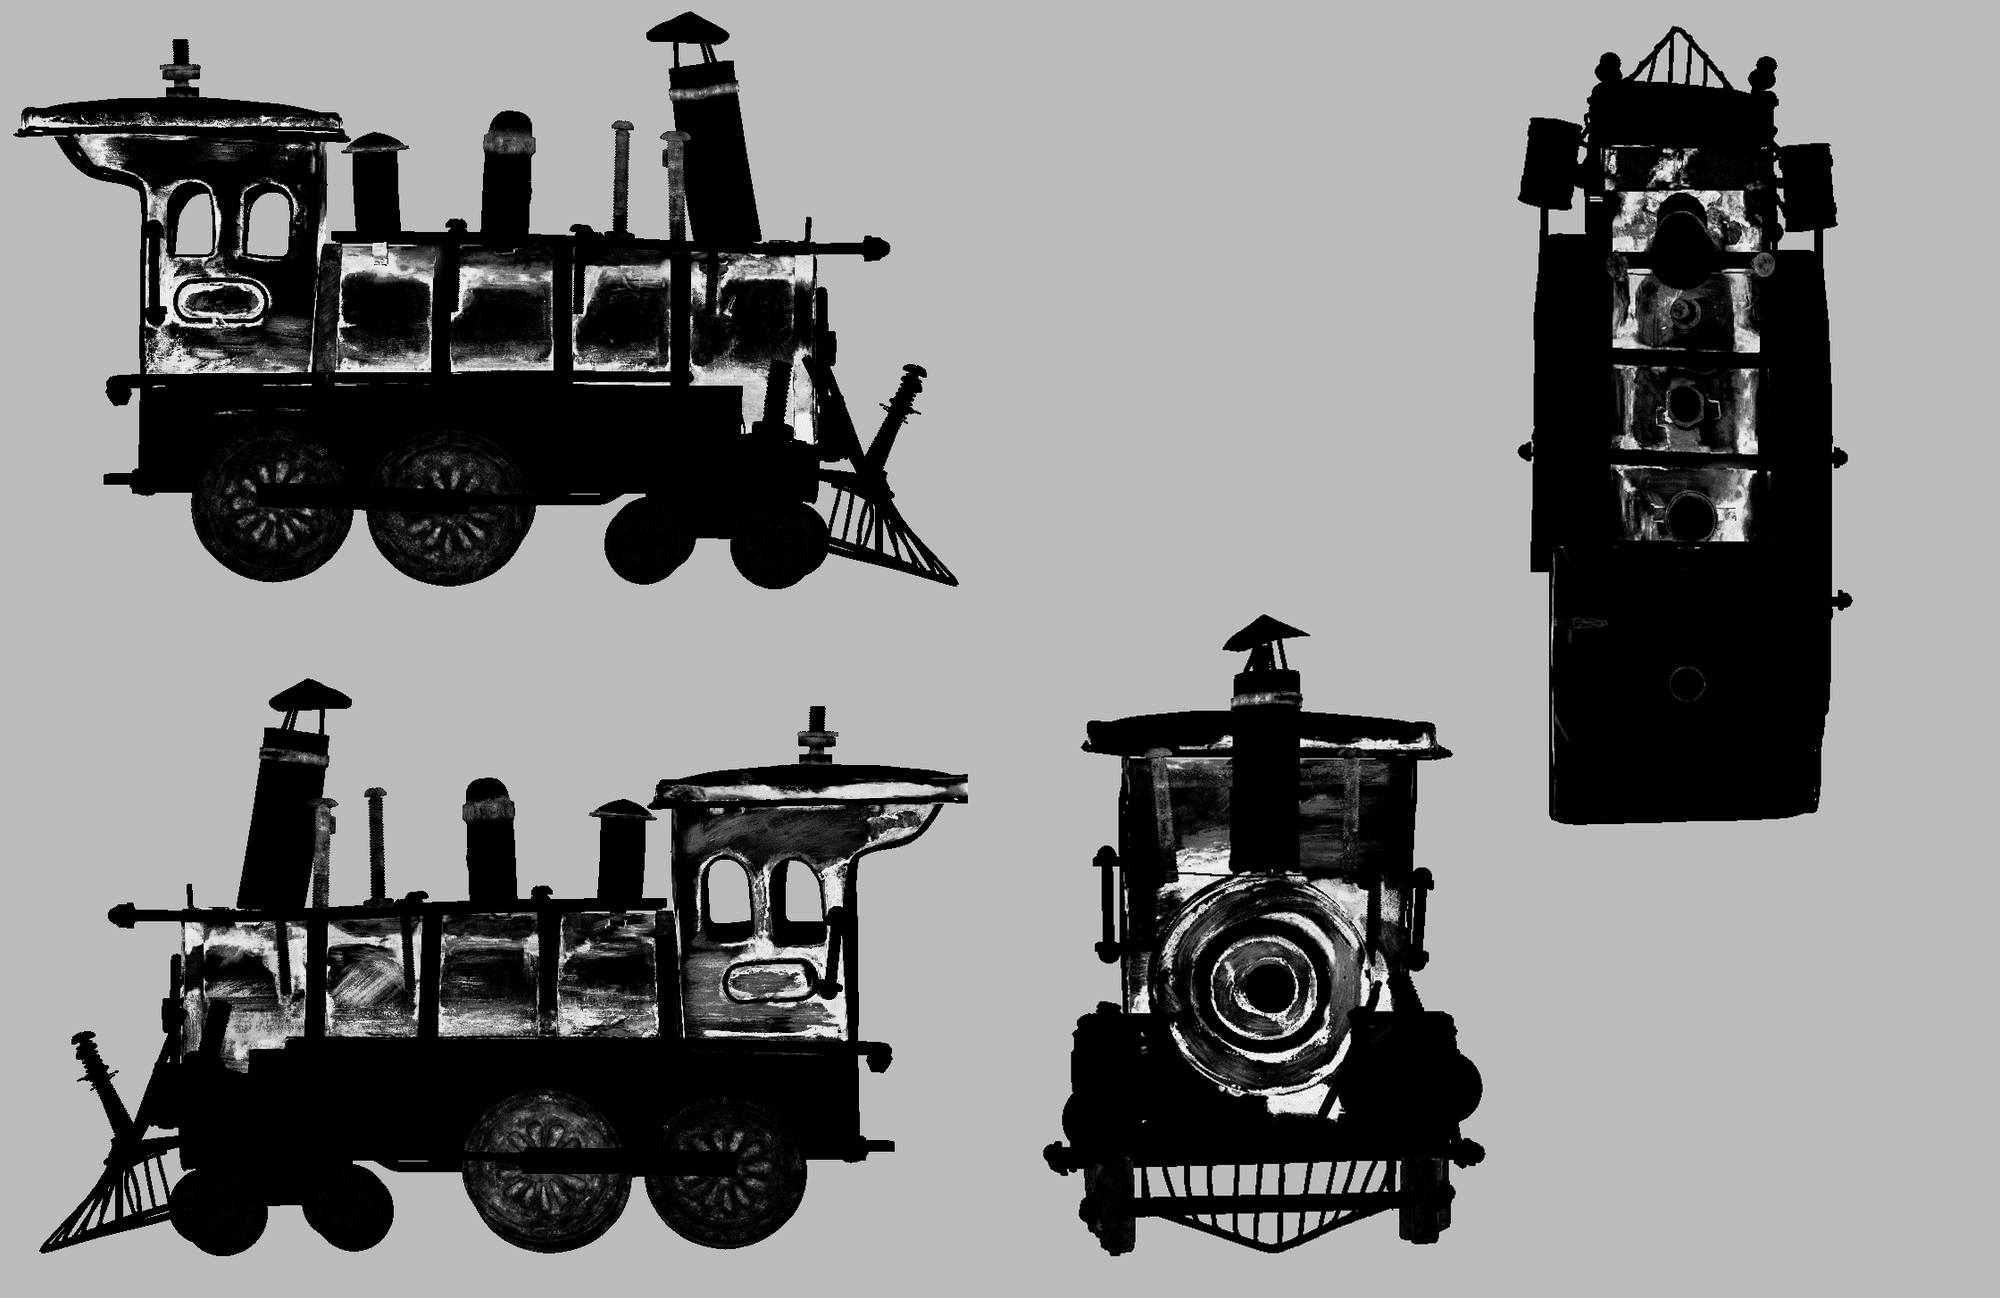
When I was satisfied with the first pass of details, I moved on to texturing, knowing some refinement would be necessary before I could call it done.
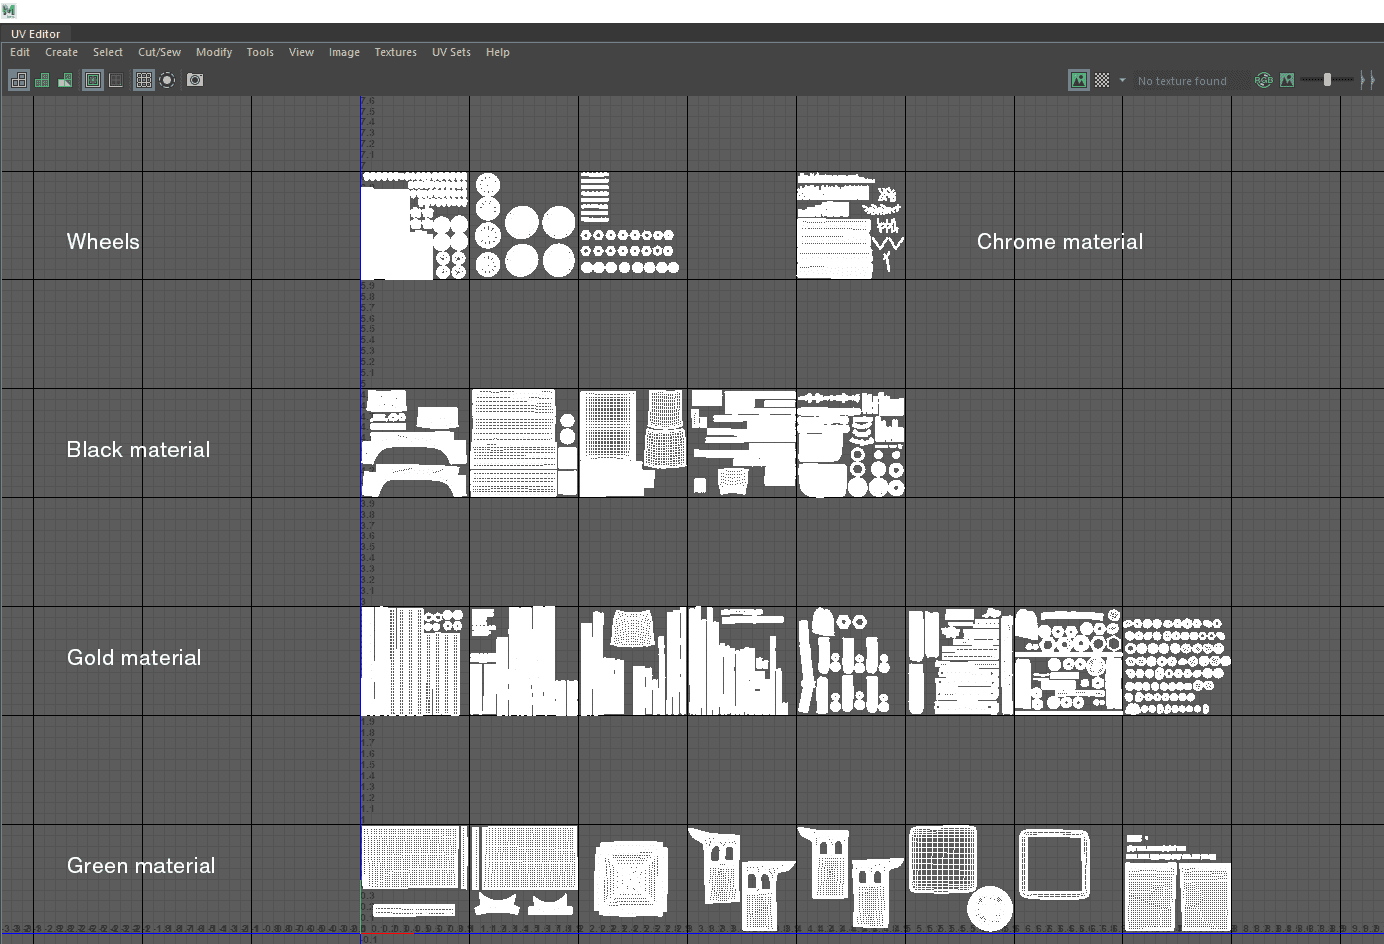
The first thing I did after opening Mari was to think of an efficient way to organise my project that would be non-destructive and would allow me to apply changes, even at a late stage of the project, without having to redo everything.
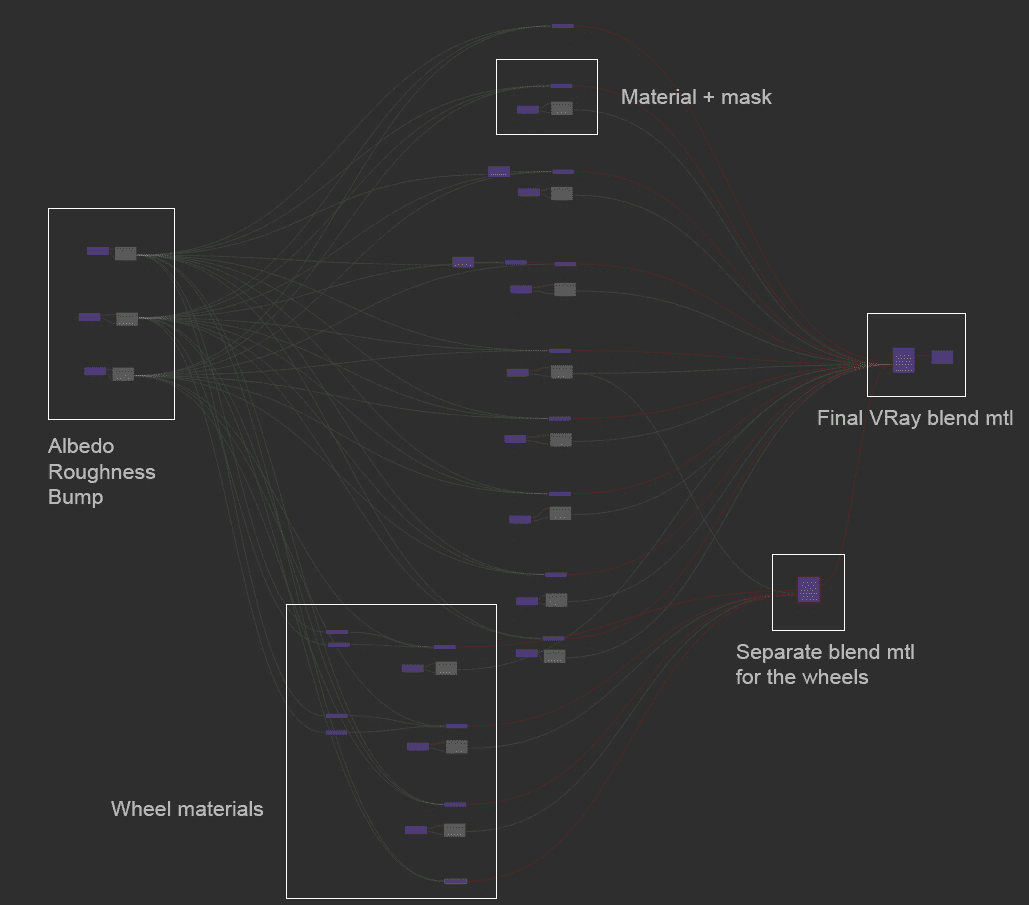
At the beginning, the node tree of each channel was composed of different sections, one for each material. I kept the materials as separate as possible, so that I could manipulate them individually without affecting the others.
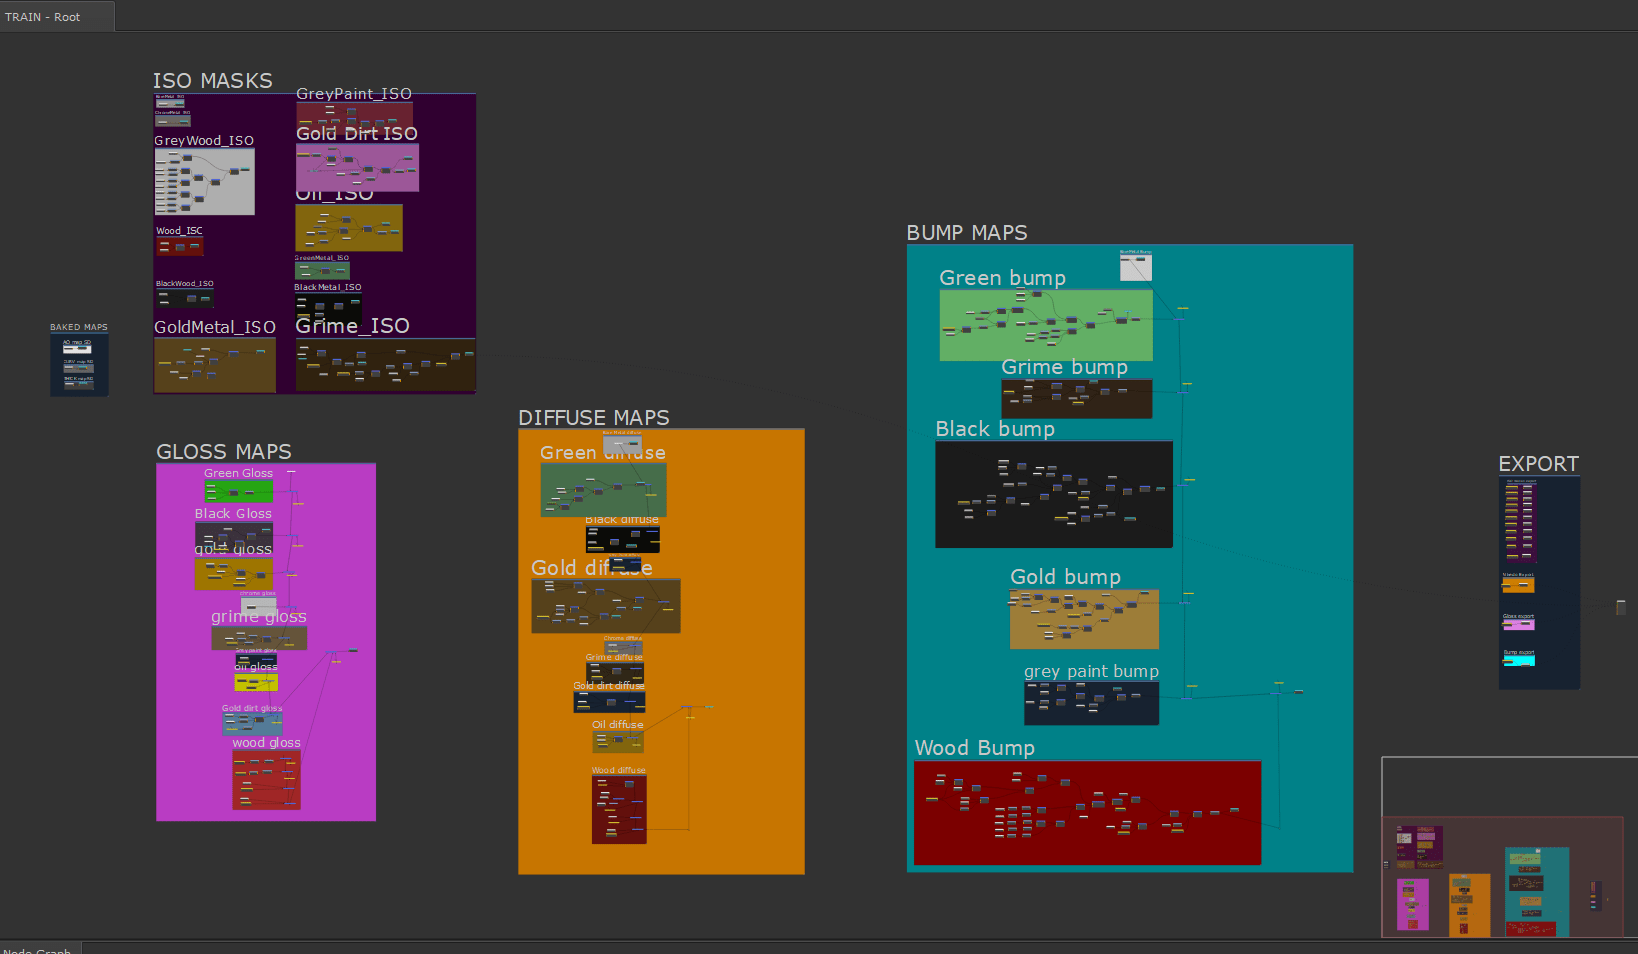
Once I had the base values of each material, I started to create the ISO masks: grayscale layers that drove where to show every single material, for every channel.
Painting a wide range in the masks will help you a lot in the lookdev stage.
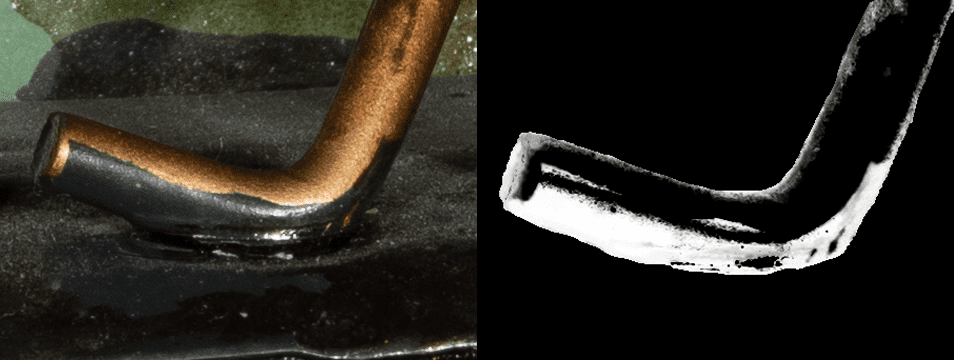
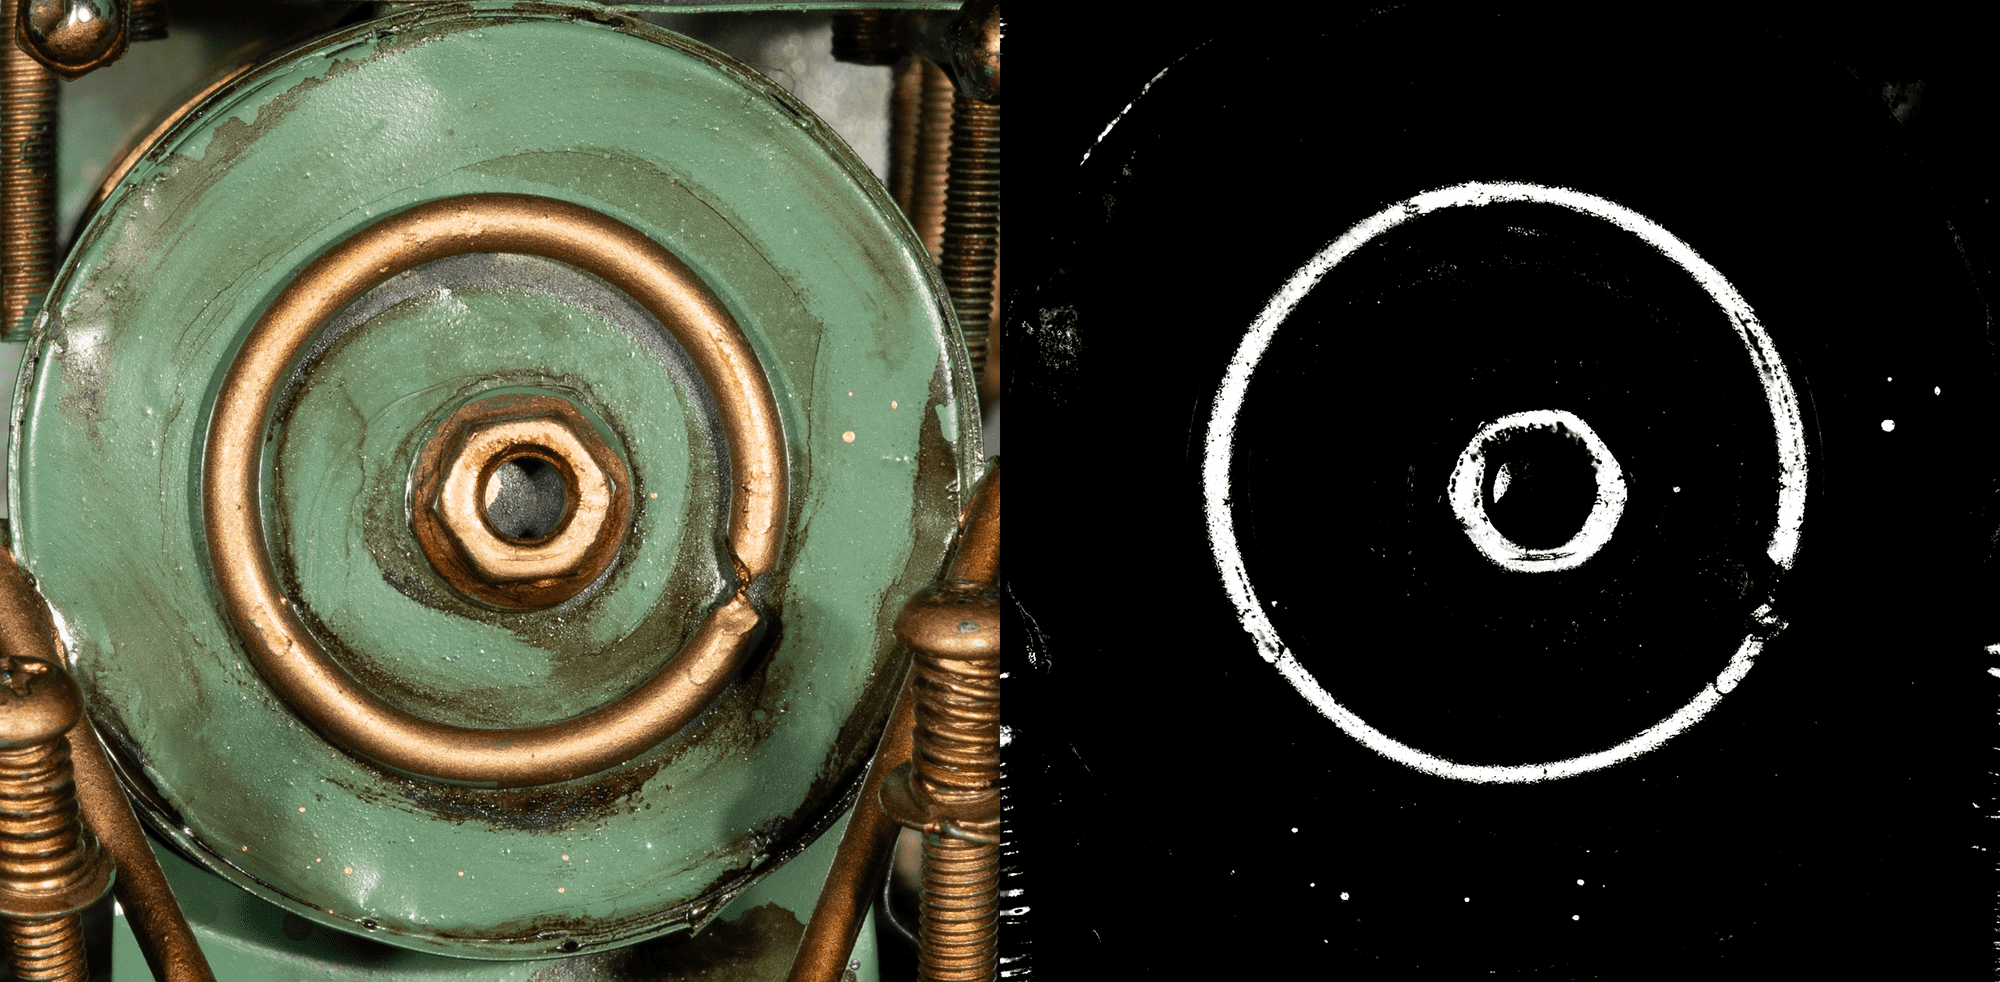
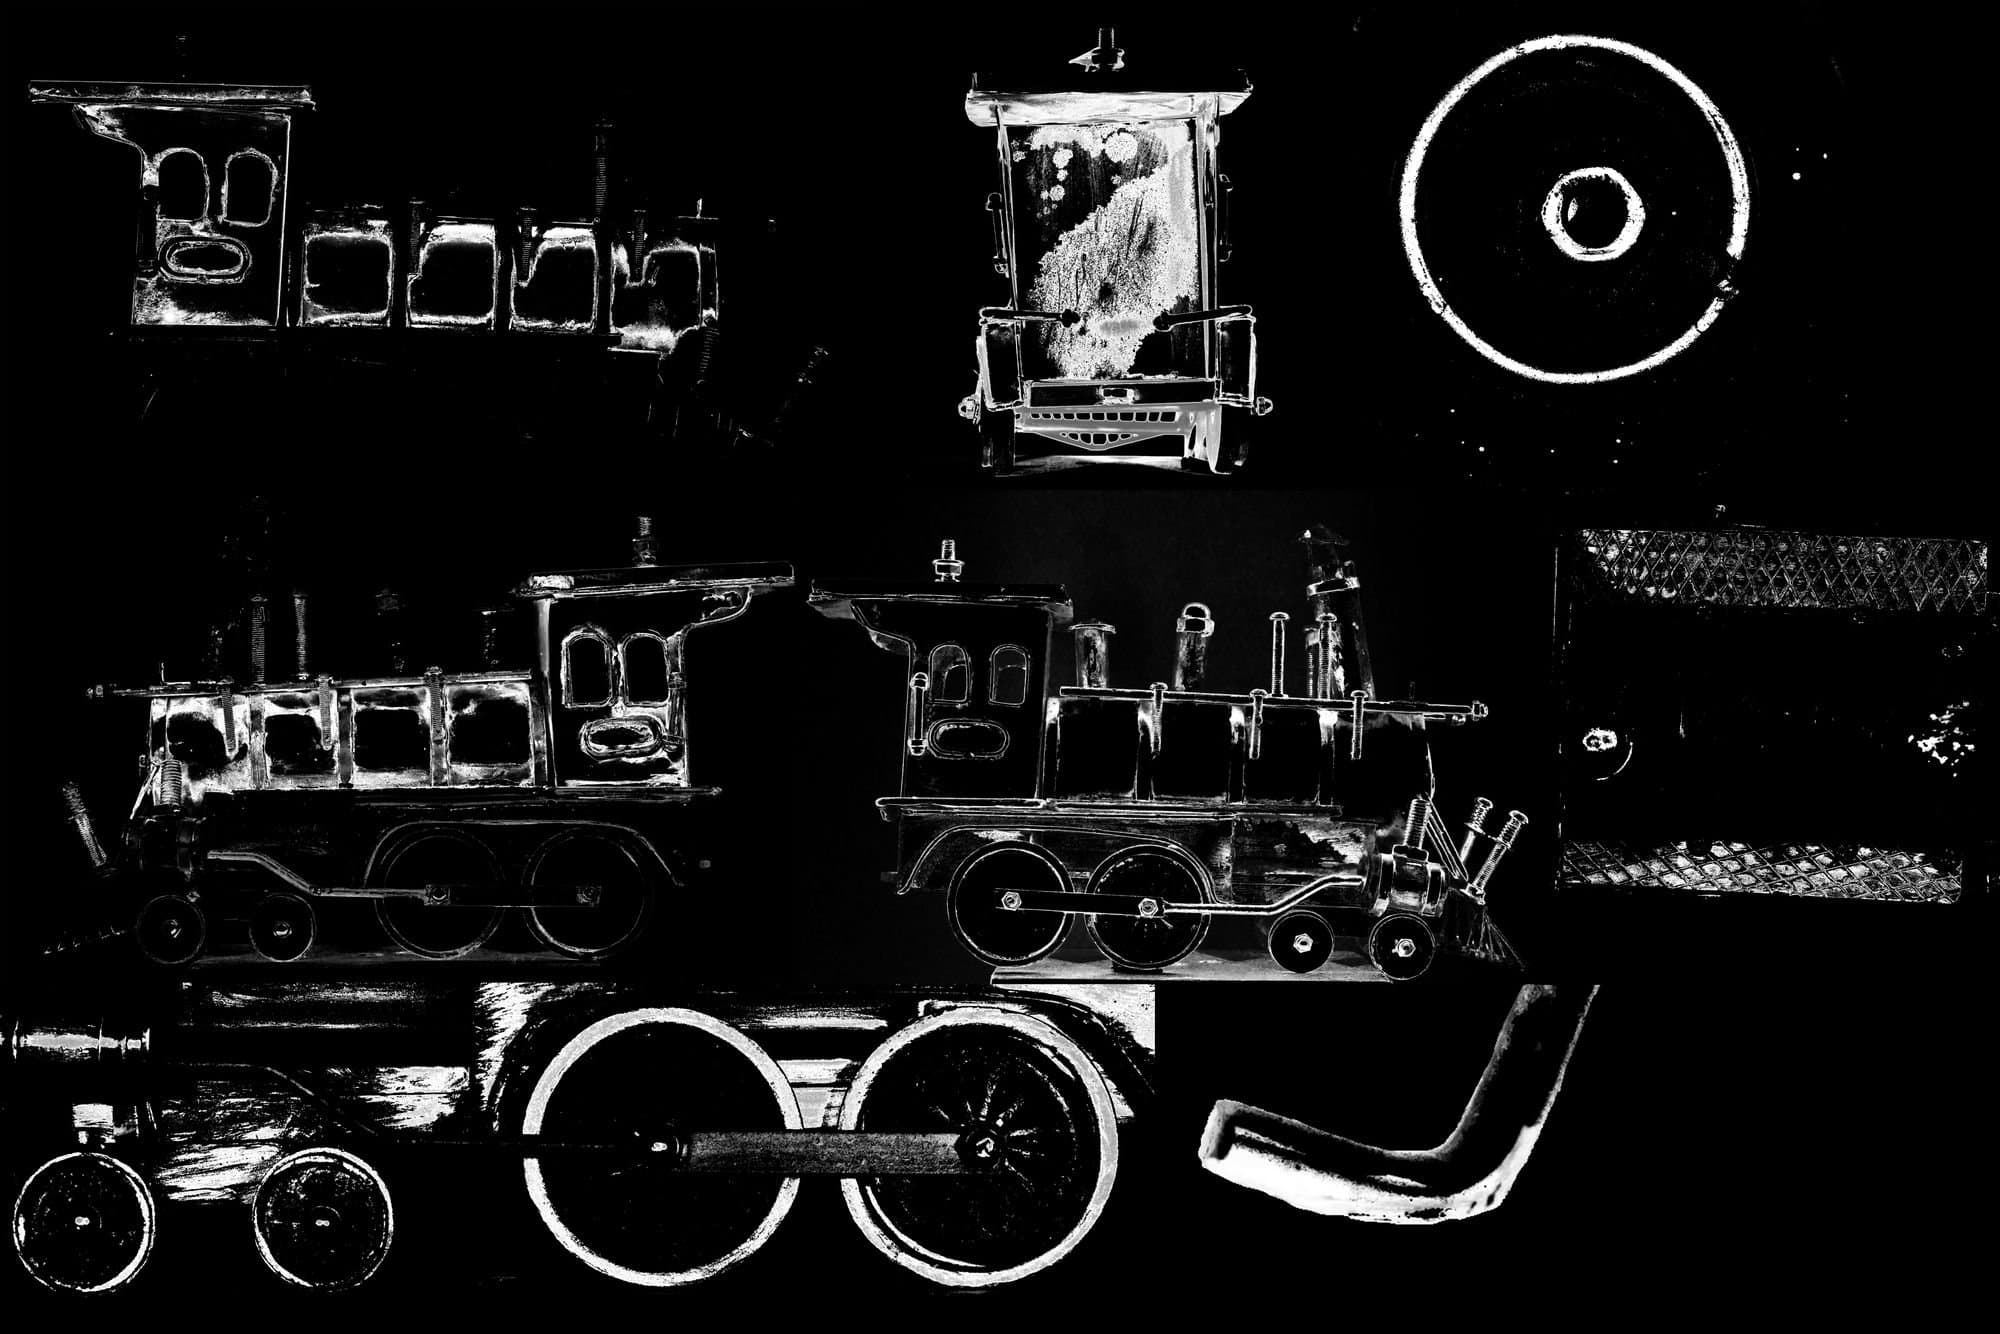
As I said, a vital resource I used in texturing, were the reference photos taken for the photogrammetry. Starting from those, I set them to black and white, graded them in Photoshop and Nuke and obtained more masks of the various details on the object. This gave me the chance to recreate the exact same shapes in 3D, making the asset look more like the real one.
Of course these images were not enough to reach the final look, but were an amazing starting point which revealed themselves very useful to paint other areas of the asset later.
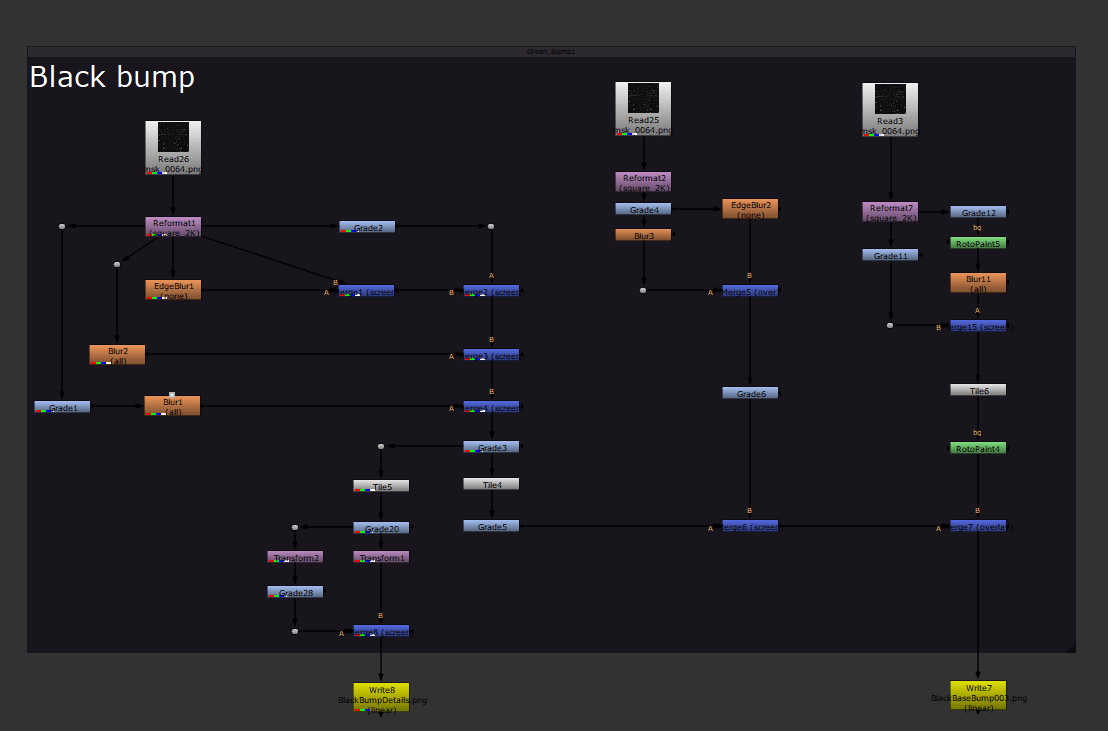
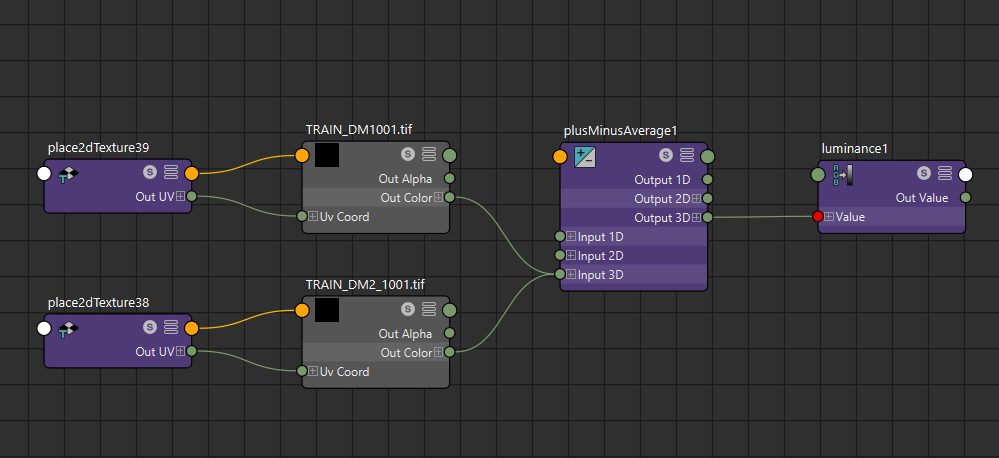
For the creation of the bump map, I approached it in a very procedural way, using some customised tileables to create a base layer of bump, different for every material.
To start this workflow, I brought some general tileables with shapes I liked in Nuke, I blurred and graded them, merging them between each other.
The software was perfect for this process because I could see exactly the value of each pixel and obtain the range I needed to create the effect I wanted on the mesh.
The second step was of course a hand painting pass on top of the procedural, in which I added more unique details and shapes, that gave the bump the complexity I wanted on the surface.

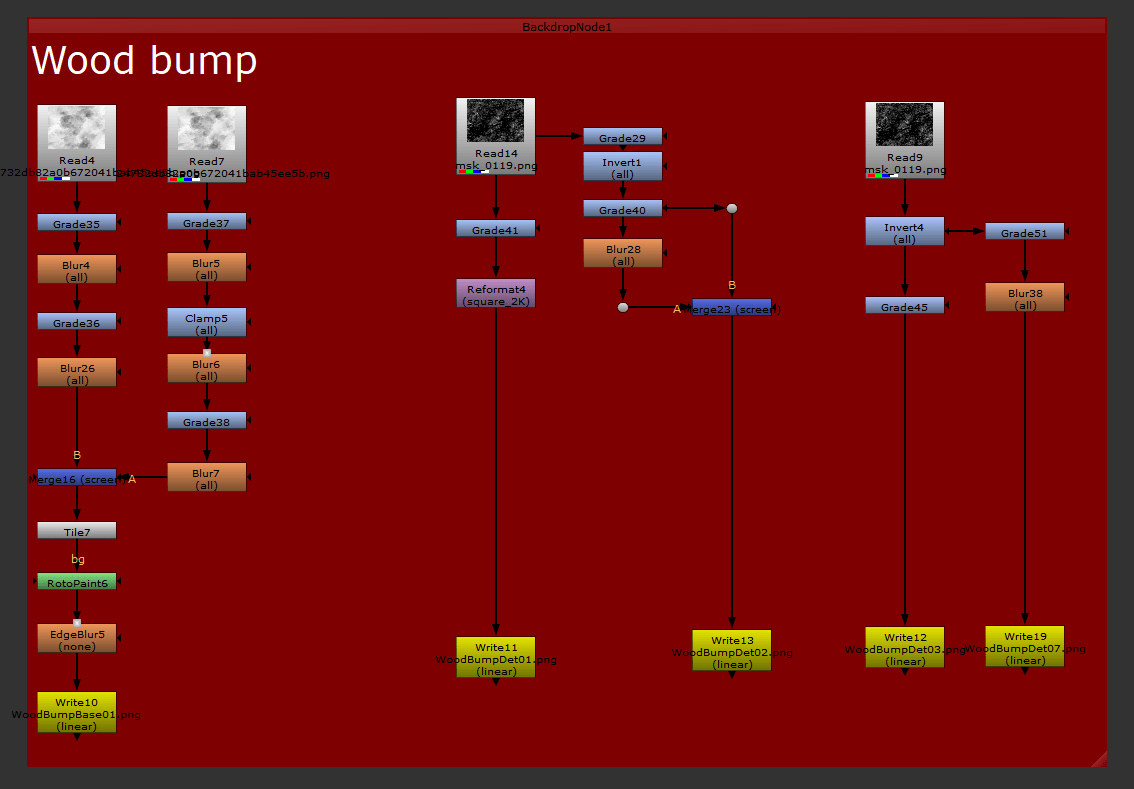
Because the toy size isn't very big, the details on it are often really small and subtle. For this reason, I had to do a lot of back and forth between Nuke, Mari and Maya, as even the smallest tweak of the values would make quite a big difference in the render.
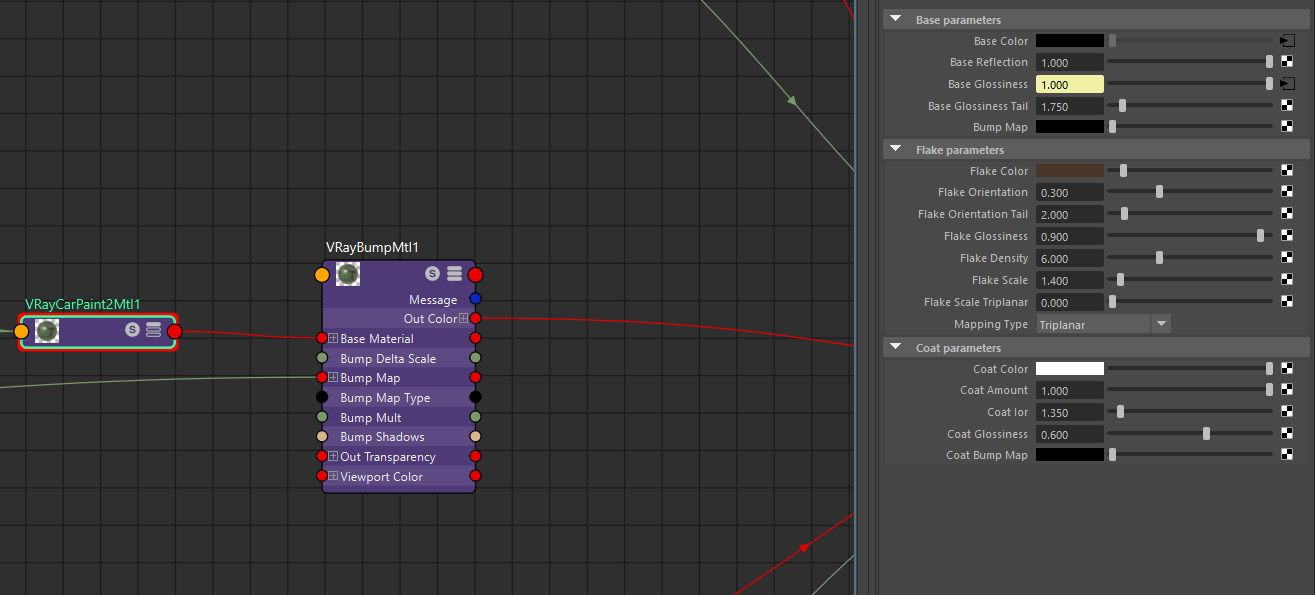
The material that gave me more of a headache was the gold. It wasn't a simple paint, it had some kind of metallic flakes and bump in it, that gave the objects a grainy look which took me a while to figure out.
In the end, I achieved the look using a particular shader called V-Ray Car Paint material, which allows you to introduce some flakes in the material and also a second level of specular and bump, in addition to the base parameters. Basically, I spent a lot of time tweaking the values in the shader to understand their effect, constantly comparing the render and the reference, until I got the look I wanted.
As you can see, the shader has a slot for a bump map, but because I needed to control the intensity of the map, I used a V-Ray Bump material, where I added my bump map from Mari.
The first step in the lookdev process was to recreate the environment in which I shot the reference photos for, in Maya. First, I applied the HDRI of the room to the V-Ray dome in my scene and positioned the lights in the same position as the reference ones. After applying the texture of the real lights to the 3D lights, the second step was to set the intensity if the lights correctly.
In order to do this, I imported in the frame buffer the image of the colour chart I took while shooting the photos, and picked the value of the mid grey, to use it as reference.
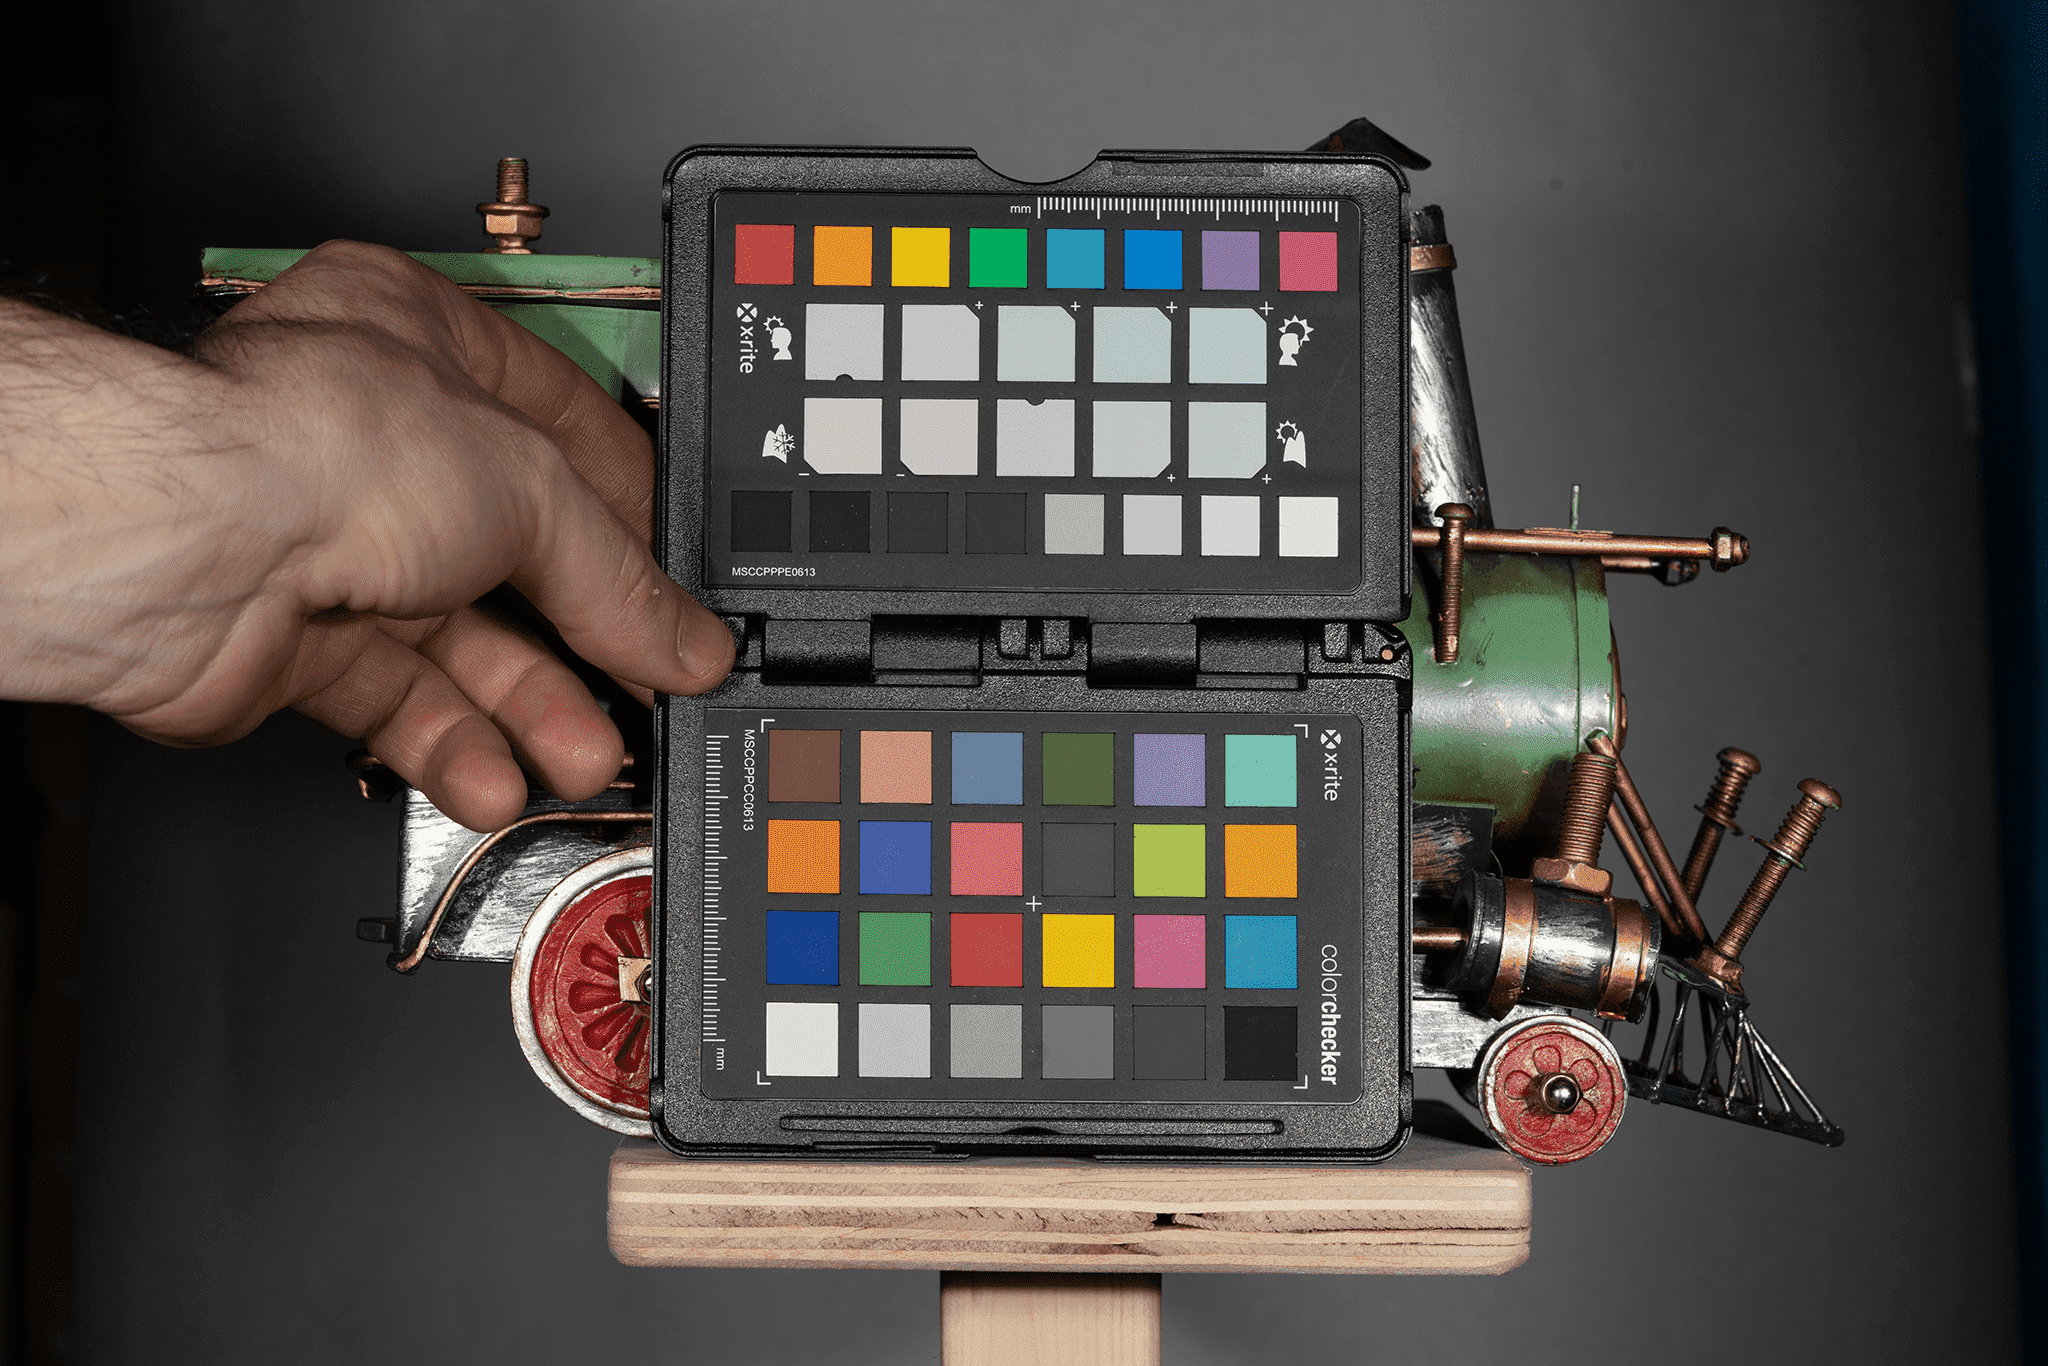
Now, I placed a 3D colour chart in my scene, roughly in the same position of the real one, and tweaked the intensity of the lights until the value of mid grey in the render was the same to the one in the photo.
When the two values match, I knew that the lighting information in the scene was correct, so any difference in the look was coming from the textures.
As a final step, I kept tweaking the textures, until render and reference looked as alike as possible. With the materials now correct, I was confident they would work in every lighting environment.
For the lighting, I used really simple setups. For each one of them I started placing an HDRI on a V-Ray dome, checking different rotation angles in the IPR render until I found the one which gave the more interesting reflections. I downloaded my HDRIs from HDRI Haven.
After setting up the HDRI, I placed some additional lights to create more balance, create some nice rim light effect on some objects and more reflections, to better show the work I added in the bump.
As last thing, I placed the object on a small pedestal to catch the ground shadows and created a limbo shape to place behind the object, not visible in this screenshot.

For the lighting of the turntable, I recreated the environment in which I shot the references, so I could create better comparison shots with the original object.
The curve you see in the viewport is what I used to make the rotation of the light.
Rendering wise, I rendered in standard FHD resolution, using render layers to separate the background and the gold material from the object. Also, I used a multimatte render pass, in order to have a black and white image of the gold objects in the shot. I needed this mask so I could merge the renders in Nuke during compositing.
For the turntable, I set up my render passes to show the diffuse, bump, roughness, wireframe and clay, so I could create the breakdown shots in Nuke.
A correct set up of the render passes saves you a lot of time in compositing, without increasing render time.
Once all the renders were done, I imported them all in Nuke and simply merged the gold with the rest of the asset. Because the merge node uses alpha channel to put the images together, I first had to use a Copy node to transfer the multimatte channel into the alpha of my gold renders.
I then blurred the HDRI and merged it in the background, so that the focus would be on the asset. As a last touch, I added a soft vignette effect, to focus the attention of the viewer even more. I made the final video editing in Premiere Pro, to achieve the final look of the demo reel.
I learnt a lot making this asset, especially I tried to do everything with the mindset of working in a pipeline, making decisions that would have made my life easier in the following steps, and in my belief it really made the difference.
You can reach out to Leonardo on LinkedIn, and find more of his work on The Rookies, and ArtStation.