Technical Aspects to Take Your Environment Art to the Next Level
If you are embarking on your next environment art project and want to showcase your technical prowess, this article is for you.
If you are embarking on your next environment art project and want to showcase your technical prowess, this article is for you.

Recent game development graduate of Games Academy Falmouth University, Chris Copeland, is an aspiring Environment Artist with some serious talent.
In this article he talks about the technical aspects of his latest environment art project for which he was given an Excellence Award during the Rookie Awards 2022.
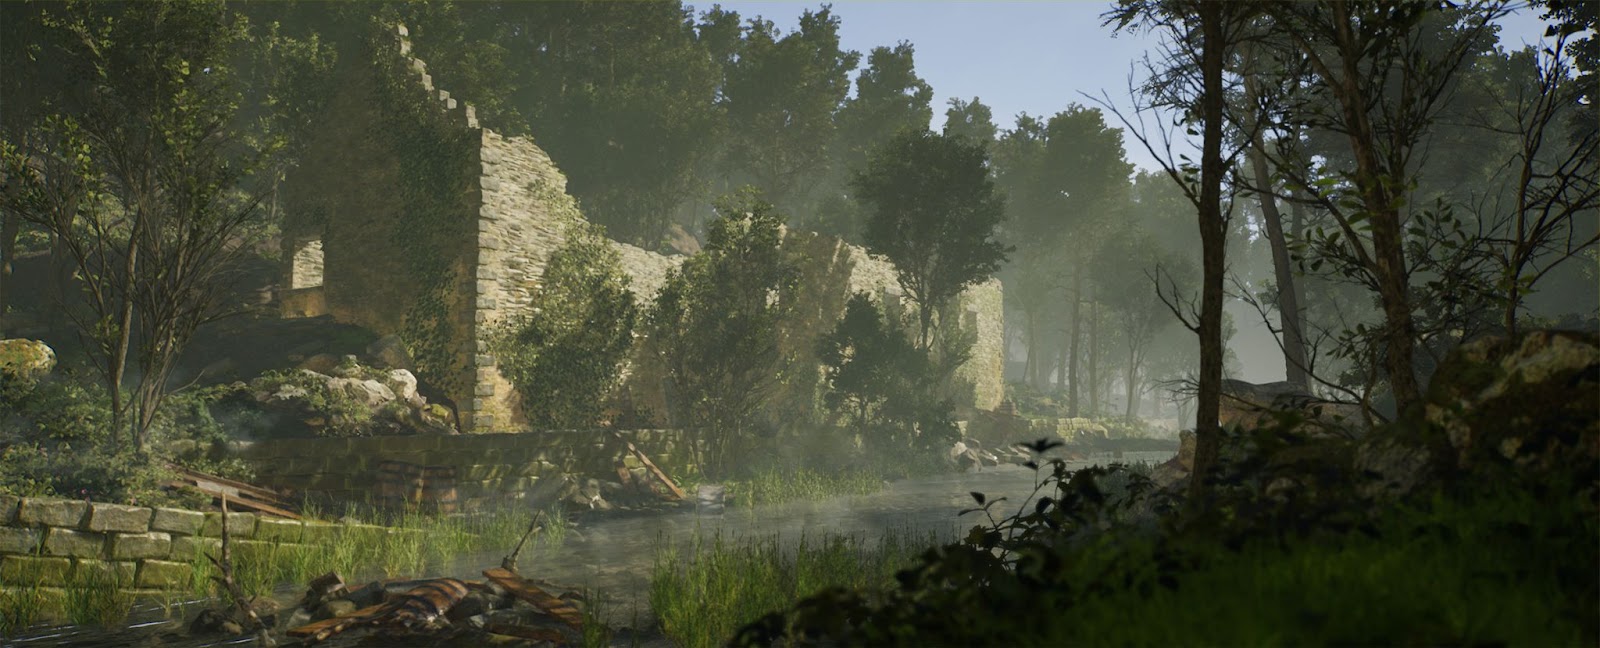
This project went through many stages and iterations, beginning as a small diorama for my third year university project and ending up as a large modular building in an expansive forest environment - which landed me my first job!

Initially I chose to create a small diorama type environment that focused on a Water Wheel surrounded by a calm forest and flowing river. I wanted to try and make this project a bit of a tech-art project as well as focusing on foliage creation because this is a workflow I have little experience with. The plan was to create a shader network within Unreal that would let me transition objects from looking brand new to old and overgrown.
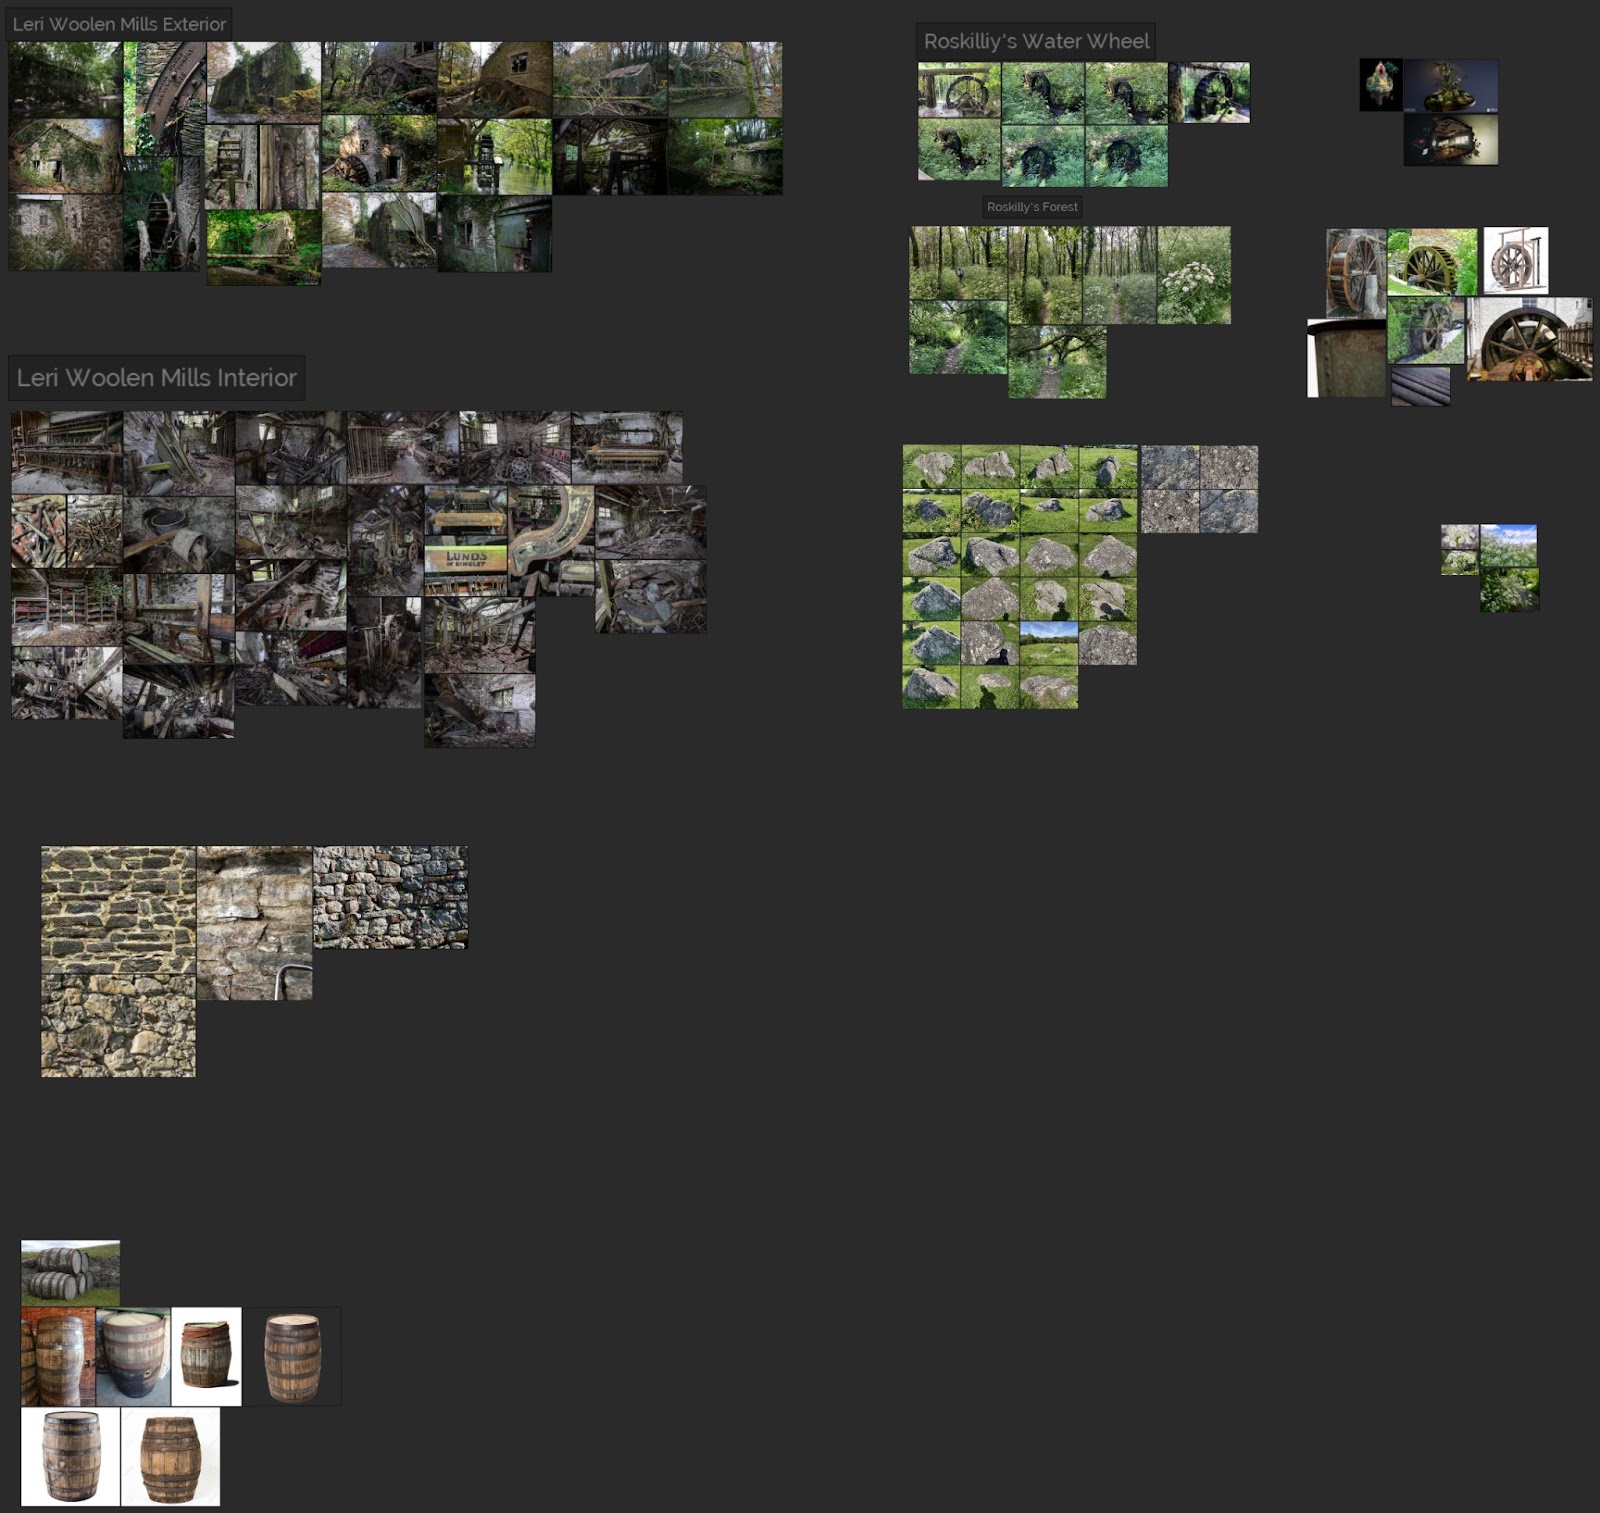
I based this scene from some reference photos that I took of a lonely water wheel whilst on a coastal walk near Roskilly farm in Cornwall.
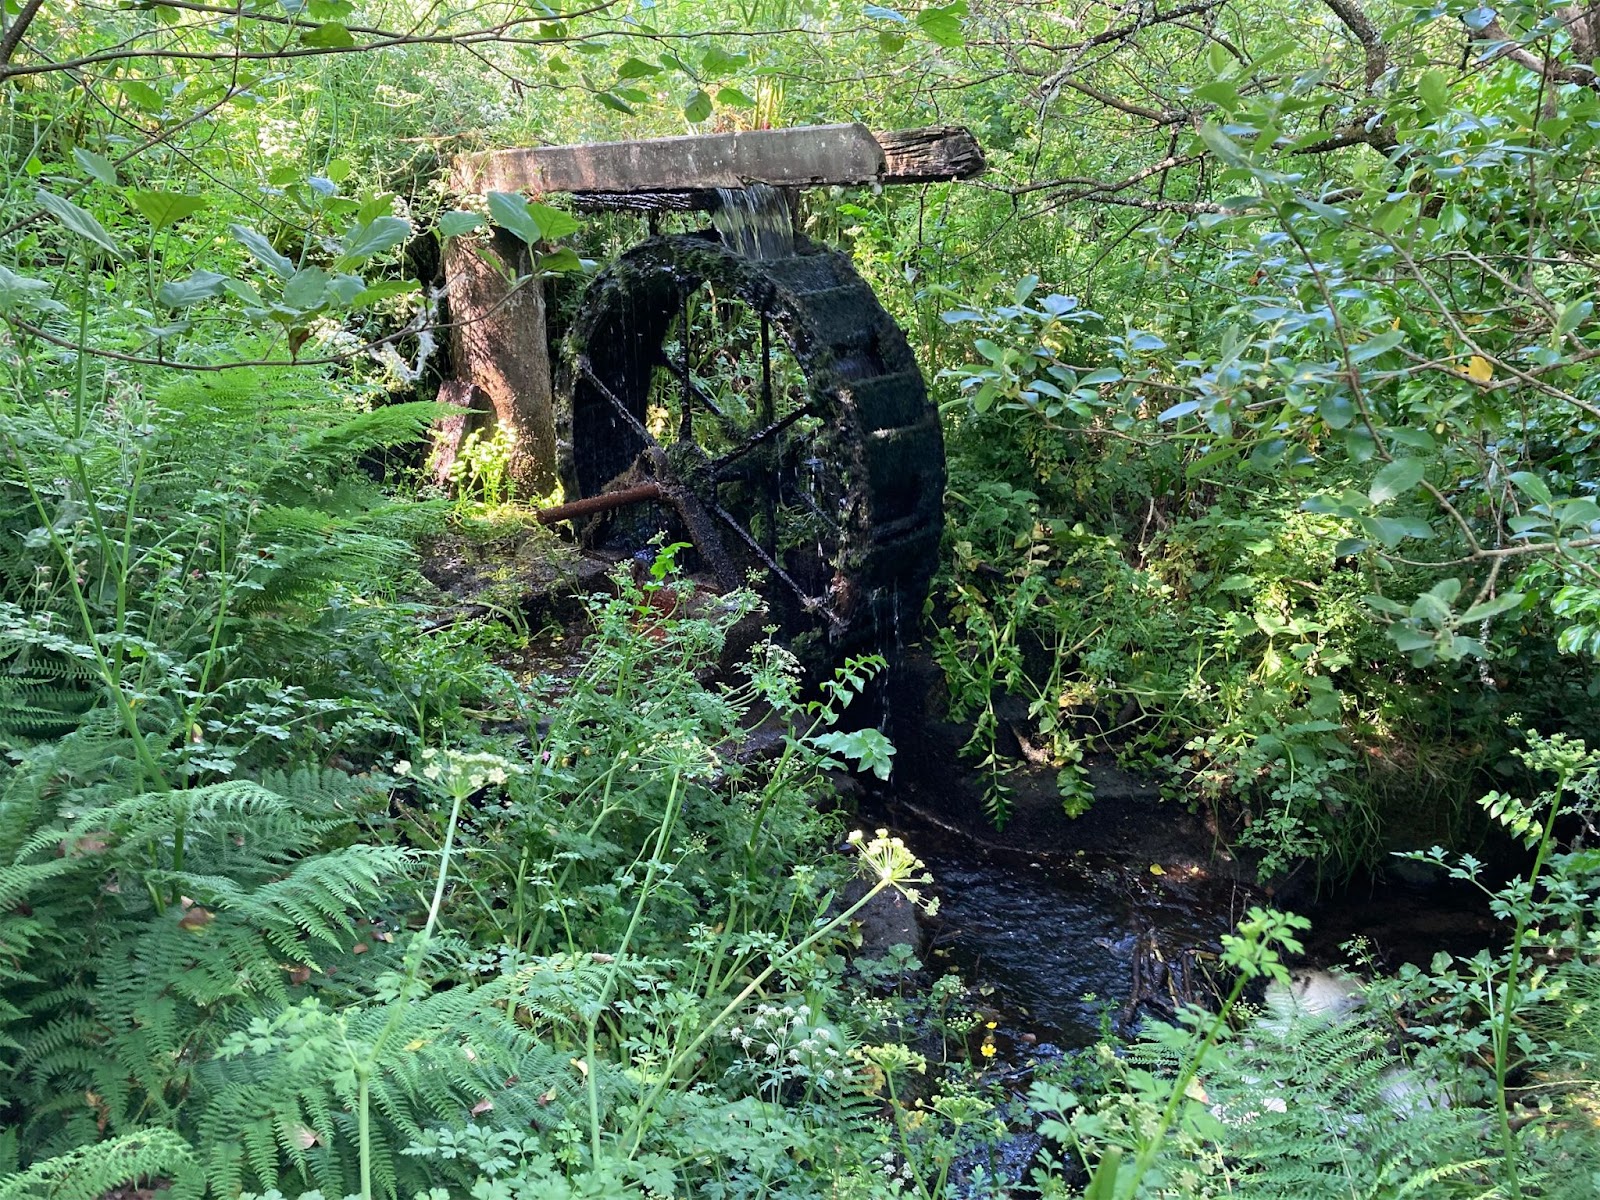
I then gathered more reference photos: a mix of my own photos and other references of water wheels, dioramas and foliage. At this stage, I was mostly focusing on gathering reference for the wheel and foliage as these were the two big things in the project.

I liked the way that Anya Jo Elvidge presented her Flooded Temple Diorama and thought that I would use this as one of the main influences for how I could present my own scene – although my scene is using a realistic style rather than a stylised one.
I started to block out my scene, gradually iterating on the layout and composition.
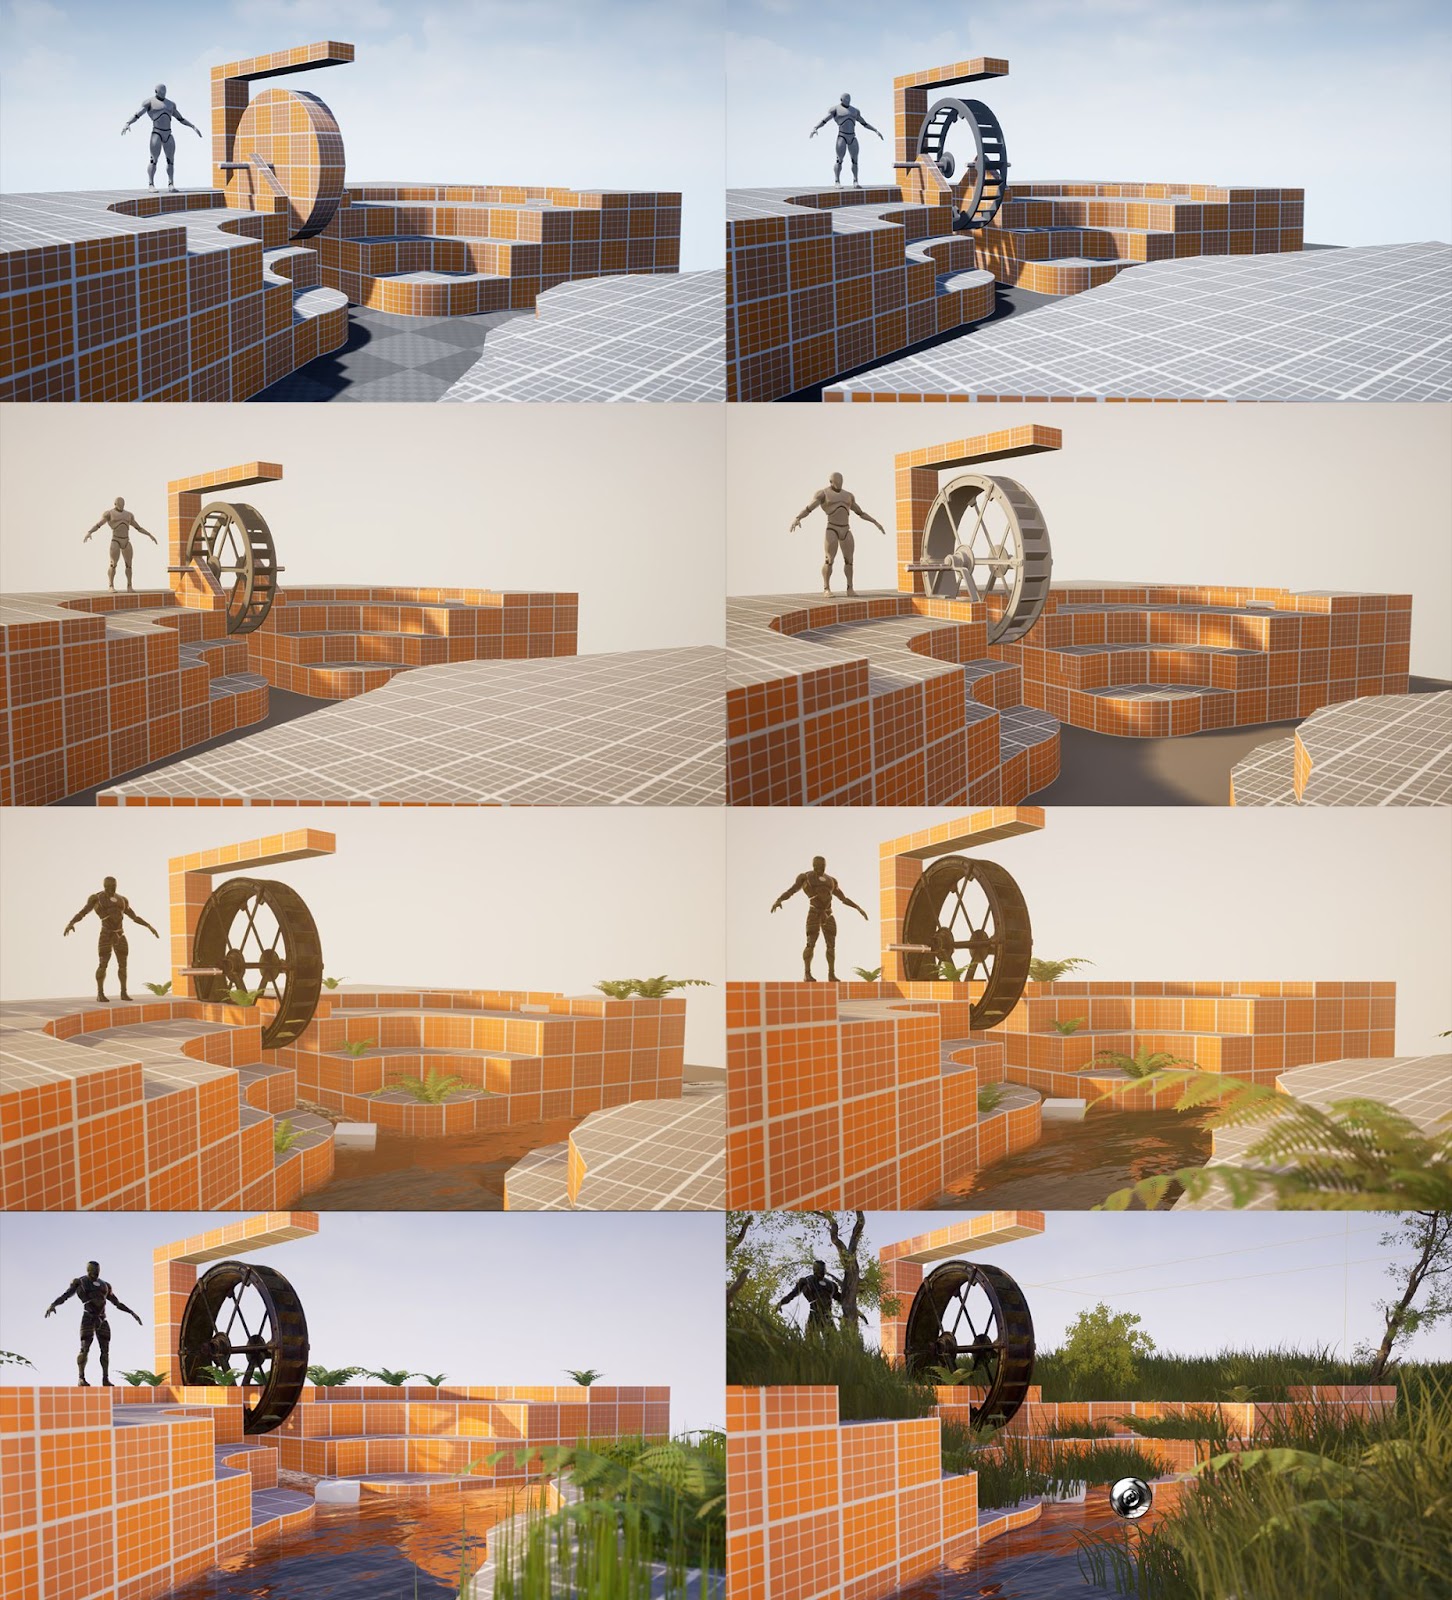
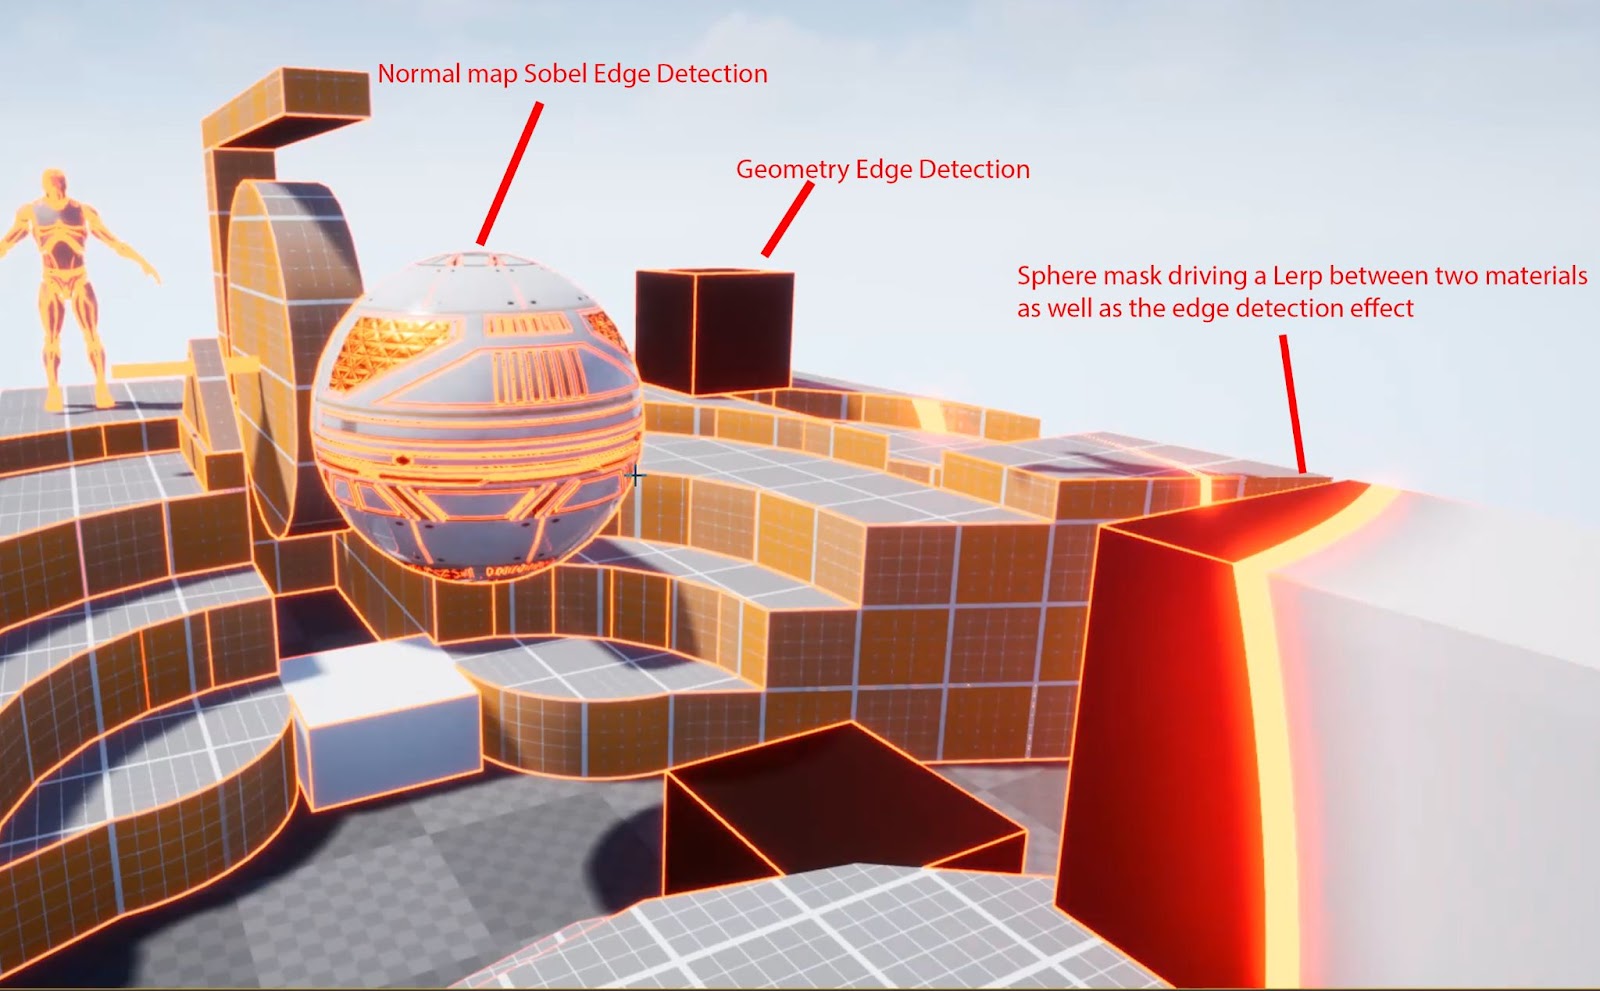
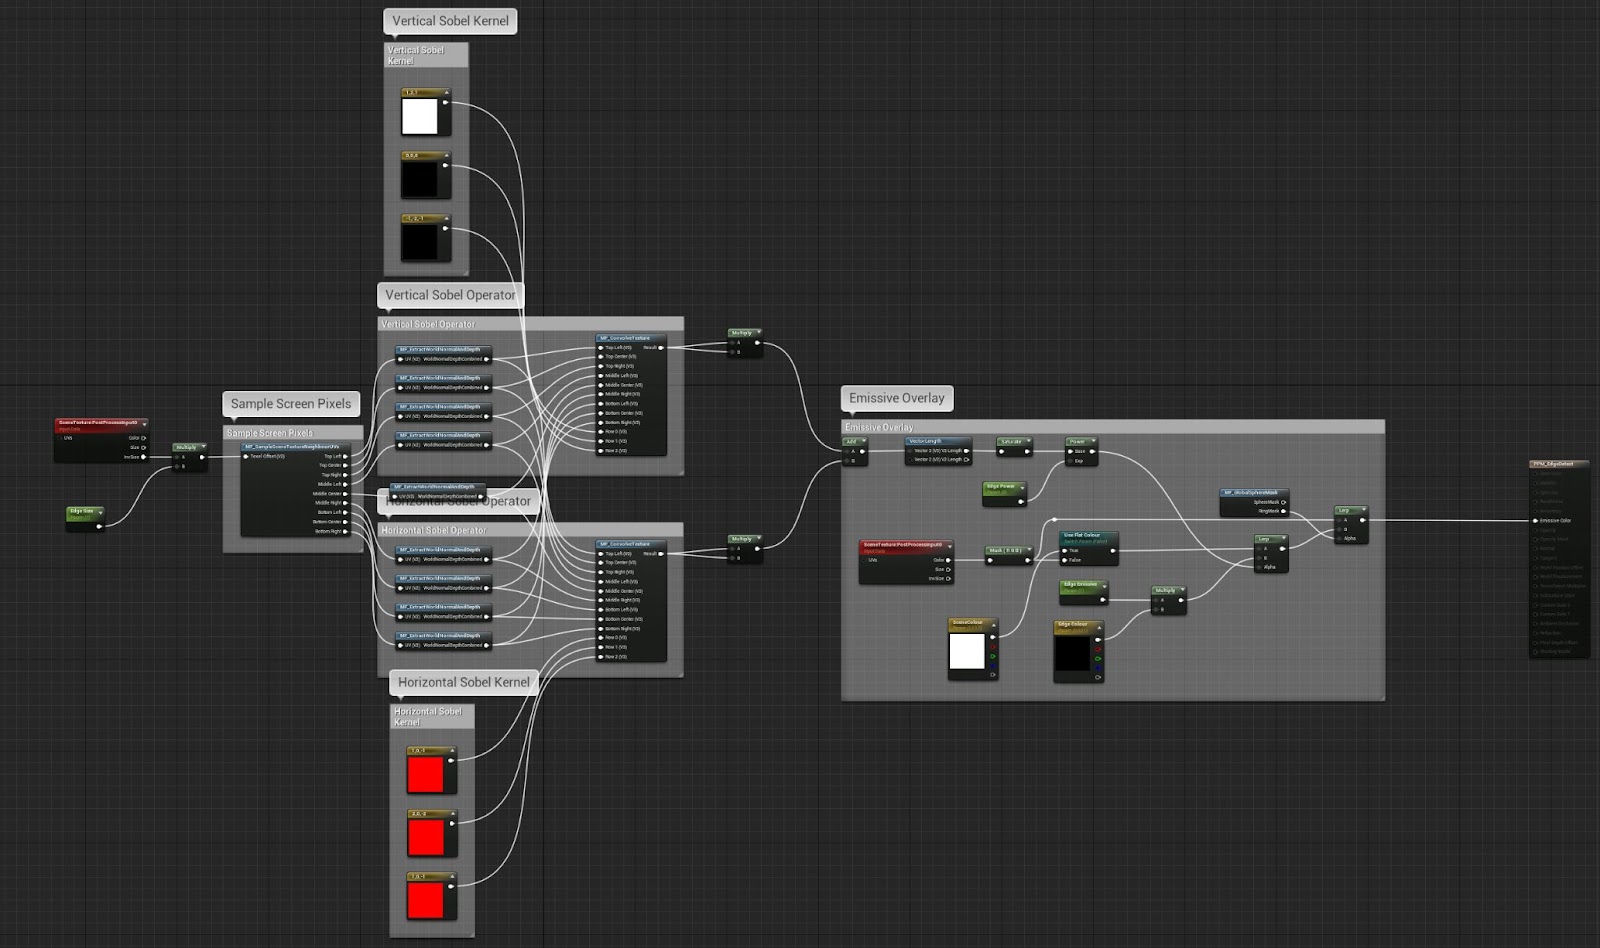
At this point, I also started experimenting with shaders to create the ‘time aging’ effect on the assets in the scene. I wanted the effect to extend outwards from the centre of the diorama and change the assets textures as it went; I thought an animated sphere mask would be best for this. Additionally, I did some research into edge detection methods within Unreal as I thought this would add an extra layer of detail to the shader.
I found some great guides and blog posts on Sobel edge detection within Unreal and how it can be used to achieve a variety of looks; I learnt a lot about the differences between Sobel and Laplacian edge detection and the Kernels that drive them here.
Then, I did some research into how to implement this into Unreal – with an added bonus of being able to input world normals into the shader so that it is able to detect edges on normal maps as well as the edges of geometry. I found information on this from this forum and webpage.
To ensure that all the different parts of my shader synced up, I kept the sphere mask in its own material function so that I could easily drop it into any material network. I also made sure that the sphere mask variables were derived from a Material Parameter Collection so that the values could be updated globally across all of the shaders that used it.

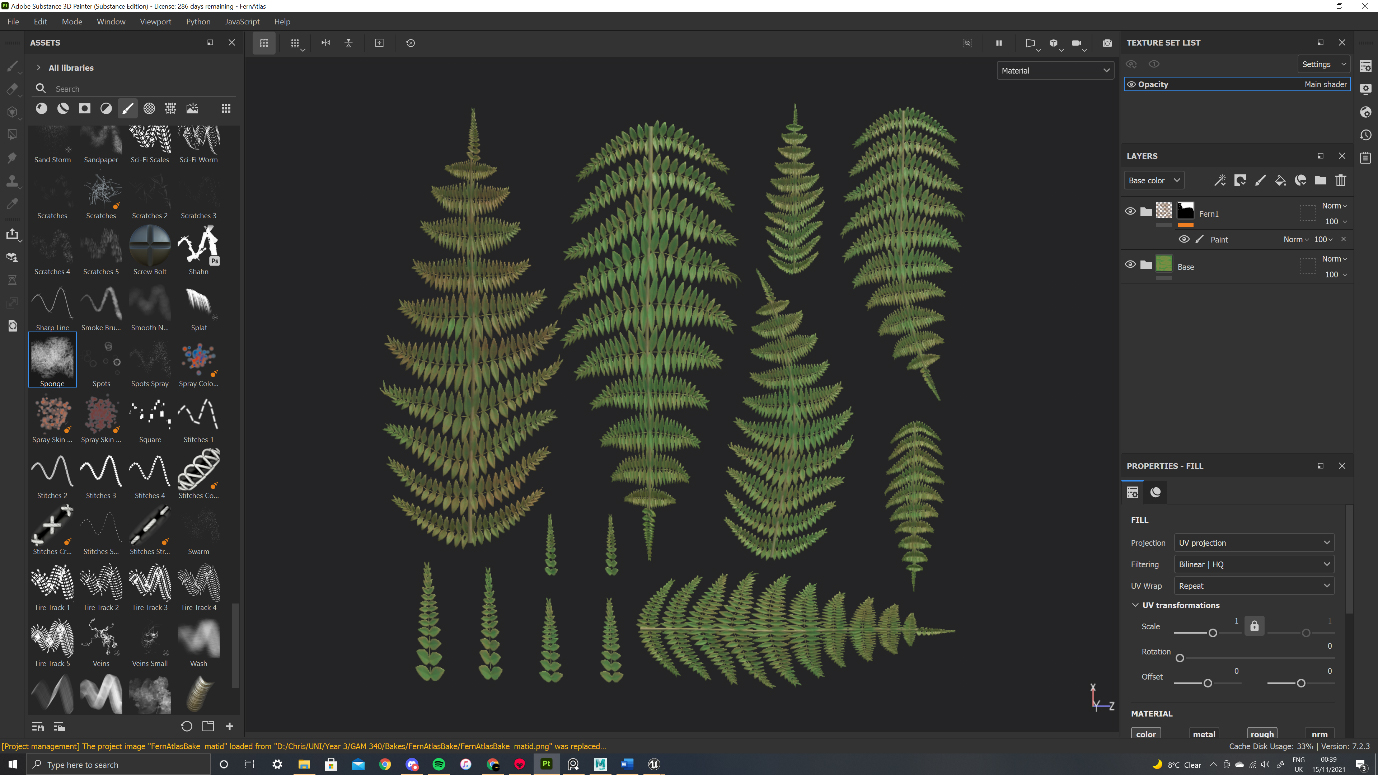
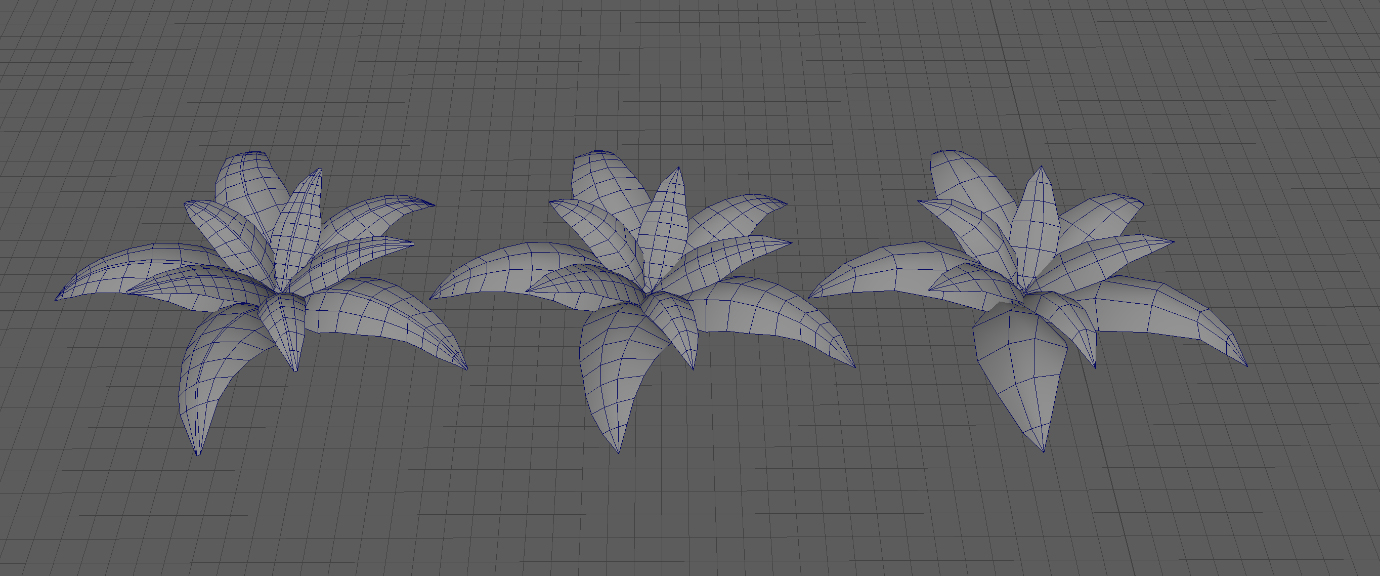
I also started to create some of my own foliage assets, creating base meshes and LODs in Maya, highpoly’s in Zbrush, baking in Marmoset, texturing in Substance 3D Painter and assembling in SpeedTree:


My grass and ferns in engine. (Trees are SpeedTree defaults):
In quite a drastic turn of events, I decided to completely change the focus of this project from foliage and shader creation to focusing more on modularity and composition. This is because I wanted this project to showcase the skills that I would need as a junior environment artist. From the advice of my lecturers and some industry artists, I decided to scrap foliage creation completely and instead use MegaScans as this somewhat reflects the direction that the industry is going in terms of scan-based foliage.
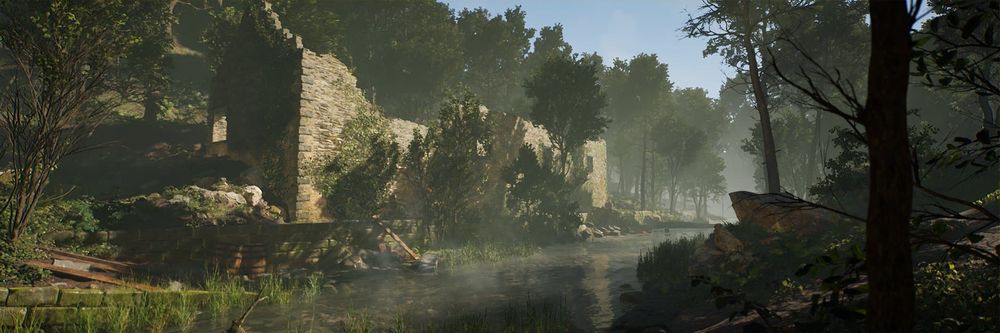
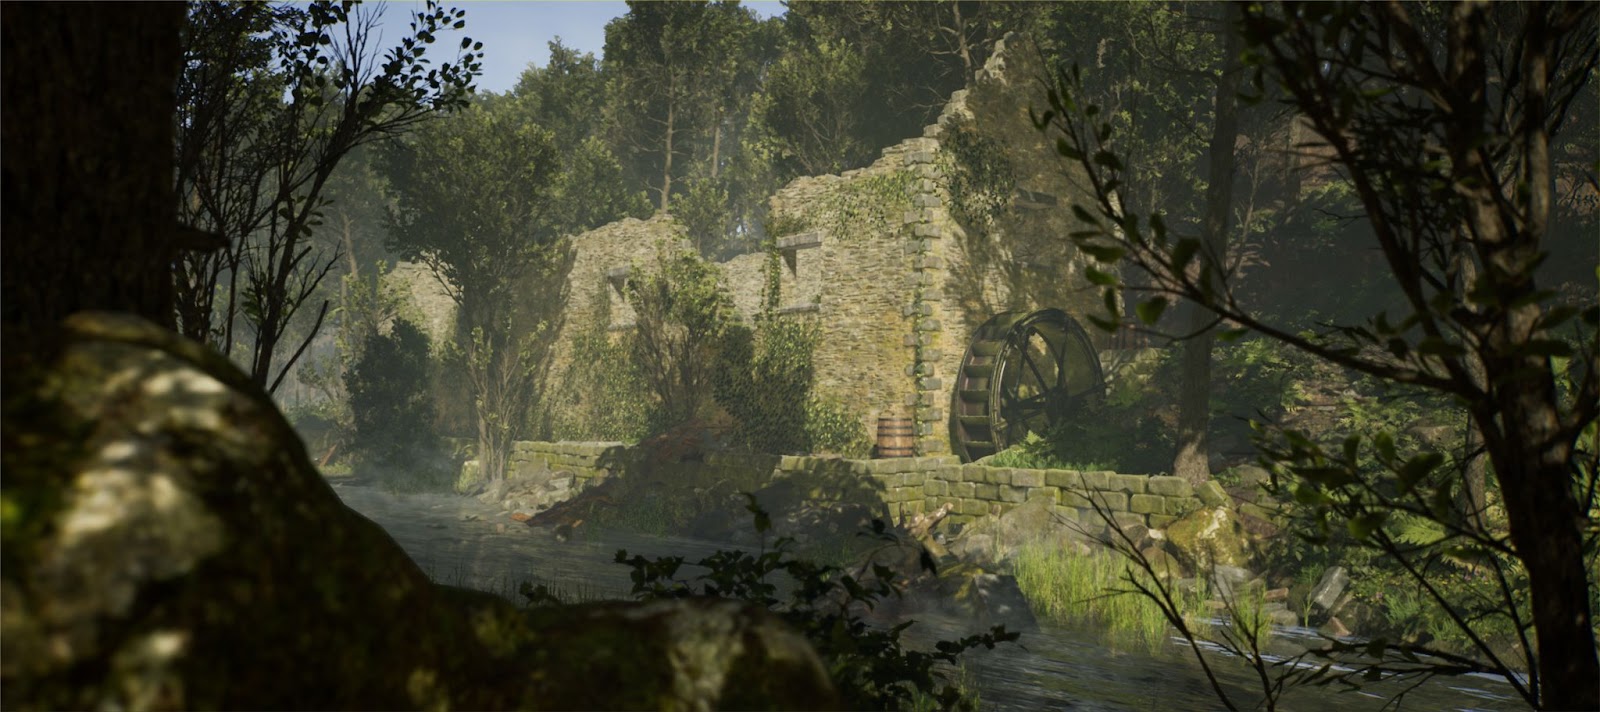
I decided to try and salvage as much of the current project as I could and decided to change the scene to a water mill rather than a lonely water wheel diorama. This meant that I could keep the wheel asset that I had already made and integrate it with my new scene. I would need to re-gather reference so I went back to my mood board and added more reference photos – the majority were of an abandoned water mill called Leri Woolen Mill:
All of the foliage (minus some grass), rocks and logs in the scene are MegaScans assets, including the trees. This allowed me to focus on the composition of my own assets and of the overall environment. One of the main pieces of feedback that I got was to break up the straight lines of the walls – really lean into the abandoned and crumbling aesthetic.
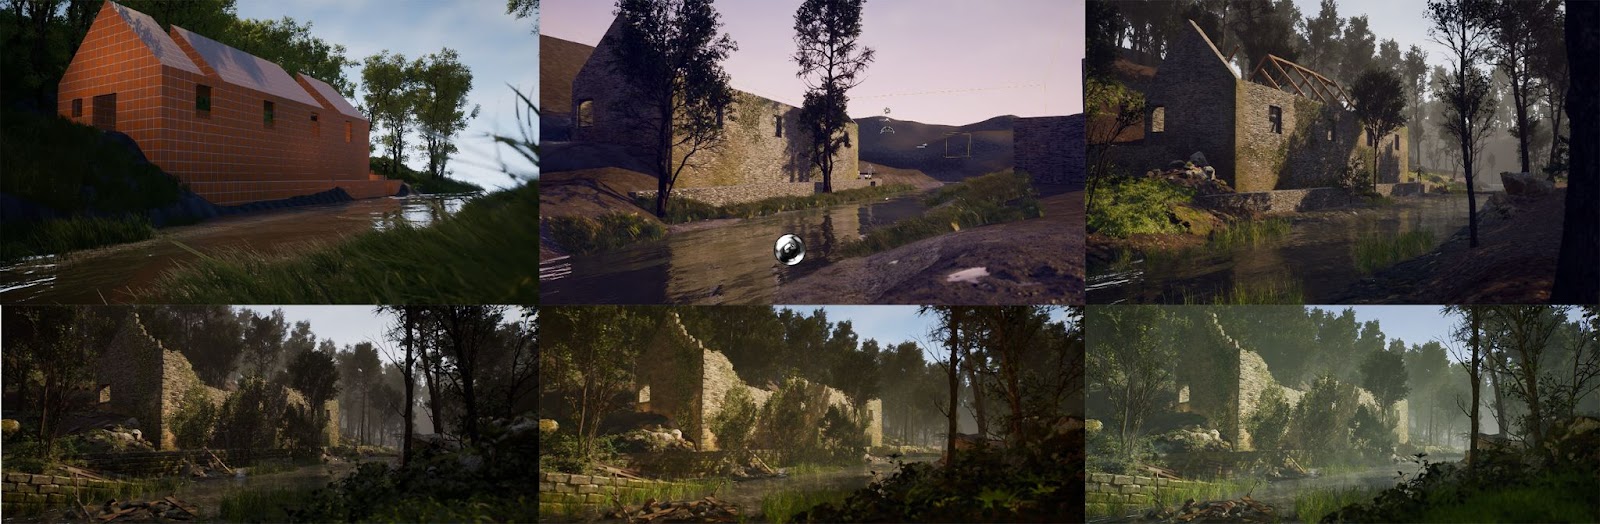
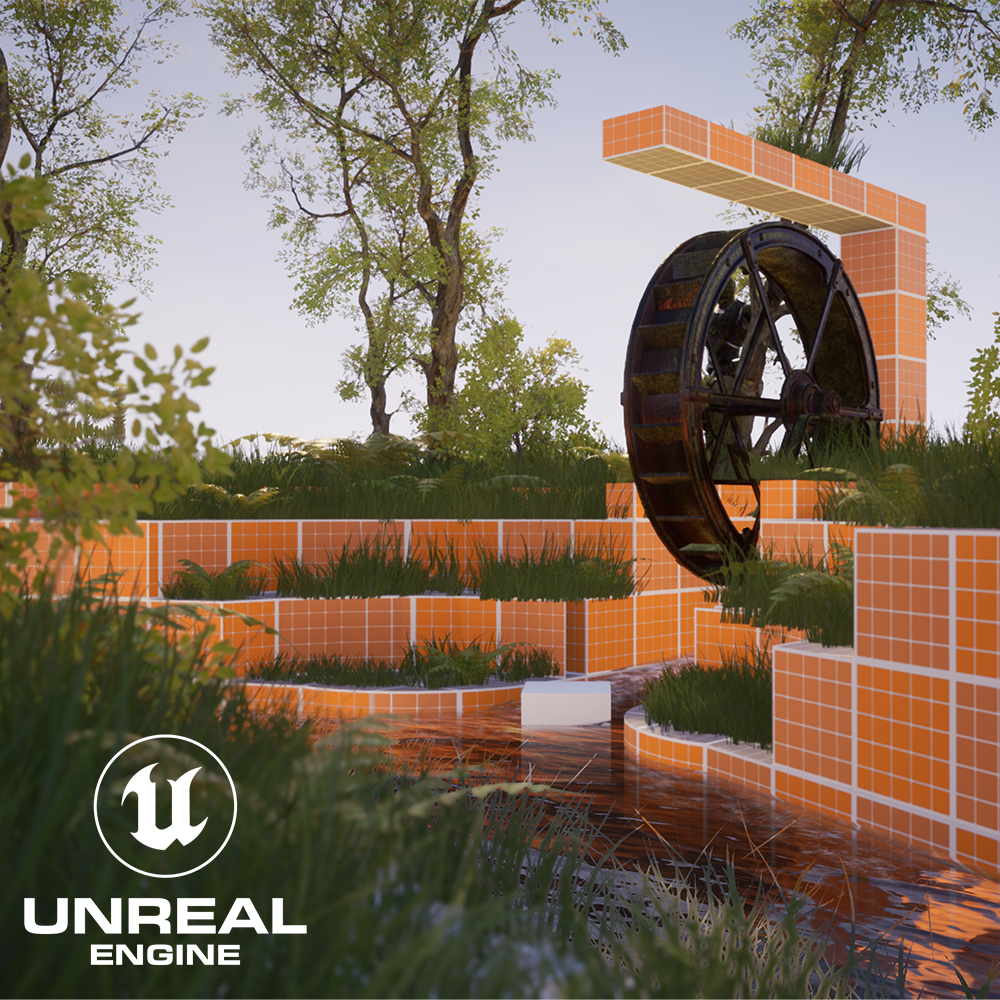
Getting a consistent and steady flow of feedback from multiple sources including my peers, lecturers and some industry professionals was a key factor in pushing the quality of the environment further and further throughout development. A shining example of this can be seen below, the first image was my environment mid-way through development, the second image is a paintover one of my art lecturers (Phoebe Herring) did and the third, is how I changed the environment to respond to the feedback.
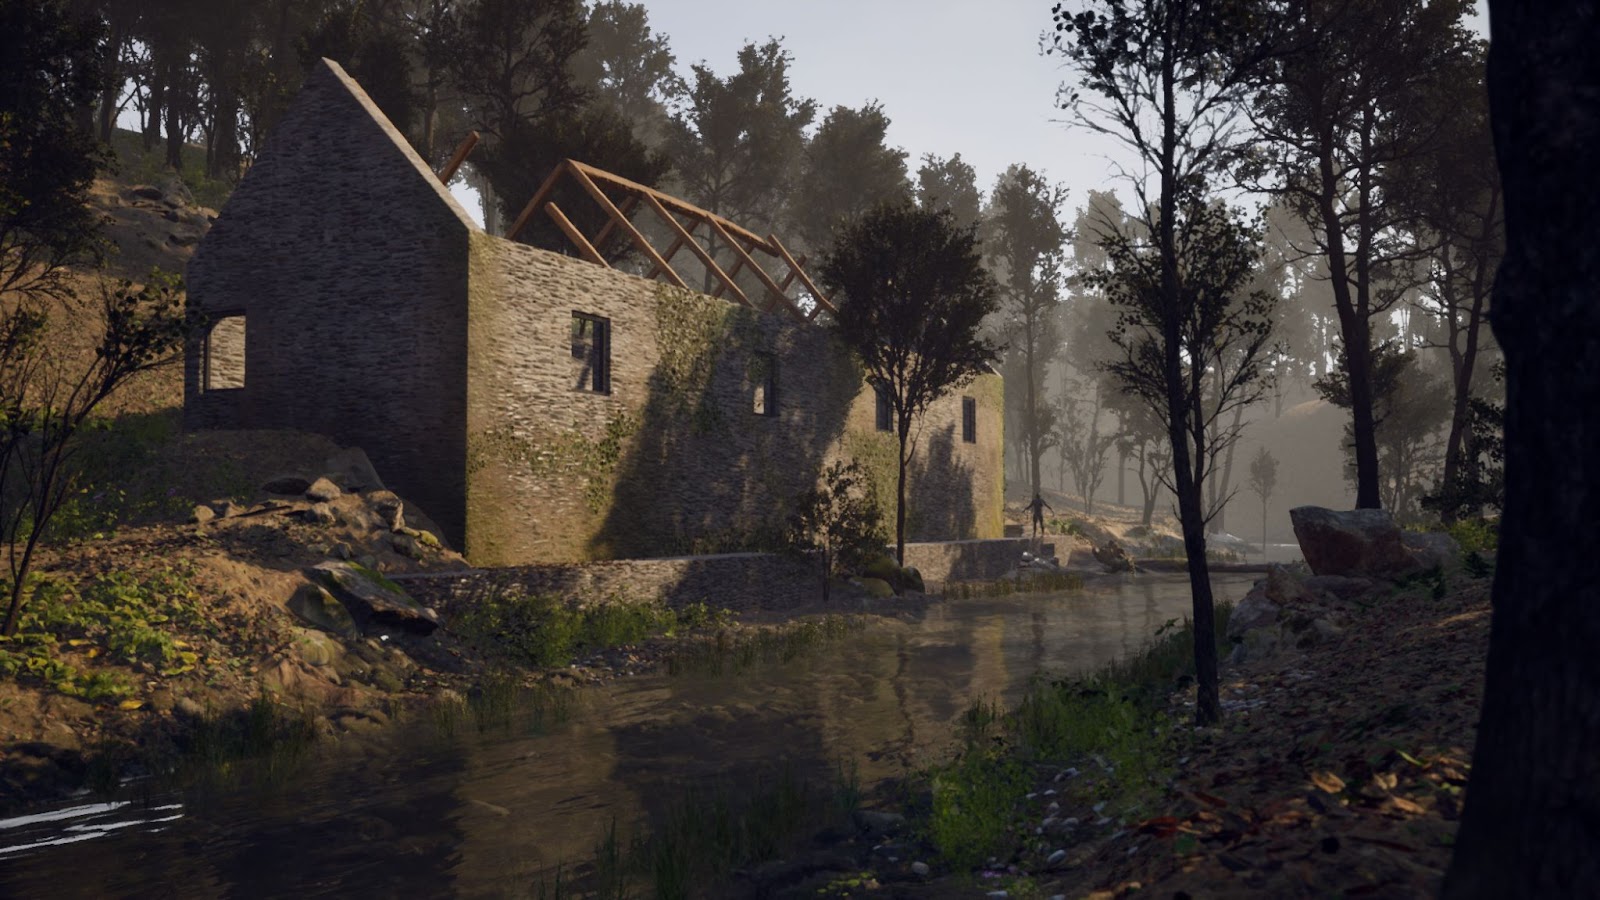
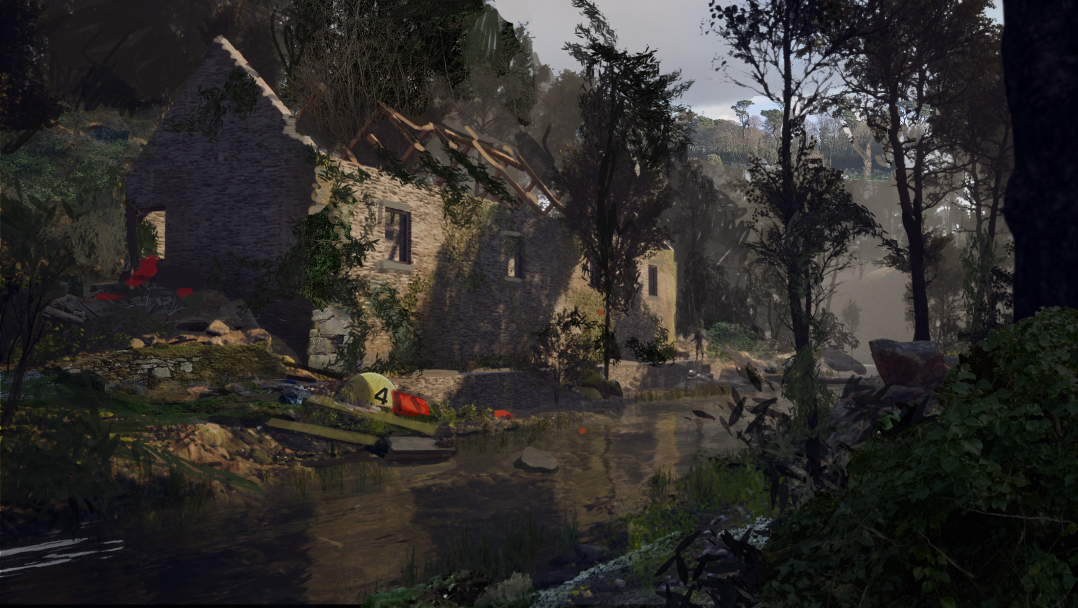
Once again, a huge thanks to everyone who gave me feedback on this piece!
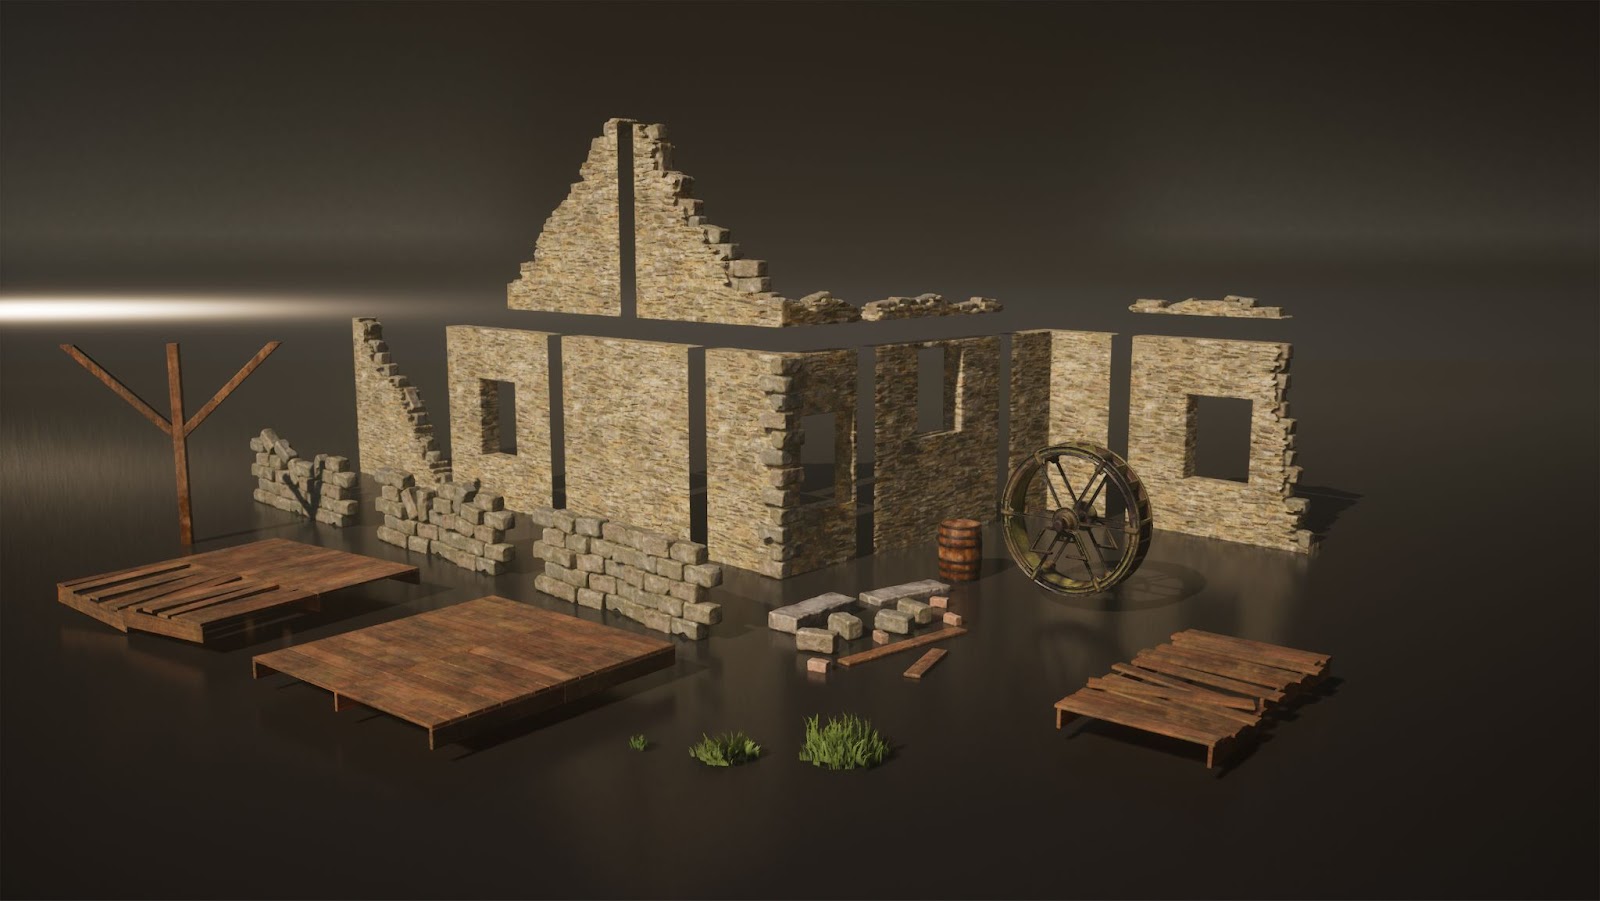
I created a modular kit for the Mill which is the main architectural part of my scene. With this kit I could technically create a Mill of any size and lots of variations in shape. To avoid the straight lines of the building I created ‘cap’ meshes that I can put at the top of walls to break up the silhouettes.
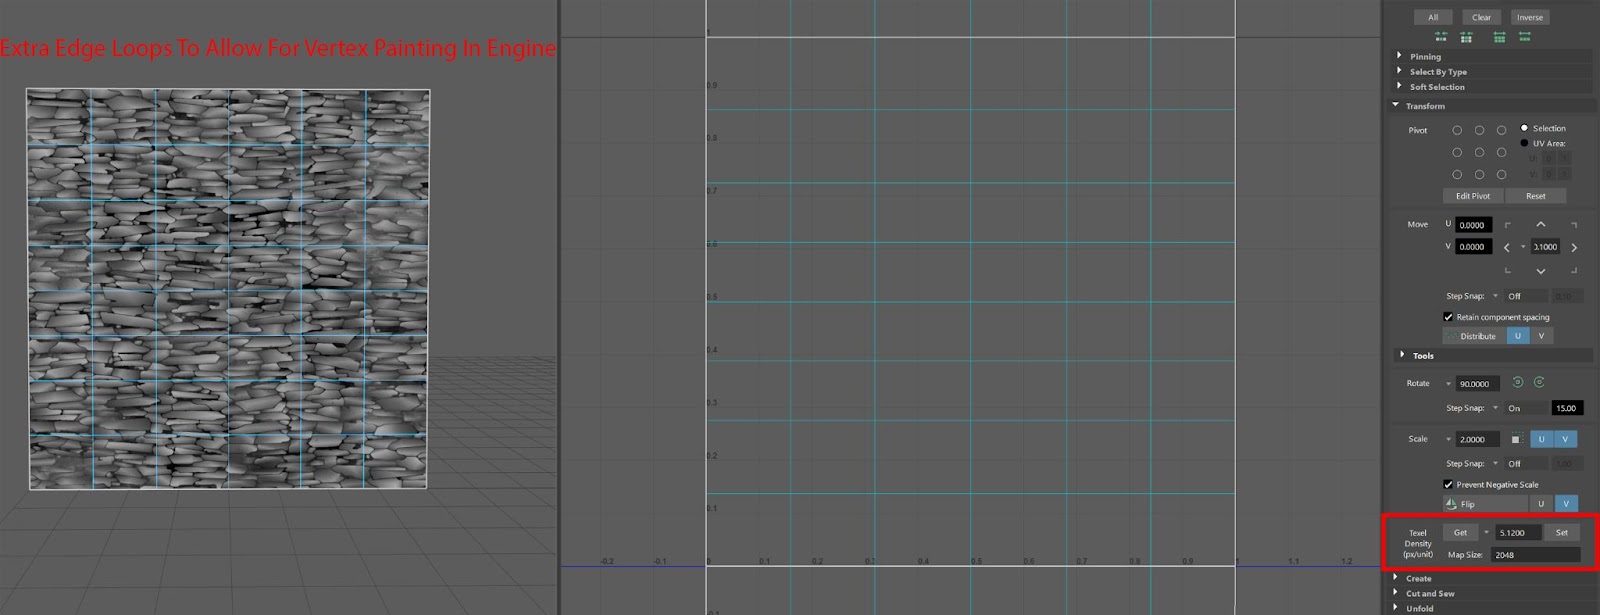
Within my stone material I created the option to blend with up to two more material layers for a total of three. This meant that I could vertex paint a moss/mould layer as well as a plaster layer over the modular meshes to break up tiling and repetitiveness.
When UV’ing the modular kit I made sure that each piece was UV’d correctly to 2048 textures at 5.12px/metre Texel Density. This means that there will be a consistent resolution quality across all of my assets.
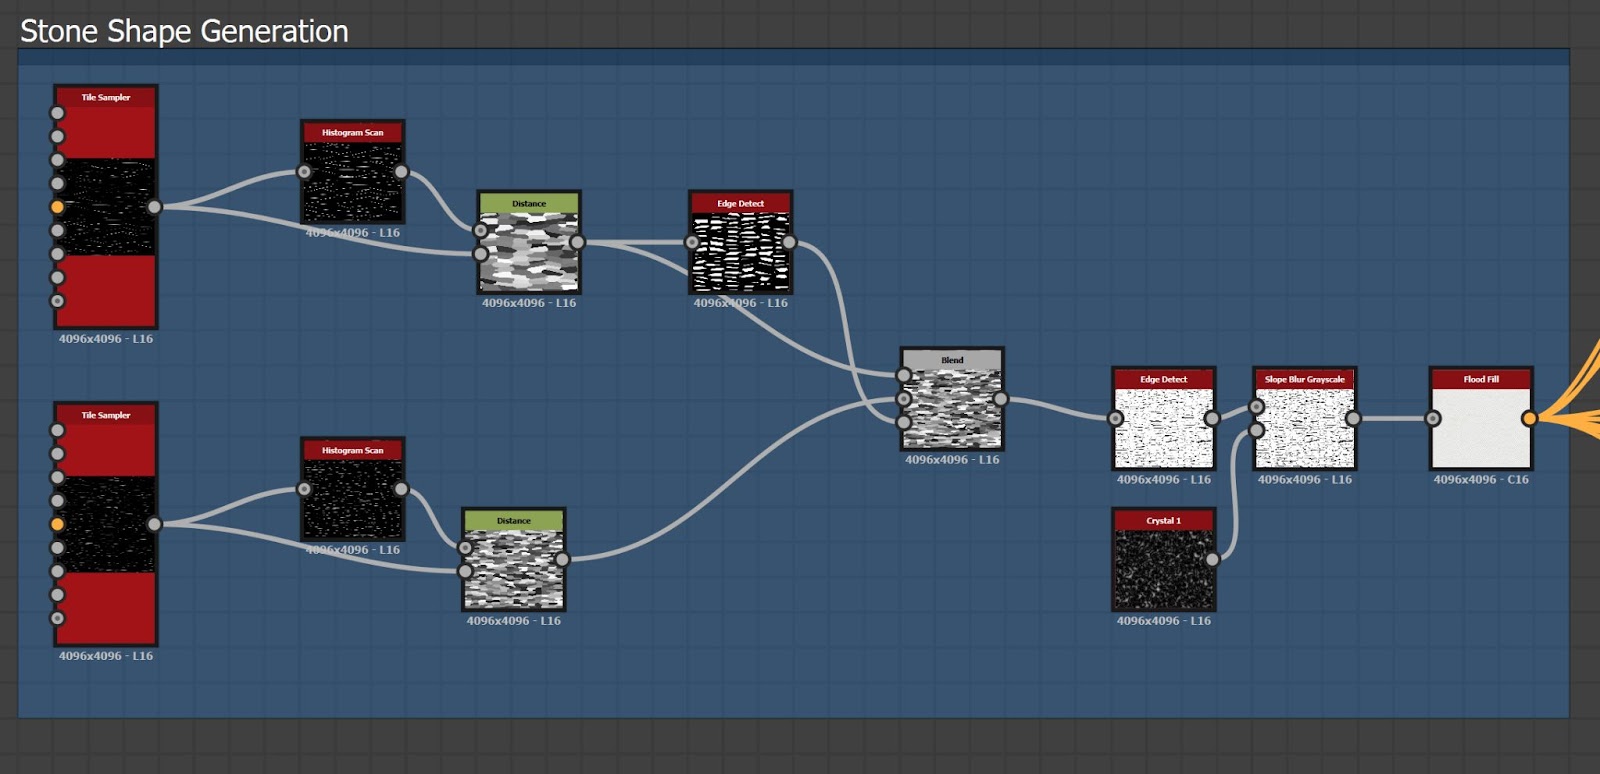
I created an old masonry rubble stone wall texture in Substance 3D Designer. This is used on my modular kit.
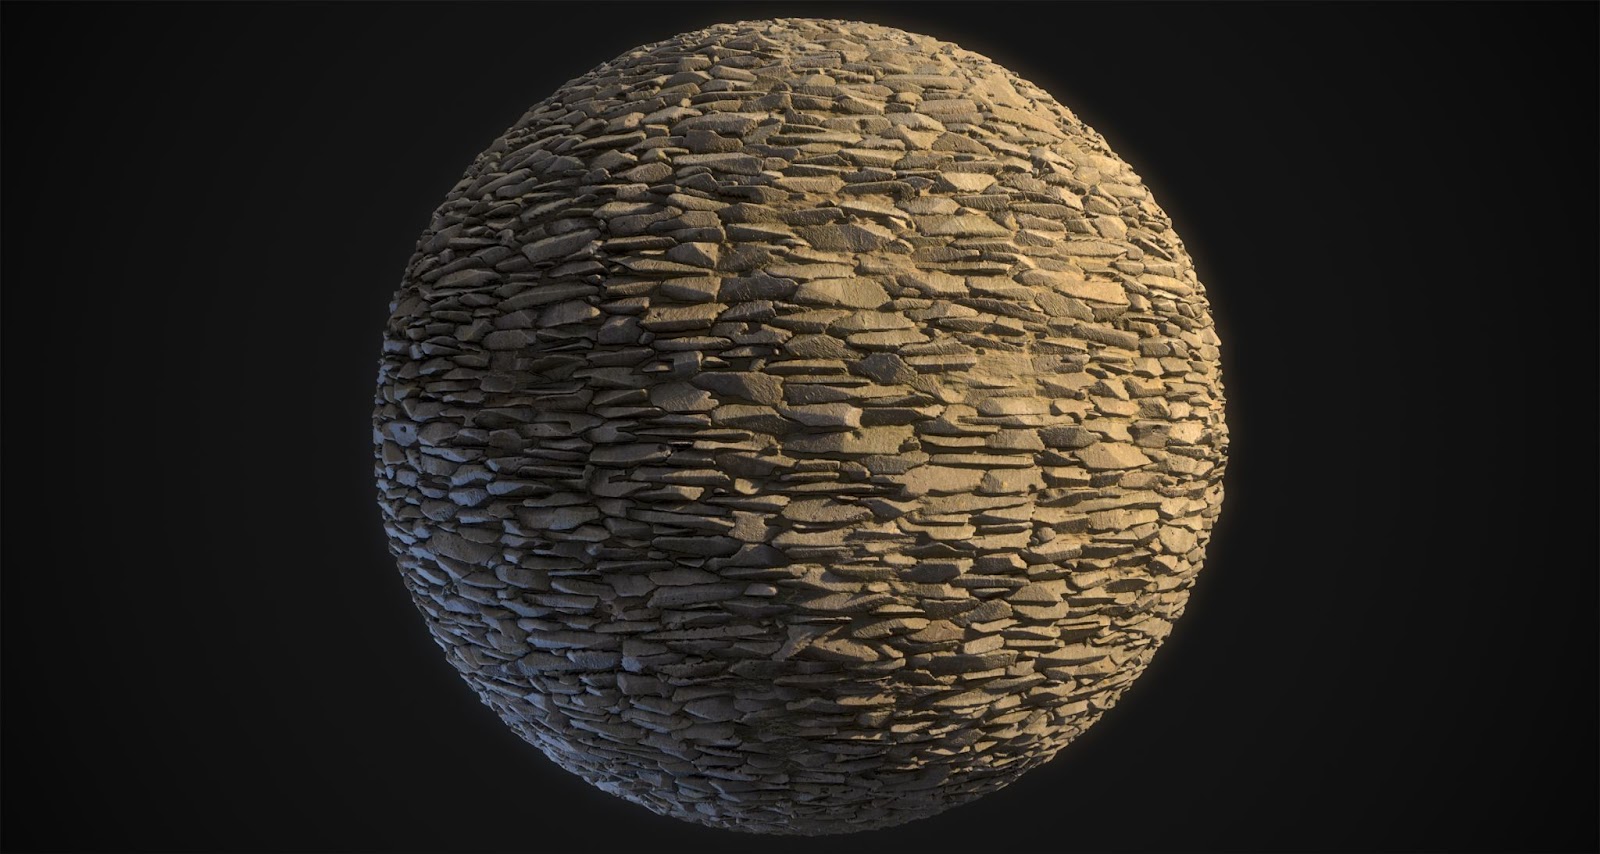
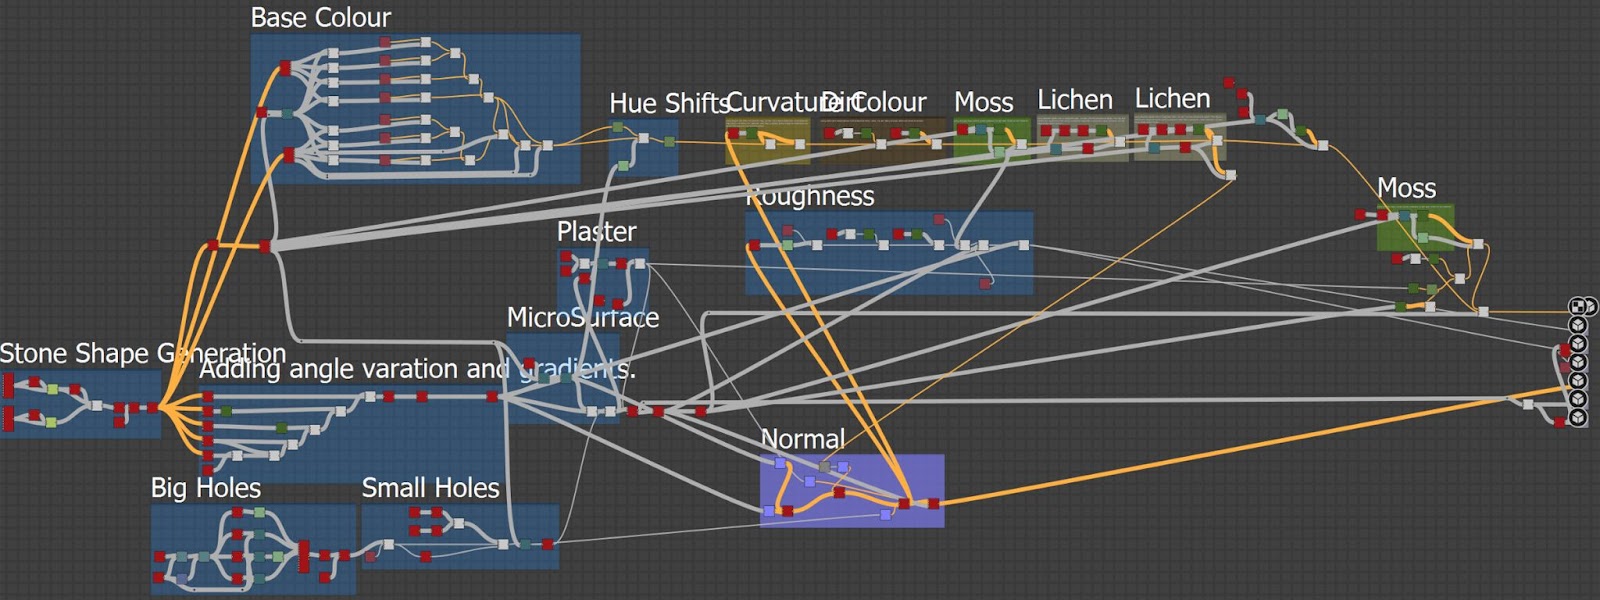
I used a shape generation technique I learnt from one of Daniel Thigers Substance 3D Designer tutorials. Using distance nodes combined with edge detection I was able to generate the irregular stone shapes.
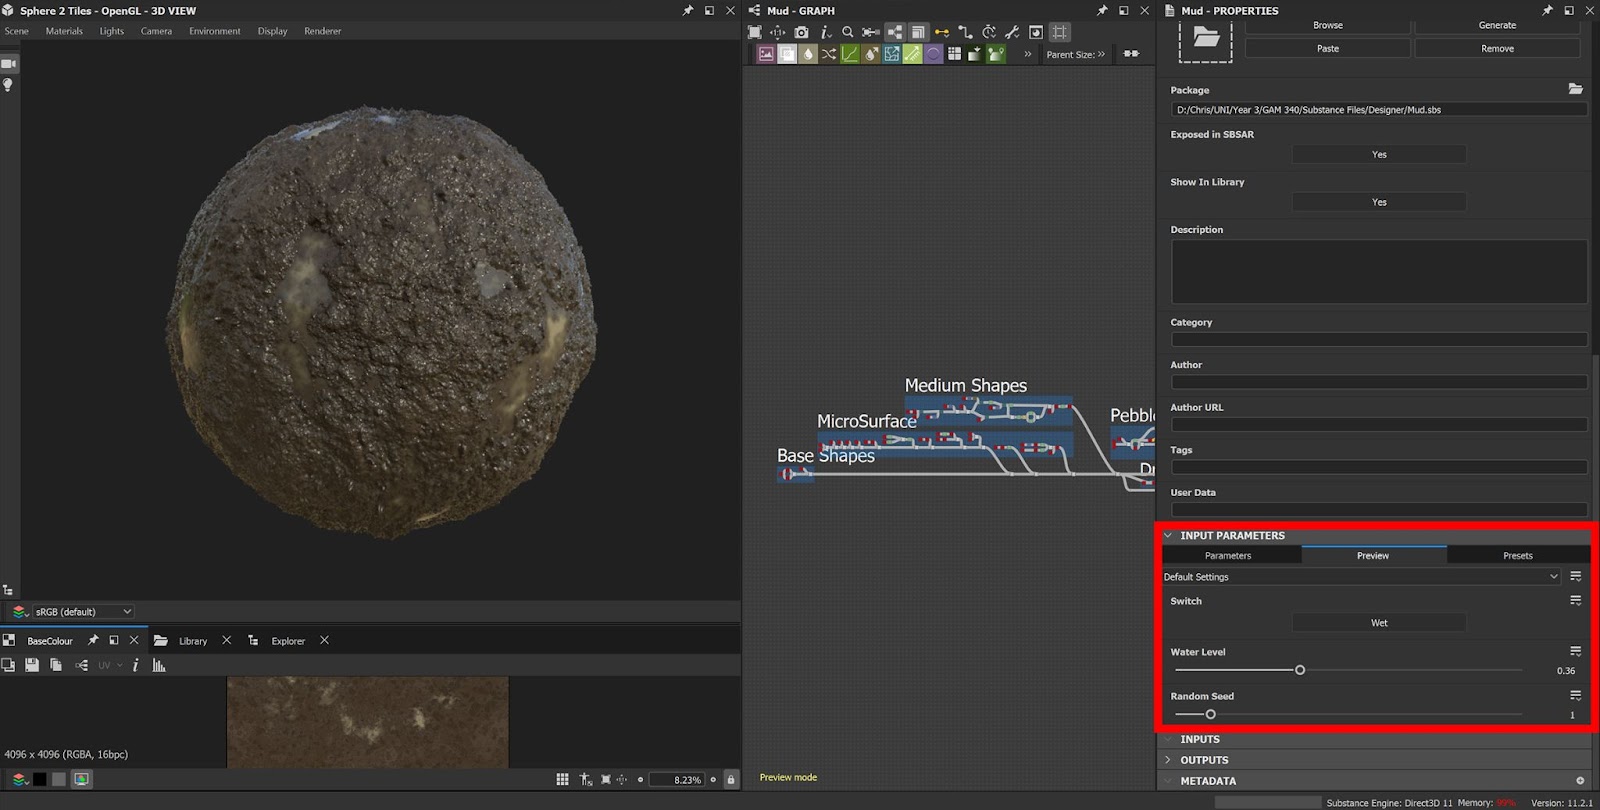
I also created a mud tileable material in Substance 3D Designer. During the process I learnt how to parameterise my Substance graphs which sped up my workflow when it came to making different material variations. Rather than trawling back through my graph I could now quickly use sliders and switches to get the desired material:
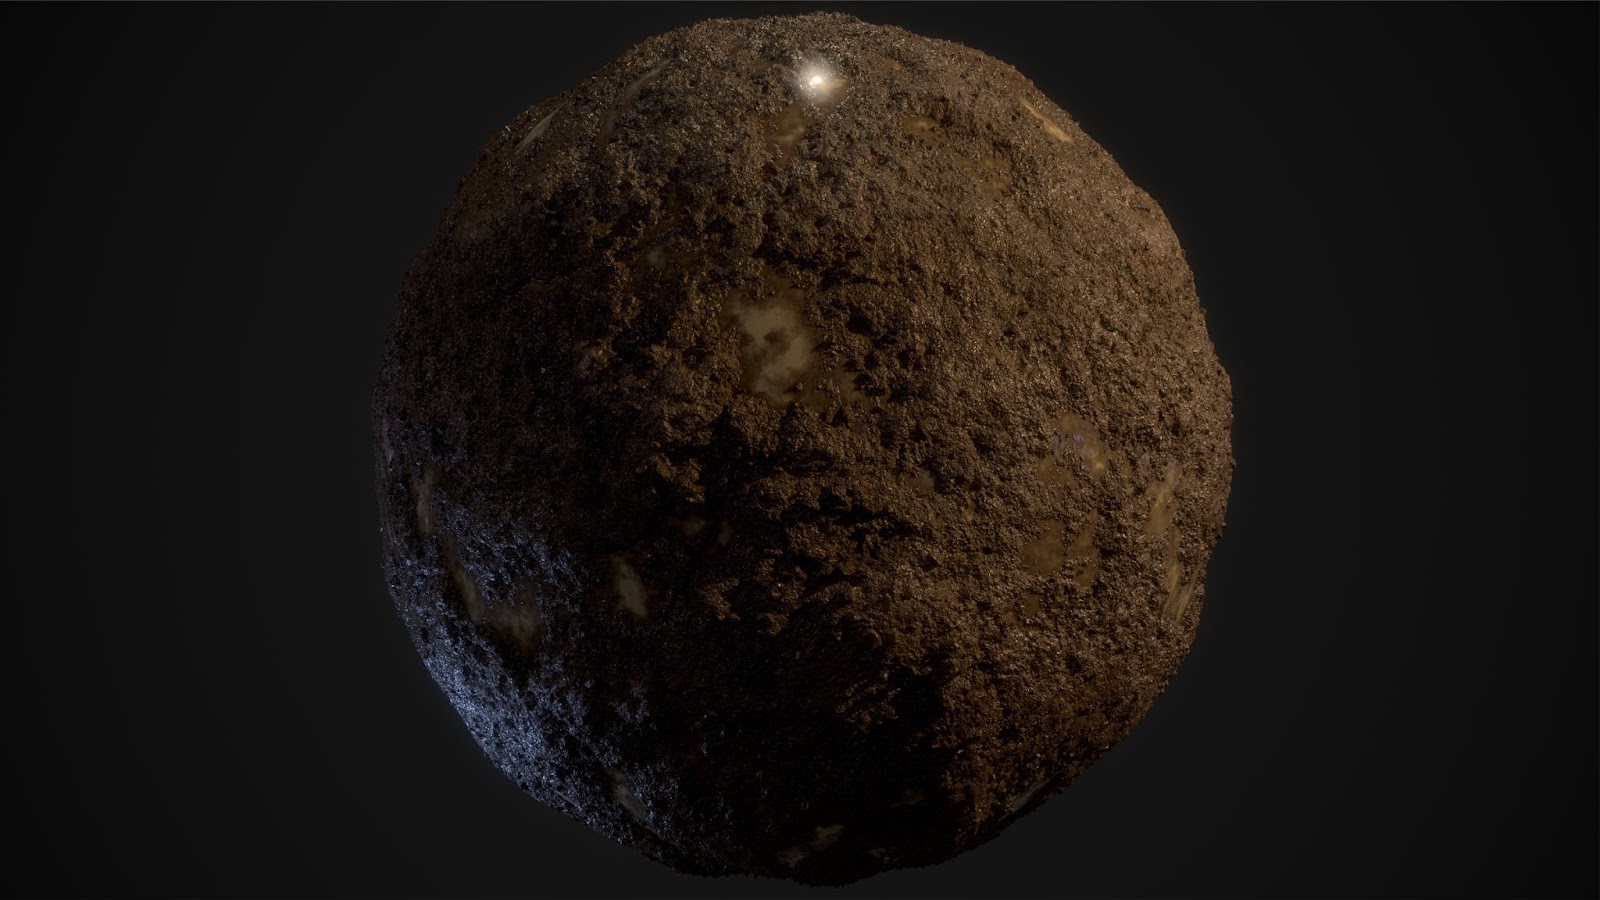
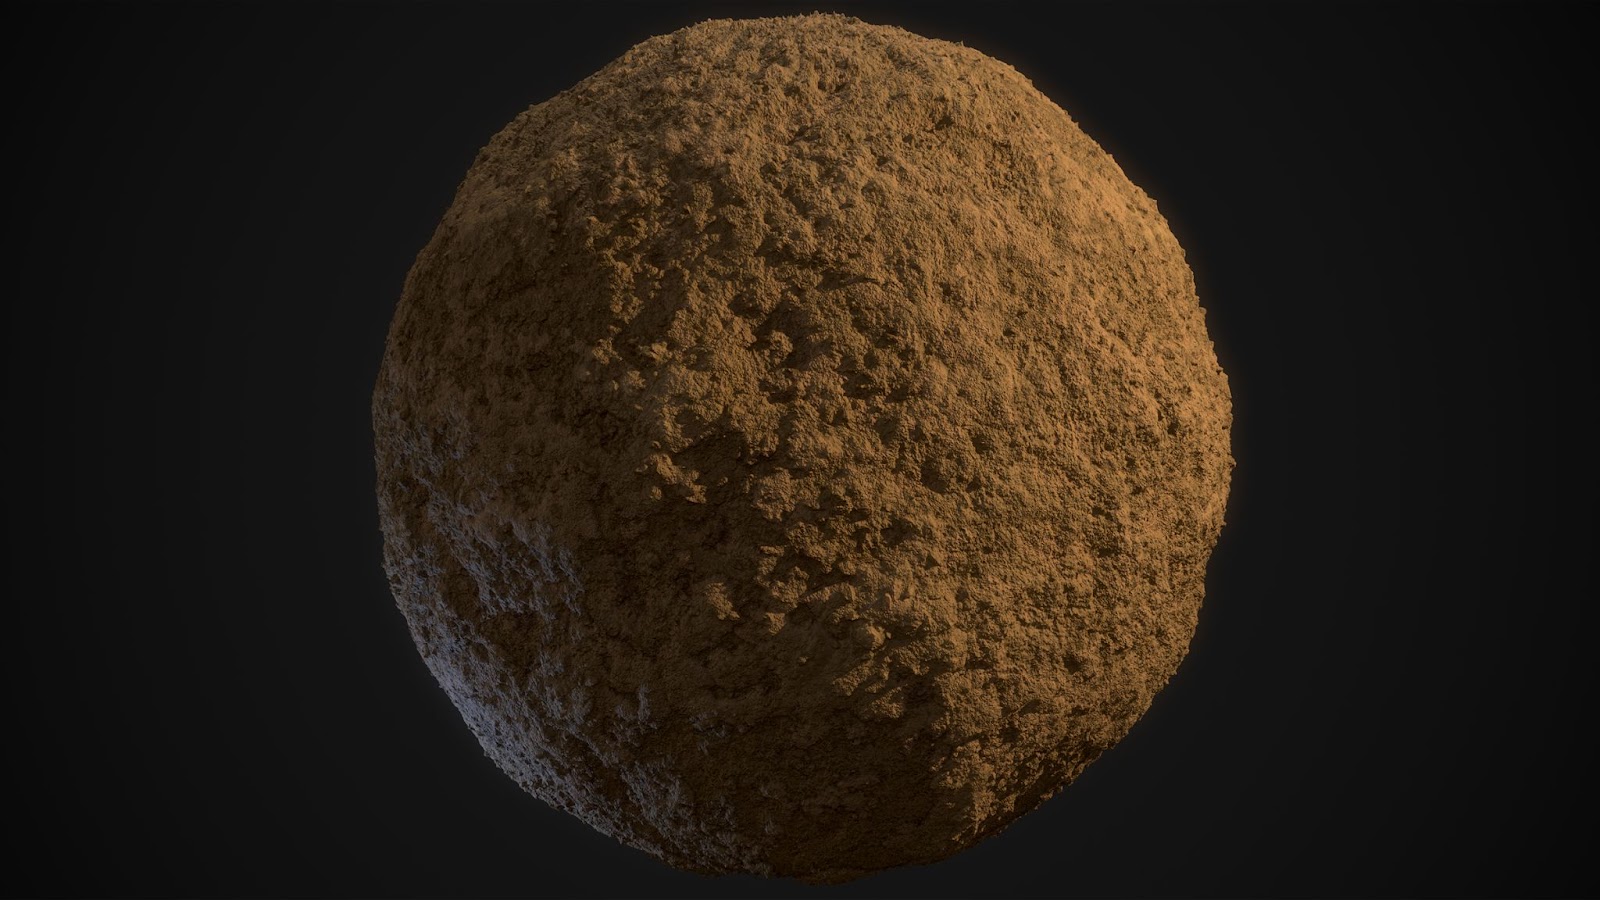
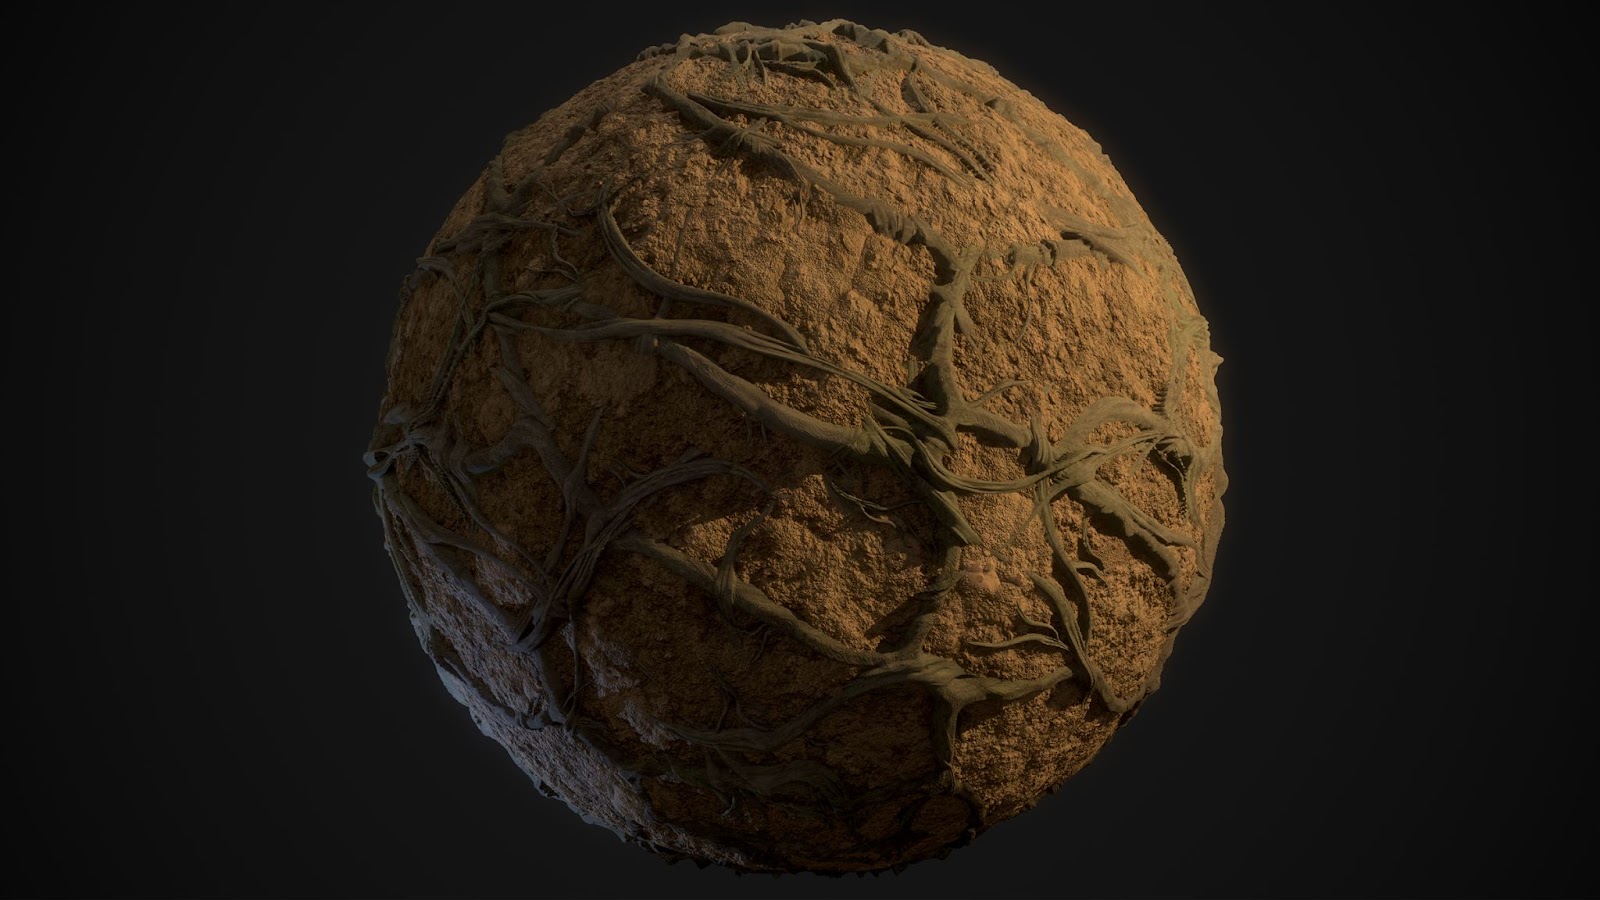
The mud materials applied in my landscape shader:

I created the Water Wheel early on in the project as I knew that it would be the main focal point of my scene. I Sub-Div modelled the High-Poly in Maya and created the low poly as well:
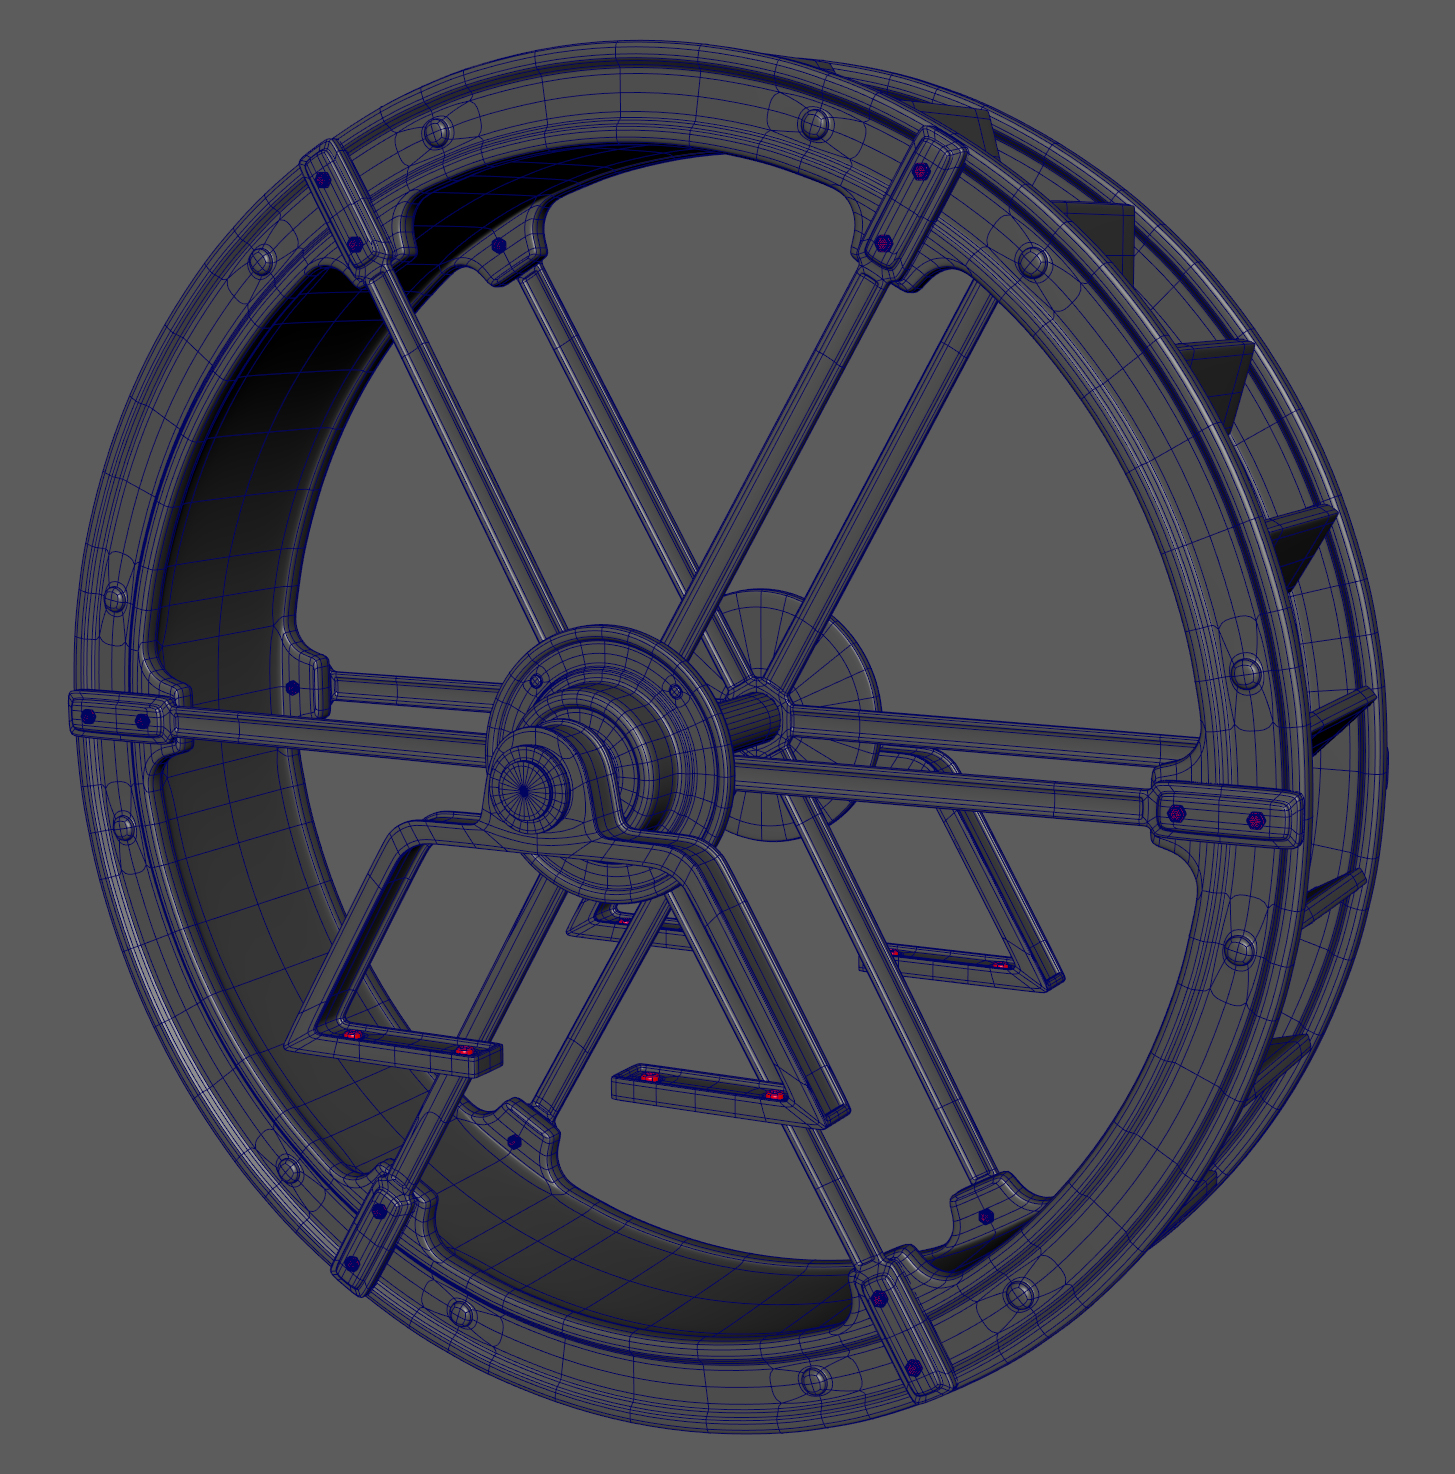
Low Poly and UVs:
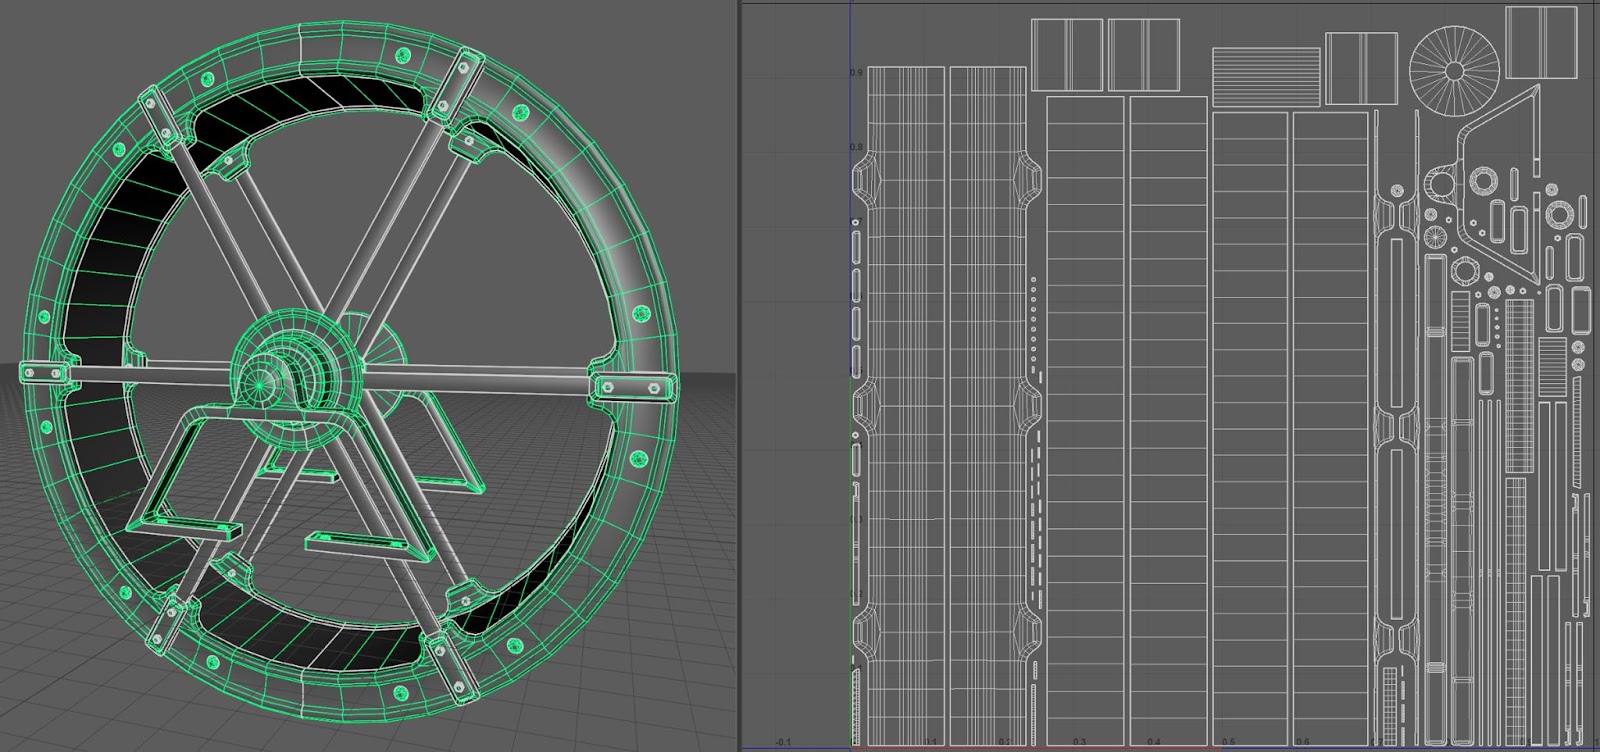
To try and maximise my texture resolution I tried to be as efficient as possible when it came to creating the UV’s for the wheel. I stacked and mirrored parts that I knew were never going to be able to be seen at the same time which meant that I had more resolution to play with without affecting the uniqueness of the asset.

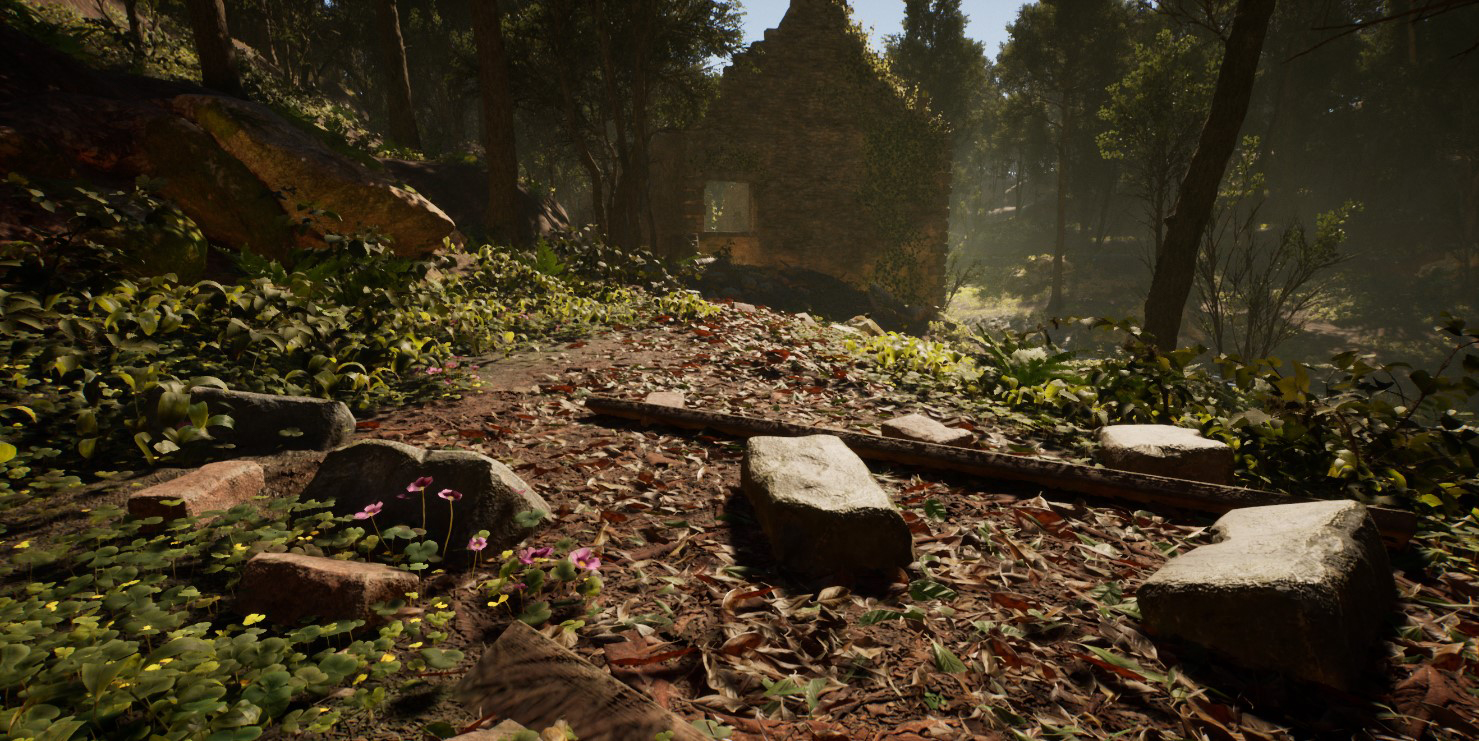
To make the scene feel more abandoned, I sculpted, baked and textured a debris/rubble kit that I could scatter around my scene. The kit is mainly made up of large stones, bricks and planks:

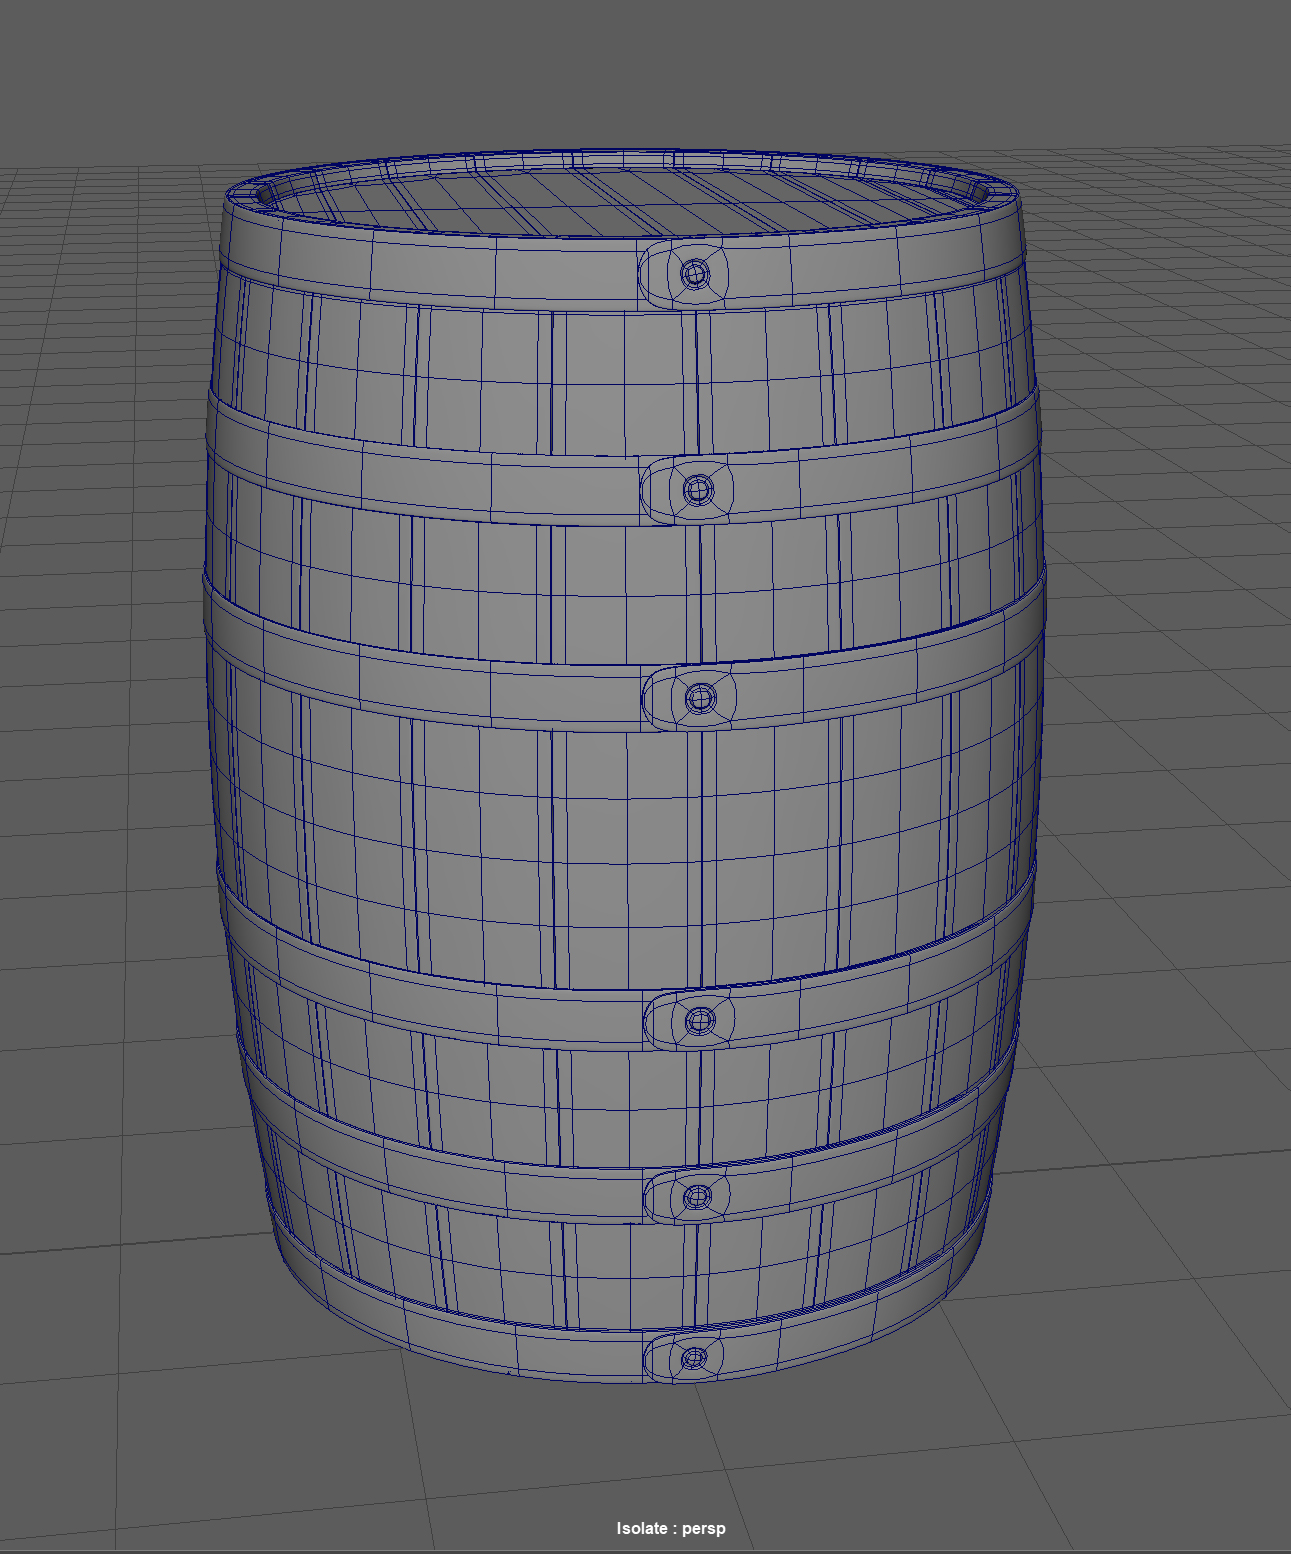
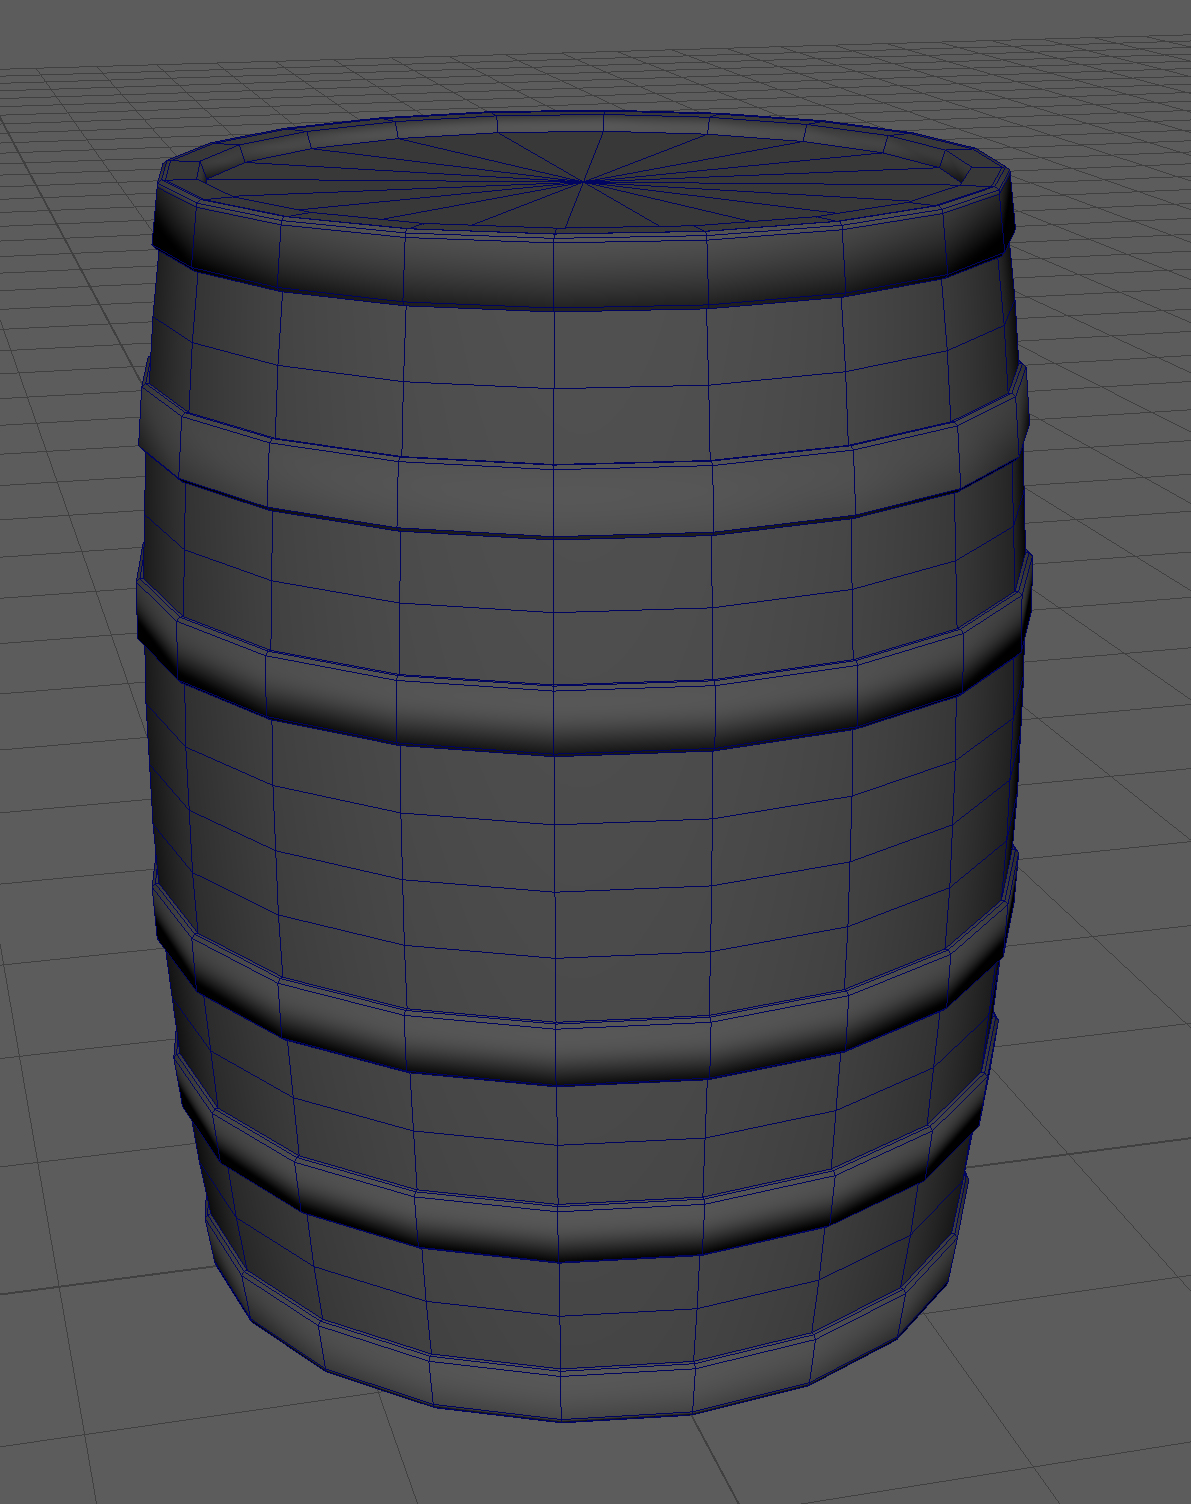
As a last-minute addition, I decided to make a barrel that I could place throughout the scene. I began by sub-div modelling it in Maya, with the intention of taking it into Zbrush to sculpt some damage afterwards.
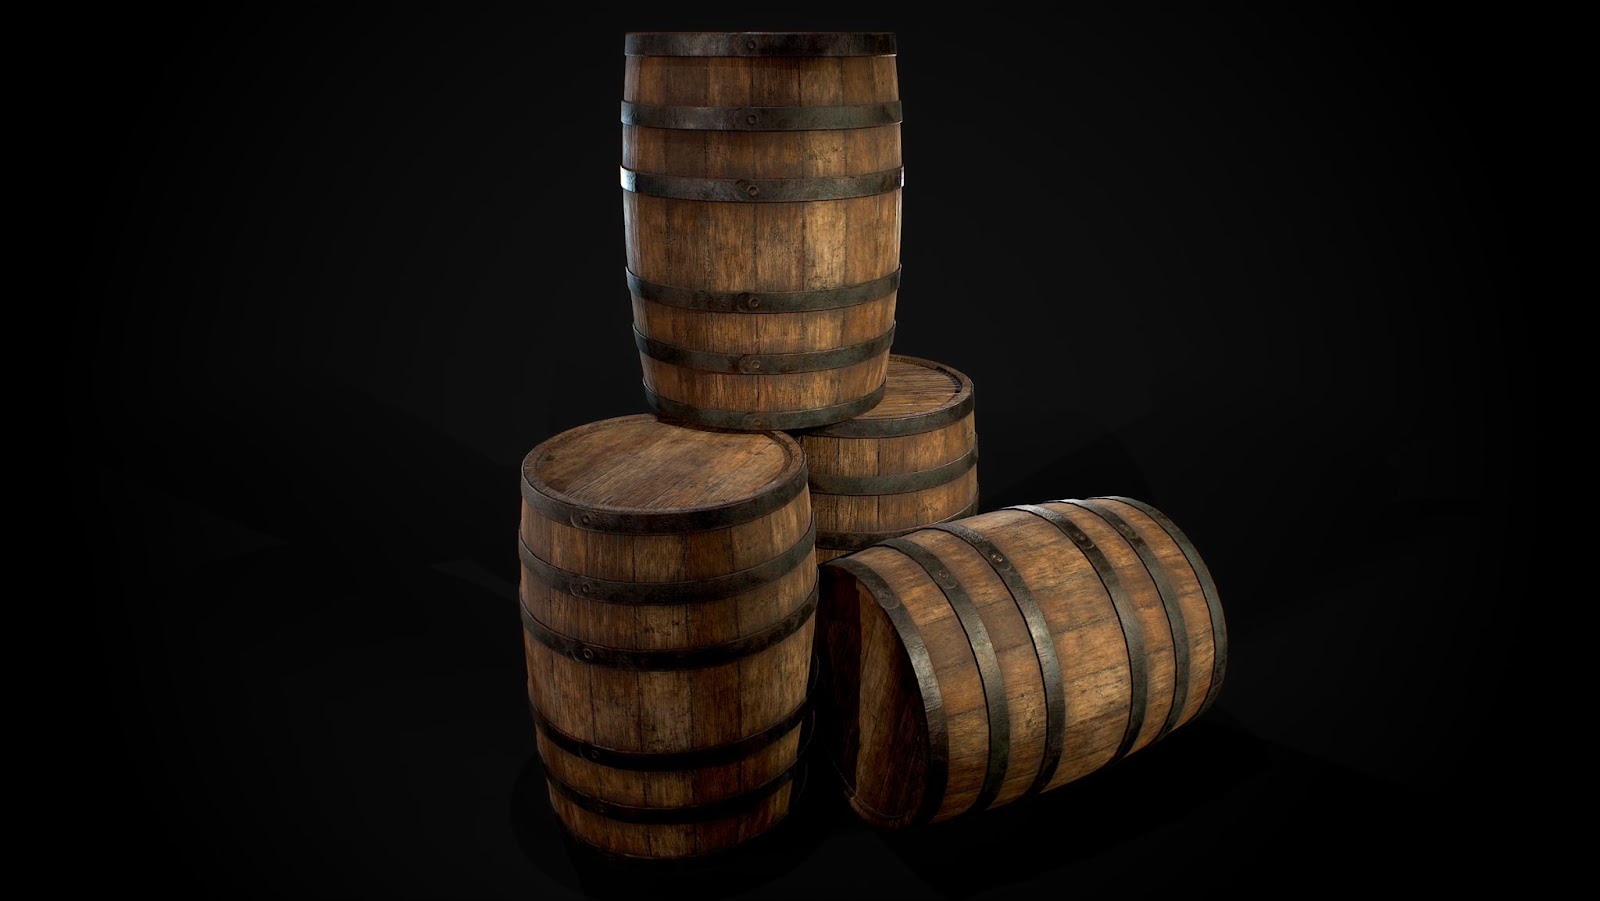
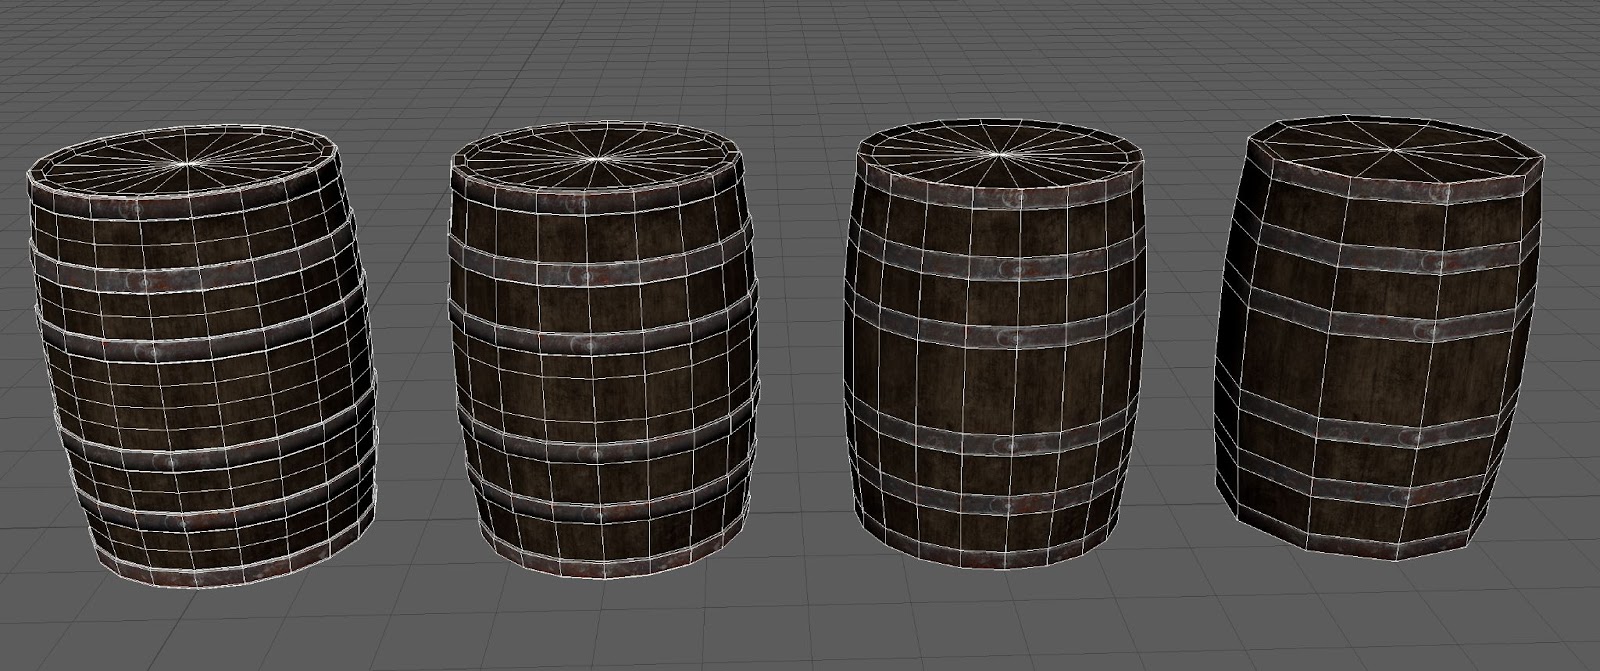
Once I had finished with the high-poly, I created the low-poly and baked the meshes in Marmoset – I made a quick texture in Substance 3D Painter and then it was basically finished. I still wanted to use best practices for this model so I created my own LODs for the barrel that I then imported into Unreal.
I love creating shader networks in Unreal that I can use to elevate my environments. For this project I continued to build upon my own modular shader network that I had created previously.
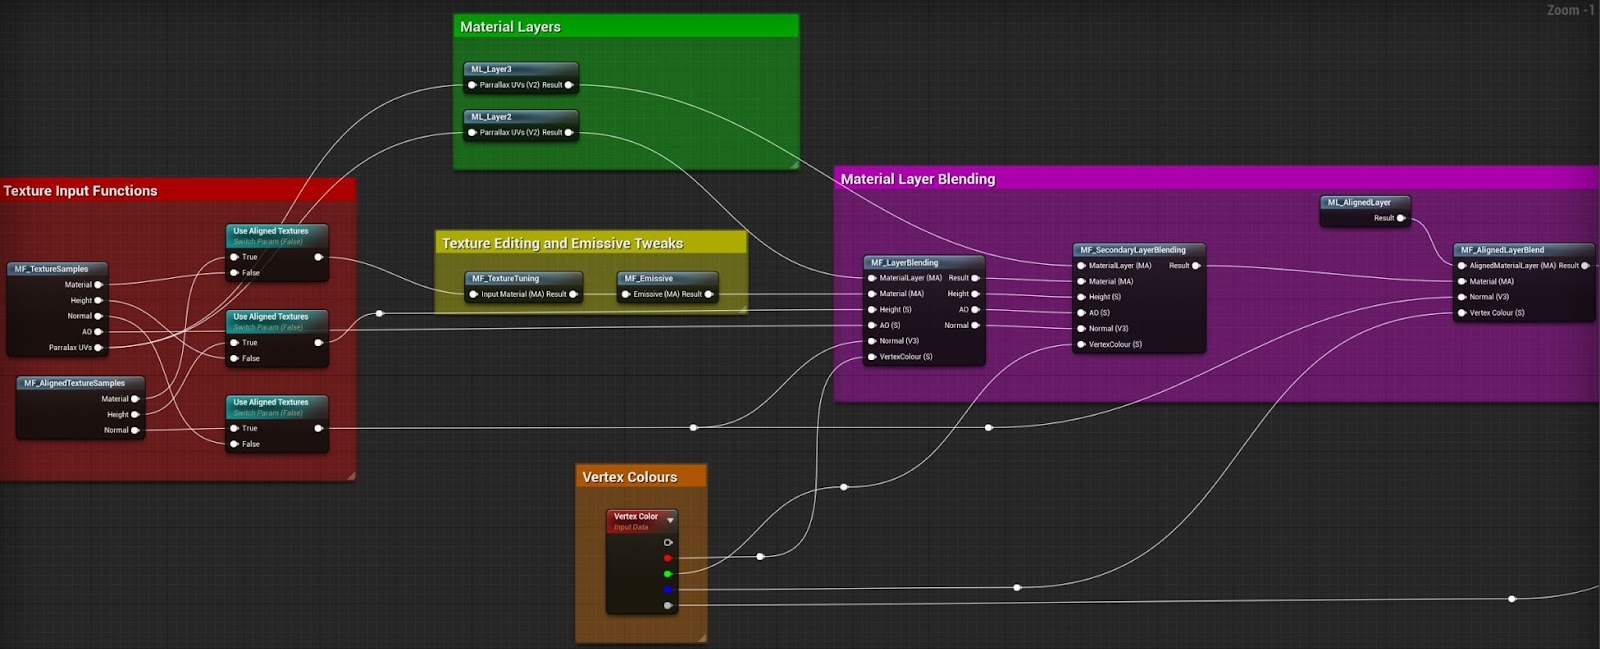
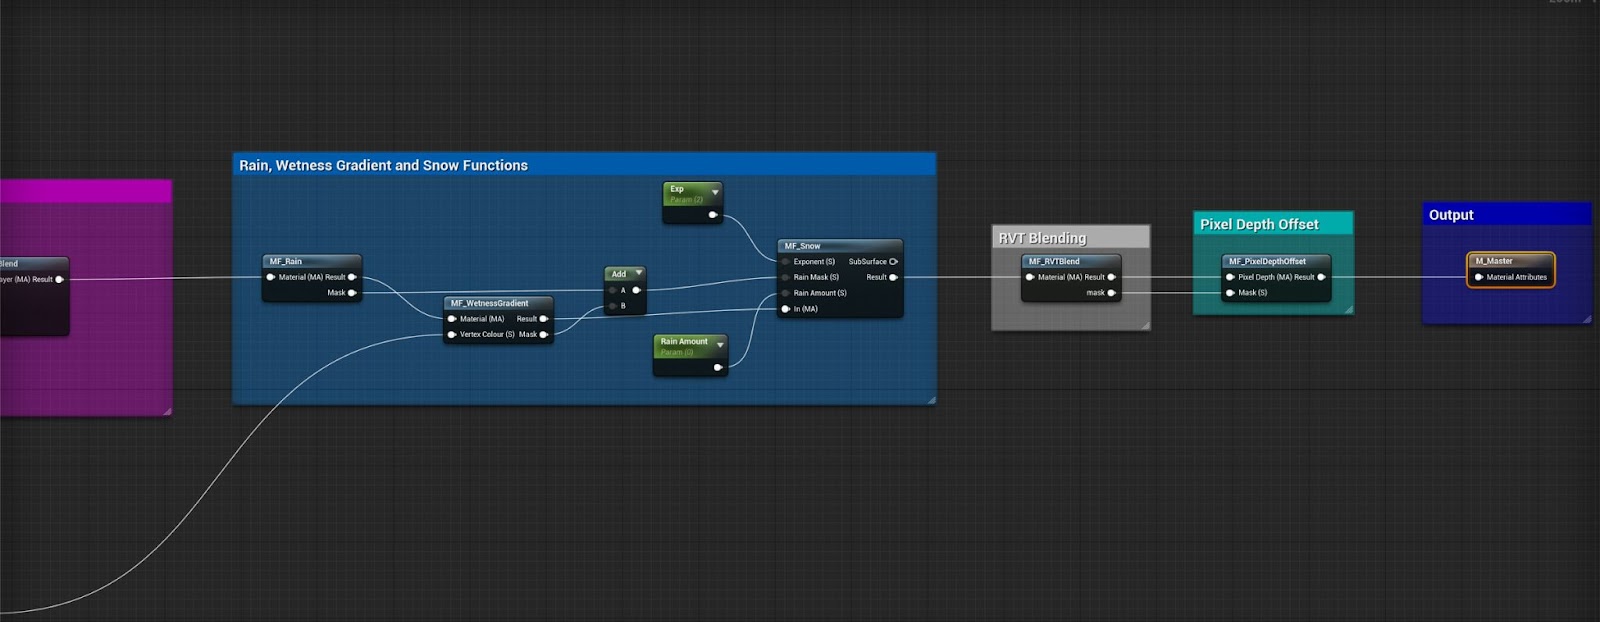
My master material consists of lots of different material functions which means that I can plugin and remove functions at any point in the graph very easily without having to rearrange lots of nodes. An example of one of my layer blending material functions can be seen below. I use static switch parameters to control which method of blending I should use.
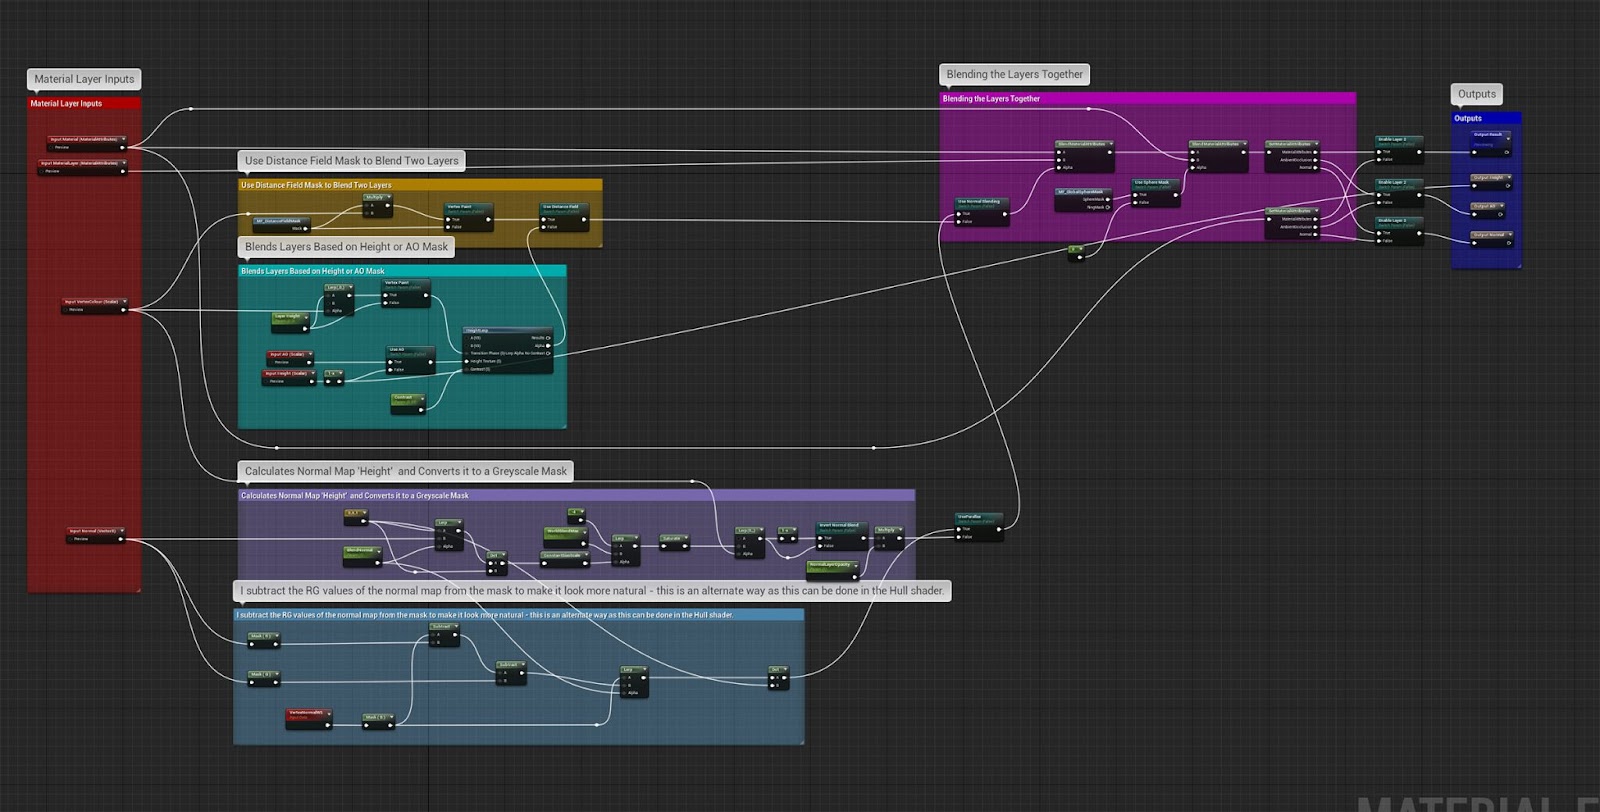
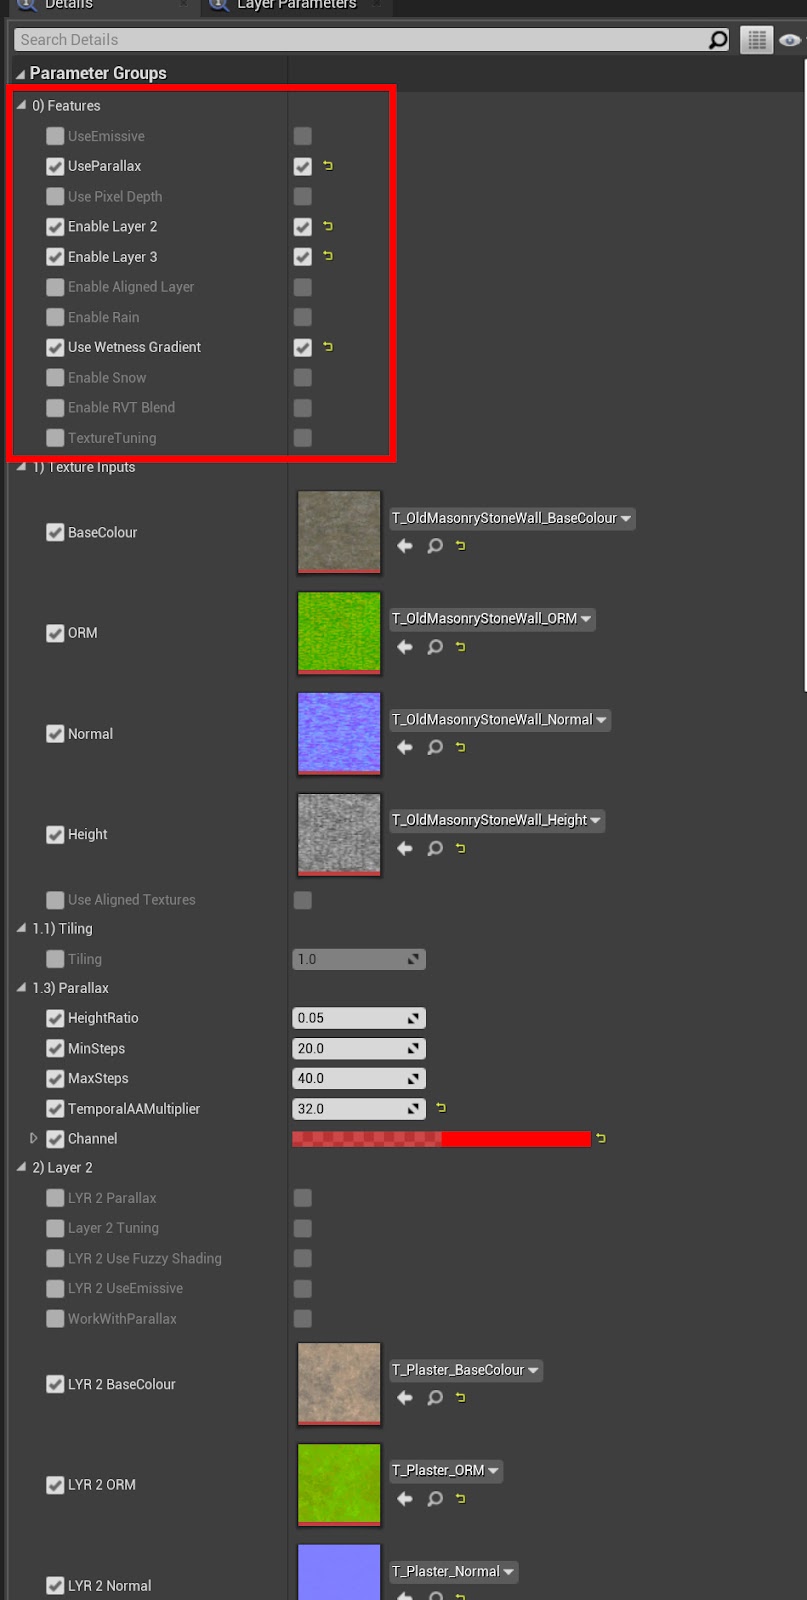
At the end of each of these functions, I always include a static switch parameter to be used as a ‘feature switch’. This means that I can avoid having an overly complicated material instance from the get-go and I can enable each feature independently if I need to – it also means that I can make the material as optimised or as complex as I need it to be:
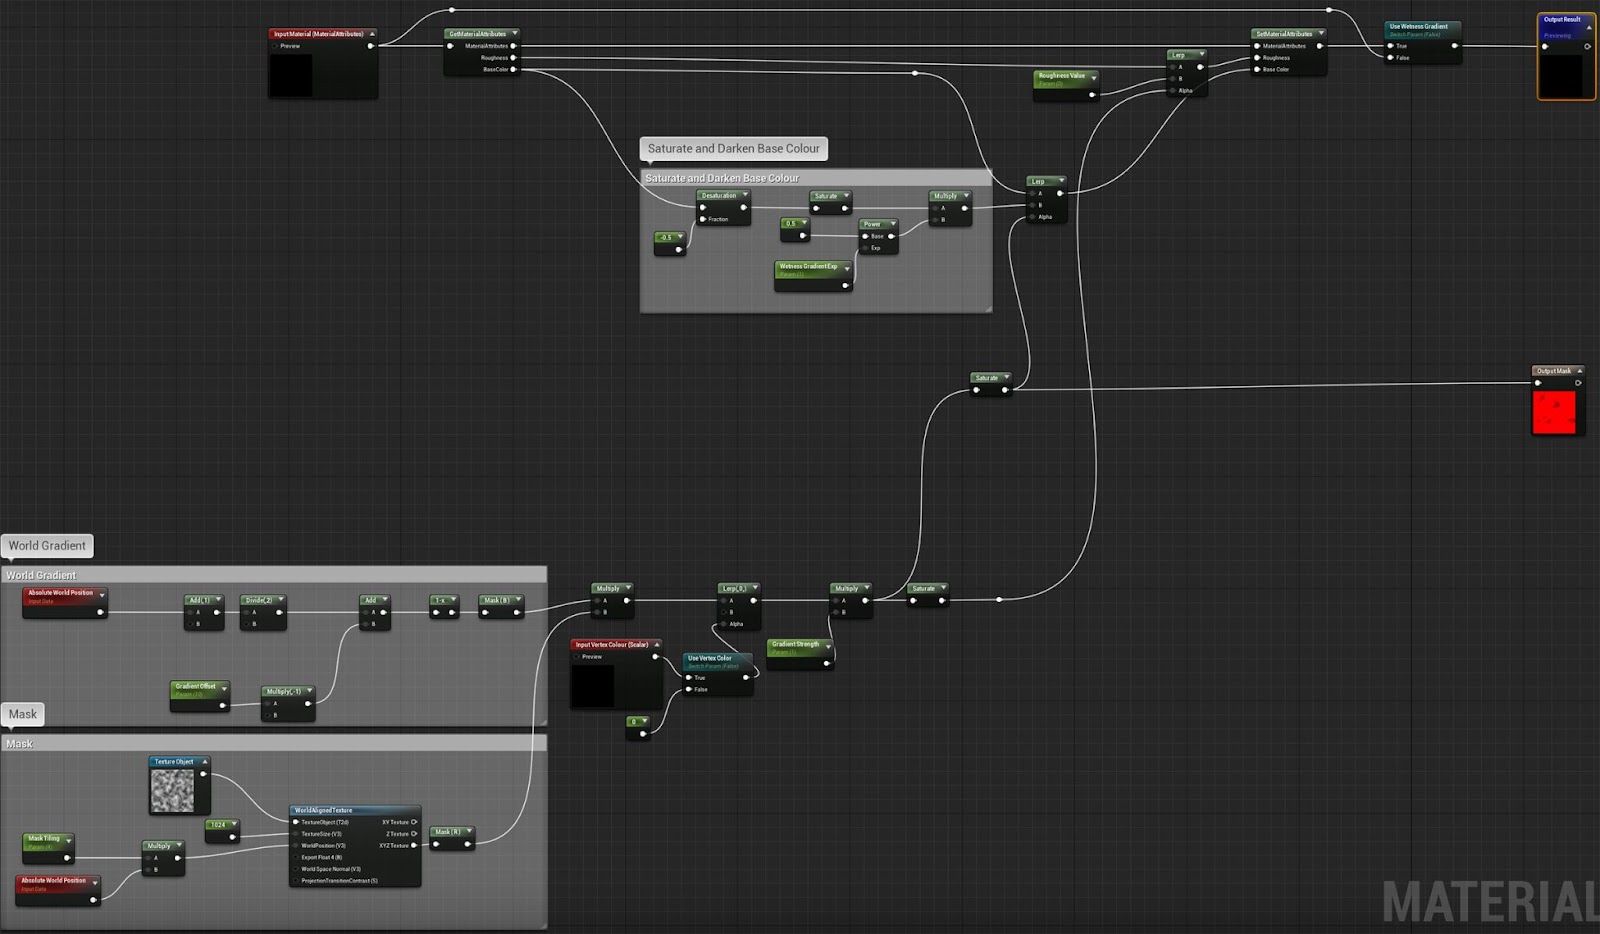
One of my favourite material functions I have made is also one of the simplest – the wetness gradient. It creates a masked gradient based on the location of an object in the environment, and then saturates and darkens the base colour and lowers the roughness value of the affected areas. It is great for adding a bit of roughness variation to the scene and I can use it to fake the appearance of meshes becoming wet near the river.
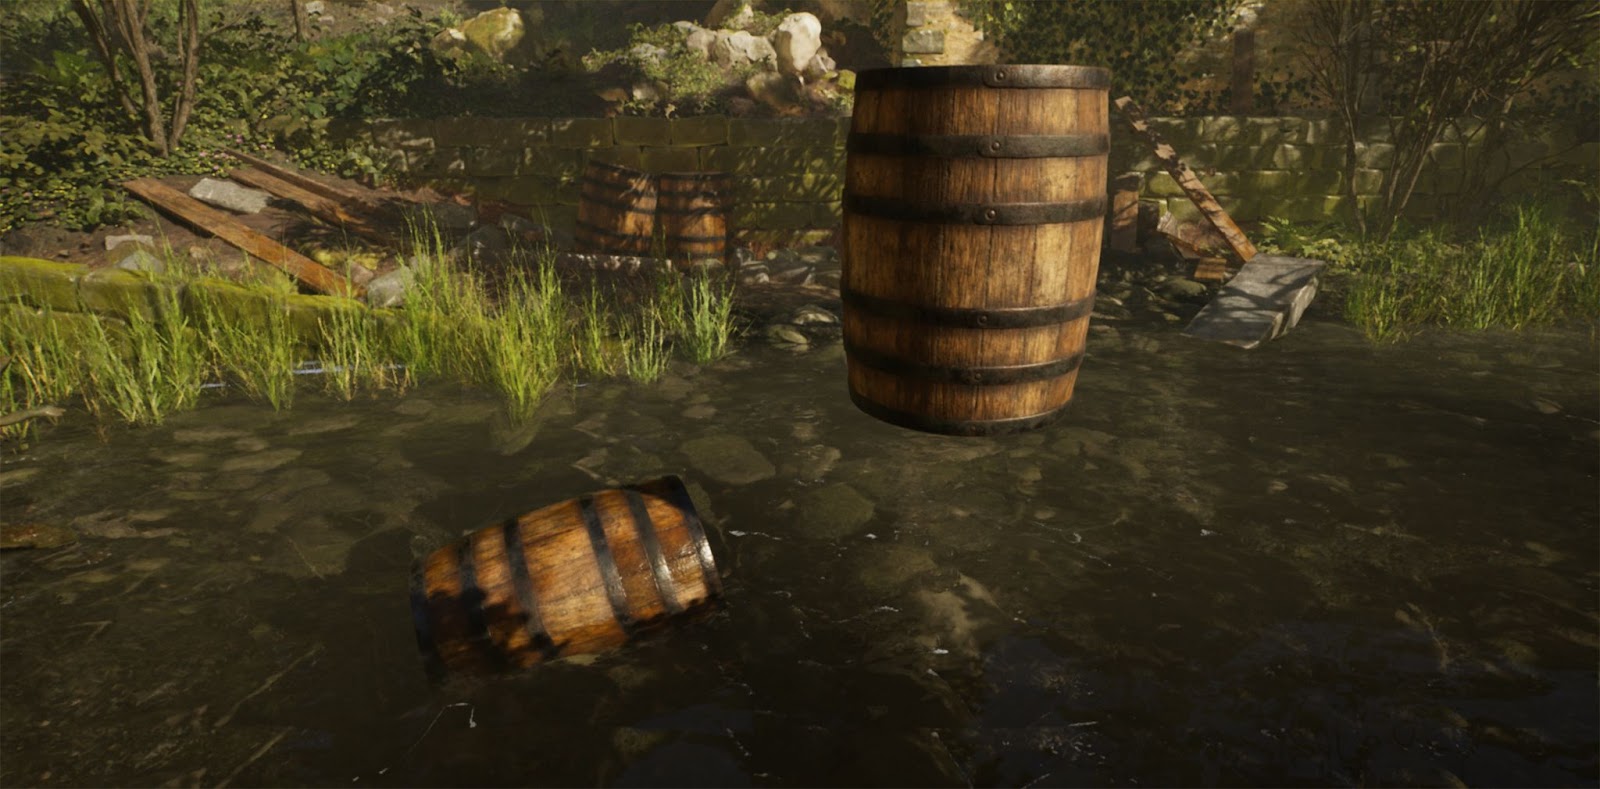
You can see the wetness gradient in action below, both barrels have the same material applied:
One of the best things I learnt during this project was how to achieve Runtime Virtual Texture blending. This allows me to blend meshes with the landscape without having to worry about which landscape layer material the mesh is blending with – it works automatically. This became an integral part of blending MegaScans assets into my own environment and keeping a cohesive overall look of the scene.

I found this video incredibly helpful in understanding and implementing RVT blending into my own material setups.
I learnt so much over the course of this project and would like to thank everyone who helped along the way, without the amazing feedback I received from everyone this project would not be where it is today! Although I changed the focus half way through, I am glad I did because I feel that this project really shows off my skills as an environment artist.
You can find more of Chris' work on The Rookies, ArtStation, Instagram and can contact him via LinkedIn.