How to Make a Realistic Animated Insect : From Pre-Production to Final Rendering
From pre-production to final rendering: Learn how to bring your own realistic 3D insect to life with animation.
From pre-production to final rendering: Learn how to bring your own realistic 3D insect to life with animation.

Marianne Autret is currently in her fourth year at ESMA Nantes in the 3D Animation Film & Visual Effects Program. Recently, Marianne was awarded a draft selection badge by our judges, who are constantly highlighting the top talent submitting their entries to the Rookie Awards.
Constantly putting her skills to the test, Marianne created a realistic animated insect and challenged her self with all aspects of the project from pre-production to final rendering. If you are looking for a similar challenge, this article is for you.
I realised this project during the first part of my 2nd year at ESMA in Nantes. It allowed me to put into practice all the knowledge we had acquired during our studies as a generalist CG. I had to create this project from A to Z: starting with the pre-production, modeling, sculpting, grooming, rigging, texturing and animation, to compositing and final rendering. The production method was very similar to the one used in animation studios.
The students were all given the same assignment: to create a realistic, animated insect in its environment. We had the freedom to choose the insect we wanted to work on.
I chose to work on the damselfly Calopteryx Splendens, which I had already had the opportunity to observe during my holidays and which had always fascinated me since that day.
In this article, I will explain, step by step, how I managed to get to my final render with very little experience in some of the software that was used.
The list of the software used in this project is quite short:
Before starting a project, it is imperative to do some research in order to know the subject. Indeed, if we want a rendering that is as close as possible to reality, it's very important to learn about all the elements that will constitute our image.
Personally, I informed myself about the damselfly Calopteryx Splendens to make a 3D version of it, that would most resemble it.
I have done research to know to which group of species it belonged, its history, in what way the damselflies were different from dragonflies, the differences between males and females, its dimensions, its anatomy, the origin of its colour, its distribution, its environment, its way of life, the months, the seasons and the time of day when it is most observable, etc...
To succeed in your project it is imperative to know your subject.
The Calopteryx splendens, is a species of odonate insect of the damselfly suborder, which is quite widespread in Europe and is generally observed along slow and sunny rivers.
For this project, I chose to represent a male for its beautiful colours.
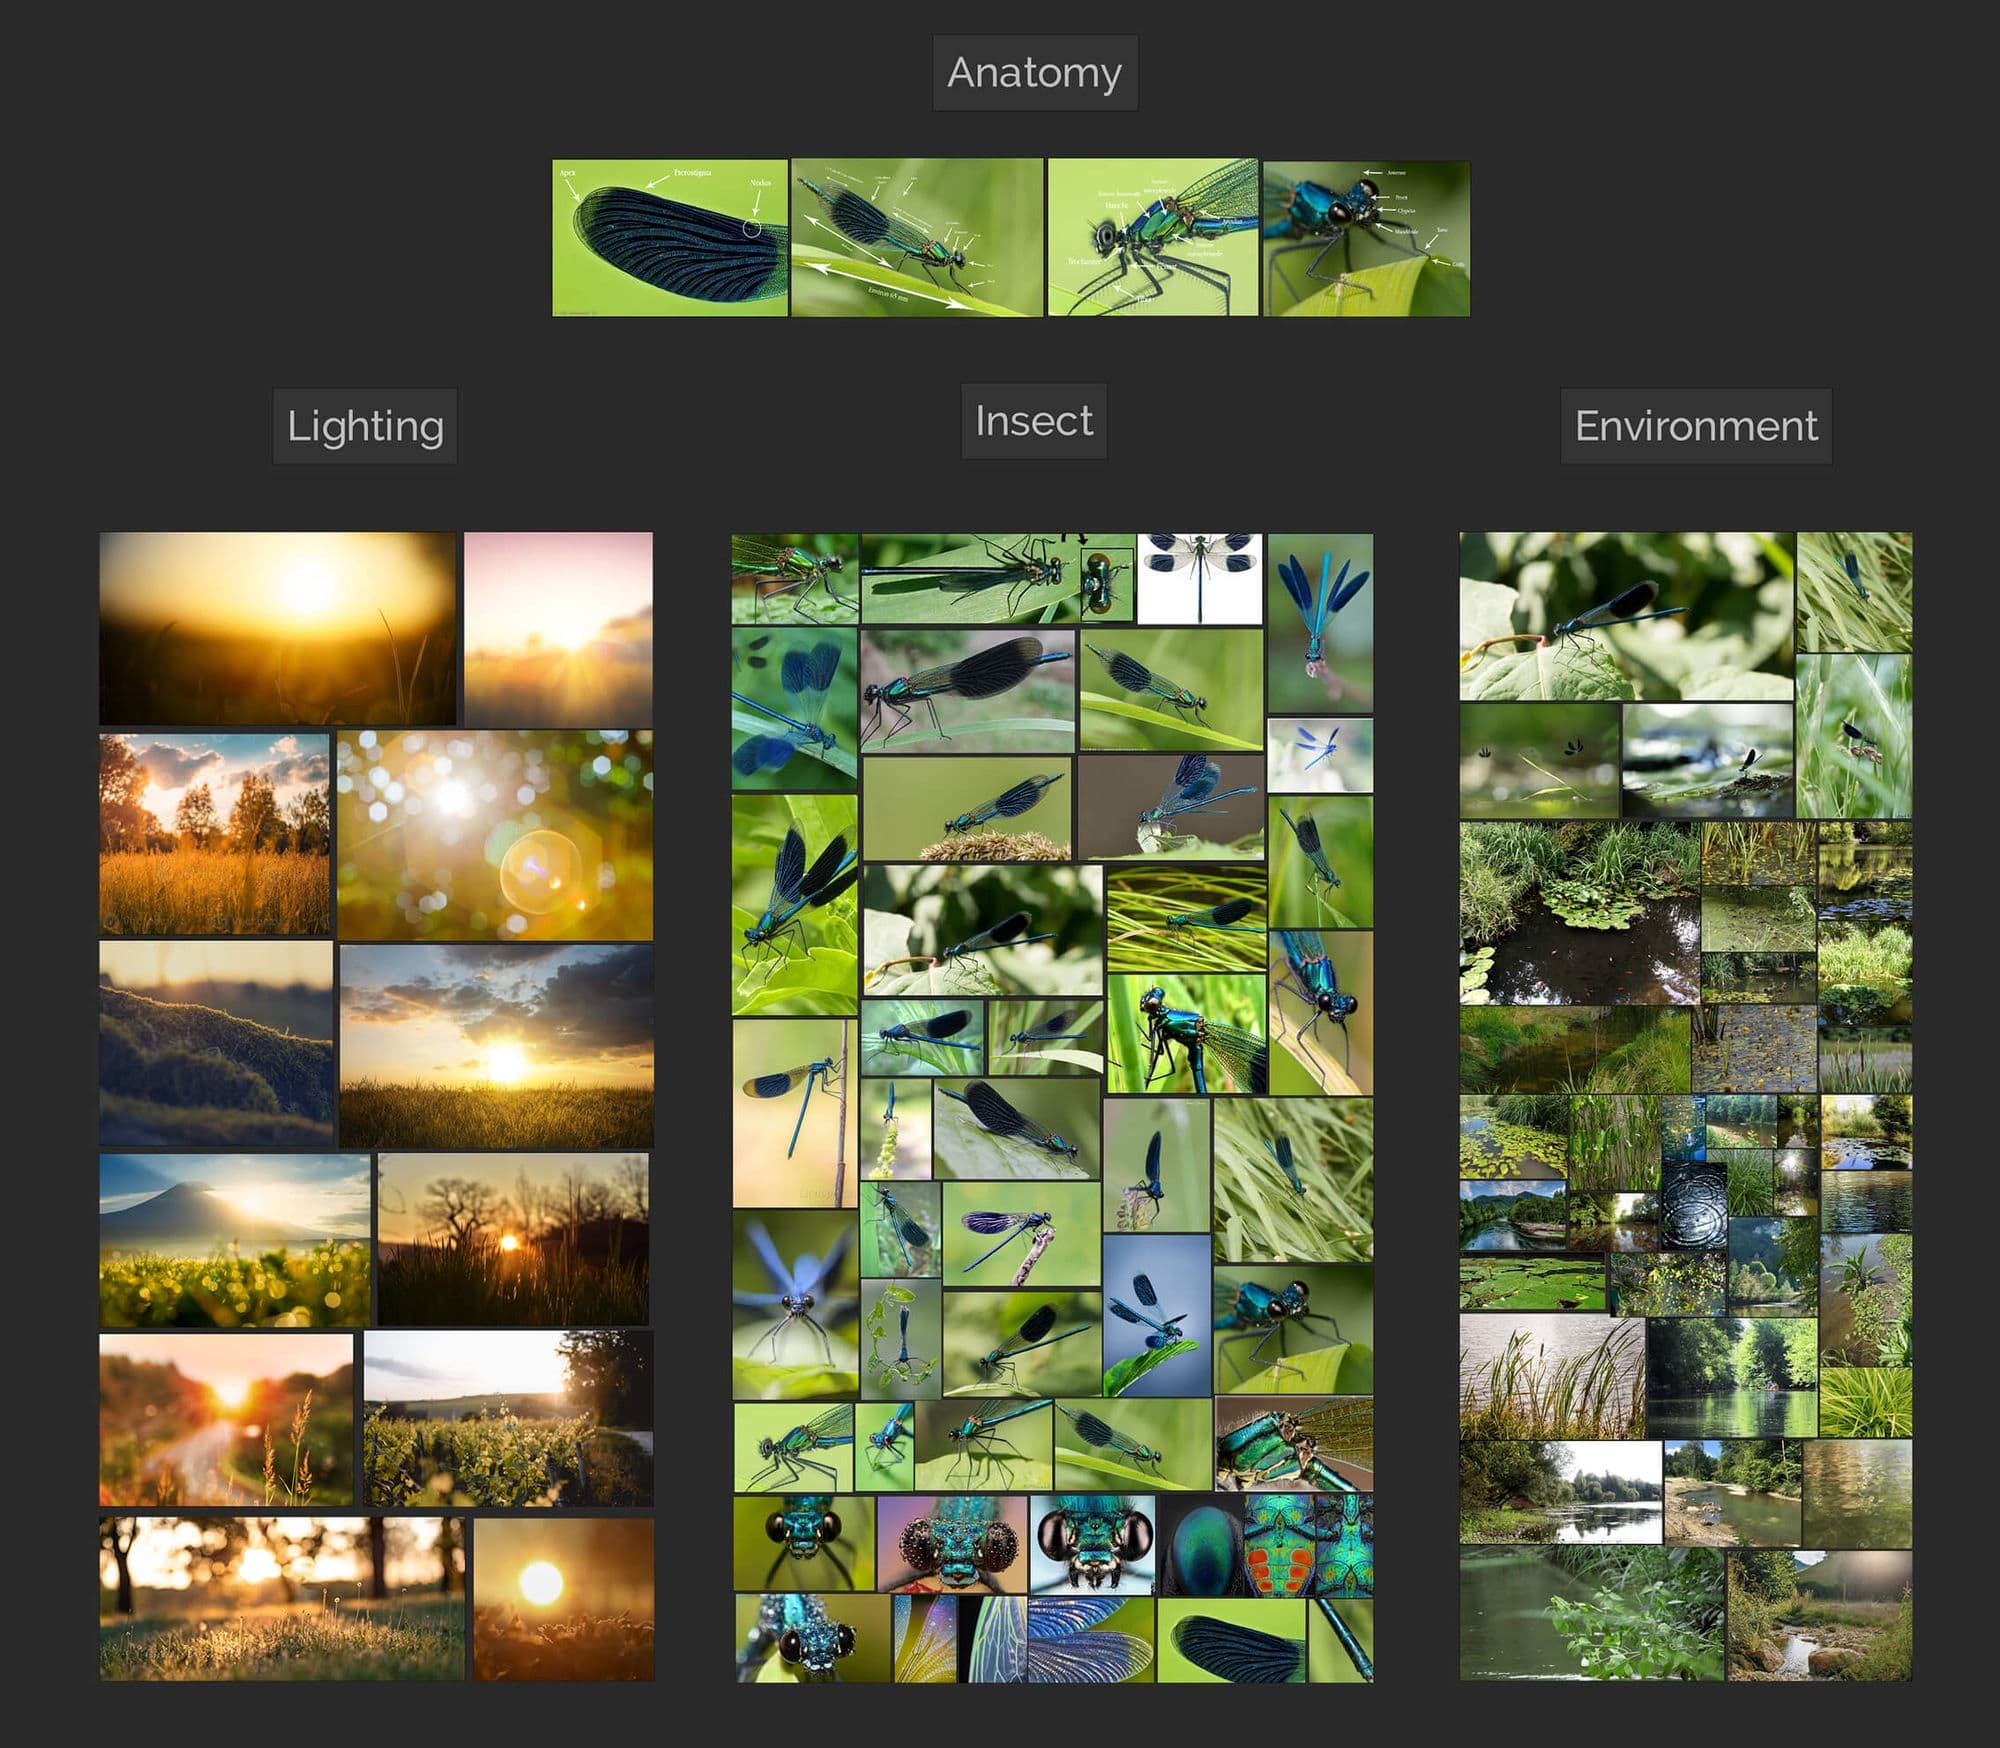
Gathering references is a very important step in the creative process. A CG artist needs to constantly have visual references in front of them to get as close as possible to the desired result. It is important to always have references in front of you for each step of the creation process.
For this project, it was essential that I gather photos of the insect, its textures, its environment, lighting references and also videos of the insect in its environment, so that I could represent it as close to reality as possible. I insist on the fact that in the case of an animal or character, it is necessary to gather a maximum of photos from all possible angles, in 360°, to be able to do the modeling correctly afterwards.
For that I used Pureref, which is very good to gather references. Here is my board below:
In order not to start blindly on the project, I did some drawing exercises to get a feel for my insect's anatomy before starting in 3D.
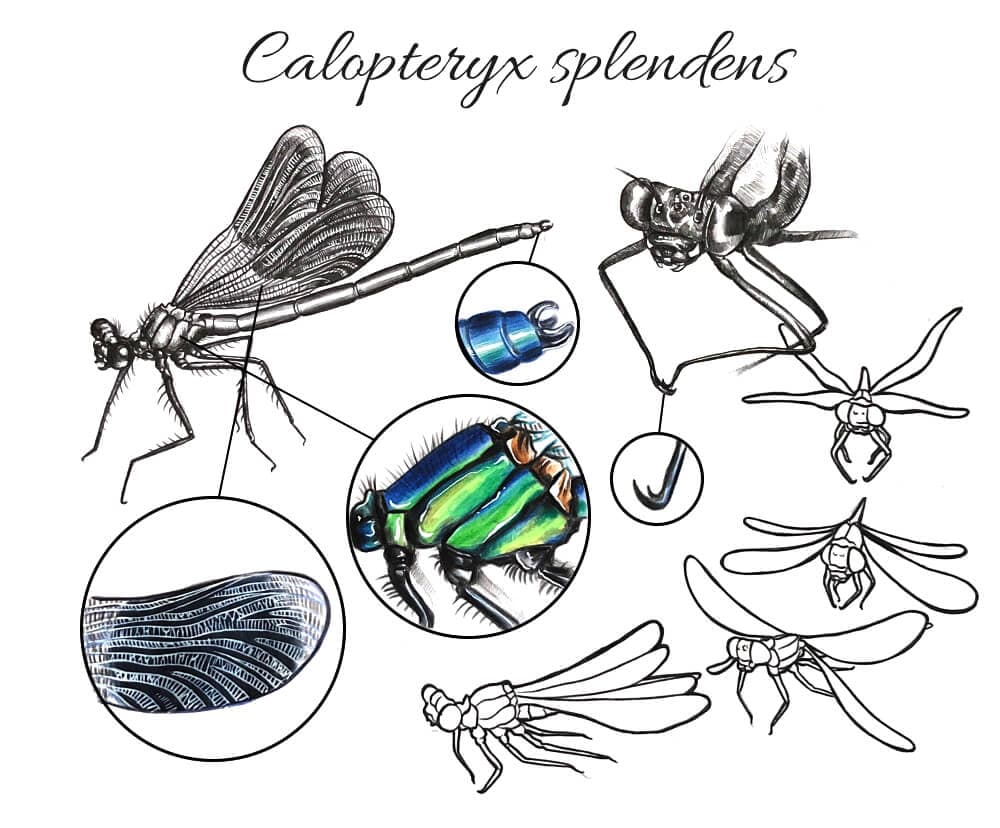
Then, I made a colour illustration as close as possible to what I had in my head. I wanted to transcribe my intention as much as possible. So I thought about the framing, the shot, the position of my insect, the environment around it, the light etc...
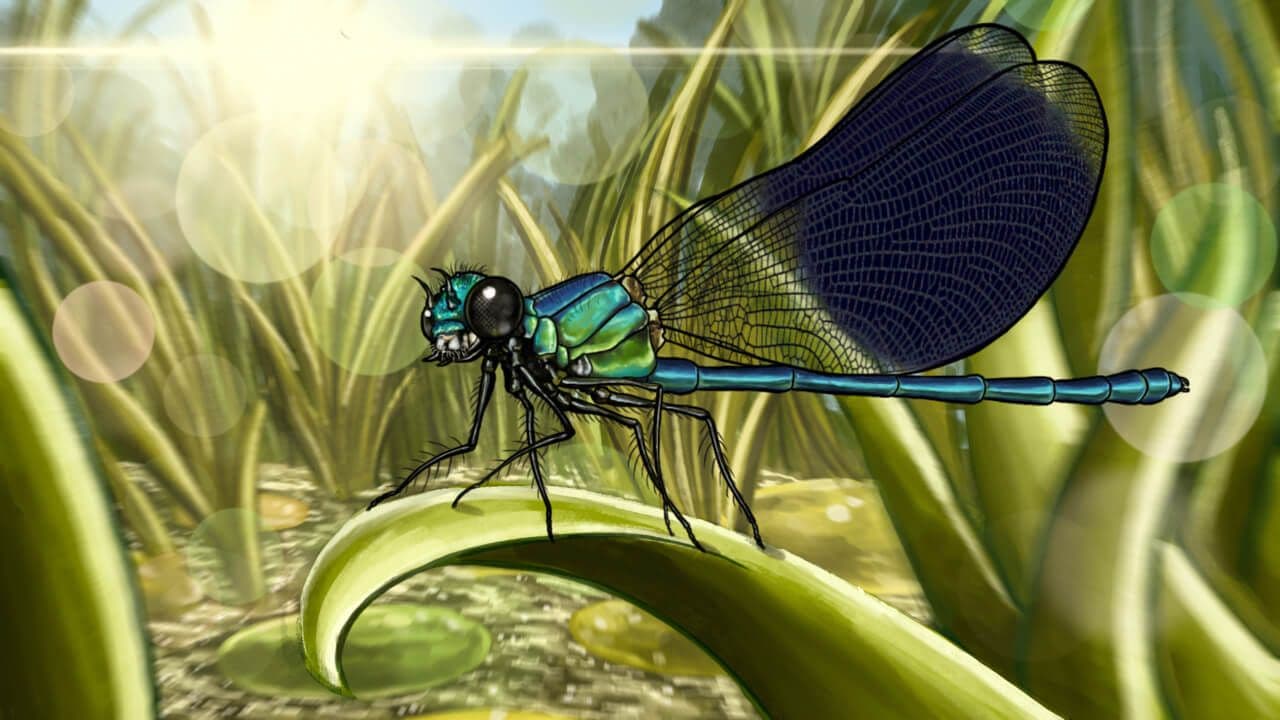
As 2D is always very different from 3D, I also made a basic 3D layout with very simple modelisations and photos, just to get an idea of the space and the perspective.
Defining your intention in sketches or a 3D layout is a real time saver for the next steps.
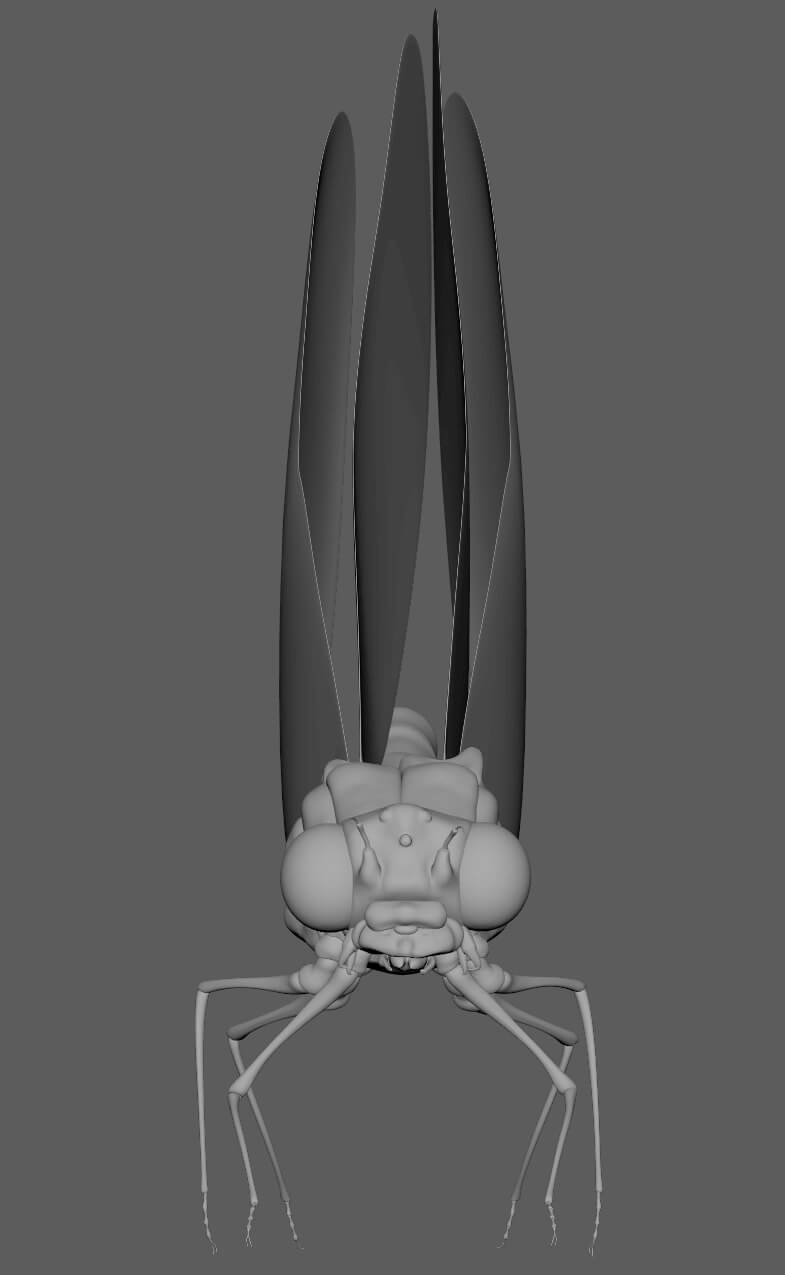
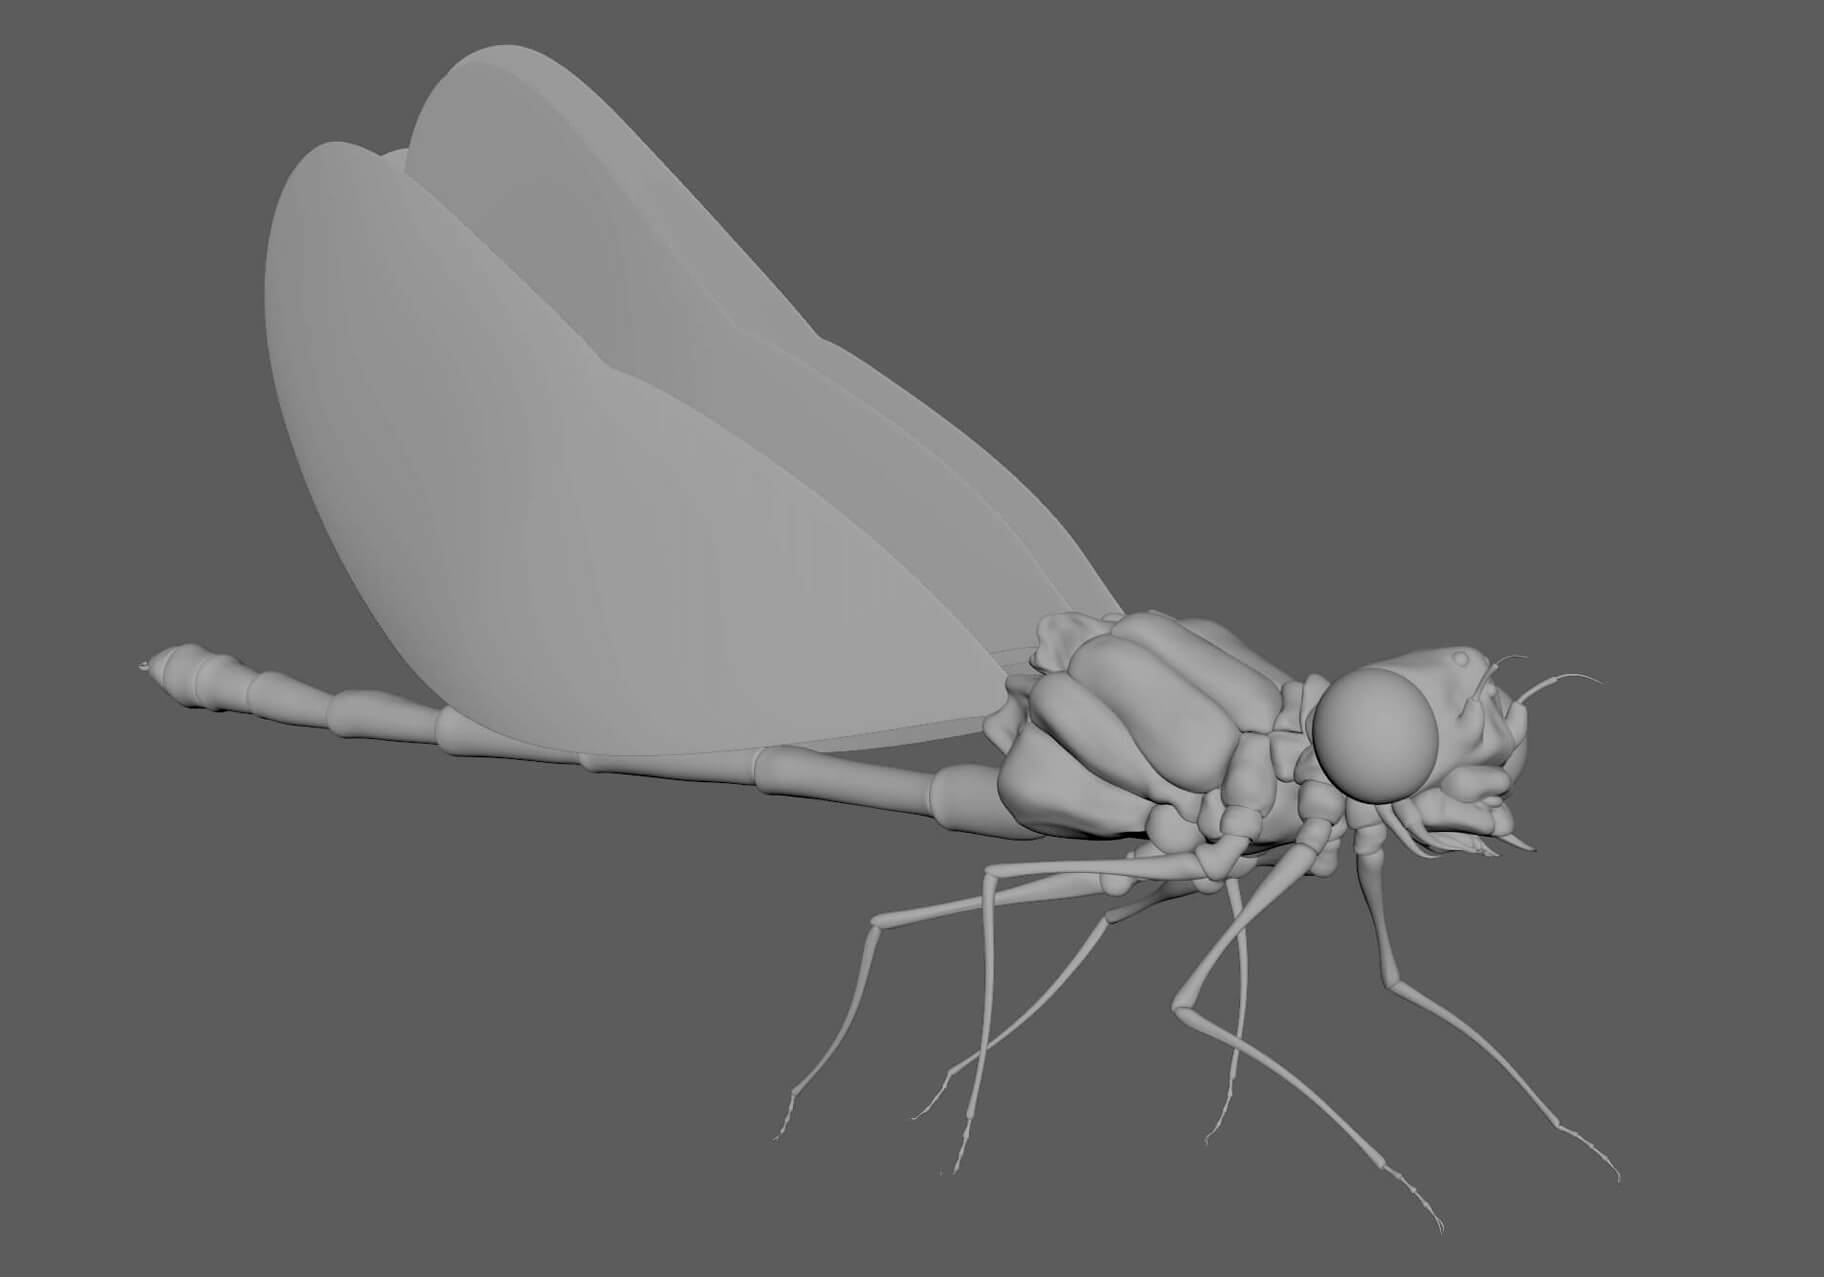
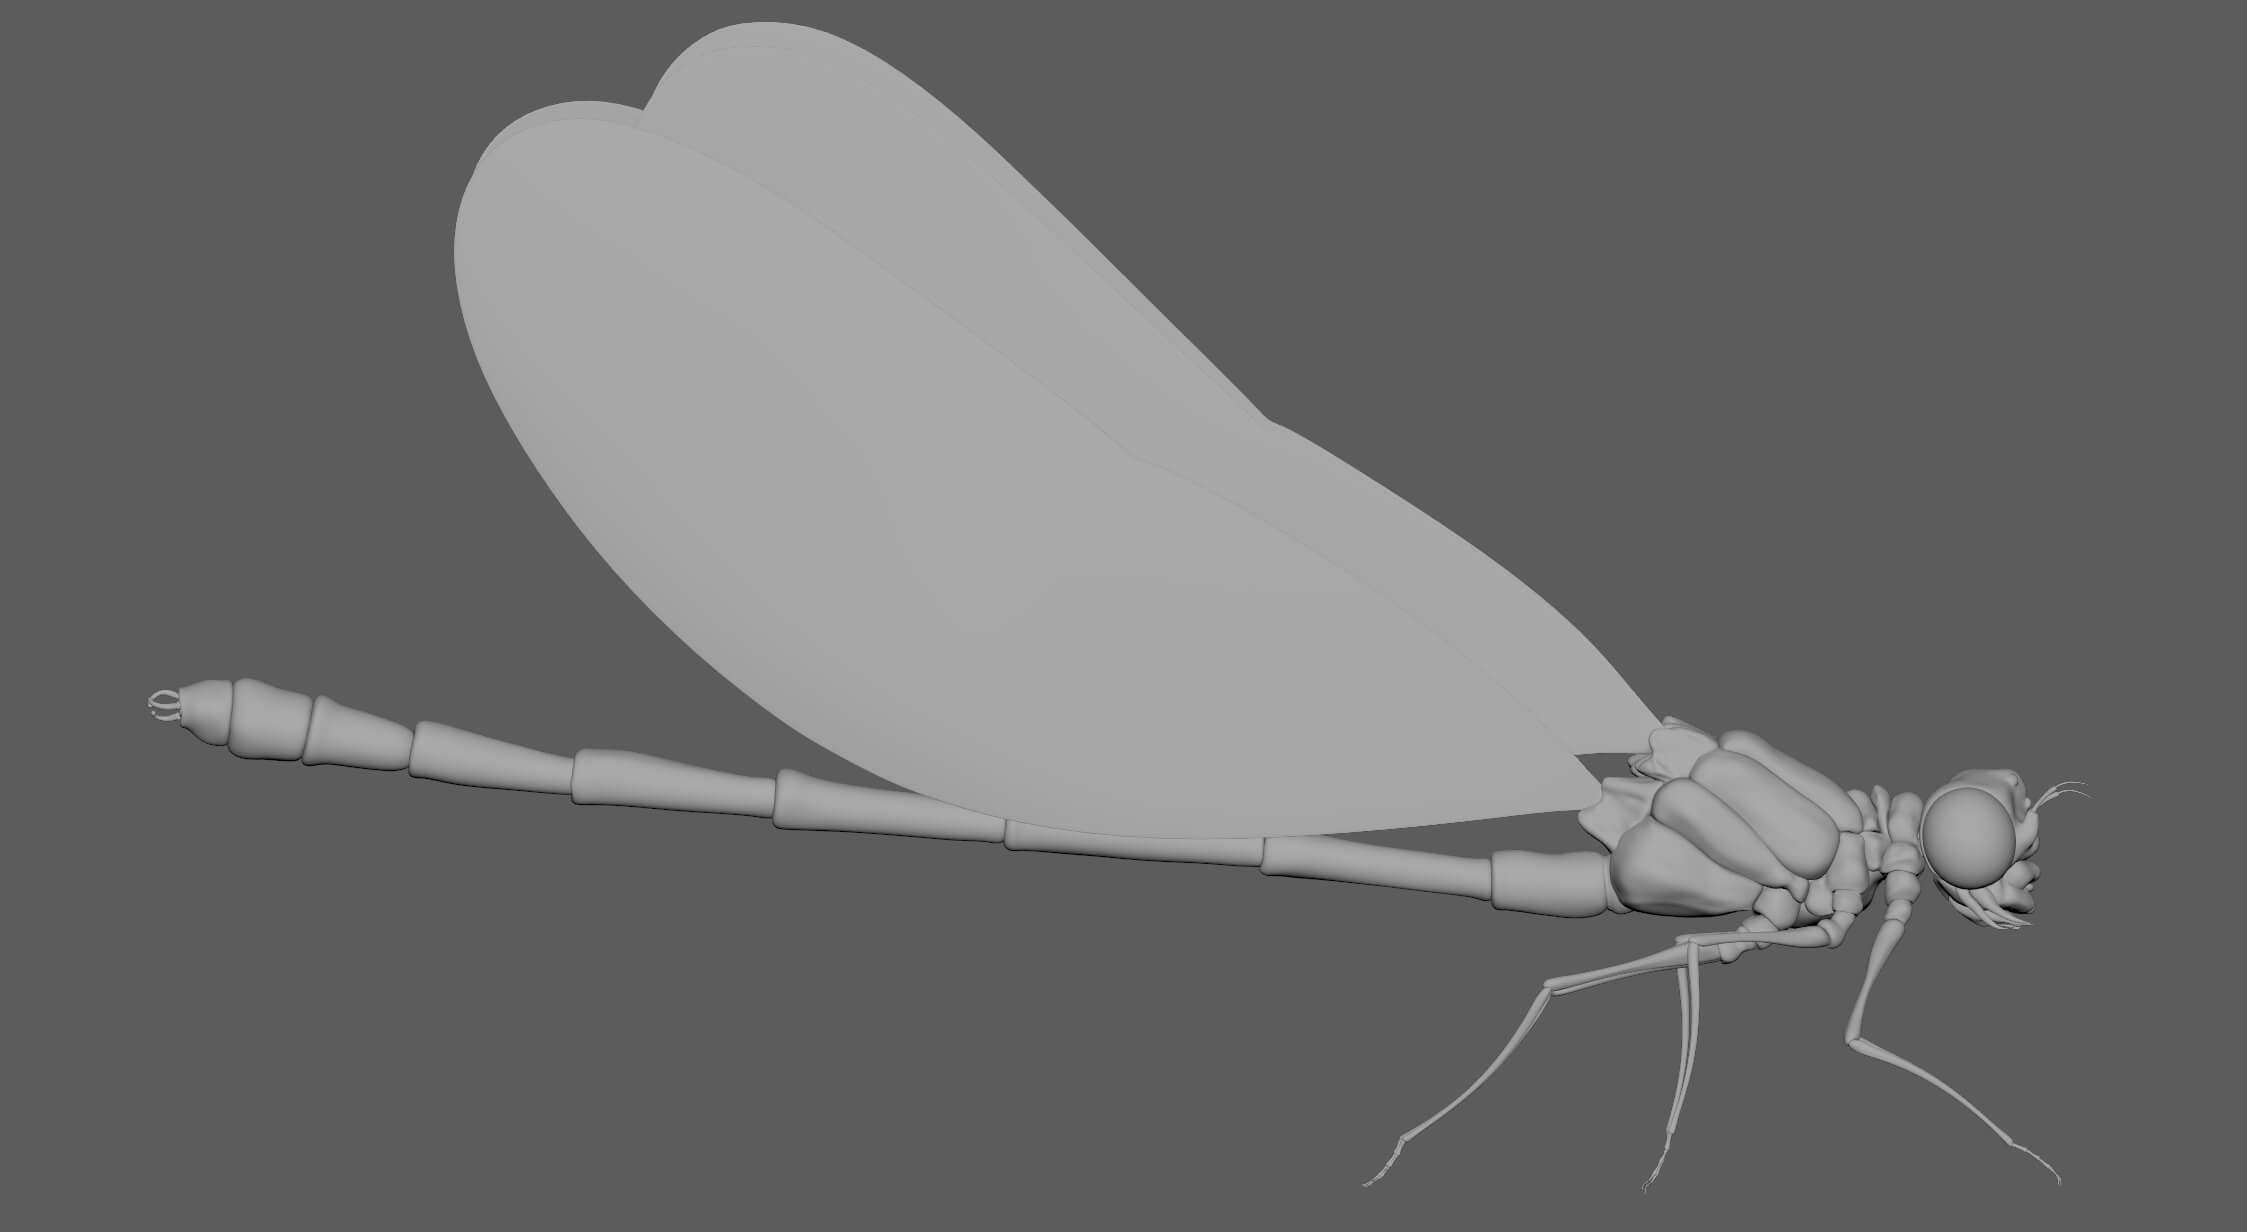
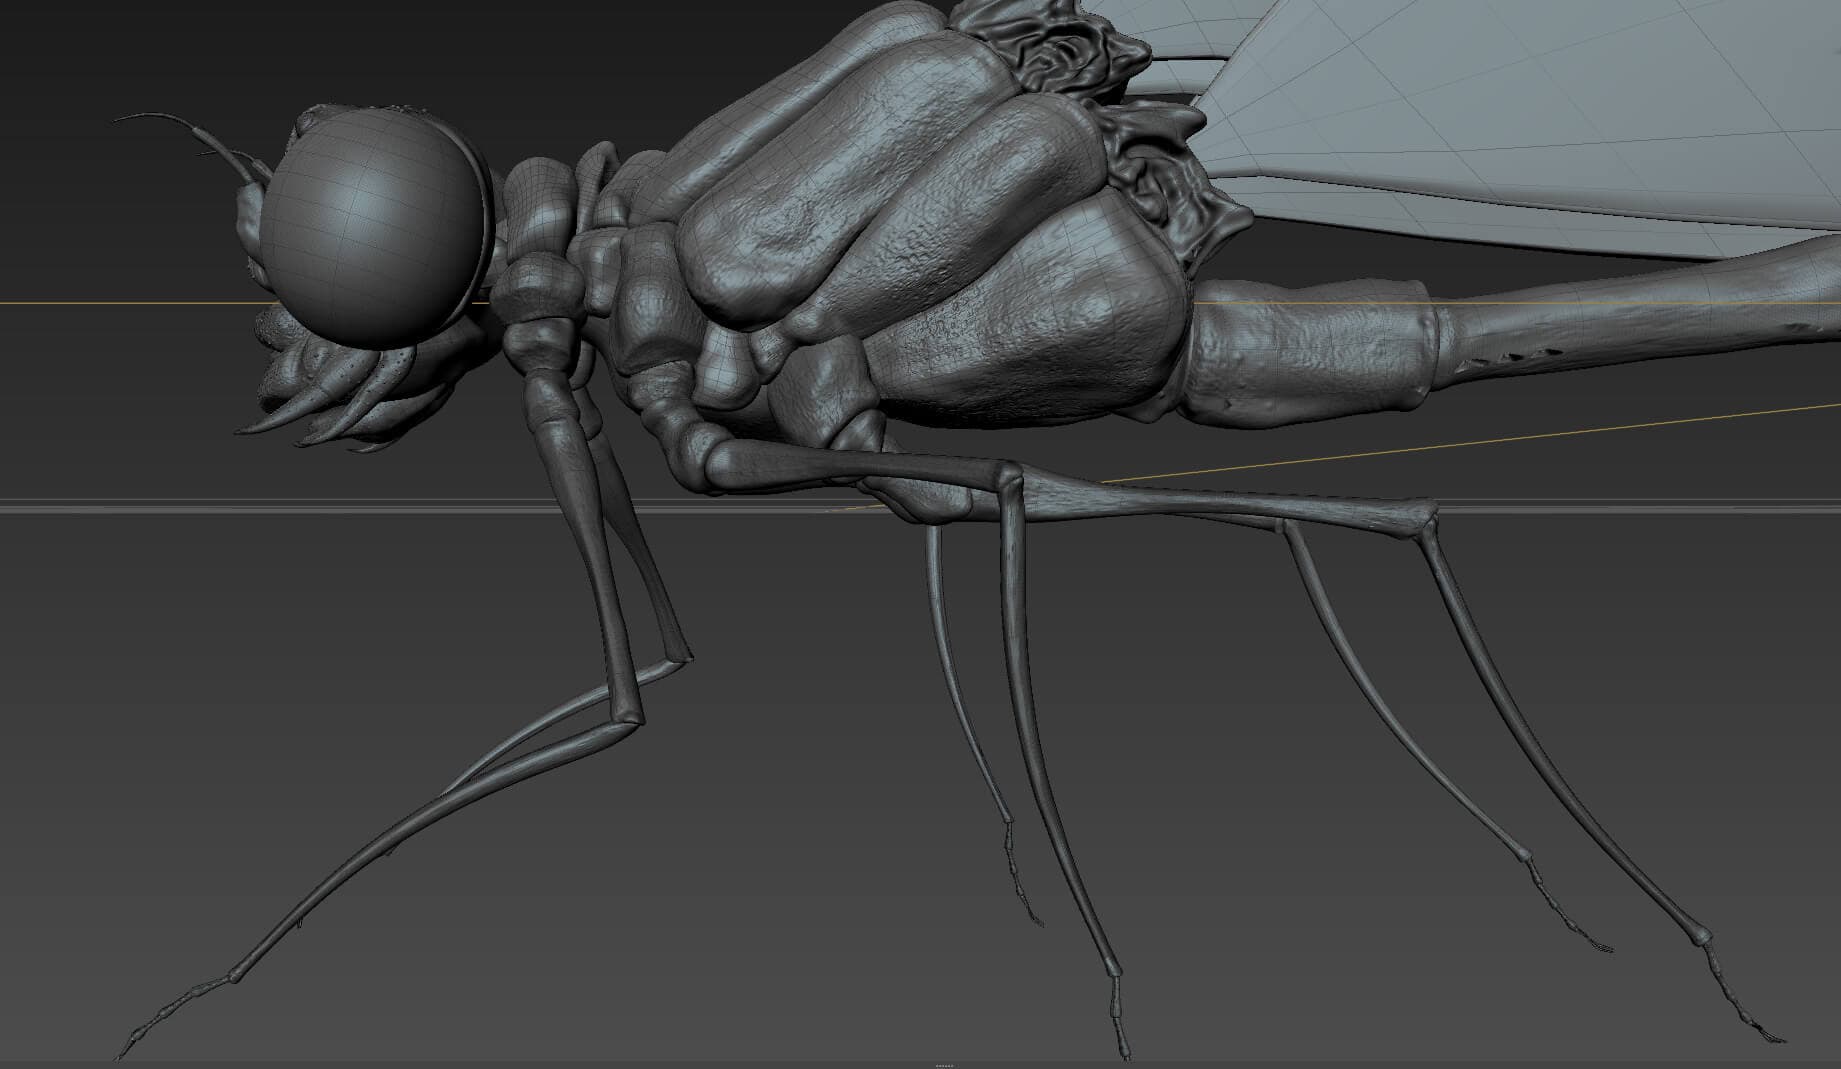
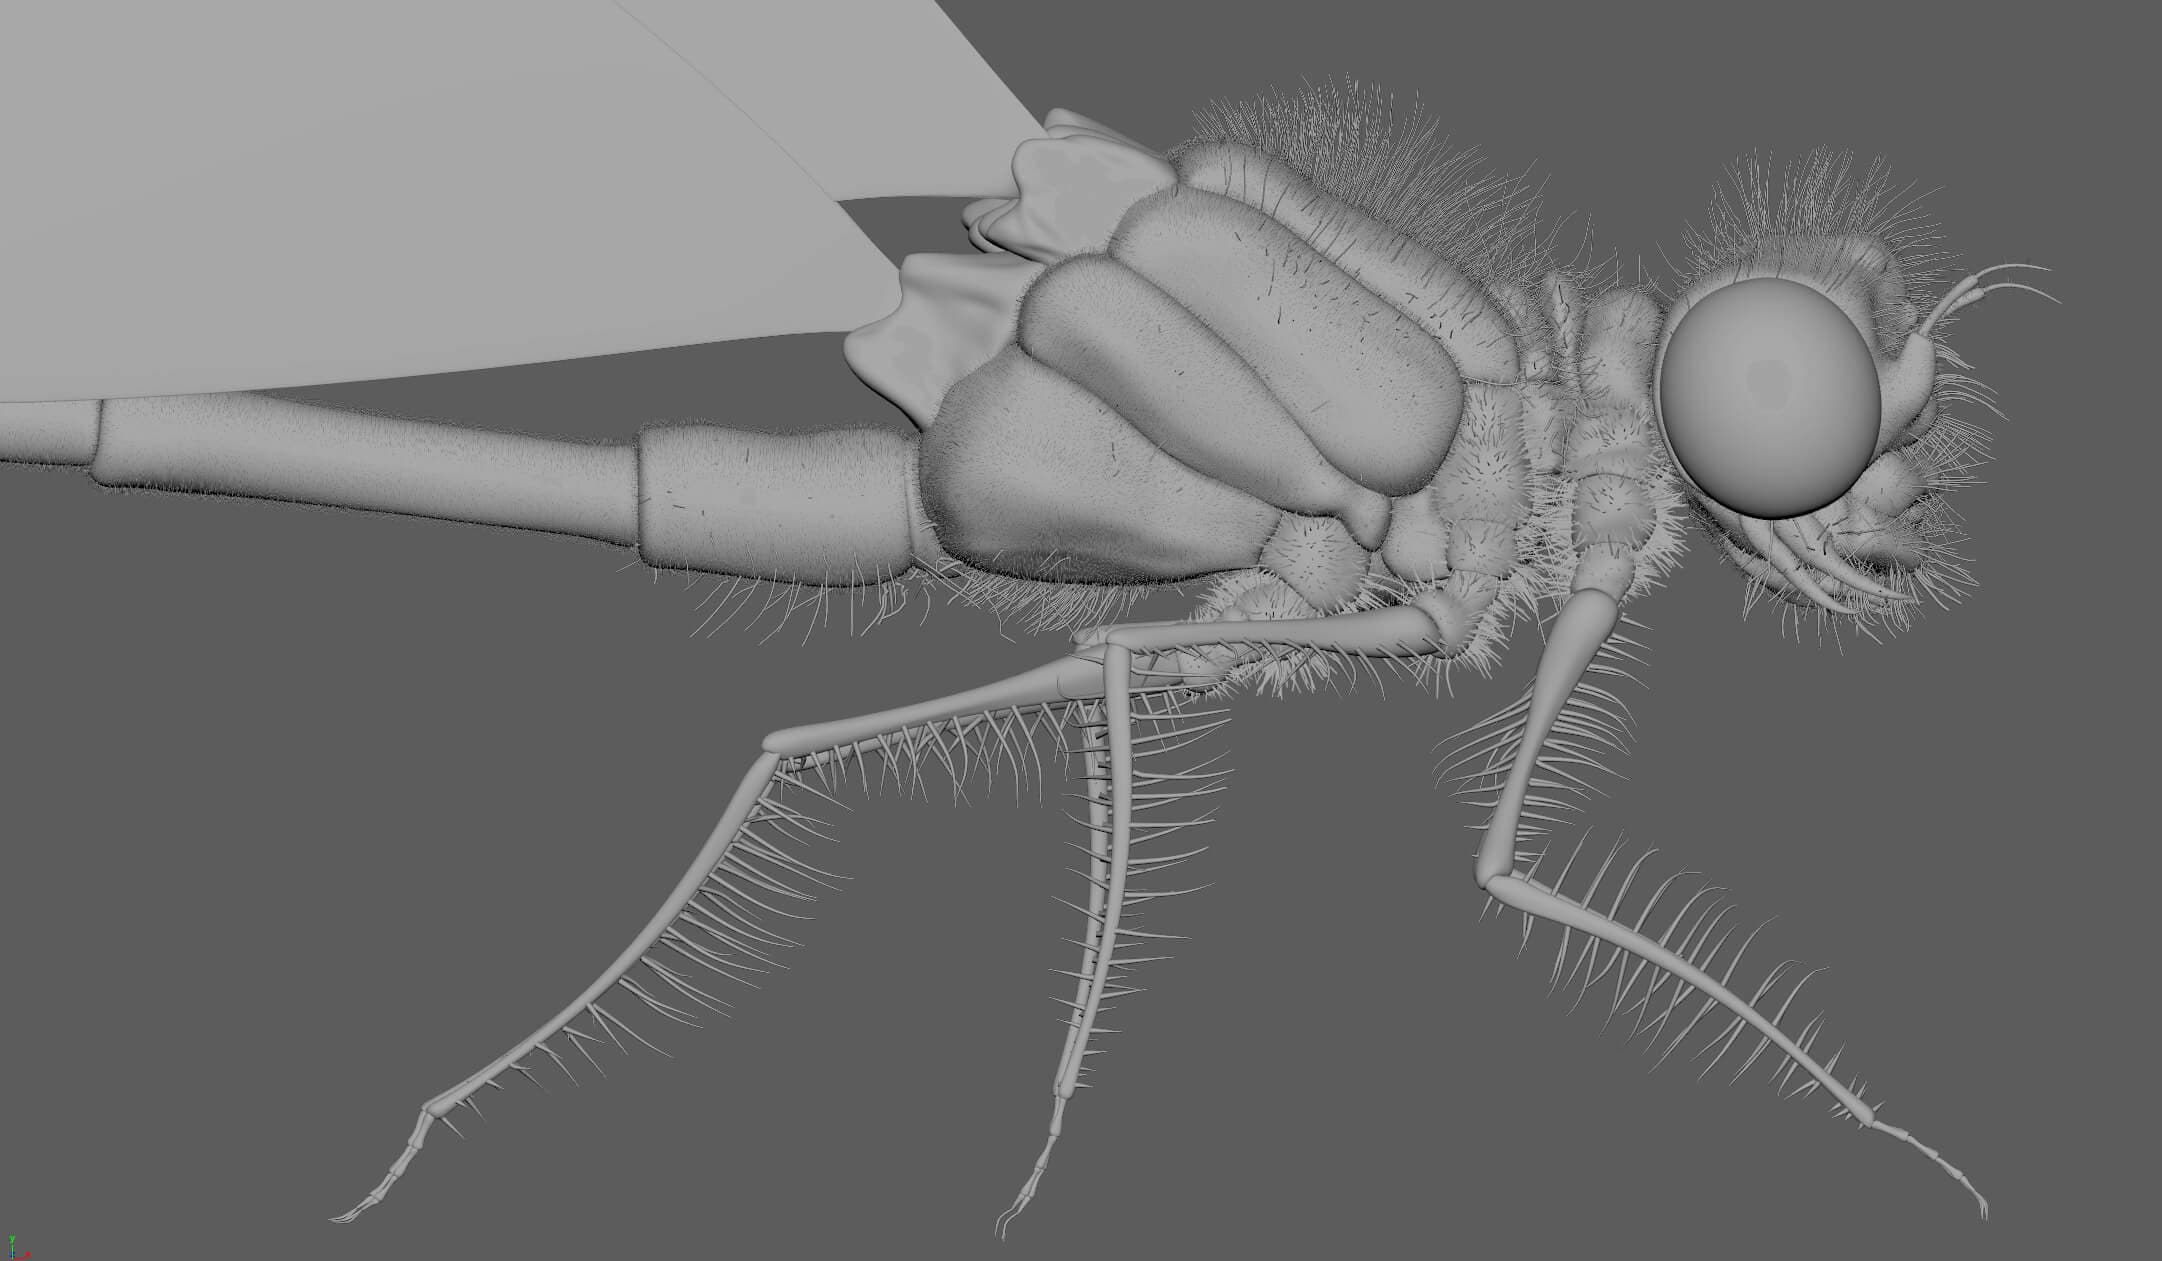
I did the modeling of my insect entirely in Maya. In my 2nd year I had little knowledge of sculpting software so I only used Maya, starting with simple shapes.
I pasted reference images of the front, profile and top (at the same scale) on the orthographic views and modelled the different parts of the body by going back and forth between the different views. My insect was made of lots of little parts that fit together, which made it easier.
Don't forget to tidy up the outliner, delete the history and rename each of the parts, organisation from the start is imperative for a big project like this!
After modeling these small parts, to make them a bit more organic and lively, I subdivided them and used Maya's sculpting tools to deform them a little.
Having at this stage very little knowledge of retopology, I left my model as is. It could have been cleaner but this did the trick.

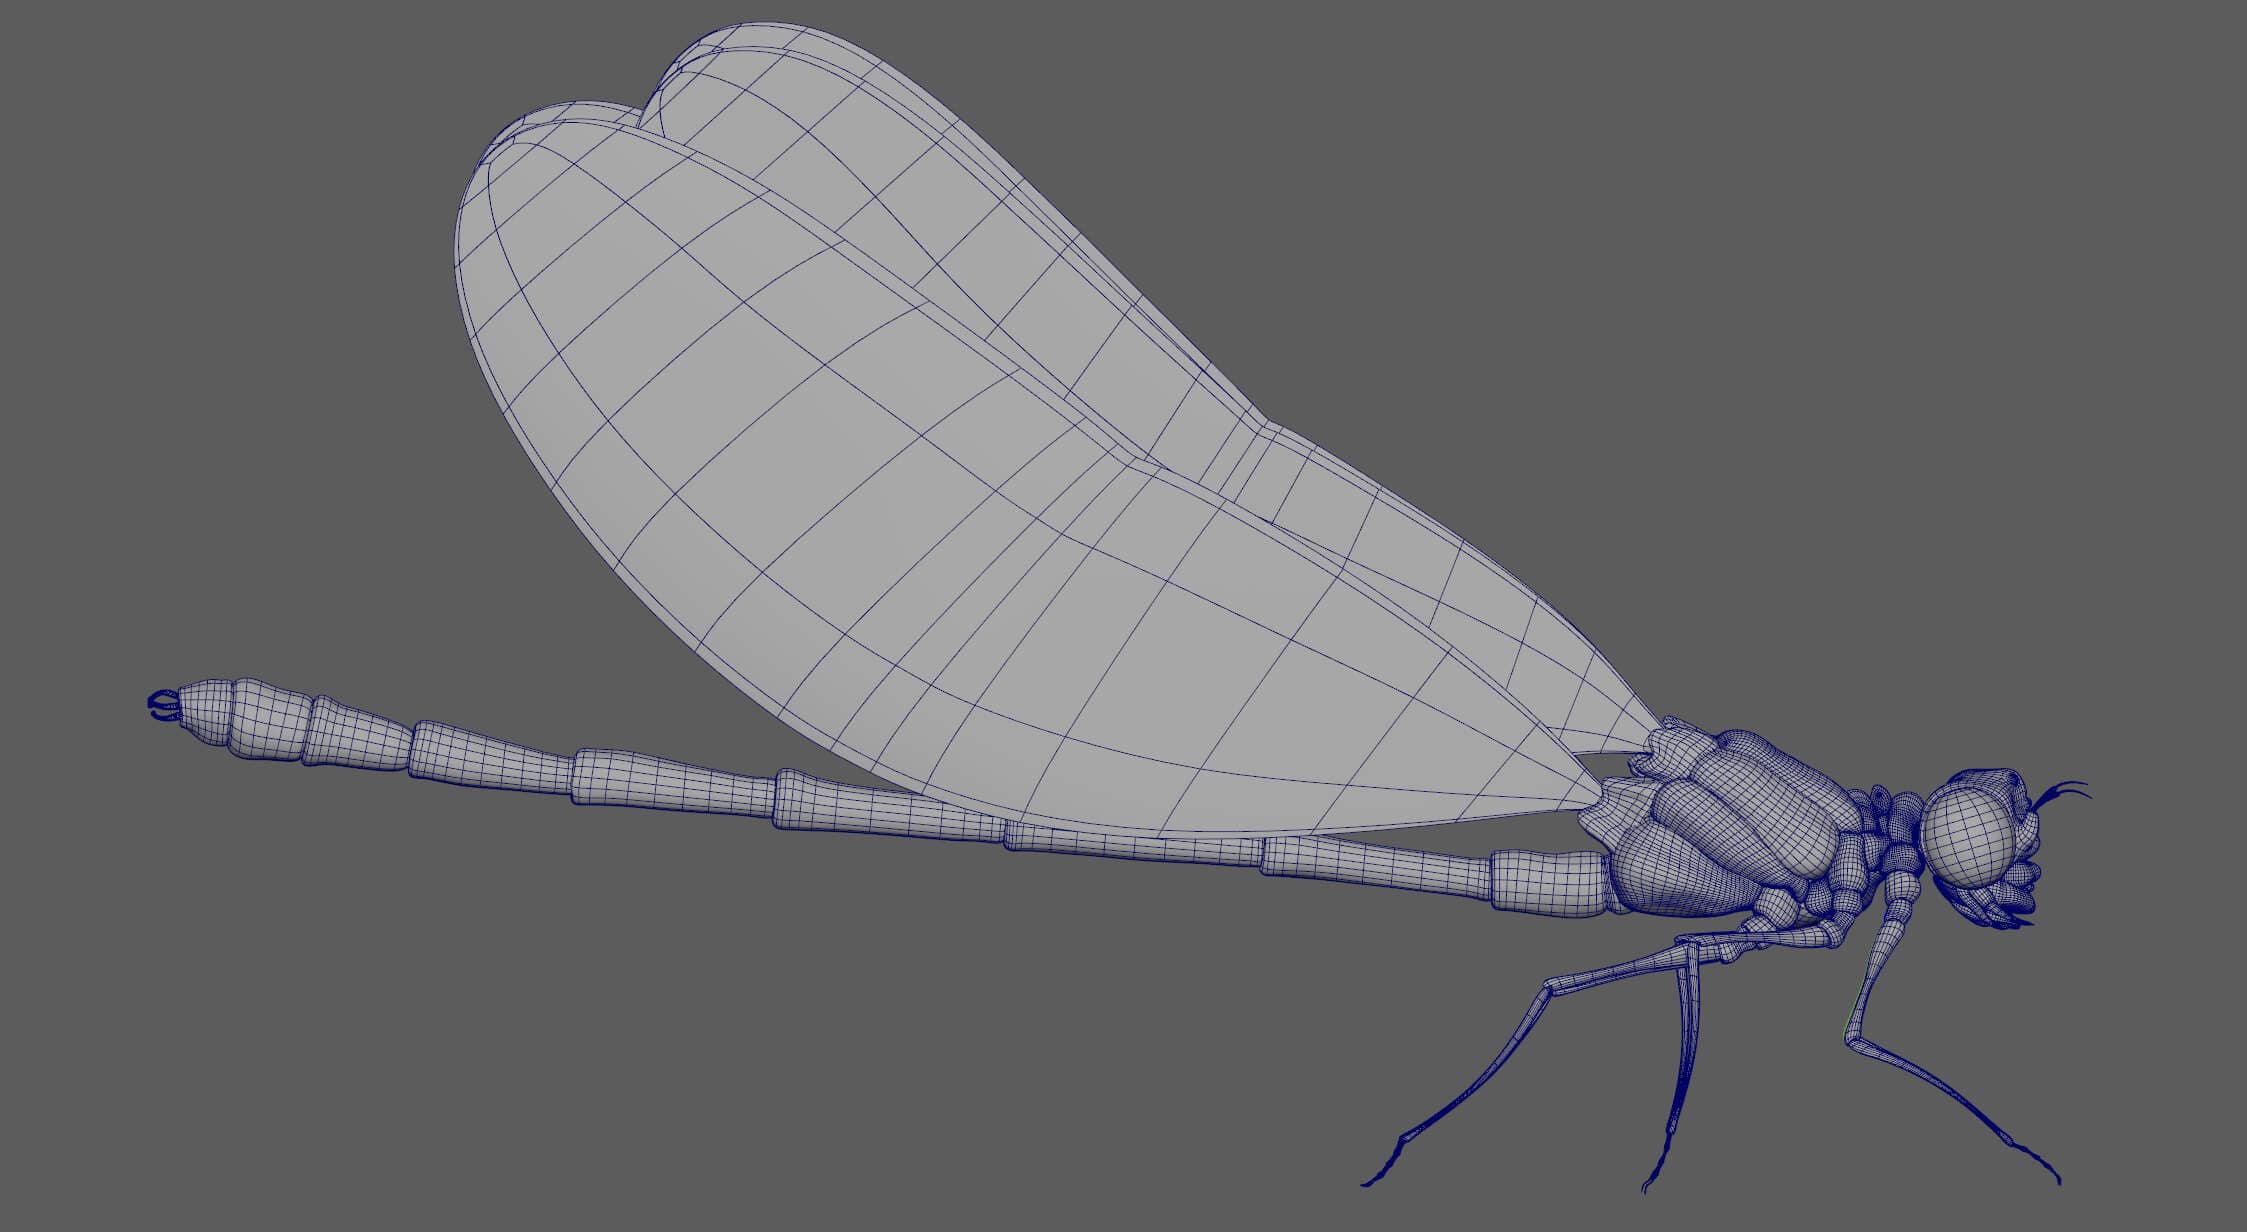
After doing this step, I unfolded the UVs in Maya's UV Editor.
When the modeling was clean and the UVs were ready, I combined them in another scene in order to export the insect in OBJ or FBX.
I did all the sculpting in Mudbox (not having had any knowledge of Zbrush yet), which is a good program to start sculpting with.
First I imported my OBJ on Mudbox and I duplicated it to keep my LVL 0 aside. I sculpted little by little in Mudbox, on one of the OBJs using the basic brushes, stamps and textures that I had imported to create a little volume texture on my insect.
The main thing was again, to be well organised. At each stage of sculpting, I increased the level of subdivision as I went along in order to sculpt in more and more detail. I recommend making several layers each time to get a good grip on them. Be careful with this software, you can only act on a layer at the subdivision level where it was created.
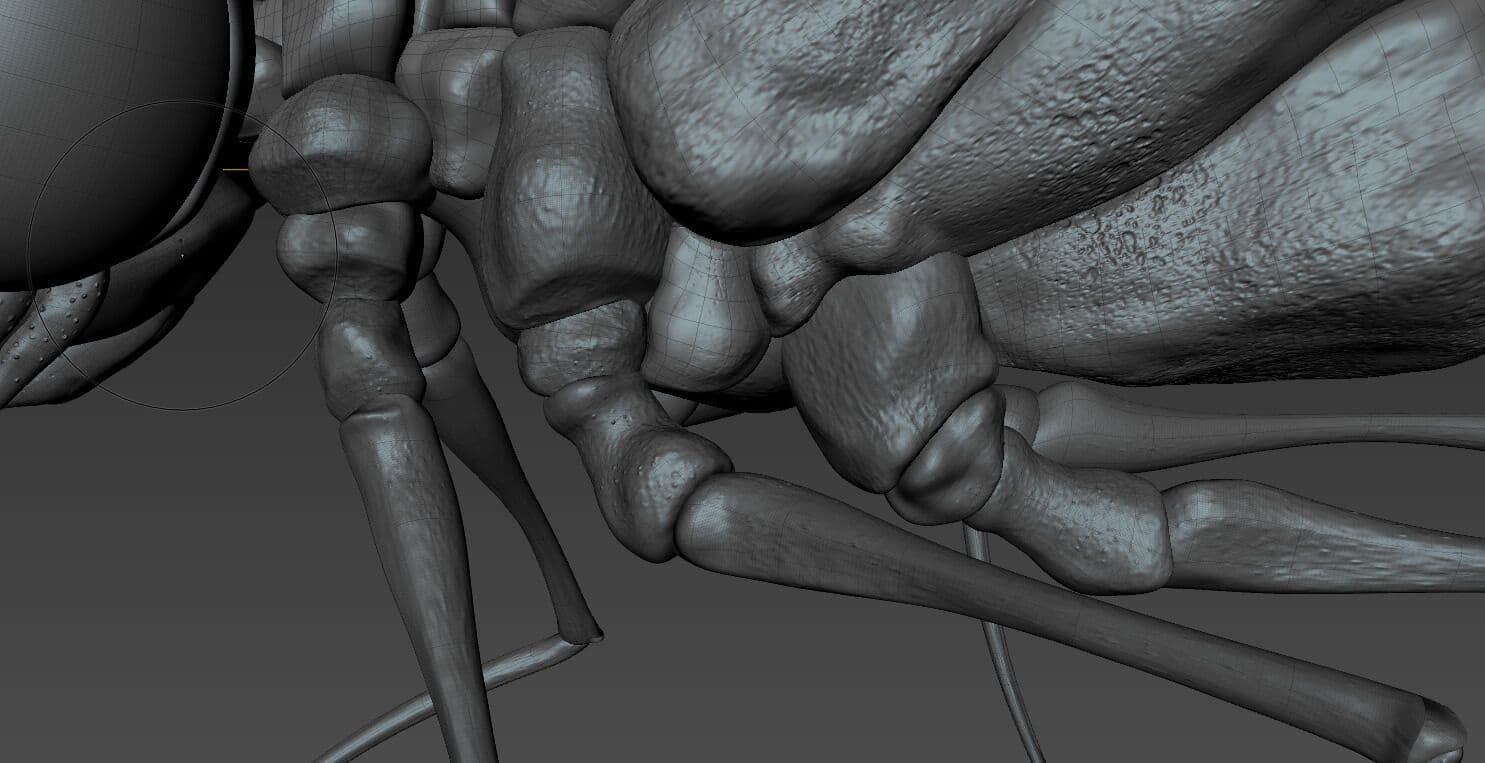
Once I had finished, I exported a map in Displacment or Vector Displacment in EXR format. Remember to put your LVL 0 in the Target; the map will simply be created with the difference between the LVL0 and our current sculpted LVL.
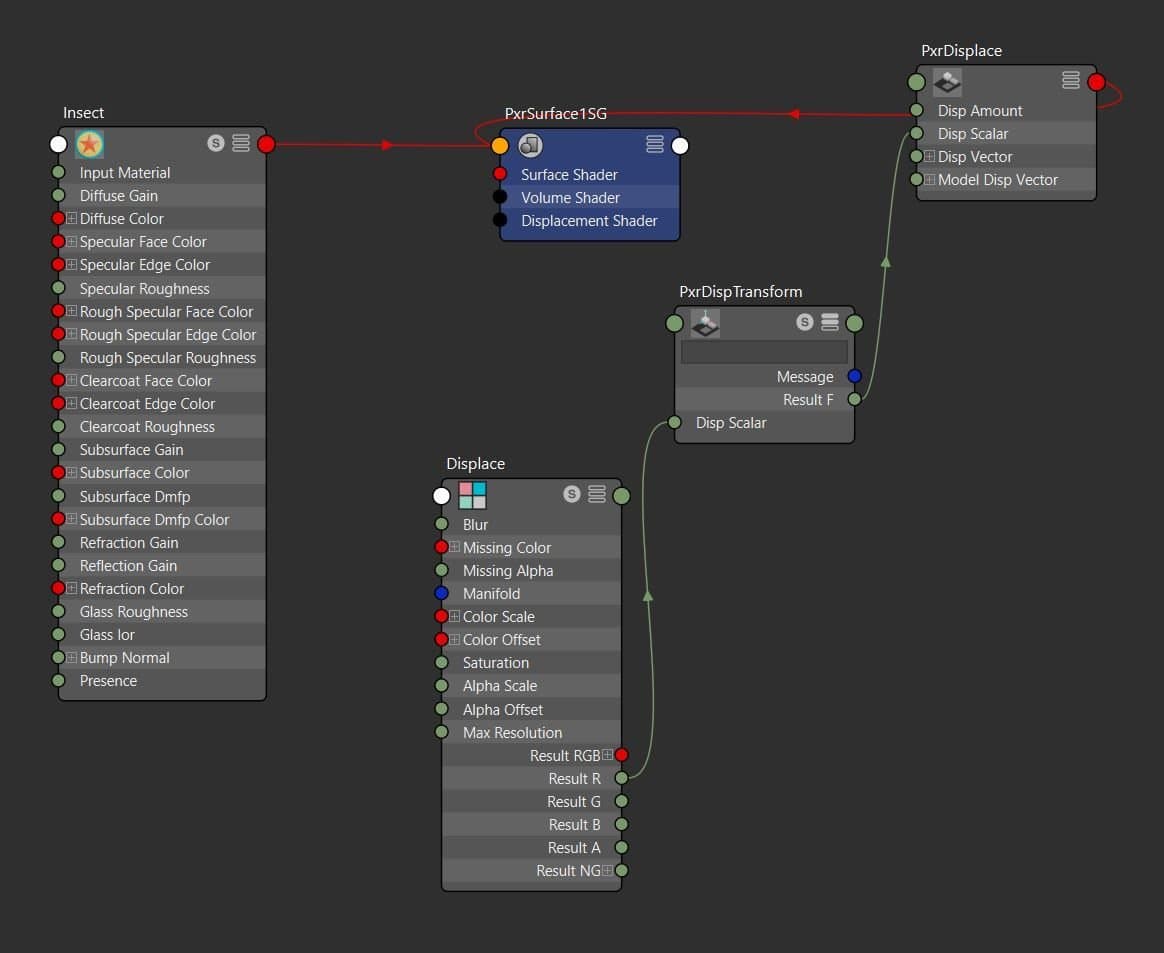
Back in Maya, after applying a PxrSurface on the insect, I connected the Displace map on Renderman.
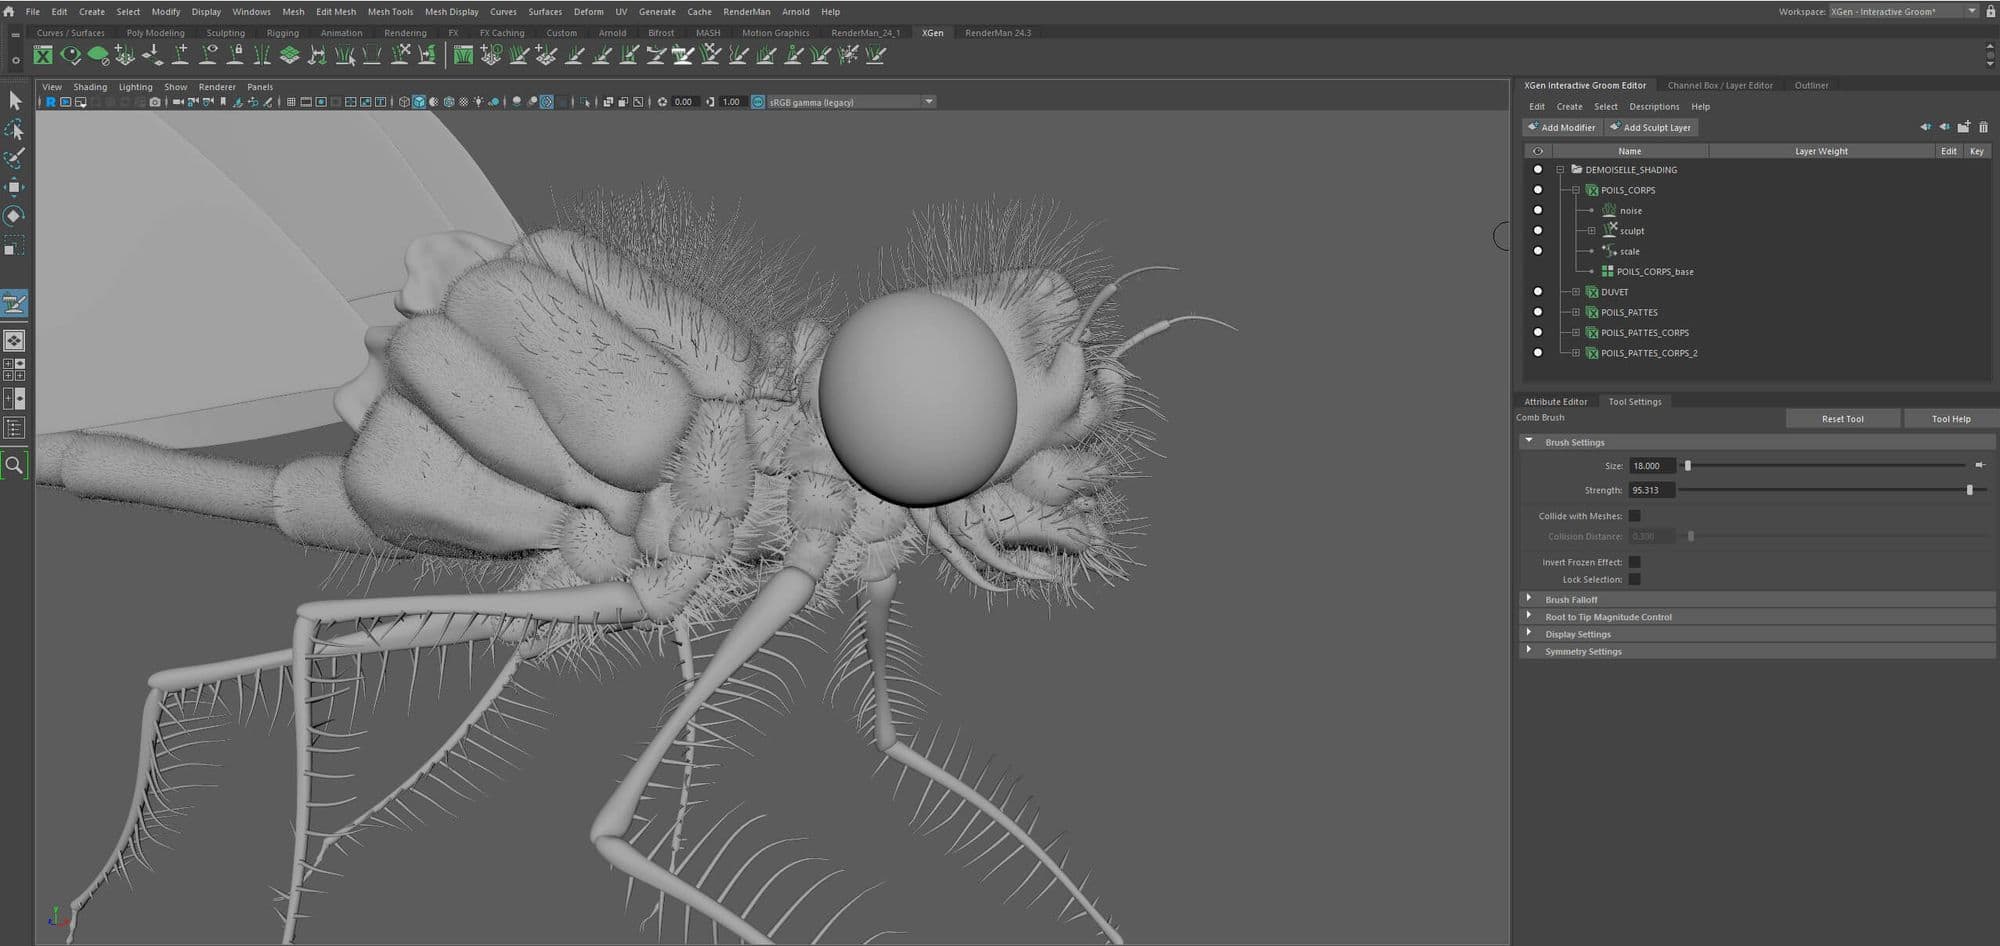
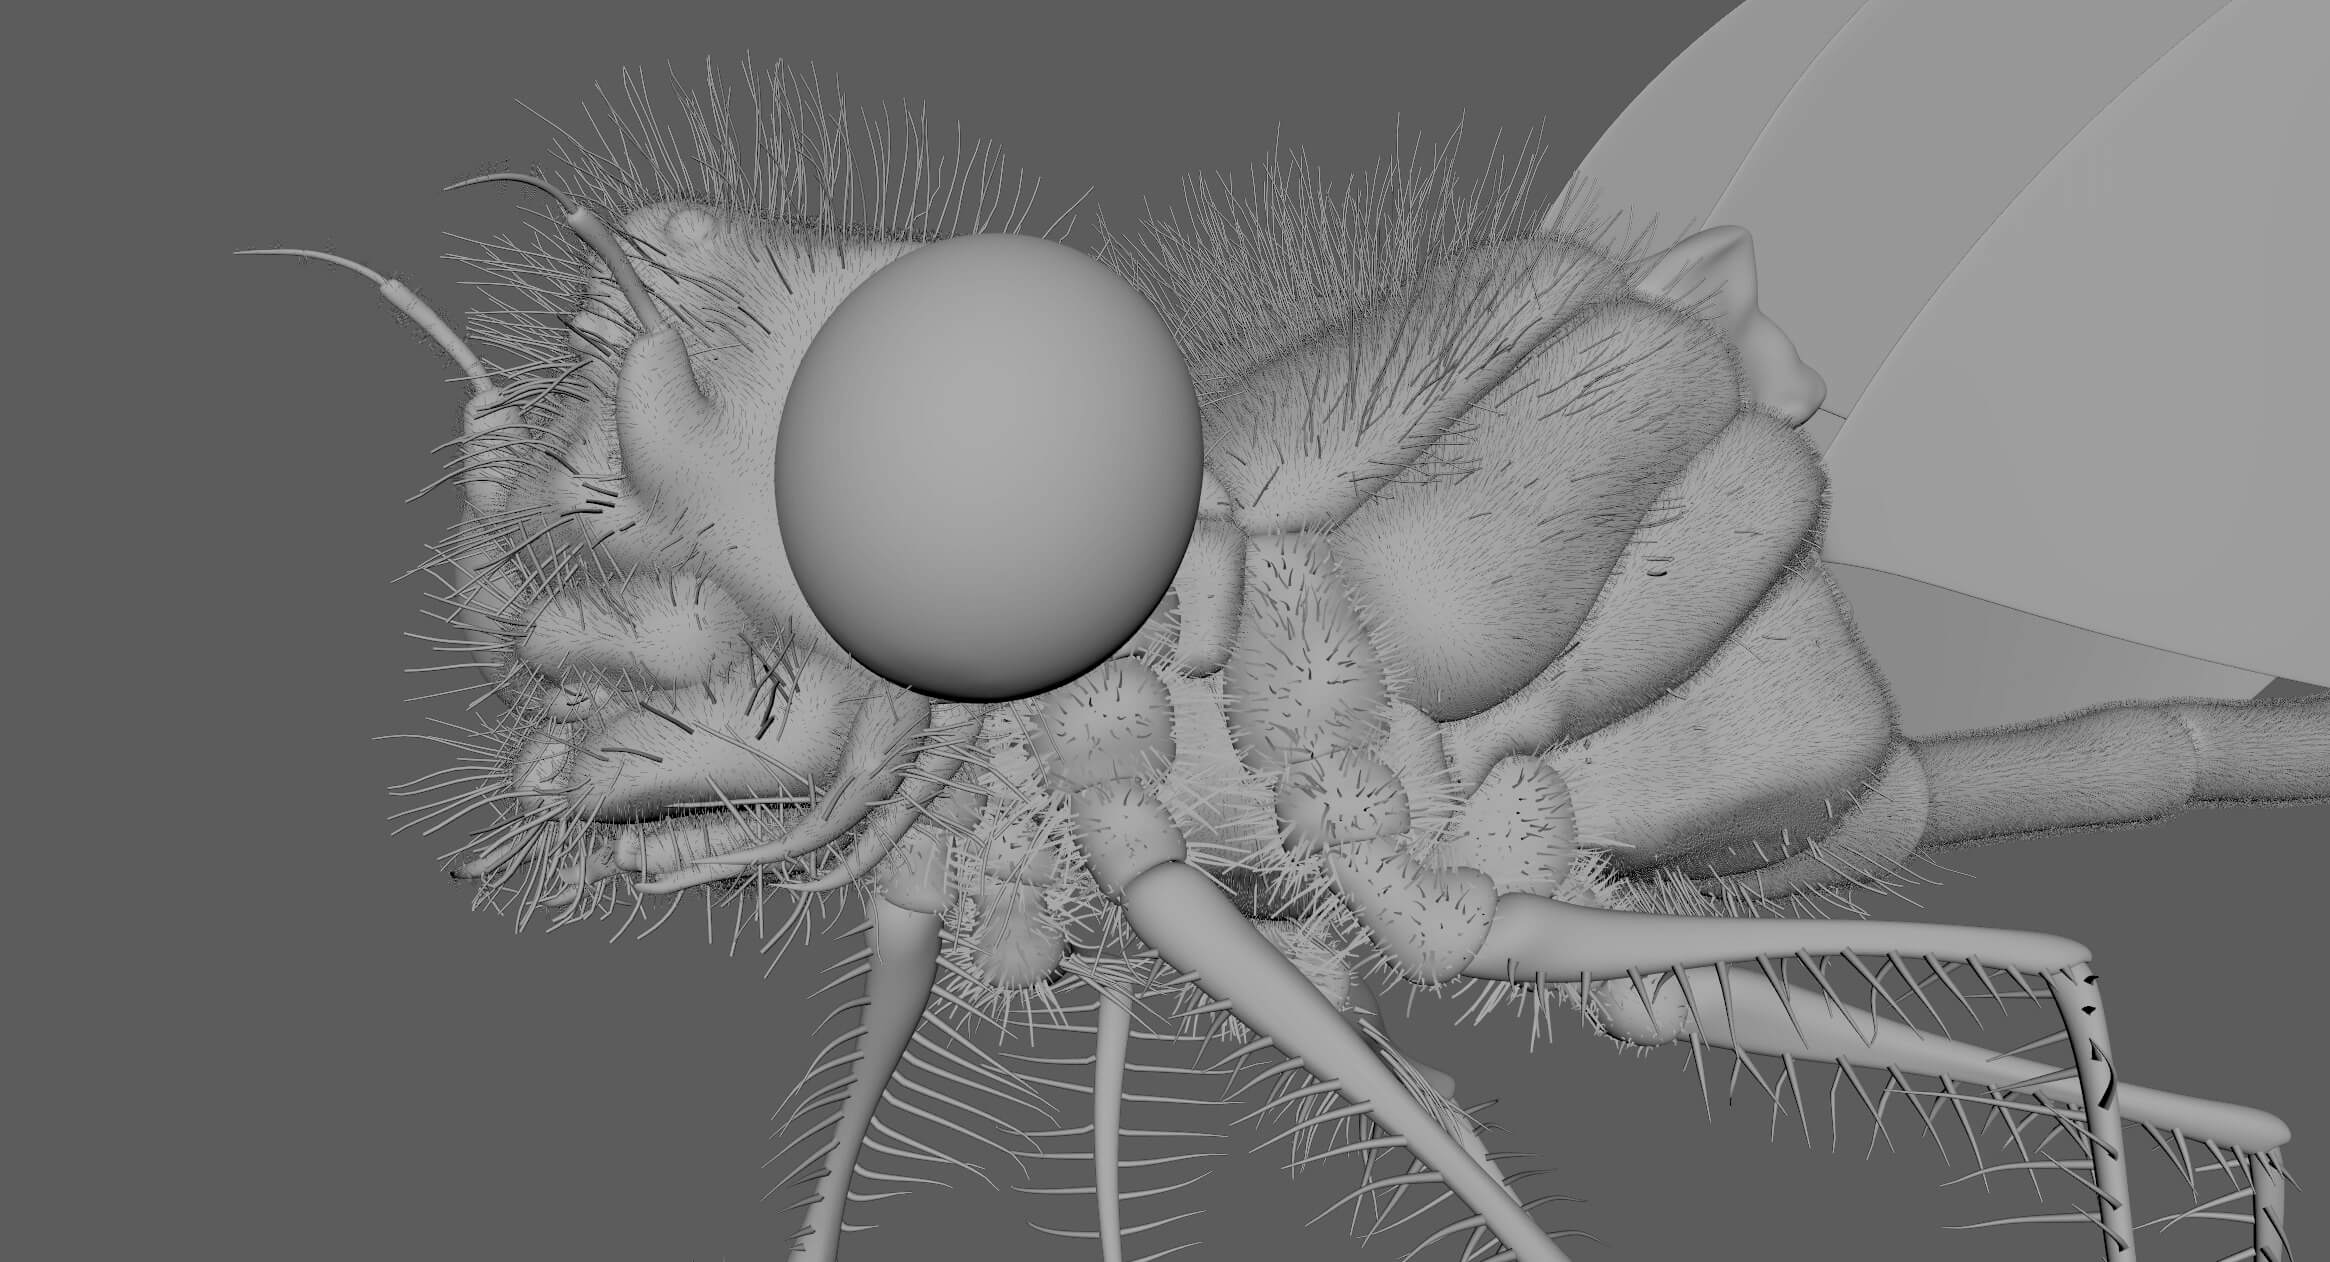
To add some hairs on my insect I used Xgen Interactive Groom which is a plugin directly integrated to Maya. This tool is interactive, meaning that each brush movement is displayed in real time.
To begin, I duplicated my insect with its displace in another scene. Before starting with Xgen, you have to think about how many types of hairs are on your insect, and in which zones they are found etc.
For each hair zone (which can take several pieces), I created a scalp: that is to say that I duplicated the pieces in question, I combined them together and I subdivided (at least x3). It is on this combined version that I applied the Xgen. Be careful on each scalp section that the UVs must be in the same 1:1 square.
I then applied a hair description to each scalp.
In total, I had 5 descriptions: 1 for the hairs on the back and head, 1 for the long hairs on the legs, 1 for the down (mini hairs everywhere) and 2 for those making the transition between the legs and the body.
For each of them I used the Xgen tools to adjust the density of the hairs, their length, their thickness, the styling, etc.

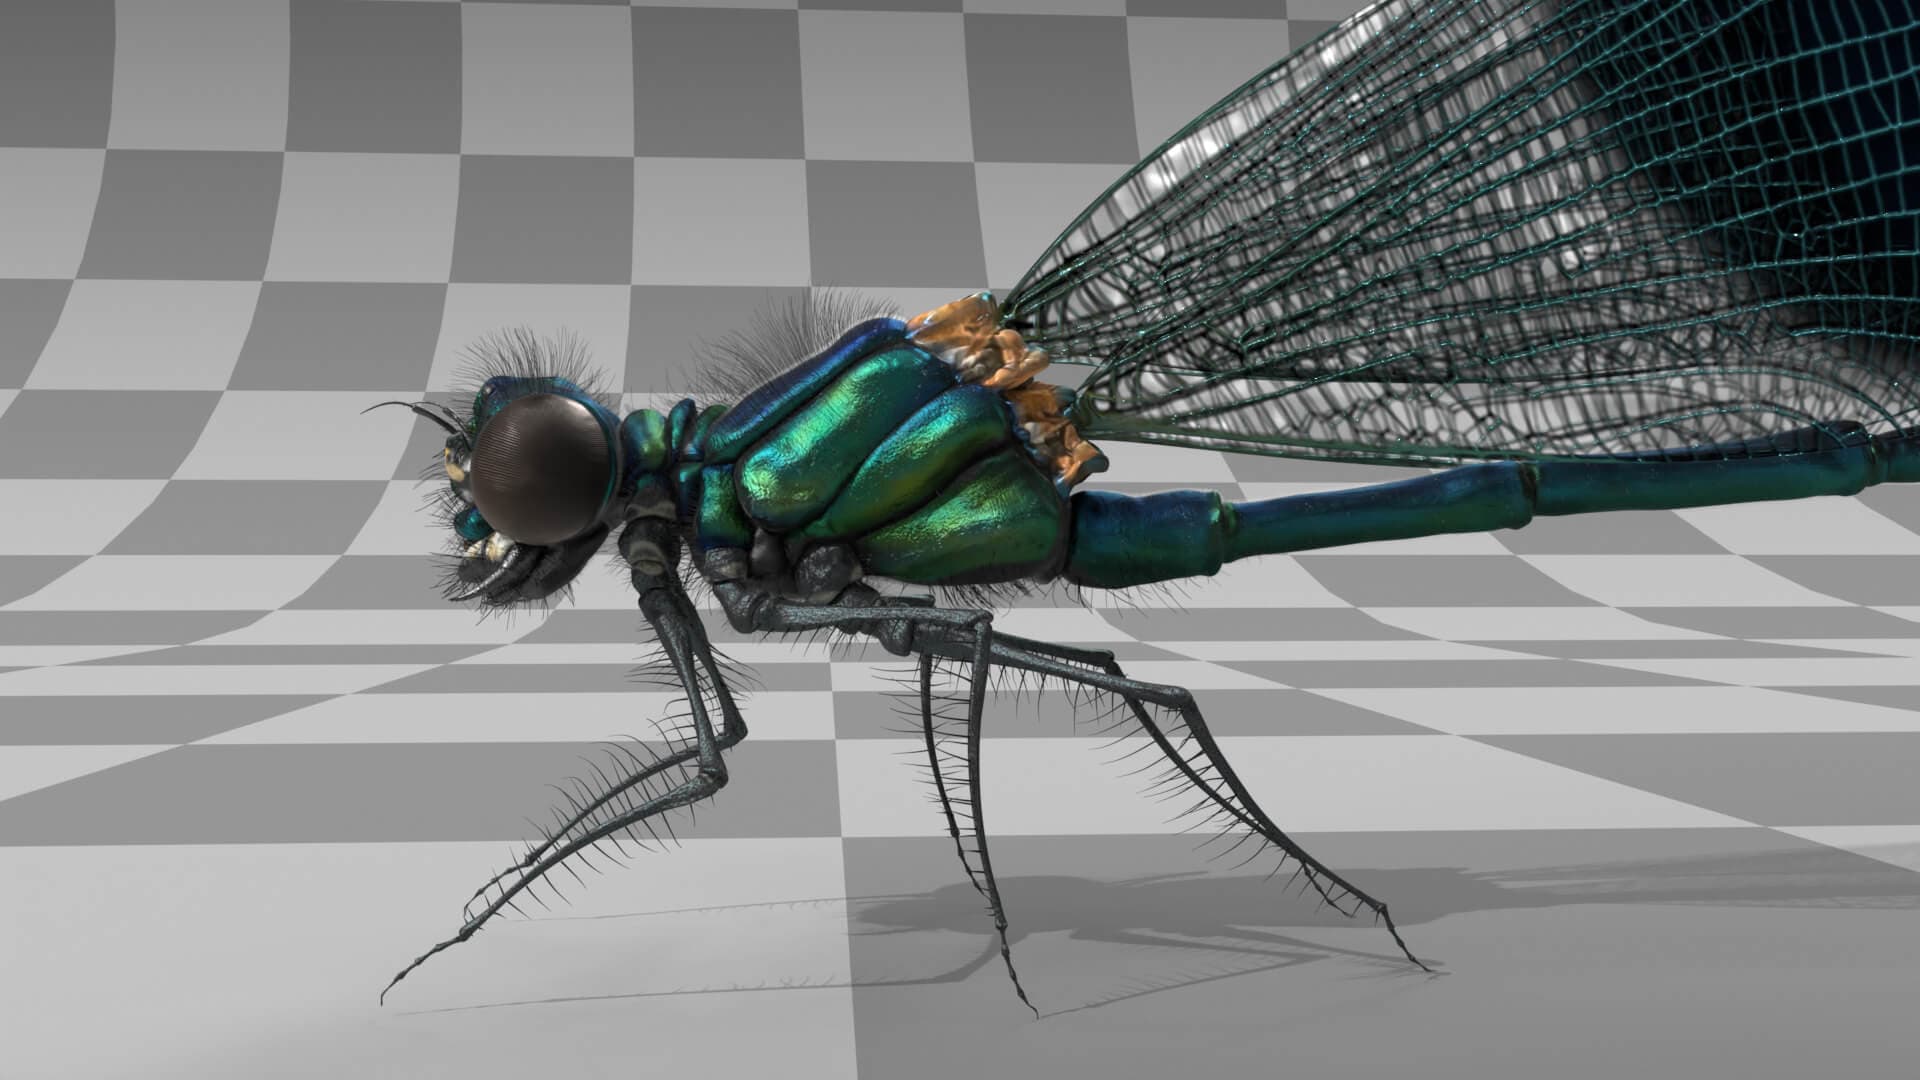
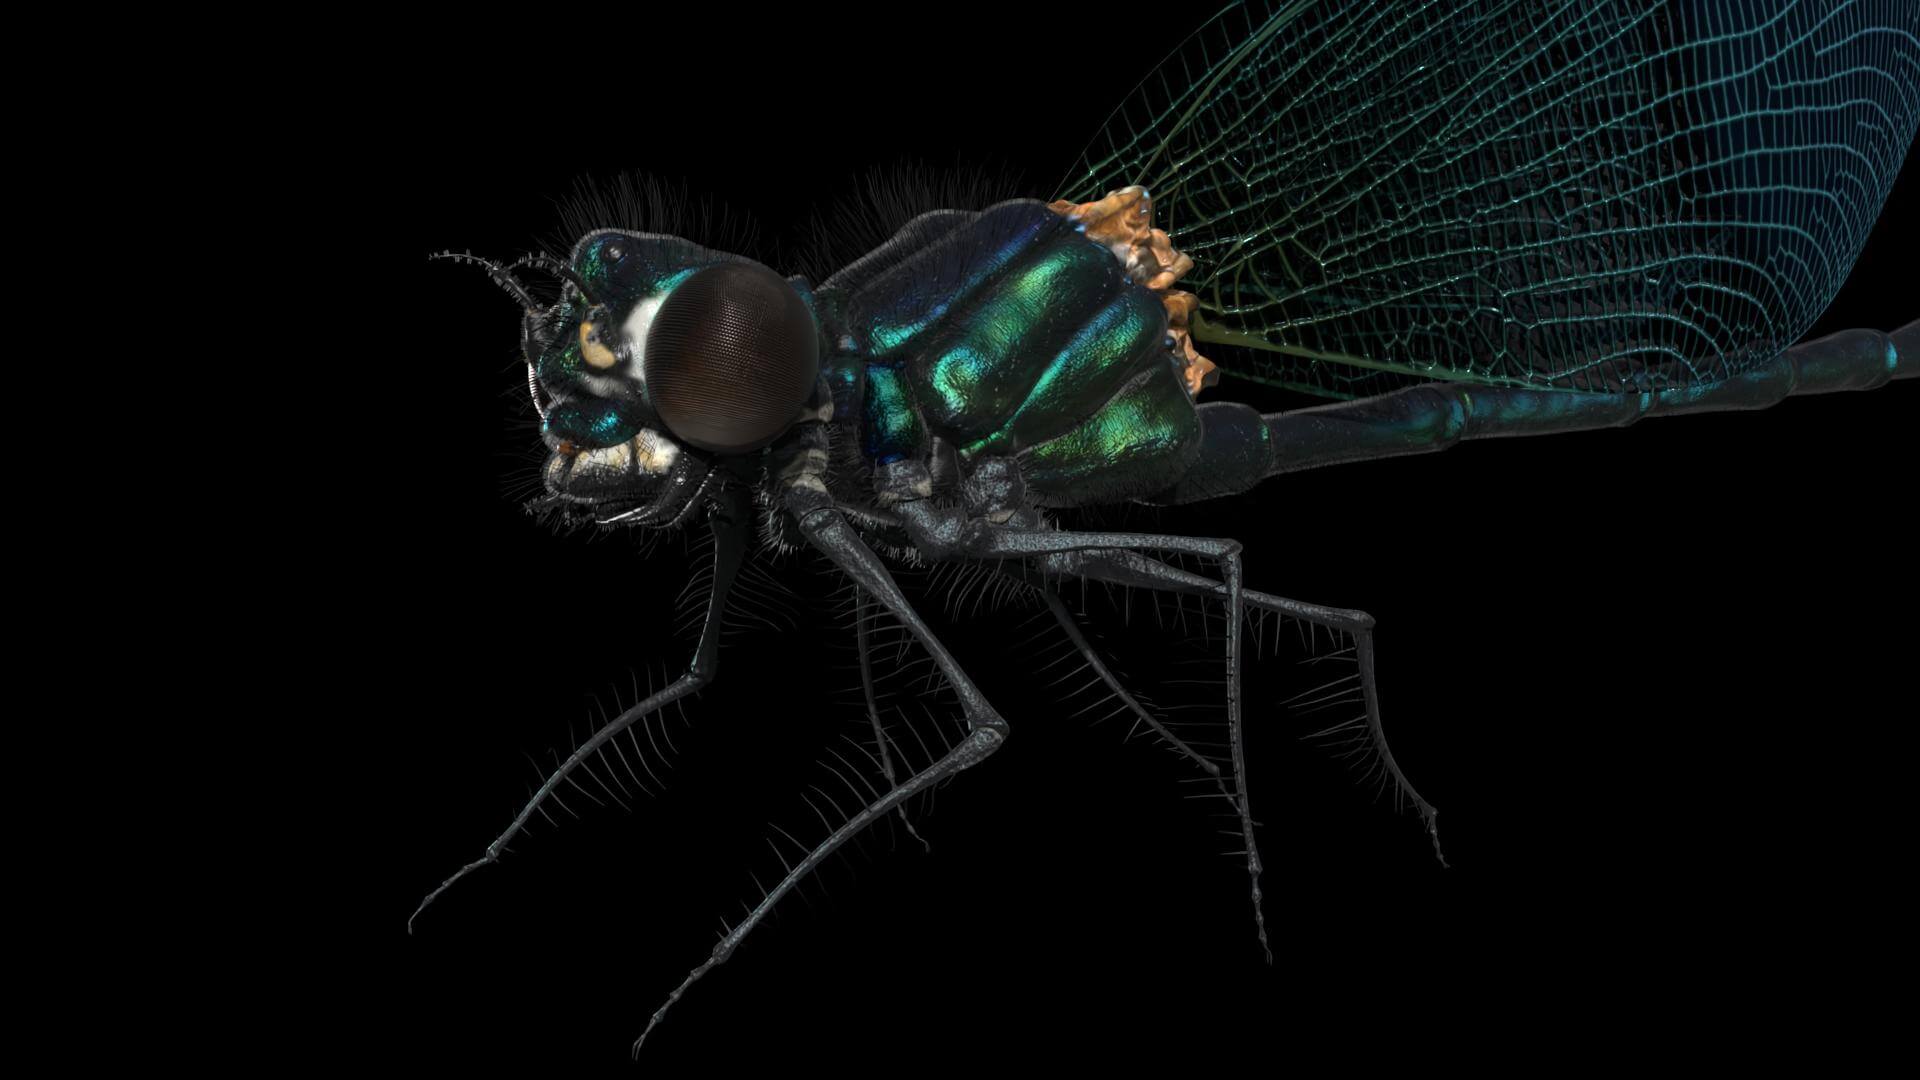
For this step I used Mudbox again. To texture my insect, I thought about how many parts needed different texturing. So, I created a different PxrSurface to separate the body, the eyes, the legs, the wing hook and the wings (while keeping the displace).
On each of the different parts, I needed 4 maps : 1 map for colour, 1 for specular (reflections), 1 for roughness and 1 for bump (more precise than the displace).
I imported the combined geometry in OBJ on Mudbox for each part, this time switching to paint mode. Using the different brushes and tools, I was able to create my 4 maps by painting directly on my insect. The albedo one was in colour and the other 3 in black and white. I then exported the maps in PNG for each part of the insect.
Back in Maya, going into Renderman's Hypershade, I connected my maps to the different PxrSurface using Pxr Texture, linked to each corresponding channel.
For example, one of the legs below:
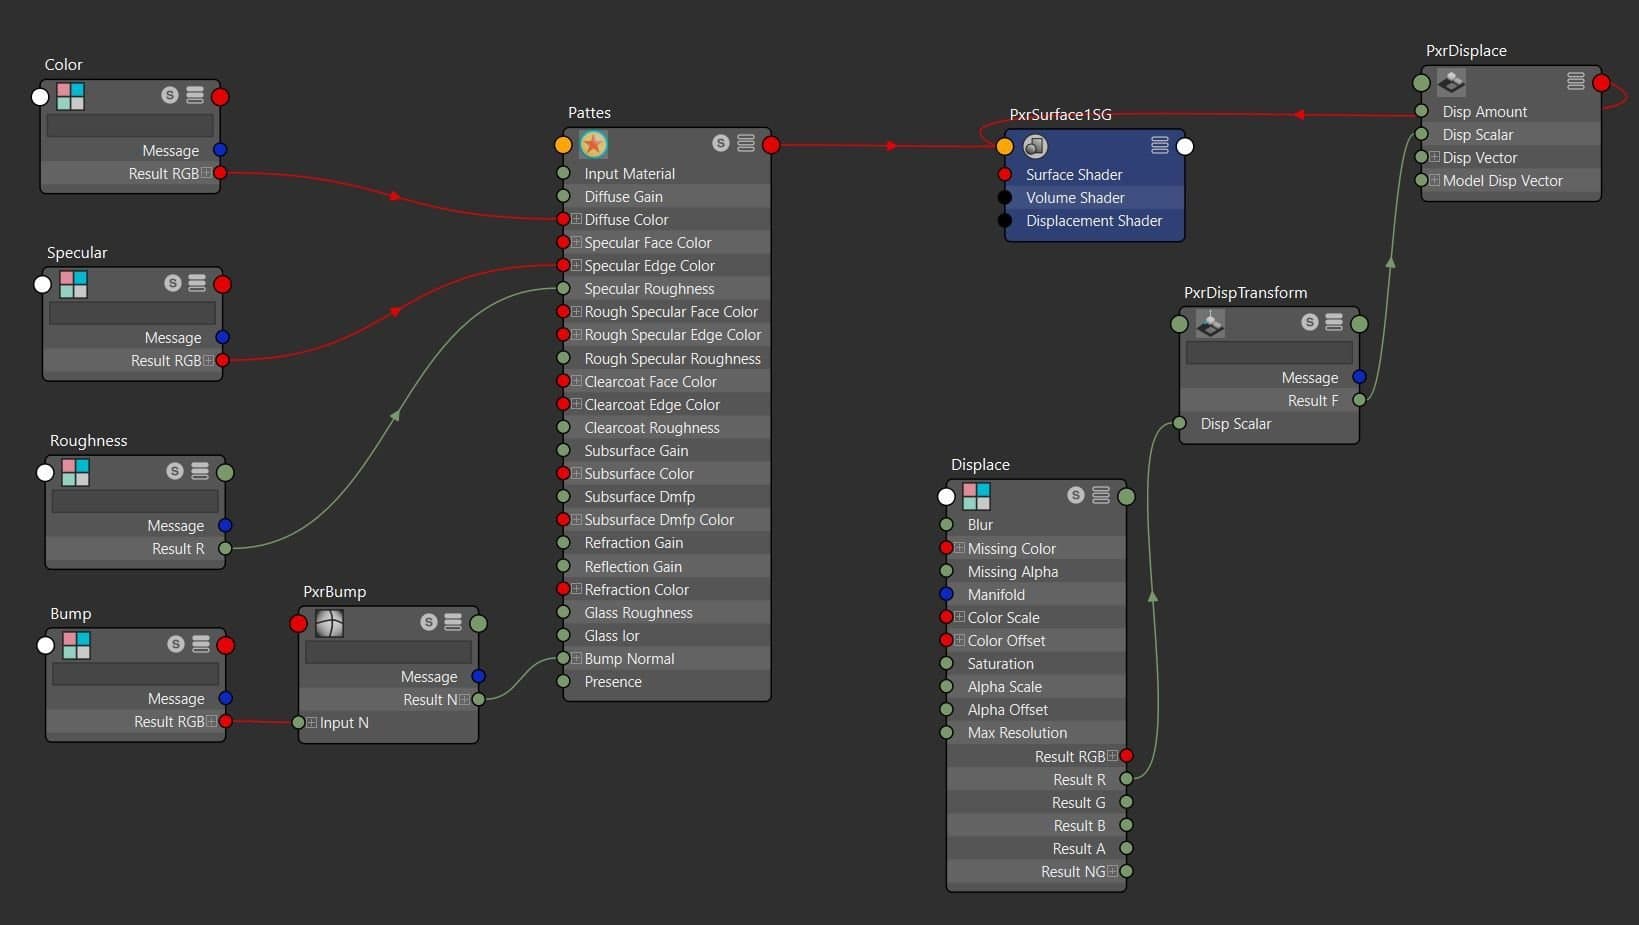
The colour can also be connected to the subsurface, giving a more realistic rendering. With the body and the tail being iridescent, I connected the Color in the iridescence and not in the Diffuse Color/Subsurface. Concerning the wings, I had to mix Diffuse and Glass in some areas to create the texture of the wings and add bump in the grooves.
From there, I completed the texturing of my insect using Renderman's procedural nodes, until I arrived at this rendering:

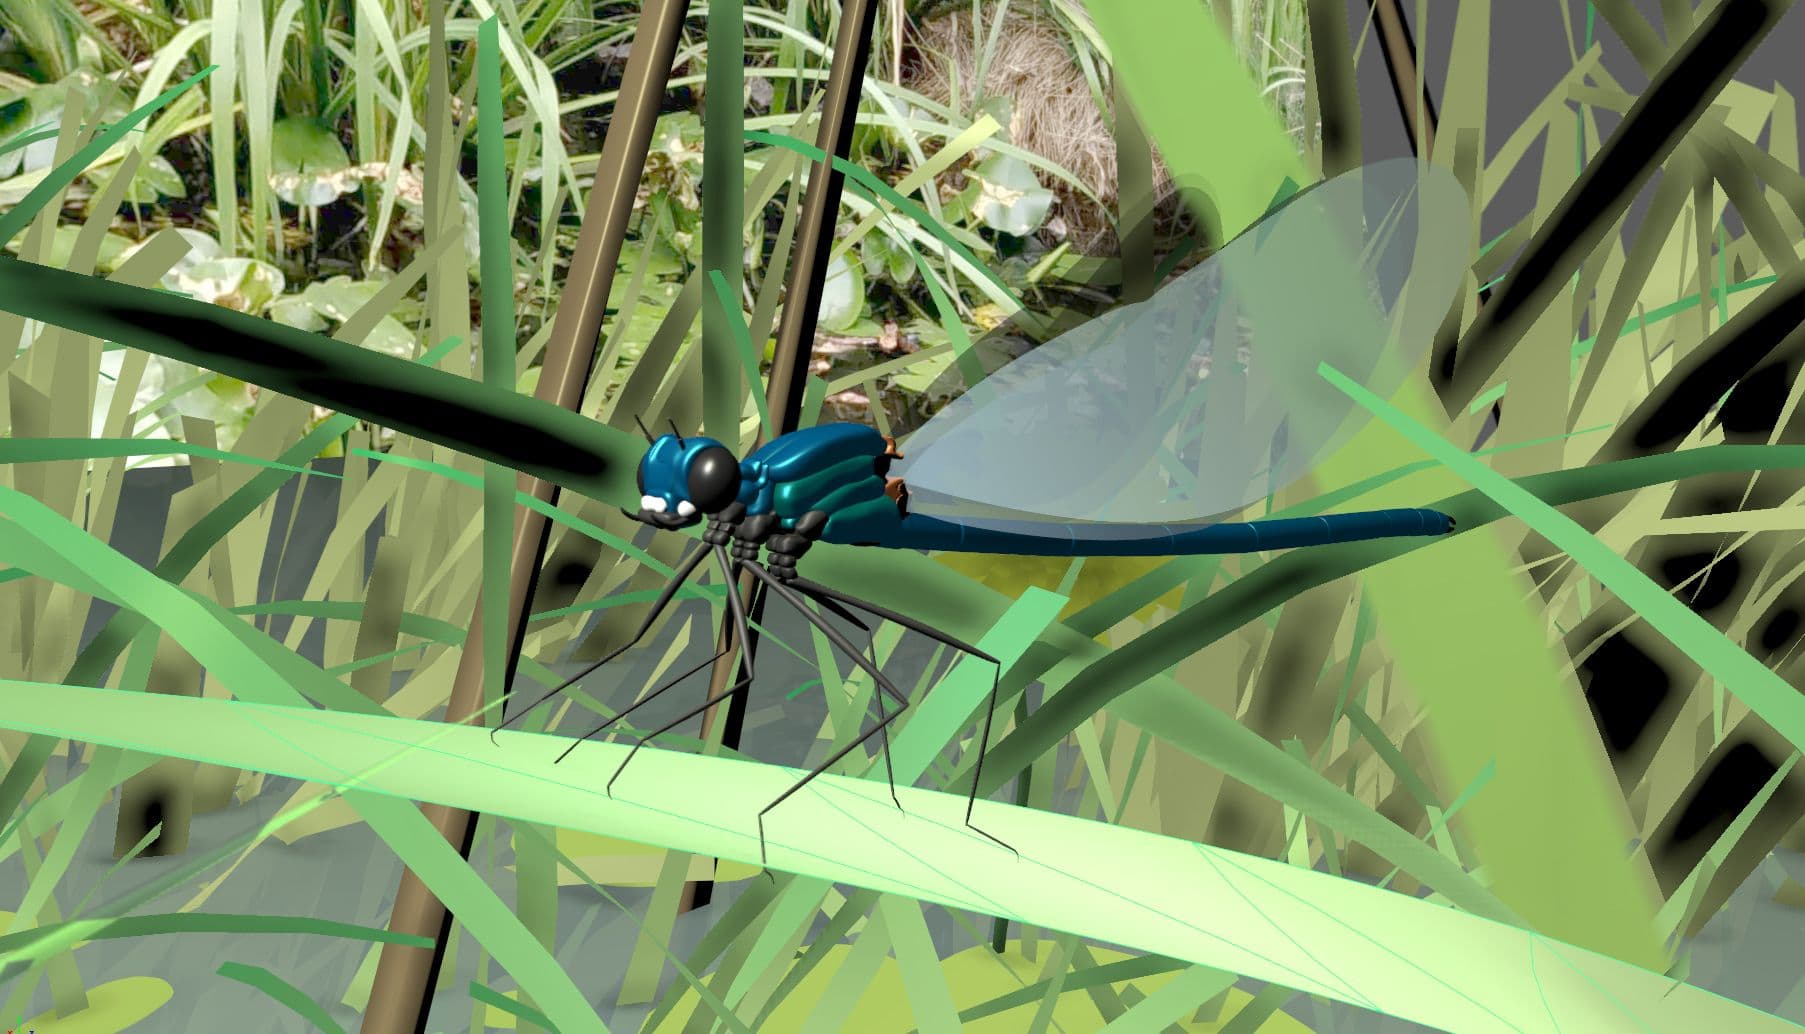
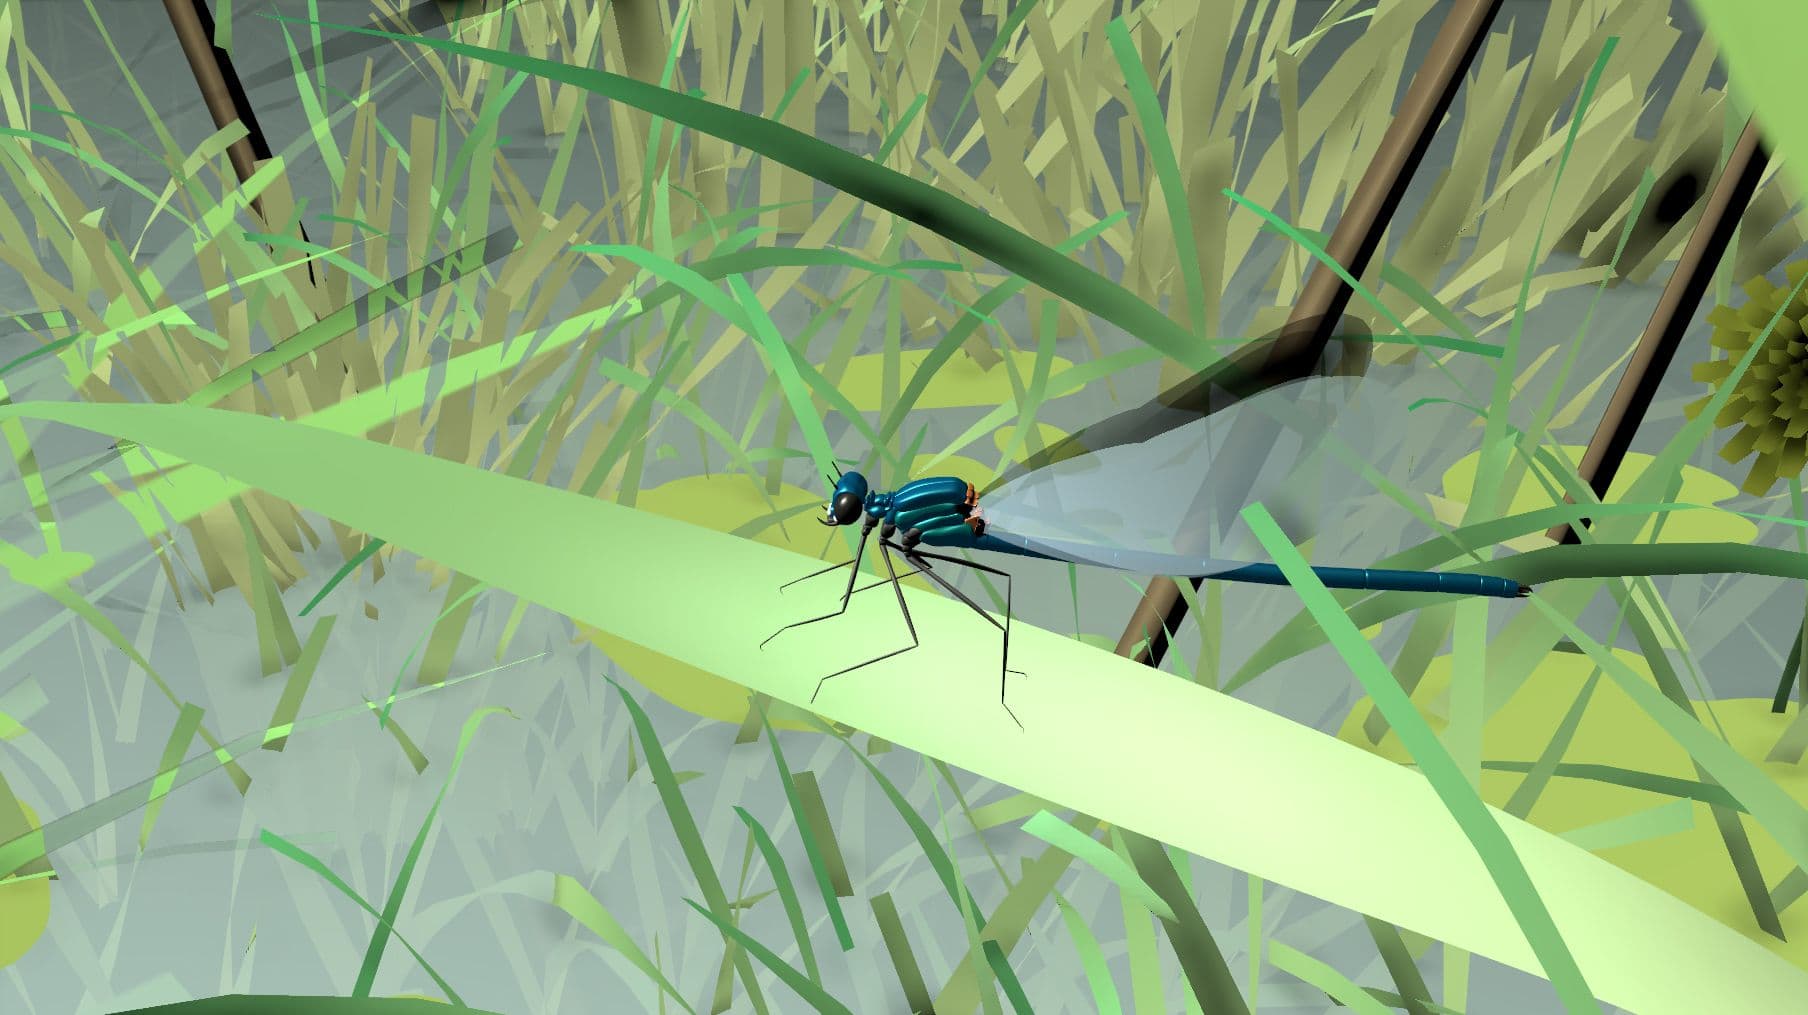
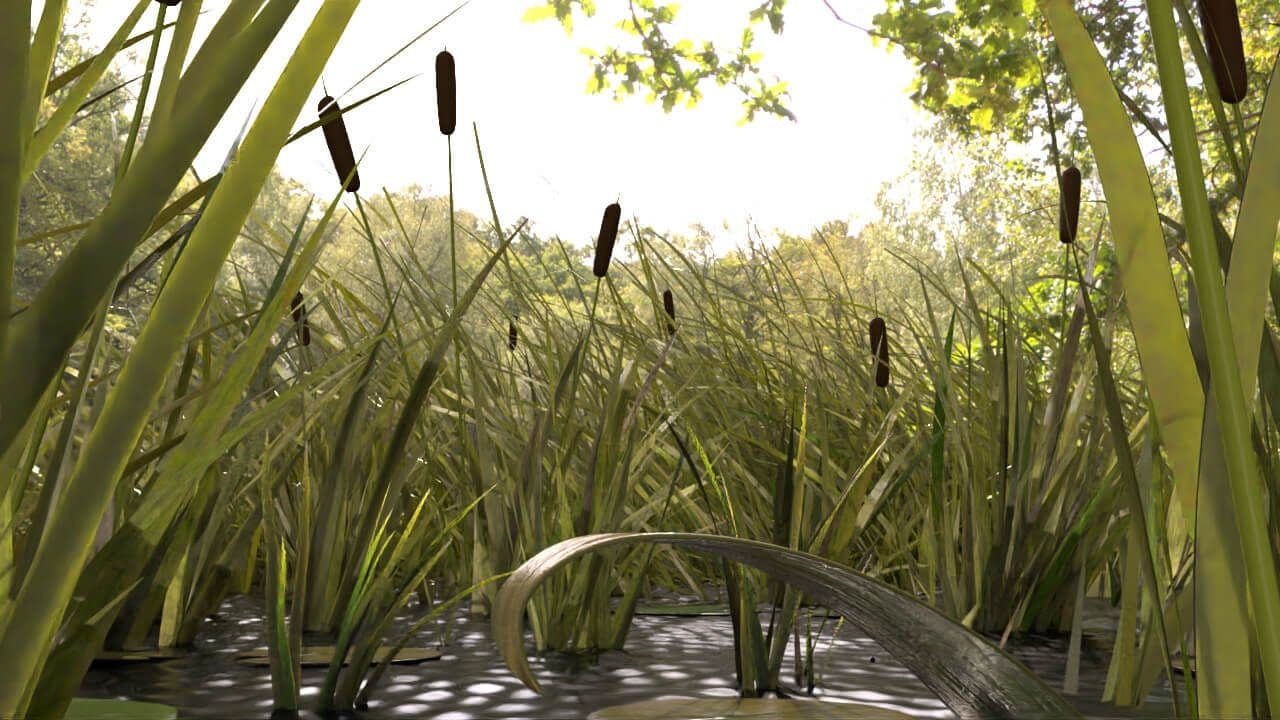
For the creation of the insect's environment, I repeated the steps done for the insect.
First of all I modeled the environment with the help of the vegetation present in Maya's Paint Effect, and I quickly placed my insect in it to start adjusting the framing and thus adapting the placement of the modeling to the insect.
For the water, I simply applied an animated deformer to a very subdivided plane, giving the impression of a watercourse.

I then textured the whole set until I got this result:
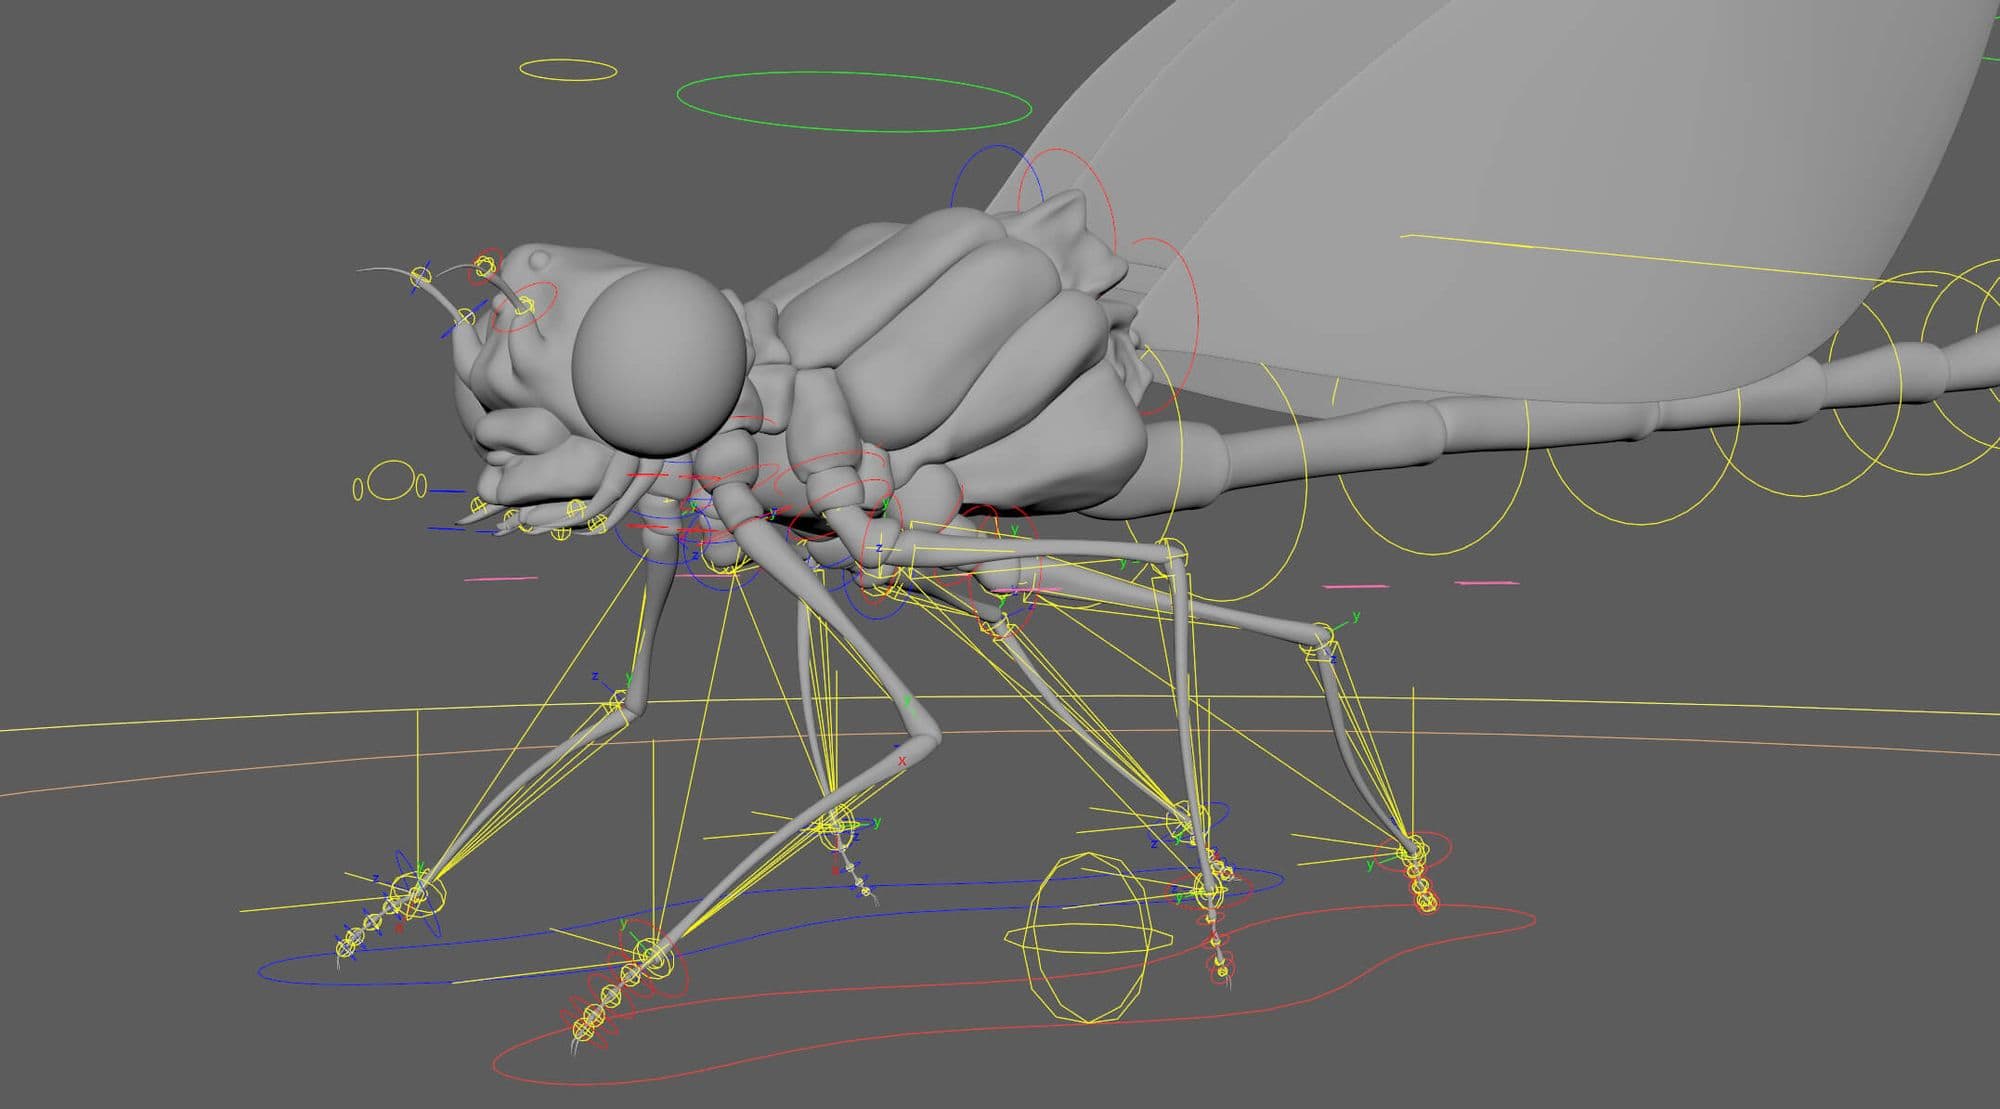
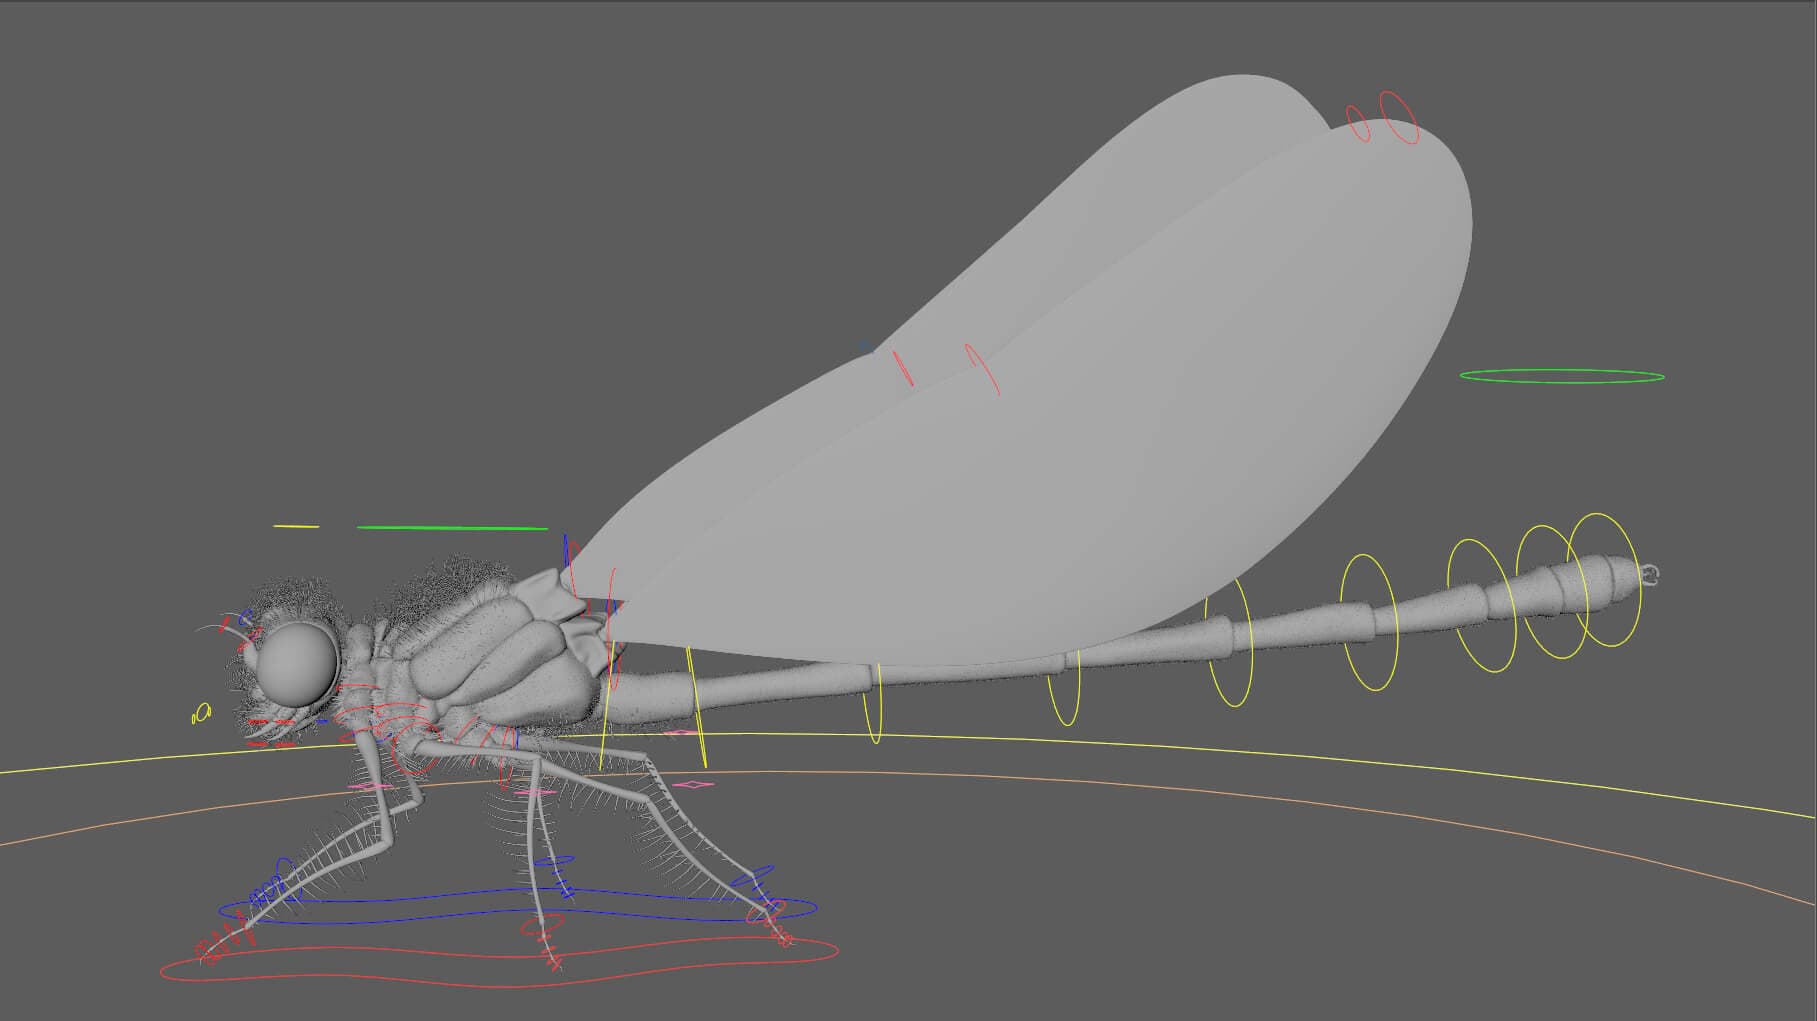
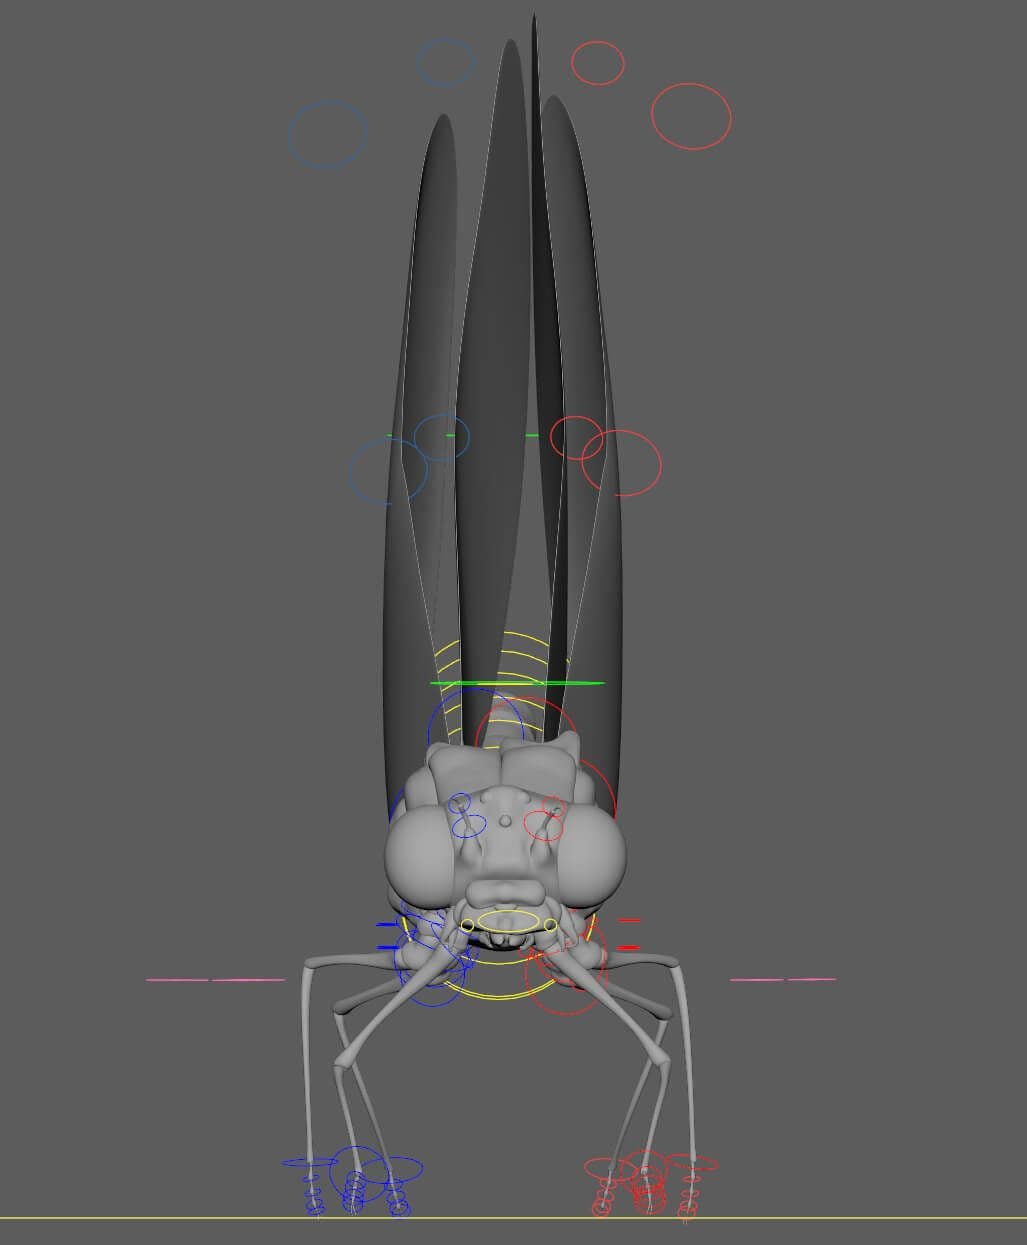
The Rigging step is very important. It is the step that will allow us to create the skeleton of our insect and that will allow us to animate it afterwards. I made the rig entirely in Maya.
To start with, I took my untextured insect into Rigging Mode in Maya and I hid the scalps with the hairs. Then, I created a RIG group in the outliner in which I inserted 3 groups:
I moved my insect into the Geo_grp.
When rigging, you have to give a lot consideration to how your geometry will move when animated.
The controls
I needed a control around the whole insect for it to move completely, and a control around each joint or part that will move. On my insect I have placed them for example at the base of the antennae, mandibles, at each joint of the different legs, at each part of the tail and at the base of the wings.
The joints
I have created a joint in the centre of the insect for the control encompassing the insect. For each control I needed a joint that would link the control to the geometry. After creating them all, I constrained them to the corresponding control. Then I constrained the geometries linked to the control to the corresponding joints.
After having done the constraints, when I moved the controls the geometries move too. I then created hierarchies in the Ctl_grp to ensure that a control could control other controls.
The legs required more complex rigging, like IK Spline or Ribbon, allowing the whole leg to be moved only by lifting the base of the leg. For this, I invite you to look at additional tutorials for more details.
Now that the controls and joints had been set up, I needed to move on to the skinning stage. Skinning is the step that allows you to manage the influence of each joint on each model.
By default, the influence of a joint on a geometry is 100%, in the skinning tool this geometry will be white. But for example, if you want to reduce the influence of a joint on a part of your geometry, you can simply paint it more black using the tools on this part. Don't forget to set the influences on the scalps so that the Xgen can follow during the animation.
When all the influences have been set, the RIG is finished:
I repeated the process for the rigging of the leaves.
In this step I was able to use the Rig to set my insect in motion.
To do this, I simply imported my rigged insect as a reference in another scene. I started by placing my insect on its leaf so that I could also animate it. Then, by moving the controls and putting keys on them in Maya's Graph Editor, I was finally able to bring my insect to life:
When I was satisfied with my animation, I selected all the geometries of my insect and exported an alembic (.abc). I repeated the process for the leaves of the decor. I also had fun animating other damselfly to give more life to the off-screen areas.
For the final render, I opened an empty scene and imported my textured insect and environment as a reference.
On the geometries of the textured insect I was able to import the animation alembic, thus putting in movement my insect with its hairs and textures. I did the same with the animated leaves.
Once everything was in place, I was able to add a background and lights to my scene with Renderman; trying to make it look as much like my illustration as possible that I had done in pre-production.
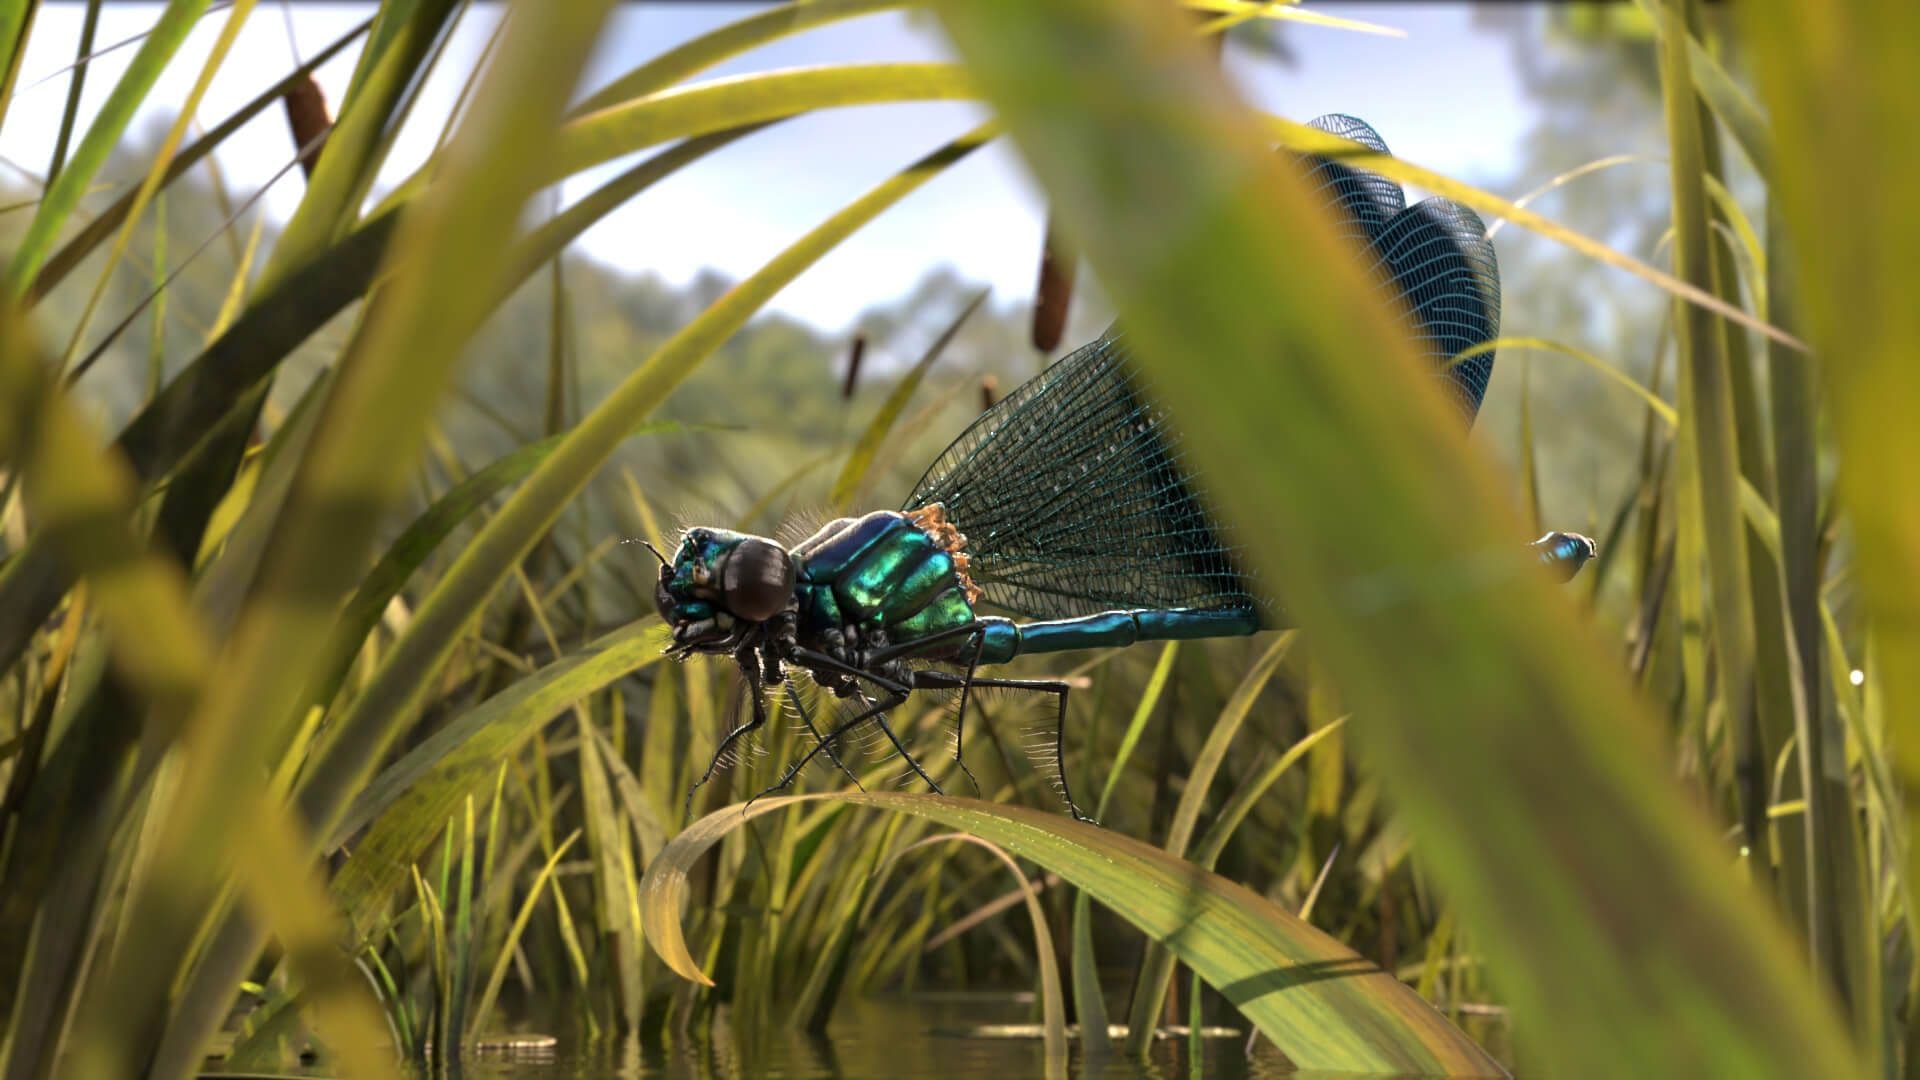
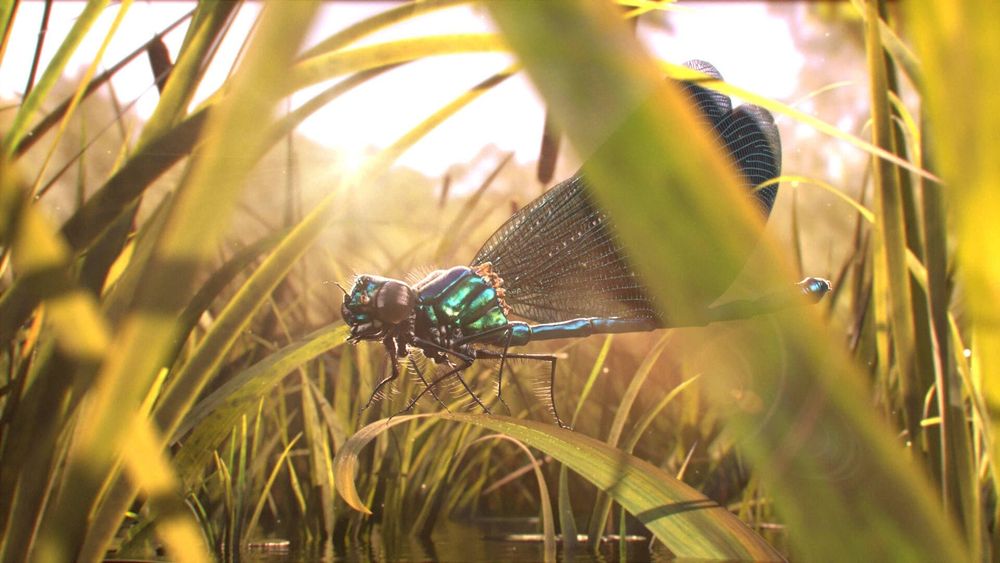
In order to beautify my image and create the sunrise atmosphere I had in mind from the start, I did my compositing of my animated sequence in NukeX.
I imported my rendered images in EXR. By retouching the colorimetry, adding a sun, particles, lens effects, blurs and depth of field I finally managed to get the look I wanted.
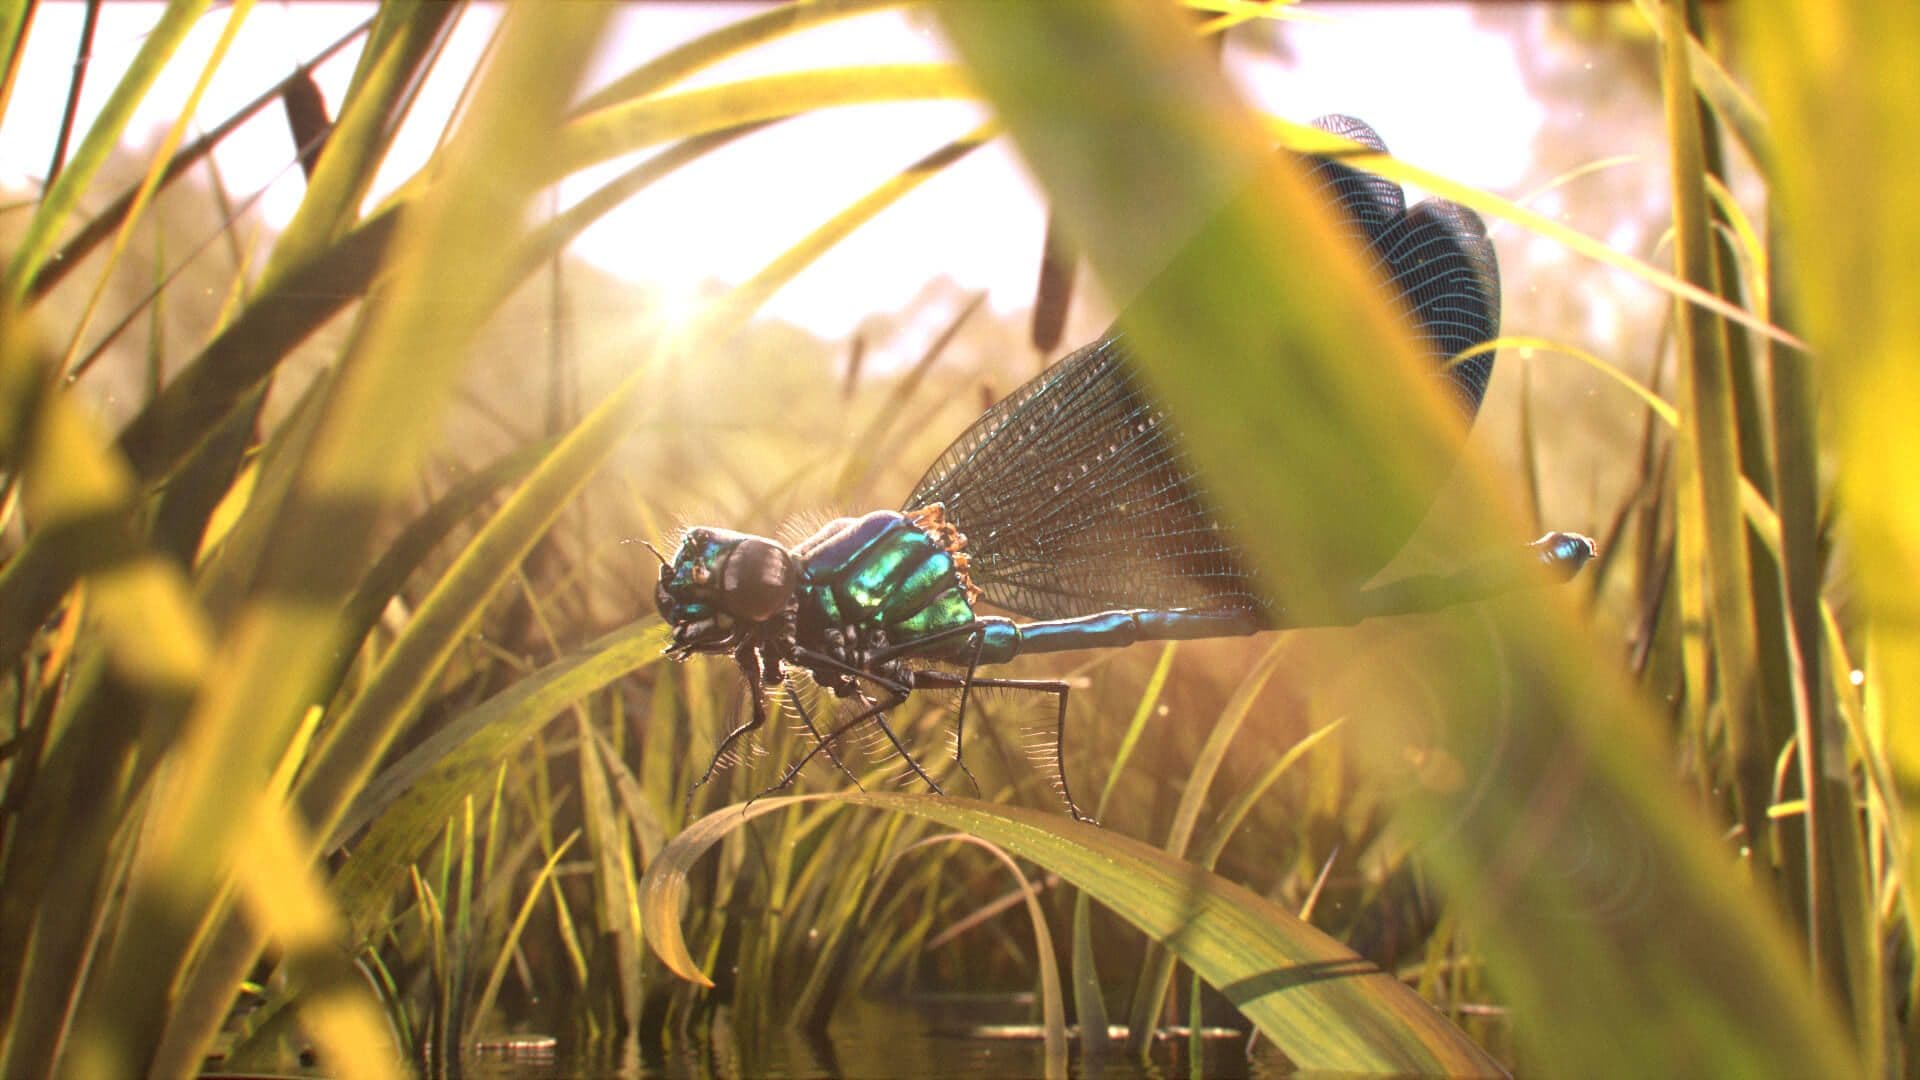
And here is the result!
I came out of this project much more experienced. It allowed me to acquire all the knowledge specific to each sector of 3D animation. I'm proud to have been able to make this pretty damselfly from start to finish and to have her come to life!
I hope that this has made you want to do the same and that the techniques I have shared with you will seem easy to implement. I hope I have shown you that even with little experience it is possible to make beautiful projects.
Thank you for reading to the end!
You can find more of Marianne's work on ArtStation & TheRookies.