Unreal Engine 5: Tips for Taking Your 3D Environment to the Next Level
In this article, you will find out how my detailed planning and creative thinking process helped me to strive for this highly-detailed Unreal Engine 5 Project.
In this article, you will find out how my detailed planning and creative thinking process helped me to strive for this highly-detailed Unreal Engine 5 Project.

Kris Yu is a Rookie Awards, ROTY Winner, of the Game Development category this year. She recently graduated from Gnomon with a Bachelor of Fine Arts, specialising in environment art creation. Kris is also embarking on her career, landing her first job at Blizzard Entertainment.
In this article, Kris shares her process for creating her award winning entry, and offers some tips for taking your own 3D Environment to the next level.
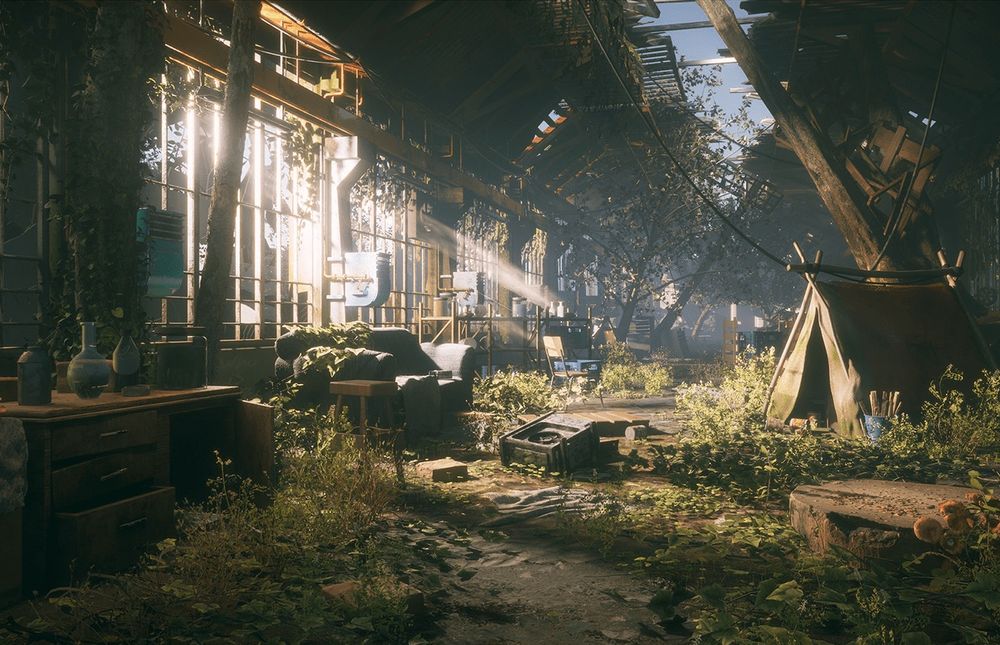
Hello everyone, my name is Kris Yu, and I want to share my working progress for one of my best environment pieces and winning entry: TAKEOVER - Abandoned Factory.
This project was inspired by Dawid Jurek's concept art Periphery. The detail in this concept are truly amazing. Please check out his amazing work!
In this article, you will find out how my detailed planning and creative thinking process helped me to realise the end result.
I strongly recommend to everyone to explore new techniques and skills and not be afraid of taking the risks.
I heard of The Rookie Awards back in 2018 when I come to the United States to study game art. I saw all the amazing winning entries and wished to be apart of it, even before I even started to learn anything about 3D. From that point, my ultimate goal was to be a Rookie of the Year in the future.
This goal was my top priority and I pushed all my projects with the best quality so that I could be ready for the Awards when the time came. The Rookie Awards is such a great opportunity to be involved with and it’s truly amazing.
I only have one important piece of advice for fellow artists who are looking to enter the Rookie Awards 2023, which helped ultimately win The Rookie Awards 2022 Game Category, and also secured my first job at Blizzard...the advice I want all the students to know is to document the process for all of your projects.
Besides the final renders, it is also very important to present your breakdowns such as technical/artistic points of interest, creative thinking process, problem-solving, etc.
I received a lot of positive feedback when I interviewed with different large game and film companies. All of the art leads and senior artists mentioned that my presentation for each project is great. They’ve seen so many students have great portfolios but lack breakdown presentation. As professional artists who are looking for new candidates to join their team, they wanted to see more behind the scene breakdowns.
So many opportunities open up after the Awards:
Now, let's talk about the project I entered into the Awards: TAKEOVER - Abandoned Factory
My main objectives of this project were:
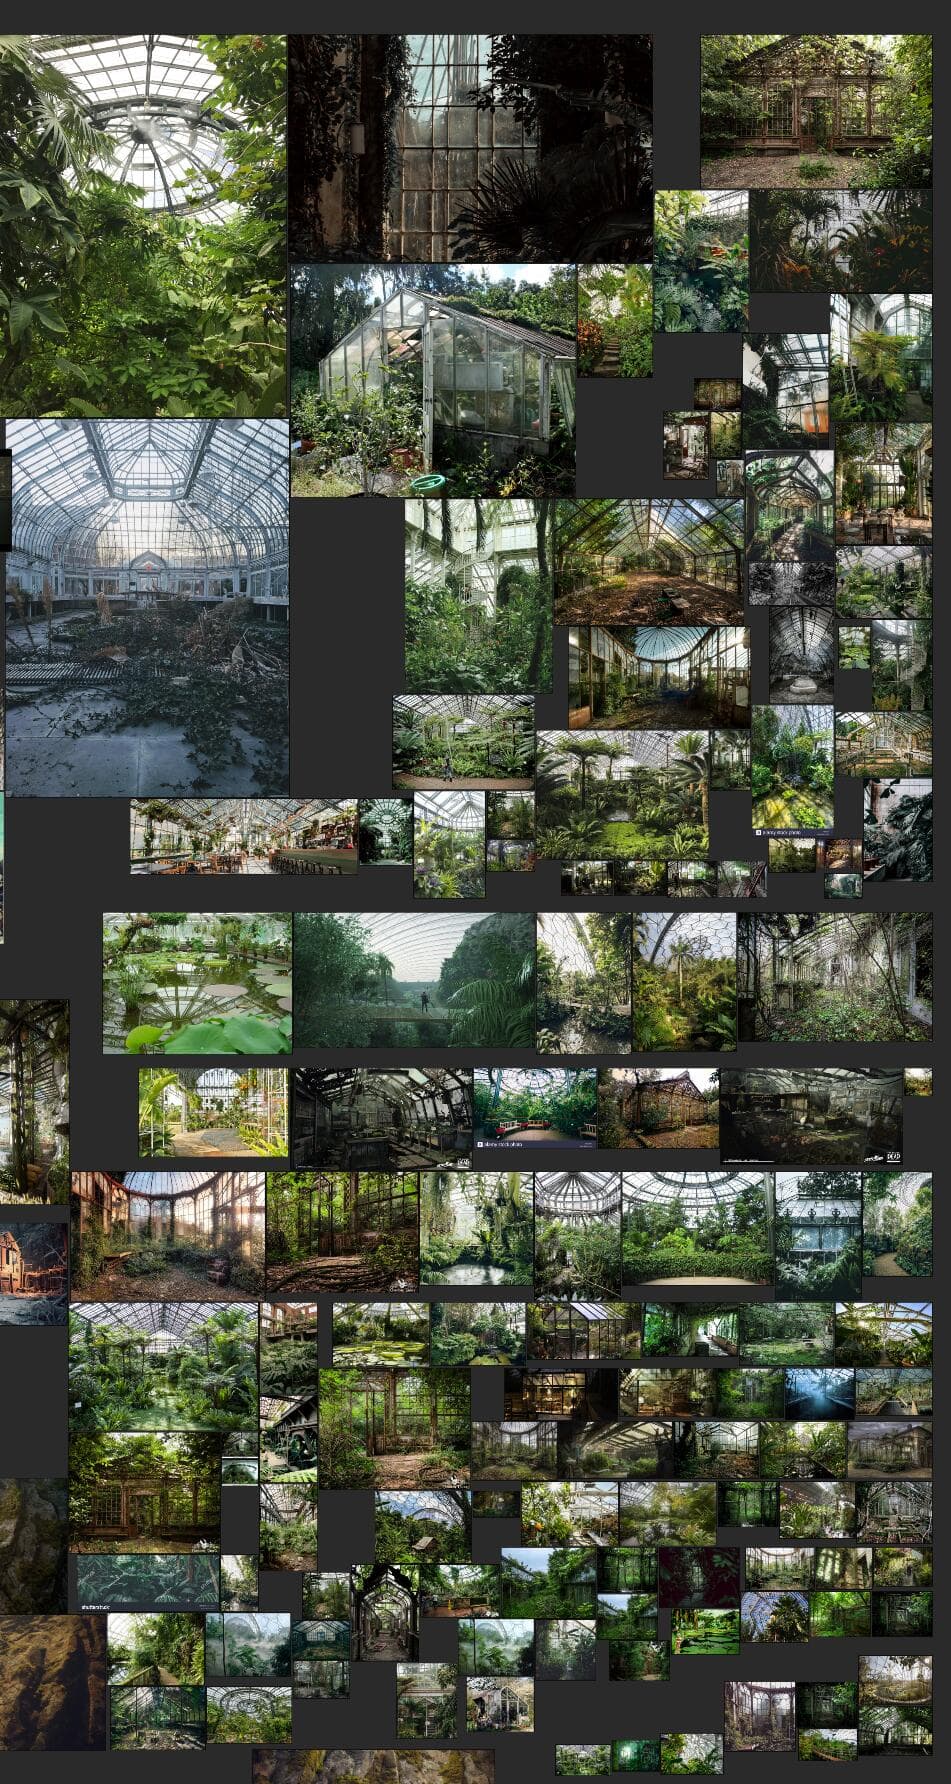
The Last of Us has always been my favourite game. I love how detailed the environment is. For this project, I wanted to create an abandoned factory scene that could achieve Naughty Dog's art style. I wanted the environment to tell a decent story by itself.
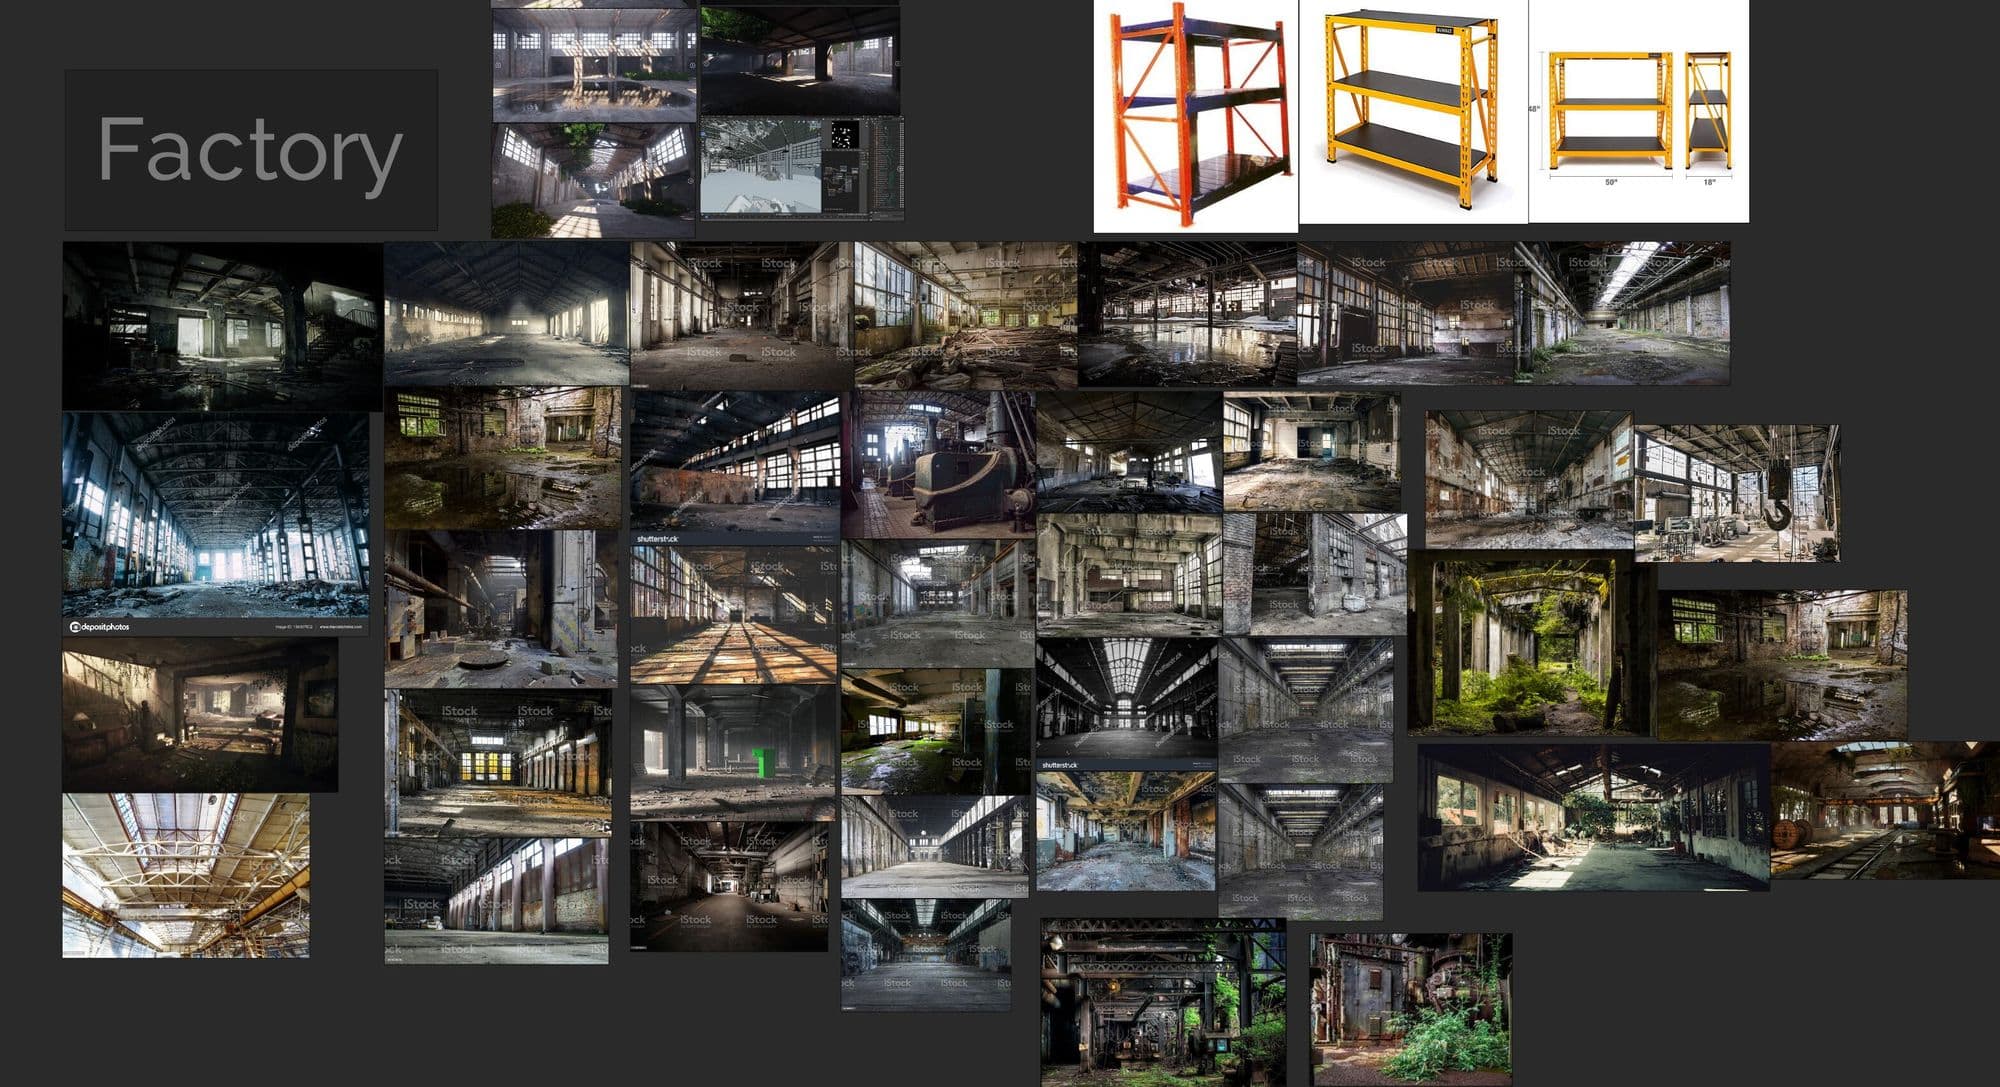
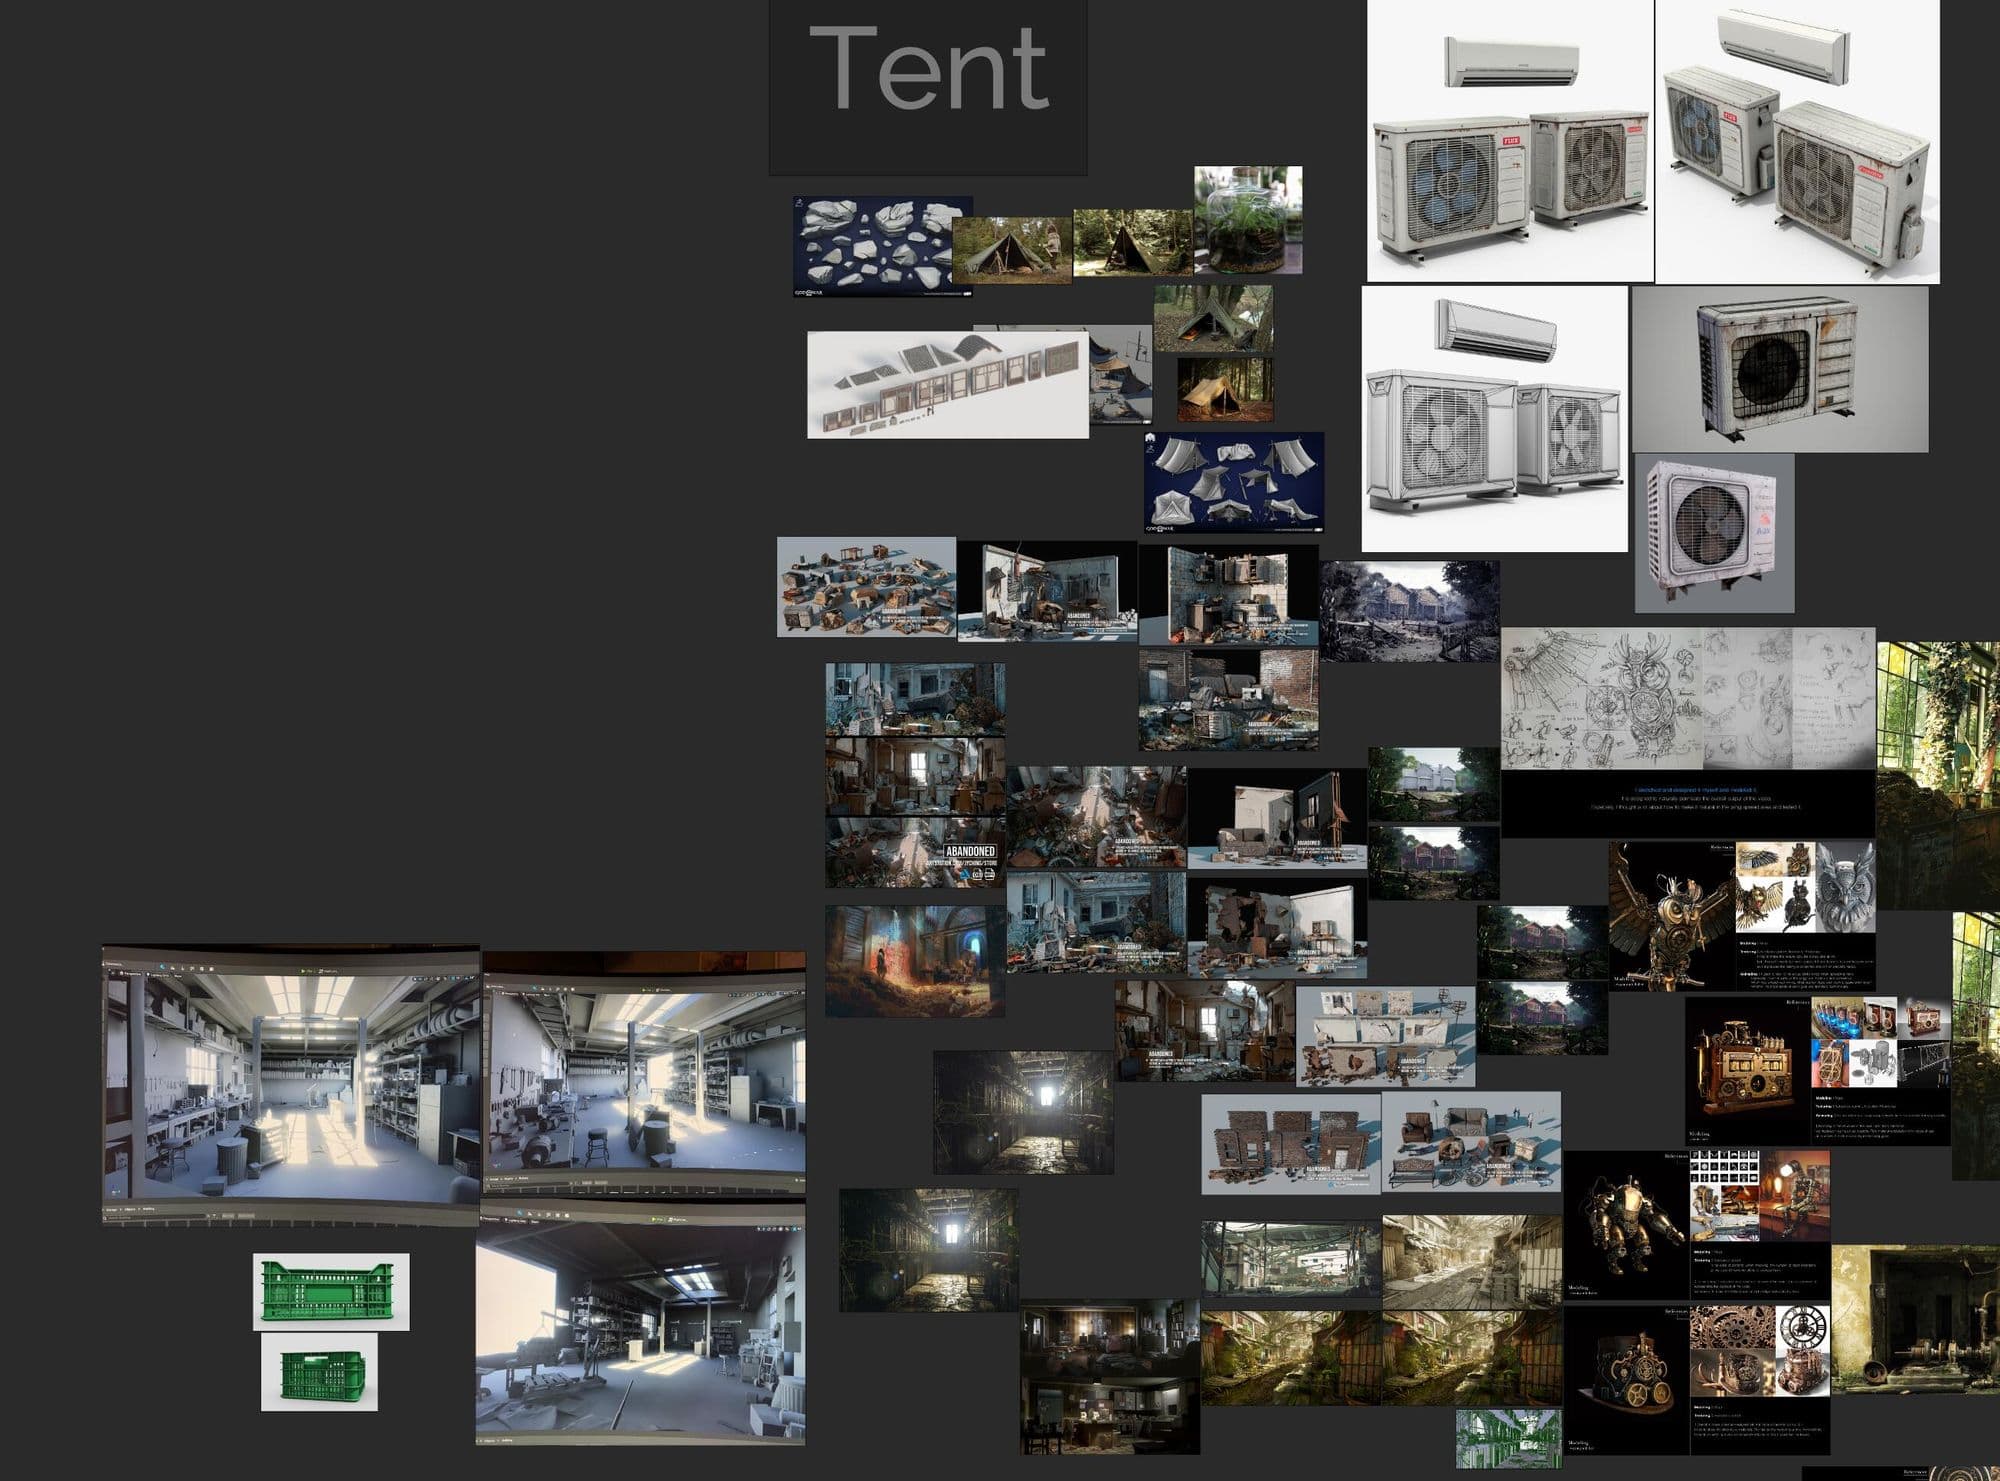
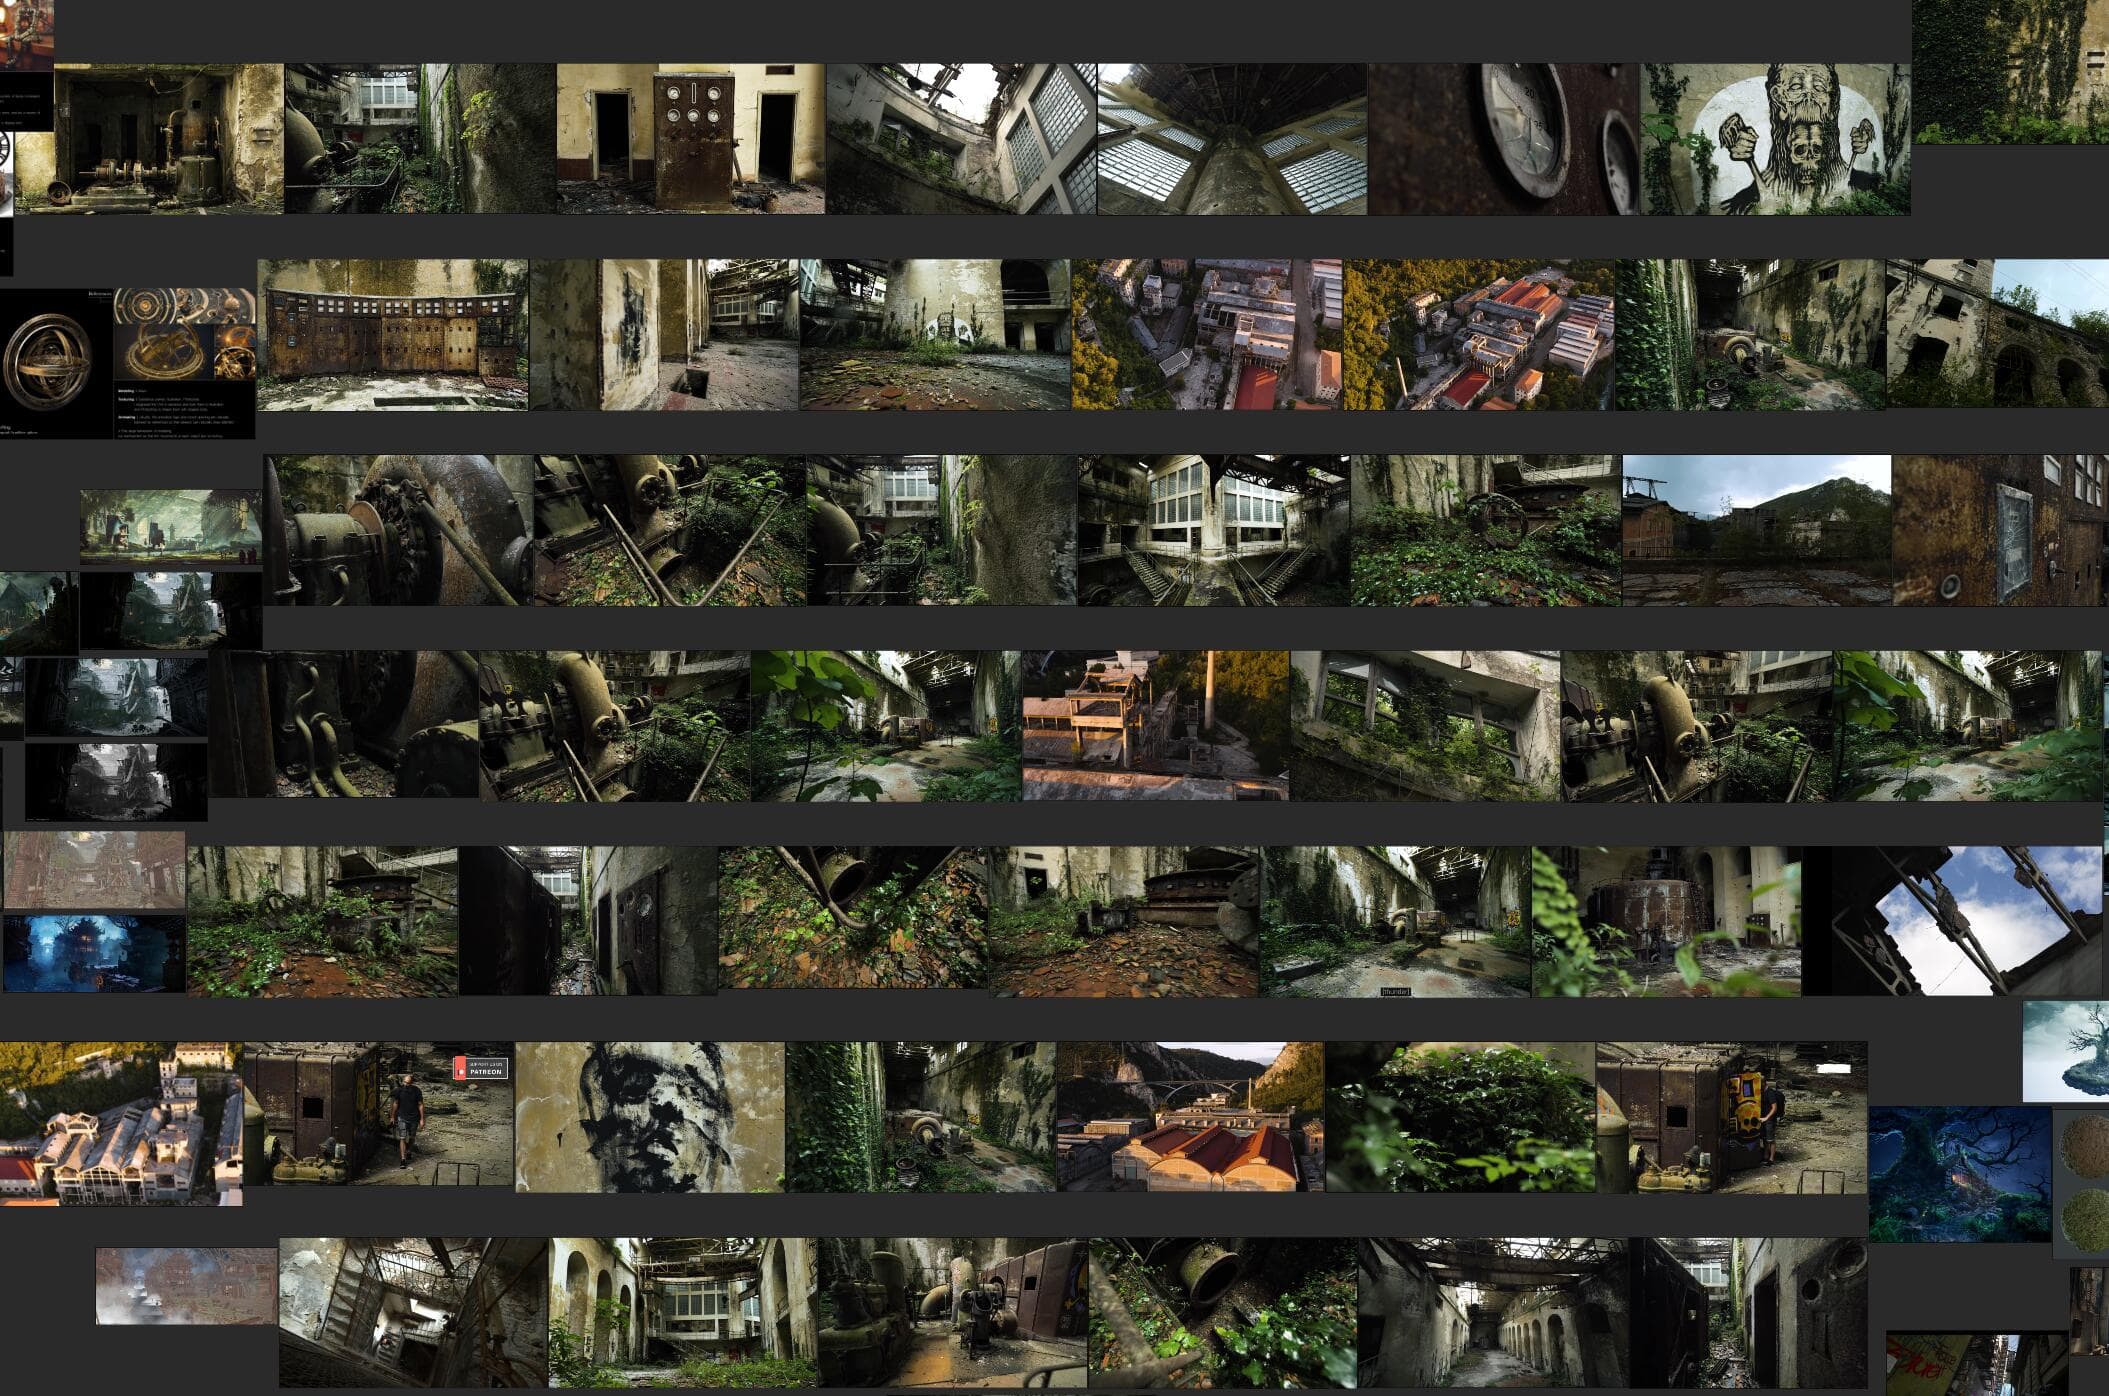
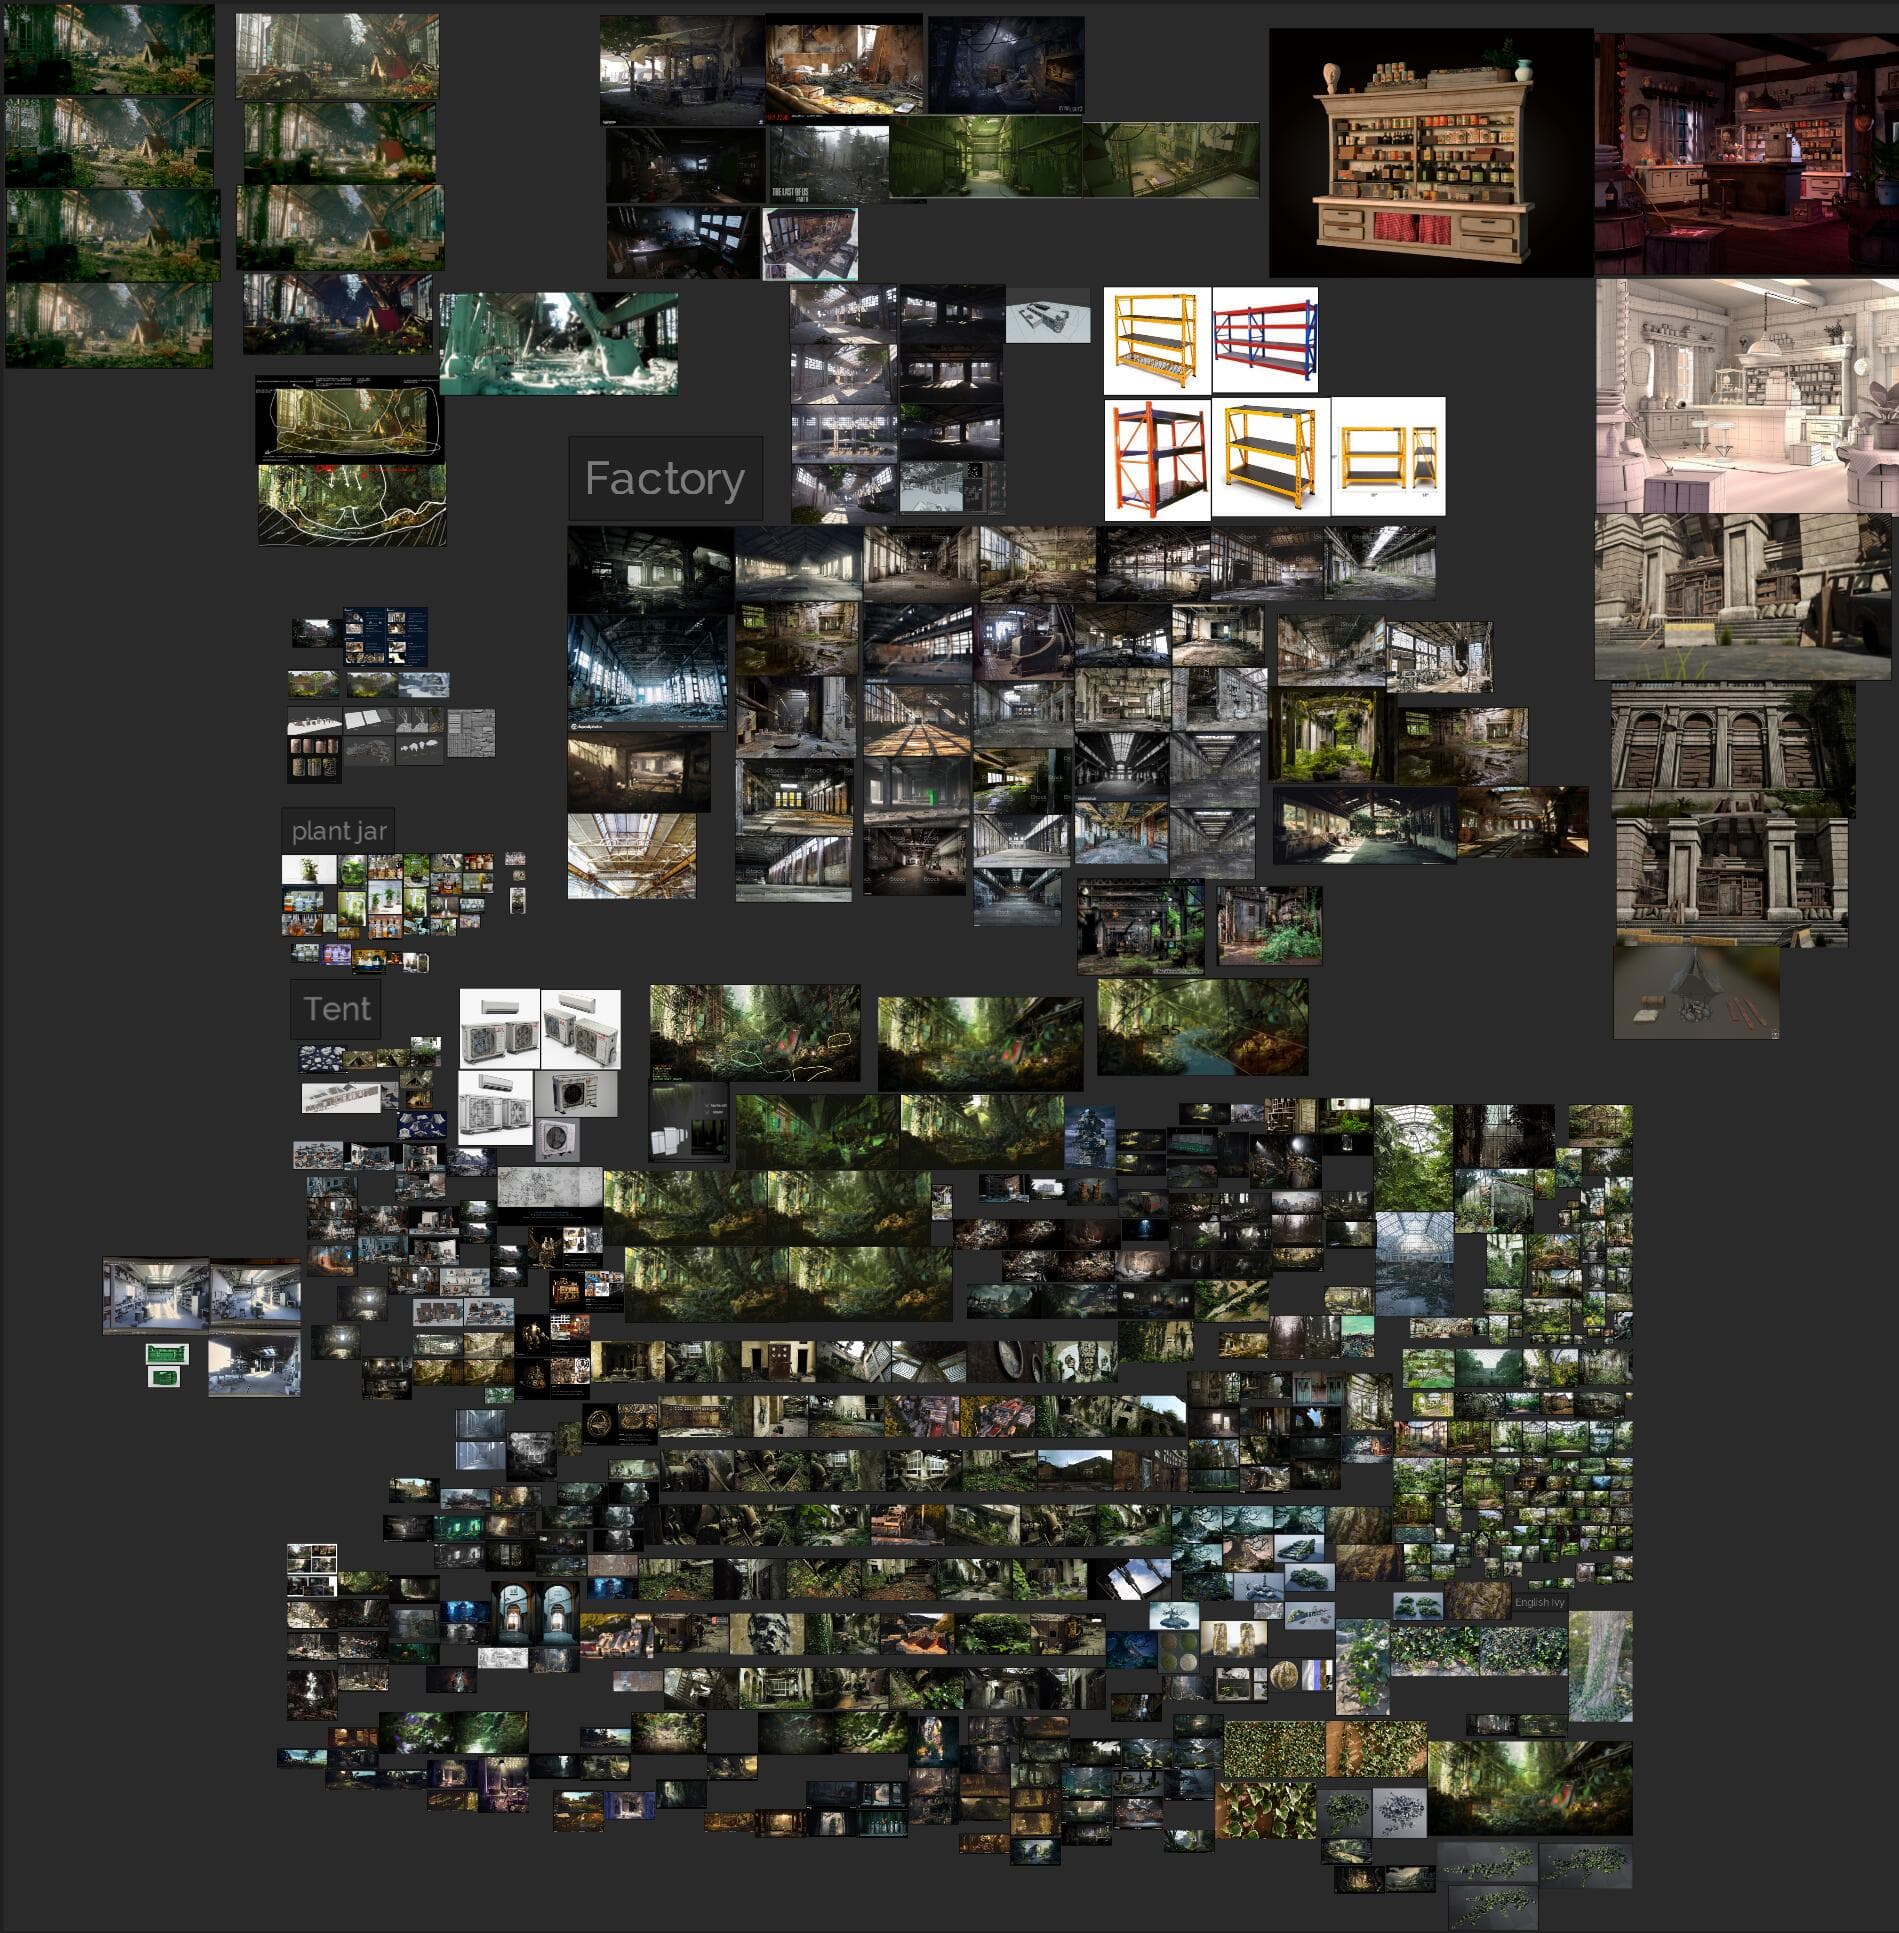
It is always important to have as many reference images as you can, before you jump into any project and start working on it. Make sure to have a massive collection of references. I learned my lessons from it, and now I will spend as much time as possible gathering references. This is a stage in the process you don't want to rush!
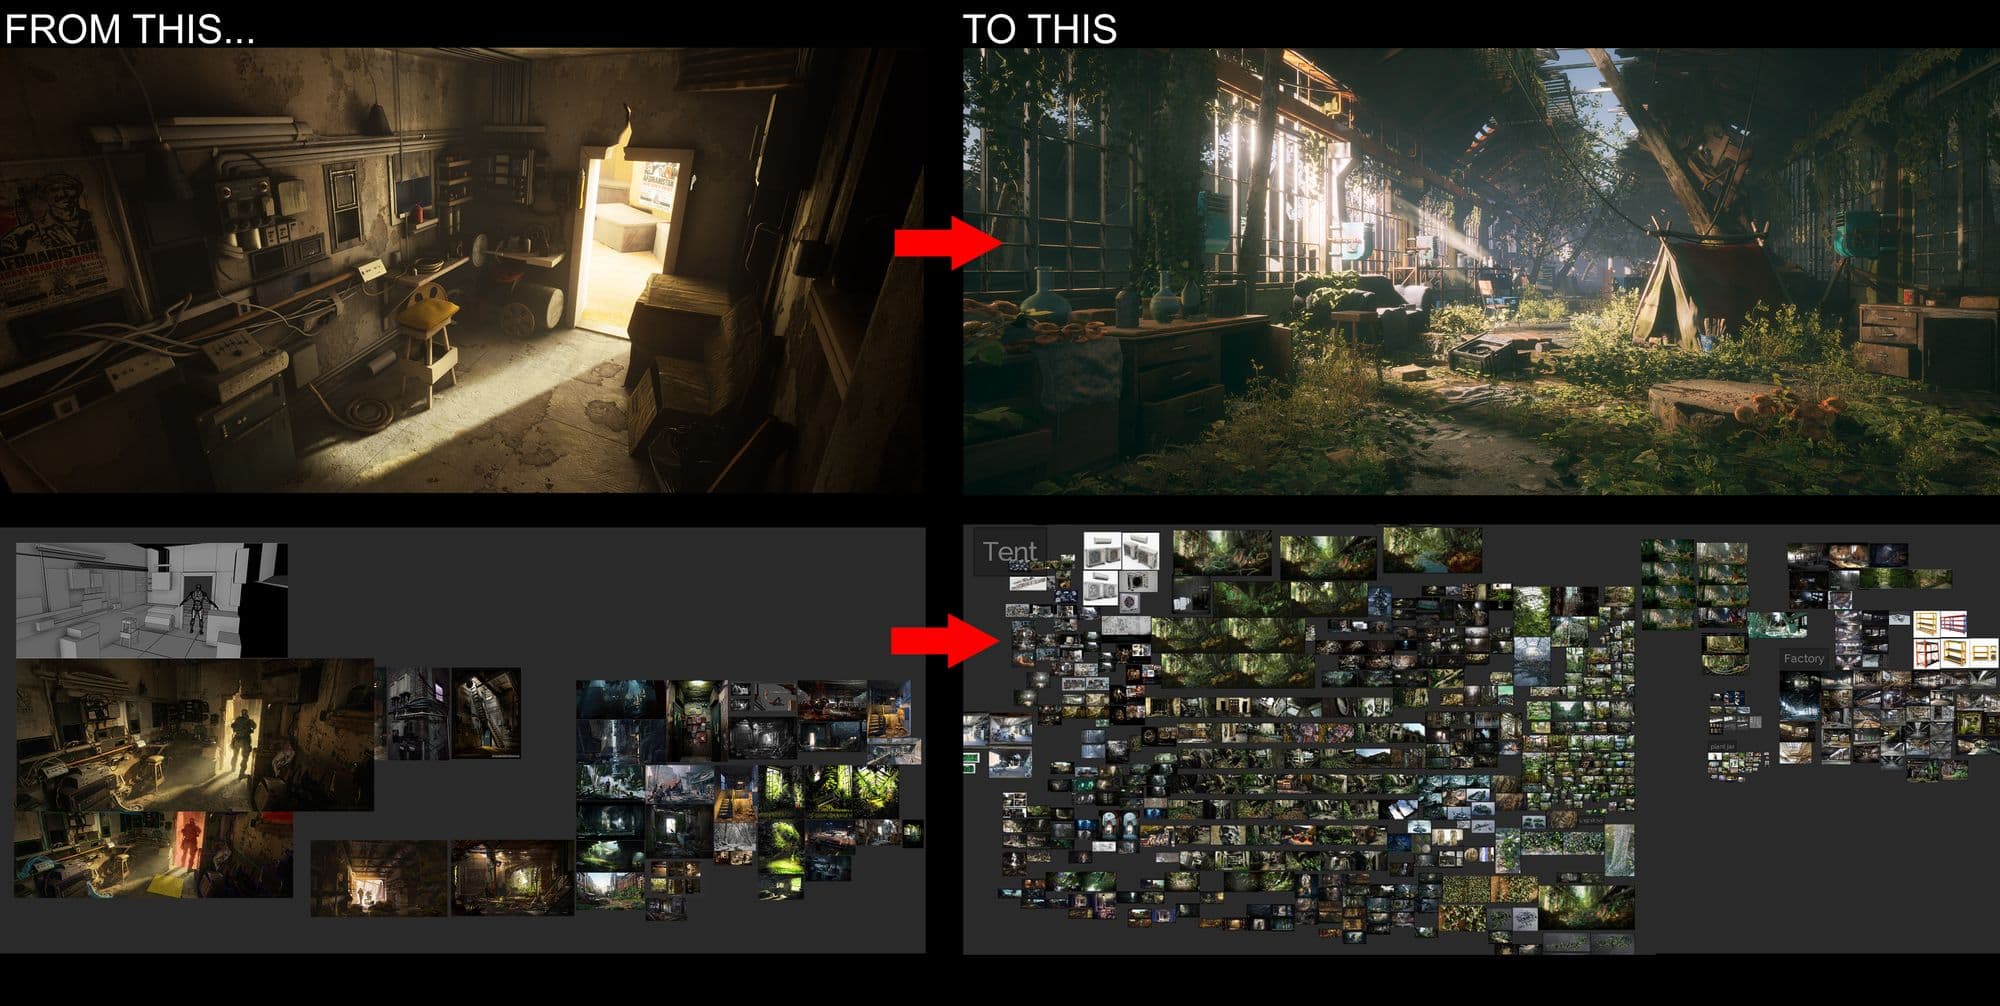
Above is a comparison of two projects I did. After spending more time on the planning phase, and gathering references in the TAKEOVER project, there is a huge improvement between these two projects and the level of detail is totally different.
Your reference board doesn't need to be perfect when you start. You can always add more references to your board alongside working on the project.
My reference board doesn't look this crazy at the beginning of the project. While I'm woking along on the project, my reference board will expand quickly. Sometimes I need something else for my scene, or sometimes I figure out this idea doesn't work and I need more references...in any case, collecting lots of references helped me to build out the scene in my mind.
Before I started to blockout the scene, I asked an amazing environment artist, Martin Teichimann, who worked on The Last of Us Part II and the Uncharted series before, for advice. He created some of my favourite game environments in TLou2 and the Uncharted games. I thought it would be best to ask him and get to know how a professional artist's thinking process and workflow was like. For this project in particular, I wanted to mimic the feel of The Last of Us.
When I ask him for some general advice on how to create large-scale scenes. He told me to think about the story, gameplay, and players' motivation when working on the blockout.
A story, or more ideas behind a scene instantly makes the artwork so much better. It becomes more than just a technical showcase. Martin Teichimann.
Martin's words inspired me a lot. Ever since then I focused on creating story-driven environments to make them believable and to bring life to them.
Since I only had three months to work on this piece, time was very limited for me to create a highly detailed environment. I revised the concept, and decided to customise it a little bit to cut down on some work. I created "my version" of this concept with some story factors. I chose to put a little tent inside the environment. From this point, I wanted to tell a story about a little sanctuary in the post-apocalyptic world.
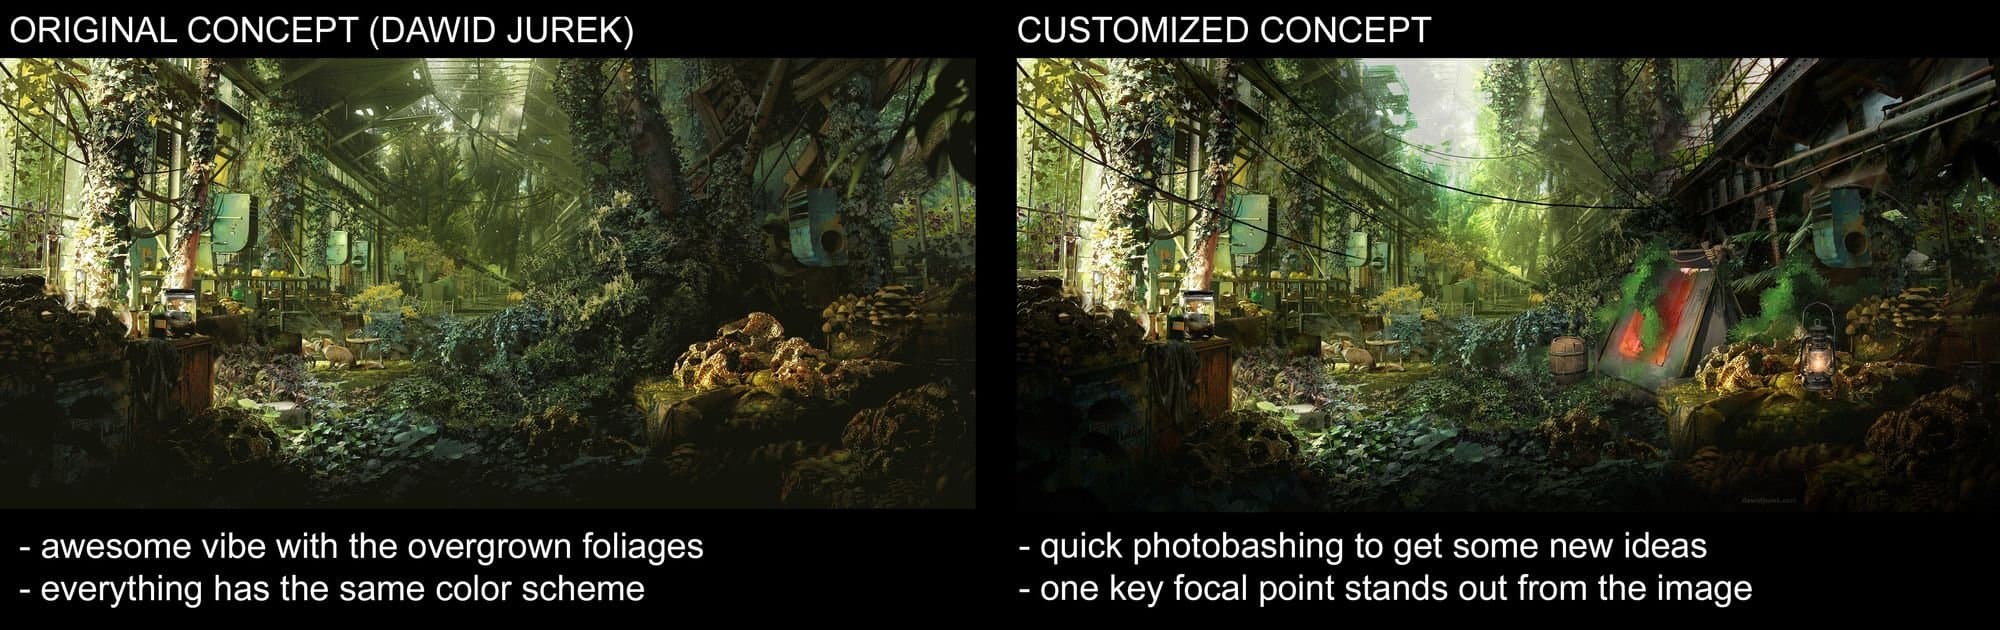
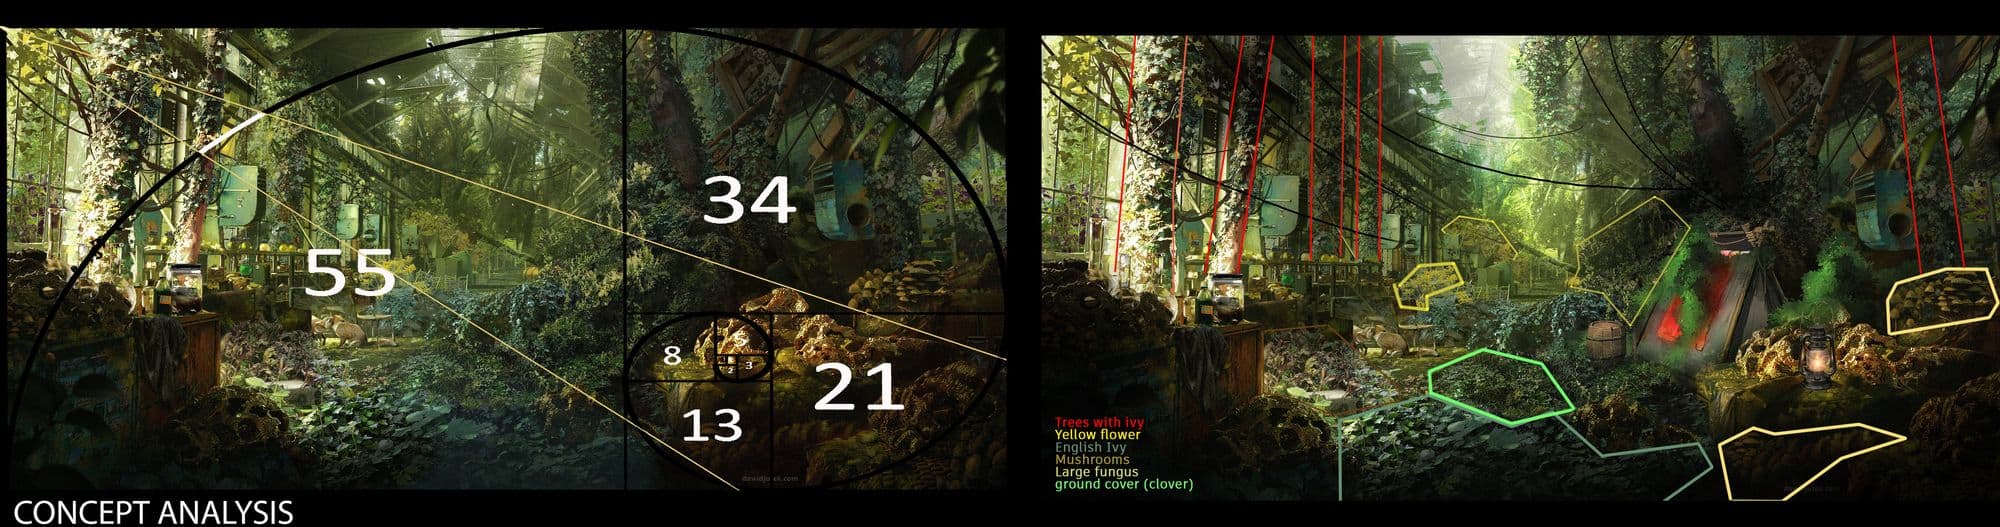
I then spent a little bit more time analysing the concept. Since this concept is complicated, analysing the concept helped me to gain different perspectives and visual guides. I enjoyed this process a lot before I started my blockout and modeling process.
Once I felt like I have a great collection of references and was ready to move to the next stage. I jumped into Maya and set up my camera with all the settings I like. Then, I started to blockout the scene.
The blockout stage is the most important part of a project. It provides a starting point and the foundation to visualise the forms, composition, and overall look of the environment.
I spent a lot of time just playing around with my camera angle and composition.
The planning should be flexible and you should always prepare for changes. You can think of the goal as the peak of a mountain. A direction route towards the peak needs to be set up, but it is not likely to plan every step towards the goal. If the route is troubling, change to another route before you get lost on it. Planning is great, but being flexible and adaptable to changes is even better. At this stage the final decisions aren’t made and it’s very flexible to change things.

I went a little bit too detailed on the blockout and spent a lot of time, however, I still think it provided me with a solid composition with all the elements I wanted. All the props in my scene have their purposes. This TAKEOVER project is the most detailed and rich looking one out of all my projects. Simply because I spent most of my time on the blockout.
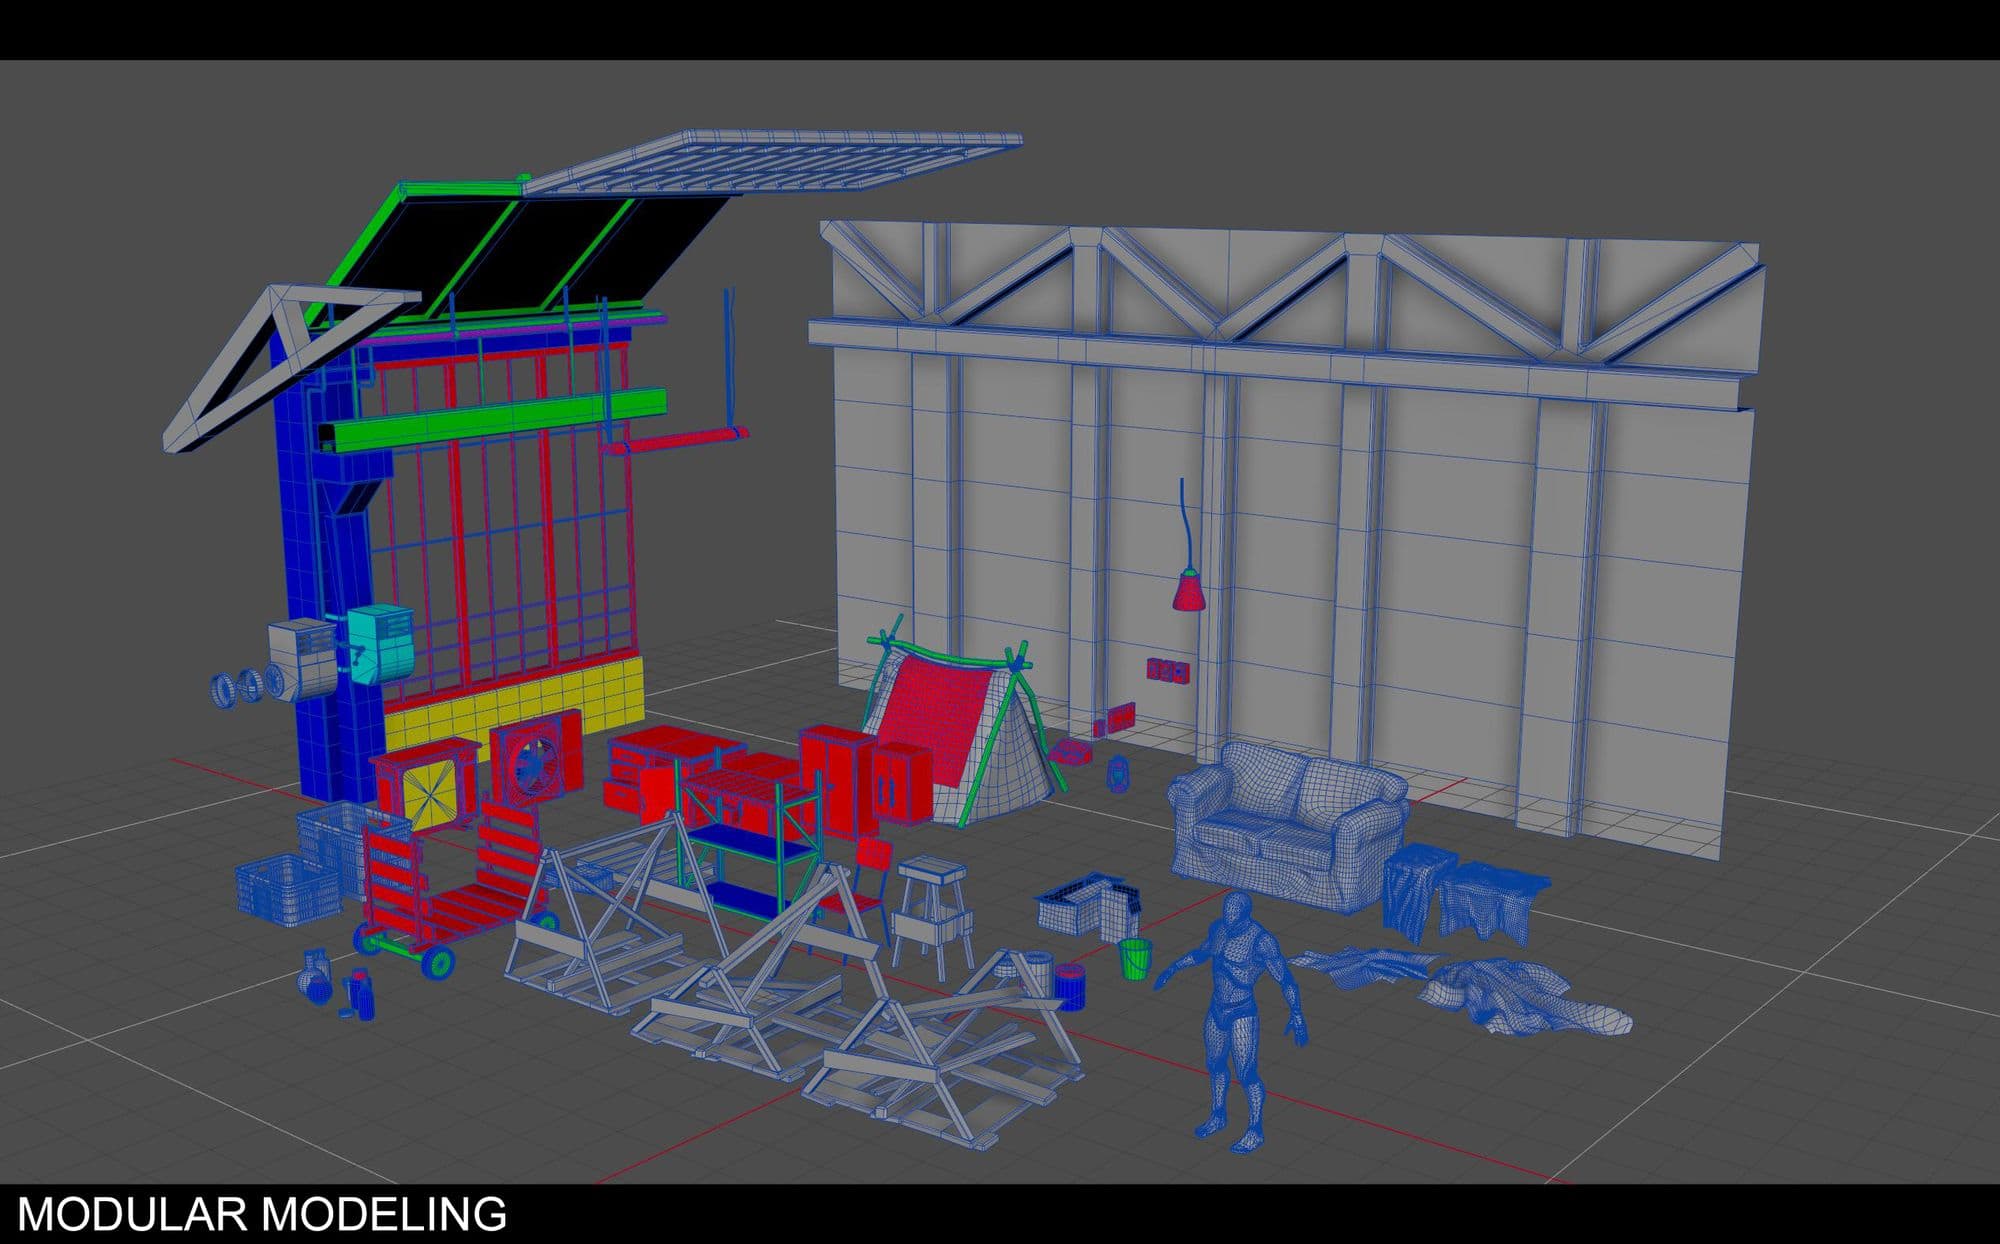
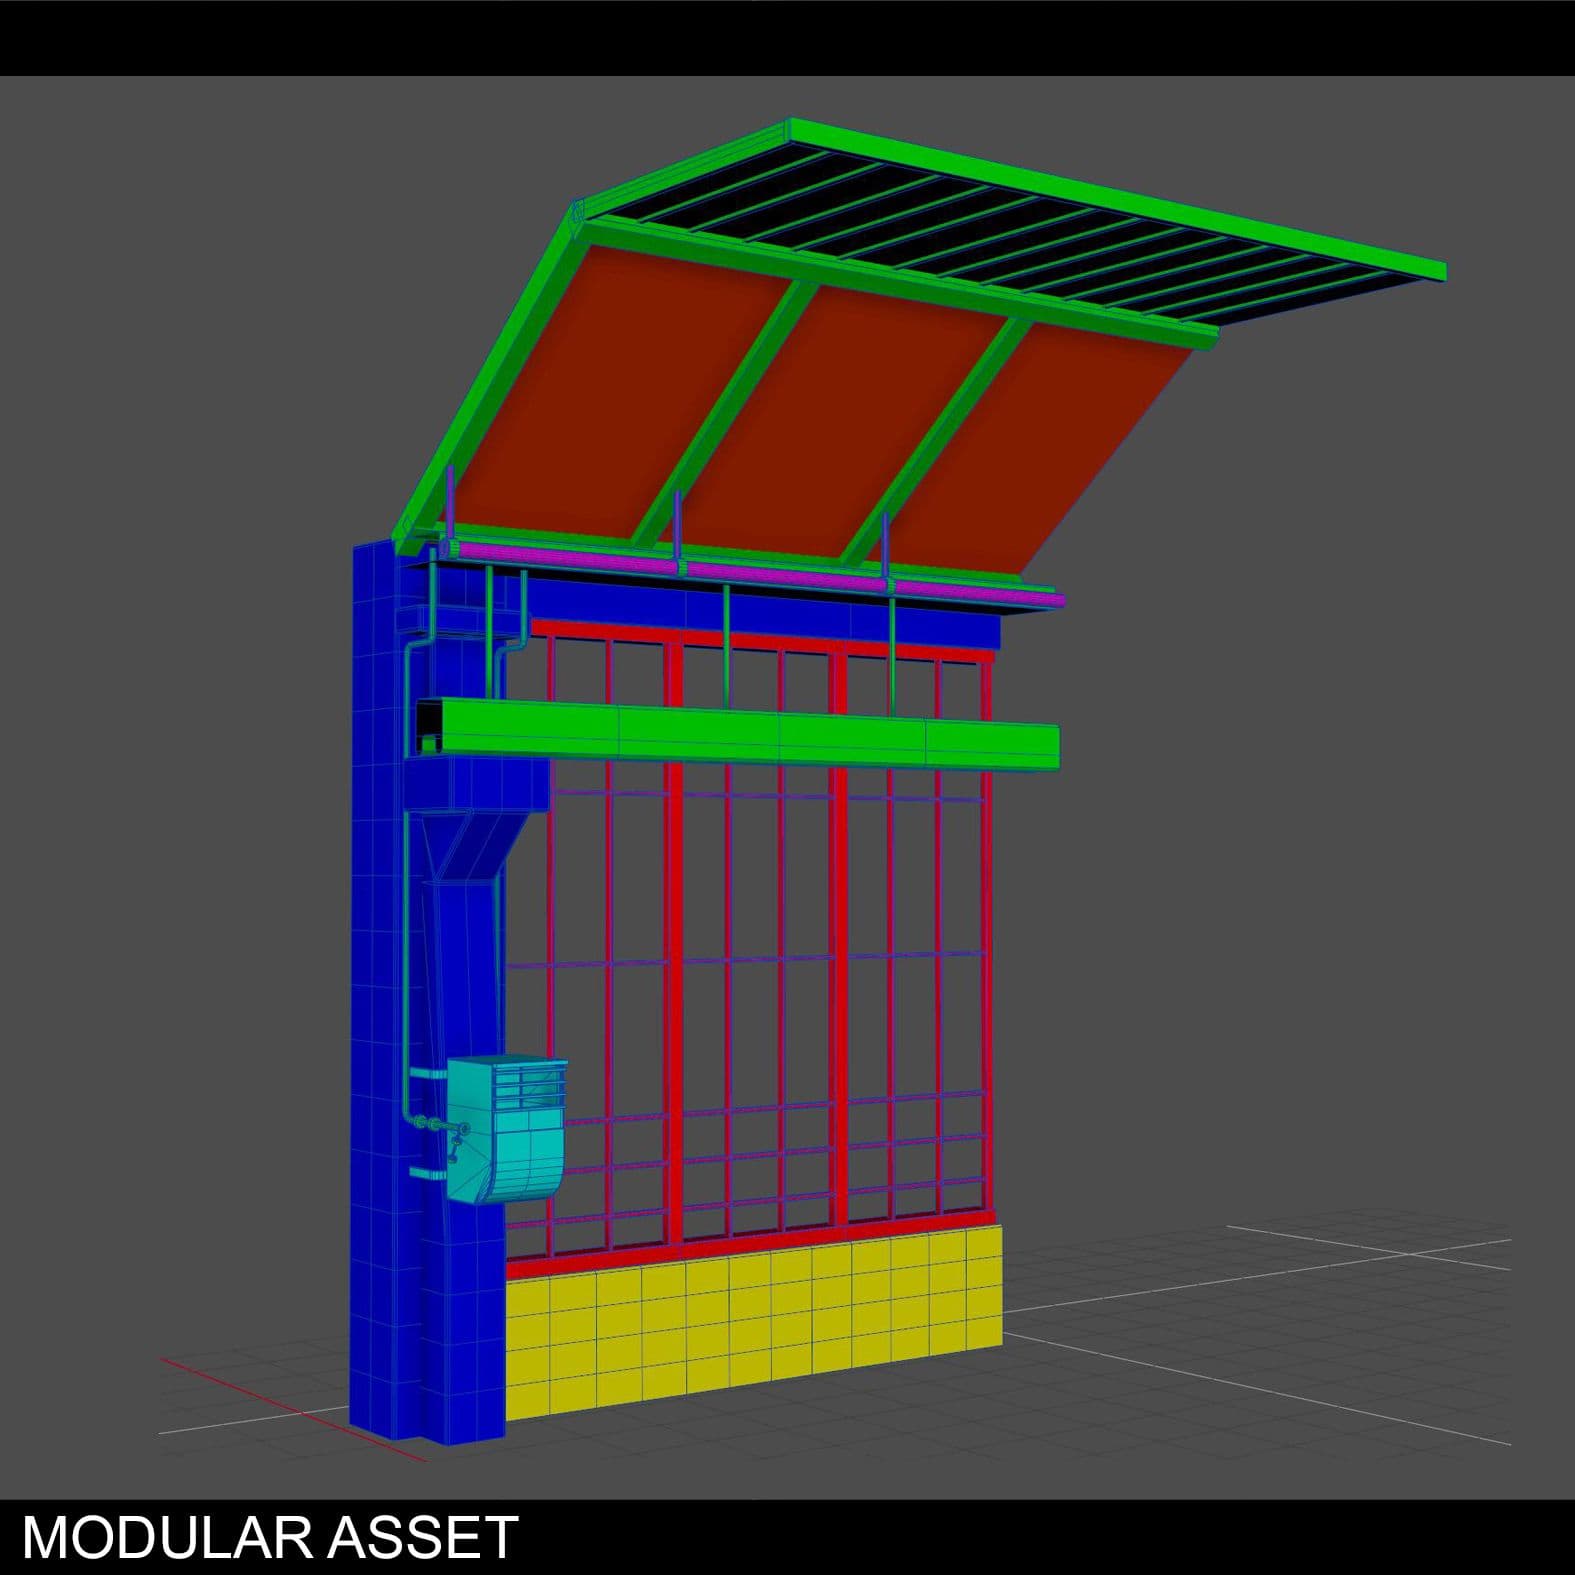
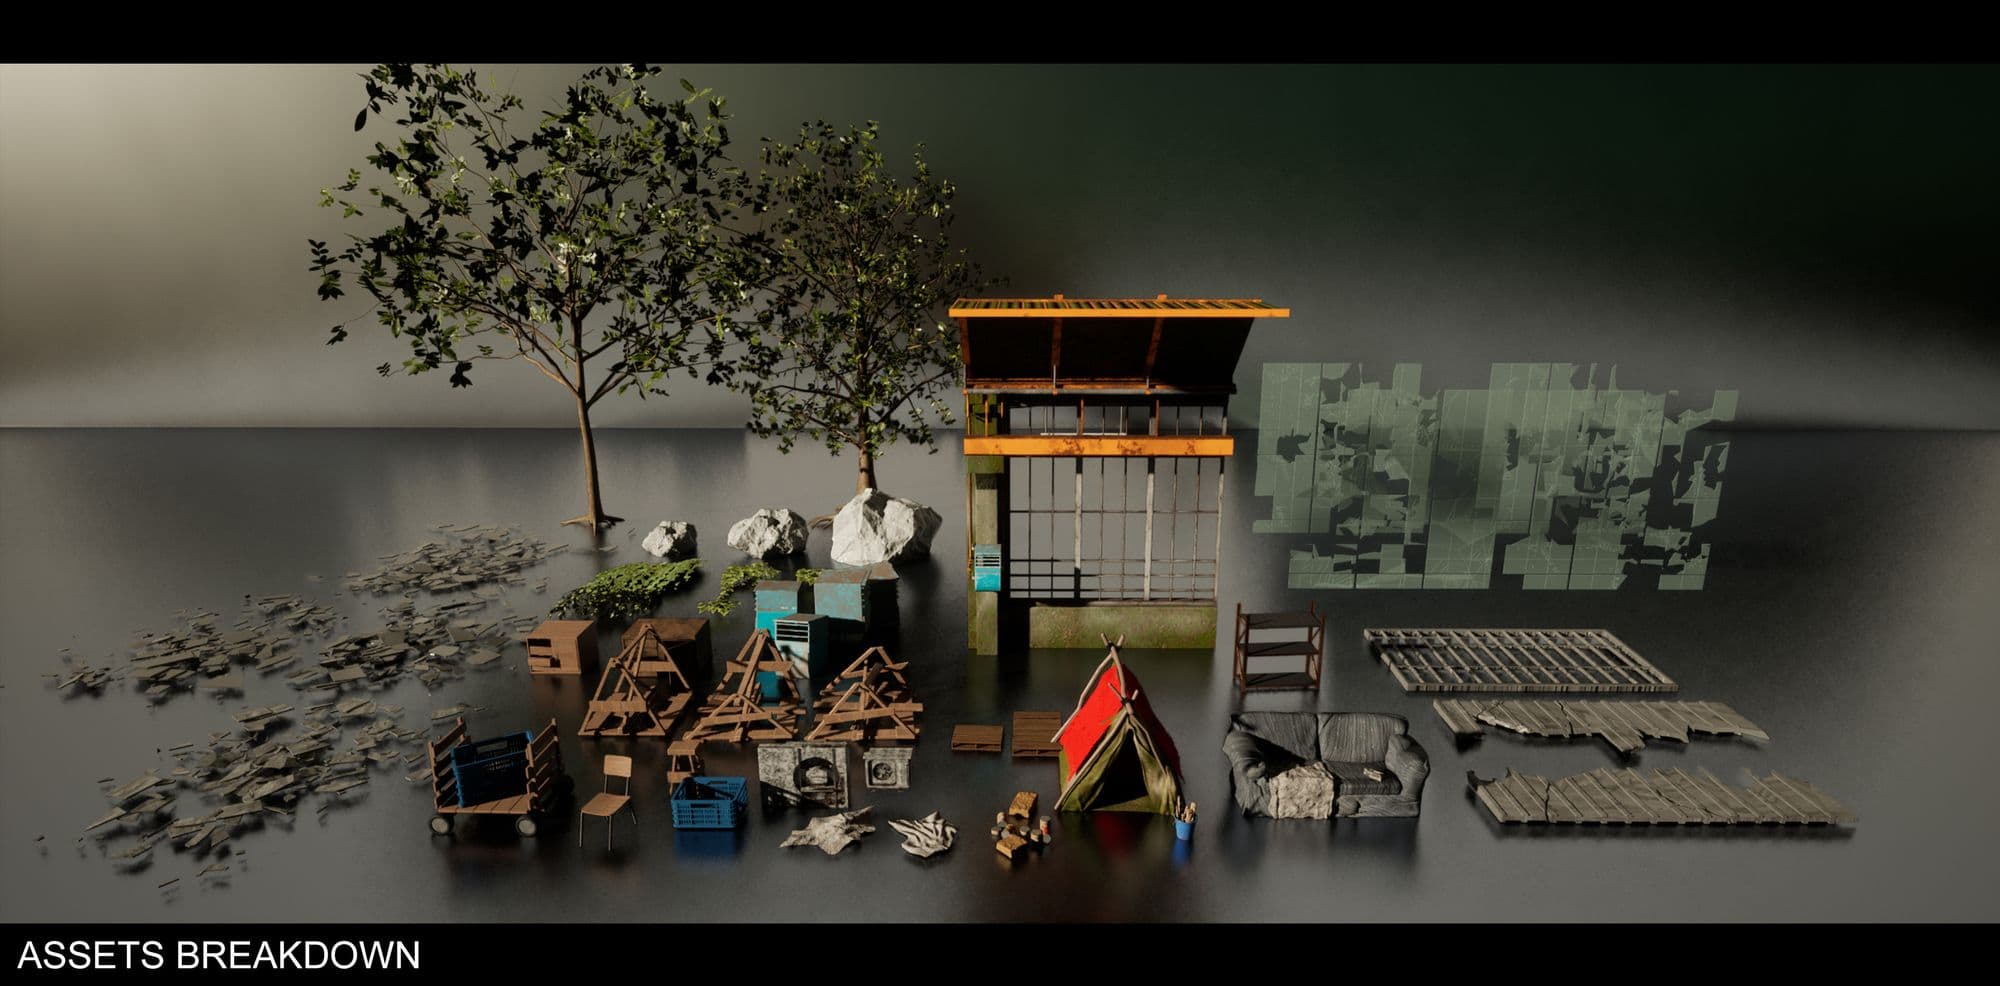
Then, I modeled all my final assets in modular pieces based on my blockout scene. I can use my modular assets repeatedly across the scene with different modifications.
I prefer to assign different shaders to my modular assets. Each colour represents different materials and then everything is combined as one static mesh. My asset library looks super clean when I export all my assets into Unreal Engine 5. In this way, I can assign different materials inside Unreal Engine 5 and it's easier to organise and manage my static meshes.
For this project, I created my blockout and then modeled all my modular assets inside Maya. All my assets were finished before I exported them into Unreal Engine 5. By doing this I had a super detailed scene already and was able to export into Unreal Engine 5 and play around with the lighting.
In addition to this, I recently tried a new workflow. I started to block my scene inside Unreal Engine 5 at the beginning of the project, and then modeled assets in Maya. By doing it this way, I already had a lighting setup at the beginning of the project.
Each method has its advantages and I will keep playing around with both methods. There isn't an absolute "correct" way to work, everything should be flexible to go back and forth.
After I finished modeling, I decided to move everything into Unreal Engine 5. Without lighting and texturing, it's hard to visualise the entire scene. I needed to textures and lighting in to get a further idea of the final qualities of the environment.
After I bring the entire scene into the Unreal Engine, the first thing I do is set up is the lighting and cameras.
Setup your cameras and light rigs, and make adjustments as you work up your scene.
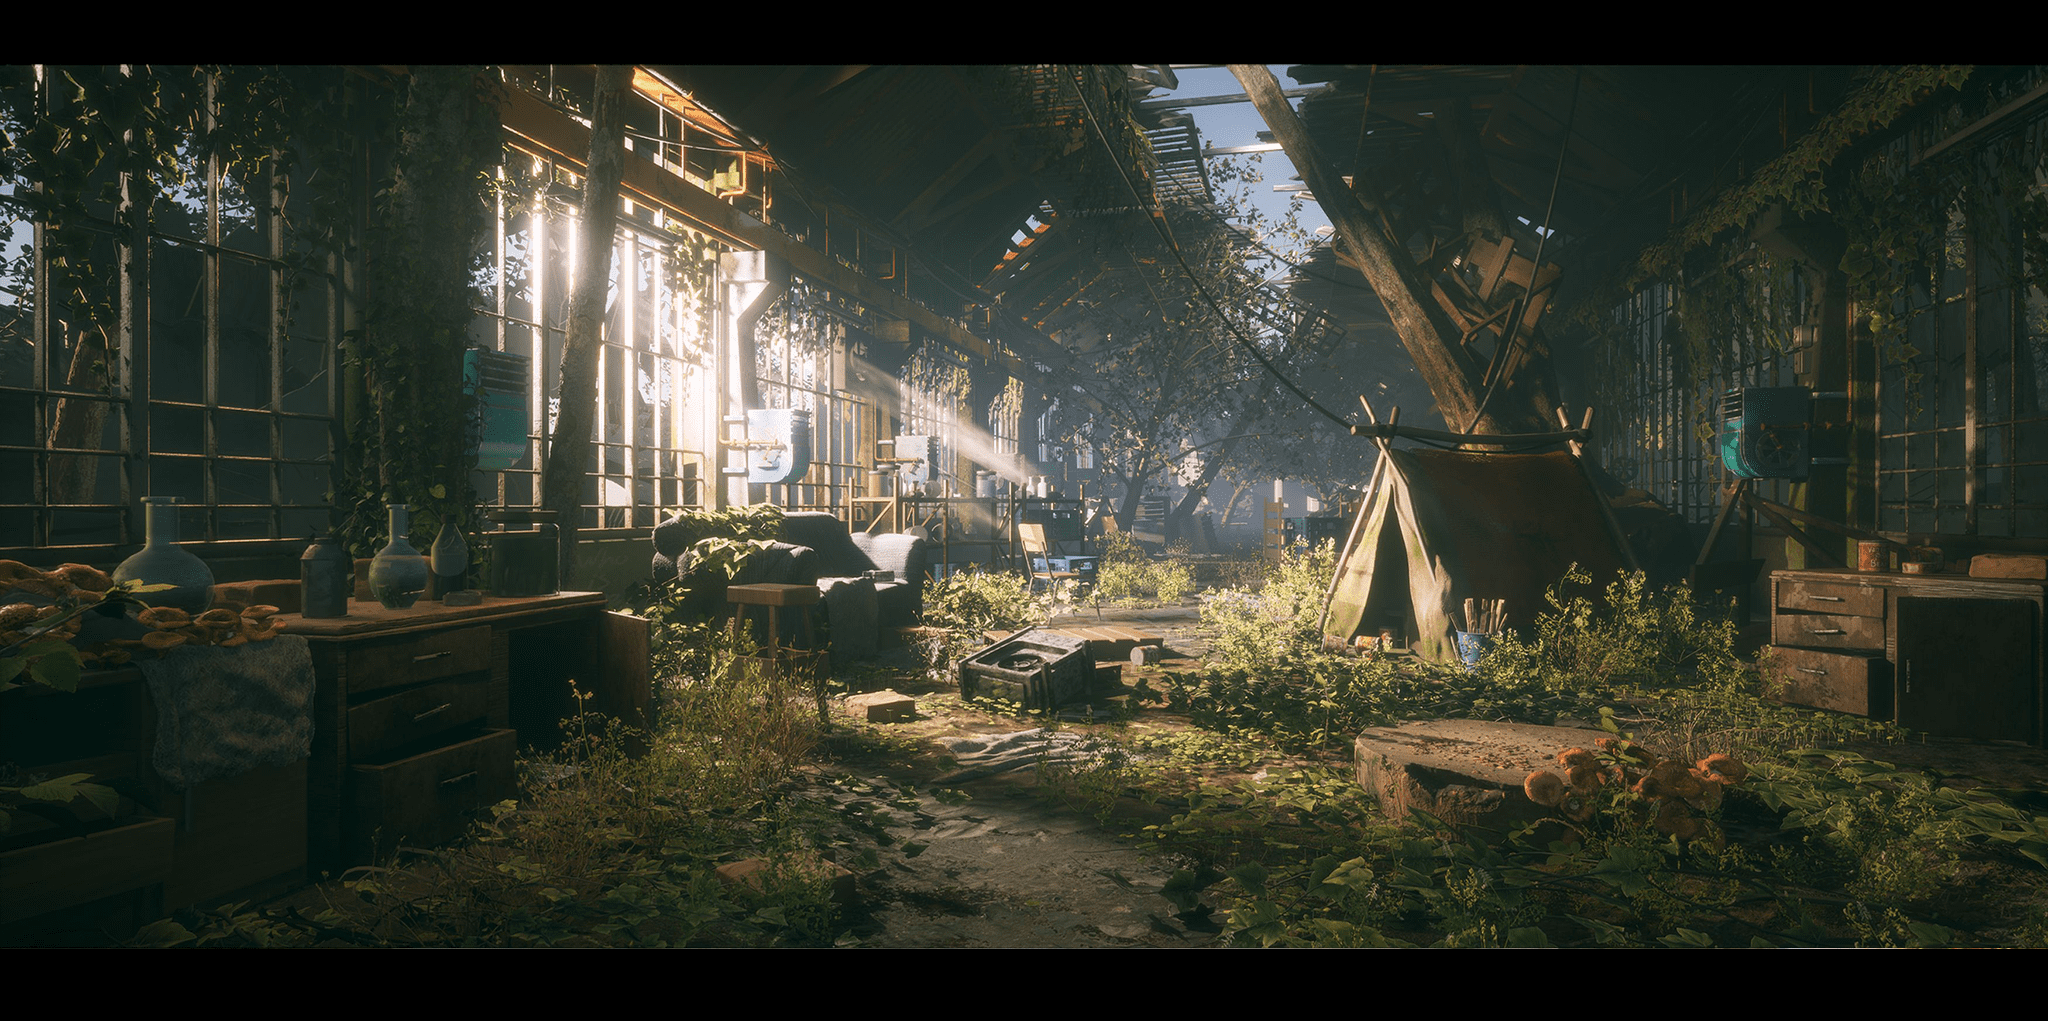
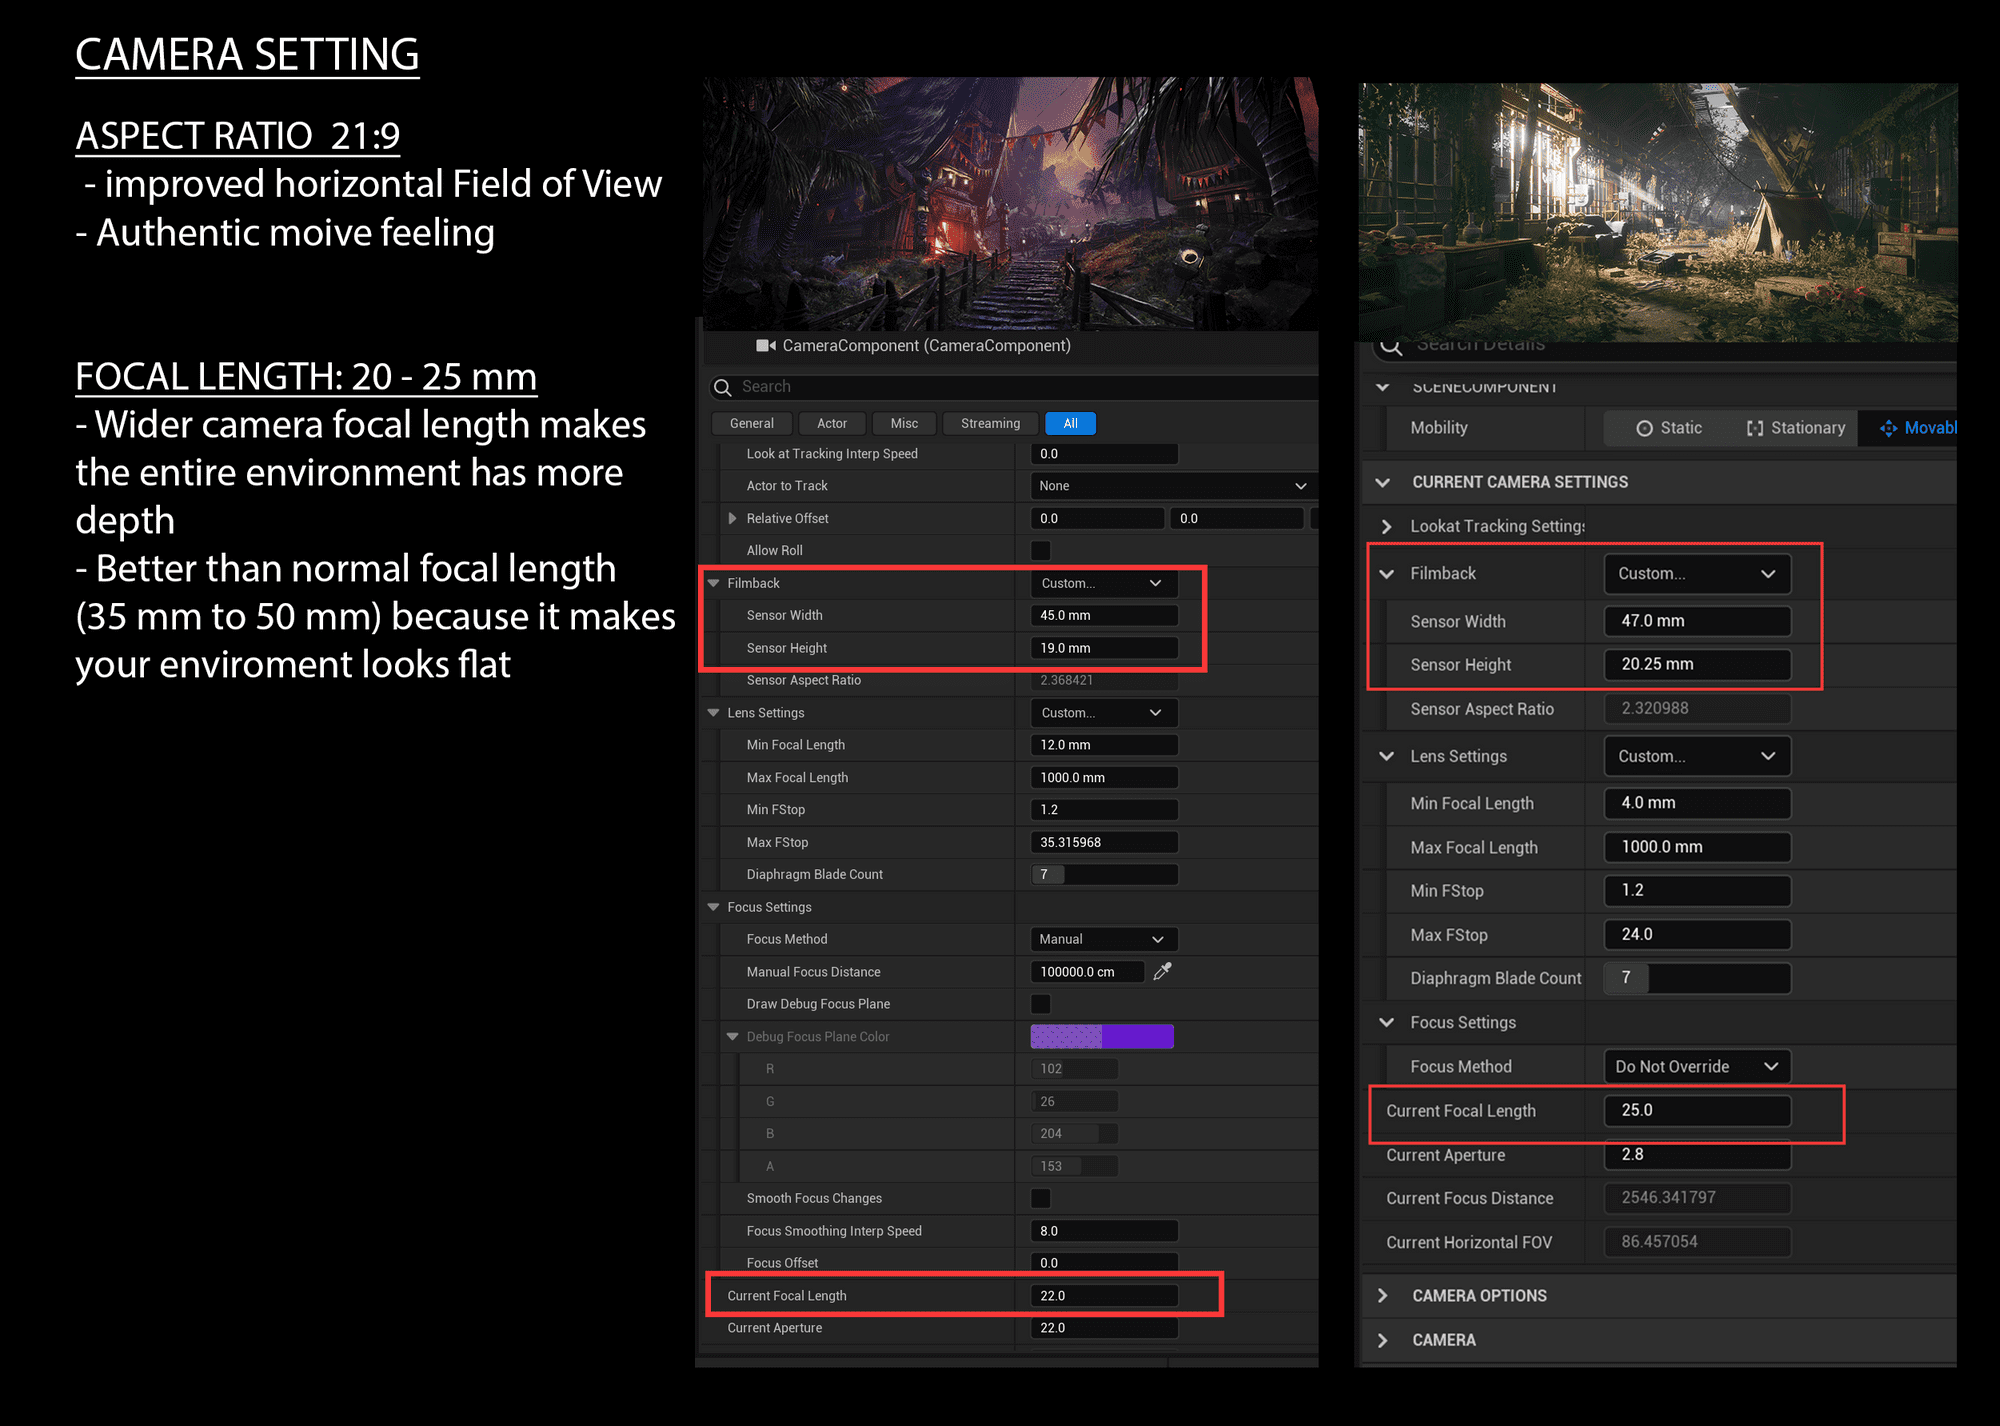
My preferred aspect ratio is 21:9 since the horizontal field of view is at it's optimum, and this also gives an authentic movie-like feeling.
Focal Length is the second set I would adjust. The normal 35 mm – 50 mm Focal Length is very boring and makes your scene looks flat. I prefer to make my focal length a little bit wider by changing the range between 20 mm – 25 mm. This way, the entire environment has more depth. Here are the camera settings for my two recent projects. I highly recommend everyone test out different aspect ratios and focal lengths depending on the scene they are creating.
Since I already figured out all the composition and assets for my scene. I started to create my modular pieces on top of the blockout. In this project, I had very limited assets and I tried my best to reuse and utilise my assets library.
I found myself becoming more creative and better artist as I challenged myself to reuse my assets all over my environment.
I relied heavily on rectangle lights and point lights since they give me more control. The old-school technique is applied by using a mesh to block the light in the foreground. Hence the middle and background are brighter and stand out more. When I create any environment projects, I will break my environments into 3 parts: foreground, middle ground, and background. I always watch out for the relationship between each part when working on the lighting.
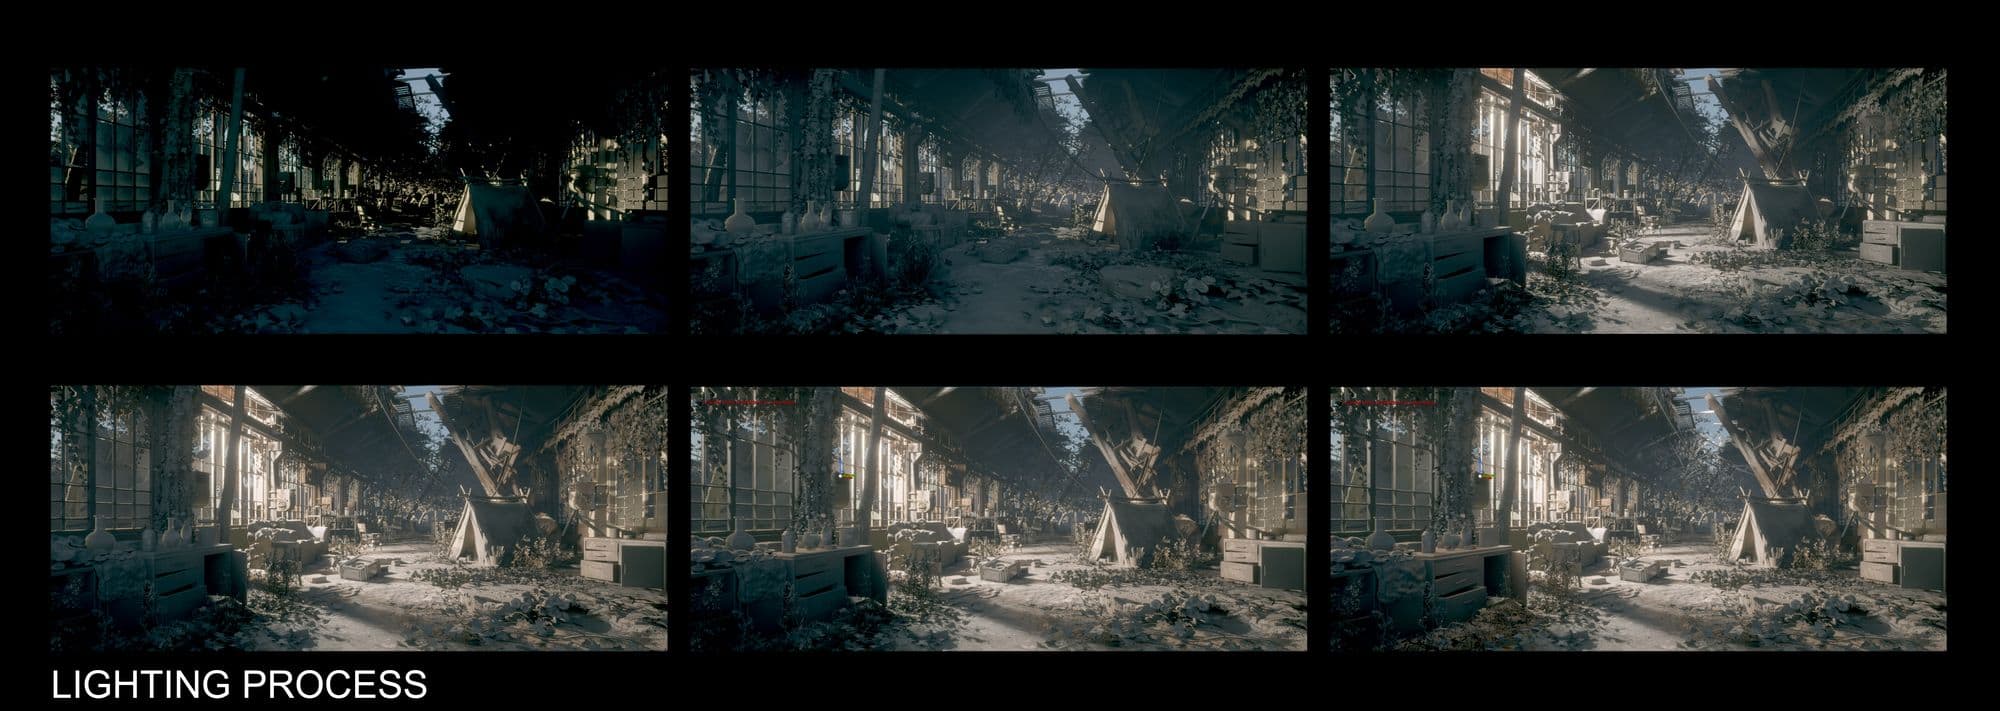
The reason I'm showing the lighting pass instead of the colour pass is that I often observe the black and white value of my scene to see if anything is unbalanced. Value is important to figure out whether the subject has a decent volume or is flat. This is why I put lots of lights next to my assets to create edge light details. This will create another lighting layer on the assets and create more volume.
The Post Process Volume is the place I'll spend most of my time figuring out my lighting and colour grading. Since it's real-time update I can always tweak all the settings and test which lighting is the best for me.
During the project, I went on a field trip with my friend to collect photos for the ivy. I believe it's really nice to know what you want to create. I wanted to know what the ivy leaves felt like, what their texture is, and structure of them; this was especially important for me as I have never created foliage before.

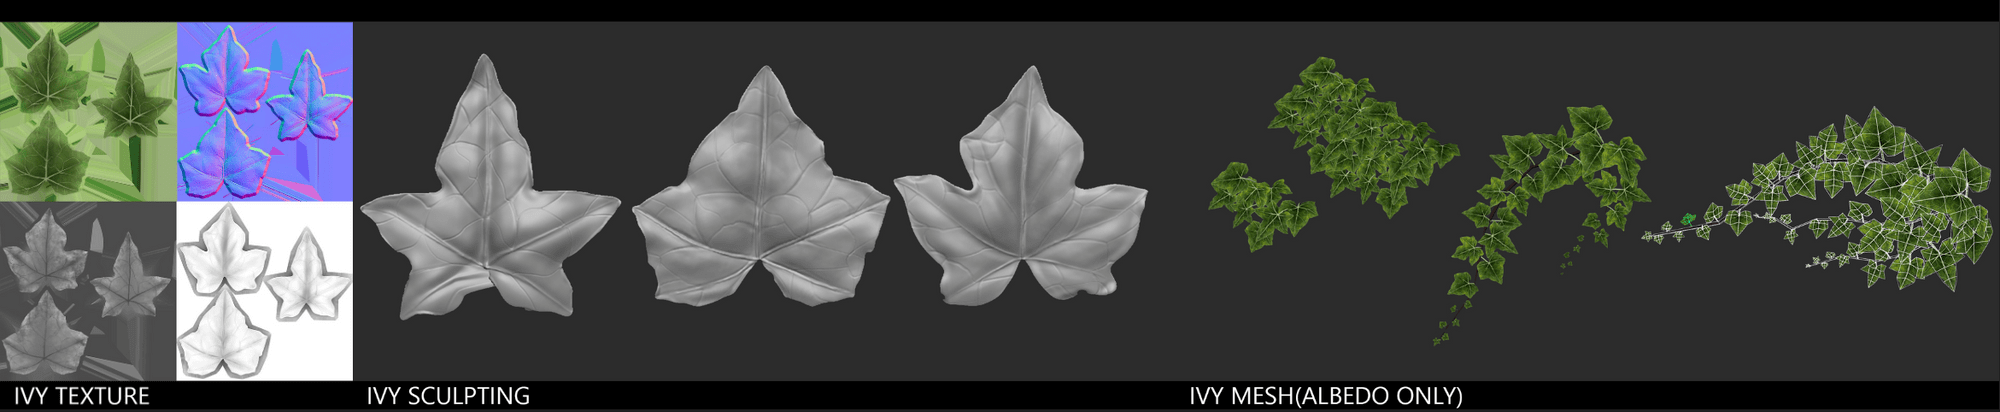
I had a lot of fun creating my custom foliage using ZBrush to sculpt high poly and baked down to low poly leaves. I then modified some variations both inside SpeedTree to create ivy cards, and inside Autodesk Maya to create ivy meshes.
Here is a quick video of high-poly leaf sculpting. I didn't need to zoom-in and be precise with all of my strokes since the ivy was going to be e small anyways. All I needed was a nice bump variation and leaf stem details.
After I finished sculpting three ivy leaves, I put them all into Substance 3D Painter and baked them down to low-poly and hand-painted the textures into one texture sheet.
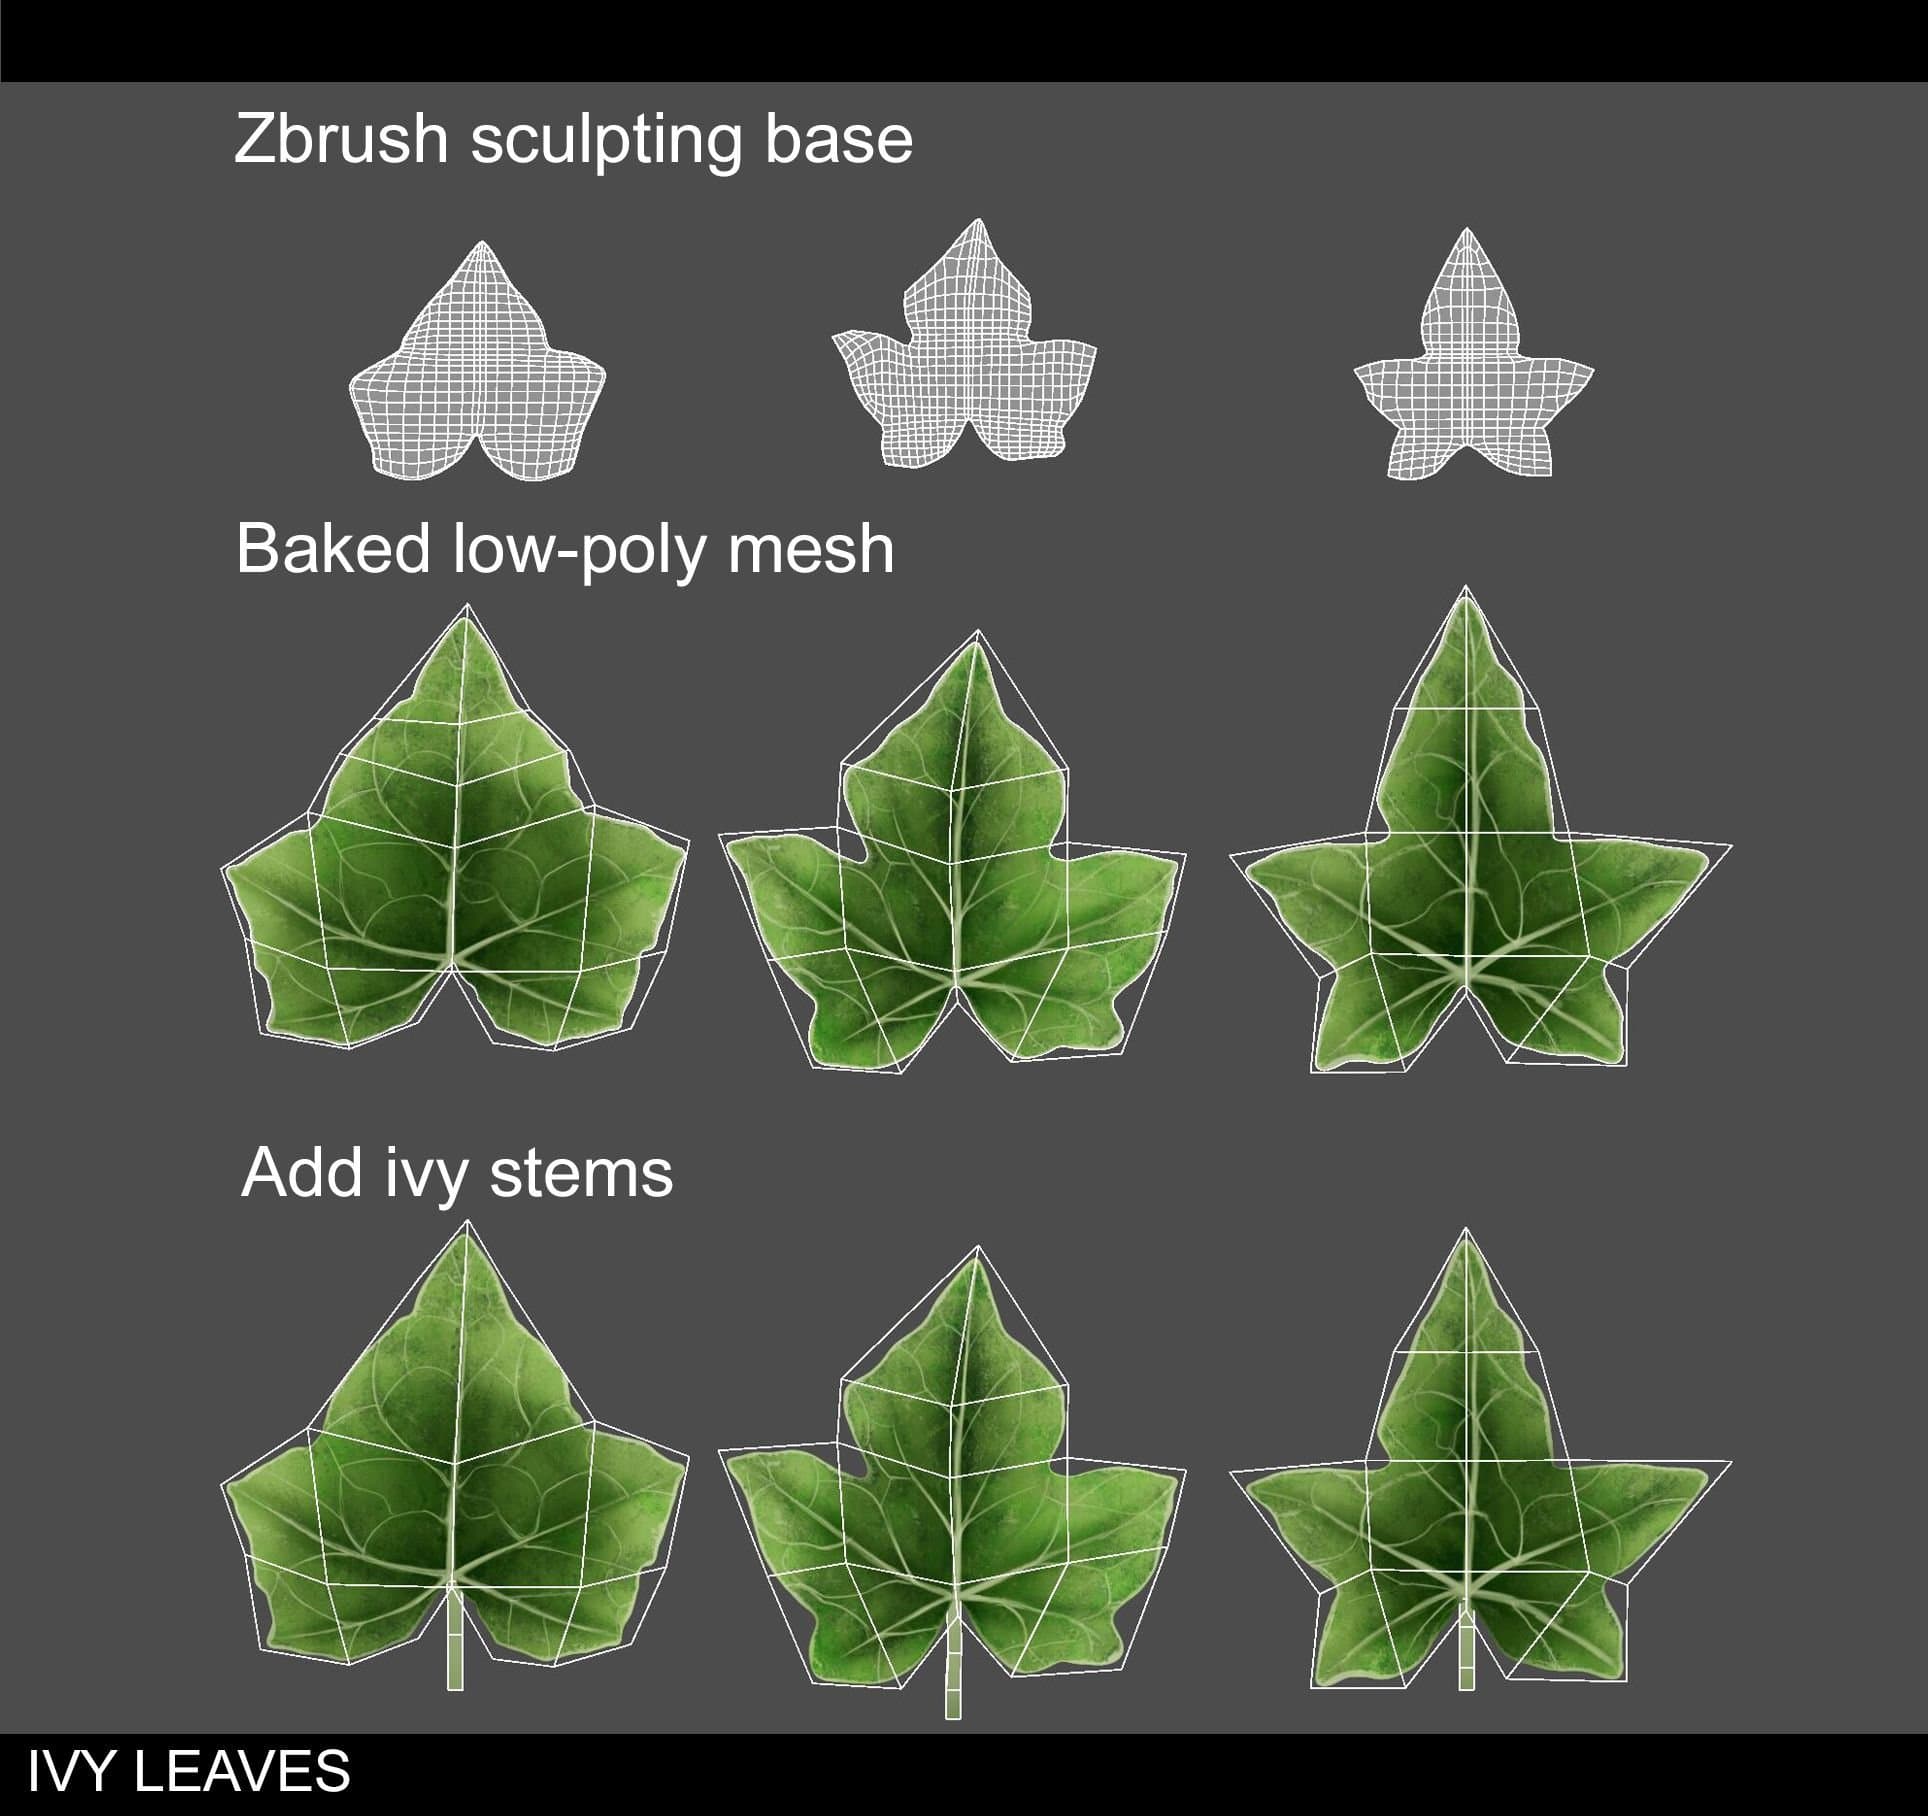
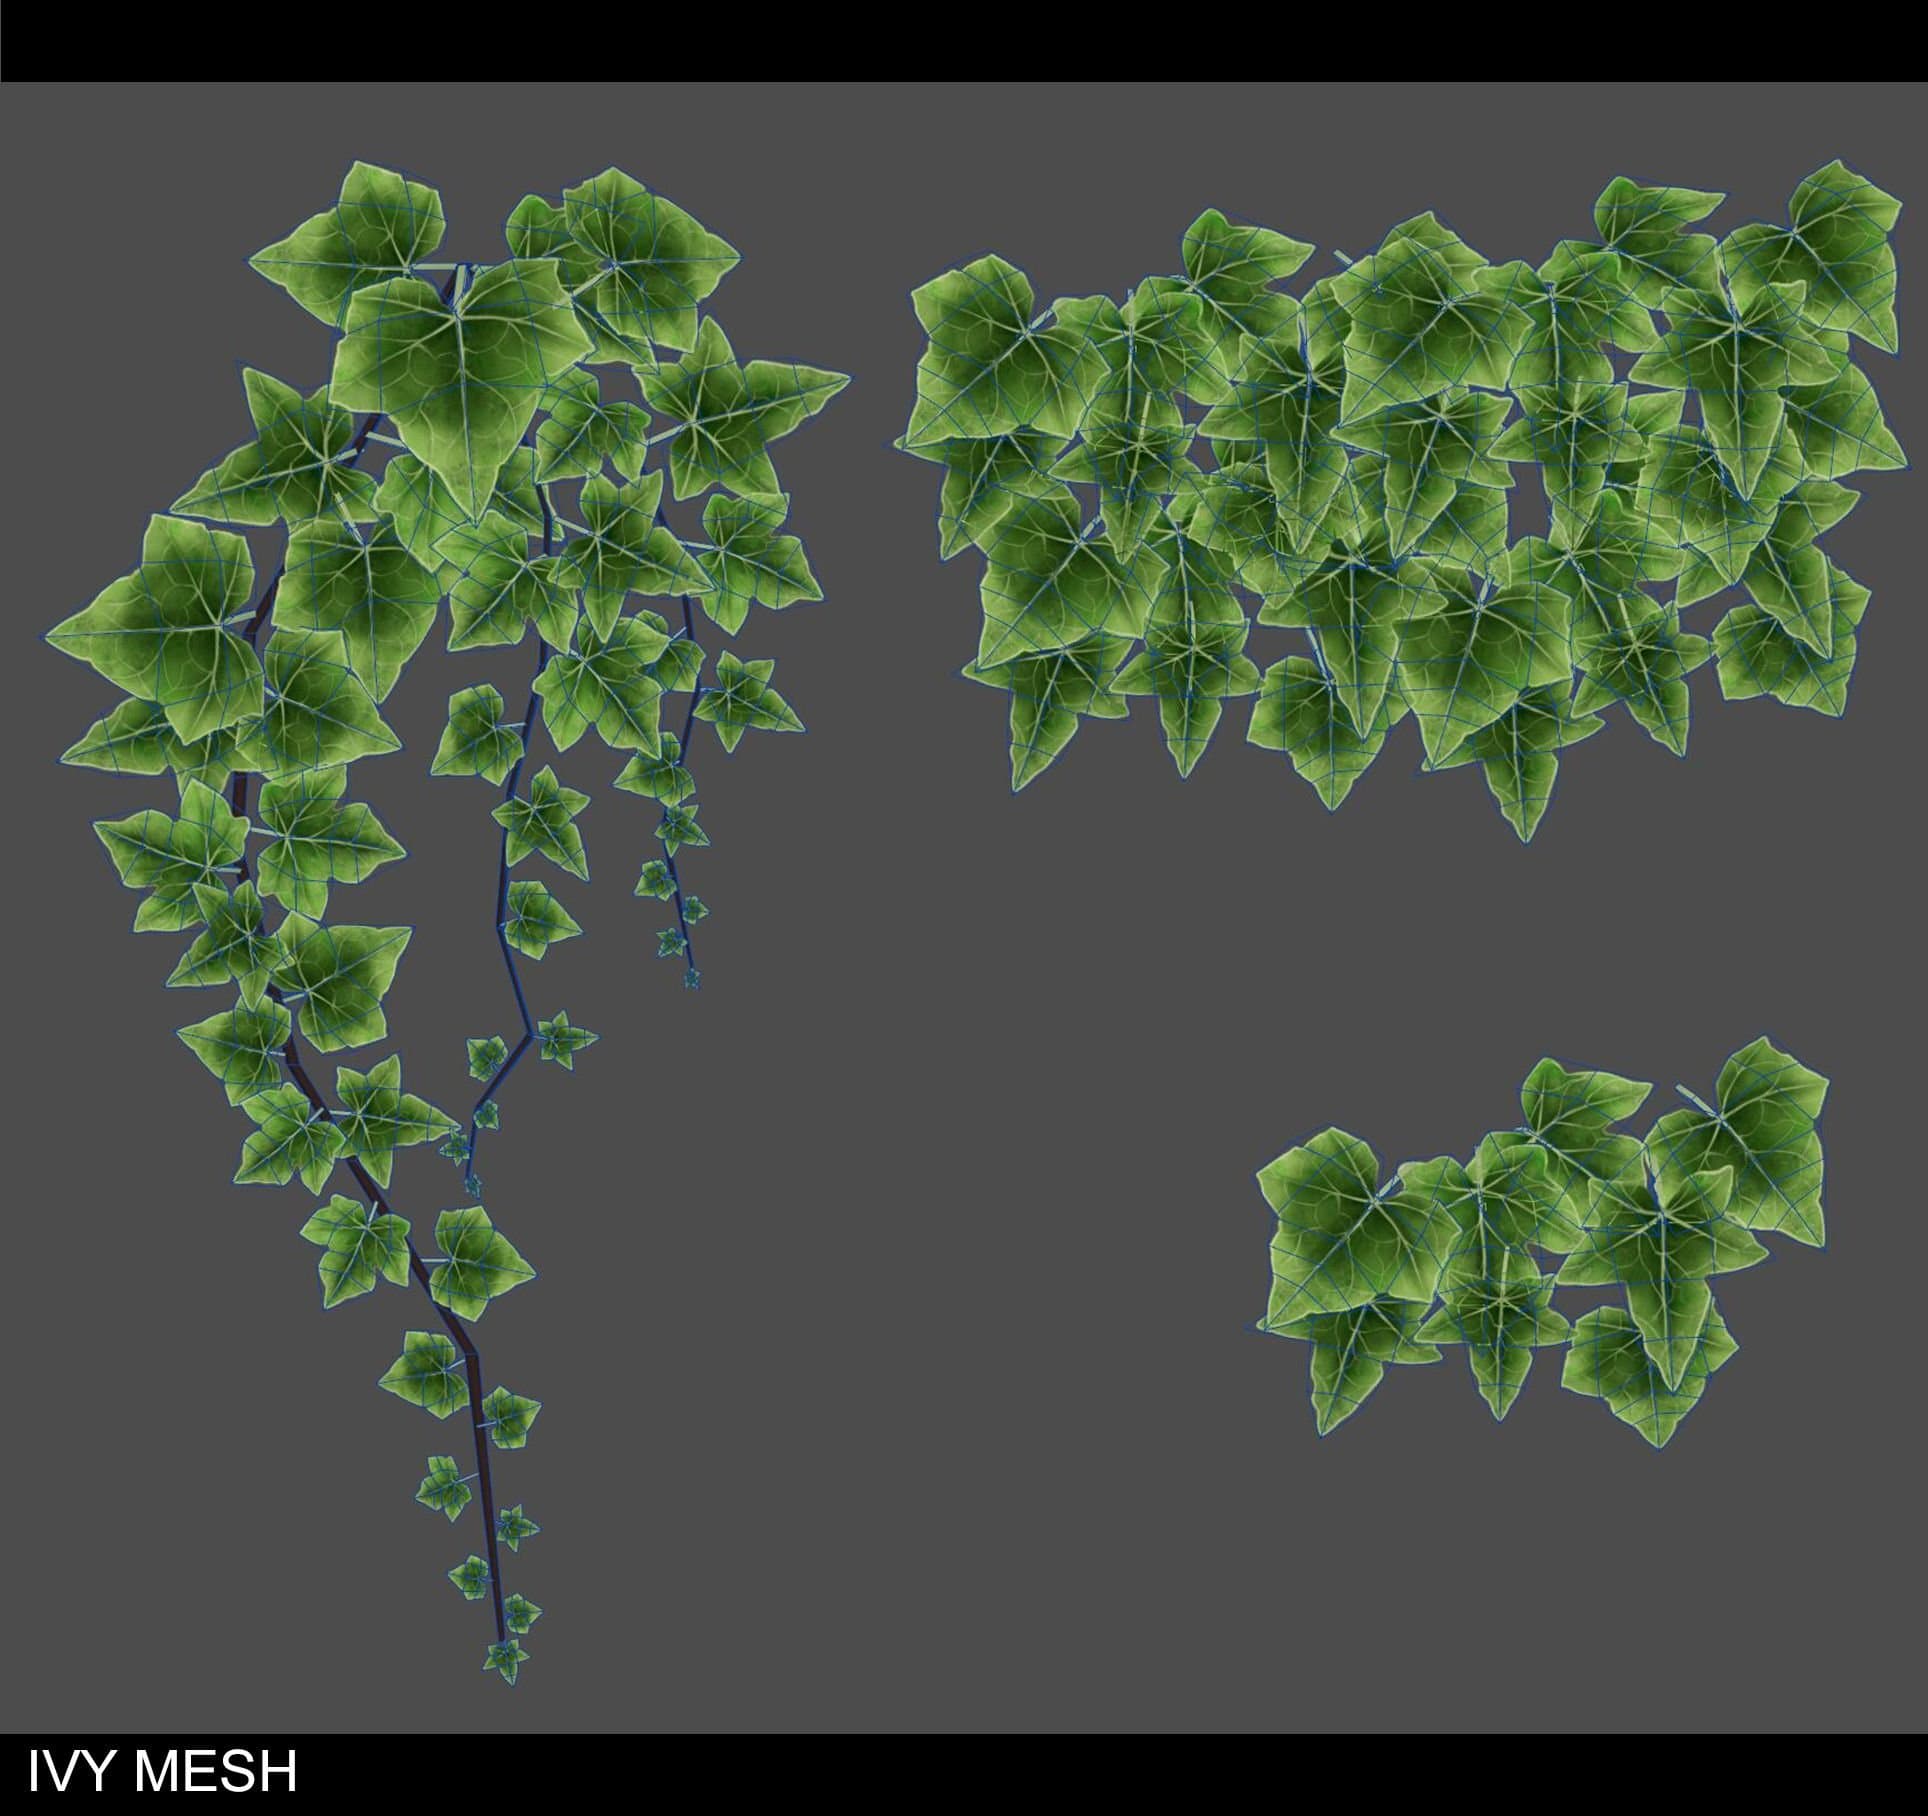
I exported all my textures and I wanted to create my final Ivy meshes at this stage. I imported my ivy textures into the shader and compose my ivy mesh by hand.
Here are more breakdowns on the ivy:
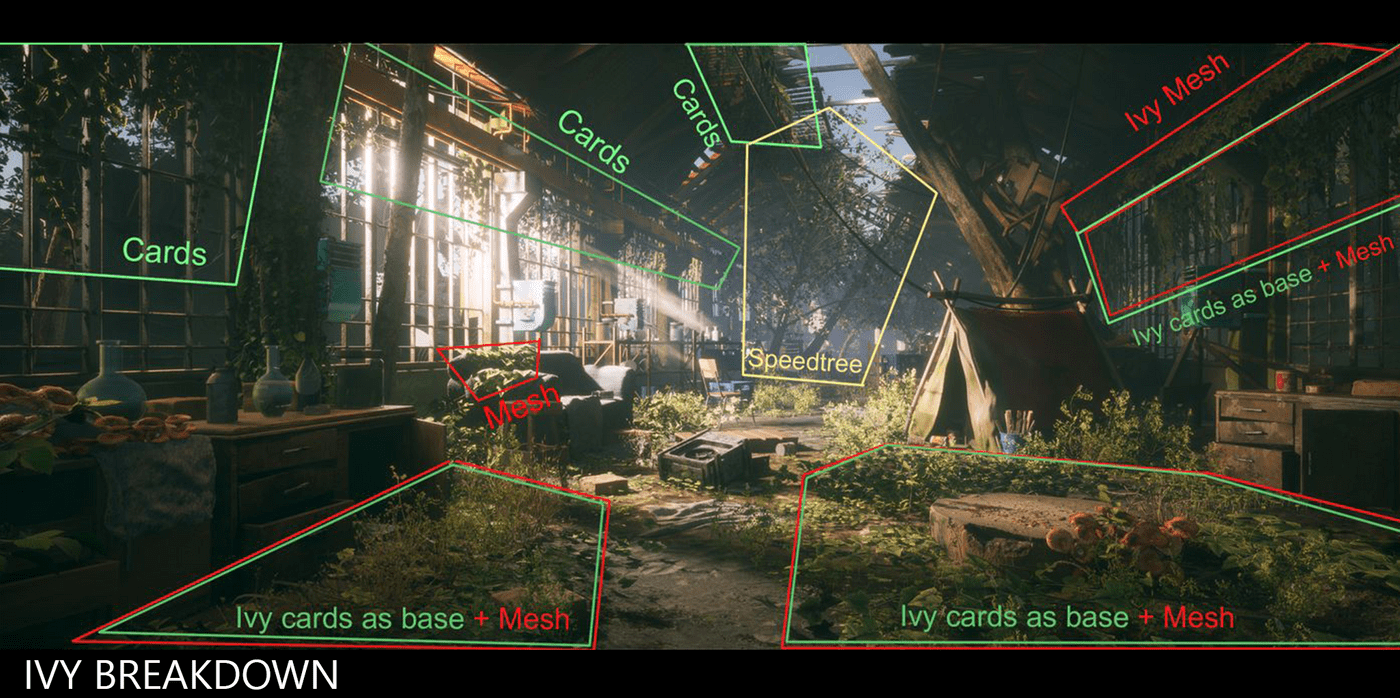
For my final scene layout, I decided to use a combination of flat cards as the base layer, and on top of that, I added actual foliage meshes I created inside Maya. I adjusted my albedo a few times to fit with the other Megascan foliage. It worked out beyond my expectations.
I found myself sometimes not seeing problems when I worked on a piece for a long time; my eyes became fatigued and I needed fresh eyes on my work to help out.
Getting fresh eyes on your work and new ideas help to discover new possibilities.
This is the time to ask for feedback from people. I love to listen to different people’s thoughts on how to improve on my scene. I had critique sessions every single week from my instructor, classmates, and friends. After I collected information from different people, I then made decisions and select the things I wanted to improve.
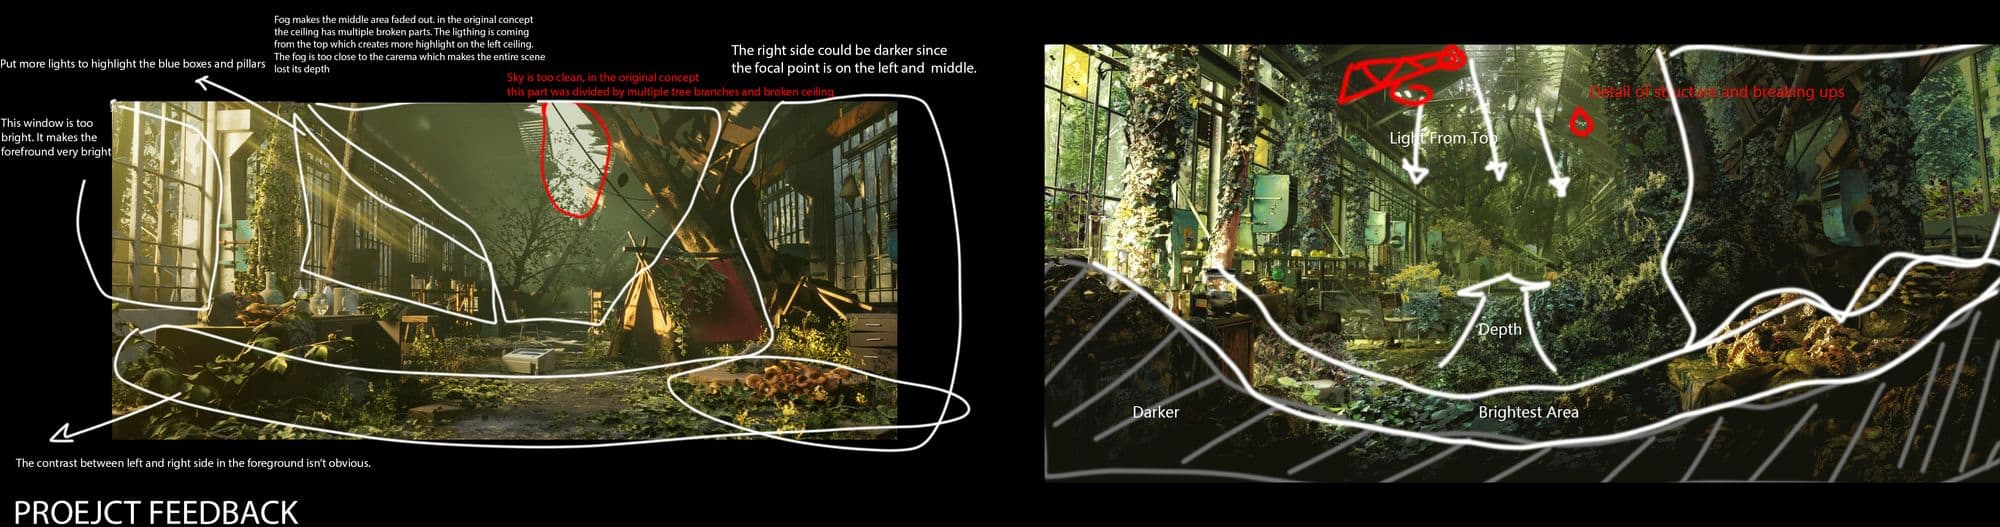
My dear friend, David Zhu helped me a lot through the project. He always gave me detailed feedback every time and drew over my screenshot. David has sharp eyes and guided me to discuss the problems I had and also helped me to analyse the concept. With such detailed feedback, I learned how to observe my scene and analyse my problems while working on the feedback he gave me.
This project was meant to explore new techniques and learn new pipelines such as using Houdini to create procedural assets and hand-sculpted foliage assets.
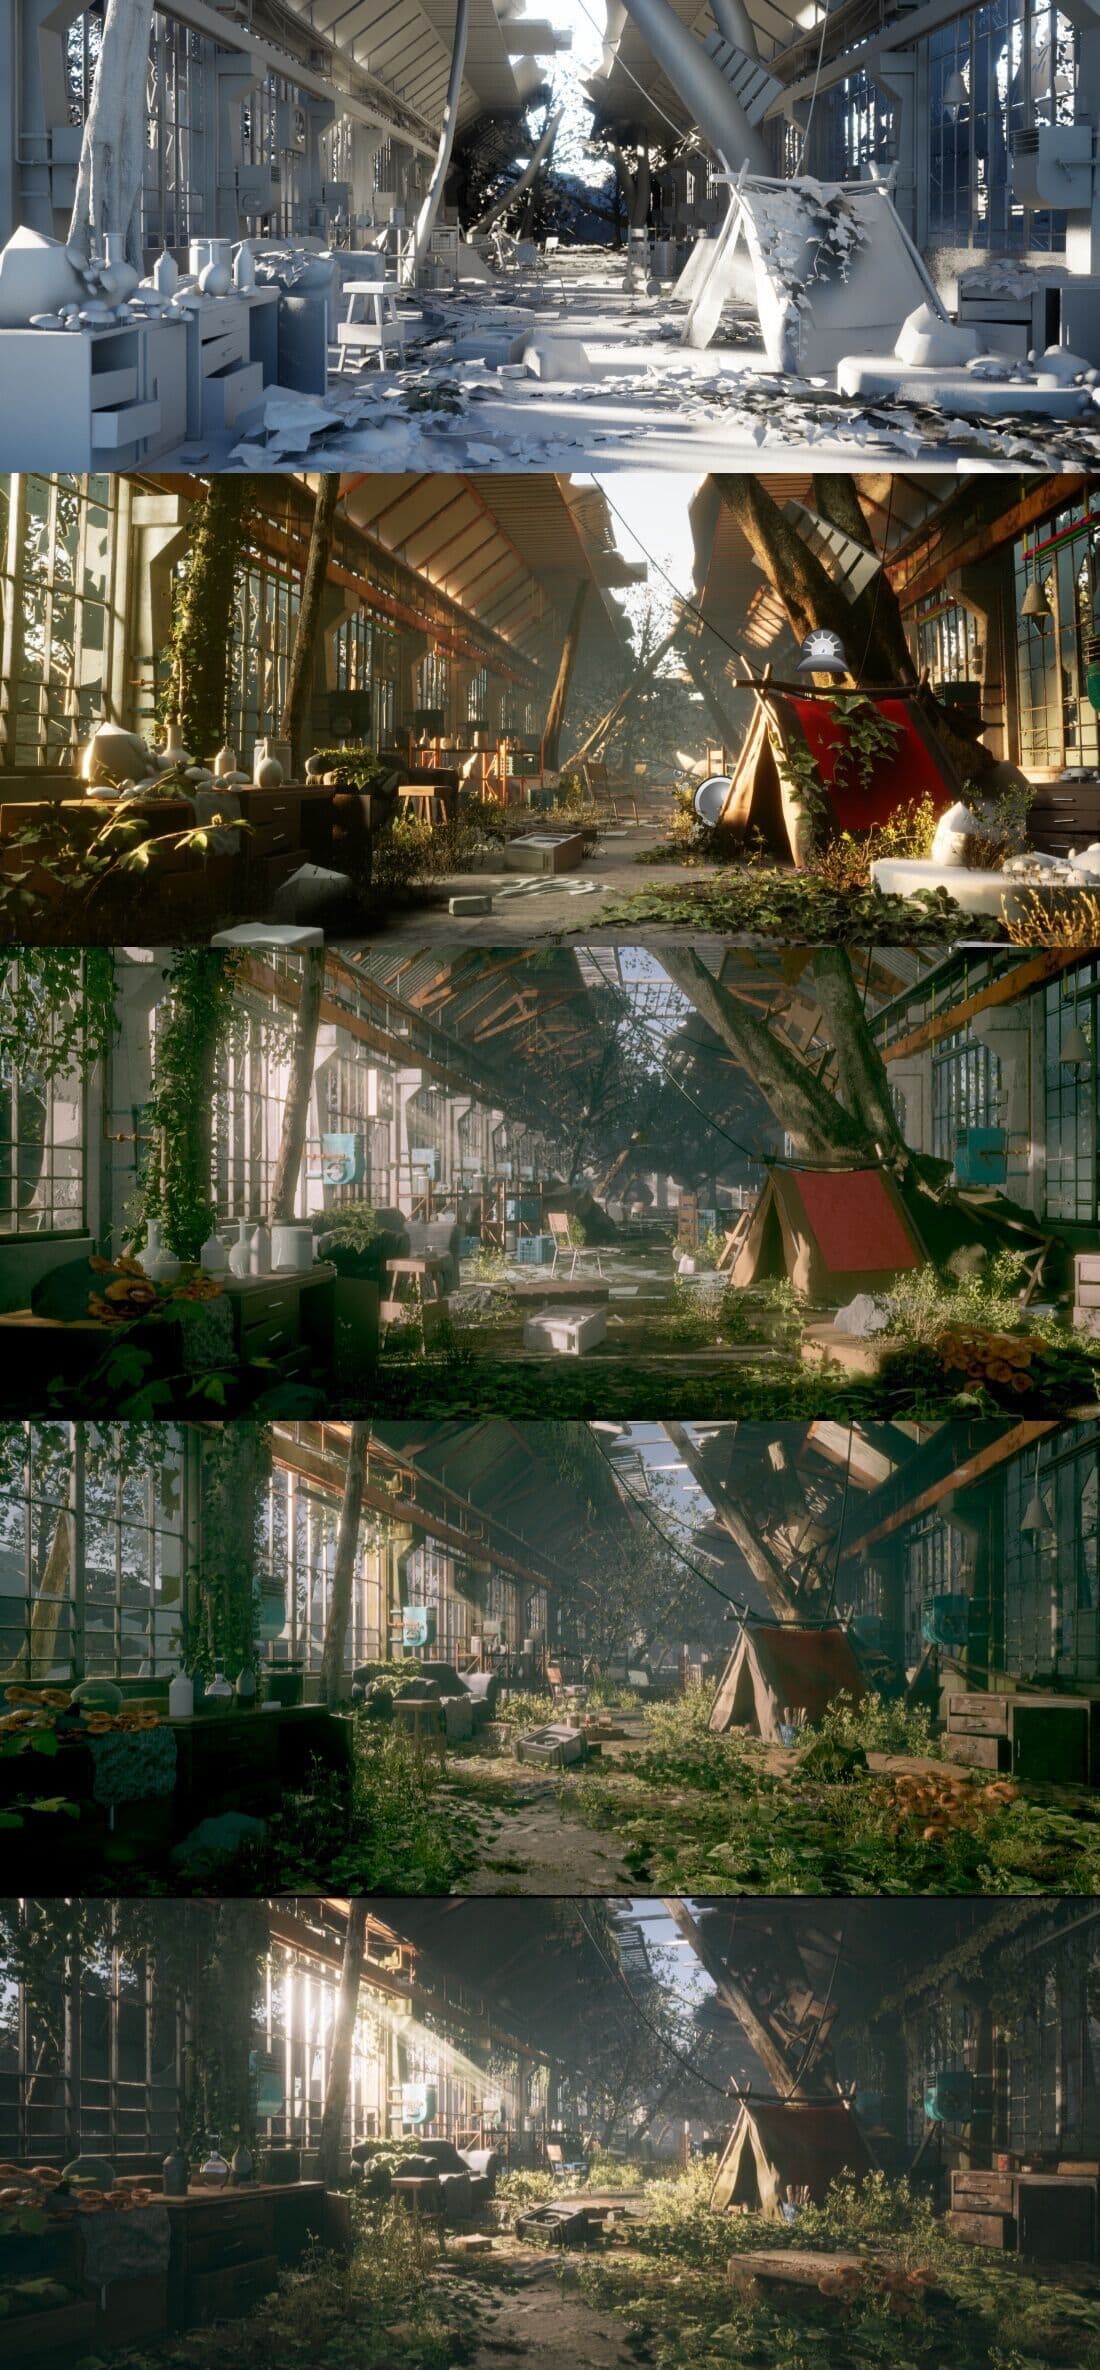
Enjoy the final result!
Surprisingly, this project turned out beyond my expectations and became my favourite one so far.
Creating a successful environment needs detailed planning and research. With limited time to work on one project, I felt the stress and it pushed my project to the next level. This project is a breakpoint for me to understand the entire 3D game workflow.
Of course, this project isn't perfect. I still notice some things that need improvement in the scene. The important thing is being open to being out of your comfort zone. As an artist, to reach something that has never been done before helps to make you a better artist overall.
Thank you so much for reading!
You can find more of Kris Yu's work on ArtStation, LinkedIn, and The Rookies.