Creating a Sci-fi Short Film: A Final Year Project from Students at New3dge
A team of six 1st year VFX students at New3dge give some insight into the process and challenges of creating a sci-fi short film as a team.
A team of six 1st year VFX students at New3dge give some insight into the process and challenges of creating a sci-fi short film as a team.
A team of six VFX students at New3dge create a sci-fi project for their 1st year group project in the VFX Specialisation. The project, OVER, won an excellence award in the VFX Category of the Rookie Awards 2022.
In this article, team member Julien Doyen gives some insight into the process and challenges of creating a sci-fi short film as a team.
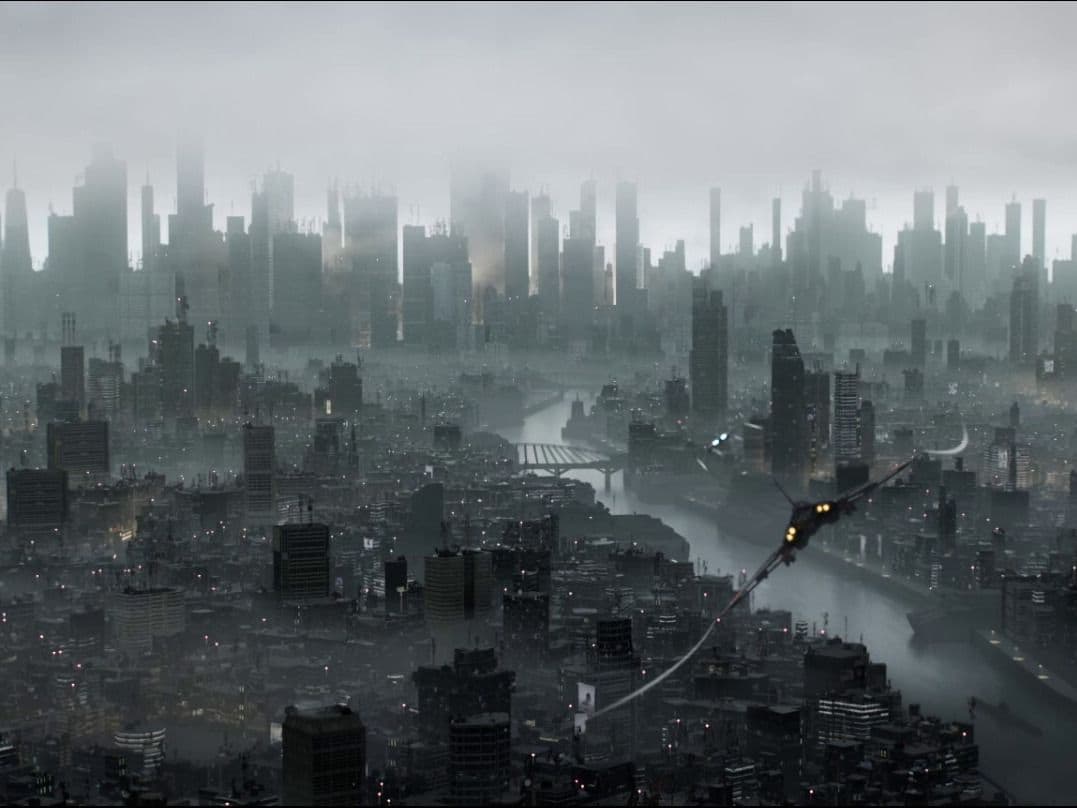
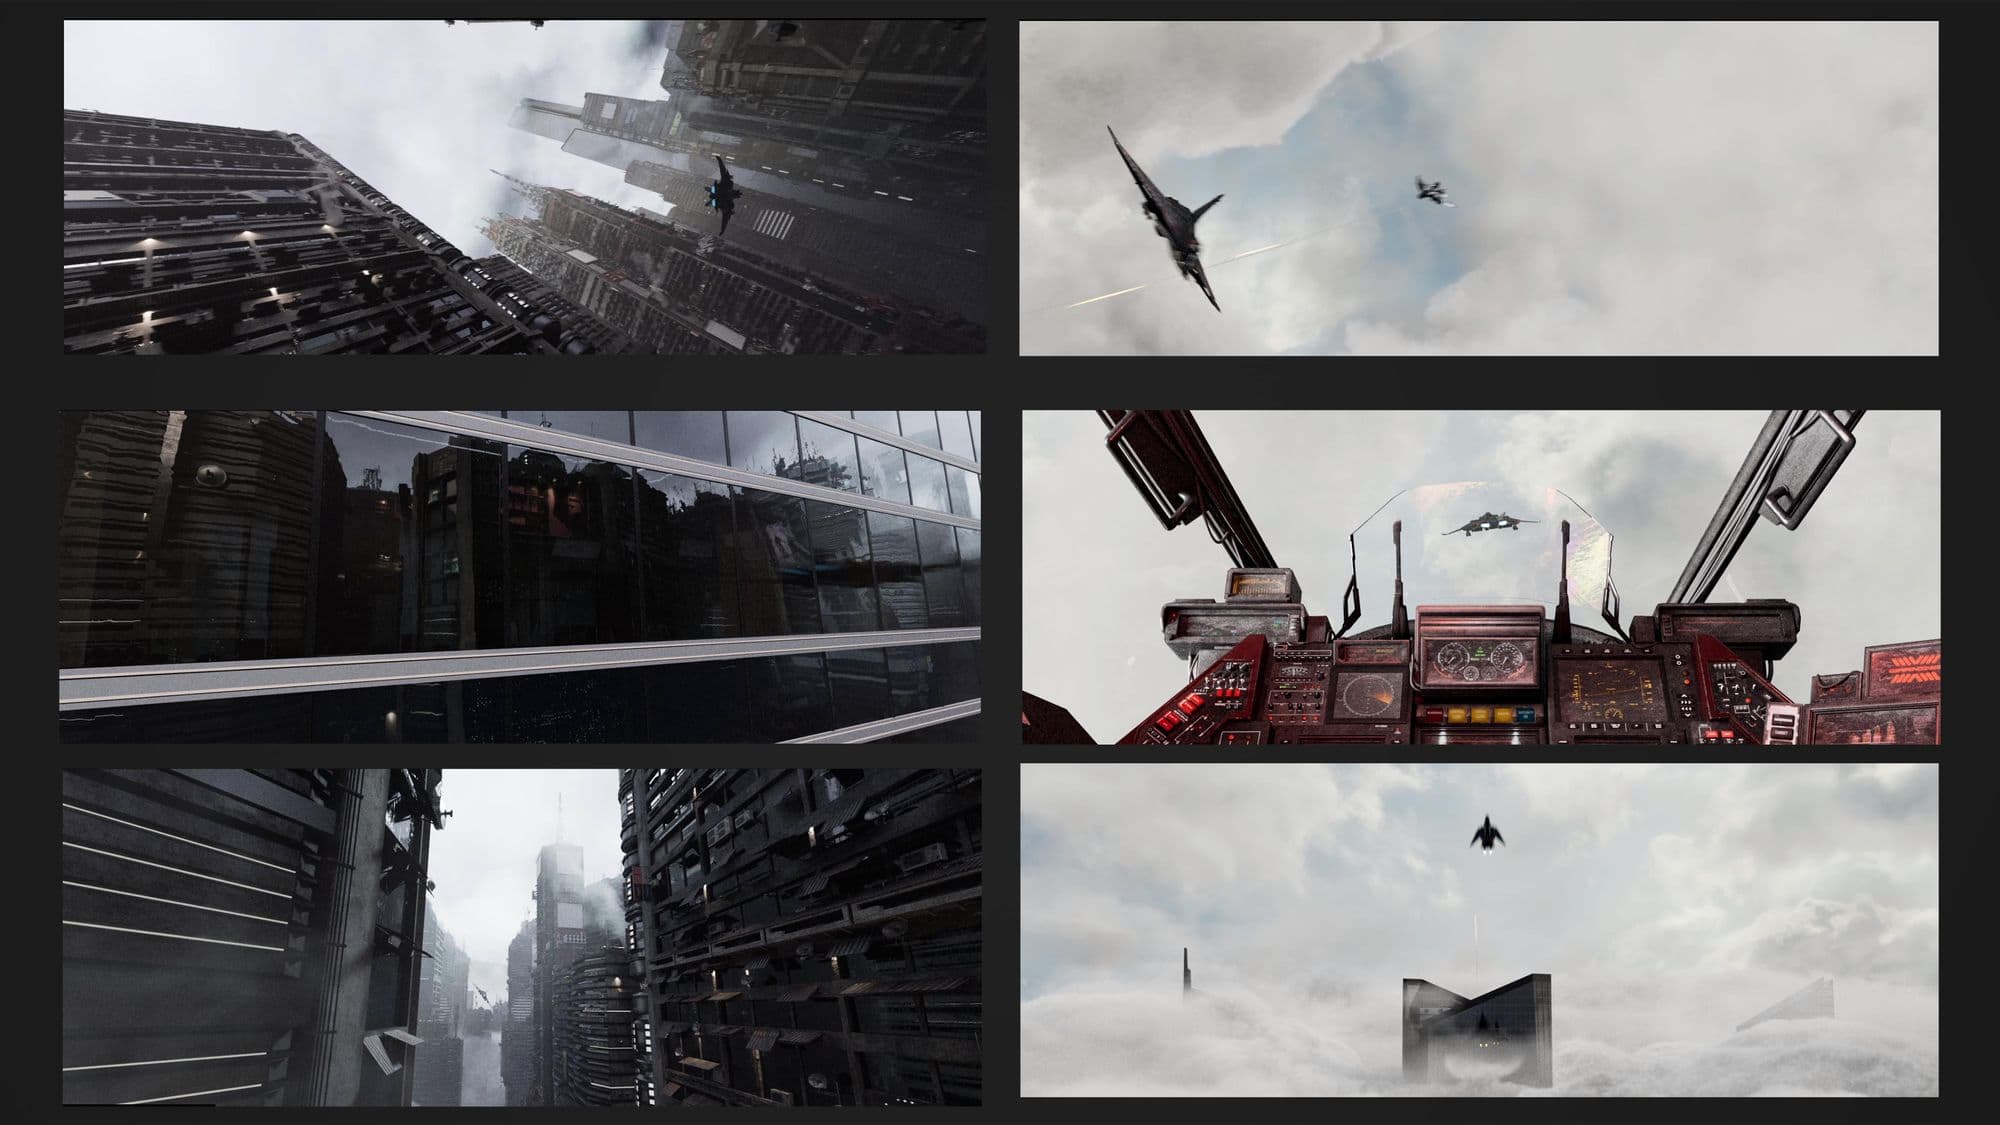
Story Synopsis: In the year 2500, two airplanes are in a fierce chase through the city of New London.
Main challenges of this project:
Here are the different softwares we used for this project:
In order to stay well organised, we used different tools:
During the pre-production phase, we looked for a maximum of reference so that everyone has the same vision of the project and to achieve a look as close as possible to reality.
We set up dailies to be able to review everyone's progress, and to make feedback as often as possible which made us save a lot of time and quality.
Finally, we set ourselves the goal of releasing a new version of the film at the end of each week, our collaborators and mentors helped us a lot to solve the different problems we encountered and to give us feedback.
Below is a visual of the workflow we maintained during the process.
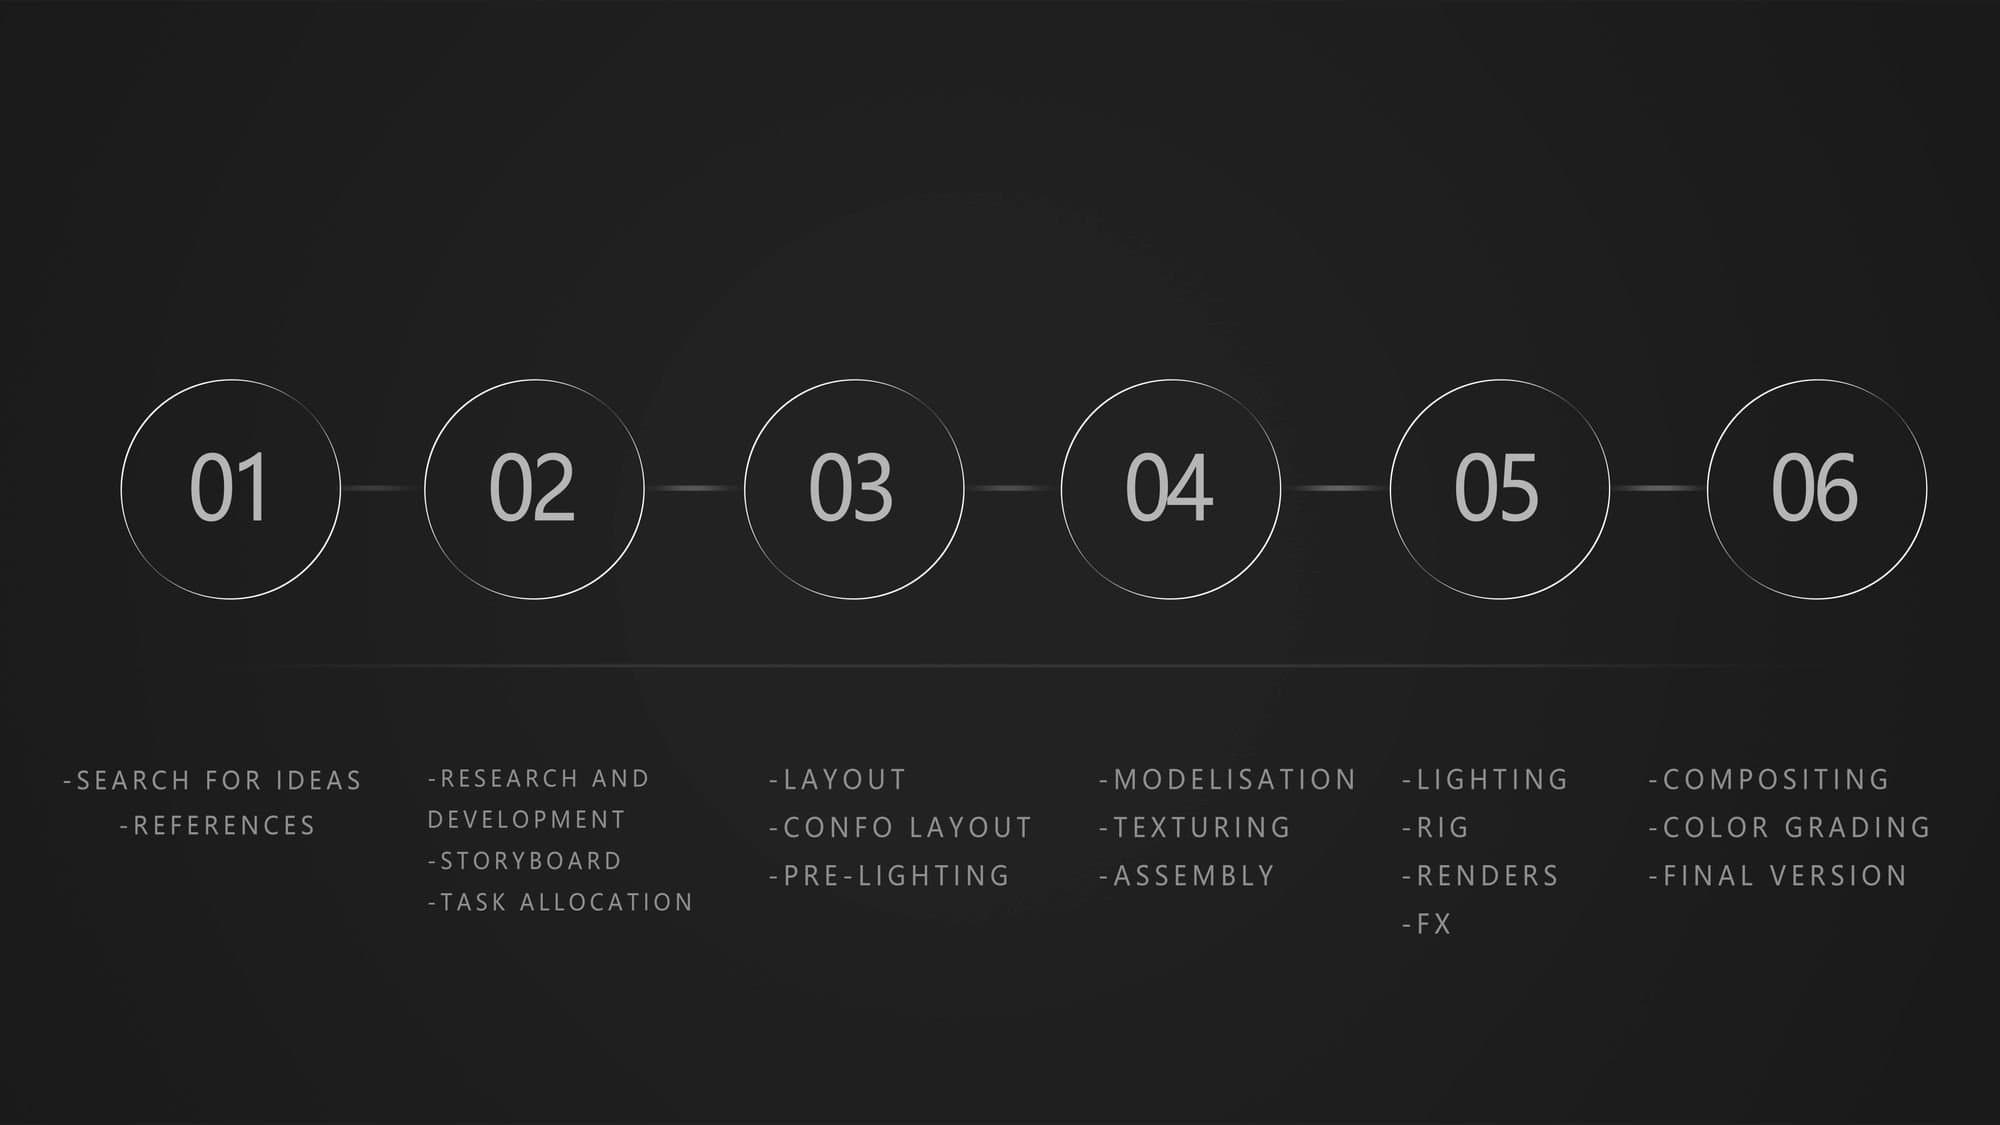
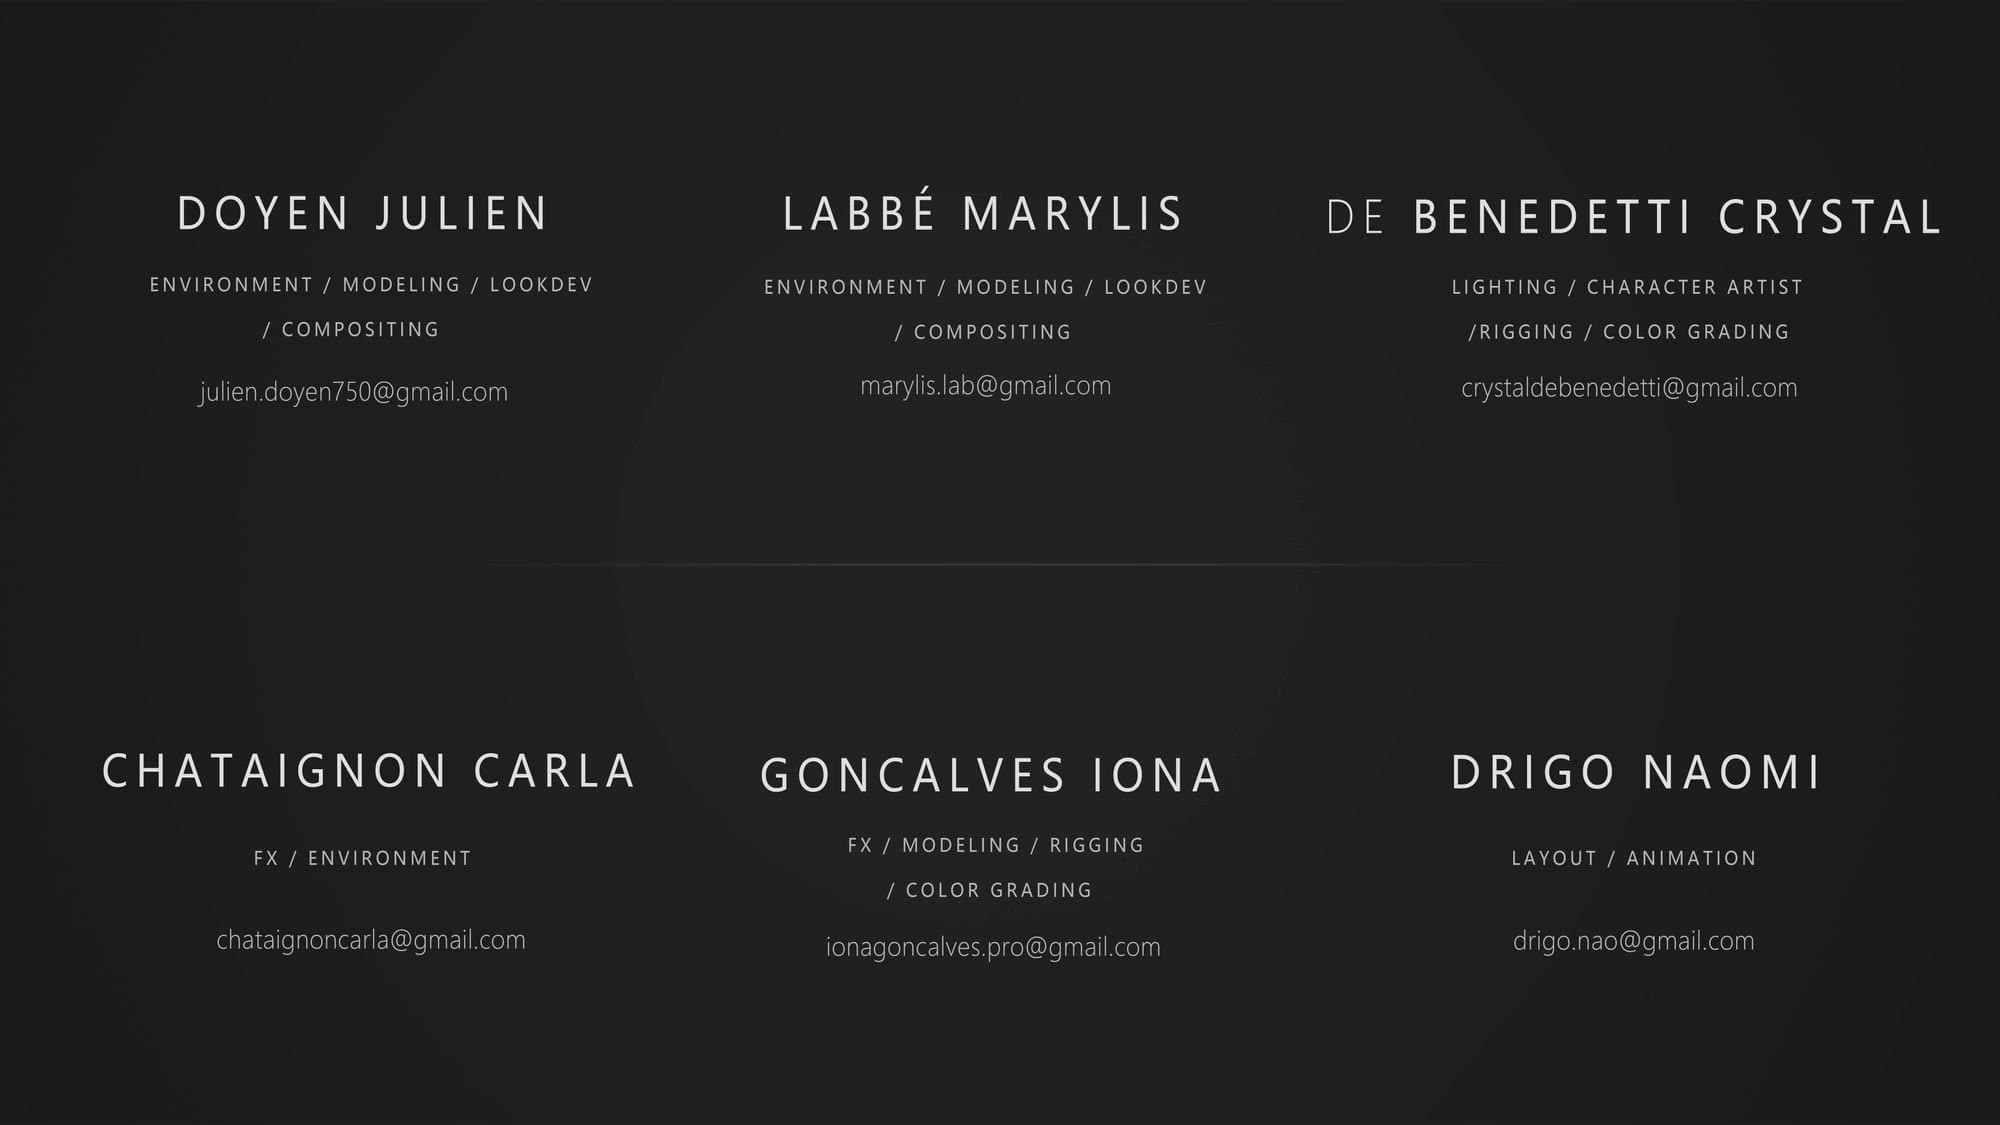
Each student including myself, had responsibilities within the different departments in the VFX Pipeline. Below is an introduction to the team member, and what they were responsible for.
The environment wide in the first shot was an interesting job. We had to find a way to build a very big city in as little time as possible. For that, we decided to make it in a procedural way. We use tools in Houdini which allowed us to extrude buildings with google map resources. We then added a lot of extra detail using a forest pack.
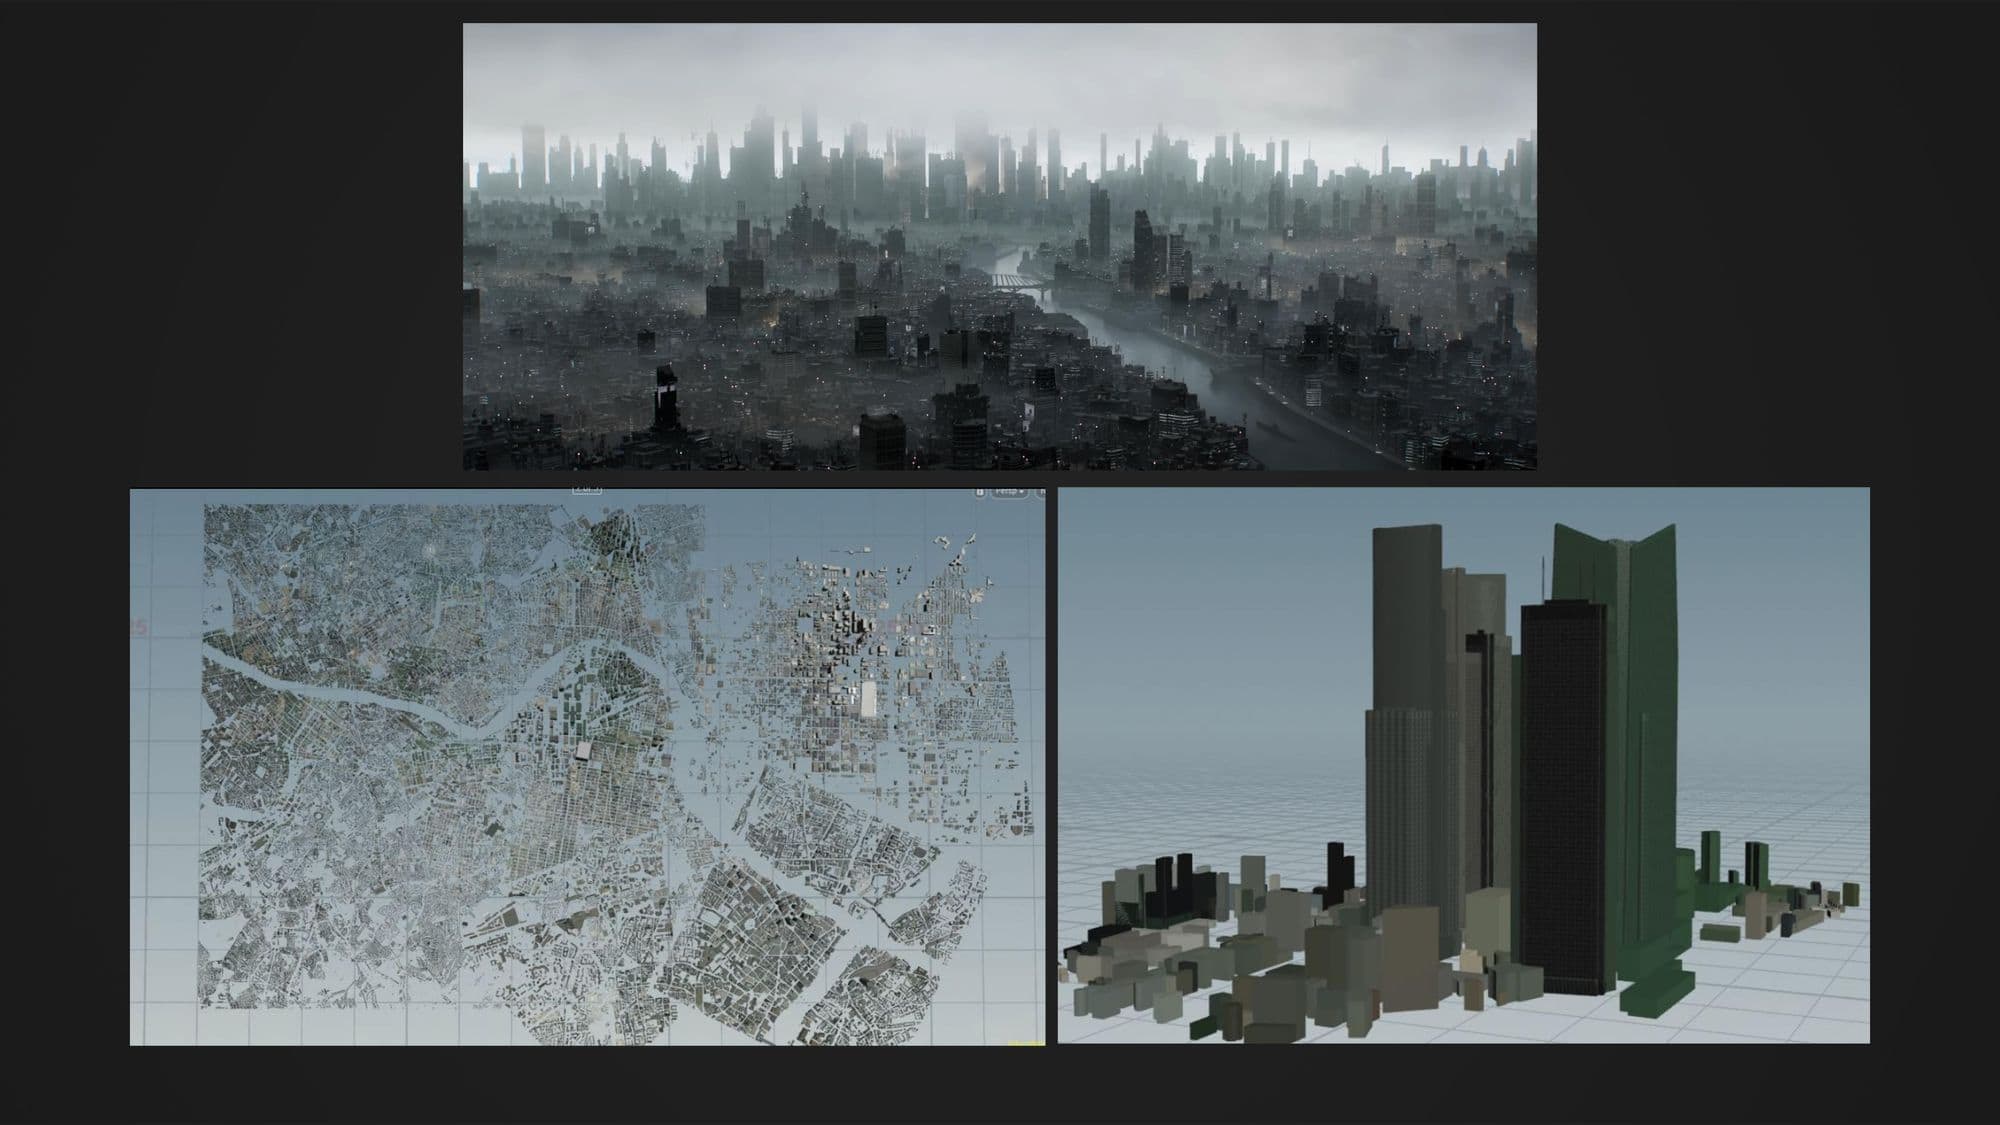
For the chase scene in the city we created buildings that we reused throughout, by turning them and adding accessories on top to create variation.

Finally, for the shots in the clouds, we faced two challenges: we needed to have depth to give an impression of size whilst optimising to the maximum, and we also had to learn how to "parameterise" the clouds in V-Ray which was not obvious to us right away.
To solve these problems, we created 10 different buildings in the library, with pending placement of proxies on them to add complexity, detail and diversity.
Finally, we placed those buildings in our scenes to give the illusion of a large city, we used proxies and instance placement to create the street.
Sky: there was a lot of reference work to understand what gave this aspect of immensity, we had to add a lot of clouds over long distances because there is no relationship of scale (building, ground, characters etc.) so it is by placing the clouds at different scales that we managed to create the effect of depth and as much as possible to put them in instance to save time in the rendering and in the staging
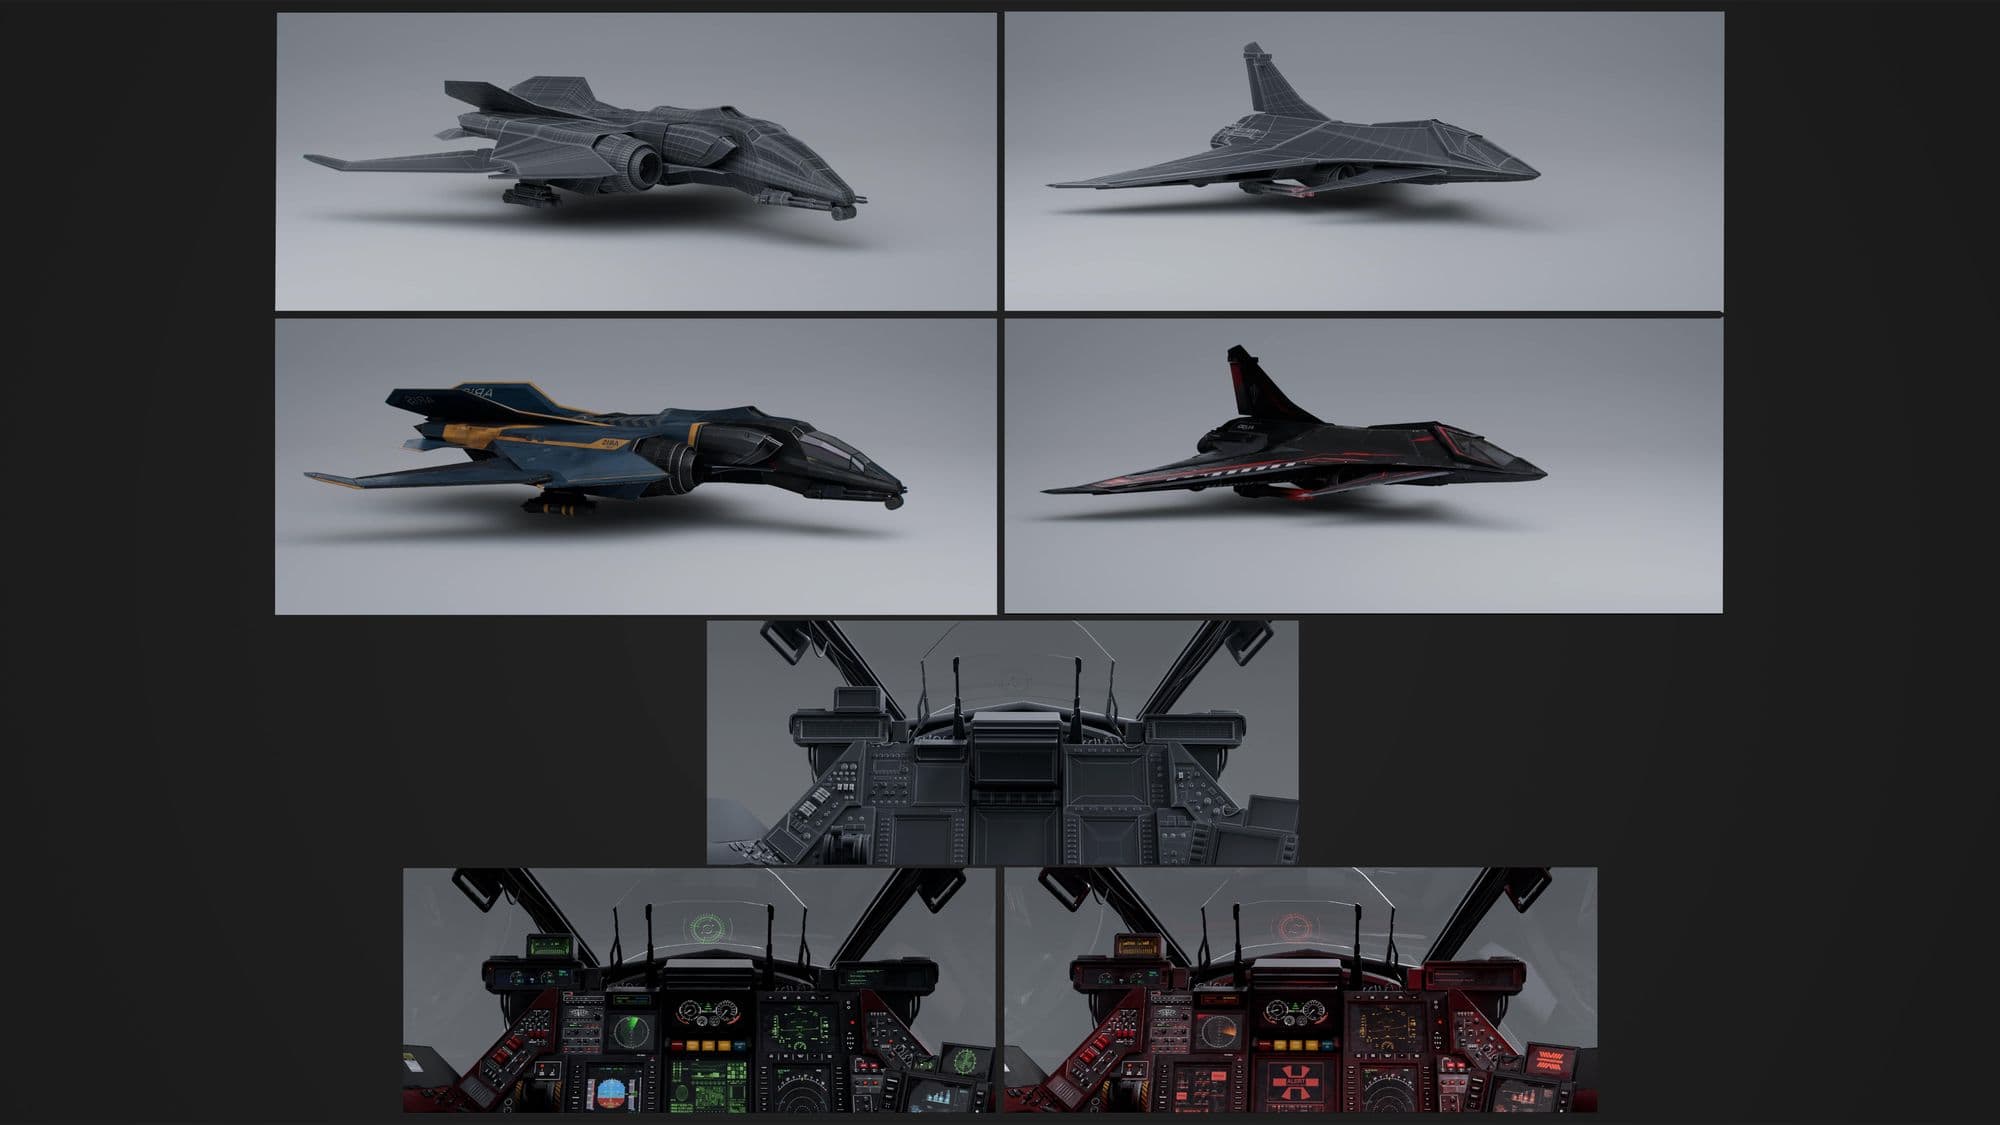
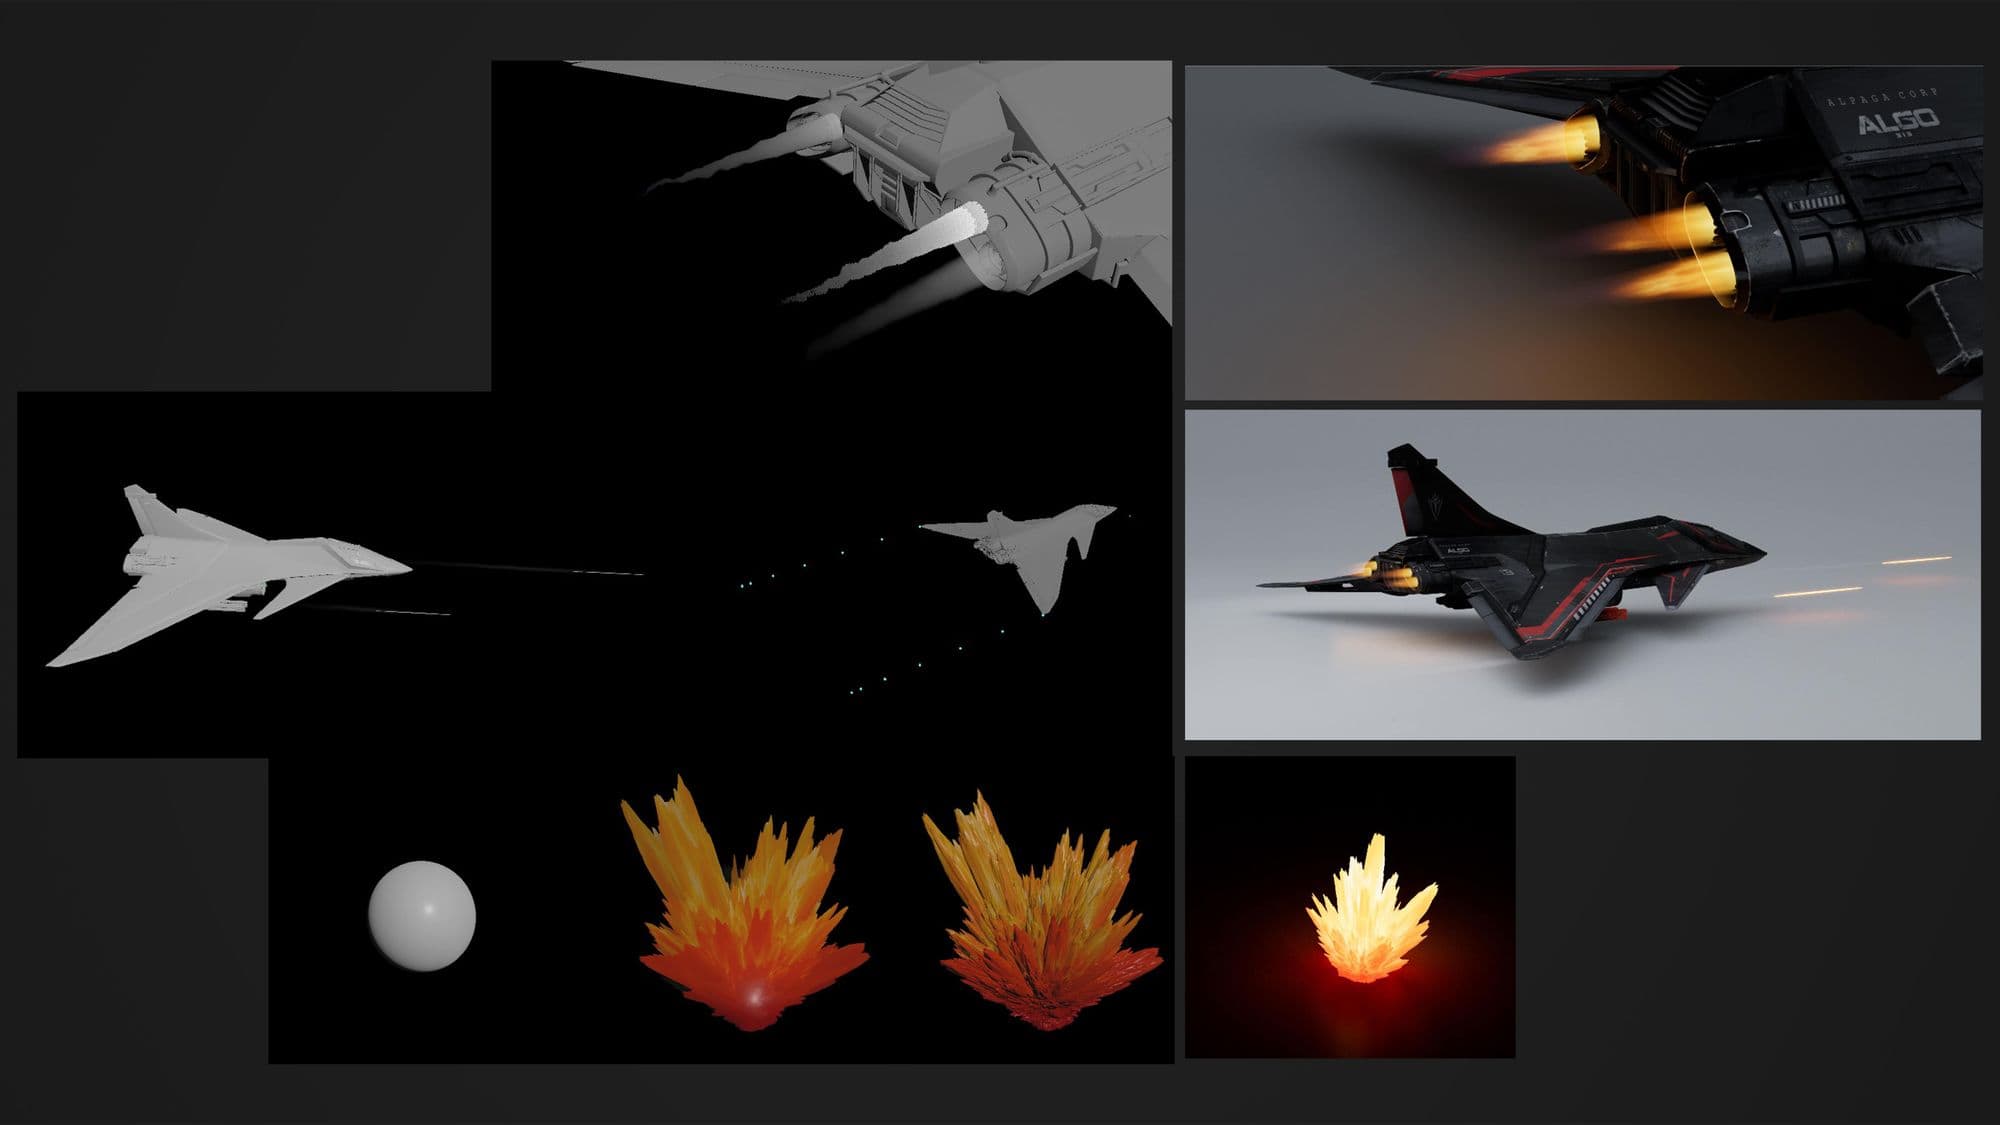
For this project, we needed two airships, for which we first produced concept designs. This step was very complicated because we had to do a lot of research to understand how the ships work.
Then we modeled them by optimising our mesh as much as possible.
When it came to lookdeving the airships, we textured in Substance 3D Painter for more control of our masks and maps. We had to undertake a lot of research, to make the two planes look as realistic as possible.
We managed to achieve this realistic look by taking inspiration from many real references (Rafale, F-35 Raptor etc.) and thanks to the mask and the layers of substance we managed to create leaks, curvatures but what really made our planes realistic were all the details such as the writings, the small details of wear, the panels, the screws etc.
The rig, a satisfying part of the process since it gives life to your objects, also requires rigour and patience.
We paid a lot of attention to the mesh - using it as a reference to see how each zone would influence another.
For the character, we looked at the fingers especially: looking at rotations so we could avoid artefacts and anticipate each future movement.
The skin will took all the bones created by the rig and worked beforehand and conformed to the mesh/character.
When it came to the plane, the main challenge was to make the plane mechanism as functional as possible to push realism.
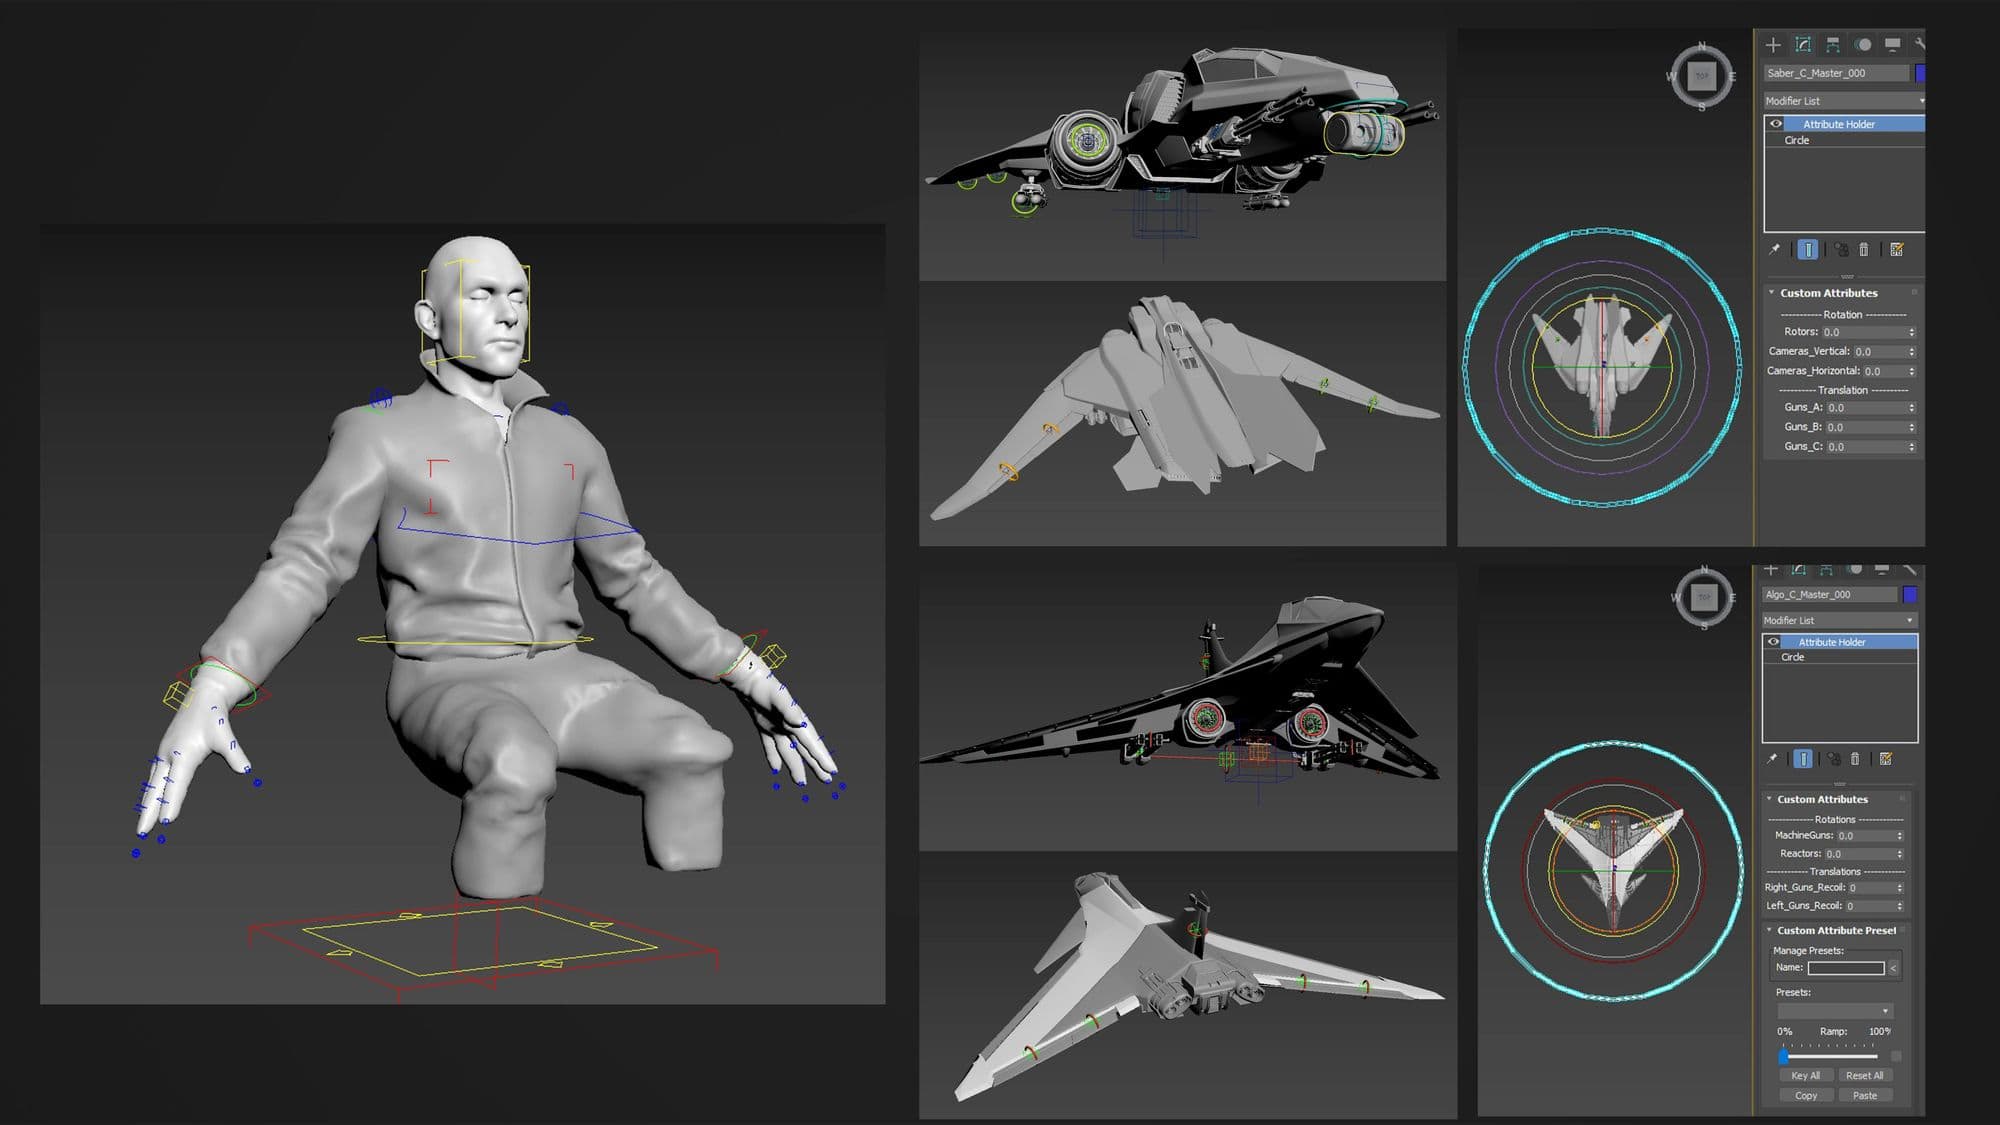
There was a lot of research into the plane and camera movements to be as natural as possible and to give a consistent feeling of weight and speed for each design. I used images found in the Star Wars pod race and the War Thunder trailer as references. It was fun to do.
In the layout, we made an animation for the first shot, and a single animation for the shots in the city in order to have a good continuity for the progression of the planes as well as for the sky shots.
Once the layout was established, we did a redraw for each shot in order to work in detail the animation. This work took us a little more than 2 months in total.
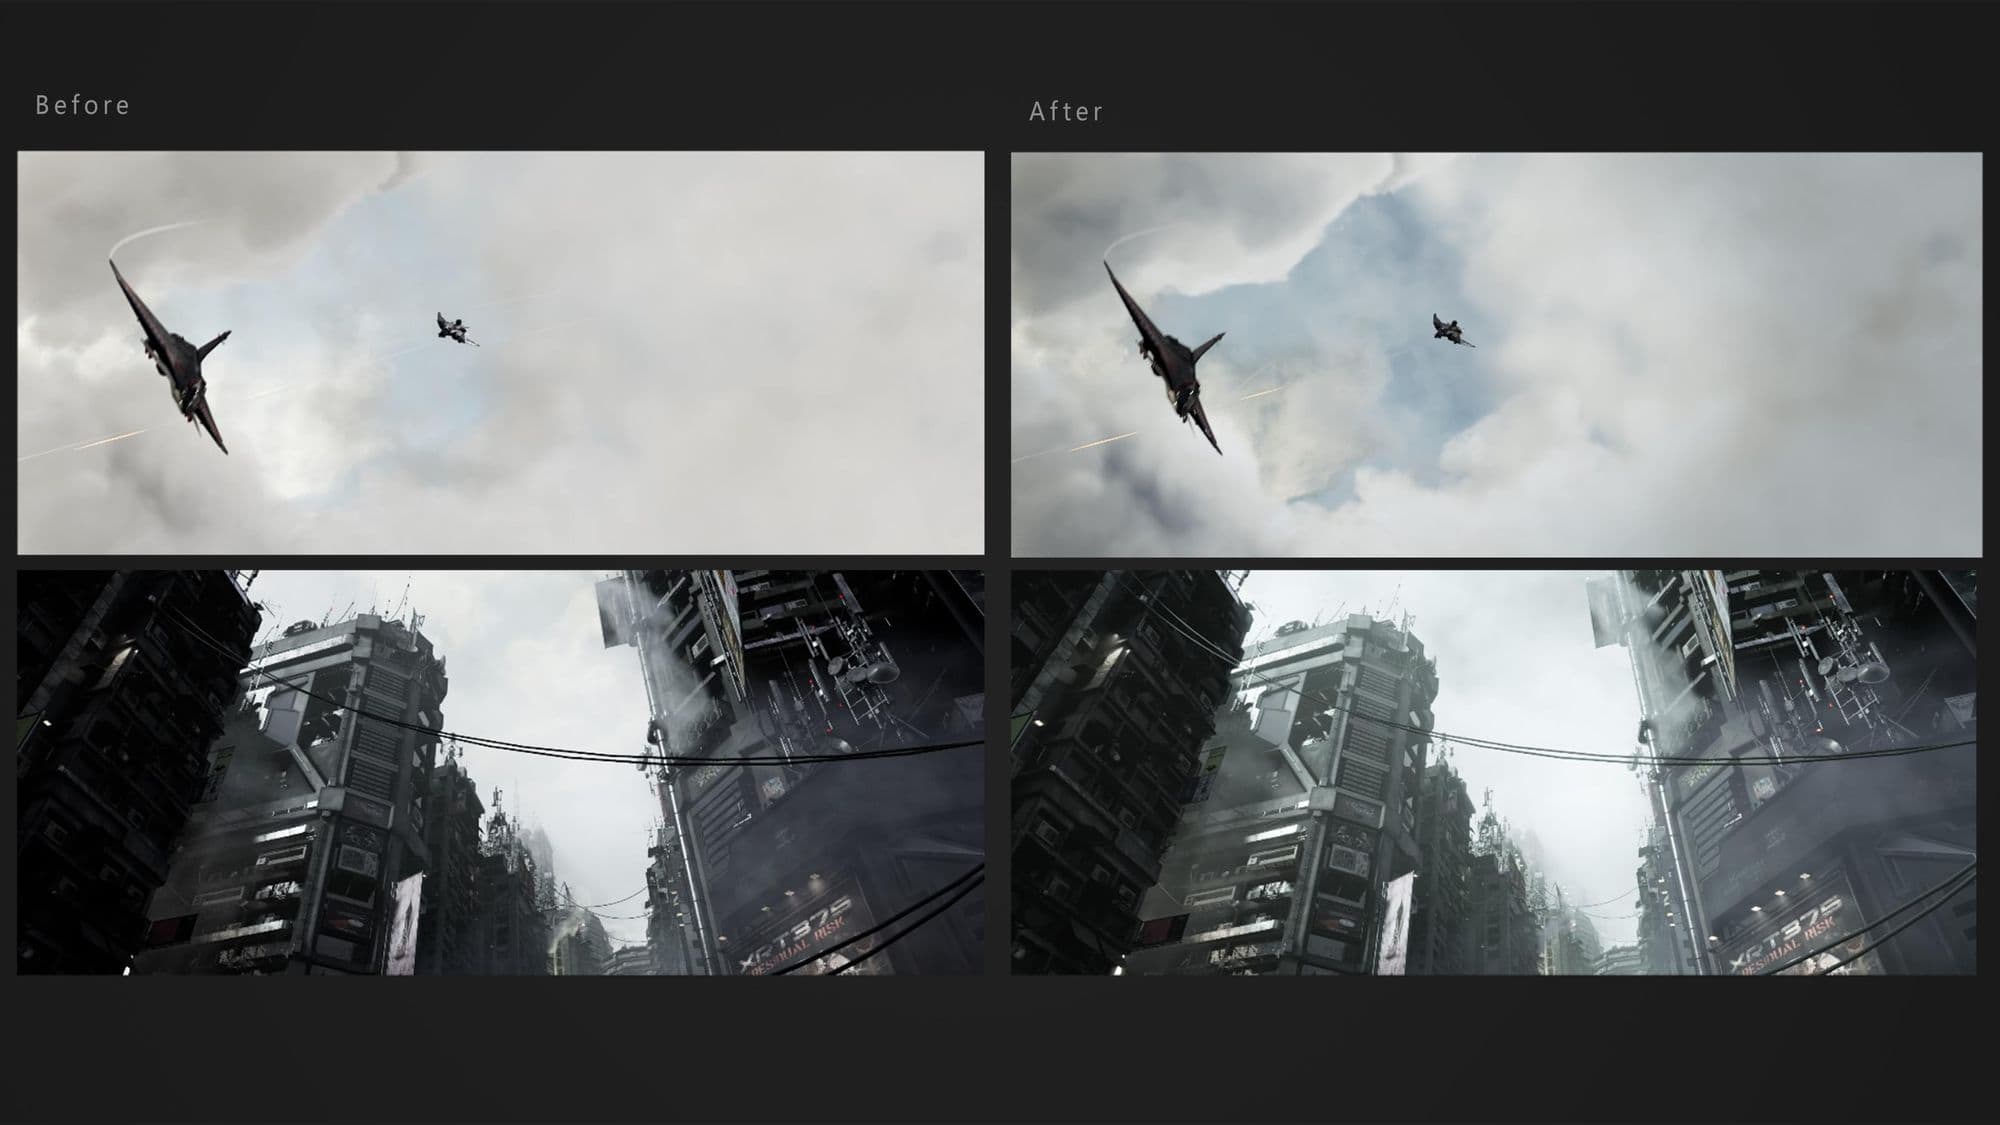
For the lighting, we needed to have a lighting rig for the city that would work in all shots while remaining interesting and impactful and focusing attention on the action. For the shots in the sky, we needed to have something totally opposite of the city that would give volume to the clouds.
We first did a global lighting for each environment (street and sky) with a hdri for the global atmosphere and then our key light to give a direction to our lighting and fill lights as well as blockers to create shadows to center the look.
It was quite complicated, especially for the street, to keep the lighting similar and consistent on all the shots while keeping the attention on what the viewer was looking at.
Once the general lighting was well established to have a uniform base, we had to rework it shot by shot to modify it for the needs of each action and viewpoint.
As the FX we wanted in the film was ambitious, we gave ourselves a research and development period of one month to experiment with several setups. After that, we moved on to creating the FX for the film, and shot production.
Between the two members of the FX team members, cooperation and communication were very important; it allowed us to progress in a productive way.
We faced many challenges. The first one is that we were introduced to FX only a few weeks before we started working on the film. The second one, and not the least, was the speed of the planes and the scale of the scenes.
The speed was so fast that we had trouble getting a good result with speed and motion blur. We finally found a solution, by first simulating the effects on a ship that doesn't move, then linking this simulation to the animated ship and changing the motion blur setting in 3ds Max.
The rendering part was a big deal too, because the transition to 3dsmax, and V-Ray from Houdini threw up some surprises.
The workflow to manage vdb in V-Ray was kind of touchy and took us a lot of time when we had not much more. Controlling vdb in V-Ray is quite complex, it took time to understand and find the right settings to apply to get the desired effect.
As the parameters to control the rendering of vdb are quite tricky, it takes time to test the rendering, find the right parameters and eventually have some back and forward with Houdini.
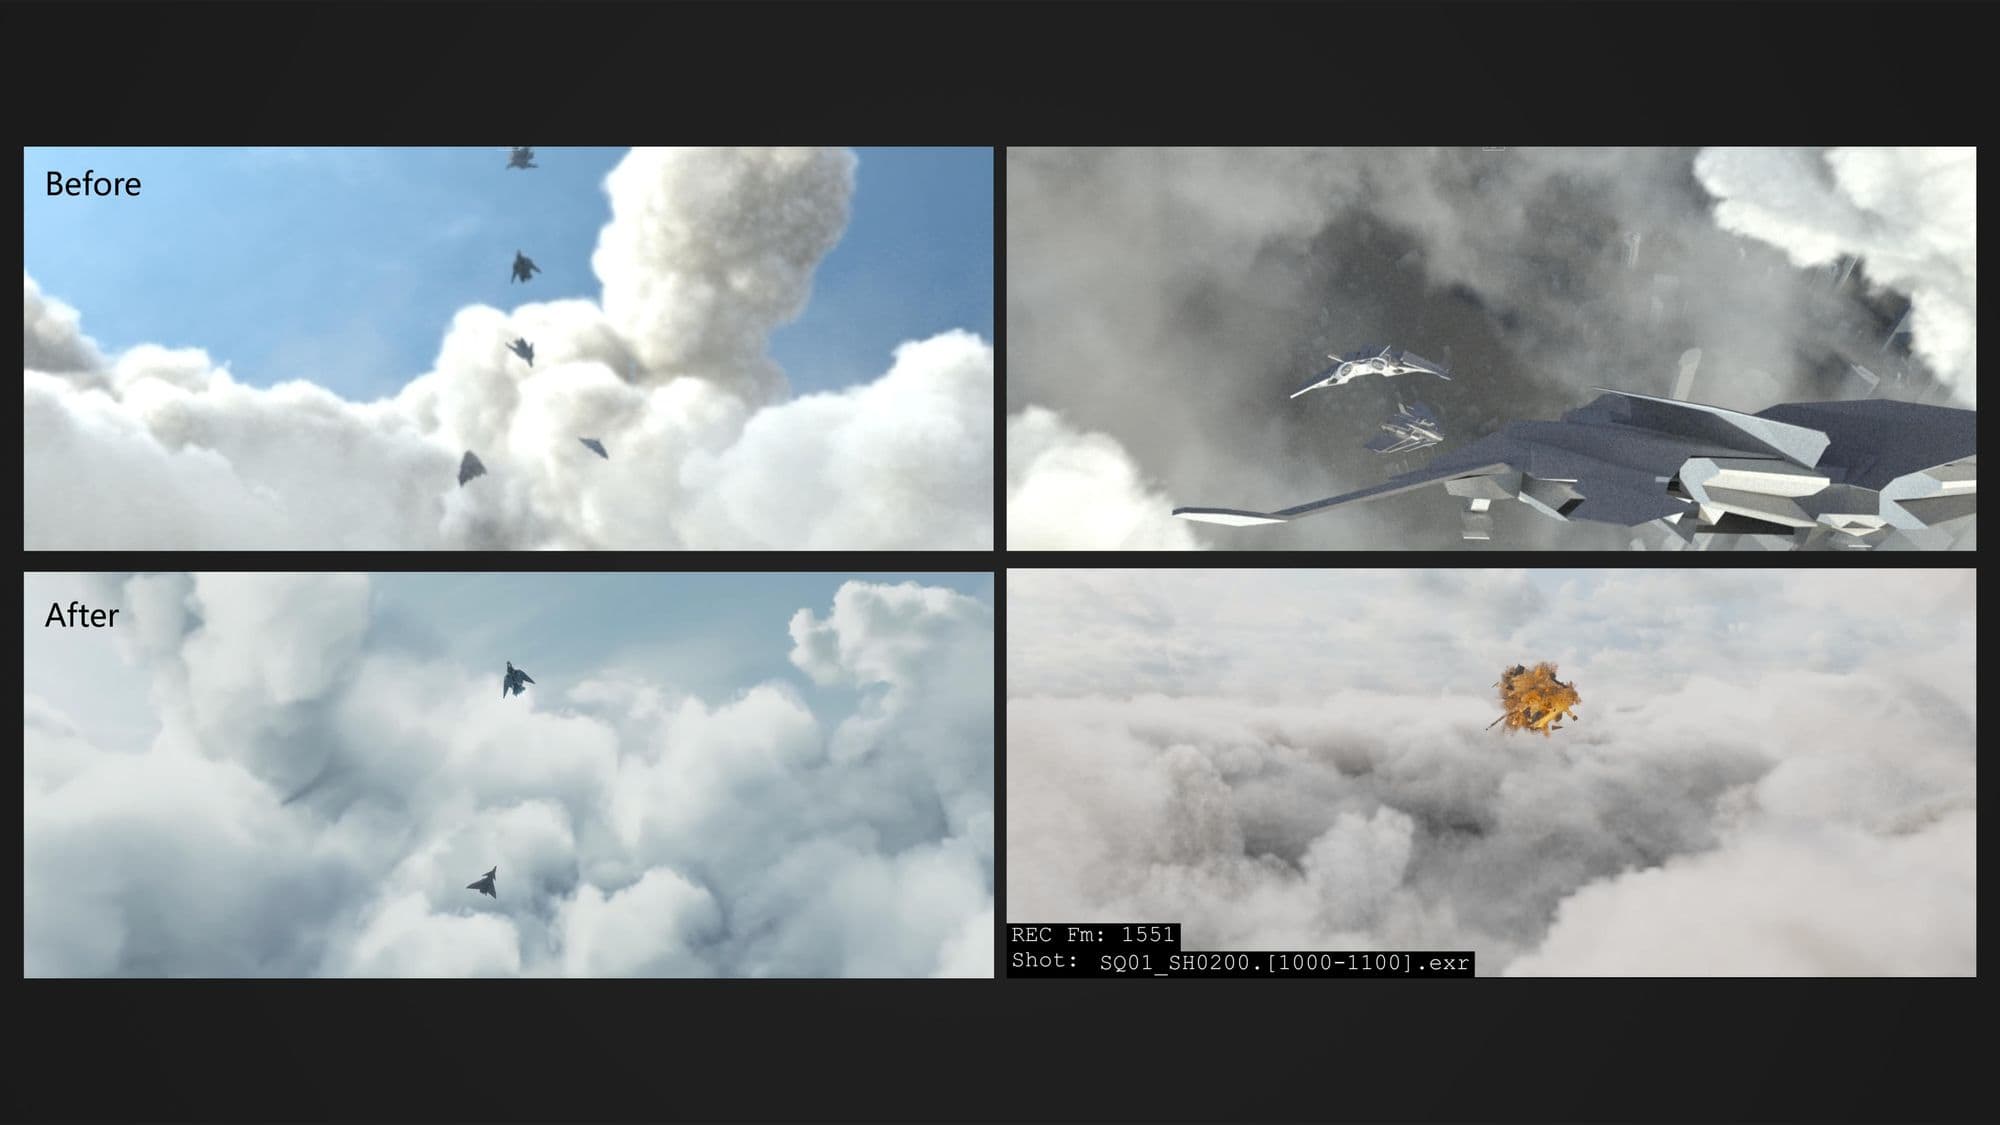
Two people were in charge of the compositing part. They separated the work into two sequences of shots. One was in charge of the sky and had to accentuate the contrast of the clouds and make the 2 ships as visible as possible, and the other was in charge of the race in the city and had to create a heavy atmosphere by accentuating the fog and the contrasts.
Different rendering passes were necessary to accentuate the FX, the fog and other elements. Masks were mandatory to be able to manage certain shots.
The most challenging shot was probably the explosion shot, as it was difficult to get the right render path to have good control over the intensity of the explosion and reshape the colours of the smoke while keeping the colours of the fire of the explosion.
We redid a base compositing/colour grade in Nuke like the light rig, on one of the most complicated shots. Then we used this base to process the other shots separately.
Then to finish, a last pass of colour grade in Davinci, to finalise the global look.
This project taught us a lot: knowing to respect deadlines and a new workflow, working with others, making animated shots, being able to help our colleagues even if we are not specialised in the department in question, etc.
We made some mistakes that will undoubtably be useful for future projects in order not to make them again (not to make compromises, good time management, etc.), and to refine our skills and knowledge.
You can find more images of the project on The Rookies. You can also find the individual team members at the links below: