
Creating a Seamless CG Integration for a Still Life Scene
If you are looking for inspiration to create a seamless CG Integration for a still life scene, 3D Artist and PIXL VISN graduate, Dominik Benz, shares his tips and tricks.
If you are looking for inspiration to create a seamless CG Integration for a still life scene, 3D Artist and PIXL VISN graduate, Dominik Benz, shares his tips and tricks.

3D Artist Dominik Benz is a recent graduate of PIXL VISN, completing studies in 3D Animation and Visual Effects. With a focus on Lighting, Lookdev and Compositing, Dominik has been sharing his latest projects on his Rookies portfolio, of which we took note!
If you are looking for inspiration to create a seamless CG Integration for a still life scene, this article is for you!
This project was originally created as an assignment for my advanced compositing course at PIXL VISN. Since I've always wanted to do a proper CG integration, this was the perfect opportunity to do so.
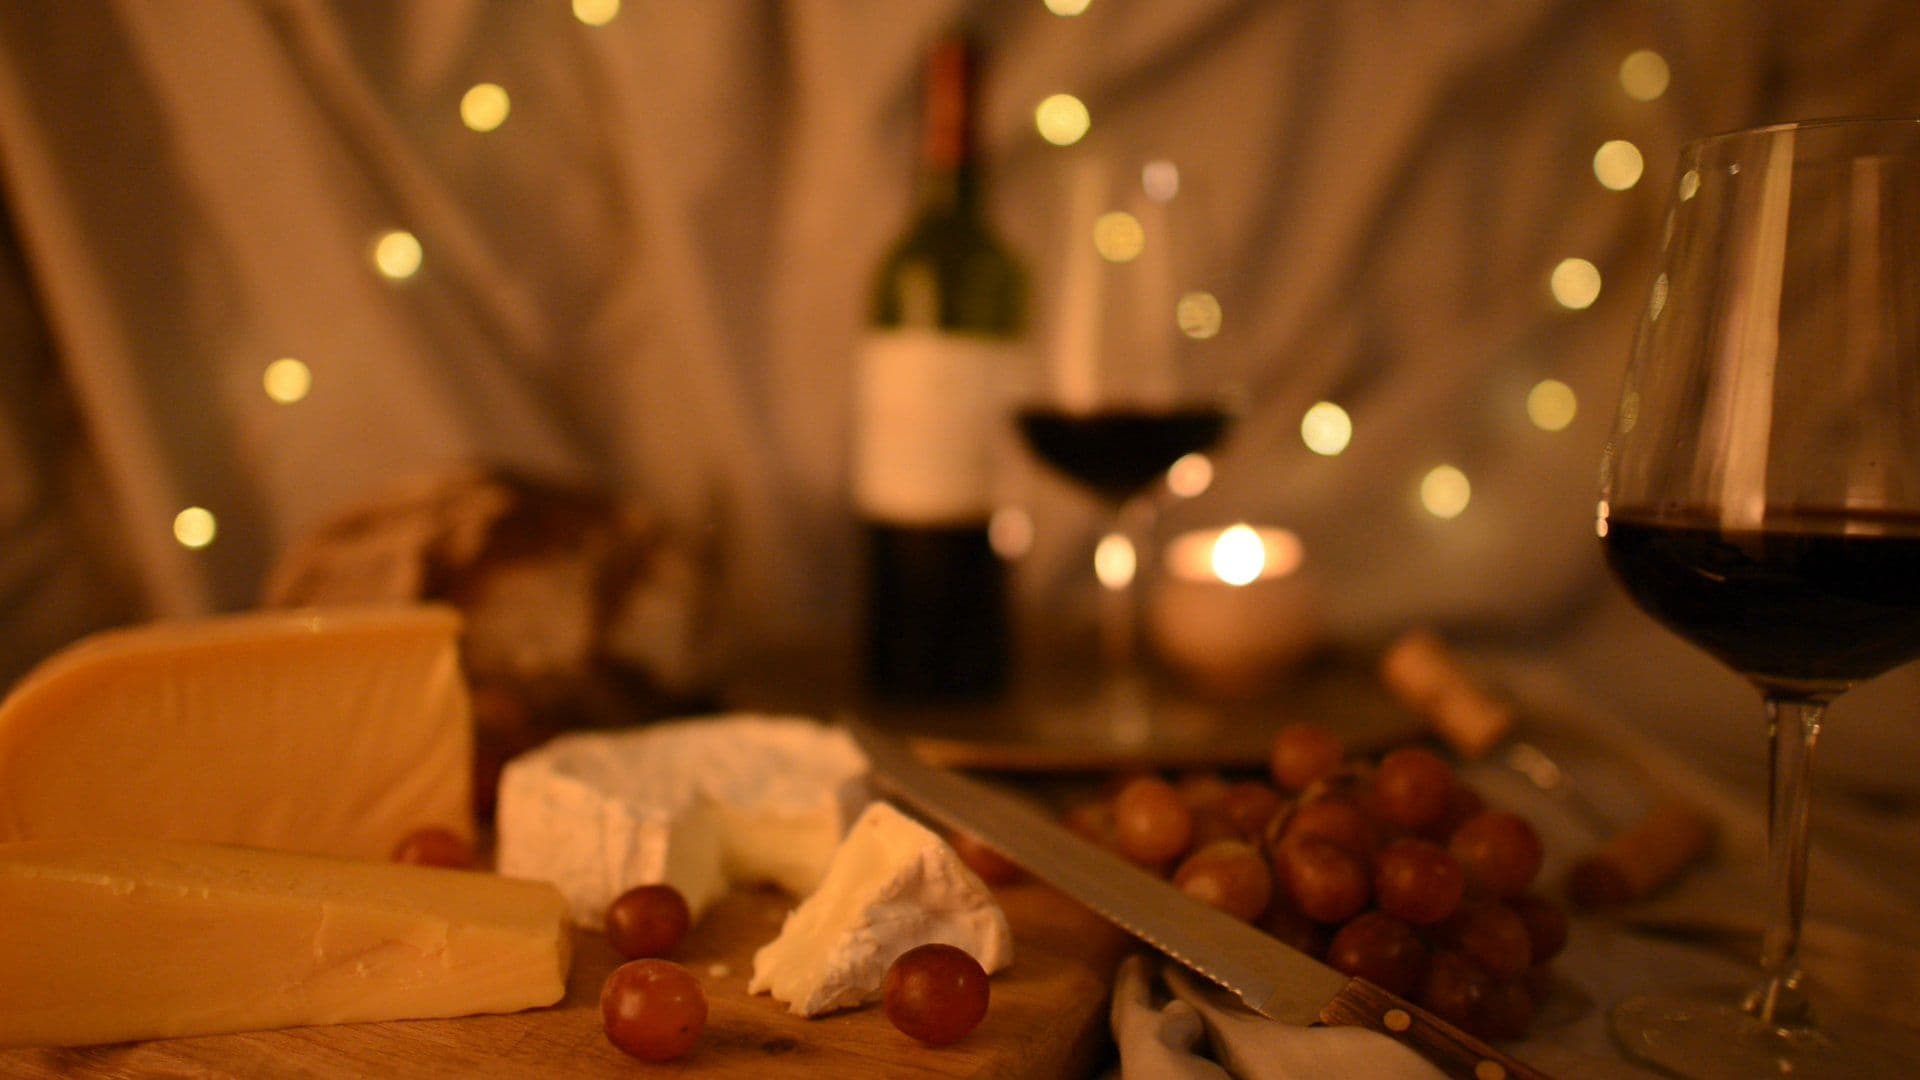
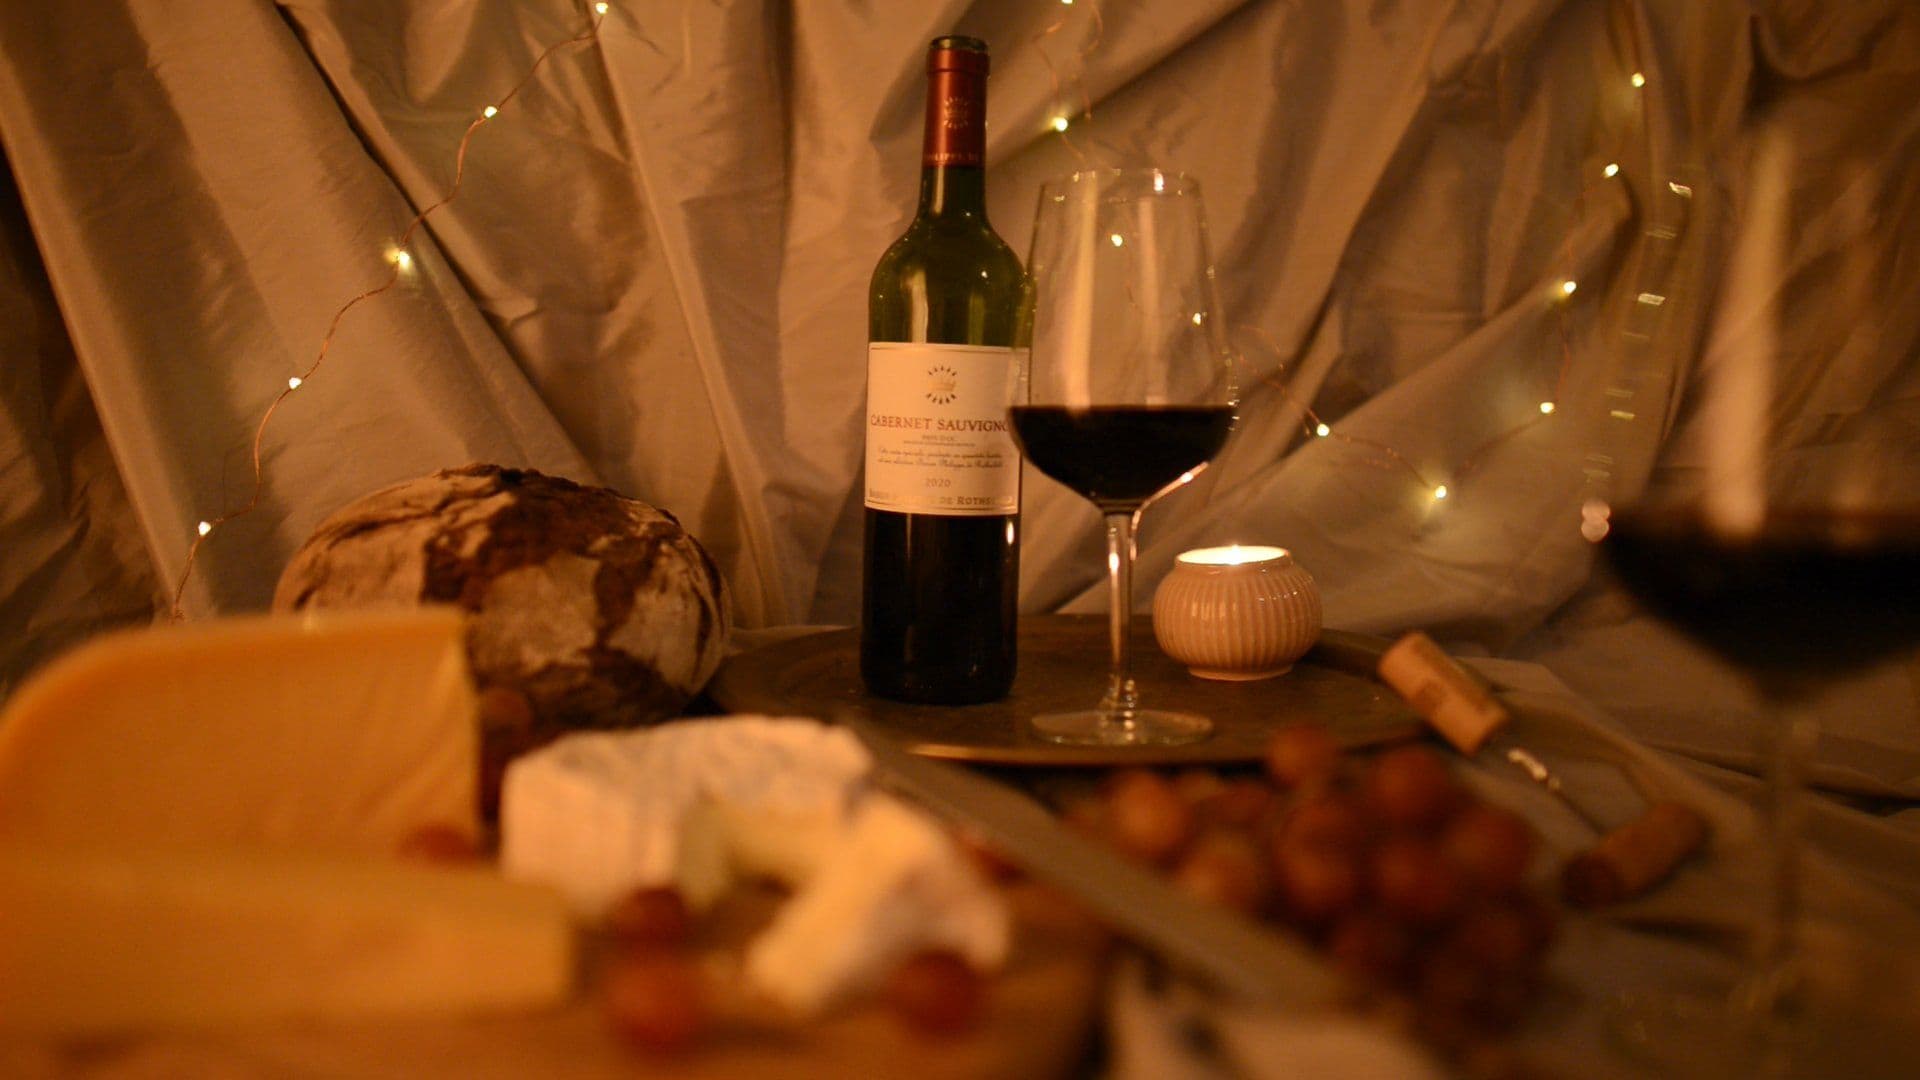
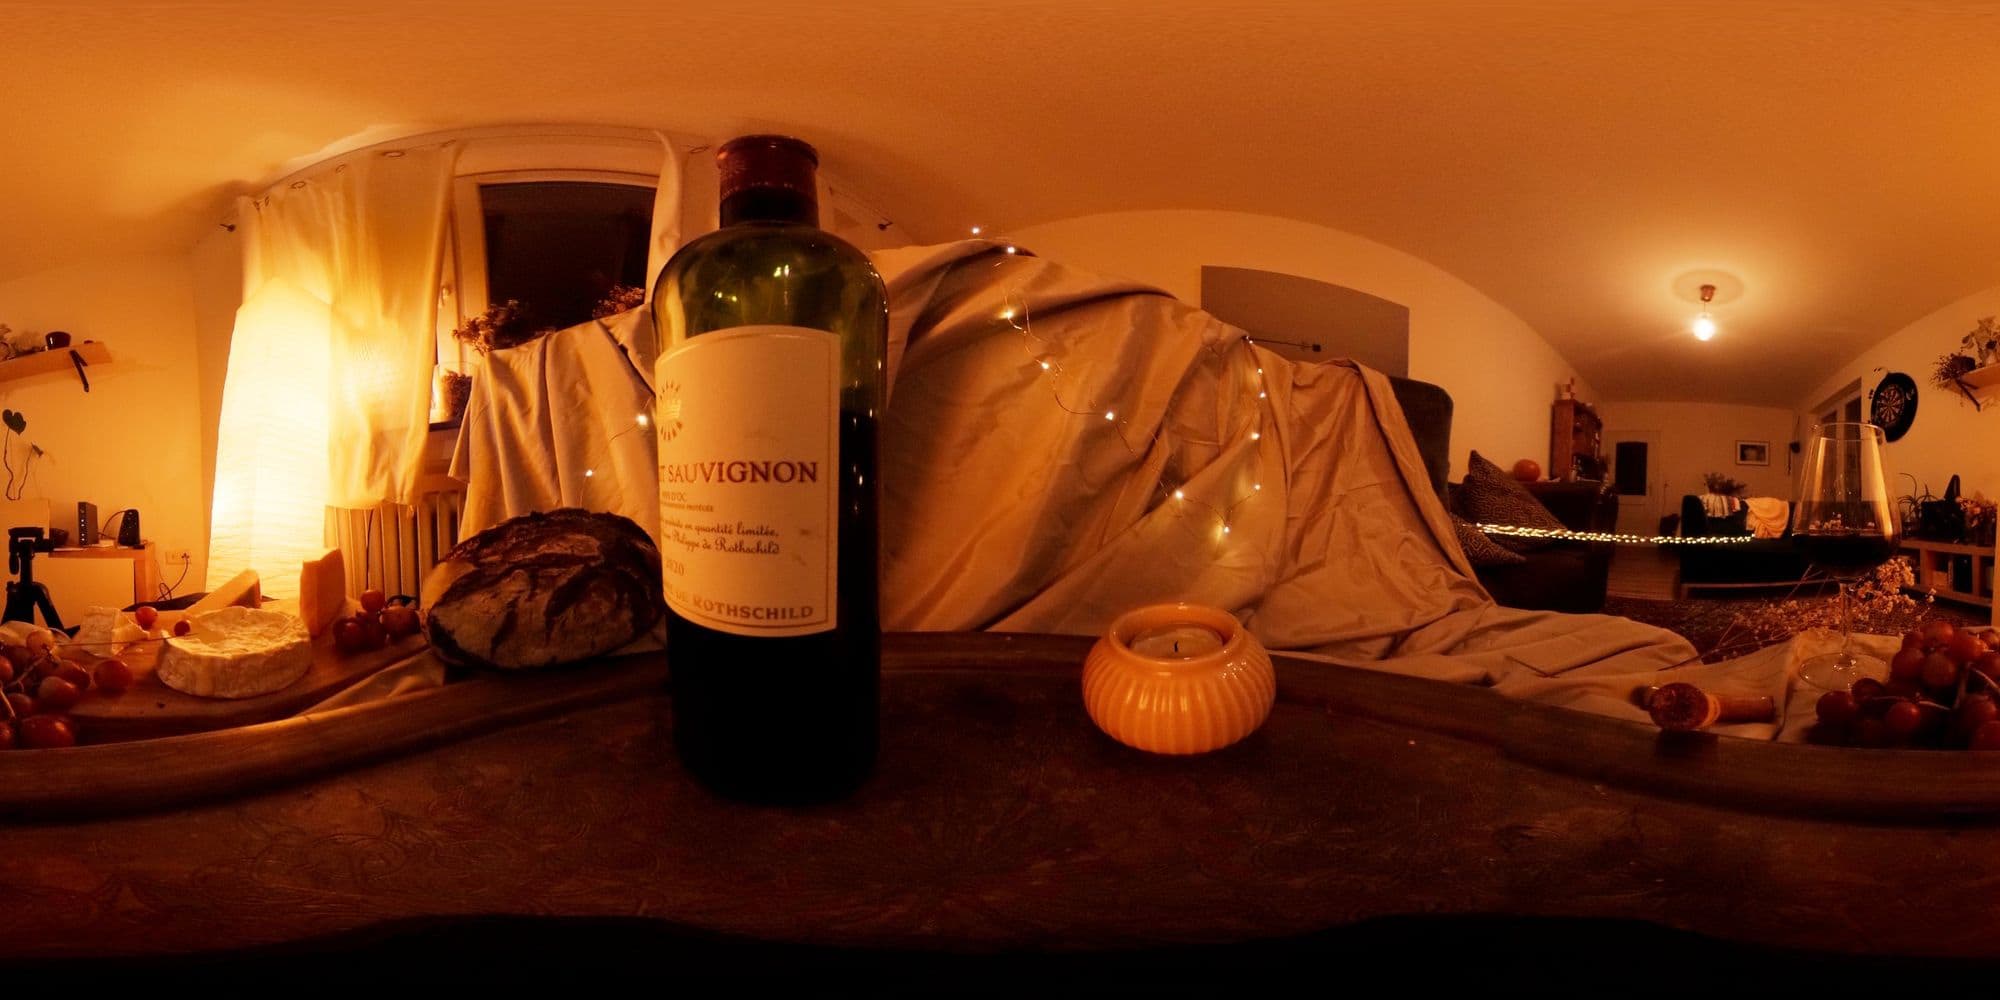
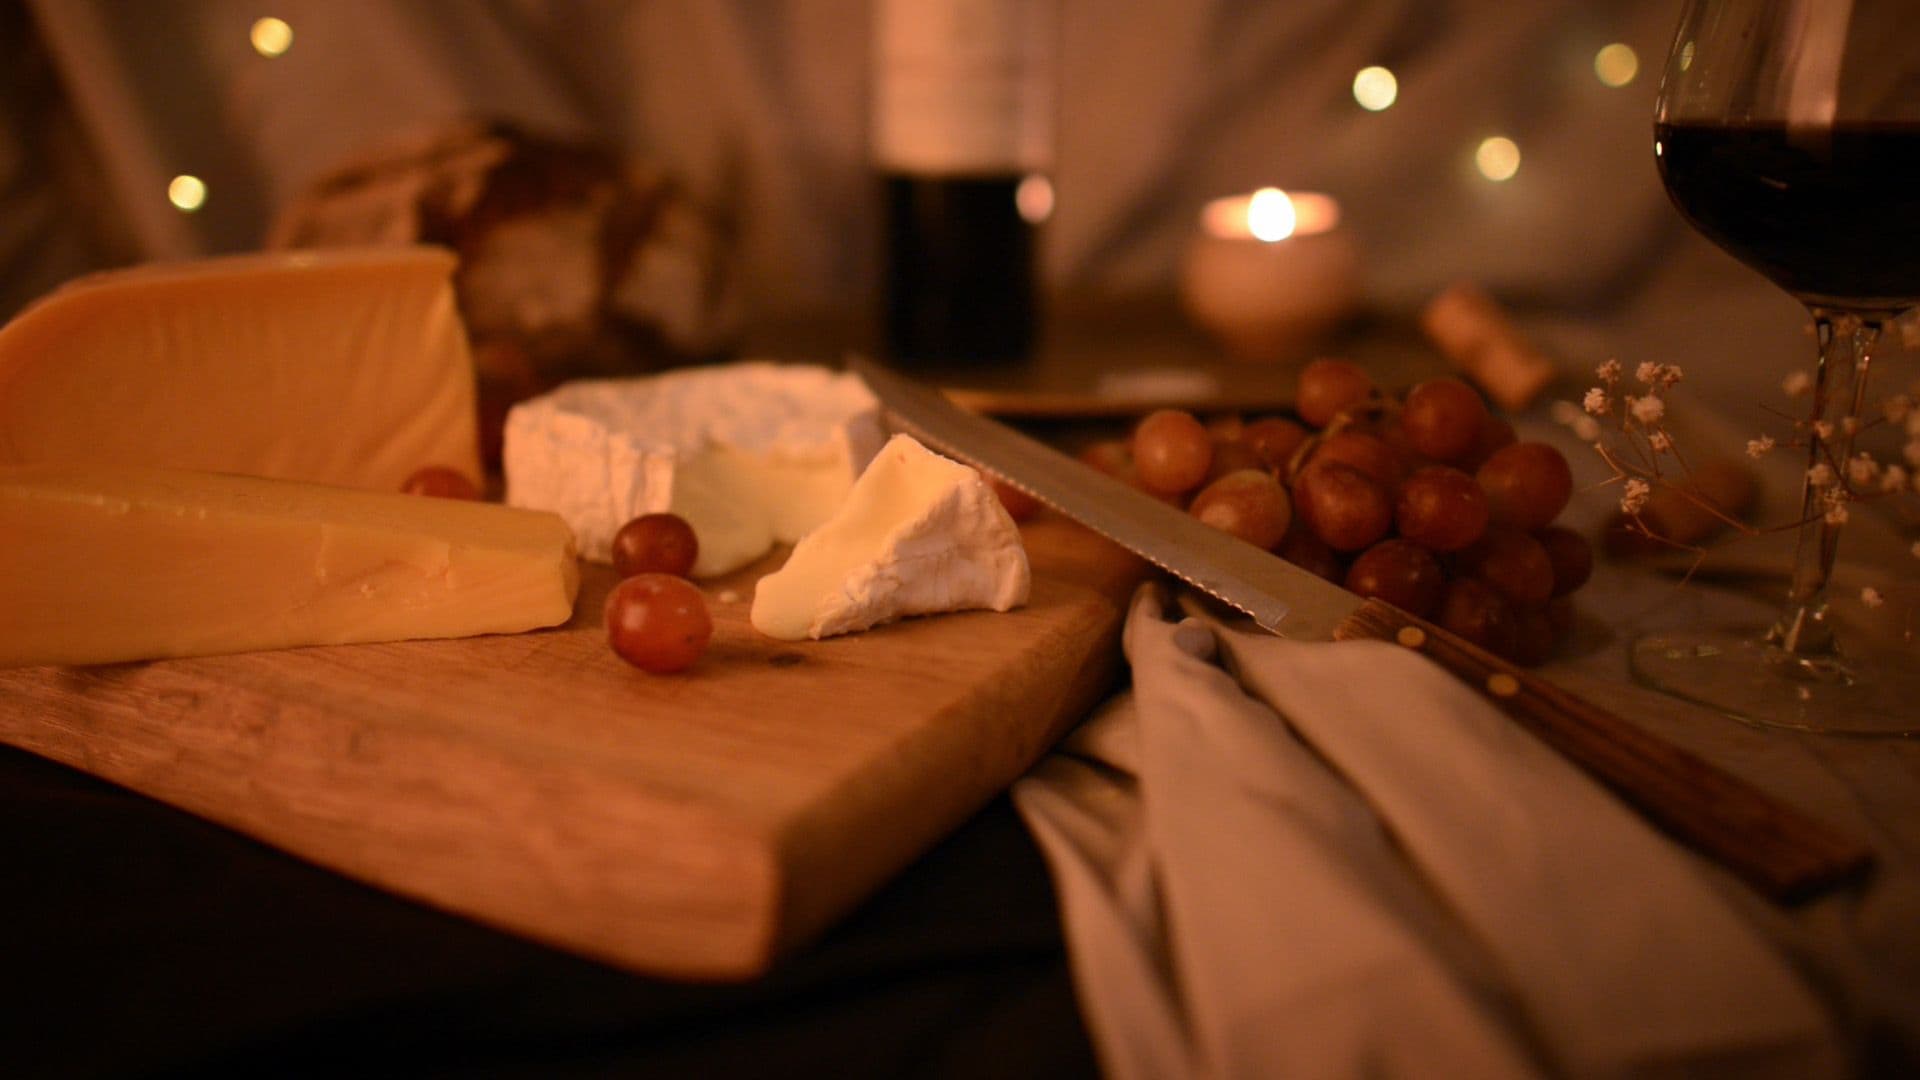
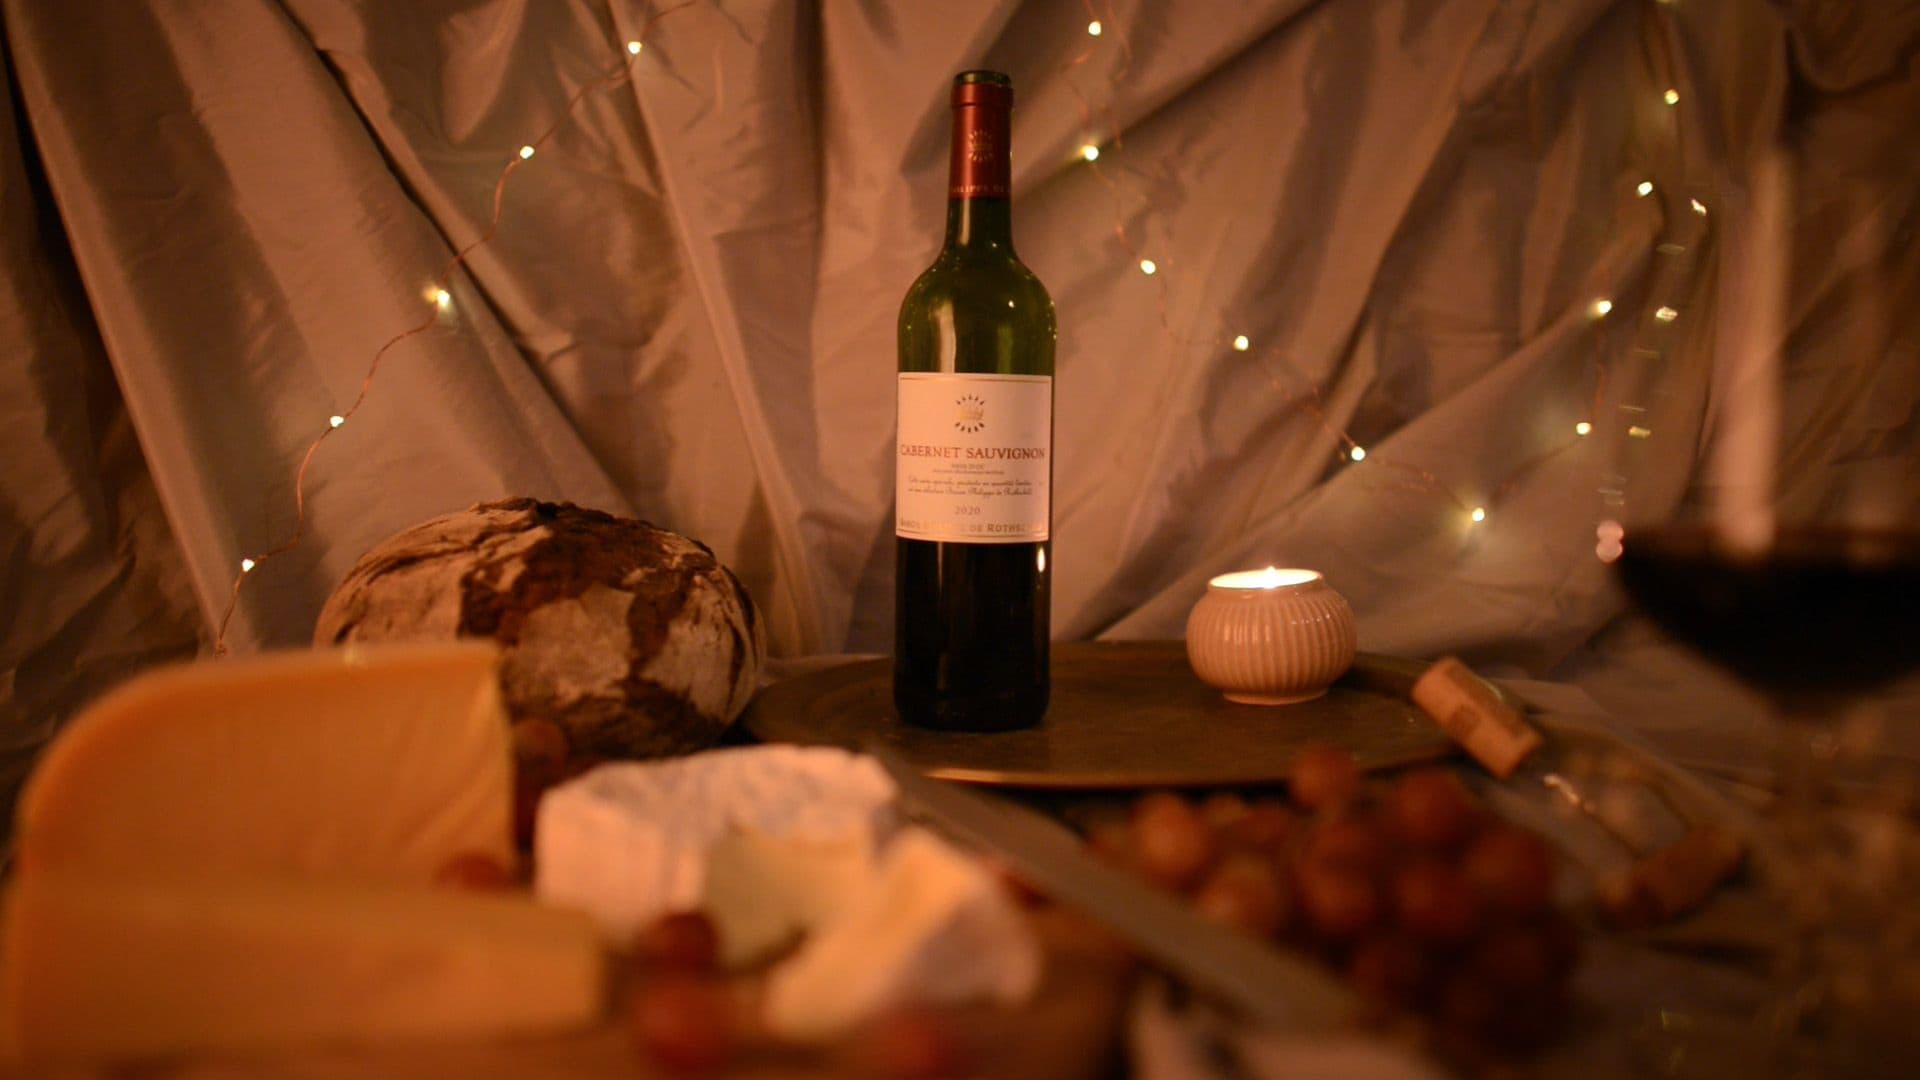
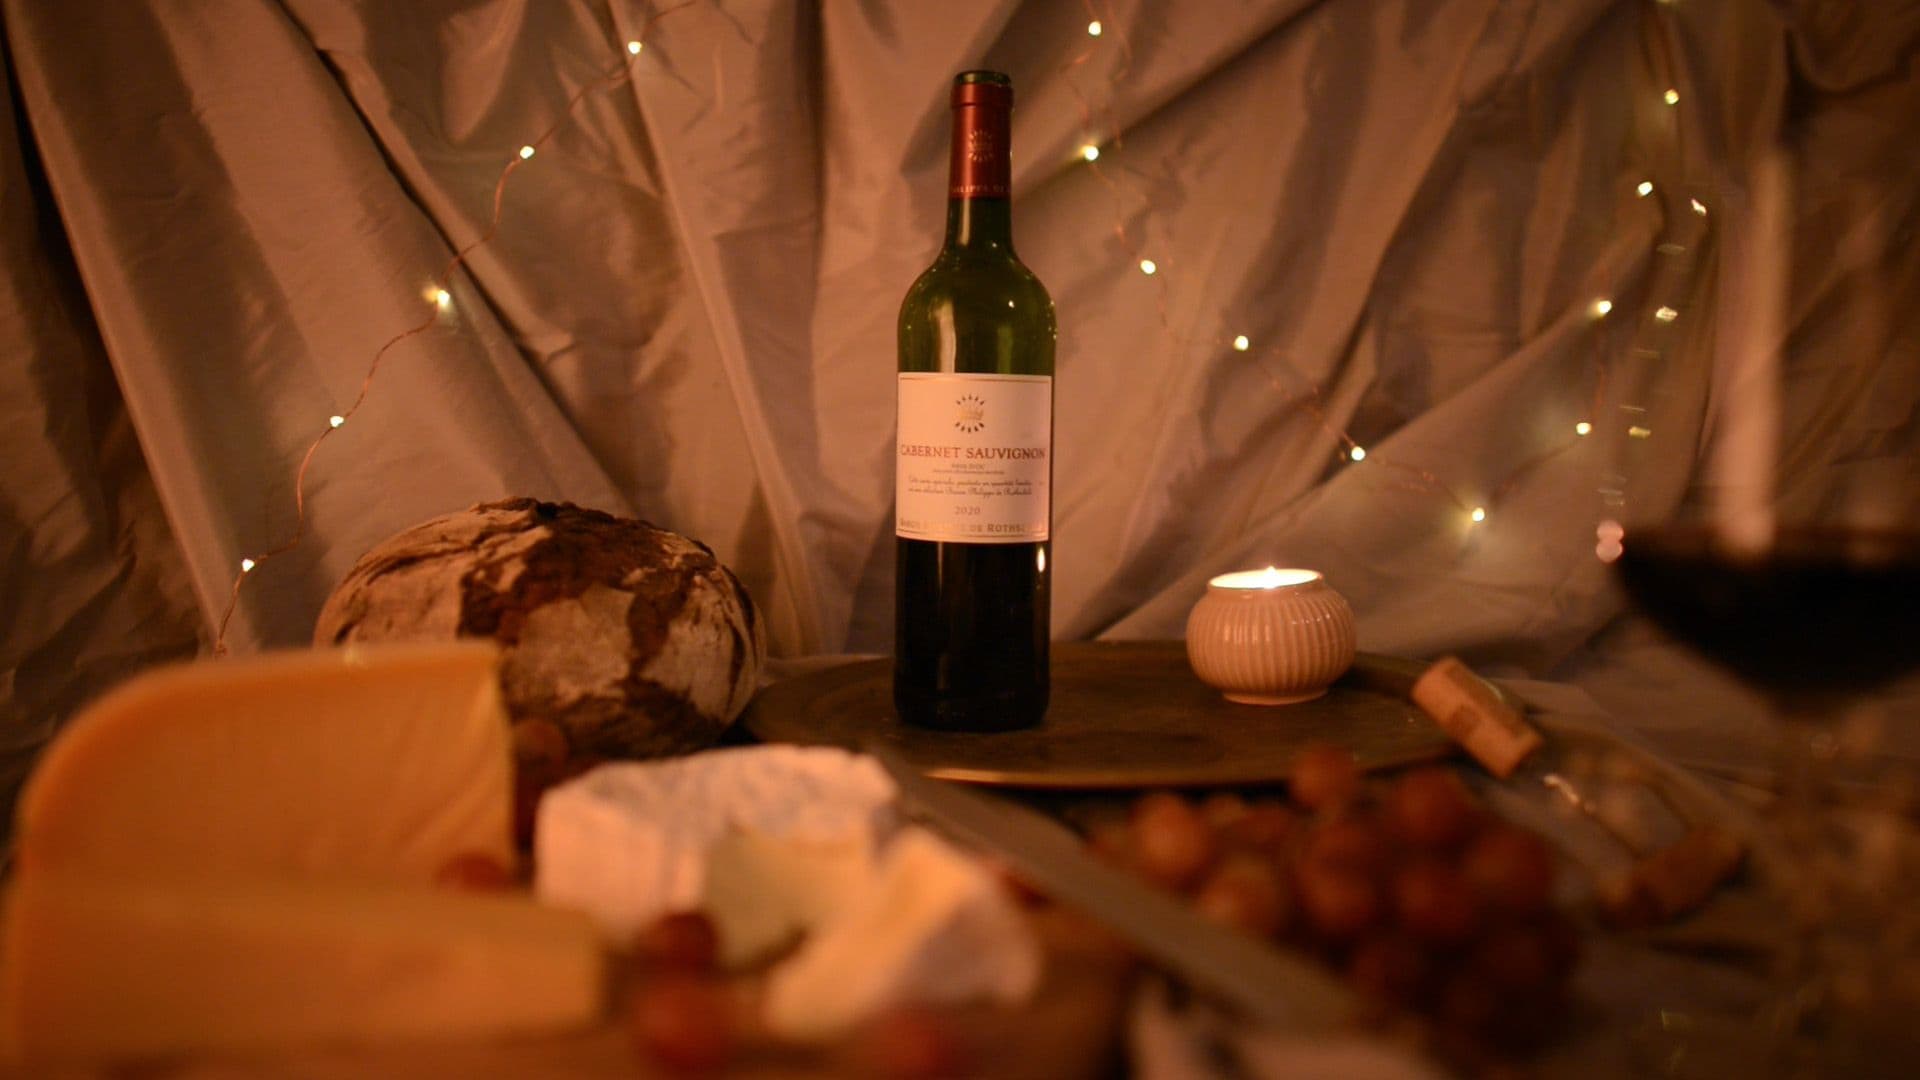
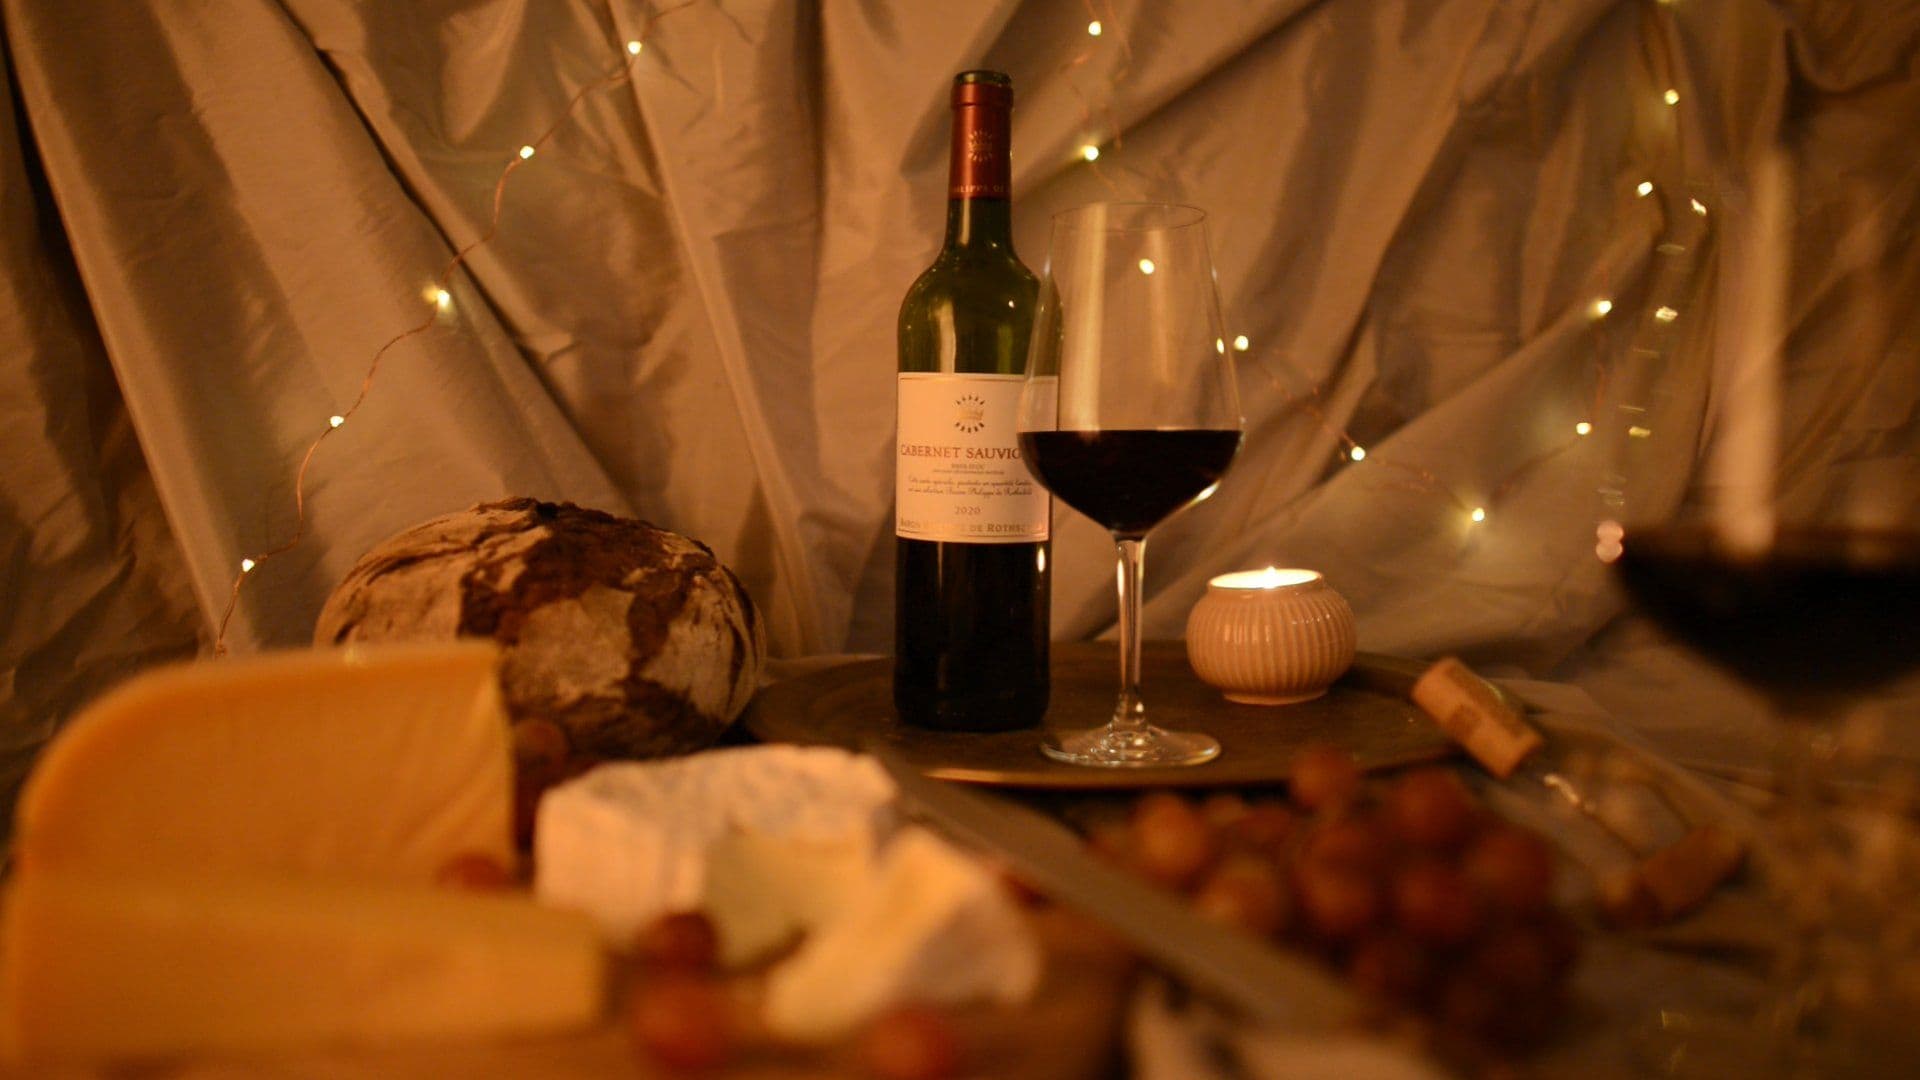
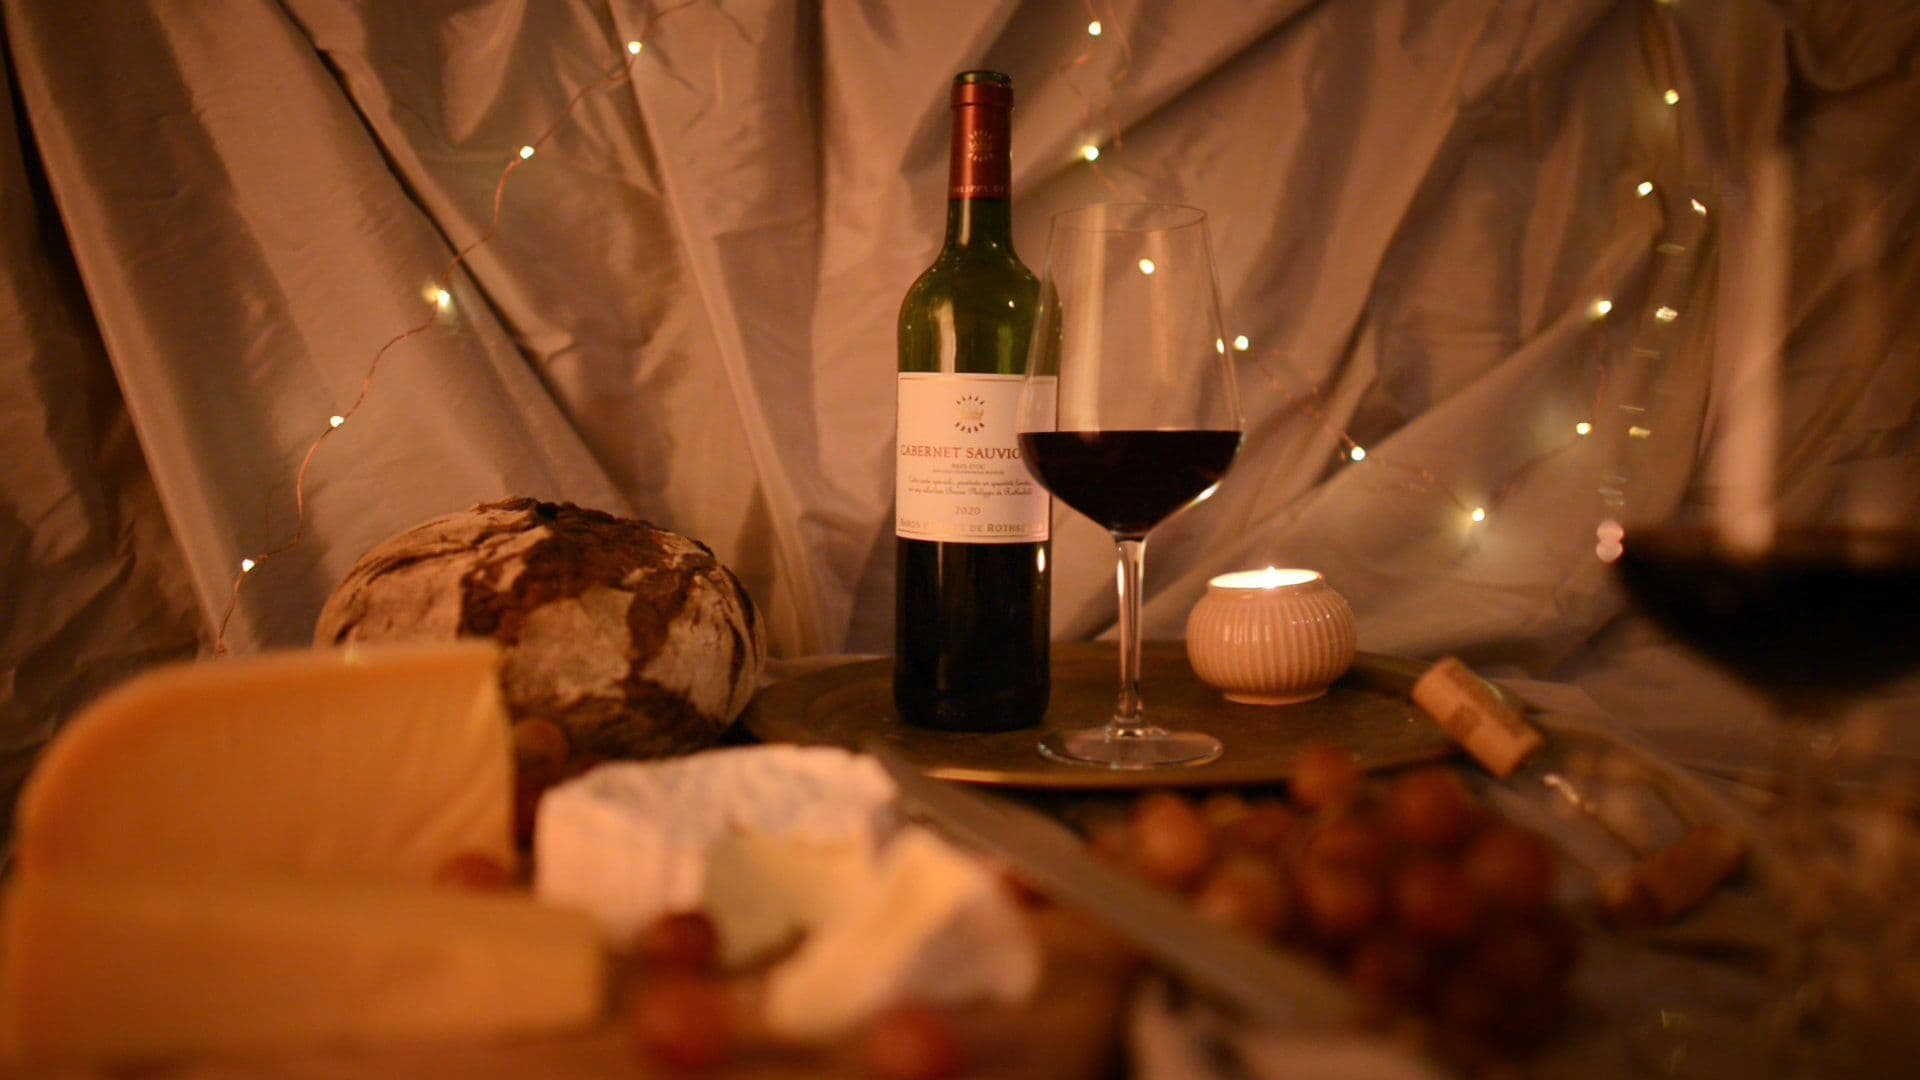
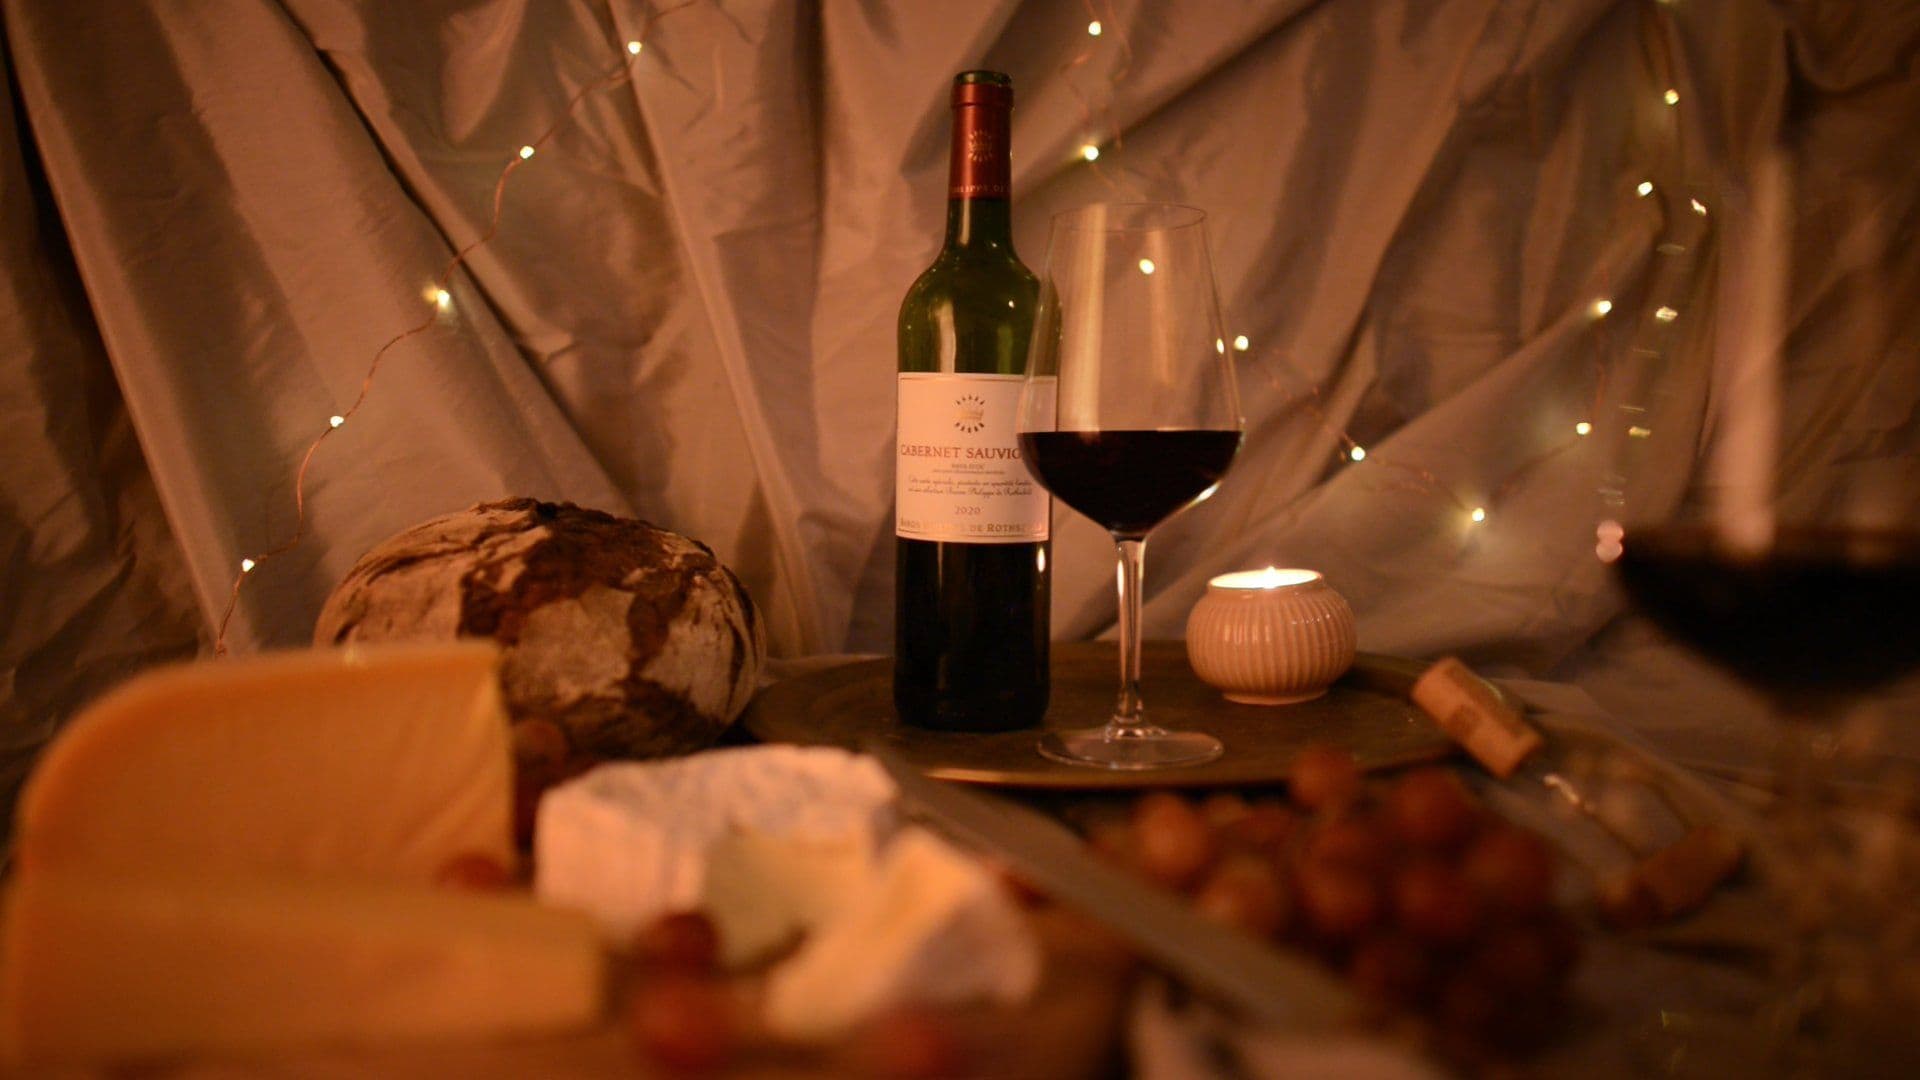
For the mood of this integration, I wanted to do some sort of still life scene with wine, cheese, grapes, etc. To add to the complexity of this project, I decided to integrate two objects that are also in the plate as real objects. Choosing a wine glass as one of my objects didn't make things any easier either. Because of the refractive characteristics of the glass, I ended up having a lot of problems with it. But since I like to be challenged a little bit, this was perfect for me.
The references I gathered for this project were mainly to get an idea of a possible layout and objects I could use. This part definitely helped me create a warm and appealing scene.
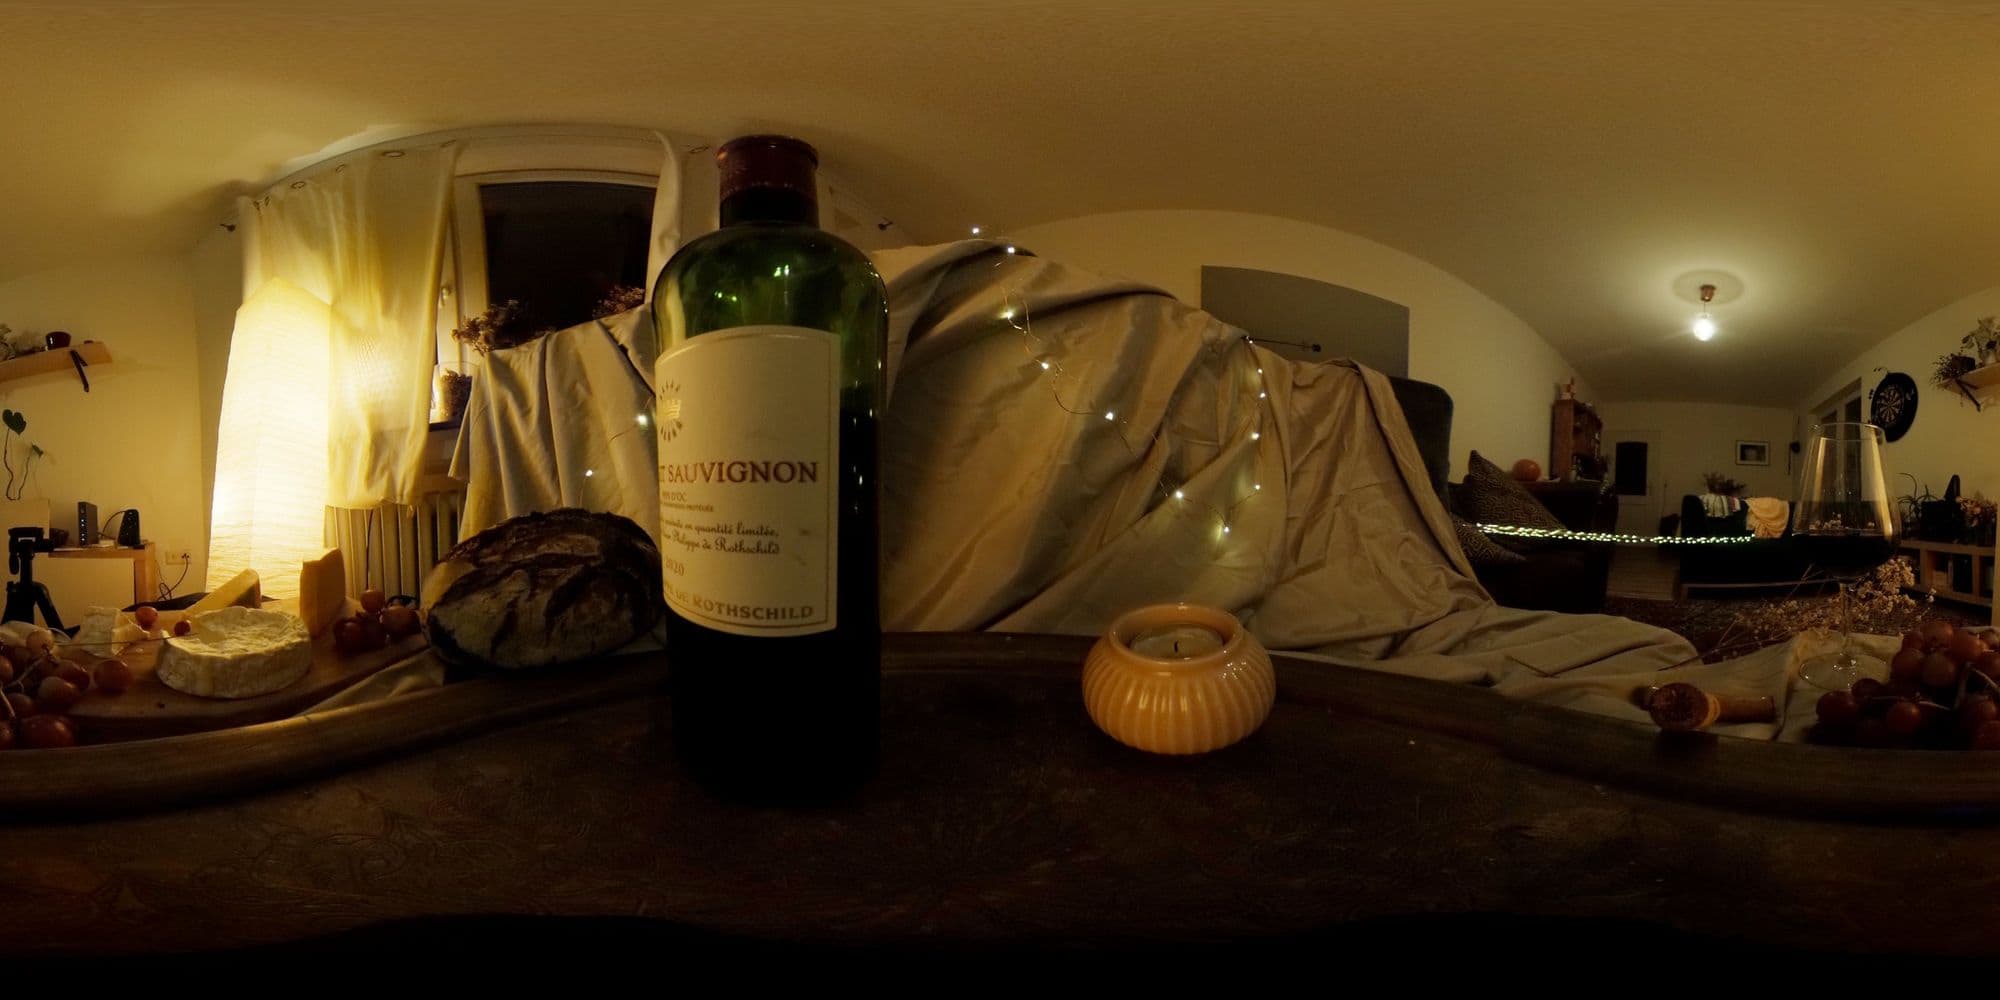
In addition to the references I found online, I also shot some references on set. These references were crucial to make the integration as realistic as possible. Because that way, all I had to do was try to match my CG objects to the references I shot on set. I also had some references for the set from different angles, which helped me align everything in 3D. Besides the references I gathered, I always had the glass right next to me while I was working on the project. So I could always look at it from different angles and see how the surface interacted with the light.
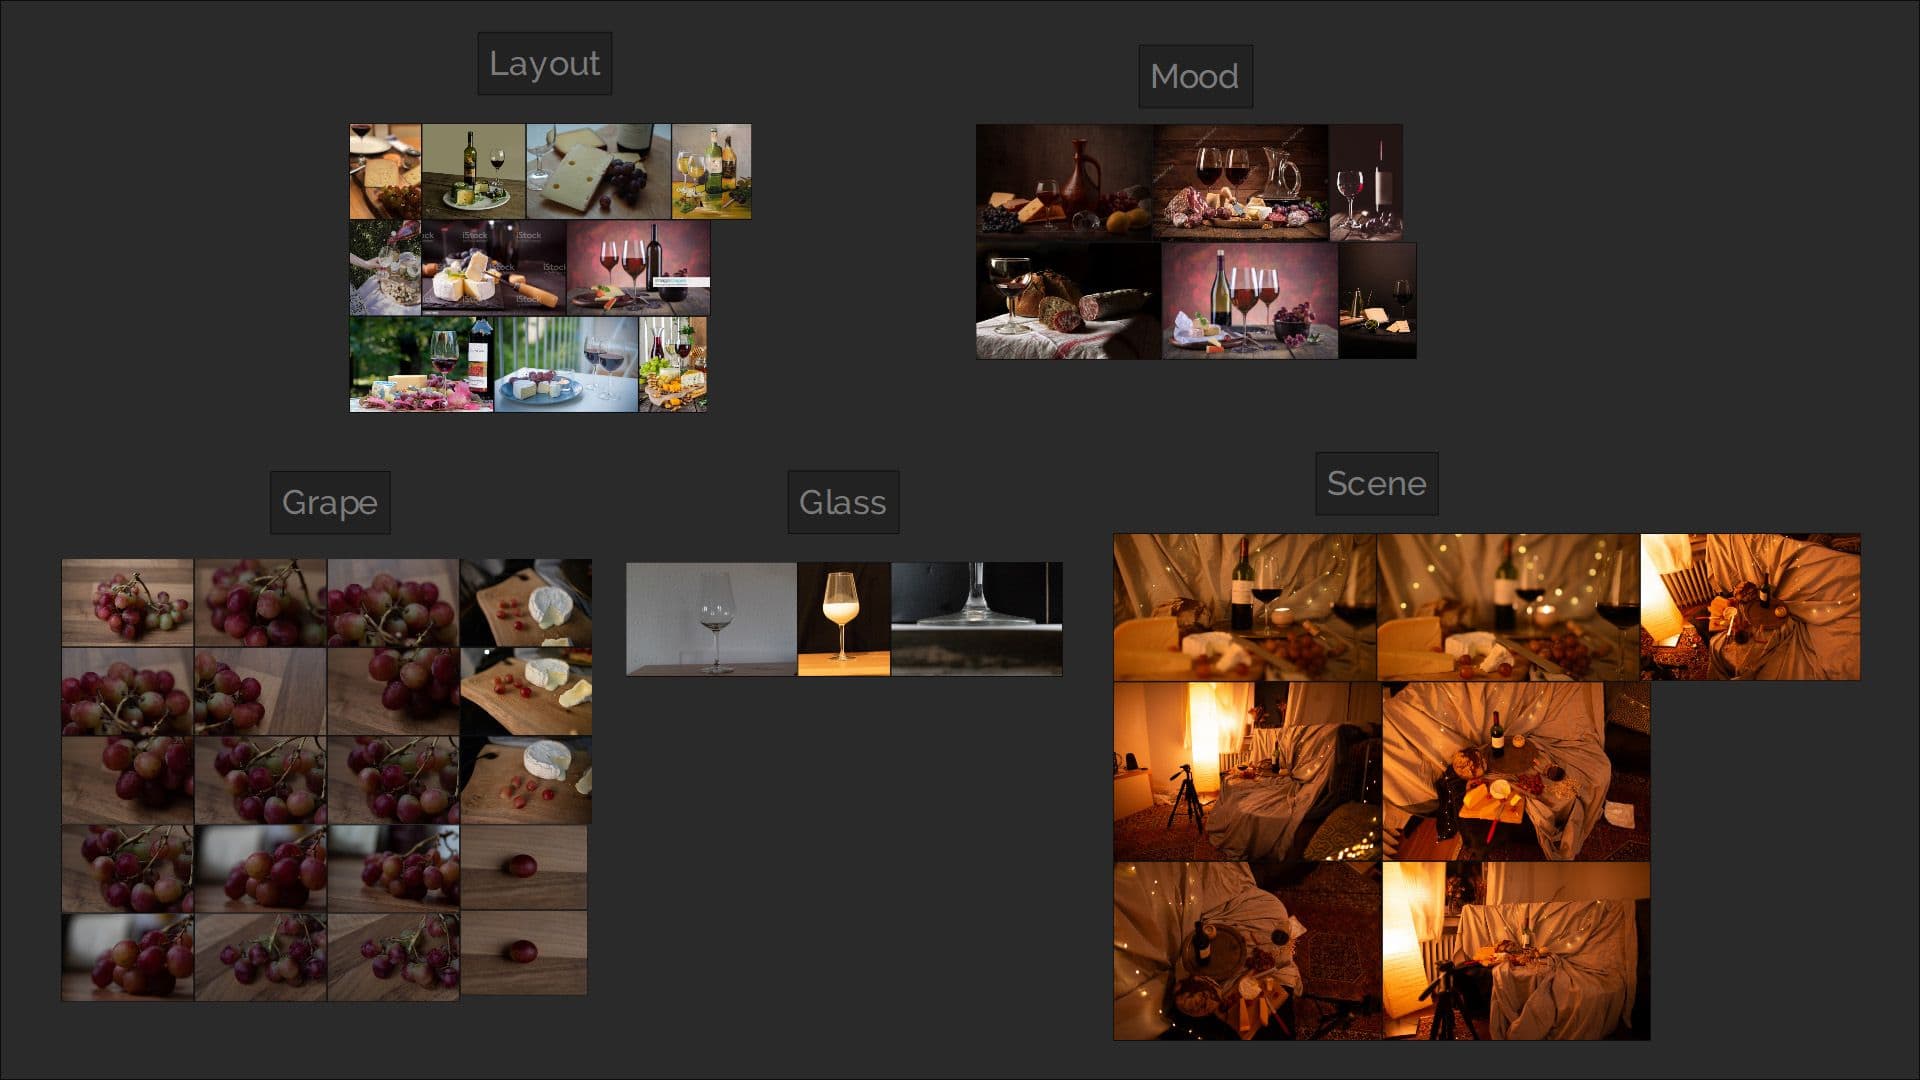
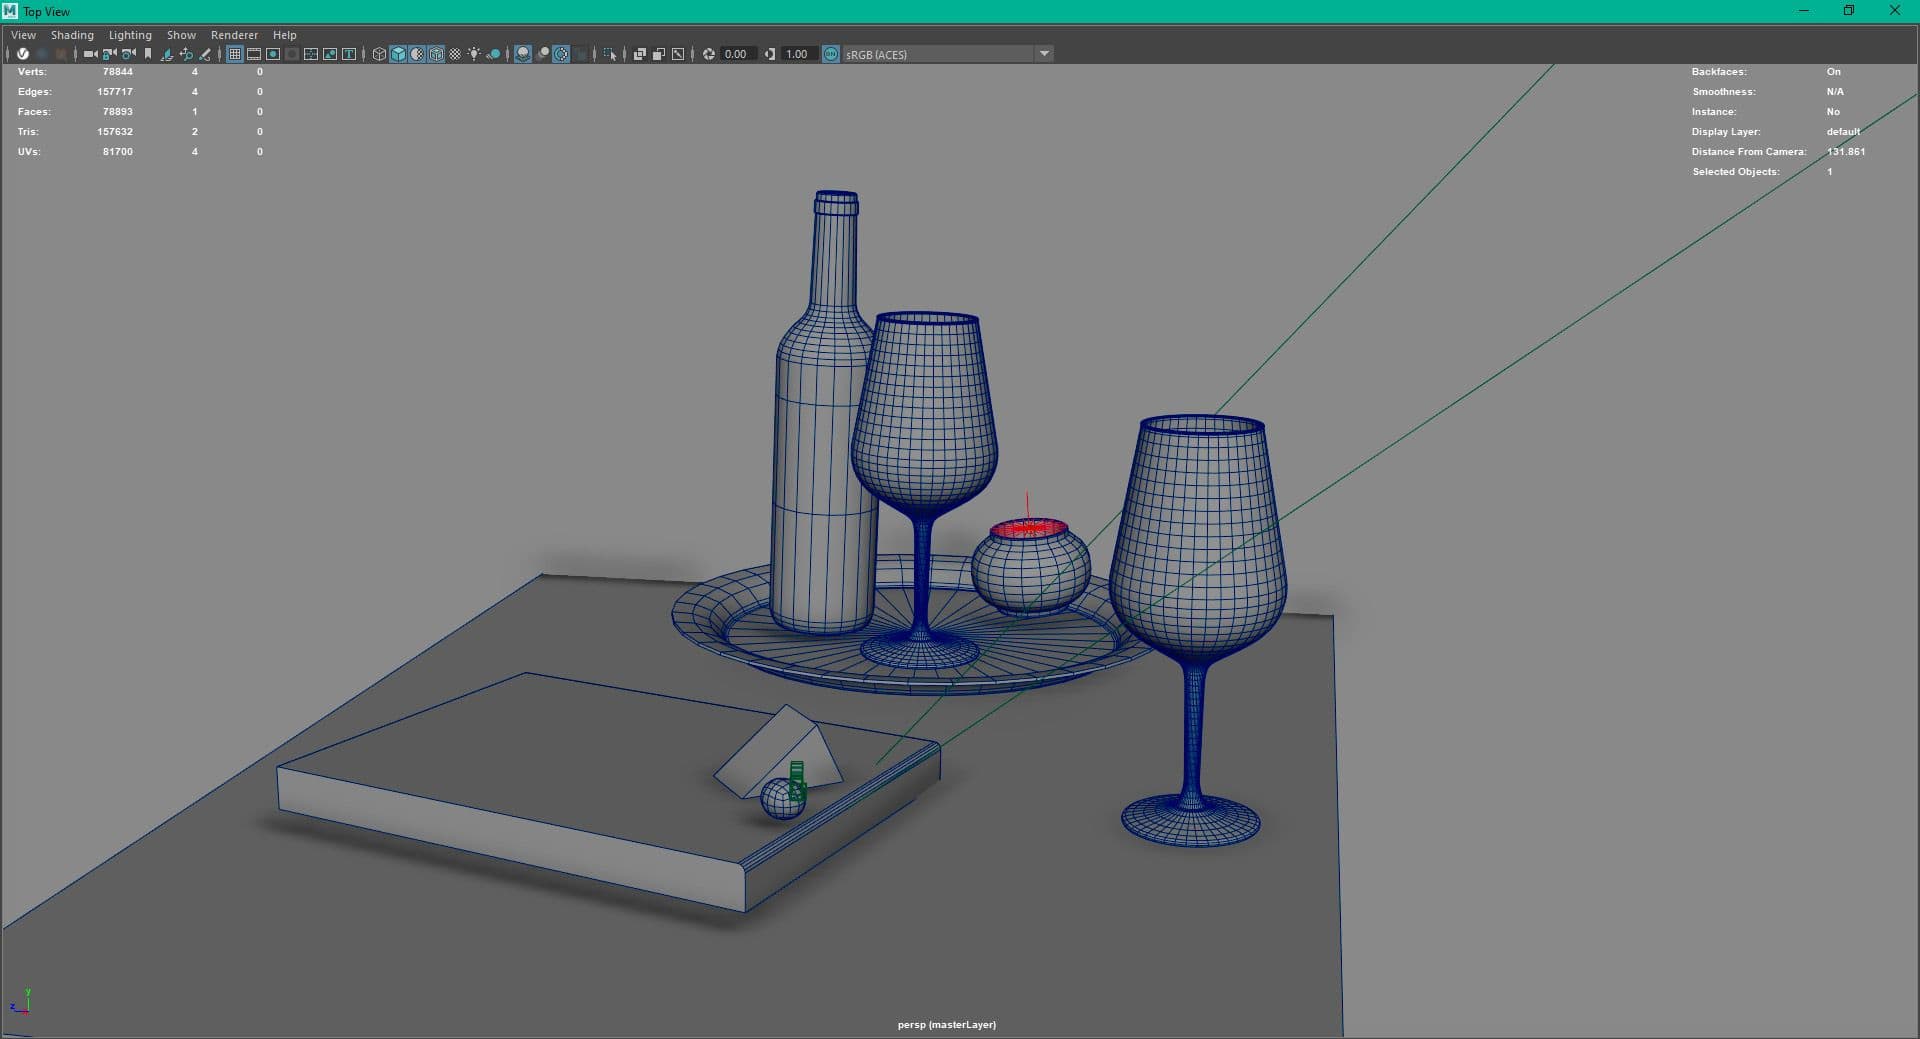
After I had everything more or less planned out, it was time to shoot my footage. With my layout references in mind, I started experimenting with different layouts until I was happy with the look of the scene. Next, I shot some reference plates with real objects as placeholders to get a feel for the camera movement and look of the final shot. Then I replaced the real objects with tracking markers and started shooting some takes for the final plate. It took me some time to get it right, since the camera movement was completely manual. To have the best conditions later, I also had to shoot a lens grid for the lens I was using and create a 360° HDRI of my set.
The two models were pretty simple, so I quickly modeled them myself using some references I took.
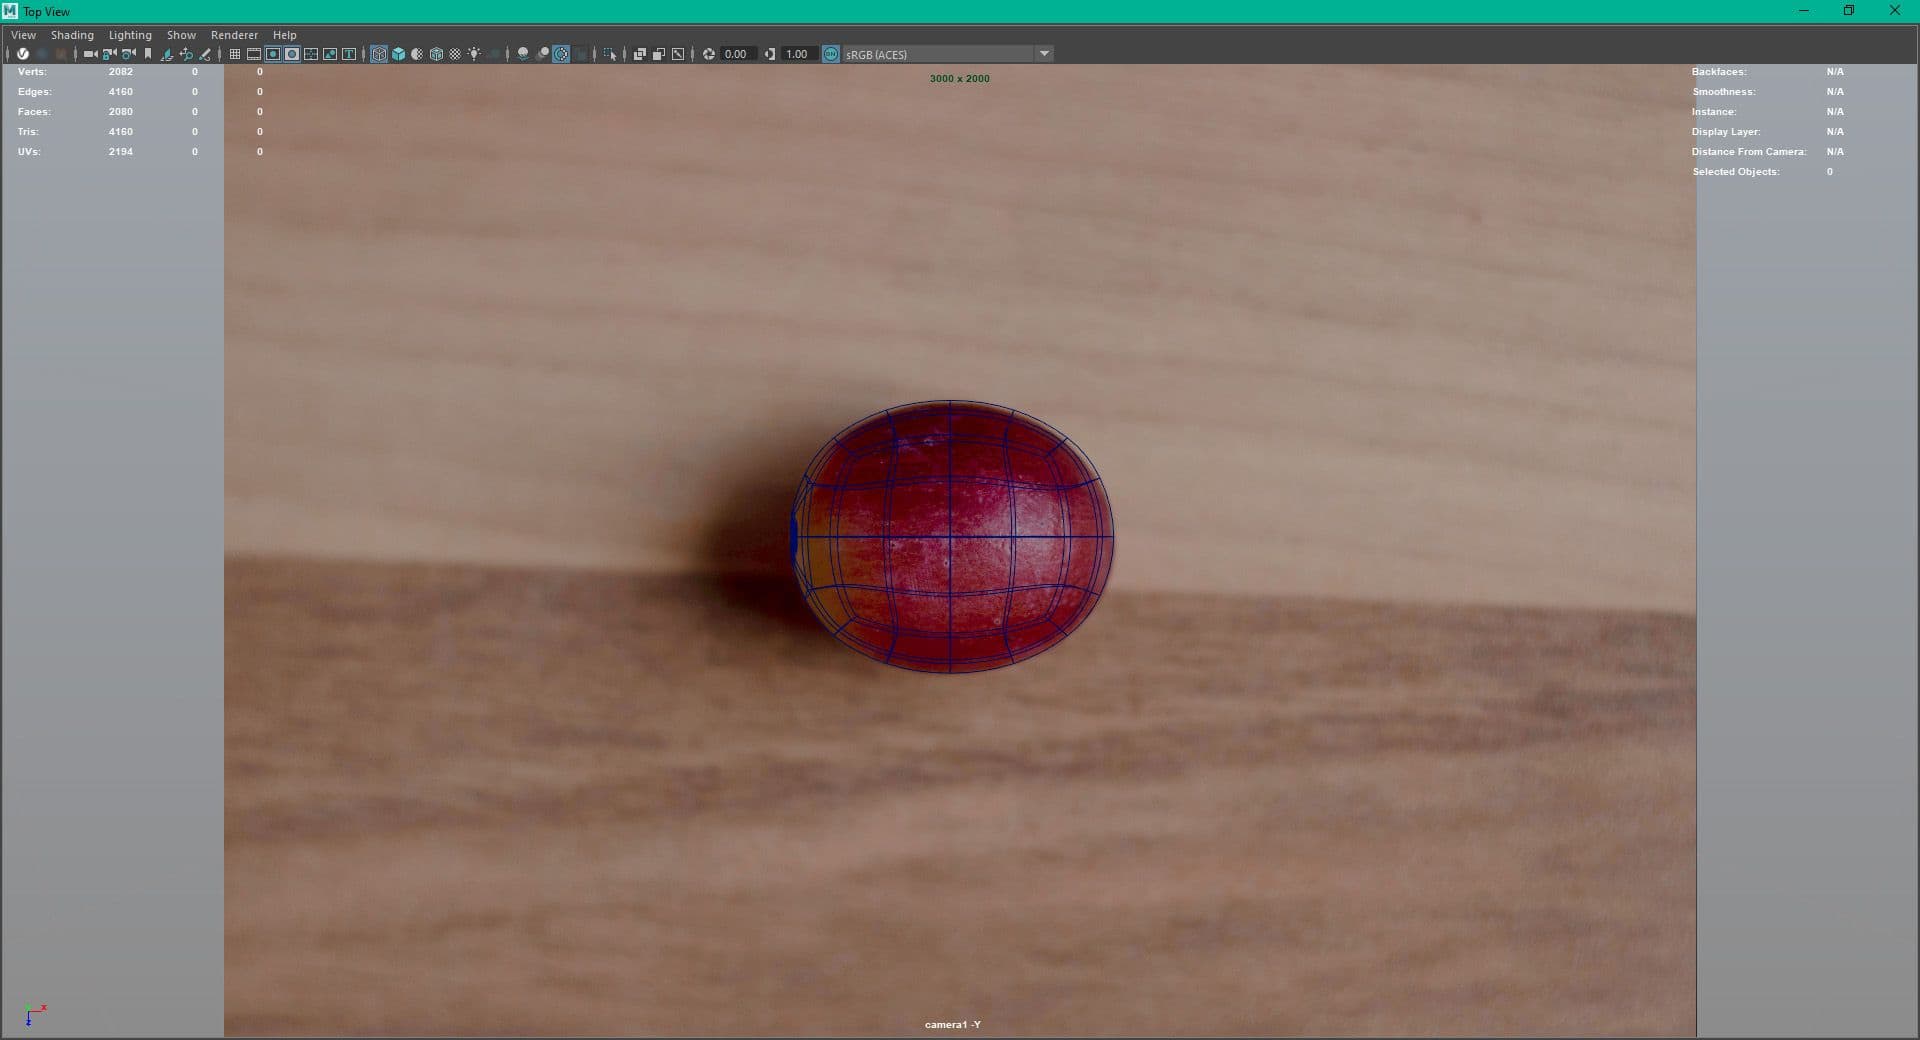
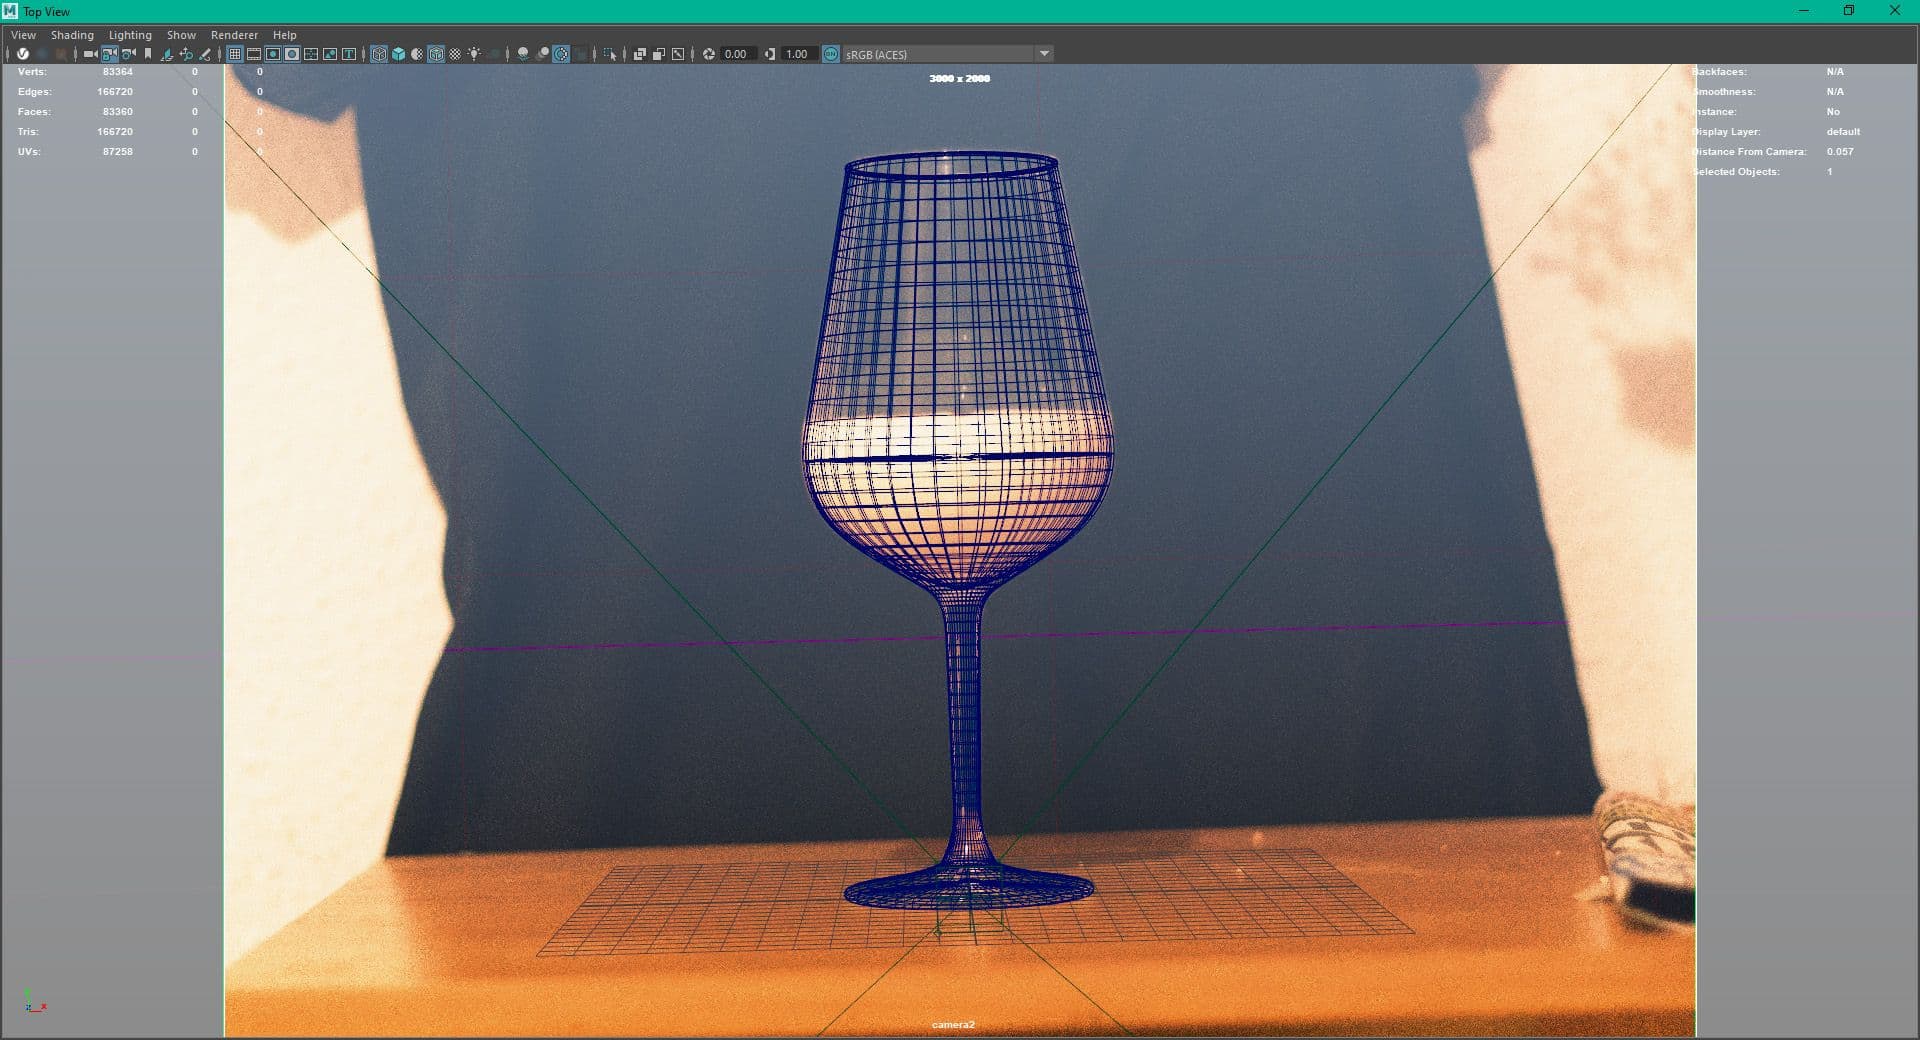
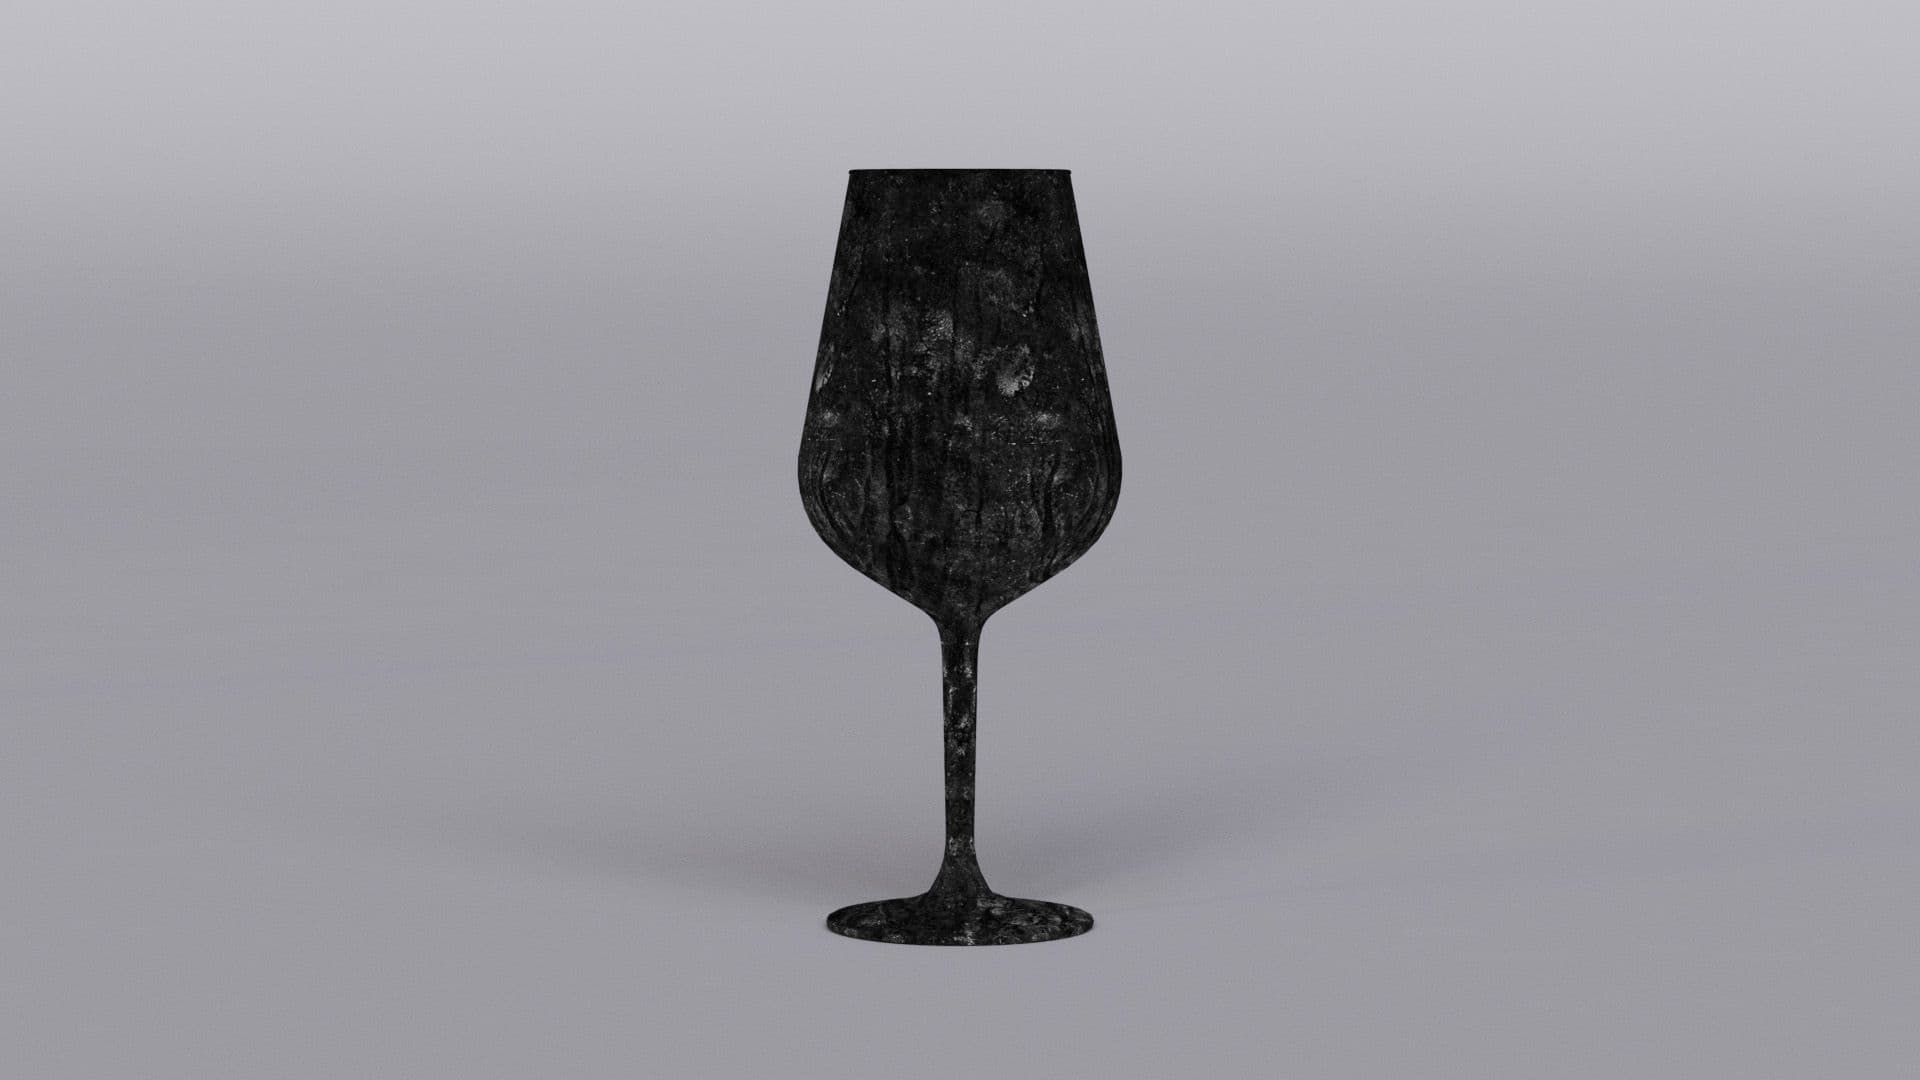
After the models were ready, I started texturing them. For the glass model, I projected some surface imperfections in Adobe Substance 3D Painter and blended them together with some masks to get a bit of breakup. Later, during the shading of the glass, I also experimented with a little more breakup by adding minor displacements. After comparing the result to my references, I found that this was not necessary because the displacement added some details that were not visible in the reference, so, I kept the shading of the glass fairly simple.
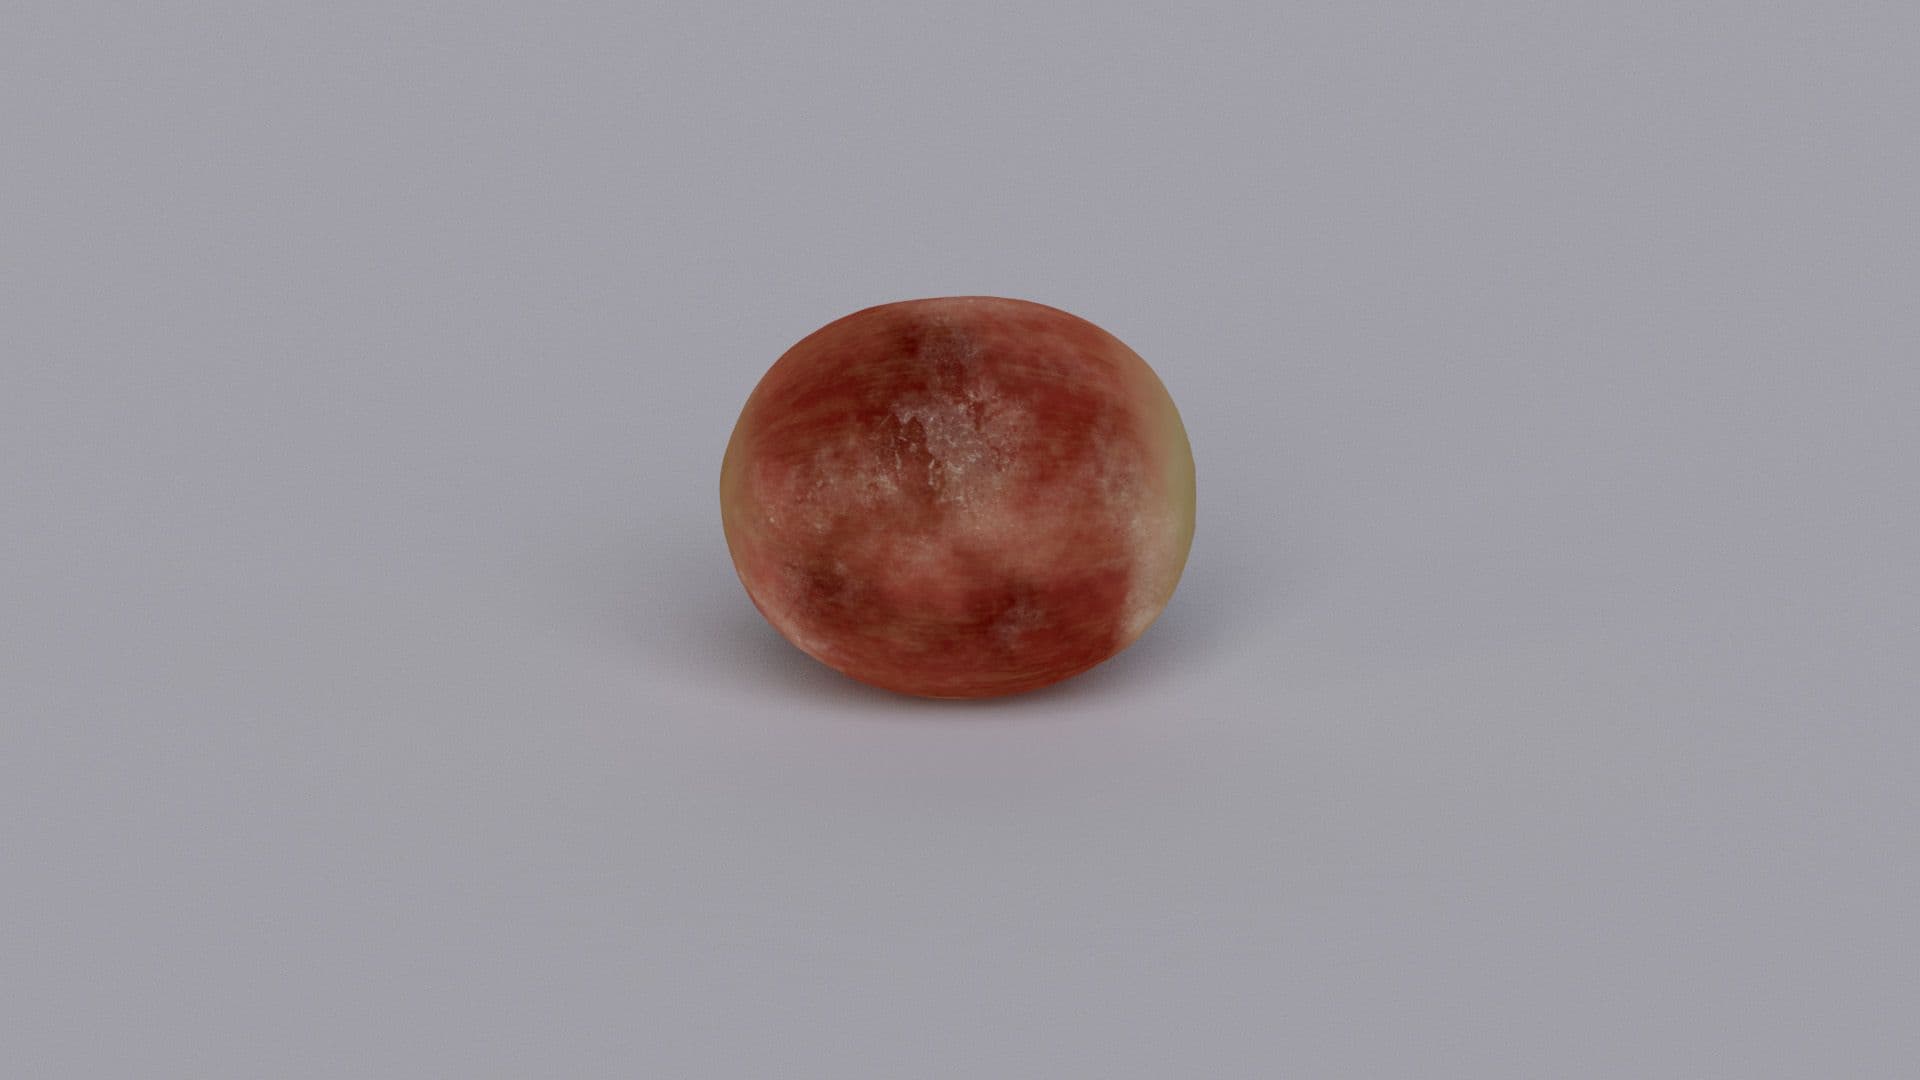
Texturing the grape was a bit more complex, but not too complicated either. I started by creating some quick procedural masks in Substance 3D Painter and exported them to Mari. In Mari, I used these masks and some other procedurals to mix some colours that I picked from my references. In addition, I hand painted some areas to bring out details that I couldn't quite get with the procedural masks.
I only created the base colour in Mari, because I was able to do the rest of the shading directly in Arnold with some procedural noise and ISO masks I extracted from Mari. Doing the shading itself was a bit tricky, getting just the right amount of subsurface scattering in, while maintaining all the texture detail. I tried to get as close as possible in shading and later on adjusted some parameters in Compositing so that it pretty much matched the plate perfectly.
The lighting aspect of a CG integration is pretty straightforward because there's not a lot of room for creativity and the only goal is to match the lighting one-to-one.
As a starting point for the lighting, I used the HDRI I created on set, but before I could use it properly, I had to colour correct it a bit as the light colours didn't match the light colours in my footage.
After I adjusted the colours, I tried to match the light directions of the HDRI to the reference. Since I didn't shoot a grey and chrome ball like I should have, I was fortunate to have a strong reflecting object in my scene that I could match the light direction to. In addition to the HDRI, I created some supporting lights to get all the reflections I saw in the references.
Since the glass is a refractive object, I had to project my plate as a background to get the correct refraction in the glass, and it also helped to get some better reflections of the environment. But that was also where a lot of problems came in.
First, I had to figure out how to project the undistorted footage with the overscan so that I could later redistort it in Nuke. So the problem was that when I exported the footage with the overscan, Maya simply pushed the overscan inside the frame while projecting.
To fix this problem, I decided to transform the overscan inside the frame before exporting to Maya, and then push everything back out in Maya with the inverse transform. This was a pretty messy way to solve this problem, but it worked.
The next problem, which I already anticipated, was adjusting the defocus without double defocusing the refracted background. At first, I thought that separating the glass from the background using Light Path Expression (LPE) would be enough, so I made a small script that created all the LPEs and AOVs for each light group separately. Having all these AOVs rendered allowed me to adjust the shading and lighting of my objects in compositing.
When I tried this approach, I realised that this wouldn't work because there would be some sharp edges in the background while the glass would be blurry and out of focus. Thus, I needed a different solution. The idea was to simply freeze the last image of my plate, where the background was as sharp as it could be, and use that as the background for the area where the glass was. That way, I could defocus the refracted background again to match the defocus of the glass.
Compositing was by far the most complicated and time-consuming part of this project. I even think this was the biggest composition I've done so far.
First, I had to prepare my footage for tracking, paintout, and projection. This included undistorting the footage using the lens grid and degraining it. As soon as I had everything prepared, I started tracking the camera movement using the Nuke Camera Tracker. Because of the rack focus in my plate, it was a bit difficult to get a good camera track, but after many tries and experimenting with different settings, I finally managed to get a good track.
Once the tracking was done, I was able to export the camera for Maya and start painting out the tracking markers. For this part, I used Photoshop as it is more convenient for me to use than Nuke. Once I was done with the paint out, I projected the paint out back onto the original plate to create a clean plate.
Whenever I was done with an important part of my composition, I always pre-rendered that part to keep my composition more lightweight. Next were the shadows of the objects. For the shadows, I rendered some shadow passes with Arnold and adjusted them with some rotos so that the shadows only appeared where they were supposed to be.


Using all the LPEs and AOVs that were rendered, I had full control over the shading and lighting of my objects. This was really useful for adjusting many aspects of the shading and lighting without having to re-render everything.


Once I was happy with the look of my objects, I added some more minor lens effects like lightwrap, diffusen, halation, etc. to make the objects blend more seamlessly into the plate. For the halation, I also tried adding a small colour change that was visible in the original plate when the focus changed for some of the highlights.
One of the many problems I encountered during the compositing phase of this project was matching the rack focus to the plate. Fortunately, I found a tutorial by Ben McEwan that showed how to automatically match the rack focus. His method required me to track one of the bokehs in the background and remap the tracked values for the defocus nodes. This worked really well and was much easier than animating the defocus manually.
There was one last problem I needed to solve for a proper defocus. I noticed that the bottle behind the glass was more defocused than the actual bottle in the plate, so I needed to defocus the bottle independently of the fabric at the very back. To accomplish this, I simply used two defocus nodes for the background and blended them using a keymix and a roto as a mask.
To make everything a bit more appealing, I made some minor colour corrections and other adjustments at the end.

I learned a lot working on this project, and it also improved the way I approach new projects. That's why I wanted to share these takeaways with you:
I really enjoyed working on this project and look forward to possibly doing more CG integration in the future. At this point I also would like to thank my Compositing instructor Marcel Pichert, who always gave me great feedback and pushed me to improve this project. I hope you had as much fun reading this article as I did working on this CG integration. If you have any questions or want to reach out, don’t hesitate to contact me on my socials.