Jacob Döhner is a Junior Animation Artist at Pixomondo Germany. In this article, he will guide you through one of his animation demo reel projects and break down his workflow of rigging and animating a realistic leopard.
Jacob Döhner is a 22 year-old animation artist from Ulm, Germany. He has always had a passion for creative work, whether it was music production or filming. In 2020, shortly after his internship in a film production studio, Jacob decided to study 3D Animation and Visual Effects and began his studies at the PIXL VISN Media Arts Academy in Cologne, Germany.
In this article, Jacob explores how to rig and animate a realistic creature for your portfolio or Rookie Awards 2023 entry!
About the project
The "River Walk" project is a collaboration with Carsten Baars, who specialised in FX at PIXL VISN and it was the second project I worked on for my animation demo reel as a student. Initially, I wanted to practice and showcase quadruped animation in my demo reel but I ended up also rigging the leopard myself with the help of Advanced Skeleton. After I did my first walk cycle with the leopard, Carsten contacted me and suggested to collaborate on a project, since he was already working on a jungle scene with a river simulation at that time.
While I was planning a project where I could show off quadruped animation skills, I was looking for a rig and discovered Massimo Righi’s great animal models with super realistic fur. I found this leopard rig and bought it from Massimo and already when testing it, I realised that the rig was too simple and I needed more features, especially considering deformations in certain extreme poses.
Advanced Skeleton
Since I did not have too much time to invest in manually rigging the whole leopard myself and rather wanted to focus on the animation, I used Advanced Skeleton, an automatic rigging tool, to create a decent rig in a short amount of time.
I found a series of videos by David Mattock on YouTube (Animator Artist Life) which is basically a rigging guide of Advanced Skeleton made for Animators, so it was really easy to follow and recreate what he did. Nevertheless, even though Advanced Skeleton can create really nice rigs with its default presets, you might run into problems or limitations or you just may prefer a different setup for animation, so I would always recommend to have a medium to strong knowledge about rigging basics when you work with auto rigging tools.
Creating a quadruped rig
I started by searching for different anatomical references for a leopard, like muscles and skeleton. I found different perspectives of a really accurate CG skeleton with muscles by Vladimira Avanti Strukanova, Senior Creature Modeler at Ziva Dynamics, and later used it as my main reference for joint placement.
Image 01: Anatomical reference of a leopard for rigging and animation.
Advanced Skeleton comes with presets for different kinds of characters or creatures. I used the quadruped preset and started by placing the joints first, constantly looking at my reference to be anatomically as accurate as possible.
I changed the setup of the front legs because the IK setup was going all the way from the scapula down to the foot. I rather have the scapula setup in FK and separated it from the IK chain, to have more control over the movement of the leg. I made changes to the foot setup to have an additional foot break control in the middle of the paw, which later really helped rolling the foot off the ground.
Advanced Skeleton was not able to produce a good result for the facial part of the rig, so I decided to delete and not use it. I still wanted to be able to have a little bit more control over facial expressions, so I added the roar expression by using blendshapes that came with Massimo’s model and created some of my own.
Looking at my references, I also noticed that the skin and lip at the mid-section of the mouth move back when the jaw opens up wide. I created another blendshape to correct that shape at the maximum opening position of the jaw.
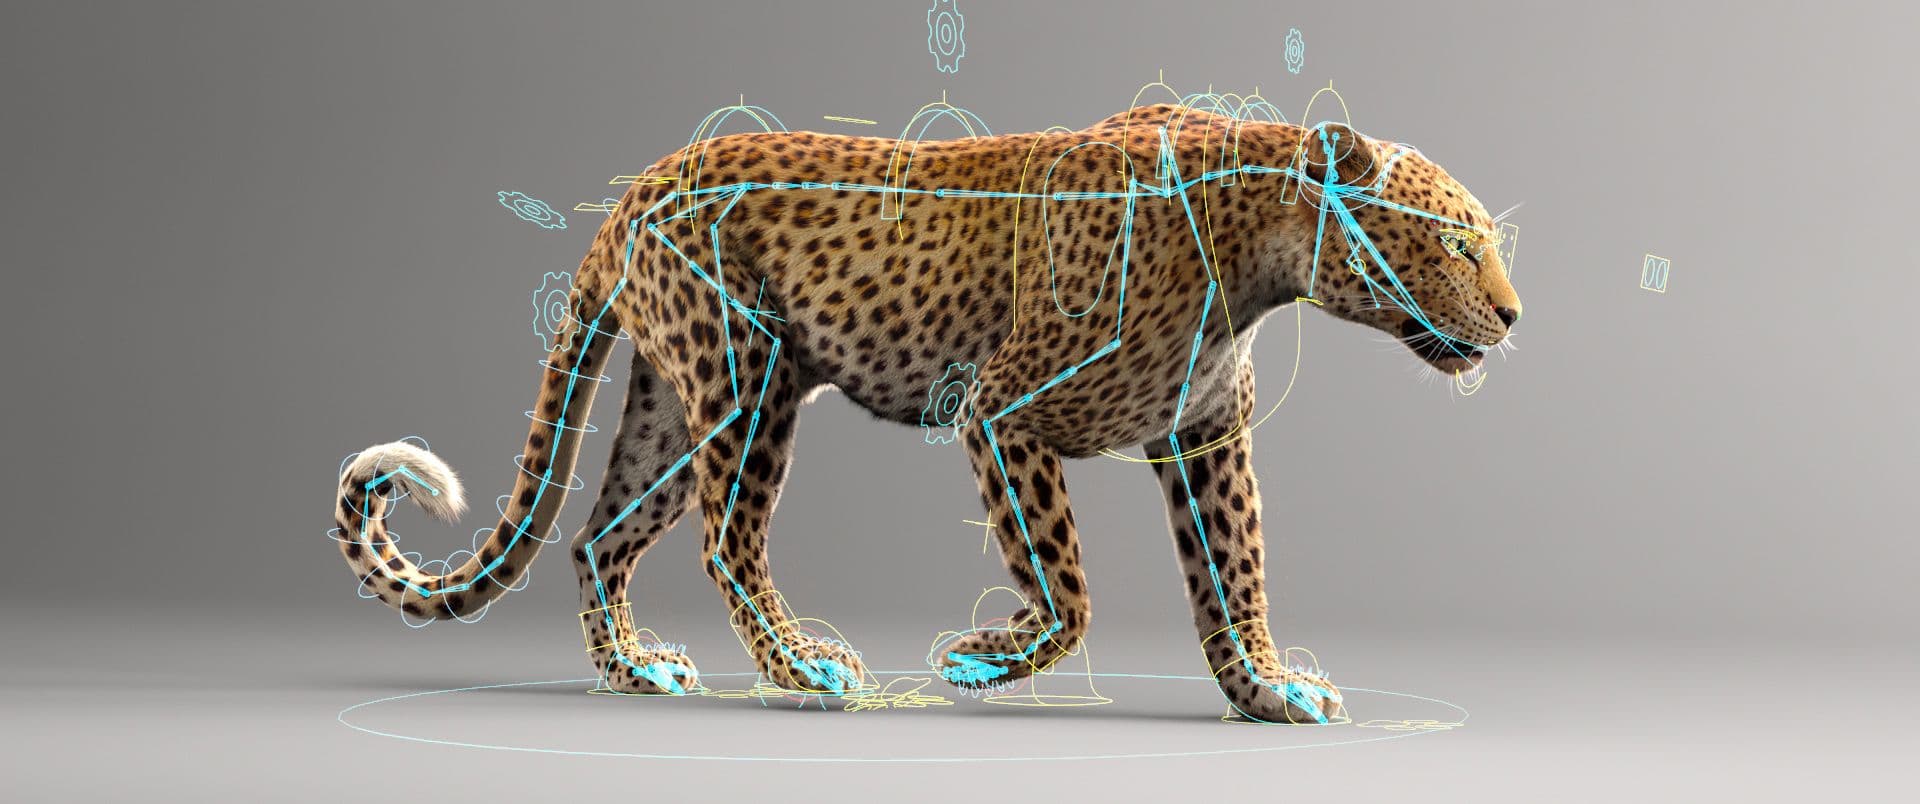
Image 02: Final rig of the leopard (joints and control shapes).
After checking the overall functions of the rig, I continued working on the skin weights of the rig until the deformations in most extreme poses looked good.
Animation
Quadruped walk cycle
Quadrupeds can be quite hard and overwhelming to animate in the beginning and everything about them was still new to me. My teacher Fonzo Romano recommended to me reading the Quadblog by Daniel Fotheringham where he explains the differences in anatomy and the movements in quadrupeds.
The Quadblog is one of the best resources on the internet to learn about quadrupeds and how to animate them: Daniel starts by explaining the differences in spines and gaits in quadrupeds and shows how to be physically and anatomically correct about weight, timing and offset of hip and chest. Later in the Quadblog, he shows an efficient and logical way on how to animate a quadruped in five steps. Before starting directly with a more complicated shot, I wanted to practice and apply Daniel’s techniques by animating a quadruped walk cycle.
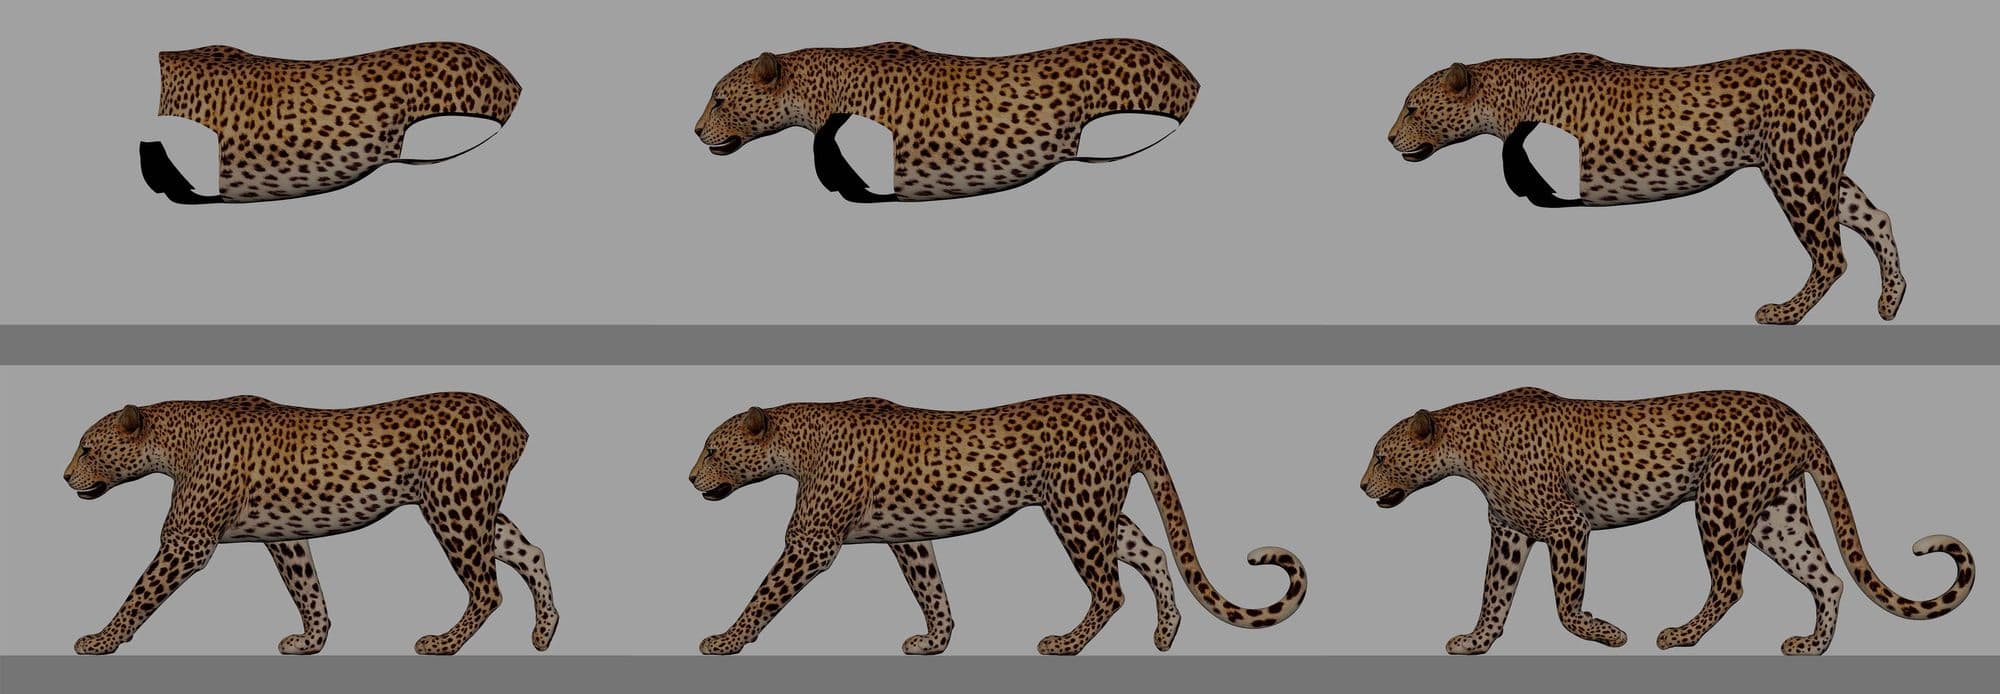
I started animating from the inside to the outside, starting with the core/heart of the animation: The up and down movement of the hips and the chest. Once this was animated correctly, I moved on to the head, back, and front legs and finally the tail.
Image 03: Quadruped walk cycle workflow (five steps).
It is quite difficult to get the roll off movement of the front feet right in the beginning and I spent a lot of time working on this part of the animation. The scapula, wrist, foot and its foot break controls all have an important role in this movement and if they do not play hand in hand, the roll off does not look smooth and the legs pop or jitter.
Quick Tip: I always recommend to not use any of the "smart attributes" on the foot controls such as "foot roll" for the roll off movement. These attributes might be really handy in certain situations but with most rigs, you will not achieve the result you are looking for and you will have a hard time finding the right balance between all components.
Previs
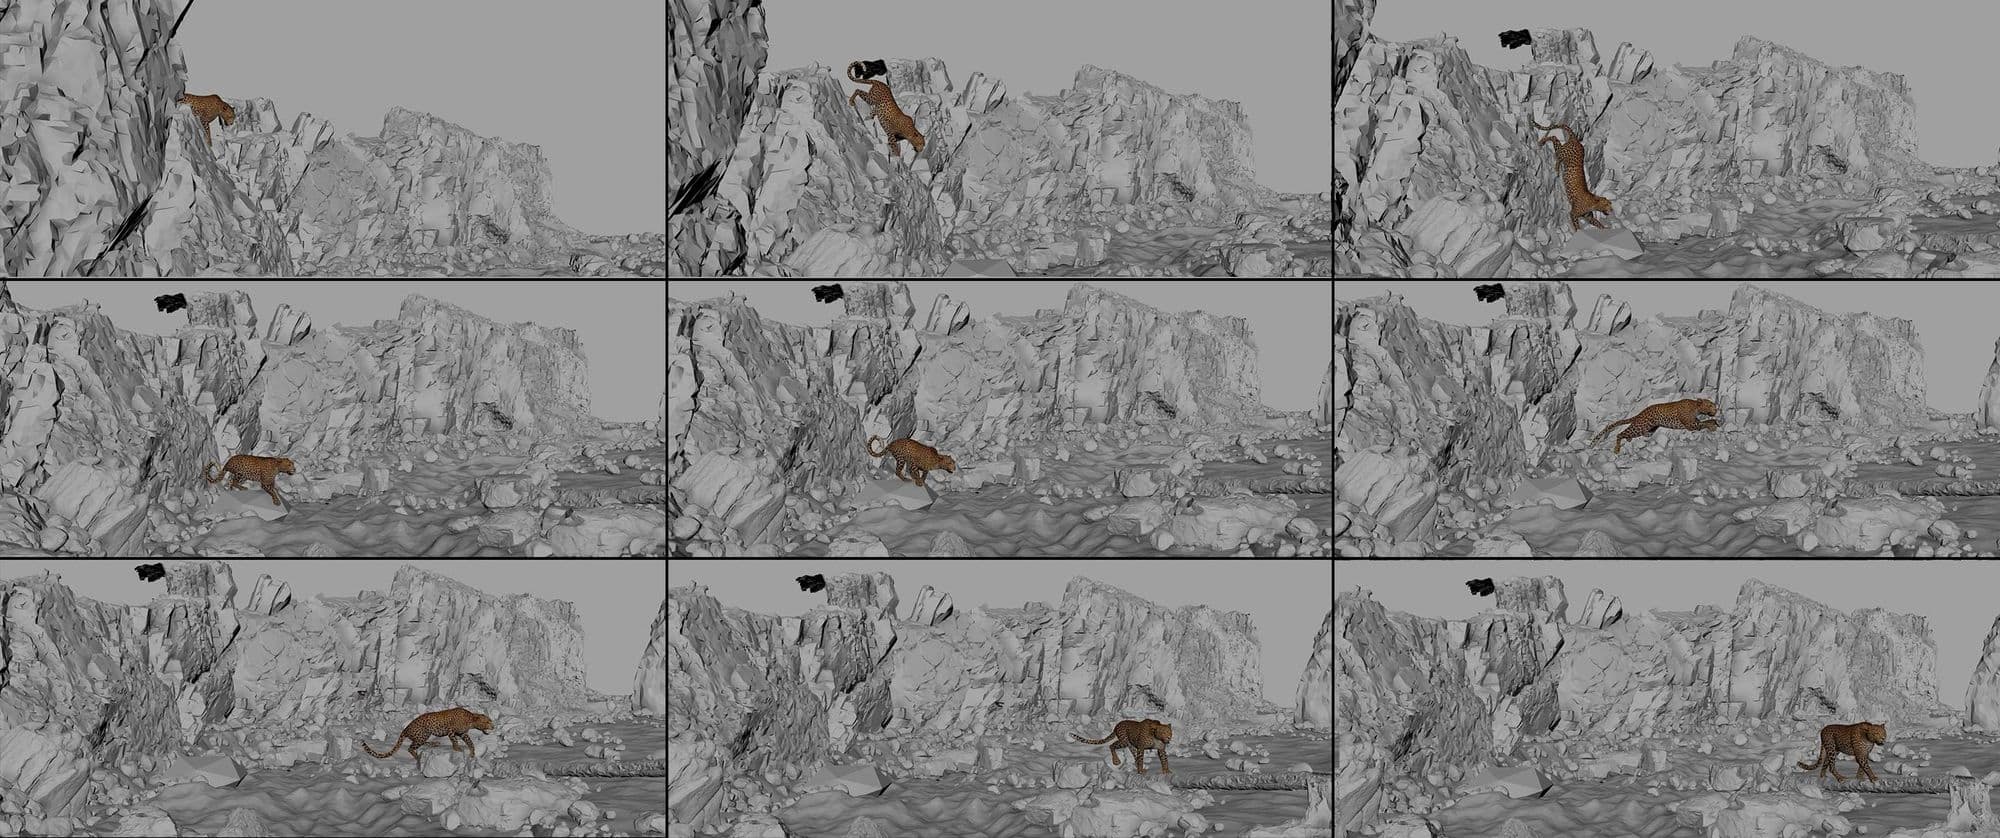
When I joined Carsten’s project, he sent me the environment for the animation and I started by creating a quick previz by blocking out a few poses over the 240 frames. This helped both of us to get the idea of the project and make some bigger changes to the environment, if needed, right in the beginning.
Image 04: Previz with nine static poses.
Reference
Once we had the animation planned, I looked for different videos of leopard reference that fit my ideas (jump, landing, shakes etc.), that I could later use to match my animation. Since I already planned out a rough timing of my shot with the previz I created earlier, I cut all of my references into a sequence that I could use side-by-side in Maya while animating.
The five step quadruped method
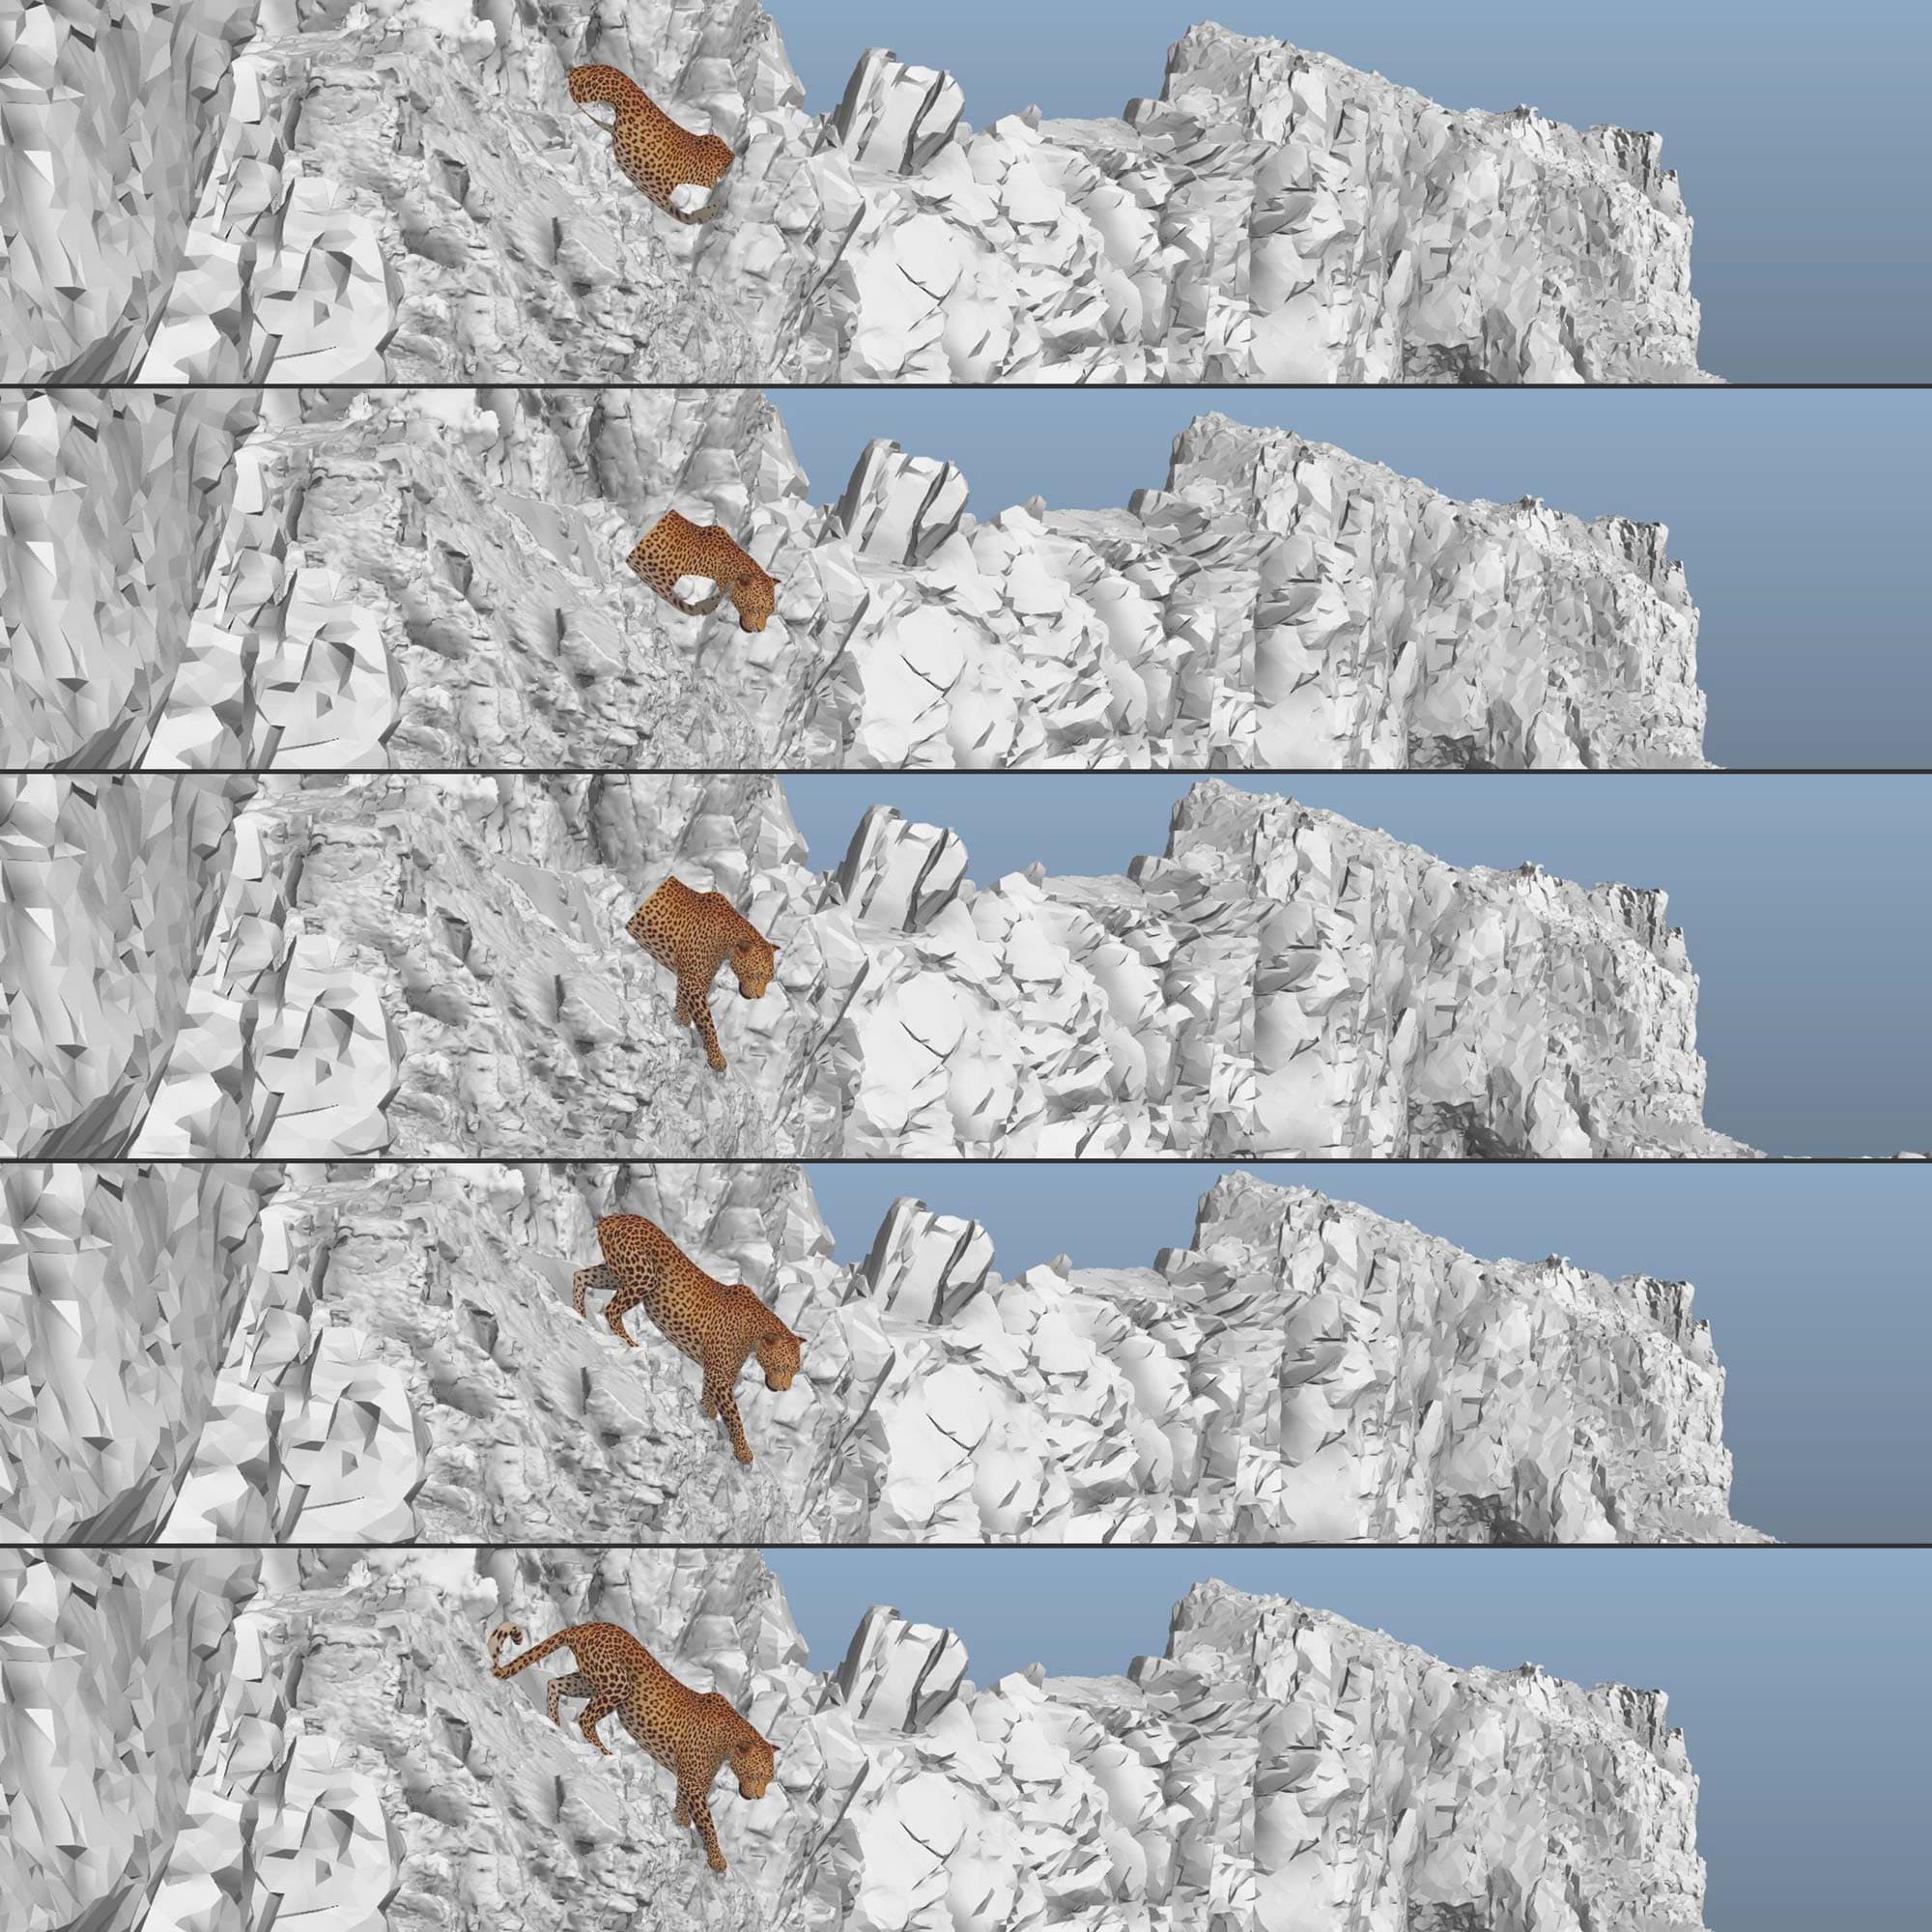
In the Quadblog, the first step of the five-step quadruped animation method is the blocking of the center of mass of the creature. However, with my rig, the "Center of Gravity" control (or root control) was located at the hips and not at the actual center of gravity, so I created a new temporary COG control which is located approximately in the middle between the hip and the chest.
Now that the setup of the rig was updated, I hid all legs, the head and the tail and blocked the center of mass of my leopard, getting in the basic movement and timing of the body.
Image 05: Applying the five step animation method.
Quick Tip: If your rig comes with a proxy/sliced geo, hiding parts of the creature is straight forward. However, if there is no sliced geo version available, you can simply create proxy objects yourself (e.g. using two spheres to represent the chest and hip) and parent constraint them to each control. However, you can also select the faces of e.g. the head and create a quick selection set which will contain only the faces of the head in it. Then, you can use this set to easily select the faces again and hide/unhide them by pressing "H".
As with the walk cycle animation, I also applied the five step animation method in this project. If you are interested in way more details about quadruped animation that I can cover in this article, I strongly recommend to visits Daniel's Quadblog and you will find everything you need to know about quadruped animation.
Feedback
As a last step of each project, I reach out to other animators to ask for feedback and more advise on my animation. I contacted my animation teacher Fonzo Romano (Lead Animator at TRIXTER) and Philipp Willer (Lead Animator at PIXOMONDO). Both gave me some valuable feedback and it took me just about another day to correct and finalise the animation.
I can highly recommend every animation student to reach out to other animators and industry professionals via LinkedIn or other social platforms. Most people I contacted offered their help and gave me great, valuable feedback on my animation. I even reached out to people before I started working on my student demo reel, asking them how to plan and structure an animation demo reel. This way, I was able to decide which projects I want to create and which skills I showcase in order to make my first steps in the industry.
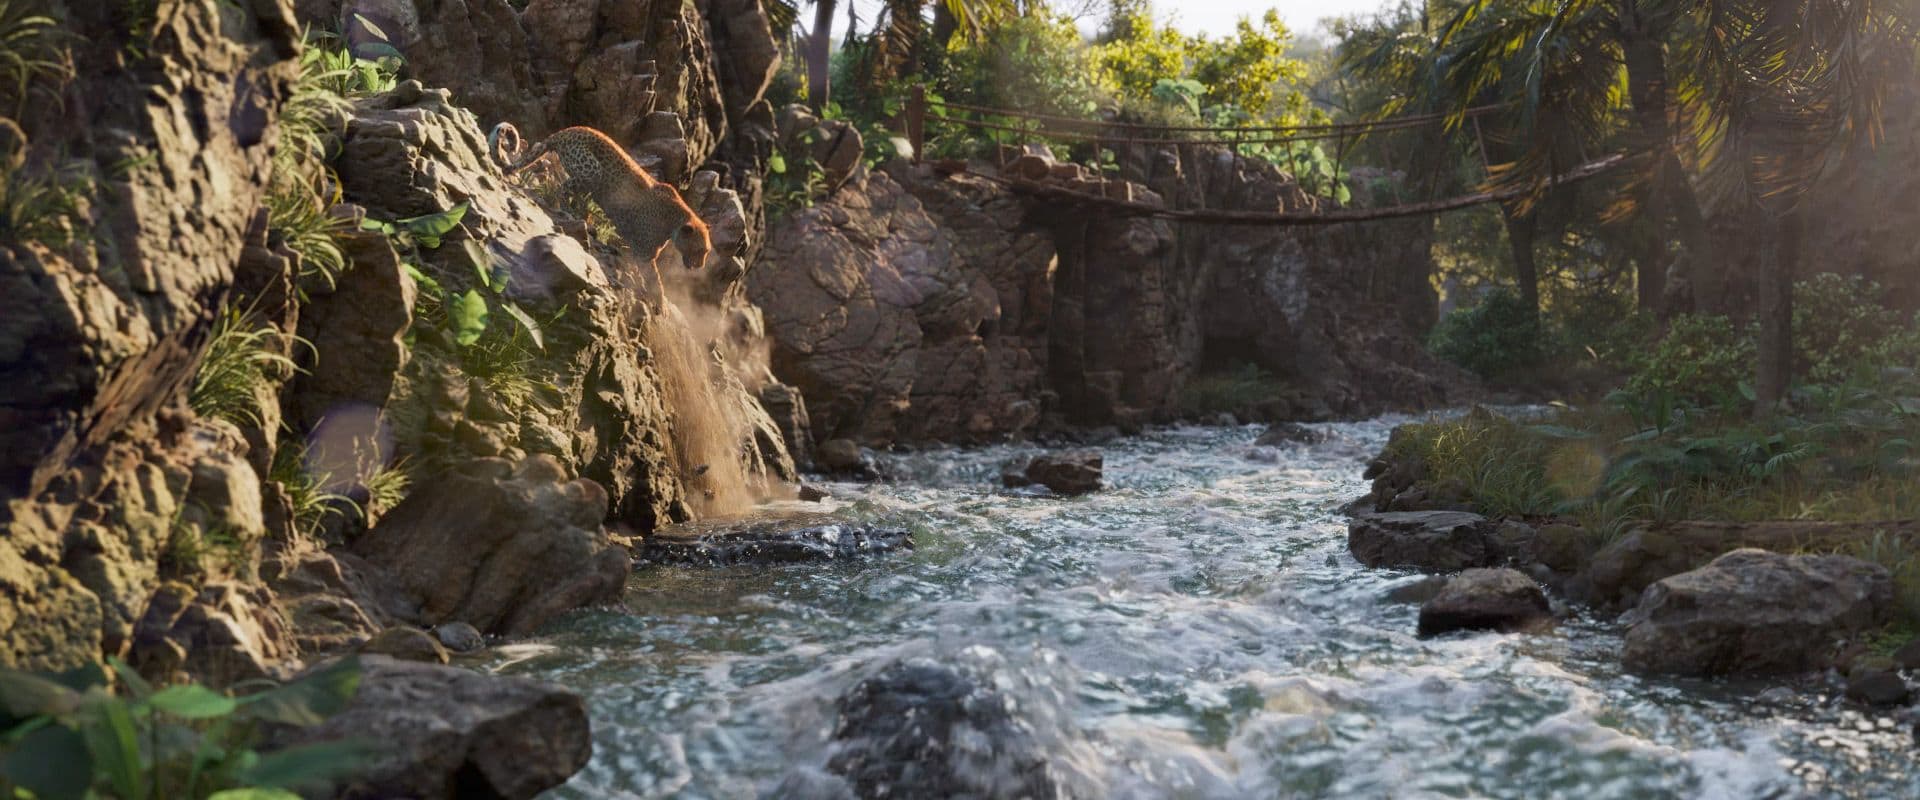
Image 06: Final render of the "River Walk" project.
Thanks for reading my article! I hope I could help you by sharing some insights into my workflow and techniques but also some of my resources. Feel free to connect with me using the button below. If you have questions or looking for some animation feedback, reach out to me on LinkedIn!