Creating a Mid-Century Diorama: A Step-by-Step Guide to 3D Modeling and Asset Creation
Self-taught 3D Artist, Giora Nohl, gives us a breakdown of his Rookie Awards 2023 entry, from establishing the end goal, gathering references, the modeling process, to final composition.
Giora Nohl is a Graphic Design student at Johannes Gutenberg School in Heidelberg and a self-taught 3D Artist. This article shares the steps involved in creating a detailed 3D diorama, from establishing the end goal, gathering references, the modeling process, to final composition.
The article provides insights into Giora's creative process, and his approach to maintain creative freedom while still maintaining an effective workflow.
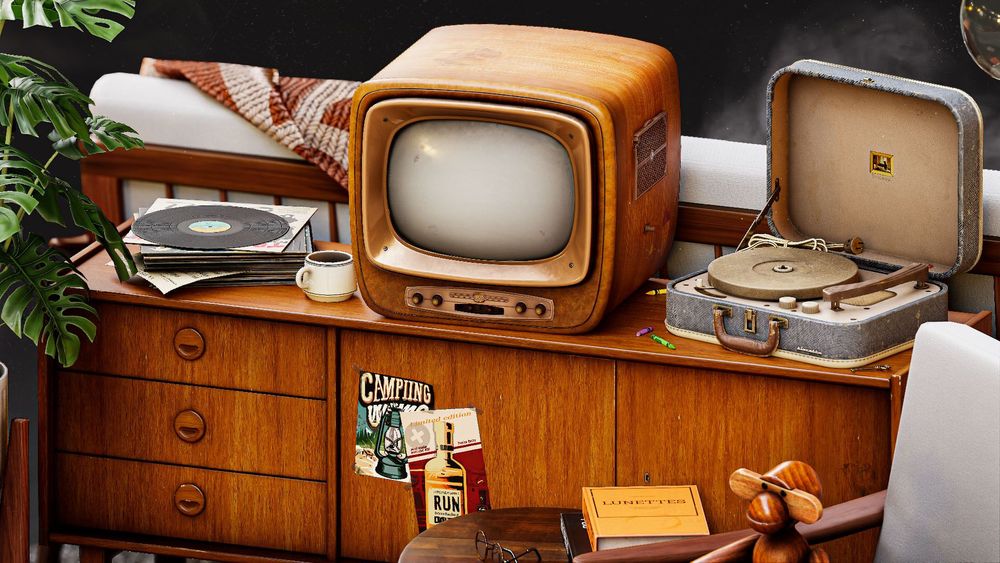
As an artist, I find inspiration in many things, and one that has always intrigued me is the Danish concept of "Hygge," which stands for coziness. With this idea in mind, I decided to embark on a new prop and environment study project that focused on creating a warm and inviting Hygge-inspired space.
I was excited to receive an invitation from The Rookies to share the journey of my Rookie Awards 2023 entry, and provide insight into my creative process. In this article, I will take you through the detailed steps I took to bring my vision to life, from the initial idea to the final presentation.
My main goal for this project was to focus on my asset creation workflow and explore new techniques, such as creating realistic plants. I didn't set strict deadlines, but rather focused on achieving the best possible quality within the time I had.
In this article, I'll be covering:
Establishing Your End Goal: How to Define Your Vision.
Block Out: Laying the Foundation of Your Scene.
Gathering References: Researching for Inspiration.
The Modeling Process: Creating Your Props and Assets.
Baking and Optimization: Ensuring Your Scene Runs Smoothly.
Adding Story Through Materials: Using Textures to Enhance Your Scene.
Embracing New Techniques: A Personal Dive into Plant Creation.
Composition and Lighting: Bringing Your Scene to Life.
Presentation: How to Showcase Your Work.
Reflection: The Aftermath of a Project.
Establishing Your End Goal
From the outset, I had a clear idea and inspiration in mind for this project. I aimed to create a mid-century diorama that featured Danish-inspired furniture and plants. To get started, I loosely planned out how the scene should look, leaving room for creative ideas that would arise along the way. I deliberately avoided planning the entire scene in advance because I wanted to maintain creative freedom and avoid creating assets that wouldn't fit the scene.
My approach was to build the scene gradually and take my time, allowing for new props and elements to be added along the way as creative ideas arose. Nevertheless, I found it helpful to create a rough blockout of the scene and define the main asset placement and composition. I knew that I wanted the TV and sideboard to be positioned centrally in the final image, serving as the focal point around which the other assets would be arranged.
Initial sketches
My goal was to create a lived-in feel for the scene, but from a 1960s perspective rather than a modern one. I purposely avoided adding excessive wear and tear to the props, instead focusing on keeping them as realistic as possible. As an environment artist with a love for the post-apocalyptic and abandoned aesthetic, I sometimes tend to go overboard with texturing wear, but this time, I actively tried to steer clear of that approach.
Block Out
When creating the blockout for the scene, I had the main hero assets in mind. My intention was for the sideboard and TV to be positioned in the center, with a chair to the right and a few tables holding a couple of books. The plants were placed to sandwich the sideboard, one on the right and one on the left. I decided to add a carpet later on, thanks to feedback from the Dinusty Empire Discord, all the other assets were added along the way.
To maintain creative flexibility, I allowed myself the freedom to add objects that I wanted to create at specific moments during the process.
First 3D blockout
Gathering References
My inspiration for this project came from the furniture in my own home. As a self-proclaimed collector of chairs, I have a deep appreciation for all things product design and furniture, especially mid-century and Danish designs. Gathering references for the lounge chair was as simple as taking some photos, but for the other assets, it was a bit more challenging. One helpful tip I've learned from working on props is to search for similar objects being sold at auctions or online marketplaces. These often come with high-quality images from various angles, which makes replicating the prop much easier.
To organize my references, I used a software called "PureRef." This tool allows for easy drag and drop of images from the web, which can be arranged and annotated as needed.
The Modeling Process
Typically, I begin my modeling process by creating a basic blockout of the asset's shape. This initial model doesn't need to be high-poly and is only intended to help me get the correct scaling and size. For my hard-surface modeling, I prefer to use Cinema4D, but any other modeling tool can work as well.
While creating the blockout, I take into consideration some of the techniques to optimize my model. For instance, for the record player, I used mirroring on several parts, which helped in saving texture space.
Blockout for the record player asset
Once I finish the blockout, I move on to modeling the high poly asset. In this stage, clean topology isn't essential as it's mainly used for baking. However, maintaining a well-made high poly mesh is a good habit if you want to make any changes later on. What's crucial is ensuring the model's shading is correct, so there are no odd artifacts visible on the asset, which will be baked into the low poly asset as well.
Next, I take the asset into ZBrush. For most of the assets in this scene, minimal sculpting was required. Typically, I added some wear and tear to the asset, and that was it. However, for the Record player, I went a bit further. I gathered references for a cracking leather handle and replicated the wear on the handle as closely as possible. Additionally, I studied how the record player was assembled, breaking it down into various materials and shapes. I noticed that the outer lining/cover was glued to the record player base, and to glue the corners to the round base shape, the manufacturer cut them in even slits and folded them over the edge, resulting in a somewhat imperfect surface with overlapping pieces of canvas.
Sculpted details (Canvas folds and leather handle)
Baking and Optimization
Once the highpoly model was completed, I brought it into Cinema4D and created the lowpoly version. My recommendation is not to aim for an extremely low polycount immediately, but rather focus on optimizing it later. Start by matching the shapes, similar to the blockout stage, but with the benefit of a 3D model for reference. Avoid using ngons and opt for polygons and tris.
After the shapes are complete, go back and examine each part, looking for unneeded edge loops, polygons, etc.
Over-optimization and reducing polycount can sometimes compromise the quality of your work, so it's crucial to find a balance.
I still struggle with this sometimes myself. I tend to go overboard on saving polygons but in today's age, game engines are becoming more and more powerful, and saving a few polygons is often not worth sacrificing quality. However, that doesn't mean you should waste polygons either. Avoid oversimplifying your topology and find a middle ground.
To begin with, I follow a simple and clear-cut process for unwrapping my models. I import the low poly model, without mirrored parts, into my preferred unwrapping software, which is RizomUV.
Once the UVs are finalized, ensuring proper orientation and a consistent texel density, I return to my modeling software and open the unwrapped version. Subsequently, I mirror the required parts or duplicates as needed.
UV's for the record player with mirrored parts
Moving on to the baking process, I prefer to use Marmoset Toolbag 4, although Adobe Substance 3D Painter can be used as well and might be more widely accessible. I don't follow any extraordinary methods and simply split my bake groups when necessary, and in case of any baking errors, make corrections to the low poly mesh in Cinema4D.
Adding Story Through Materials
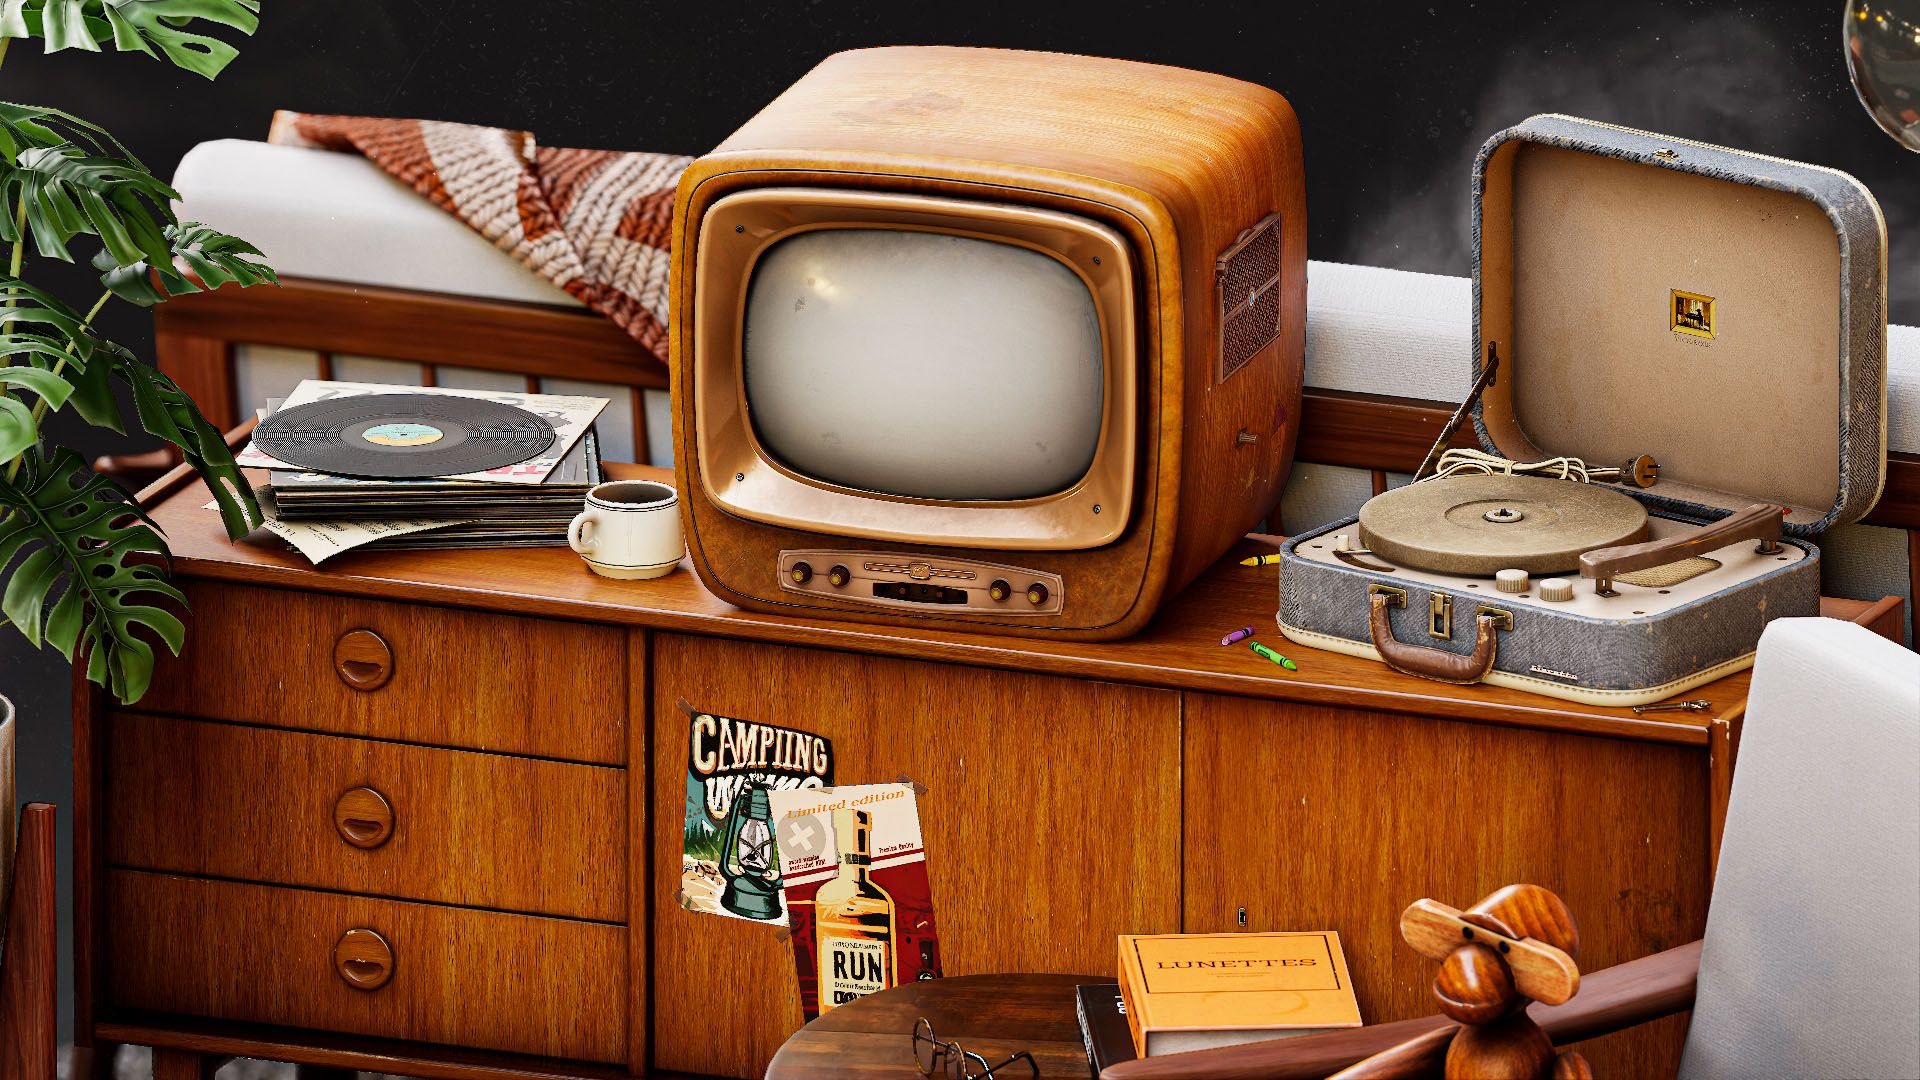
Adding story has been a big focus for me on this project, and materials play a big part in that. Once I finish the first pass of materials, I start thinking about how the asset has been used and what smaller details can be added. For example, on the TV, I added a wipe texture to the roughness map to show that someone had cleaned it recently. It's these little details that add to the overall story of the scene. It's important to reward the viewer for looking closer and exploring the scene, so I always keep that in mind when texturing. Coffee stains on the sideboard and fingerprints on metal are other examples of materials that add to the story.
Roughness map view of the TV
One of the biggest story elements in the scene is the carpet. I wanted to show that a kid lived there and had been playing and drawing recently, so I added an imprint of a child's body and arms where they had been laying on the carpet. I also added some stains from a spilled coffee to make it feel more lived-in.
Carpet details close up
Embracing New Techniques
As I mentioned earlier, I wanted to use this project as an opportunity to learn new skills. One thing I had always been intimidated by was creating plants, mainly because there are so many talented artists out there doing i well. However, I decided to face my fears and try my hand at it this time. I chose to create my all-time favorite house plant, a Monstera Deliciosa, which is both beautiful and fitting for the mid-century design aesthetic.
To start, I gathered references of the leaves and used them as a background in my modeling software to get the silhouette of the leaves. I created three unique leaves, which I later realized was not enough. While three large leaves were sufficient, it would have been useful to have some smaller, younger leaves as well. Scaling down the large leaves didn't create the realistic effect I was looking for, as younger leaves are lighter in color and have fewer holes and splits.
Despite this, I'm still proud of the final outcome. I used a similar process for the fig tree in the background.
After getting the basic leaf shapes in my modeling software, I took them to ZBrush and started sculpting by hand. I wanted to make sure they looked as realistic as possible, so I put a lot of effort into making them match as closely to the real thing as possible.
Once I was happy with the high poly version, I went back to Cinema4D and worked on the low poly version, making sure to include enough polygons for future adjustments. I could have used a lower poly leaf, but I wanted the ability to change the direction of the individual leaf parts later on, to add more variety to the final plant.
After finishing the leaves, I baked the normal, AO and curvature maps, and then moved on to texturing. I used references and took my time to get it right. Once the leaves were done, I manually assembled the entire plant in Cinema4D.
Monstera leaves (Highpoly sculpted on top, low poly textured on bottom)
Although I could have used tools like Speedtree or 3D scanning to speed up the process, I wanted to learn how to do it myself. It was a lot of work, but it helped me understand the entire process from start to finish. While I may use shortcuts in the future, I believe it's important to learn how to do things manually at least once, to gain a deeper understanding.
Composition and Lighting
When I started this project, I had a clear vision of what the final product should look like. However, transforming that vision into a reality presented a host of unexpected challenges. I quickly learned the importance of flexibility and willingness to discard ideas that didn't serve the overall vision.
For the first shot, I opted for a traditional golden ratio composition and loosely adhered to its principles. To ground the scene and convey the carpet as an integral part of the environment, I added a concrete texture that faded into black beneath the carpet.
Rough golden ratio composition
My lighting setup was relatively simple, consisting of an HDRI, rim light, and additional lights to highlight darker areas that the HDRI didn't fully illuminate. I also included a light for the lamp. The lighting was evenly distributed, yet dynamic enough to keep the scene visually engaging. I aimed to showcase the intricate details of the texture work to the viewer. Therefore, I avoided an excessively dramatic lighting setup that would obscure these details, rendering my hard work pointless.
Returning to the theme and title of the scene, "Hygge", the objective was to create a warm and inviting atmosphere. The aim was to evoke feelings of comfort and relaxation, amidst a world full of turmoil and sorrow. To achieve this, I contrasted a warm central area with a cooler grey backdrop. The scene was intended to resemble a haven for a warm and friendly gathering, reminiscent of nostalgic childhood memories, viewed through the lens of an adult reminiscing about simpler times. It was meant to convey a sense of innocence, as if the child had taken over the living room to play and revel in the moment, free from any distractions or worries.
Presentation
When it comes to showcasing my work, I always aim to present it in the best possible light. That's why I kick off my posts with a hero shot of the entire scene, designed to grab the viewer's attention, and entice them to explore further. From there, I feature close-ups of the individual assets, always keeping composition in mind to ensure they tell a cohesive story.
💡
Showing off your assets without any distractions allows the viewer to focus on all the details you added in your modeling and texturing stages that got lost in the scene composition.
To highlight the topology of my models, I often include a Marmoset Viewer file or a sketchfab link, which lets viewers inspect the assets from any angle. I find this approach strikes a good balance between showing off my work and respecting the viewer's time and interest by not forcing the technical details on them if not wanted.
To get a better understanding of what I mean, check out this record player prop from my scene. To access all the technical details just click on the little stacked sheets icon next to the settings wheel on the bottom right and turn on the wireframe or enable the 2D viewport (to inspect the texture maps)
When it comes to sharing my work, I'm a big believer in spreading it across multiple platforms. In addition to ArtStation and The Rookies, I also upload my models to Sketchfab, which provides a great opportunity to give others a chance to download and use them. I was thrilled to see my Monstera plant get an incredible amount of attention on Sketchfab, with over 600 likes and 20 thousand views to date. It really helped ease some of the imposter syndrome I sometimes feel about my plant-making skills, and motivated me to keep honing that craft in the future.
Reflection
Thank you for taking the time to read through this article. I apologize for its length, but I wanted to make sure that I didn't leave out any important details that could be helpful to someone interested in this project.
I am incredibly grateful to The Rookies for inviting me to write this article and for the opportunity to share my work with others. Throughout this project, I learned a great deal, particularly after taking a break from 3D for a while due to school. I was eager to get back into 3D and create one final project before embarking on a job search. I believe that my asset creation, lighting, and composition skills have improved significantly as a result of this project. I would like to express my gratitude to everyone who provided feedback and inspired me during the development of this project. I’m really keen on starting to work in this industry after graduating. Have a wonderful day, and thank you again for your interest in my work!