Wouter Engering and Jurrian Witmans, two third-year students from the Netherlands Film Academy, created a CG chimpanzee in a real environment to create a realistic shot for their showreels and Rookie Awards 2023 entry. In this post, we'll show you their impressive project and process.
Meet Wouter Engering and Jurrian Witmans, two talented third-year students from the Netherlands Film Academy. Recently, they created a remarkable sequence of a CG chimpanzee in a real environment with the goal of making it appear as realistic as possible. Their aim was to produce a stunning shot for their showreels and ultimately secure desired internships. In this blog post, we'll take you through their process and give you an inside look at their impressive project and Rookie Awards 2023 entry.
-
Creating CG Elements: Jurrian Witmans
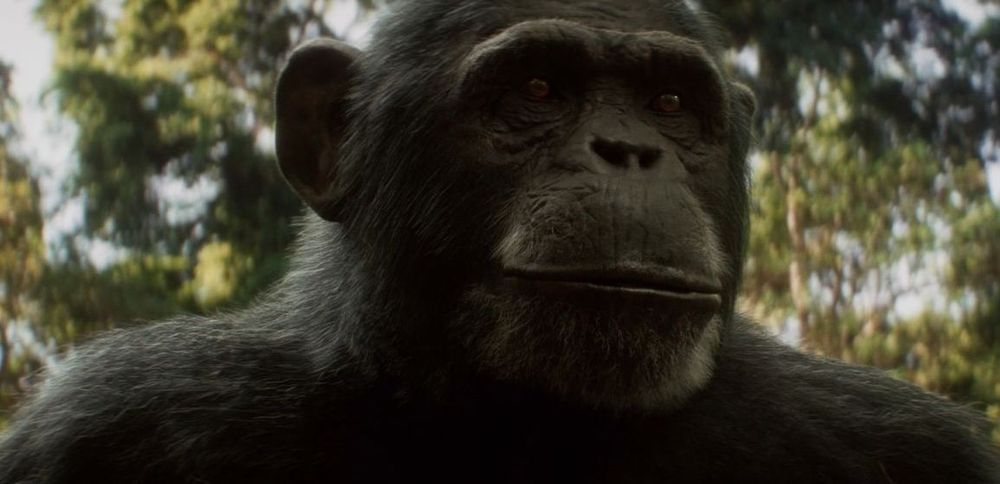
During the summer holiday, I was watching Planet of the Apes and got inspired to make a chimpanzee.
I wasn’t planning on making a serious project out of it at first, so I just started playing in ZBrush without reference. I started with the dynamesh sphere and began pulling and pushing it until it looked somewhat like a chimpanzee. It quickly started looking pretty good and I decided I wanted to continue developing it further.
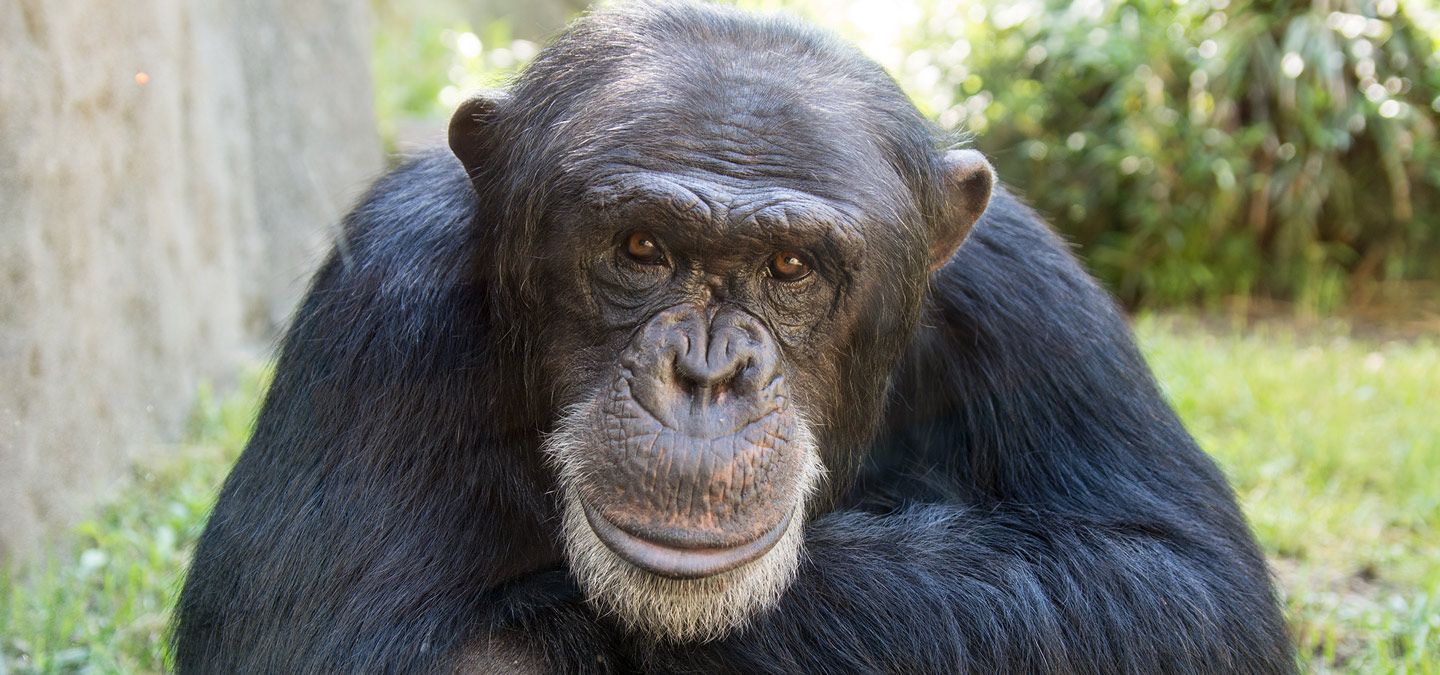
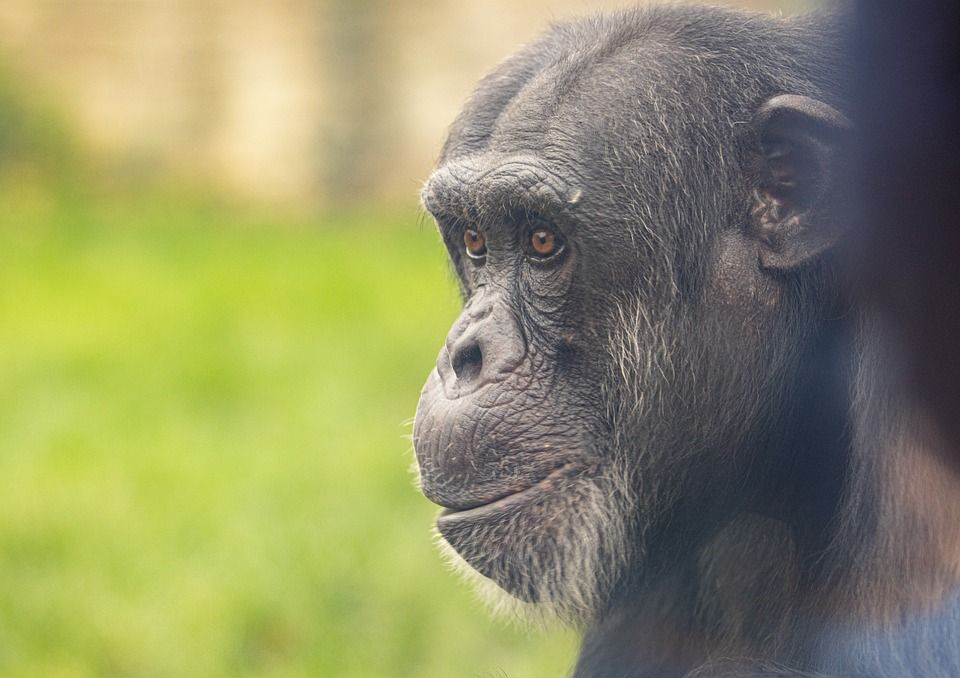
Reference gathering
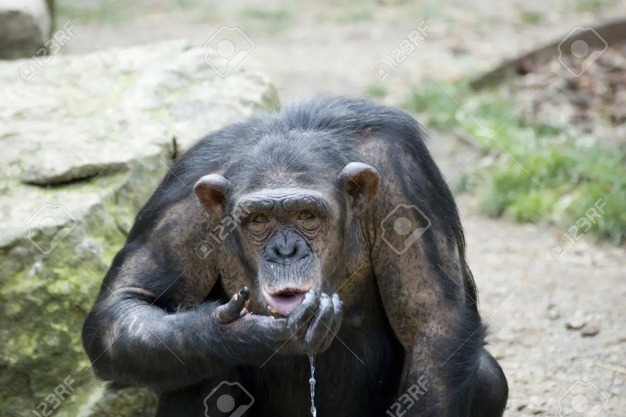
So before continuing, I started looking at reference. While searching through images, I quickly realised that chimpanzees vary in characteristics and traits such as behaviour, physical appearance, and genetic makeup; their faces seem to differ as much from each other as human faces do. But after some searching, I found the faces I was looking for and went back to work.
Modeling and Sculpting
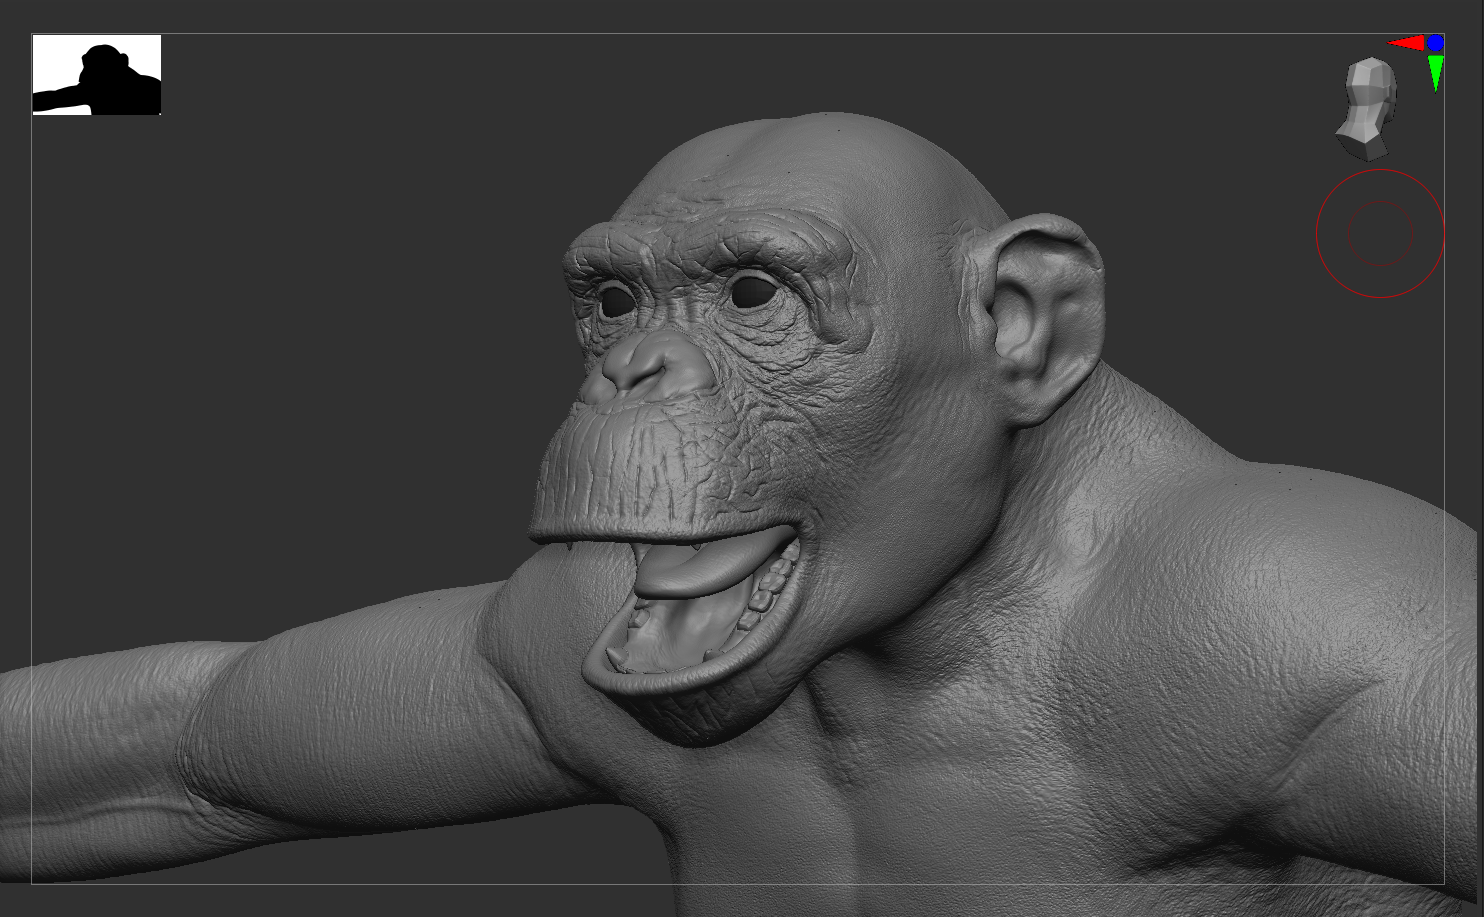
Going back to Zbrush, I upped the resolution and started adding some rough details like wrinkles on the face and hands. I used these wrinkles mainly to see if the proportions were right and get a feel for how the topology should flow.
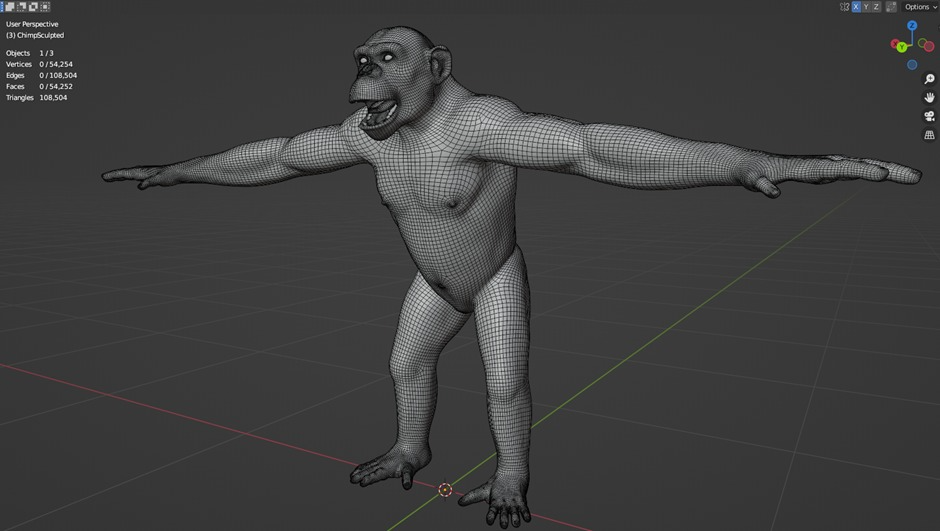
When I was happy with the result, I exported it to Blender and started retopologising. I used the Shrinkwrap modifier and activated snapping to faces. I find this setup very useful because you can easily duplicate objects like fingers by deactivating the shrinkwrap modifier.
I started with big shapes and then added more edge loops as I added more detail. First I separated the head, hands and feet from the body. This allowed me to focus on clean edge flow. I didn’t have to worry that an extra edge loop in the face would be affecting the feet.
I wanted the face to be able to have a lot of detail in its expressions so I made the mesh fairly dense. I later matched the density of the rest of the body to the face so there wouldn’t be a big discrepancy in the detail.
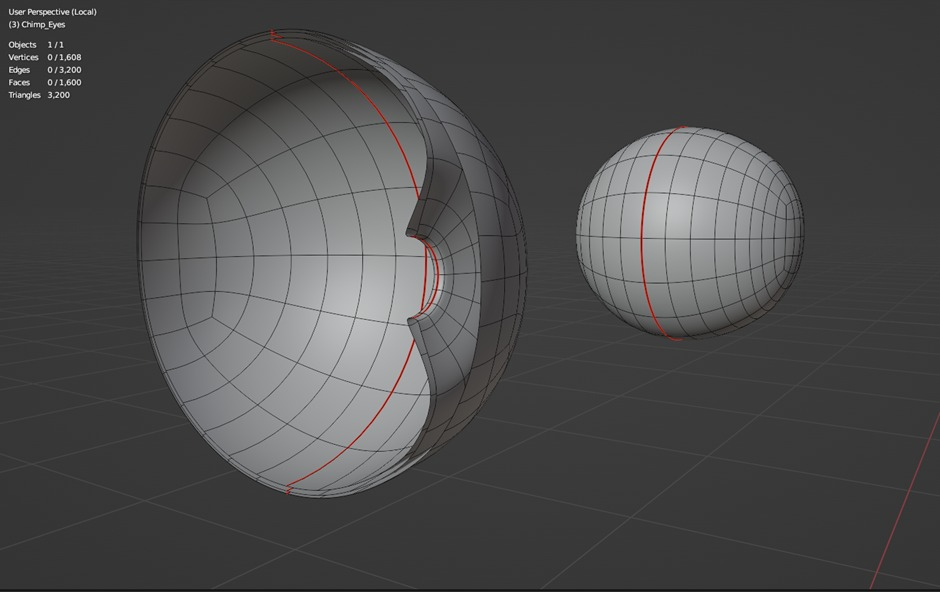
For the eyes I modelled the pupil and iris into a sphere. I then added a second sphere for the cornea. I find that the refraction you get with this technique adds a lot of realism to the eyes.
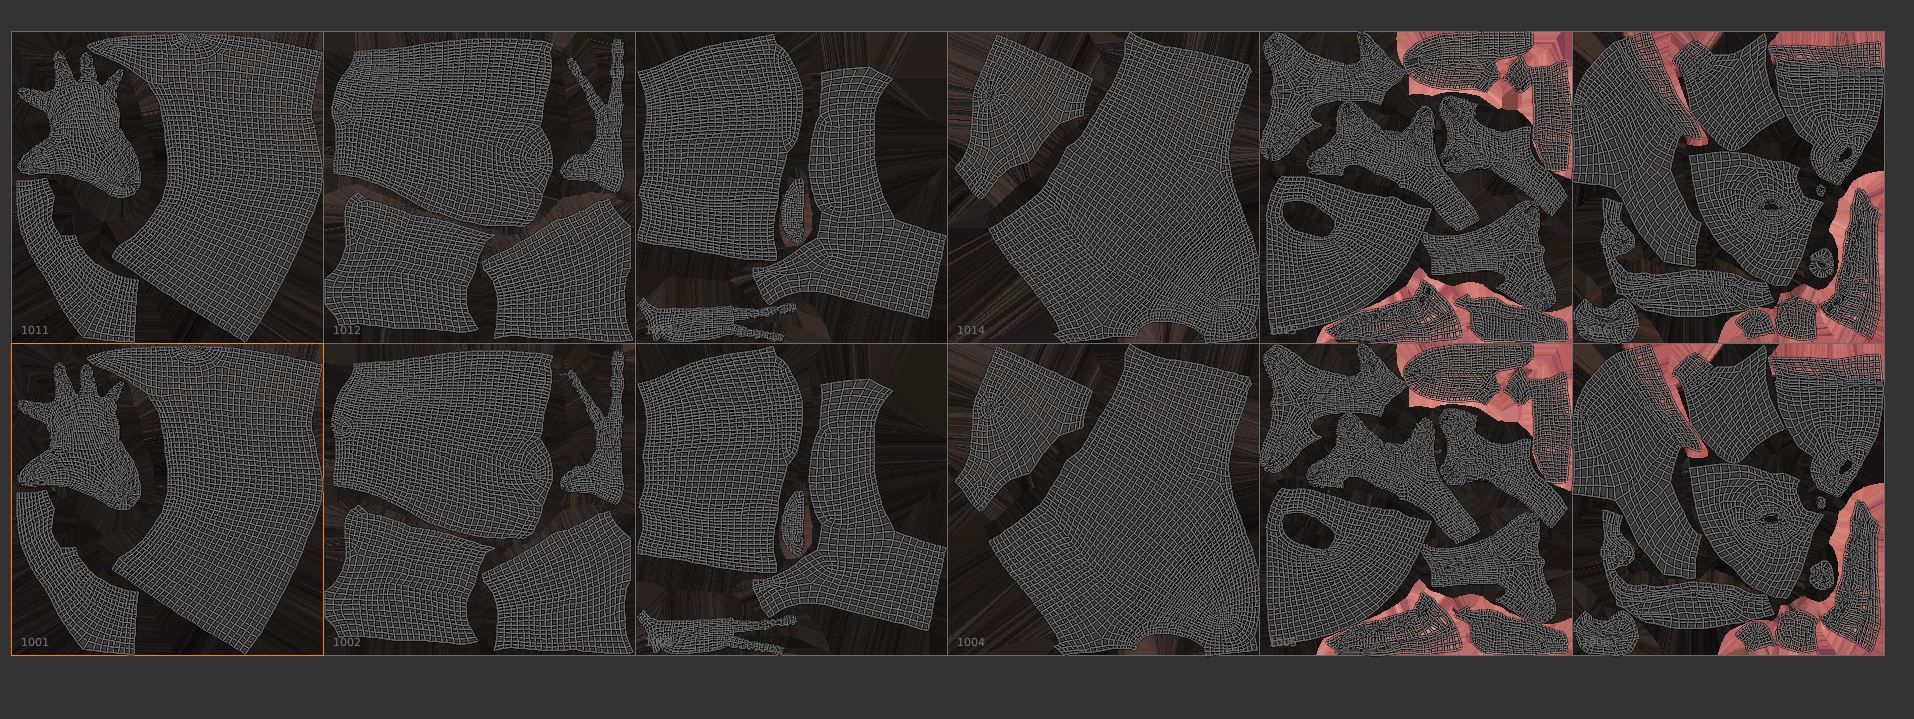
When the topology was finished I started UV-unwrapping. I ended up using 17 UDIM tiles, with 12 being for the body. I wanted to be able to get extreme close-ups so I needed a lot of detail. I also scaled up the face 2 times to give it even more detail.
I like to split the model in the middle and use identical UV’s for the left and right side. This technique is very mistake friendly in areas like the face. Here you want to break symmetry in some areas and keep symmetry in others. If you forget to turn symmetry back on you can simply mask that area out and copy the textures to the other side afterwards.
After UV-ing I exported the model back to Zbrush and started detailing again. I like starting over instead of re-projecting the details because you have much more knowledge the second time. This almost always gives better results.
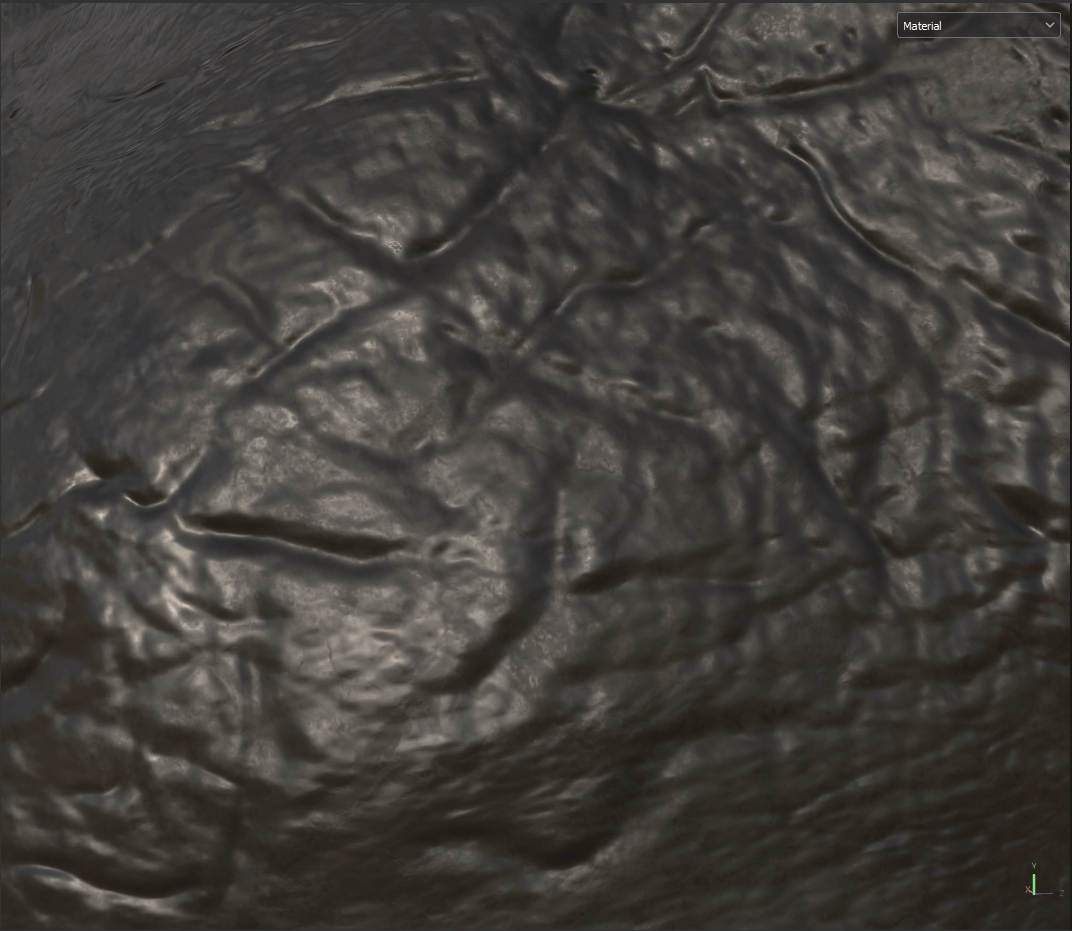
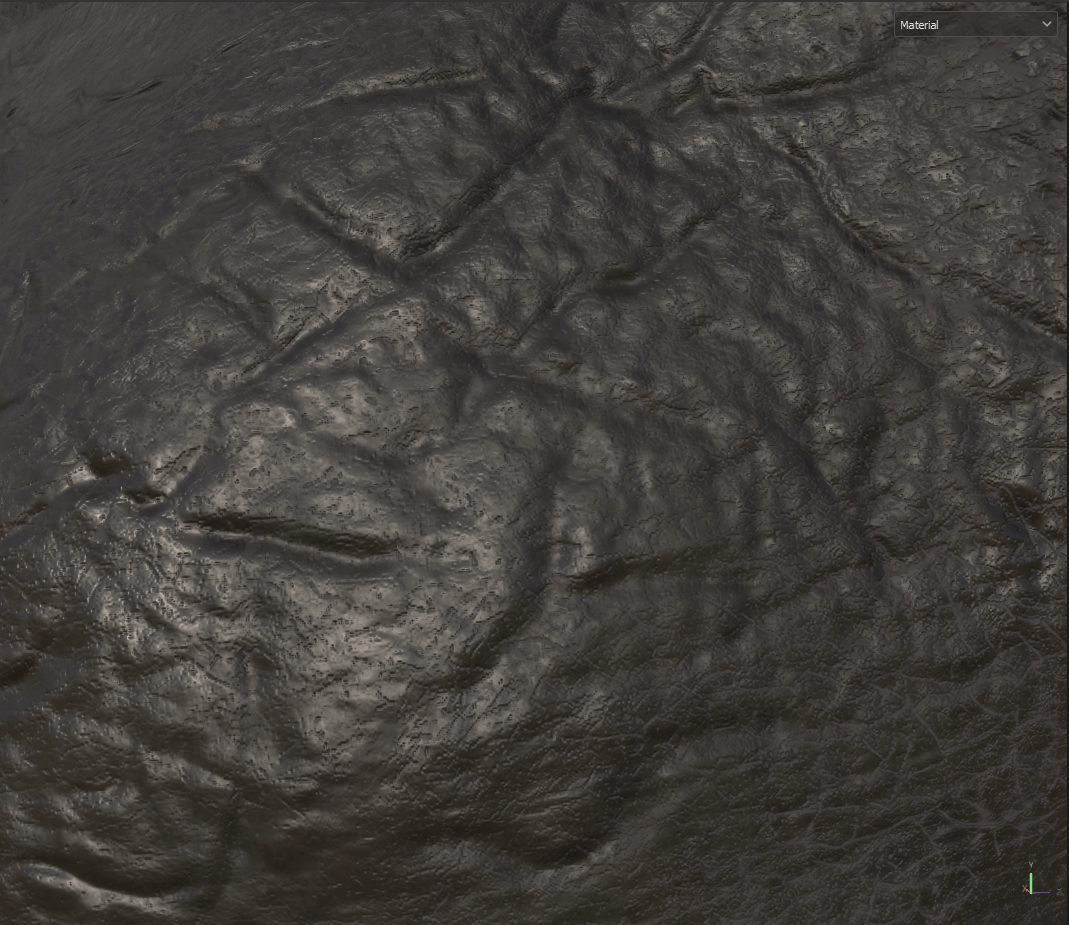
When working on the details I like to sculpt the bigger more recognisable details by hand, but for the micro details and the large empty areas I used alphas.
When I was happy with the details, I exported the low-res version with displacement and normal maps to Substance 3D Painter. Although Substance 3D Painter has a lot of great presets, I prefer working from scratch because it gives me more control.
Texturing and Shading
I first create some slight varieties in the base colour and roughness with some noise textures. I then added some micro details to break up the skin further. I usually like to use the displacement map with a Level's node to add colour variation in the valleys and peaks, but because the skin was mostly black this had a minimal effect.
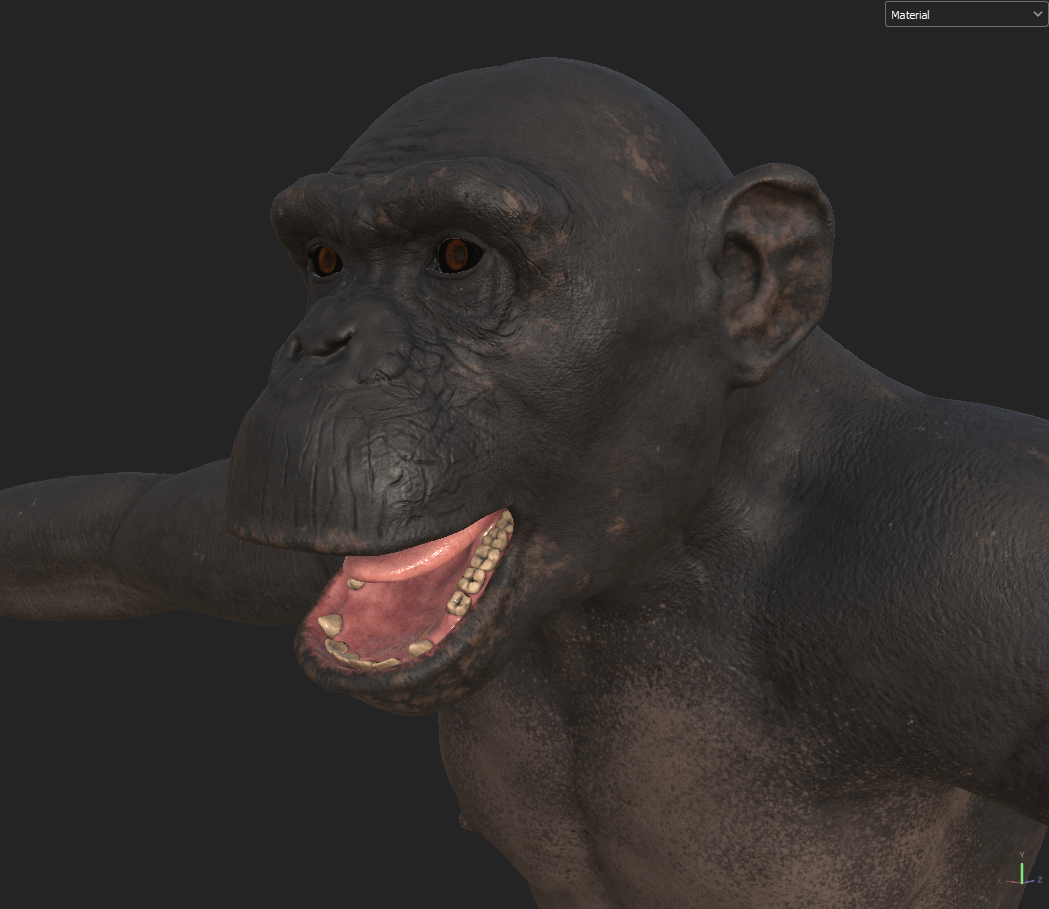
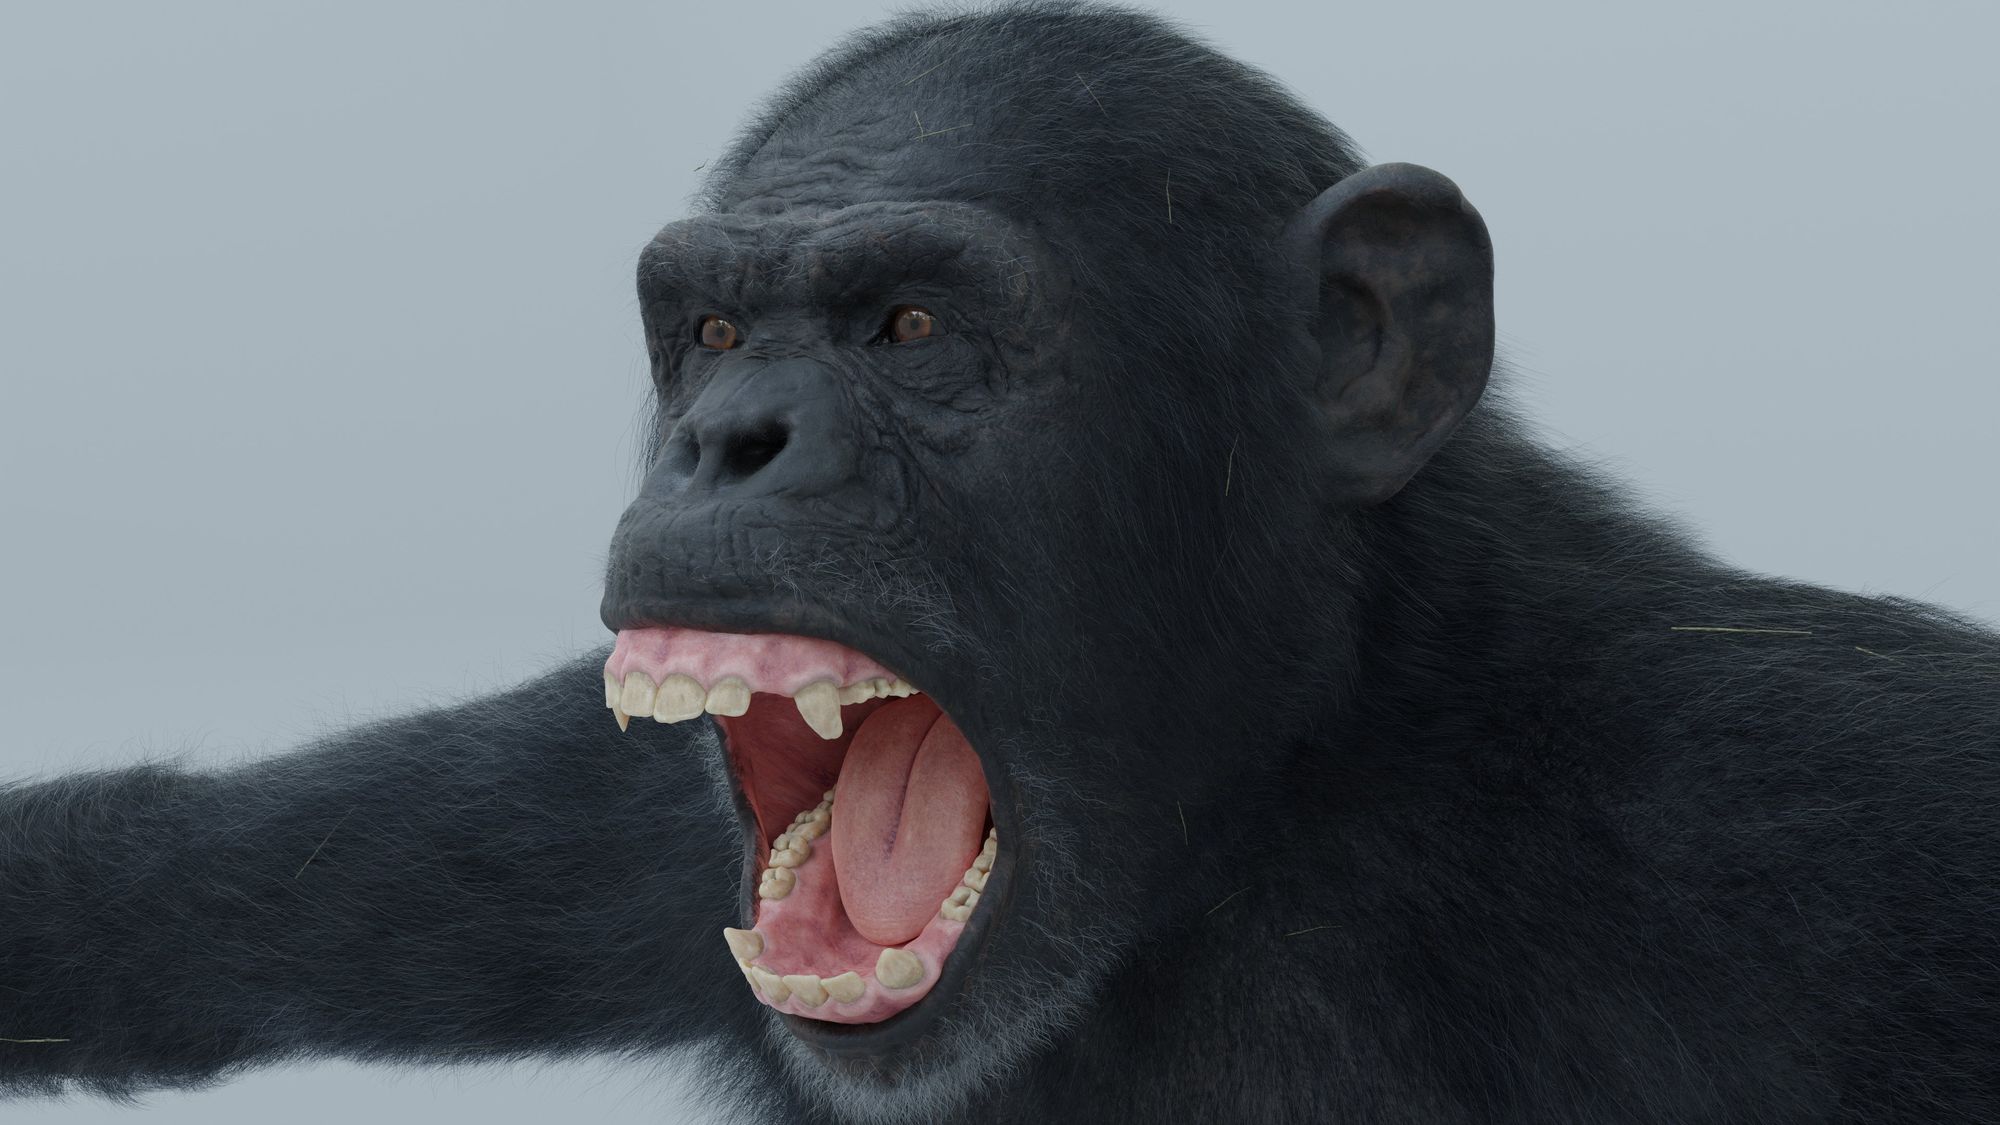
When I had a base for the skin I went on to the bigger variations like patches of paler skin. Then I added some wetness around the eyes and inside the nose. To finish the face, I shaded the inside of the mouth. Again using noises to add variation, and this time the displacement map was very useful to make the peaks more white and the valleys more red. I used similar techniques for texturing the eyes and teeth.
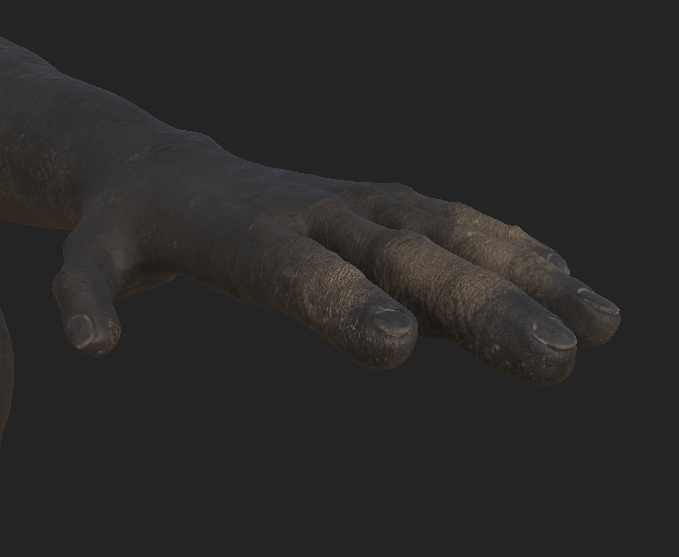
For the fingers and toes, I added some cracked dirt to show the chimpanzee has been walking on a muddy floor. I also added some different shading to the nails.
Finally, I went over every layer and added a subsurface colour to create a depth map for the subsurface. Because the skin is black there is very little subsurface scattering. But there are still some slight variations around the ears and eyelids, and of course the inside of the mouth has a lot more subsurface.
When I was happy with the shading, I exported the textures to Blender and added a HDRI for lighting. When I turned on the first render it looked pretty good, but something about the face felt off. I decided to first add the hair to see if this would help.
Groom
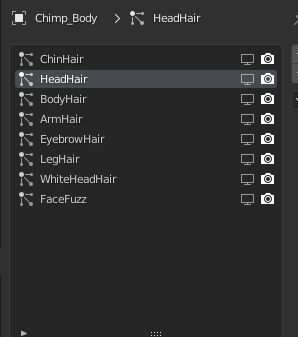
For the hair I used the Blender particle system. I split the hair up in body parts with multiple particle systems for the face. This allows for more control over the roughness of the different types of hair.
After this result the chimp felt even more off. Looking back it seems clear that the eyes and eyebrows are the biggest problem, but I wanted the Chimp to look intimidating and I liked how the heavy eyebrows made him feel bigger. I decided to take a break and come back with a fresh view.
It was around this time that Wouter came to me with the idea of a shot involving a CG creature in a real environment. This seemed like the perfect opportunity to use the chimpanzee and it gave me the renewed drive to make it the most realistic chimpanzee it could be.
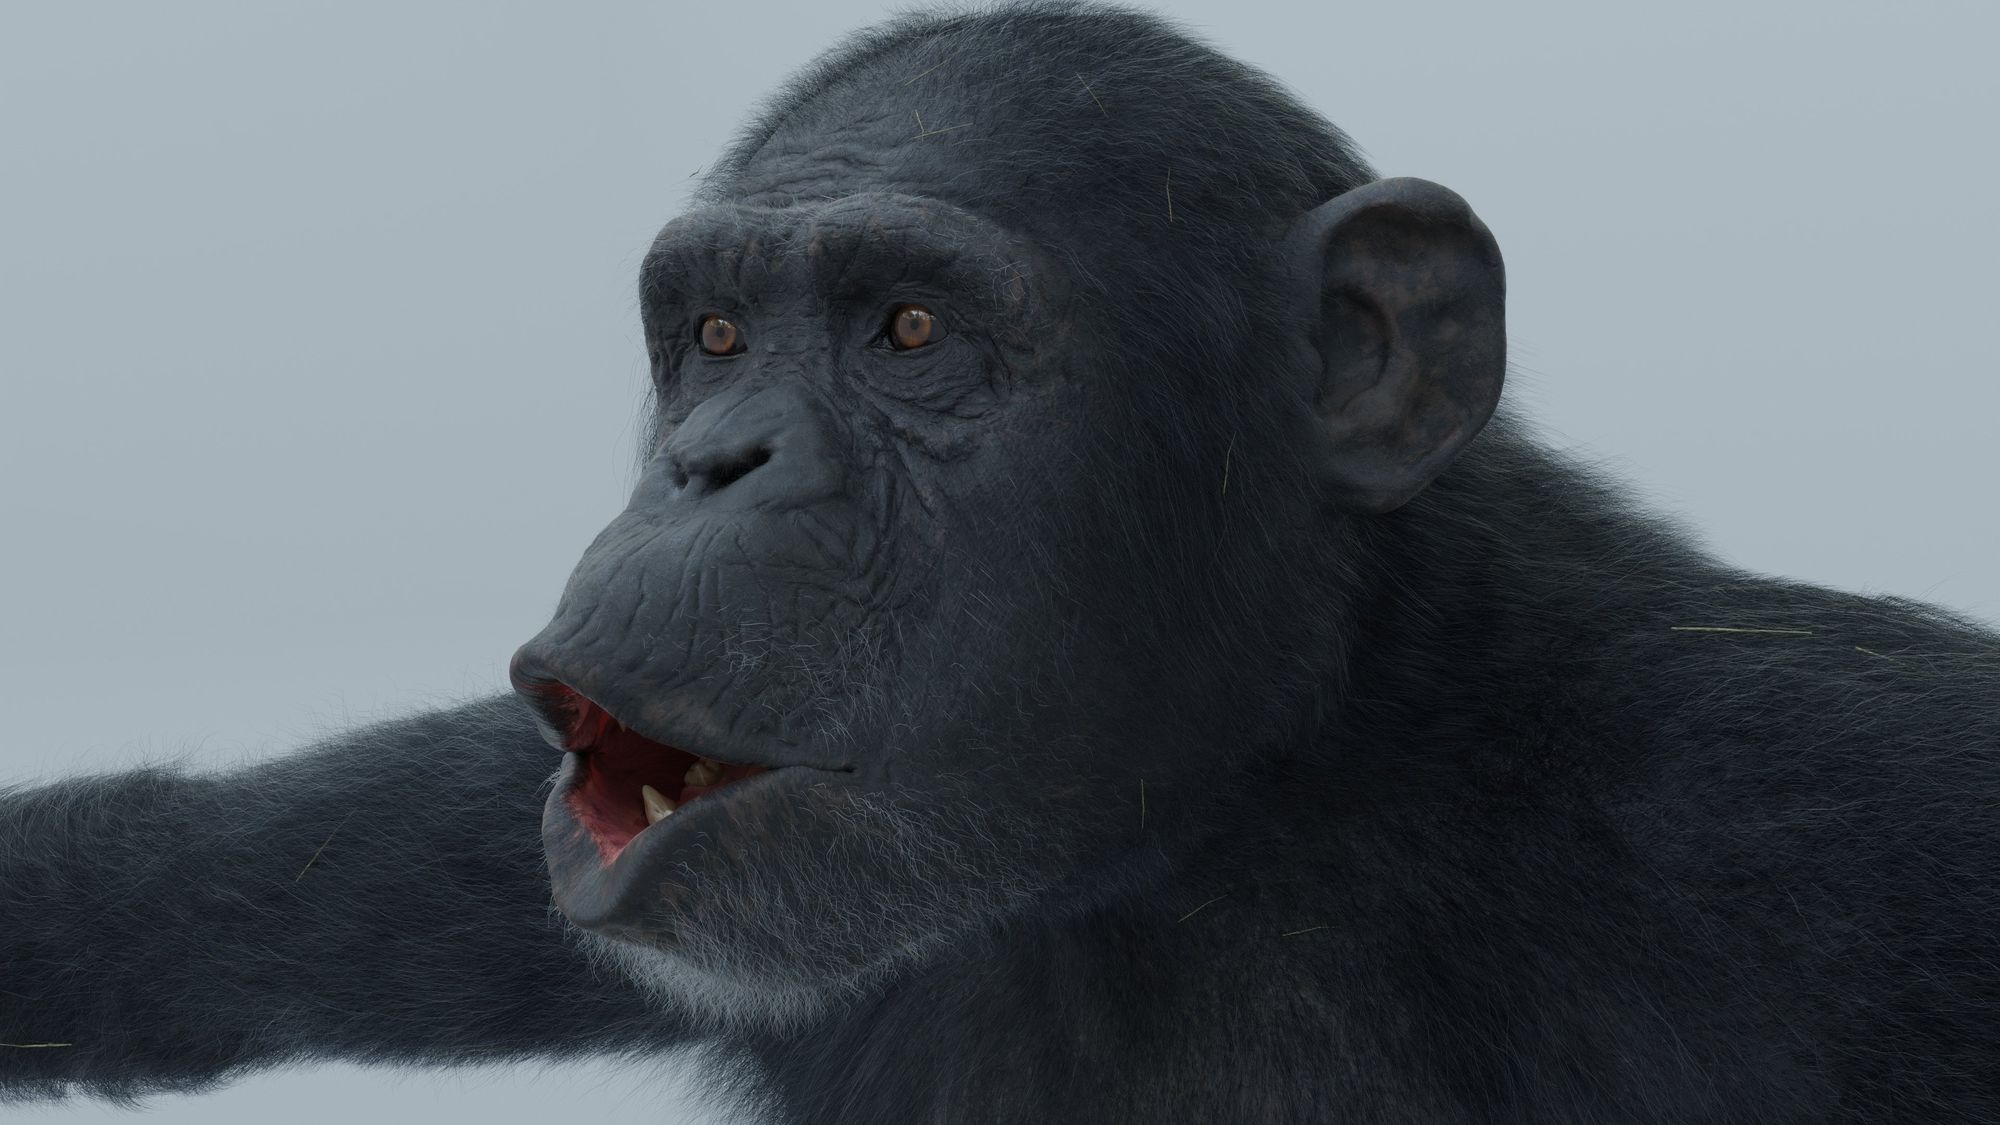
When I came back I couldn’t ignore the eyebrows anymore so I started experimenting with the shape. I also worked a bit on the nose and the wrinkles under the eyes.
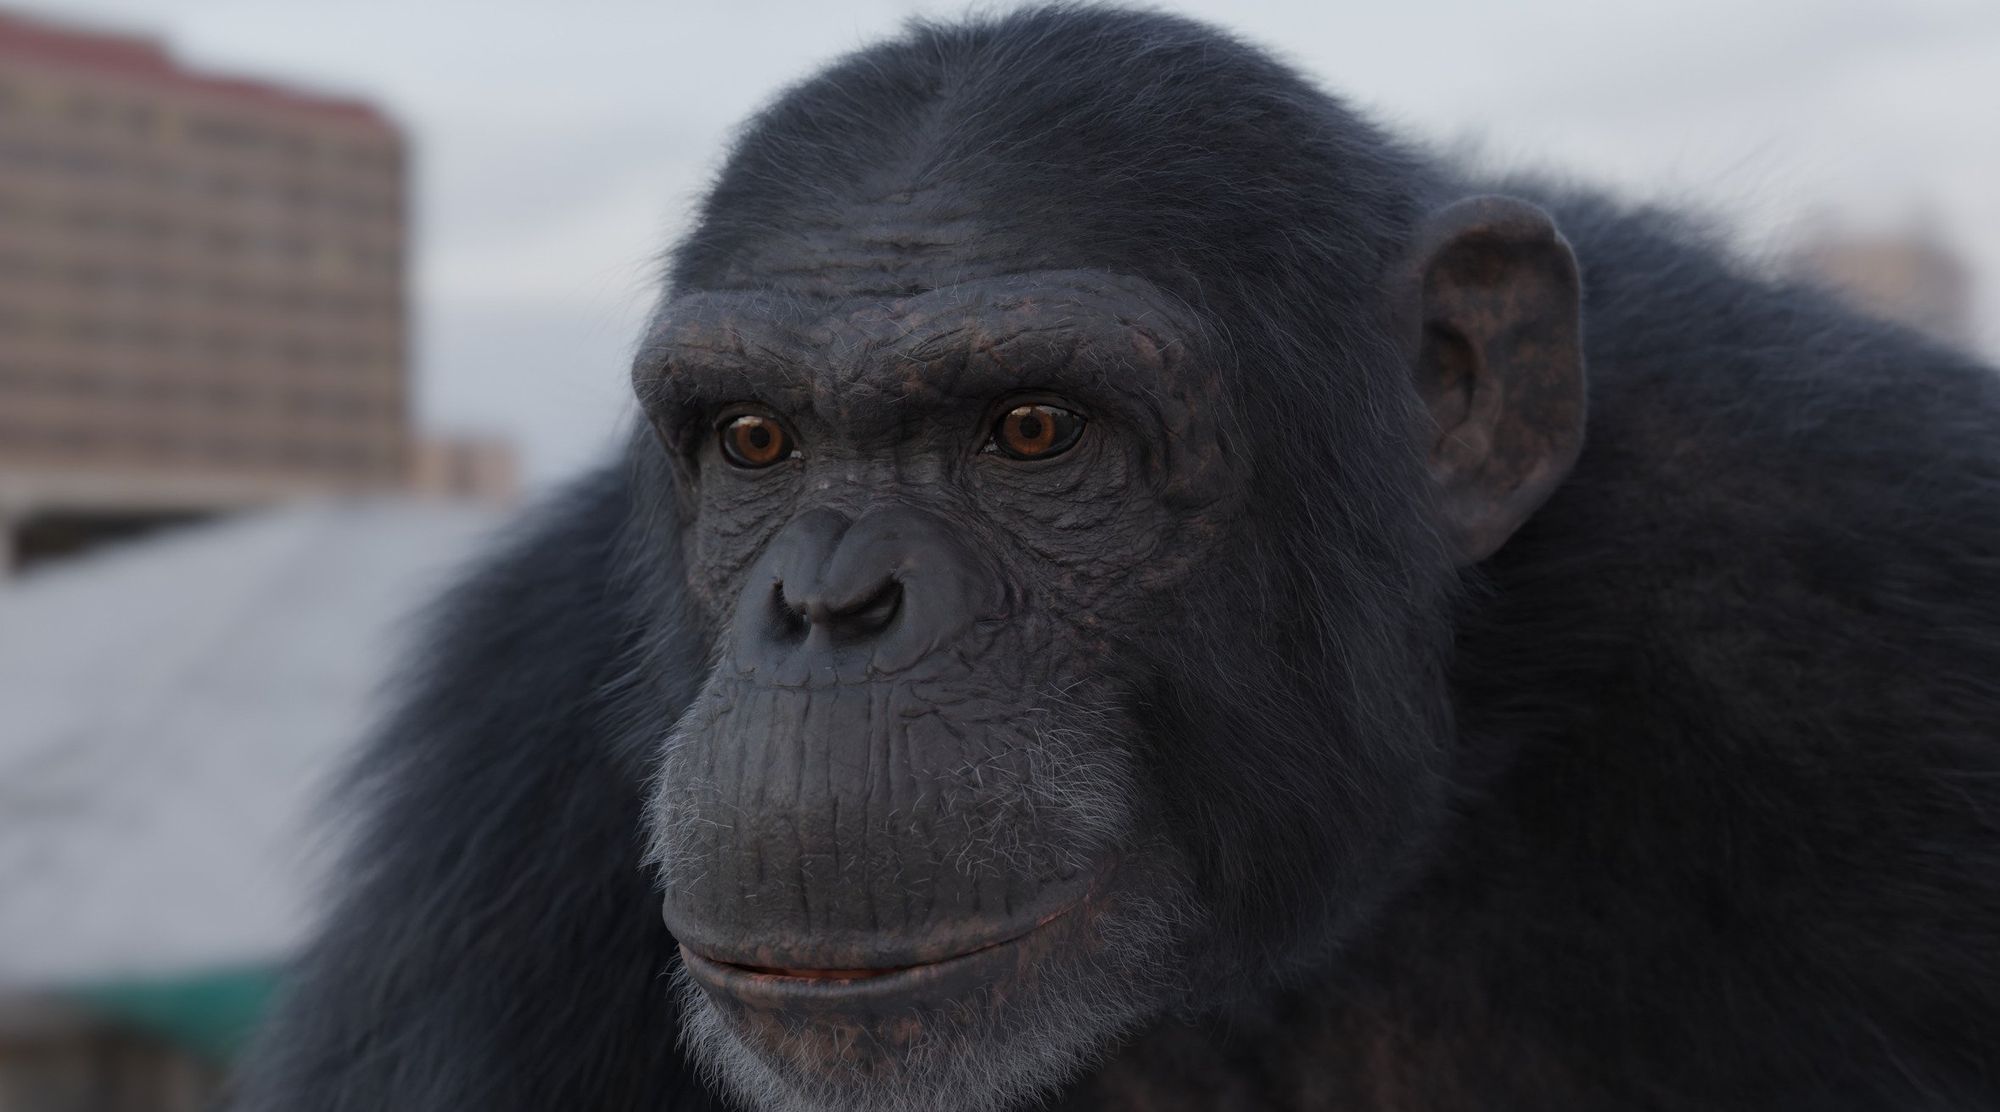
This immediately made a massive difference. I particularly liked how the eyes lost a bit of their expression, similar to what you see with reel chimpanzees. The only problem was that it now looked like a very small chimpanzee. So to make it feel bigger I made the eyes a bit smaller. I also made the skin a bit darker so it worked better in different light setups. As a final touch I created some twigs which I instanced in the hair.
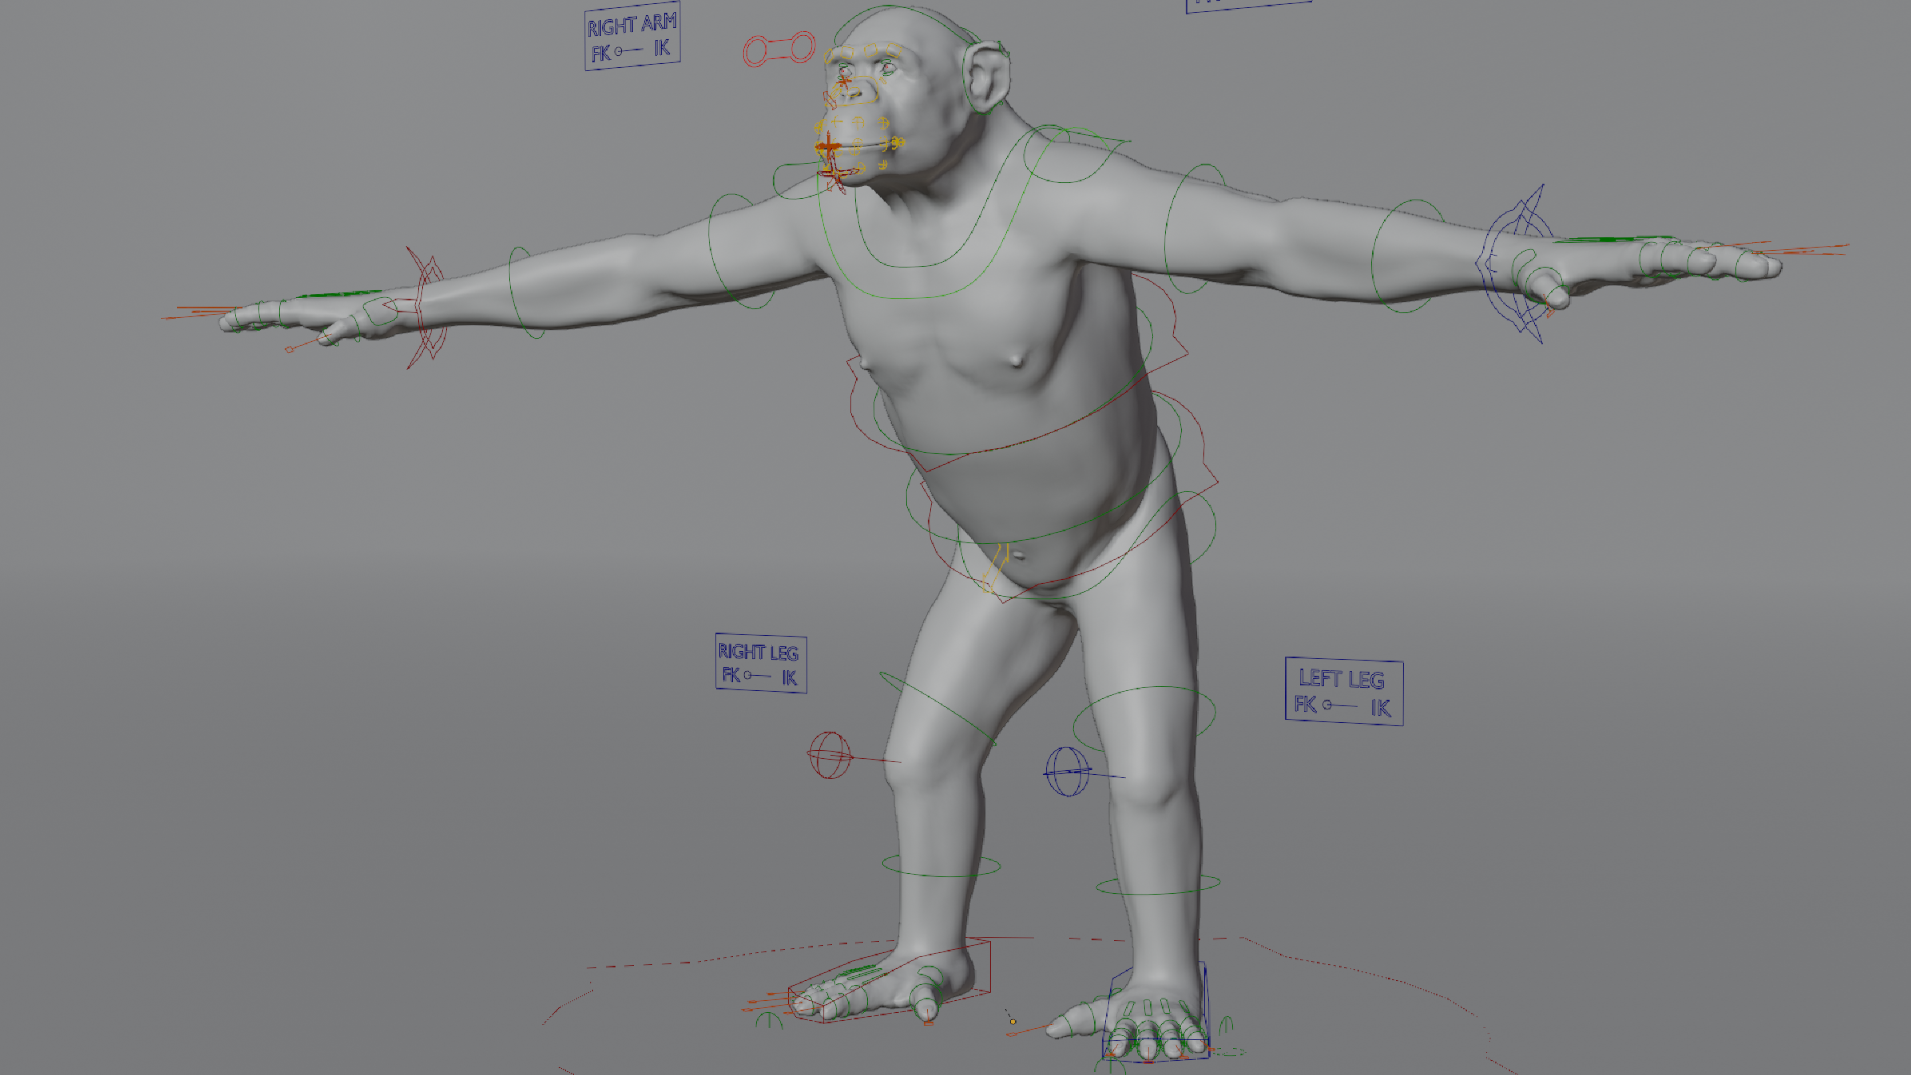
Rigging
Now the final step before I could start working on the shot; rigging. For the rig I used a fairly basic FK-IK rig. But there are some features I would like to highlight.
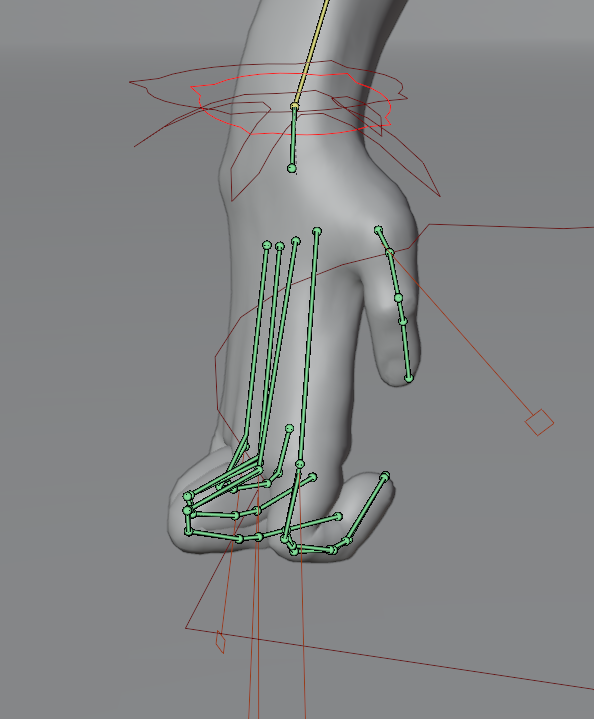
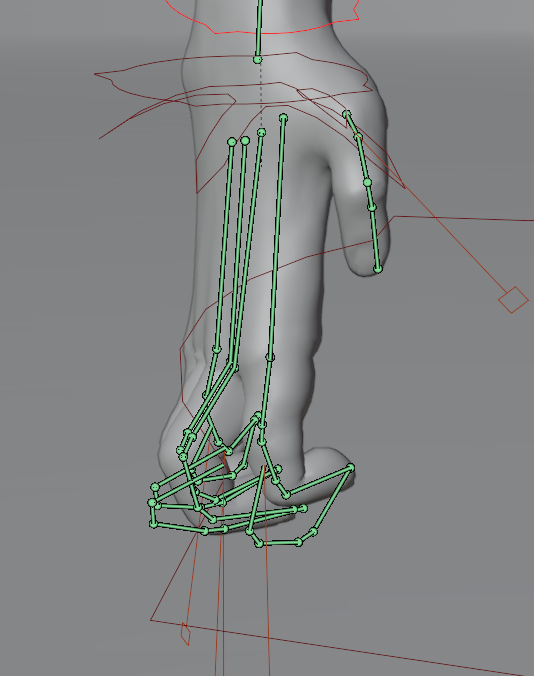
The first feature is in the hands. To allow the chimp to walk on its knuckles easily, I added two sets of bones in the hands. The deform bones would target the end of their guide bones. This allowed the hand to pivot around the knuckles with the fingers adjusting correctly.
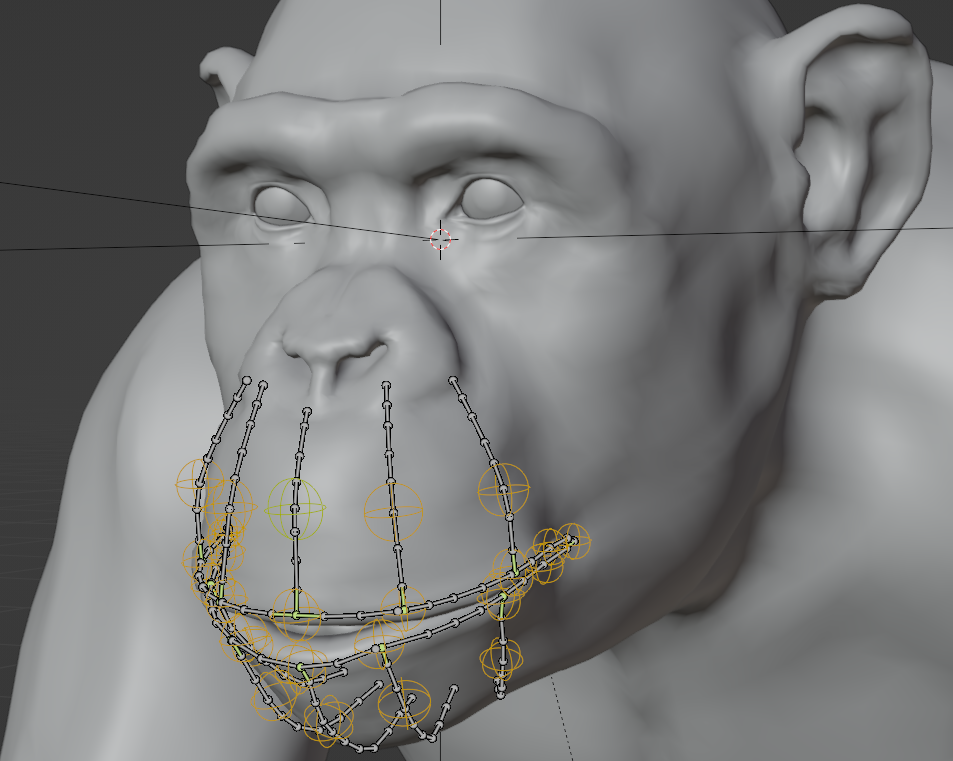
Secondly, I spent a lot of time on the face rig and in particular the muzzle. I wanted to use the chimpanzee in future projects. So even though the muzzle didn’t have to do much for this shot I gave it a lot of flexibility. Starting with a spline-IK to allow for a lot of different expressions.
I then added some preset expressions which could be blended in with a control bone. I made sure each expression worked with the mouth opening and closing. For this, I added two controls for the lower jaw. One which keeps the lips together and another which opens the mouth fully. This enabled me to create facial expressions very quickly.
Animation
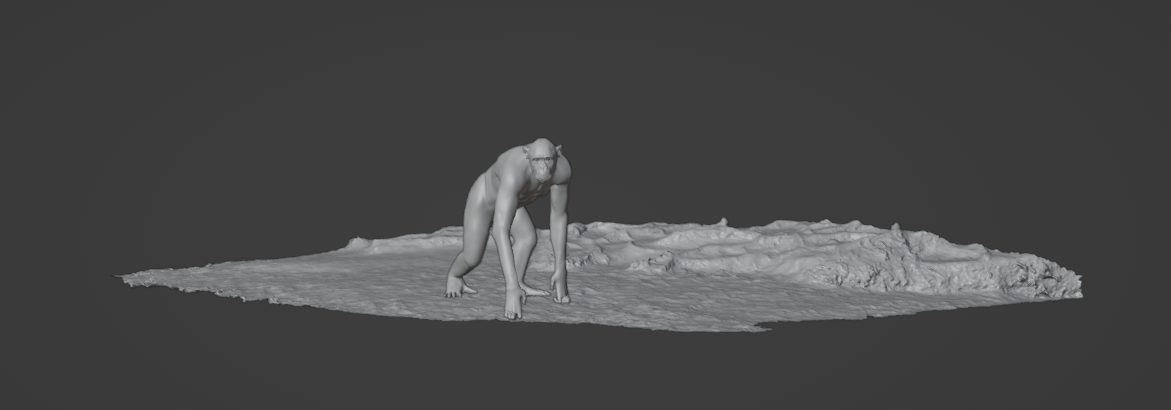
Now the rigging was done, it was time for the animation. Wouter had found a plate from VFX tutor on gumroad. The plate already had a camera track, a LIDAR scan and an HDRI included. So, I simply loaded everything in and started animating. I like to begin with large movements and work my way down to the details. Beginning with how the body is positioned and where the hands and feet are planted. Most of the animation was straightforward, I found some reference of chimps walking, so I started from there.
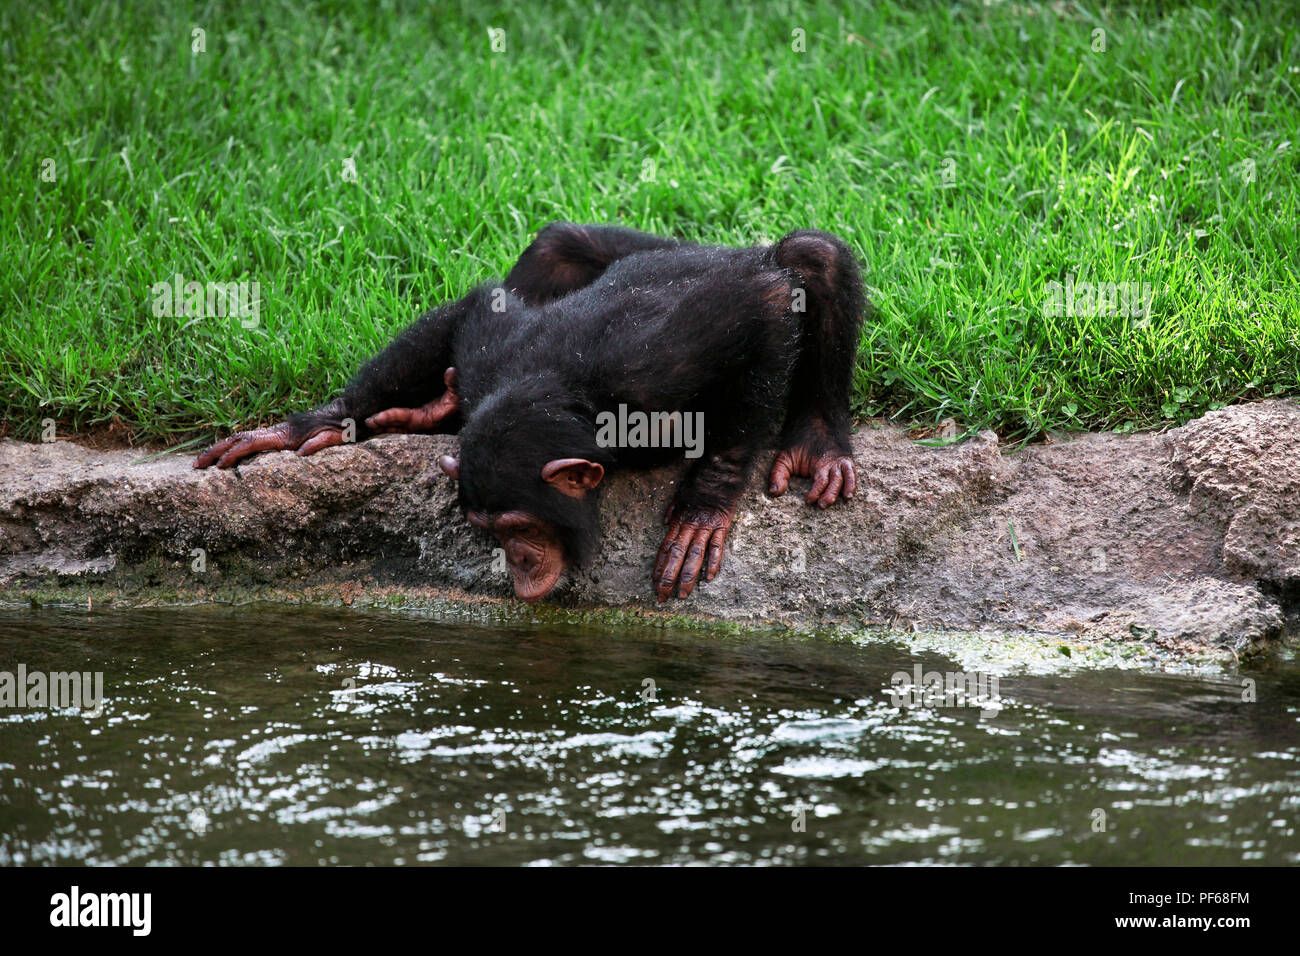
When it came to drinking, I found two options. Most chimpanzees in the wild appear to drink directly out of the water with their mouth. While some chimps in zoo’s have adapted to drink out of their hands. Because I wanted the chimp to act more like a human I decided to go for the second approach.
To fill the shot up a bit, we decided to add a second chimp. This one didn’t need to grab as much attention so we decided to keep him sitting mostly still.
To show more of the details of the model we also made a close-up shot. For this shot we decided to follow the chimpanzee’s head as it drank the water. For the chimp we used the same animation as the first shot. The camera movement was created with keyframe animation. I animated the rough movement of the camera, then I added a noise modifier to the animation to give it more of a handheld feel.
To show the skin was wet I used the dynamic paint tool to create a mask on the hand and the lips. I lowered the roughness and brightness of the skin under this mask to make it look wet. I also duplicated the hand and gave it a water shader. I then lowered the displacement and used the mask as an alpha to fill the cavities with a small layer of water in the wet parts.
For the lighting, I added in the HDRI and rotated it to the right orientation. I then used the lidar scan of the floor as a shadow catcher. Now it was time to render and send it off to comp.
Compositing: Wouter Engering
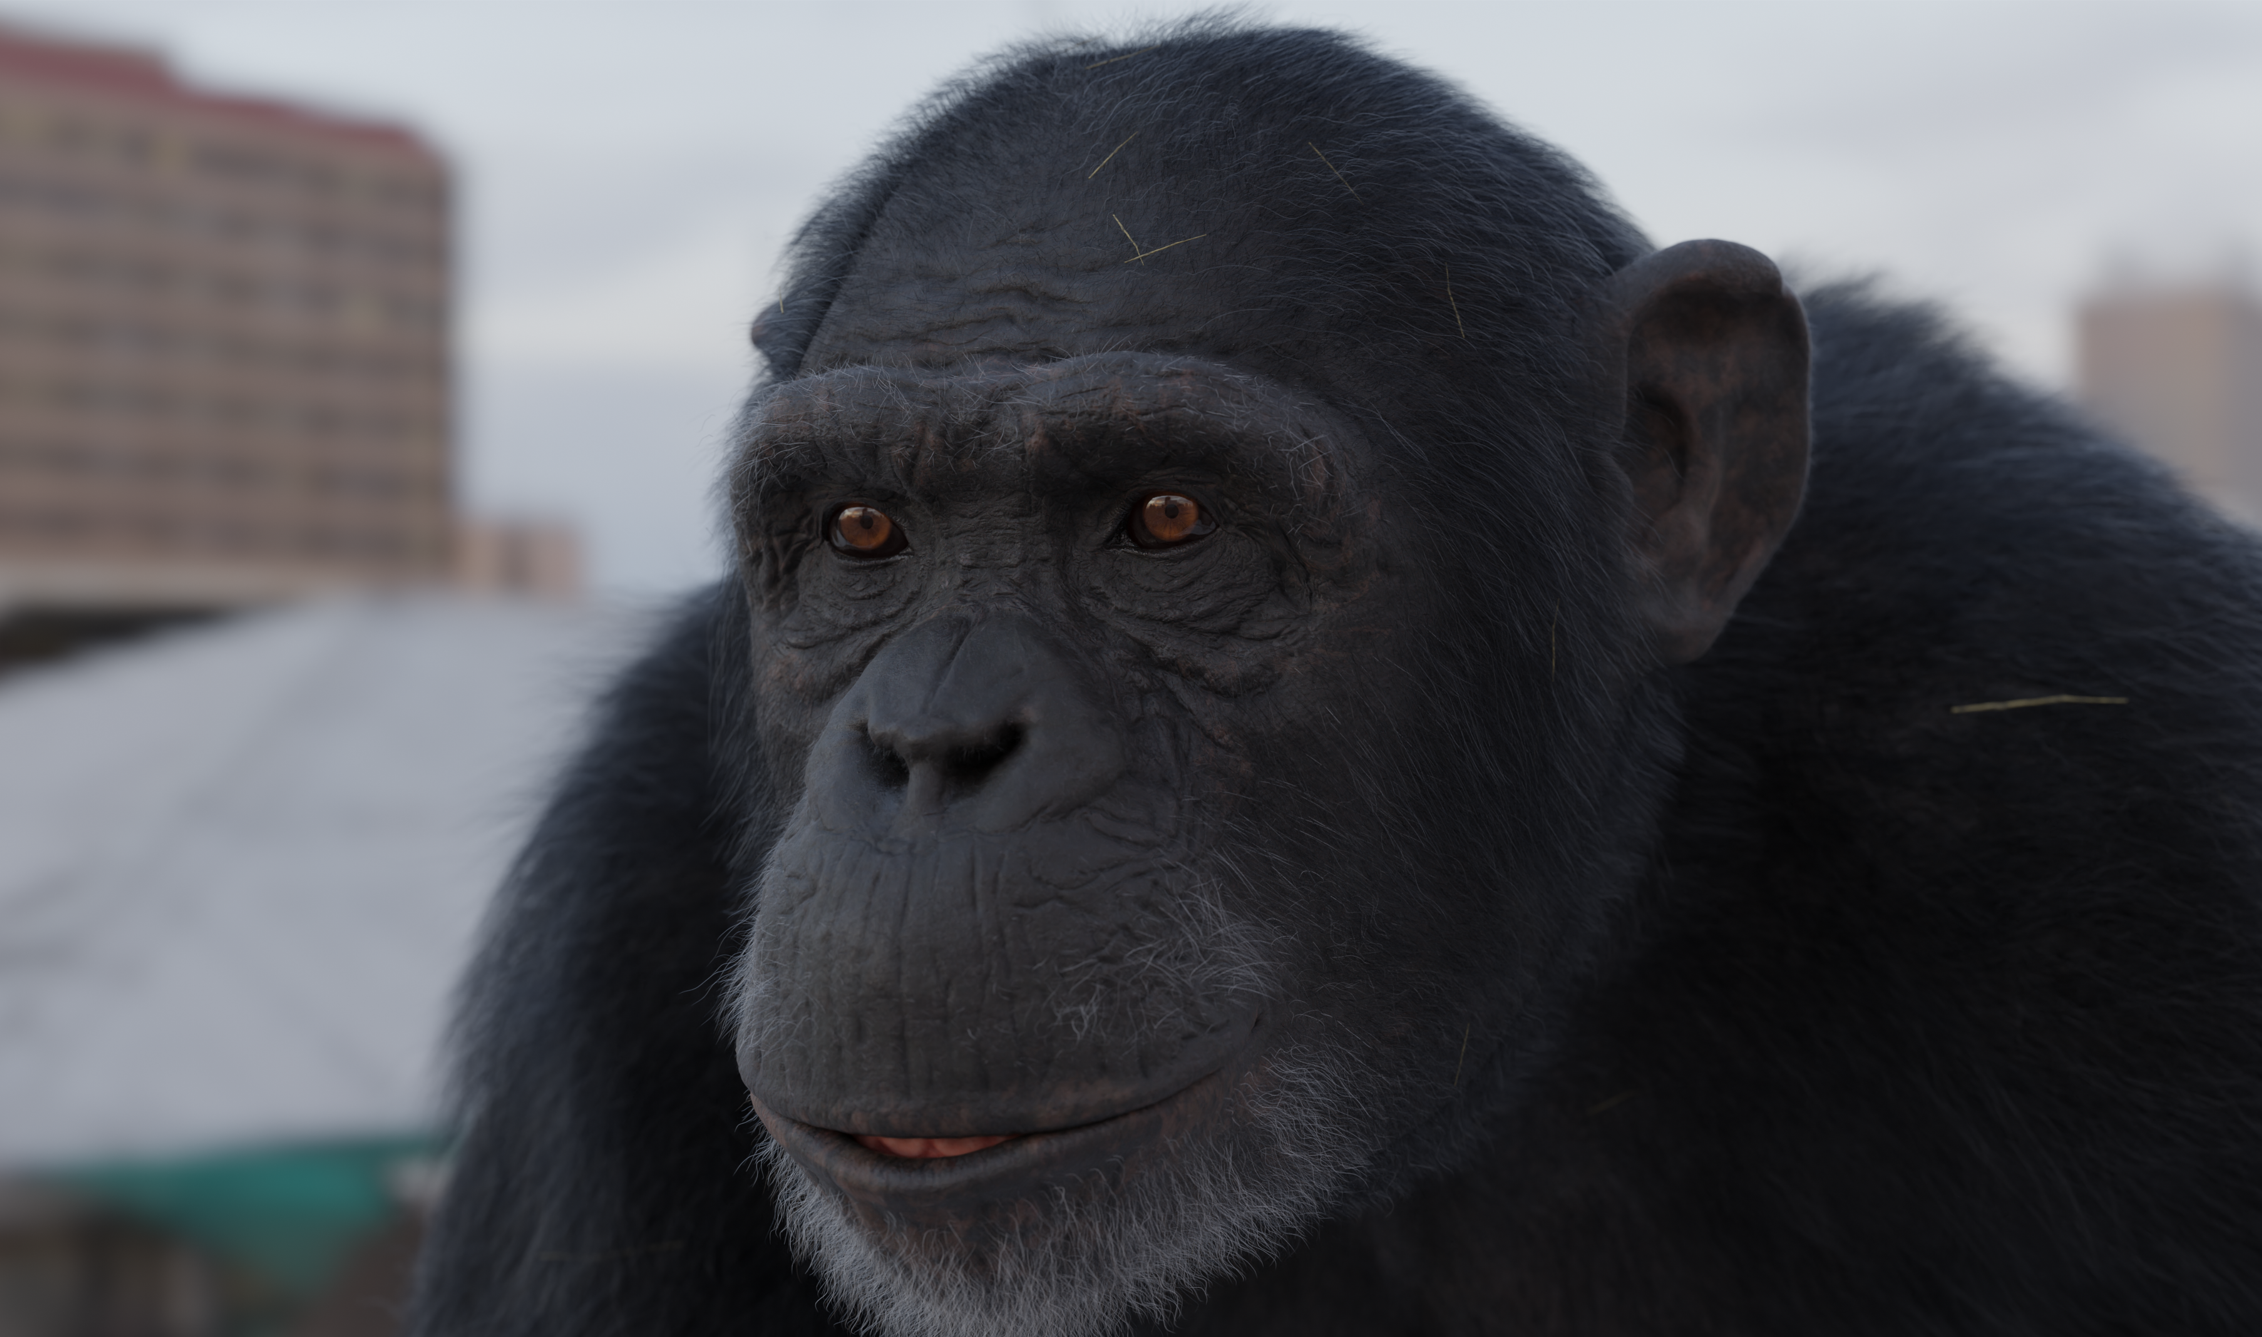
After getting the renders, it came down to compositing the shot. For the project we wanted to create two shots, a CG blend and a full CG shot to showcase all the details in the model.
I started working on the first shot as this shot had the highest priority. The shot had a lot of different things that needed to be done in comp which made it quite an interesting shot to work on. After loading up the plate in Nuke and getting the shot ready by removing trash from the plate, I added a subtle atmosphere thanks to stock footage in the background to highlight the character. I then started doing the usual tweaks like colour adjustments, shadows, and sharpness. The real challenge in this shot was the reflection of the monkey in the lake.
For this, I created a gizmo in Nuke where you load in the geo, reflection geo, and the beauty renders, and it automatically creates a pretty accurate reflection. Although there were multiple scanline renderers to make this reflection possible, everything rendered pretty quickly.
As a completely still river didn't fit the shot, I added some ripples by driving distortion on the reflection plane with different types of noises. To keep the original flow in the river, I created a mask with some frequency separation. After minor adjustments like his hand going through the water, water drops leaving his mouth, and a grade, the shot was finished.
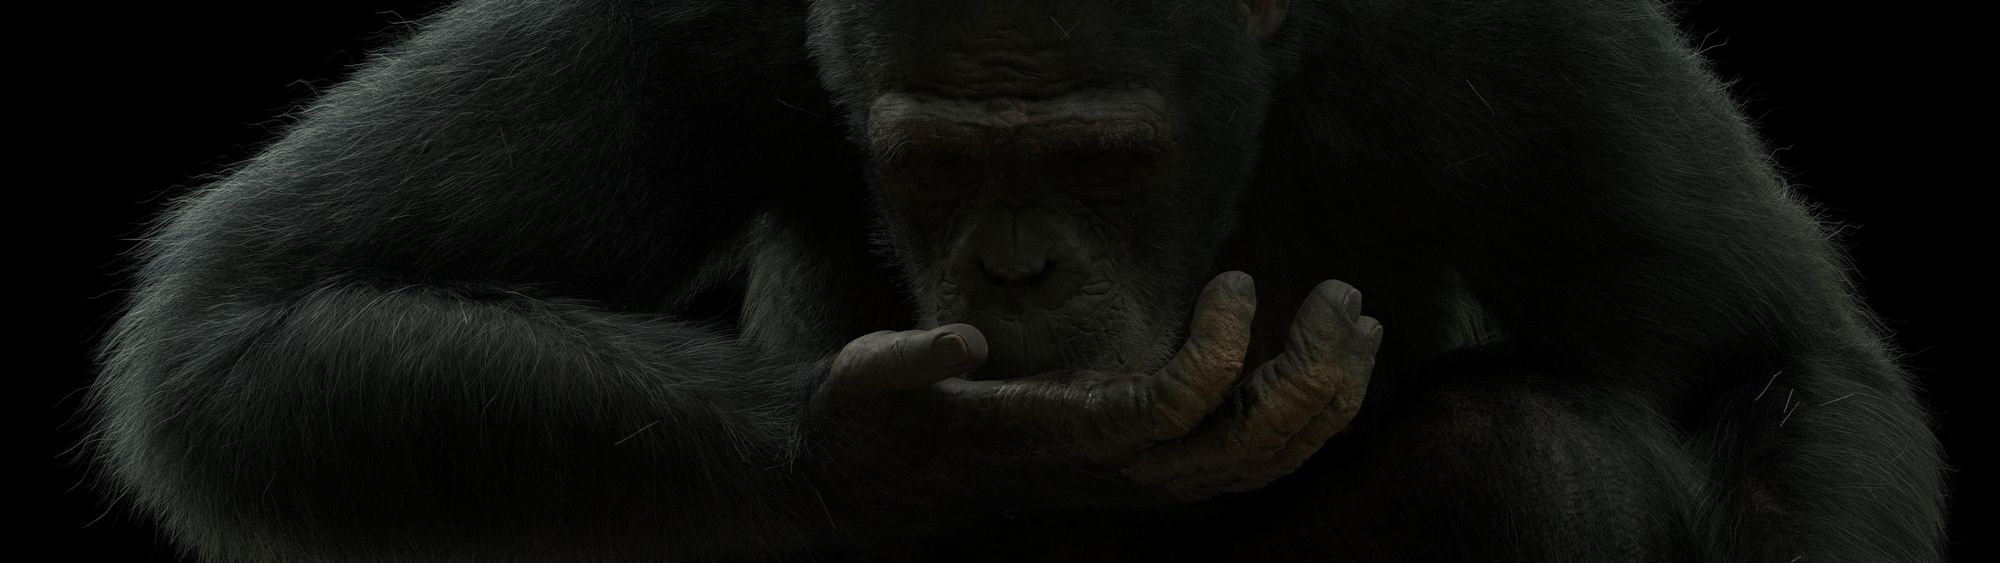
The Close-Up
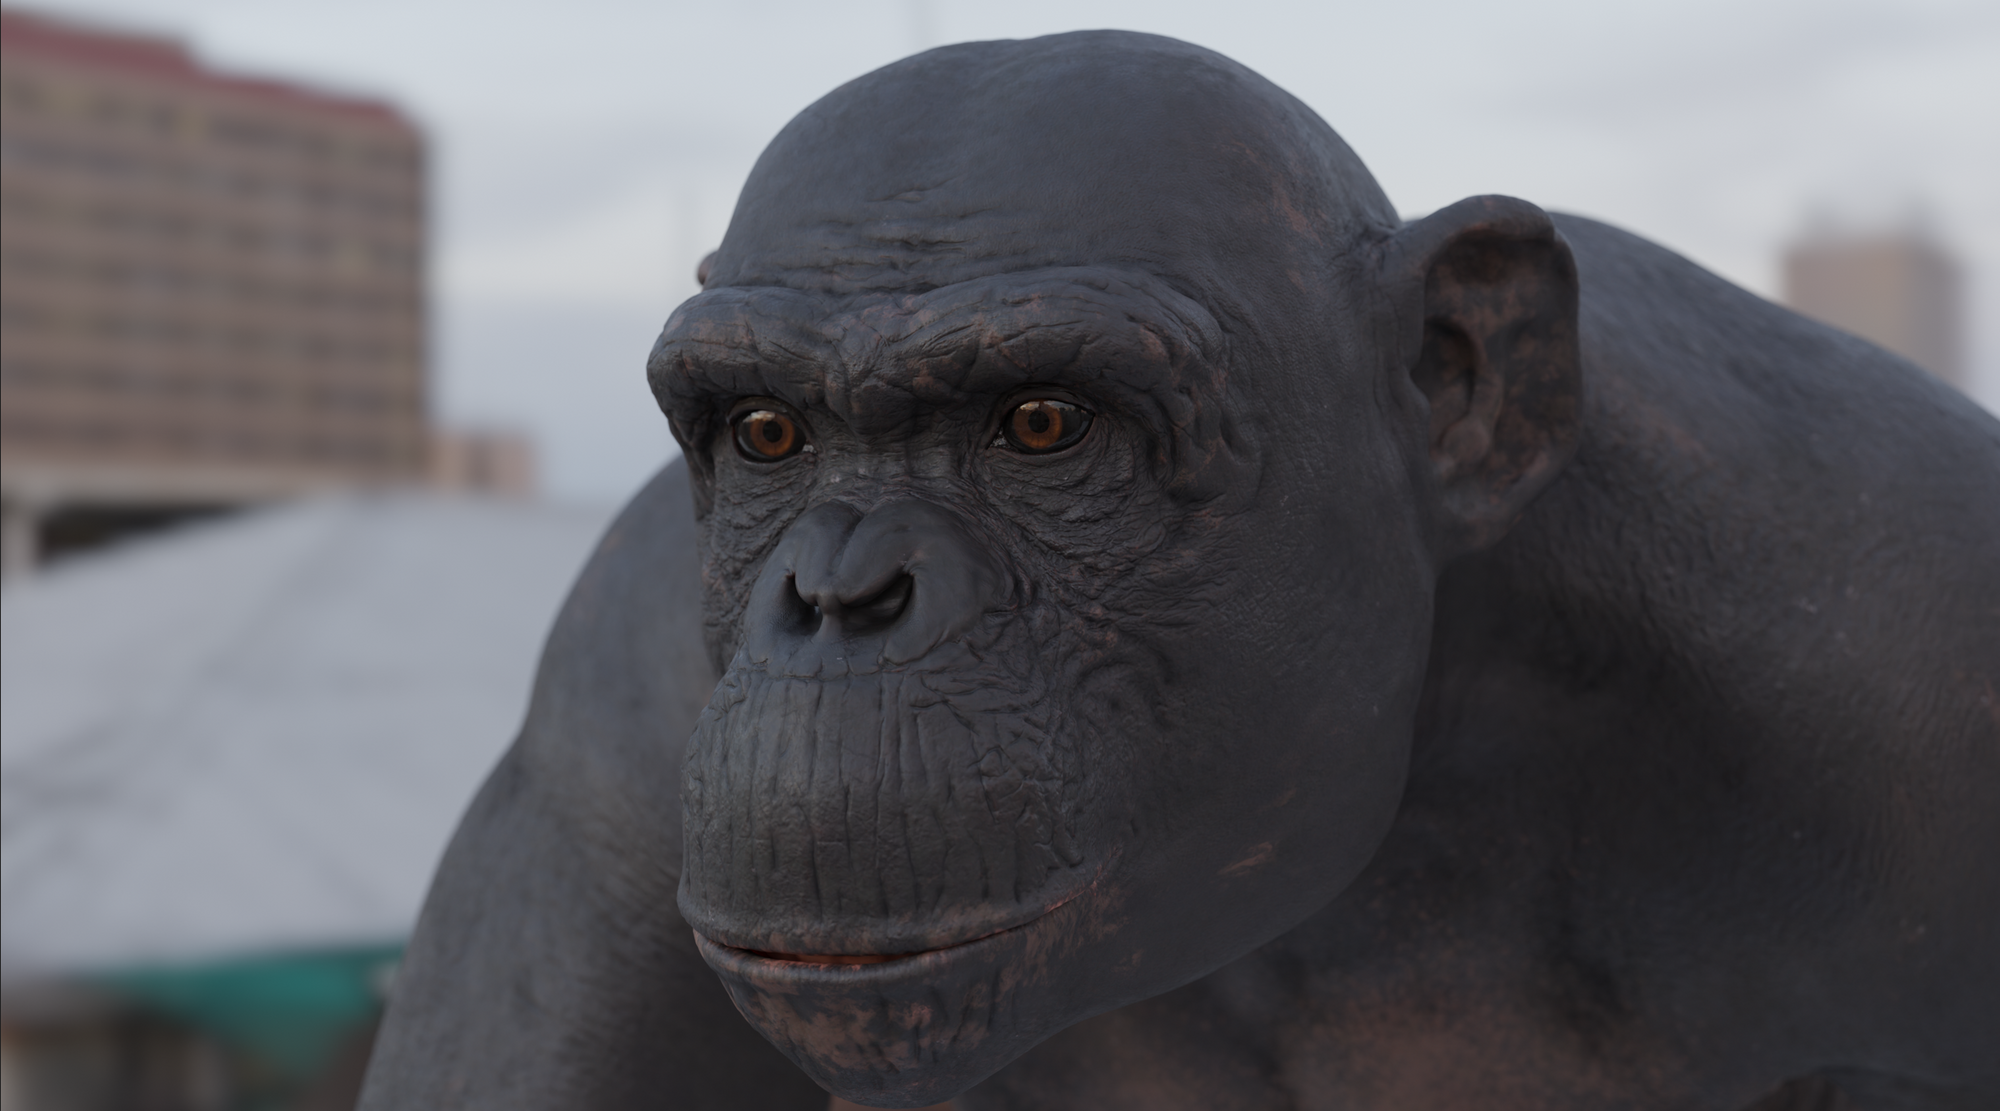
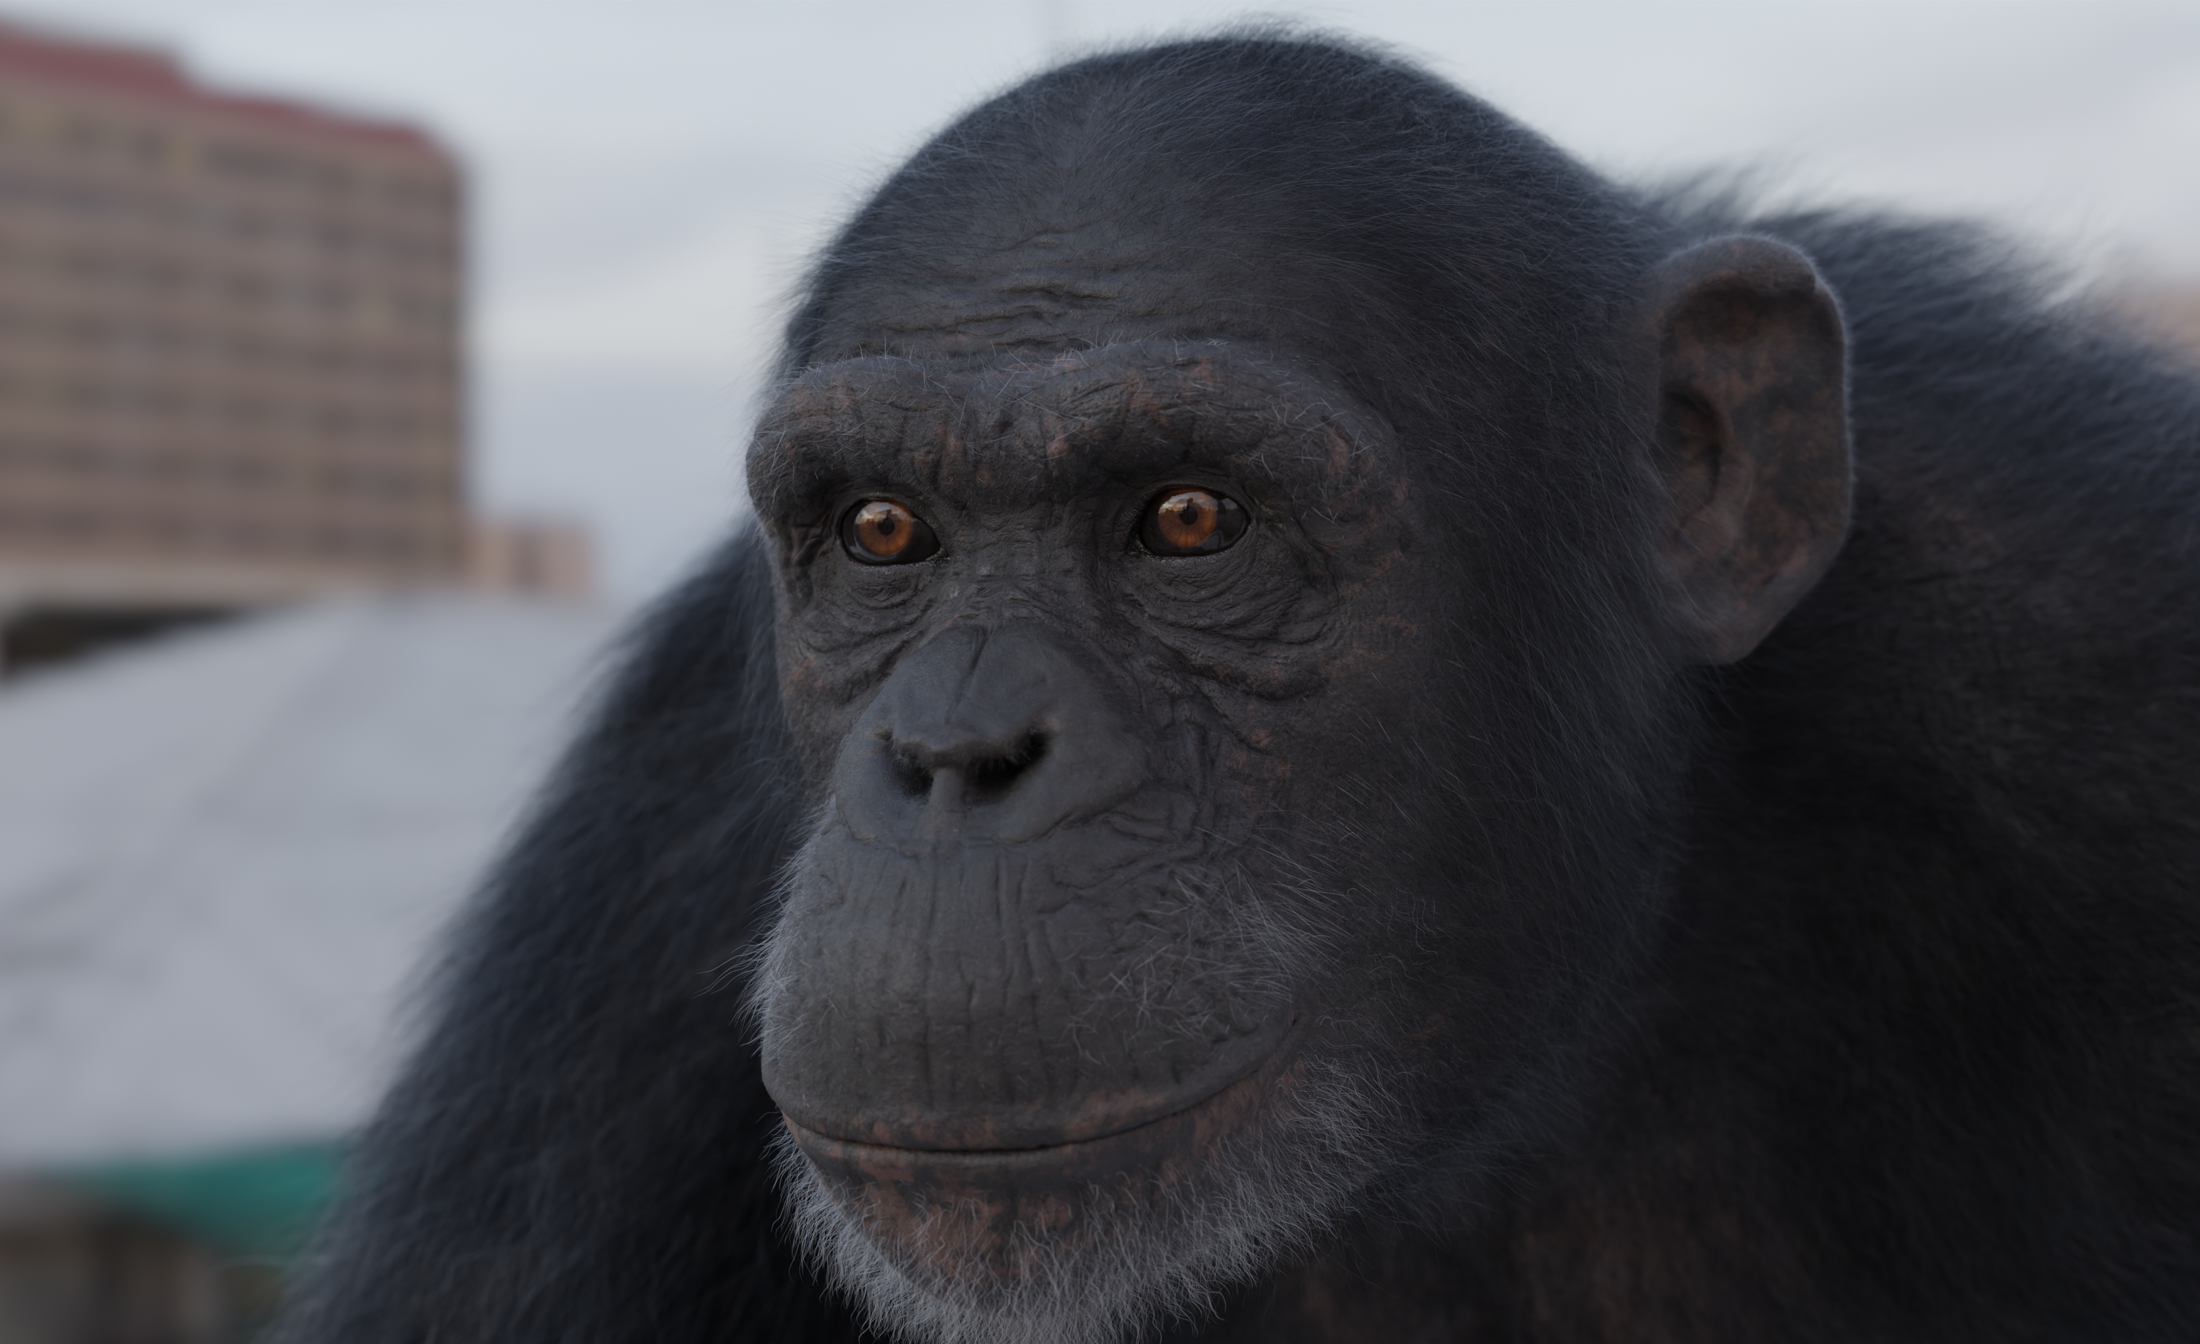
The second shot was quite straightforward, the only real difference is that it was a full CG shot, this had some benefits and complications. For example, there was no background. So because the shot was going to be pretty out of focus, I quickly threw some Mattepaint images together. To steer it away from it looking like a lifeless photograph in the background, I added a subtle animated distortion in the leaves, which helped the shot out a lot. Furthermore, I experimented with a lot of different lens kernels in the convolve node to push the realism in the shot further.
As this shot involved a complete CG approach, we had to look back at the basics of what it takes to make a creature feel alive. For this shot, as it was such a long focal-length shot, I mainly focused on the eyes. So I experimented with creating a certain depth and boosting the reflection in the pupils. This was driven by the specular AOV and a separate plate plussed on top. These old but golden rules used in movies from some time ago like King Kong really pushed the realism aspect further.
Overall, we are super happy with how the shots turned out, and we also learned some new techniques along the way.
Wouter Engering and Jurrian Witmans from the Netherlands Film Academy created a remarkable CG chimpanzee in a real environment. Their project showcased an impressive level of skill, attention to detail, and dedication. By sharing their process, we hope you get more insight into how much goes into creating a single CG element, and get inspired to create your own Rookie Awards entry!