
How to Turn Concept Art Into a Stylised 3D Render
If you are looking to create a stylised 3D Render from a Concept, Think Tank Training Centre student, Brian Cheng, shows you how.
If you are looking to create a stylised 3D Render from a Concept, Think Tank Training Centre student, Brian Cheng, shows you how.
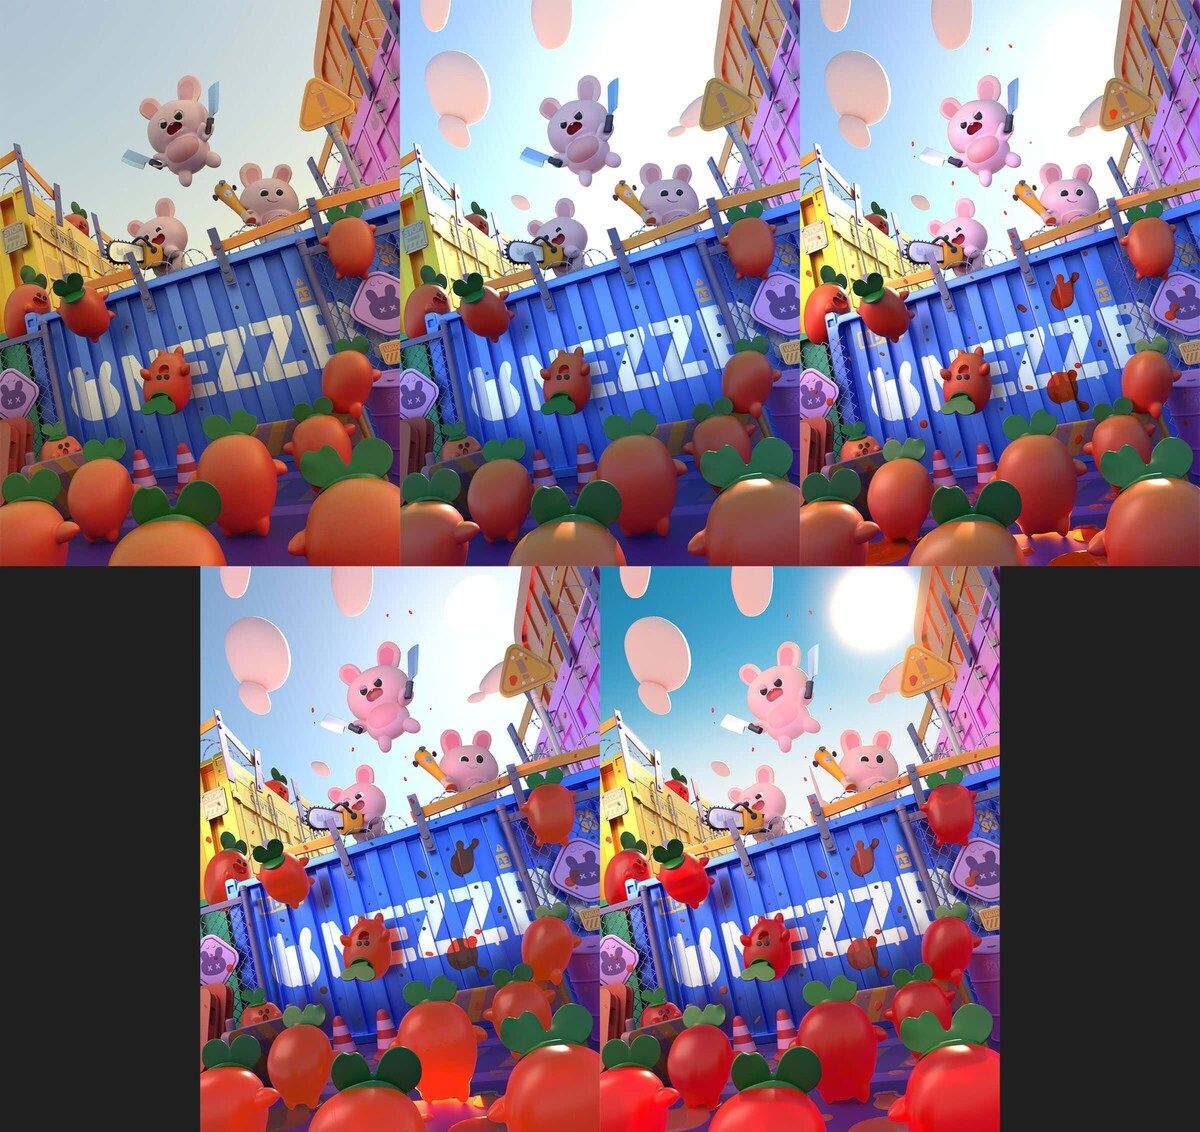
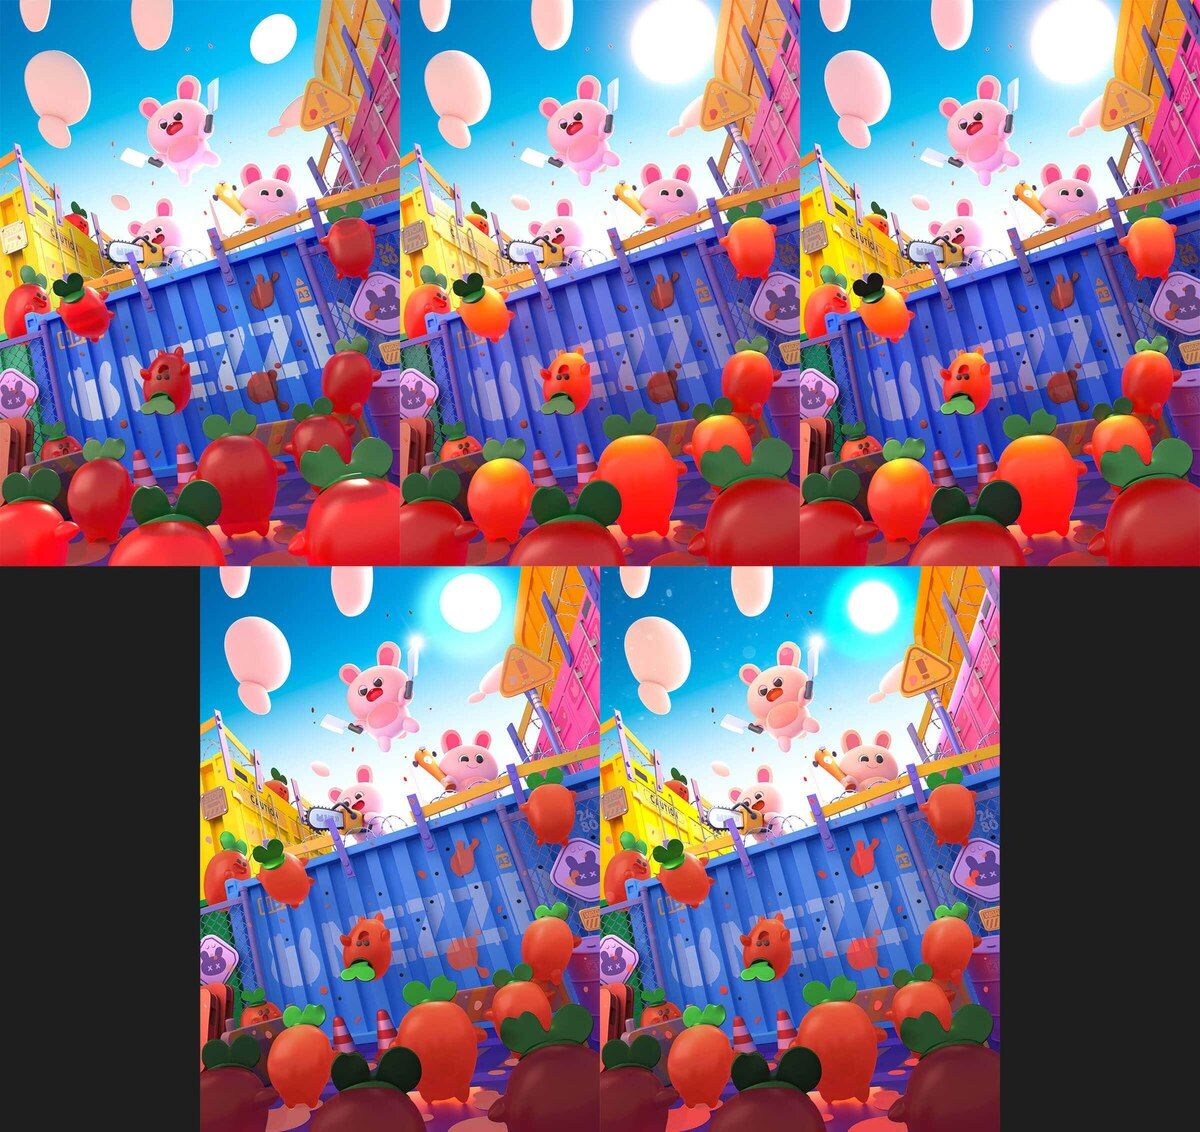
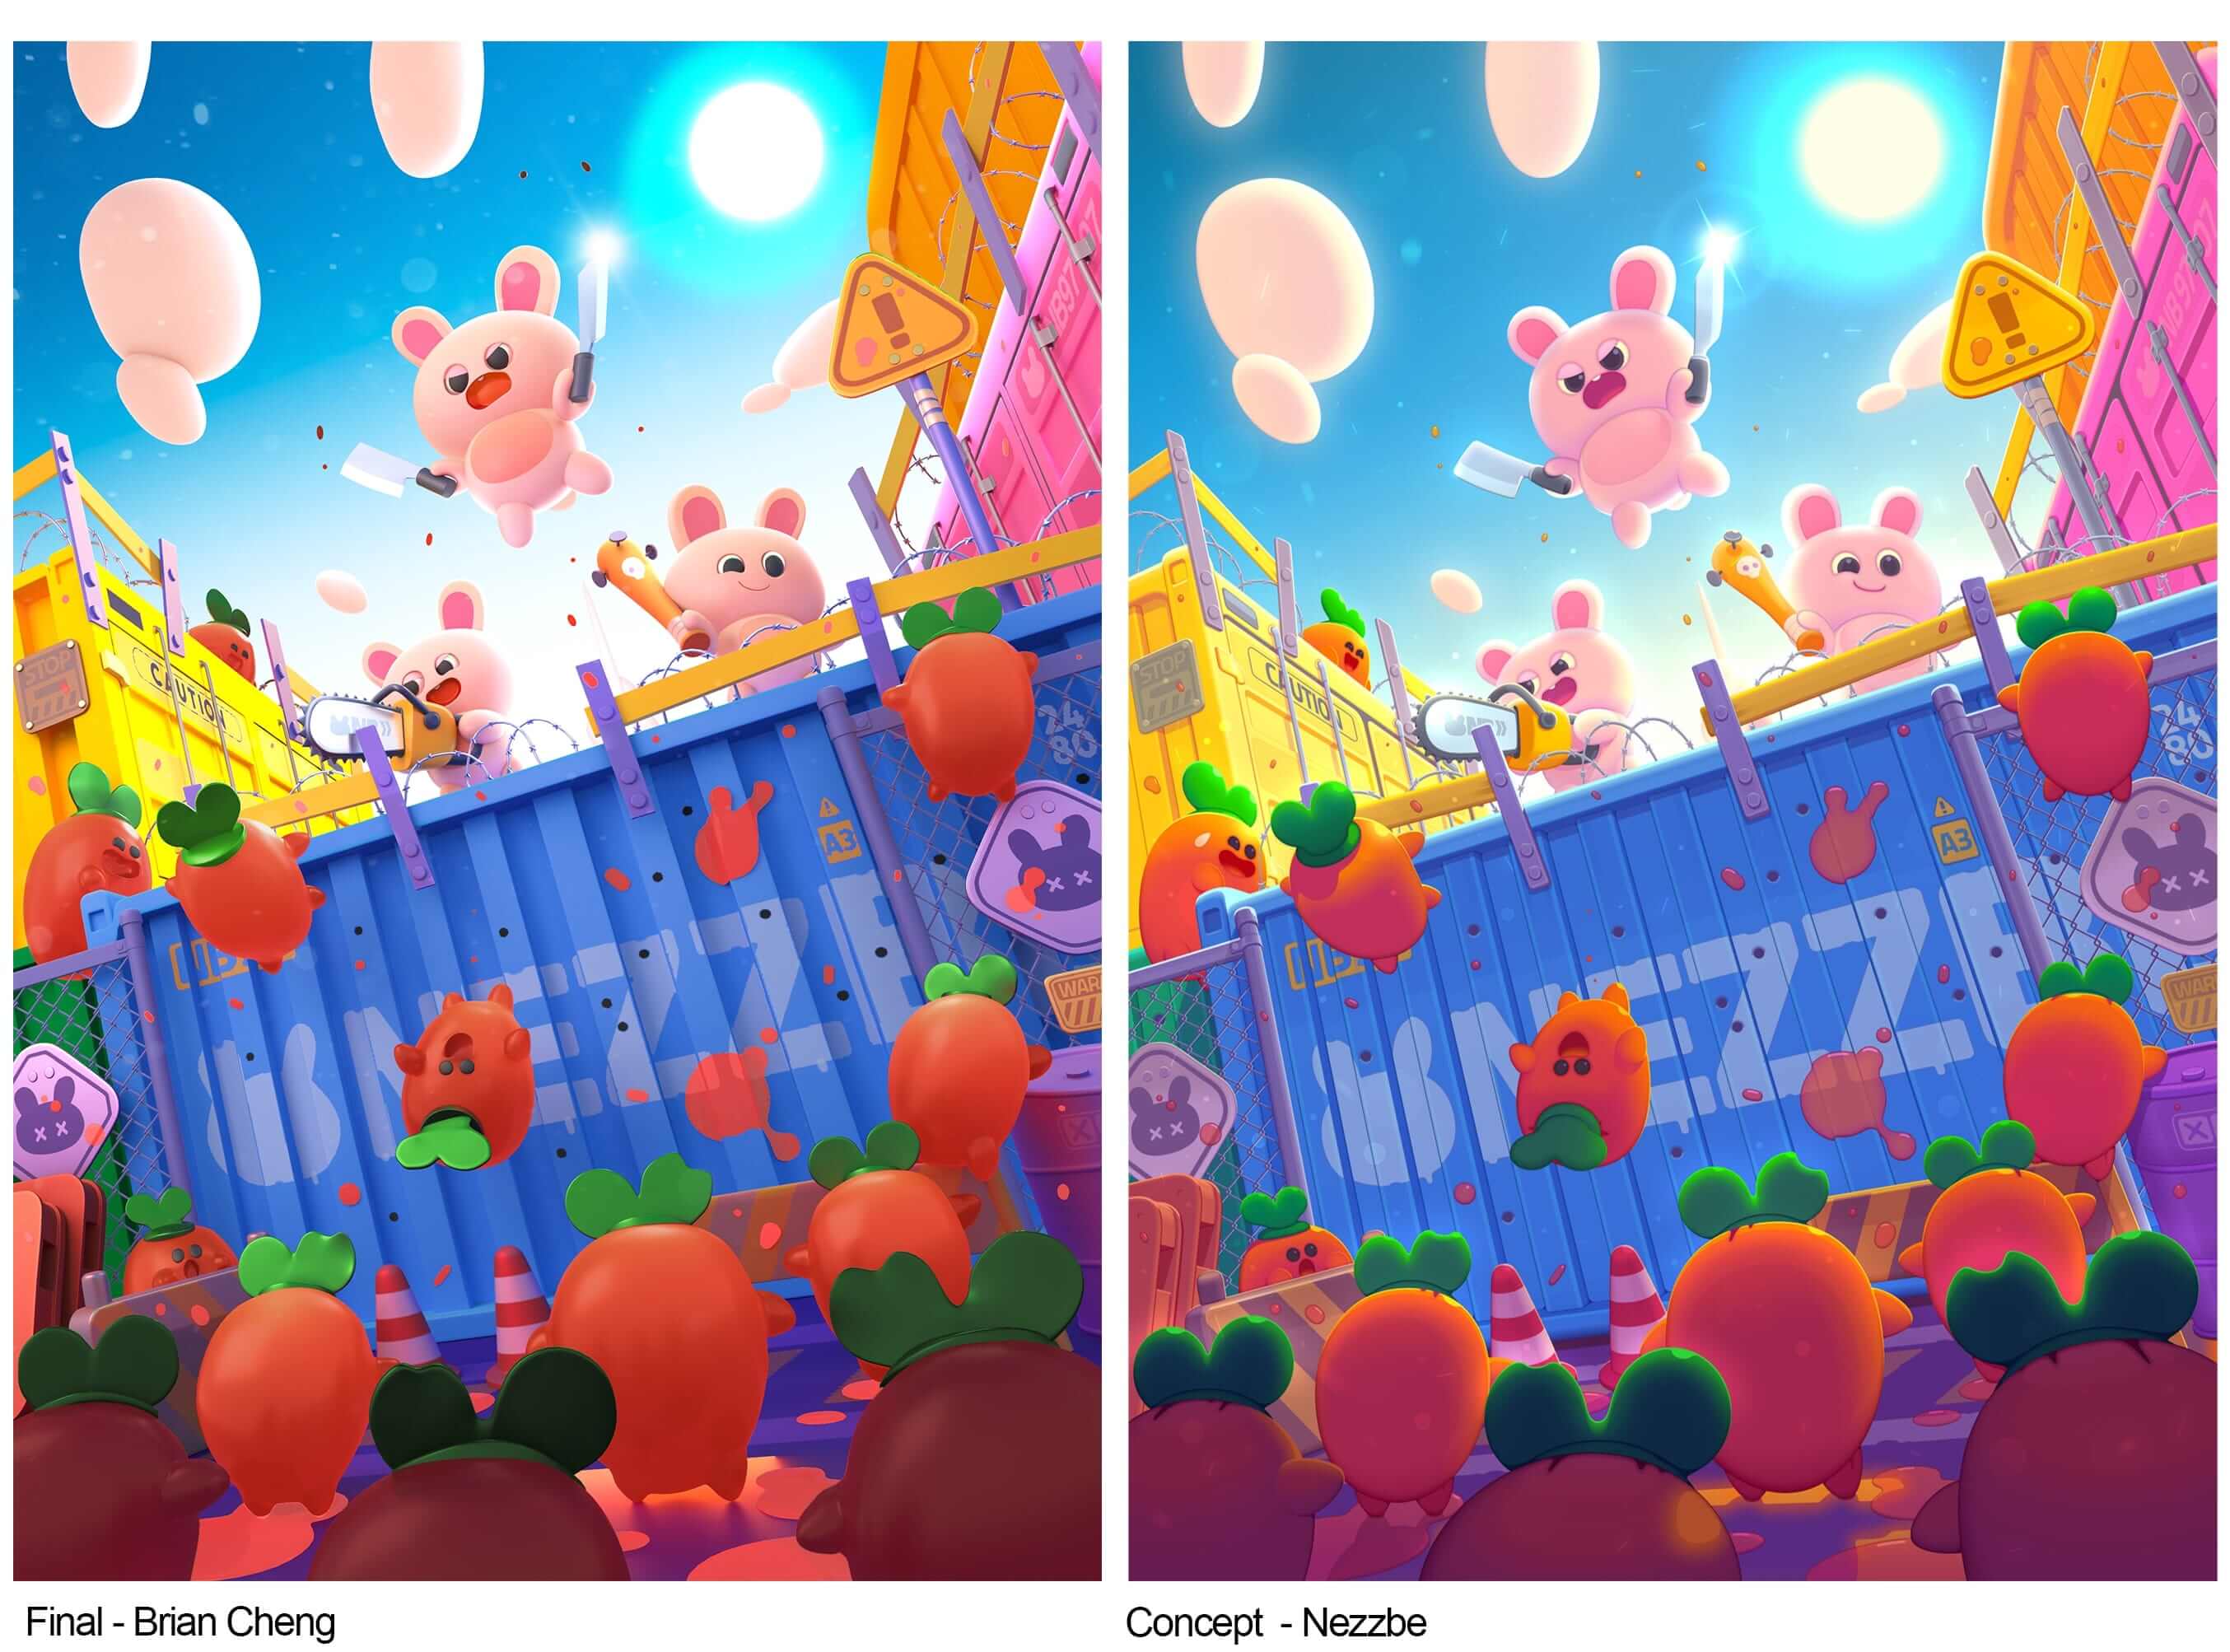
Rookie Awards 2023 entrant and final year student at Think Training Centre, Brian Cheng, challenged himself by creating a 3D rendered scene including characters, from a single Concept Art by Nezzbe, over a period of six weeks.
If you are looking to level up your skills and take on your own ambitious project, this article is for you!
I created this project as part of my foundation's final project at Think Tank Training Centre. The project spanned over six weeks, during which I transformed a 2D concept into a 3D render.
From the beginning of the term, I began searching for concepts that piqued my interest and compiled a collection of those that stood out to me. Seeking to challenge myself, I opted for a more stylised concept featuring multiple characters, as opposed to my typical focus on realistic and gritty environments.
Things I Looked for in a Concept:
I started with around forty concepts, from which I narrowed it down to about twenty, with feedback from my Supervisor, Rodrigo Borges. After that, I selected my ten favourites, and asked my friends and family for their opinions. In the end, I chose Zombie Carrots which was illustrated by Nezzbe. It had everything I was looking for and my supervisor approved it.
Before I started the project, I set up a schedule to make sure I had enough time to make everything up to my standards. I wrote down all of the main pieces of the scene, and a few of the smaller assets. I then created a schedule based on their importance. There was a two-week break in the term, so I made two schedules in case I wanted to work on my project during my break.

At Think Tank, our initial major project involved creating an environment blockout that required precise camera alignment with a given concept. Despite encountering difficulties and dedicating almost a full day to the task, I eventually resorted to using fSpy and exporting the camera from Blender. I subsequently employed this technique in my final project, as it proved to be an efficient time-saving measure that enabled me to prioritise the project's key aspects.
I wanted to make sure the scale of the scene was relative to real-life scale, so I created a cube the size of a shipping container before matching it to the concept.
The rest of the main props were just basic modeling, aside from the chainlink fencing and barbed wires. For the chainlink, I used Blender to model a segment of the chain, then used multiple array modifiers to finish it. For the barbed wires, I also used Blender since I am more familiar with the curve tools. I made curves to match the concept, then added the barbs by hand. Polishing all of the props was very simple, only needing some holding edges or quick bevels.

I very rarely delved into character modeling before this project. At first, I wanted to try and sculpt the characters, but with my limited knowledge of sculpting, I decided to model them using basic shapes, then quad-draw them to form one mesh with decent topology.
Both the rabbits and carrots were first created using only rounded cubes and normal cubes. For the carrots, I knew I wanted to make a jello-like shader later, so I had to make the whole body into one closed mesh. In order to make the rabbits one mesh, I combined each body and used quad-draw to draw loops where they were needed. I then filled in the rest of the mesh as evenly as possible. The topology wasn't the best, but the mesh was usable enough and looked fine in the render view. I did the same thing with the rabbits, but in the end, chose to remake them without making them a closed mesh since they looked better when not connected and they didn't need a refractive shader. After all of that, I moved on to the next step, UVs!
I’ve never fully unwrapped a scene before, as I usually just used auto seams or smart UV project for most of my scenes then moved on to PBR materials. The texel density of the whole scene isn’t very clean to prioritise some of the models with text or images on them.
From my basic knowledge of UVs and the assignments at Think Tank, everything was pretty simple to cut and unwrap. I used about 40 UDIM tiles during the layout, separating every single model into one UDIM.
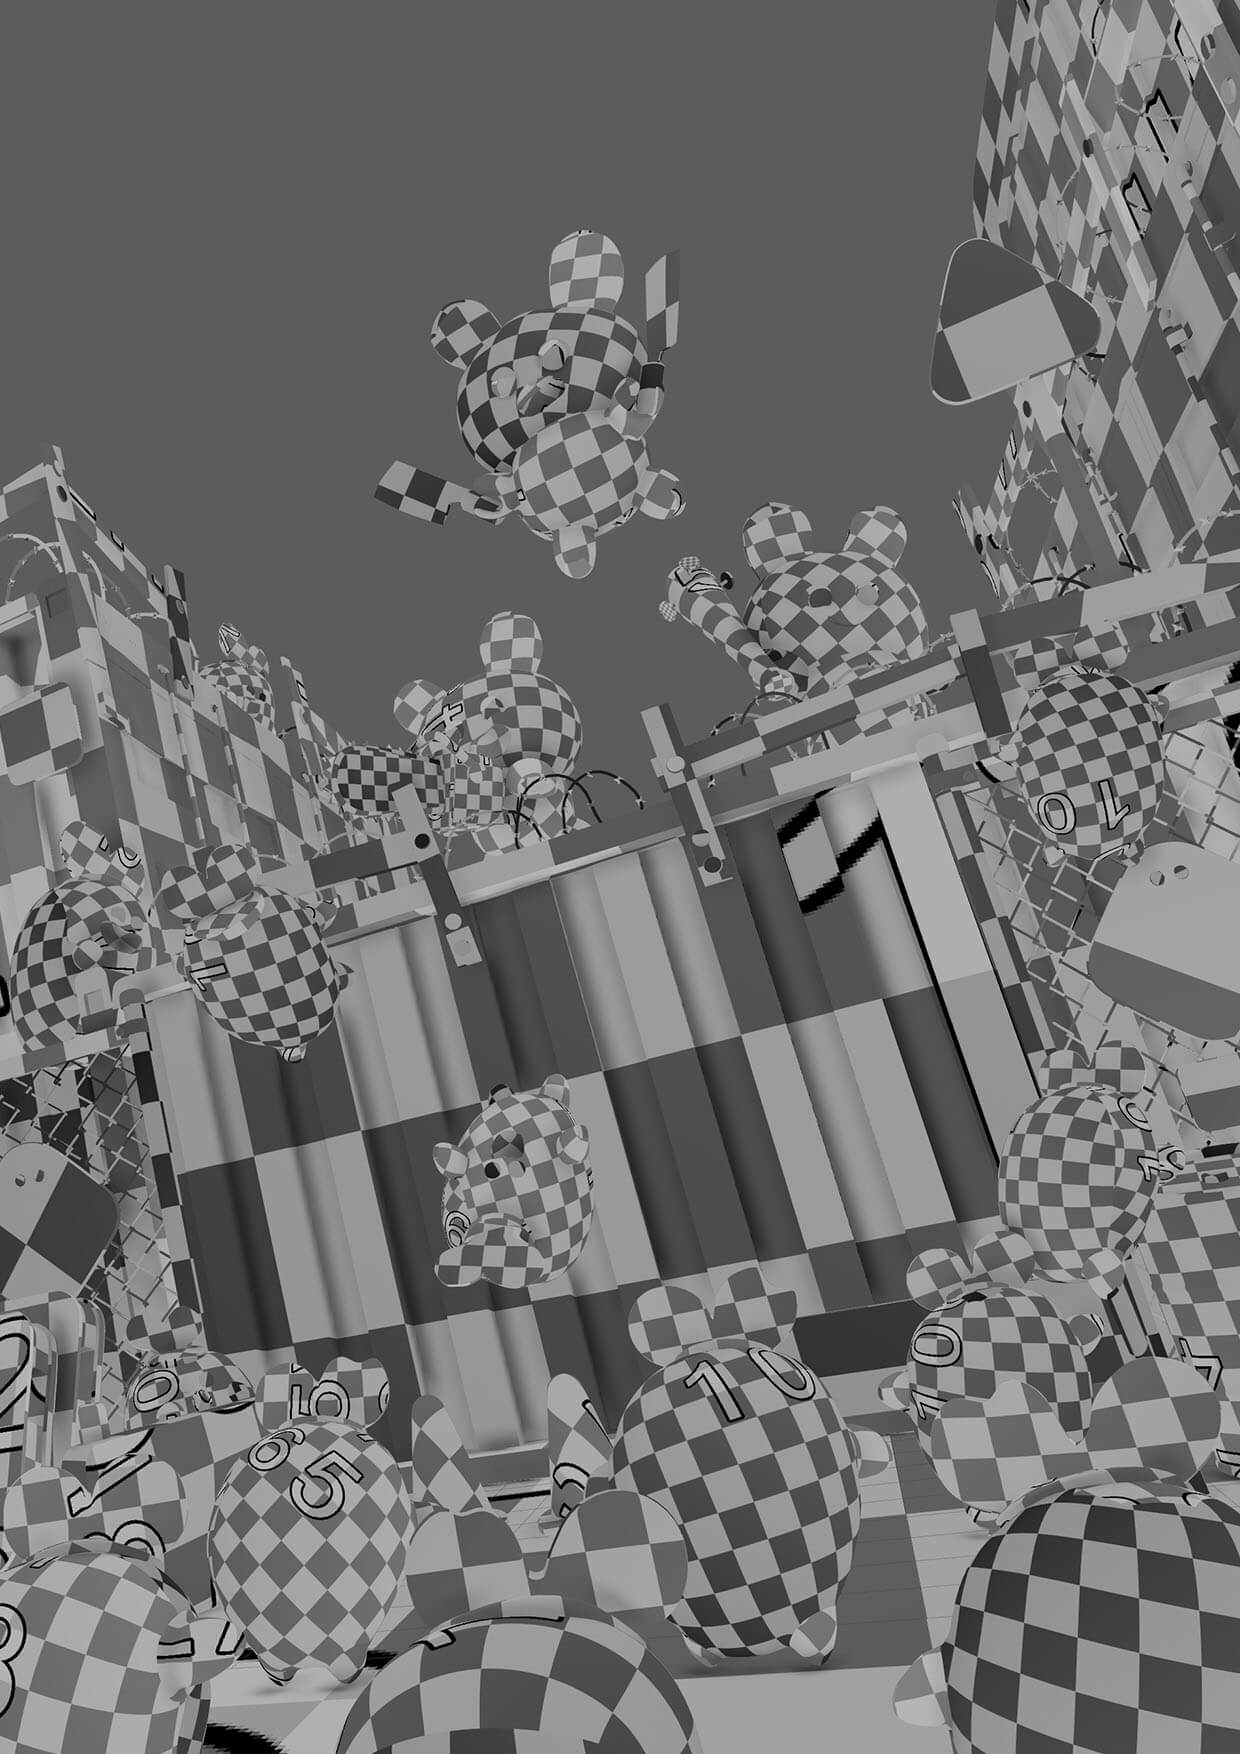
For ID maps, I didn’t want to draw on the models using vertex colours since drawing isn’t my strong suit. Instead, I modeled all of the text and symbols on the models to match the concept as close as possible and then filled them with vertex colours to create the ID maps.
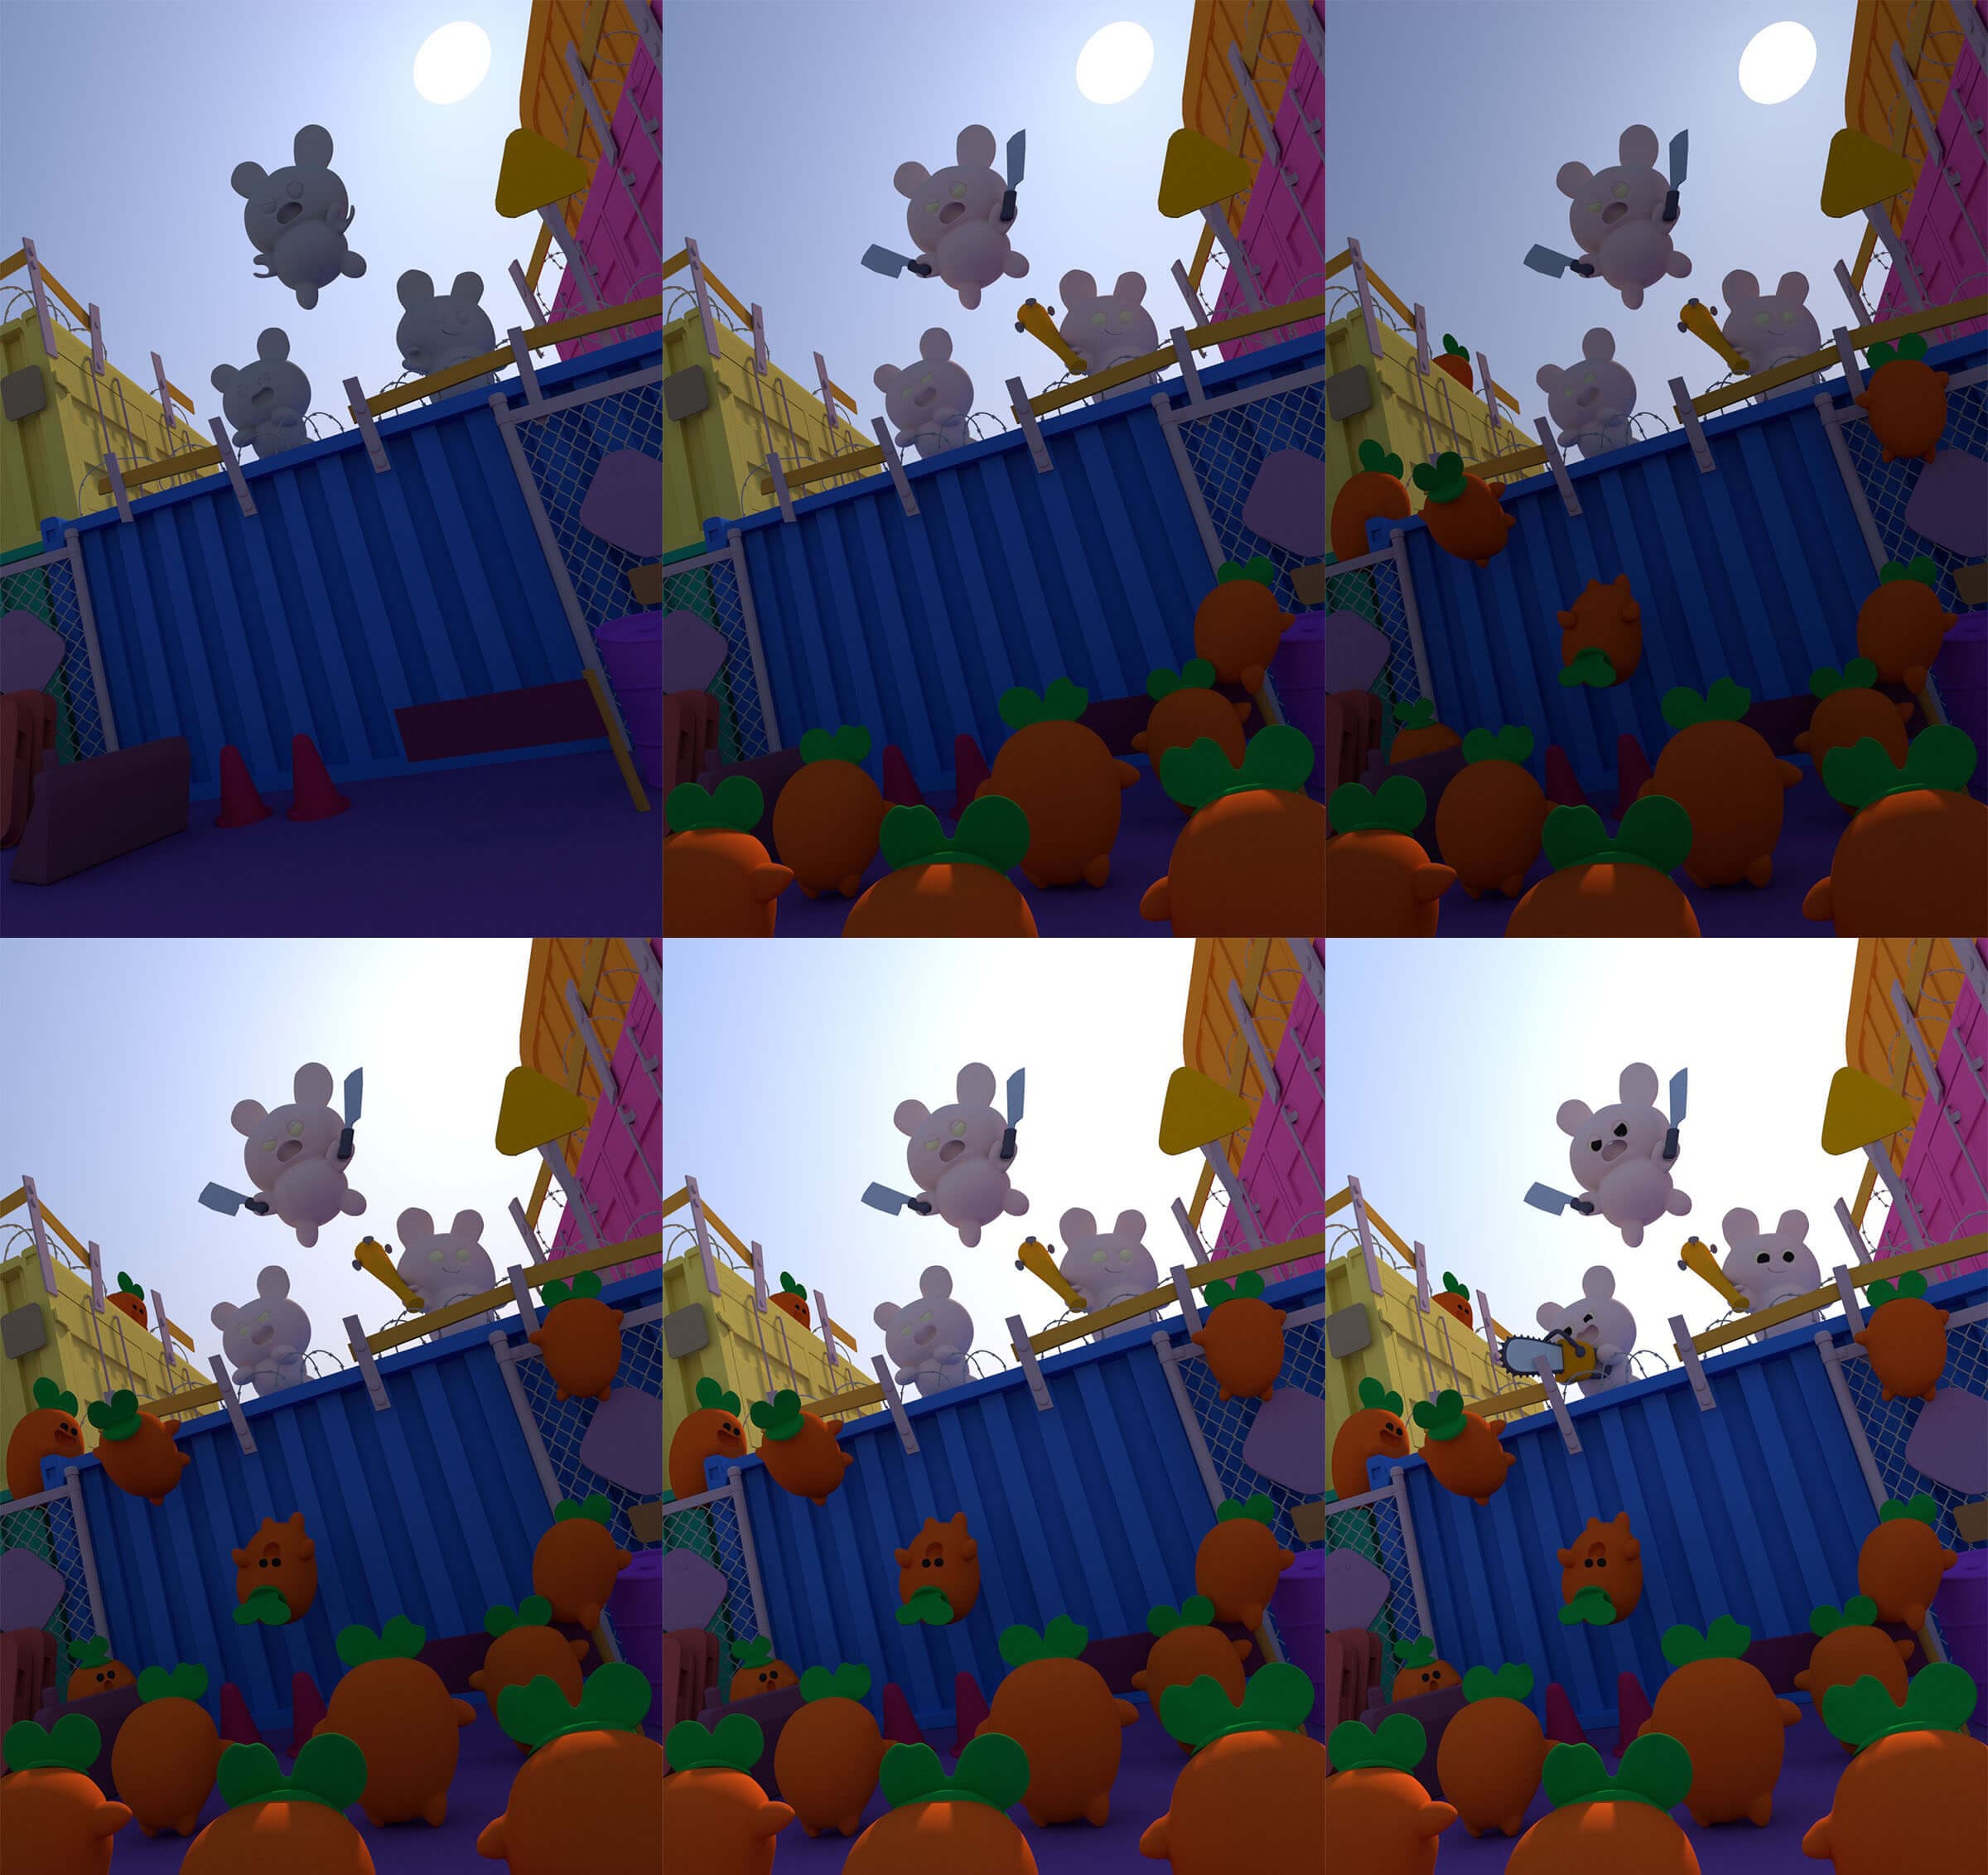
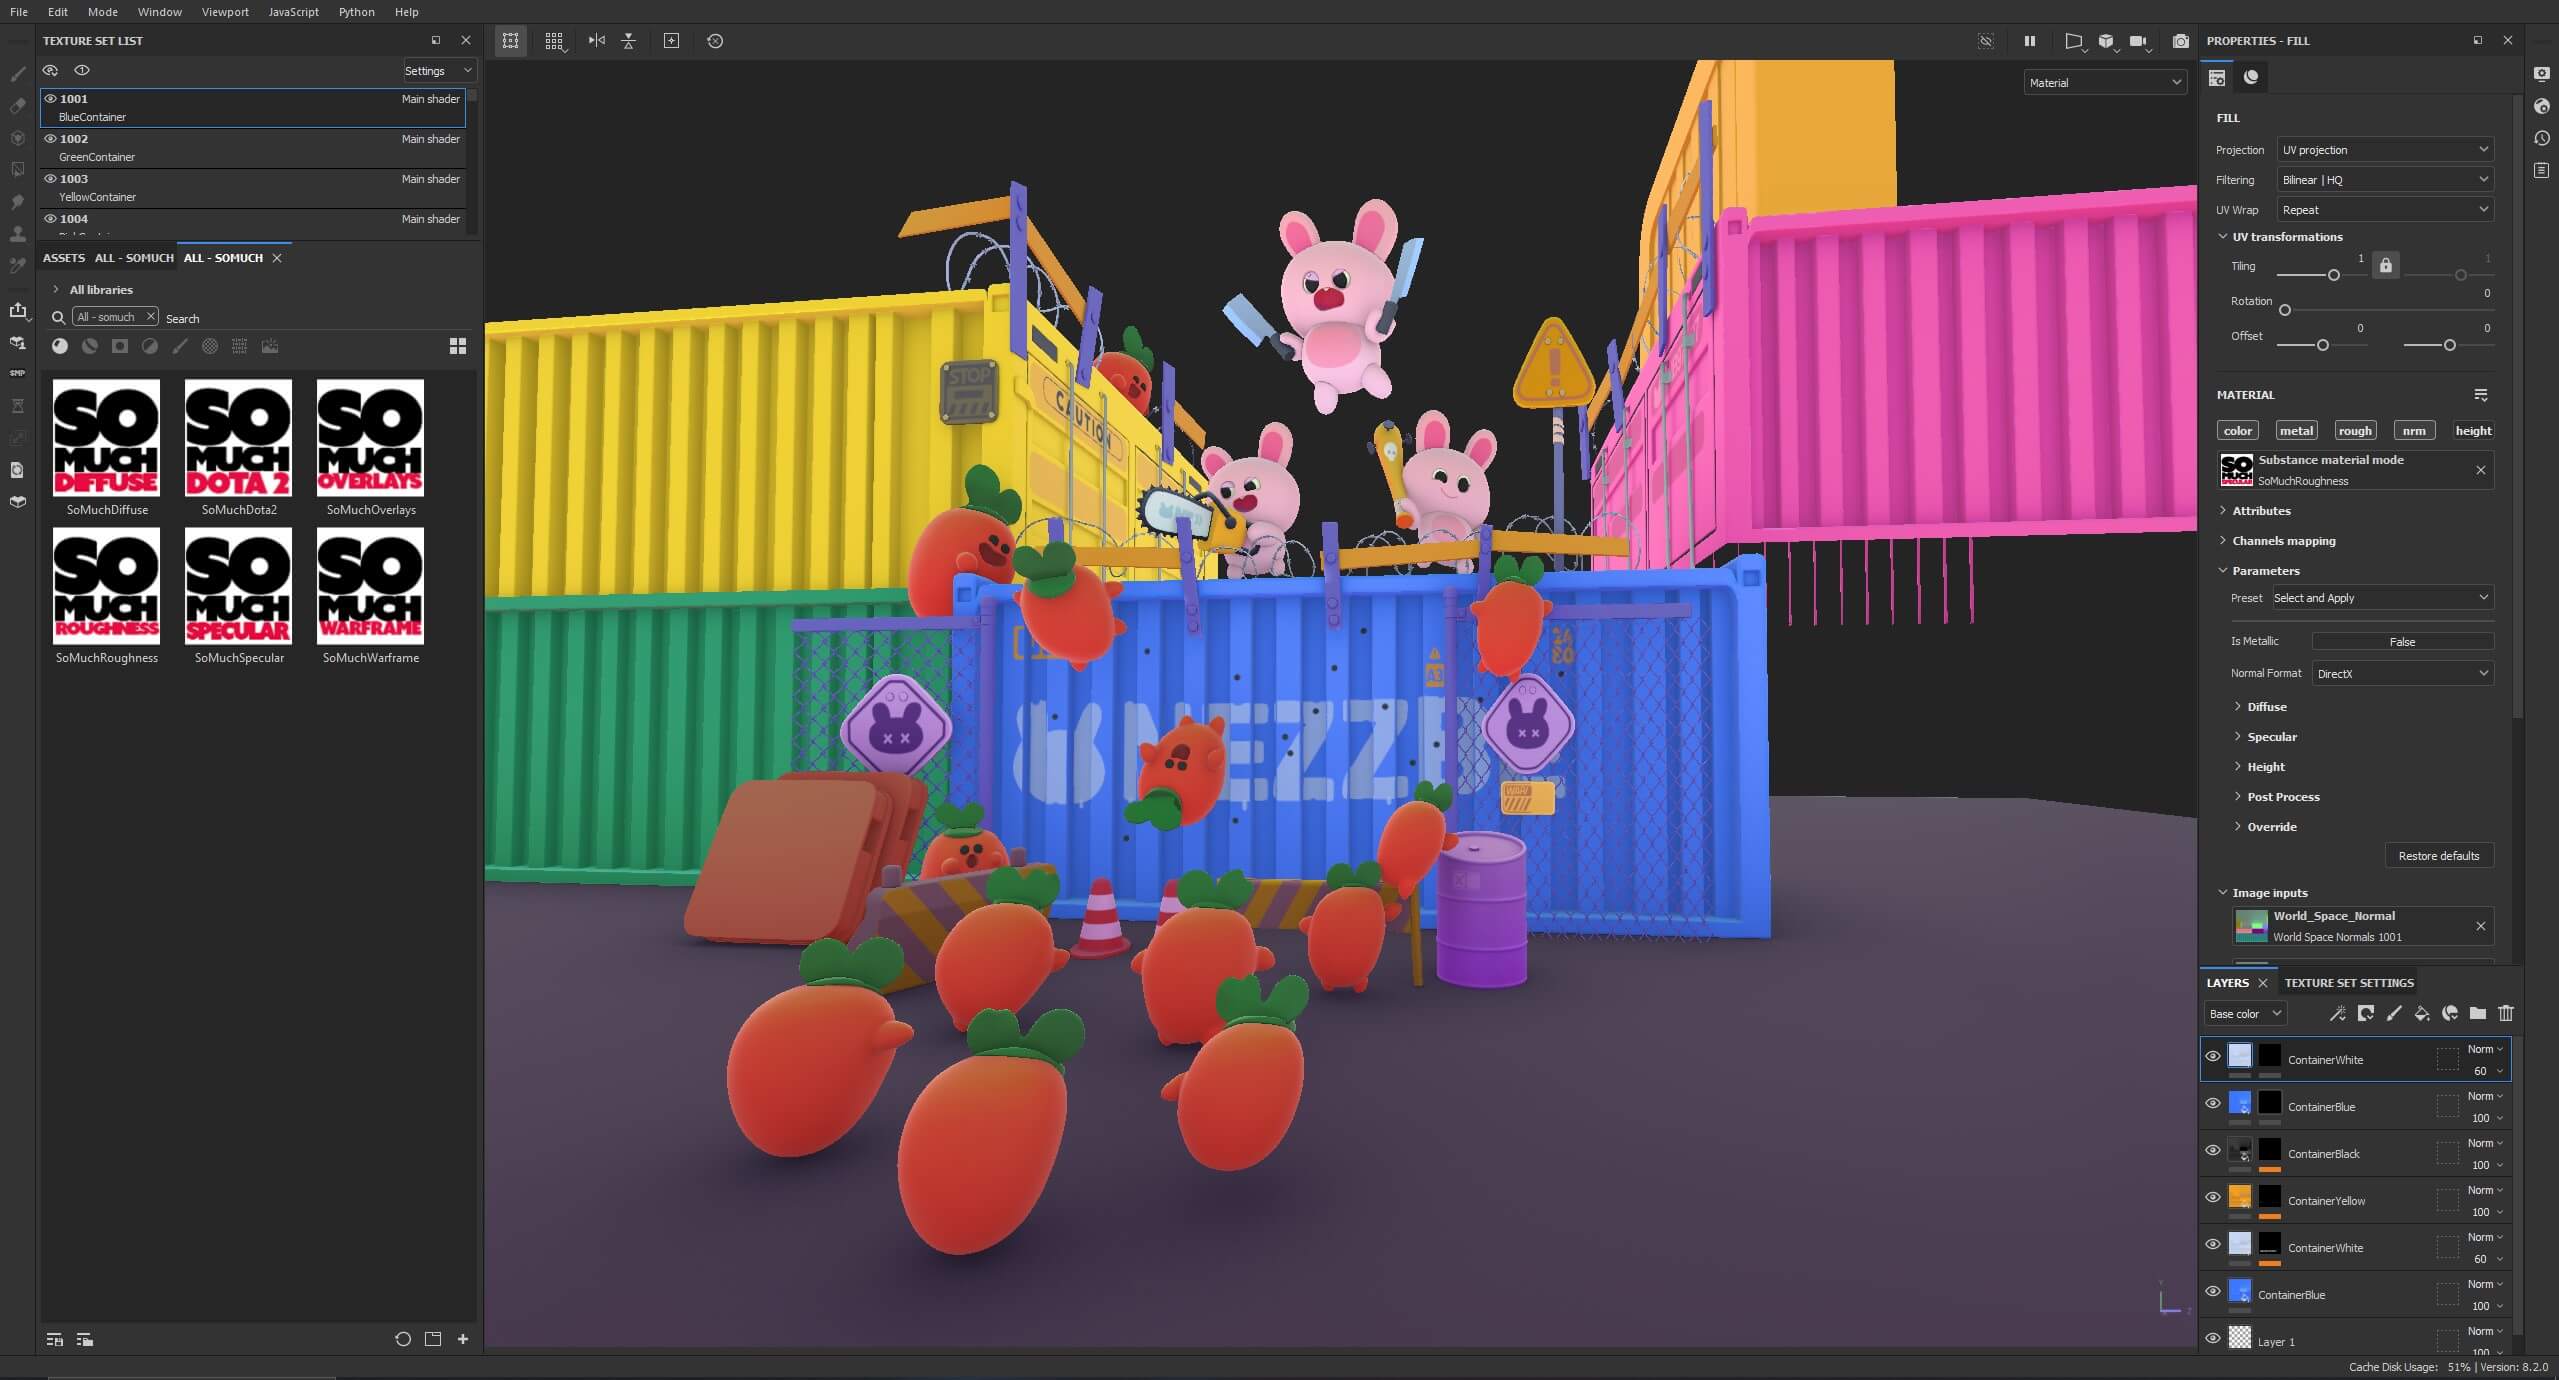
After exporting to Substance 3D Painter, I baked all of the maps I needed. I wanted to speed up the texturing, so I used SoMuchMaterials, which is a stylized material generator. All I had to do was make sure the colours and gradients all matched the concept. I started with some things being metallic, but in the end, chose to make nothing have metalness to keep the stylized look of the concept. I kept going back and forth to Maya to see how the colours looked in the render until I was satisfied enough with the look to go onto lookdev and lighting.
I’ve always used Blender for any lighting and lookdev, so using V-Ray was very different from Cycles. One thing I found super handy was light linking, where you can pair certain lights with certain items. This was super useful in getting the right stylized lighting I was looking for.
I lit each character one by one to get the lighting of the concept as perfect as possible. For the sky, I made a gradient in Photoshop and matched the colours and placement of everything.
For the main scene light, I used a V-Ray sunlight and some area lights to point at the rabbits. After lighting, I started to put all my textures from Substance 3D together using Maya’s Substance plugin. I didn’t have to do much with the majority of the shaders, but for the carrots, I wanted to make them a refractive, jello-like material. I made a refractive material with volumetrics, then added a point light in each of the carrots to give an almost glowy, gradienting effect to them. After that, I was ready to move on to rendering.
The render settings were the default, besides changing progressive to bucket and changing the subdivs in the light cache to 250. I also added a bunch of render elements just to mess around with them later. The main render elements I used for post were: object IDs, diffuse, reflection, refraction, reflection gloss, and refraction gloss.
The majority of the post-processing was simply isolating models and tweaking the colours until they matched the concept. I also added some camera dust and smudges since I noticed those details in the concept.
Check out more of Brian's entry and Rookies portfolio here, and on Instagram.