Workflow for Real-Time Character Rendering: Creating a 3D Likeness
In this article, we will explore the approach taken by Siew Jia Huey, a 3D artist and recent graduate of The One Academy, in creating an accurate 3D likeness of American rapper Tyler, The Creator.
Character art is one of the most fascinating areas of art. The ability to create lifelike figures that can be placed in any setting is a skill that takes years of practice to perfect. Creating a character that looks like a famous person, in particular, is an impressive feat that requires attention to detail and a great deal of skill.
In this article, we will take a look at how 3D Artist artist and recent graduate of The One Academy, Siew Jia Huey, approached a recent 3D likeness of American Rapper, Tyler, The Creator. Whether you're a seasoned artist or just starting, this article will provide some valuable insights into how to approach your next character likeness project.
Hello there! I am honoured to be invited by The Rookies to share my approach and workflow of my latest character likeness project. In this article I will explain my approach to pushing details while maintaining the polycount and optimising for real-time rendering and hope that it’ll be helpful for other artists approaching their work and wanting to learn something new.
In this article I will be focusing on the four main steps in my workflow:
Sculpting with a non destructive workflow;
Texturing with variety in mind;
The importance of look development;
Detailing/Lighting while keeping on a budget!
It is important to have a clear vision and establish quality benchmarks before embarking on any project. Personally, I have a fondness for creating characters, creatures, and sculpting various elements related to characters.
A sketch sculpt from a while back
For this project I wanted to see how much detail I could push for a character project while also learning and implementing some new workflows that I had wanted to try for a while.
Reference is King
For any project regardless of complexity or style, it is always important to gather and find references that will help you. I use PureRef to compile my references because it is straightforward and simple to use and better yet, you can drag and drop most of your references with full uncompressed quality while also keeping it organised.
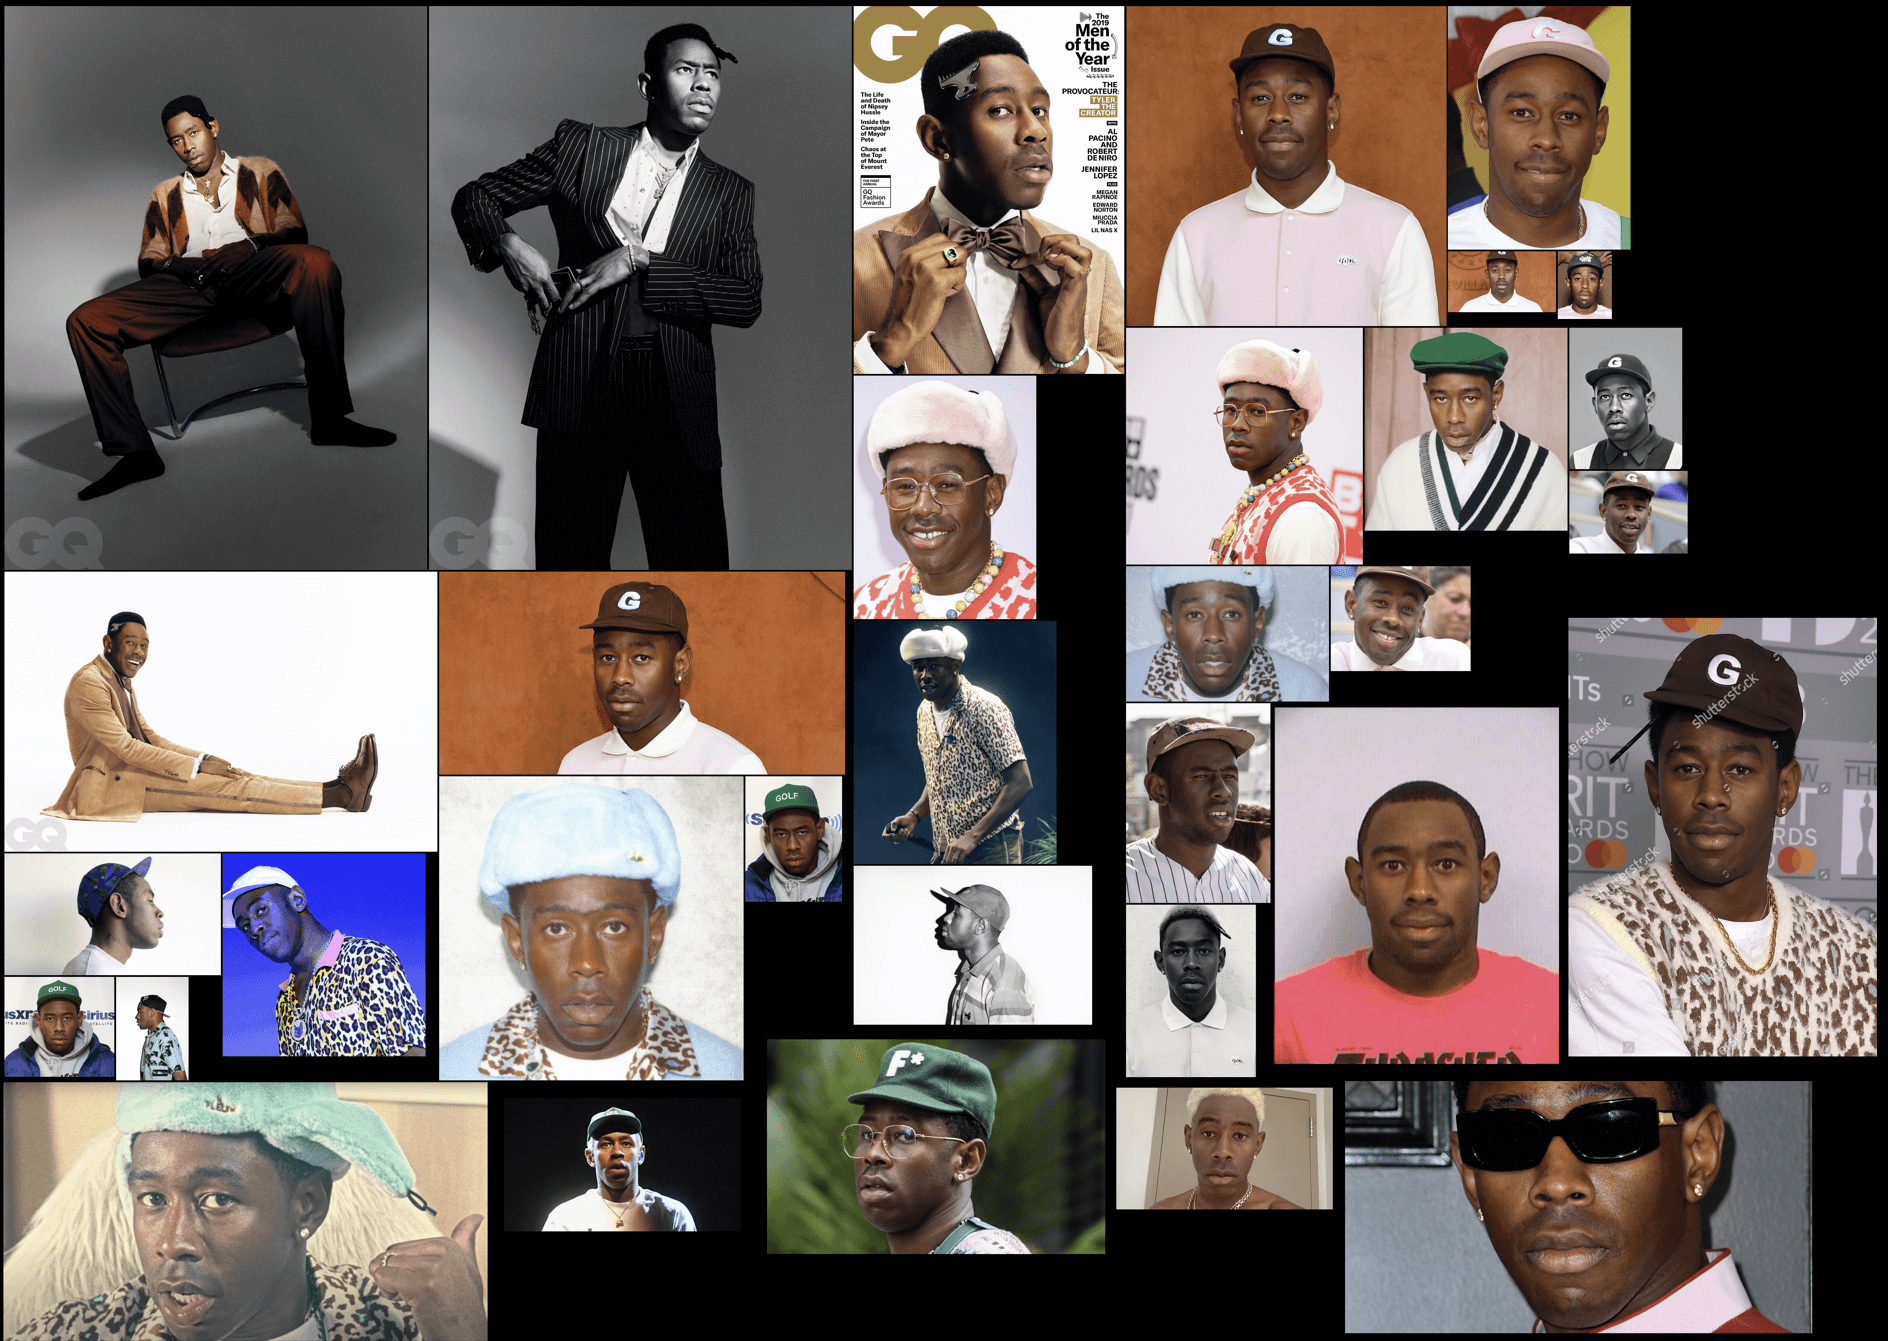
I decided to reference the rapper/musician Tyler, The Creator as my main subject and proceeded to gather references for it.
References gathered
Although finding references for Tyler was not difficult, it was challenging to gather references and determine the quality standard I aimed to achieve for my character sculpt. These references served as a benchmark to emulate the quality achieved by others in the field, rather than competing with them. In particular, I looked to artists such as Liam Grice from Supermassive Games and Brad Myers from ProbablyMonsters for in-game/real-time character quality and Ian Spriggs for CG character quality. I find them to be a great source of inspiration and their approach to projects has influenced me greatly. Be sure to check them out!
Sculpt! Sculpt! Sculpt!
When first getting started on any sculpt, I usually plan ahead on what I want to do with the character before I even get started. For this project, my approach was the same but with a twist. I've learned and heard a lot about character artists using texturingxyz to detail the skin of their characters and I decided to give it a try as well, but before all that I had to establish a base to sculpt on.
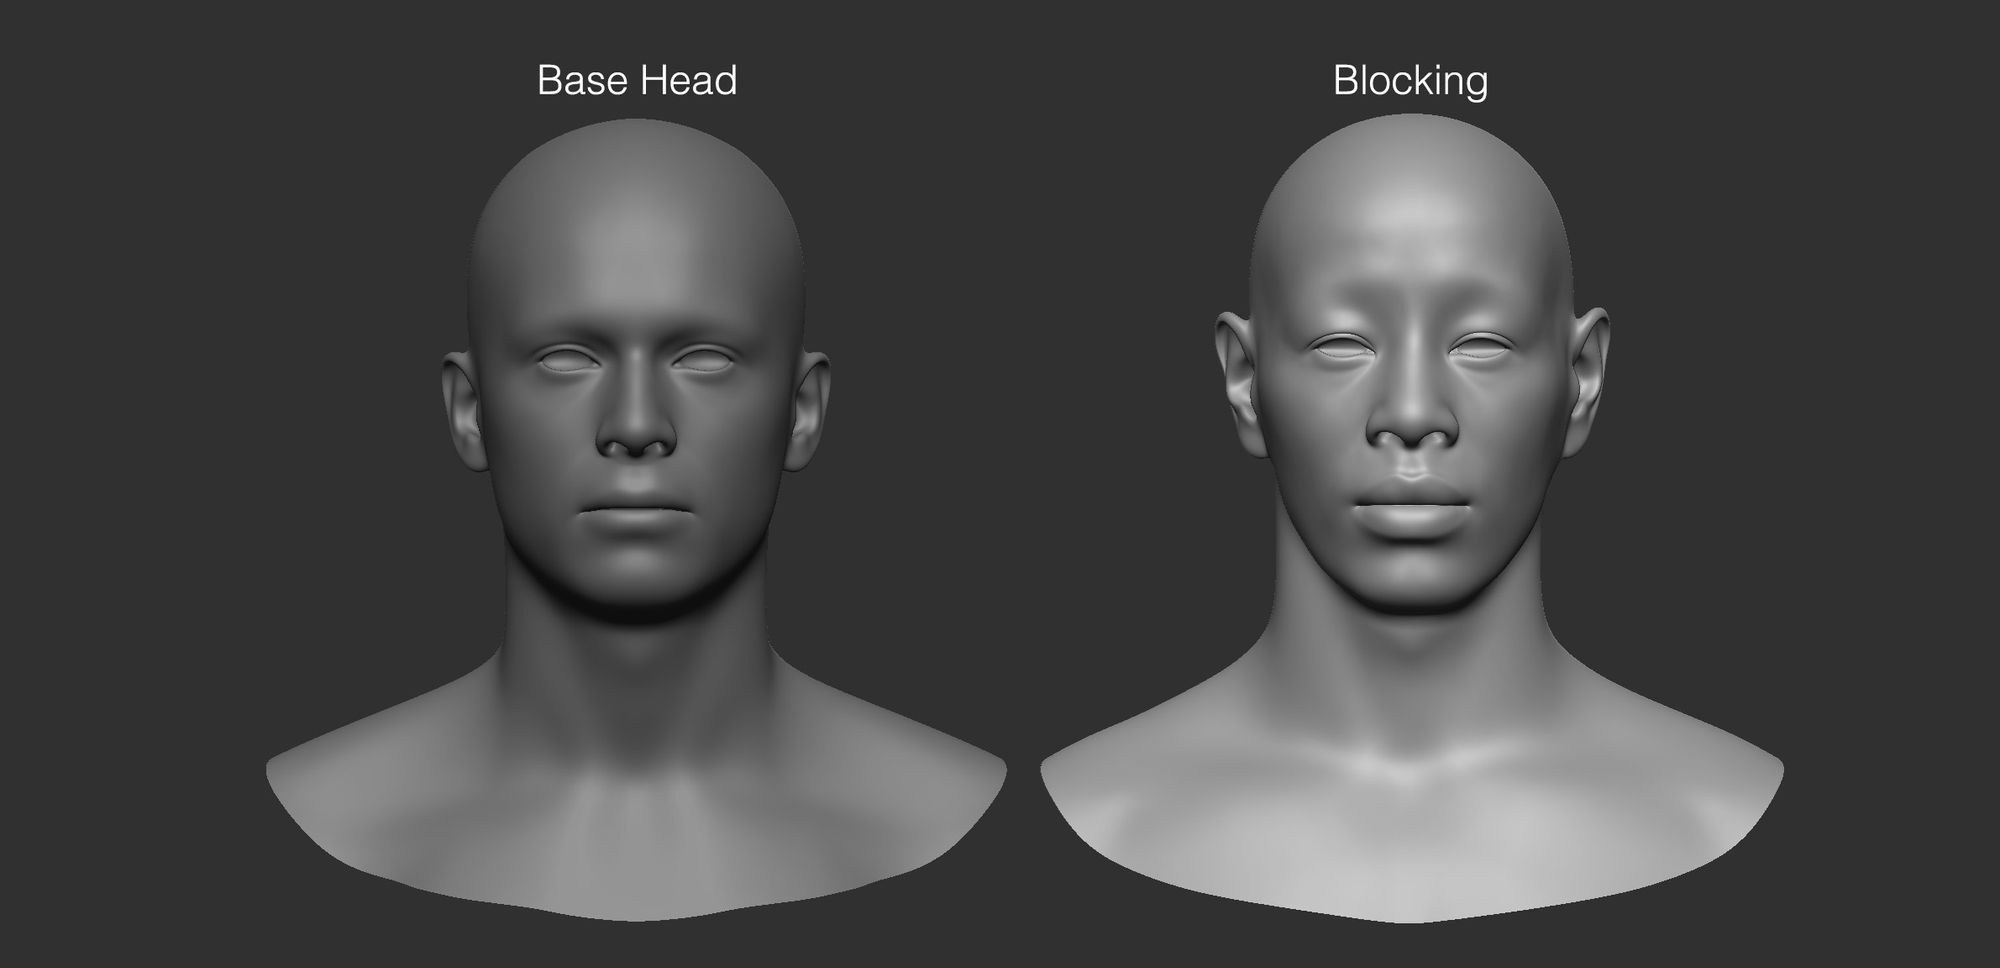
Blocking
I decided to use a simple male head as my base and from there I started to do the blocking by adjusting different proportions, sculpting in shapes if necessary and getting the base look and forms as a starting point.
What I would do is never start sculpting with very high poly as you’ll start to focus on details instead of forms. It is important to start low and slowly work your way up if you’re feeling like the polycount is limiting your sculpt.
Since the base head I was working with was a generic head, it was quite a bit of a challenge to get the form of Tyler in one go, so I came back to do several passes of blocking to get the baseline.
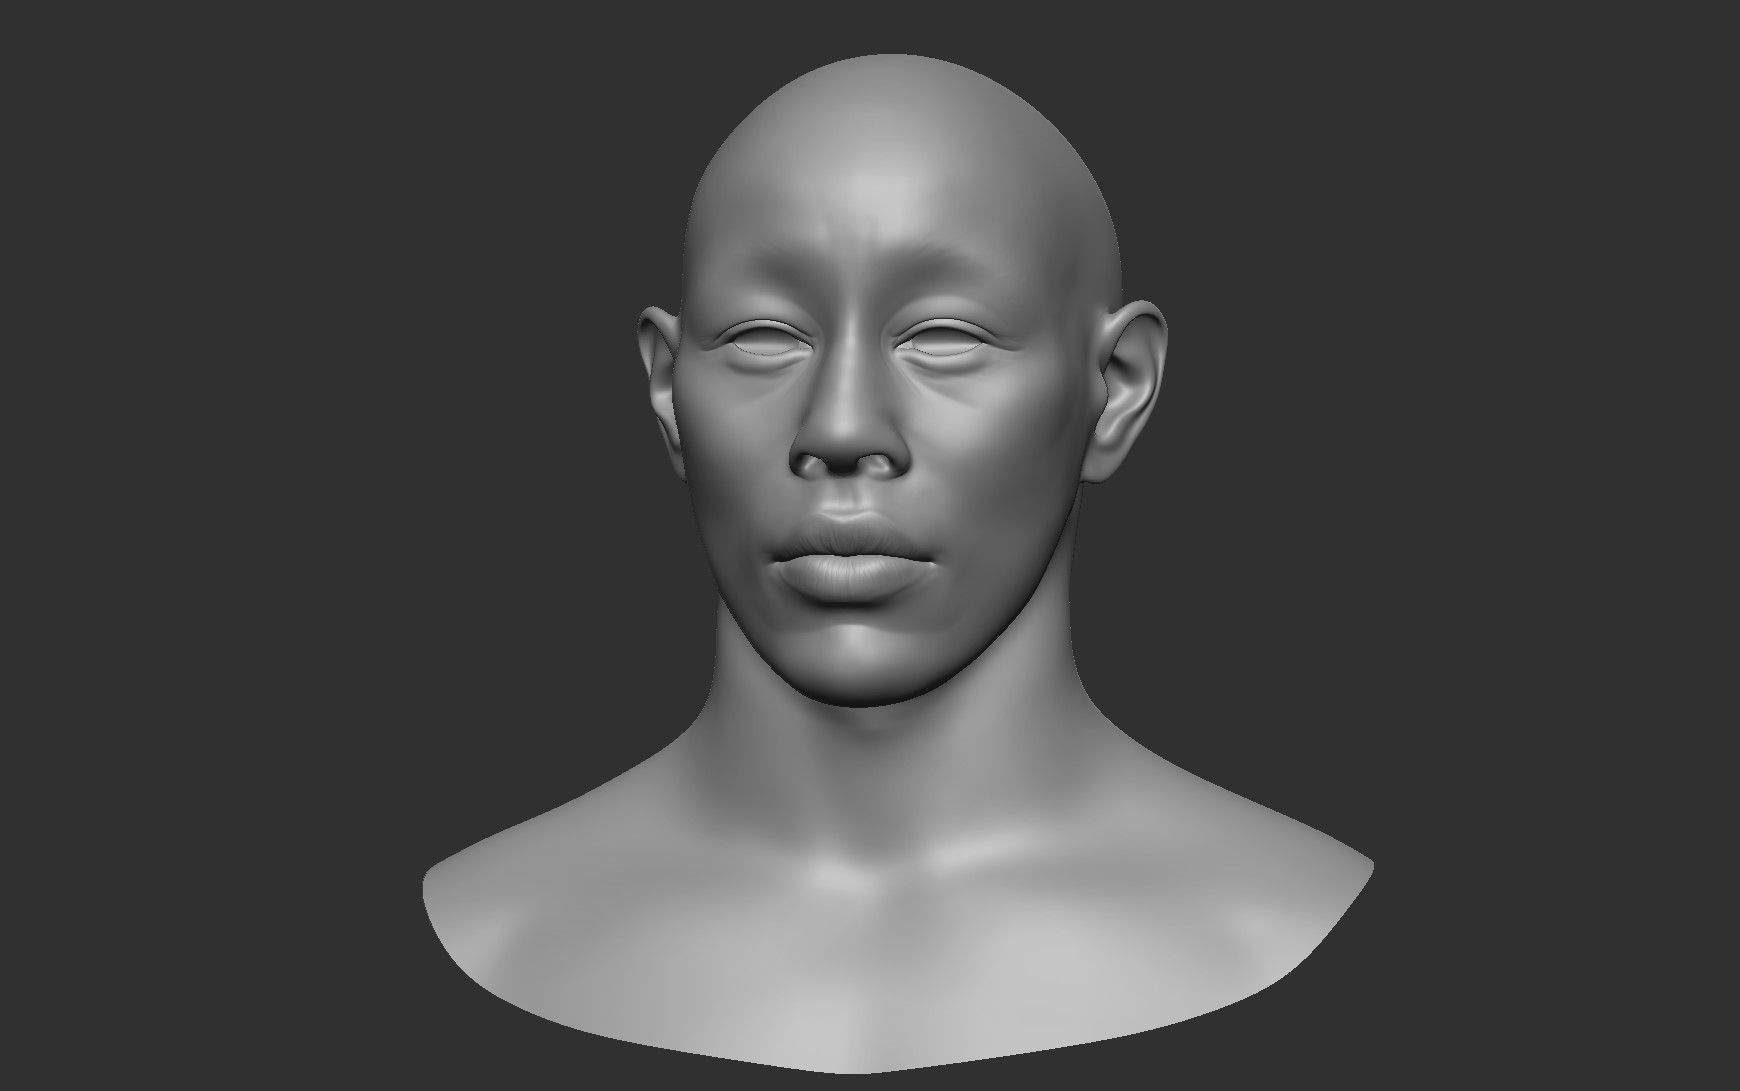
Tip: When sculpting a head of a character, try to get the landmarks correct first before proceeding to more minor forms. Things like the eyes and nose are what we will focus on first for a character, and getting those right is essential to making it look correct and not in the uncanny valley.
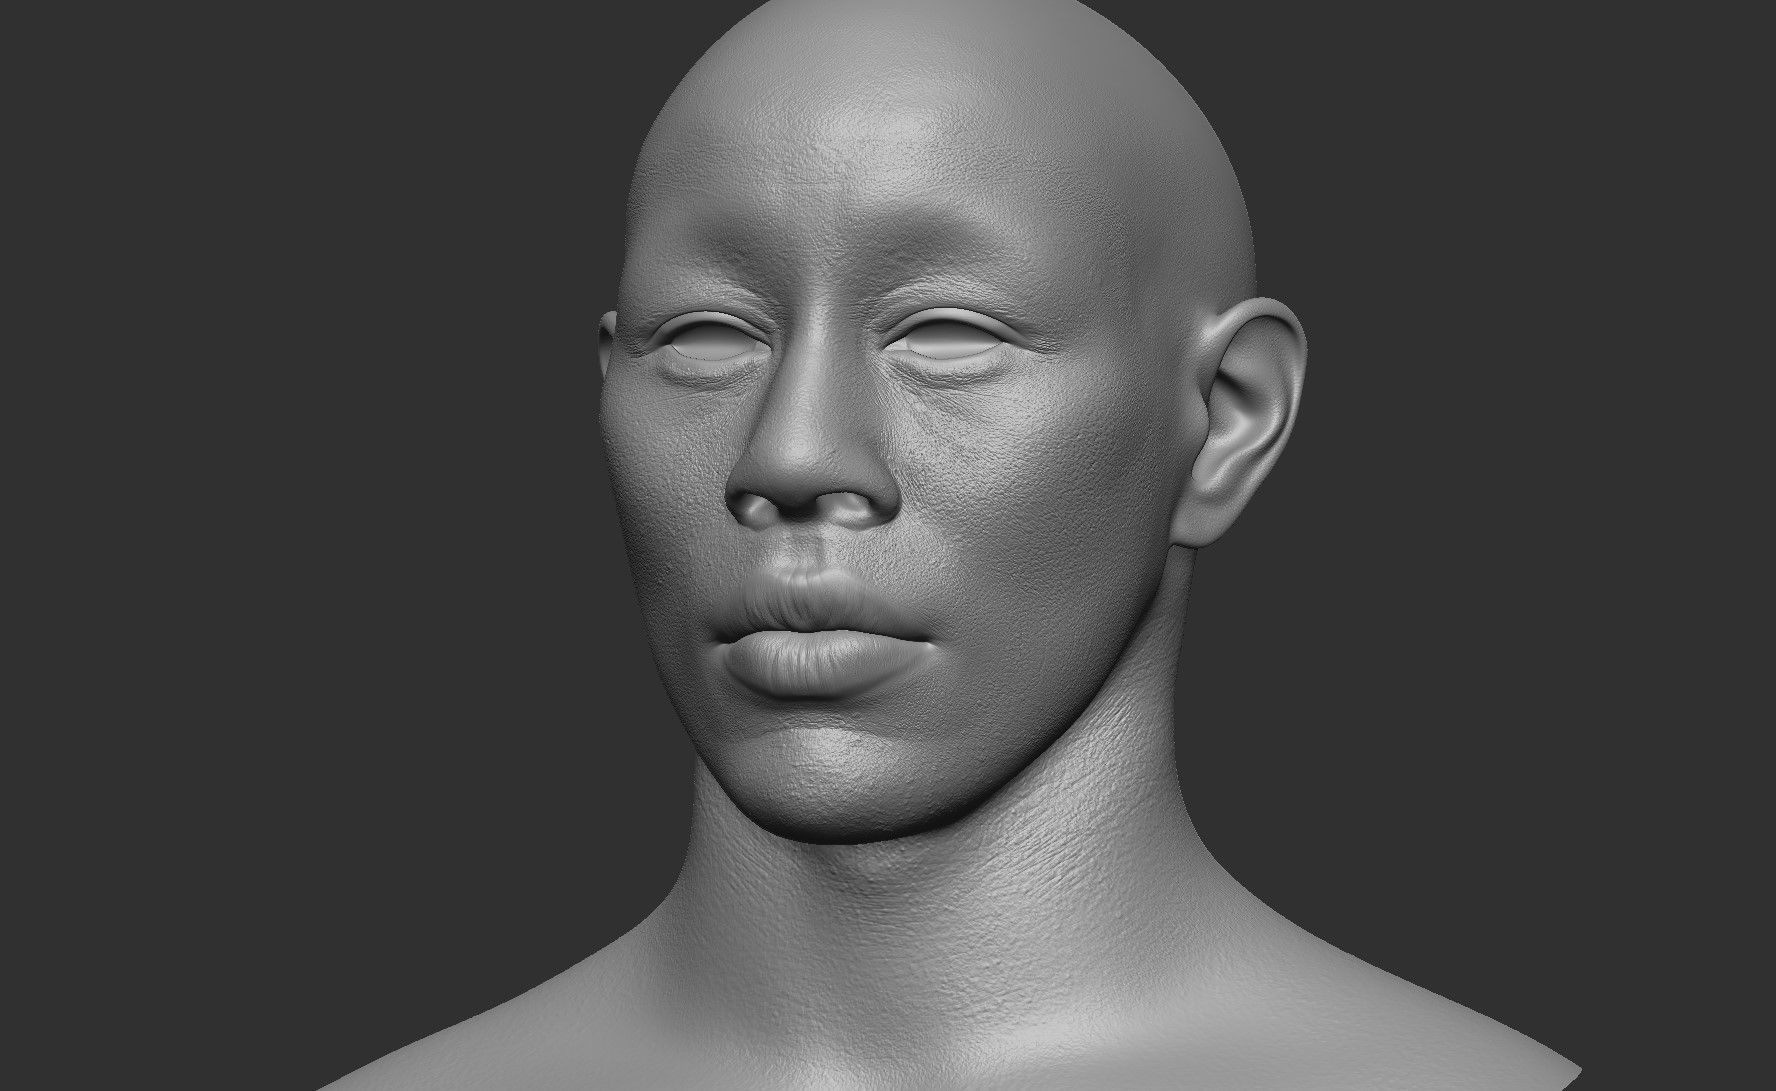
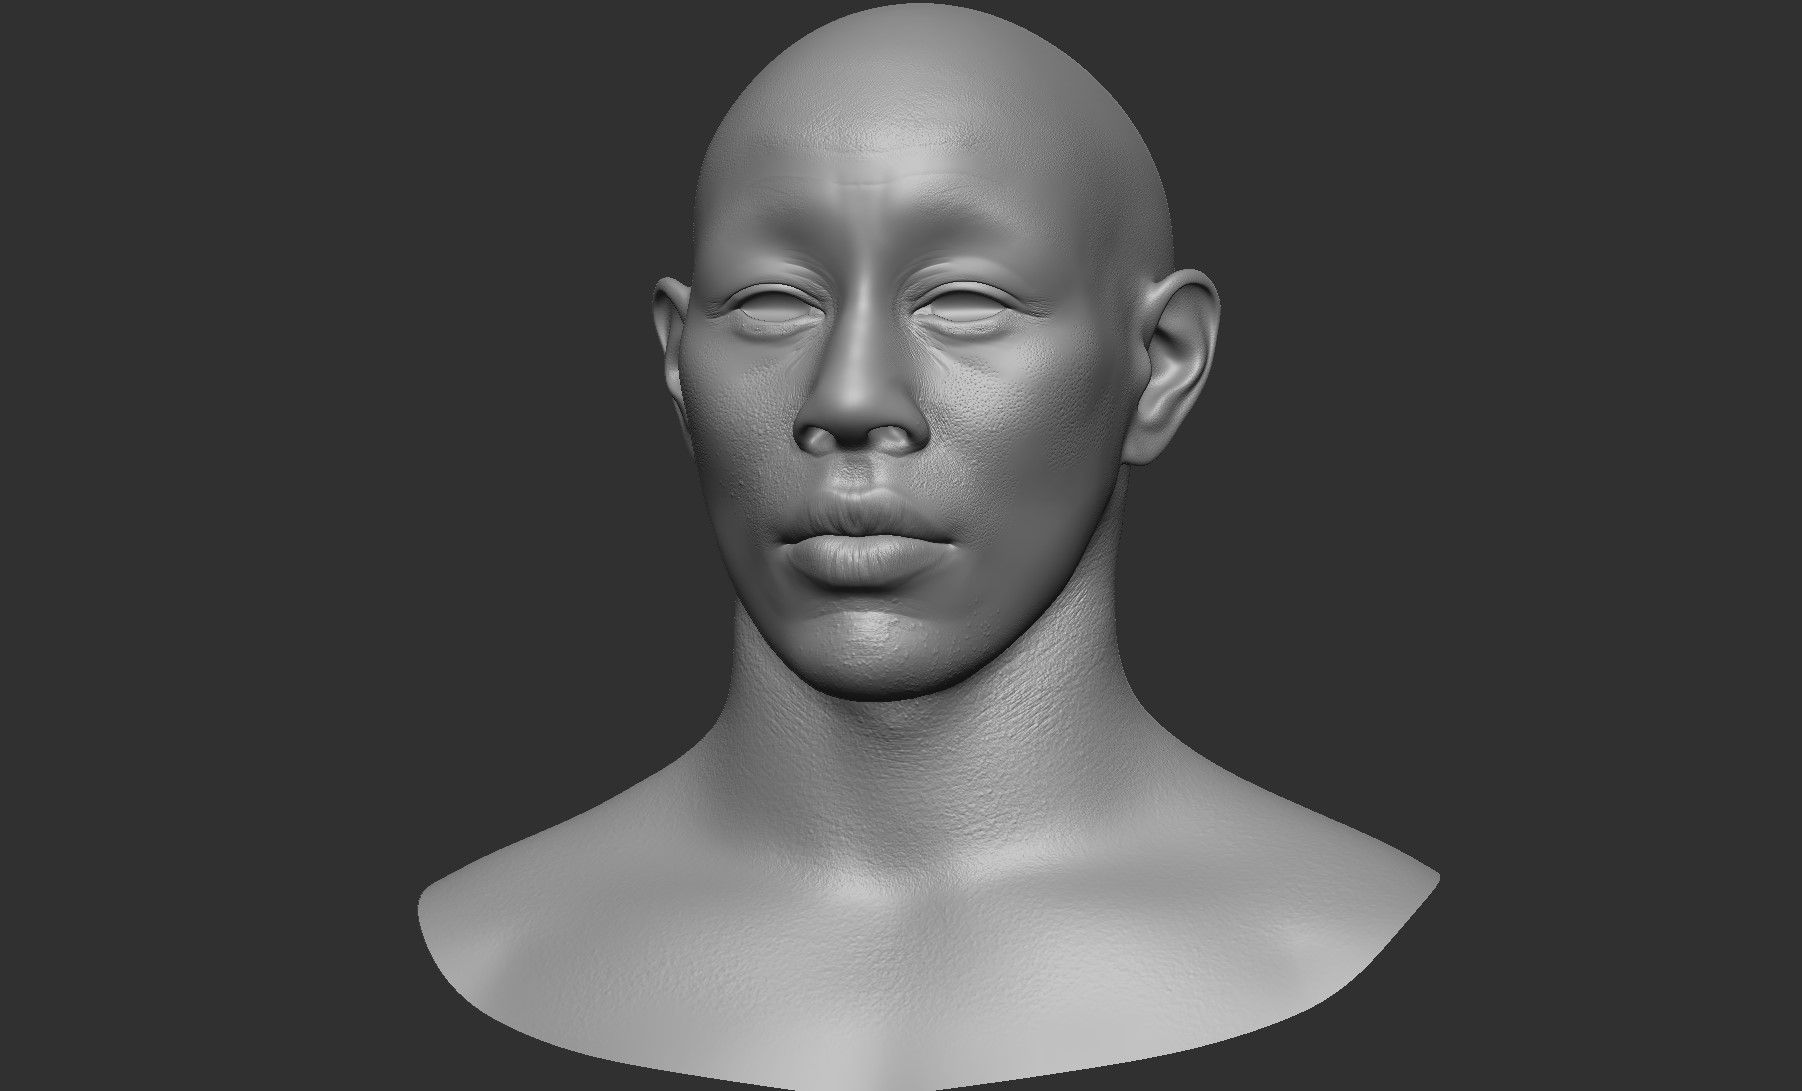
After getting the base down it was time to refine more on the forms and proportions based on the references before moving on to my favourite part, Detailing!
Details in ZBrush
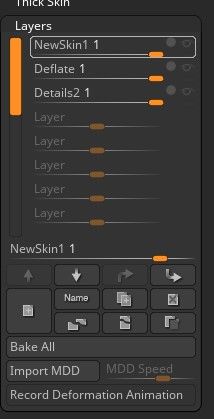
When it comes to adding details in ZBrush, it can be tempting to sculpt everything at once and call it a day. However, this approach can be a mistake, as different projects and characters may require many iterations. Instead, try to use ZBrush's layer system. This system allows for non-destructive changes, testing out different ideas, and refining the look of the character. It is an essential tool for achieving the desired level of detail while maintaining flexibility throughout the sculpting process.
This can be found at the right side toolbar in ZBrush by default
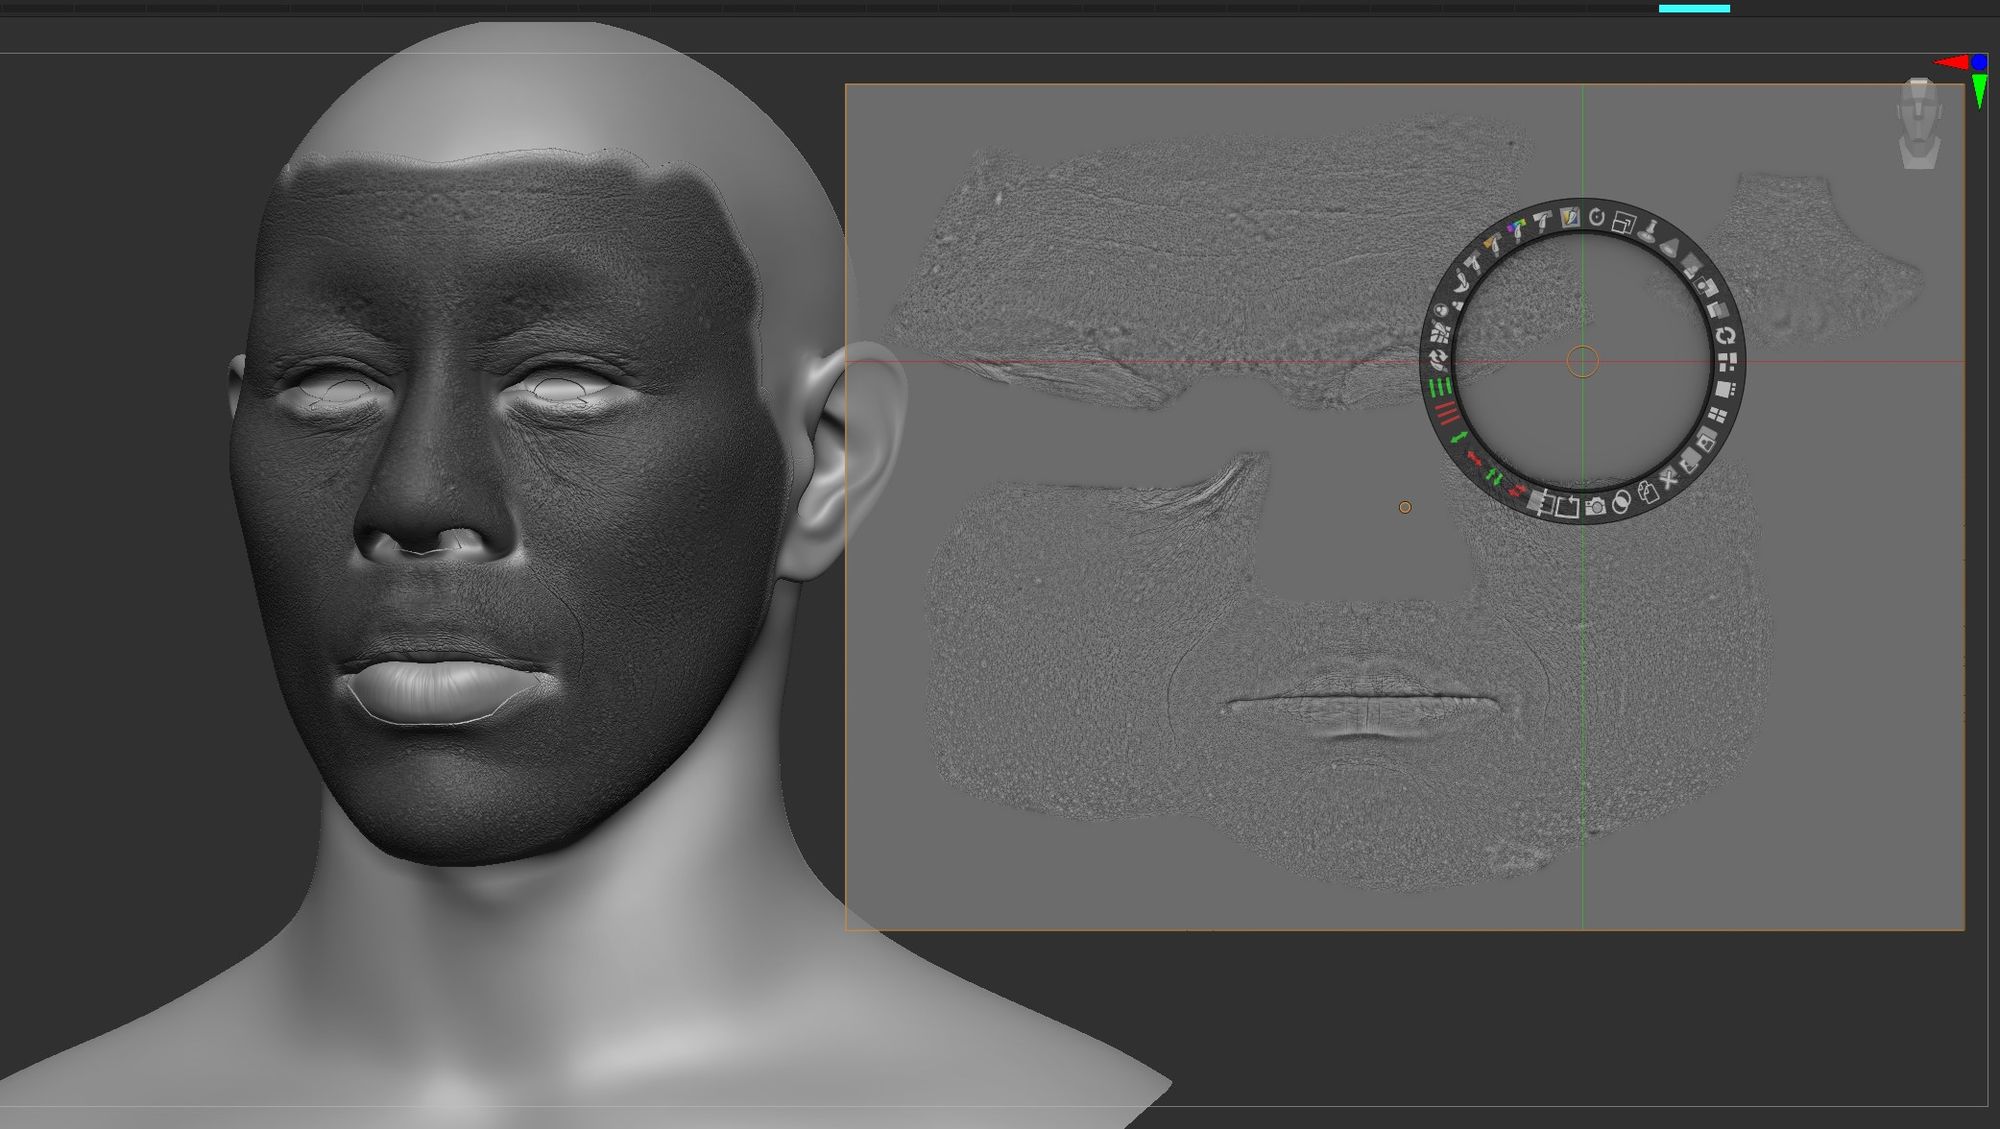
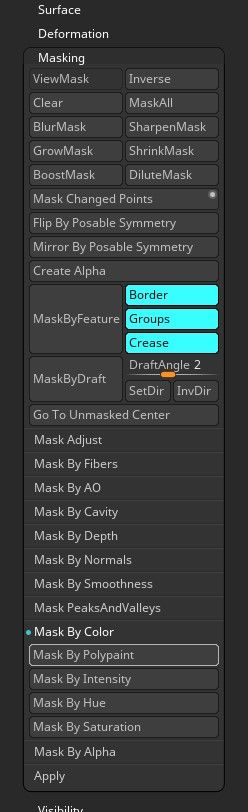
After importing the texturingxyz skin displacement with some modifications, I saved a morph target of the mesh and used the spotlight tool to project the map onto my sculpt and using the masking options I masked out the polypaint and proceeded to inflate it to get the projected displacement onto the first layer of my mesh.
Tip: Always have a backup of your mesh or save a morph target before doing any major changes so that you can revert back to the original form later down the line.
Doing this also caused the issue of odd inflated lines on the projection and this is where using morph target and having layers really helps; I was able to add on a layer that is just for deflating while also being able to revert back if anything went wrong or the result was not what I expected.
Using layers to blend/fix details and parts
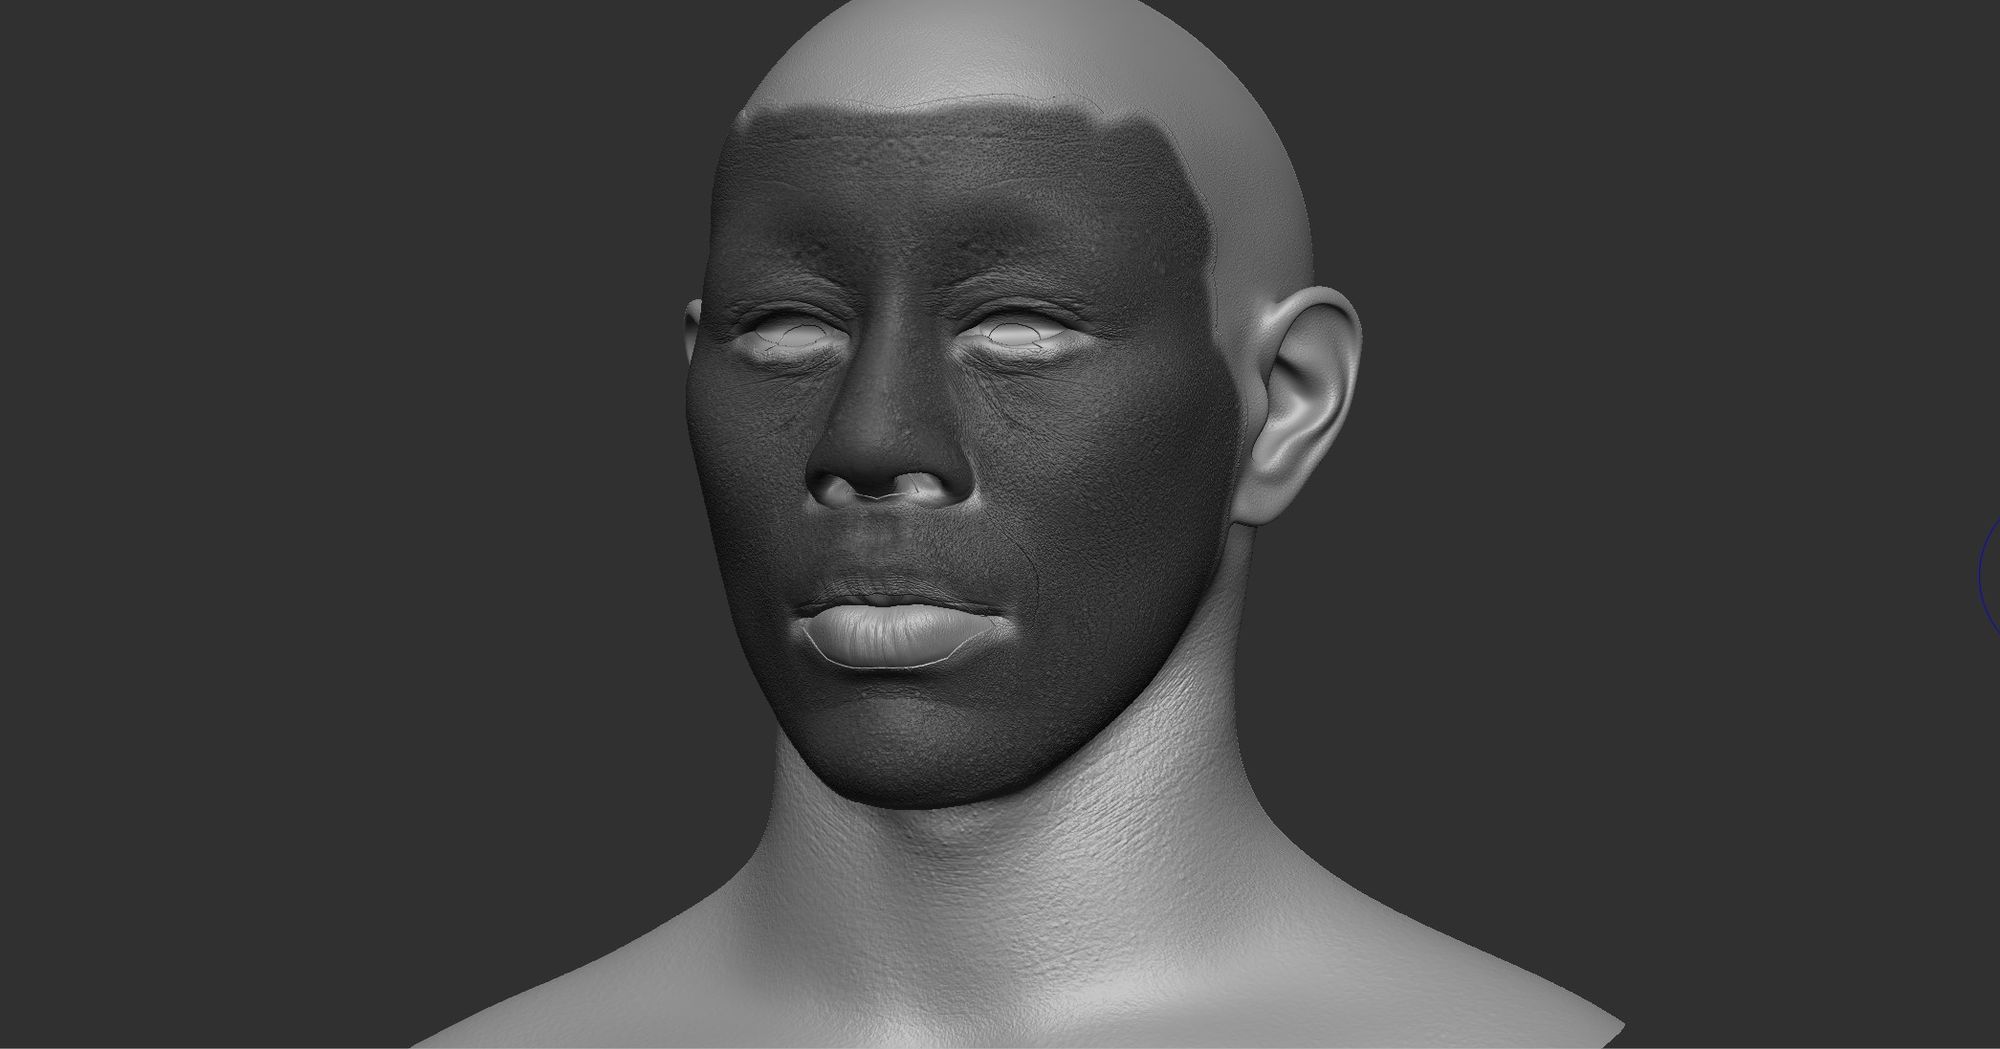
While texturingxyz maps are great for getting quick details, it’s also not perfect, which is why getting another layer of details needed some more manual sculpting to get it feeling natural.
A solo view of the layer of details that is fixed and adjusted in combination with the texturingxyz map.
Rig Heist
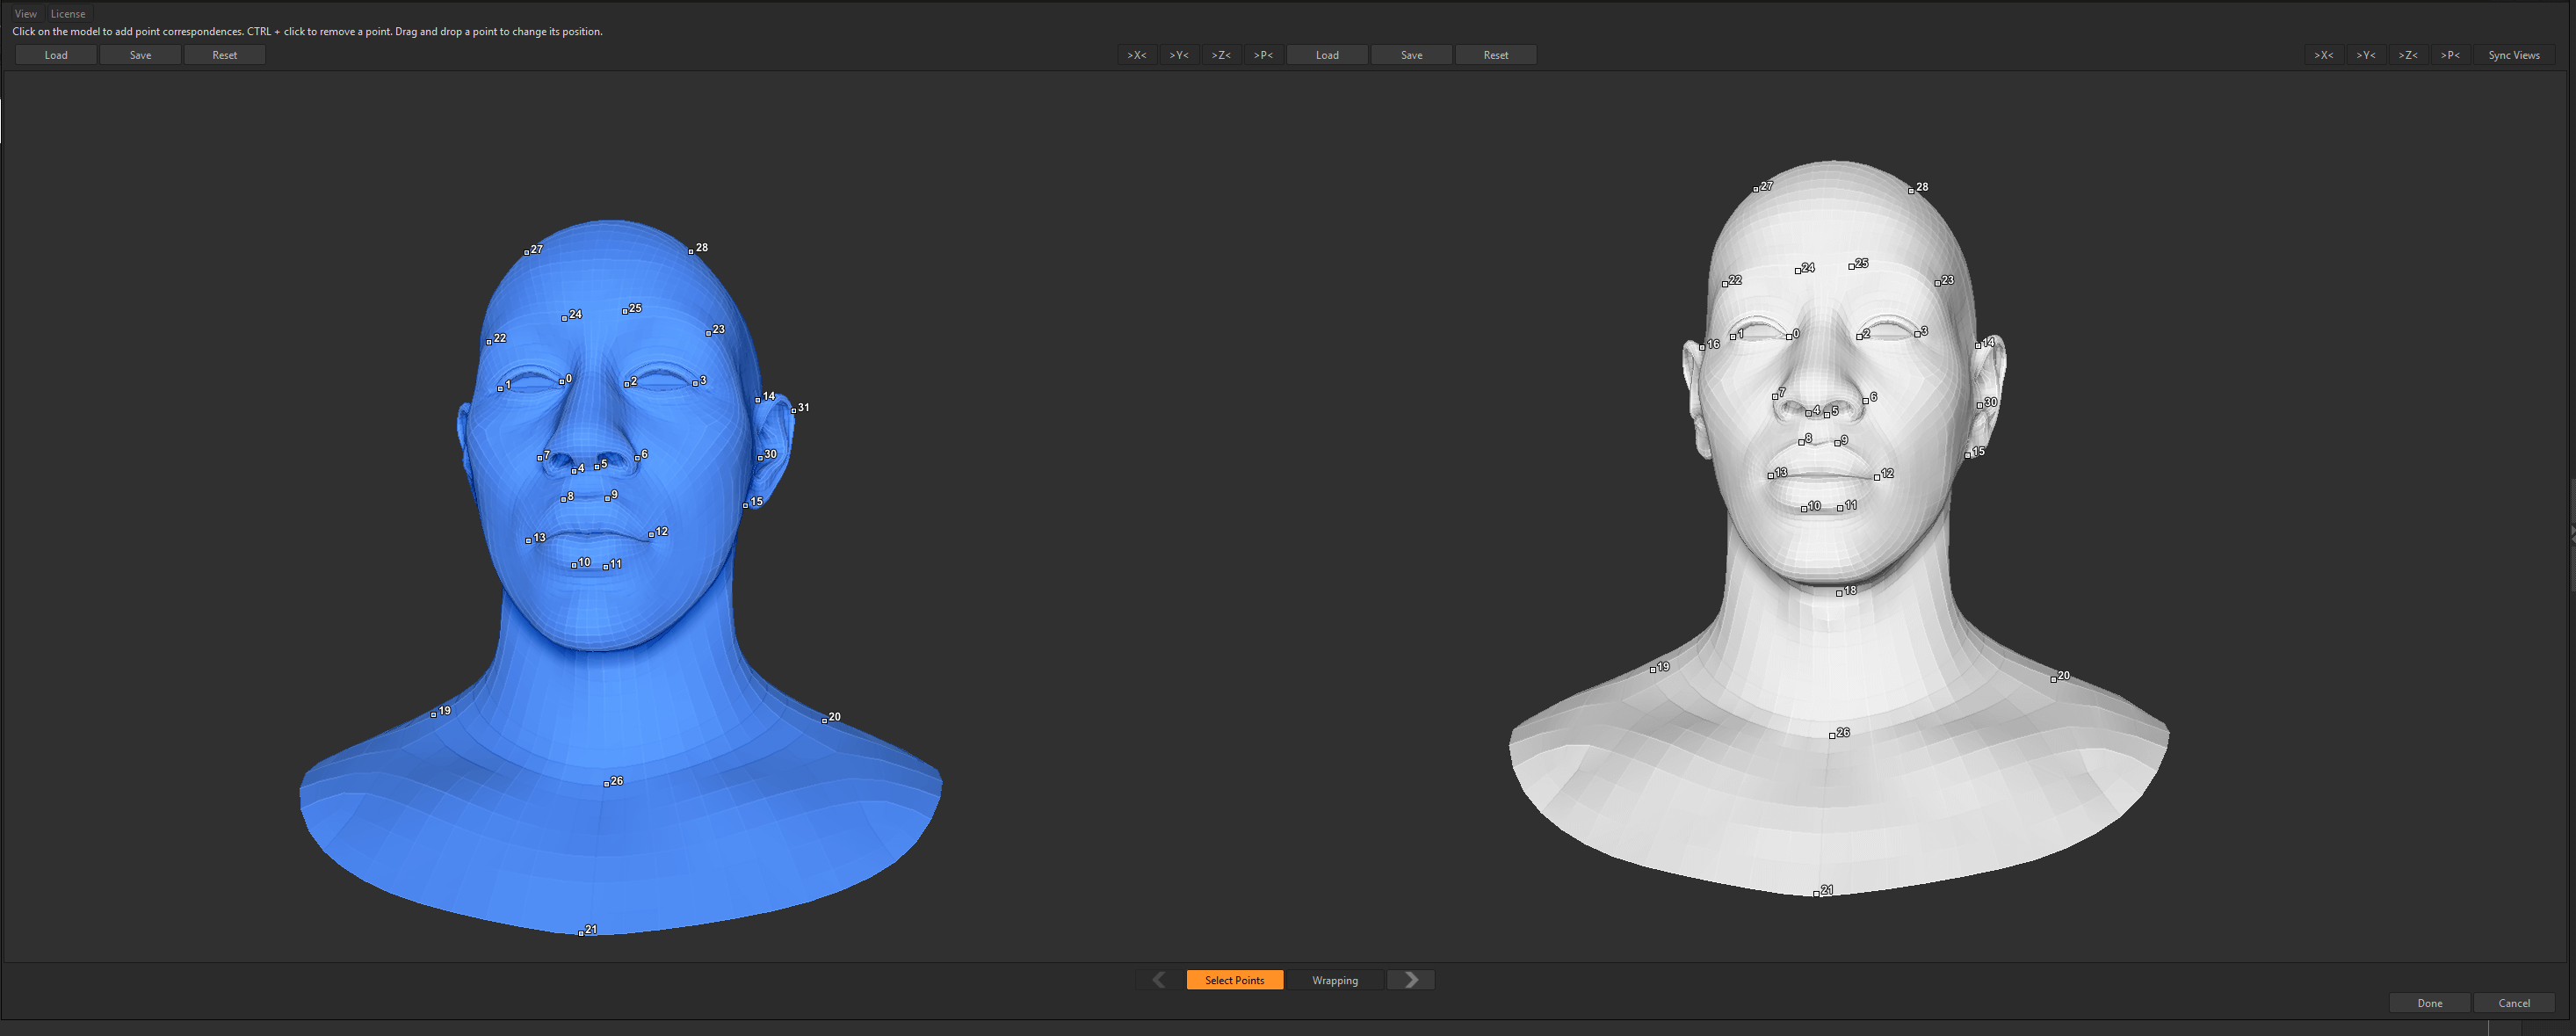
Now for most projects like this, I usually would use Transpose master to pose the character. And while it works, I wanted to try something different this time by hijacking a MetaHuman rig and also understand more about the game development mesh transfer workflows as well. So, I downloaded a normal MetaHuman rig and exported the head to wrap it to my existing sculpt.
Previously, I used R3DSWrap, but now there is a plugin to work directly in ZBrush while also saving the hassle of swapping different softwares to do the wrapping.
Screenshot of the wrapping process with the plugin in ZBrush
Tip: This is where learning the different landmarks of the face is important to getting a consistent wrap. Also, don’t use too many points for the wrapping as it might get confused and messy if there are too many points. Keep it simple and manageable!
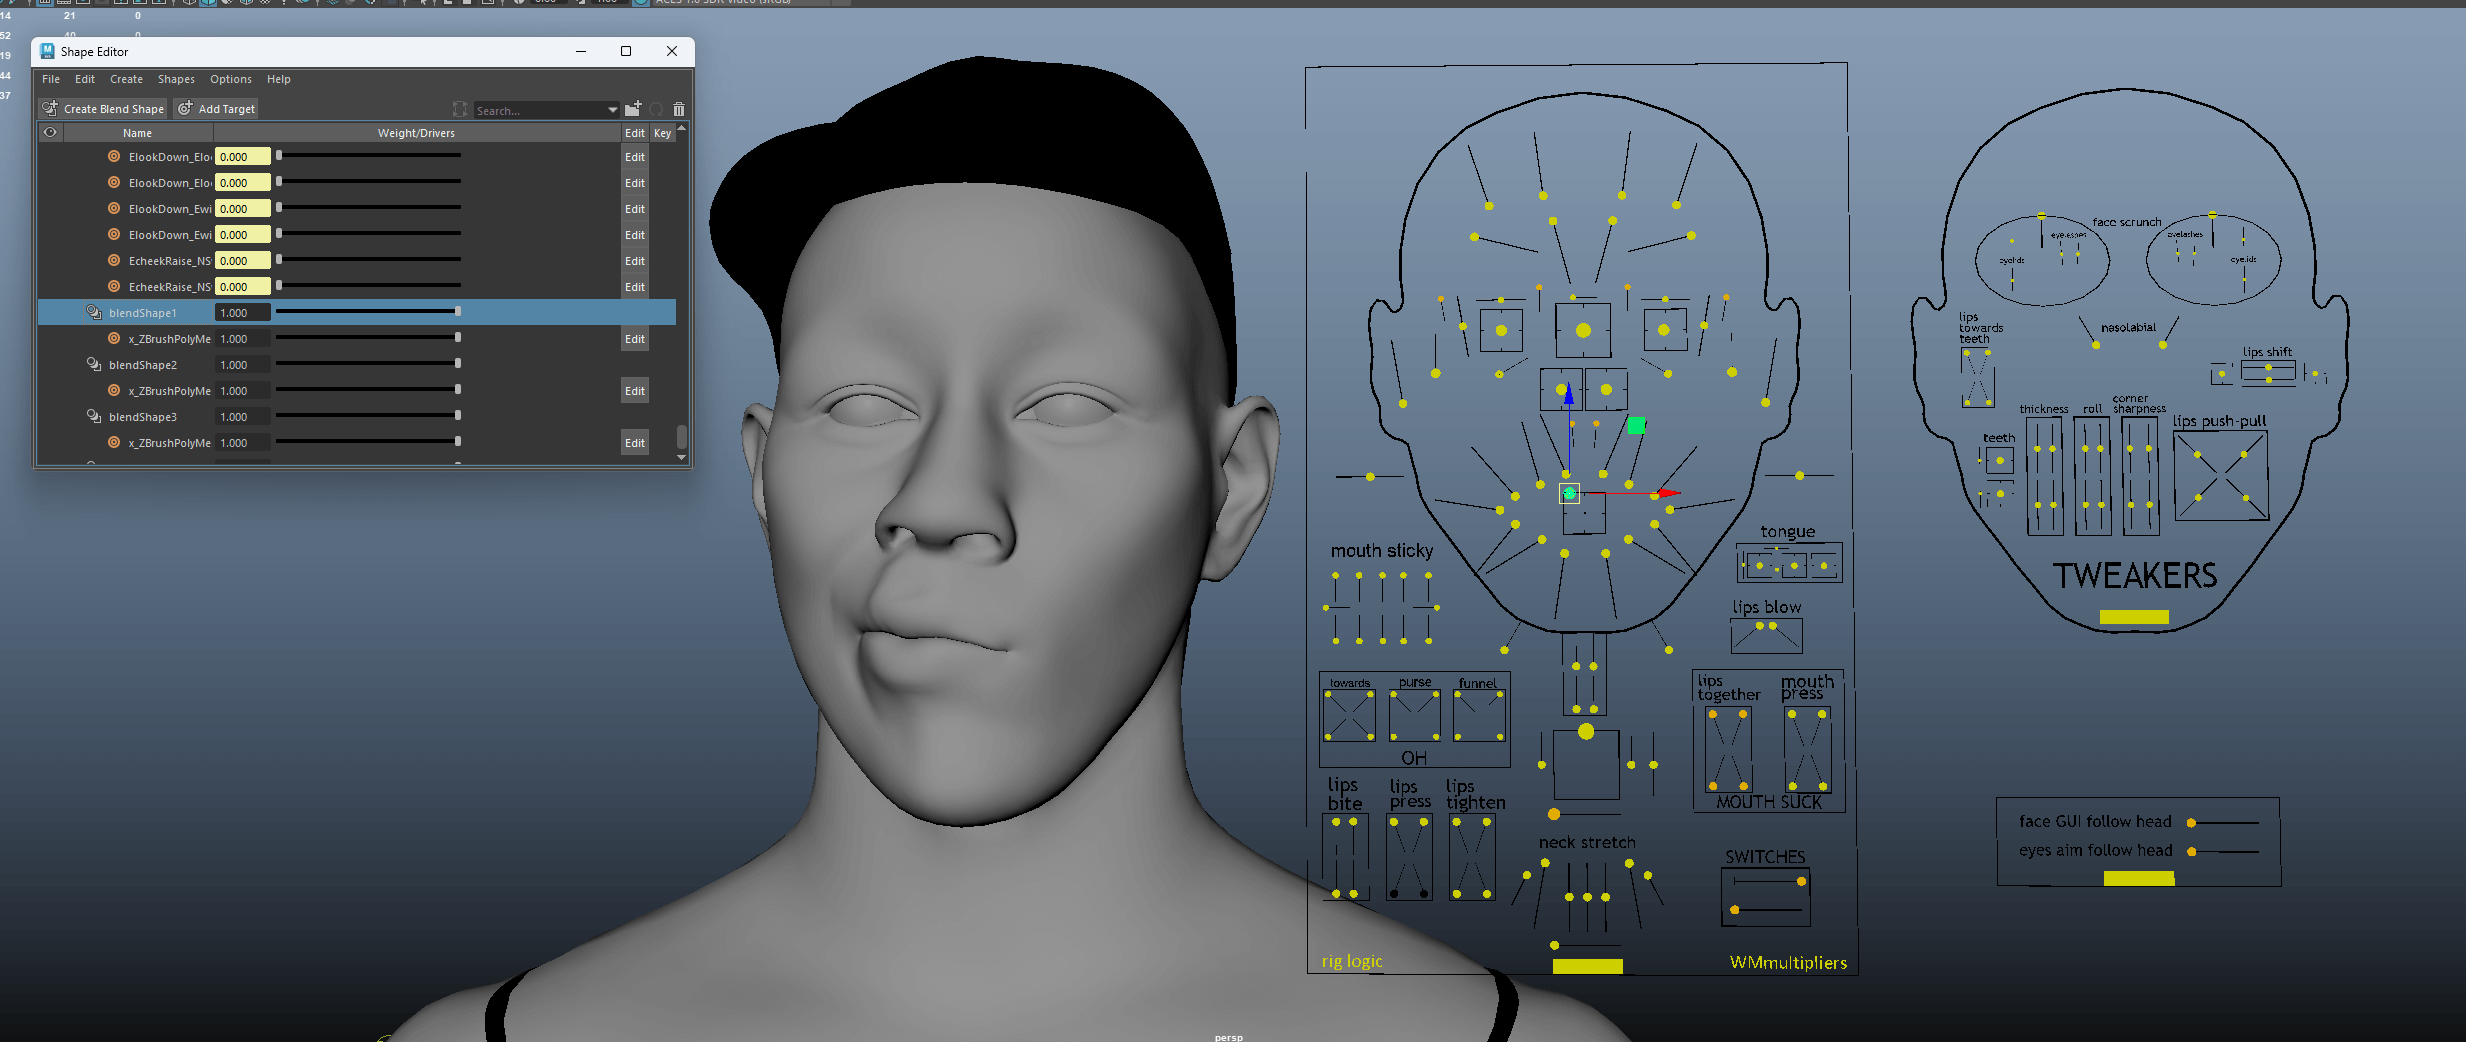
And after wrapping it’s just a simple transfer attribute and/or blendshape in Maya to hijack the face rig.
Releasing your inner Bob Ross!
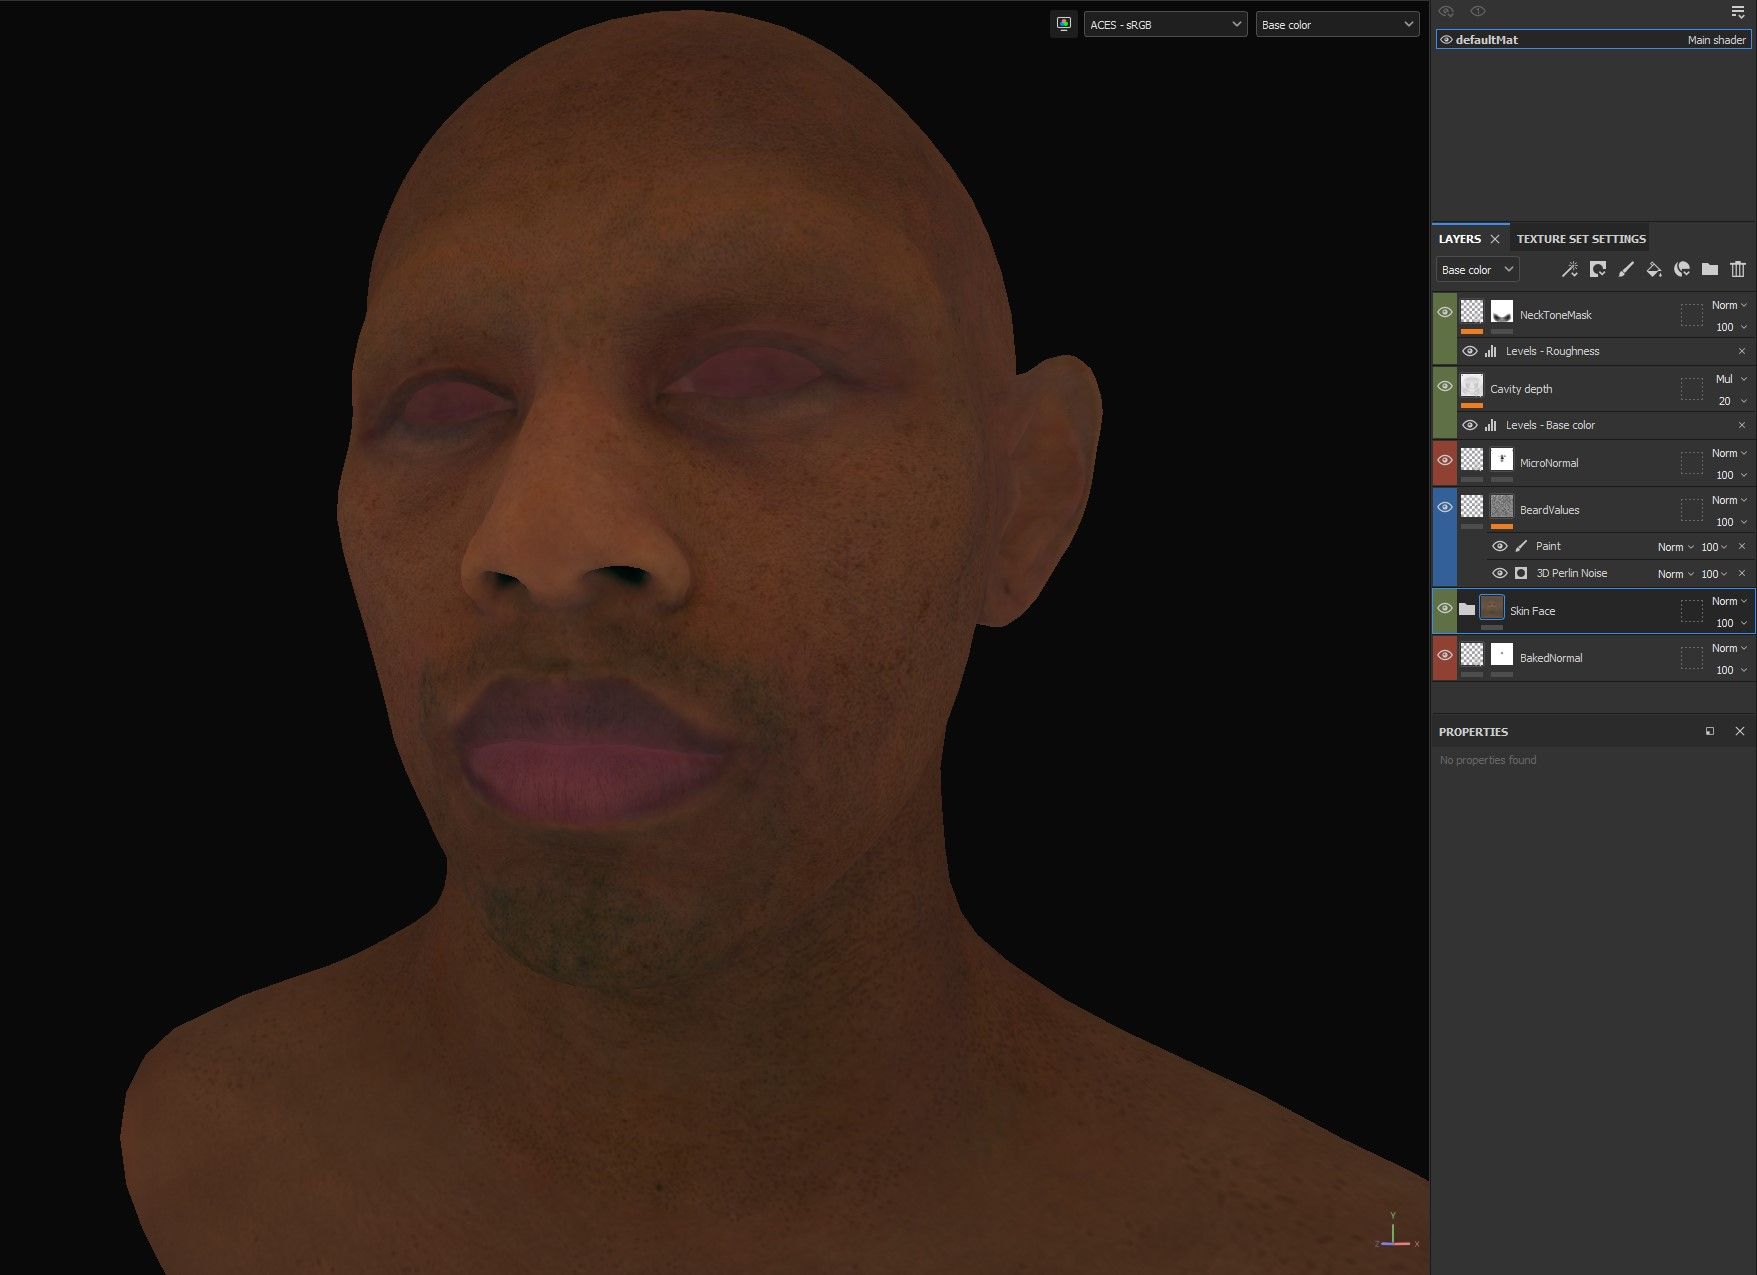
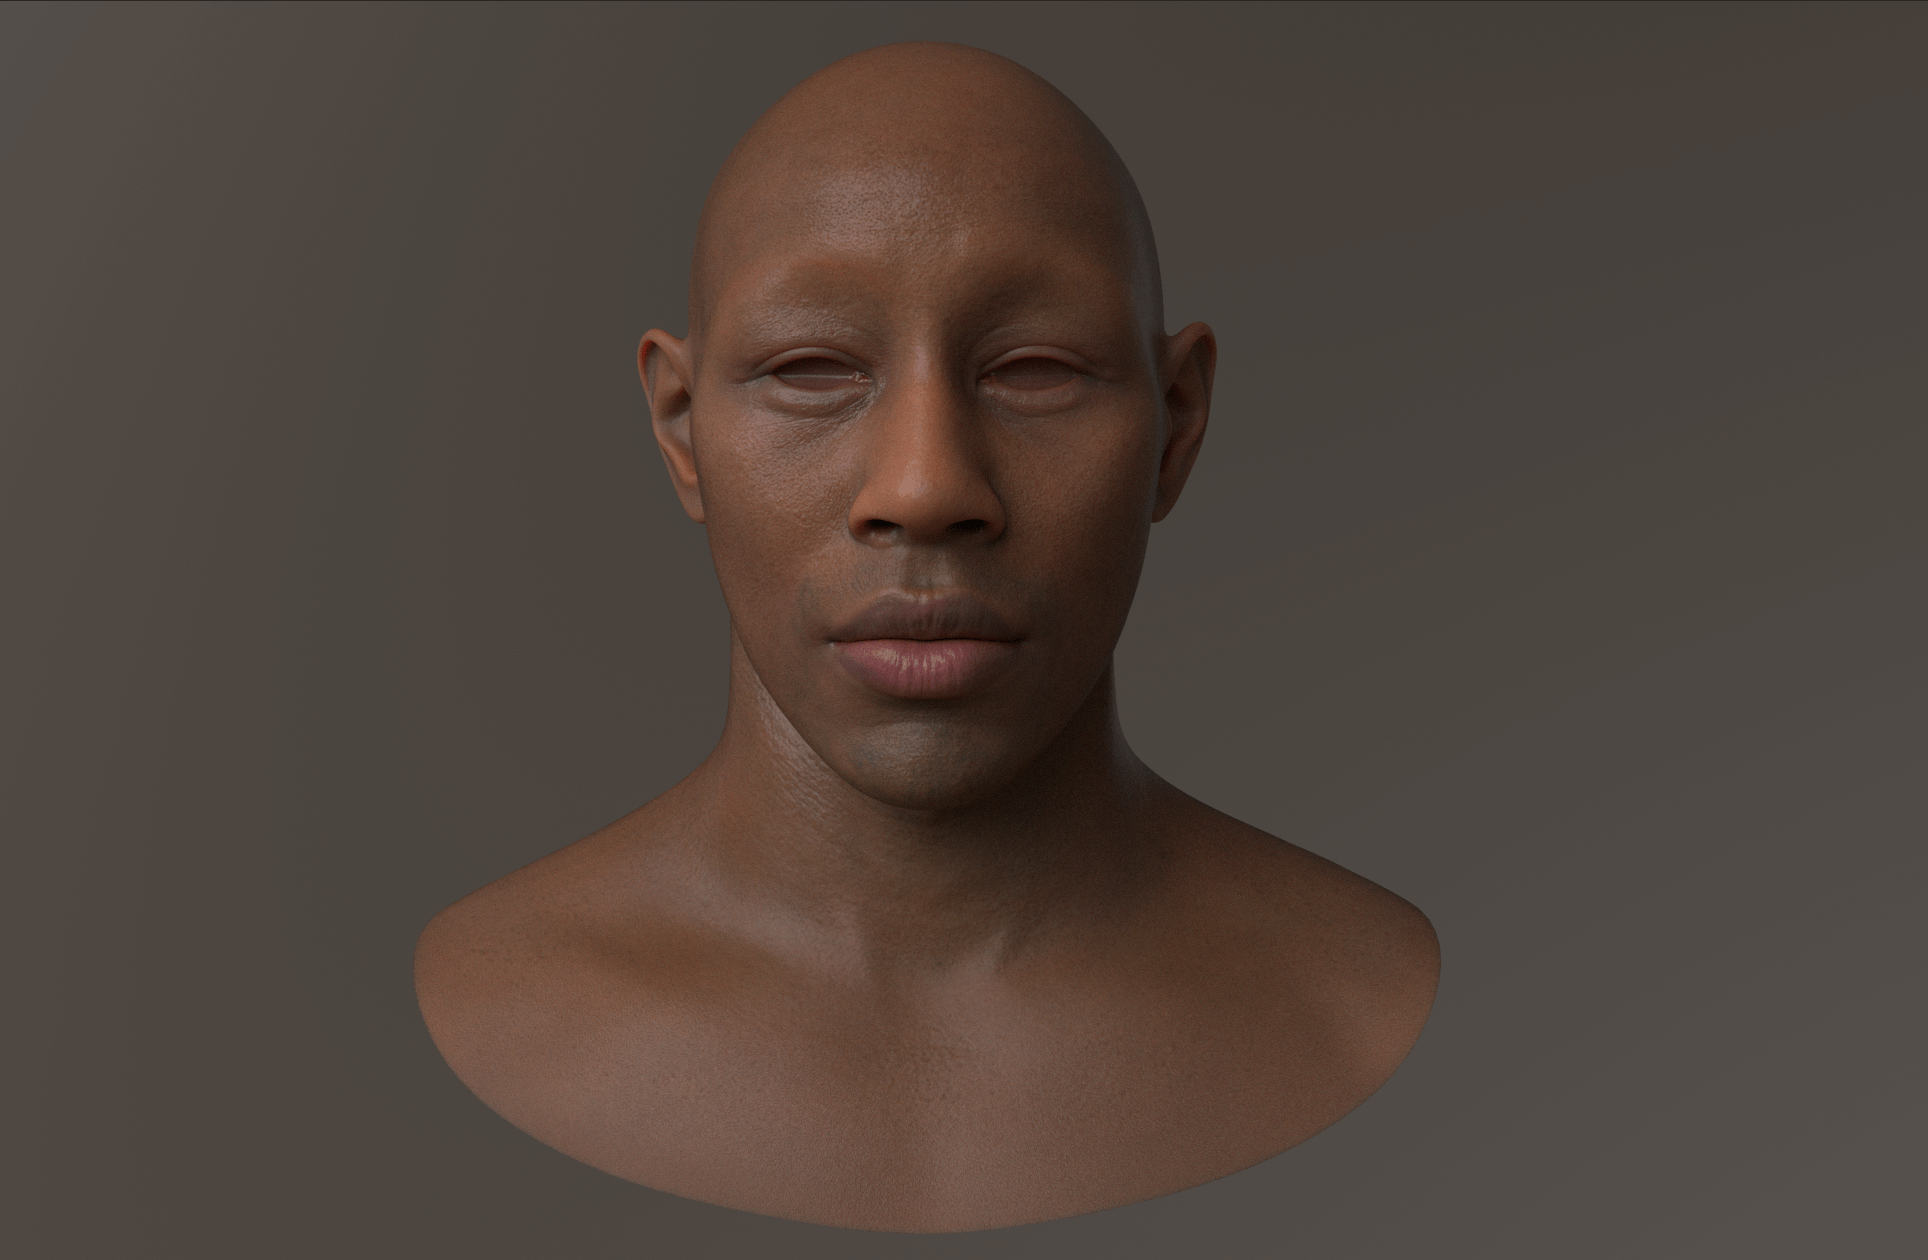
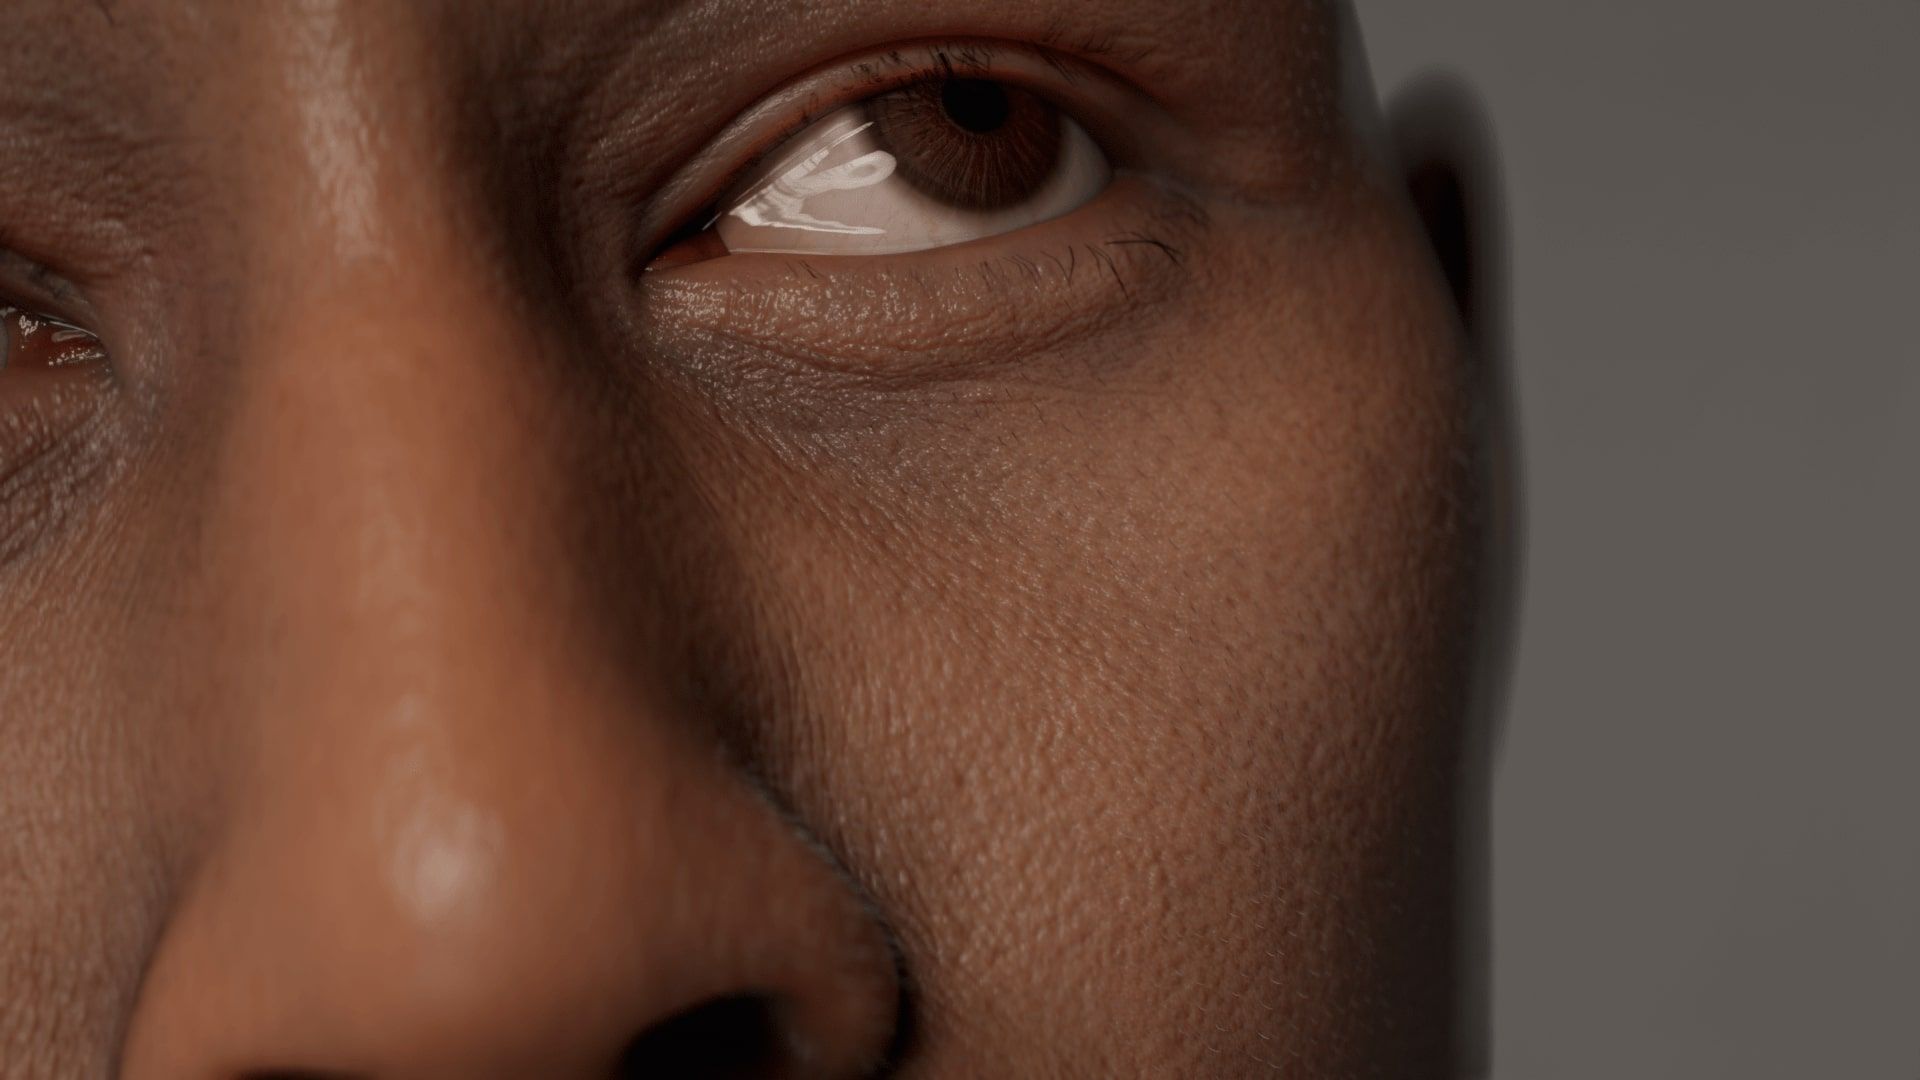
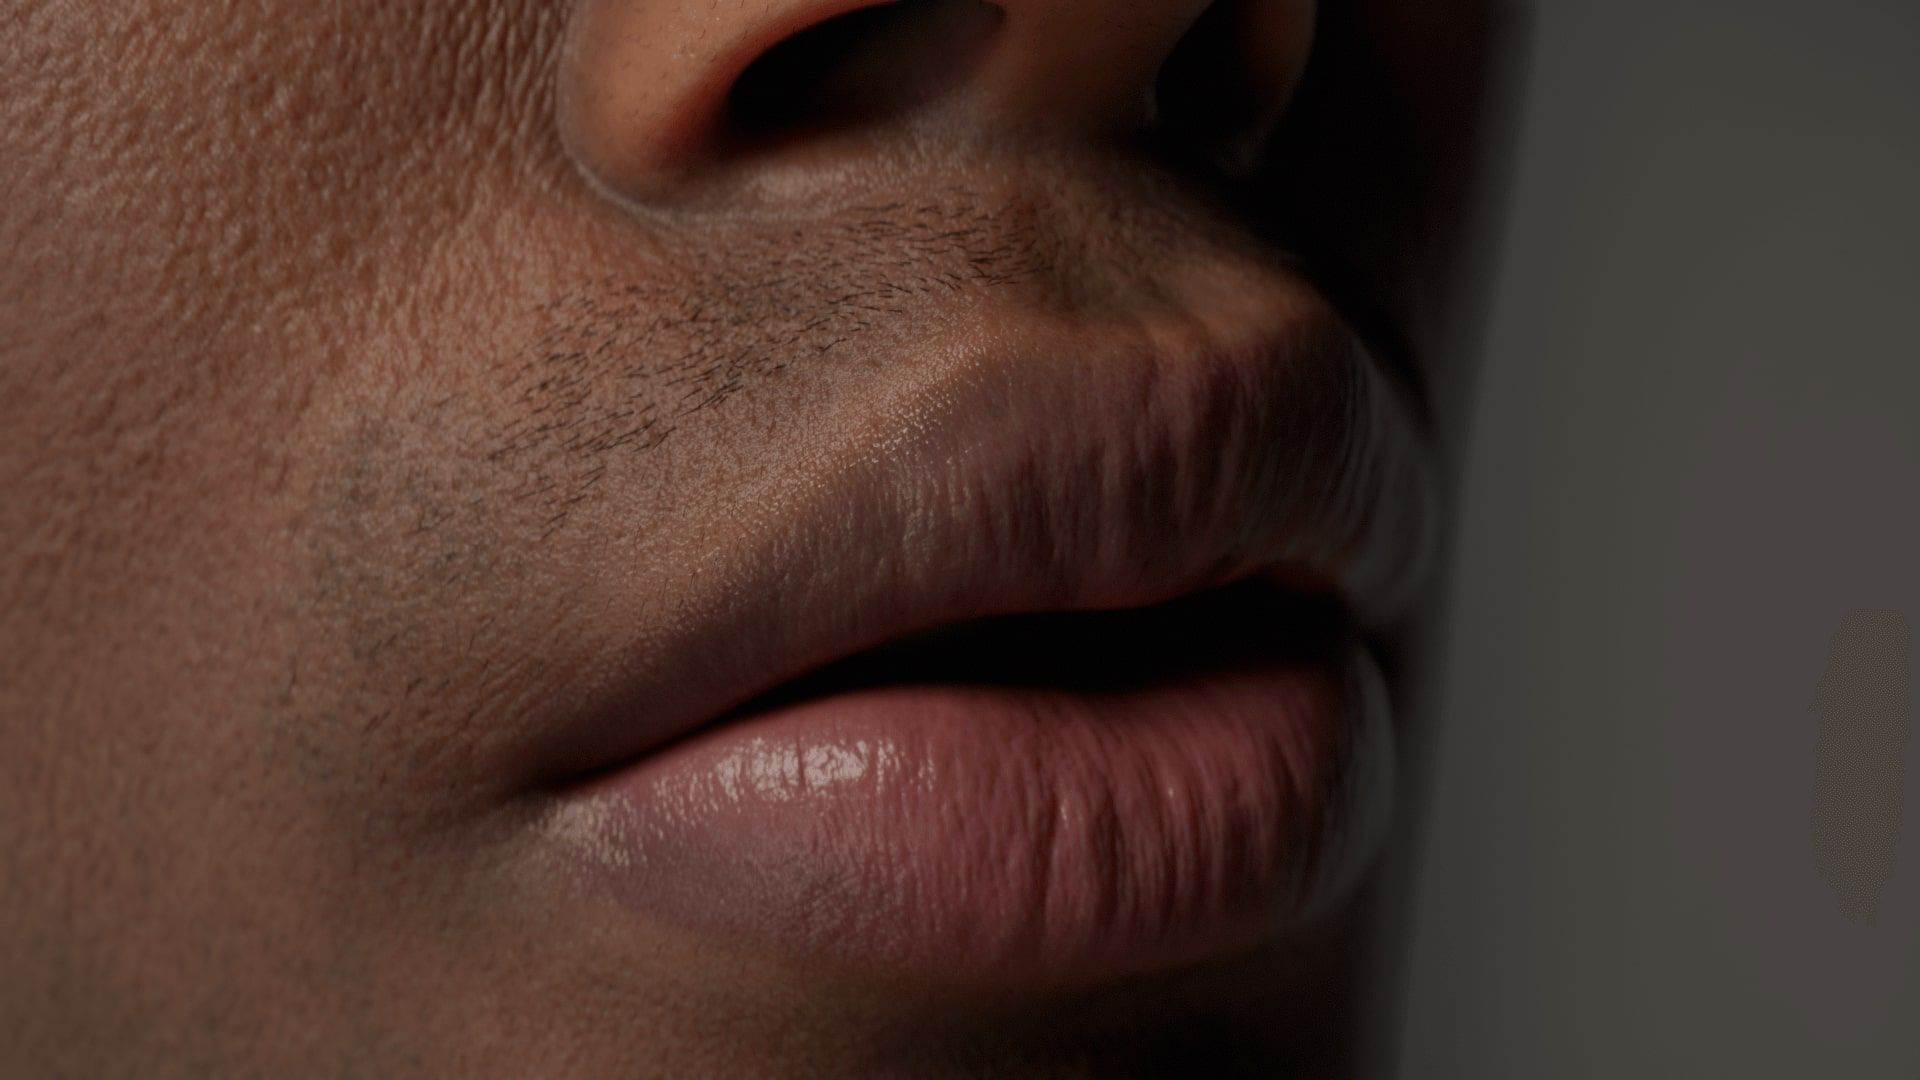
Moving on to the texturing stage. For skin texturing it’s a tricky thing as a realistic skin texture is not just one single tone but a mix of different blue, reds, and yellow tones to really make the skin pop and for it to feel natural. After exporting the baked normal maps of the head from ZBrush I exported it into Substance 3D Painter to start the texturing process.
Starting with a baseline colour tone and some minor details, this is to get the starting skin feel while not worrying about things like roughness and values first.
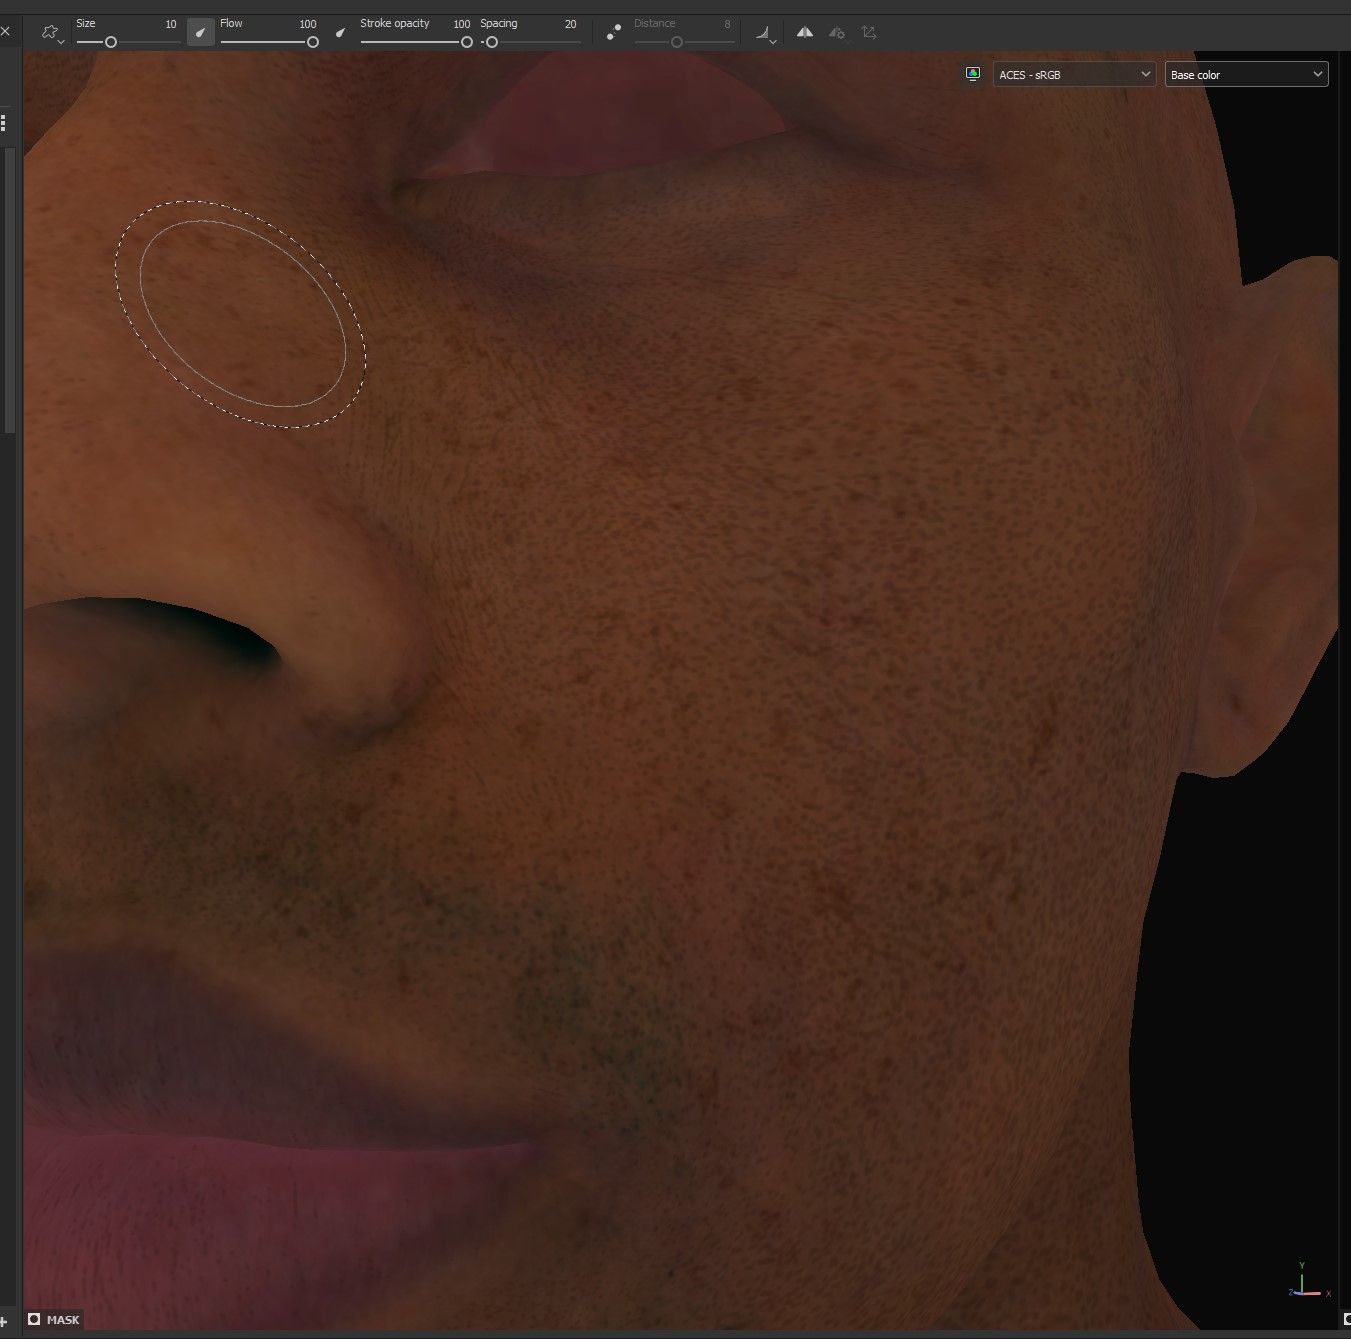
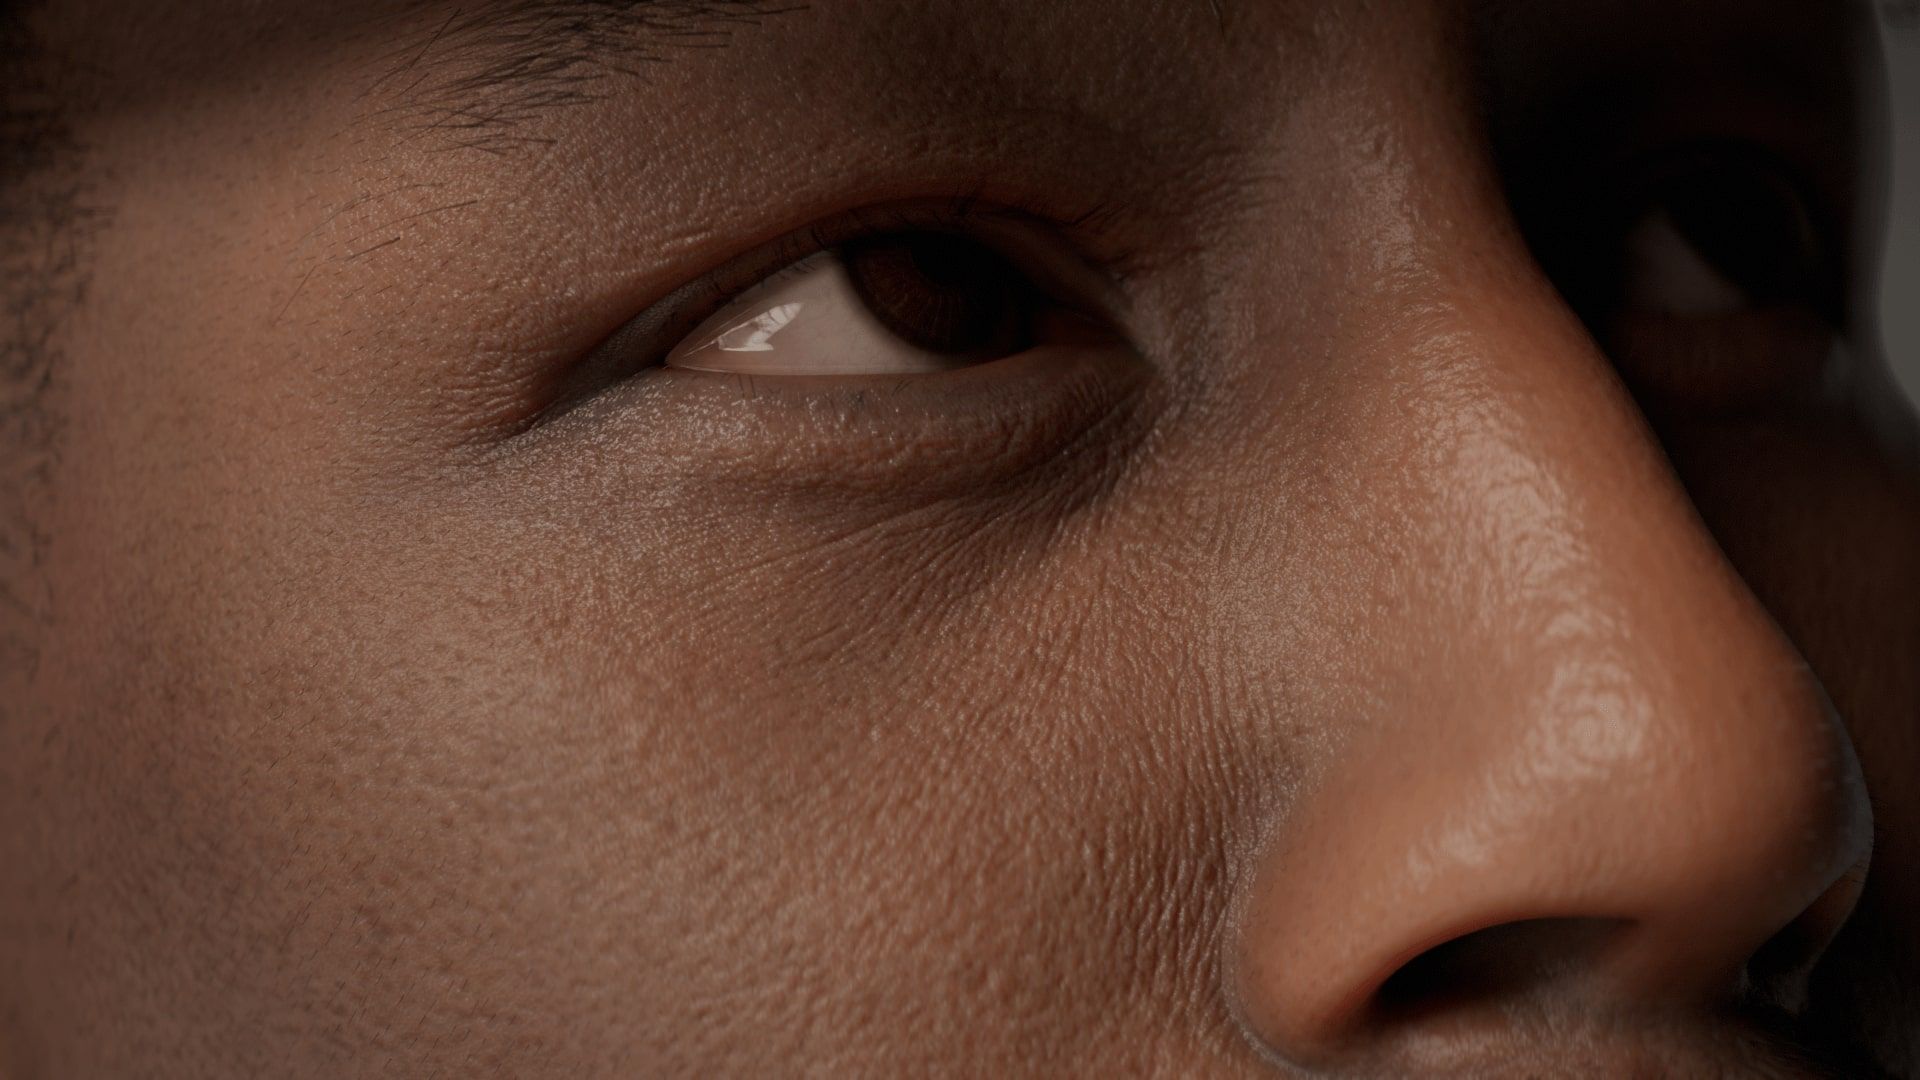
Substance’s starter base materials can be a great starting point to easily make changes to your project. In my case, I already had baked normal maps which I used to create a basic skin tone and establish a workflow for the skin. Combining the baked maps with the exported ZBrush cavity map and ambient occlusion map in a layer allowed me to enhance the skin pores and depth with just a few generators and filters. To add micro details to the skin, I also utilised tileable textures scaled down to create the desired effect.
For the second pass of texturing, I tried to give as much variation to the skin colour by adding more blue and red tones to balance out the texture.
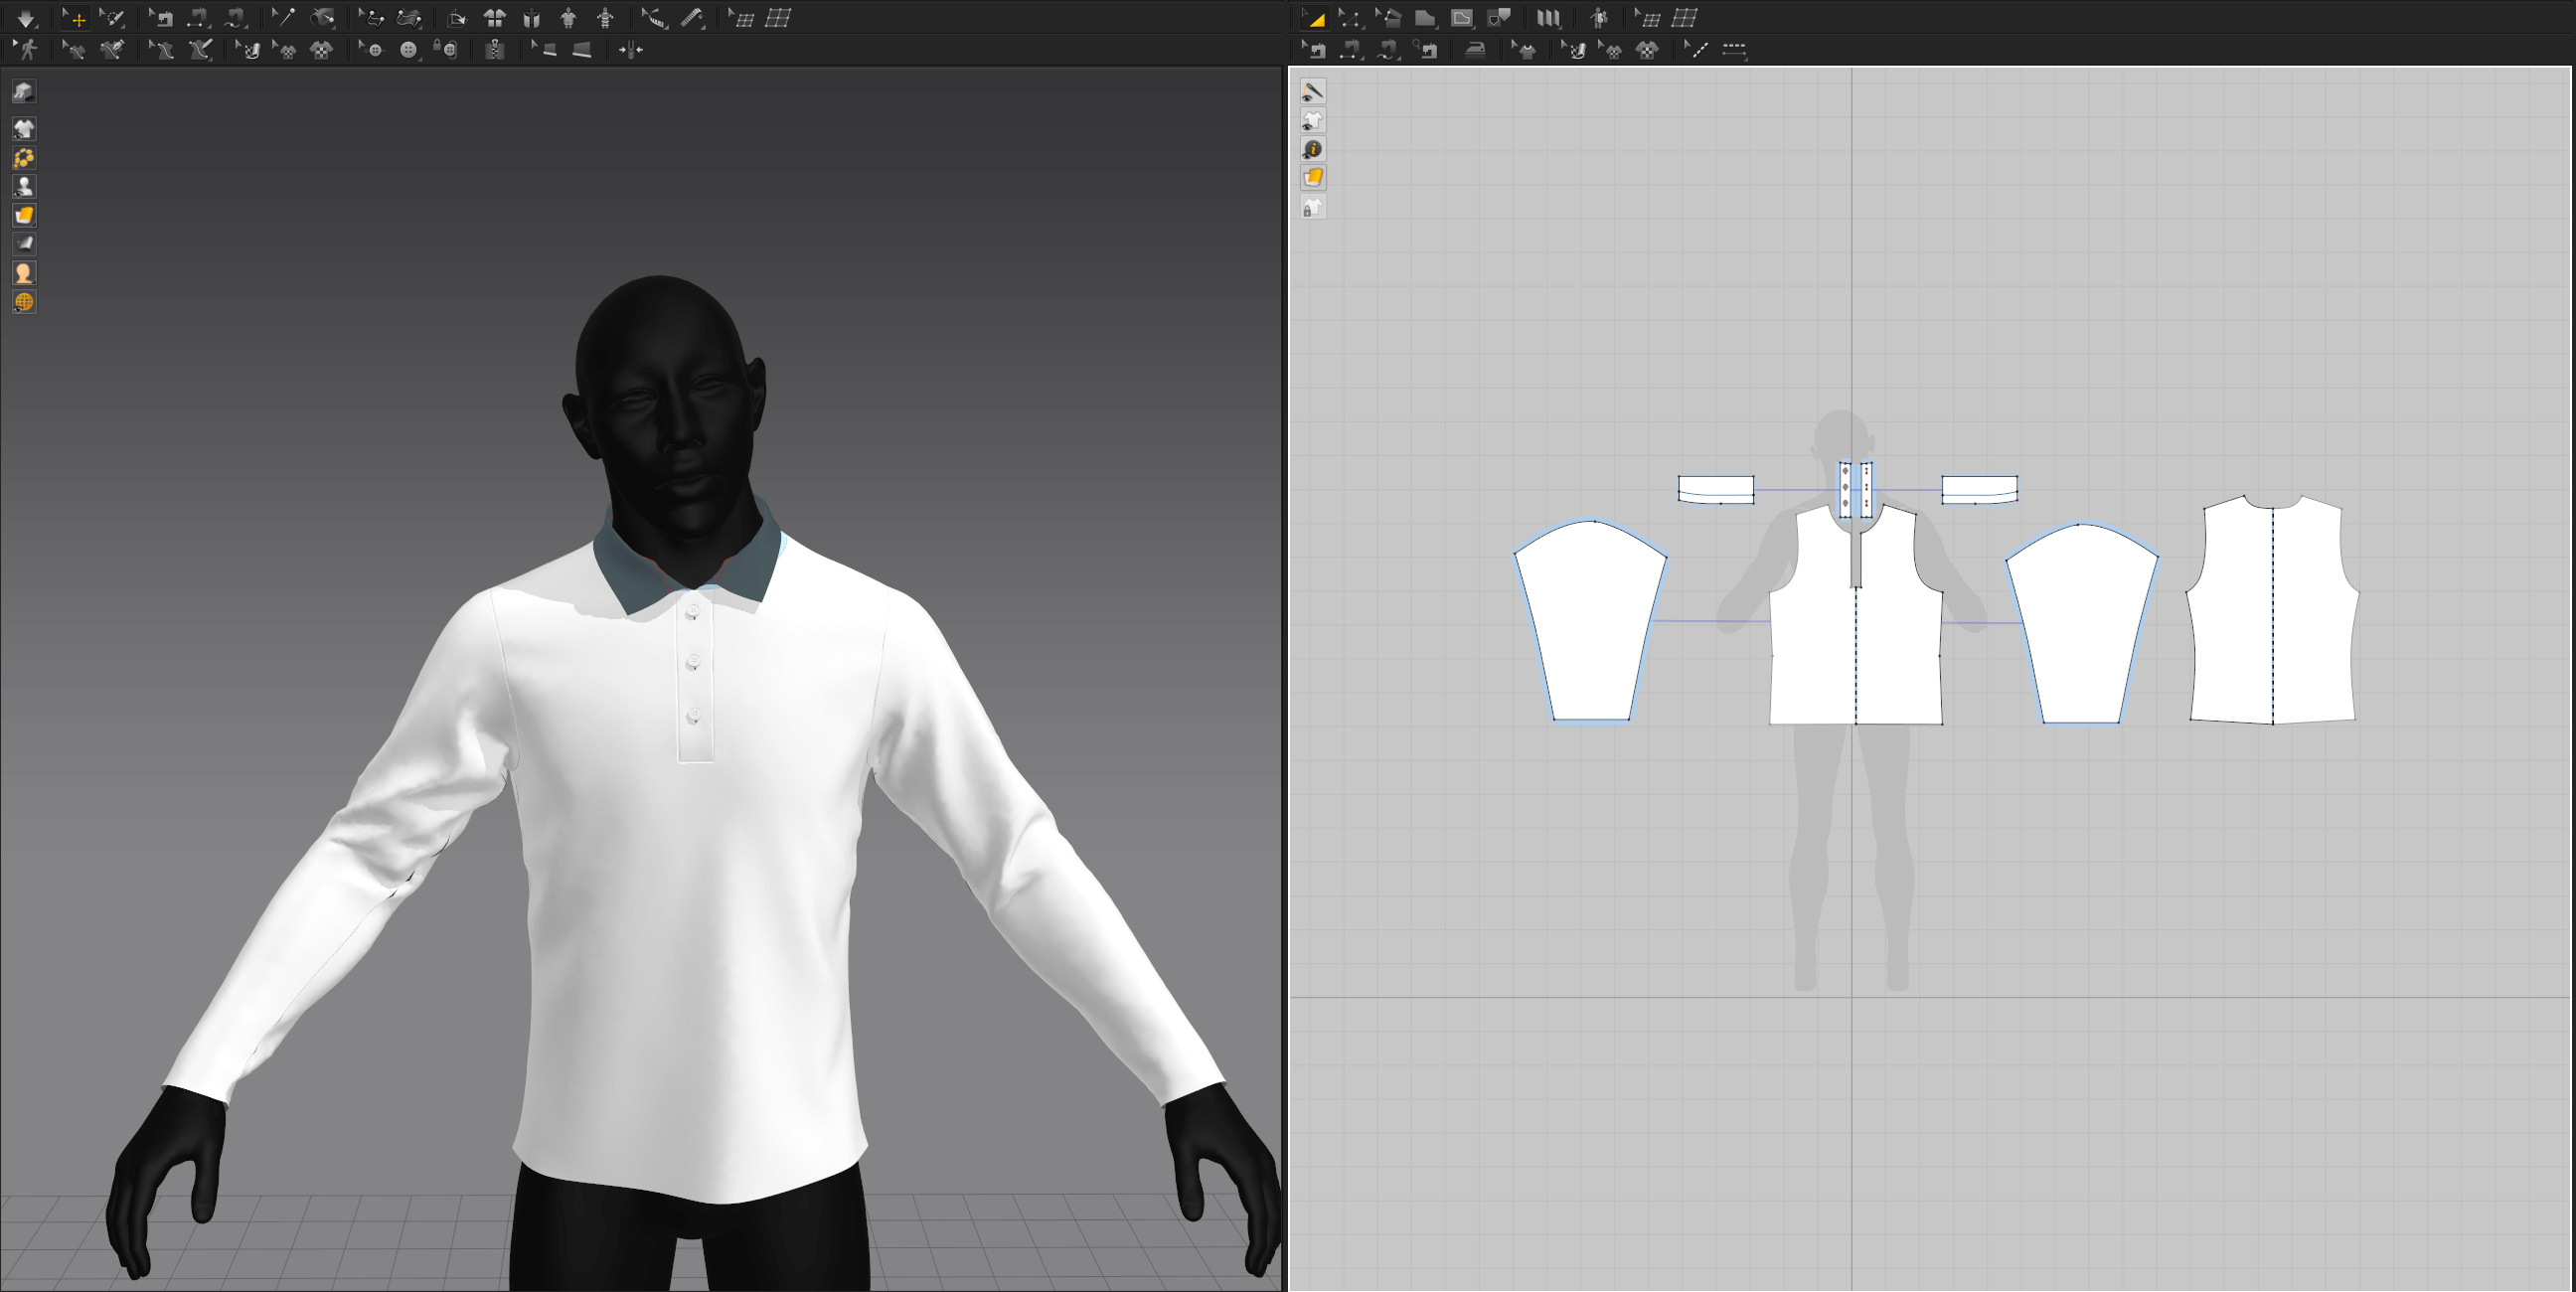
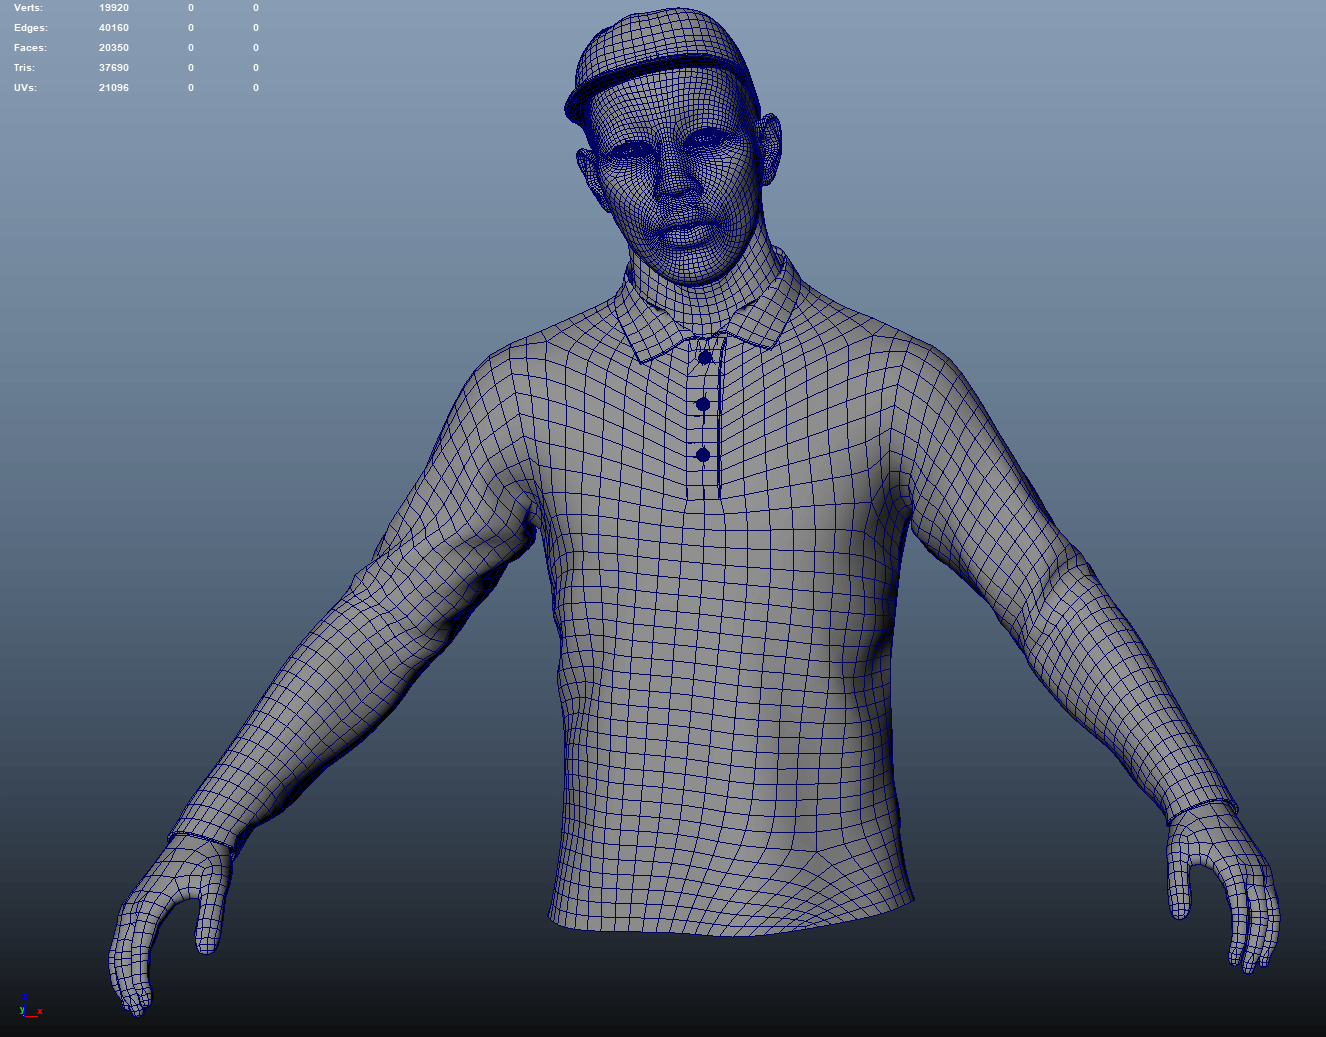
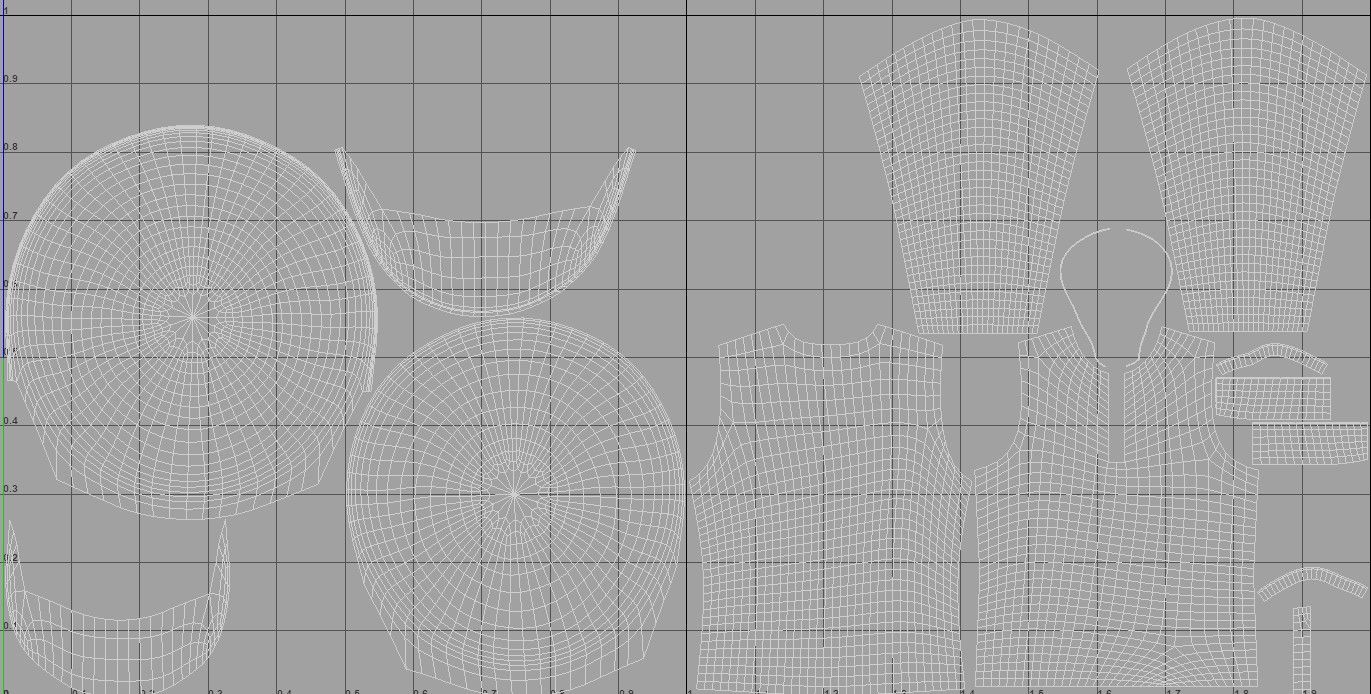
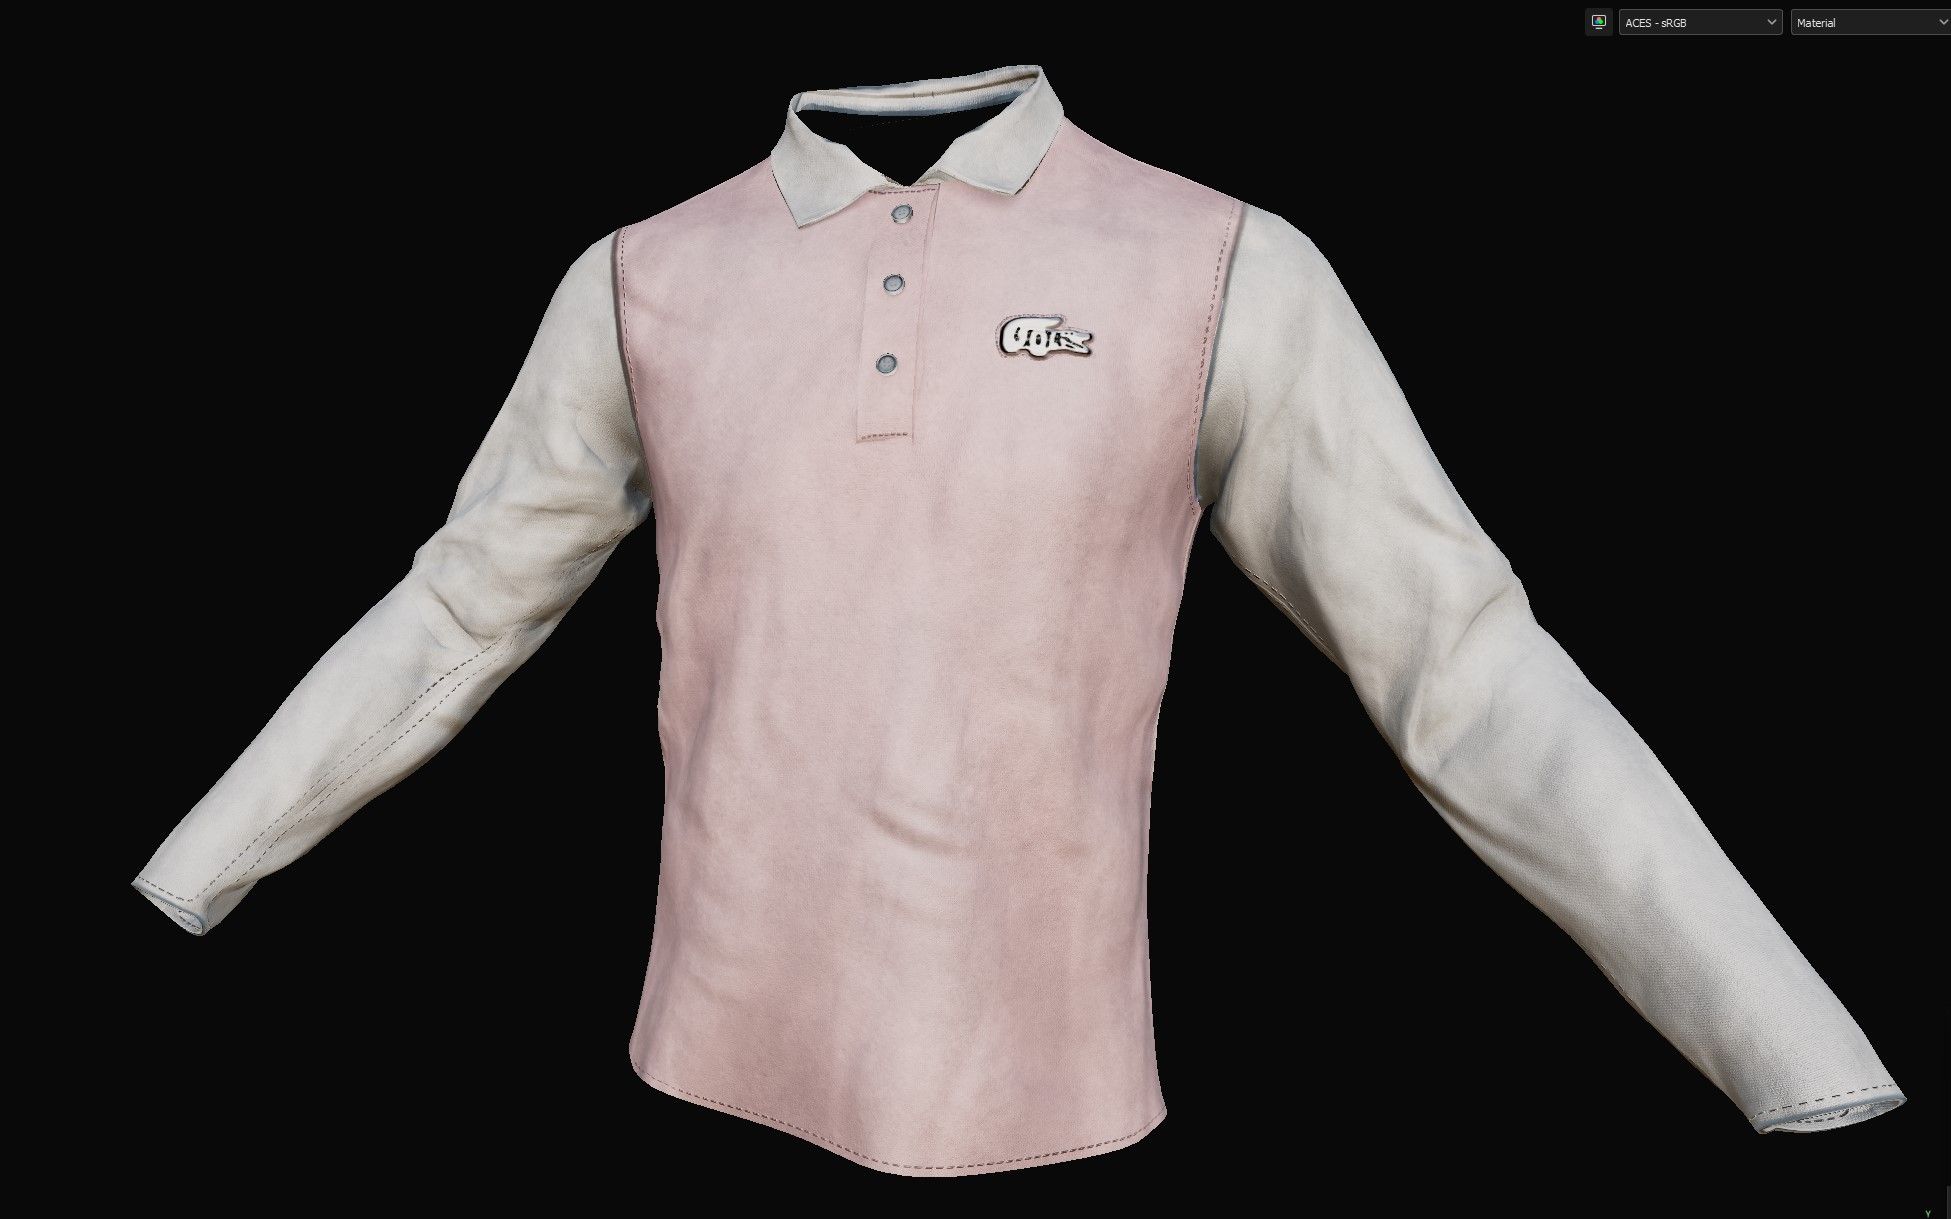
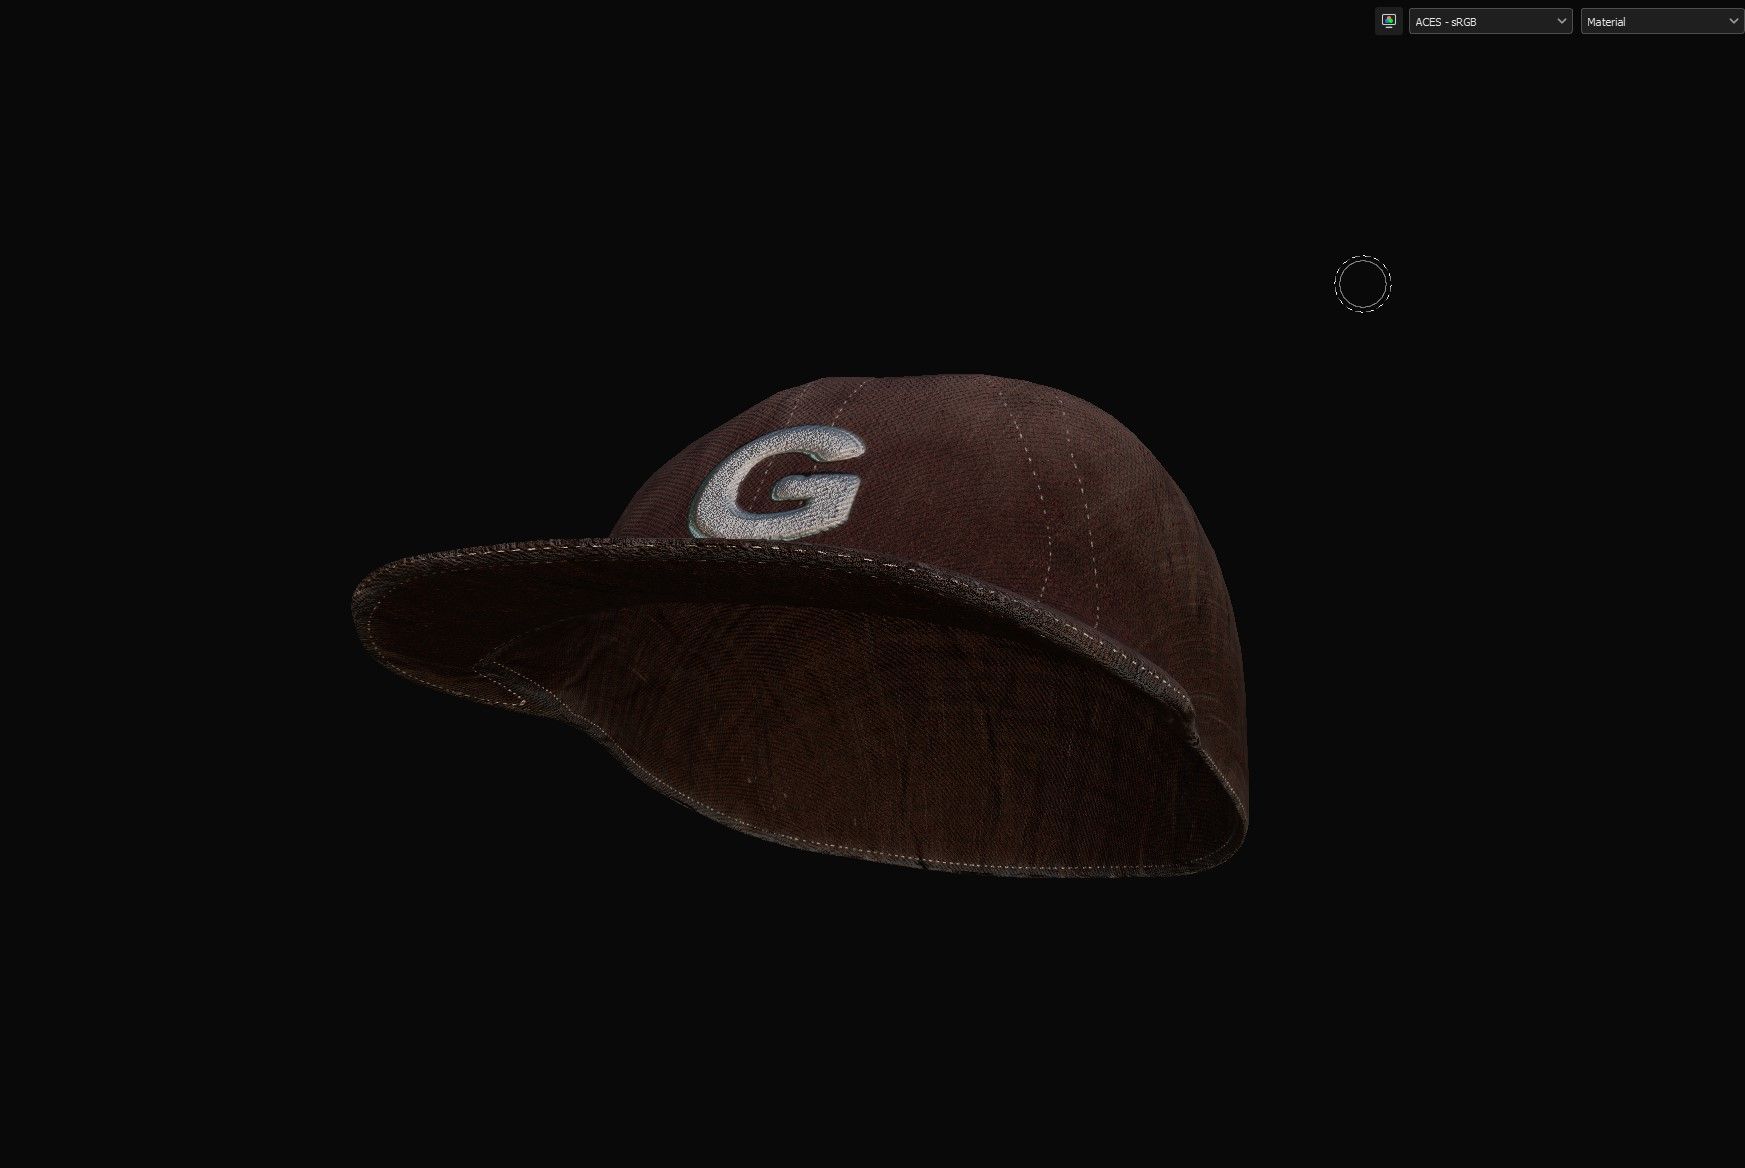
While doing the skin textures, I also painted the outfit on the side and to do it simultaneously to keep the consistency. It's a simple method of creating the pattern in Marvelous Designer, retopologizing/uving in Maya to my desired polycount and texturing it in the same way, in Substance 3D Painter.
Marvelous Designer pattern and Topo/UV in Maya
Textures of the outfits in Substance 3D Painter
With the skin tone and outfit done, I was able to hone in on the roughness values and proceeded to the look development stage.
Final render of the textures in Substance's preview render
Lights, Camera, Look Dev
For look development and final rendering, I decided to use Marmoset Toolbag as it is quick and snappy to make changes and iterations in real time using PBR workflow and their rendering features are really powerful if used properly.
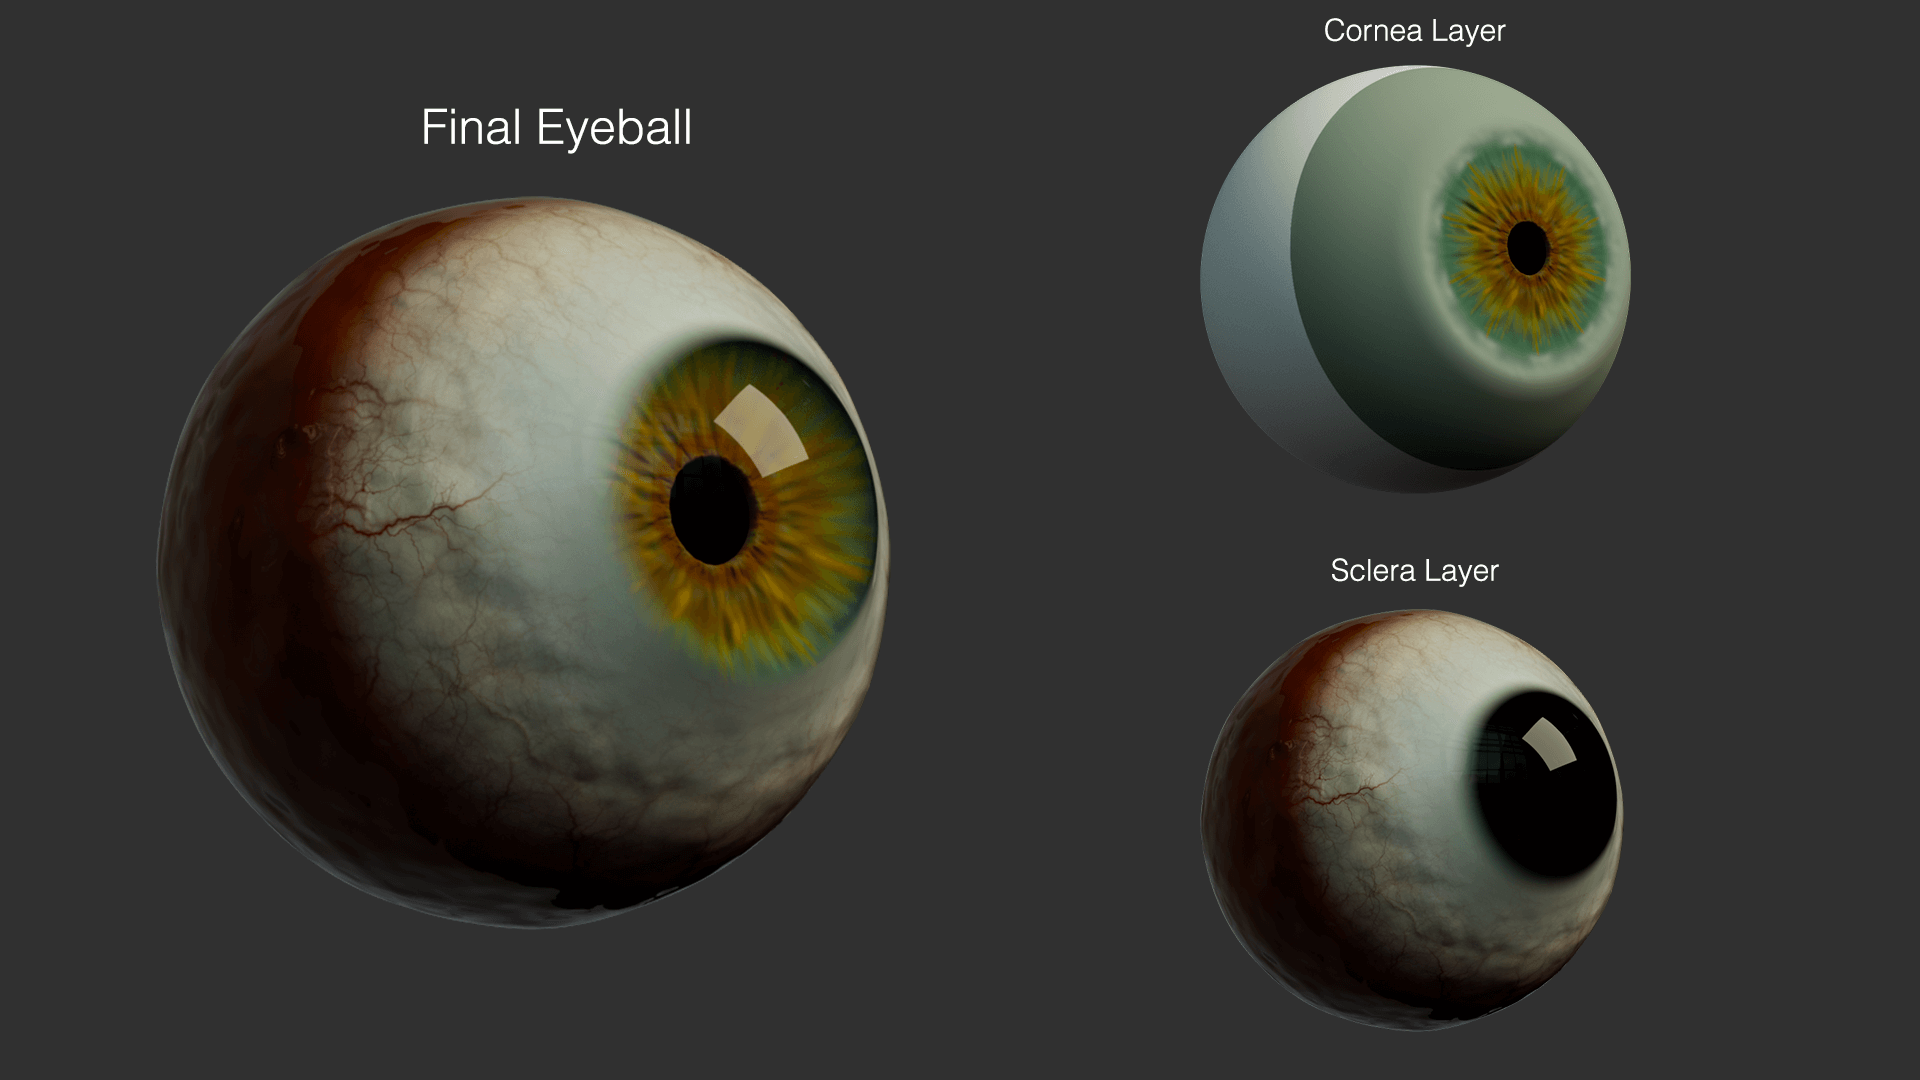
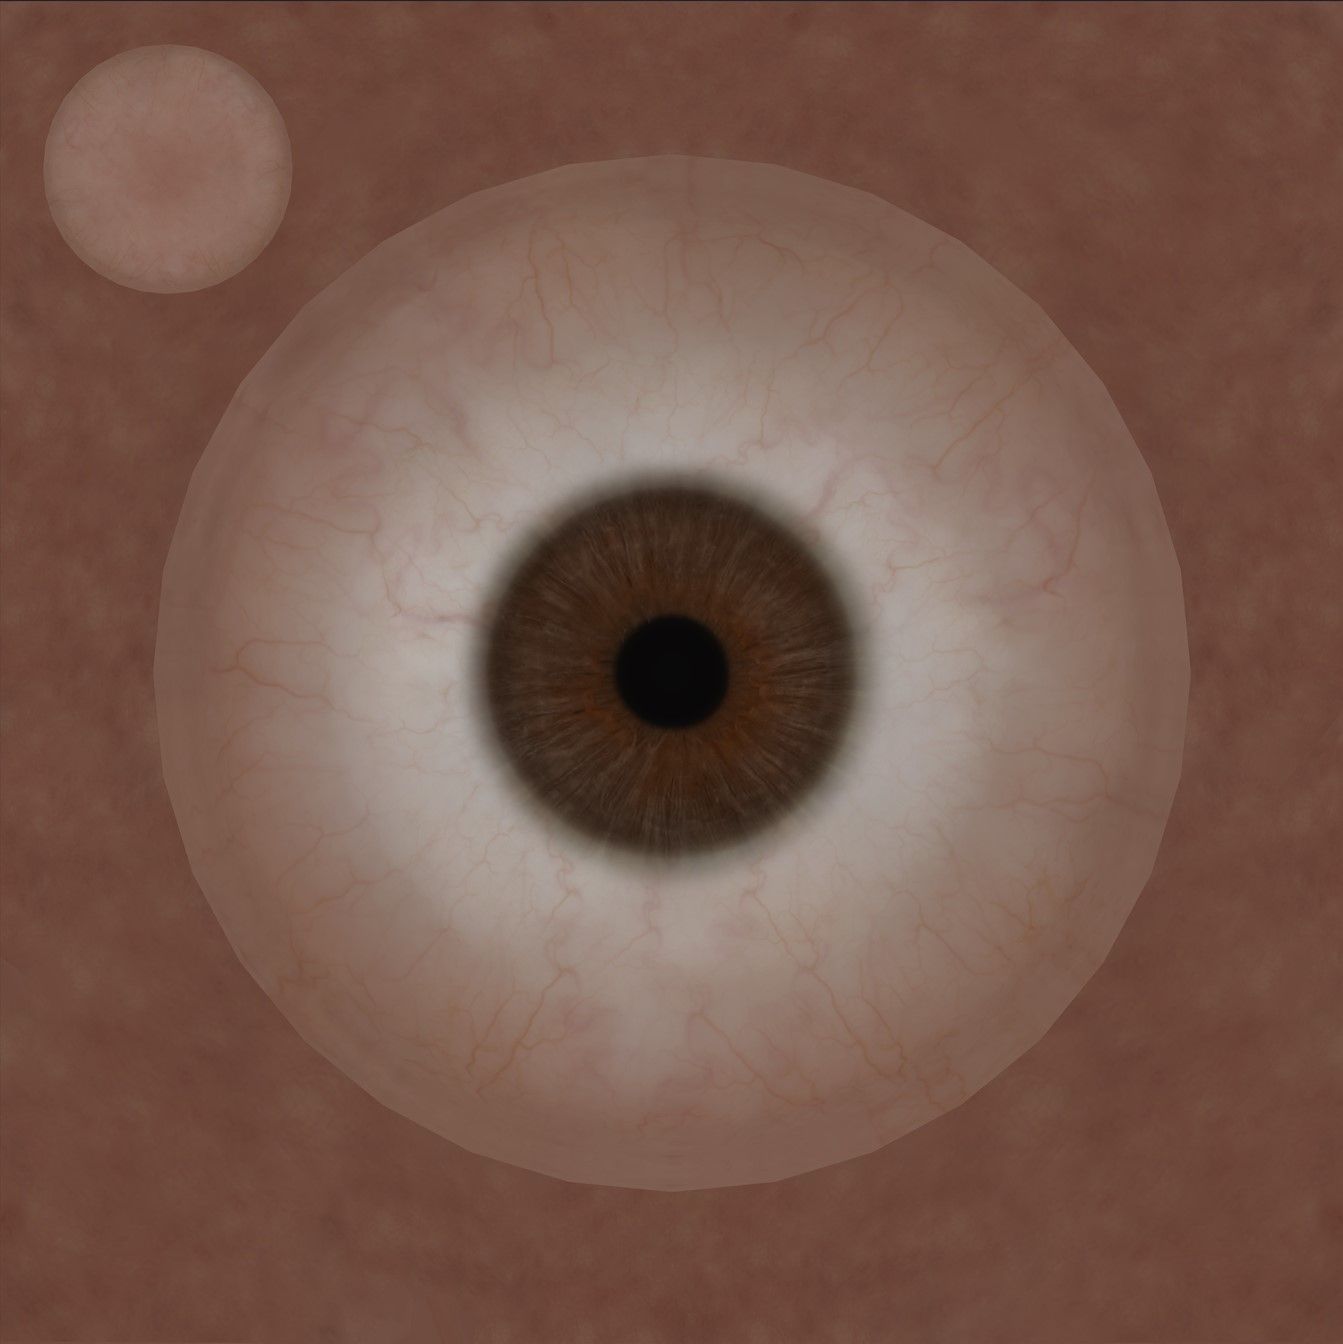
For the eyeball, I already had an eyeball that I created from a previous project ready to go, as it was as simple as swapping out a few textures to get the desired look and feel.
Tip: When doing character projects, plan out different ways you can make the asset modular so that it is easier for you to implement into your next project. This can be things like the eyebrows, eyelashes, and eyeball.
During the process of look development, it is crucial to conduct experiments and gain a thorough understanding of the various options, shader setup methods, and techniques to create a highly realistic appearance.
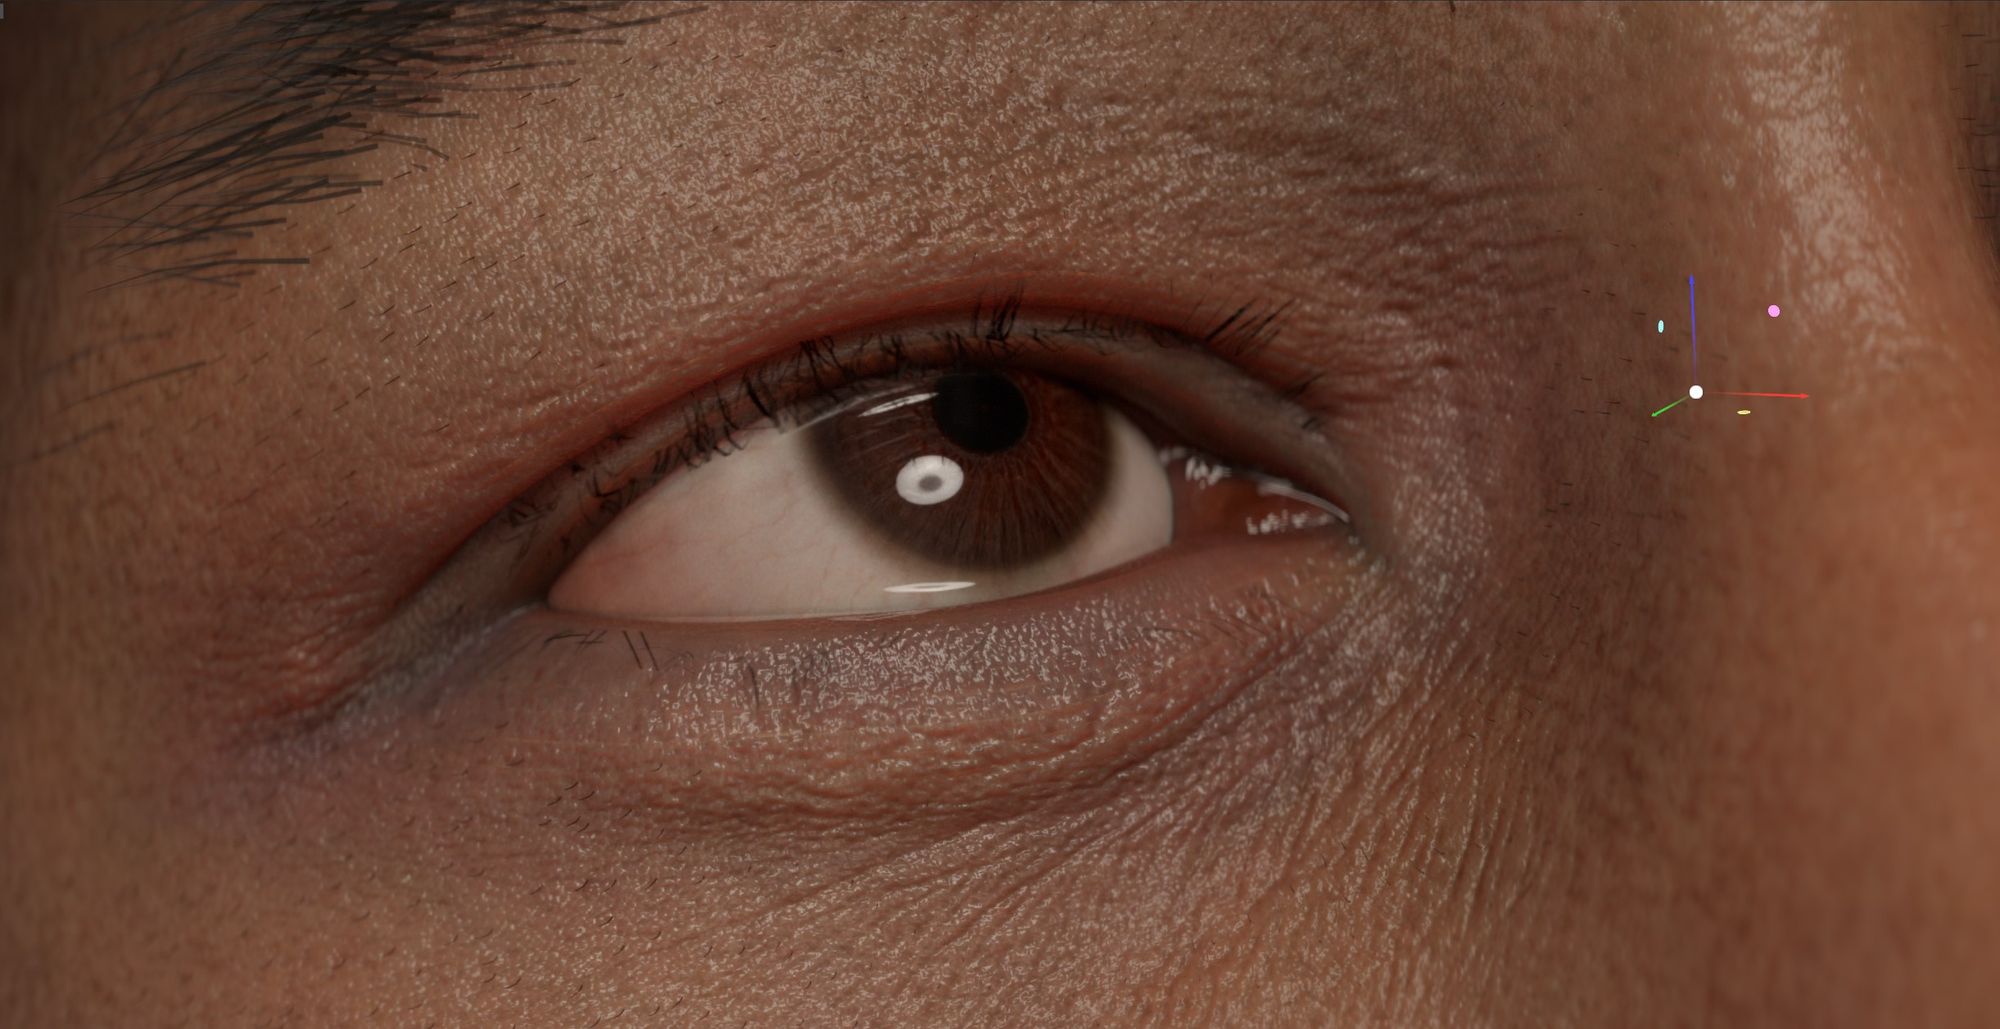
For the eyes it was the first thing I focused on, and getting the correct IOR and or Parallax values in the shader was essential to convey the look and feel of an eyeball. As for the process of the overall head, it was a matter of jumping between Substance, ZBrush and Marmoset to make adjustments where necessary.
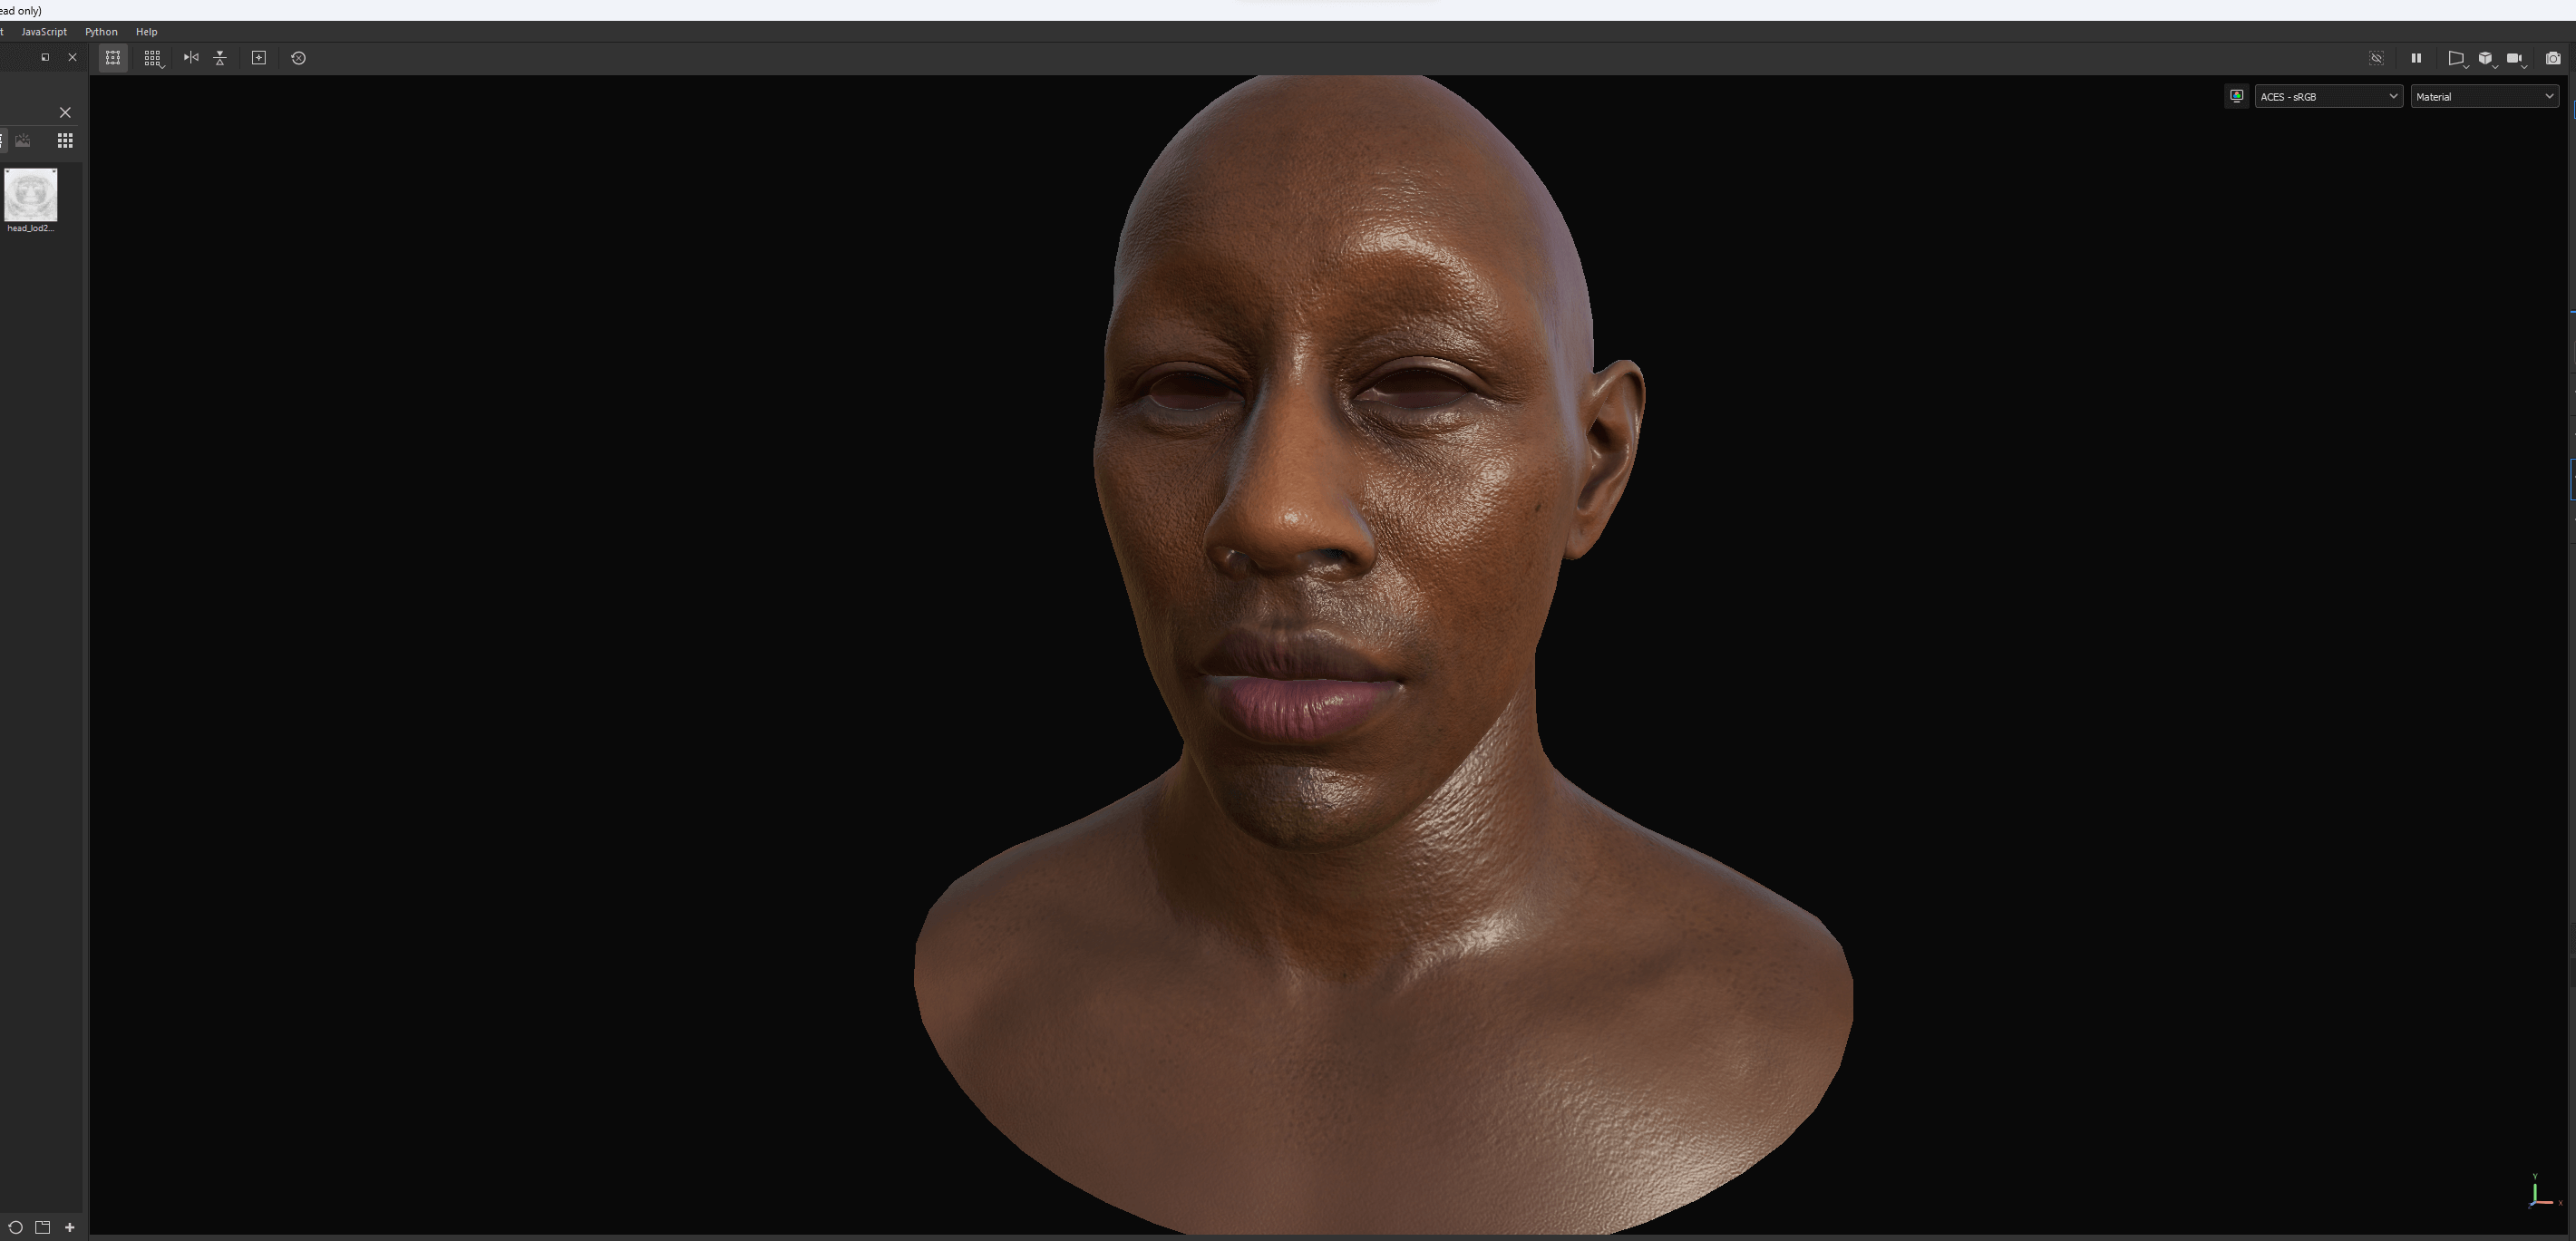
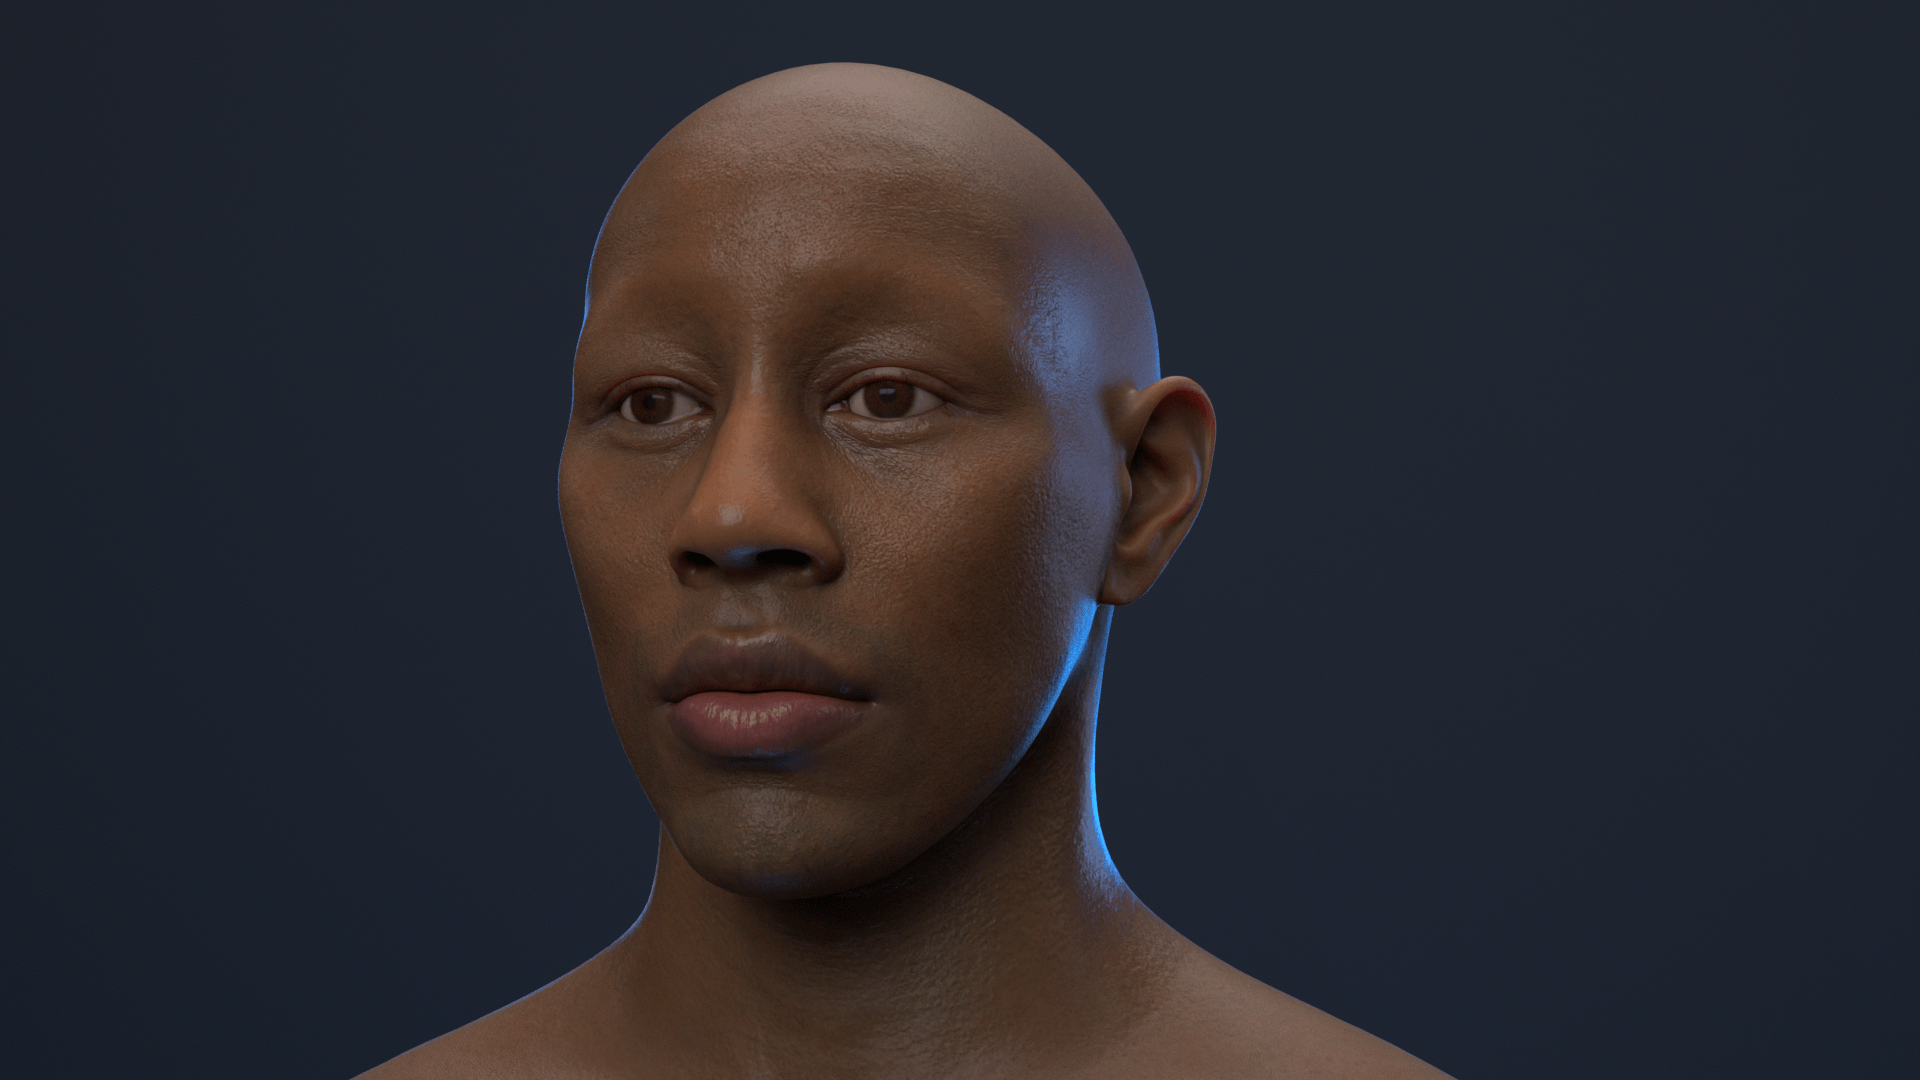
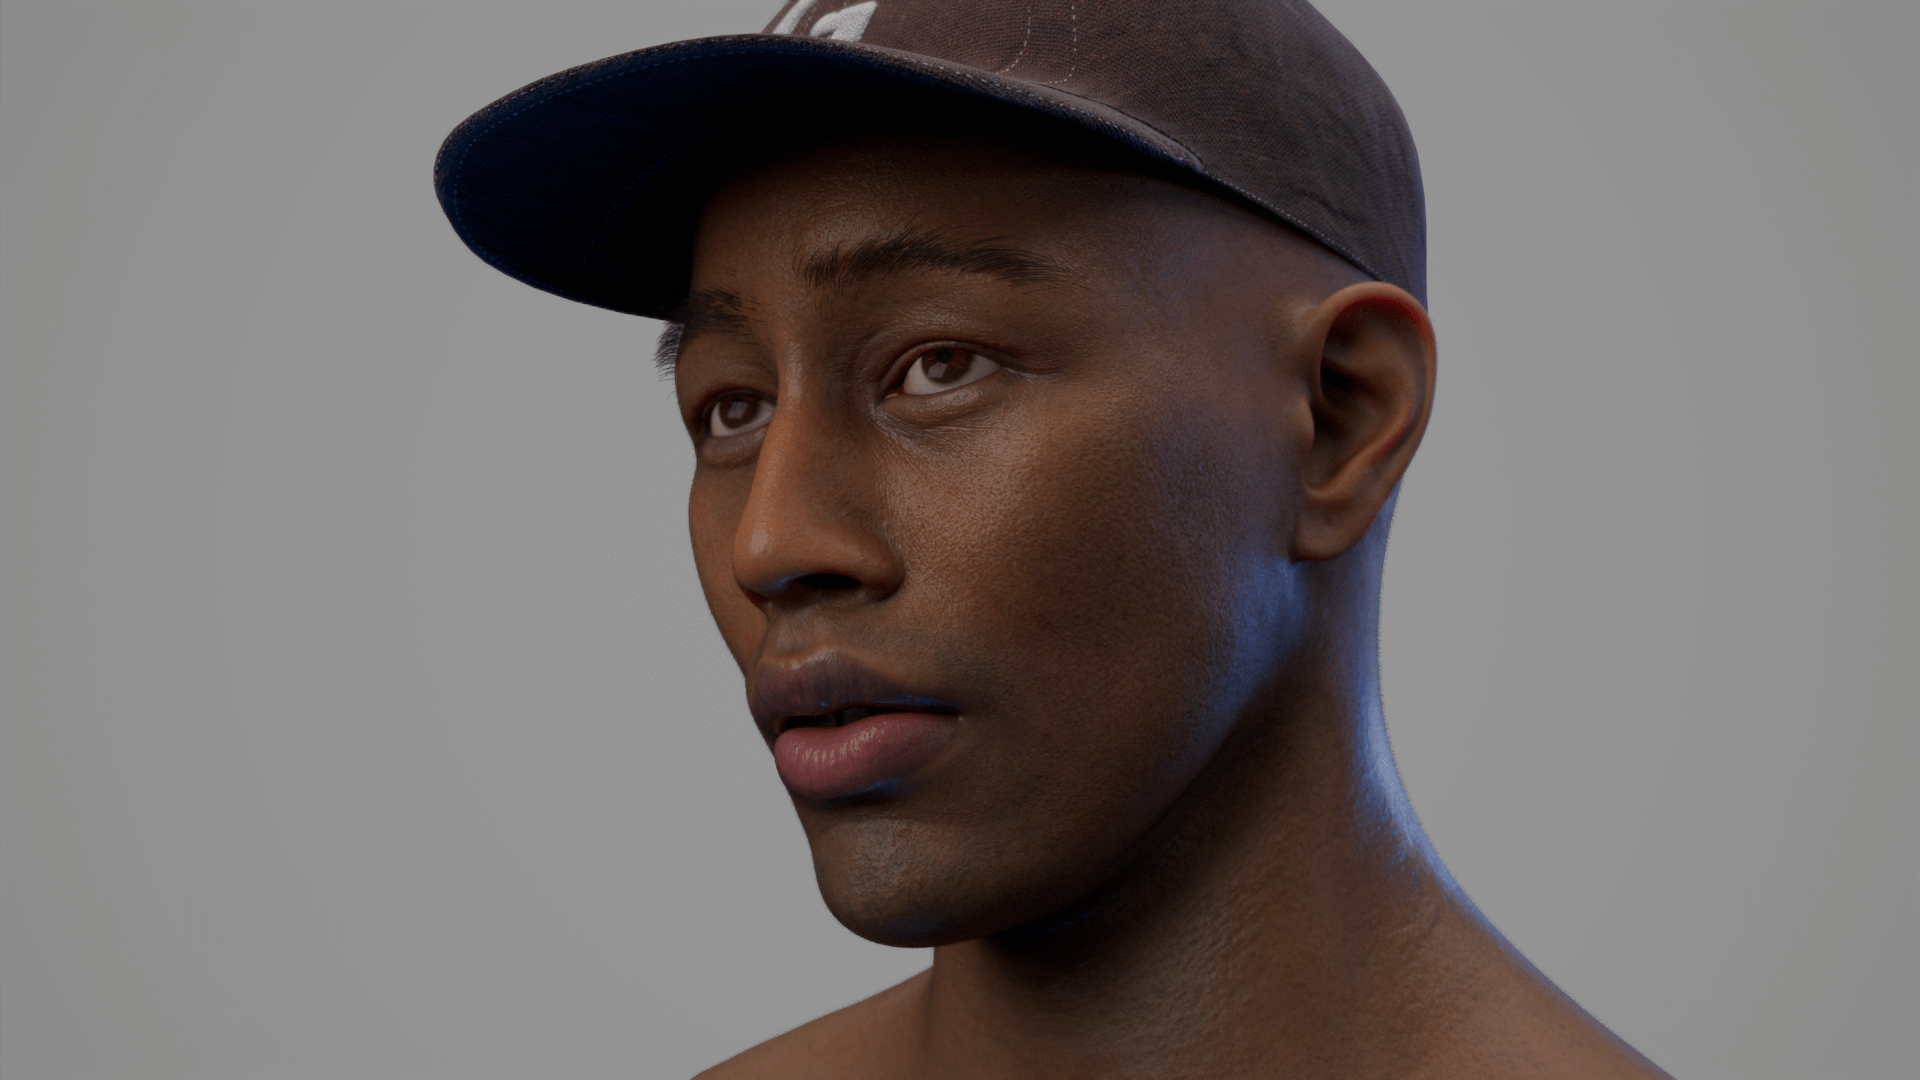
Early render test
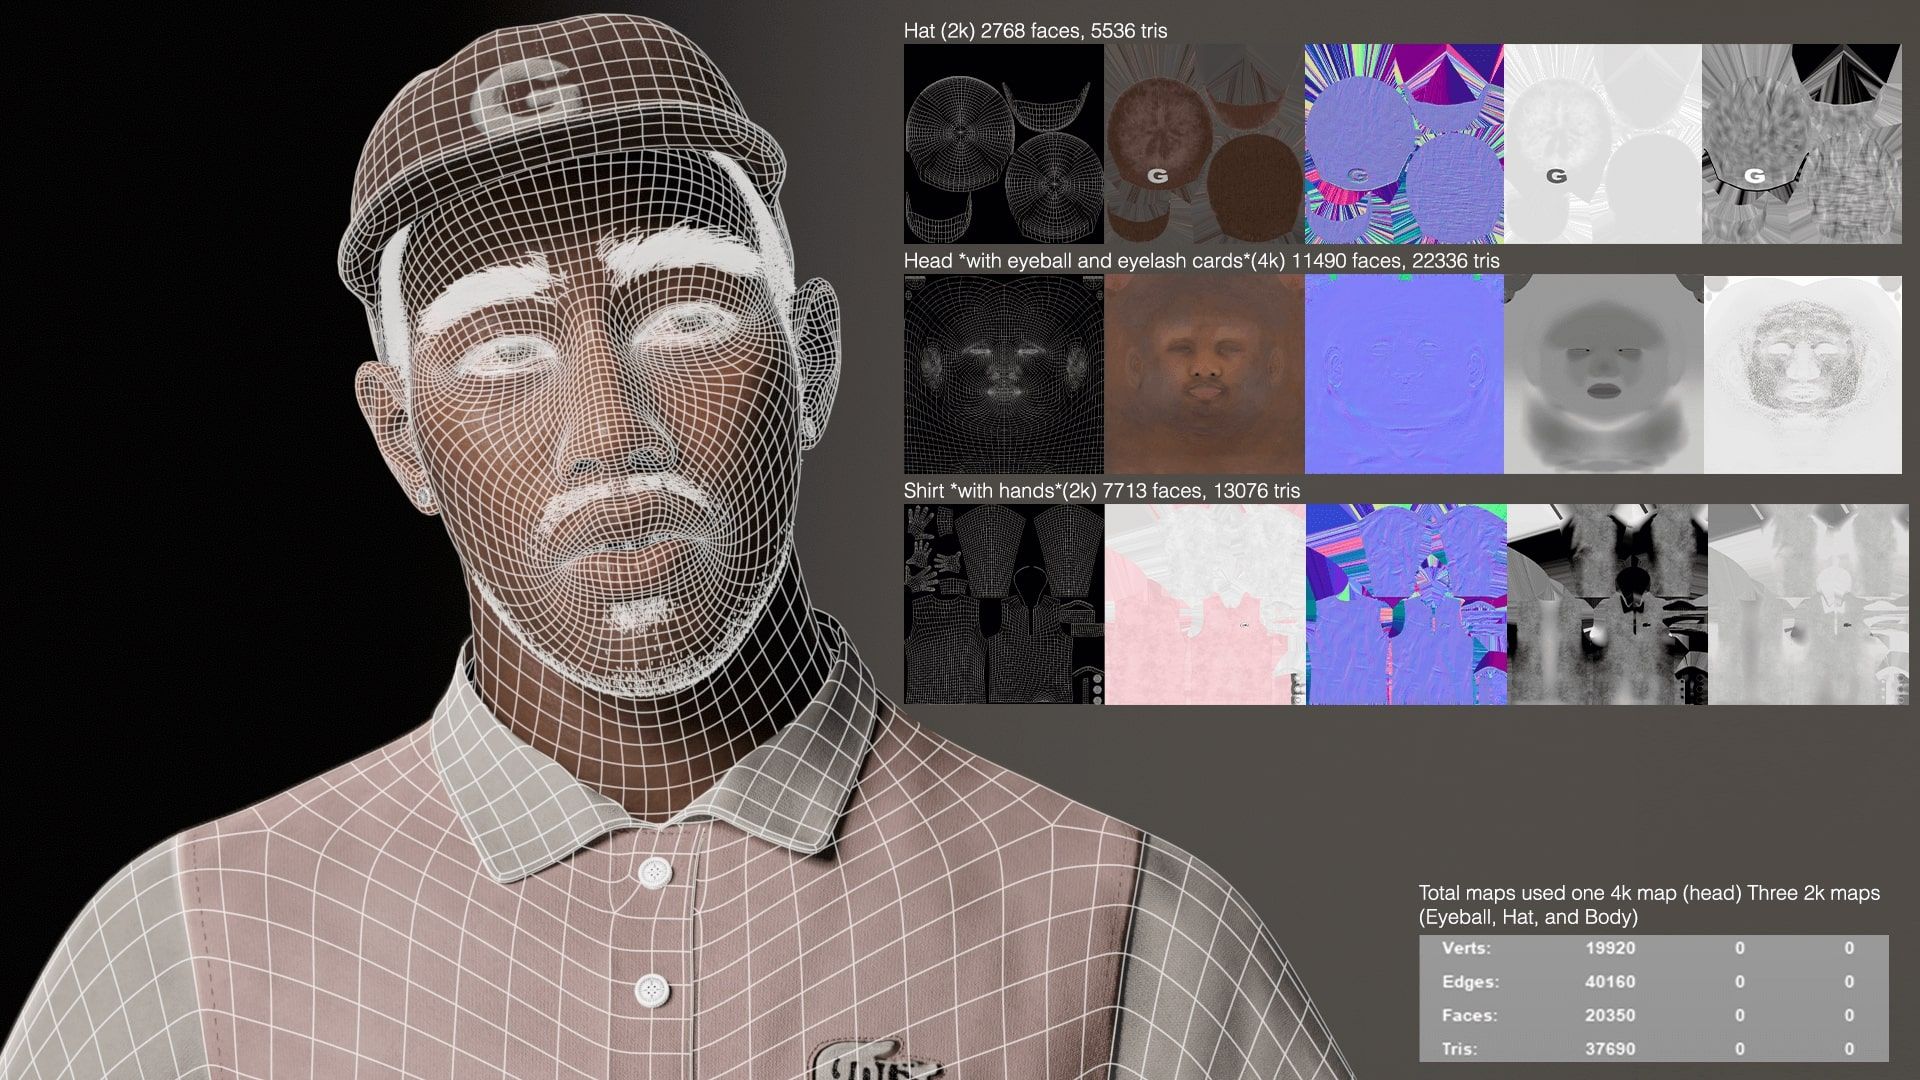
To begin the process, it is crucial to set up the shaders, including the normal and cavity maps, roughness maps, and subsurface scattering values. If the normal map appears incorrect at first, remember to check the flip Y option. Additionally, placing a temporary light allows for an understanding of how the shaders appear in various lighting conditions. The head maps were created in 4k resolution to be the primary focus of the shot, while 2k maps were sufficient for the eyeball and outfit.
Shader test renders
And after getting it down I moved on to importing and setting up things like the posed head, hat, shirt and also the hairs.
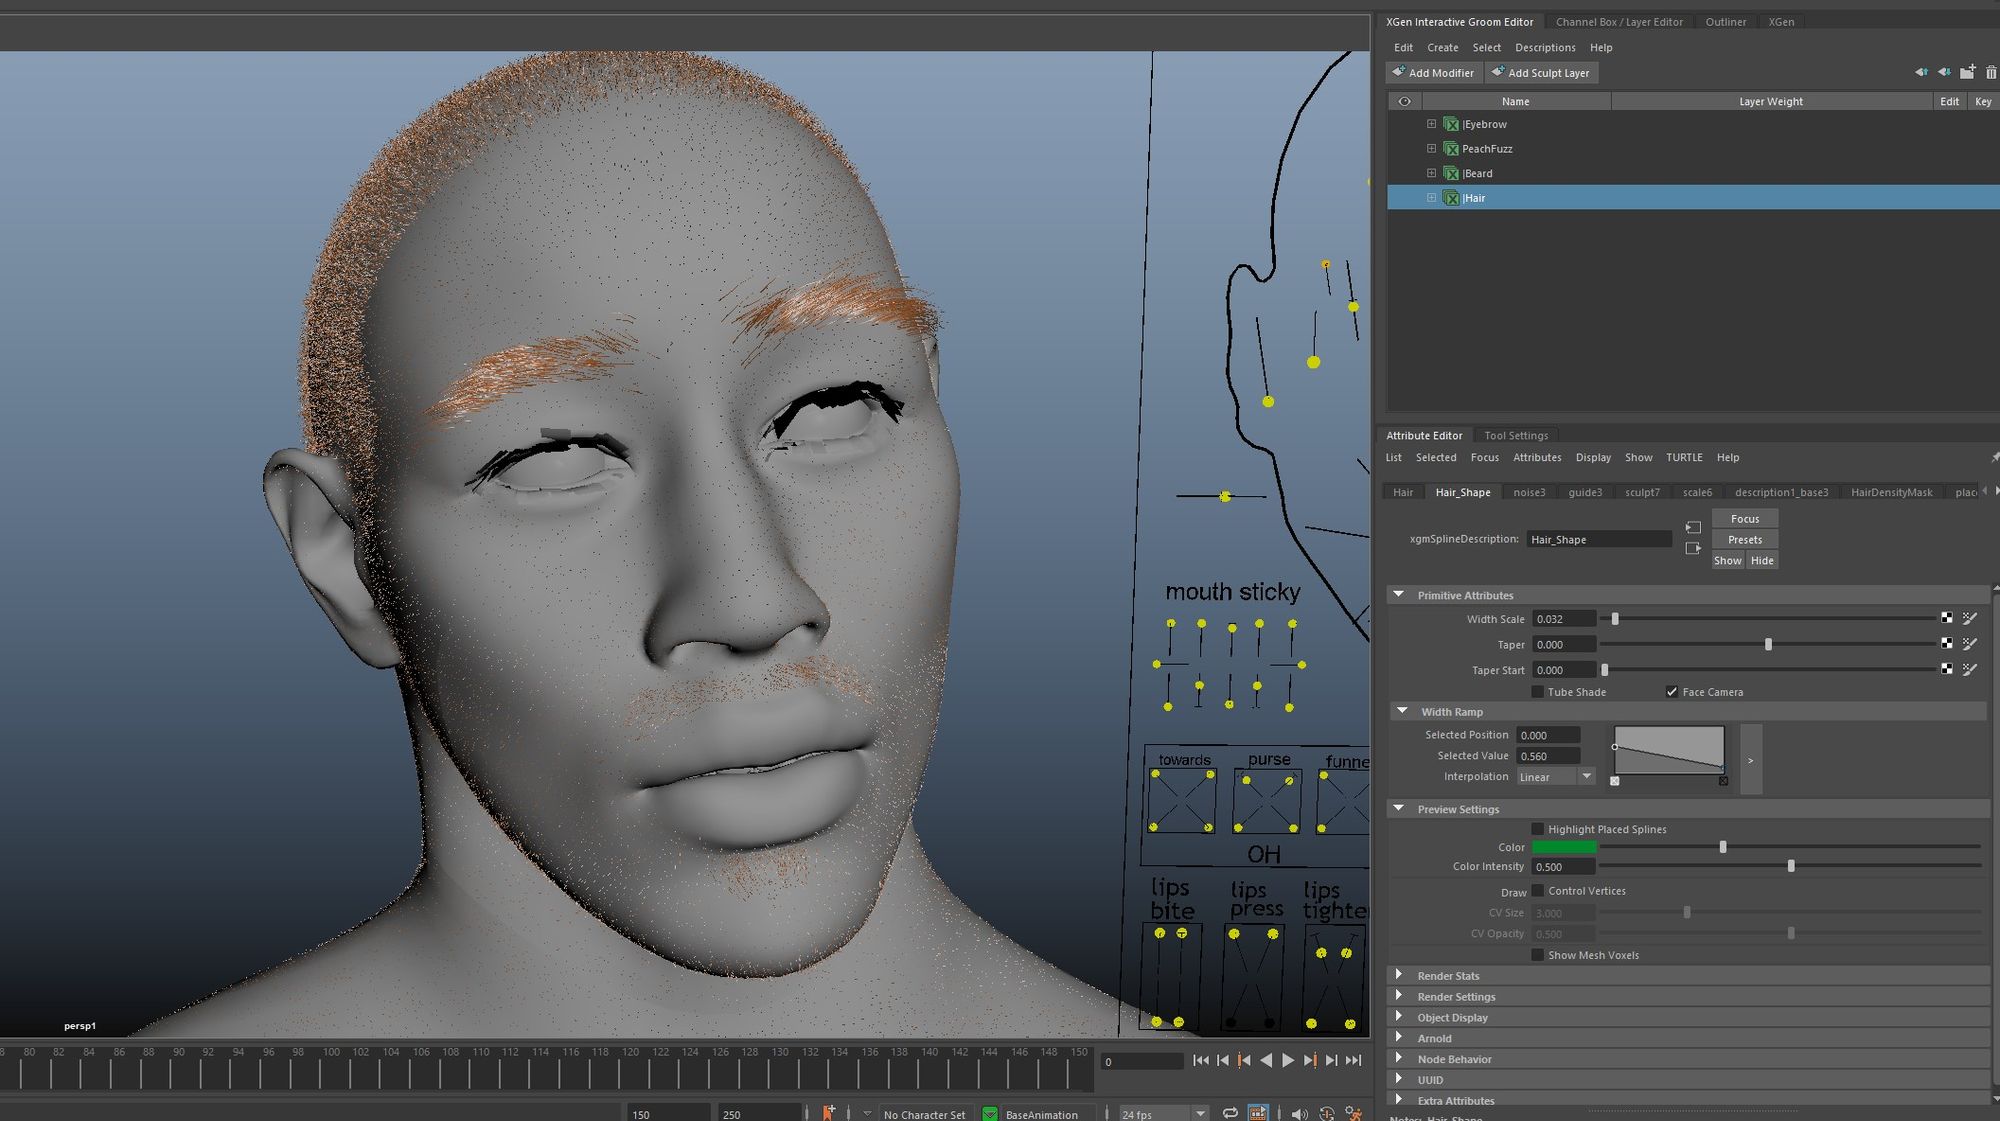
A Hairy Situation
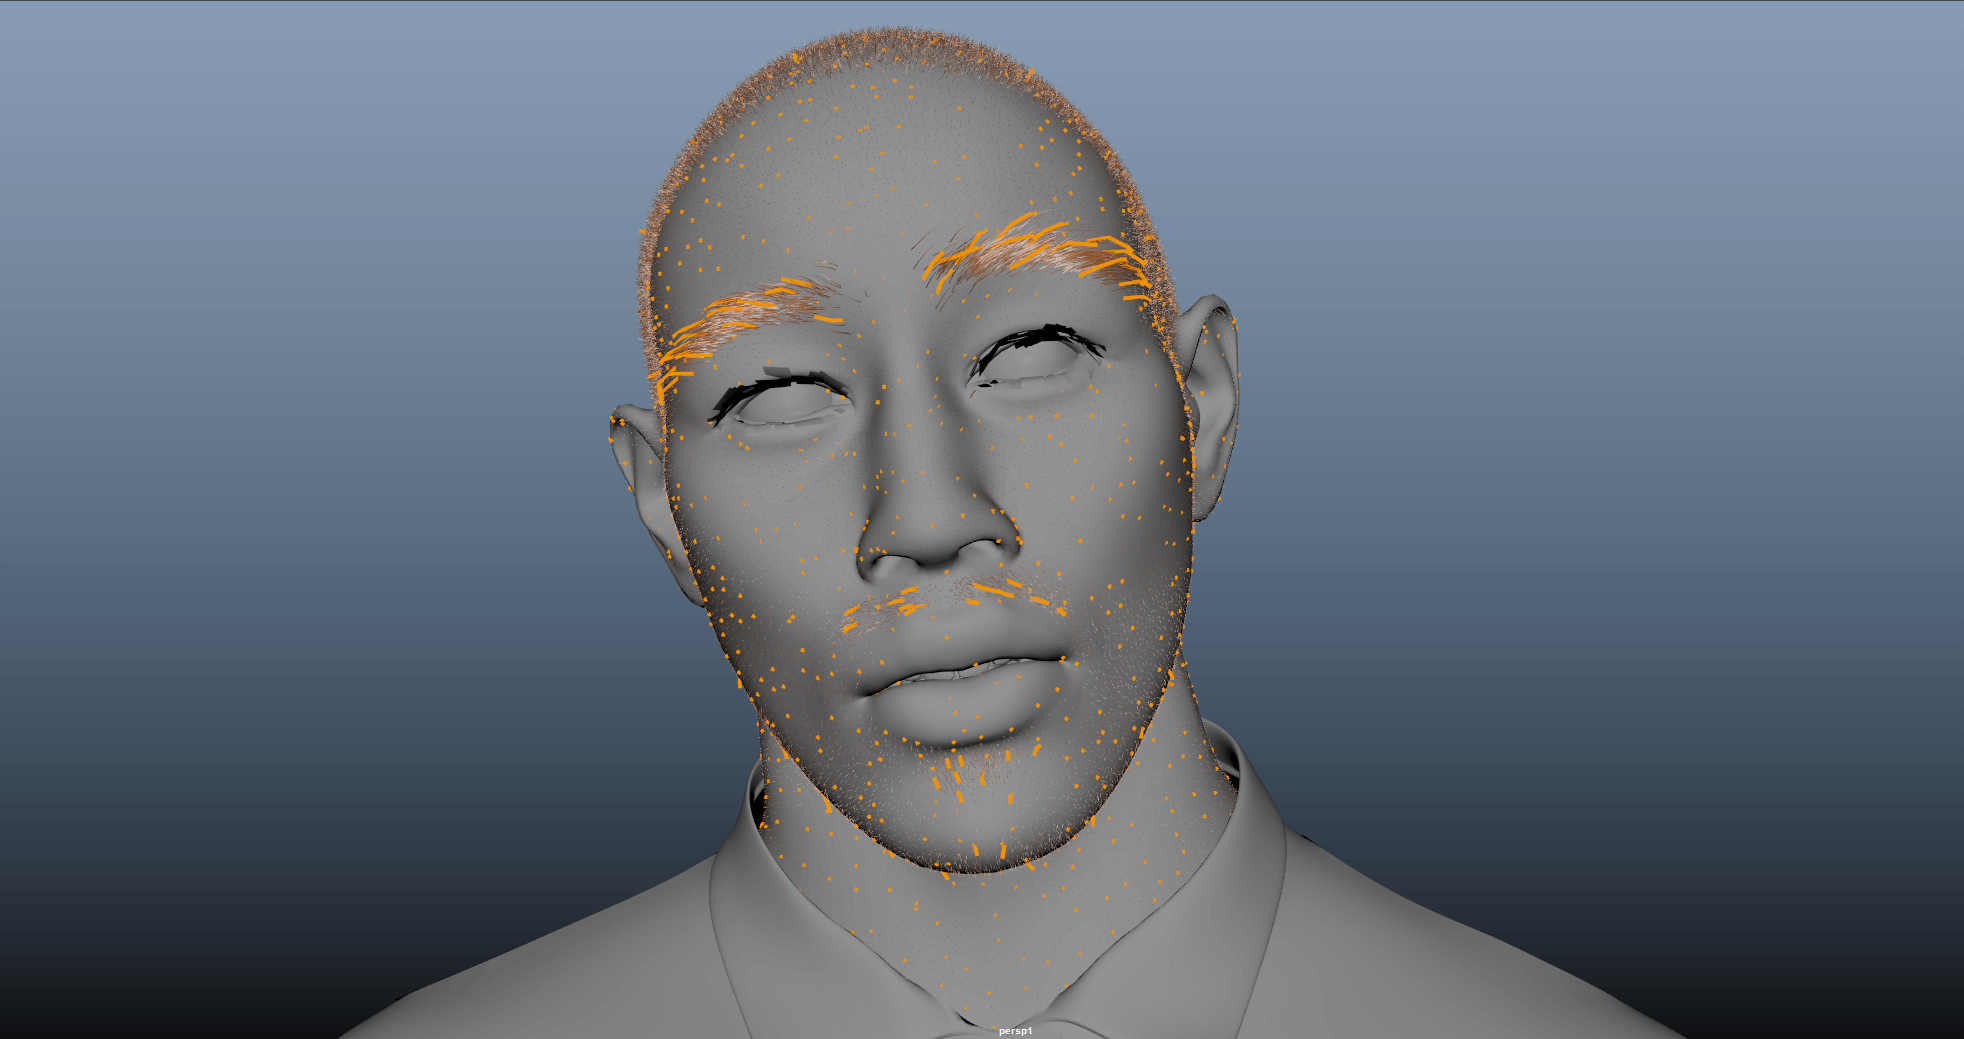
For the hairs such as the eyebrows, top hair, facial hair and the peach fuzz I went with Xgen as I’m more familiar with the setup process and workflows. It is as simple as setting up the guides with the appropriate shapes and forms and playing around with the modifiers to get the look and feel that you need while also keeping the CV’s in check before you convert it into meshes so that it’s not extremely high polycount when you bring it into Marmoset Toolbag.
Xgen hair guides setup
While I would love to test out more of using hair cards instead, I decided in the end to use Xgen and convert it into meshes as I'm still in the process of figuring out a proper workflow for hair cards and the eyelashes are a test of that.
After the groom was converted and imported into Marmoset, it was time to compile everything together and set up a proper lighting for the final scene.
Lighting and Rendering
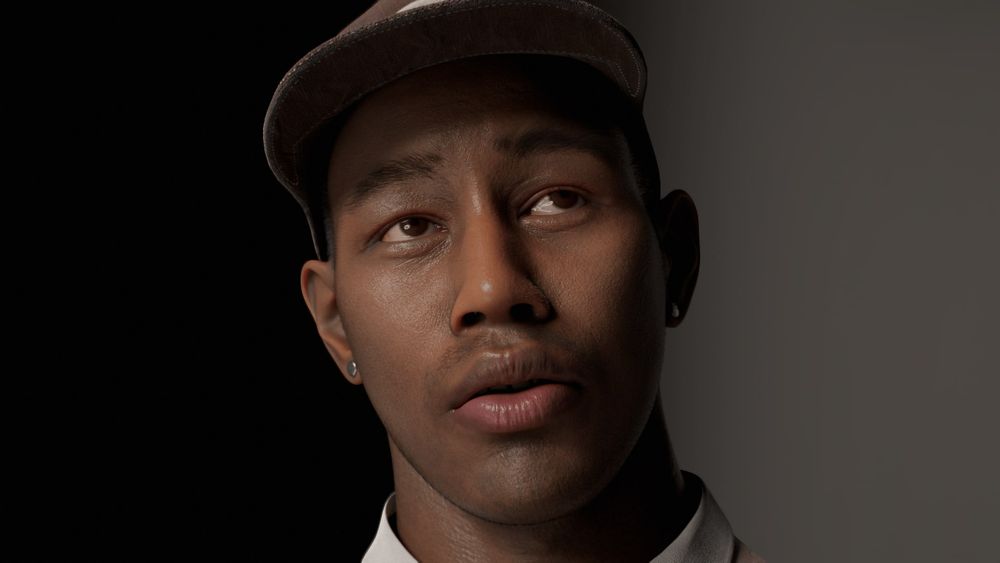
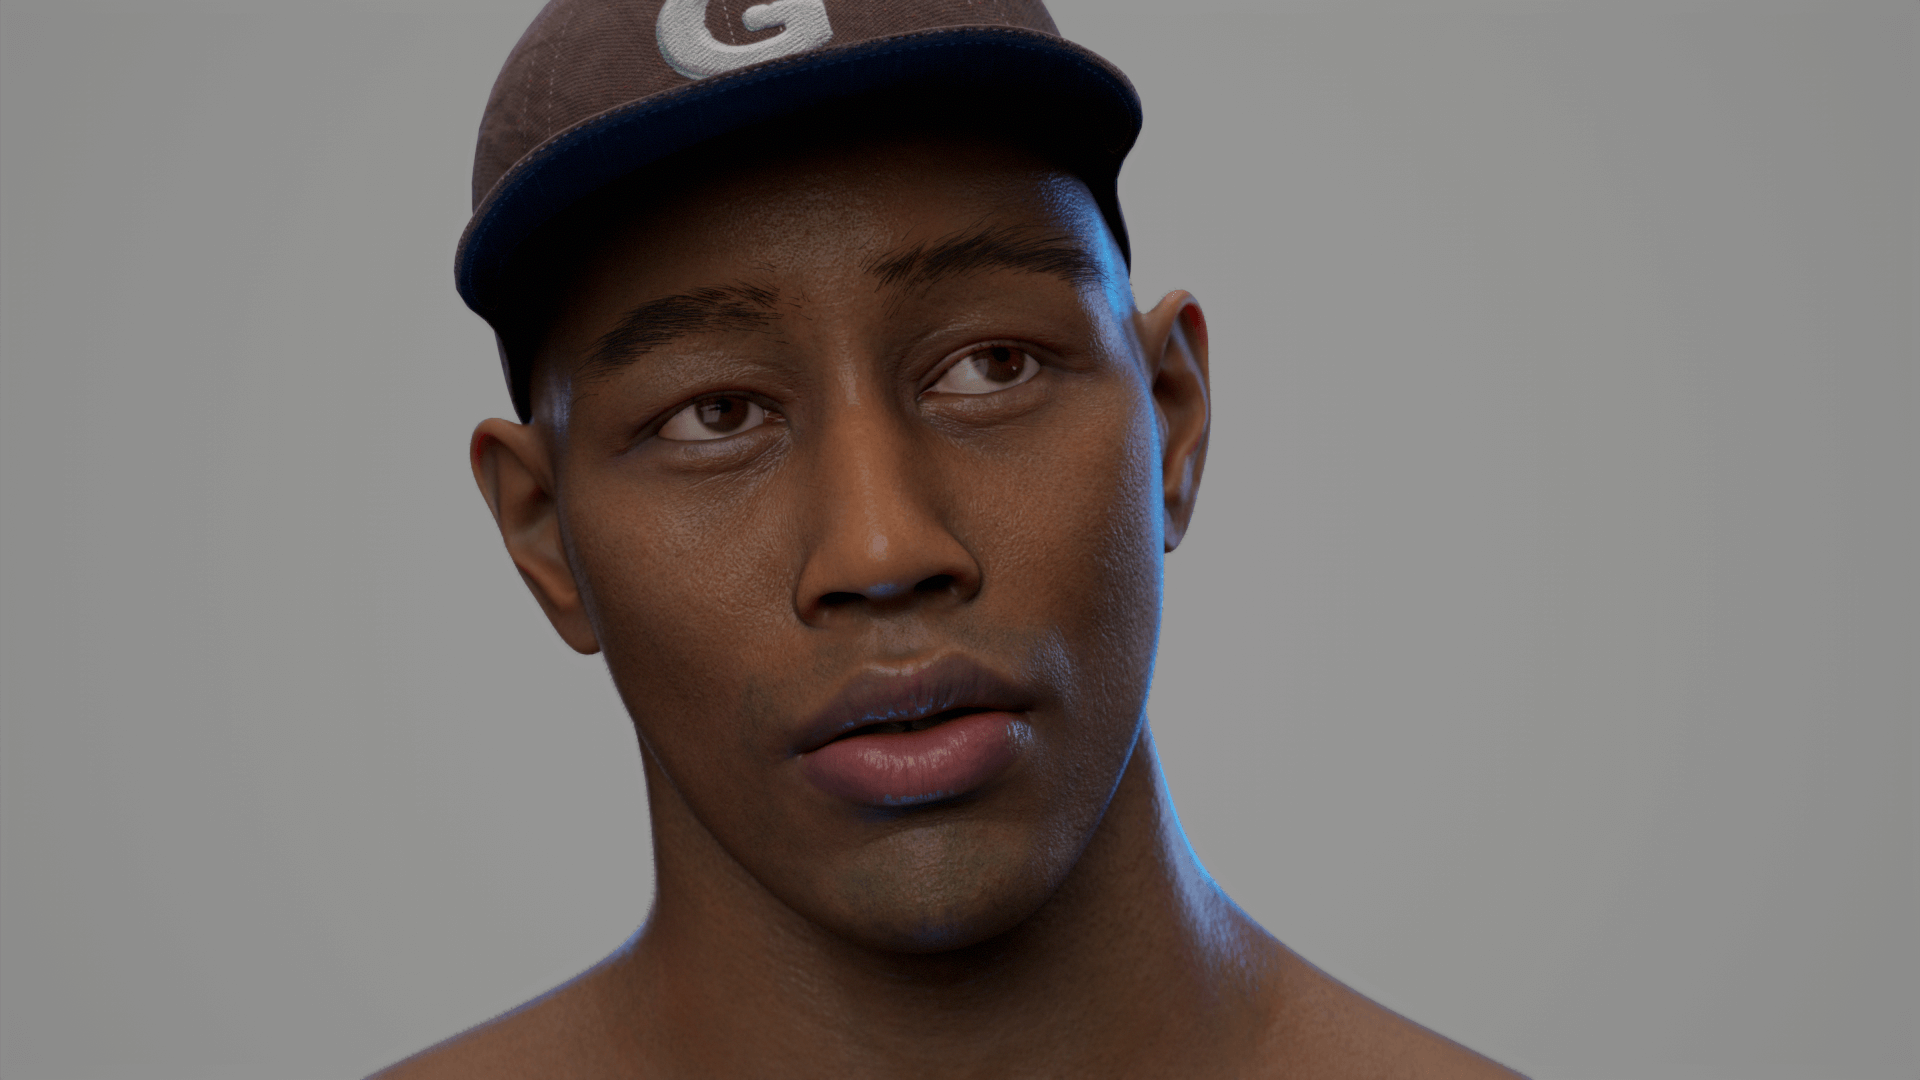
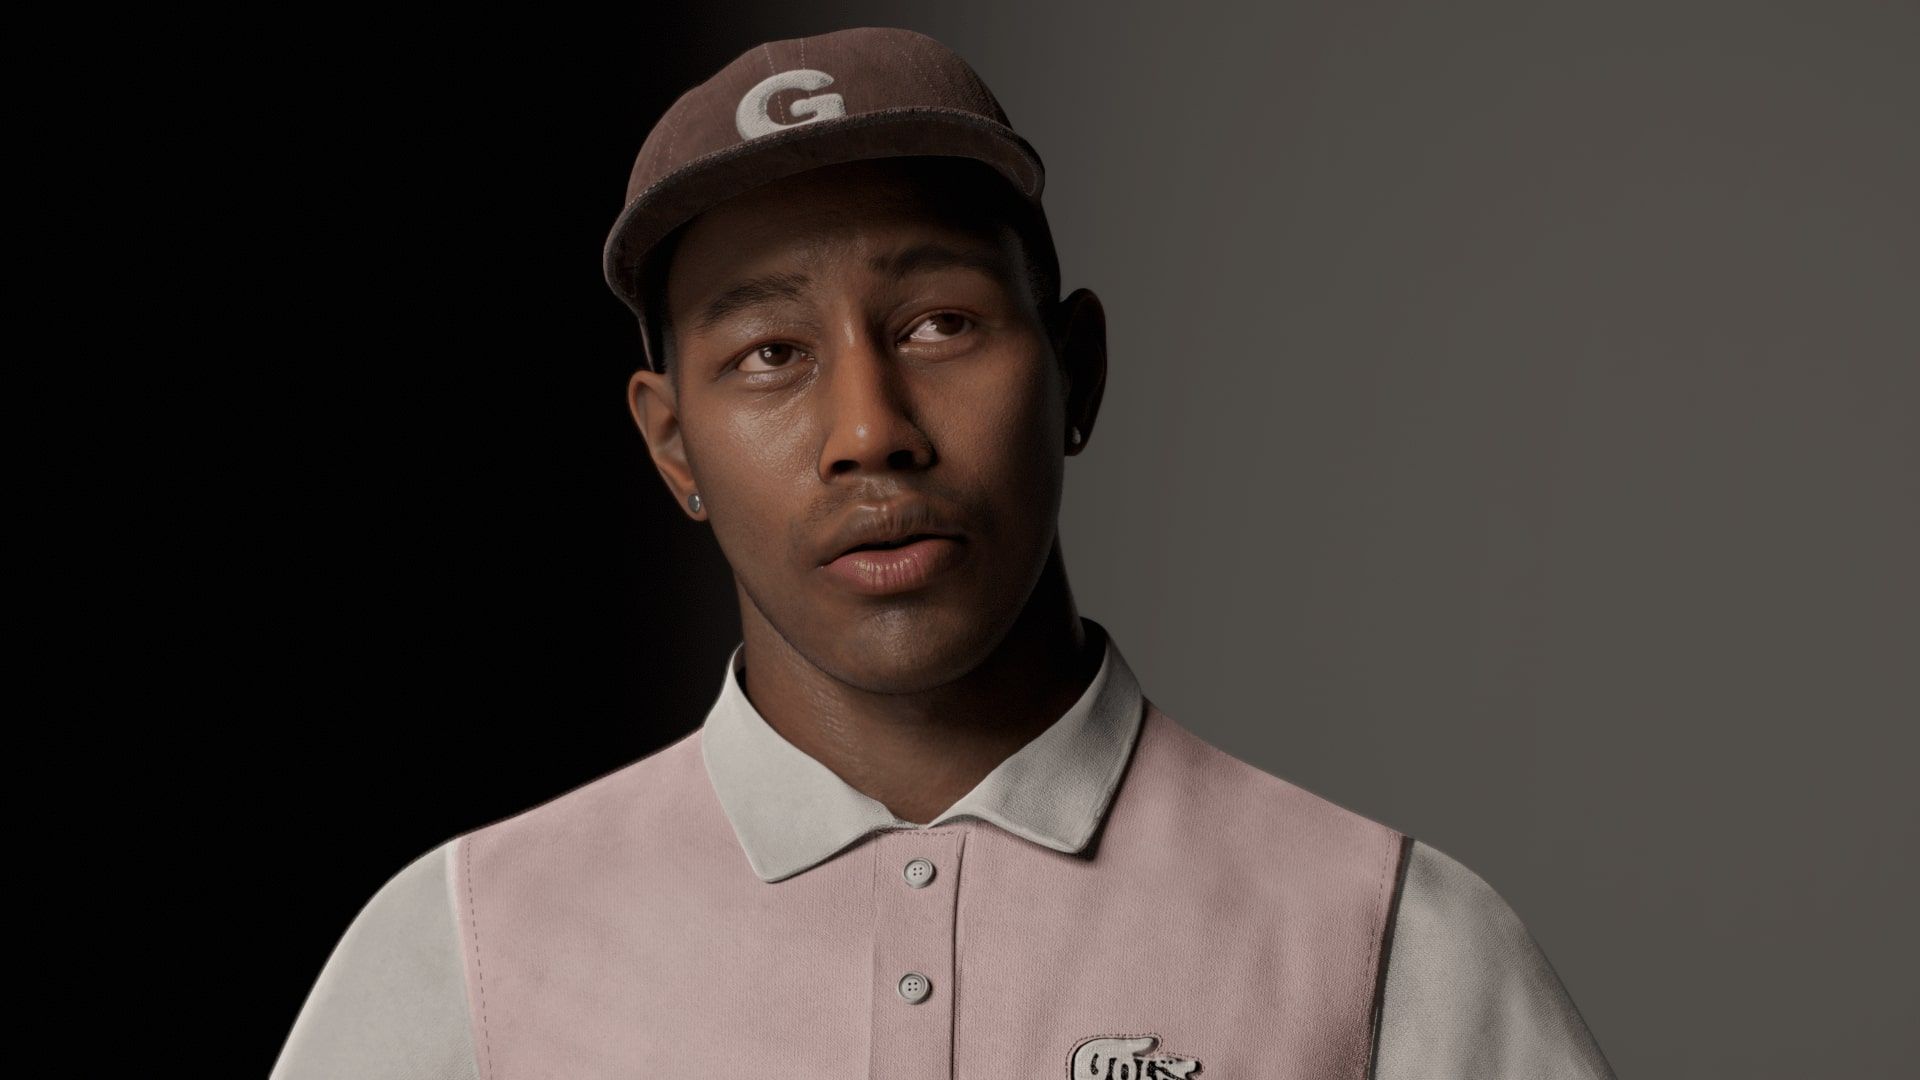
For the final lighting and rendering setup, I opted for a natural skylight HDRI complemented by a key and fill light. This setup allowed me to achieve a studio portrait look and give the scene a cinematic feel. To prevent over-exaggeration of details that could look odd with a super bright rim light on the back, I decided not to use rim lights for this project.
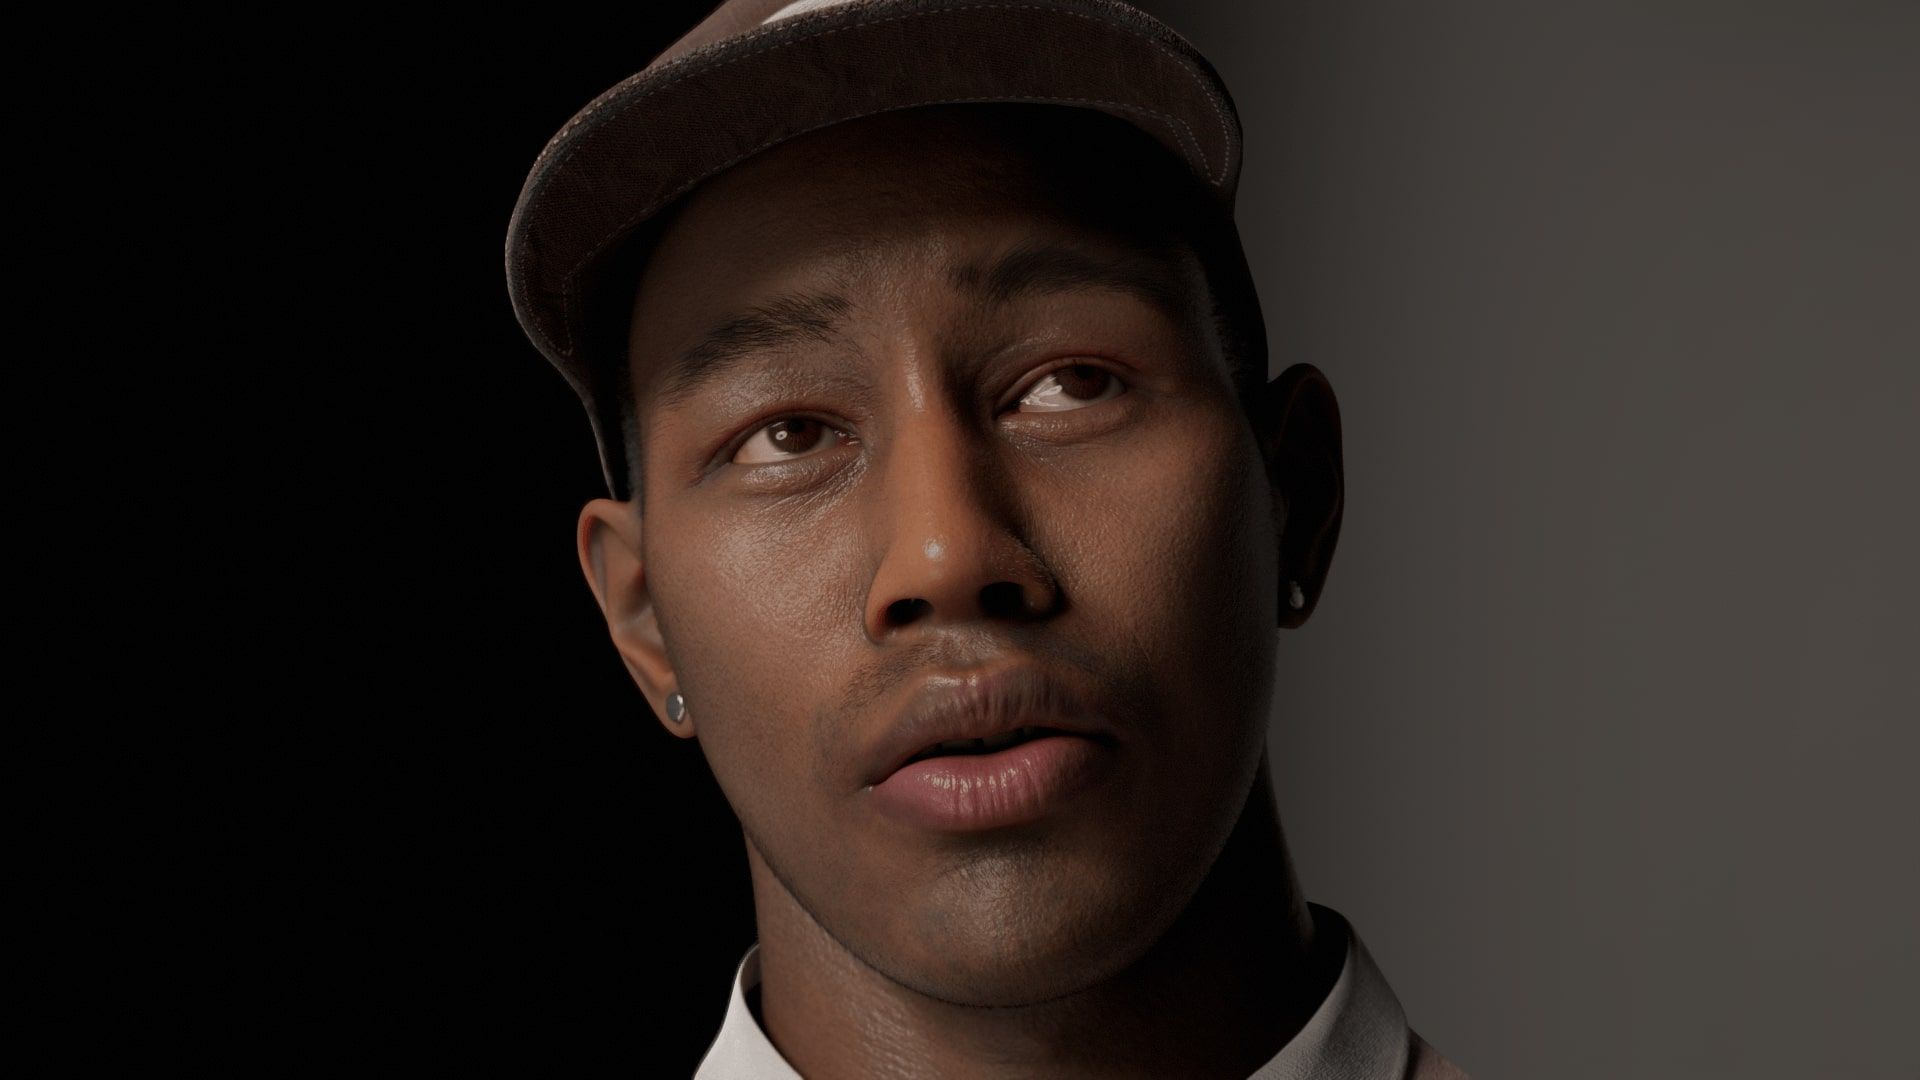
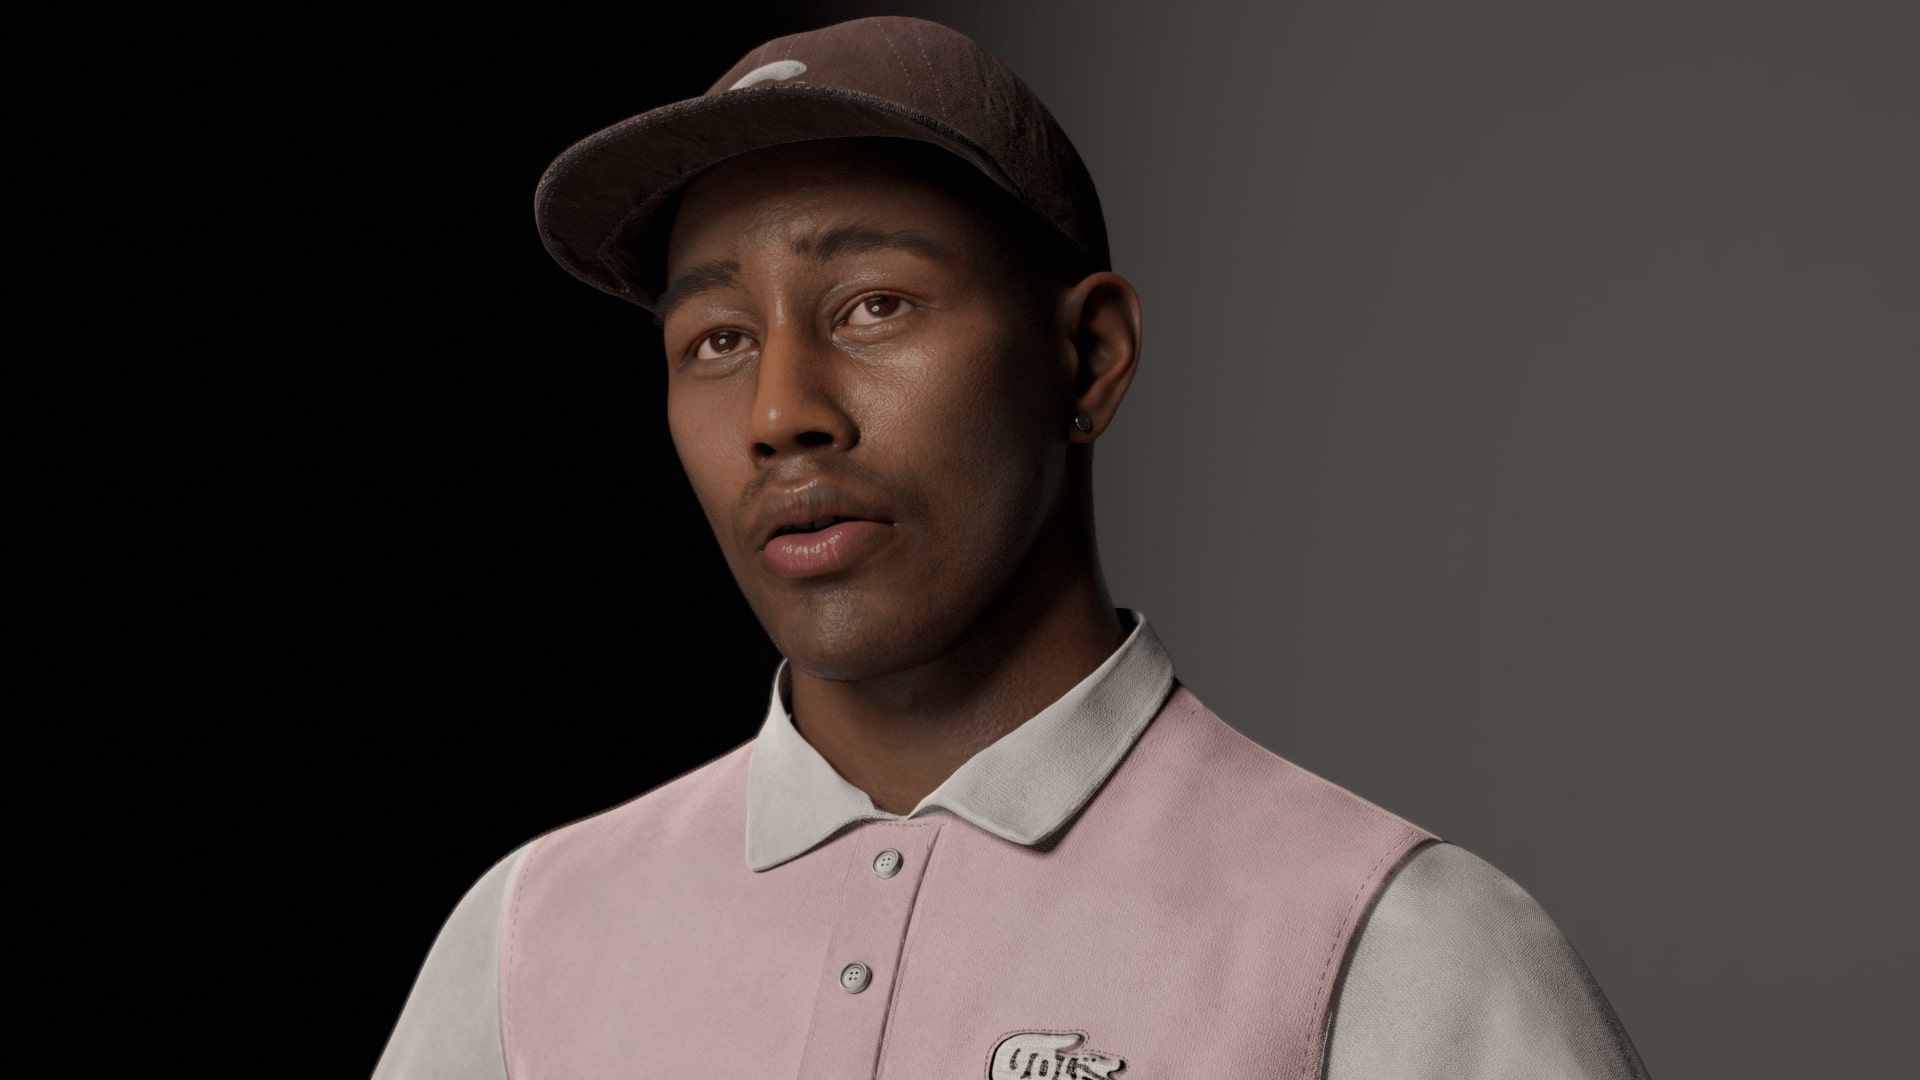
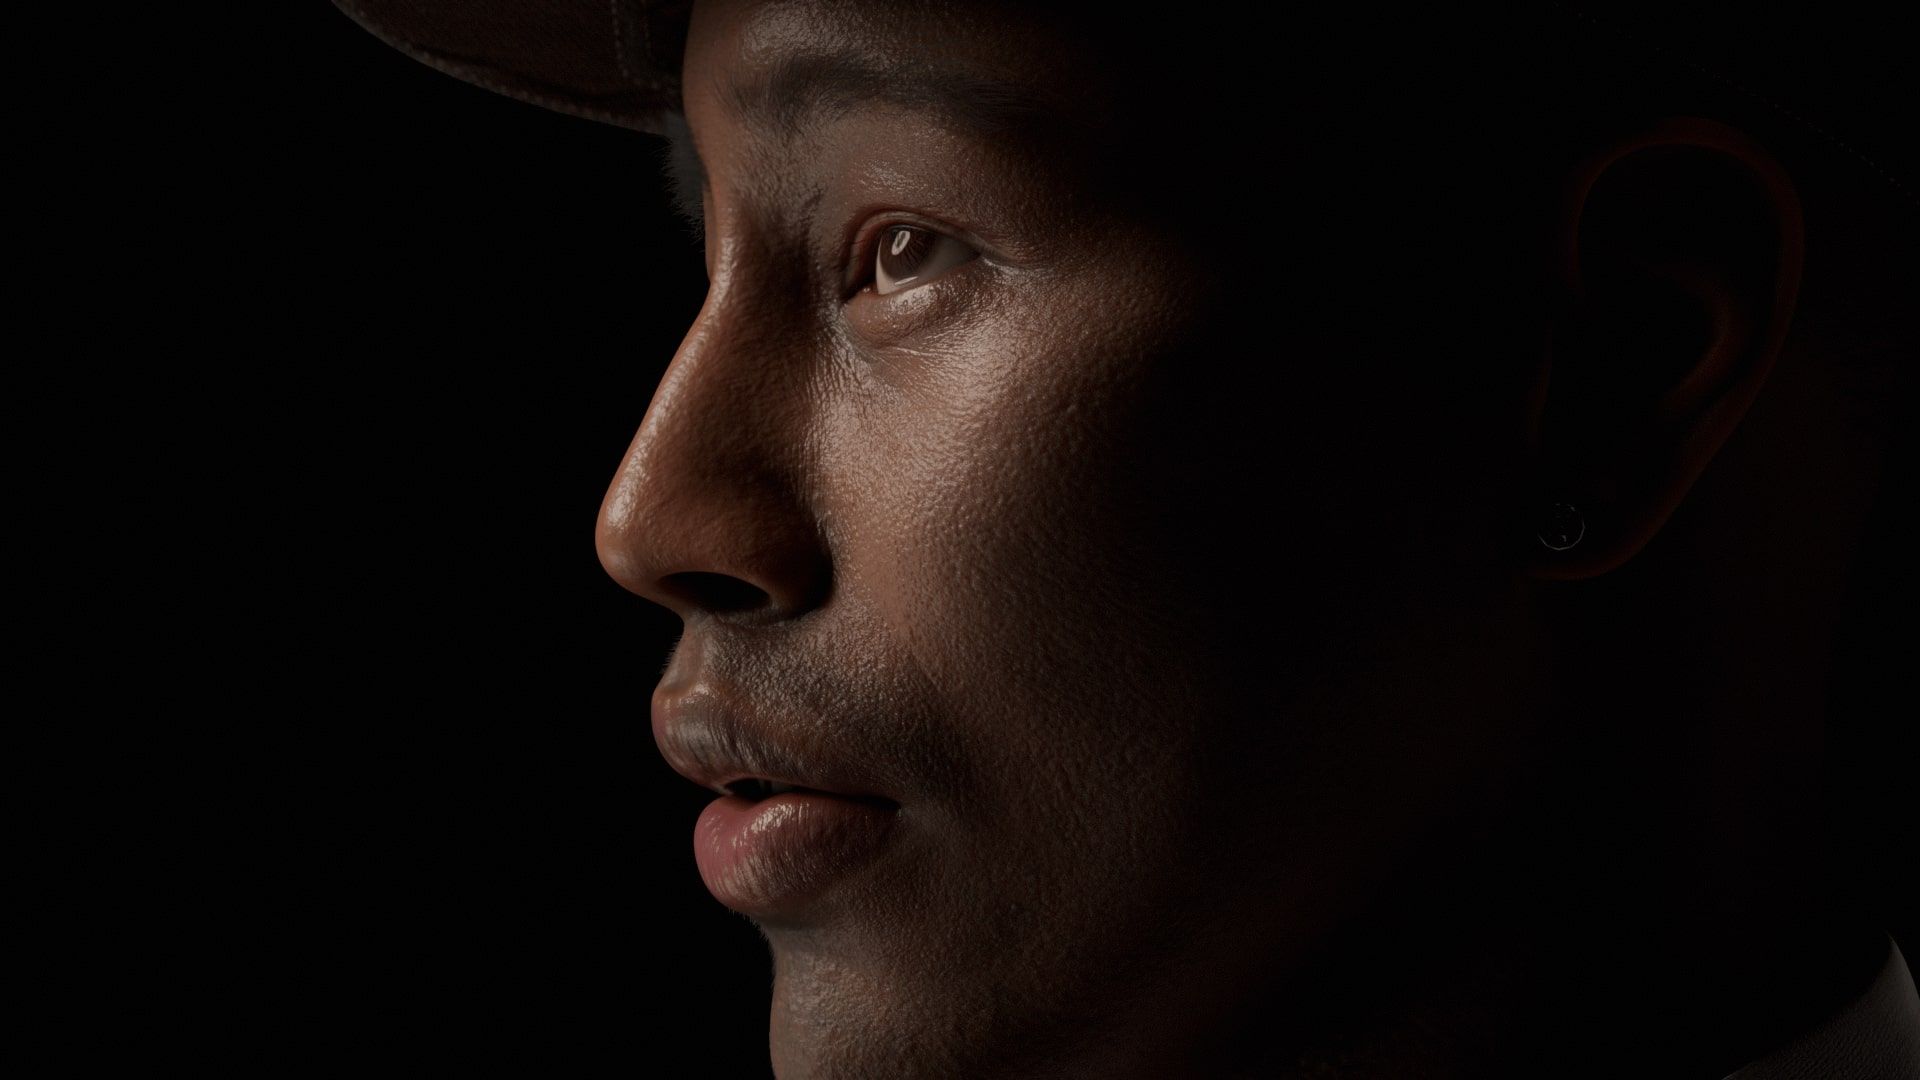
Final rendersRealtime screen recording of the final scene in Marmoset Toolbag
Looking back
And that’s pretty much my workflow throughout the whole project. I hope that some of what I shared today is helpful or useful to you!
Once again I want to thank The Rookies for giving me the opportunity to explain my workflows and thought process and giving a more in depth look on the character modeling process.
I encourage everyone to try out a different workflow to challenge themselves when starting a new project and who knows, you might find an even more efficient way of making things work. And thank you for taking the time to read through and taking a look at my work.