How to Create an Animation-Ready Stylised Character with Realistic Textures
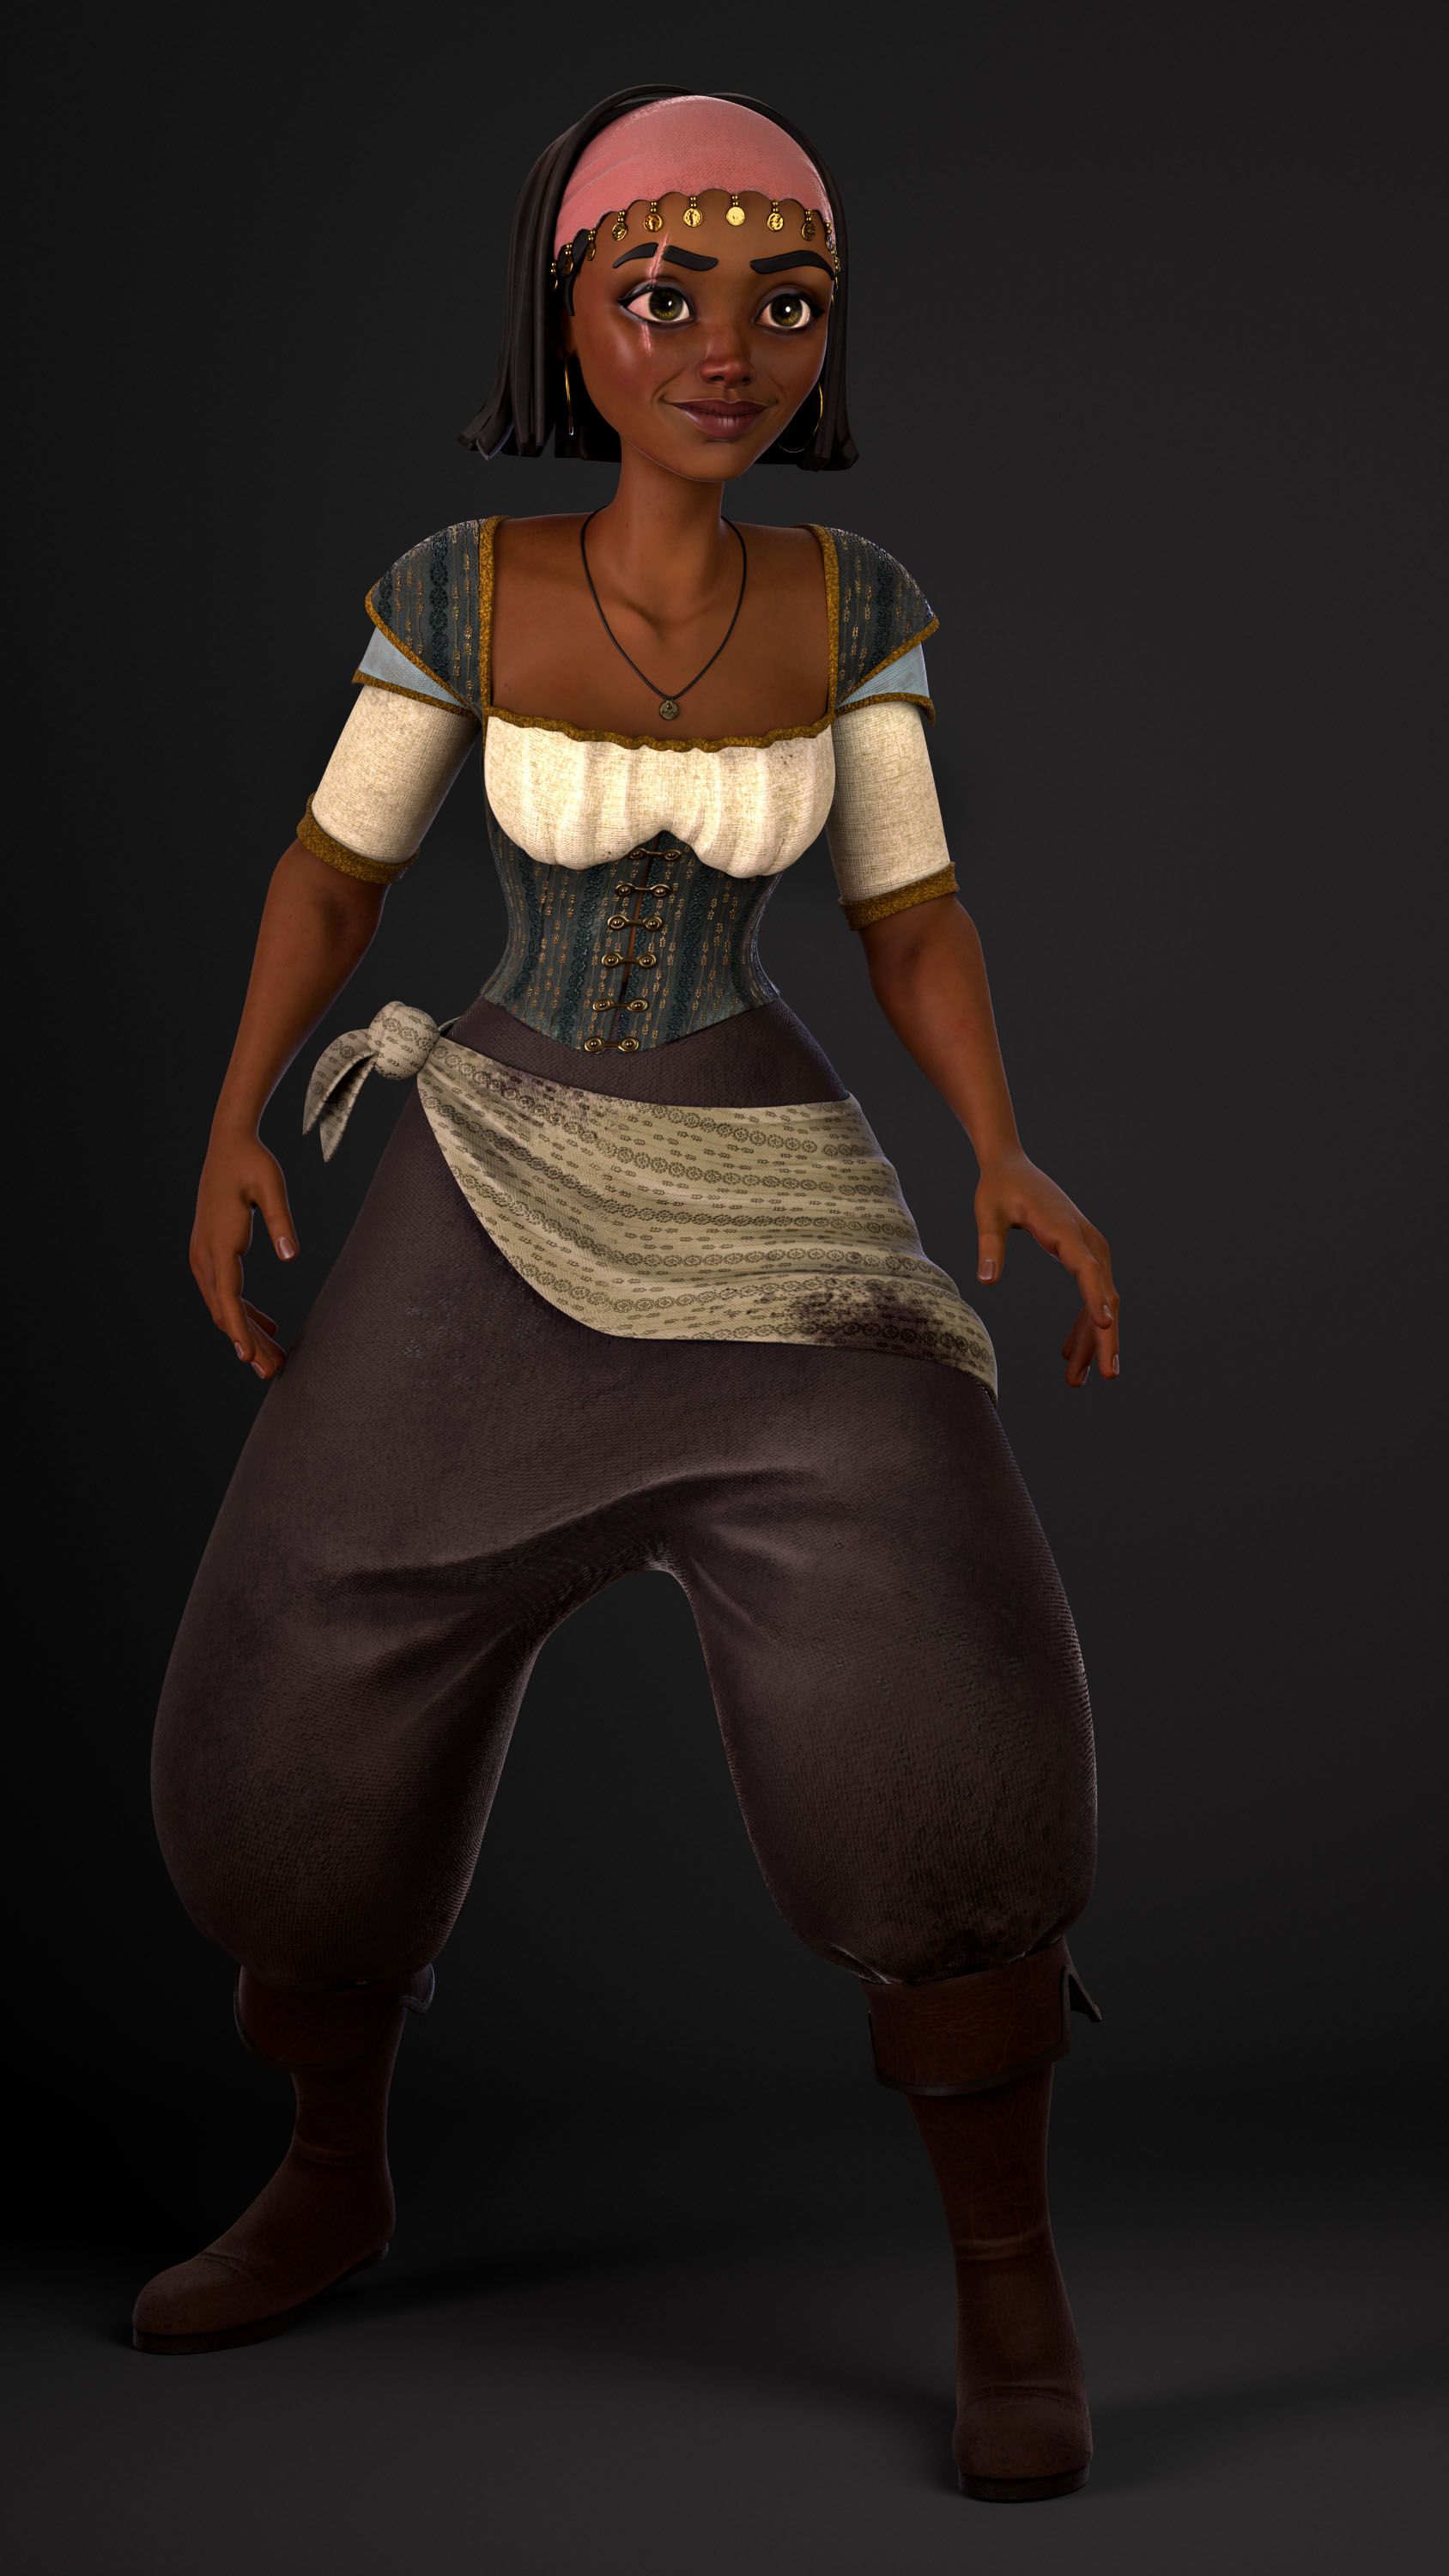
Discover Snezhana Golubeva's project "She's a Pirate" and delve into the process behind her impressive Rookie Awards 2023 entry. Guided by experienced mentors, she takes us through the steps of creating a stylised 3D character with realistic textures.
Snezhana Golubeva is a 3D student of L’idem Creative Art School based in Barcelona, currently specialising in 3D Character Art.
In this article, she takes us on a journey through her captivating project titled "She's a Pirate." Guided by experienced mentors Javier Benver, Esteve Garriga and Edu Morales, Snezhana breaks down the process behind her Rookie Awards 2023 entry.
Join me as I take you through a detailed step-by-step process of creating a stylised 3D character with realistic textures. We'll explore each stage, including:
Blocking: Establishing the basic forms and shapes.
Sculpting the body: Adding intricate details and refining the overall structure.
Adding clothes and details: Enhancing the character's appearance with clothing and accessories.
Retopology: Optimising the model's topology for better performance.
Texturing: Applying realistic textures to bring the character to life.
Final posing and Render: Giving the character a dynamic pose and capturing the perfect render.
Blocking
At this stage I focus only on basic forms. I have all my big trials and errors here as it will be more difficult to fix them later. I always block my characters in ZBrush - it gives you precision and freedom. I use spheres, cylinders, and rings. It’s a cartoon character, so I don’t think about every single muscle, only shapes and exaggeration.
An important tip - let the mouth open. It’s better to bake it later, as the lips won’t create any errors in ambient occlusion.
Basic shapes only
Sculpting the Body
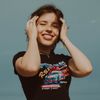
For the next step I put together all her body parts using Dynamesh and then ZRemesher. I smoothed the joints and began to sculpt. I use basic ZBrush brushes listed below. TrimDynamic and Pinch are actually life-savers. They let you create a more “cartoonish” look.
The challenge for me was to not over-sculpt. I wanted to achieve a stylized look, so no over detailing. Sharp edges, but soft shapes, simple hands.
I didn’t sculpt the feet, because I didn’t plan for her to take off the boots. If she was in an animated movie where was barefoot, I definitely would have sculpted them.
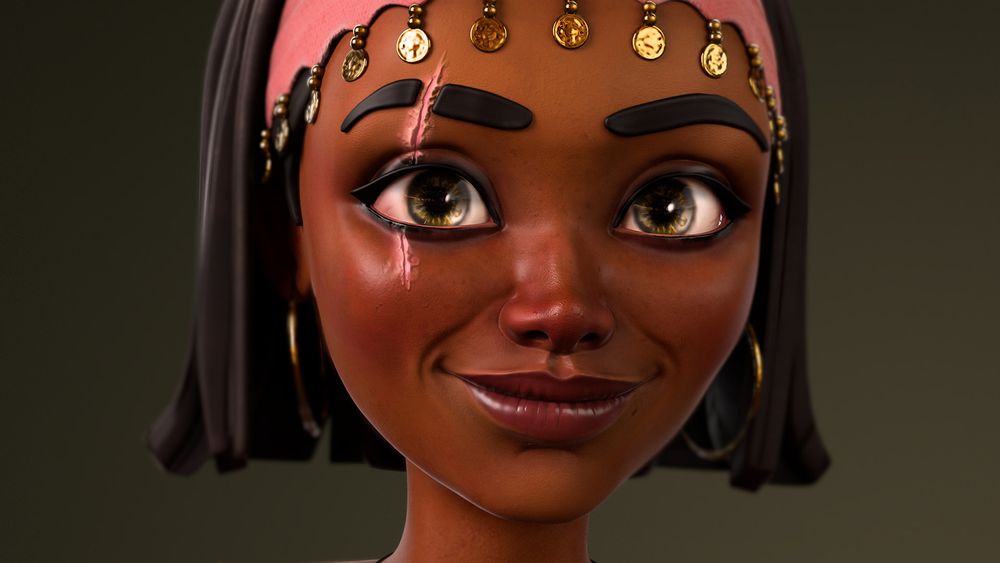
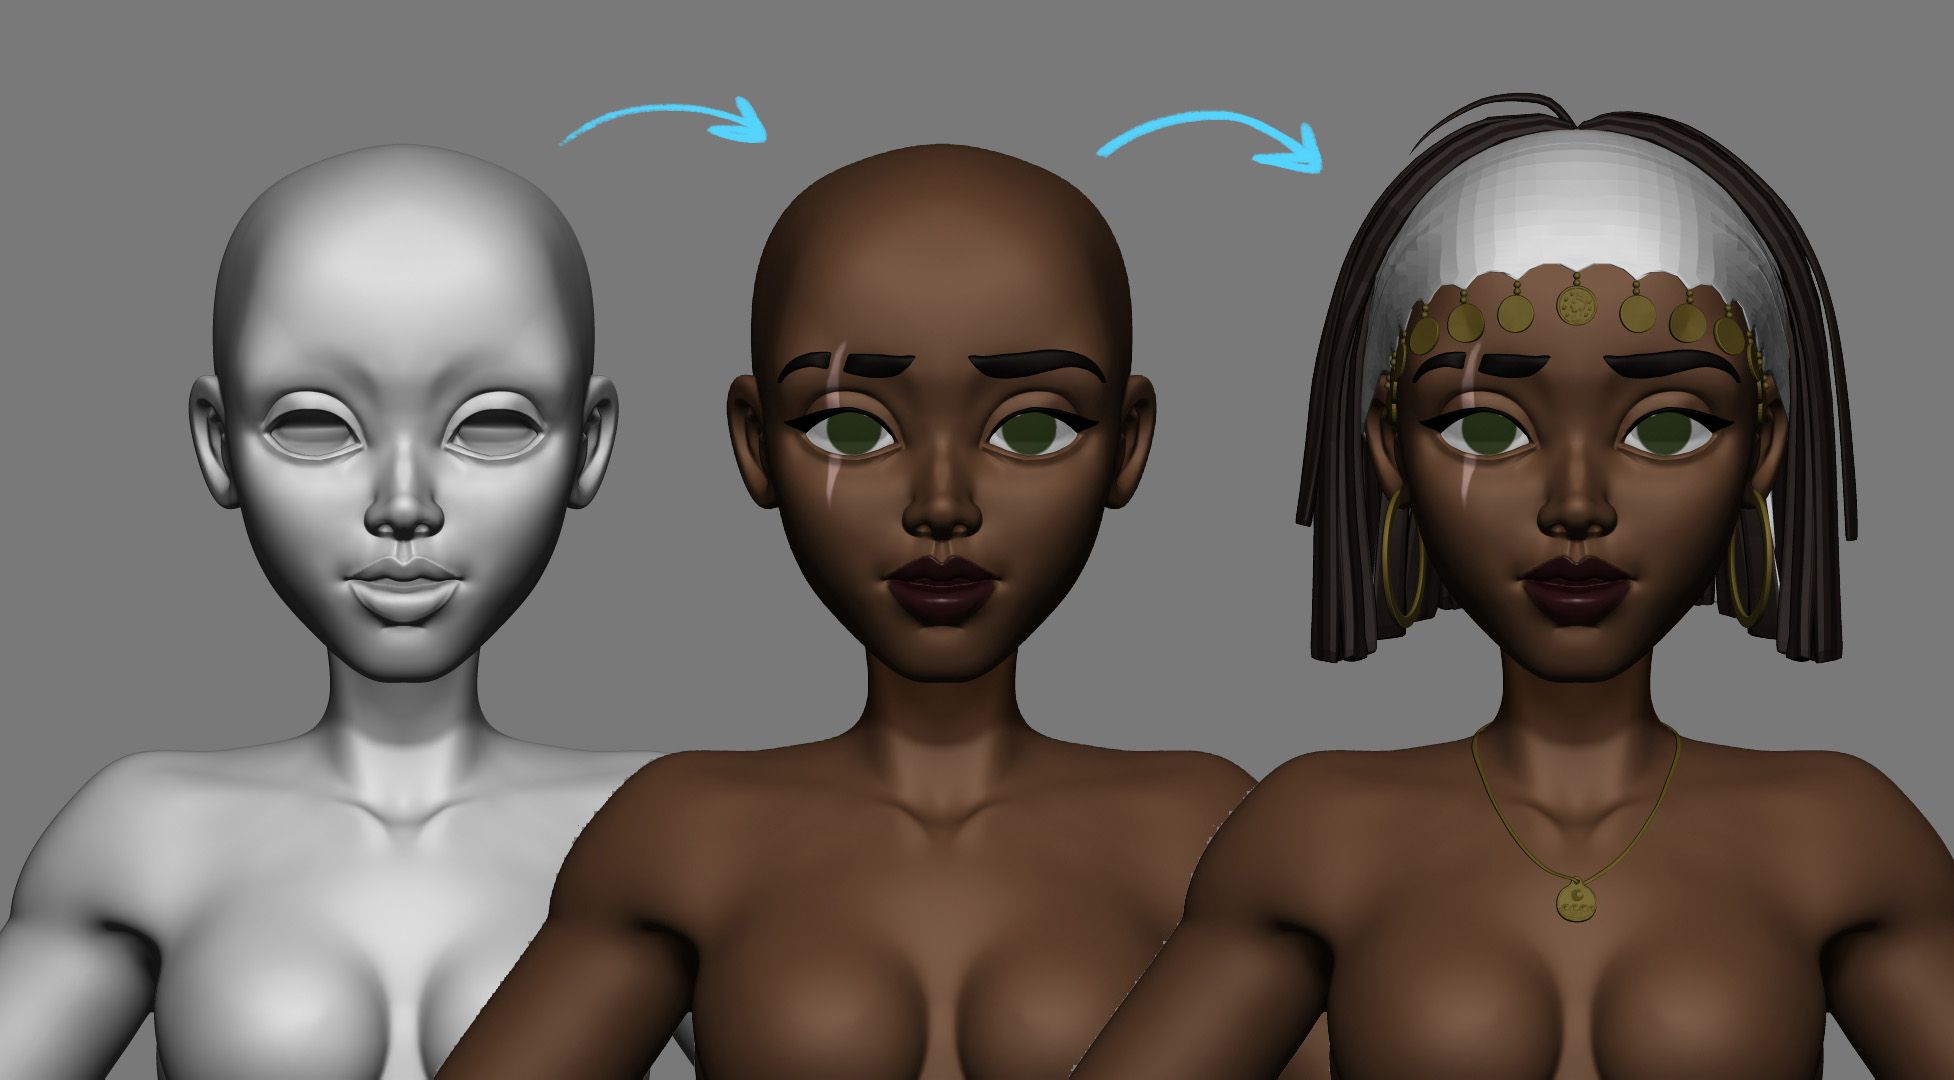
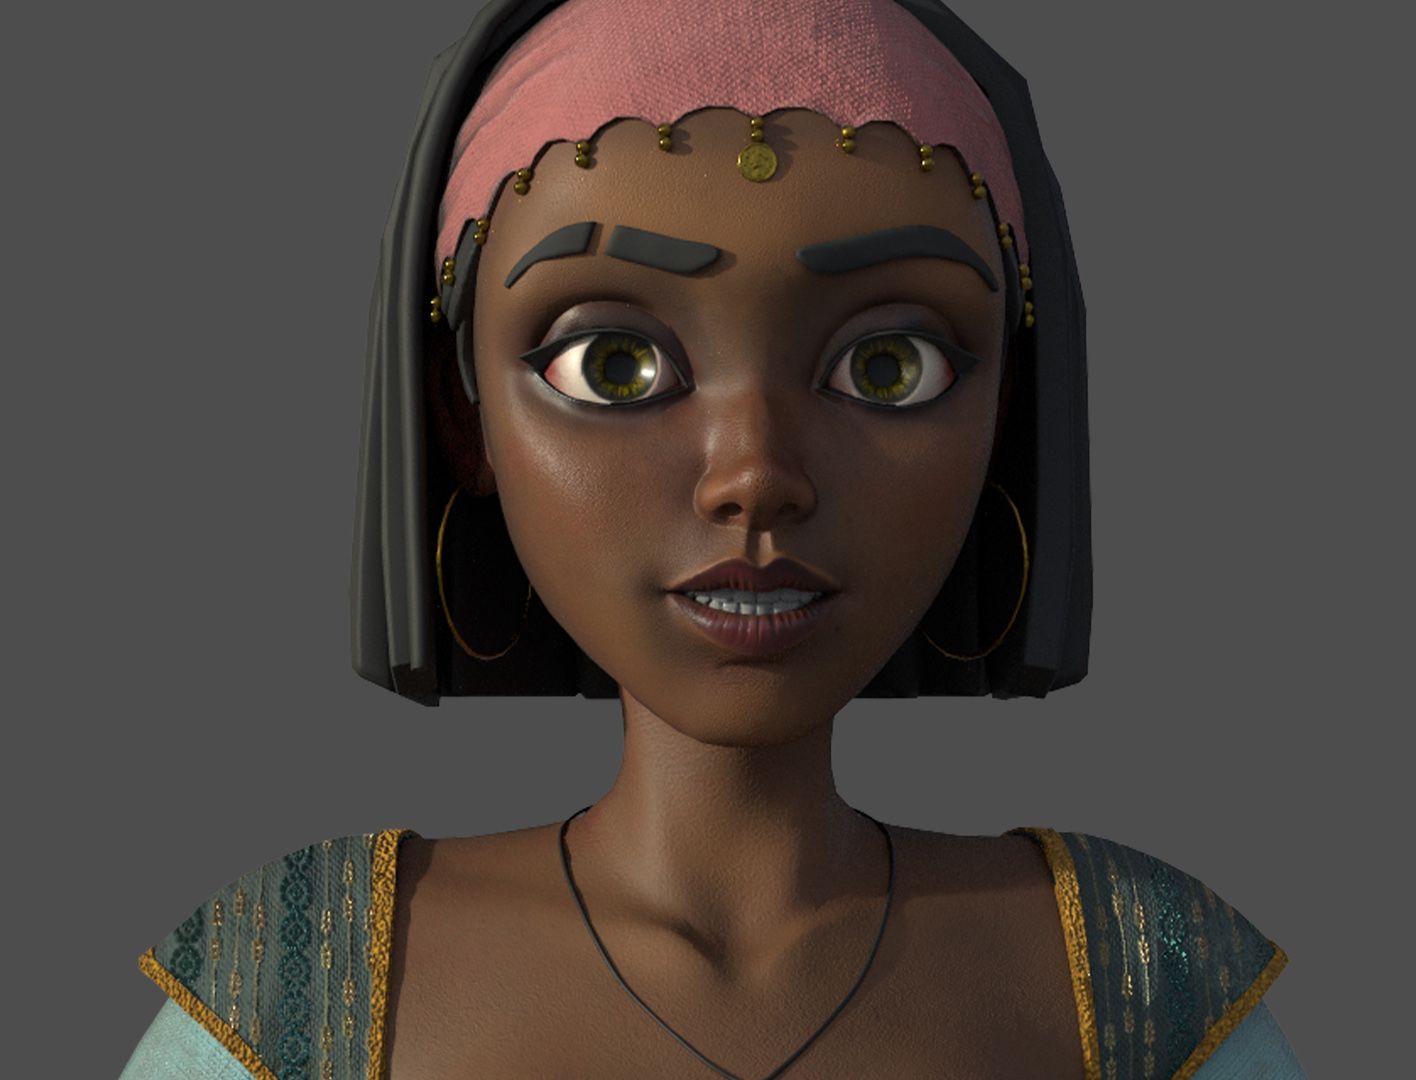
Part of my character sculpting process involves painting in ZBrush and adding essential details such as eyes and hair. A face without eyes or colors can make it challenging to gauge the progress of the sculpt.
Add the colour and eyes mid sculpt and then adjust face features.
Adding Clothes and Details
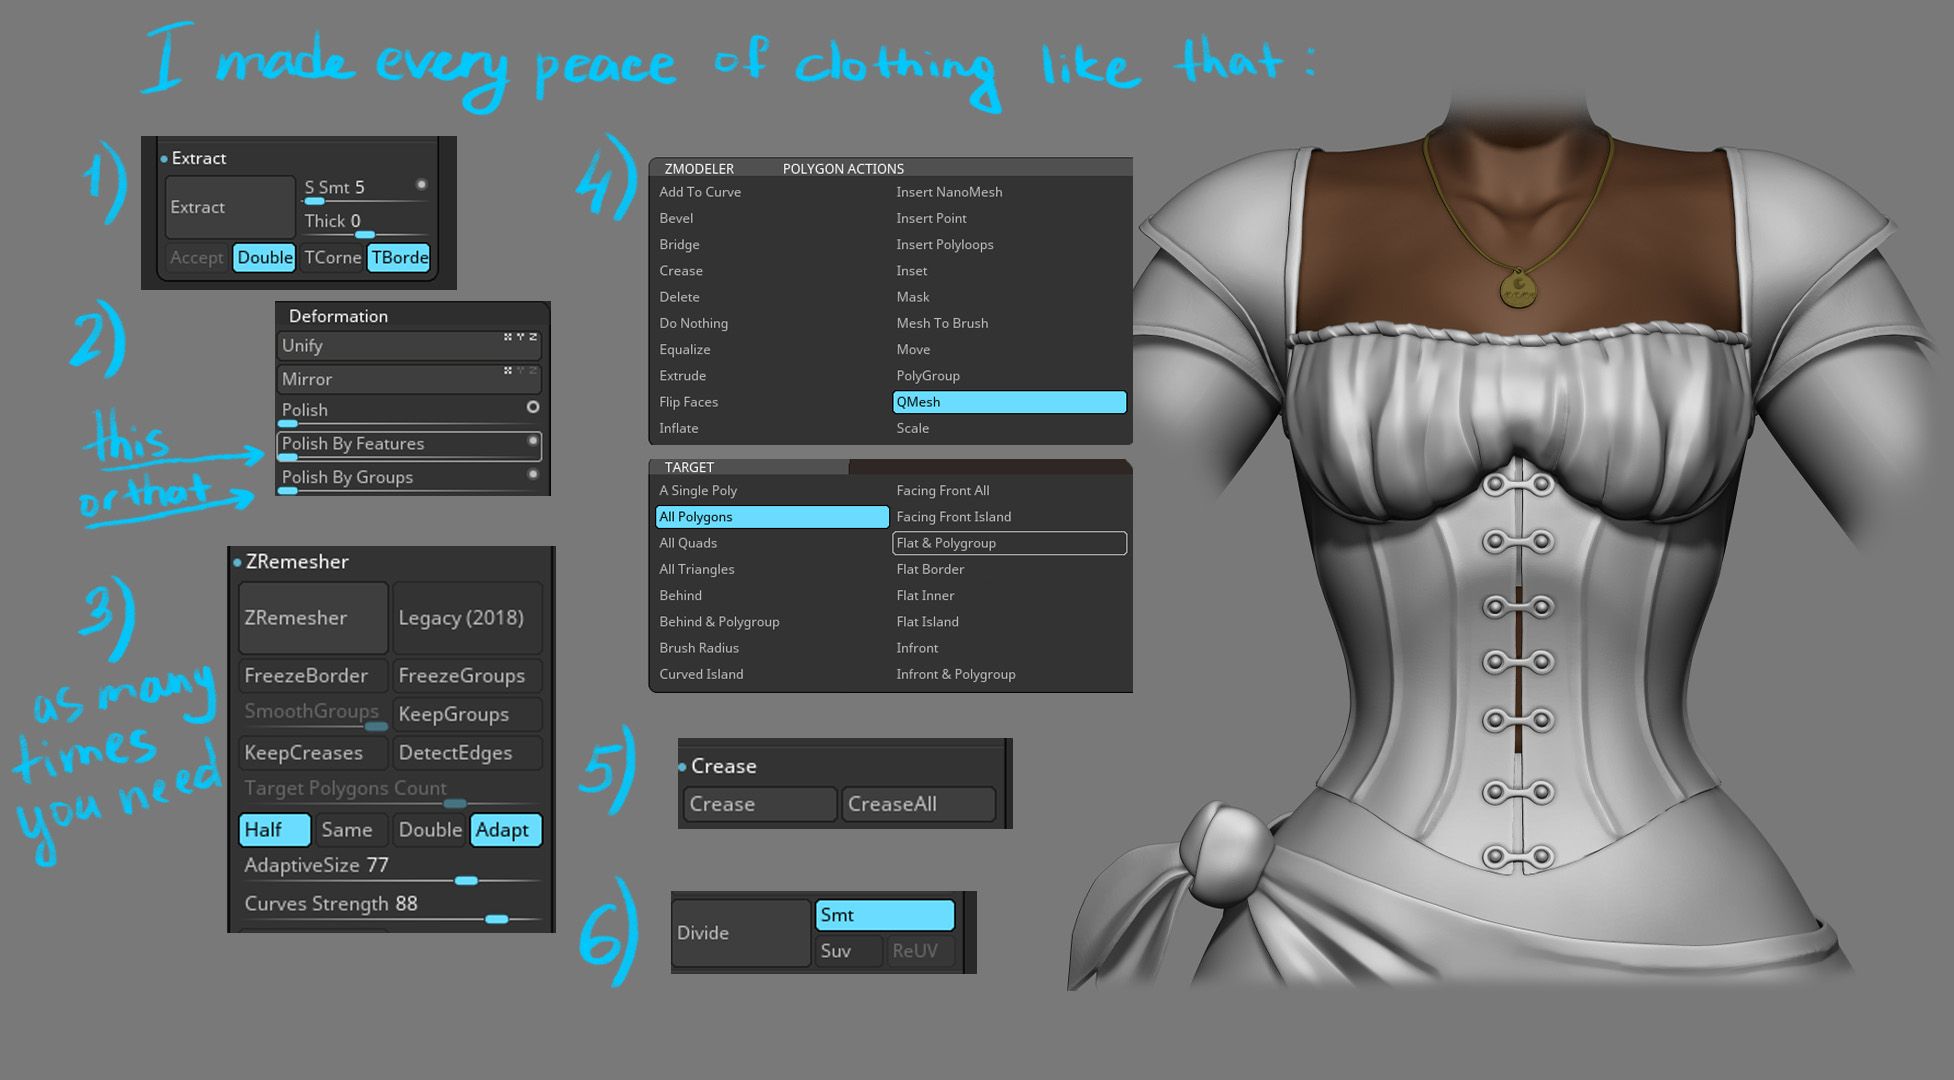
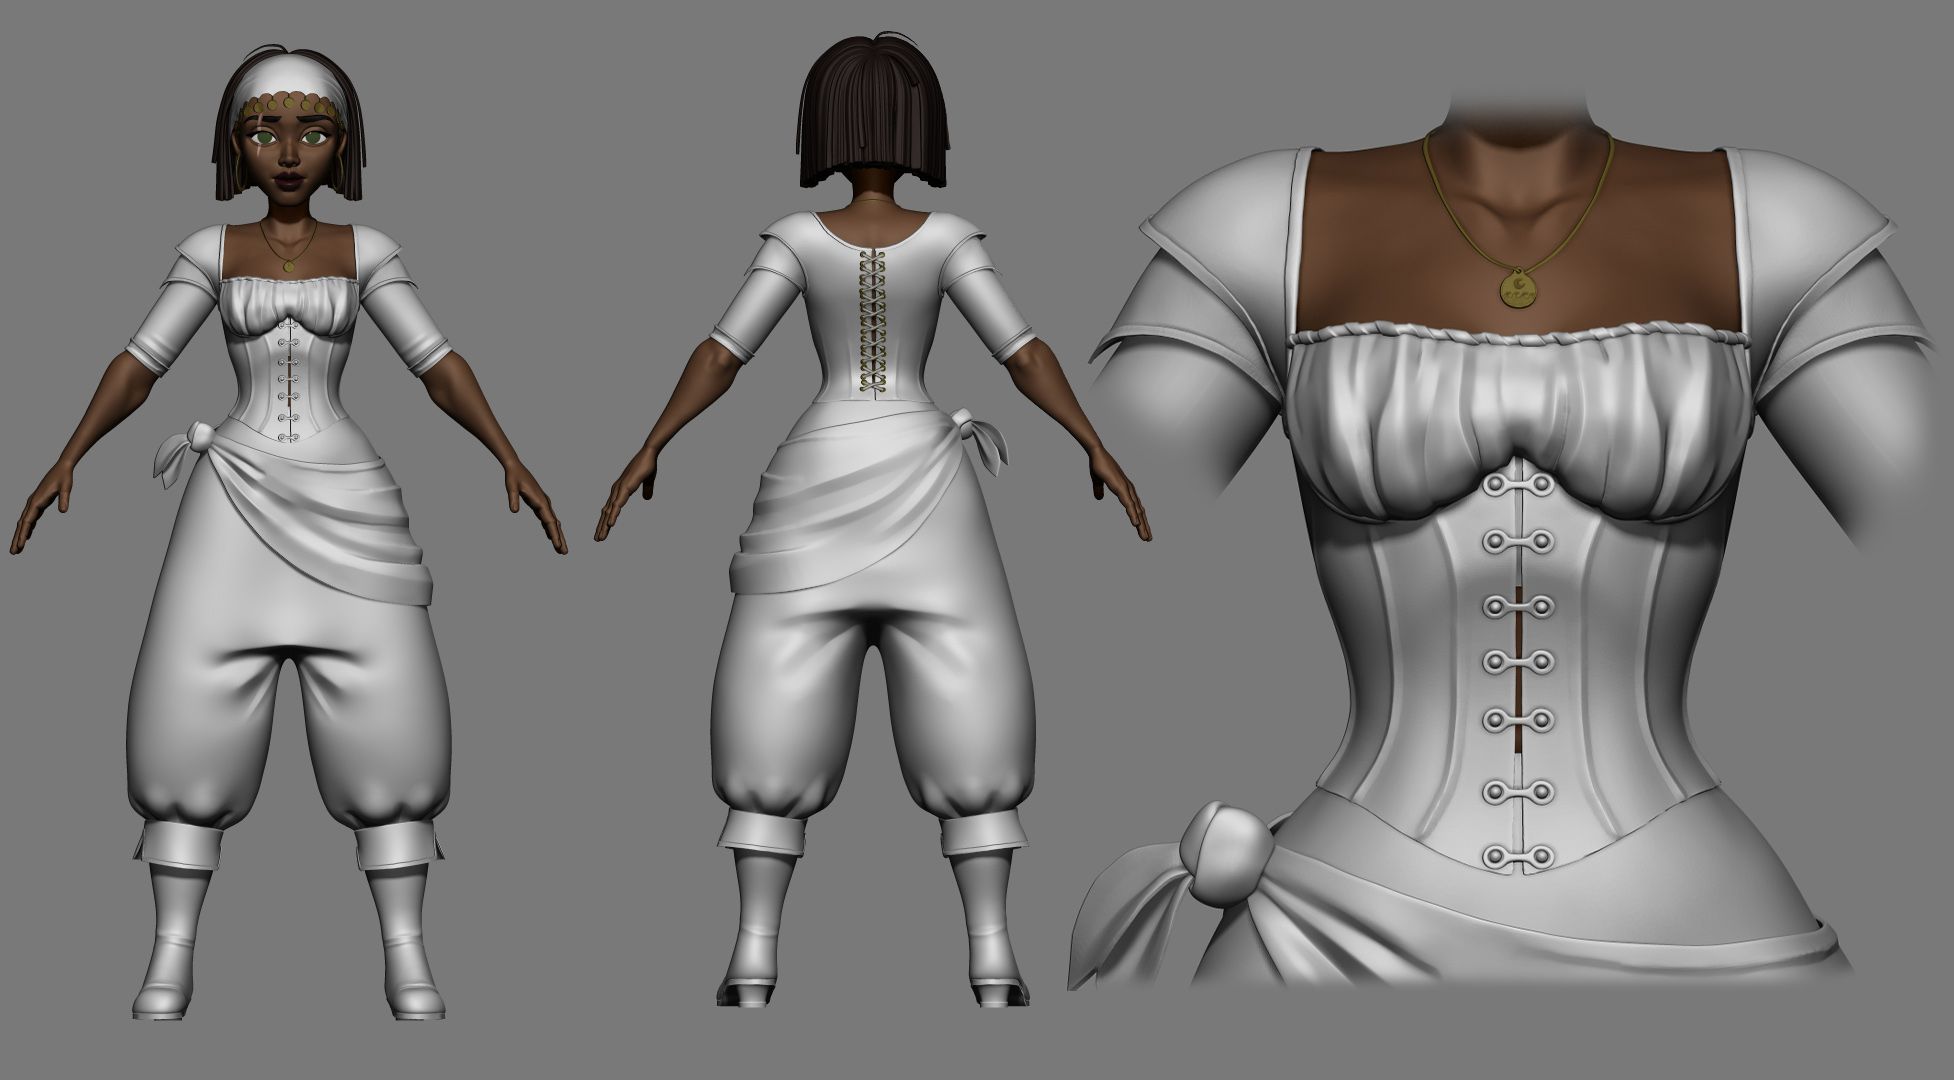
I make my clothes in ZBrush with masking and extracting parts. I tried to keep the topology clean, so my clothing can have hard edges. Also I kept it stylised and pretty simple; smooth and cartoonish.
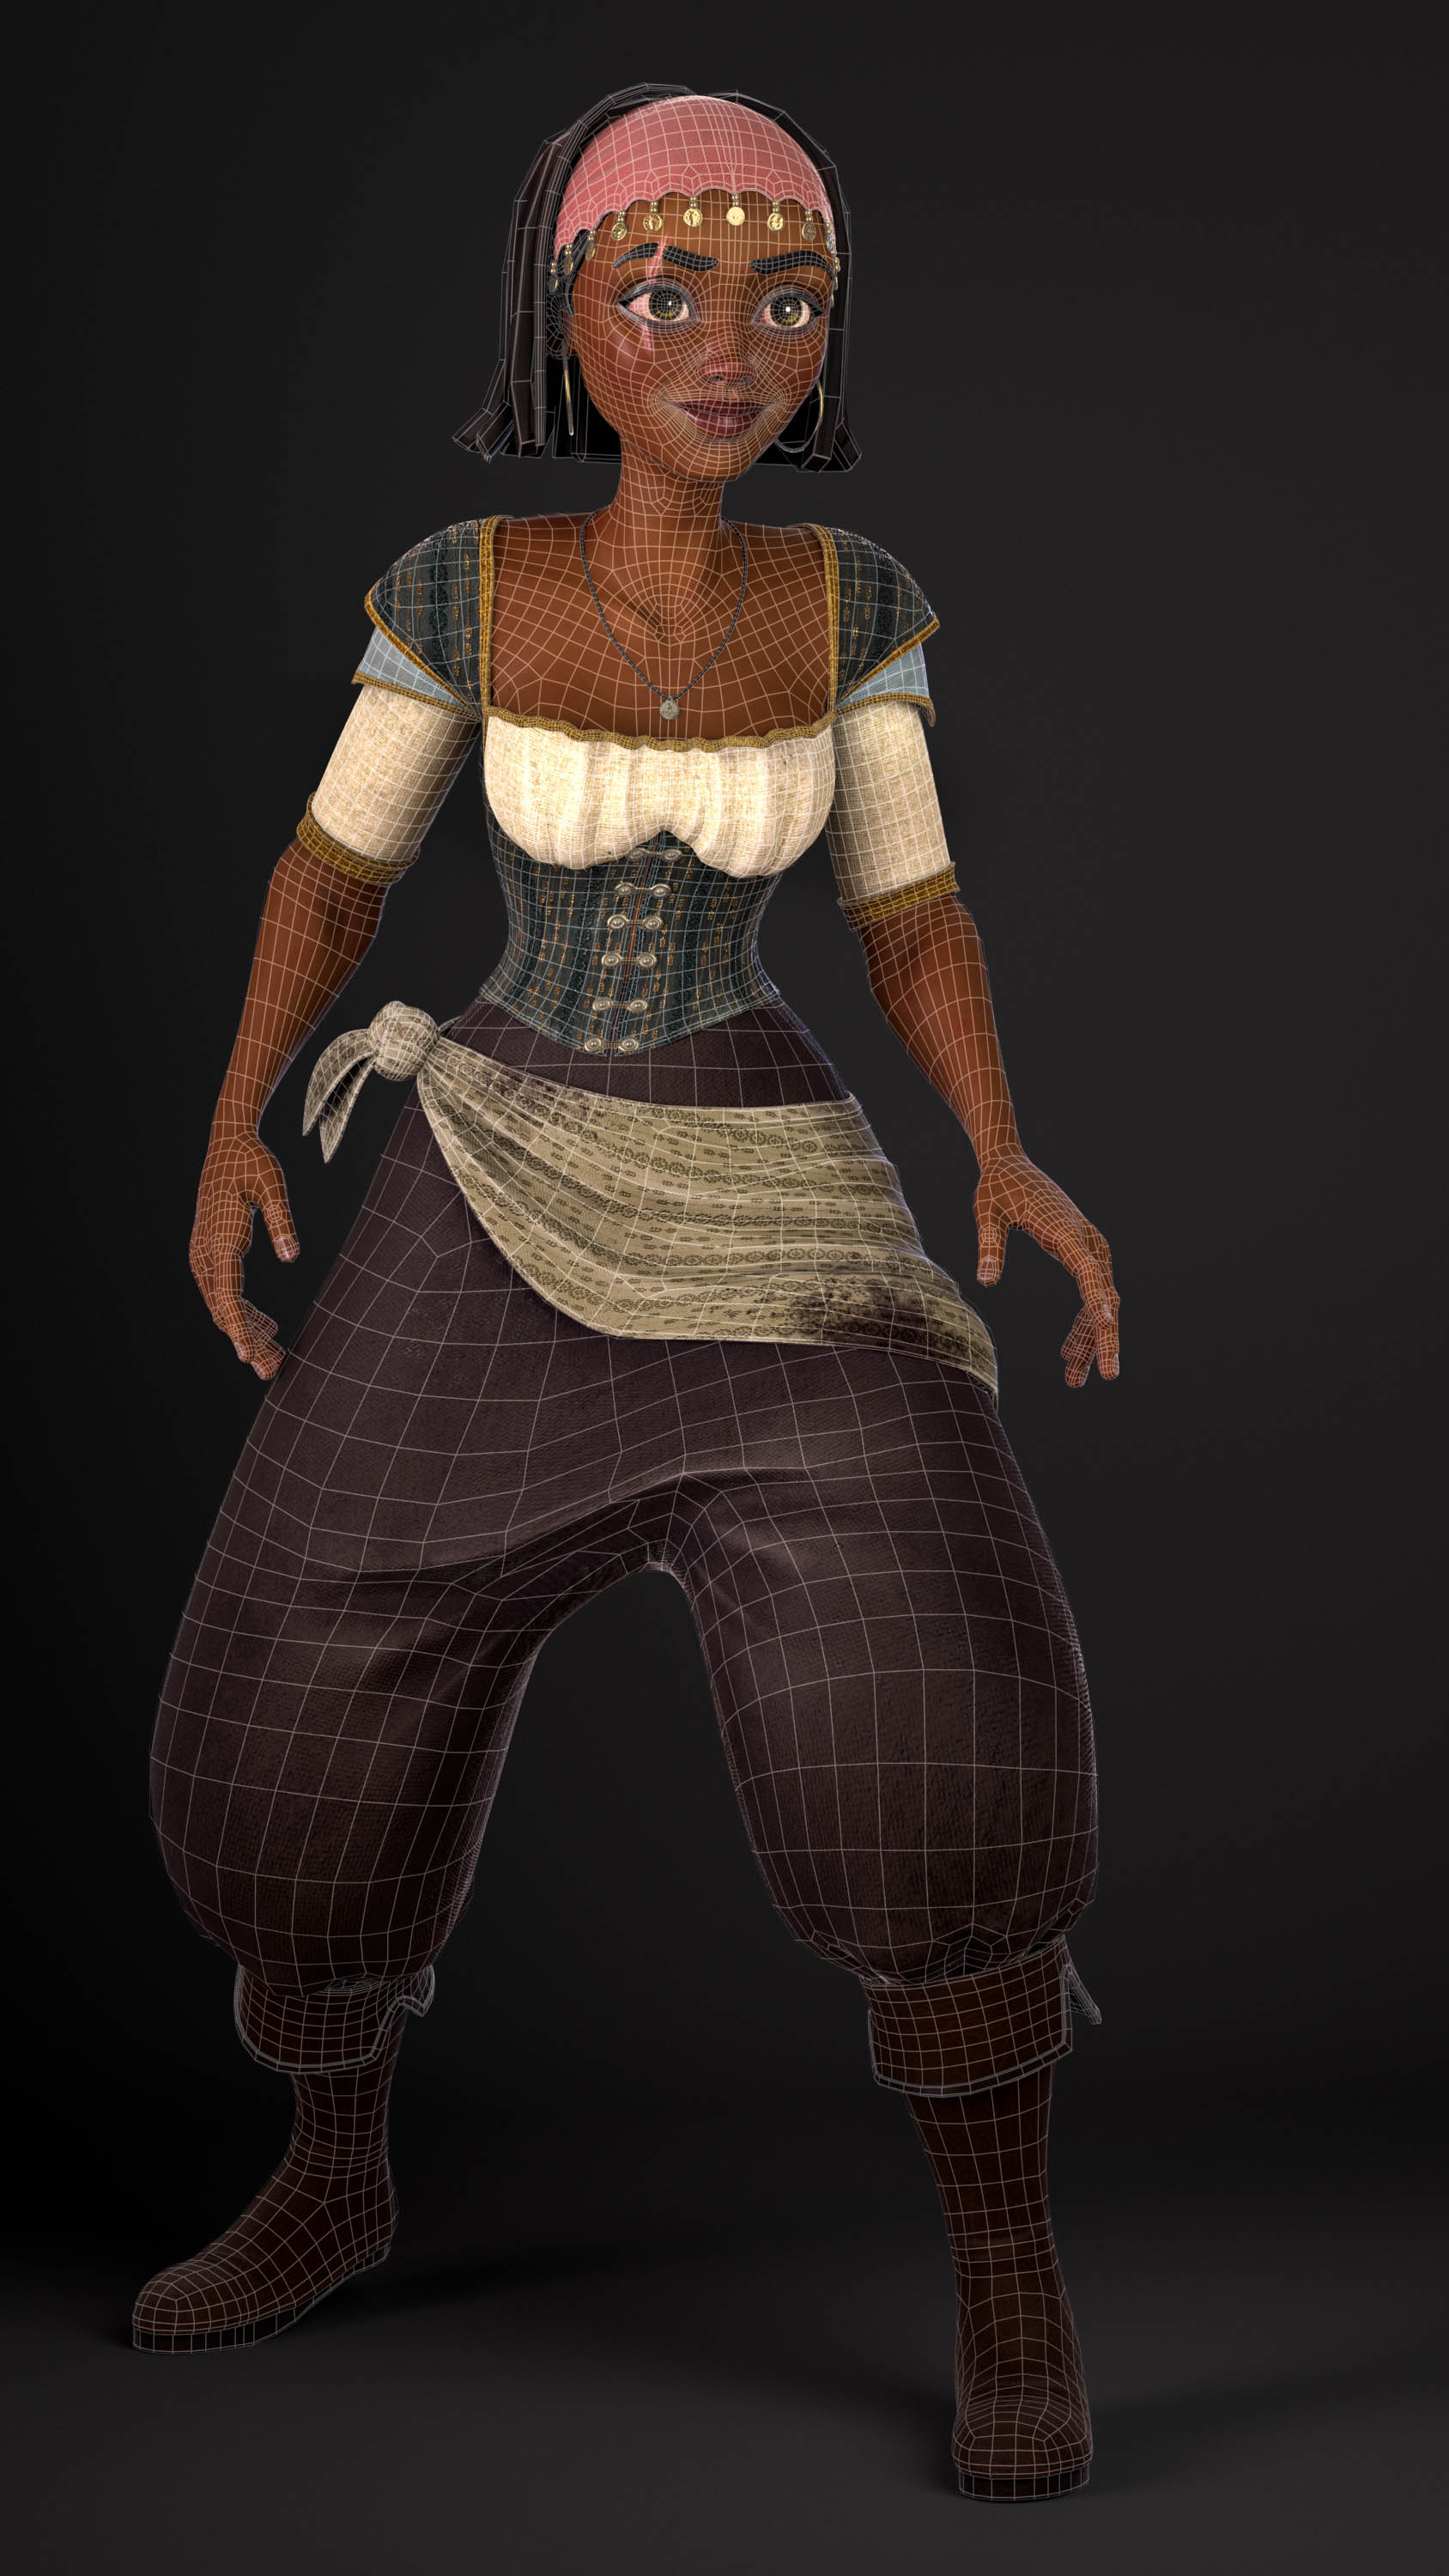
Repeat steps 2 and 3 until you like the shape and the topo.Final sculpt
Retopology
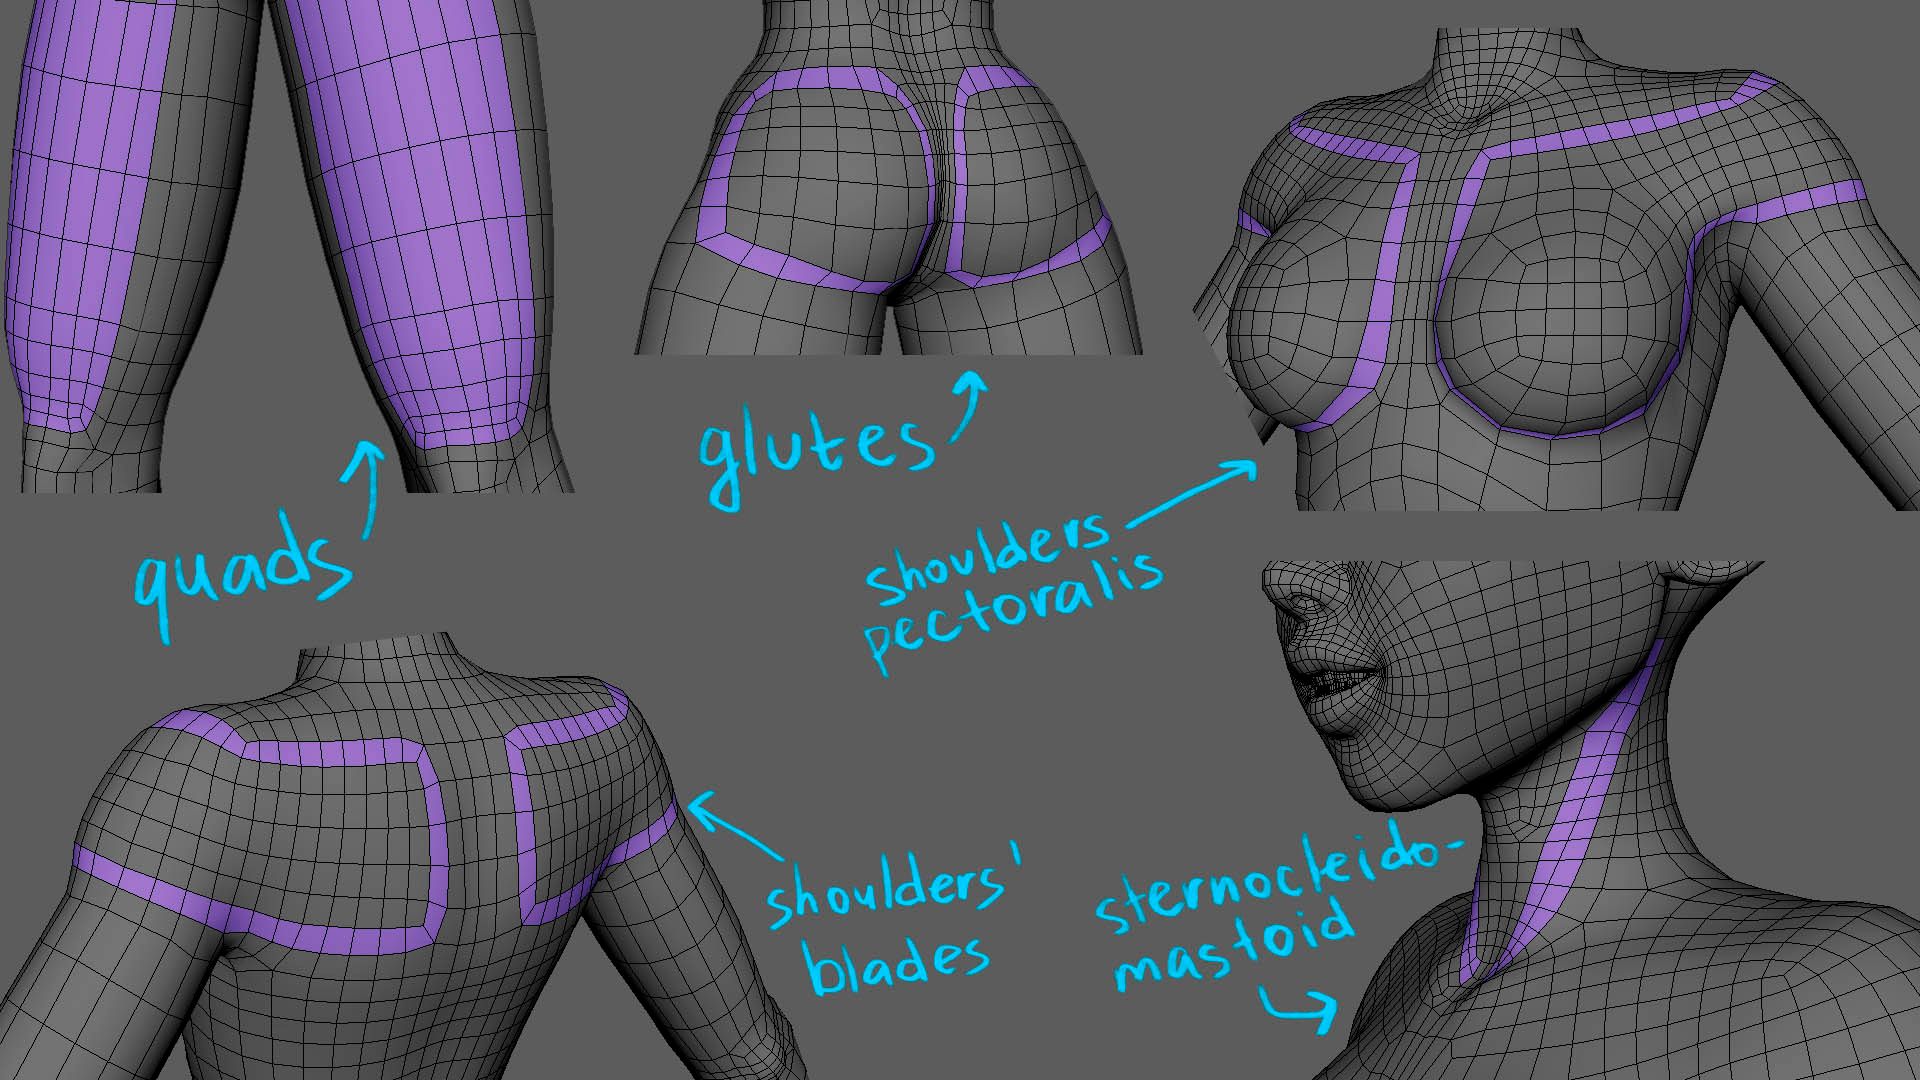
Retopology is an important step for creating a character for animation. The character had to be “riggeable”, so I had to study all the loops of the body and the face.
First of all, I try to do all-quads topology with quad-draw in Maya, so the model is smooth and clean.
Topology has to go straight (when it’s possible), but at the same time to follow the anatomy. Naturally, cartoon characters are more stretchable. If you want an Hotel Transylvania look, go for more subdivisions. In that way body parts can deform more smoothly.
Topology follows anatomy
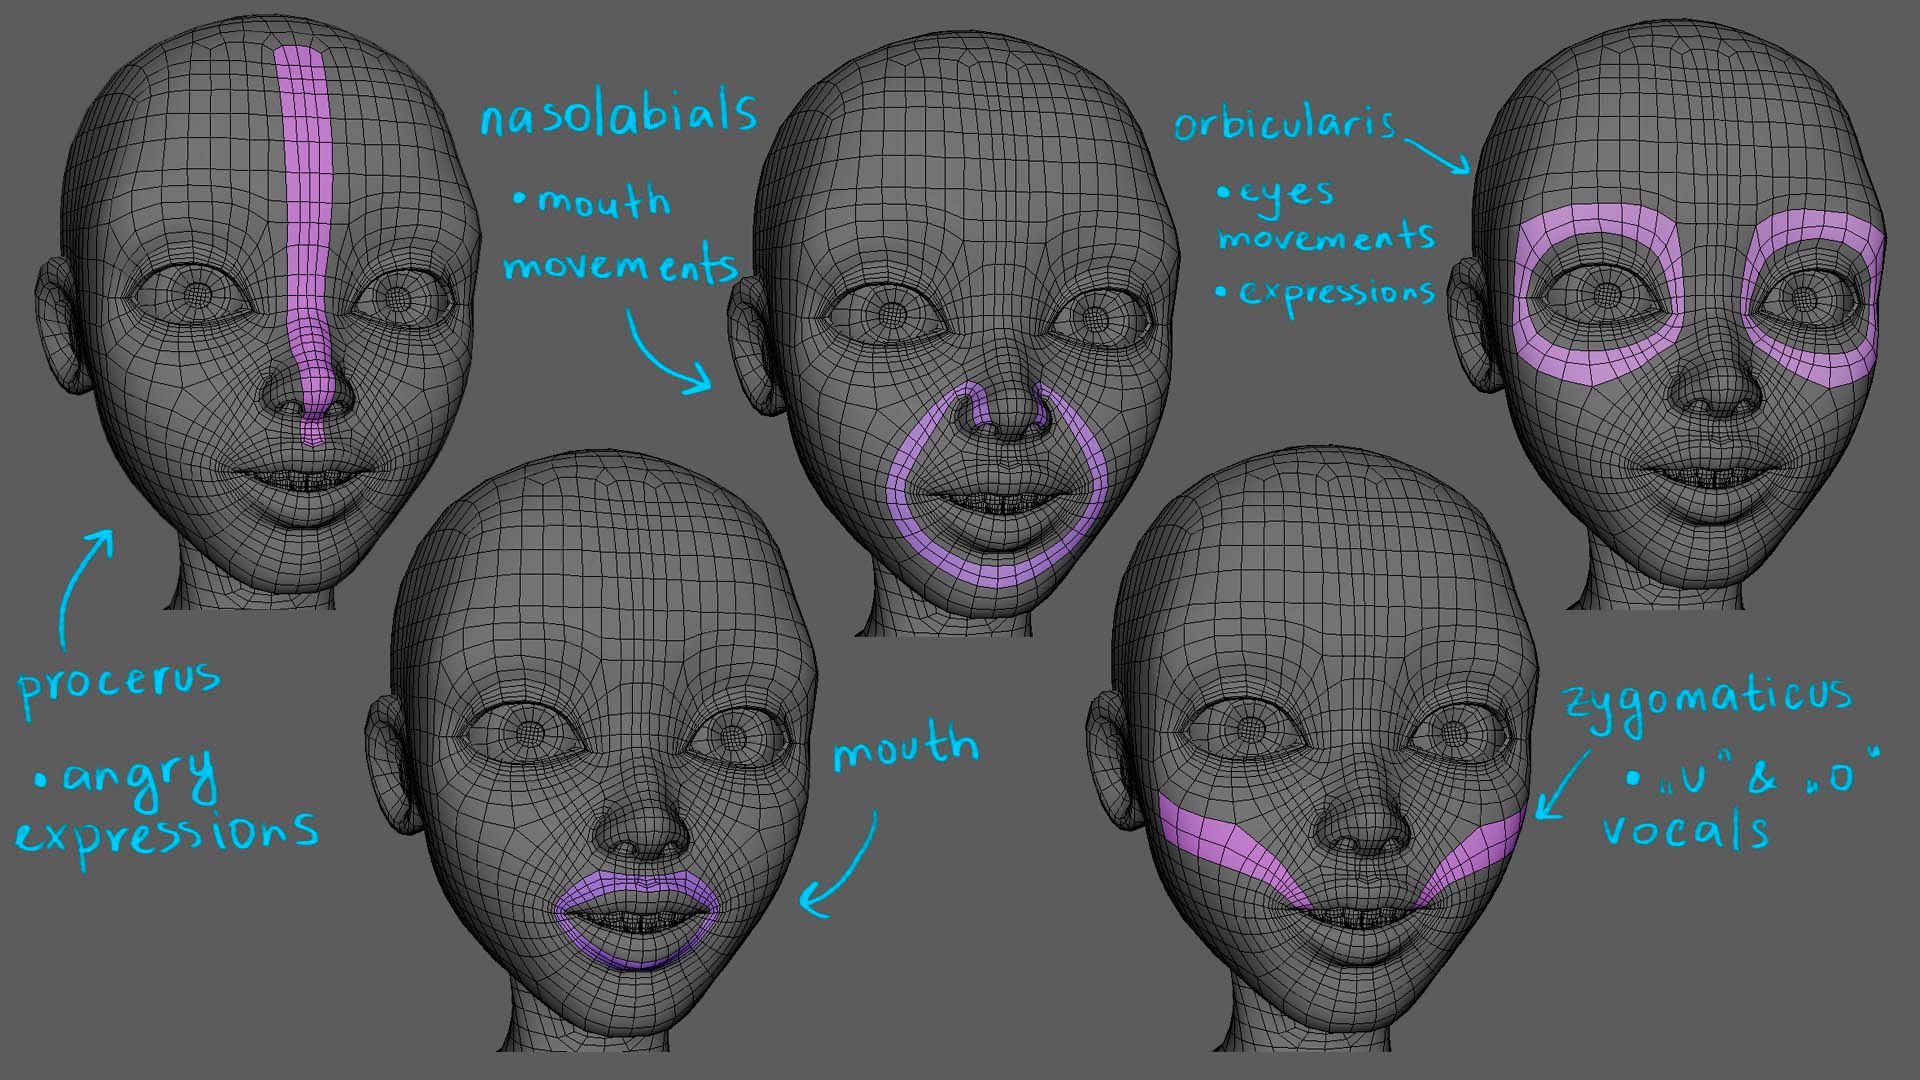
I use the same strategy for the face. Muscles and deformation.
Think about emotions and expressions. The characters have to be able to talk, smile, be angry etc.
Remember to add subdivisions where joint bend and add loops where it has shapes. Focus on areas such as elbows, fingers, knees.
The final look with all the important loops:
For the clothes, I followed the body topology as much as possible. The trick is to make the clothes have “the same” topo density as the body, so when it bends, it doesn’t break.
Texturing
For texturing I use Substance 3D Painter. I am in fact a fan of realistic texturing so I decided to create some for this character. I followed a tutorial of J Hill to understand how to achieve the look.
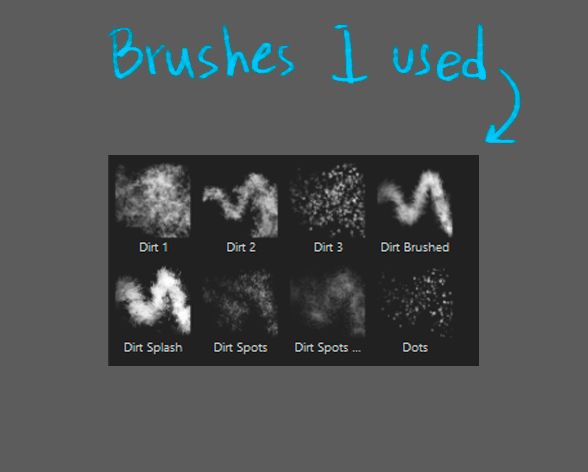
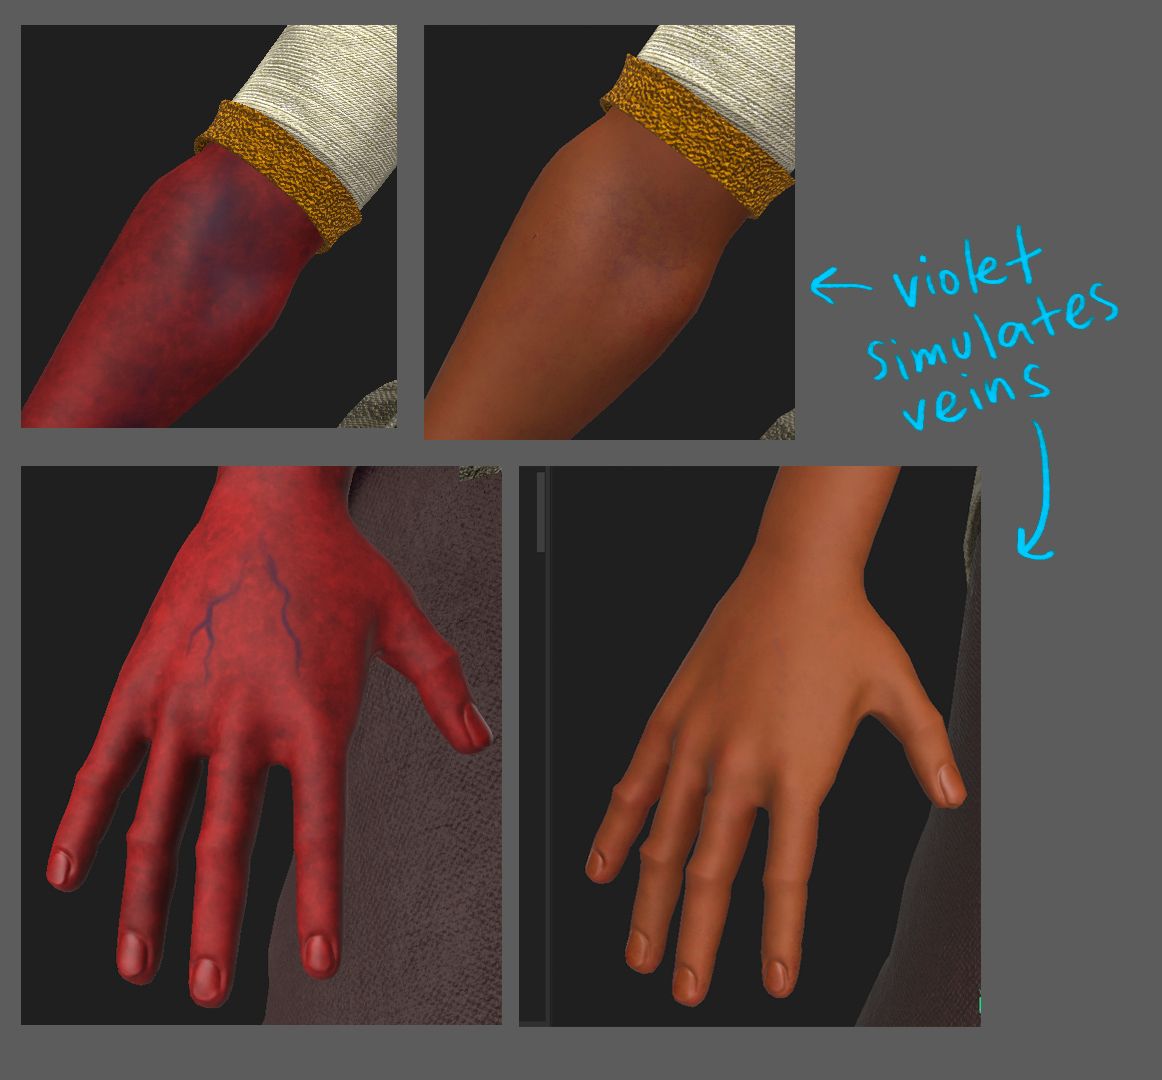
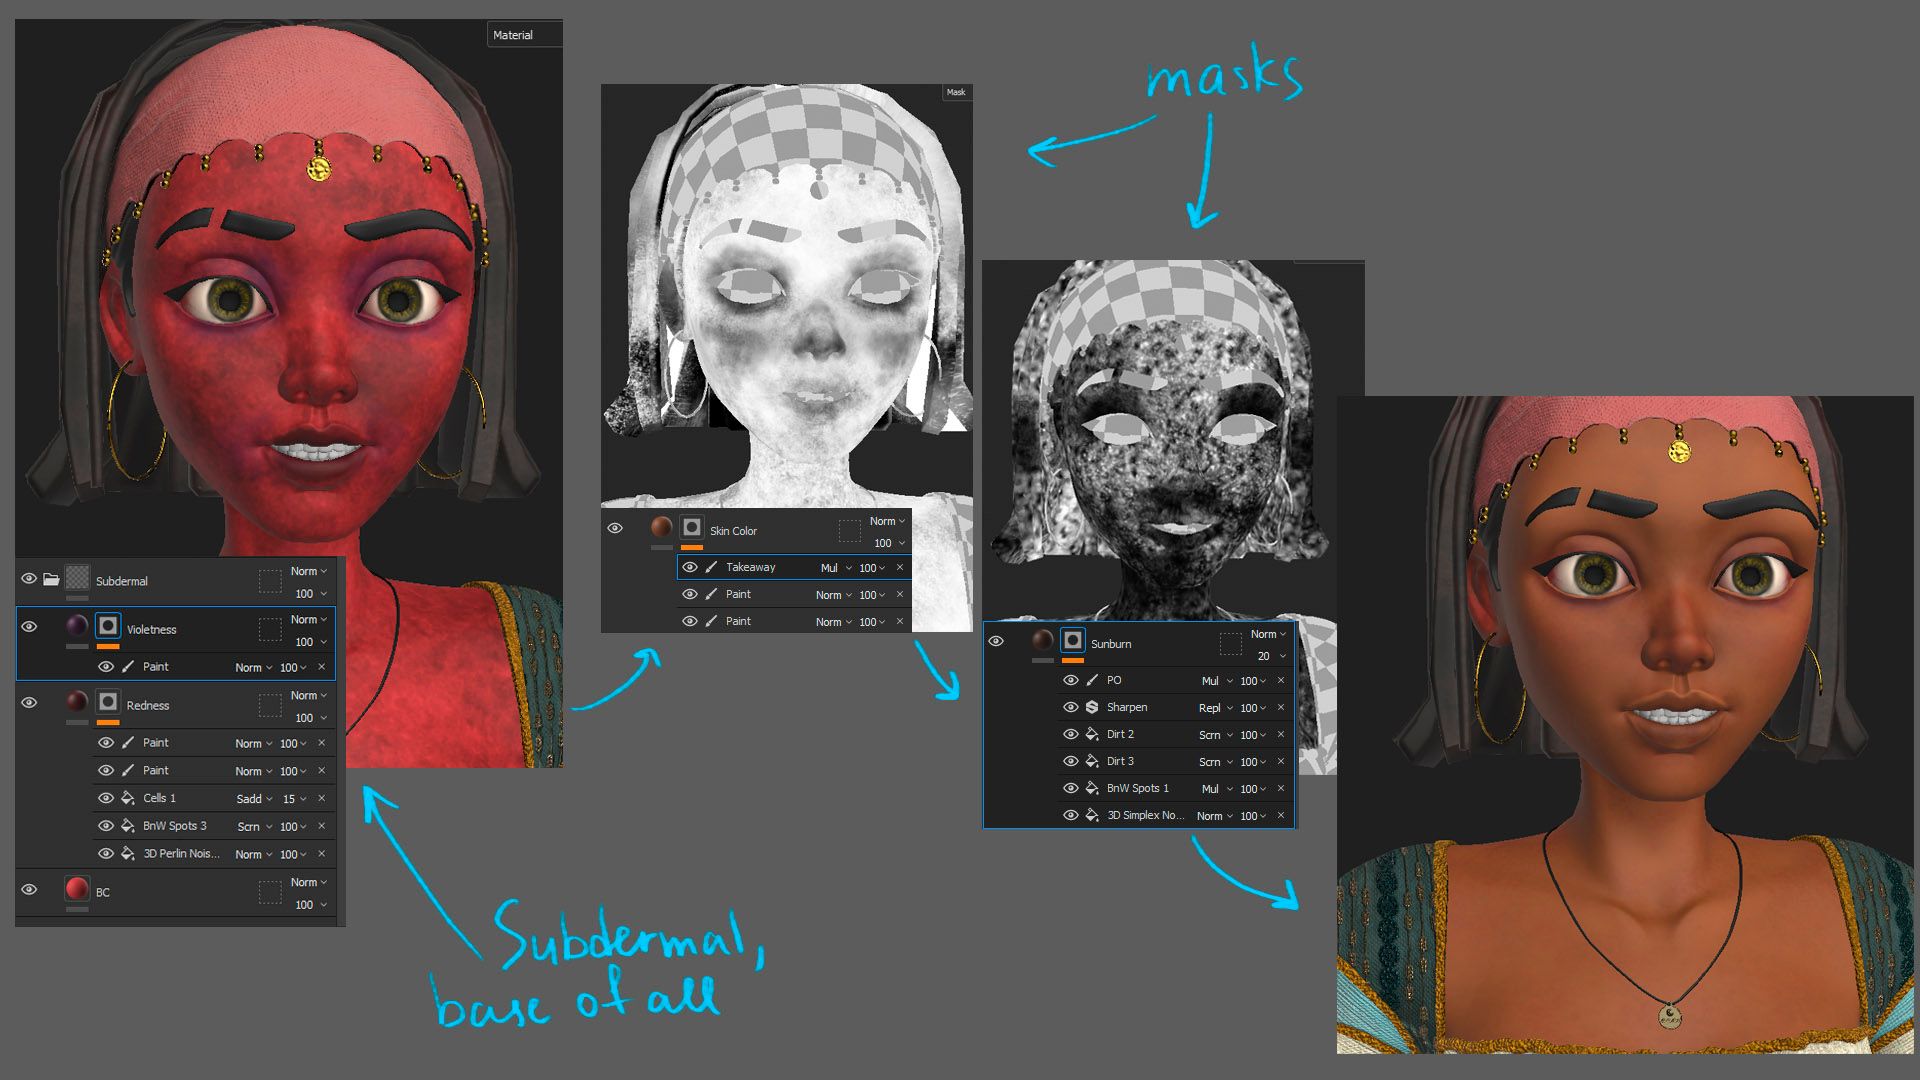
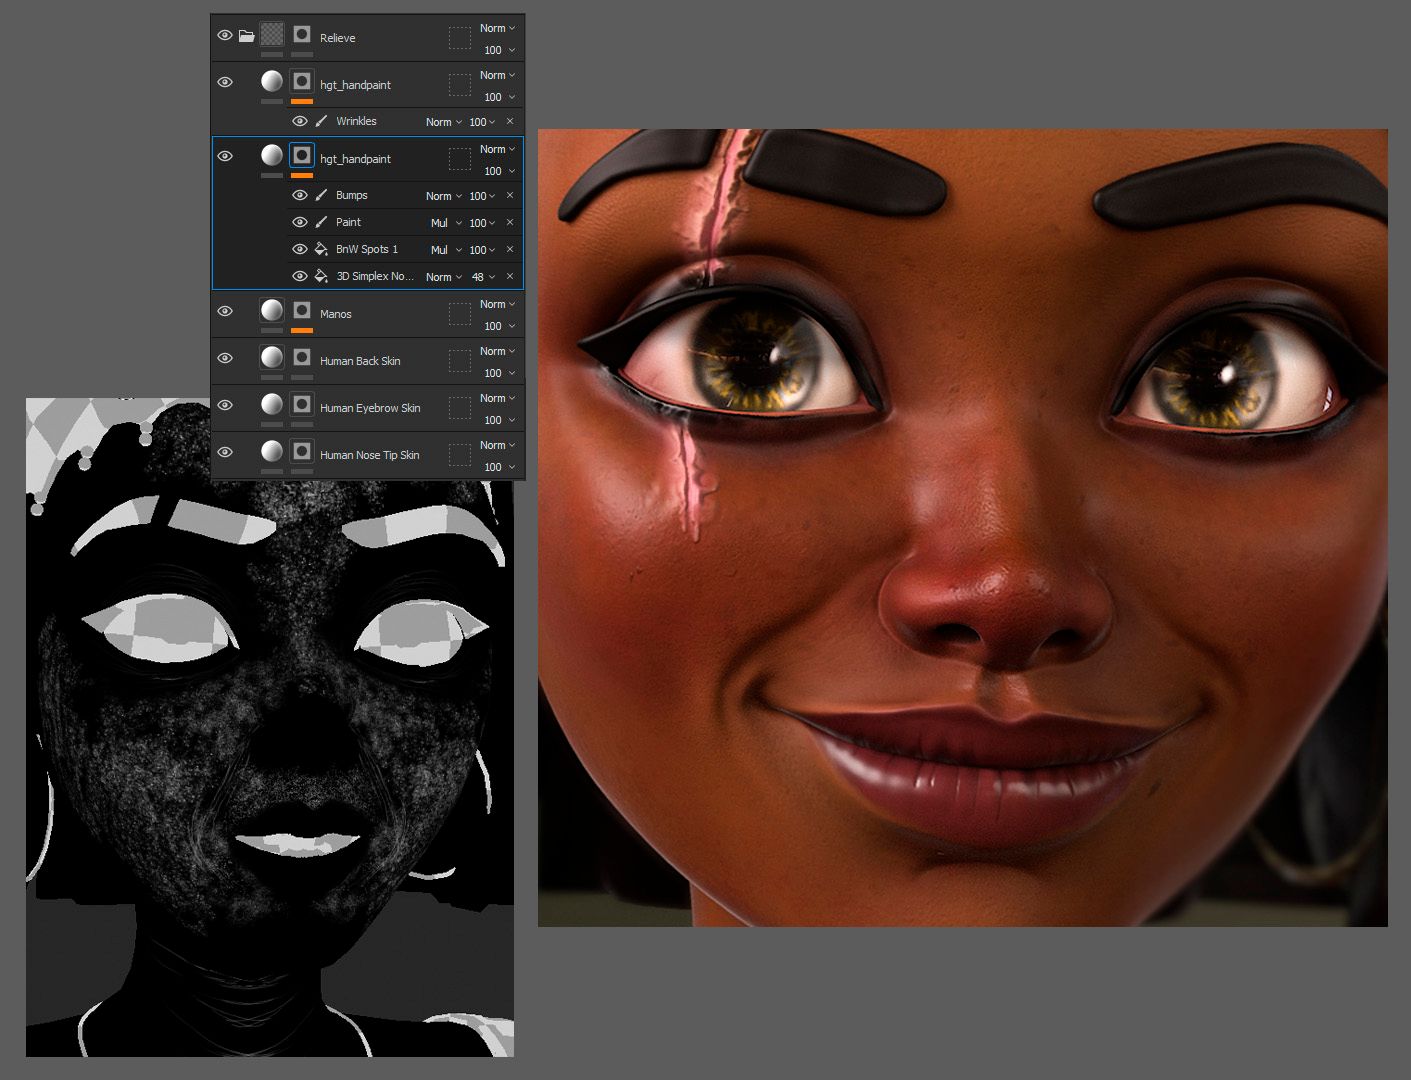
The approach is to work layer by layer, mimicking the natural layers of real skin. I implemented a "bloody" Subdermal layer with various shades of red. Procedural grayscale textures were employed for creating BnW spots, along with different noises. To refine the details, I utilised hand painting with Dirt brushes and created masks.
Think about the Circulatory system when creating subdermal.
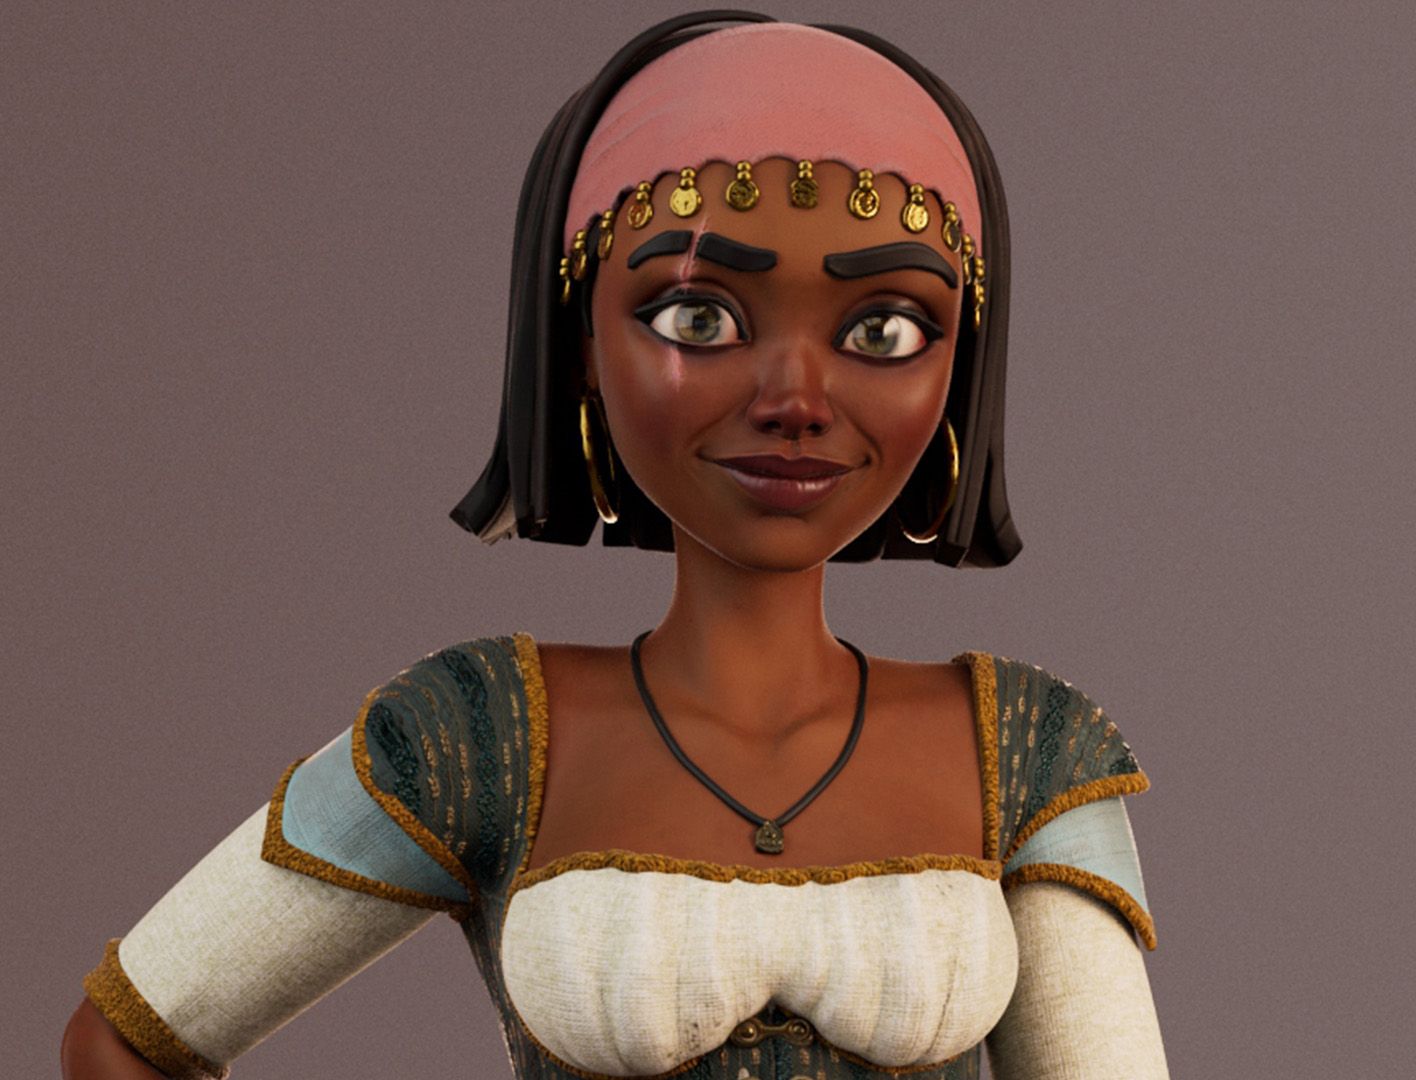
I then worked on the Dermal layer - Skin colour, Sunburn, Imperfections, Freckles. I used a lot of masks, generators and filters. The colour variation should be very subtle, as it would in real life.
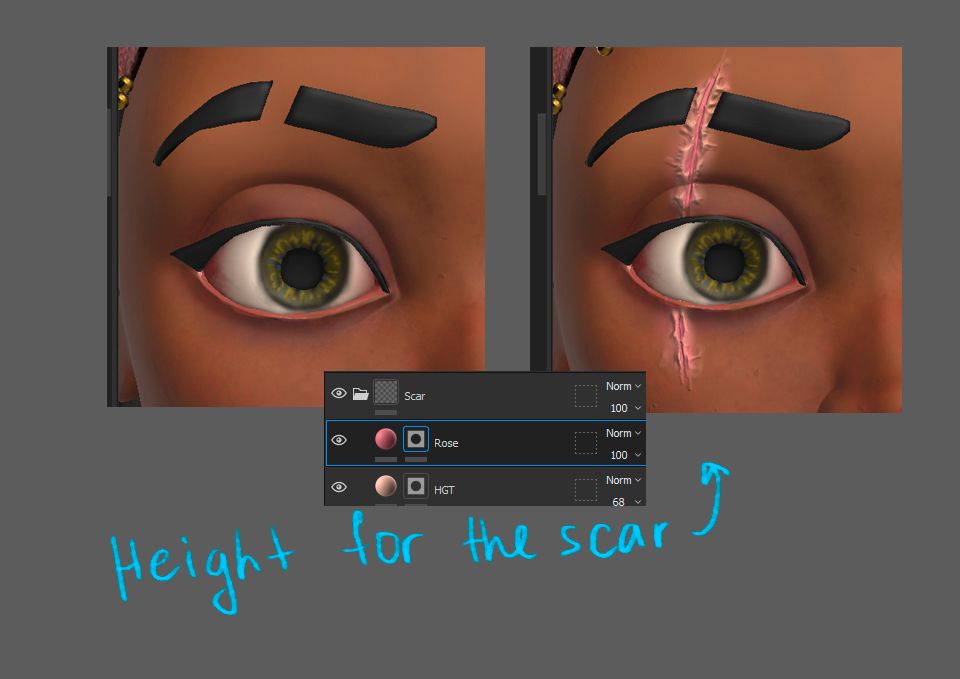
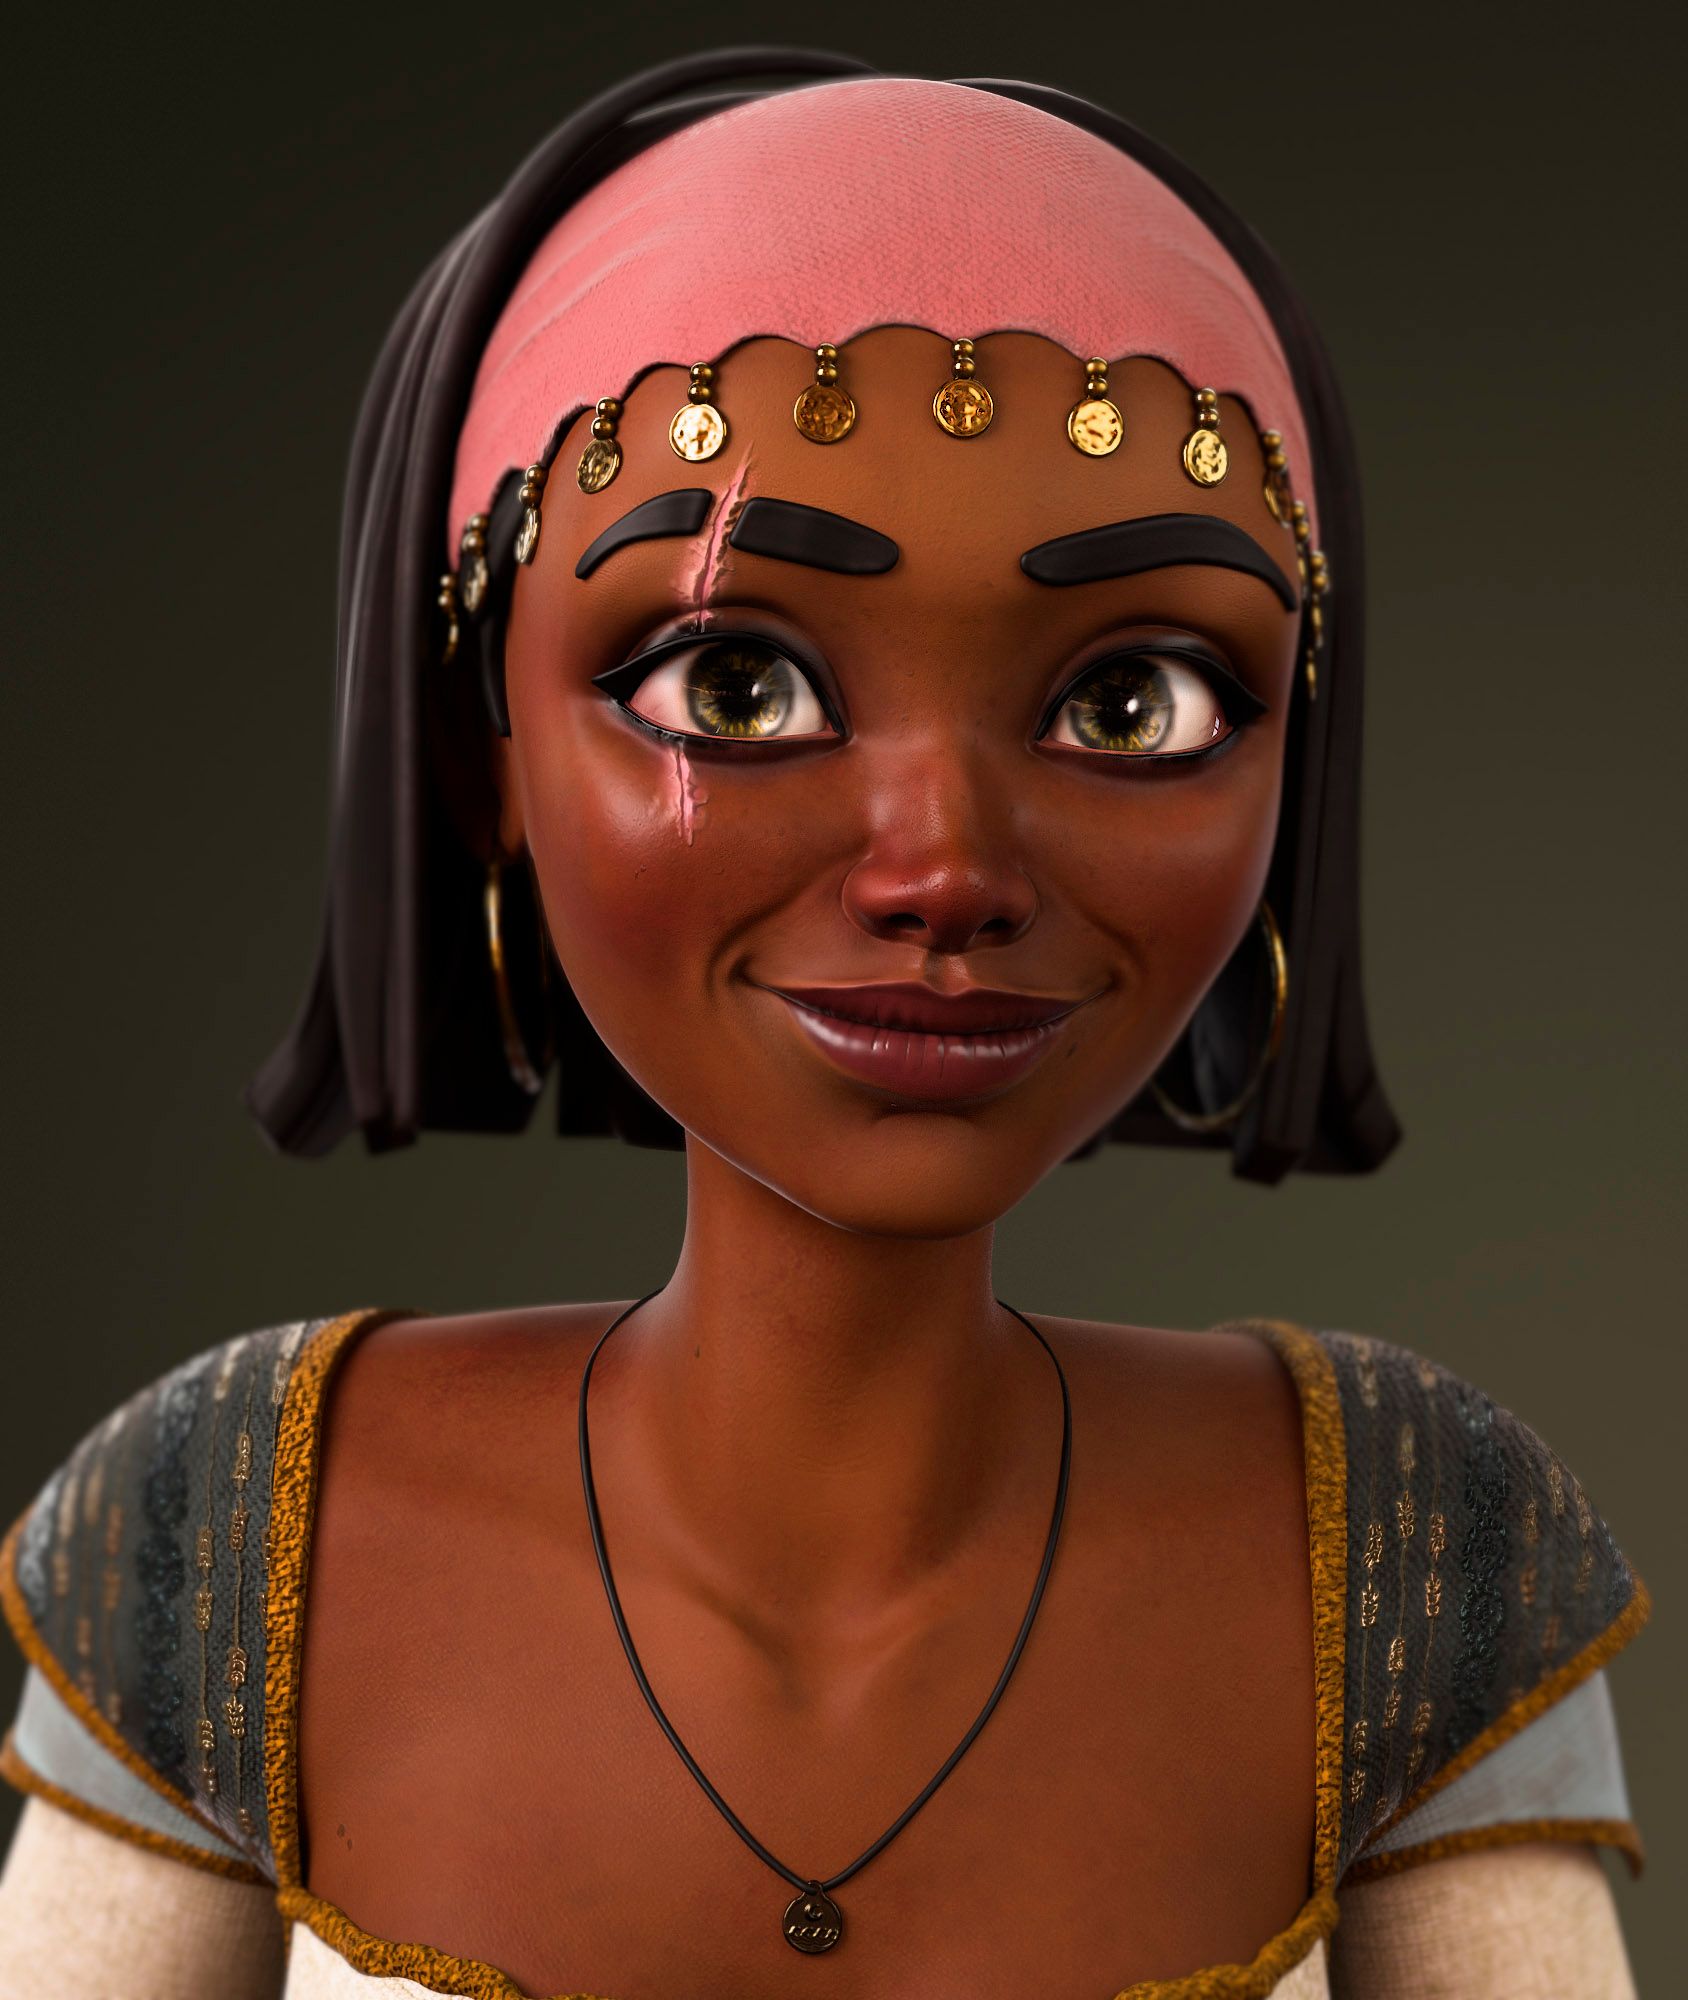
The scar I made with height, I drew it by hand.
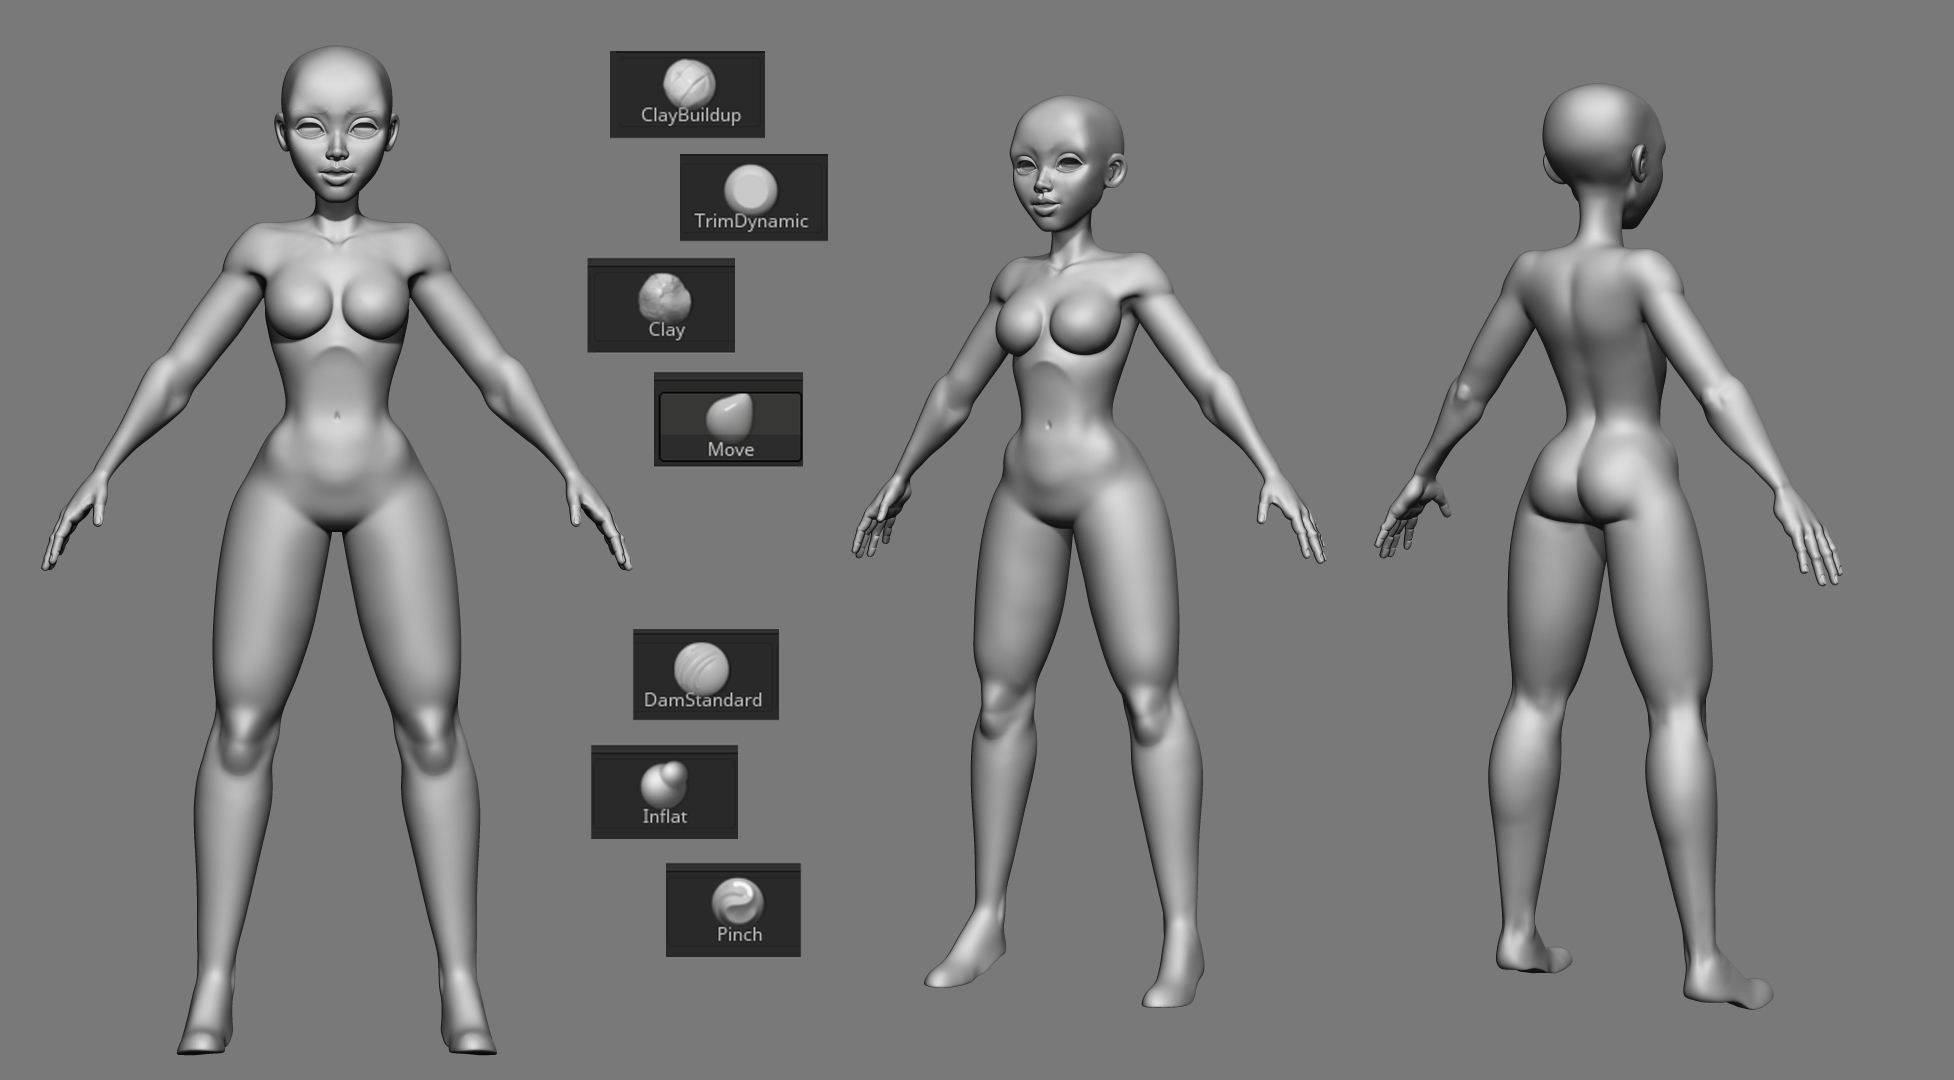
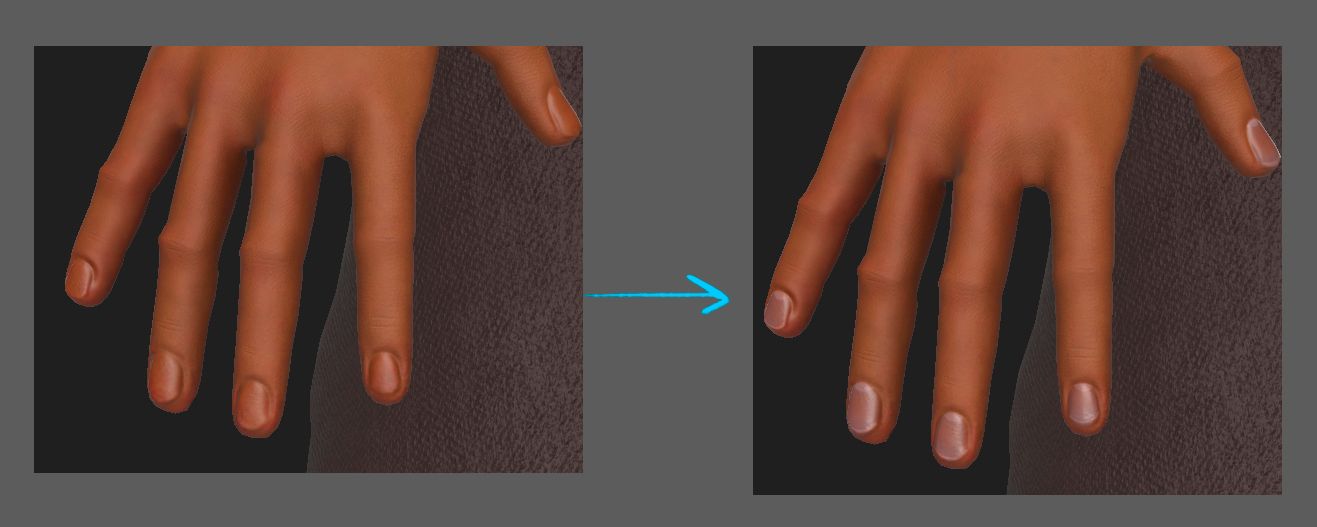
Hands are important too as they are the second most observed area after the face.
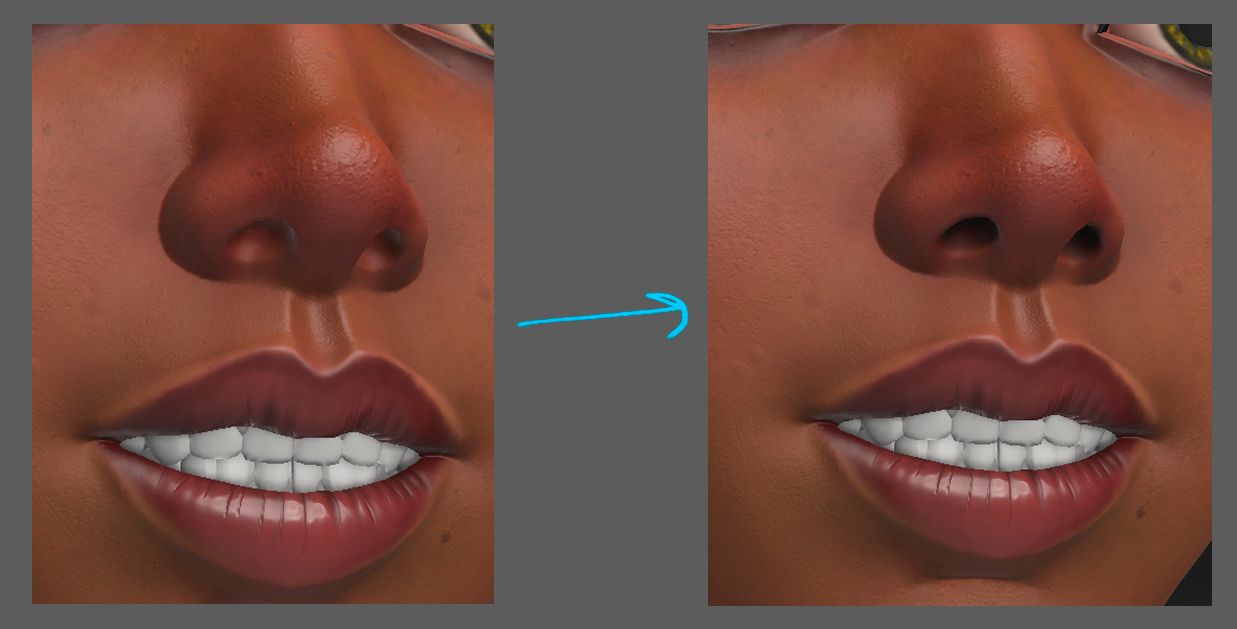
Little tip: paint nostrils black, it adds depth.
For the bump map I used Substance 3D Painter basic skin materials. I masked and assigned every material, “Human Nose Tip Skin” for nose tip, and so on. Besides, I used a lot of noise and I did a little hand painting too.
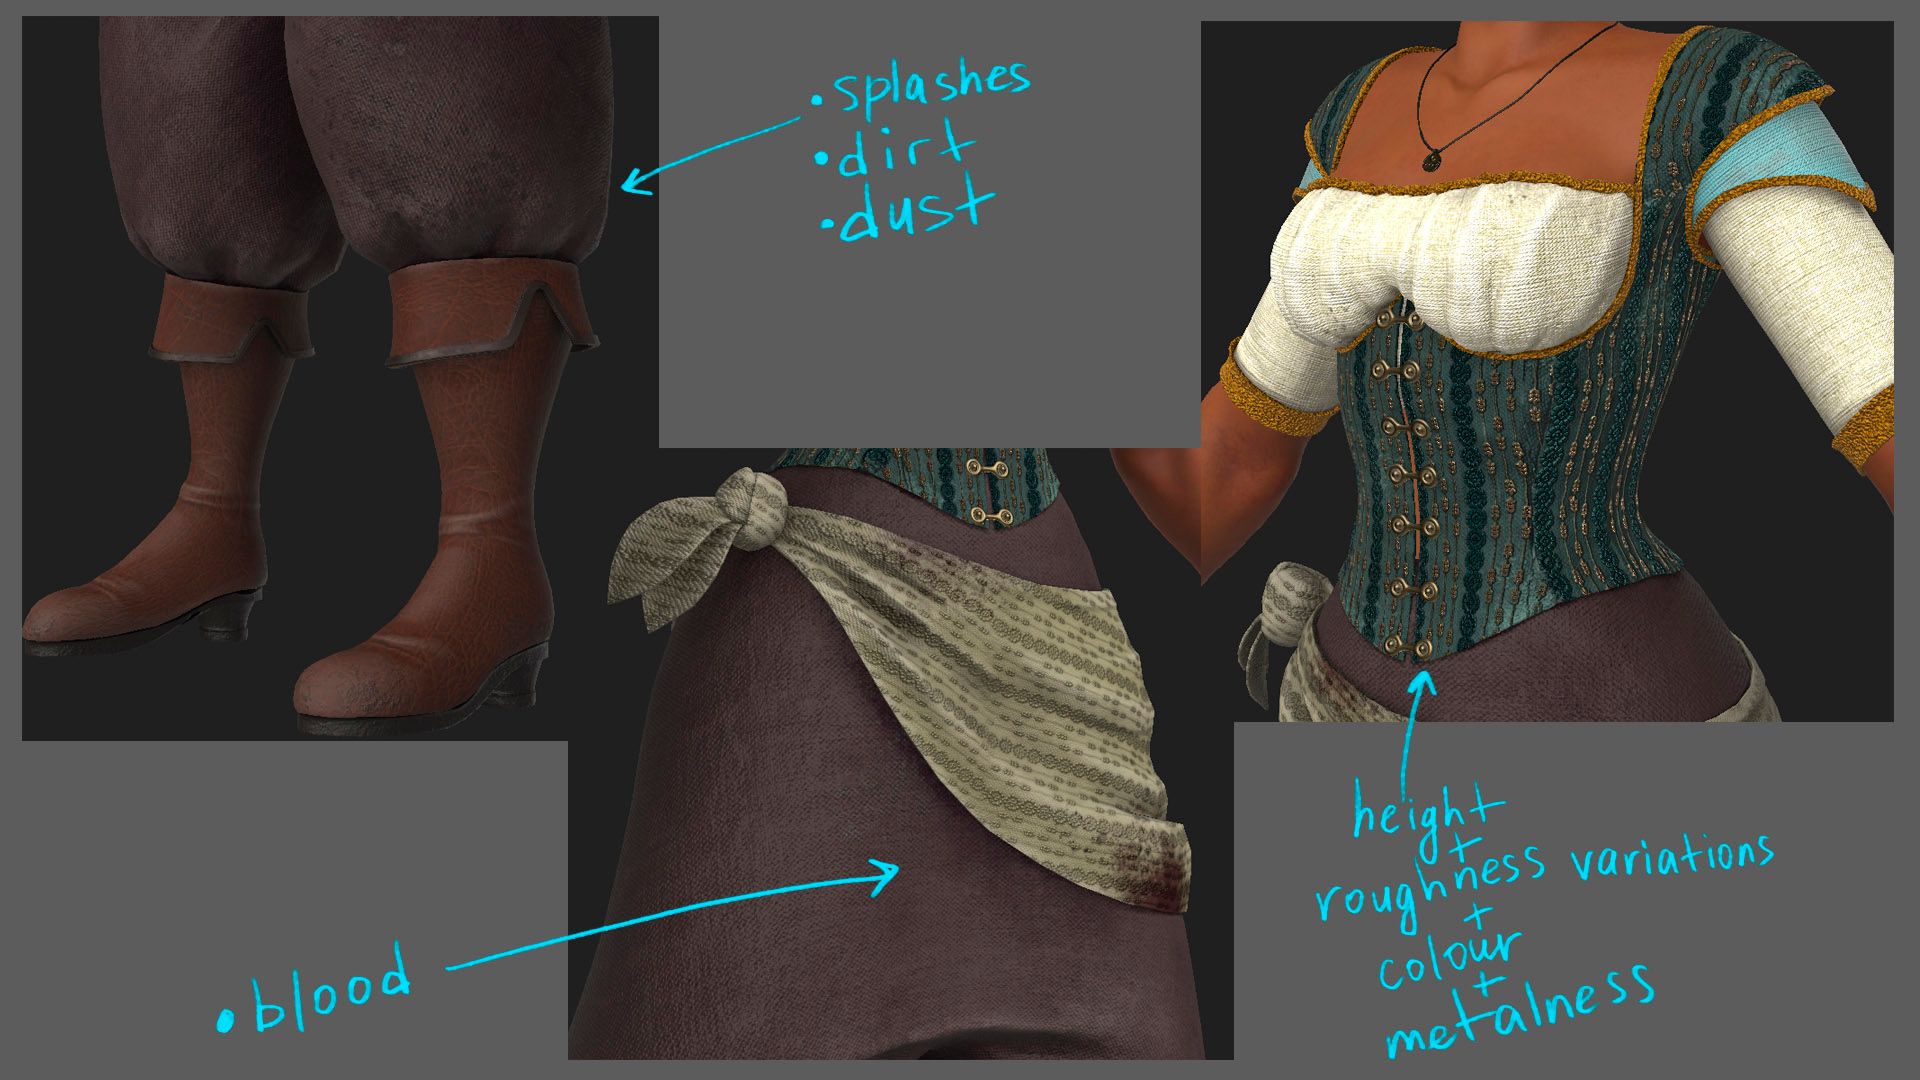
As for clothes texturing, it's a pretty generic tip. Tell stories, go layer by layer, as with with the skin.
Think about the character. Is she a pirate? Does she have some dirt on her shoes or splashes from the sea water? Does she fight, so she has a little blood mark somewhere?
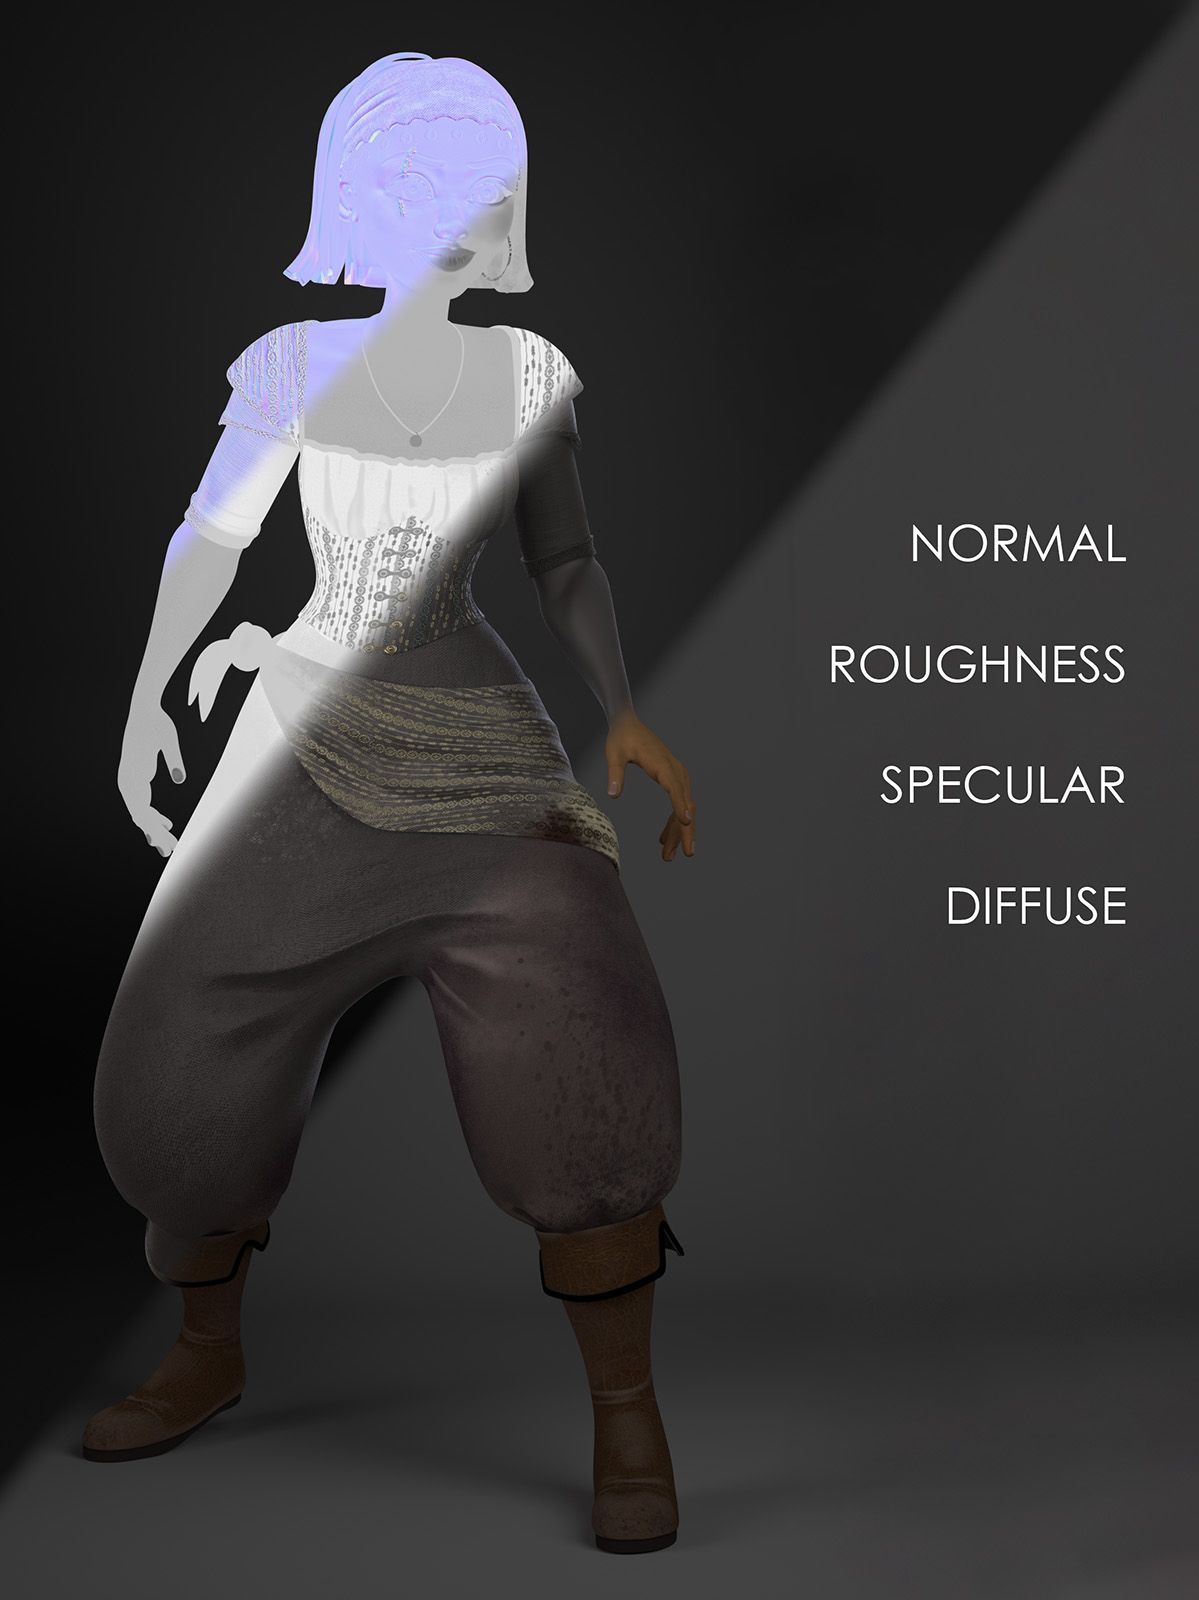
Tell storiesTry to create variations in all the channels.
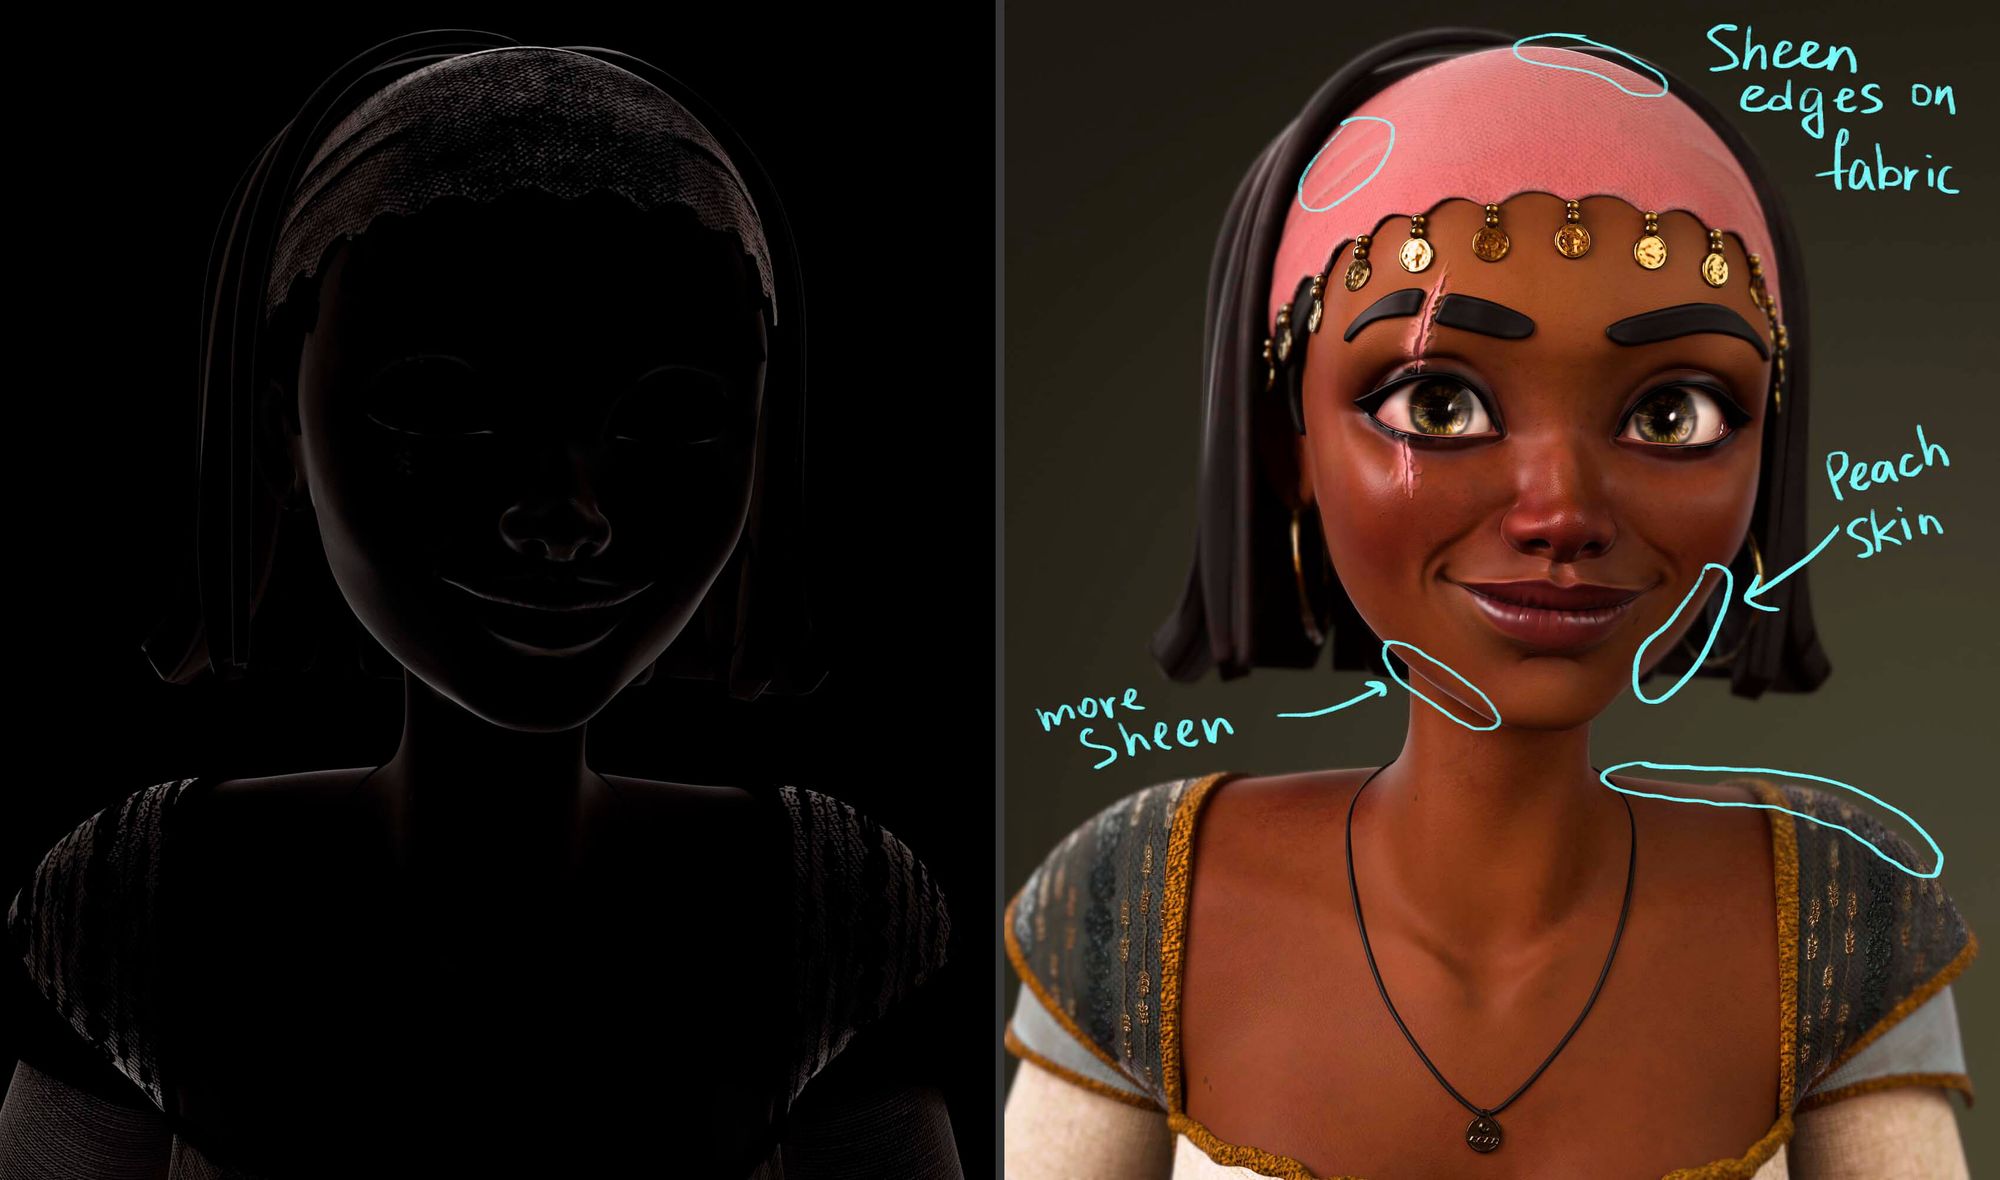
Final little tip on texturing: play with Sheen channel. It fakes the peach hair on skin and gives an extra credibility to fabric.
Sheen AOV and the Final Look
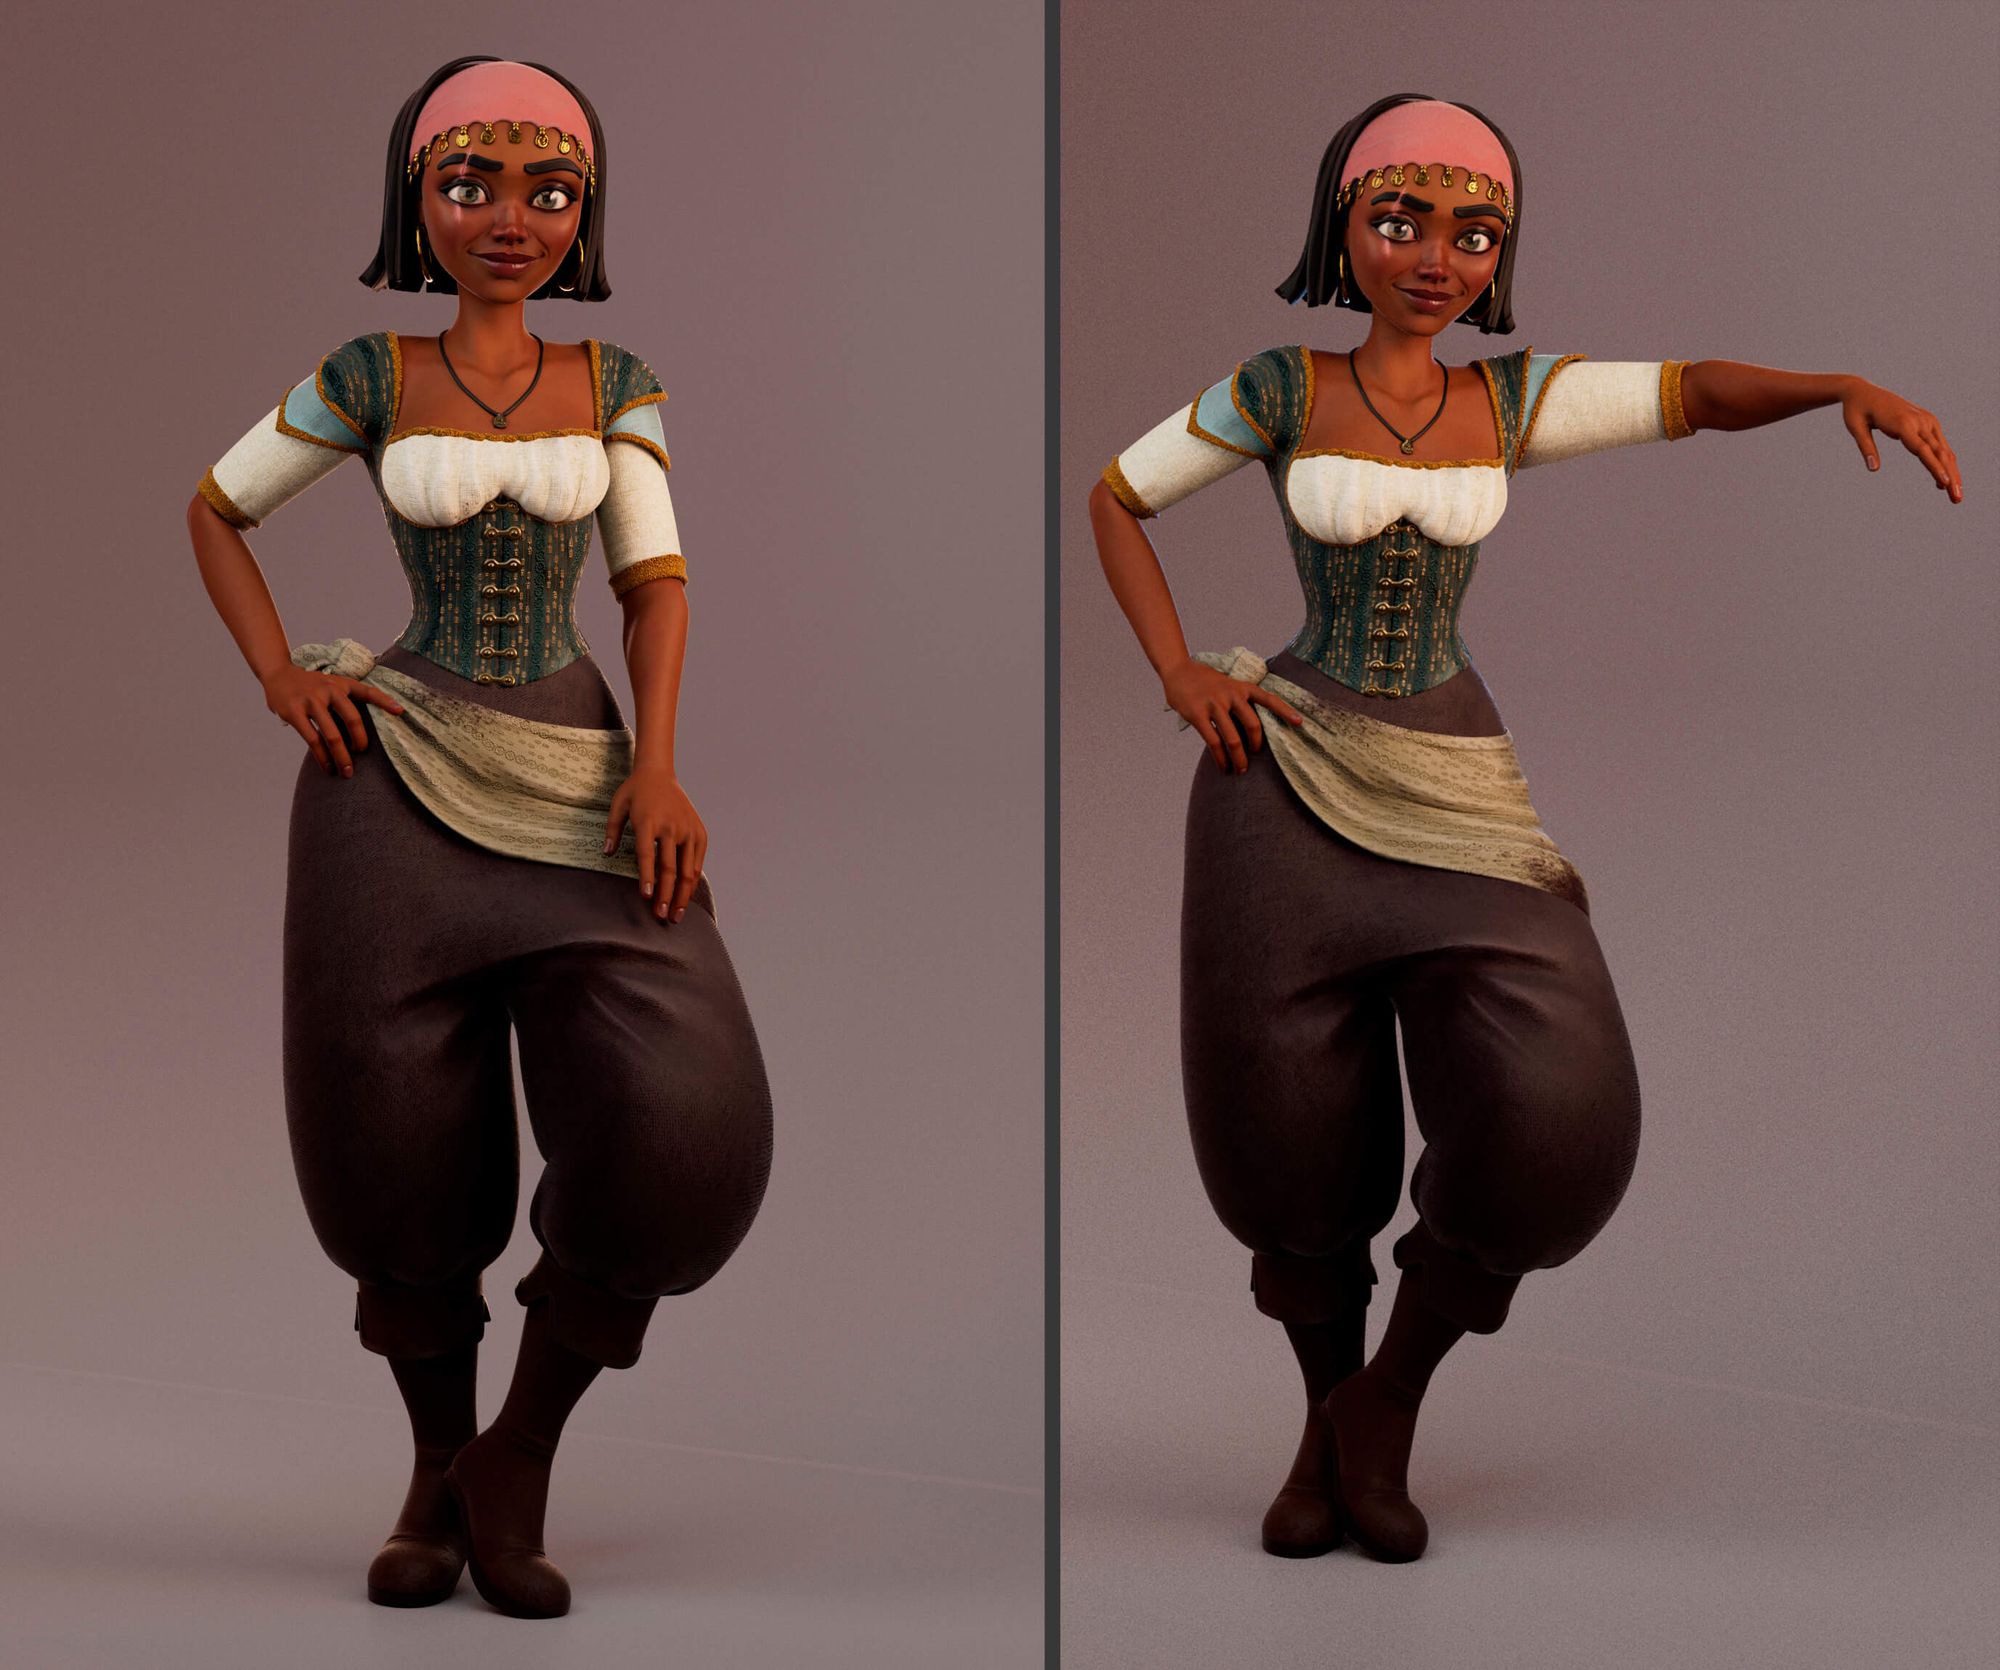
Final Posing and Render
As for posing, I prefer to use Mixamo. It gives you a skeleton you can move around as you wish. It helps very well to create an animation too.
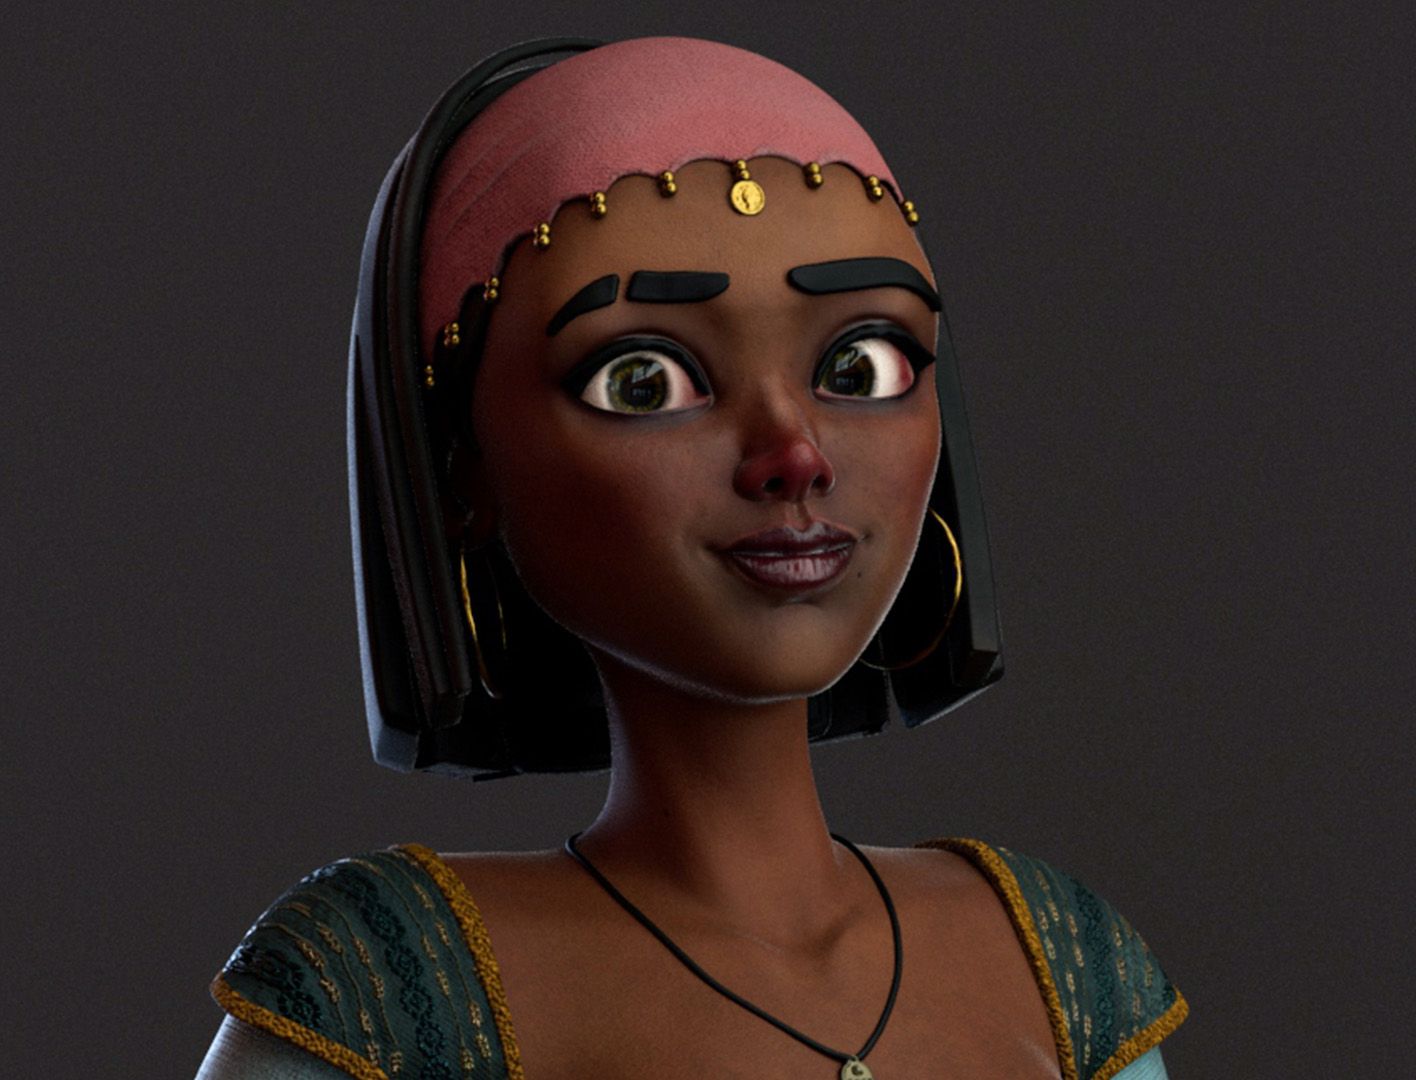
When it comes to the face, I manually sculpted it in Maya. Achieving a pleasing smile while keeping the mouth closed proved to be a slight challenge. The key was to avoid creating an uncanny valley effect.
Afterward, I made additional adjustments to the texturing. It's perfectly normal to experiment with your render engine and make changes accordingly. Keep in mind that Substance 3D Painter may not display things exactly the same as Arnold (or Unreal, Unity, etc).
Final face exspression
I used Arnold for the rendering. I usually use AOVs to do a postpro later in Adobe Photoshop. Some things will never feel right in raw render, or take too much time, so I spent some time doing my blur and colour grade work there.
Final image
Conclusion
This project has taught me invaluable lessons in patience and perseverance. With the guidance and feedback from my teachers, I pushed myself to complete this character and achieve the level of production I aimed for. While I'm pleased with the final result, I recognise that there is still much to learn and improve upon. Many more characters are waiting to be created! If you have any further questions about the process, feel free reach out via The Rookies, Artstation, Instagram or LinkedIn.