How to create a photorealistic 3d rendering of a rhinoceros
William Fiorentini is a 3rd year CG student at ESMA Toulouse, France. Today he is sharing his workflow for creating a photorealistic rendering of a rhinoceros using Zbrush, Maya, Mari and Arnold Renderer.
William Fiorentiniis a 3rd year CG student at ESMA Toulouse, France. Today he is sharing his workflow for creating a photorealistic rendering of a rhinoceros using Zbrush, Maya, Mari and Arnold Renderer.If you've ever wanted to push your cgi creature skills to the next level, this is a great place to start.
Collecting reference images
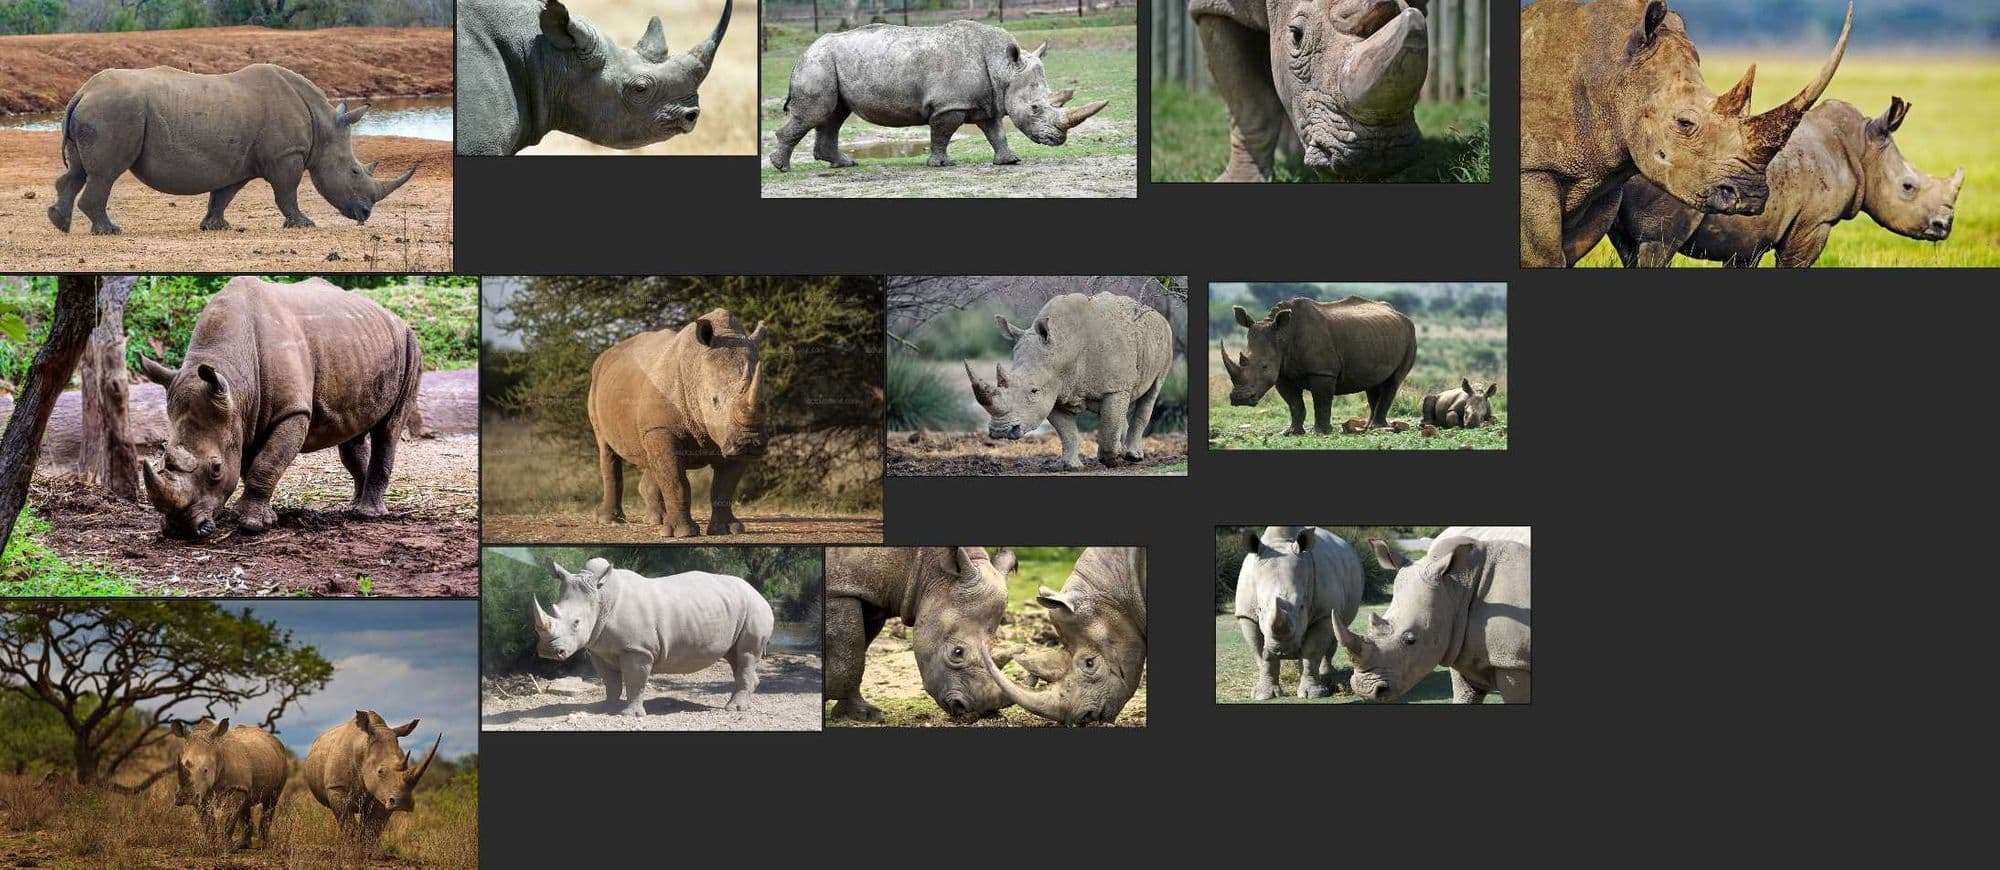
The idea of making a creature was always in my mind, and the rhino was on my top list, not because it’s one my favorite animal but also it’s a magnificent creature. It’s all in the title, gathering references is one of the key to make a great project. Try to make a project without references and you will go straight to a wall.
Now, back to the rhino, if you make some researches you will notice that there isn’t only one type of rhino specie, but a lot. So you’ll have to think about ‘what type of rhino I want to make’, ‘does this one look cool?’ etc. A lot of questions going on your mind but at the end of the day make sure to make something that you will enjoy the most first, you’re doing a project for you and not for the others, I made the rhino only because I love this creature and I thought that was interesting to work on a creature from our world.
The goal was to make a creature from scratch, no base mesh used or anything. I wanted to learn on how to make a sculpt from was the best way to learn.
The modeling process was done using Zbrush only and retopo in Maya, then projected back in Zbrush. I tried to make a good topology workflow and get it ready for animation.
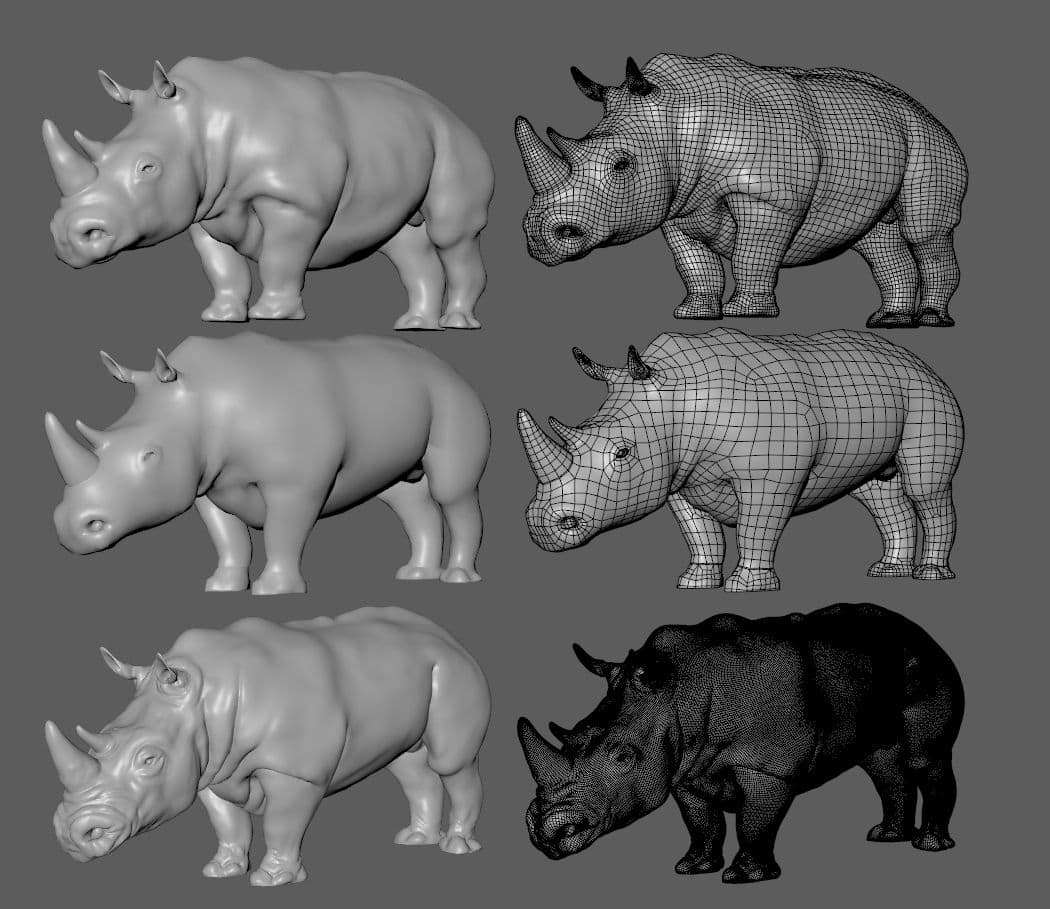
I usually stop sculpting where I’m happy with the primary and secondary shapes, then I go in Maya and retopo the whole model with a low poly level. Once it’s done, I can make the UVs, at the time I was using Mari Non-Commercial at home so I was able to make the UVs into 6 UDIMS, but for this kind of project it’s totally enough I didn’t want to make extreme close ups shots.
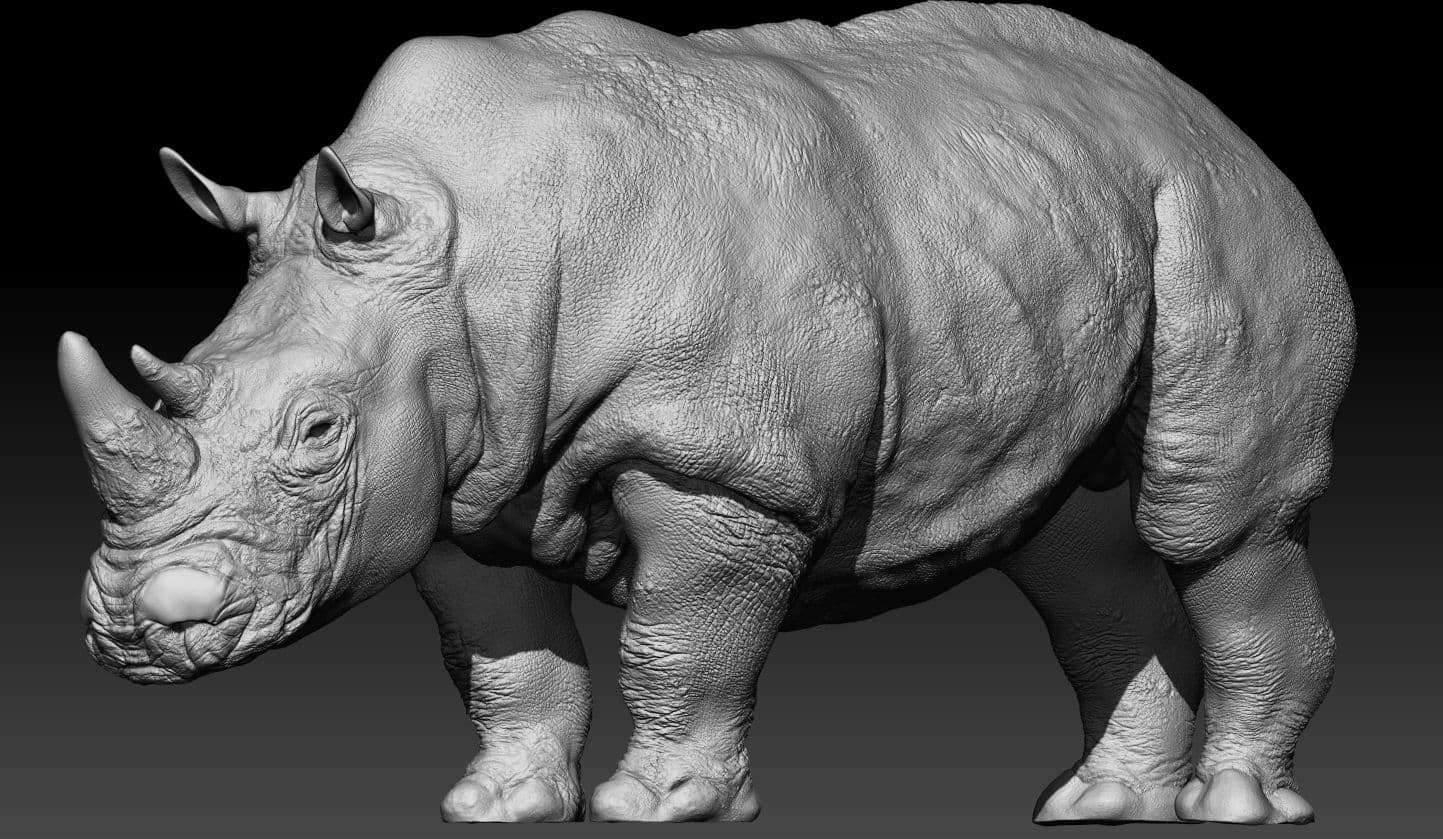
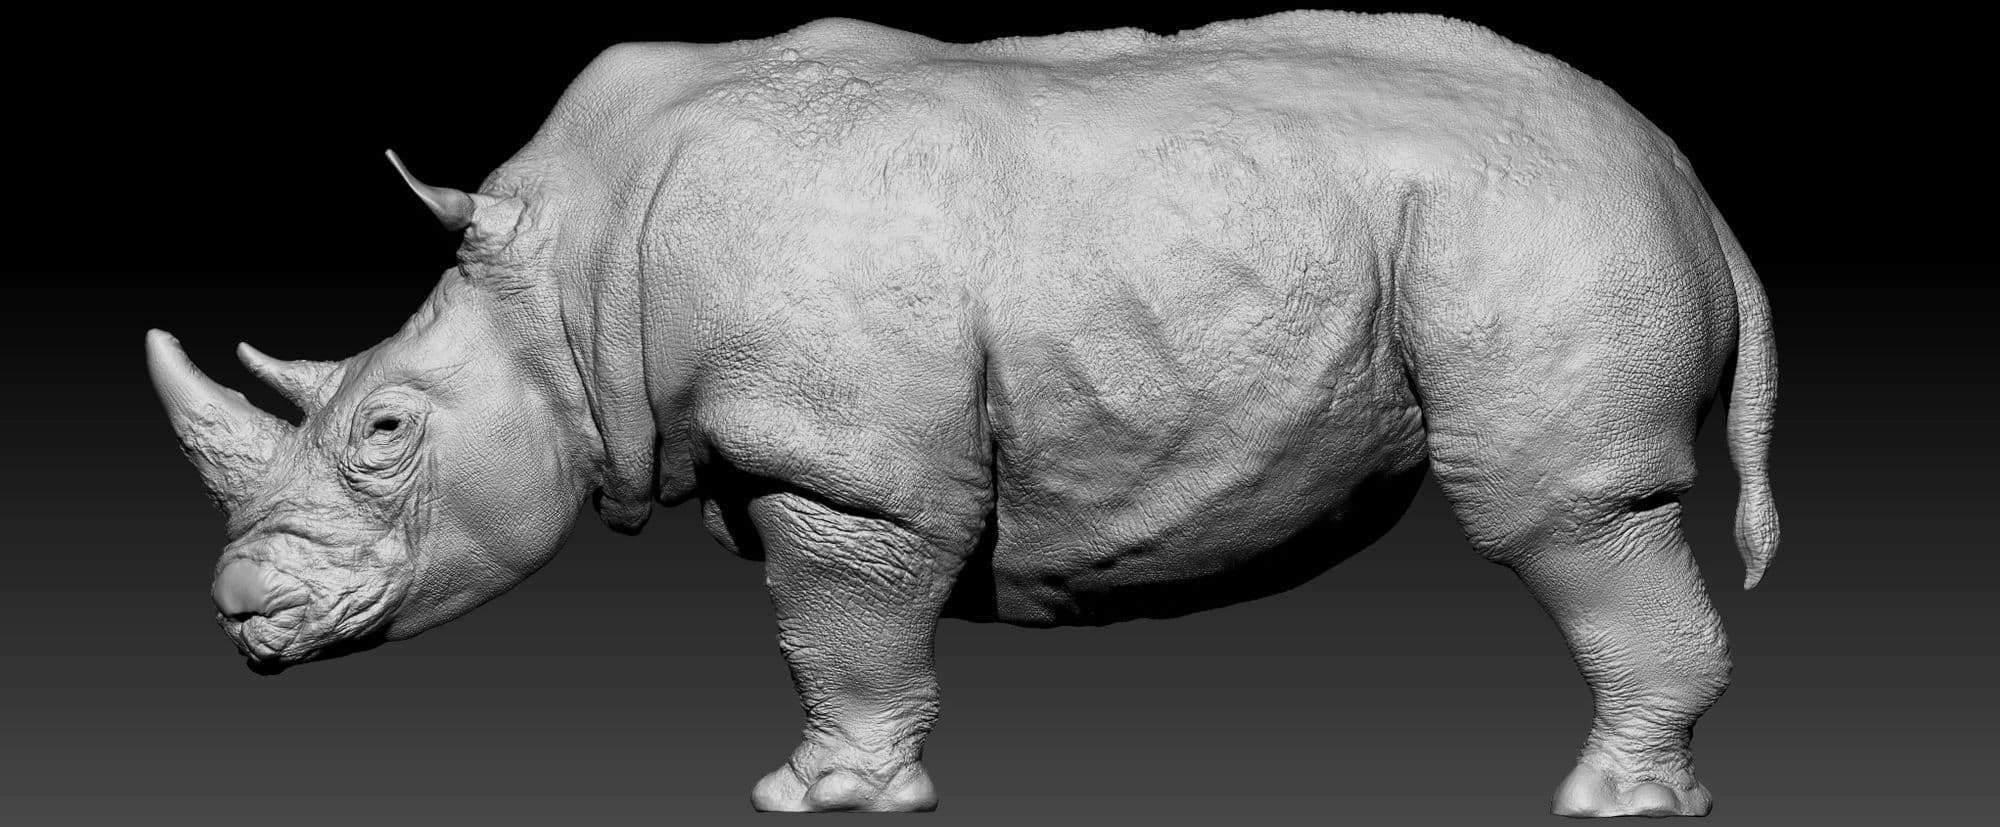
In order, from bottom to top. Model exported from Zbrush before retopo; Retopology done; Model re-sculpted.
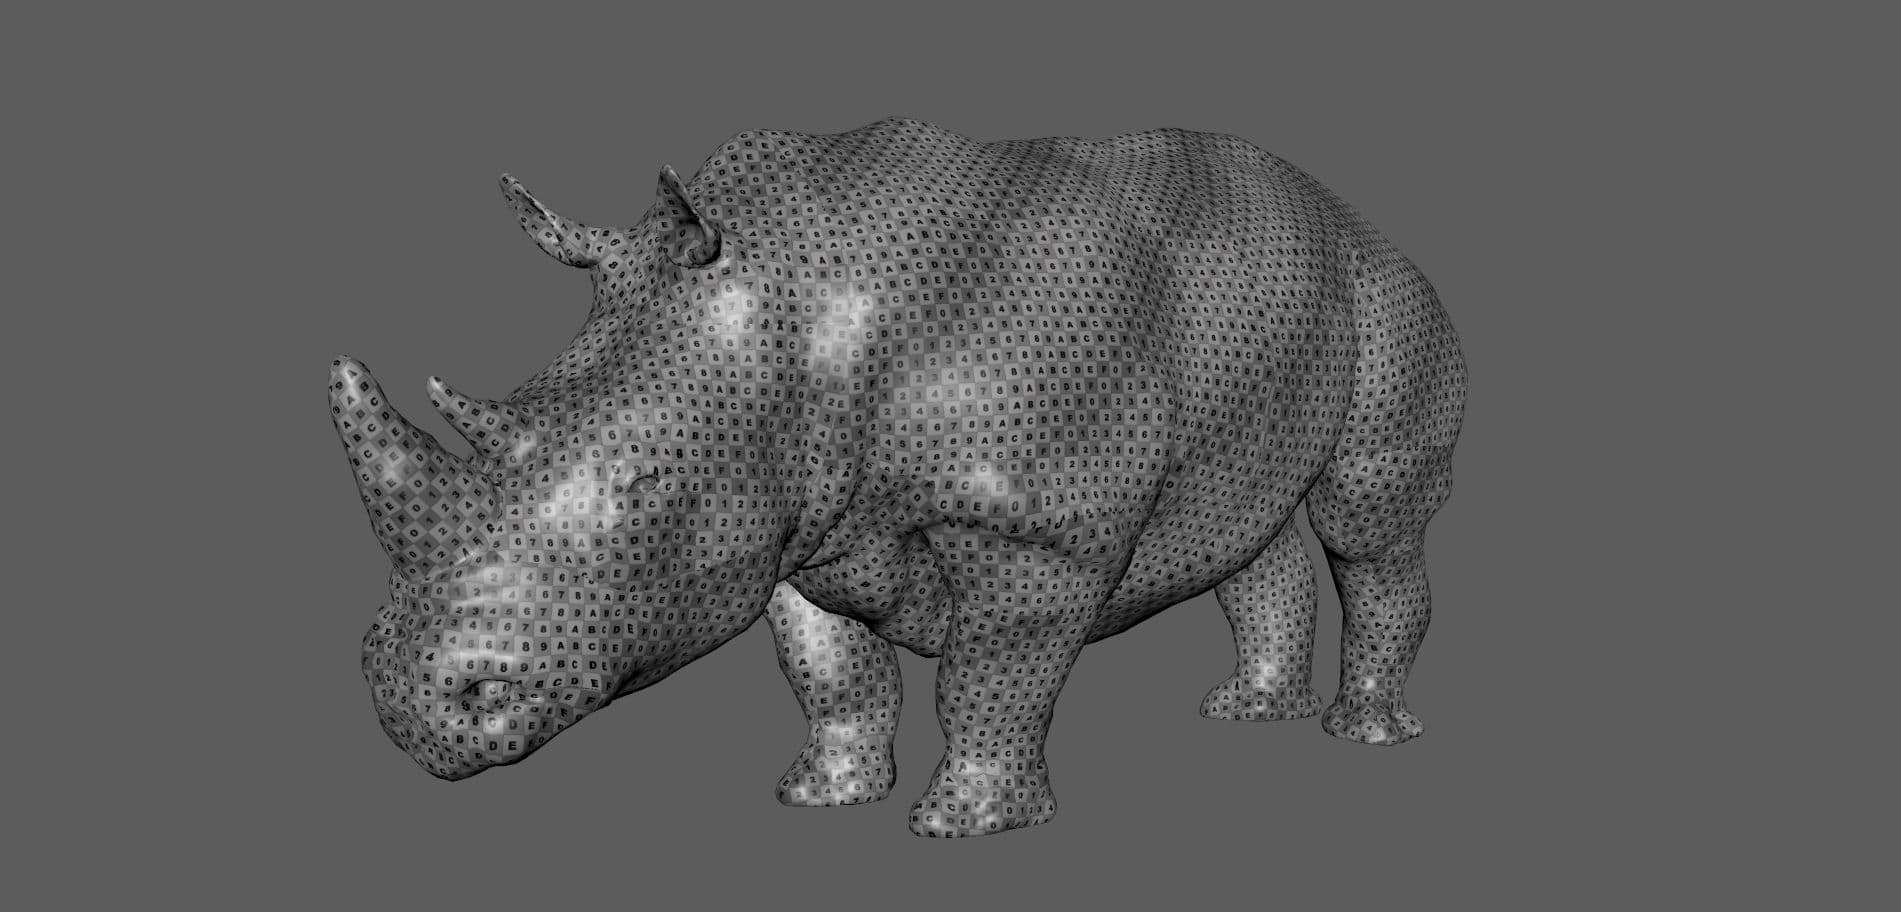
After that, I imported my low poly version of the rhino into Zbrush and start to re-project the high detailed model on the low one, some very tight parts of the model can be messed up because of the projection but don’t worry, you can re-sculpt them or try to play the projection settings. Once you’re done with secondary shapes you can start sculpting the skin, for this part I used the FlippedNormals Skin Kit which is a very set of skin alphas for reptiles and humans, you can get it here. A little tip here, I always sculpt while using layers so whenever I want to go back on the primary forms I can change them without affecting the skin or secondary shapes. It’s only back and forth between Maya and Zbrush.
Modeling is one of the most important part of a workflow, this is why it’s really important to take time to make it right, the model and topology are as important as the textures and animation.
Gather enough references before you even start sculpting, the more you have, the better it will be for you.
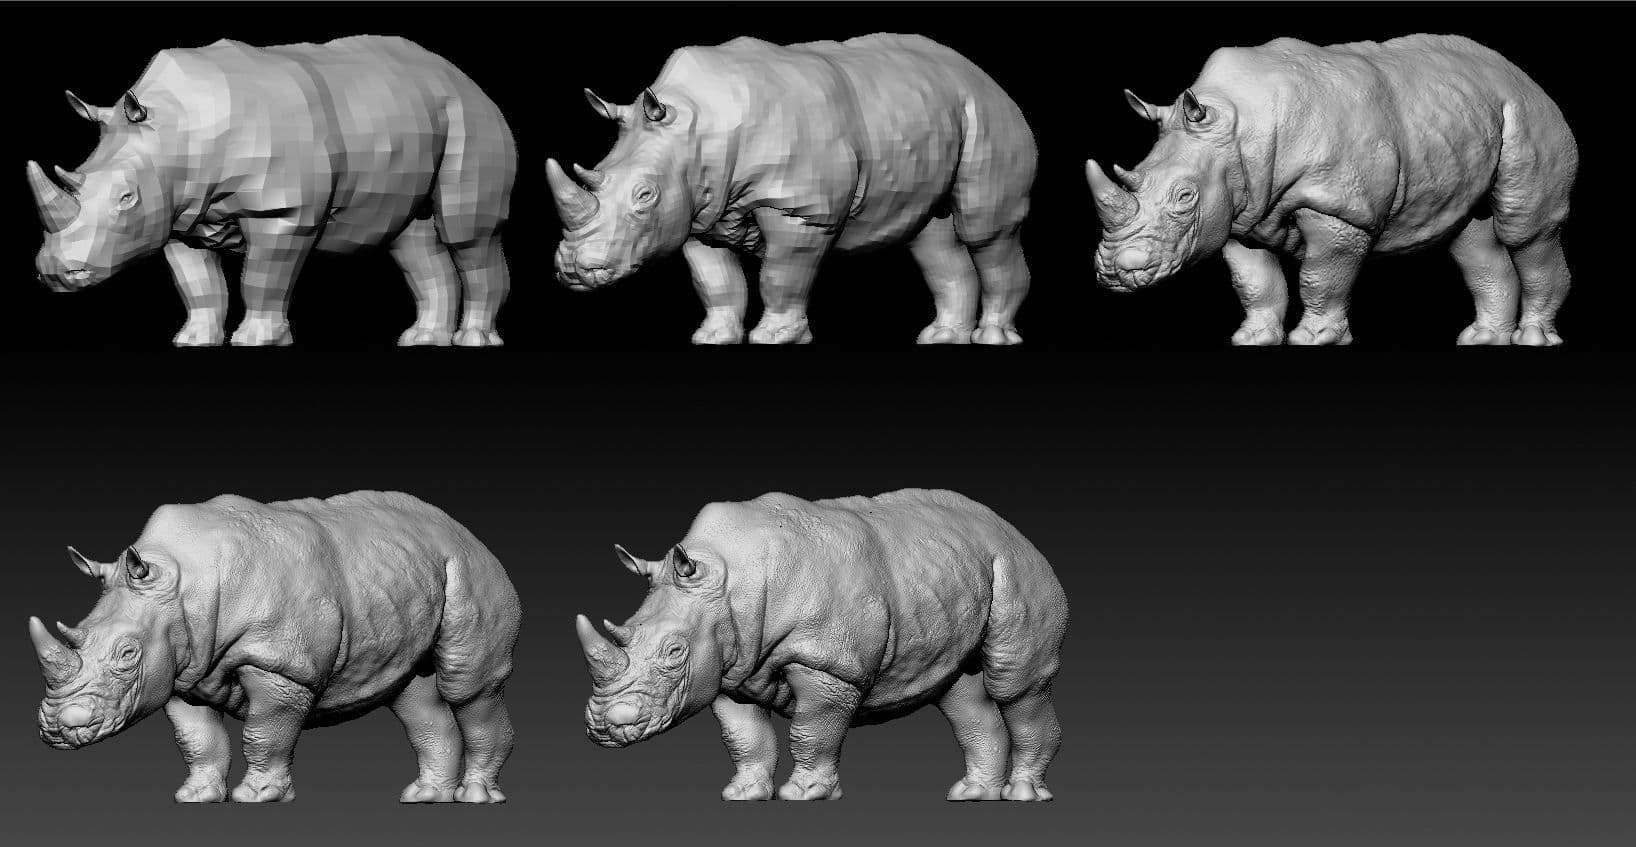
Make sure to keep your subdivision level at the lowest level as possible while making the first primary shapes, it’s better for you when trying to have the silhouette of the whole model
Take your time, there is no rush while making it, the more time you spend on it, the more time you will have to perfect your sculpt.
Don’t rush the primary shapes, they are as important the secondary/tertiary forms, if not the most important parts, the volumes/forms come first, details last.
Don’t be afraid to ask around some feedback on your work, it’ll help a lot.
Take some breaks, again, no rush.
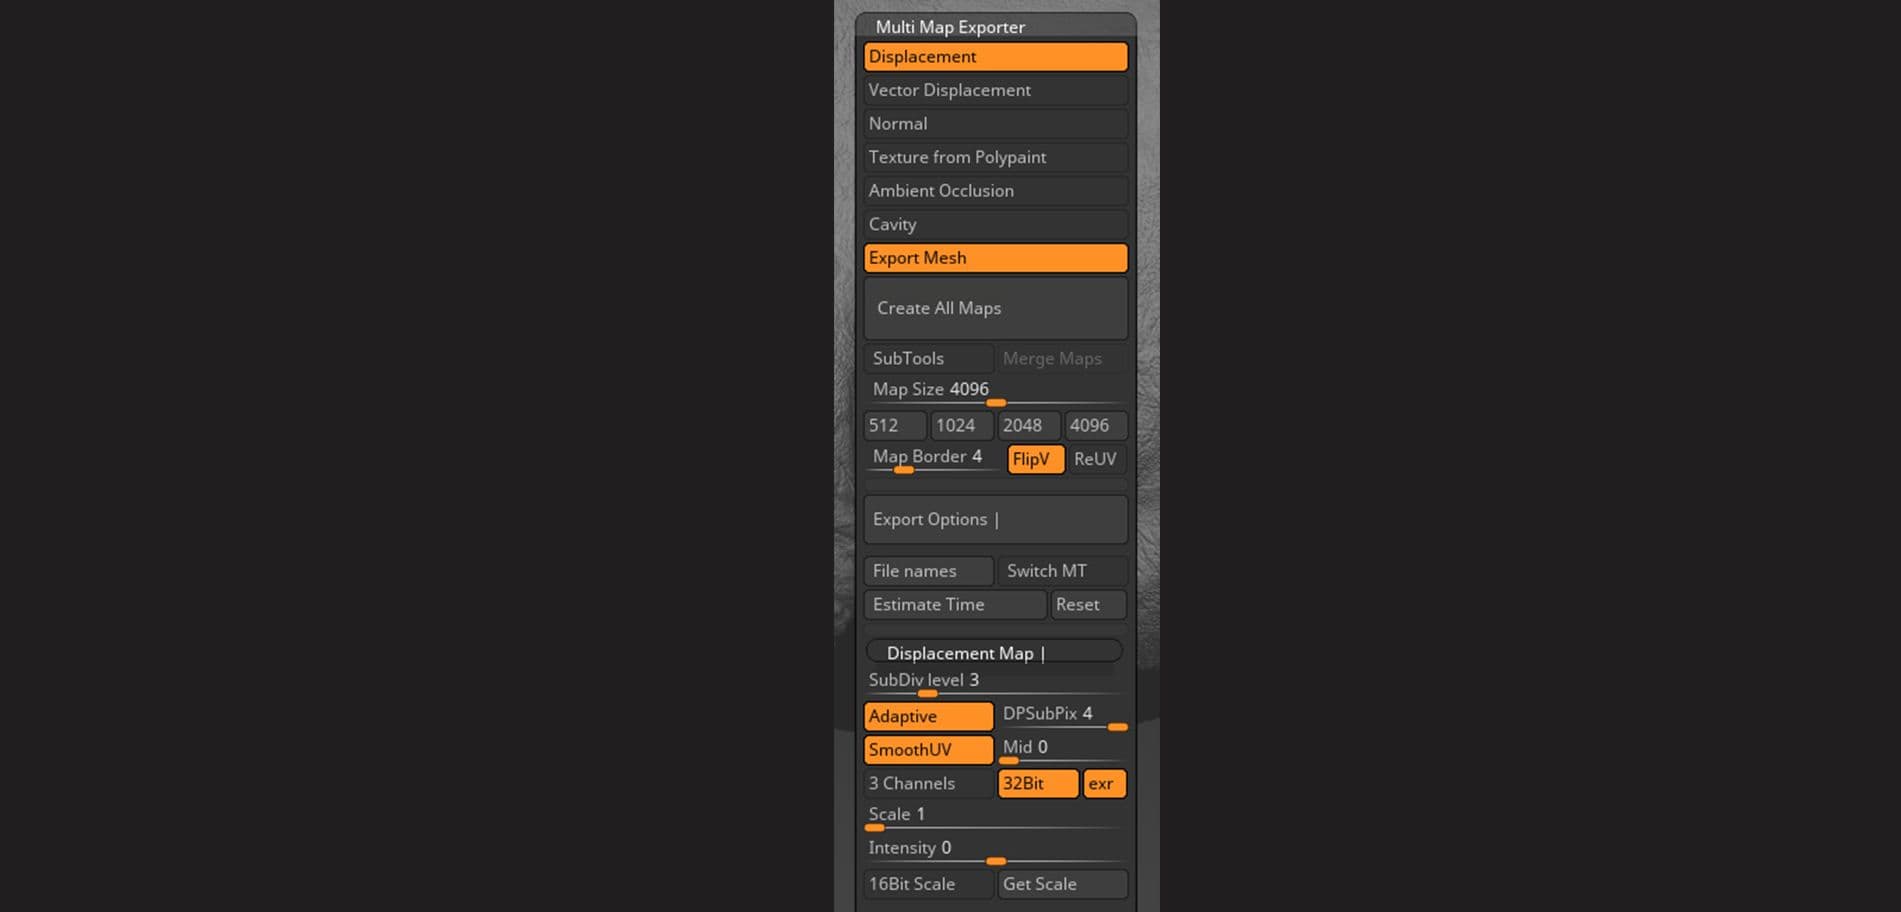
Now time to export the beast, I was up to level 7 on the subdivisions, getting higher isn’t necessary. For the export, I suggest to check out this link which was really helpful for exporting my displacement map, here, it’s also guiding you on the import of the displacement map while in Maya.
Zbrush export settings for the Displacement map.
Texturing & Rendering your 3d Model
For the texturing process, I only used Mari as I wanted to learn and practice more on the software used in the industry. The fact that Mari can easily support UDIMS was the reason why I made multiple ones on the rhino.
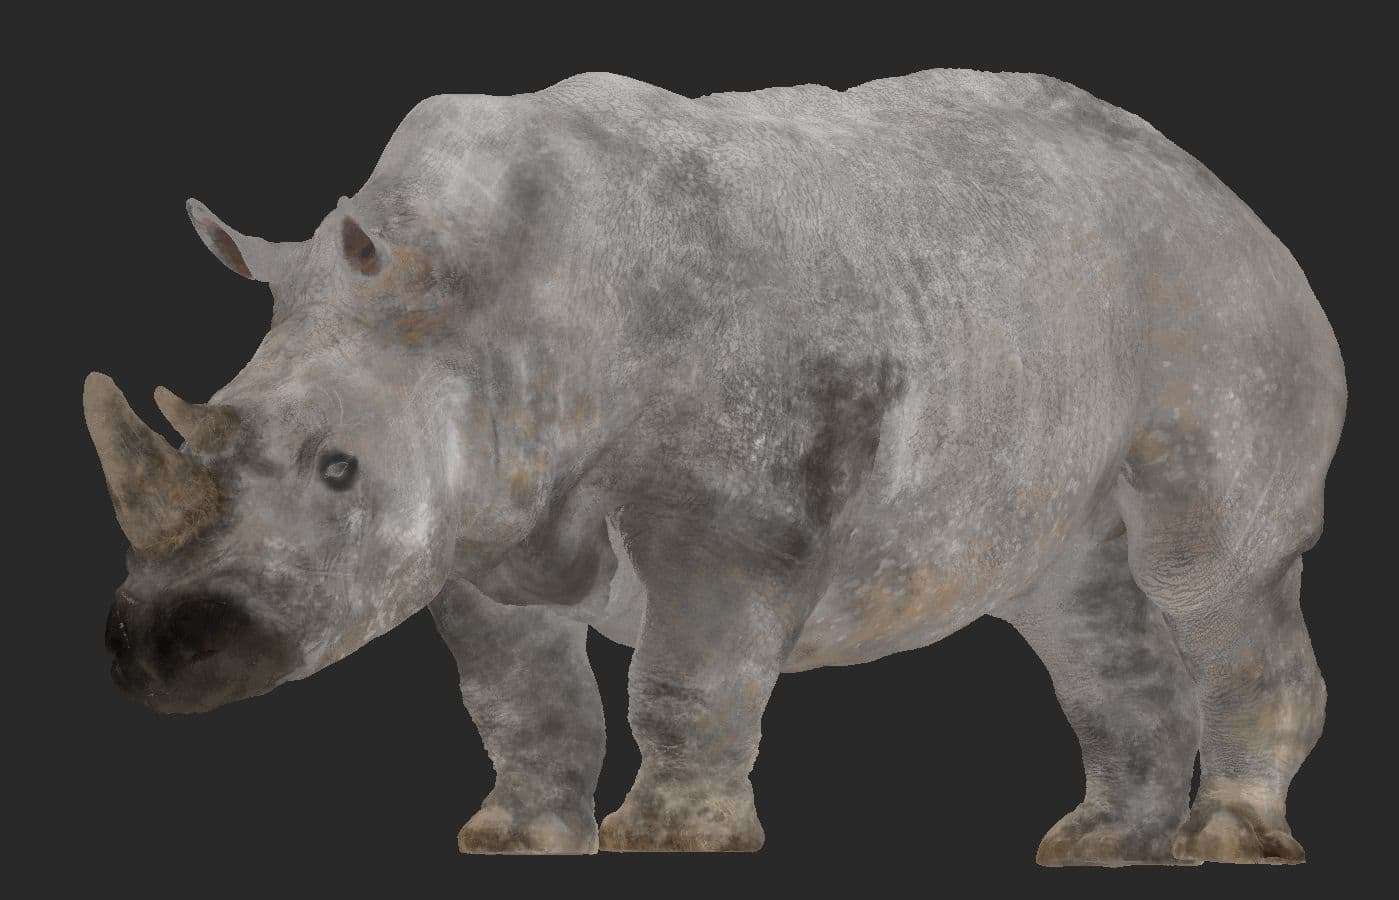
I started by adding layers from rock, ceramic, frog, and dirt diffuse colors. A little bit of procedural layers were used. Since you can’t really find rhino skin textures like wood for instance, you can create your own by following your references. The White Rhino, which was my main reference for this project is mostly white/grey depends on the situation (if it’s covered by dust, dirt, mud, ect.). Most of the time these creatures are covered by dust and dirt, and mud for the feet, so I mixed procedural layers with rock textures I’ve found on Internet to build my base color.
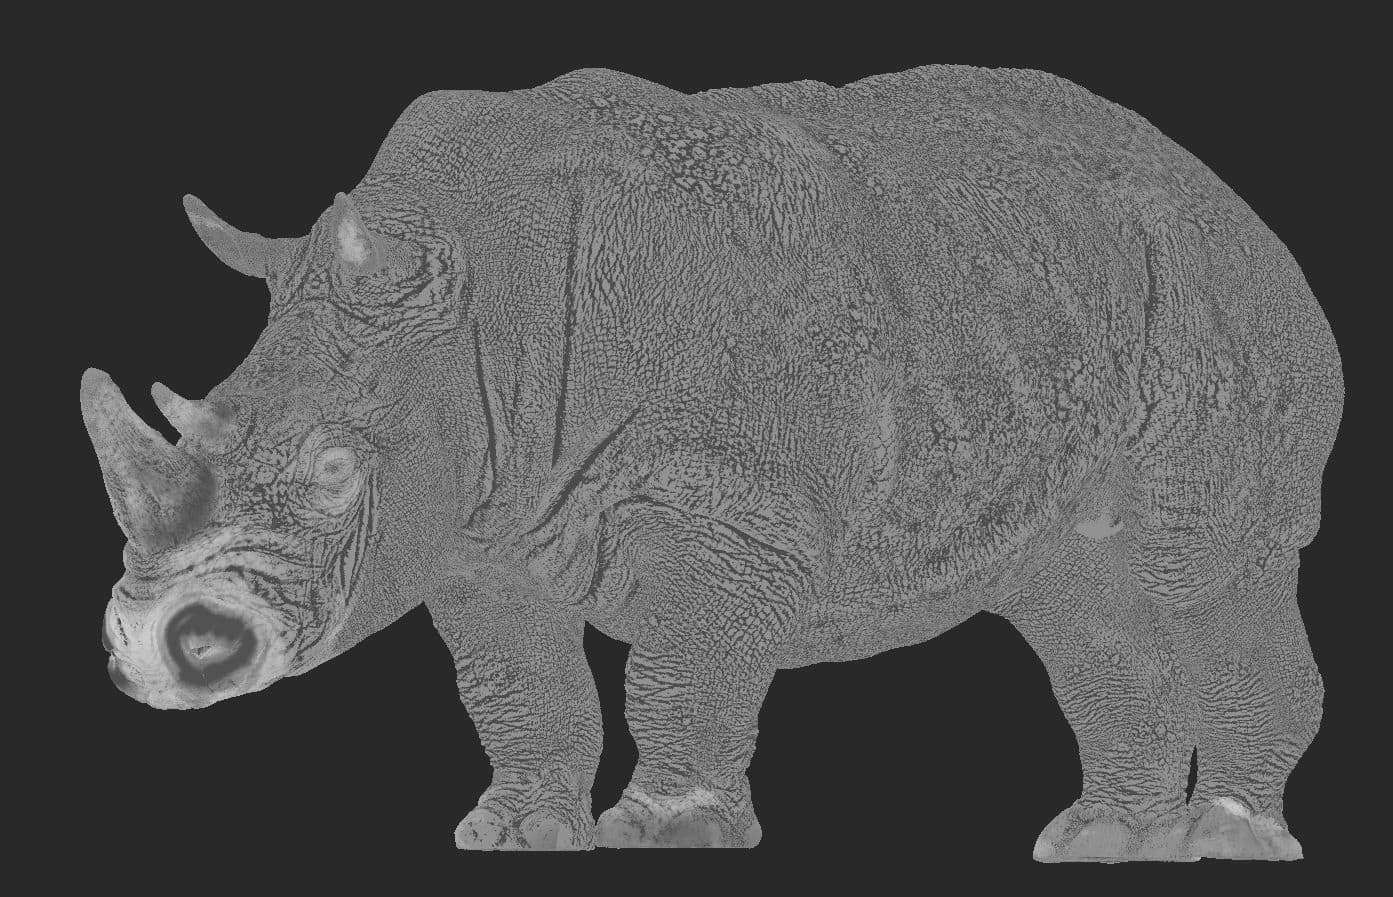
After that, I used my Cavity map to mask the hollow parts of the sculpt from the top ones, you can create the map directly on Zbrush by using the cavity mask, here is a little tutorial from Paul H. Paulino.
The Cavity map was really helpful in this case because I wanted to give more variations to the skin Albedo, a mix with the cavity and procedural layers in Mari really did the job on this one.
Rock tiled texture (left), Cavity map (right)
Then, I started adding details such as on the feet where it’s all covered by mud, so I started to paint the skin to make it look darker as if the rhino just walked into a puddle of water.
Albedo
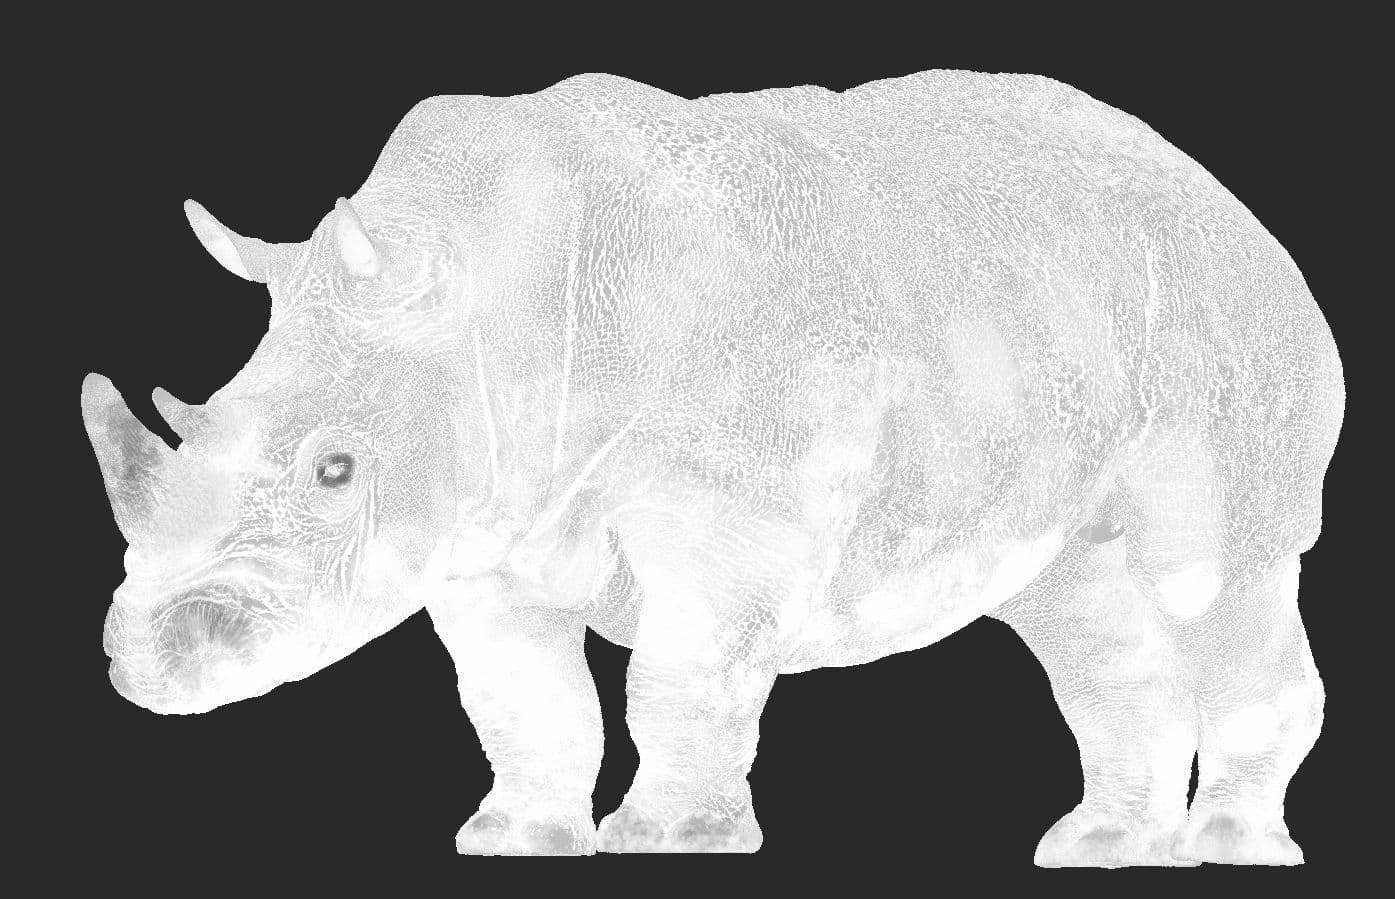
Once you’re happy with the diffuse, you can start painting your Specular and Roughness maps. For the specular one, I just copy/paste my diffuse color and added a Luminosity layer to make it black and white, after that I began tweaking the values of each layers with Grade and Levels nodes so lower the brightness of the hollow parts. This can compared to a human skin where the pores receive less specular than the top, same thing with the rhino.
The Rhino is often covered by dust so its skin looks like rock more than anything, at the end you will have a lot of variation going on, you don’t want the skin to be uniform. I suggest you start by painting with symmetry on then break it by adding more mud or dirt manually, this will look more natural.
For the Roughness map, it isn’t difficult, I just painted the parts where it should be glossier than others. For instance if you’re planning making your model look like it stepped on water the feet will look glossier than the top of its head, ect..
Specular (left), Roughness (right)
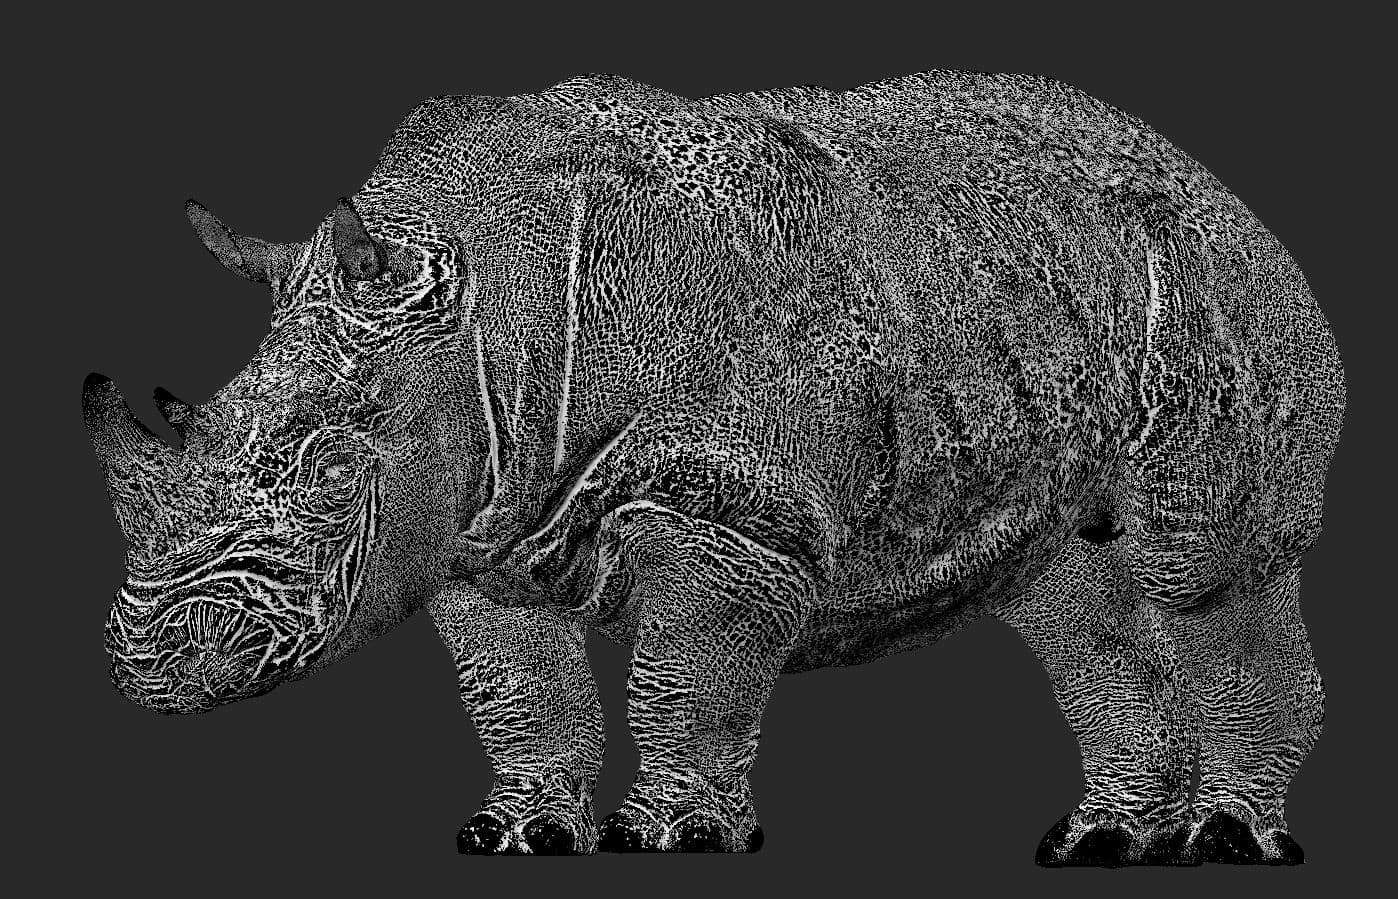
Last step is to make the Bump map, thanks to Arnold there is the “Auto Bump” attribute that can help a lot, but I thought there was not that much detail displaying on the skin, so I took the tiled textures from the Skin Kit and put it on a Tile layer in Mari and repeated the textures enough until it’s almost fully grey, be careful with the size of the skin pores!
When you’re done with your maps in Mari, you can export and start plug them into Maya, I’m was using Arnold for this project, as I usually use Renderman at ESMA but in that case I wanted to try other rendering softwares to get out of my comfort zone.
Now you can plug your textures on your AiStandar shader, you should have your Albedo, Specular, Roughness and Bump map. The diffuse color of your shader is usually set to 0.8 by default you can increase it to 1.
I plugged my Specular map into the specular weight slot, I even plugged the map into the coat slot to have a bit of oily effect, but not too much. I set my IOR to 1.5, which is a bit higher than human skin (generally set to 1.33 or 1.4), it’s up to you for this part. You can tweak your textures by adding Color Correct and Range nodes, that'll help find the right balance.
Don’t forget to turn SSS as even if it’s a creature covered by dust, etc. it’s still a skin, so you can add a bit of Subsurface to make it feels like skin. Adding too much and we’ll lose this dusty effect of the rhino. For Subsurface, Solid Angle has a great documentation on how to use the SSS properly here.
Look Development and Shader Development
First of all, you should check out Timothée Maron’s tutorial on creating a photorealistic portrait, his lookdev part is awesome.
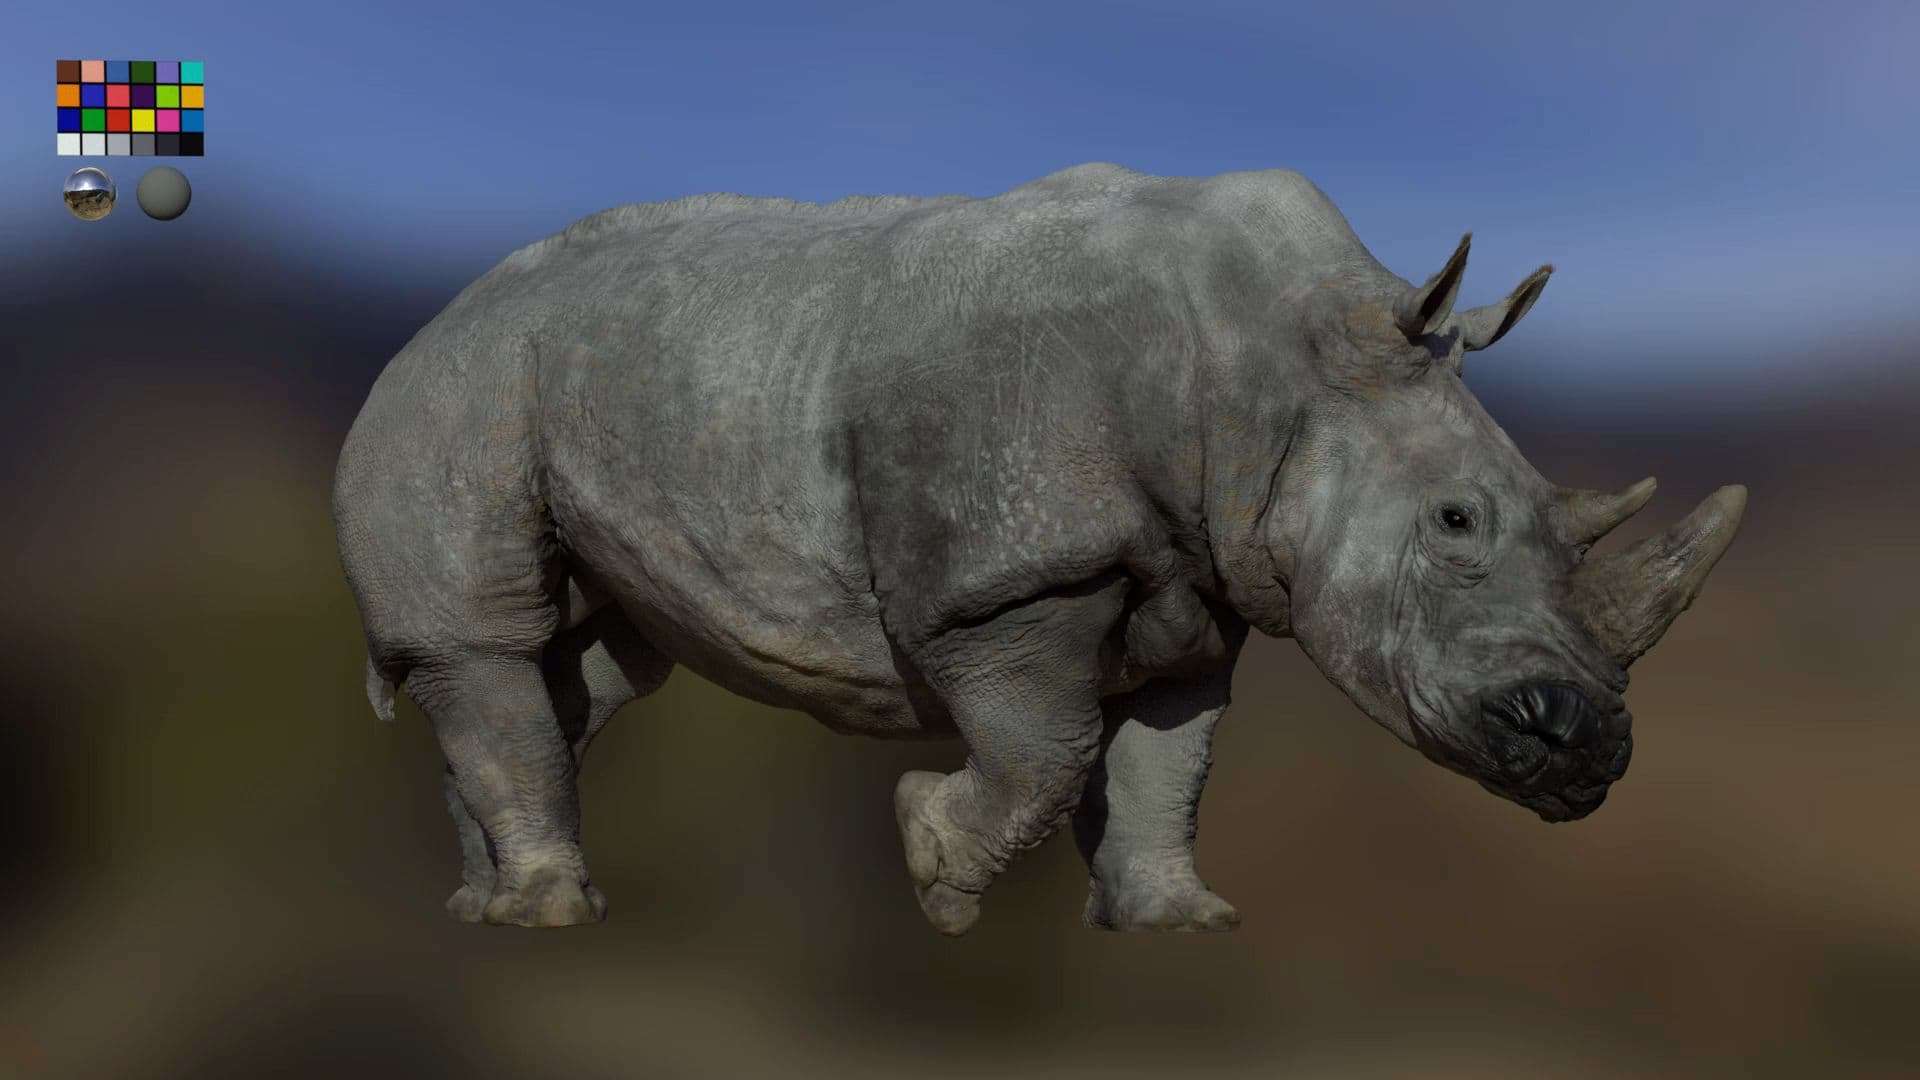
I used a studio HDRI to get my shader right, and try to not overexpose your model, this is why it’s important to start with a neutral lighting, the ones from Jahirul Amin are amazing to work with!
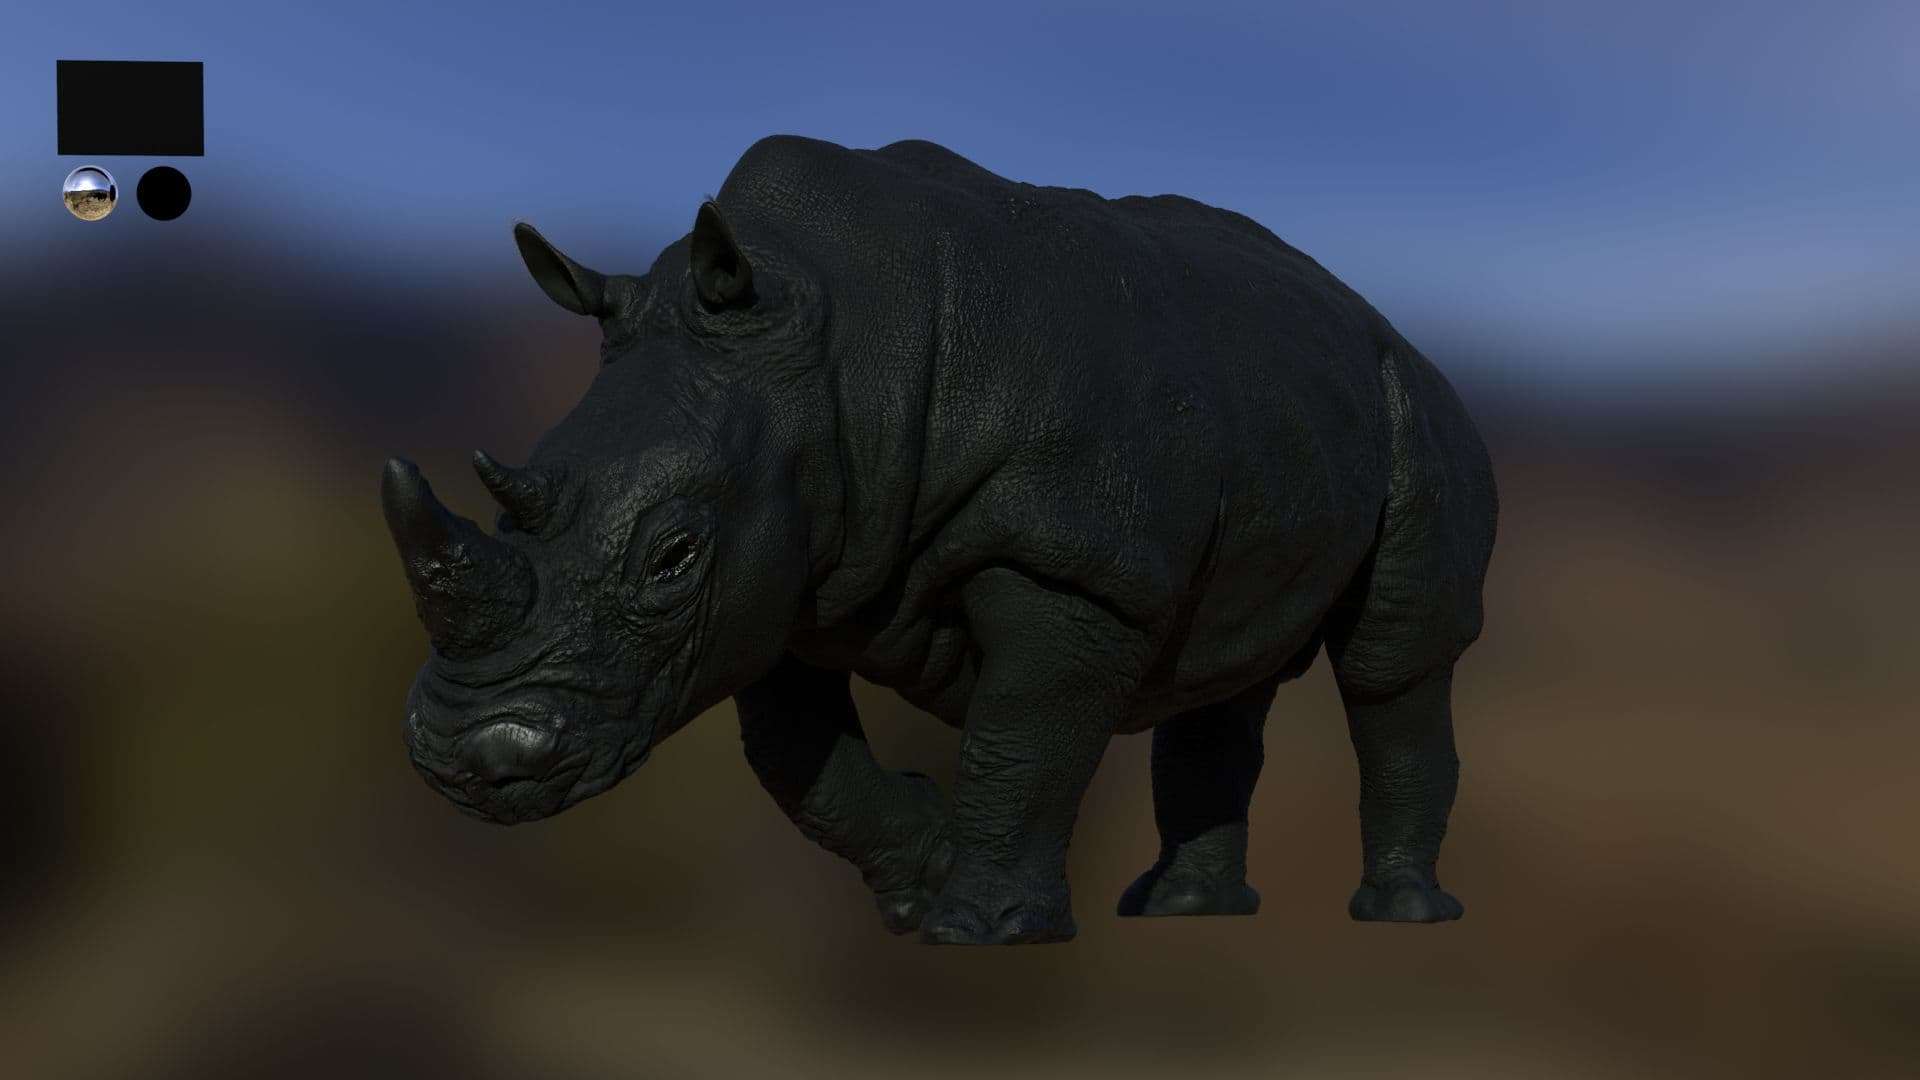
When you’re satisfied with your shader, you can start by using more natural environment lighting like other HDRIs, the ones that come from HDRI Haven are great, also JorgenHDRI has a pretty decent amount of HDRIs that you can use or you can get a free kit from Dusan Kovic.
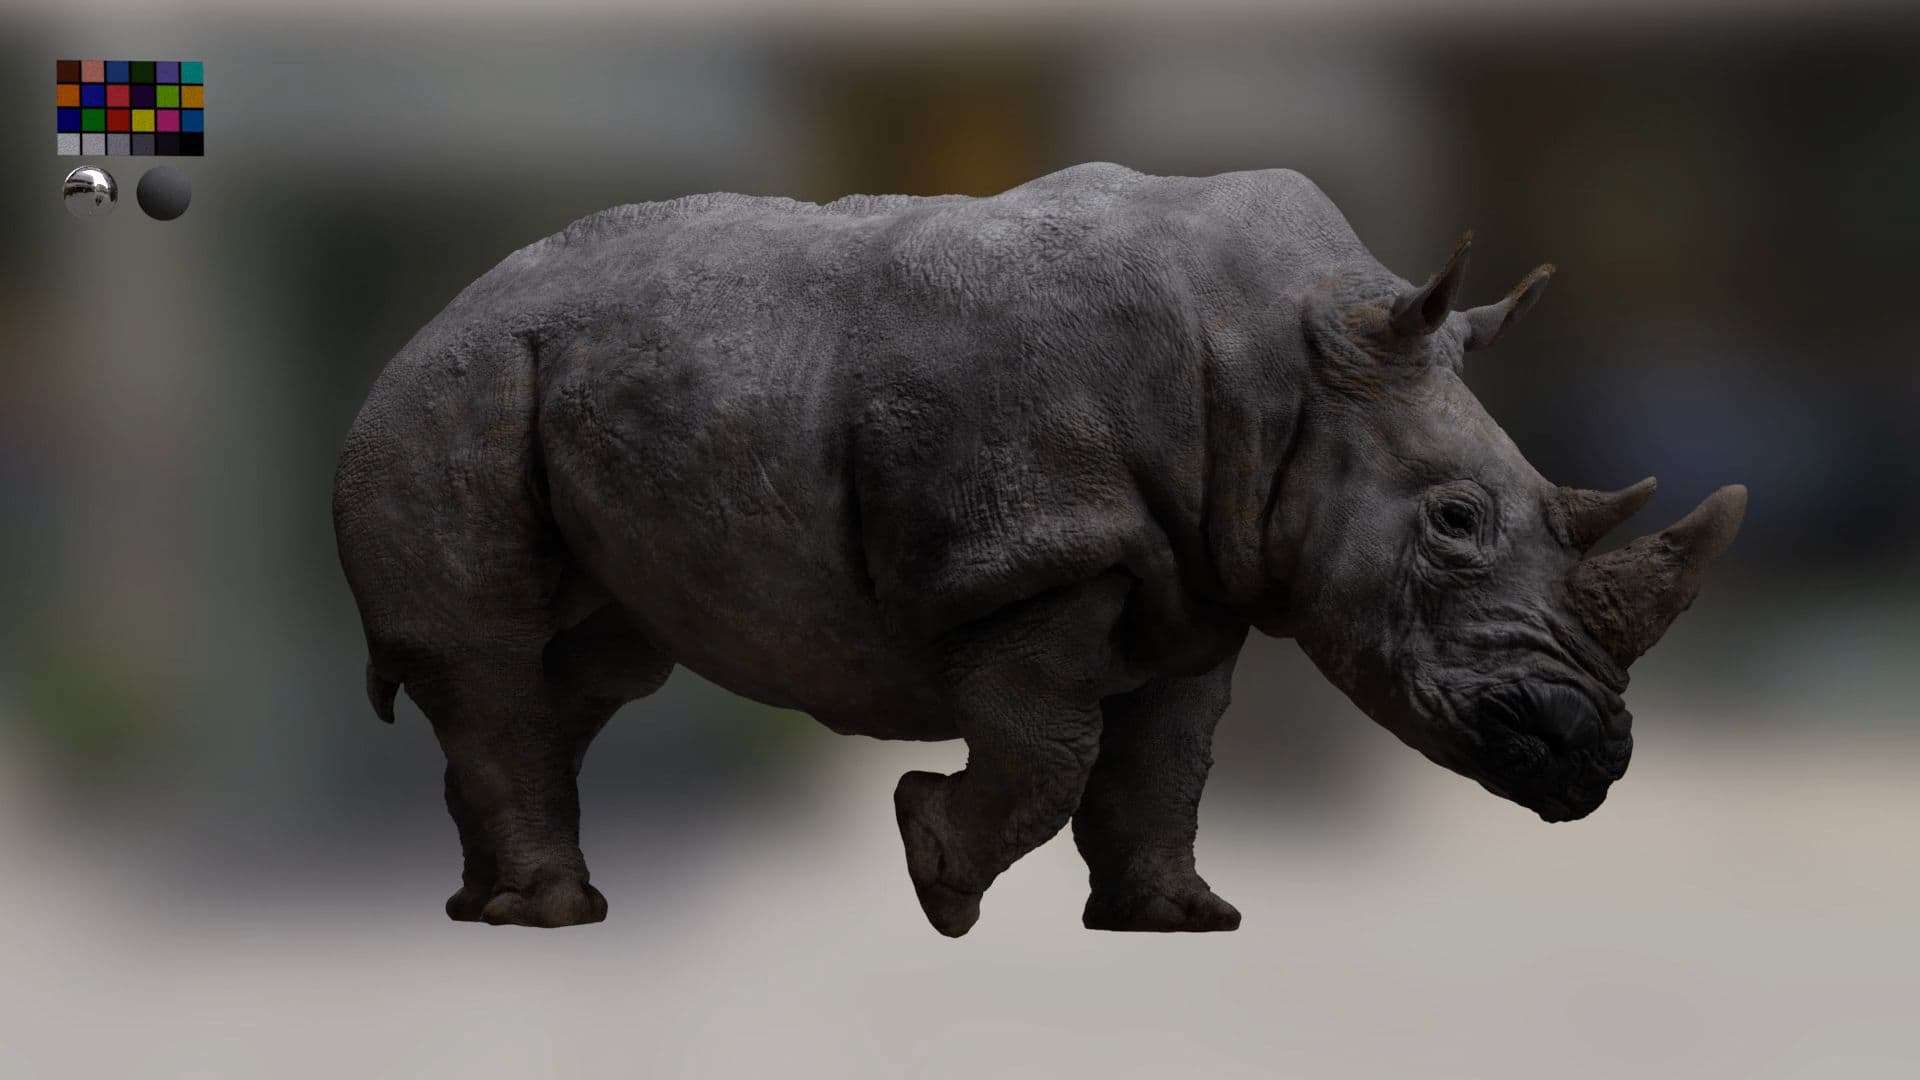
It’s only back and forth between Mari and Maya because you always have to tweak your textures at some point. I used 2 shader balls, one fully chrome and one with a grey at 0.18, that’ll help me getting the right values for my shaders and textures, it also helps to not overexpose your scene. Using a color checker isn’t always necessary as I’m not trying to match any real plate, you can still use it, depends on you.
Specular
With your lookdev done, you can know try to have a little bit of fun with your asset.
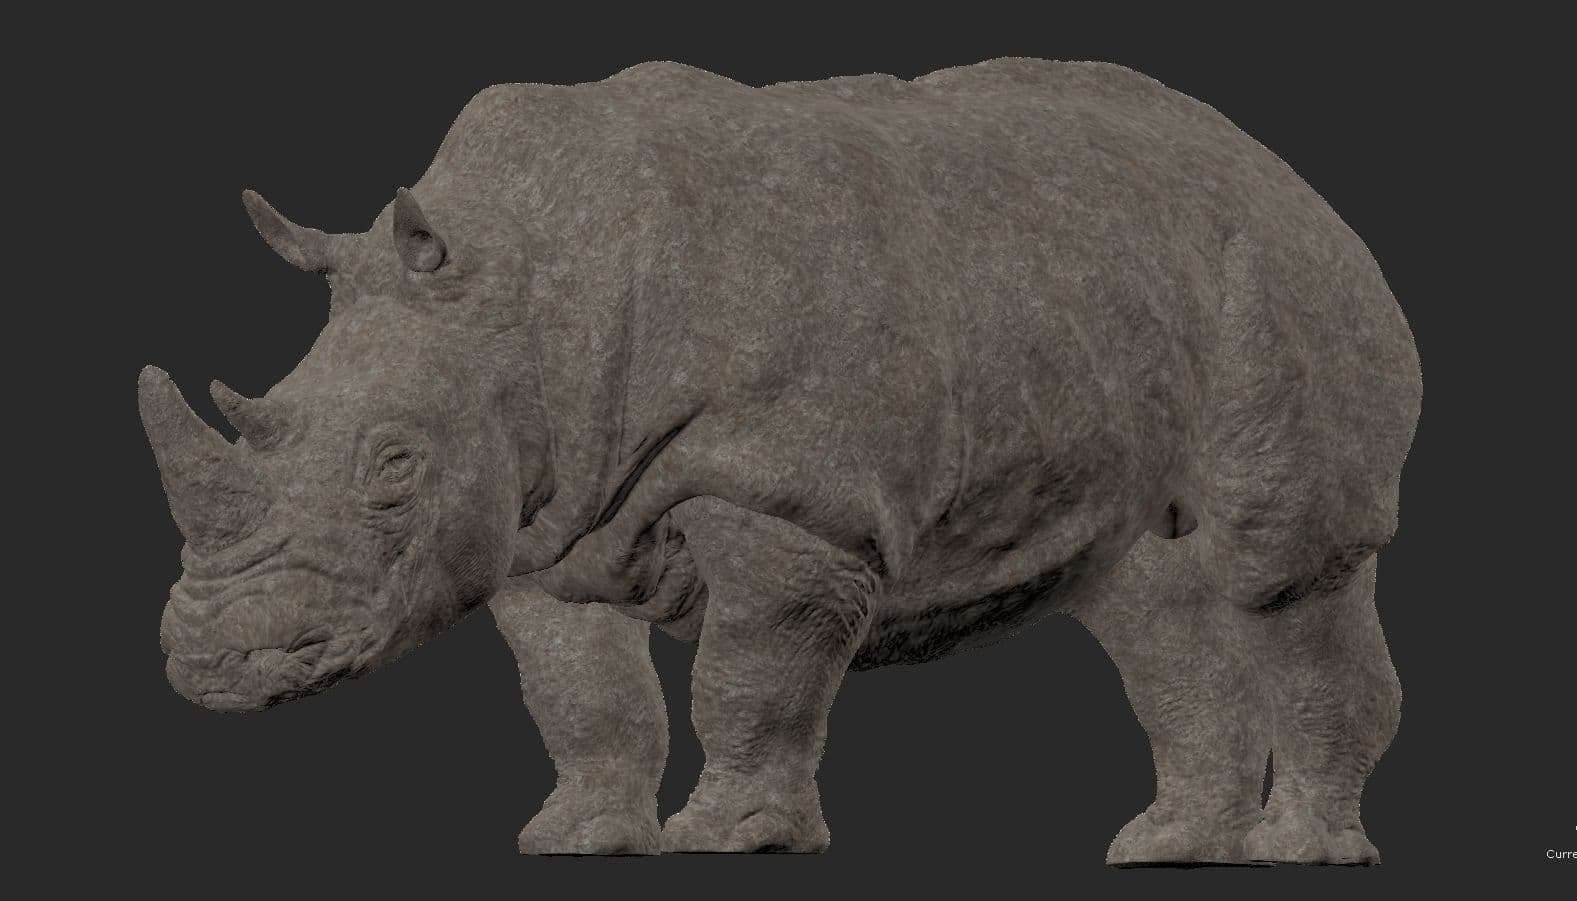
I searched on Google a simple photo in Africa or desert that I’d would like to use and put my Rhino into it. Once I’ve found the right photo I erased some parts that would bother me in Photoshop and then put it in Maya.
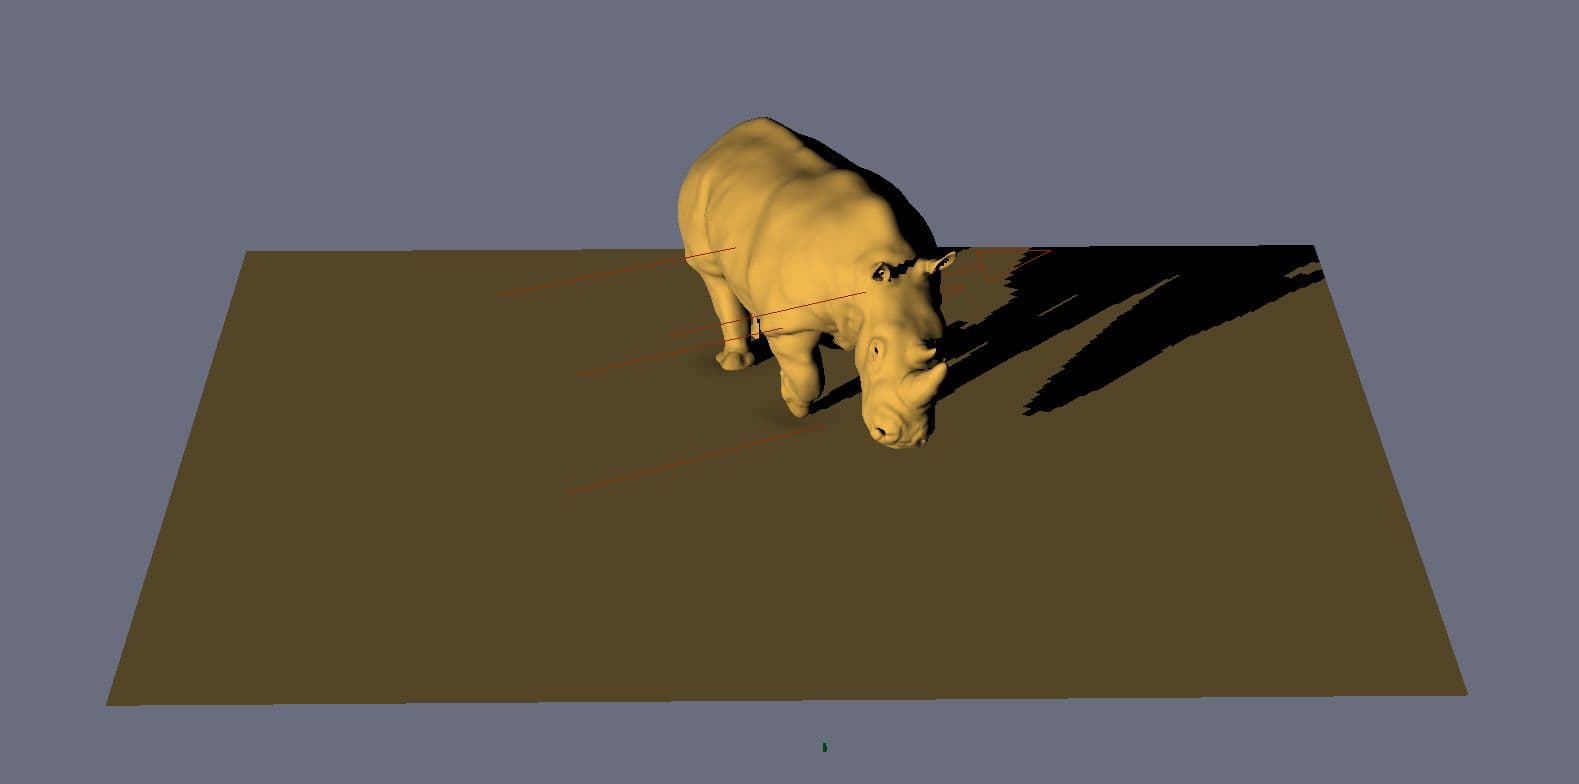
I matched the lighting of the plate as close as possible and once I was finished, I rendered. There is no compositing behind the final image, all this is done in Maya.
Lighting screenshot of the scene inside Maya
That’s it! I really hope I helped you getting the answers you wanted, if you have any question don’t hesitate to reach me out on Linkedin, Instagram or Artstation!
Thank you to Timothée Maron and Clément Feuillet for helping me on the project! Also, if you’re familiar with Discord you can join the “La Forge” server filled with students, pros, hobbyists, etc. They are the ones who helped me the most on this project.