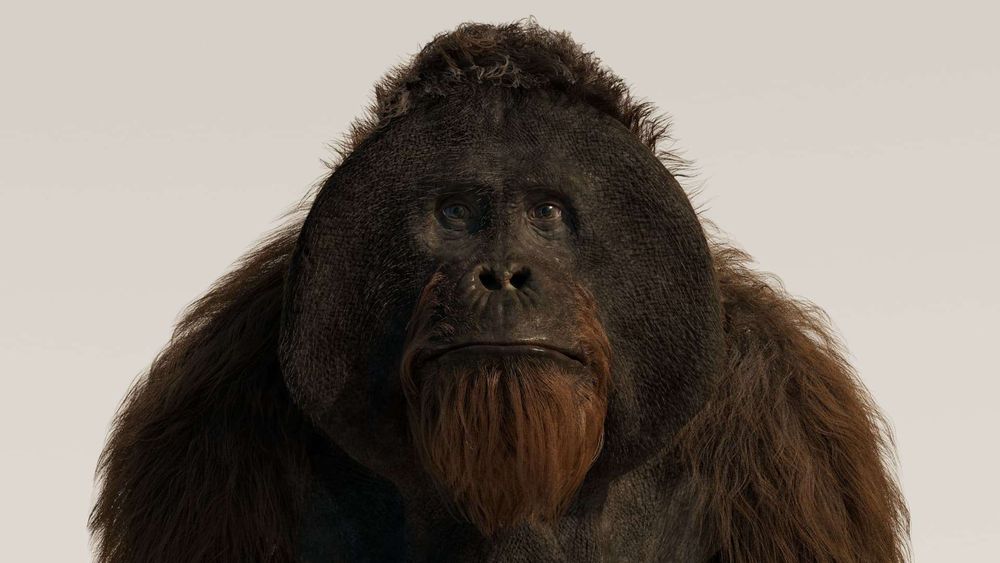
Martin Usandizaga completed this amazing orangutan project while studying at ISART Digital in Paris, France. In this article, Martin shares his experience with you and walks you throught his workflow and what he learned from the process.
References / Studies / Anatomy
The first thing I did for this project was learn about Orangutans in general, their size, skeleton, how they eat and how many different species their are. I reserched using pictures and videos of them. The main reference of a 3D orangutan was Maurice from Planet of the Apes.
For the anatomy part, I went to the Musée d’Histoire Naturelle in Paris to see skeletons of great apes. Jun Huang’s work was also a big help for structure and muscle study.

Scultping
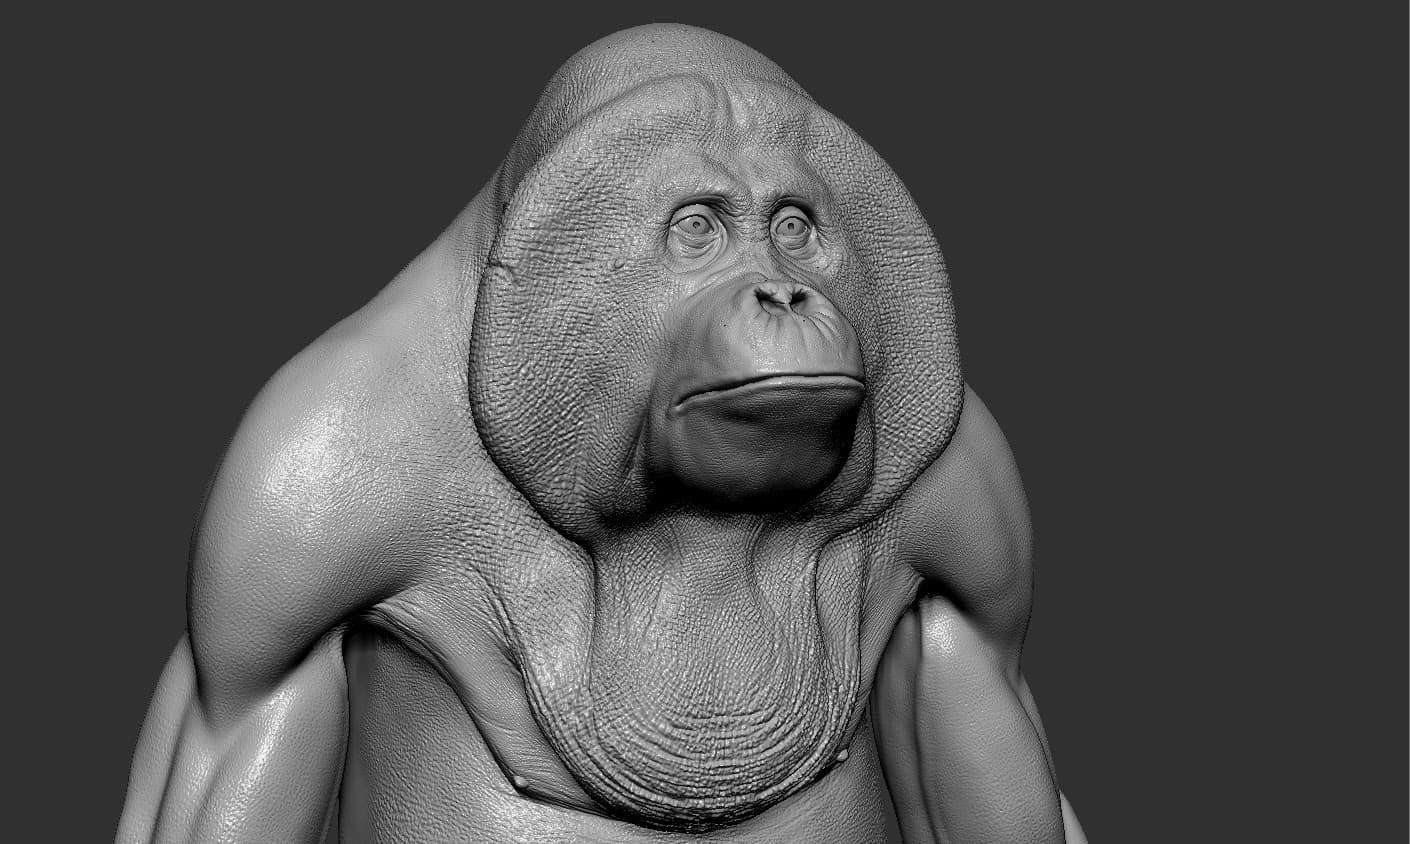
Using all these references, I started sculpting in Zbrush. I started from a sphere and was moving it around like clay to lay down the big forms really quick. I enjoyed using Sculptris pro at the start because I knew I would retopologize it myself.
This was my first animal sculpting project so I learned to spend a lot of time on primary forms (bone structure, muscles) and see how they affected secondary forms (skin folds, fat). So again anatomy references and videos of moving orangutans were really helpful.

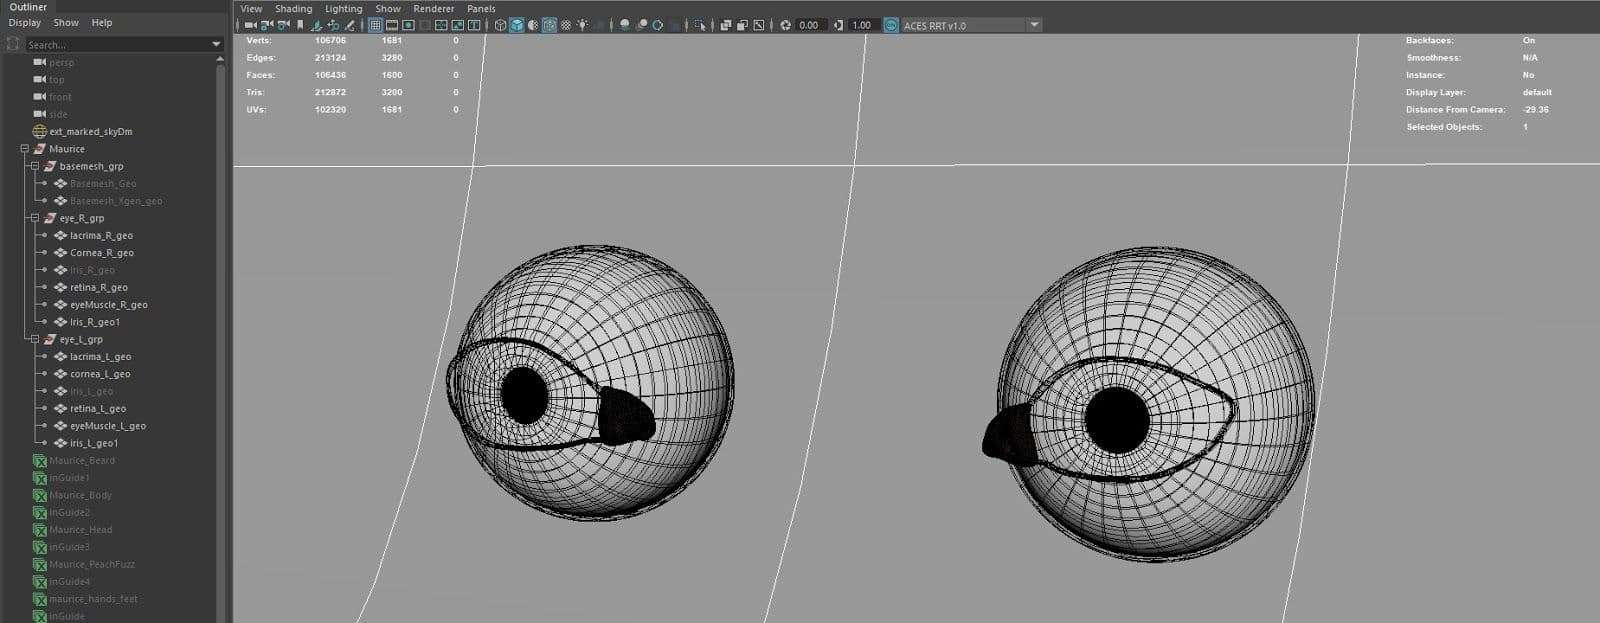
For the eyes, I just placed low poly eyes that I made in Maya just to have them in the right place. They were also essential when I started sculpting eyelids.
Retopology and UVs
After finishing my primary forms, I used Houdini to retopologize my model. The retopology tool is quite similar to Maya’s quad draw. The topology was done using human topology references. I then considered animation and deformations for production purpose.

Uvs were done in Maya following the principles of Human Uvs. I tried to optimize them by scaling-up important parts like the face, hands, and feet which were partially covered by fur.

Reprojetting and Sculpting Secondary Details
Back to Zbrush where I imported my retopologized model, I projected details of my sculpt onto my divided base mesh using masks and “project all” in the subtool palette.
Now that I had a model with good retopology and all information of sculpting that I needed, I moved onto secondary forms and details. For skinfolds and fat zones I applied what I was learning with my references. Details were first applied with alphas, then refined by hand without symmetry. I focused on the head and hand parts because I knew the rest would be covered by fur.
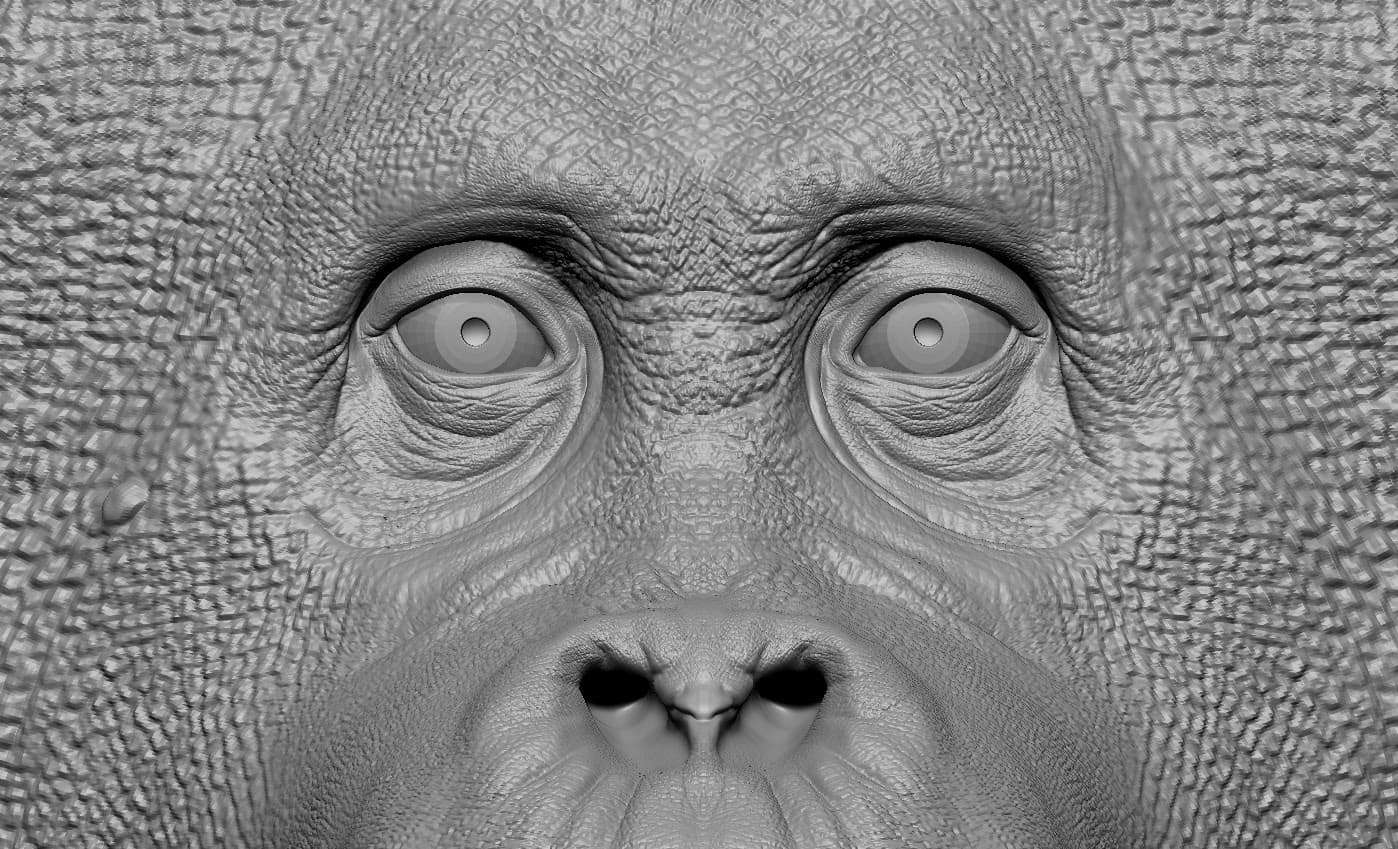
I also finished the eyes using radial symmetry, masks, and extracts for the iris's, then detailing them by hand.
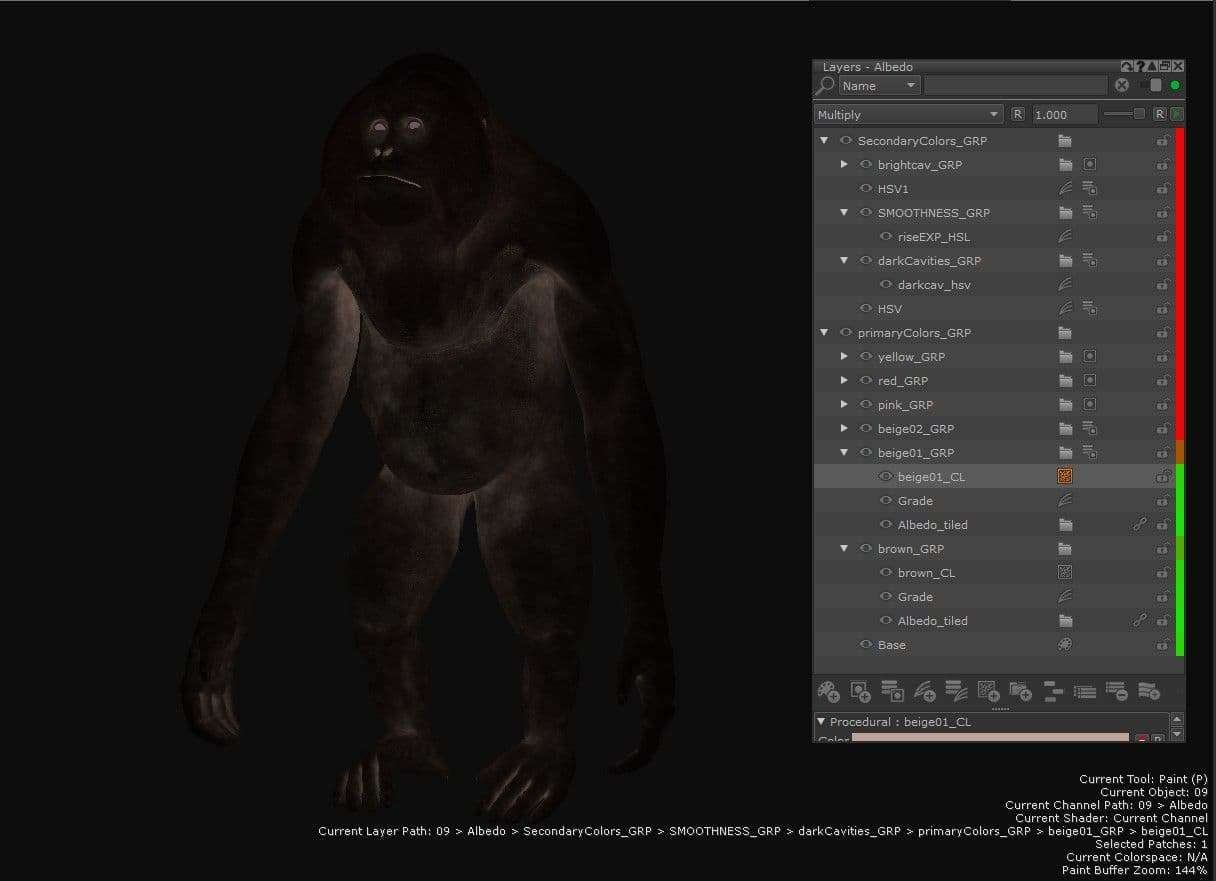
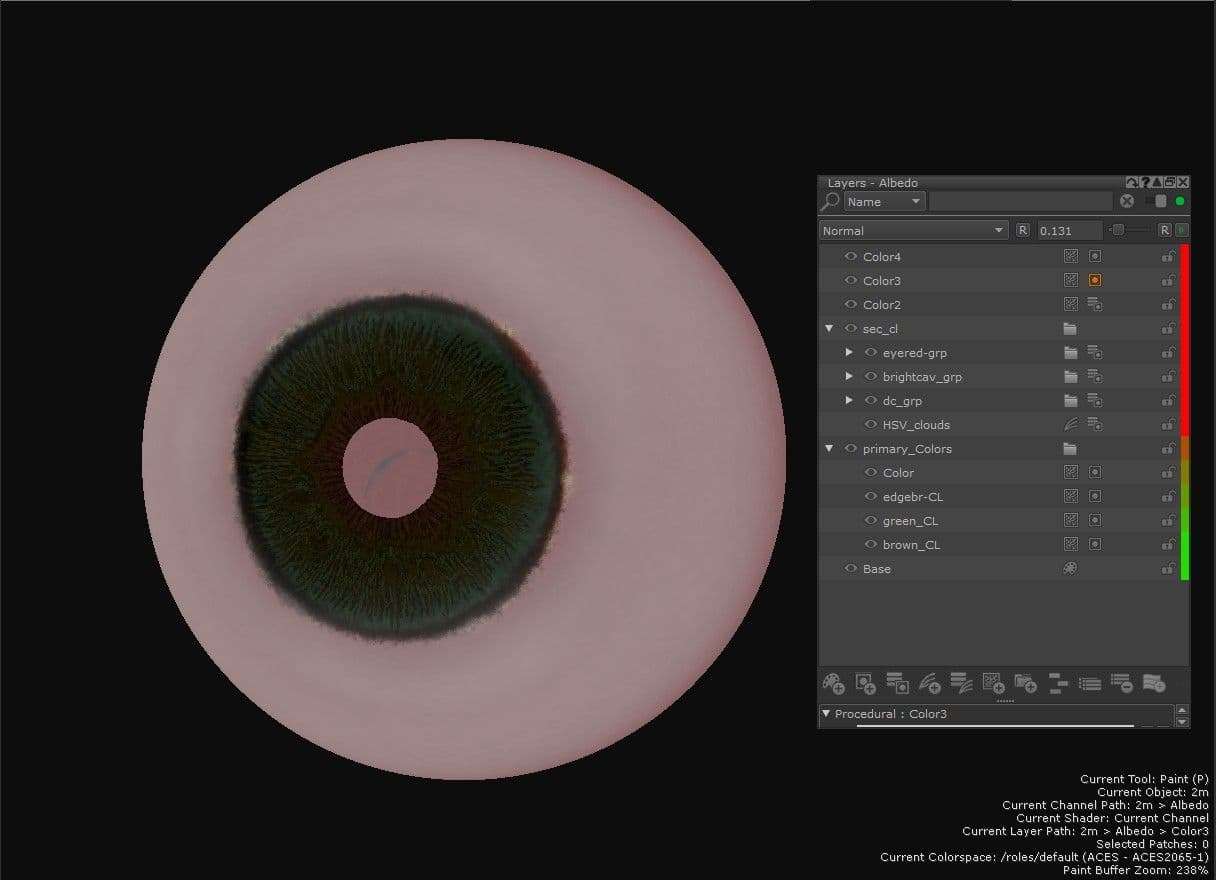
Texturing in Mari
In Mari, I imported a model with no more than 2 million polygons to have a good view on how the texturing would be applied to the model.
I highly recommend Gael Kerchenbaum’s article “Release the beast”: https://texturing.xyz/pages/gael-kerchenbaum-making-of-release-the-beast that could give you an idea about the main workflow I used with my orangutan.
The main purpose was to divide the albedo with primary, secondary and tertiaries/details colors. Eyes were also textured on Mari using the same technique.


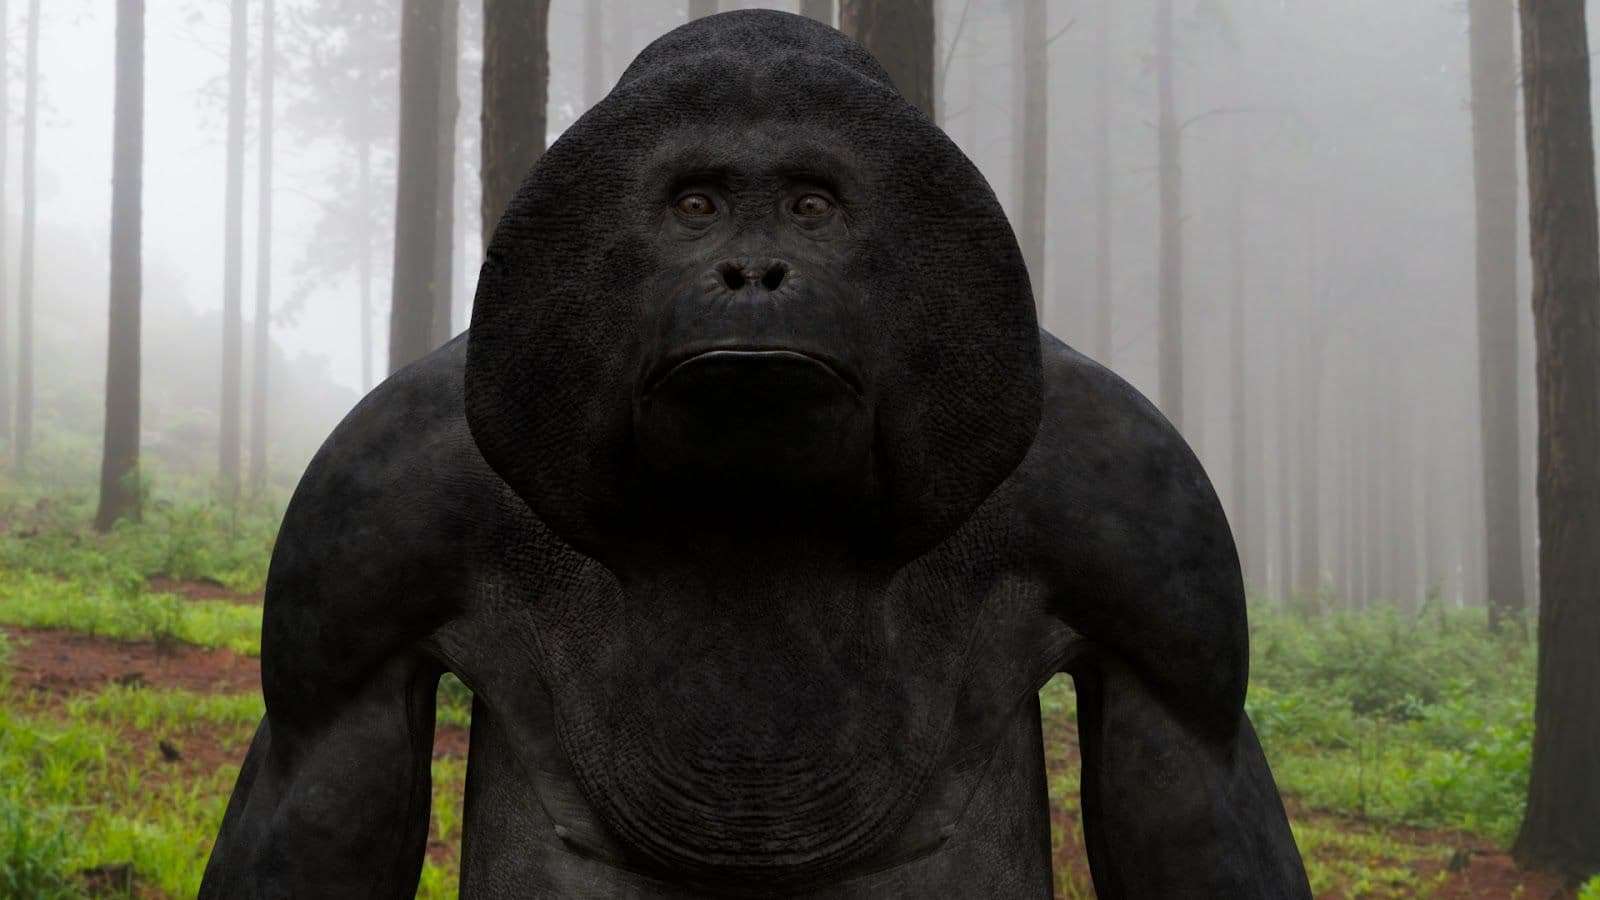
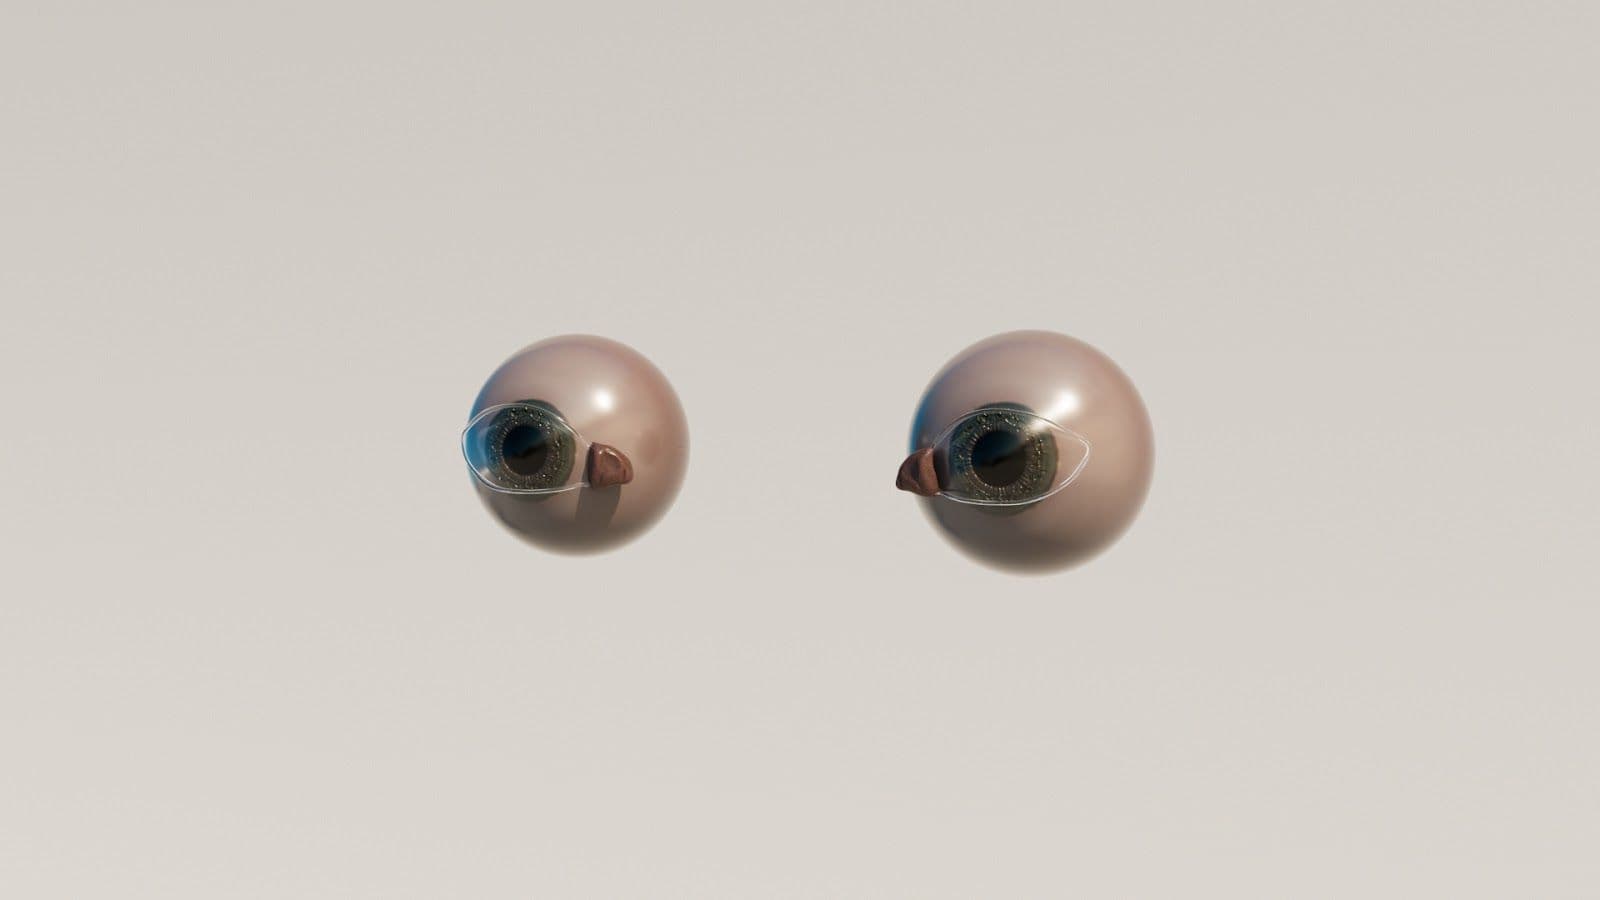
Lookdev with Arnold Renderer
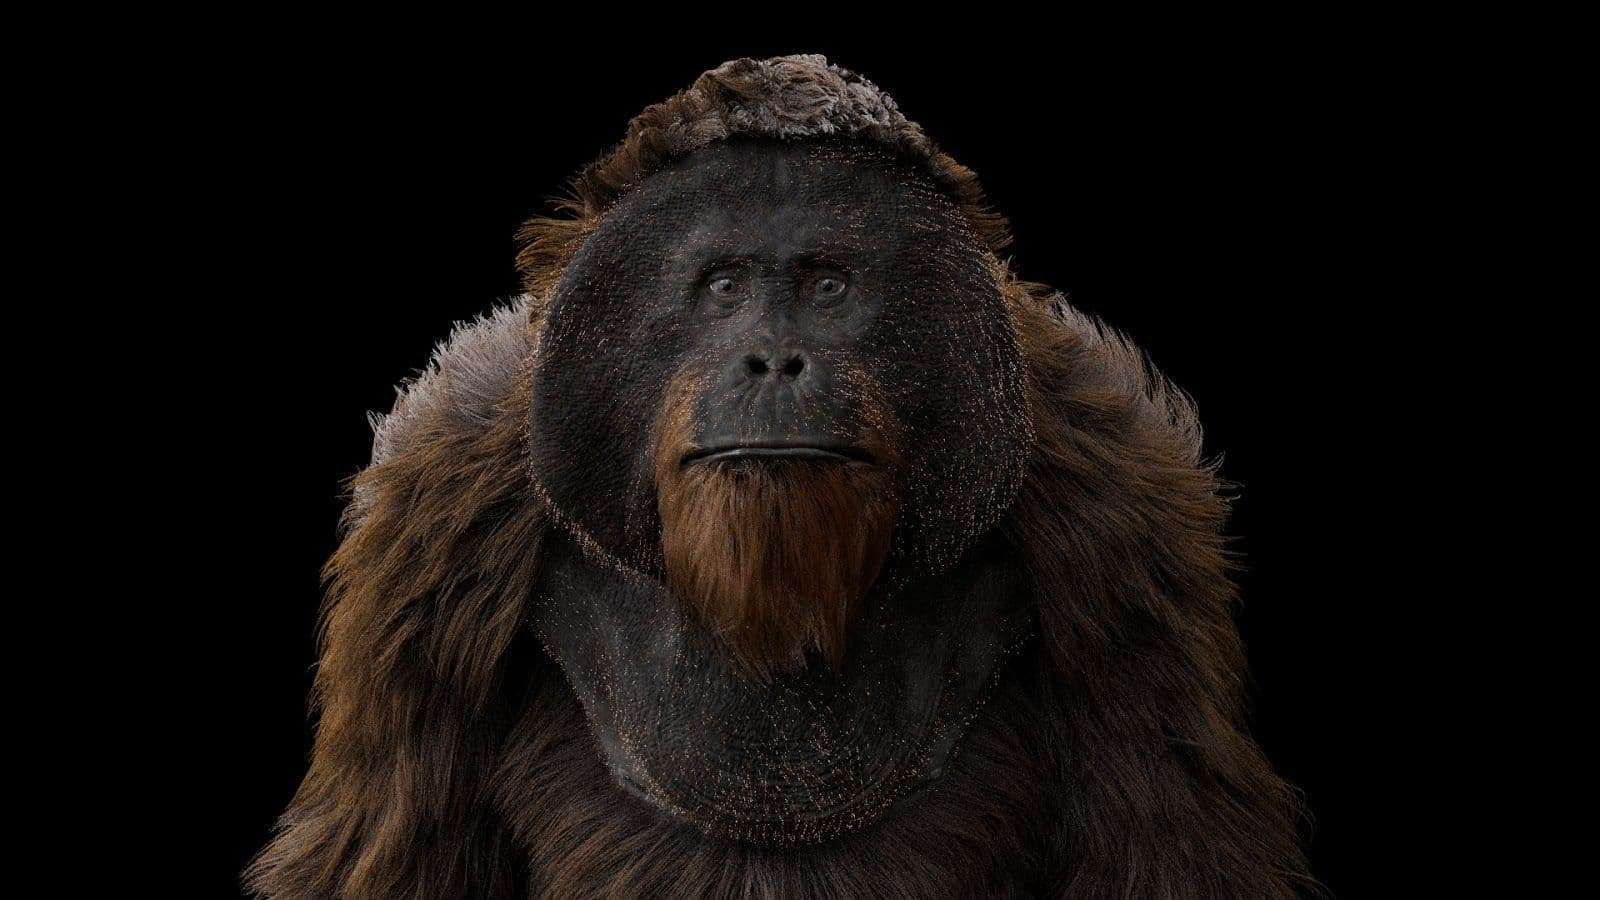
Once I had my retopologized model finished, the eyes and all textures were exported, I then moved onto Maya to start my lookdev scene. I used a few HDRIs to see how the textured model would respond. I balanced 2 HDRIs, one inside a forest with neutral lighting, and another with marked lighting in snow. They reminded me of War of the Planet of the Apes when we see apes in their cave or when they are riding horses in the snow. The final goal was to enhance the forms and details of the head with the lighting to make it look as good as a portrait.


The eye shader was made of transmission within the cornea. I added the lacrimal by extracting a face loop, extruding it, bevelling it and make it look like an extruded cylinder. The eye muscle was quickly sculpted on Zbrush.
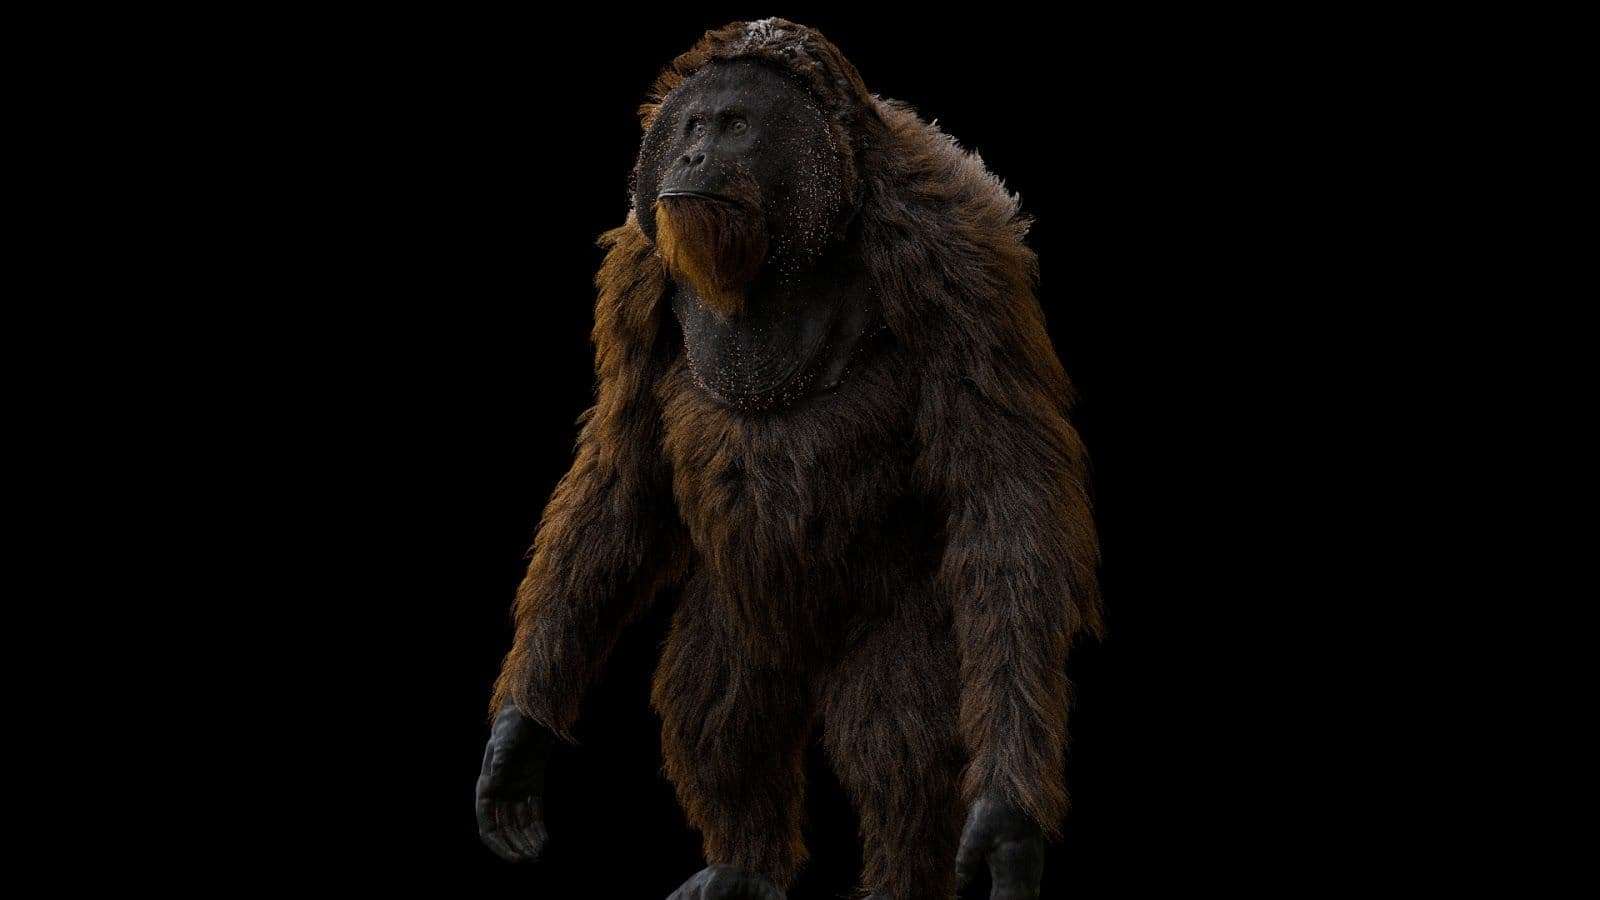
Xgen Interactive Grooming Maya
Time to groom! Again I armed myself with a lot of references. I used Xgen interactive grooming for everything. I tried to be accurate with the descriptions, thinking about production and simulation, what parts could move independently from the others etc. So I broke it up into 6 descriptions,head, beard, body, hands and feet, beard, and peachfuzz.
My main tool was using guides with the comb brush for rapidly get primary directions. I approached the workflow as I did with my sculpt: primary forms and directions before moving into length variations and modifiers.

I generally used clumps and noises. There are a lot of possibilities inside a clump modifier so you can optimize your scene with a few modifiers. That depends on your laptop or desktop performance, but Xgen can take up a lot of data and makes a scene crash often.
Fades were made using cut modifiers with masks painted directly on Zbrush and exported as alphas.


For the shading part, I used the AiStandardHair, one for each description because I wanted to have control of each part based on the lighting. The hair shader is based on how light is bounces on fur, so I think it is the last thing to work on since everything else has been done with your grooming.


Resources
Here are some artists and links that helped me a lot during this project. They don''t always refer to animals, but I think discovering and constantly learning within other subjects is important to improving our work. So you might find things about eye shading, skin detailing and texturing, rendering advice and more.
- https://texturing.xyz/pages/gael-kerchenbaum-making-of-release-the-beast
- https://texturing.xyz/pages/antoine-verney-carron-making-of-sinodon
- https://texturing.xyz/pages/making-a-digital-face-sefki-ibrahim
- https://jesusfc.net/
- https://www.awn.com/vfxworld/hail-caesar-weta-delivers-digital-mastery-war-planet-apes
- http://www.paulhpaulino.com/making-of-the-southern-cassowary
- https://www.artstation.com/damz
- https://www.artstation.com/kriscosta , https://www.youtube.com/watch?v=Lfen-BSwWcE
- https://www.youtube.com/channel/UChR5ovCmKrvWd4zxtj0gl4Q/videos
https://www.artstation.com/junh_art - https://www.youtube.com/watch?v=SWVip91M4Pk&t=993s