How To Create Photo Realistic Characters in 3D in Autodesk Maya
For students, I highly suggest starting your sculpts from a sphere (no base mesh) and going through the whole process.
For students, I highly suggest starting your sculpts from a sphere (no base mesh) and going through the whole process.
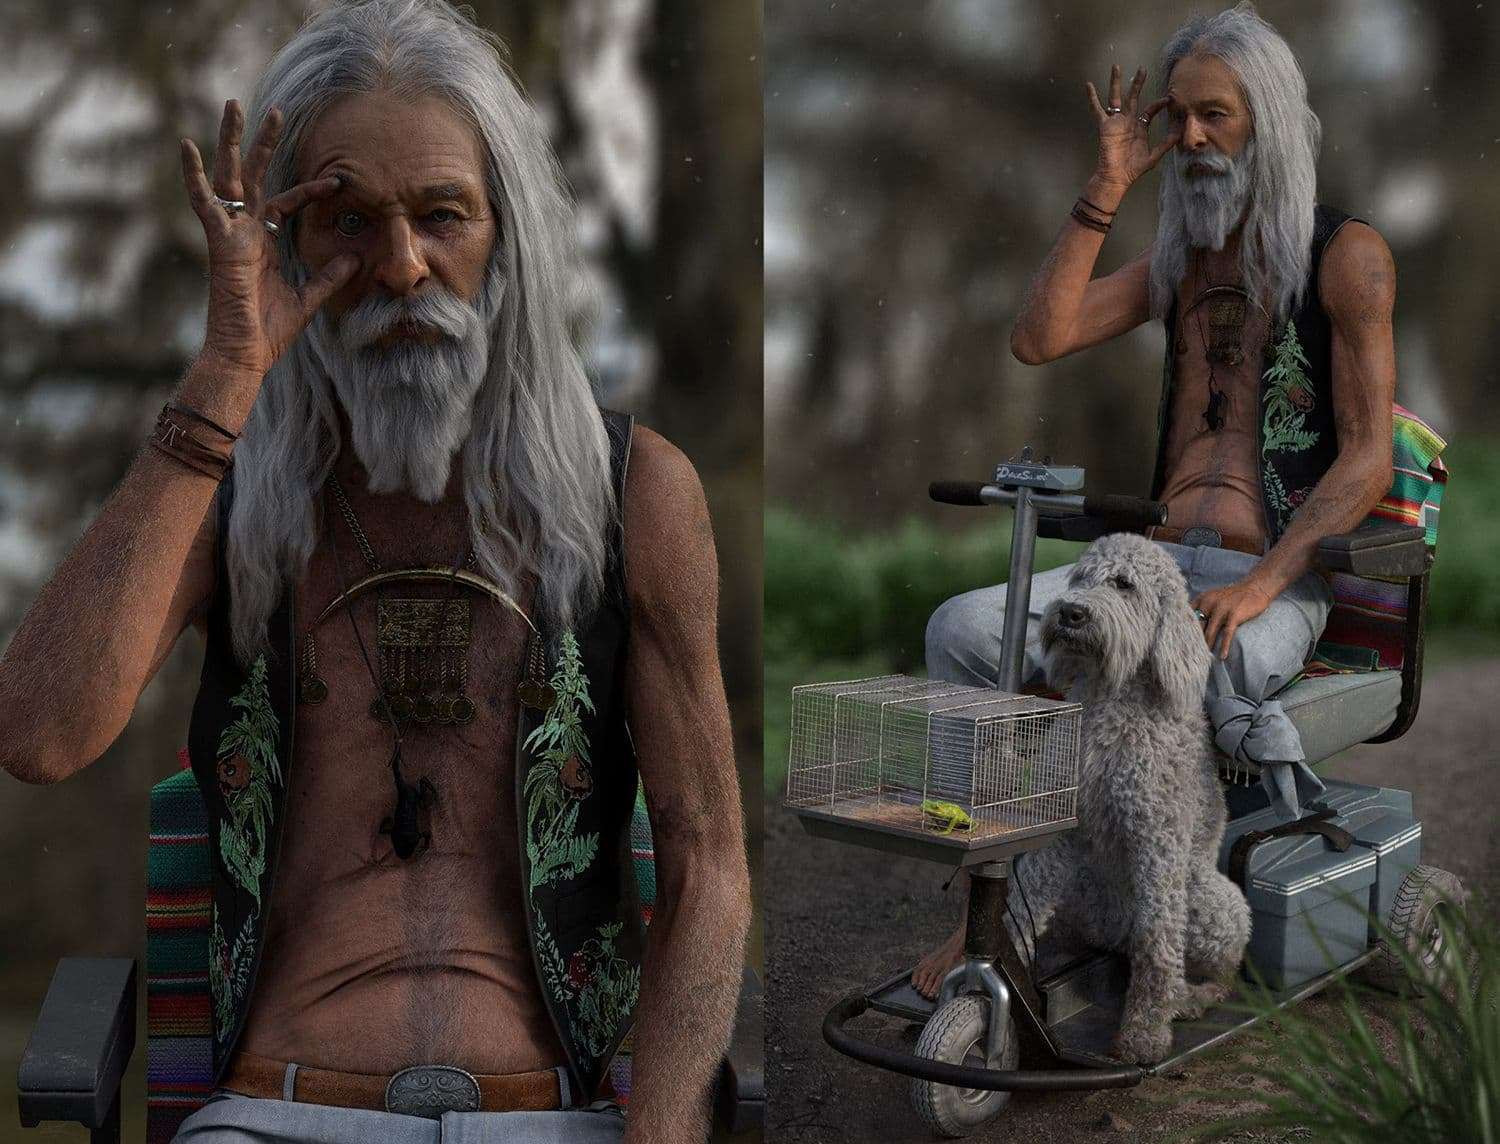
A big thanks to Luc Ray for his breakdown of ' The Night Tripper', which was his entry to this years Rookie Awards. Luc is from Vancouver, Canada and is currently studying at Think Tank Training Center. Luc talks about how he used Marvelous Designer and other 3D apps to create his hippy character. We love the detail he was able to get in the skin using texturing xyz maps and fine hair covering the body.
Let me start by introducing you to 'The Night Tripper,' a character based on a story I came up with called 'Louisiana Trip.' This was created for my advanced term project with Think Tank.
Rick's brother has gone missing after embarking on a trip to study the black magic folklore of rural Louisiana. Amongst the strange characters Rick encounters and questions on the whereabouts of his brother is a grimy old man that simply goes by The Night Tripper.
The Night Tripper tells Rick he can find his brother, but first Rick must try some of a drink that he refers to as Gris Gris. After sipping the pungent liquid, Rick plunges into a nightmarish psychedelic trip, the forest coming alive with ghastly creatures and anthropomorphized frogs. Now Rick must try following a trail of clues to find his brother, all while experiencing a trip that's making it impossible to tell the difference between reality and sleazy black magic.
For students, I highly suggest starting your sculpts from a sphere (no base mesh) and going through the whole process. The only way to properly learn anatomy, likeness and retopologizing is to do it (many times) from scratch.
I was heavily influenced by these three albums: Exuma - Exuma, Comus - First Utterance, Dr. John The Night Tripper - Gris Gris. I personally find creating a music playlist just as helpful as creating a mood board.
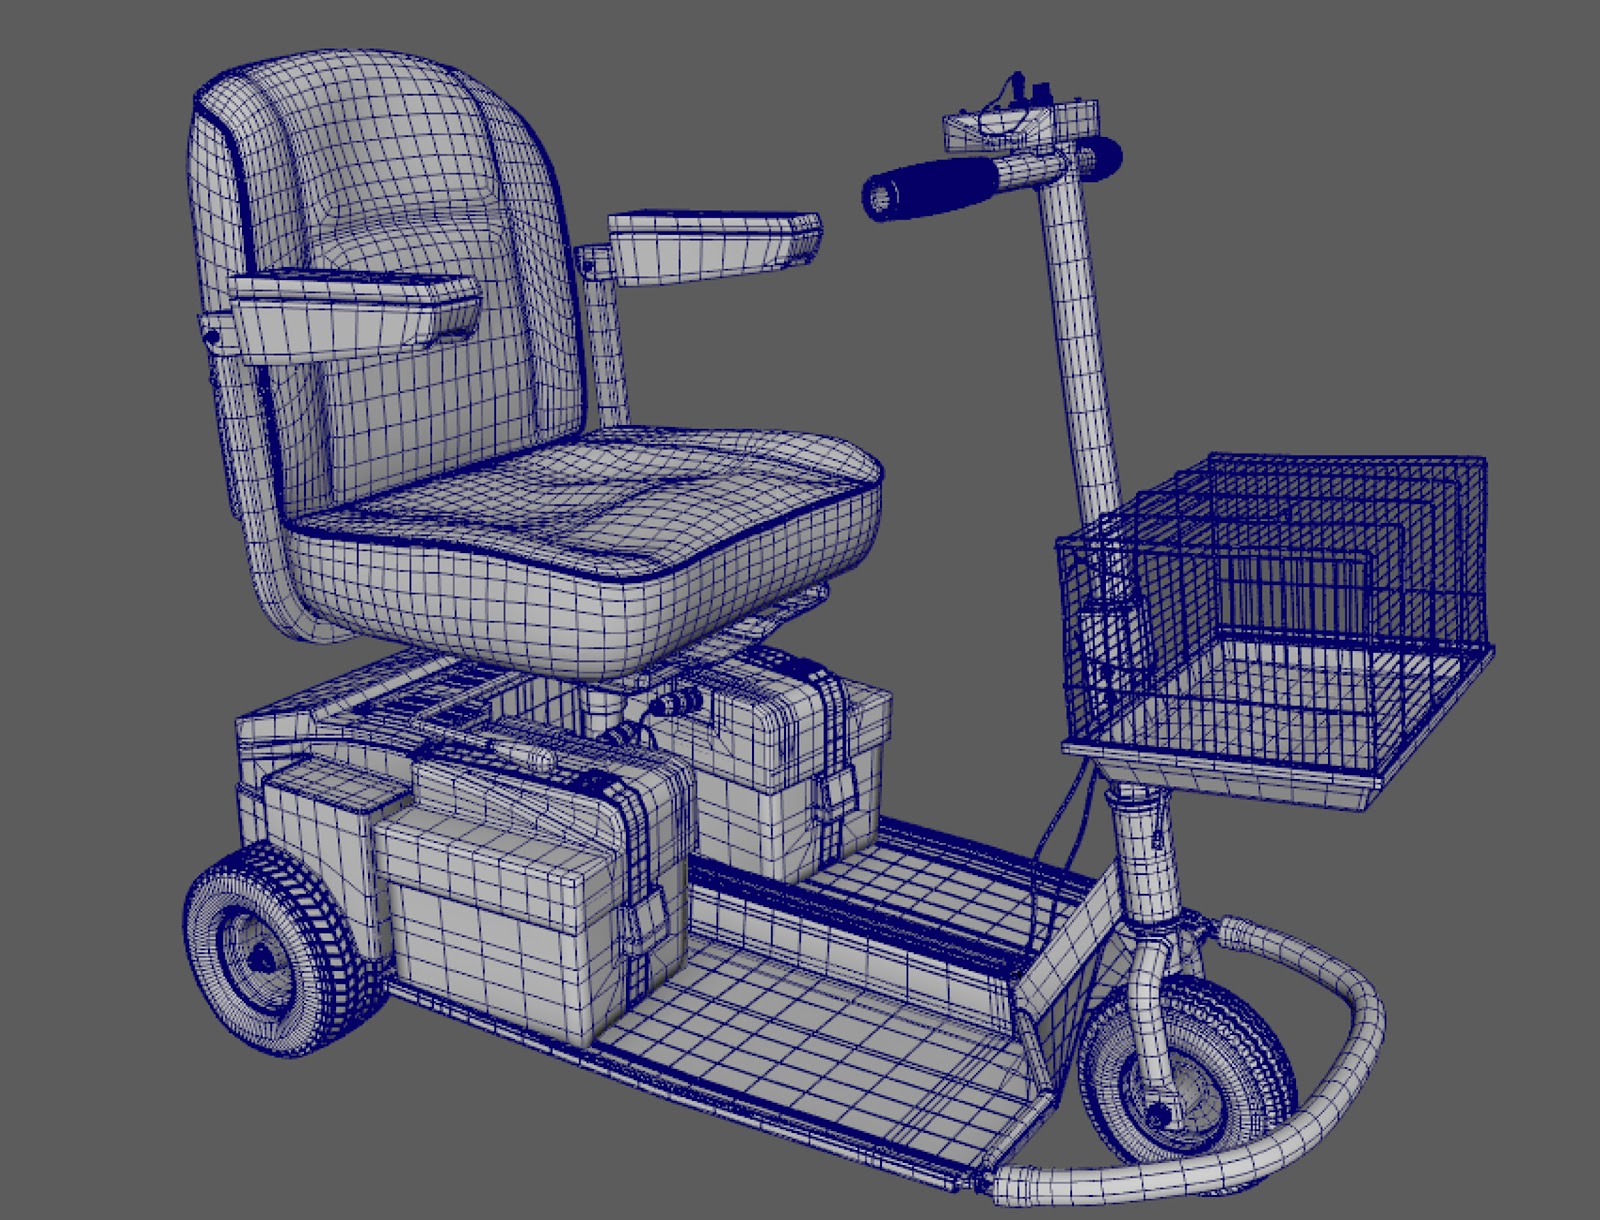
The mobility scooter was modeled in Maya. I used soft select to randomly move verts around slightly, giving all the metal a bent, beat-up look. It is good practise to study real life objects and observe subtle details—something as simple as flattening the tires a bit on the bottom to show the scooter has weight goes a long way.
For students, I highly suggest starting your sculpts from a sphere (no base mesh) and going through the whole process. The only way to properly learn anatomy, likeness and retopologizing is to do it (many times) from scratch.
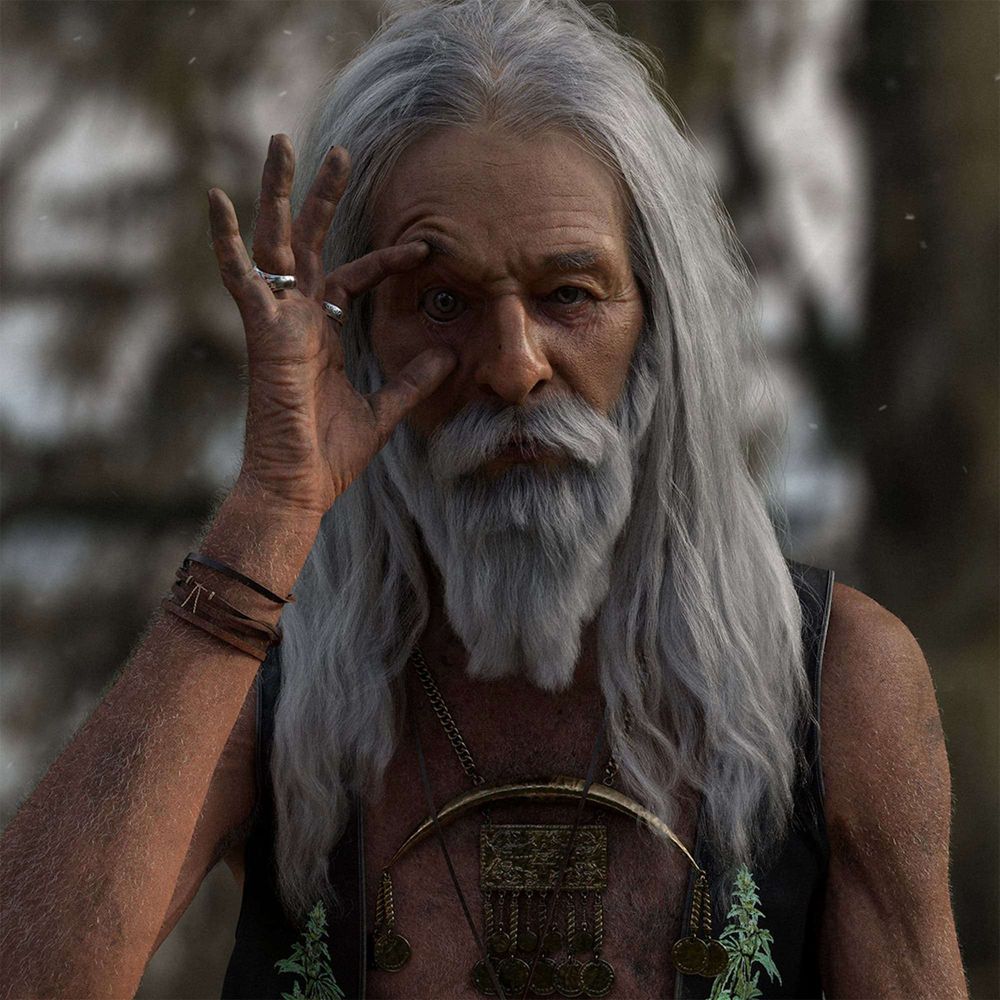
I’m still a student, so even though I have a finished base mesh from my last project, I start from scratch just for the practise. I used Alejandro Jodorowsky for the likeness. There was a picture of him peeling his eyeball open that worked perfectly for my character.
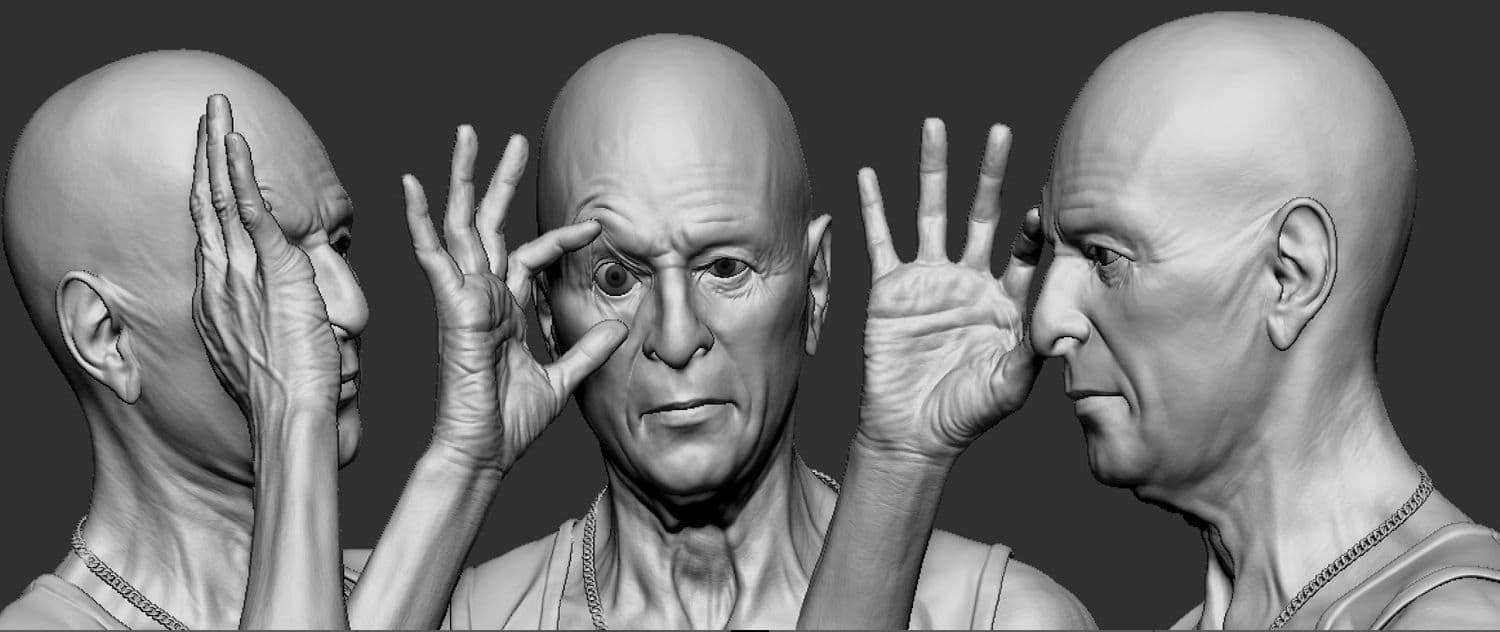
Something that really helps push realism is adding as much detail as you can before doing any texturing.
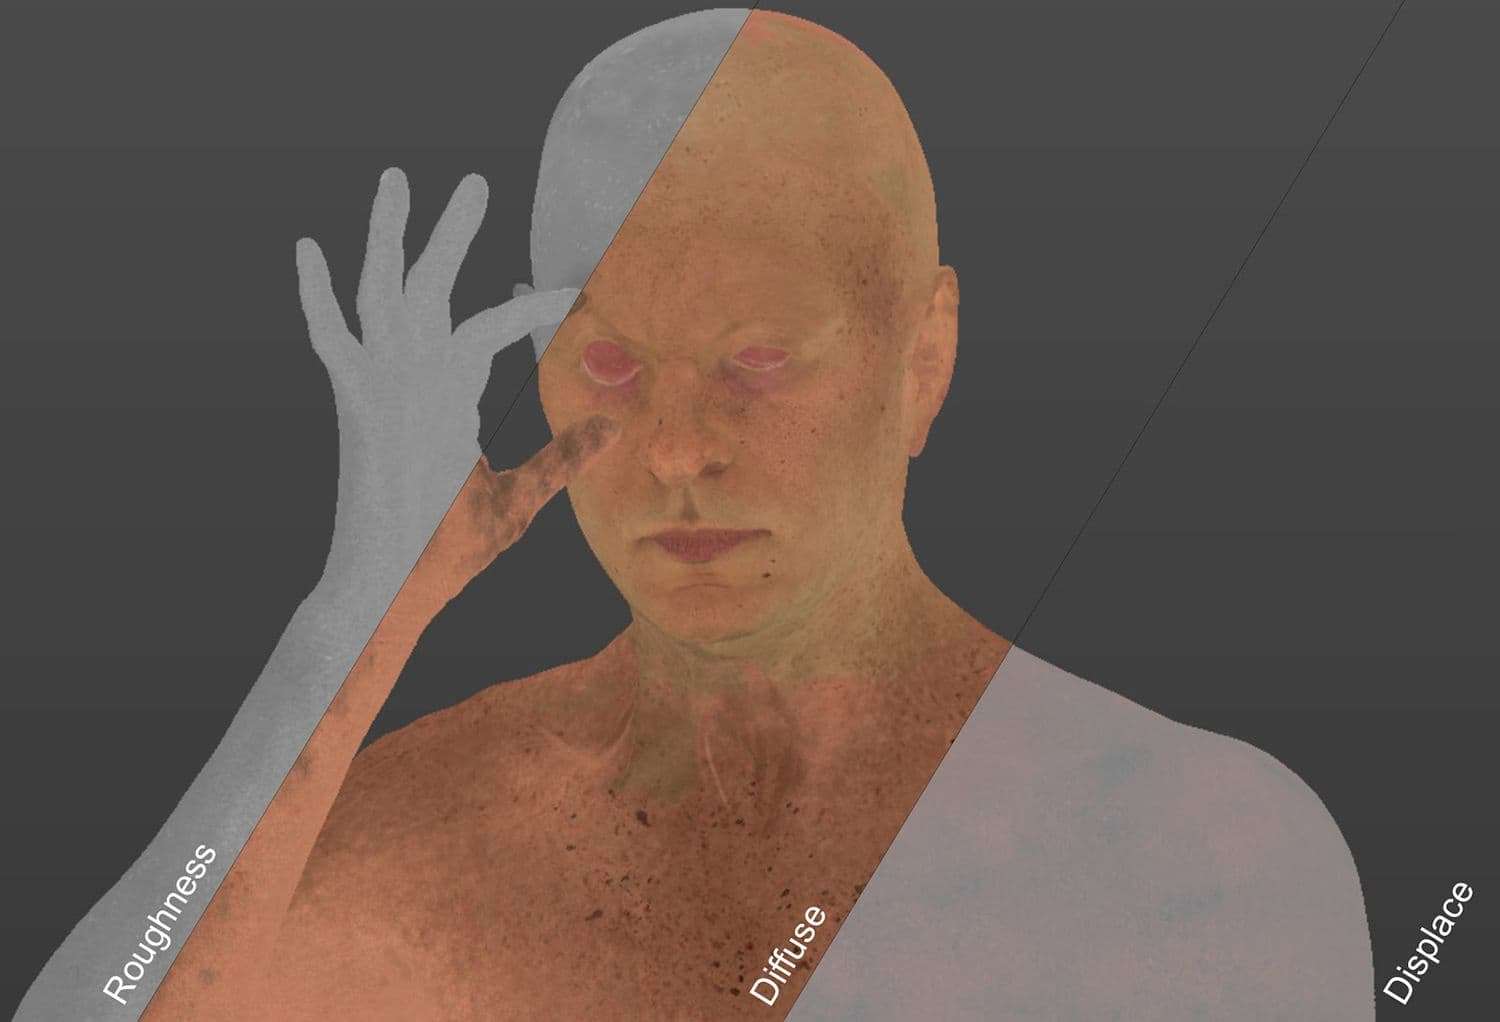
I used a multichannel face and hands from texturing.xyz, but a lot of the wrinkles and details are just sculpted in. Notice how much displacement there is in the hands?
I exaggerated the diffuse and displacement textures, as the VrayALsurface shader tones them down quite a bit. The Texturing.xyz textures worked great for a base, but I added a lot of hand painted details, like moles, dirt, and a lifetime of sun damage.
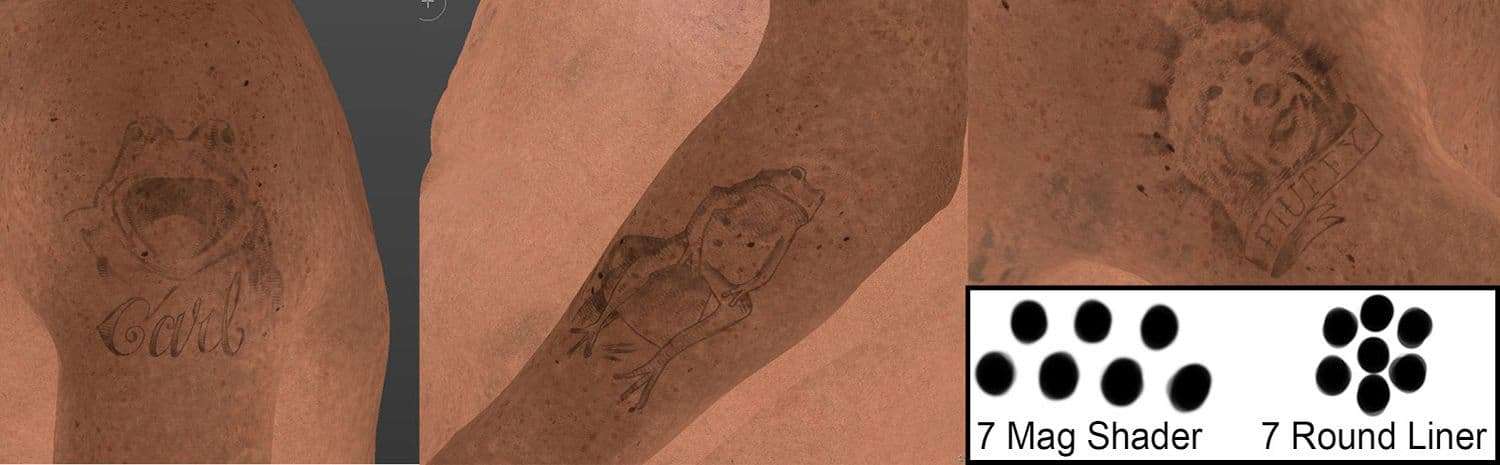
Plus, I added a few scratcher tattoos. I made them in photoshop with custom tattoo machine brushes. I added 10% spacing to the liner and 170% spacing to the shader to get some nice whip-shading textures.
Related Article: How to Turn a 3D Portrait Study into a Full CG Character
I then painted over a few spots in the lining with a soft round brush to mimic blow-out. After making about ten different tattoos, large and small, I just brought them into Mari and used paint-through to place them where they looked best (or in this case worst).
I created all the hair (so much hair!) with XGen—which I won’t even get into because I’mstill new to XGen and it was such a huge process of painting maps for density, curls, color etc.
There ended up being so much hair that my MacBook (this entire project was done on a MacBook) could barely handle rendering it. In the time frame I had to finish, I managed to render out a turntable, a zoom-in shot and a few still images. I wanted the reel to have a lot of movement, so I used Nuke to comp in some moving trees, camera shake, grain and depth of field to the still renders.
My wife gave me the idea to add some bugs flying around his head, which helps distract from the fact that they’re just still renders. I then made a quick song for it in Logic Pro and put it all together in Final Cut Pro.
I would like to share an interesting process I came up with for creating necklaces, bracelets and other such dangly paraphernalia. I’m sure there are even easier ways to make a necklace, but I don't know them and this worked well for me.
First, create the chain link and give it some uv’s. Take note of the thickness of the link, as you will need it in Marvelous Designer.

Export your character and the pendant of the necklace as one .obj and add it in Marvelous as an avatar.
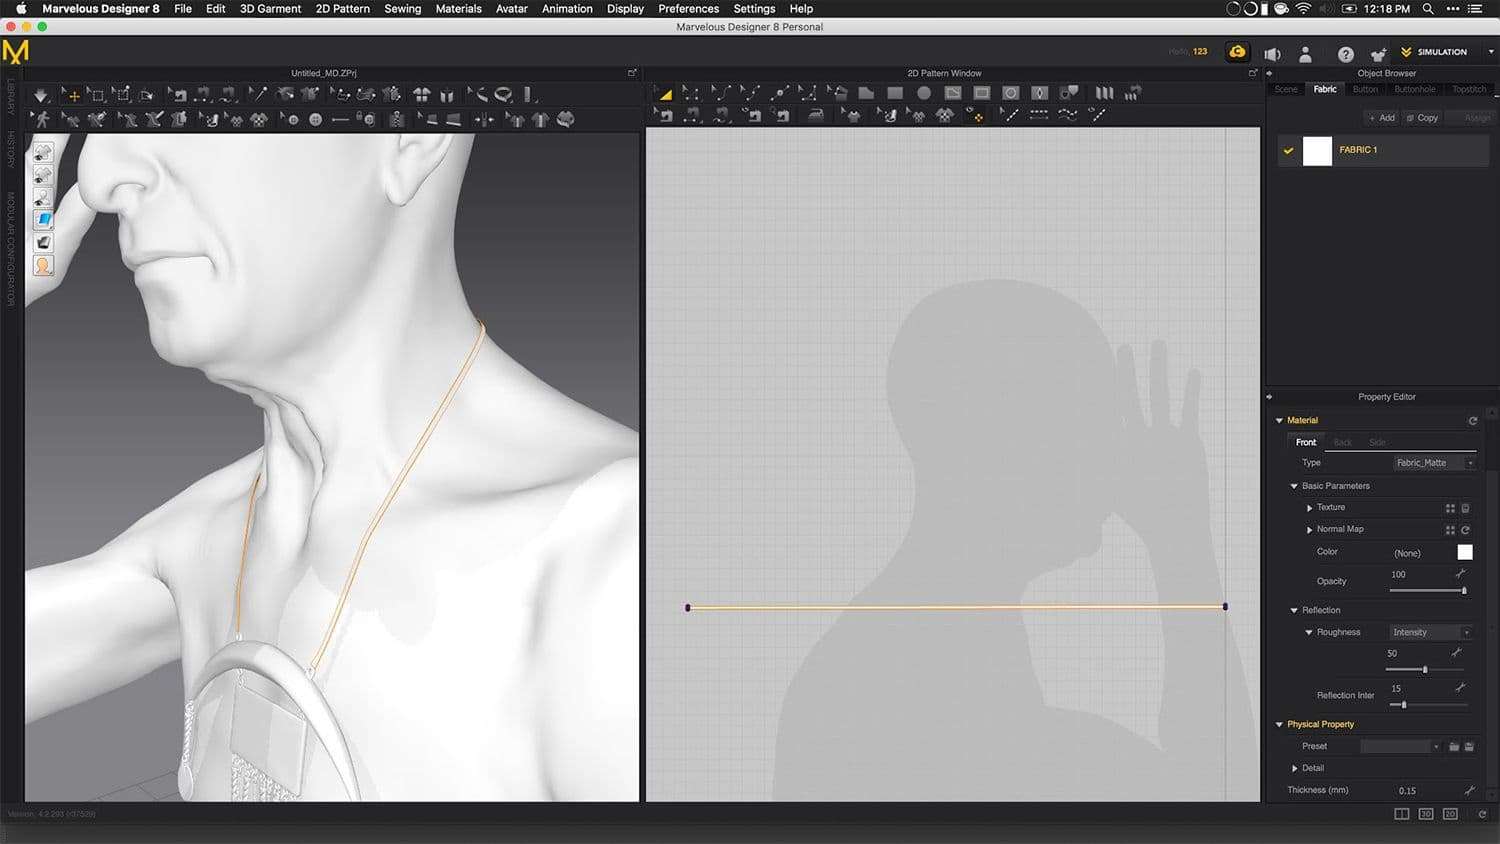
Create a strap roughly the thickness you would like the chain and pin it to the pendant (or sew the ends and loop it through the bail if it has one).
The nice thing about doing this in Marvelous Designer is you can create as many necklaces as you want and easily pull them around until they look good.
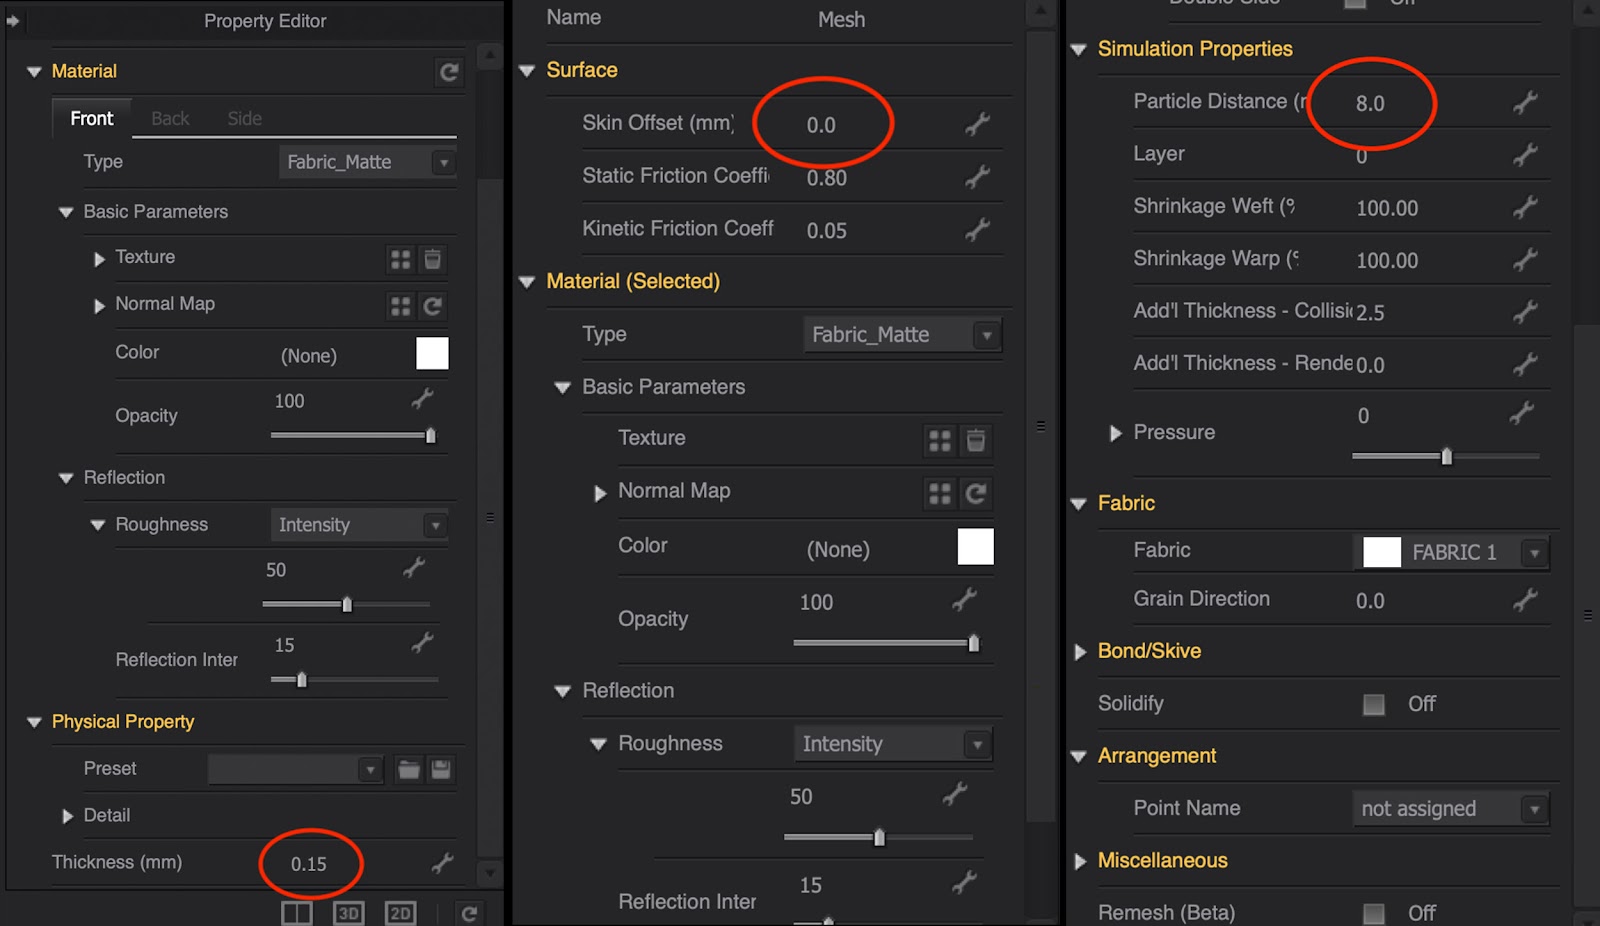
Do you remember the thickness of the link I told you to remember? Add half that value to the fabric’s thickness and make the skin offset 0.0 and the particle distance 8.0.
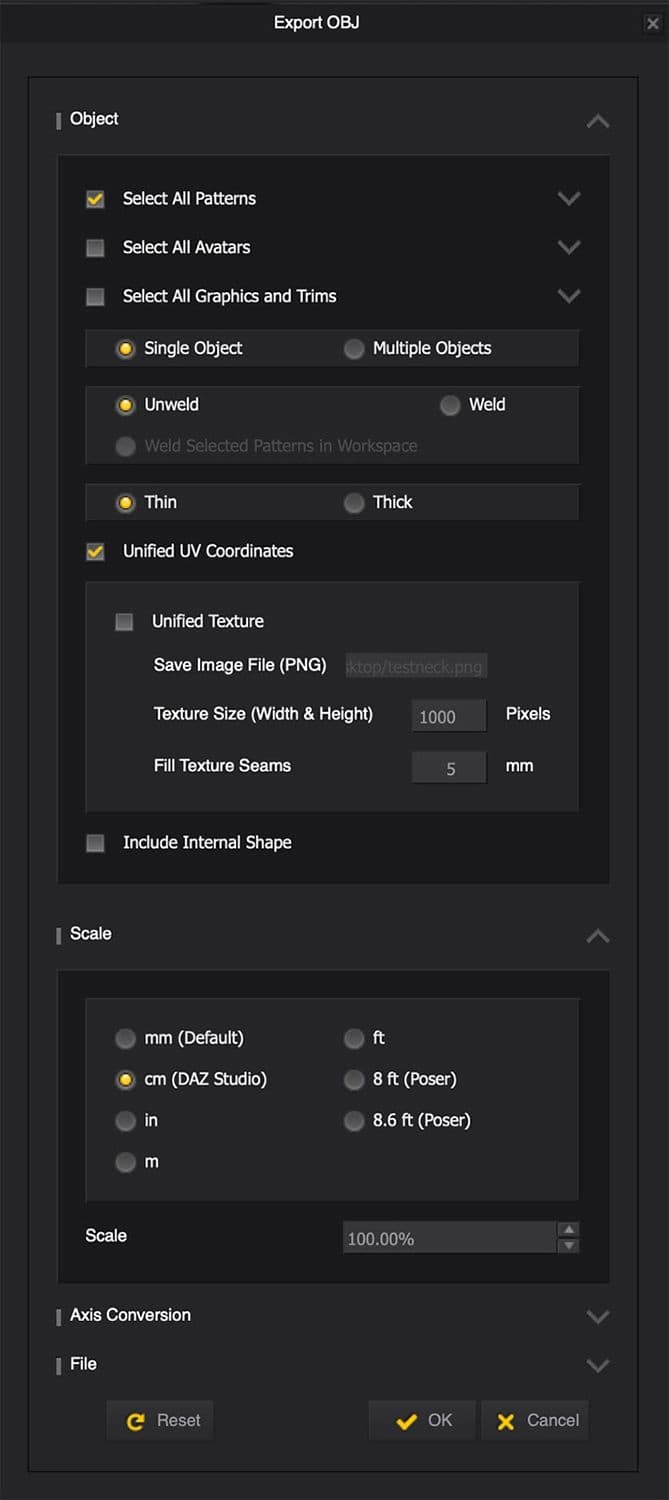
Export your strap with “thin” checked and in CM.
Import the strap into Maya and delete all the diagonal edges, making it all quads.

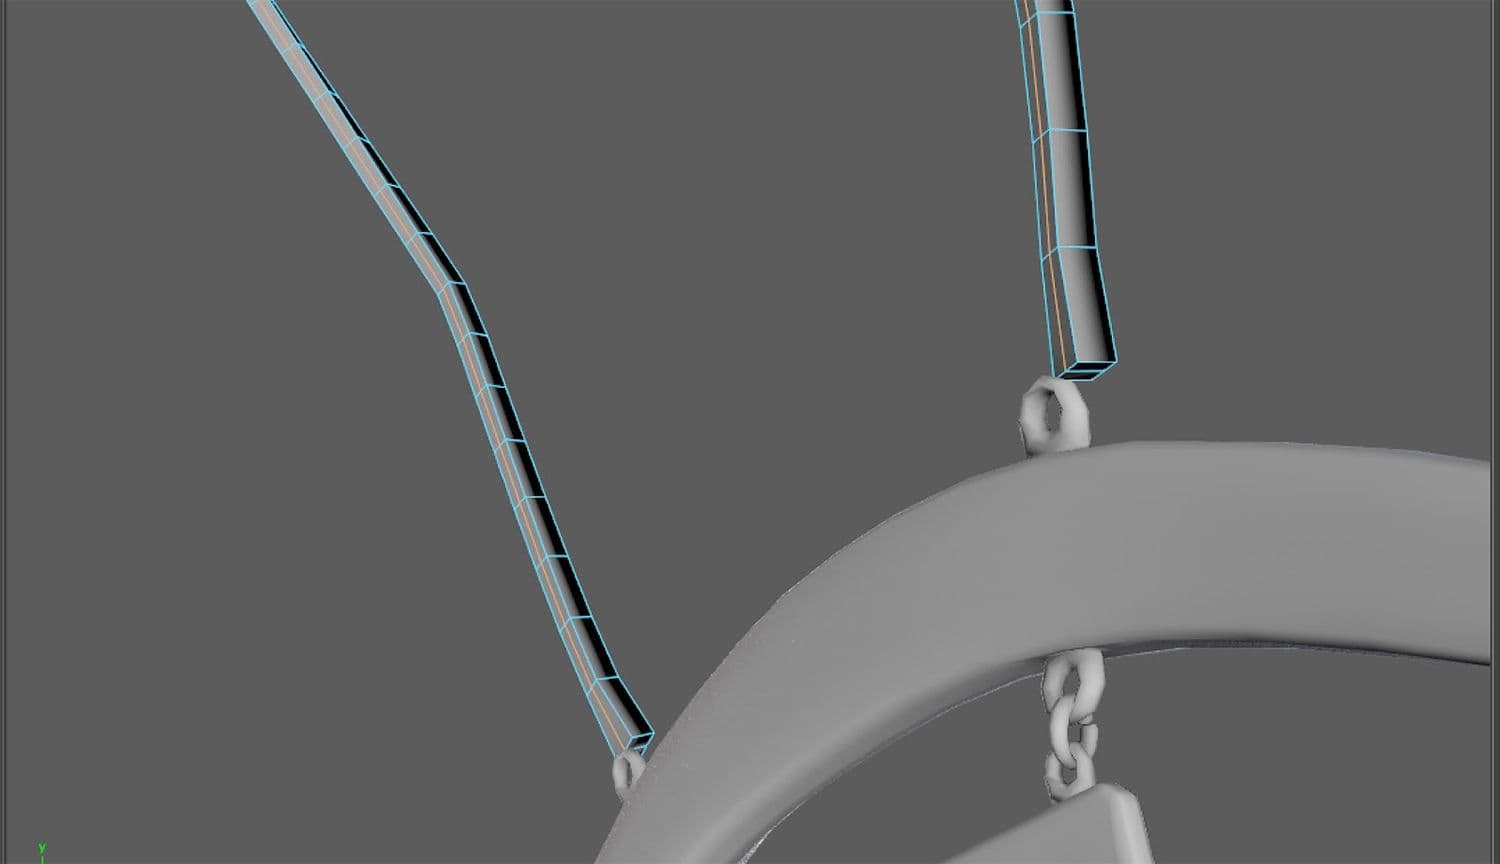
Extrude the faces away from the body and add an edgeloop through the middle.
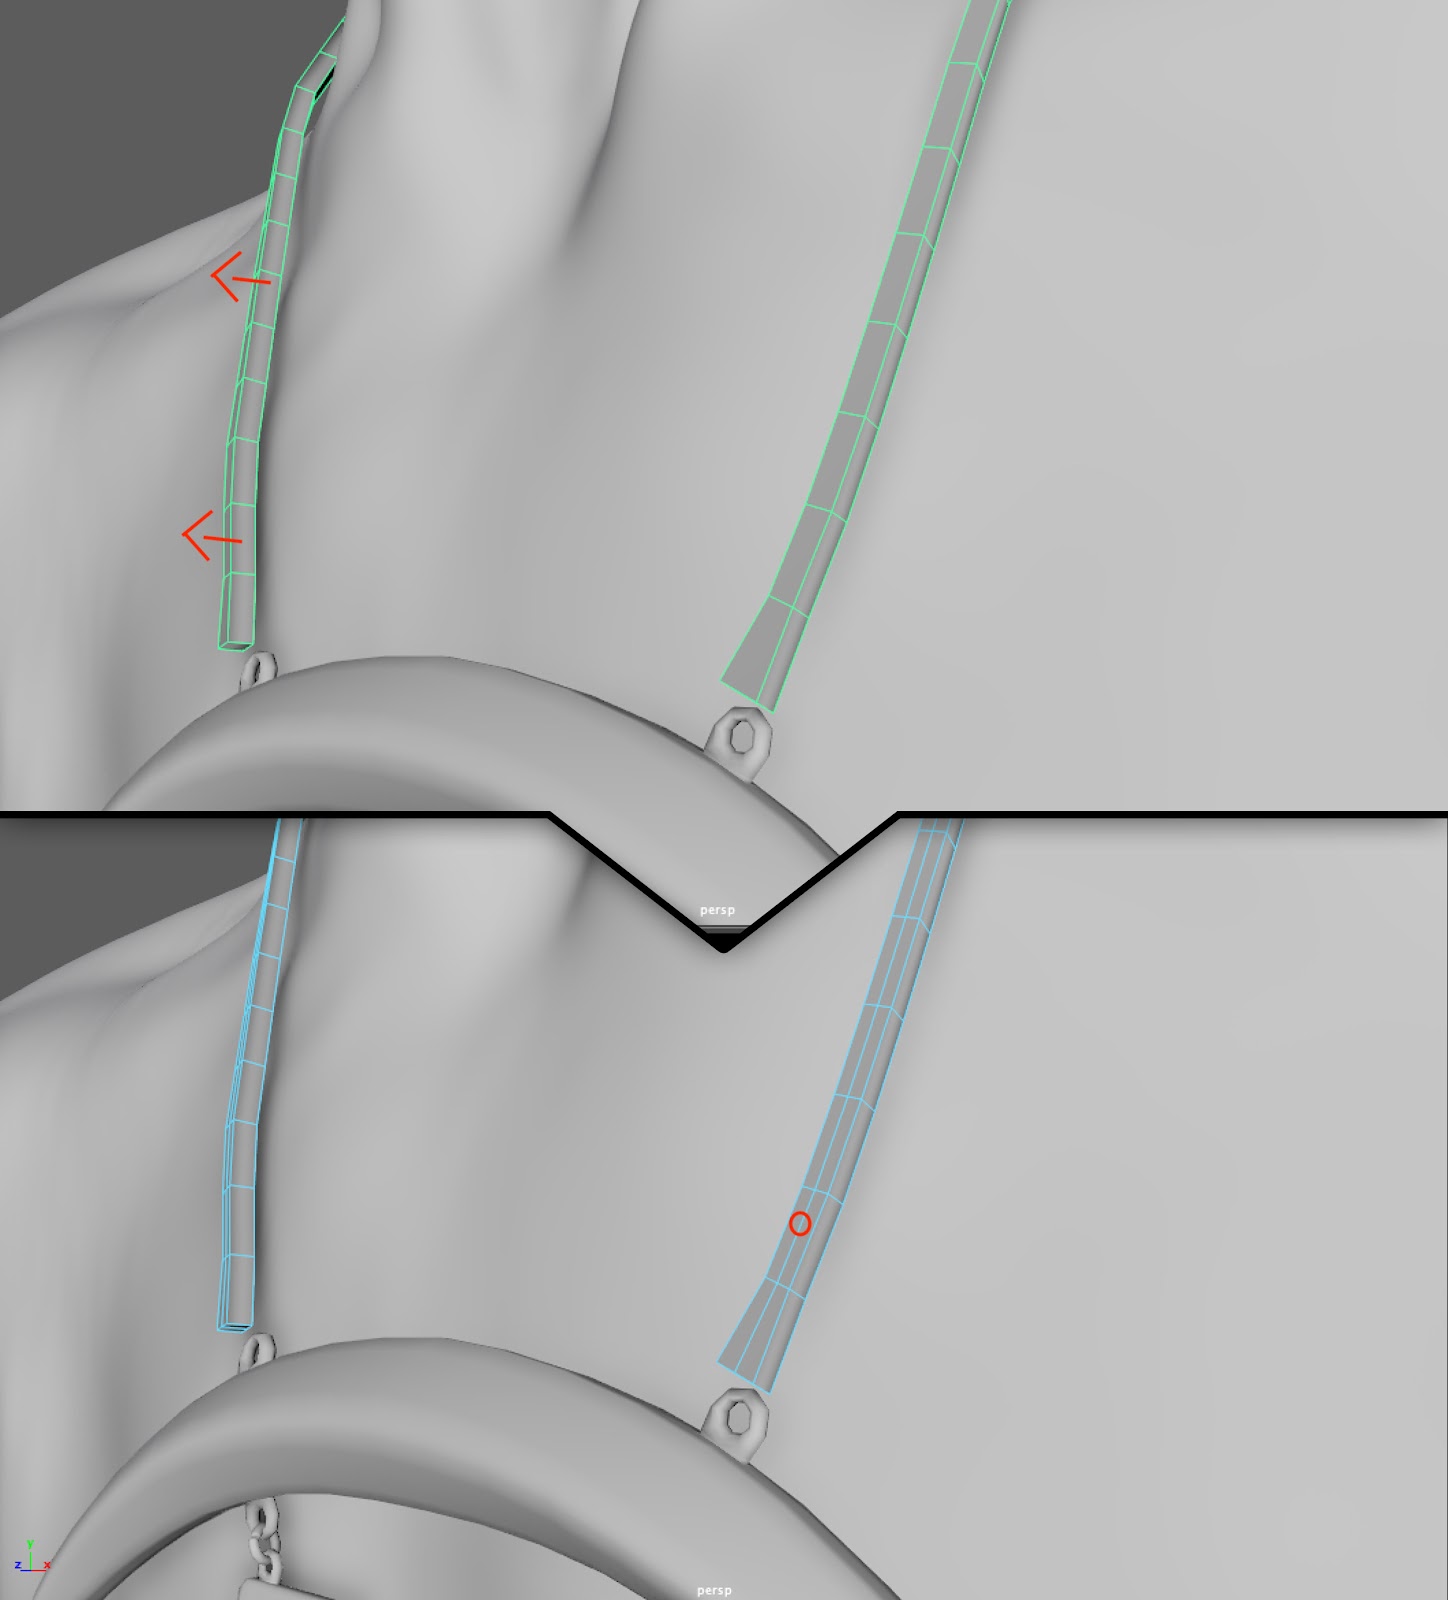
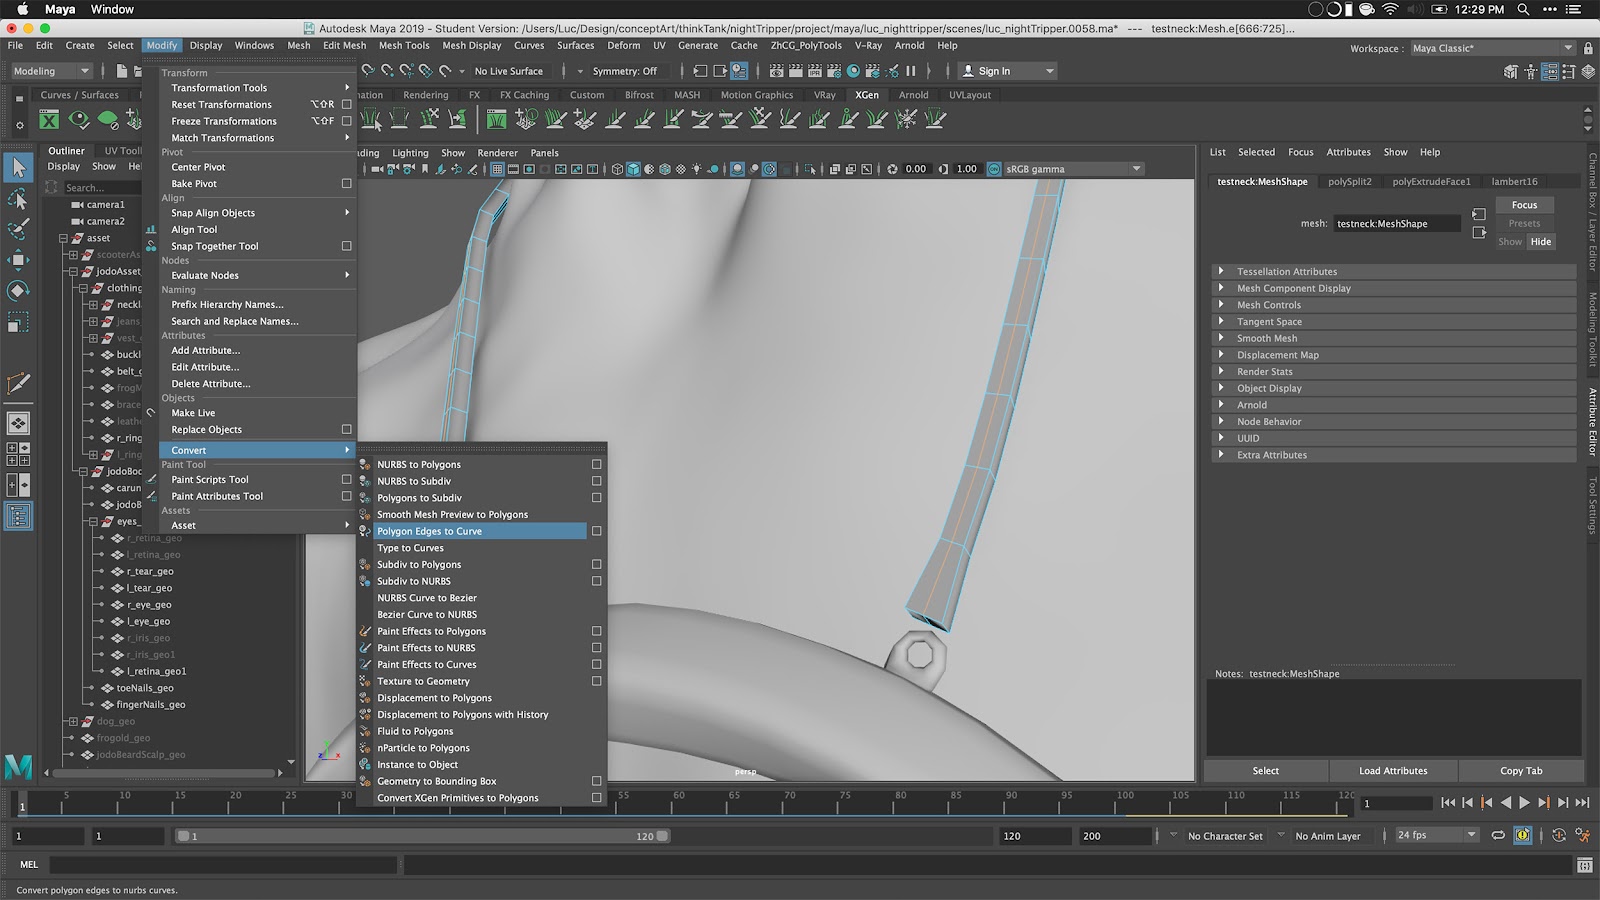
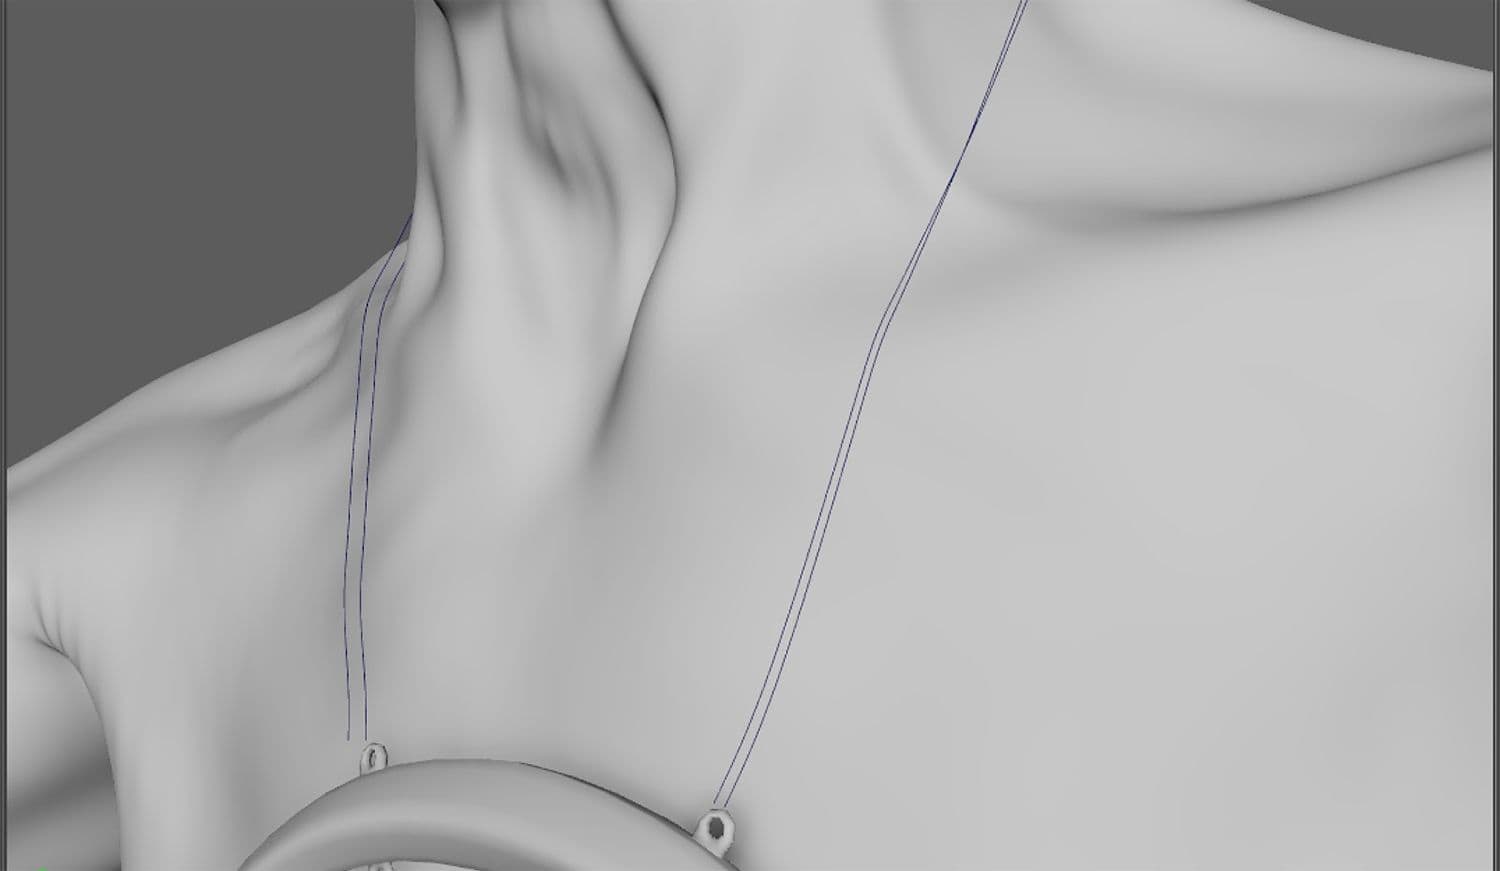
Next, select the middle edges on the top faces (not the sides or bottom) and convert them to a curve.
Do the same thing for the bottom edges.
You should now have two curves. Make sure they’re running in the same direction. You can check this by right clicking over the curve and selecting “control vertex”. There will be a small square at the start of the curve. If you need to change the curve’s direction, select “Curves > Reverse Direction”.
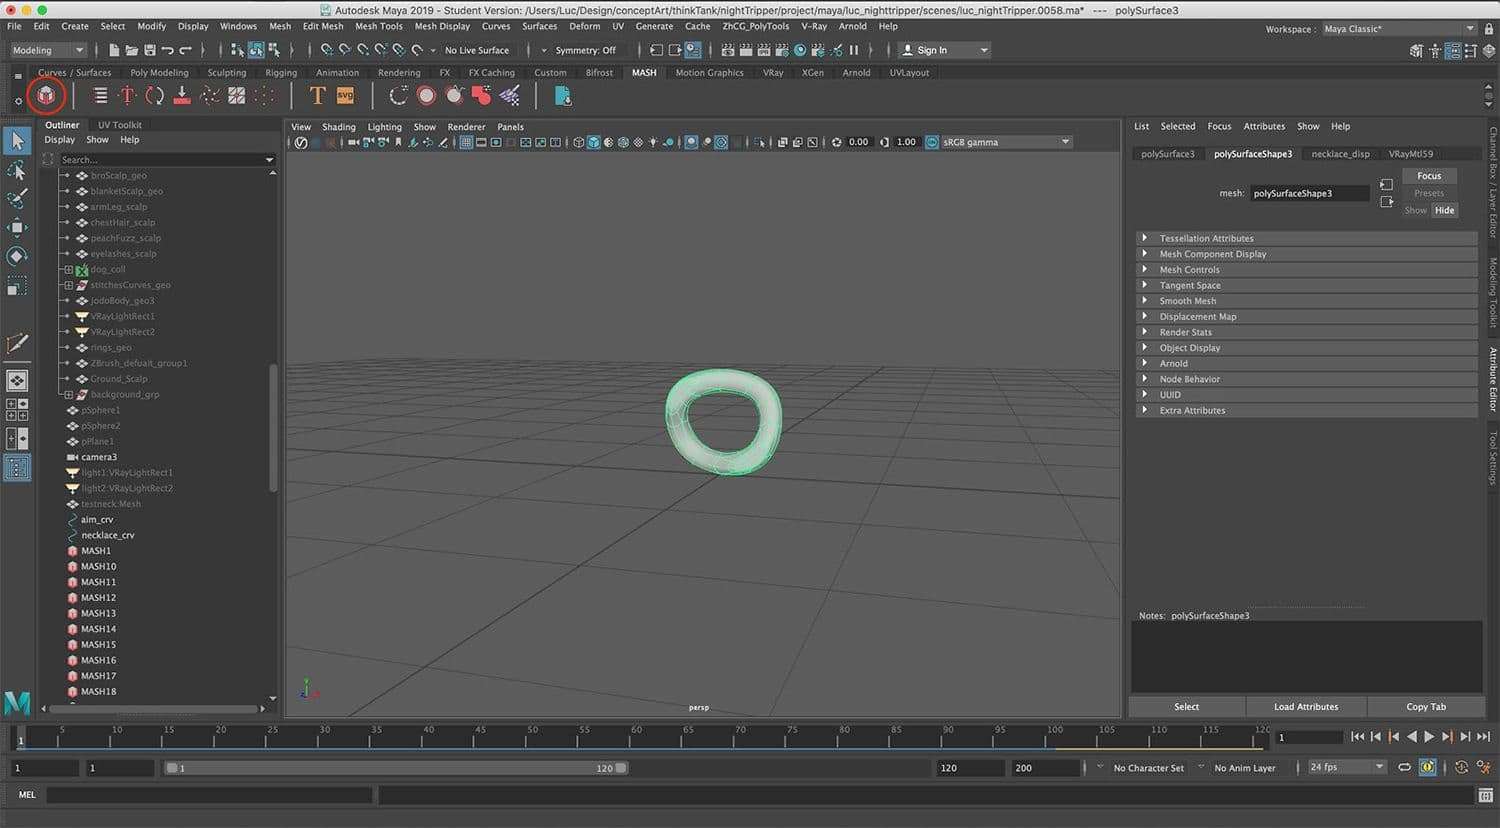
Next, select your chain link and create a MASH network. MASH is a great tool to learn, I used it for all the clothing stitches in this project as well. The links will run in the x direction so make sure the link is oriented accordingly.
Create a curve node, add the curve closest to the body to the input curve and the curve furthest from the body into the aim curve by middle click dragging them into the fields.
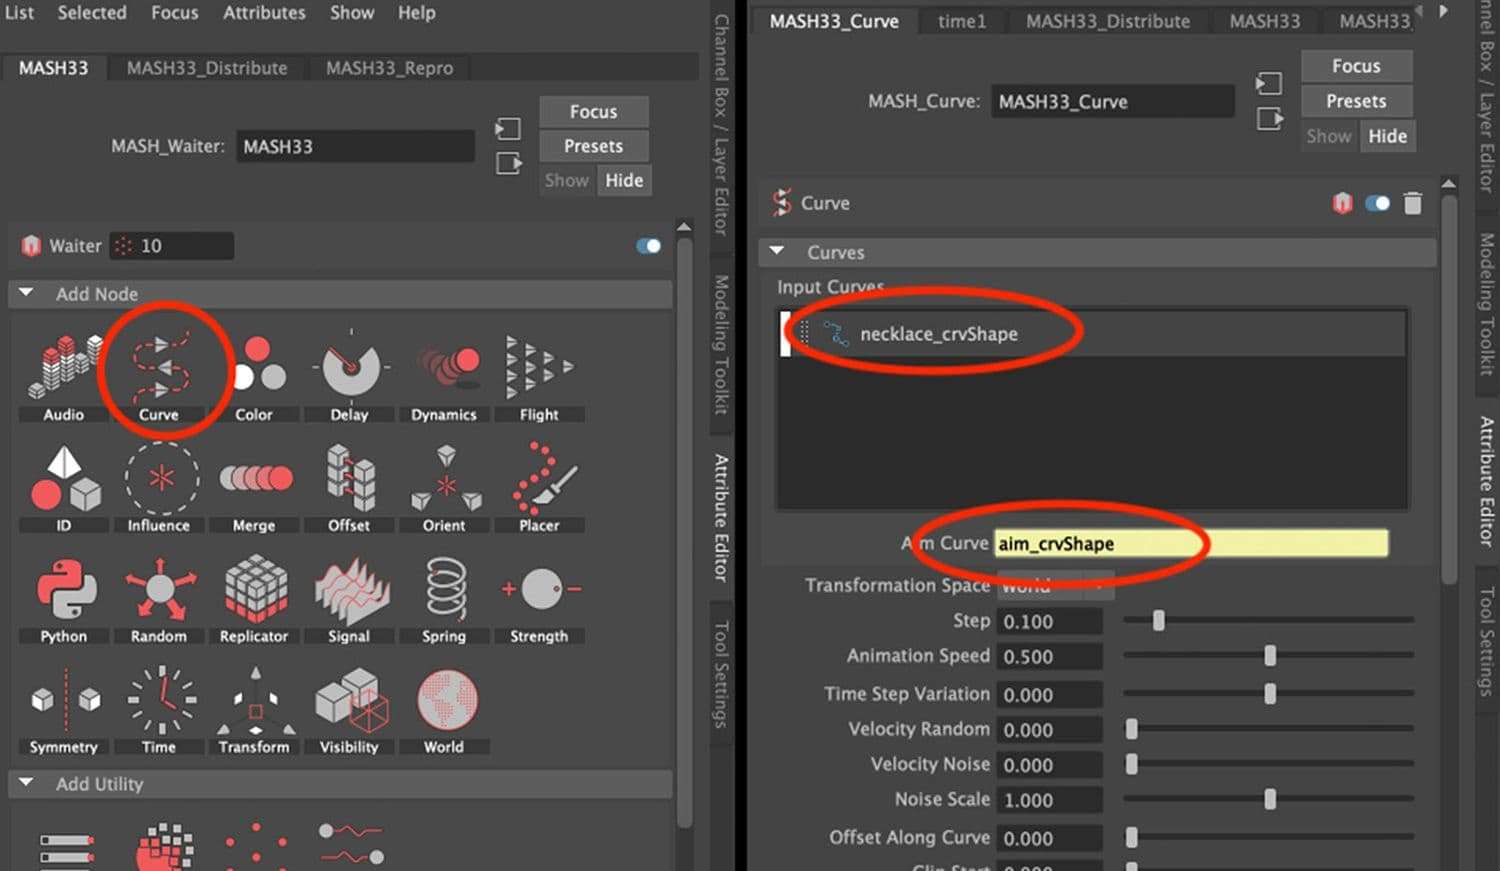
Drag the step all the way to 1
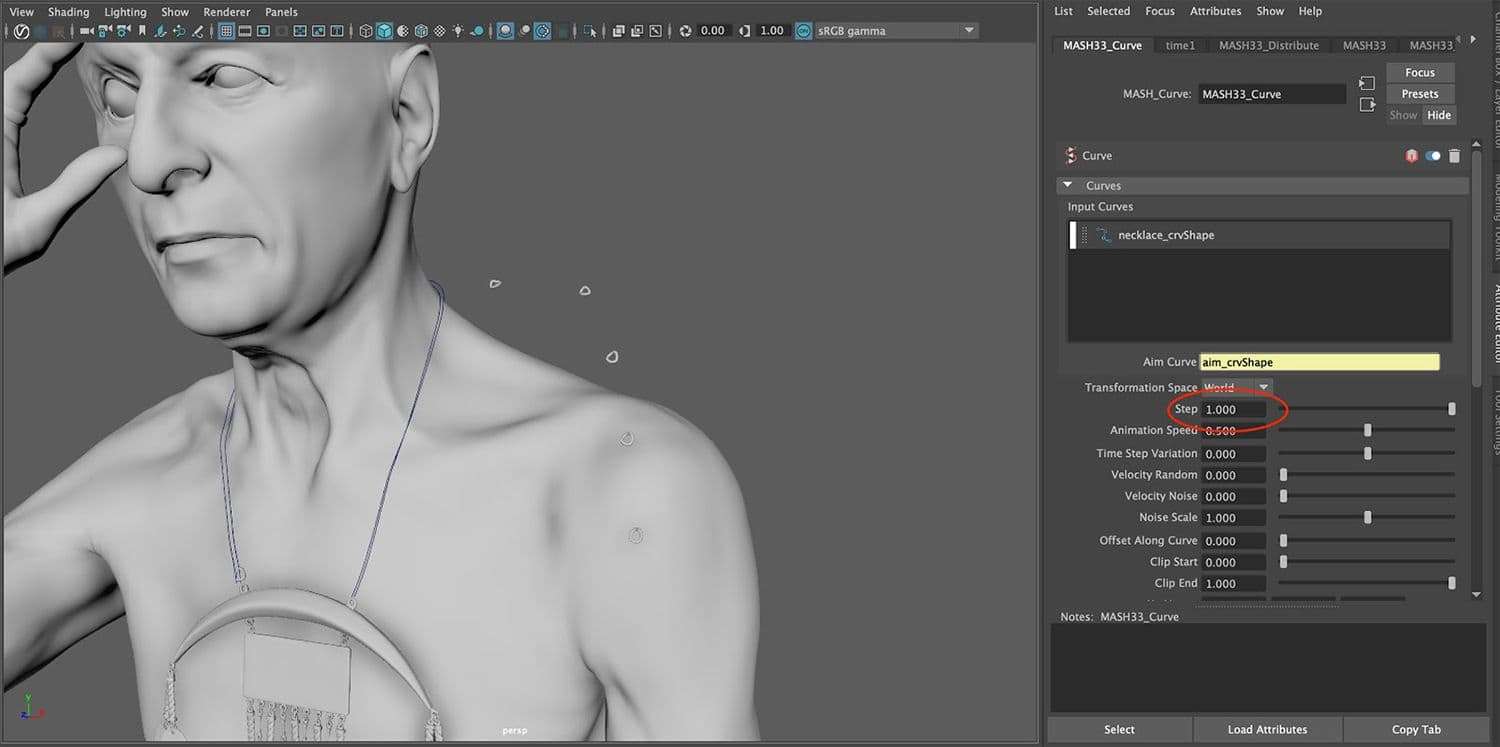
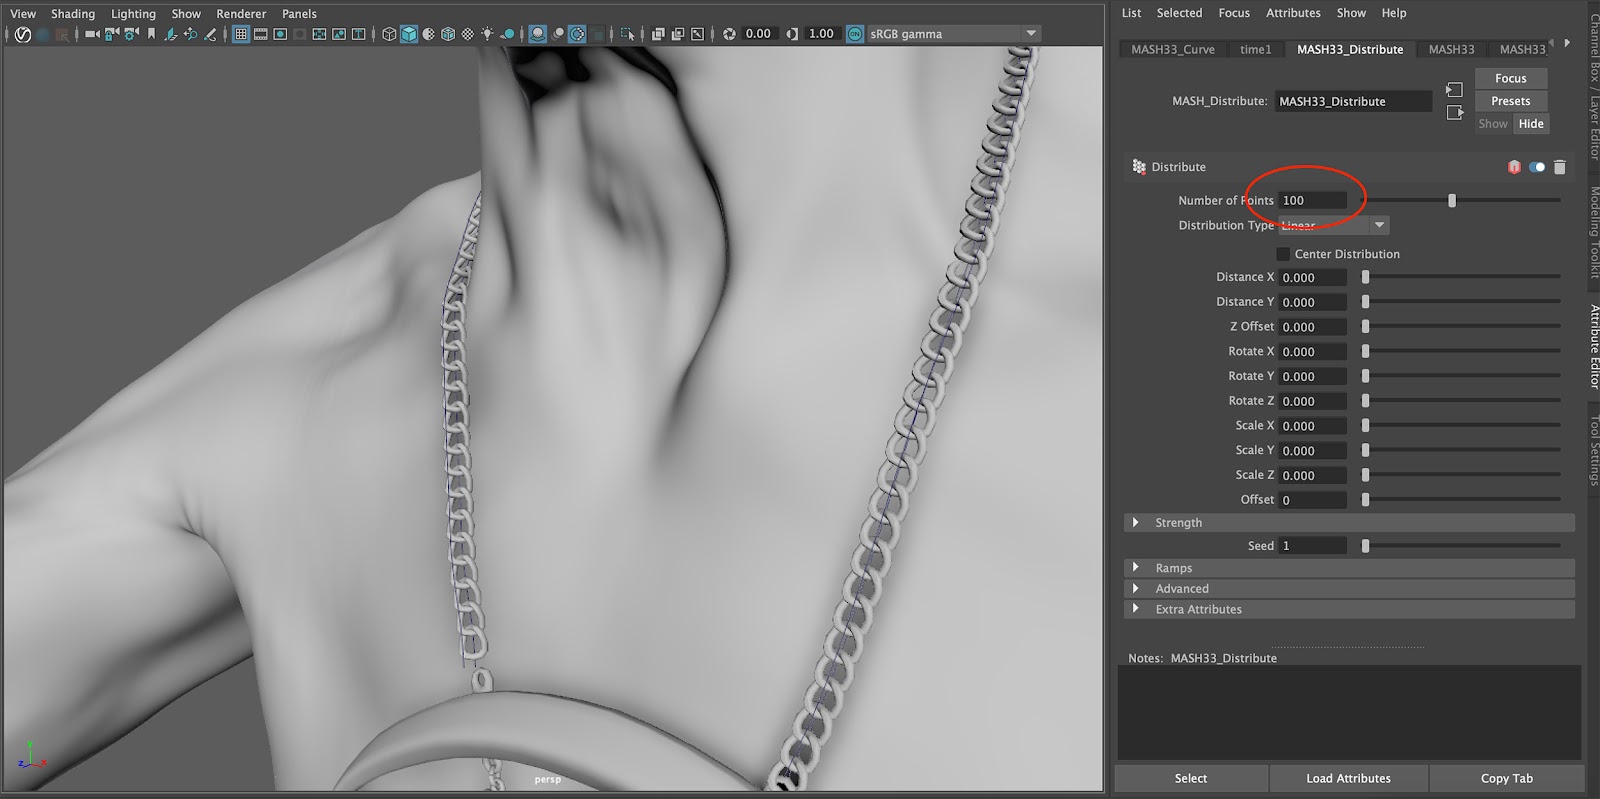
In the distribute node play with the number of points until the links are spaced to be perfectly linked together.
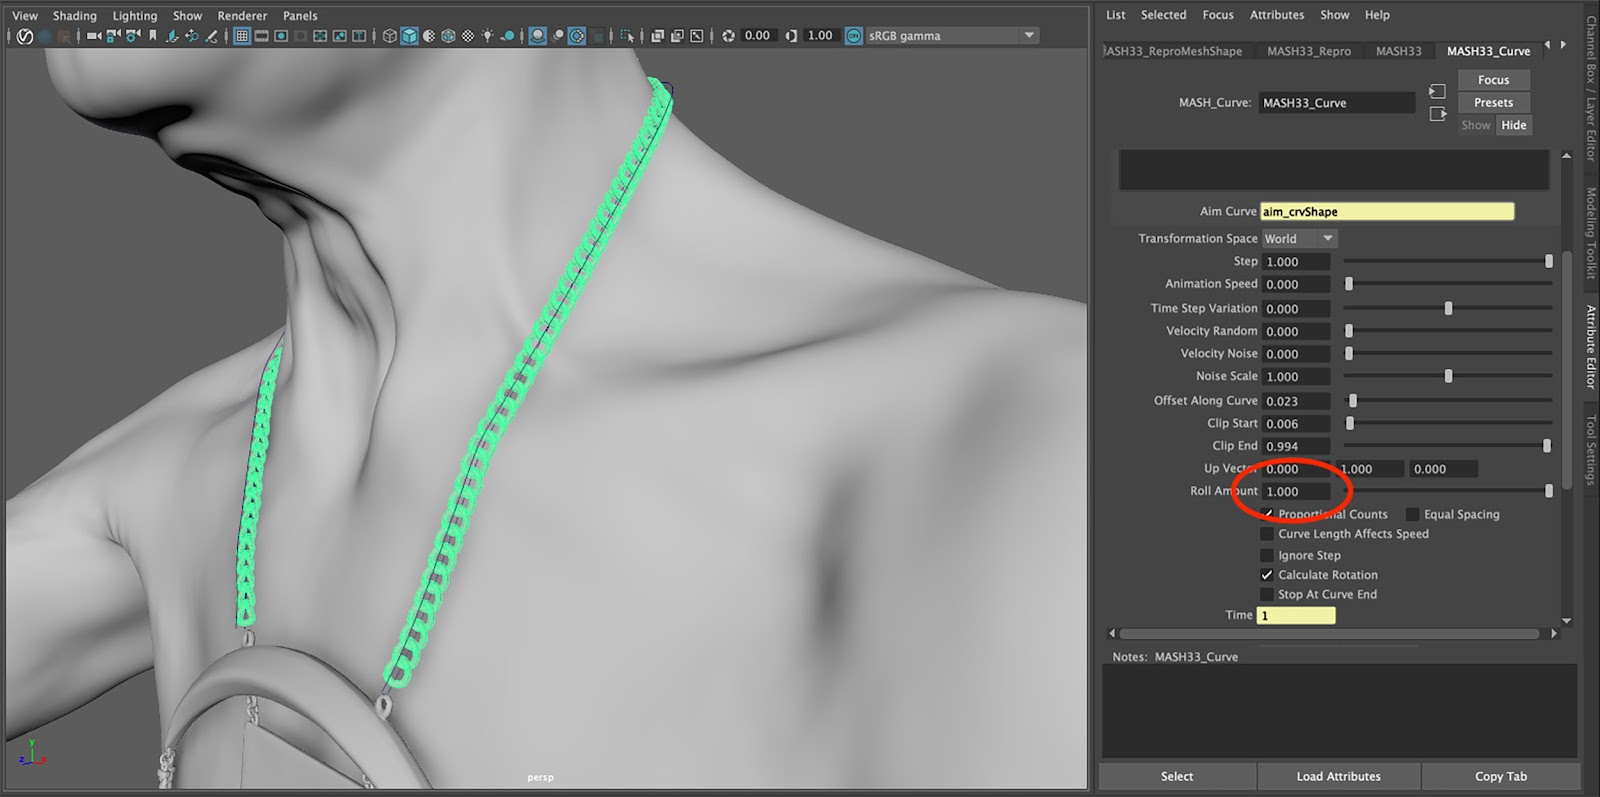
Back in the curve node, change the roll amount to 1. If you need to you can tweak the clip start and clip end to adjust the fit to the pendant. You may need to go back and play with the number of points, just adjust these parameters until the chain is perfectly placed.
Add a small link to connect the chain to the pendant, and you are done. The chain should sit perfectly on the skin and hang in a physically accurate manner.