How to Create World of Warcraft Characters using ZBrush - Part 2
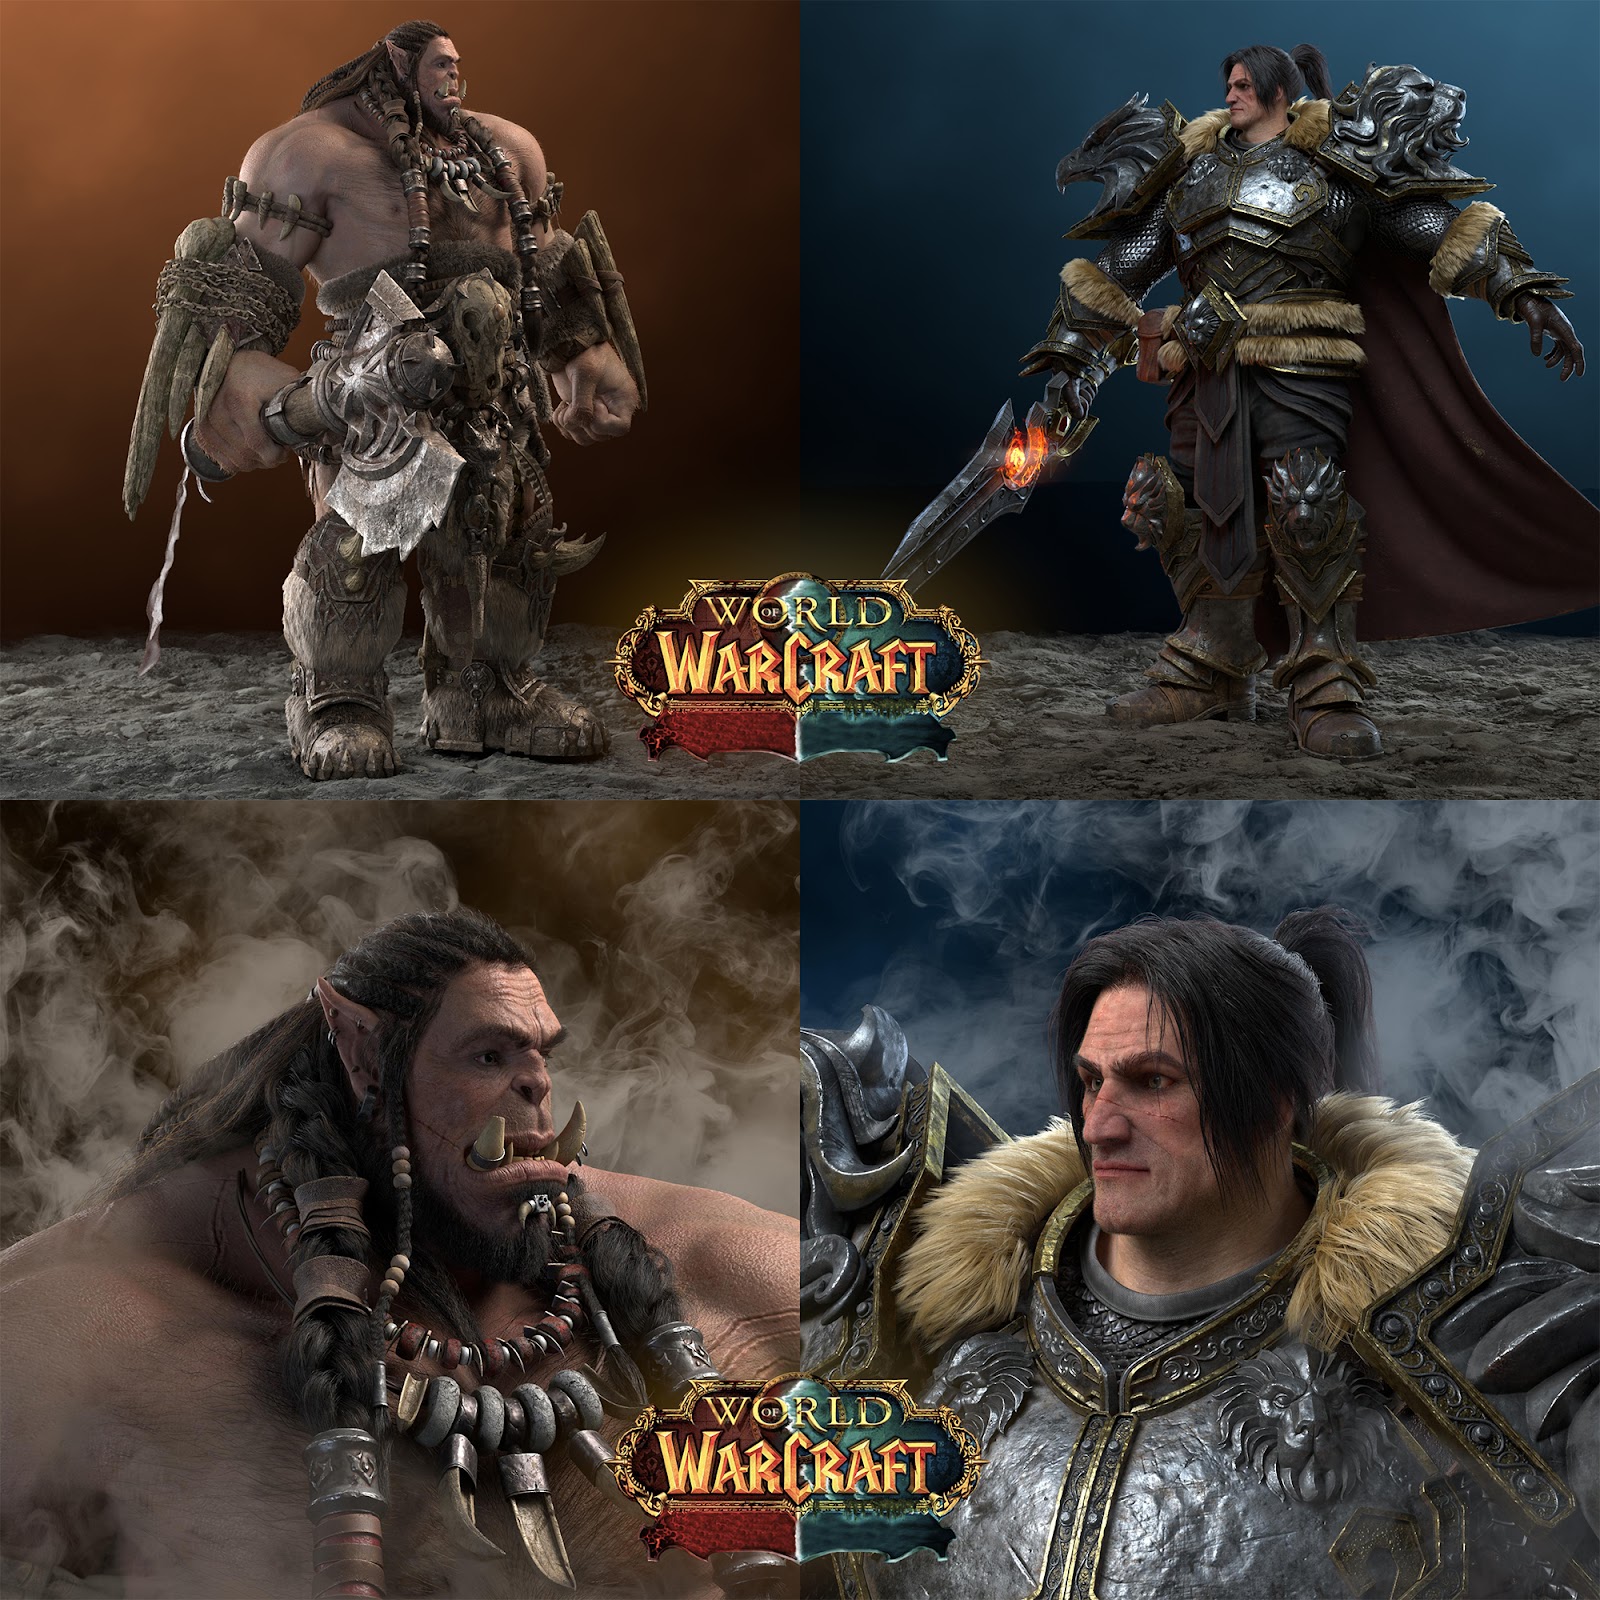
Tyler Lee, a recent graduate from the SF Film School, shares with us how to create iconic World of Warcraft characters using ZBrush.
Tyler Lee, a recent graduate from the SF Film School, shares with us how to create iconic World of Warcraft characters using ZBrush.

When Korean born Tyler Lee was younger, watching movies like The Avengers, Transformers, and Terminator, inspired him to seek out the knowledge to make the visual effects that made him love those movies so much. A recent graduate from the SF Film School, Tyler realised very early on he wanted to work in the entertainment industry and now he is realising his dreams. In Part 2, Tyler shares with us how to create iconic World of Warcraft characters using ZBrush.
Using the same process I described in Part 1 of my workflow, I created armour and other props using ZBrush and Maya together.
When creating ornaments on the armour, at first I used curves and curve warps in Maya.
After that, I sent the objects in Maya to the ZBrush to create more detailed shapes and I expressed scratch and damage descriptions.

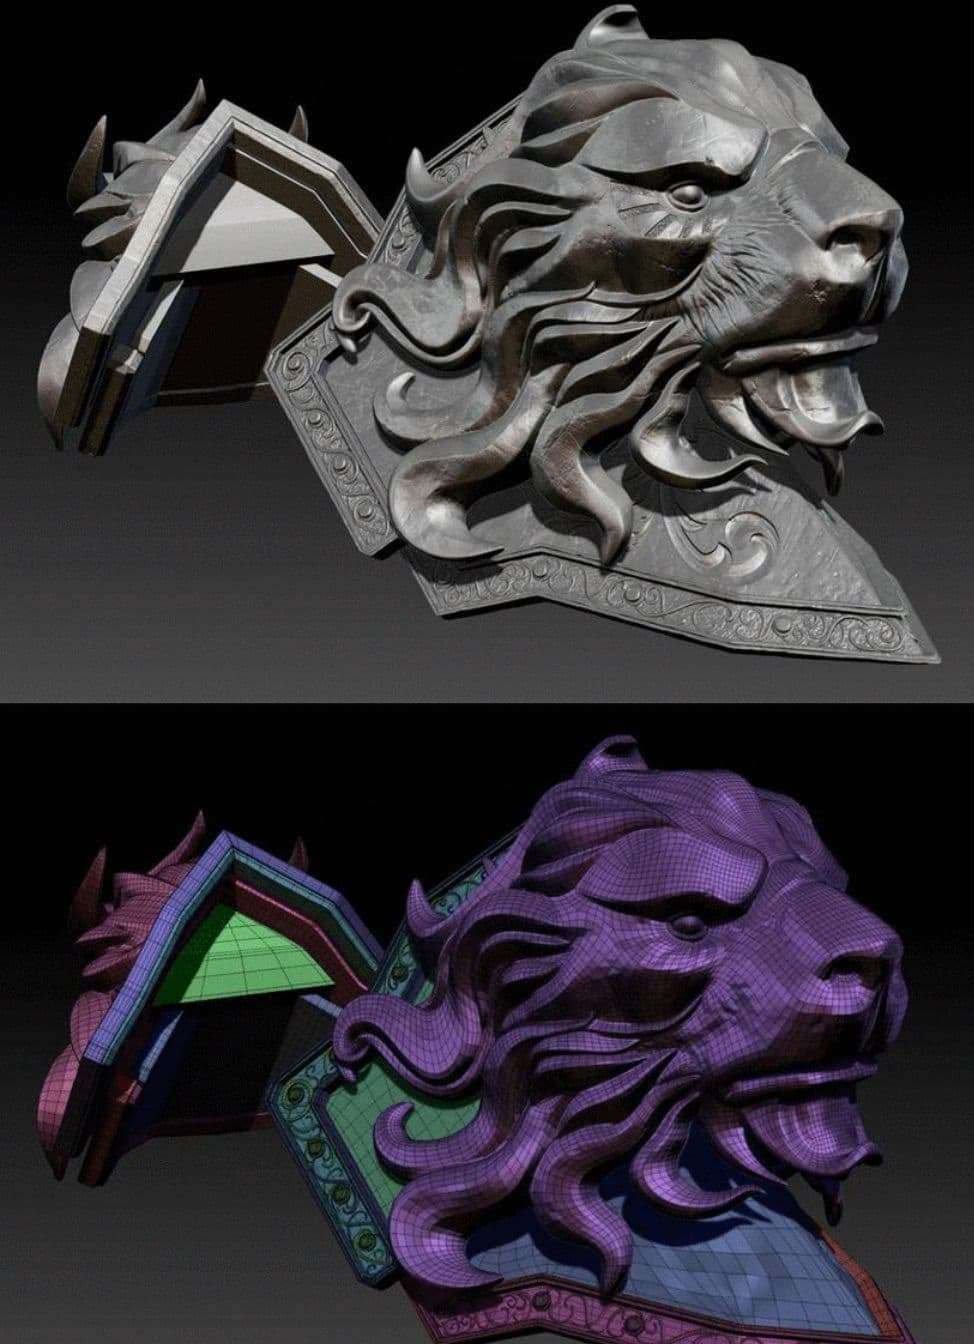
To create armour that needed a pattern, I made a body-based topology model and a scale-model that was used as a repeating pattern.
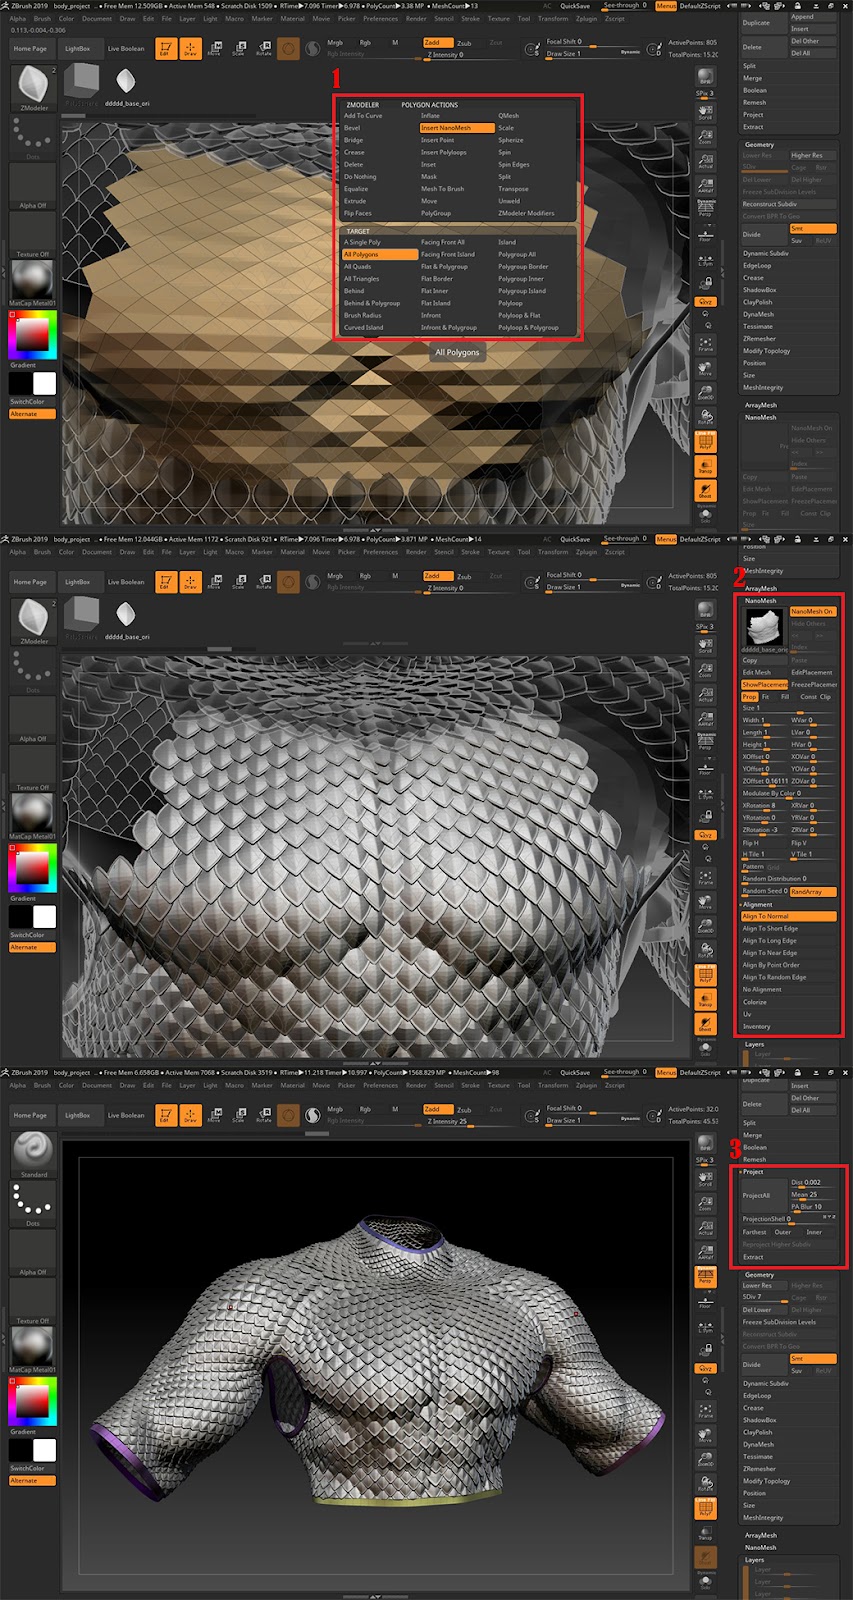
Using ZModeler's insert brush on the body-based topology model, I created the scales to be repeated. I then set the Nanomesh option for patterned objects to be placed naturally.
In my experience, if you set the values as shown in the image below, a better model will come out.
Lastly, I made a topology on the modeling of patterned scales armor, dividing the topology to a high polygon, and then working on the project from there.
I sculpted the face in ZBrush with references from anatomy books. I also referenced Varian fan art and the Blizzard cinematic Video.
The pores and face wrinkles were created similar to what may be expected of a man in his forties. I tried to make the scars look as realistic as possible by using actual photo references as well.

I worked with Varian using nodes differently than how I approached Durotan. In the coming paragraphs, I will explain how I worked with Displacement map, Normal map, Diffuse map, and more.

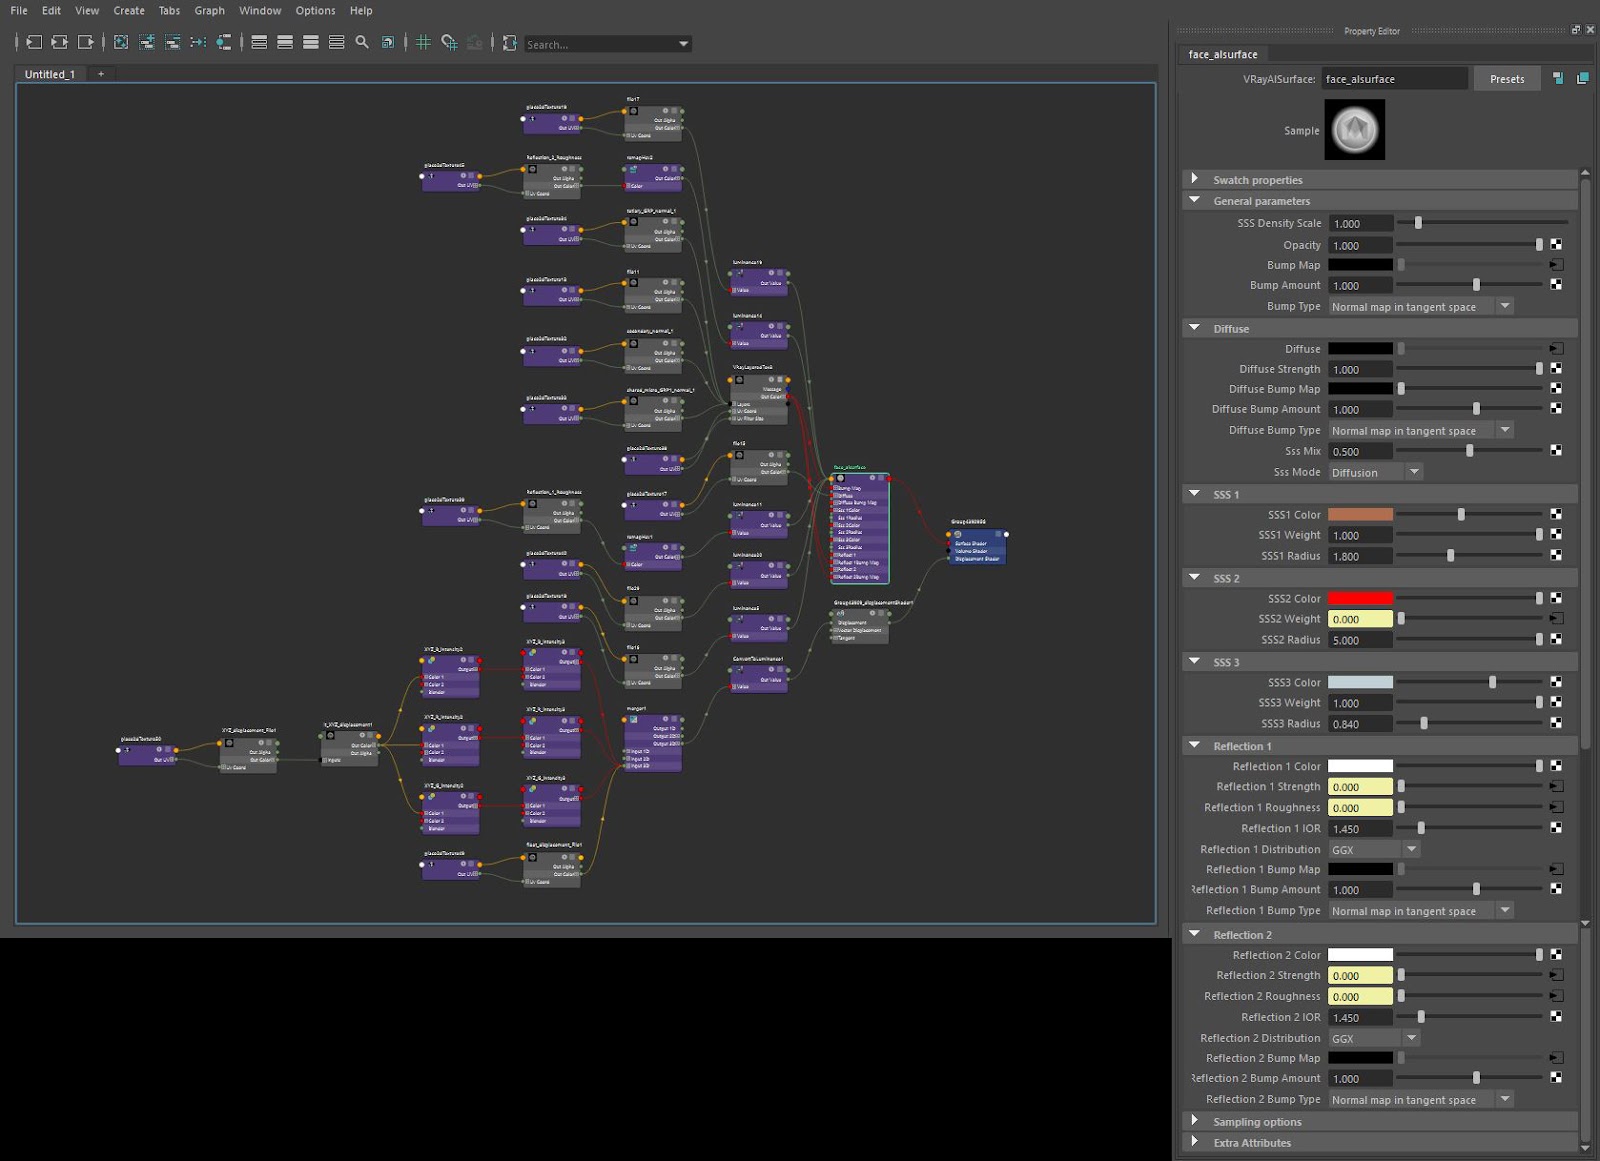
I expressed the skin using Alsurface. In Alsurface, the diffuse Lambert colour is defined in the same map as diffuse. Alsurface has three levels of depth map, and each level has a weight control to mix different colors of SSS.
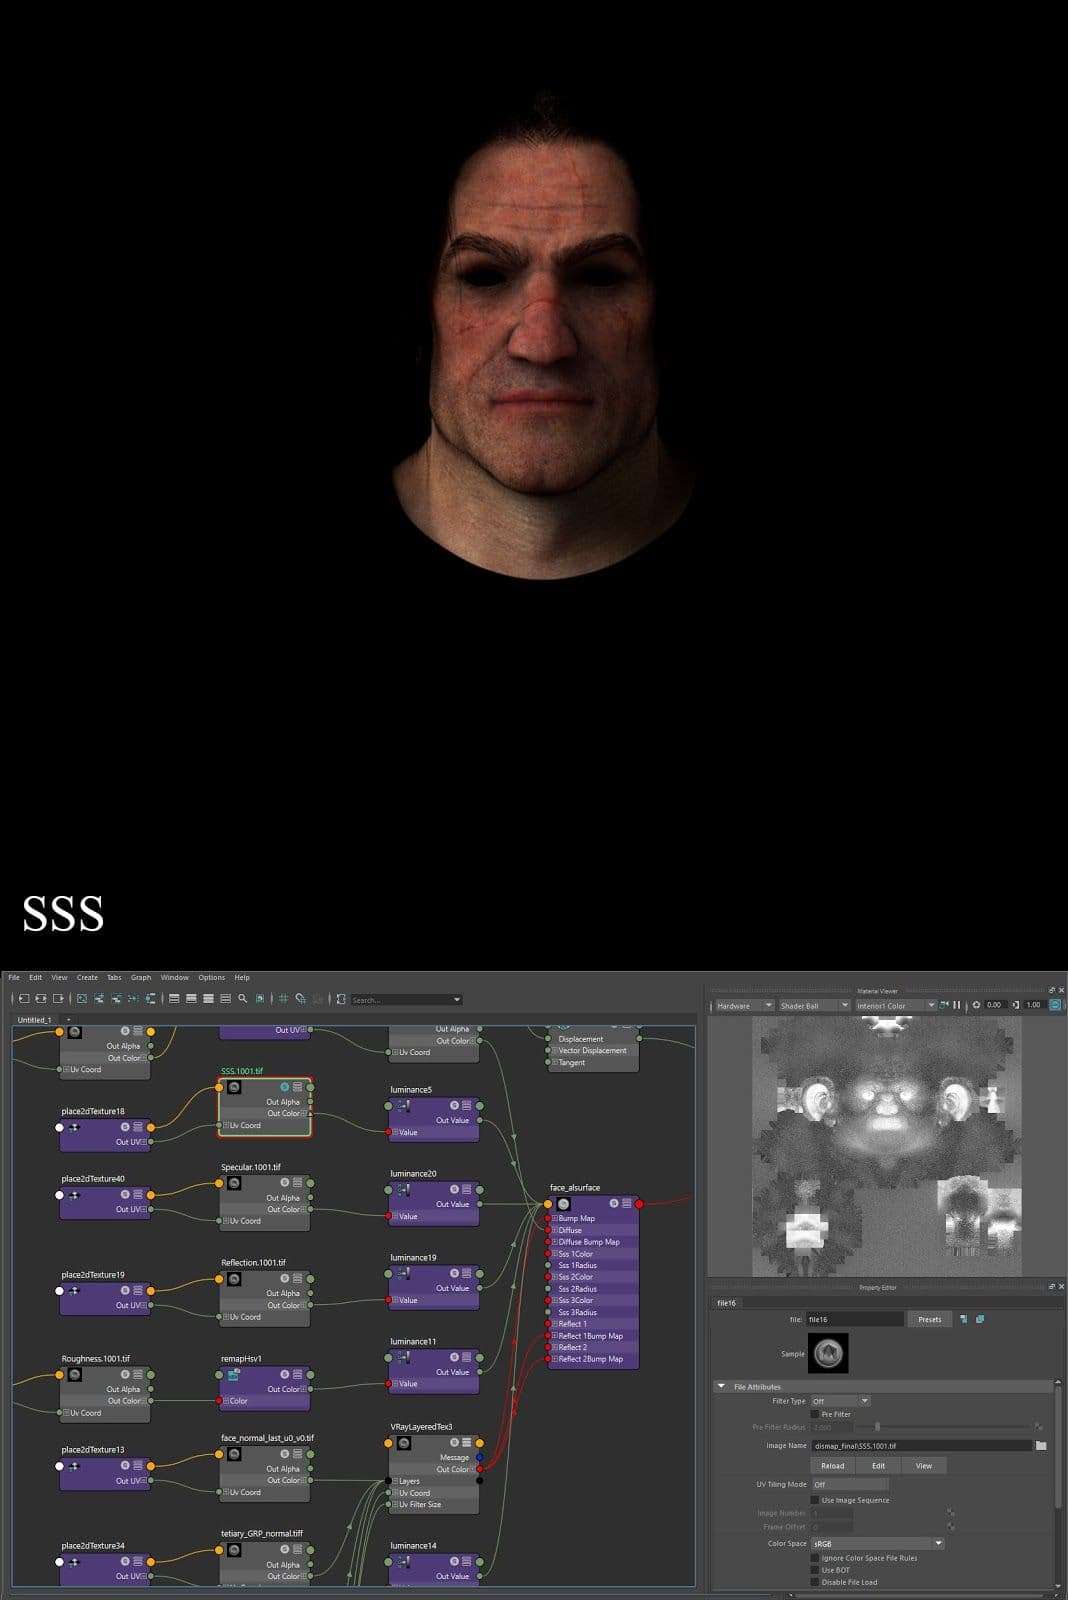
In my case, I was able to express the overall skin texture by mixing SSS1 and SSS3 in the face model.
I wanted to express the red SSS color more strongly in the ears, mouth and eyes, and did so by creating a mask map in Mari and connecting the mask map to the weight of SSS2 to create a region to mix with SSS2. I adjusted the SSS Radius to control the intensity of the SSS color.
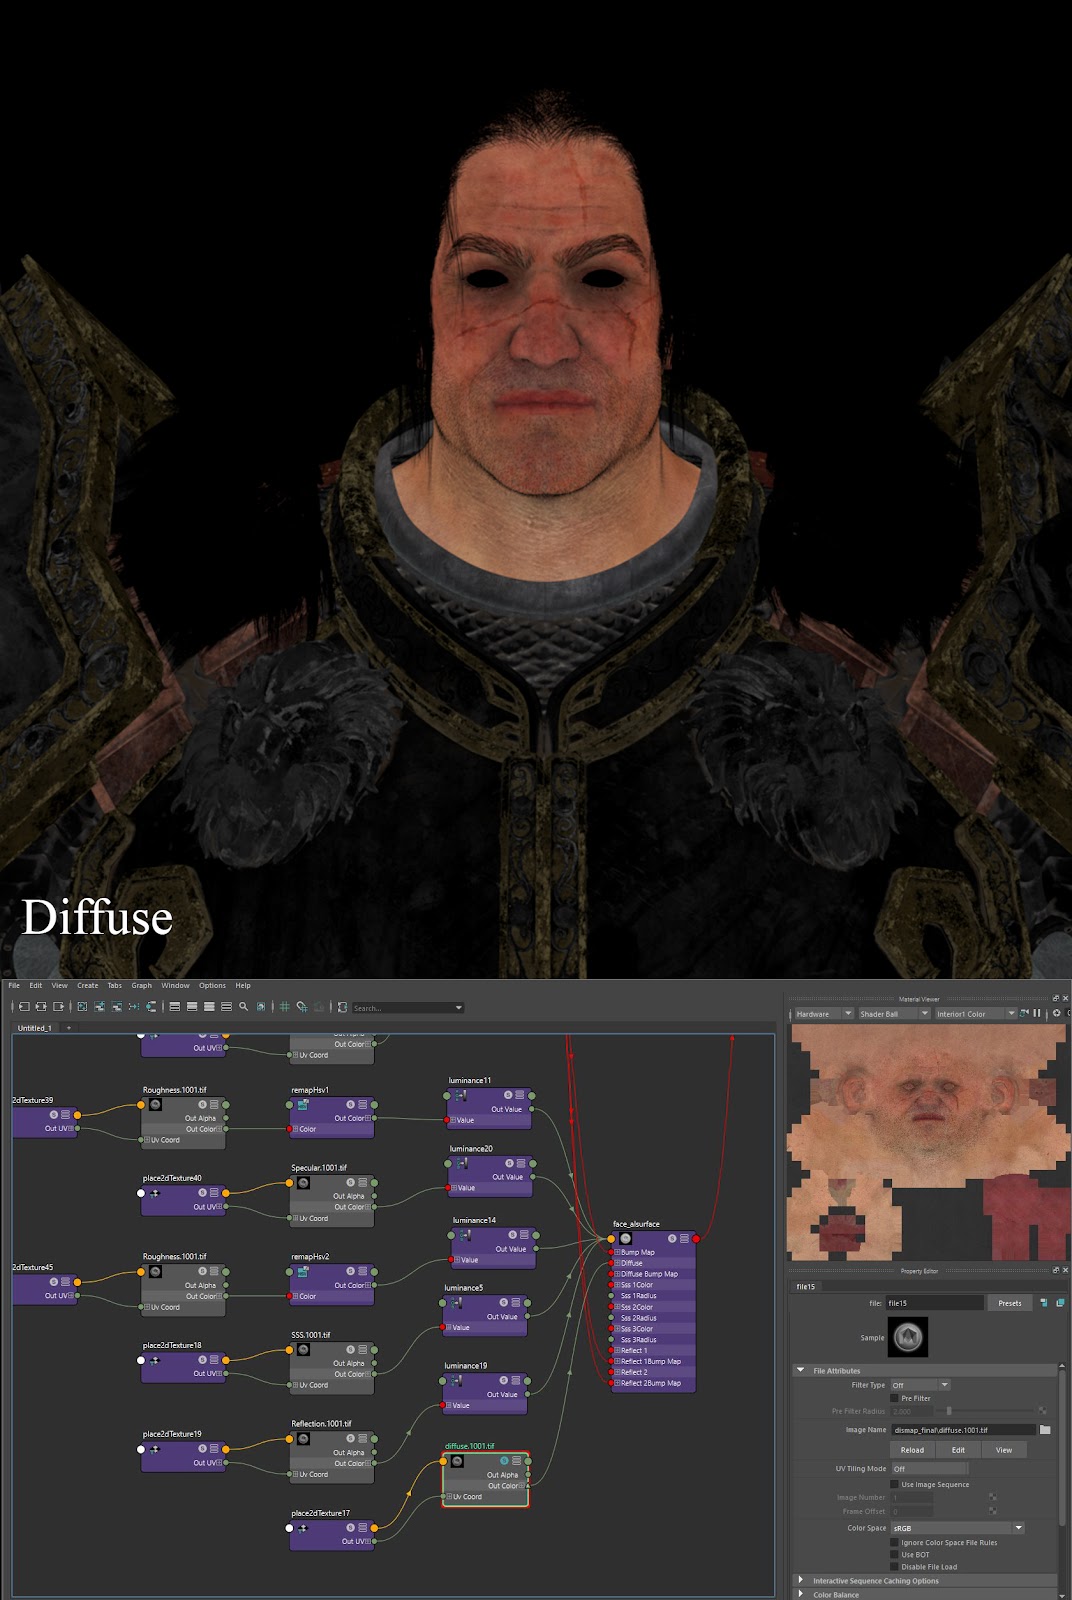
When I created the Diffuse Map, I first painted on my model by using Albedo texture in Mari, and used various textures and Mask Map to improve the detail of diffuse colour.

To create my reflection map, I exported my model to Substance Painter to bake an ambient occlusion map, and I used the exported AO Map as a Reflection Map in Maya.
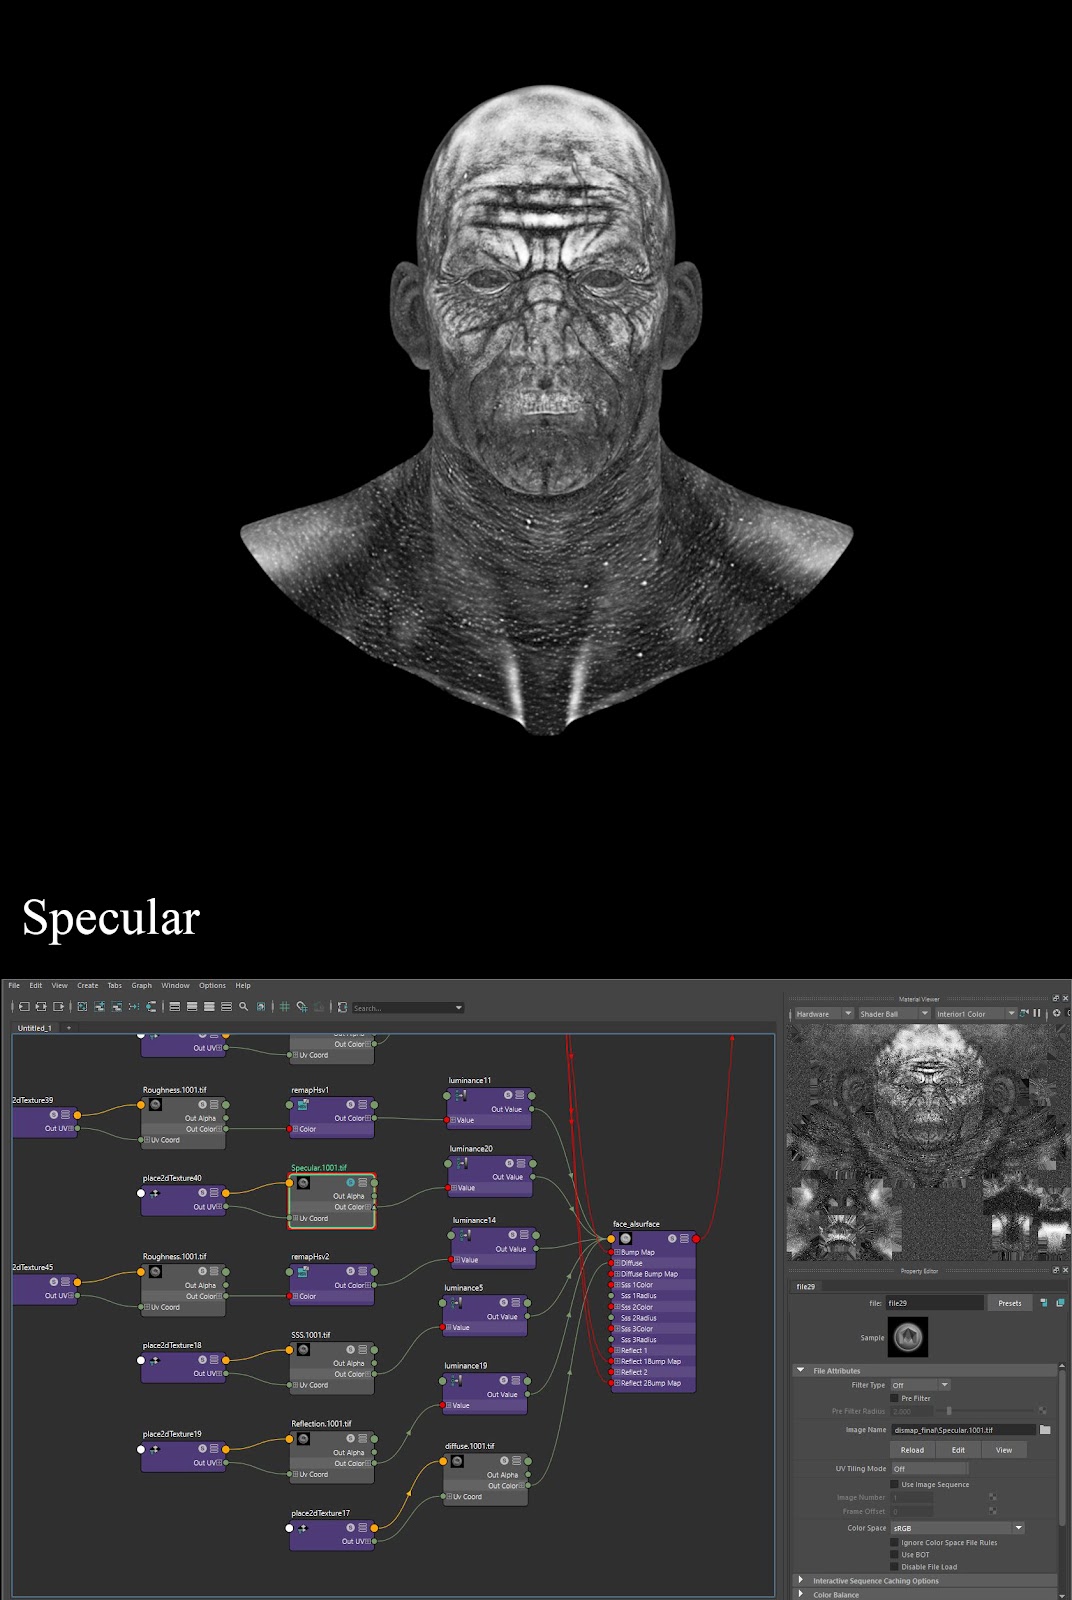
I made a Specular map in Mari by using Height map from Knald, and RGB dismap texture.
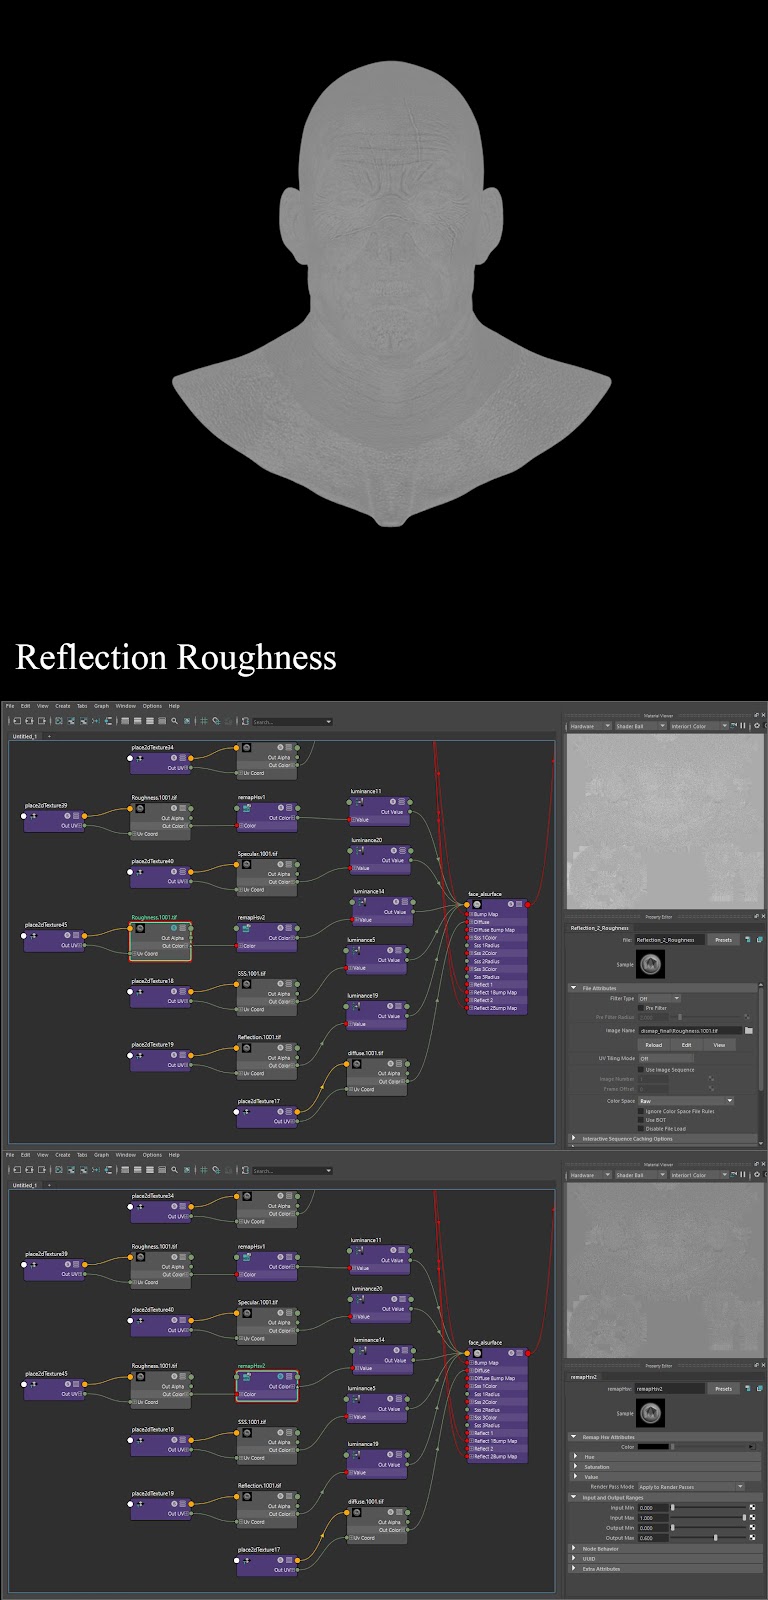

For this exercise, I wanted to make 'Reflection 1 Roughness ' more rough than 'Reflection 2 Roughness '. The 'Reflection 1 Roughness ' and 'Reflection 2 Roughness ' were connected to the 'RemapHsv' node.
I was able to control the intensity of each layer of 'Reflection 1 Roughness ' and 'Reflection 2 Roughness' and by setting ‘RGB’ on the ColorSpace in 'Reflection 1 Roughness ', I was able to make more roughness than before.
To get better detail on the face of Varian, I applied a displacement. It was hard to express the details on the face of human only using displacement maps from ZBrush. So, this time I worked the XYZ texture painted by Mari and the sculpted texture extracted from ZBrush, and combined them in Maya.
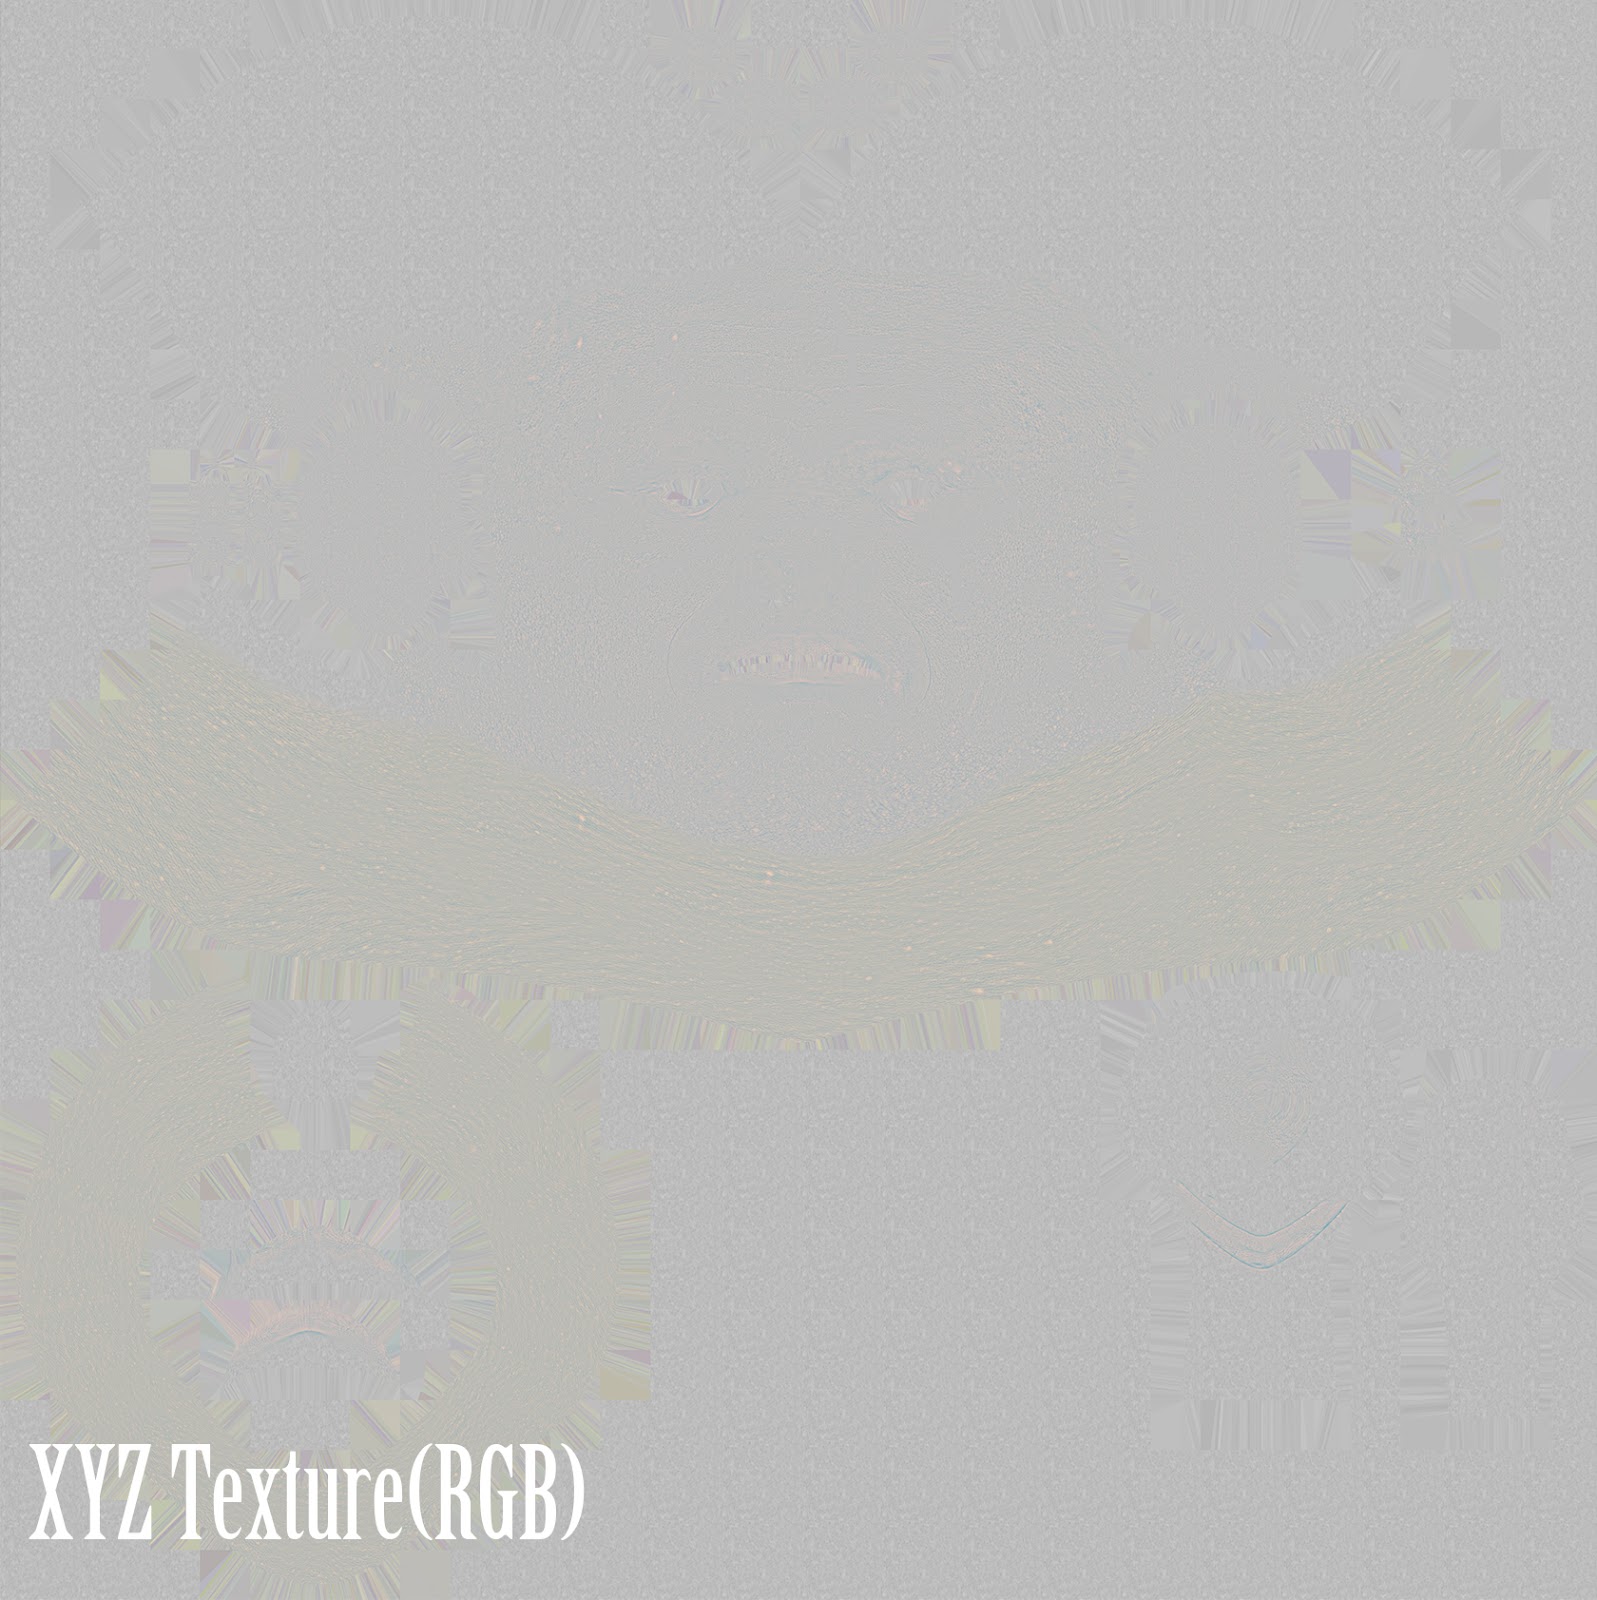
First, I used the maleFace_40s_04 texture from the Texturing XYZ site to paint it in Mari. I then applied the maleFace_40s_04 texture on Varian face sculpted from ZBrush (If you want to know more about how to paint in Mari, I recommend this tutorial.)
Secondly, I imported the RGB displacement map made by Mari to Maya.
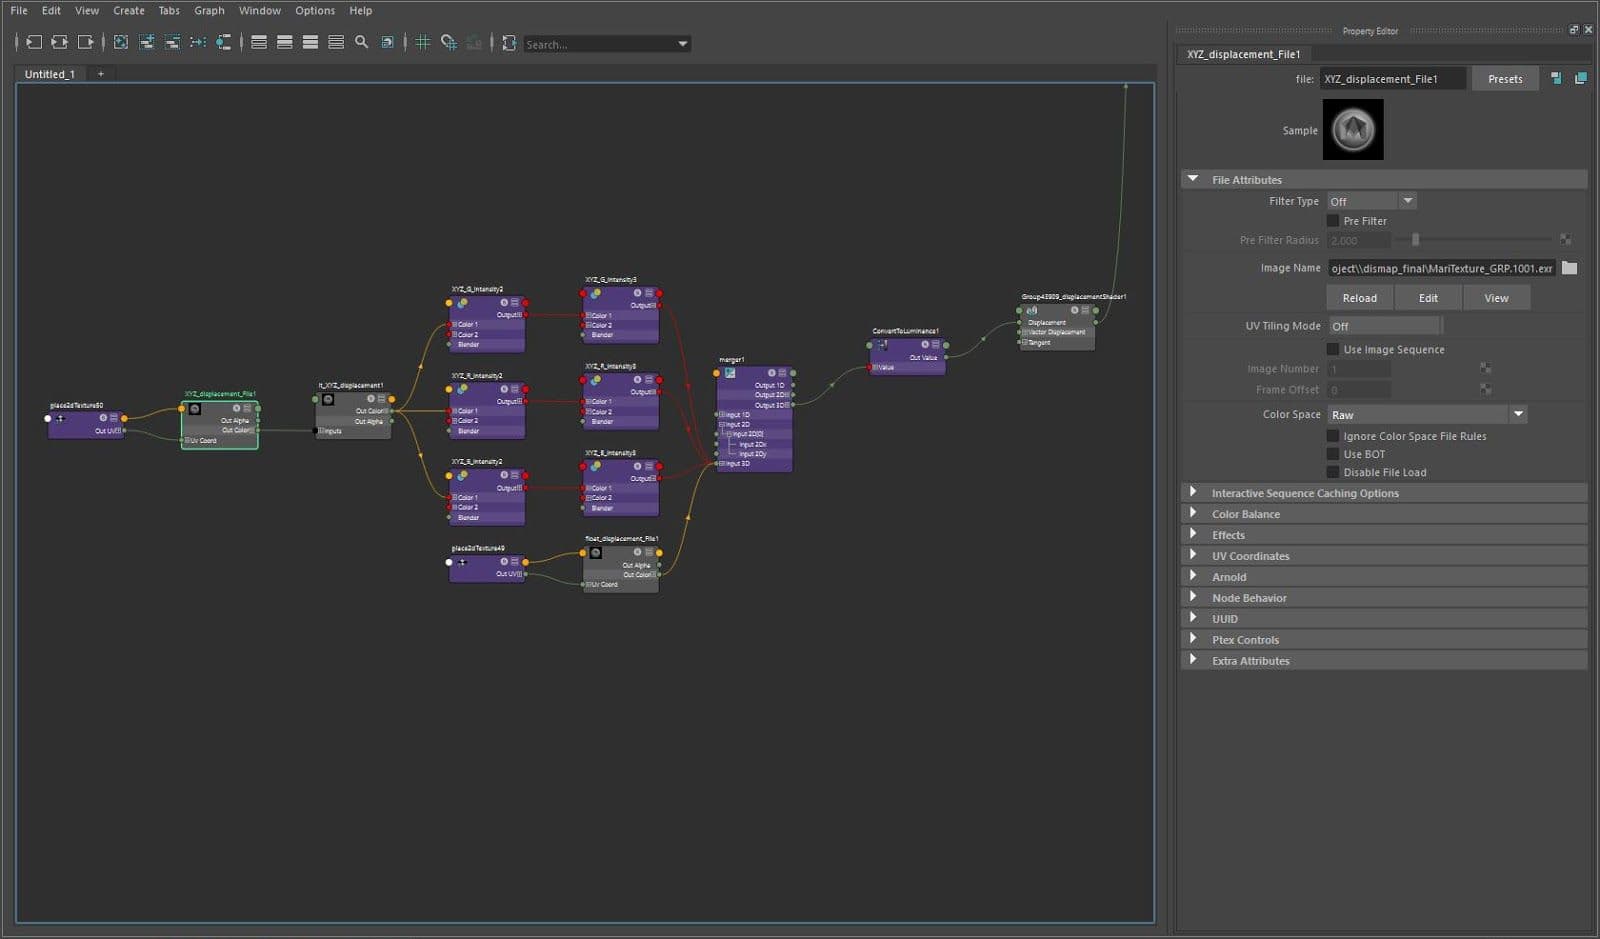

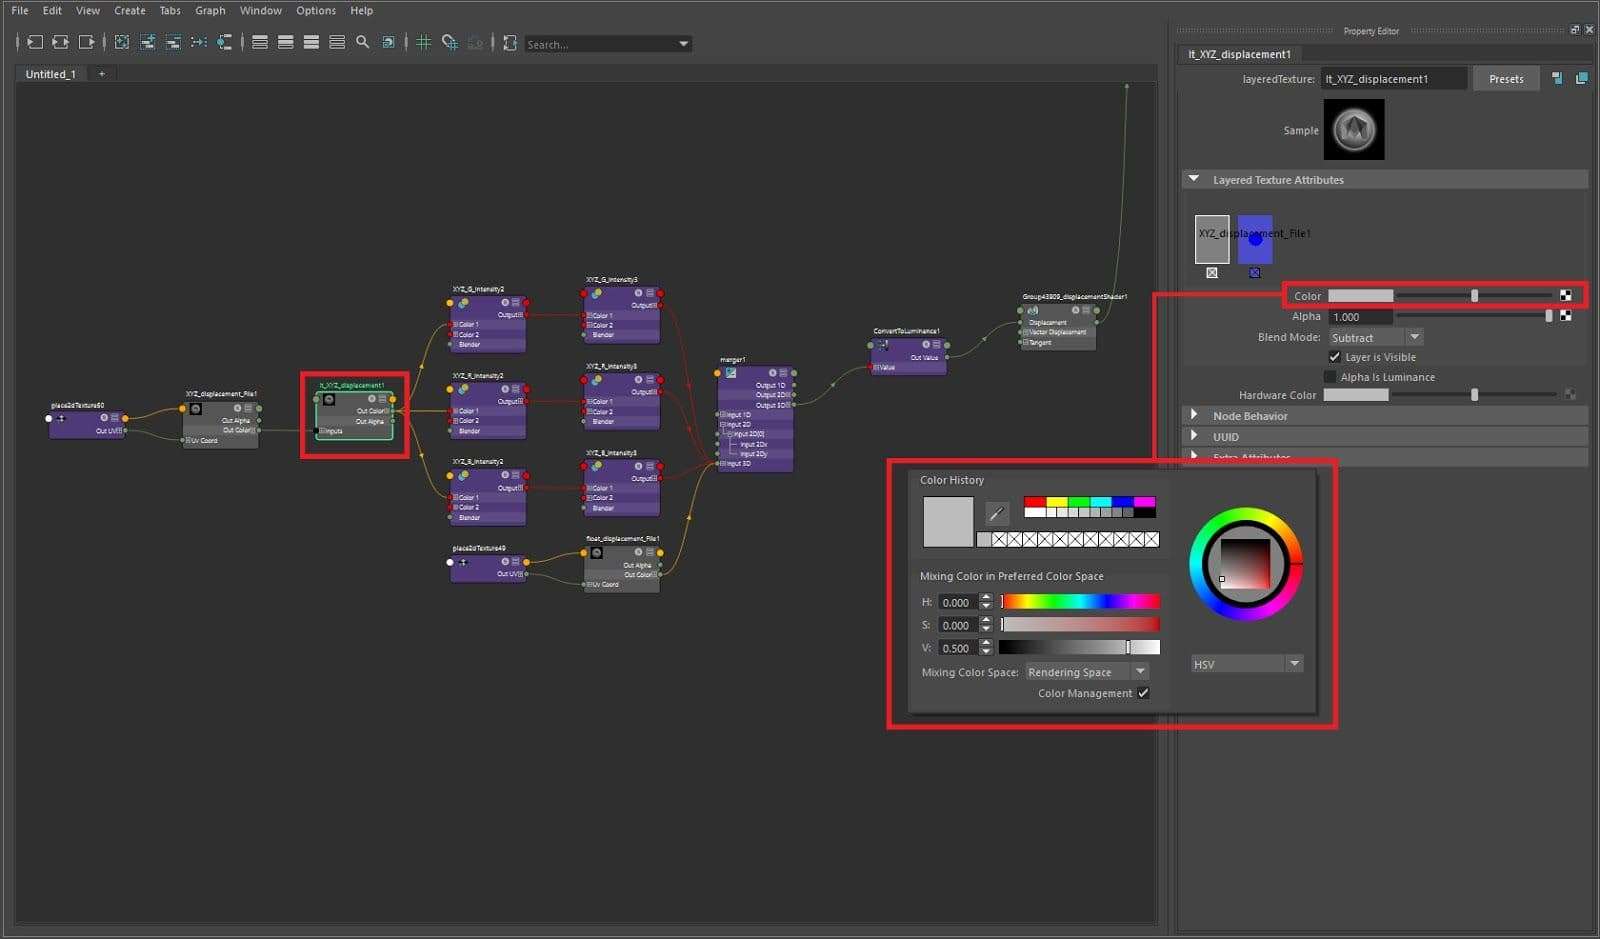
I set the colour space to Raw and I subtracted 0.5 to make the mid value 0 by using the “layeredTexture” node.
The displacement map texture made by Mari, have mid value of 0.5. That's why you have to subtract the mid value 0.5 of the grayscale maps to express the correct dismap.
In my case, I used the “layeredTexture” node and I subtracted mid value 0.5 by settings shown in the photo above.
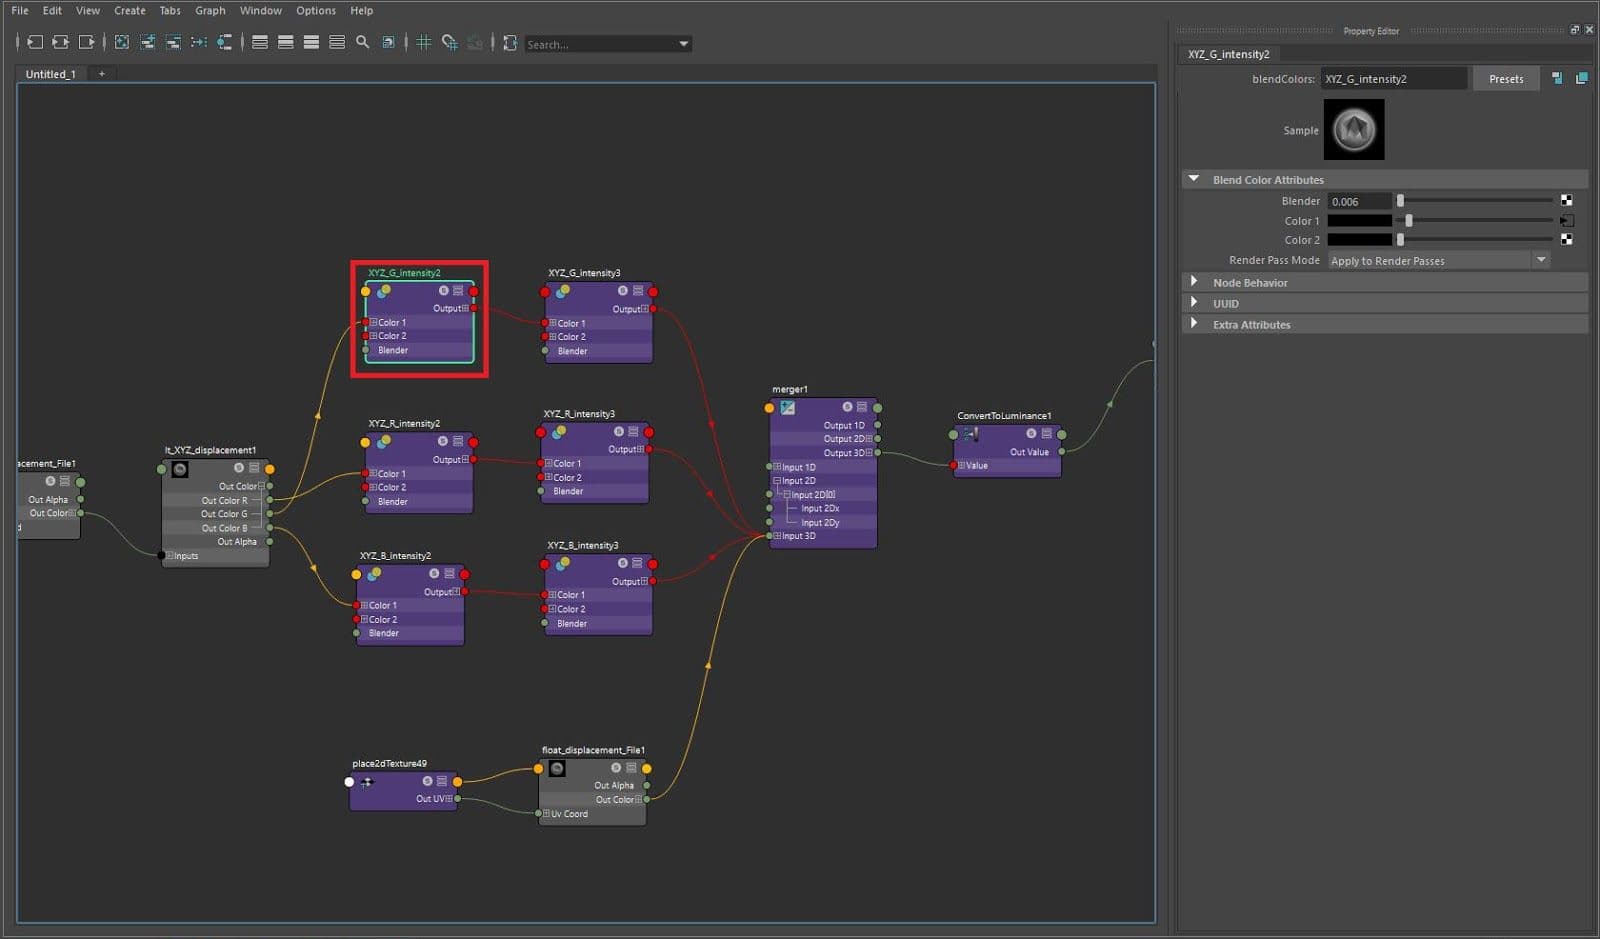
And I divided them into R, G, B in the “layeredTexture” node and connected them to the “blendColors” node each others.
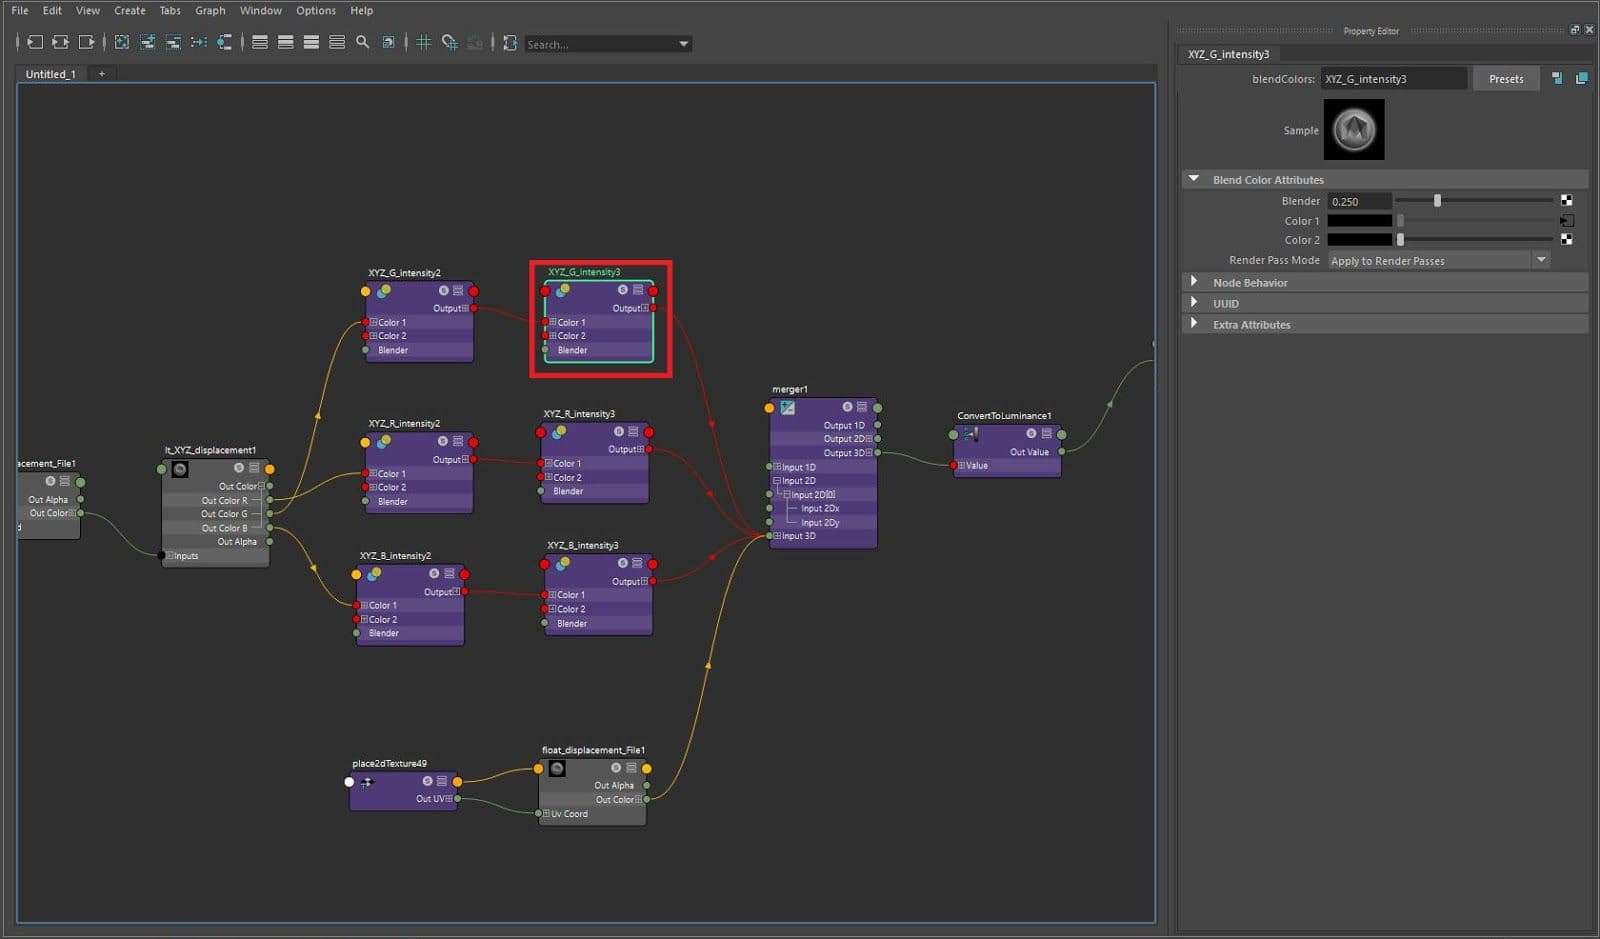
If you work this way, you can express the intensity of R, G, B by dividing them. And you are able to express various skin qualities as you wish.
For reference, I recommend using two “blendColors” nodes because those have a limit to the intensity control with one “blendColors” node.
Finally, I used the "PlusMinusAverage" node to combine the R, G, B that were divided and ZBrush dismaps. The node finds an average of the four displacements and it can creates an average output of the images.
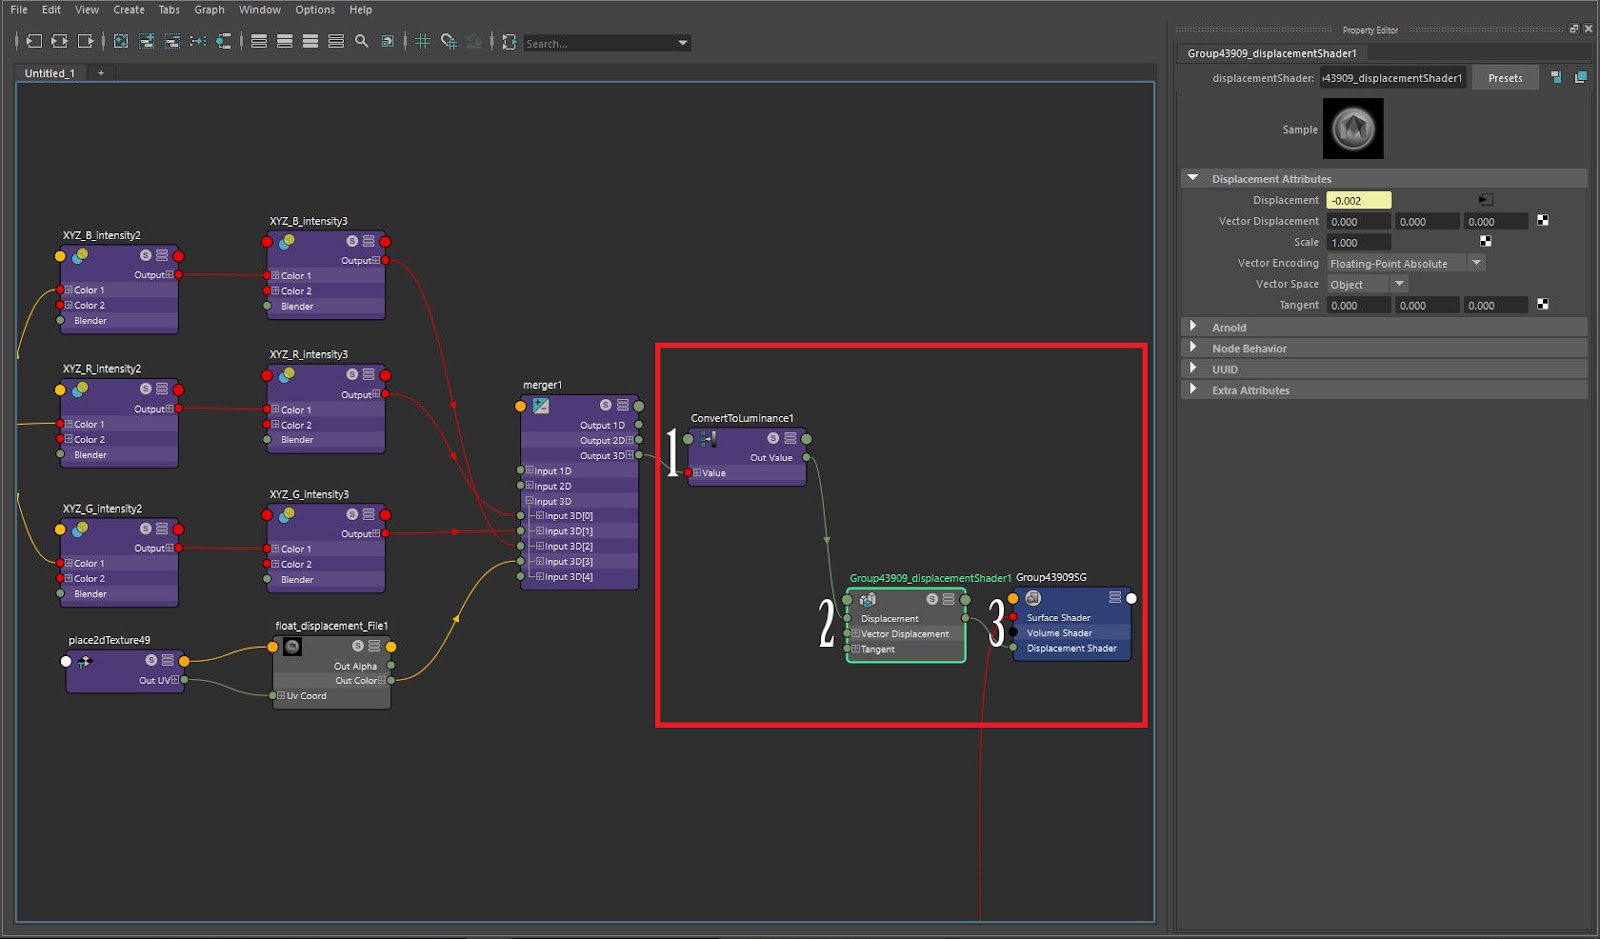
For reference the "Luminance" node converts the RGB to Luminance values before the displacement node. In that way, you can apply your dismap to the obj.
After that I connected the displacement shader to the applied shading network.

And then, I selected the object and I set the Vray displacement shader option to the scale value adjusted in Maya. The numbers are the same as shown in the picture above.
If you want to know more about this process, I recommend this tutorial from the Texturing XYZ site.
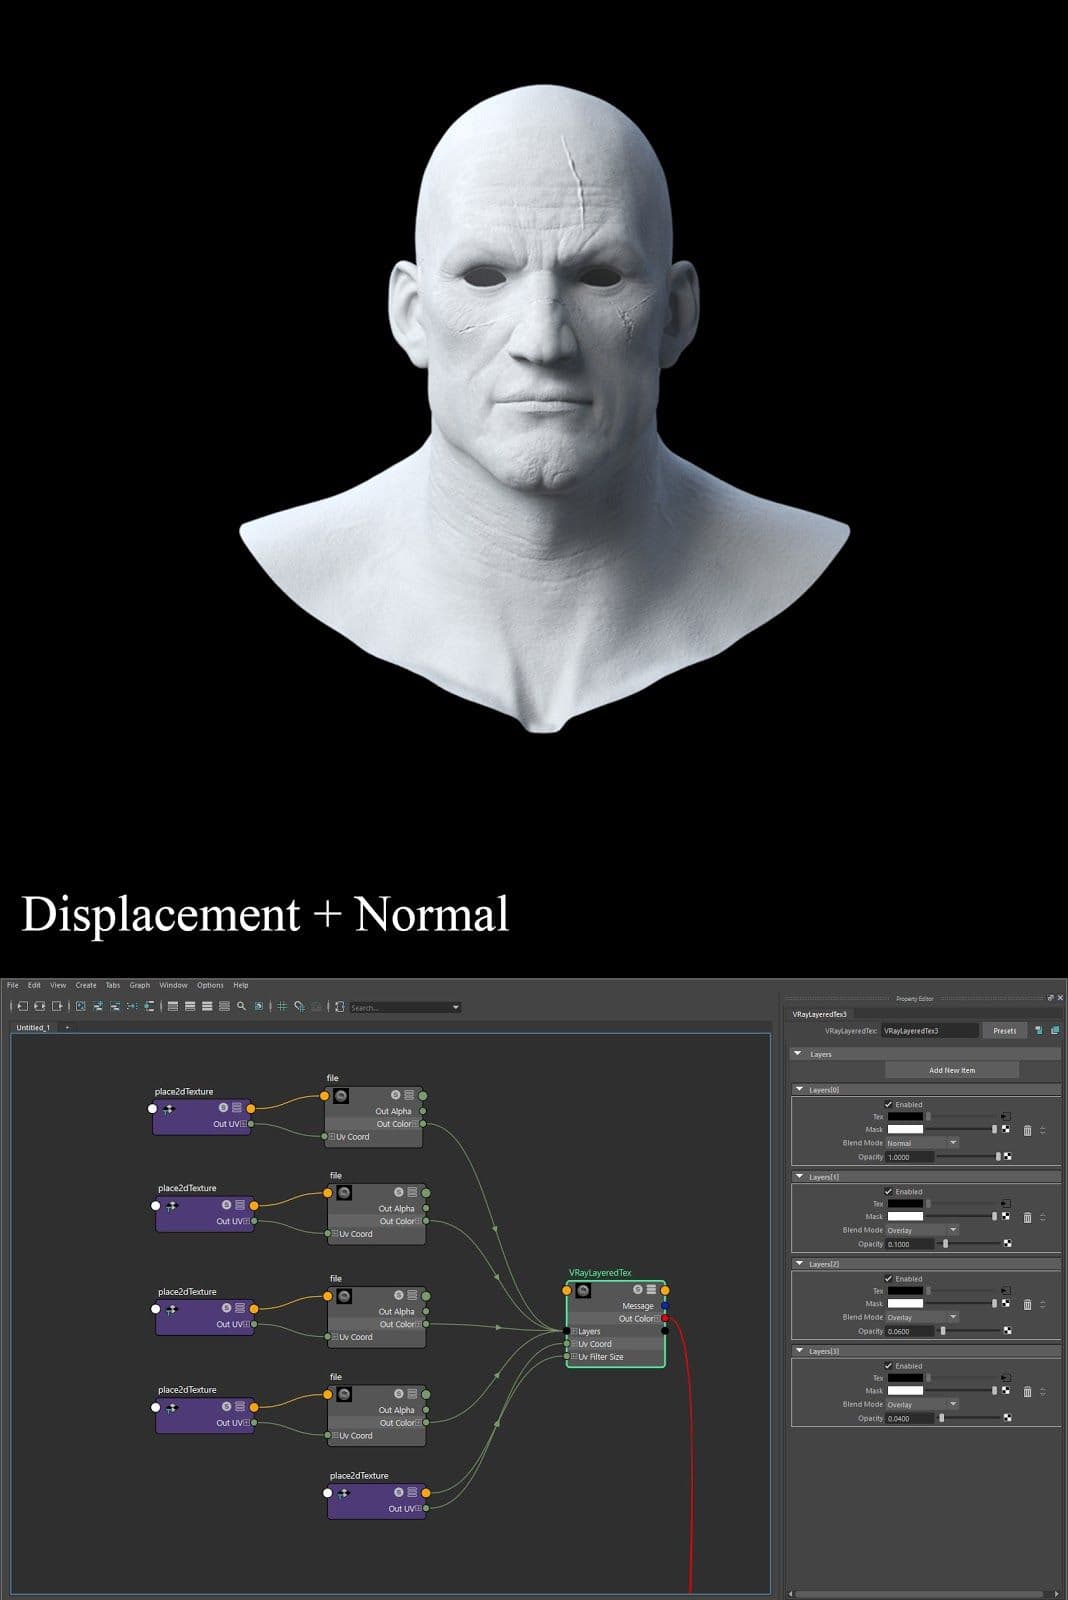
First, I exported a Normal map by using xyz dismap texture in Knald. I combined the Normal map exported from Knald with a ZBrush Normal map by using the 'VRayLayeredTex' node in Maya.
Applying a combined Normal map, I was able to make the expressions more detailed.
When I made eye, I divided the structure of the eyeball into three parts and shaded them according to the characteristics of each eyeball structure.
First , I selected the obj for the sclera and applied the Alsurface Mtl. The Alsurface Mtl's SSS makes the eye more realistic.
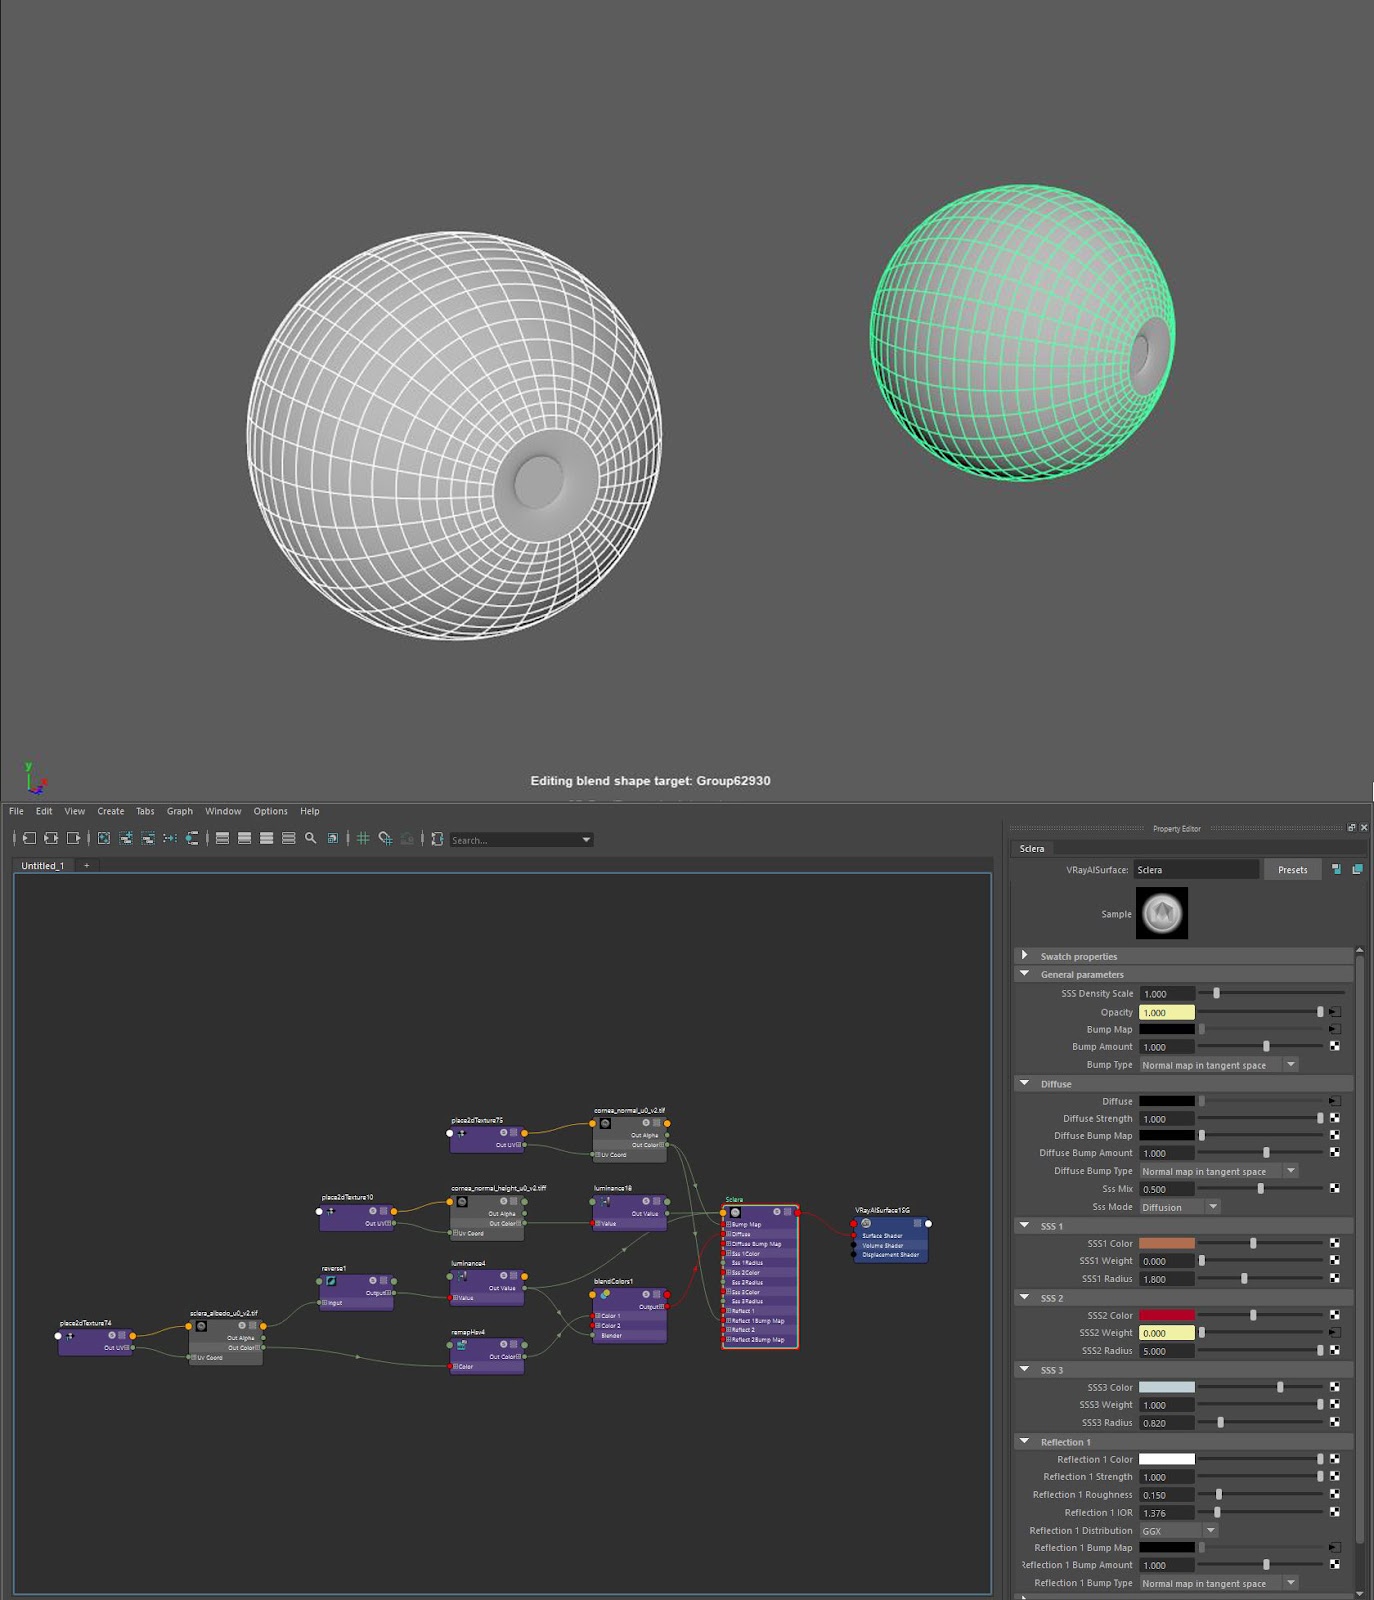
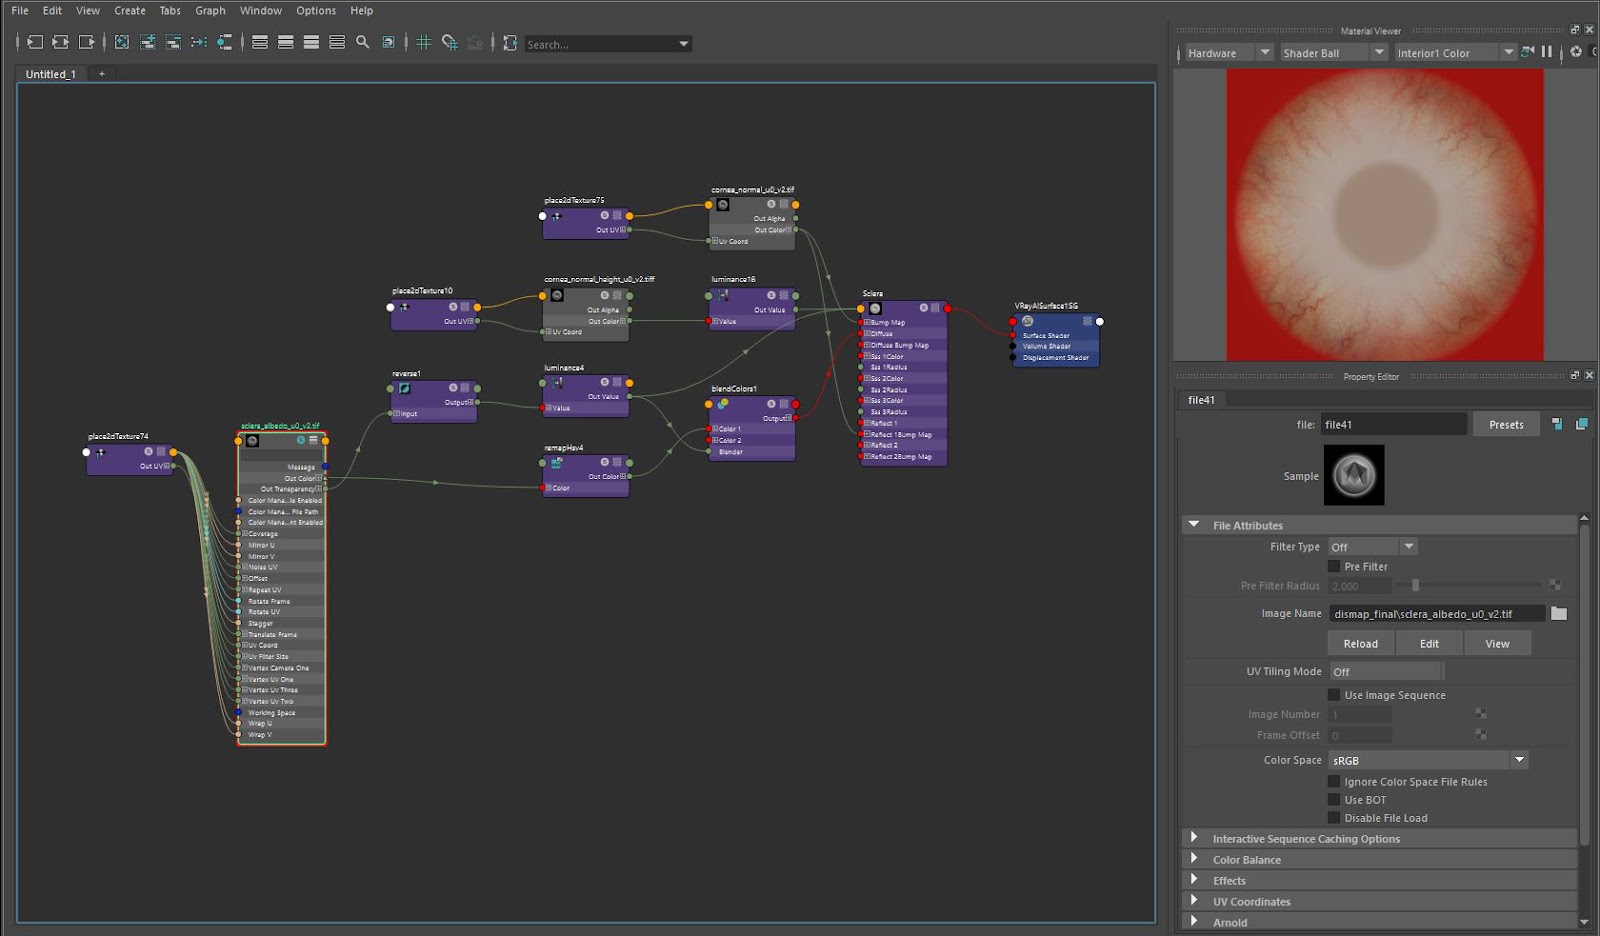
Secondly, I dragged the sclera Albedo texture into Maya's Hypershade to use Out Transparency data of Texture. I connected Out Transparency to the reverse node to create a Mask.
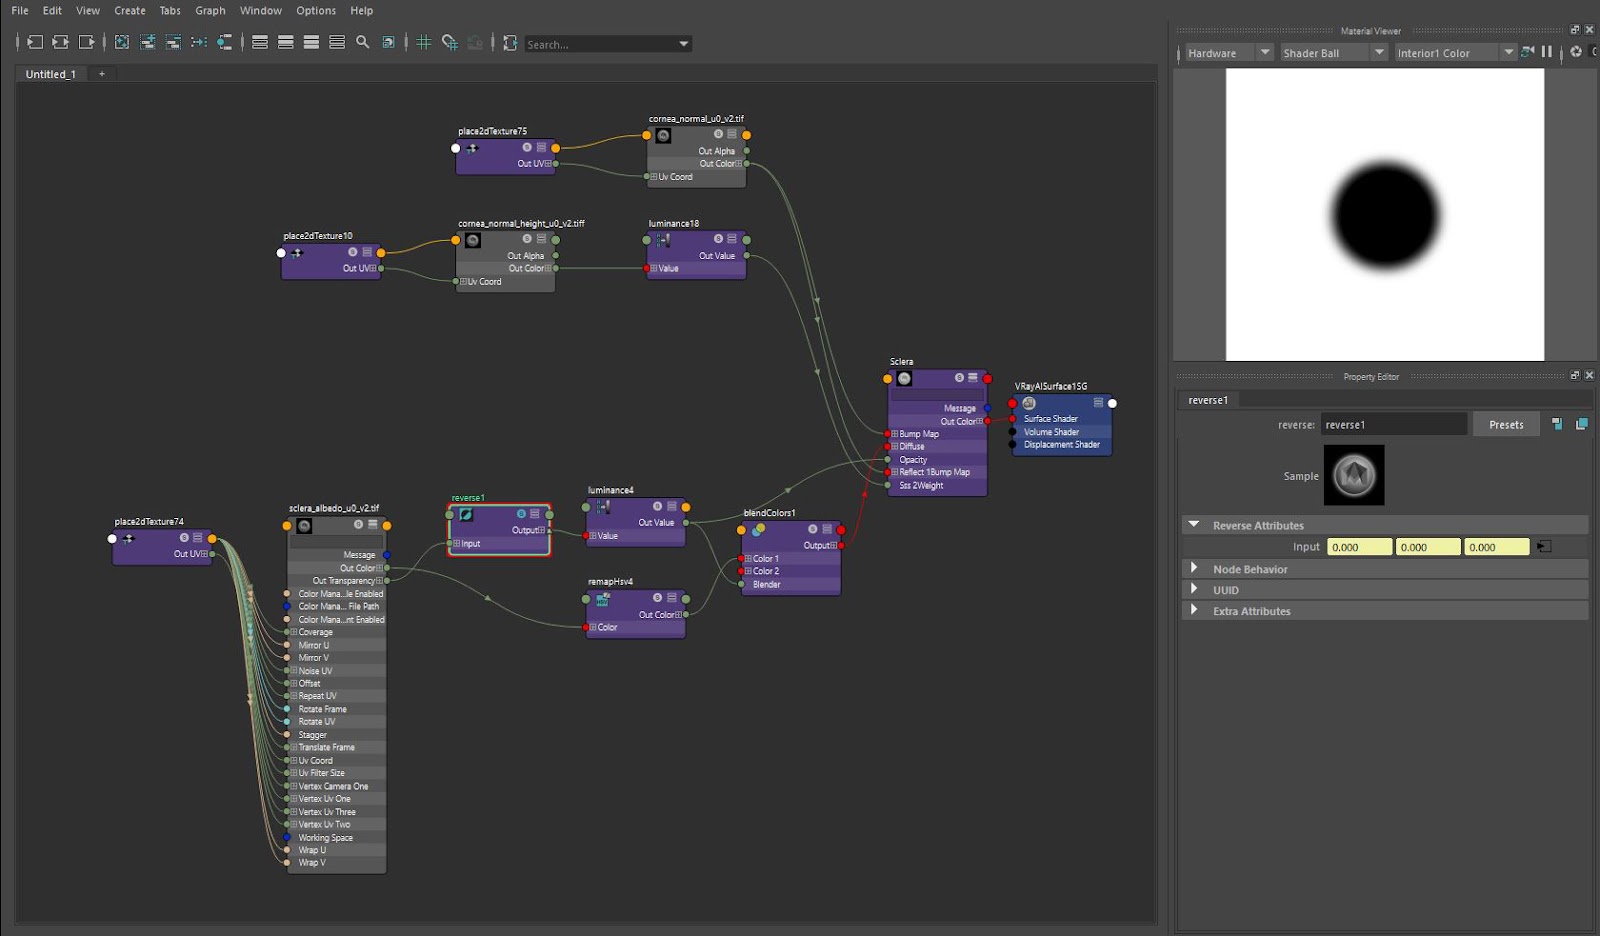
I wanted the sclera to be fading naturally by connecting the opacity of Alsurface. So, I converted the colour value to one number by using ‘Luminance’ node.
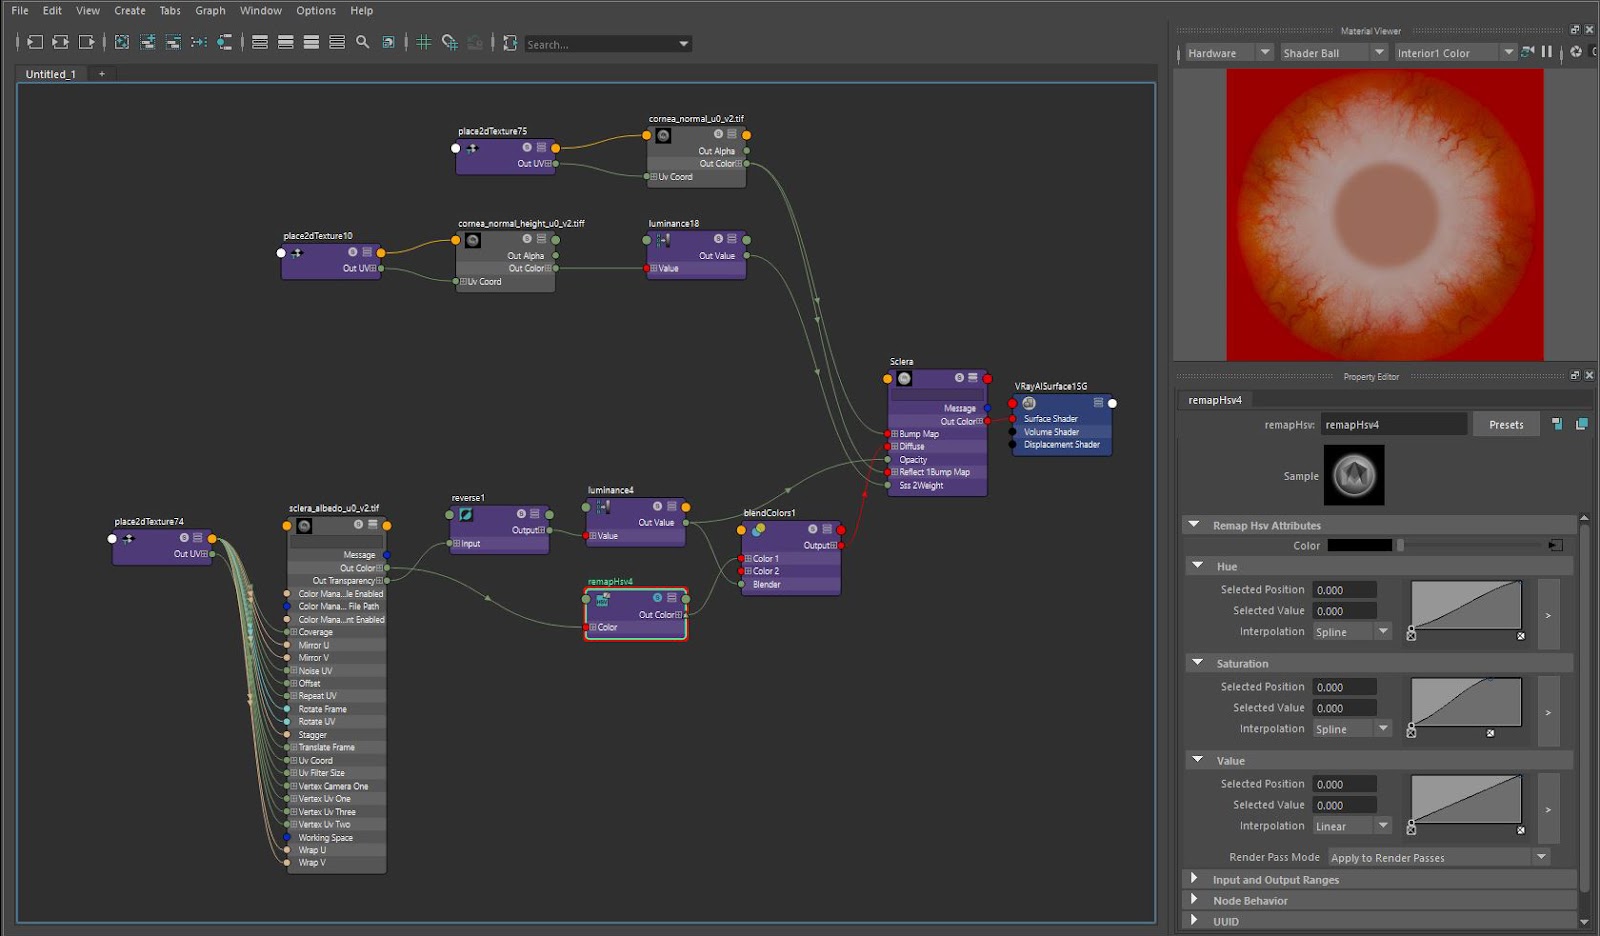
Finally, I modified the Hsv graph of the ‘RemapHsv’ node to make the eyeballs more red.

I used the ‘blendColor’ node to mix the RemapHsv node modified from Albedo Texture and black colour.
The fading mask was used as a blend colour mask, so it was able to express more dark colours on facing parts.
When it came to working on the cornea, I adjusted the reflection and refraction in VrayMtl. Also, I set refraction ior value to 1.336, and unified the reflection ior value with the refractive ior value, because I wanted to make the refraction of cornea model to be equal to the actual cornea refraction.

This material was made by the Texturing XYZ height map and Normal map for detail. I applied the iris Albedo texture and used the Reflection map to make reflection area.

After that I set roughness to raw value to having no reflections fresnel. If you want to know more about how to make an eye, I recommend this tutorial.
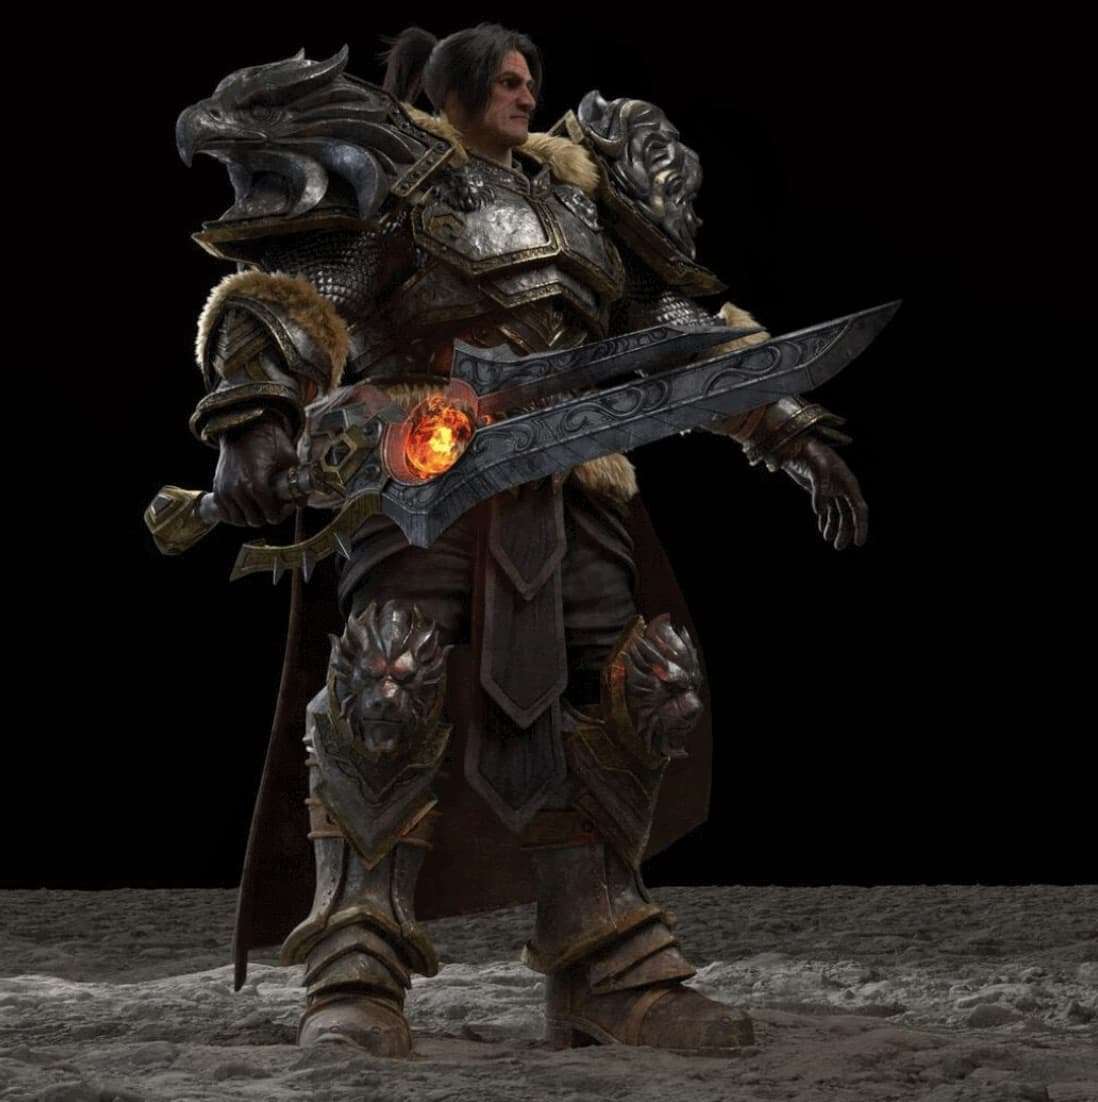
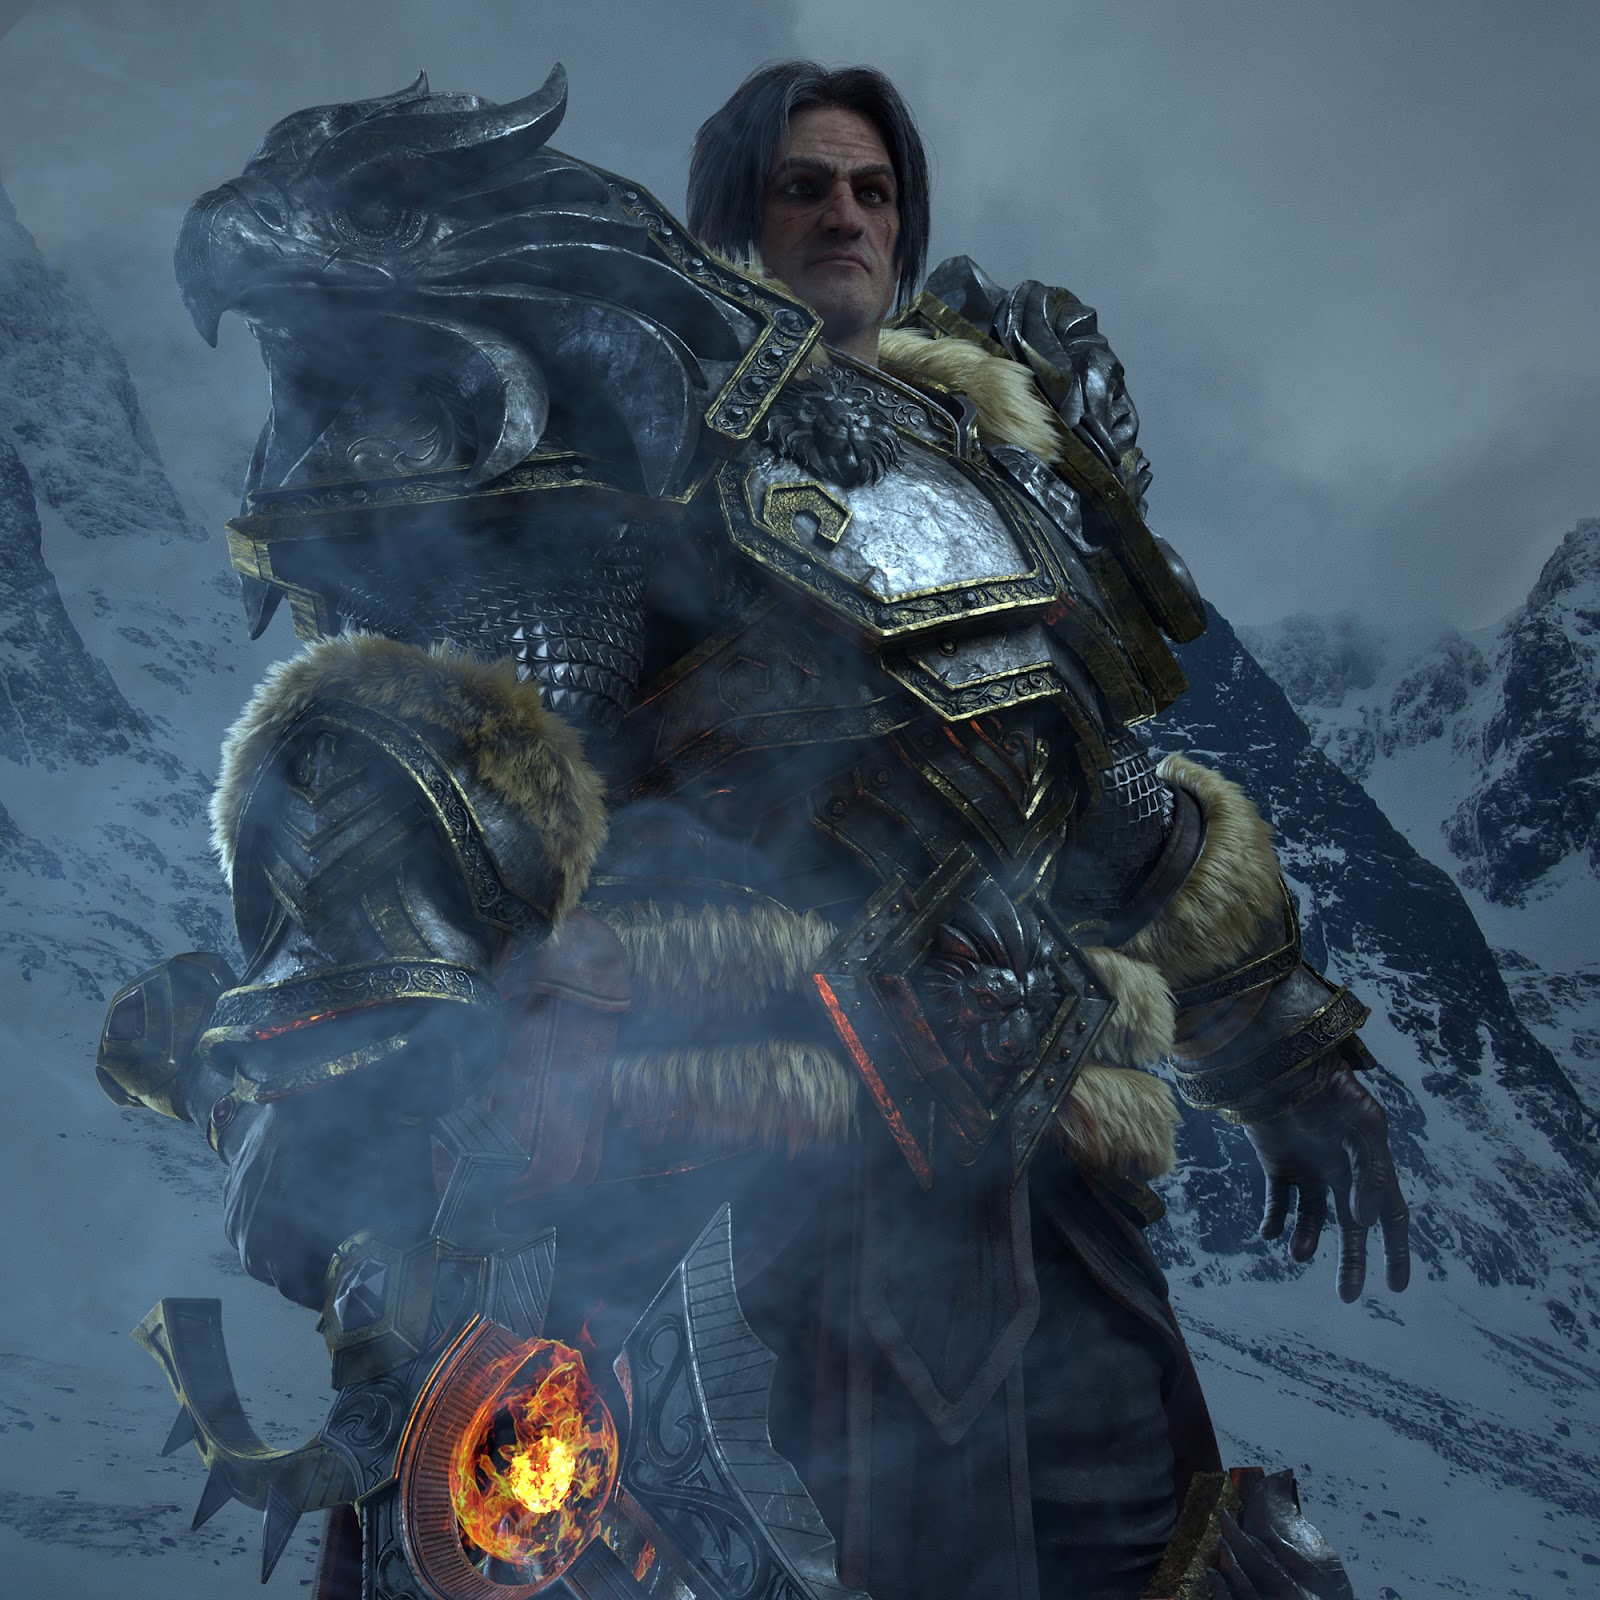
After I finished my model, texture work was completed, I used the scan data to create the ground. And I set the camera and lighting after I made the Varian pose properly.

Finally, when everything was done, I used Vray Next Render to render and I was able to get the output of the picture above.

Thank you for reading my article and I hope it helped you - I still have a lot to learn about 3D, but I am doing my best.
I am looking forward to become a great artist someday. Last, I give thanks to The Rookies for giving me this opportunity and thanks to the SF Film School, I was able to finish my portfolio.
If you want to know more about my work, you can find me here, here, here, here and here!