Recreating Iconic Concept Art in 3D
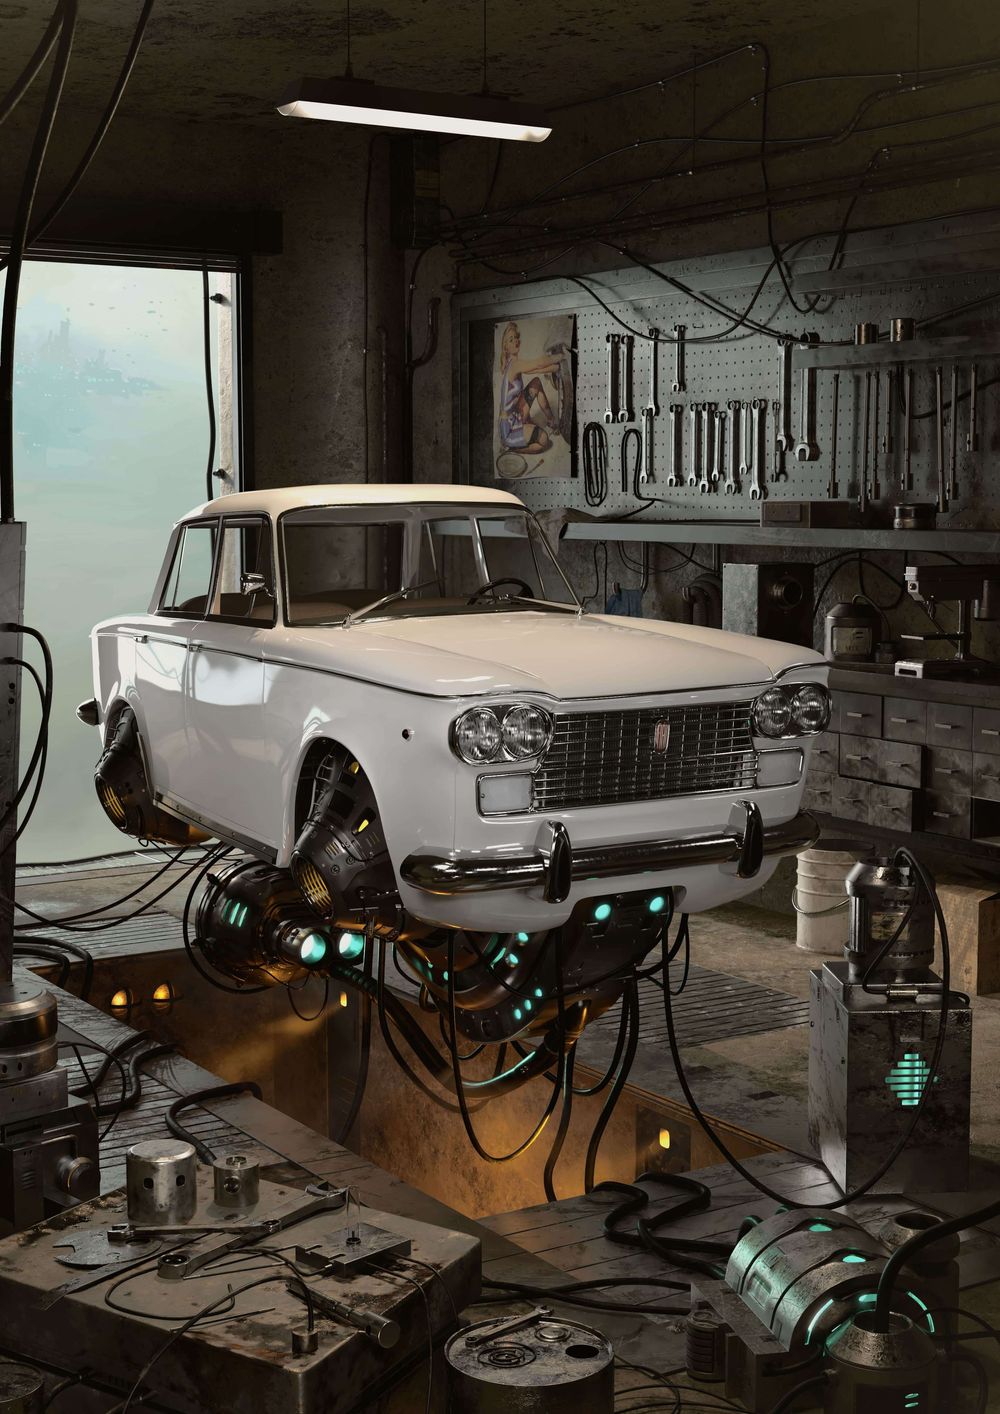
Roy Bennett, a Full Sail University Game Design Alumni and student at Think Tank Training Centre, takes on the challenge of re-creating Alejandro Burdisio’s Iconic 2D concept “Milqui" in 3D.
Roy Bennett, a Full Sail University Game Design Alumni and student at Think Tank Training Centre, takes on the challenge of re-creating Alejandro Burdisio’s Iconic 2D concept “Milqui" in 3D.

Roy Bennett is a Full Sail University Game Design Alumni, currently studying at Think Tank Training Centre specialising in 3D Environment Art for Games.
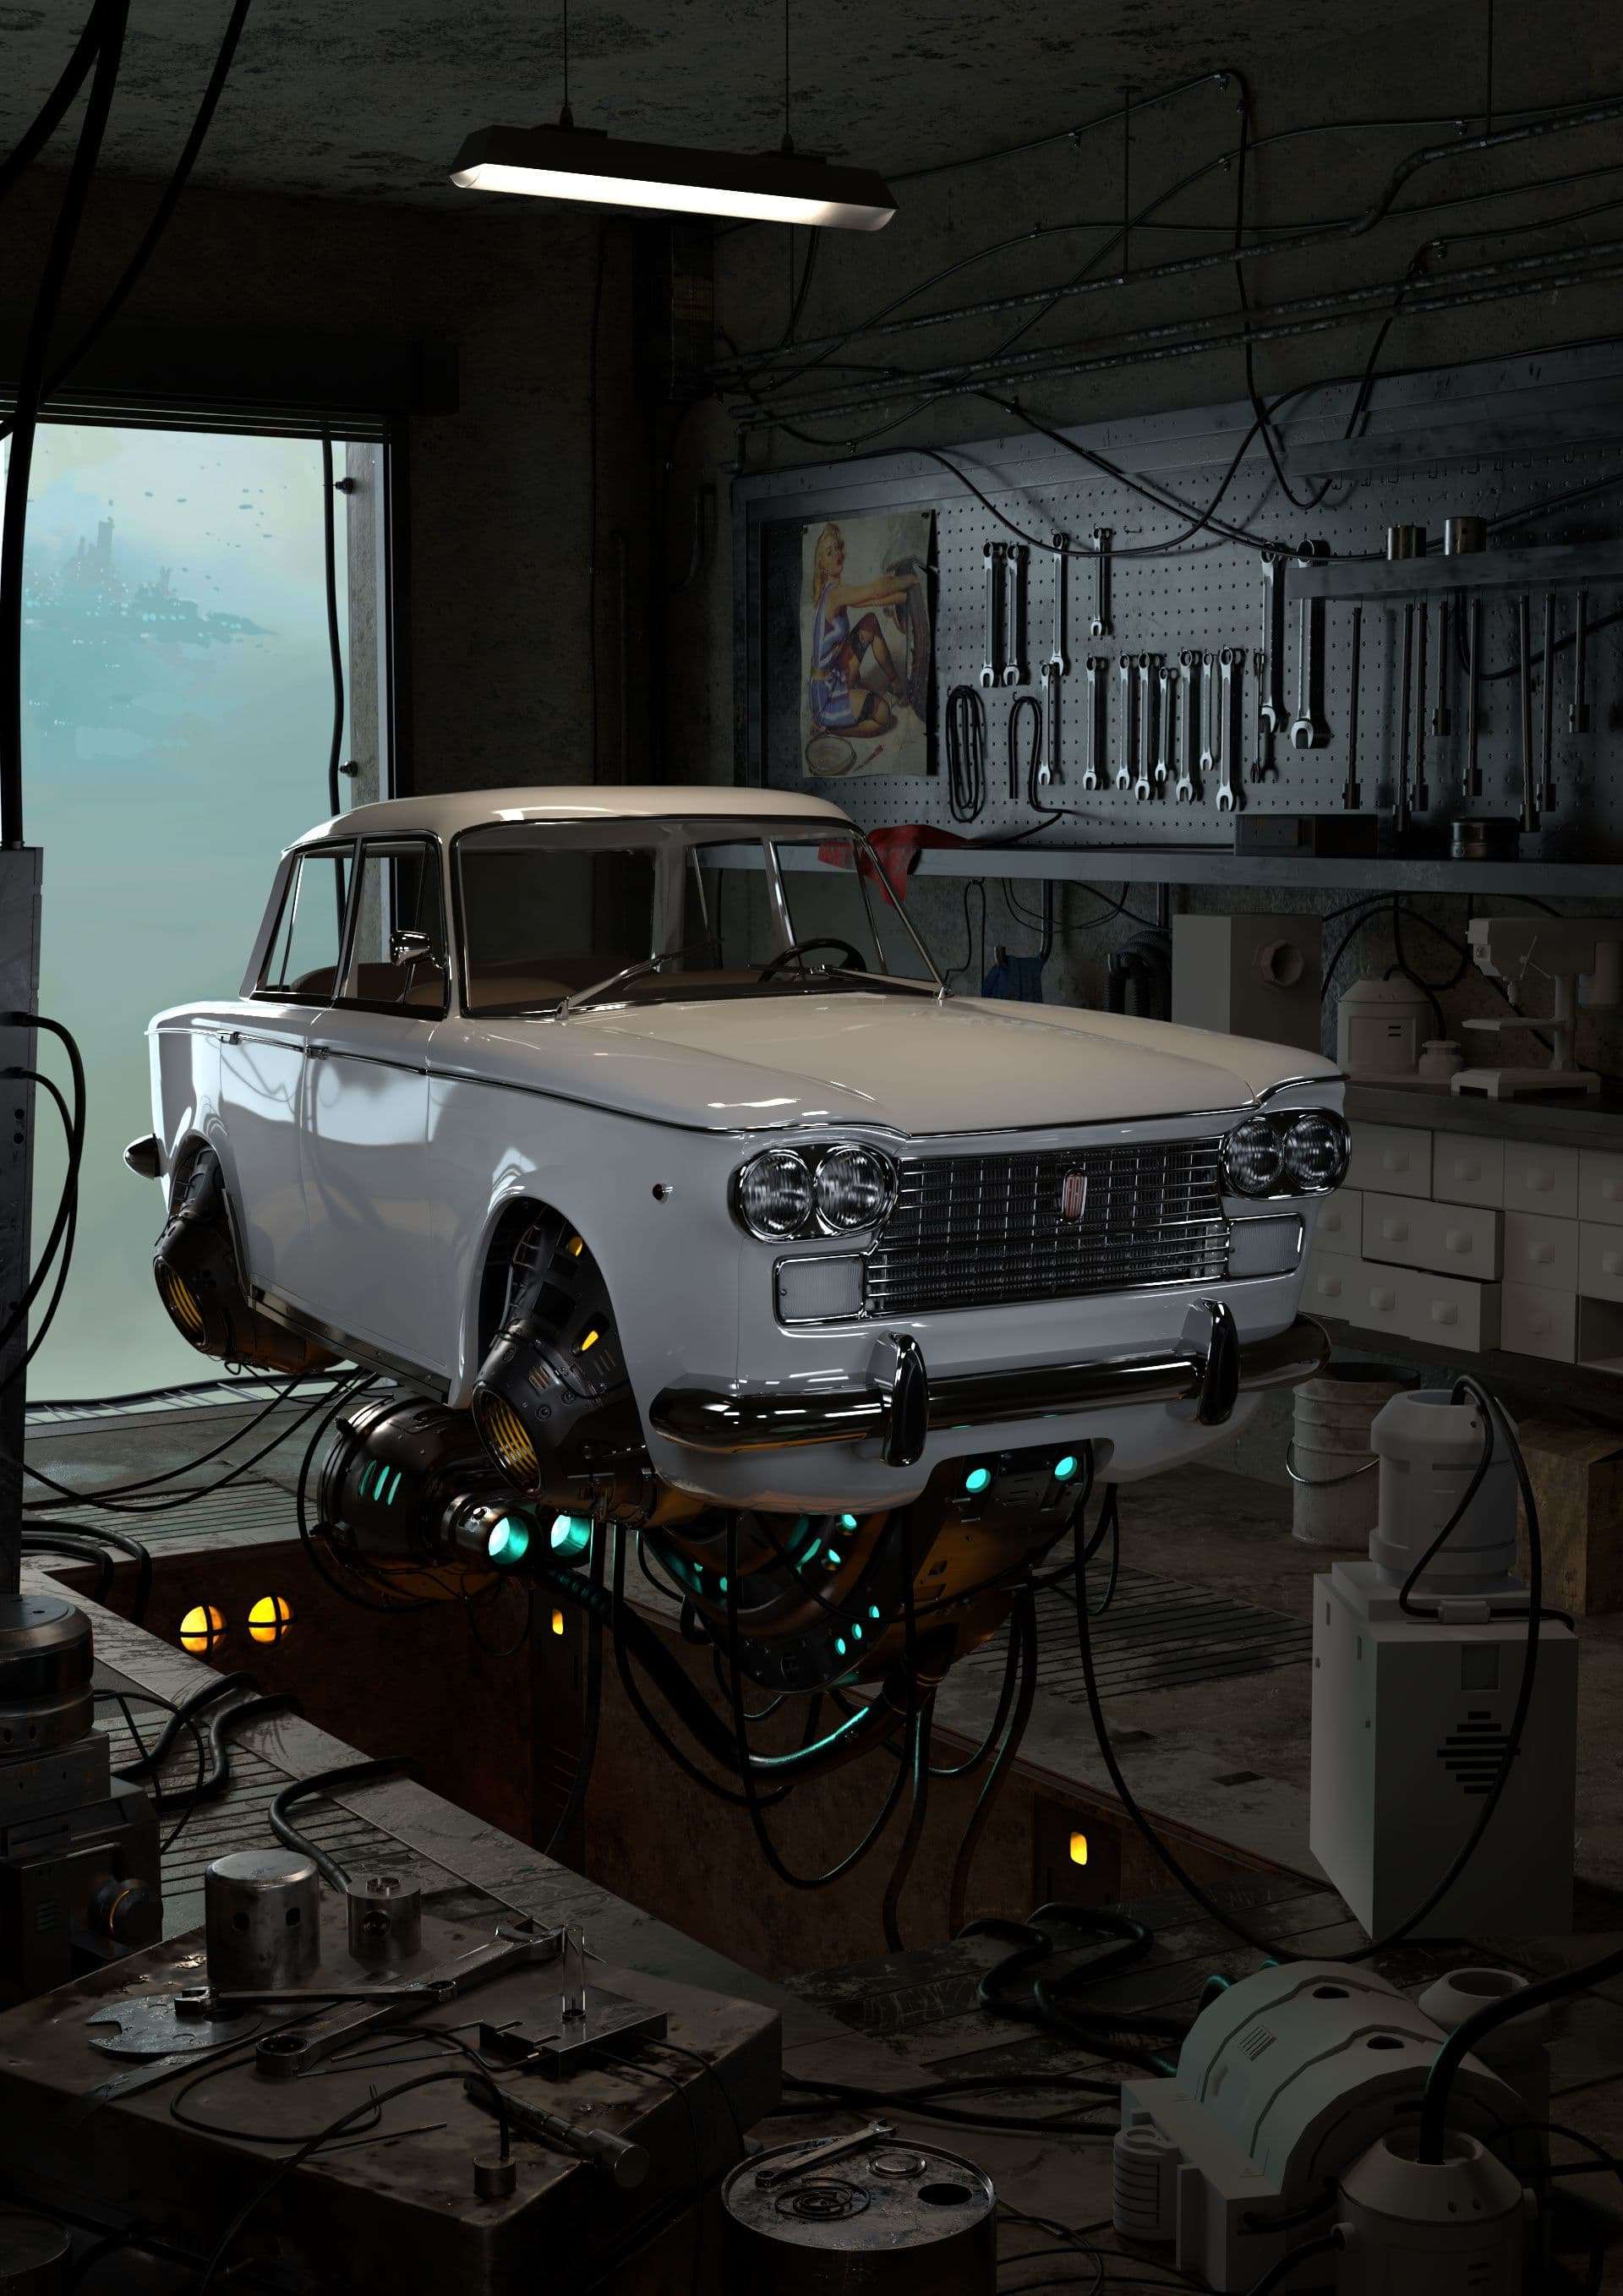
Roy has always been a fan of sci-fi and hard surface modeling, so he took on the challenge of re-creating Alejandro Burdisio’s Iconic 2D concept “Milqui" in 3D, and shares with us his approach.
Searching for a 2D concept to recreate in 3D can be challenging in and of itself. You want to find subject matter that speaks to you—something that gets you so excited that you can’t stop looking at it. Alejandro Burdisio’s "Milqui" was one such concept that had me hooked the moment I scrolled past it. As a new student studying 3D art, I knew selecting this concept was going to be a great challenge to complete. So let’s dive into how I approached tackling this project!
Planning is important. It might not be the sexiest thing to start a project with, but it will keep you focused every day when you sit and get to work. Below is one of my calendar screenshots I took early on when starting to plan for this project:
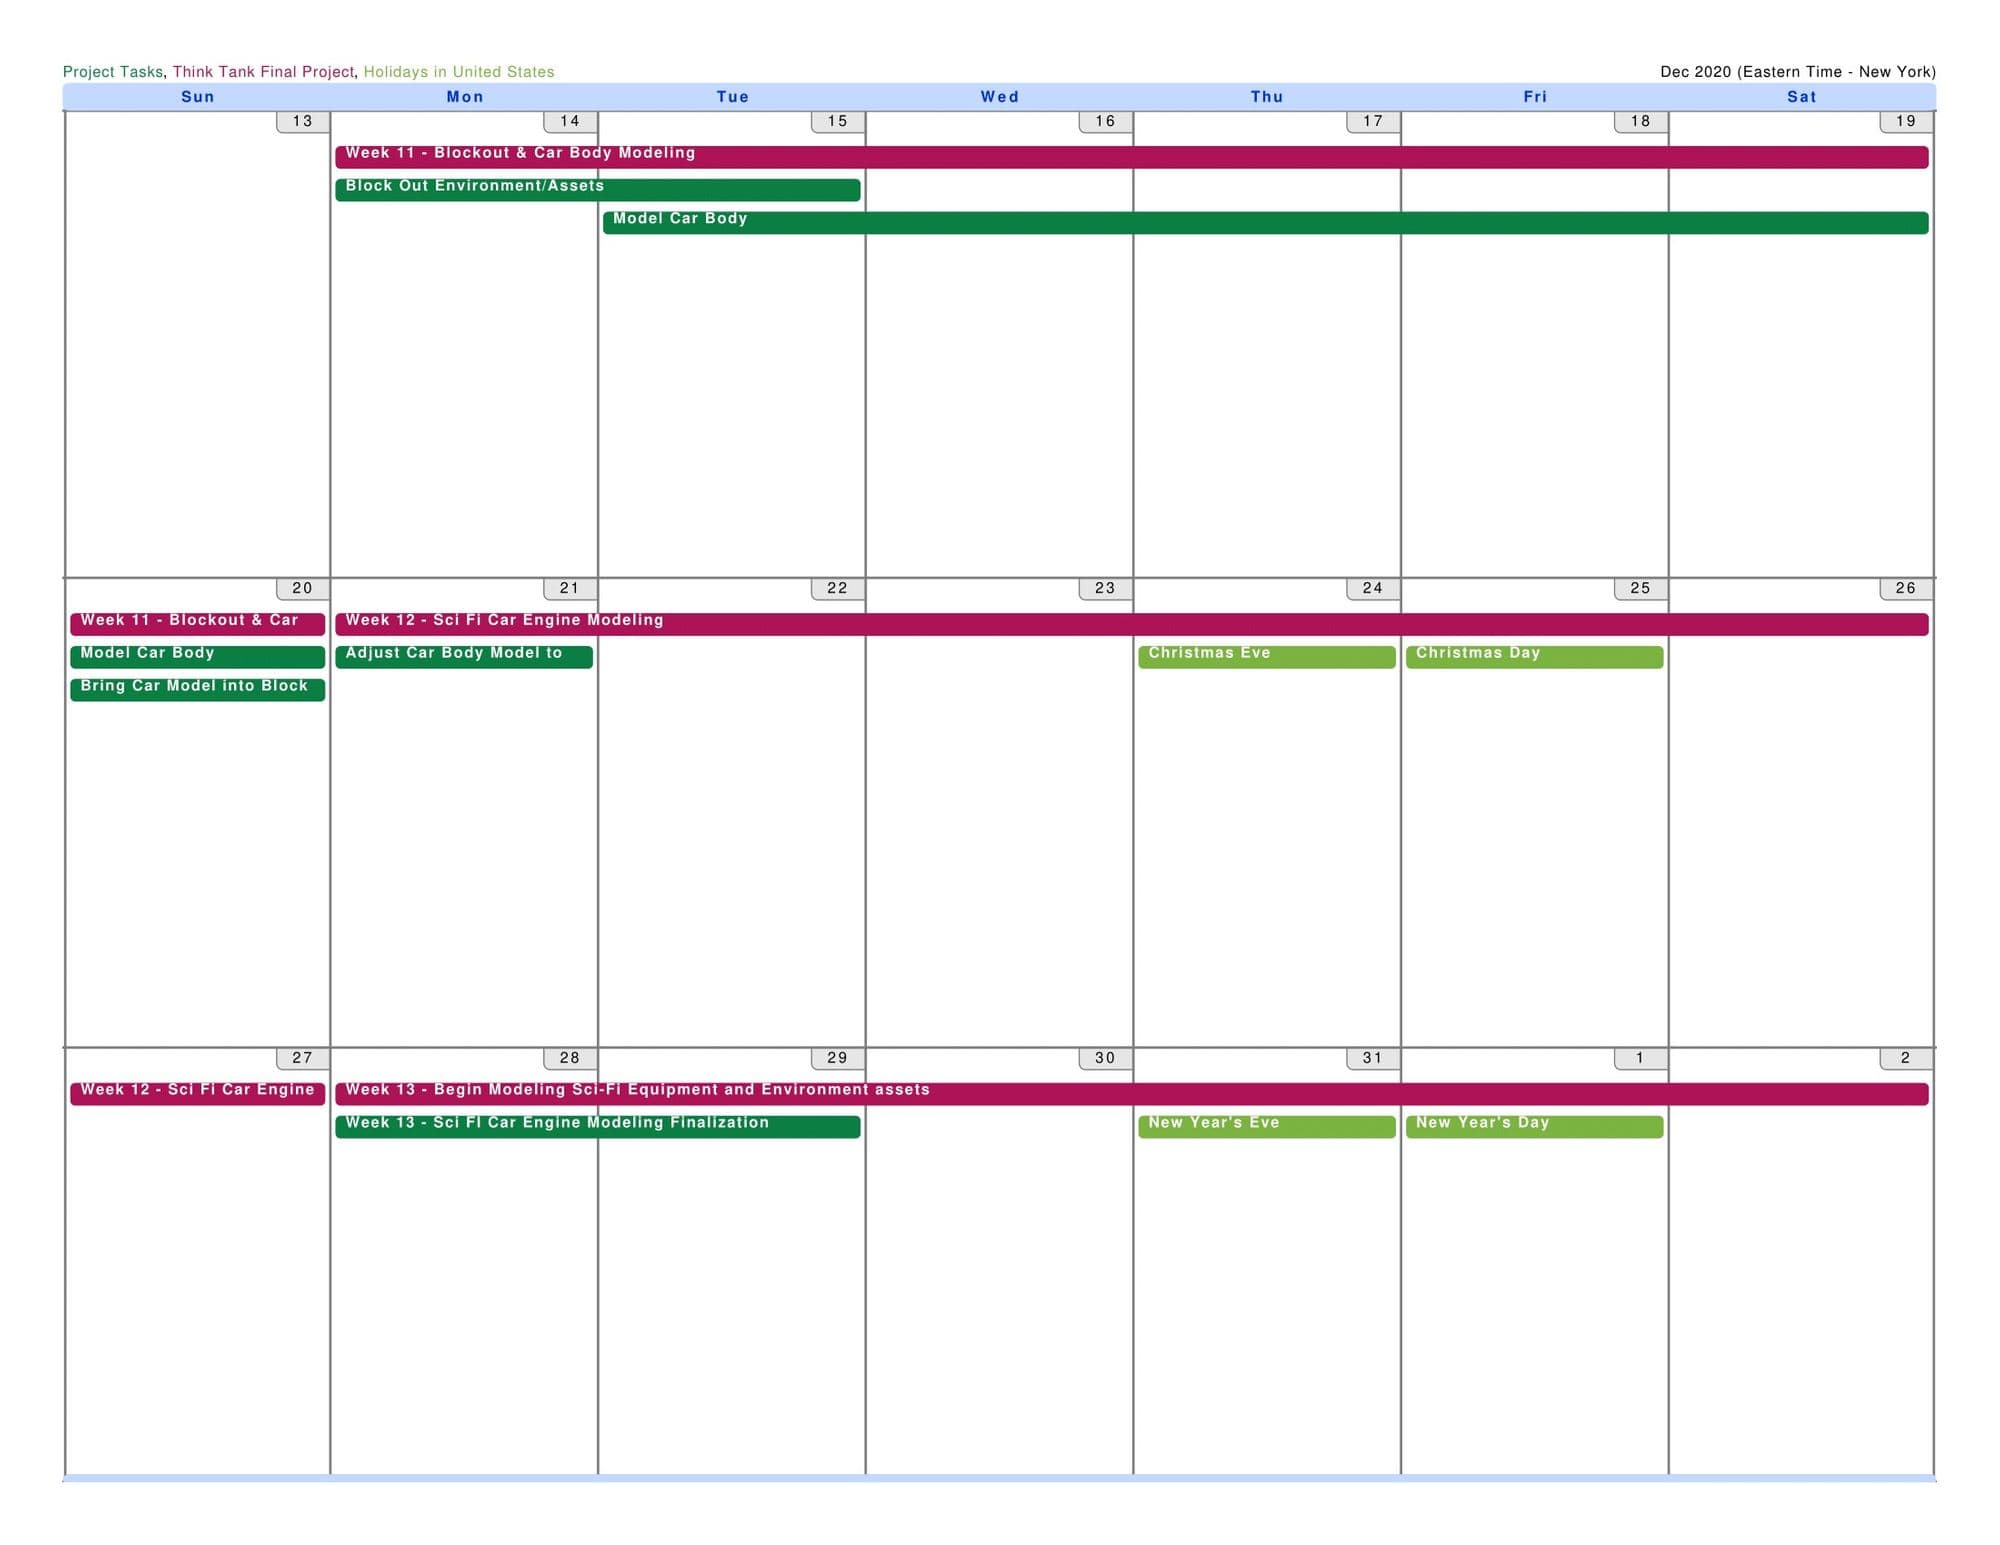
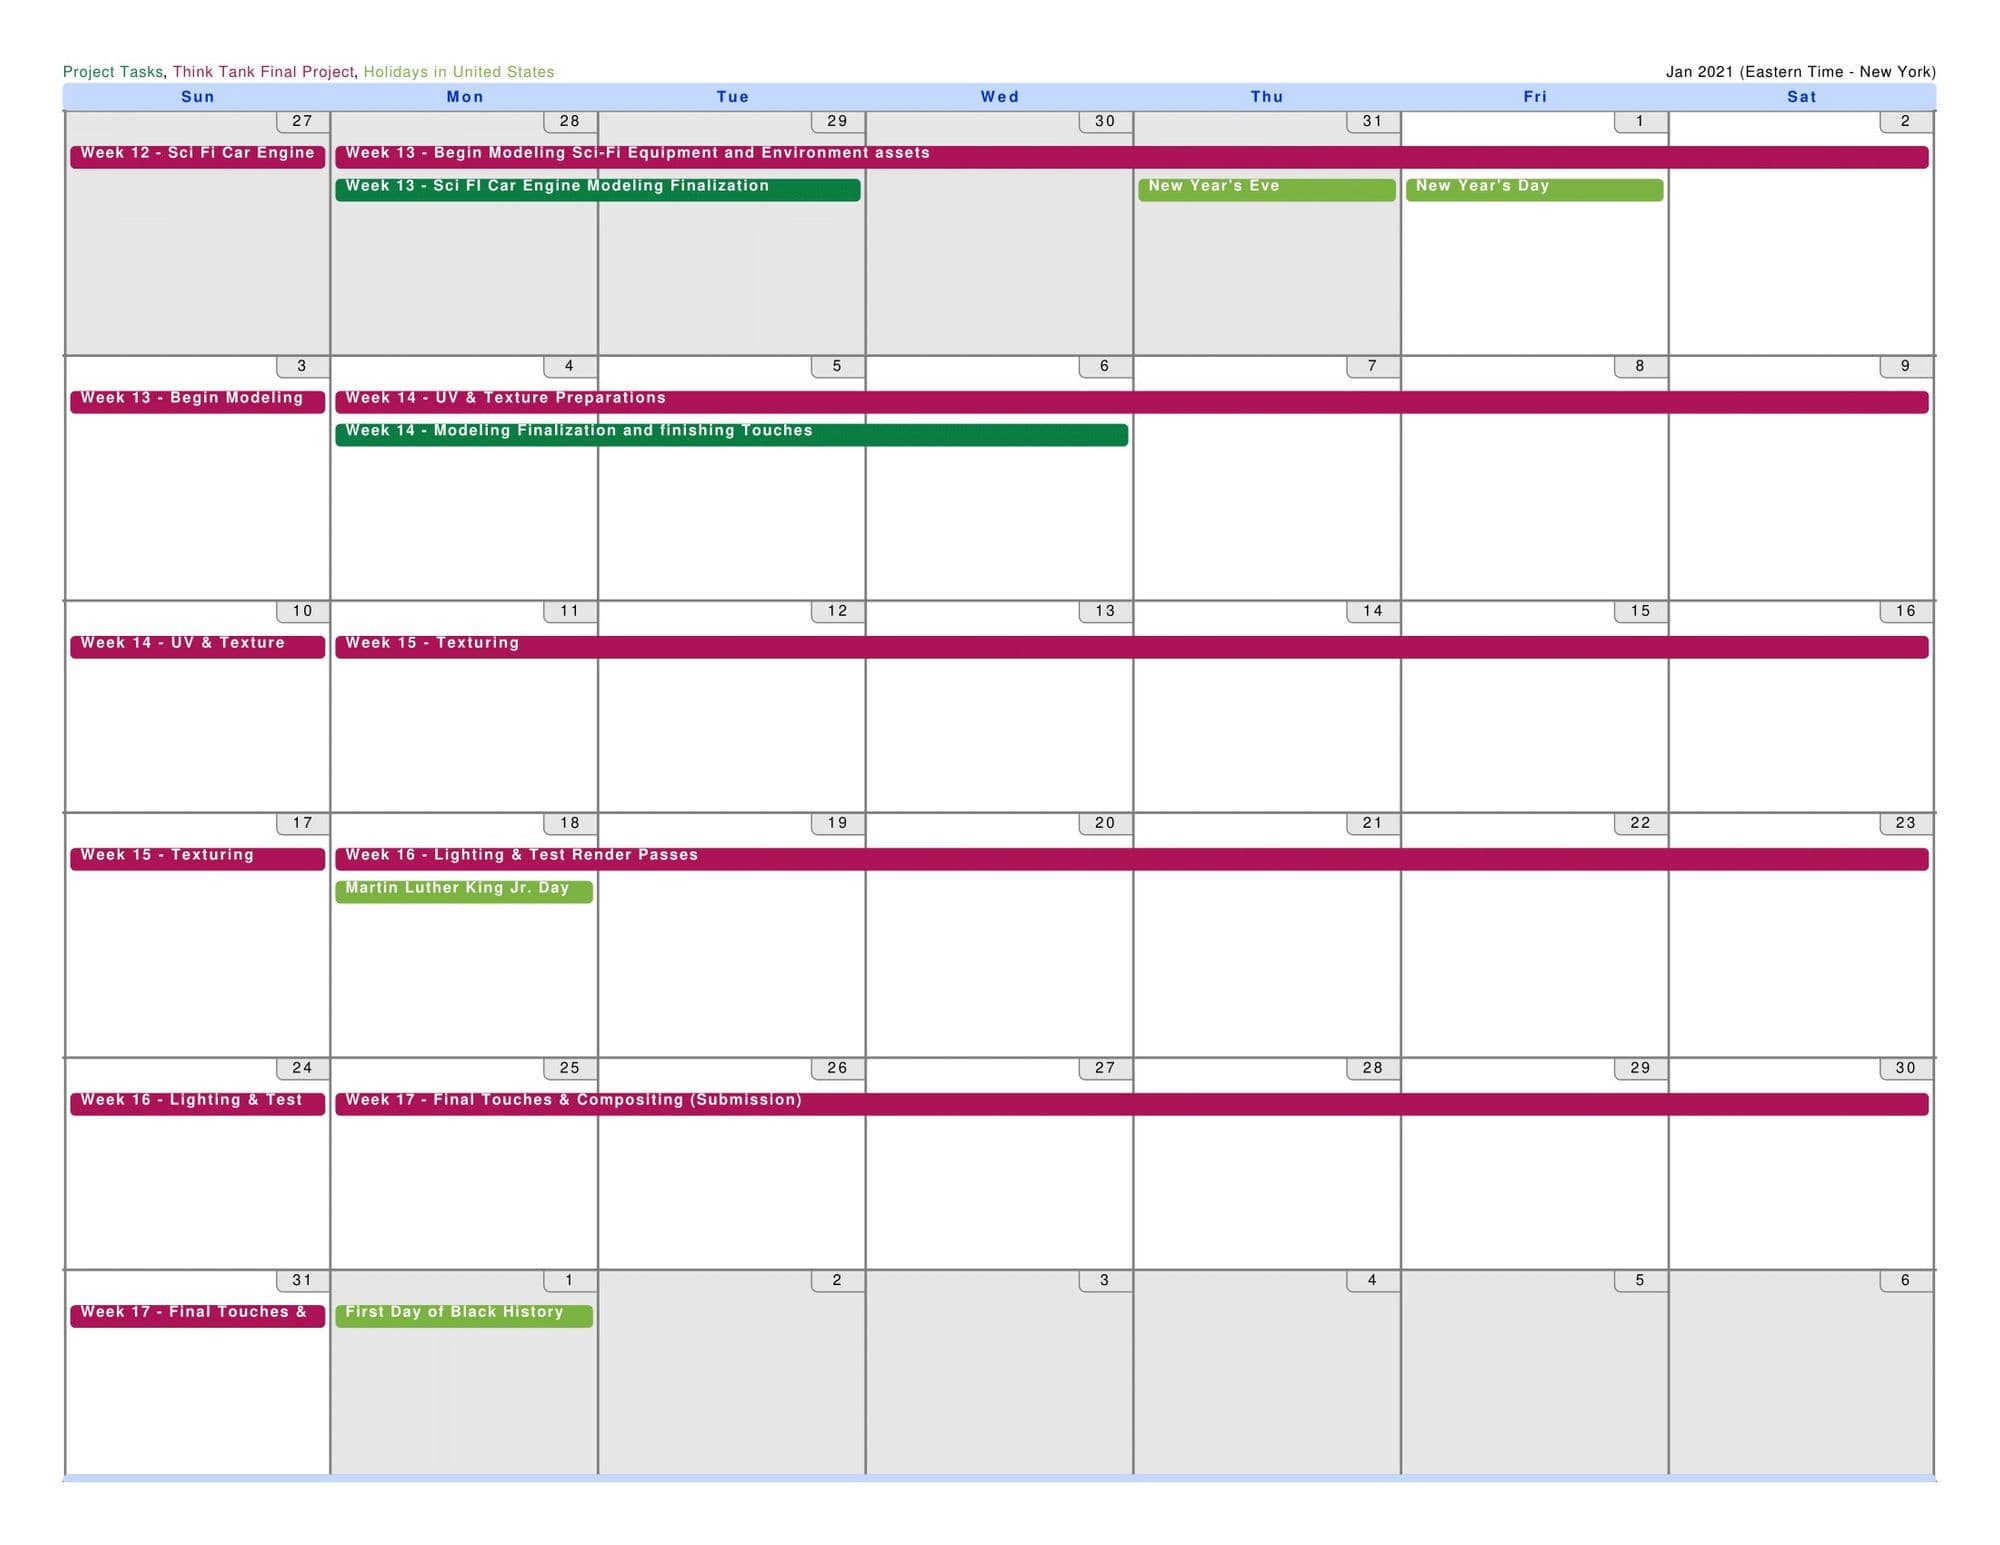
Keep in mind that your schedule can and should change every week. The point is, knowing that it’s okay to push things back if something takes you longer to complete. Tasks can overlap onto each other, but that’s okay. You’re at least keeping on top of everything that still needs to be done and it’s all right there in front of you.
Give yourself milestones to meet so you can have moments to celebrate during the project. Large projects can get overwhelming, so it’s important to remember to reward yourself.
What sticks out the most about your concept? Is there a prop or character that stands out more than the others? Study your concept and think about the composition. What are your eyes focusing on first? This becomes your blueprint to focus your level of importance of modeling and ‘where to start’. With my project, the focus was obvious: the car.
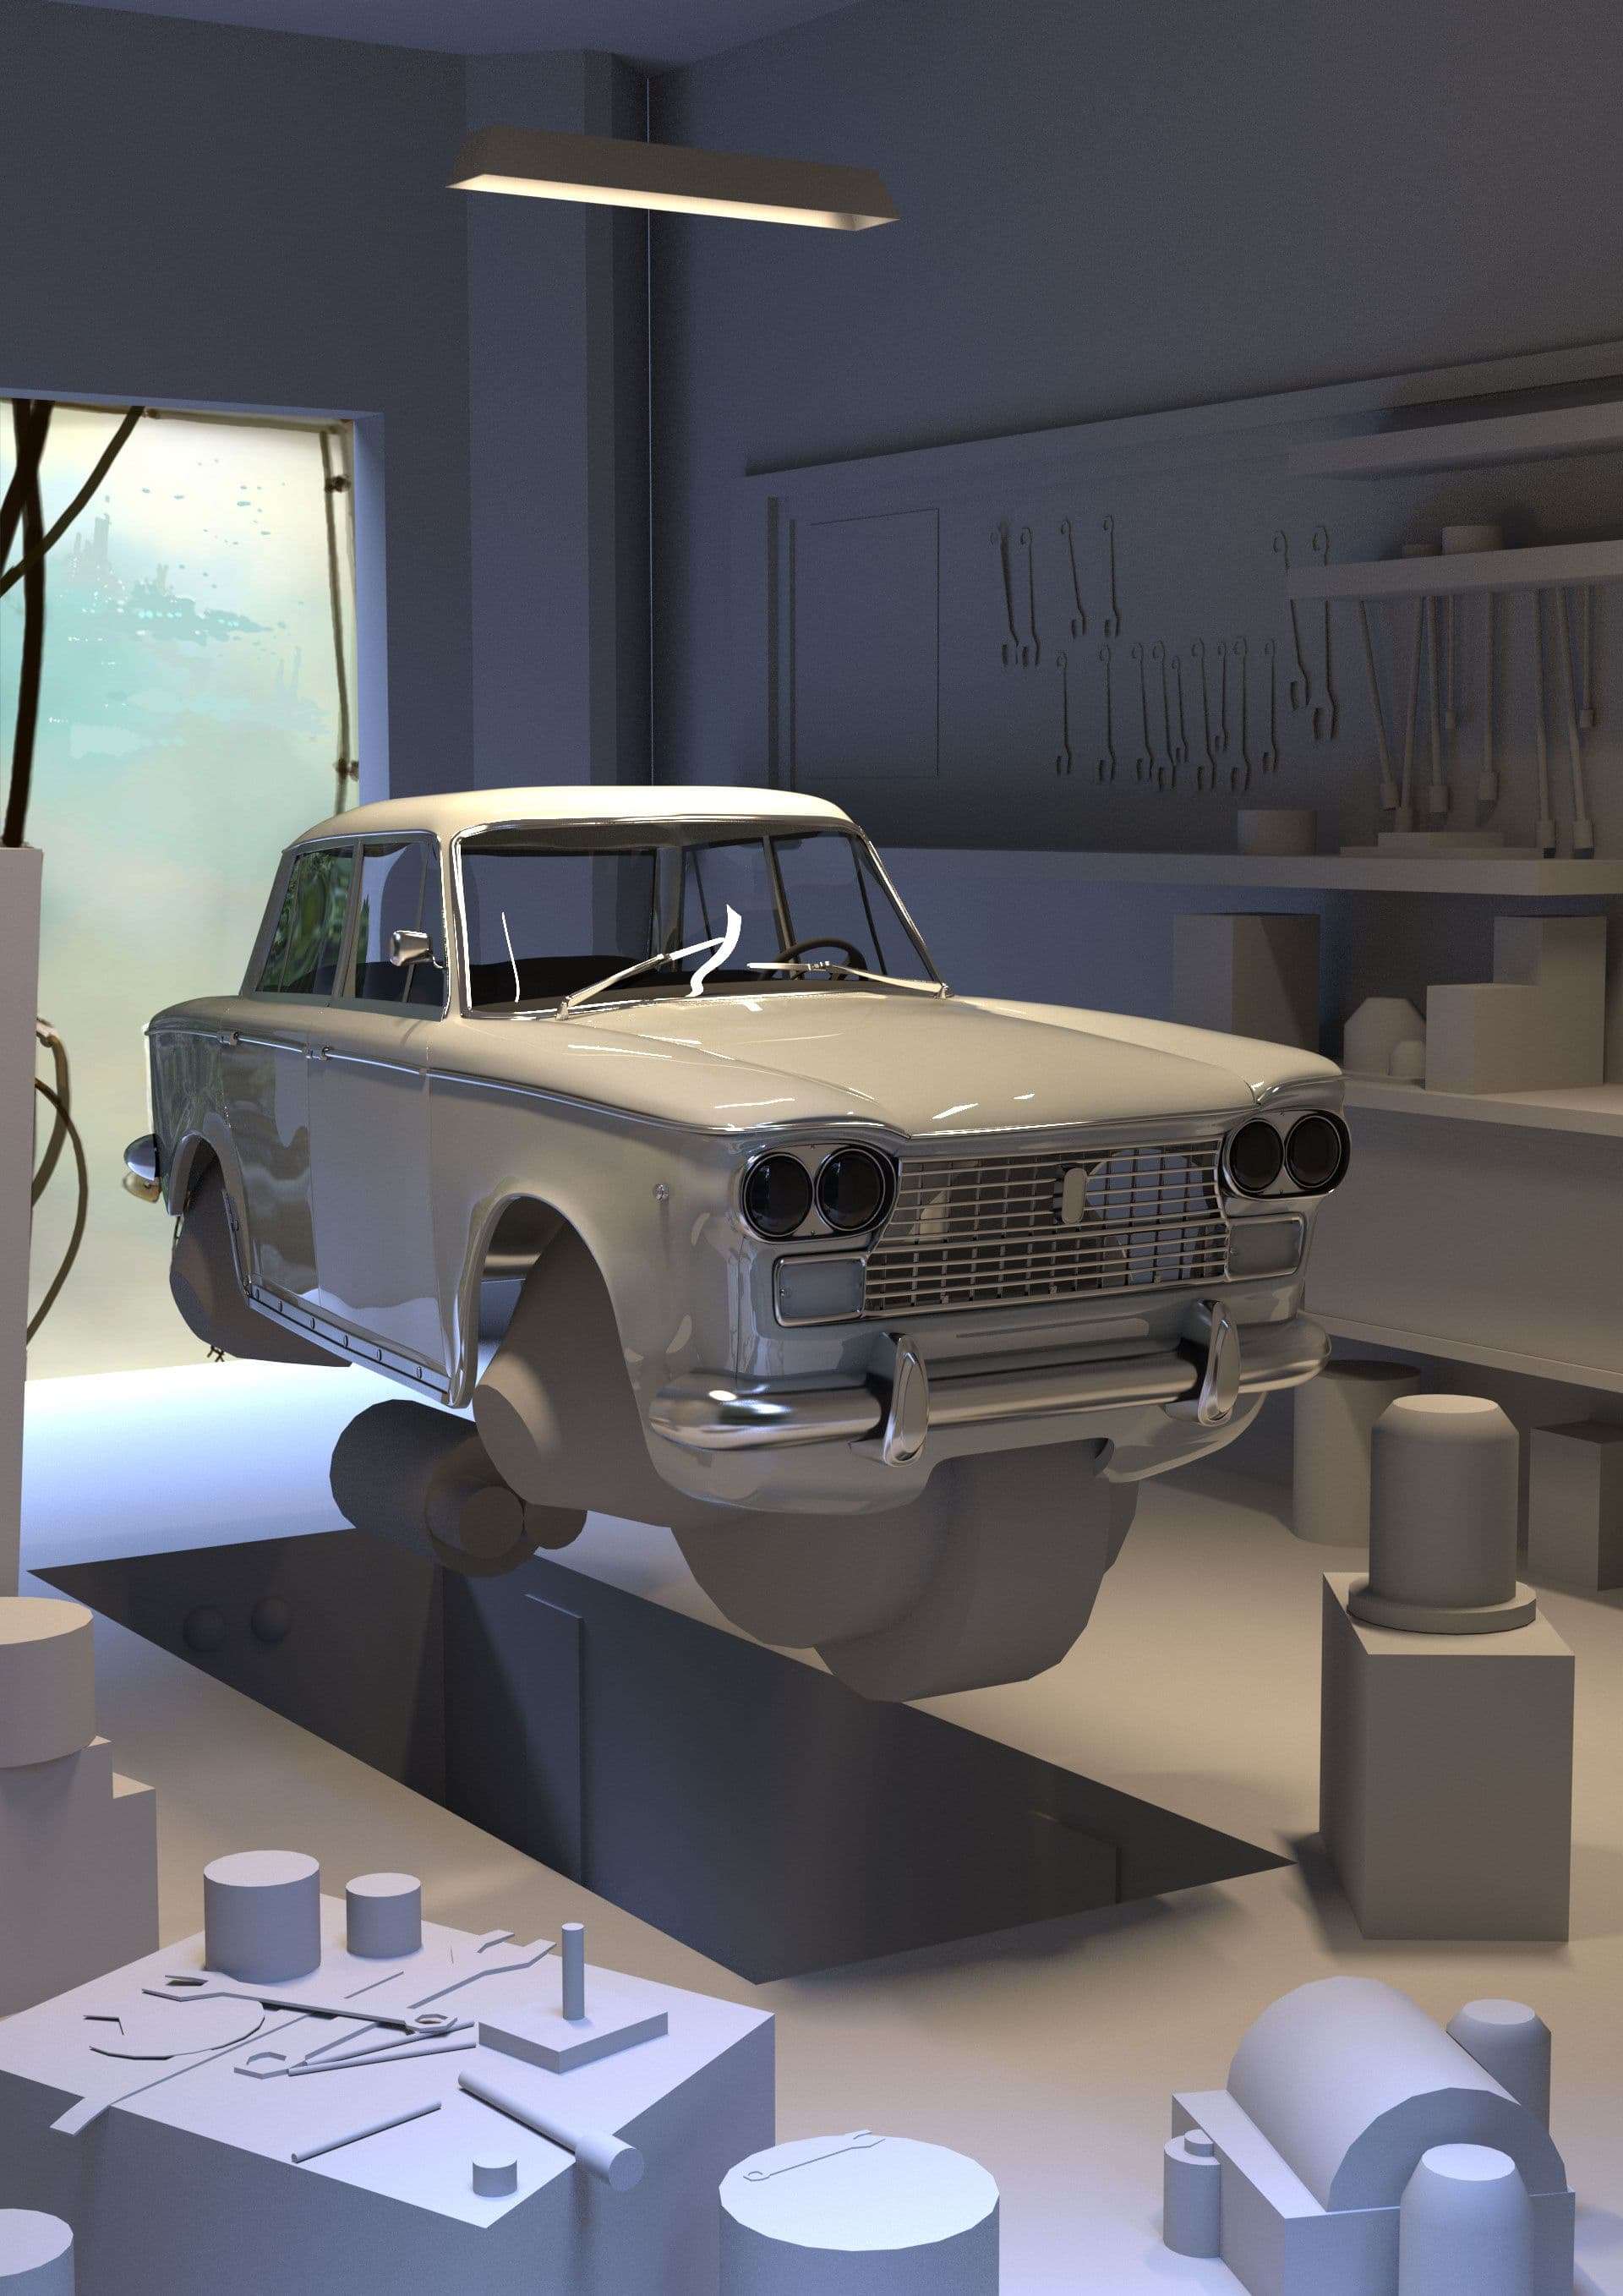
Before anything can really start happening though, you must set up your 3D scene to match the perspective of the concept as closely as you can. It won't ever be perfect, so feel free to make exceptions where you have to - as long as pieces line up as close as possible. Some tricks to consider are adding in basic shapes to match items in the scene. Your eyes will thank you for it and you’ll start to get more of an idea where the camera should sit.
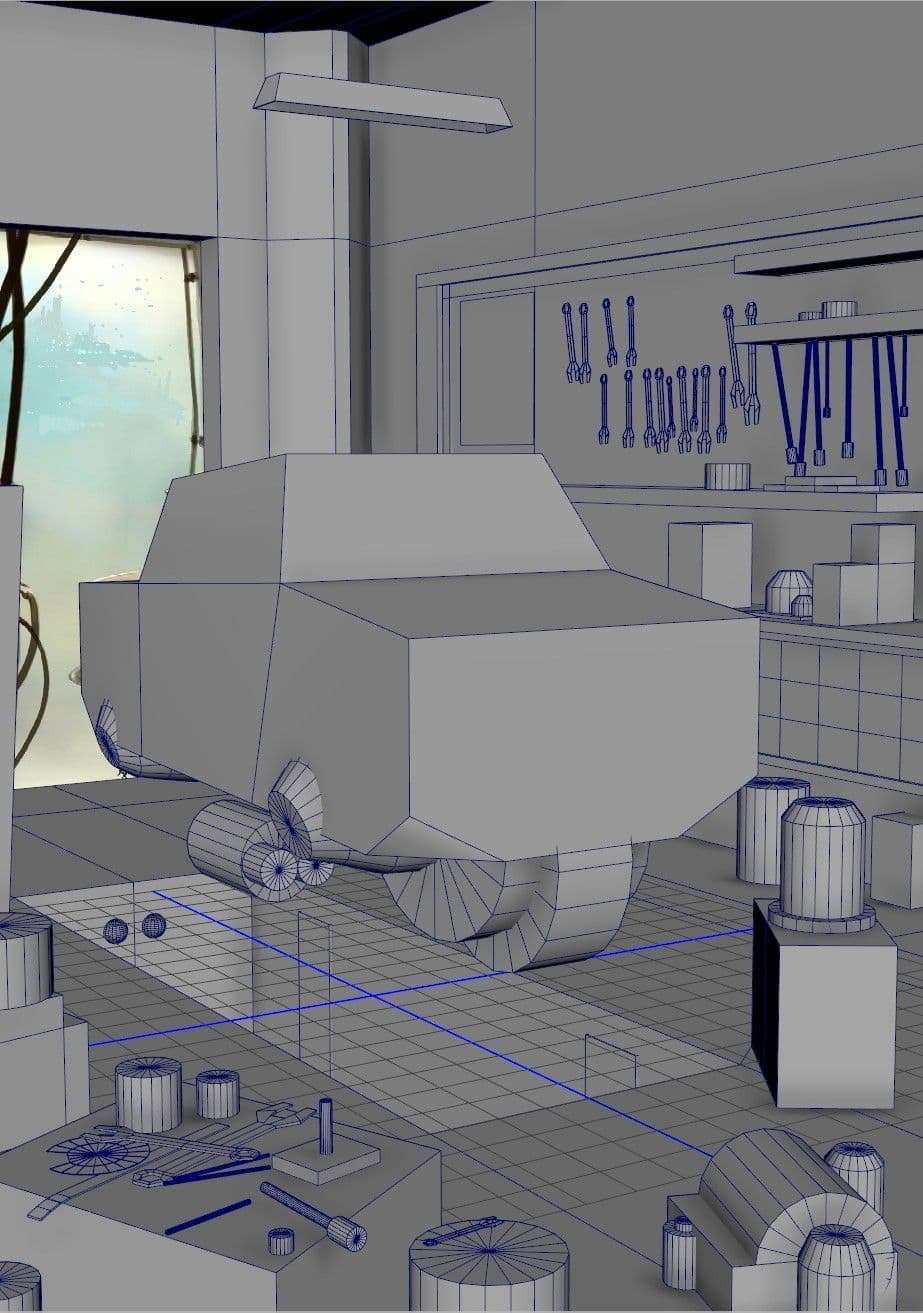
Something else to consider when matching perspective is figuring out where the ‘center of the world’ is in your scene and what should be located at the (0,0,0) coordinate in your concept. For me, I made the car at the center of the grid and raised it up to where it matched the concept. This helped me orient everything else around it. Feel free to adjust things later as you see fit, nothing here is set in stone. Do whatever helps you match the concept more in the end.
Cars are pretty complicated to model. So it’s best to break things down into pieces and think about what we know about cars. Gather some references and a good blueprint if you can (www.the-blueprints.com is a great source for car blueprints to work from).
Cars are pretty symmetrical. We can use this to our advantage and save some time by doing only half the car and mirroring it over. We could also work with symmetry turned on in Maya. But I found that symmetry could break, creating a whole mess of unwanted results. Best bet is to complete half and mirror it afterwards. You’ll only have to then merge all the vertices in the middle together.

Another thing we know about cars is that they have some smooth surfaces. So bumps and pinching in your model will be very noticeable. Especially when you texture with a reflective metallic car paint.
To prevent pinching in your geometry, think where your geometry is heading while you work. Don’t extrude without having an idea where you want your edge loops to be. You could end up working yourself into a corner having to delete areas and start over again. I recommend starting with the hood of the car first. This sets up a good idea of what your topology could look like and match throughout the modeling of the car.
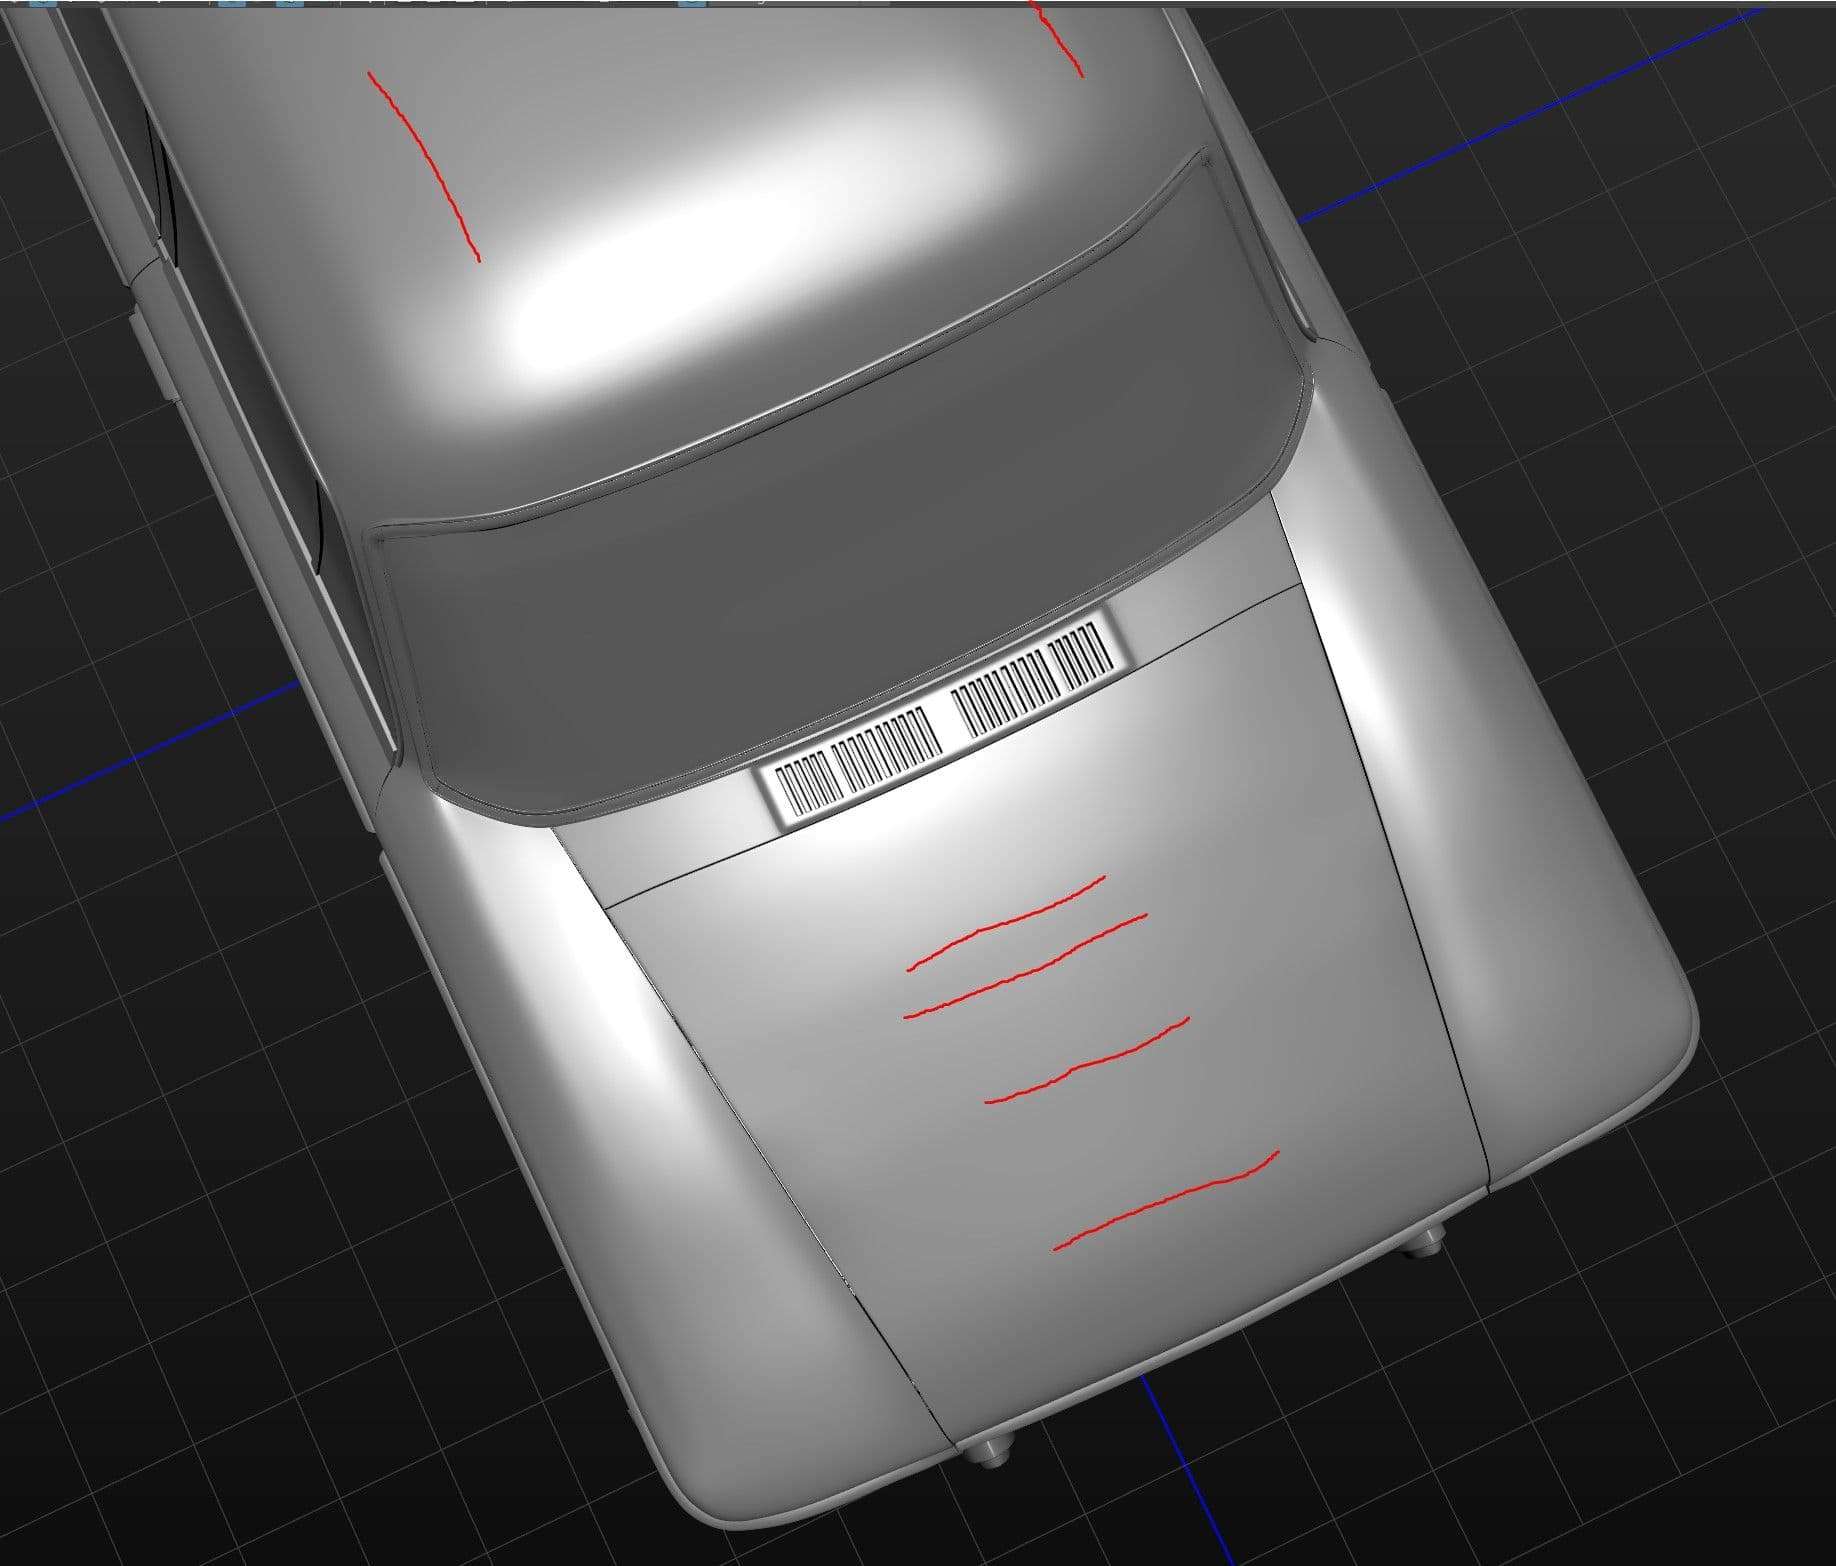
Bumps will occur that need smoothing out. Identifying them is much easier when you apply a Blinn material/shader to the car. Then, rotate your camera around using the light source in the Viewport to shine onto the surface. You can see shadows in areas of your geometry creating a wave-like bubble on the surface. There are many tools to address this, like using the Edit Edge Flow tool in Maya. But some tools I like to use that provide more control are the Sculpting Tools (Mesh Tools > Sculpting Tools> Smooth Tool or Relax Tool). Using either the Smooth or Relax brushes helps even out some of the vertices to give a more desirable result. Be sure to mind the strength and size of the brushes you are using as they can be pretty sensitive.
Once satisfied with the result, it was time to get the car shaped more to match the concept. The concept has a more stylized look than the actual blueprint of the car. So using the Deform > Lattice tools in Maya helped with stretching and shaping the existing model to fit the concept. Modeling the car body took 1-week to complete. Which kept me on schedule to then push on to next week to model the engine parts underneath the car.
Give yourself milestones to meet so you can have moments to celebrate during the project. Large projects can get overwhelming, so it’s important to remember to reward yourself.
Without drawing out all the modeling involved in this project (and trust me, there was a lot of modeling), I’ll leave you with this one final tip: wherever possible, find ways to repurpose your models to save time. An object you modeled can look different depending how it is textured. Making it appear like two separate objects—or mirroring the orientation. For example, the two engines within the wheel-well of the car are the same however the one in the rear of the car is flipped on the X-axis to reveal the other side that you don’t see in the front of the car. If it saves time and gives a unique result, give it a try and it might help!
When it came time to texture, I knew I wanted to use Substance Painter. But I was a little worried how to organize a workflow that would get everything textured, while easily allowing me time to iterate. I spent at least a day thinking about how to organise this and came up with a decent process.
First, organise and name everything in your Outliner. Group things together that make sense to you and keep the naming scheme consistent with your Substance Painter projects.
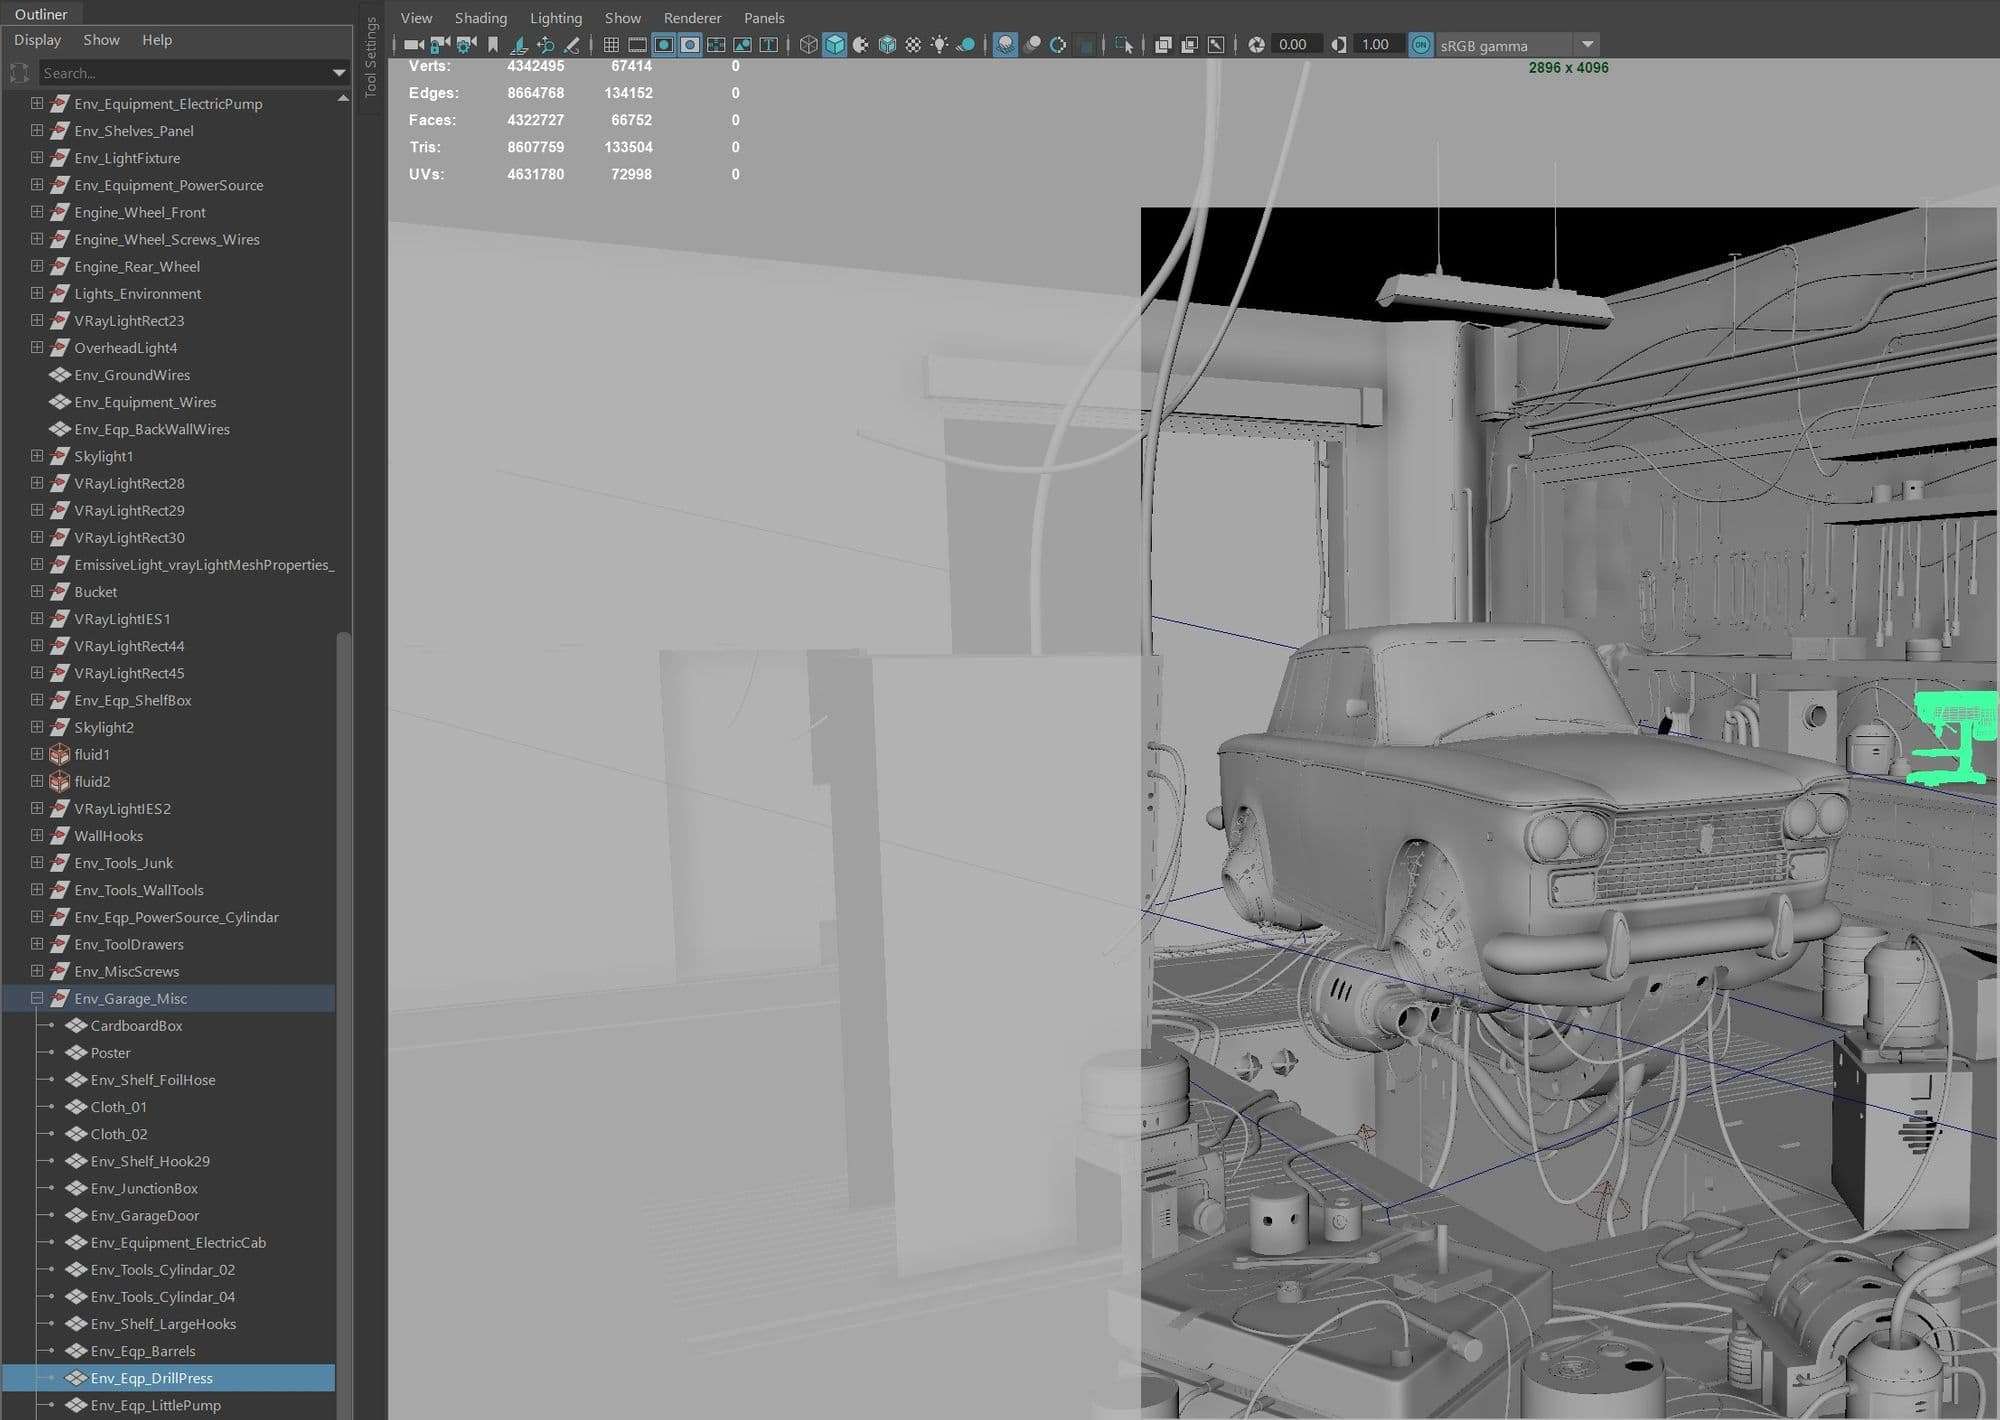
While I worked in Substance Painter, I would create a new folder with the same naming scheme as the asset in my Outliner so there was no confusion.
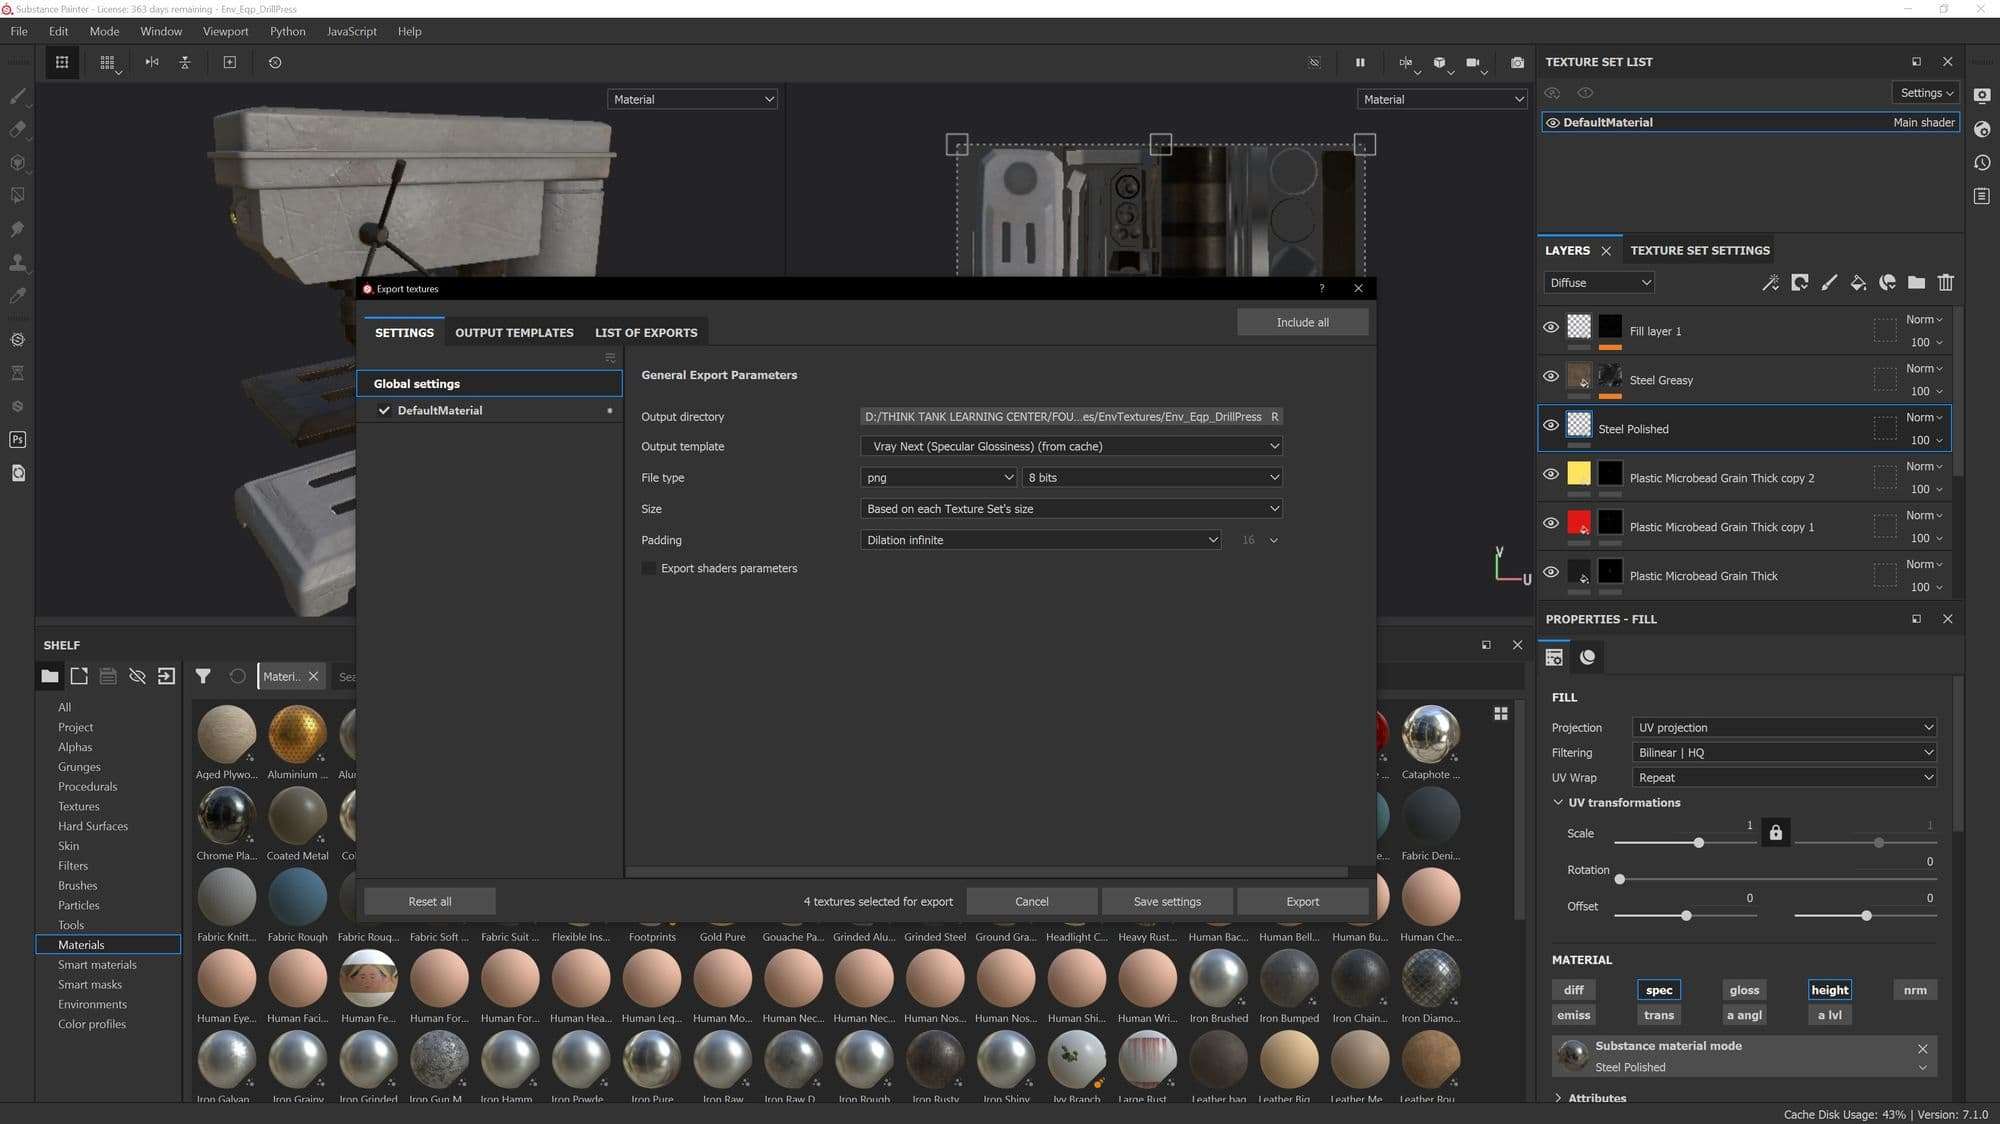
The benefit of this organization made it easier for me to navigate between all my assets and tweak them all individually. The downfall of this setup was that it required all assets to have their own Substance Painter project. Which can become a hindrance on your storage space as Substance projects can be pretty large. But it was a sacrifice worth making in my case. After assigning an asset a material and connecting the texture files within Maya, I could render the results in V-Ray while still making edits in Substance. Re-exporting and overwriting those textures allowed me to see the results almost in real-time with V-Ray. This process made lighting much easier as well being able to see the results rather quickly.
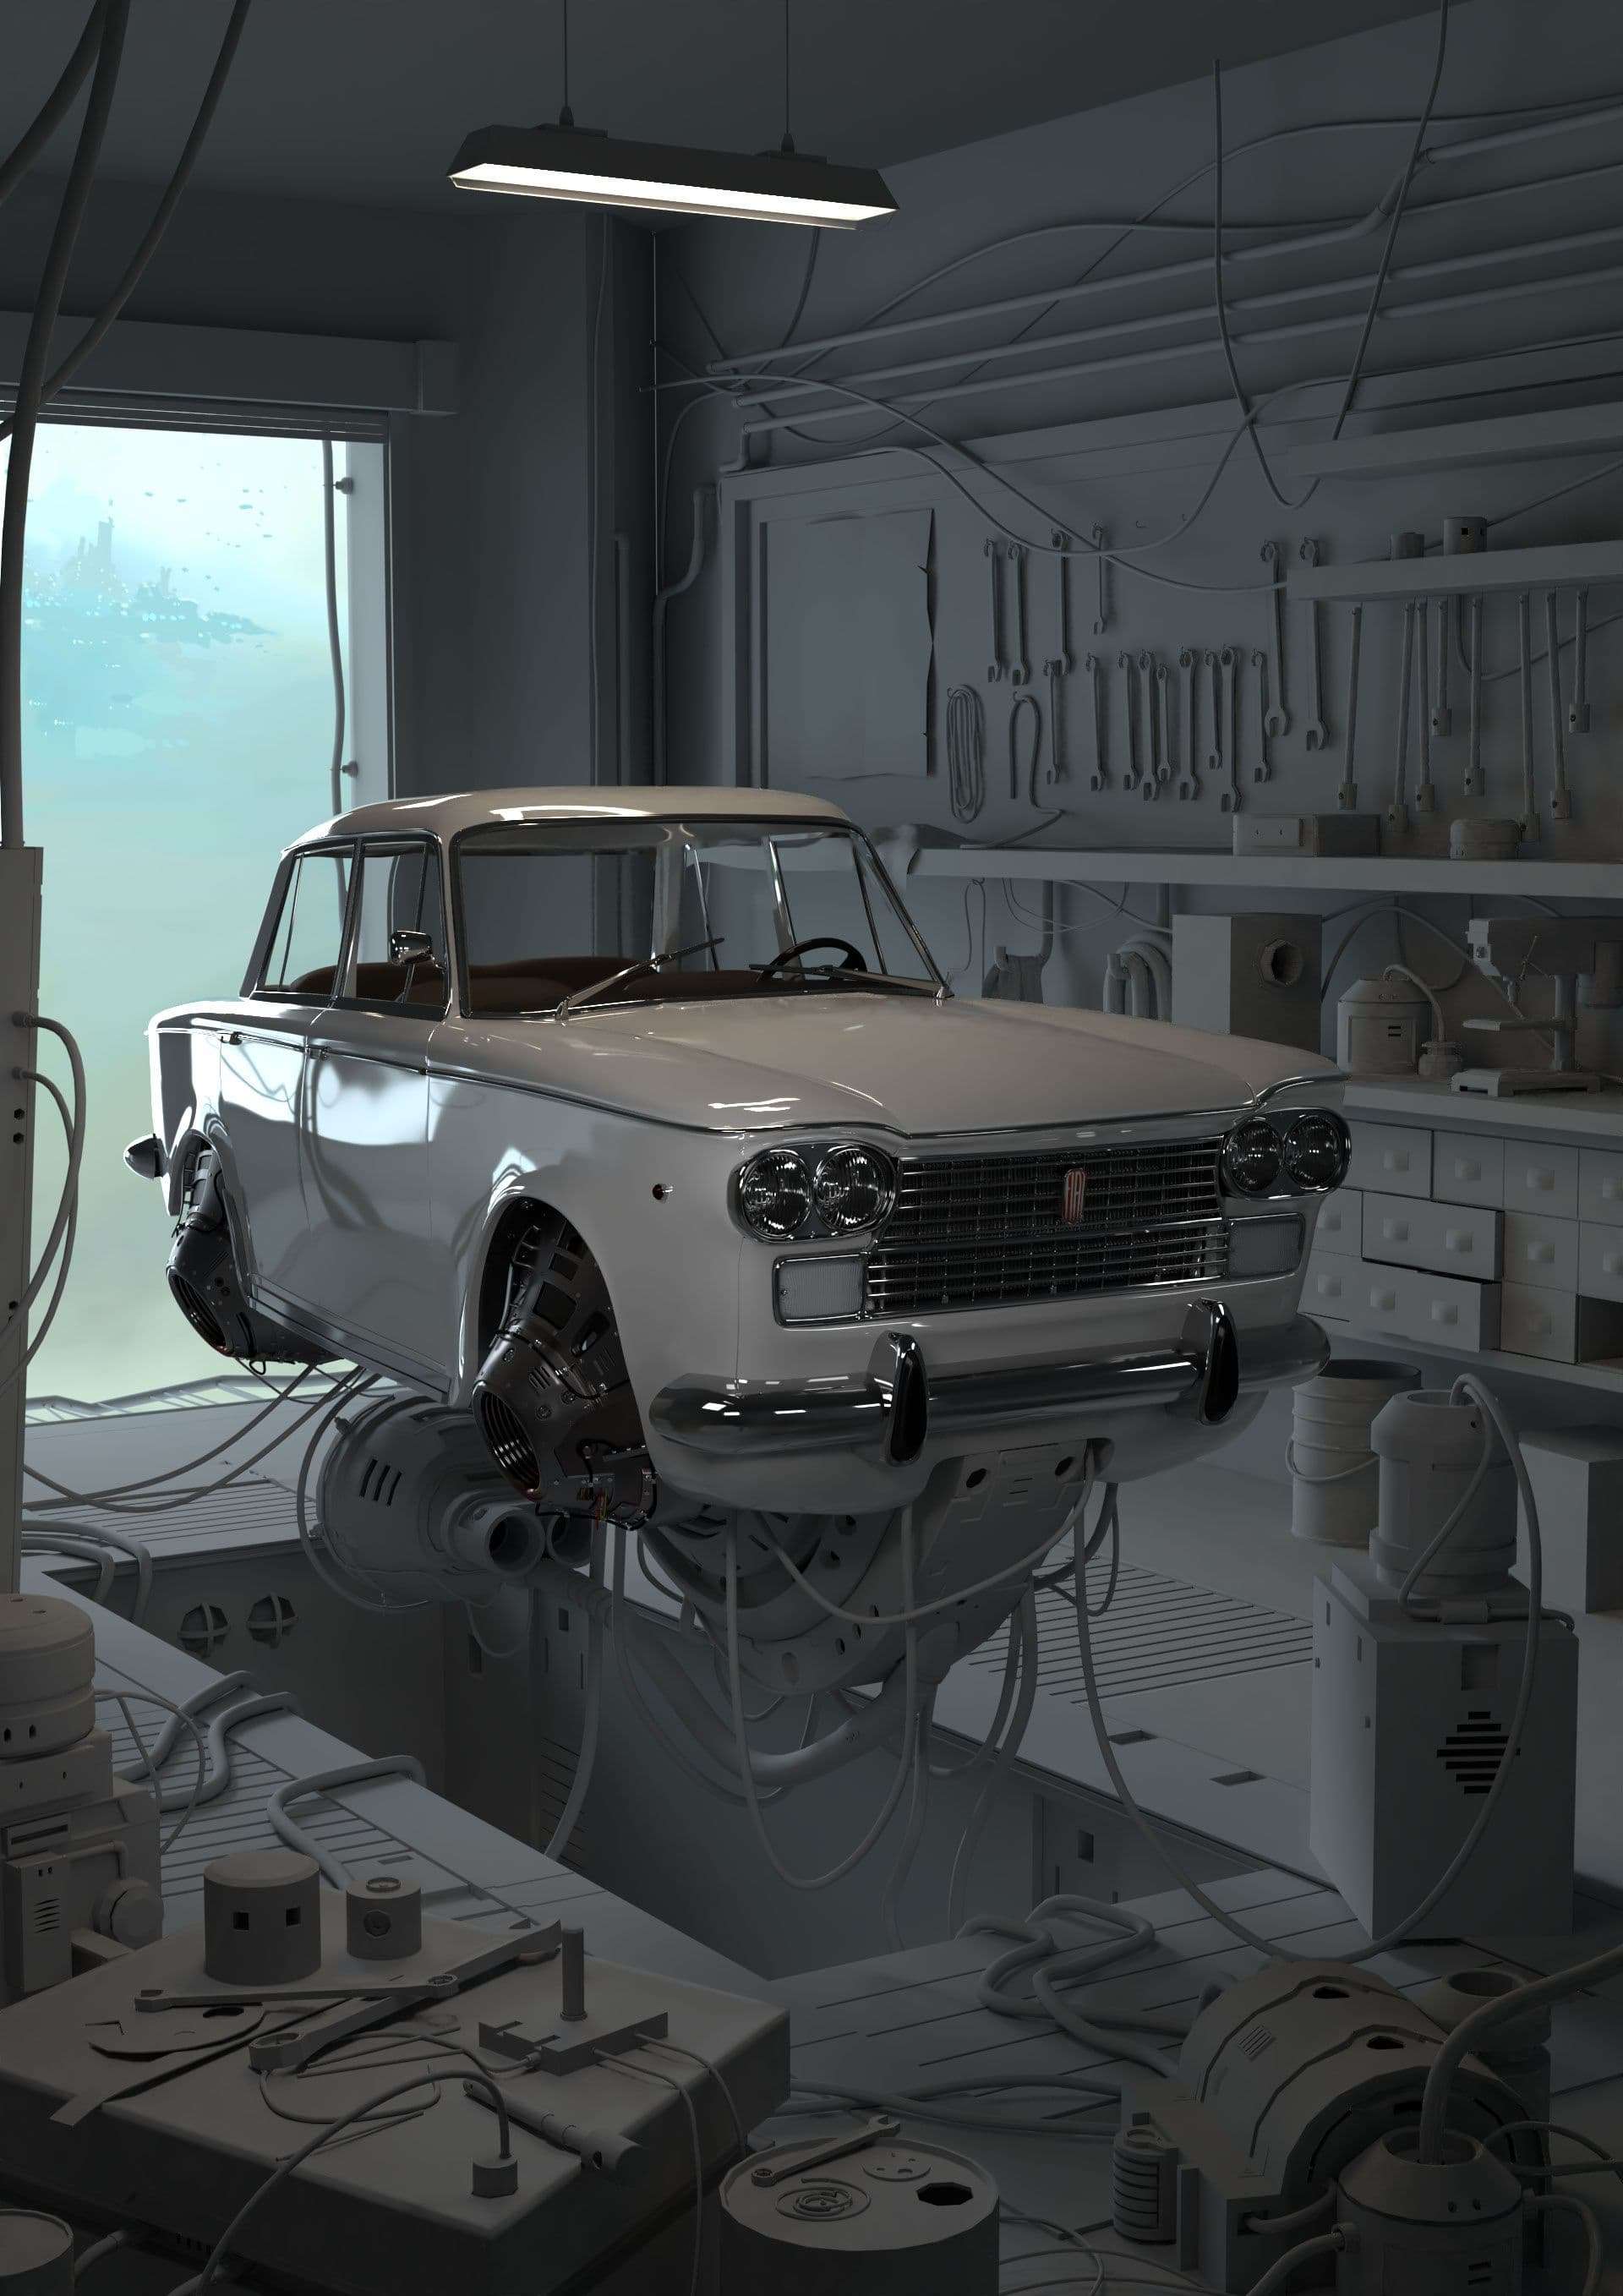
With a workflow in place, the process was redundant until everything finally received a texture. Lighting and final iterations could now begin. This is the part where feedback becomes very crucial. Share your work often and take in every bit of feedback you can. Some of the most common feedback I received was that the lighting in the scene was still too dark. After iterating the lighting again it got to where it needed to be.
After obtaining a final render, I took the image into Photoshop for some minor touch ups. Using an overlay gradient and adjusting the color temperature helped create a more vintage tone. There wasn’t much else needed in post though. I was told sometimes knowing when to call a project finished is as hard as starting it. It’s very easy to overwork your image if you’re not careful. So, always share your progress for feedback - your eyes may begin to deceive you after having spent weeks on the piece.
I hope this breakdown shed some insight on how I approached this project. And hopefully this can help you with how to approach your projects in the future!
You can find more of Roy's work on ArtStation and The Rookies.