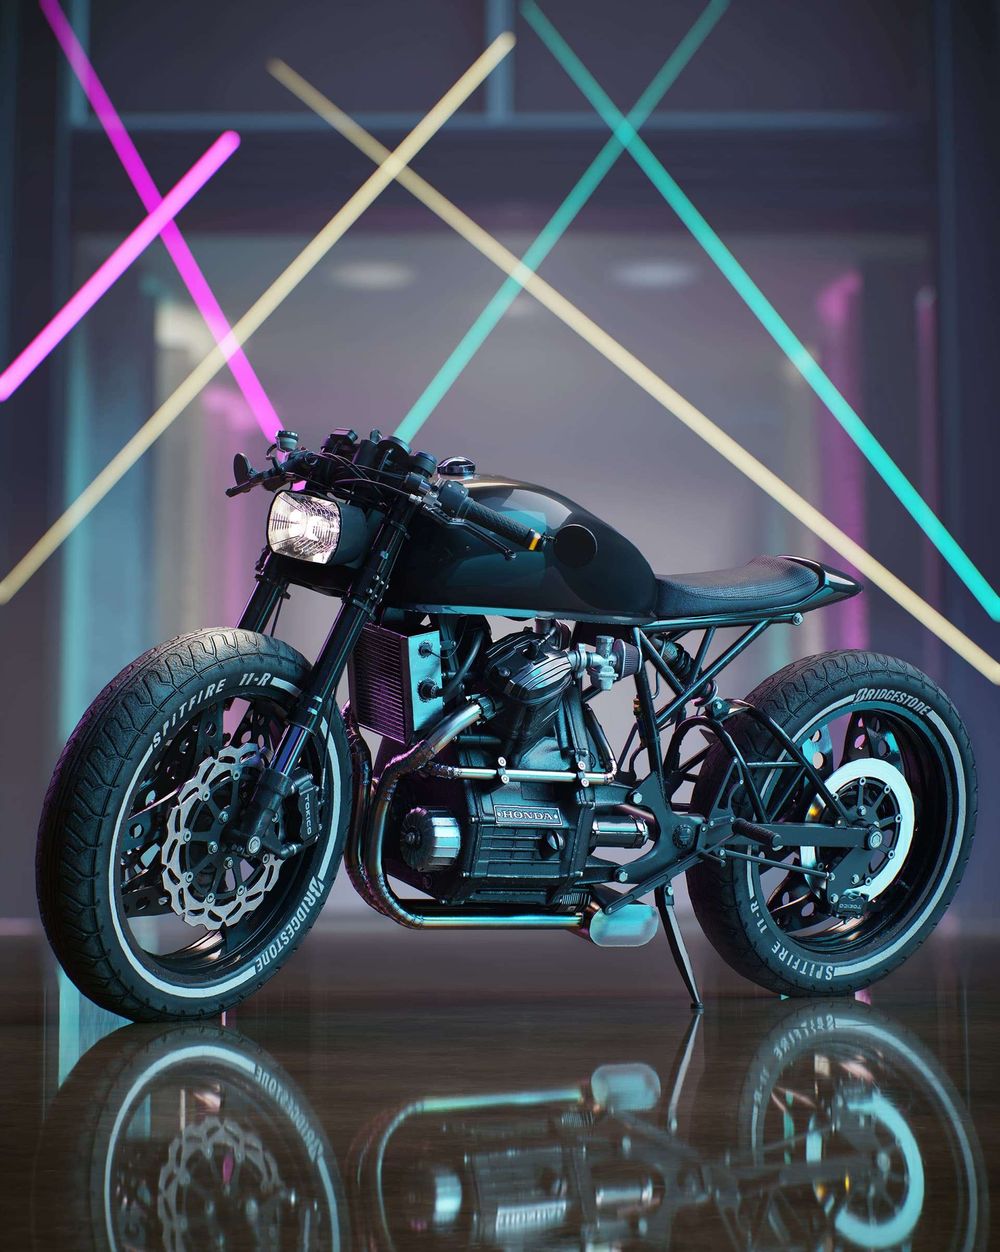
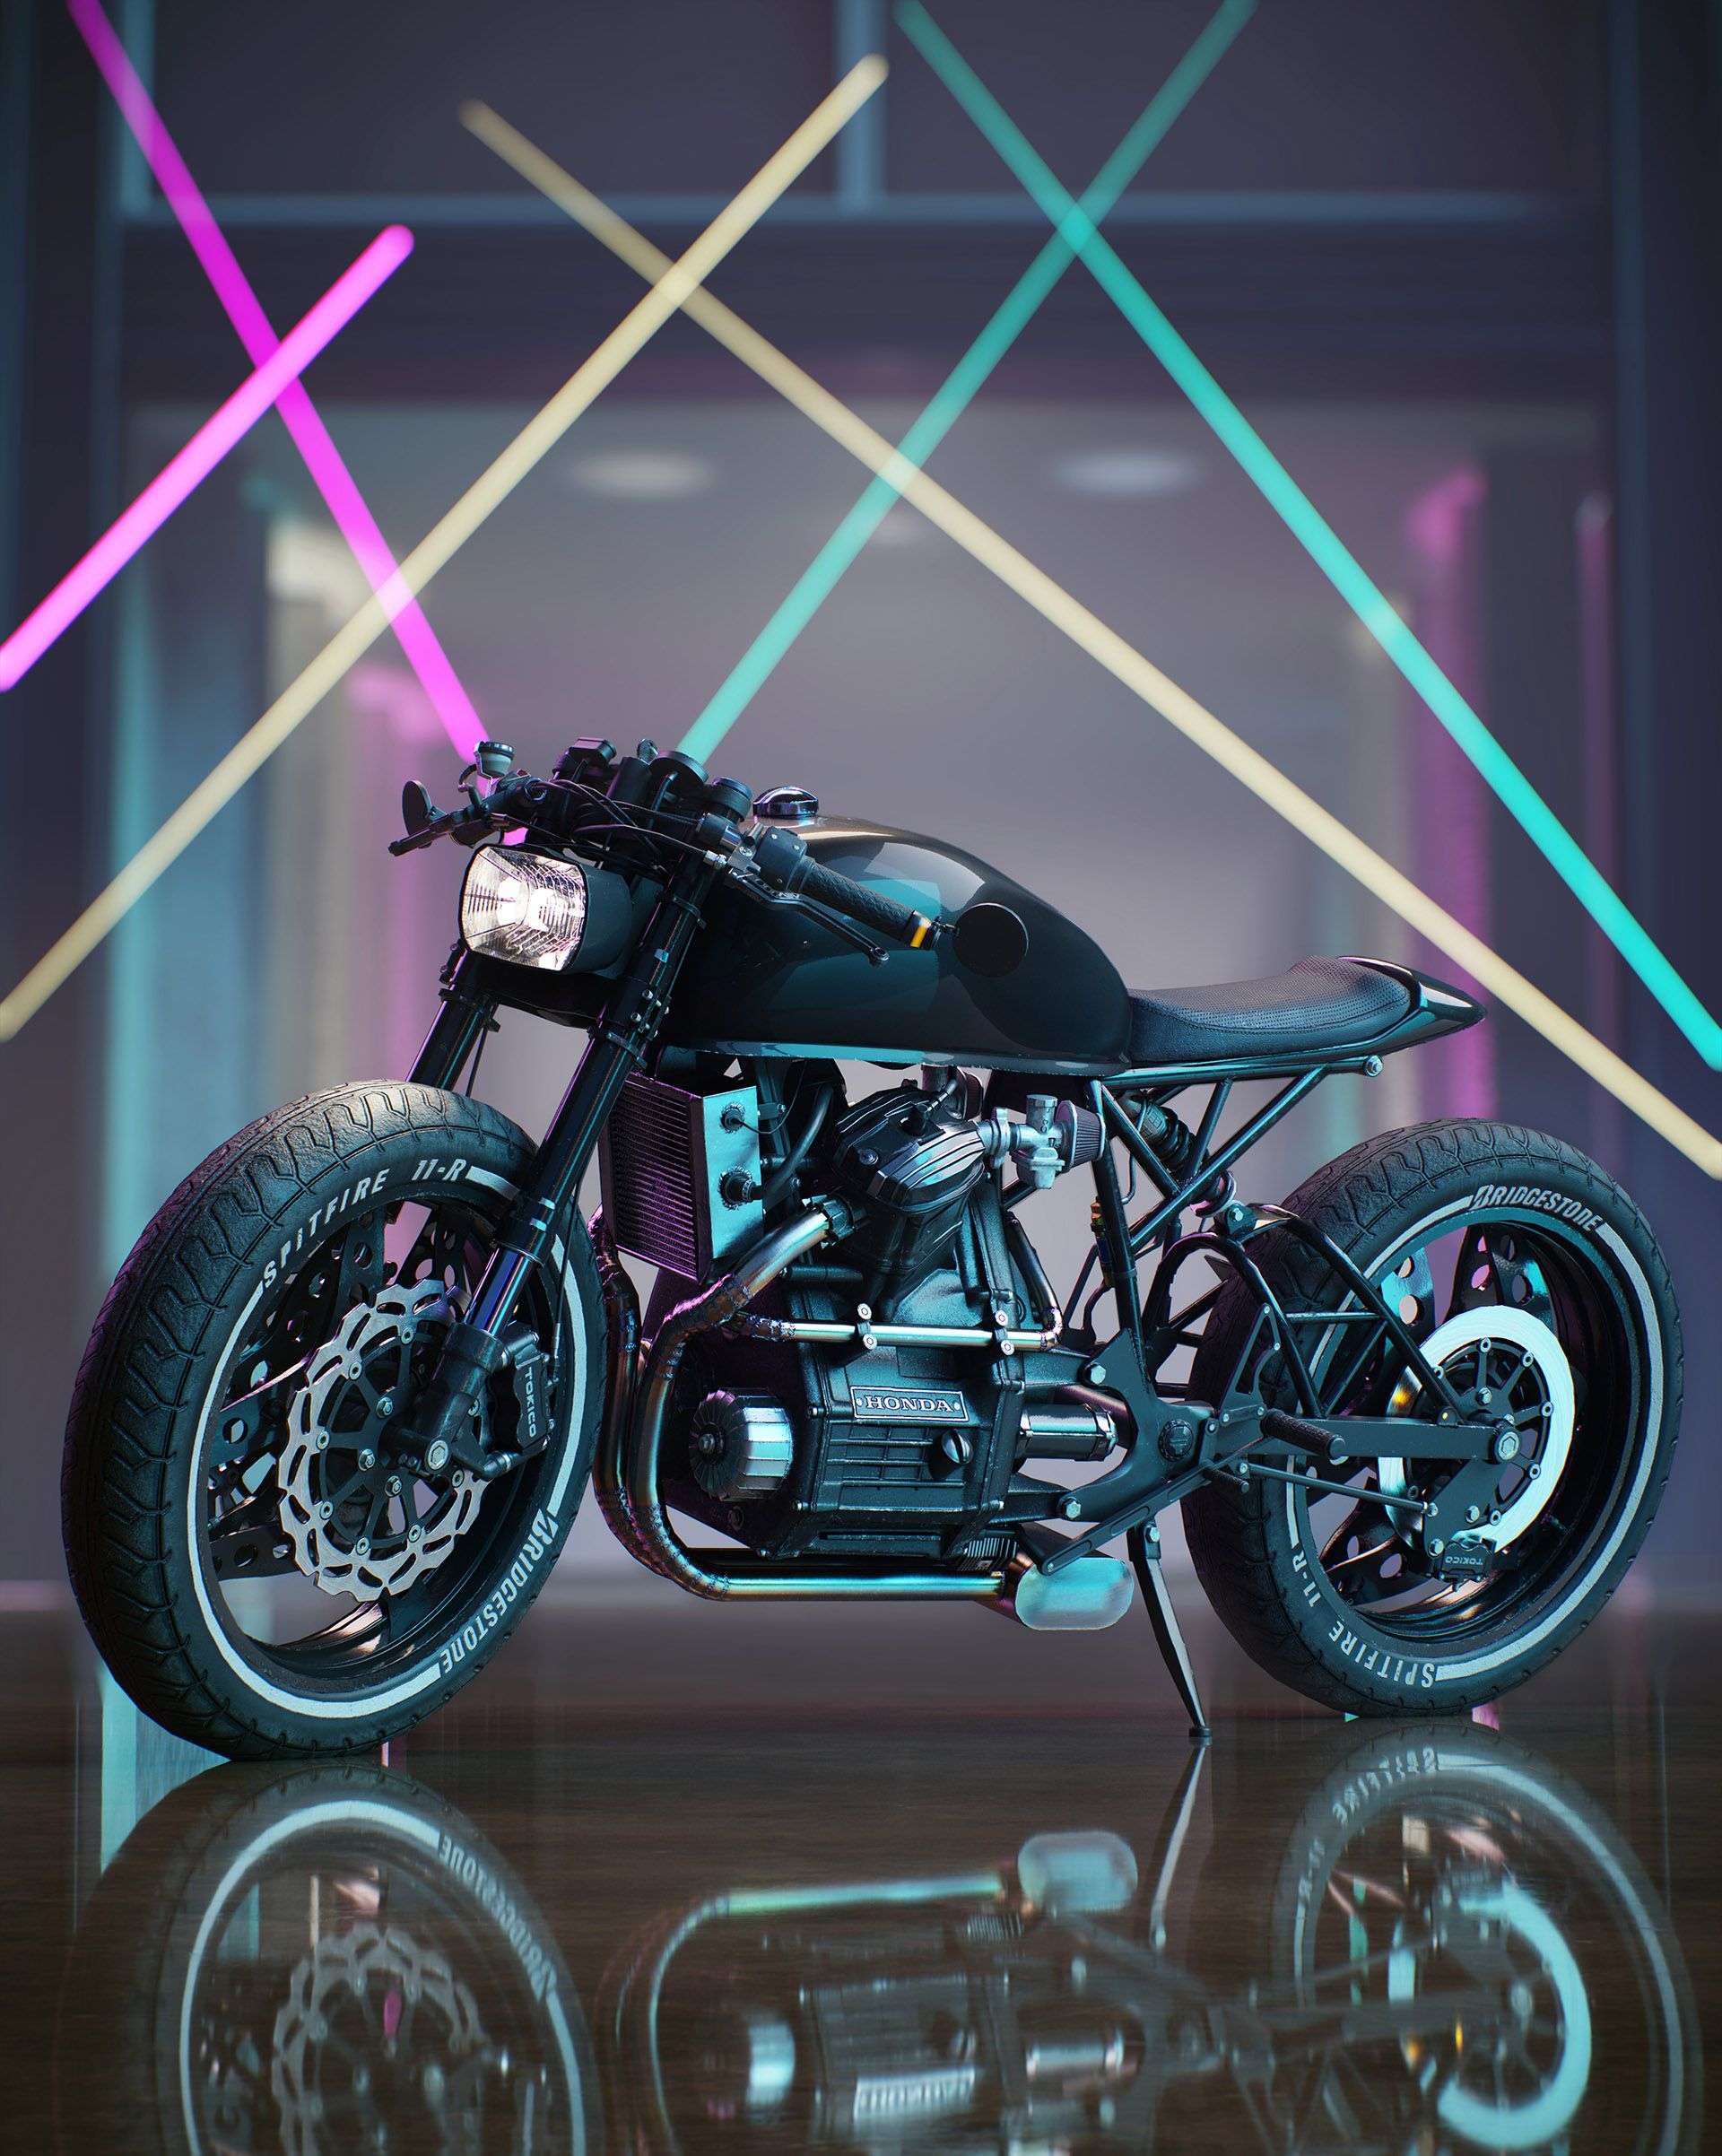
Create Game Ready Assets in a Real-Time Pipeline Using Unreal Engine
Eldar Seydamet, a Tech Art Intern at Epic Games, 3D Artist at Dekogon, and a Think Tank Online alumnus, takes us through the entire asset production pipeline using Unreal Engine. Learn how to create detailed game ready assets, in real-time.
Eldar Seydamet is a recent Tech Art Intern at Epic Games, 3D Artist at Dekogon, and a Think Tank Online alumnus. He started his learning journey in February 2020 and in a short time has been recognised for creating incredibly detailed game ready assets, in real-time. In this article he takes us through the entire asset production pipeline using Unreal Engine.
Buckle up, this will be a long ride. For convenience’s sake we will outline each of the stages in case you are looking for a specific insight, so you can skip ahead.
We will go over the following pipeline steps:
Reference gathering and project planning
Blockout
High poly modeling
Low poly modeling and retopology
UVs
Baking
Texturing
Shading
Rendering and Lighting
Extra
Tips and advice
At the end of this article you should be able to take on a prop and follow through the proper pipeline.
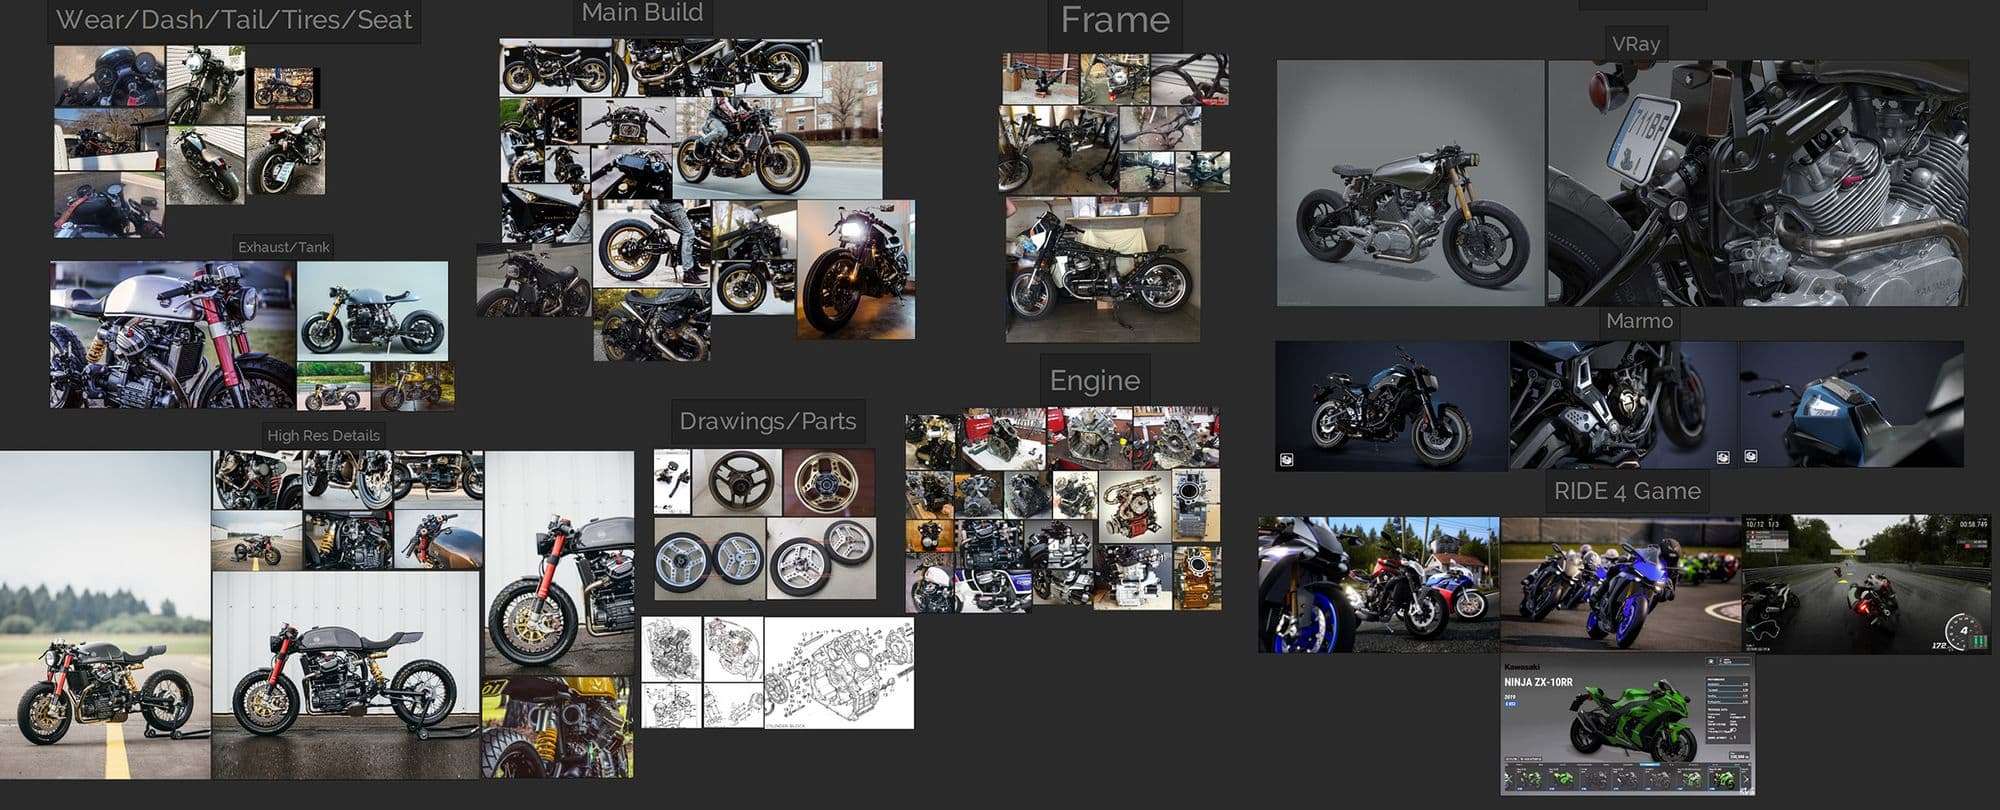
When you plan to design something, the first step would be to gather all the useful references possible. Remember: many new designs are often just well recycled old ones.
It is a good idea to break the object down, learn how it was built and understand how it functions. Doing this will also give you a better idea of the project’s scope and how much you actually have to do. Do not underestimate the scope.
In this instance, I used Miro and a local copy in Pureref to gather reference and break down the details of my asset. Miro is useful when working with a mentor so you don’t have to send large data back and forth.
Miro Breakdown
My main reference was in Pureref on my machine for ease of access and the overlay options.
Besides the references I found online, I was also using pictures of the Honda I used to own. I modified quite a few parts on it back in the day, and a lot of those changes were incorporated into the design of this digital asset.
Pureref Board
It is always a good idea to include detailed references of specific parts. Besides that, we should always leave some room for CG reference: both as a benchmark to match or surpass, and an insight on how other artists went about approaching more challenging details.
Blockout
It is paramount to get the scale right and test how it feels in the game engine. When starting a blockout we should use anything that can help us:
Specs and dimensions of the real world object;
Photo reference;
Standard mesh to compare to.
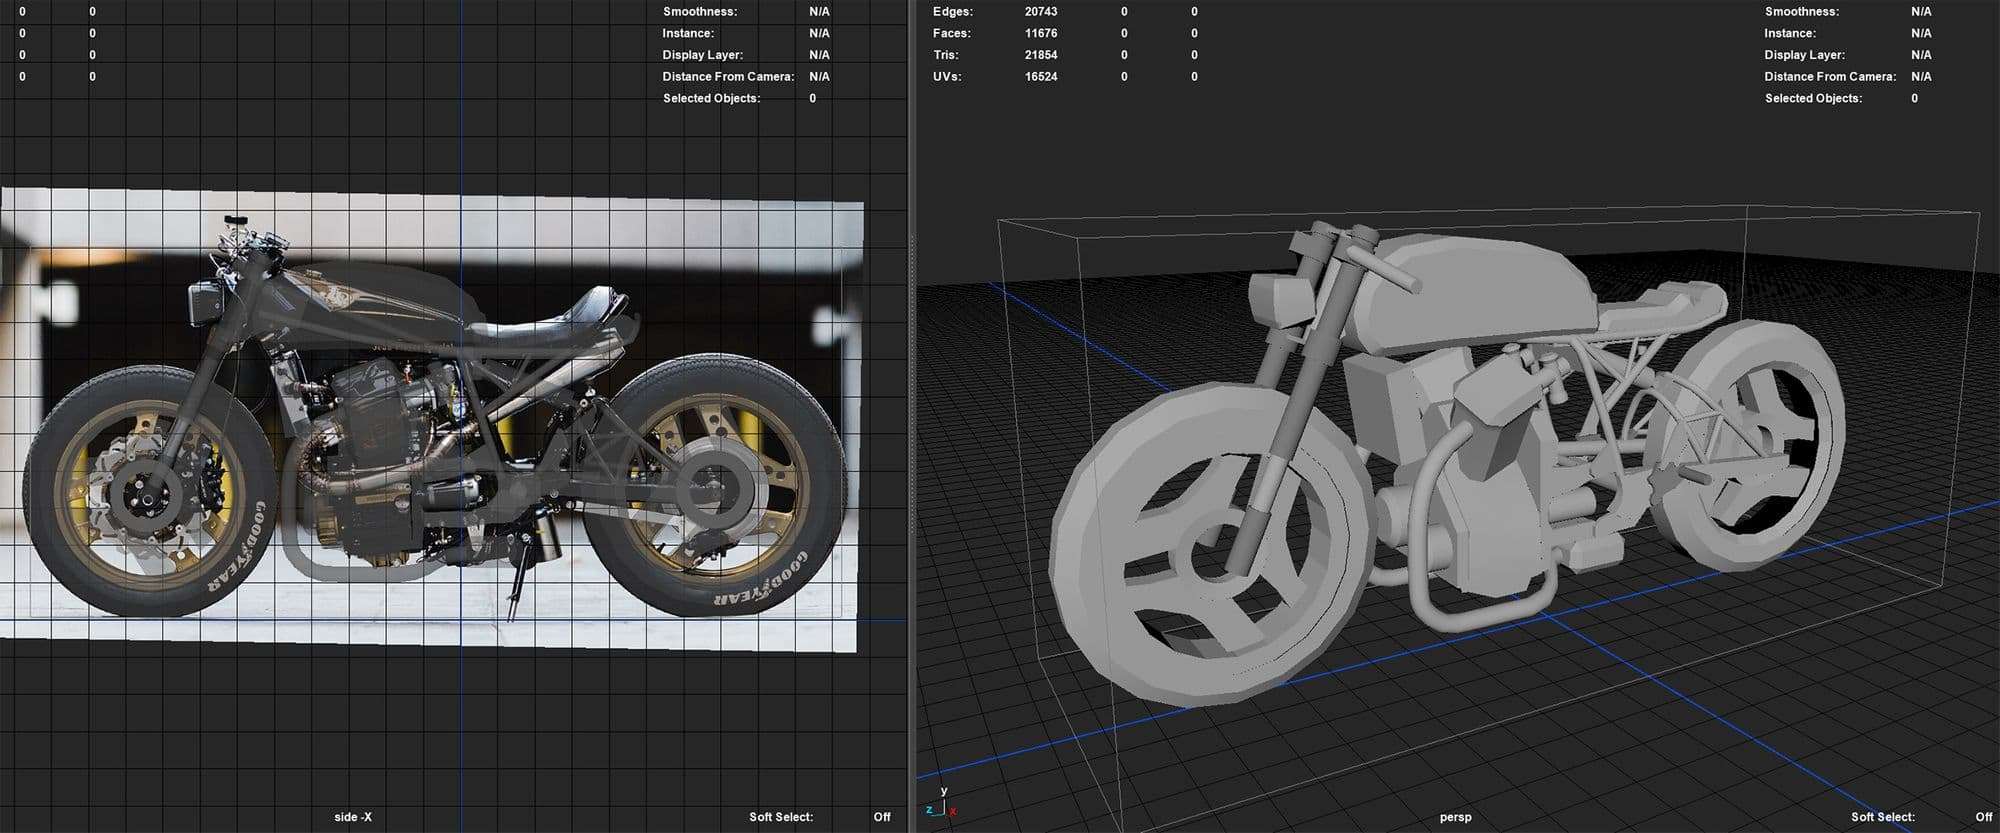
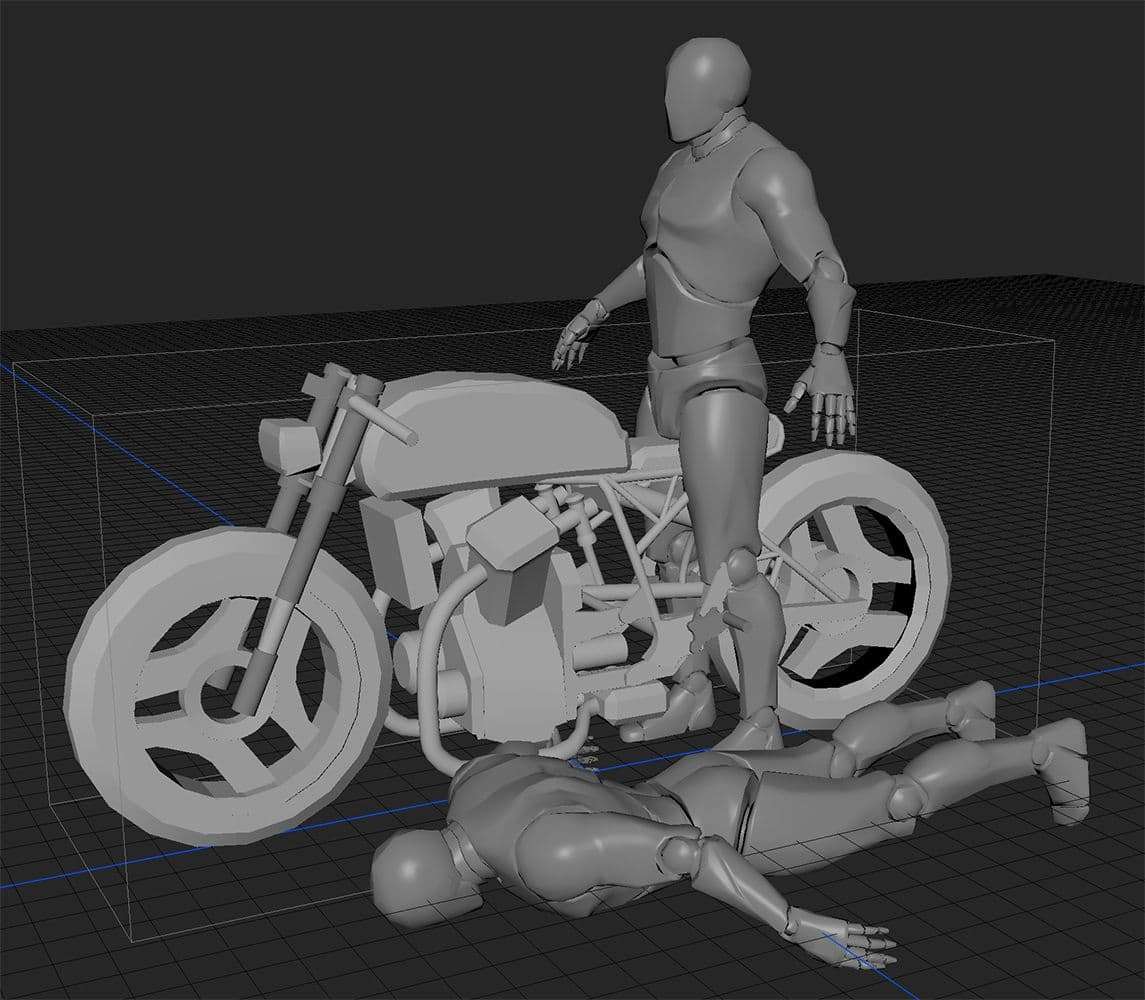
We can import an image into Maya’s viewport, where it will handle it as a plane. It is useful to assign it to a layer so you can toggle its visibility.
From here we can use primitives, curves or Create Polygon Faces tool to start tracing the silhouette. Selecting the meshes and hitting Ctrl+T will show you object dimensions, but we can also use a primitive box to check out dimensions.
Check how your image looks with a mannequin/scale model to ensure everything checks out
When I work with image planes in multiple viewports, I often find use for this script I modified back in my first term at Think Tank.
This MELscript allows you to toggle X-Ray mode in all viewports at the same time, instead of clicking on each individual window.
High-Poly Modeling
When starting the high poly work we should consider whether the model needs to be future proof, used in a cinematic, or if it is strictly a game asset.
In the latter case, a simpler high poly model should suffice, and the rest of the height and normal information can be added in the texturing stage.
In the former case, we should spend a lot of time on the high poly, putting in the details and taking care of the topology to some extent.
A few things to consider when working on the high poly model:
Large shapes first—refine shapes—add details later;
Break complex into simple;
Keep in mind the low poly shape to do less work later;
Use Crease or Bevel tools, depending on your workflow.
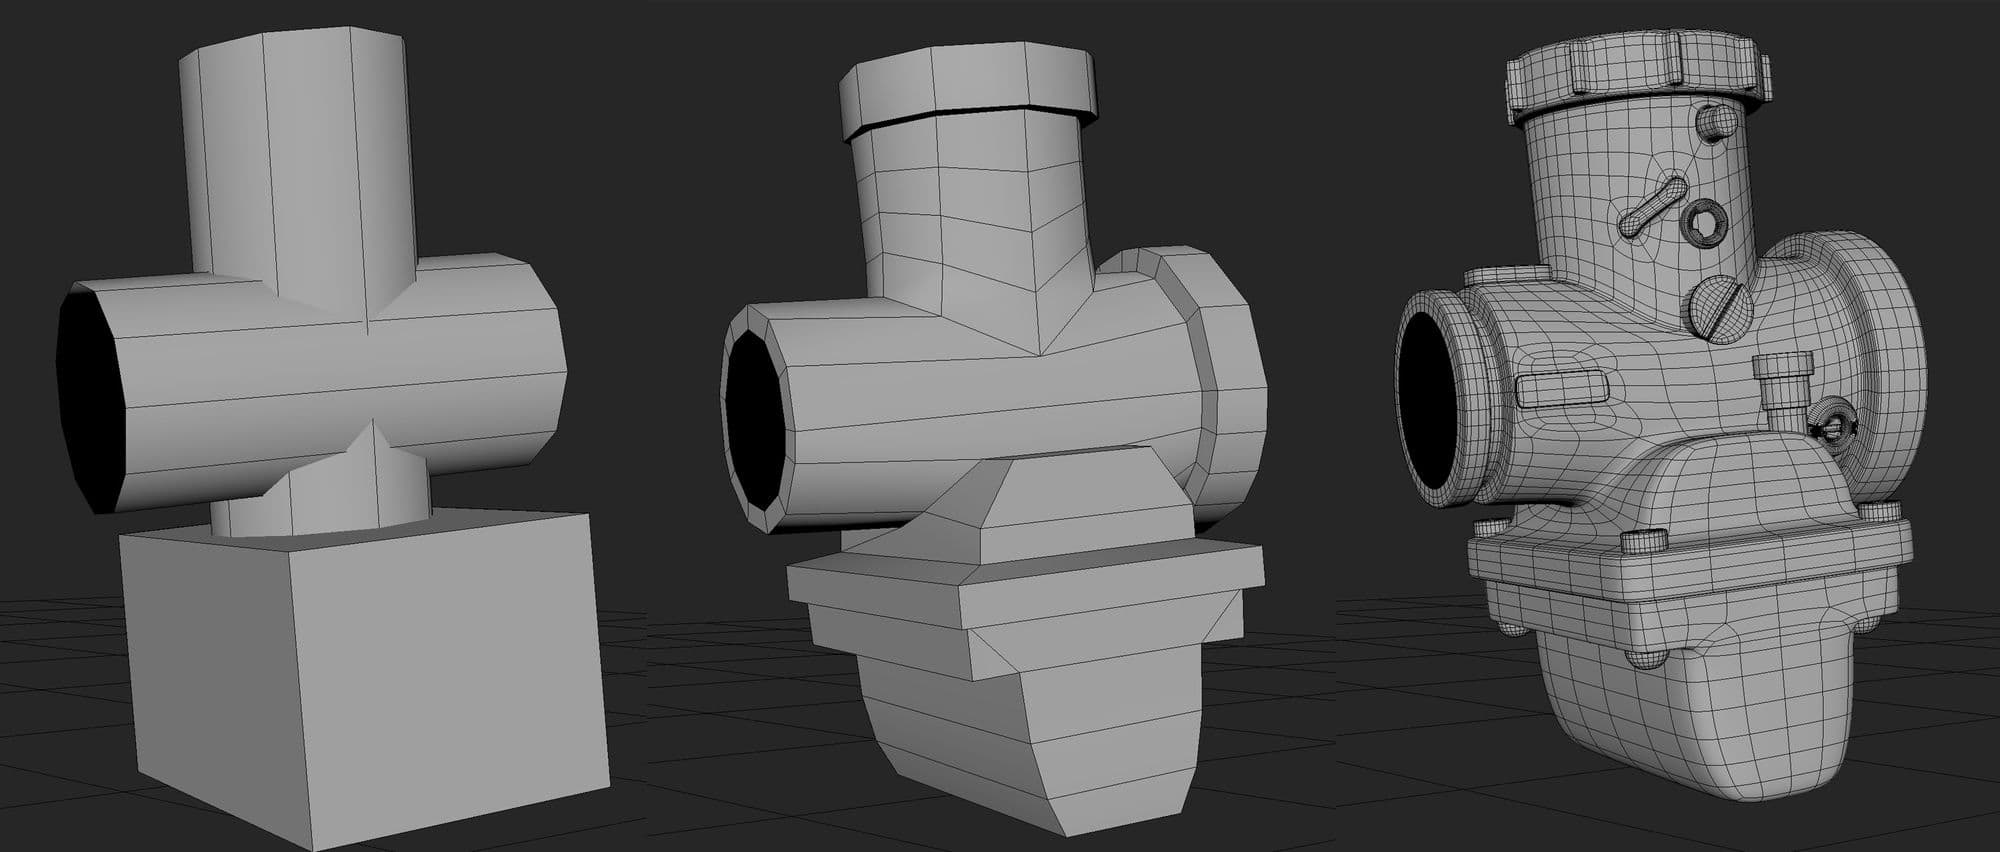
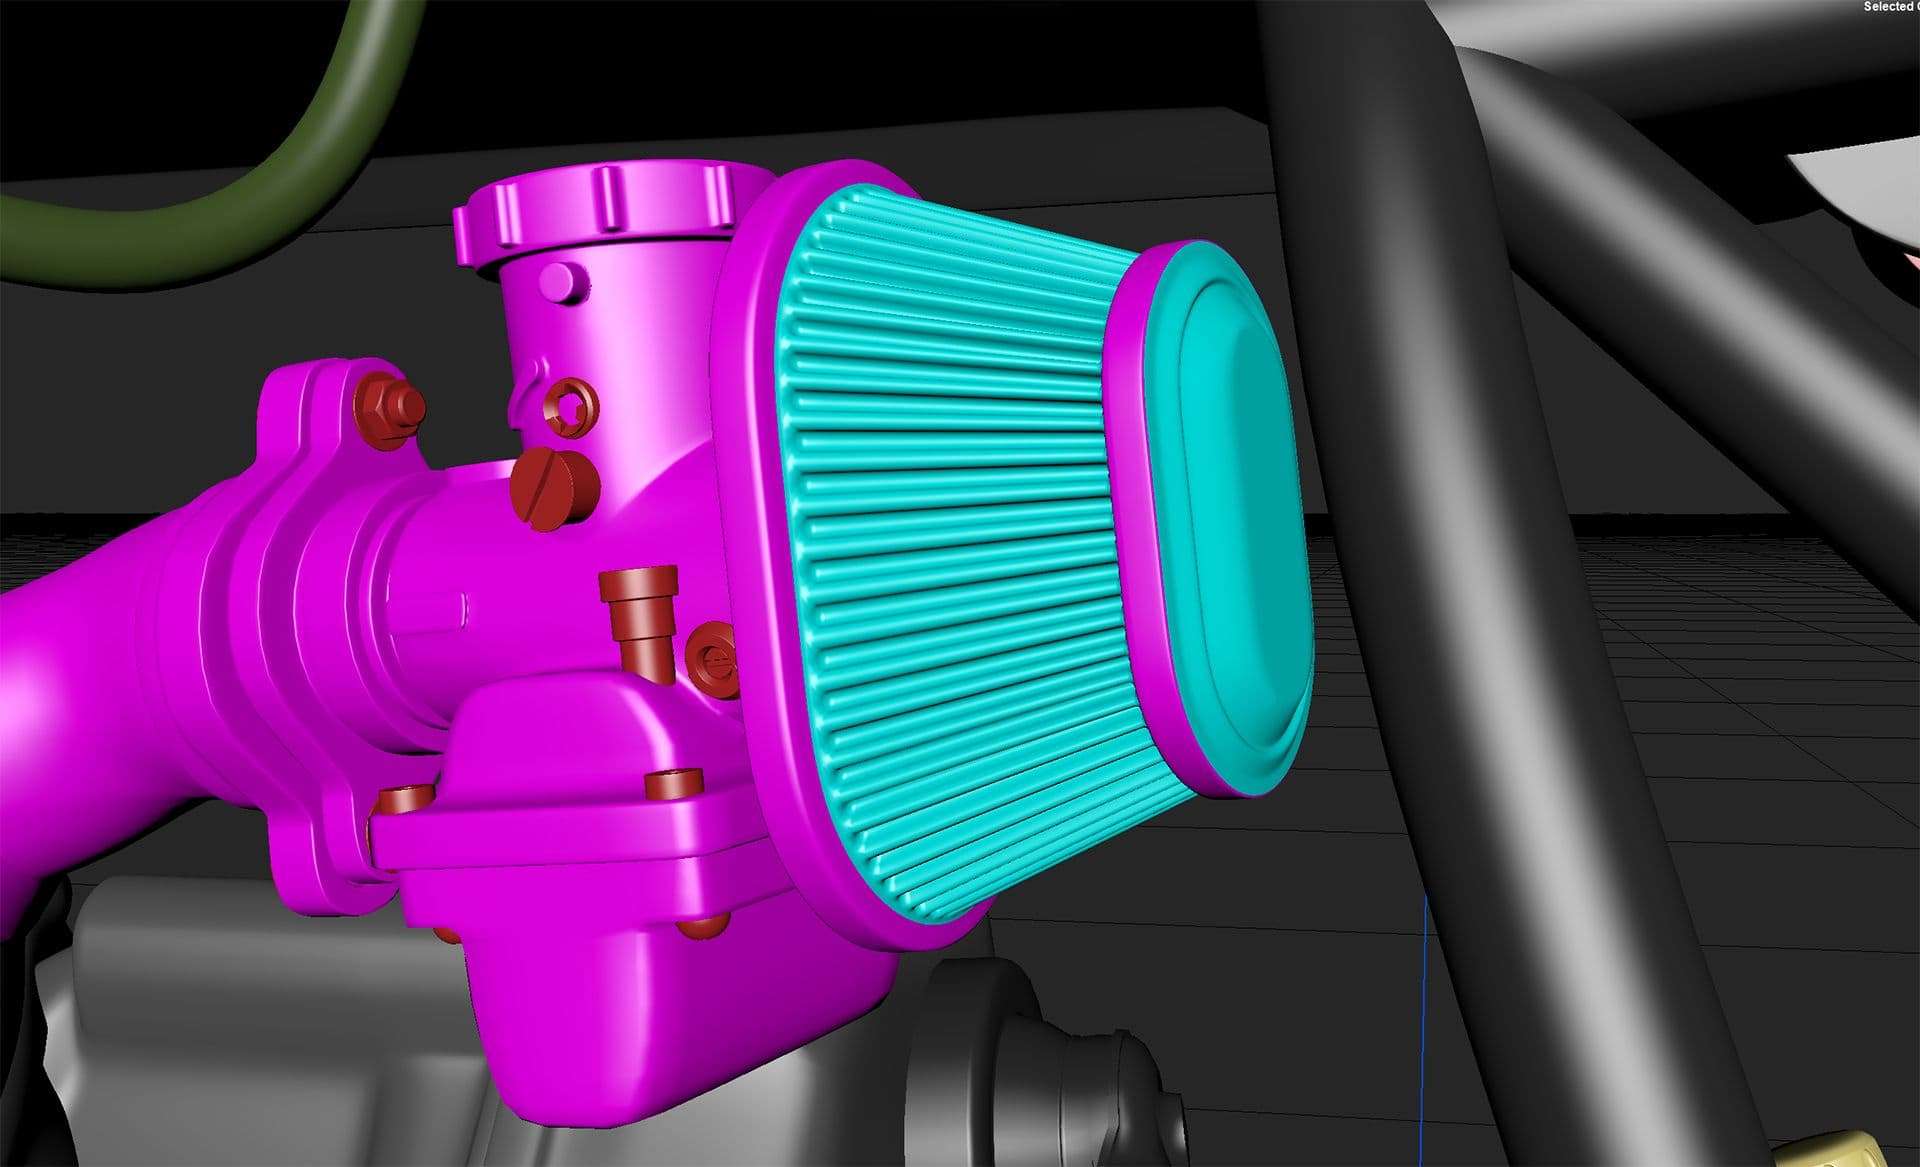
For example, to tackle complex shapes, like this carburetor intake body, we can start with separate primitives, then use the Multi-Cut tool to slice a precise loop at the intersection where we would weld the vertices of the meshes together. Once they are welded and unnecessary faces are removed, only then we can proceed to add more loops, bevels and details.
Carburetor modeling phases
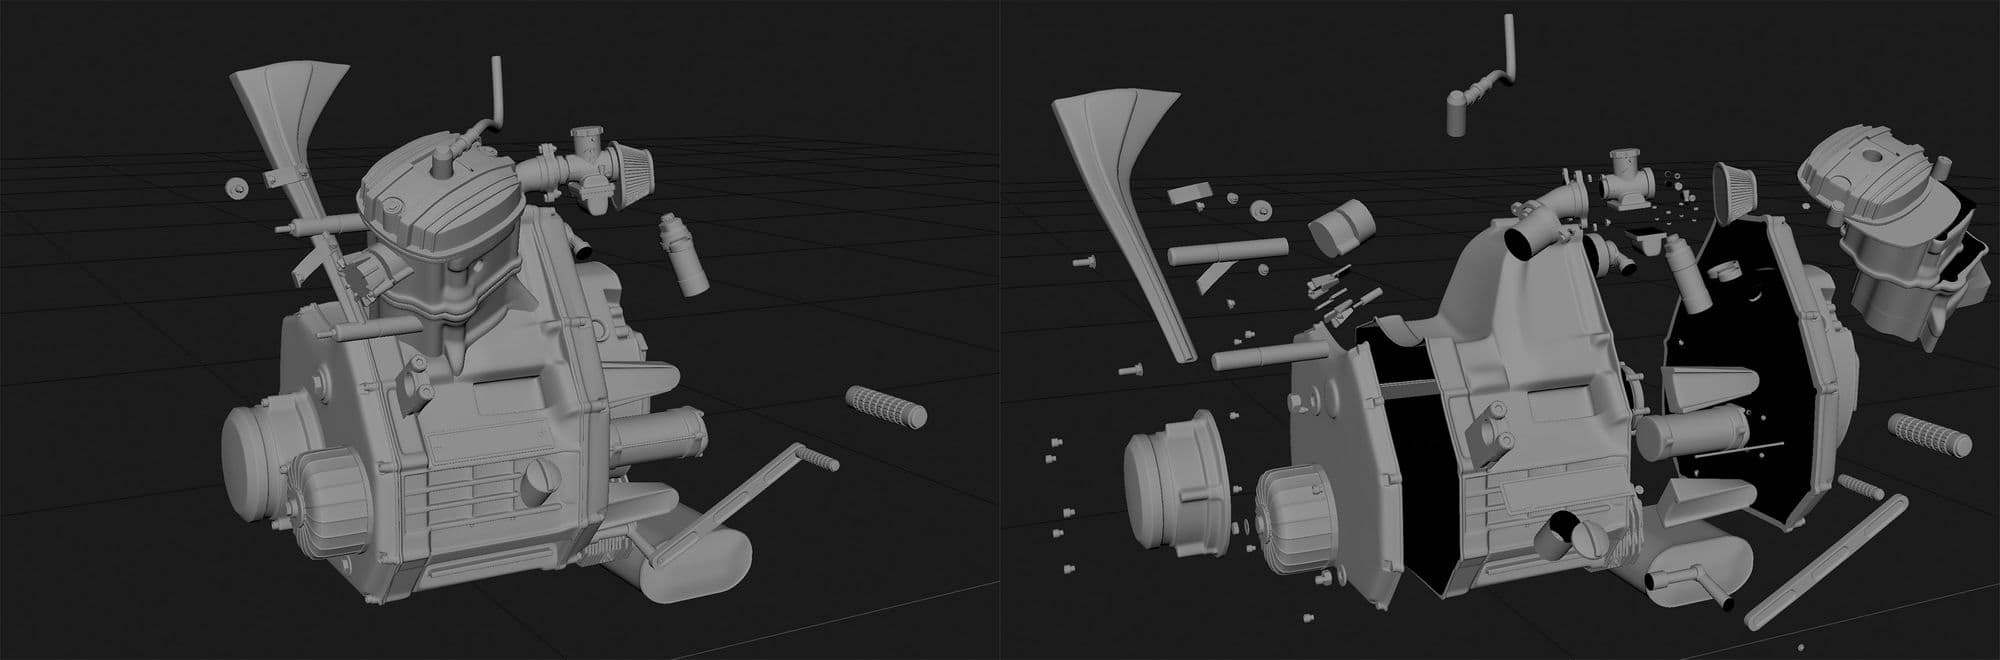
The engine itself also consists of very simple shapes once it’s taken apart.
Engine parts
One useful trick we can use is mesh instancing in the Duplicate Special tool. This will allow us to work on the mesh in the centre of the grid utilising easy worldspace symmetry, while seeing the results of our changes on the instance that might be positioned in an awkward angle to work on. We can keep the instance on the second monitor (separate viewport camera) so we can fully focus on the world centred mesh on the main screen. This way you don’t have to work with odd angles and constantly set a custom pivot.
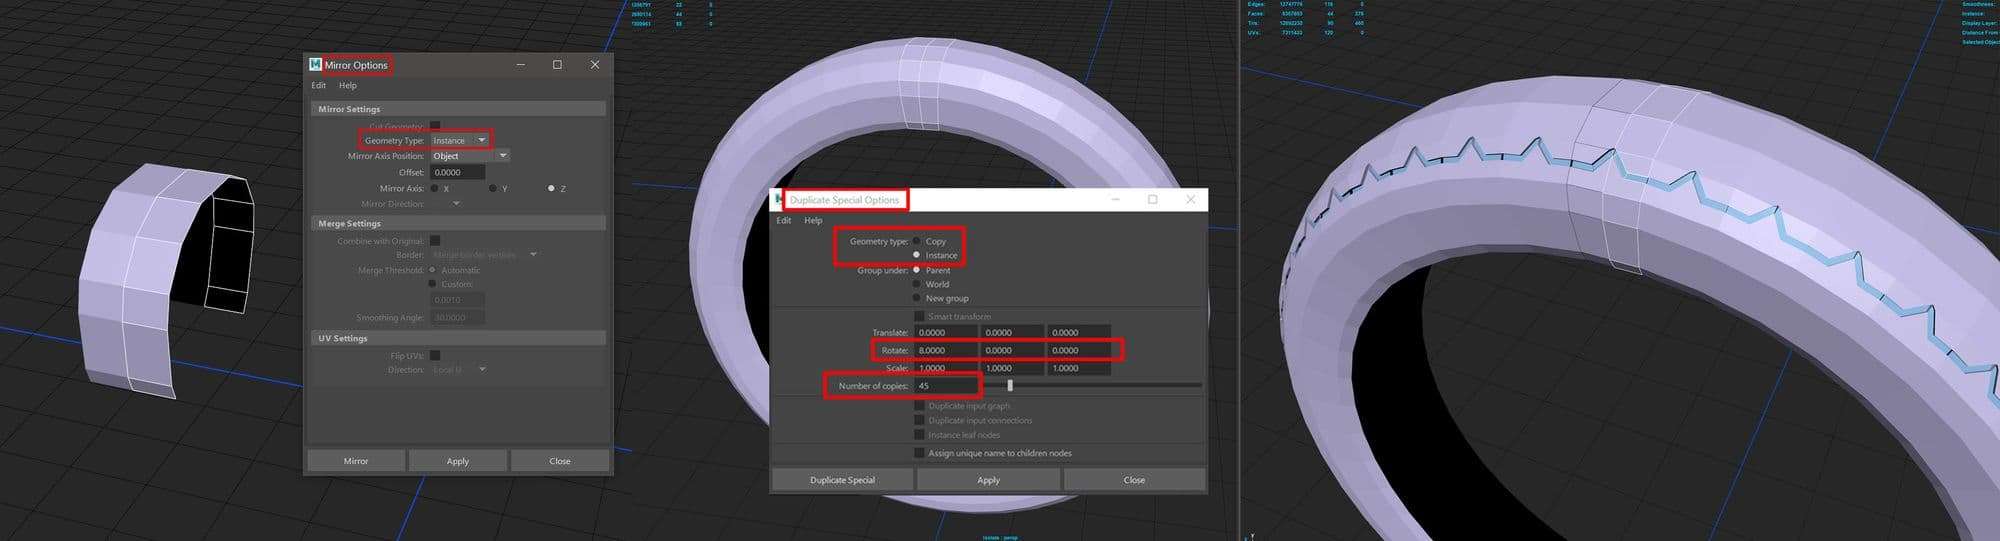
When it comes to working with tires, brakes, grips, pegs or any other circular meshes, we can go about modeling in a couple of ways. The best method I learned, and now prefer, is to use radial instancing.
If we use this method, we should align our wheel to the world centre, then use one segment and apply an instanced Mirror to it. Now, we can select both meshes and use the Duplicate Special Options, calculate the amount of radians we need and specify the rotation and copies. Once it’s done, you can select one segment and work on it while seeing exactly how geometry tiles in real time.
It is always a good idea to keep a simple disc as a utility mesh so if we lose the perfectly centred pivot of our mesh we can always pivot it again.
Mirror Options: Instance | Duplicate Special Options: Rotation and Number of Copies
Similar approach of geometric tiling is used when making something repeatable like the radiator fins. It’s always simple shapes to start with, no need to overcomplicate things. Feel free to use Deformers or even a Soft Select to get what you need.
When approaching something like the simple air filter, we can use the method of beveling and extruding in or out every other edge, and the Nitropoly plugin is my absolute favourite tool when it comes to this.
This plugin is free, but please consider donating to the developer.
To mention some other tools: ModIt and PlugIt by Wizix. You can certainly live without these by creating your own library of hardware to snap onto a surface, but this is just quick and efficient. Hats off to Wizix for making this stuff!
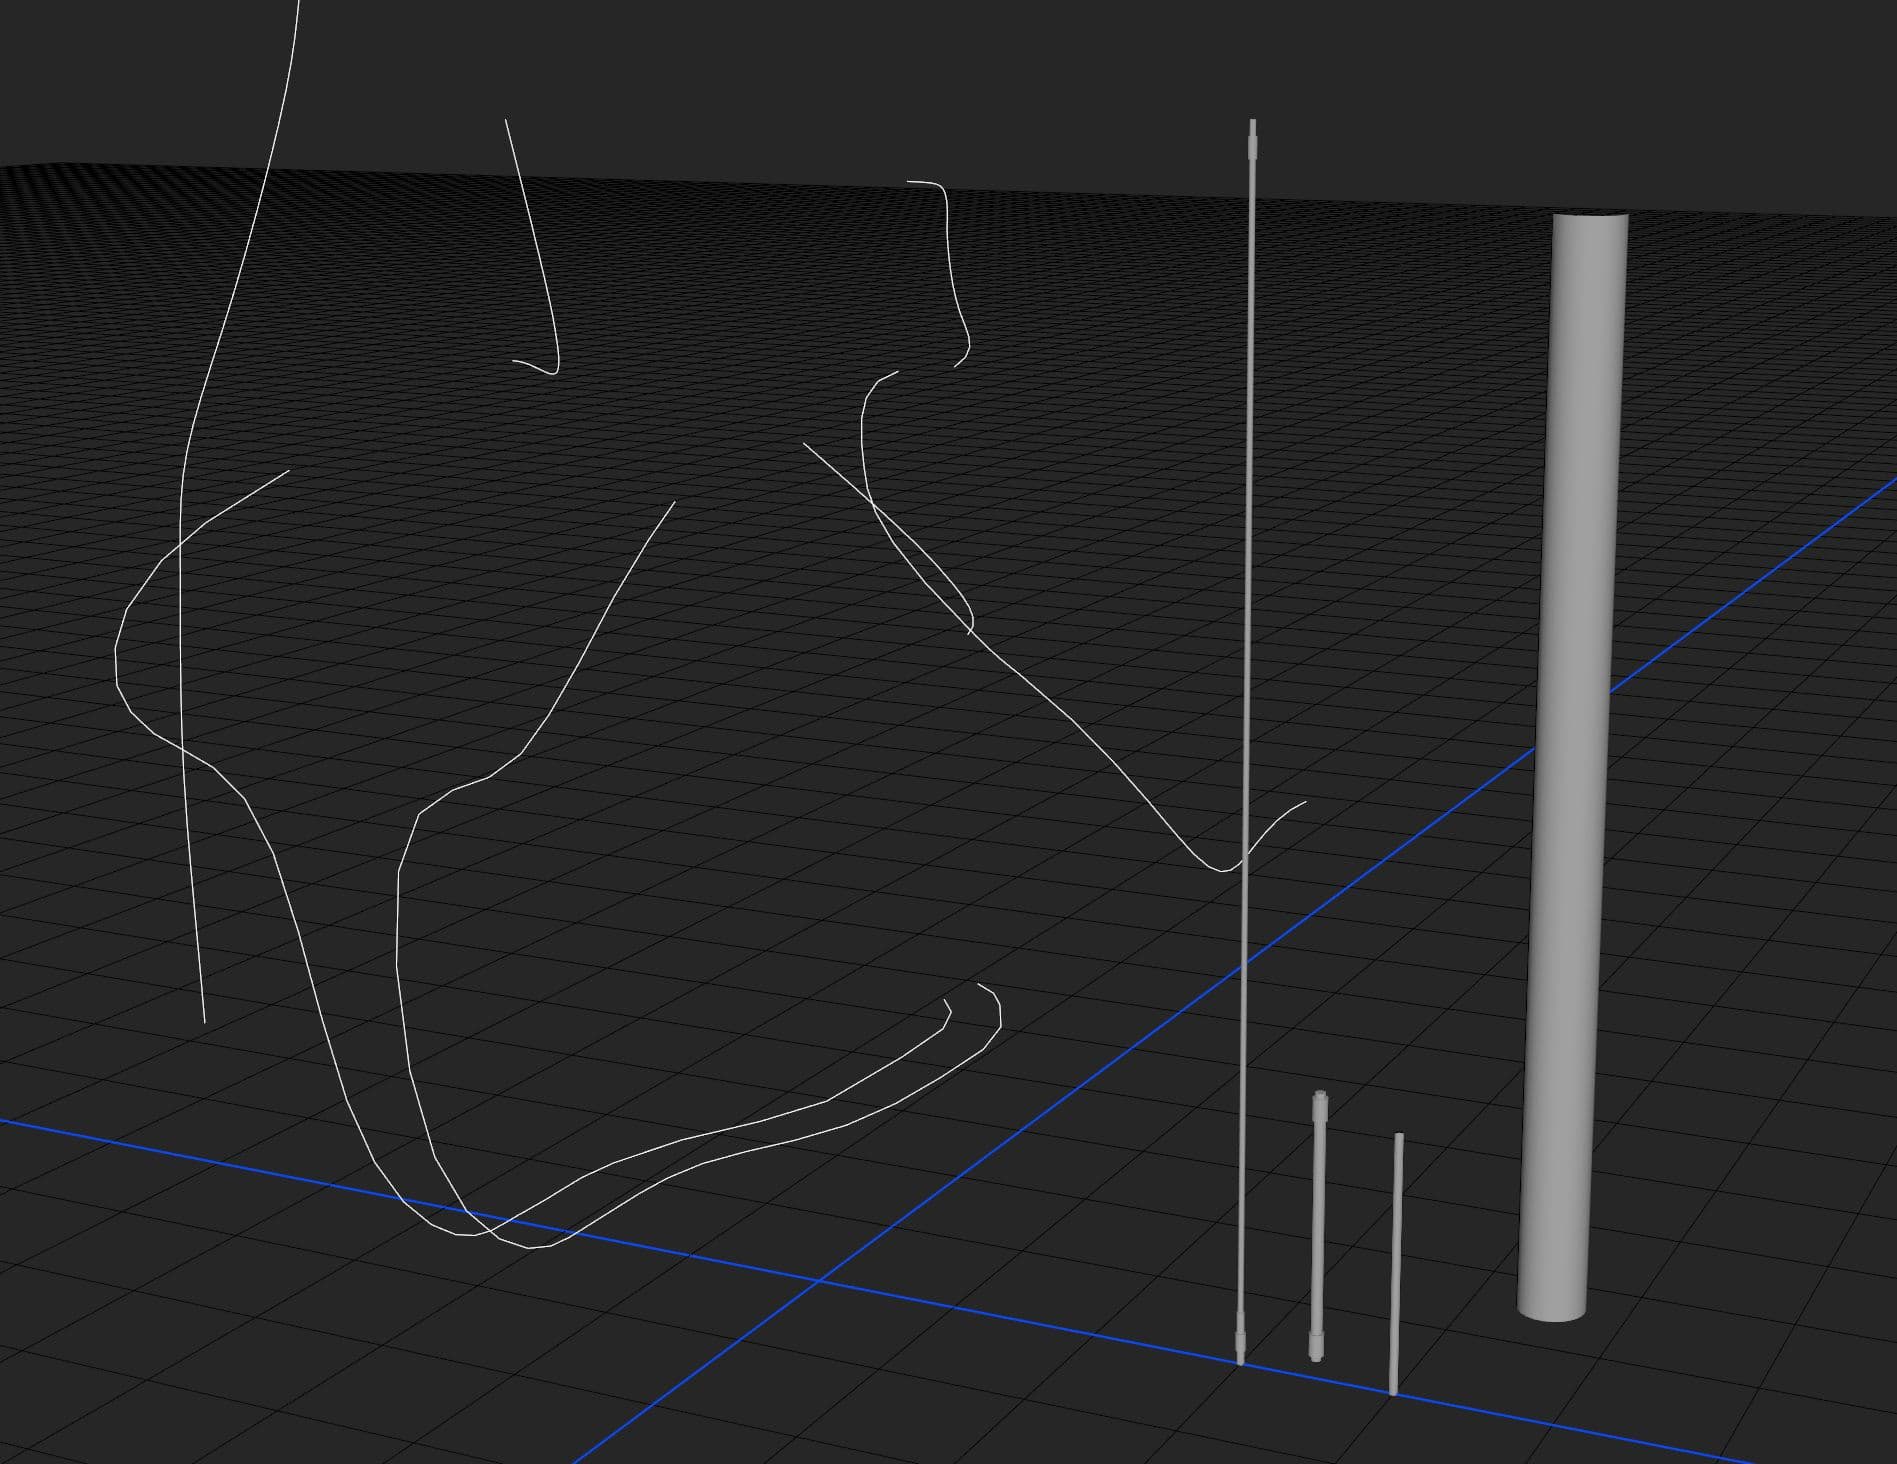
Lastly, to model all the cables we can turn to the good old EP Curves. You can find plenty of tutorials on how to use these in various ways. My favourite way is to keep my meshes straight for easy UVing, duplicate them and use the Warp deformer with the curves.
Low poly Modeling and Retopology
There are a few ways to go about low poly creation:
We could use primitives, like cylinders, for a lot of the parts;
We could use the duplicated geo we kept from our high poly stage;
We could simply utilise the Crease features if we used that workflow;
We could simply remove the bevel edge loops from the high poly duplicates;
We could use the Quad draw method to keep the tri count very optimised for more complex parts, like the engine block.
The balance we have to achieve on what to bake down VS what to leave as geometry is not easy to maintain. Simply ask yourself: will it affect the silhouette? If yes, then we want to leave the geometry. We can use the 7 hotkey in Maya to quickly check the silhouettes in the viewport.
What do you do when you have an internal silhouette problem? This means when you press 7, you won’t see this geometry silhouette, but when looking at it in the normal shaded mode you can see the difference with background parts.
When looking at the horizontal engine details below, they clearly break the silhouette with the background oil cap (beige). In a case like this, we should ask ourselves whether the camera would come close from this angle in the game or our presentation. If yes, then we should keep some form of geometry in our lowpoly.
Internal Silhouette Check
For smaller parts, like the brake discs, We can resort to alpha transparency bakes and masking in shader later. This can save thousands of triangles just on that single disc. We should not do the same with larger openings because we want to keep the high quality of the asset.
Low poly (left) High poly (right)
I would say creating low poly geometry is more of a mentality than skill. Don’t skip a mesh if you know there are tris you can save on. Always optimise, because cumulatively this will make a huge difference at the end. Before I grasped that concept my low poly was in the 90k tris range. After adjustments, I was able to get it down to 69k.
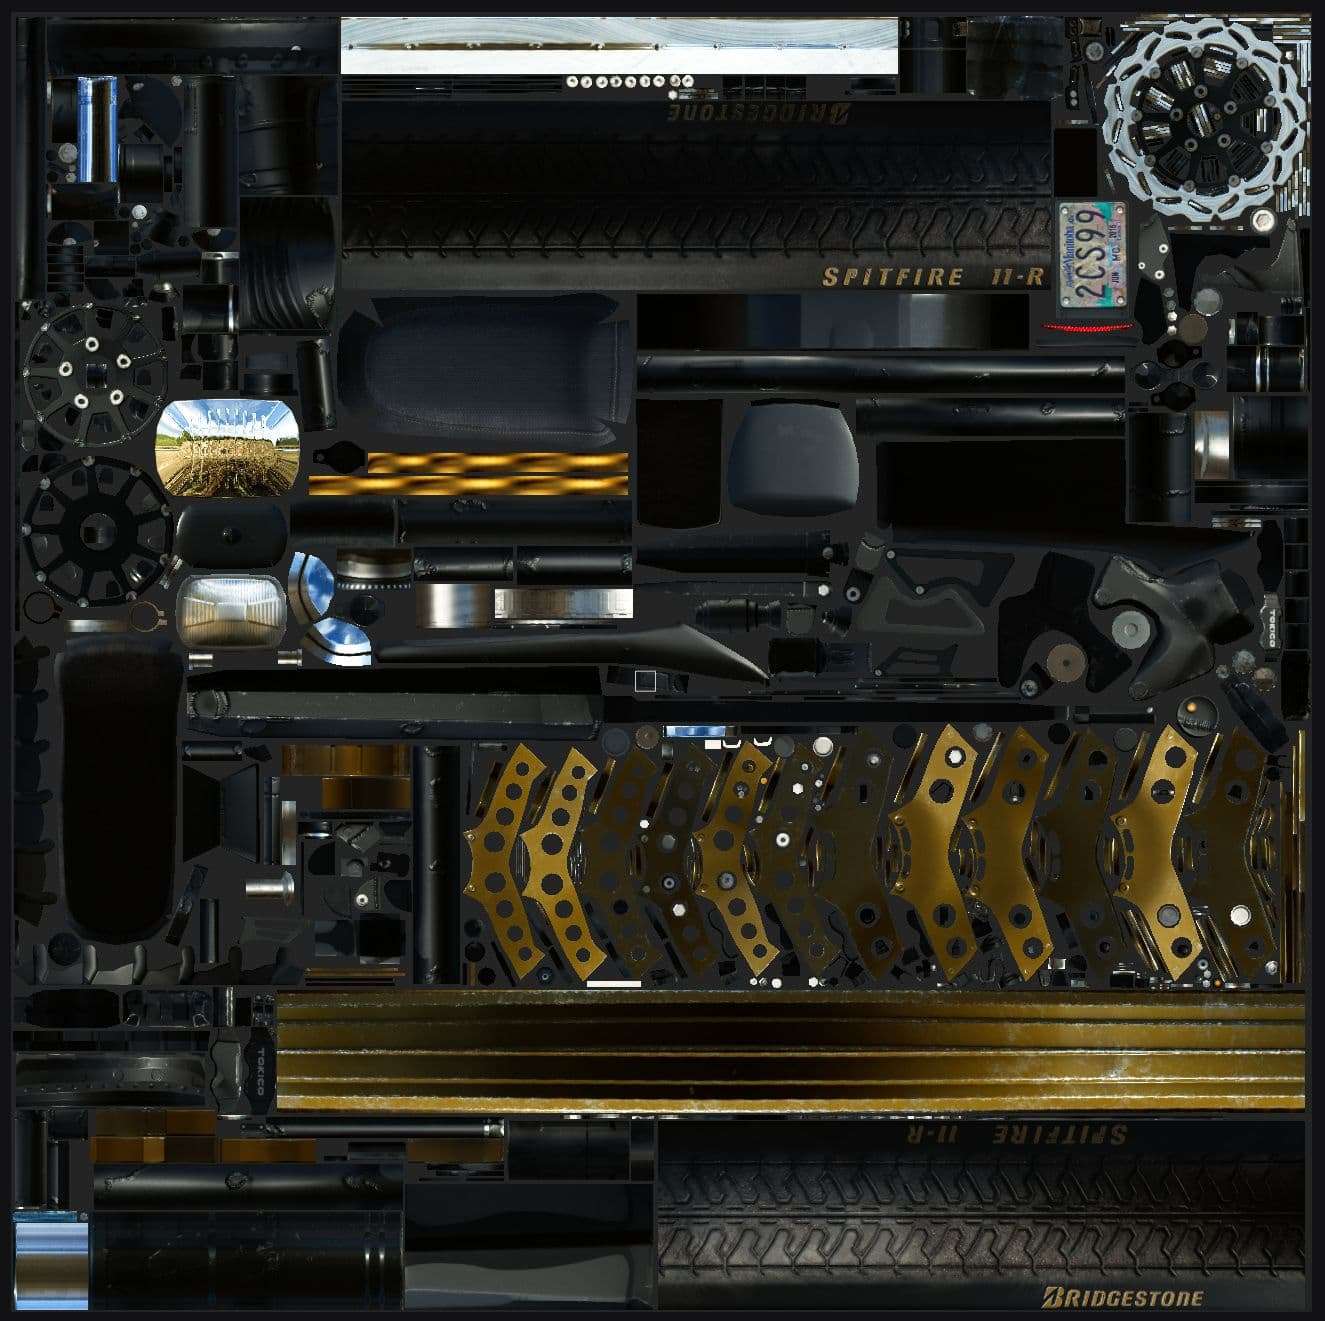
UVs
When it comes to UVs, doing a good packing job on a heroic asset is essential. This is because in games, performance benchmarks need to be considered and there is no luxury of freely using UDIMs in production yet. Here is how I approached the UVs.
I unwrapped every single mesh and kept it out of the 0 to 1 UV space. It is important to try and have as many shells straightened as possible to get the best bakes and to avoid pixelation.I learned it from this 80LV interview with Aleksandar Danilovac.
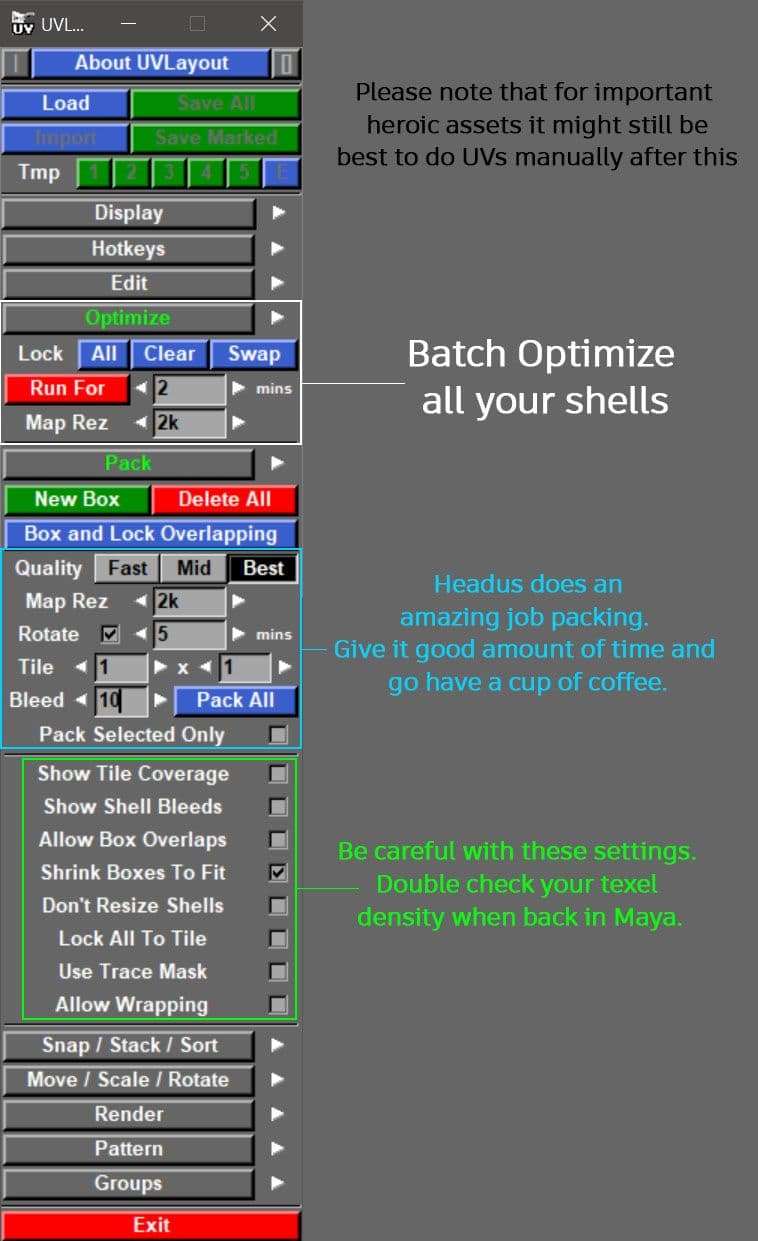
In my opinion, this process is best to be dealt with in Headus UV Layout where we can simply press R while hovering over a shell and Headus will straighten it automatically no matter how complex it is, as opposed to Maya. Tackling complex assets is really fast and easy in Headus and I highly recommend it. In general I save 50% of my UVing time thanks to Headus.
We can also run the Optimise and Pack features for a certain amount of time for all the shells: the software will do it all automatically with multiple iterations over time, while you can just have a cup of coffee and relax.
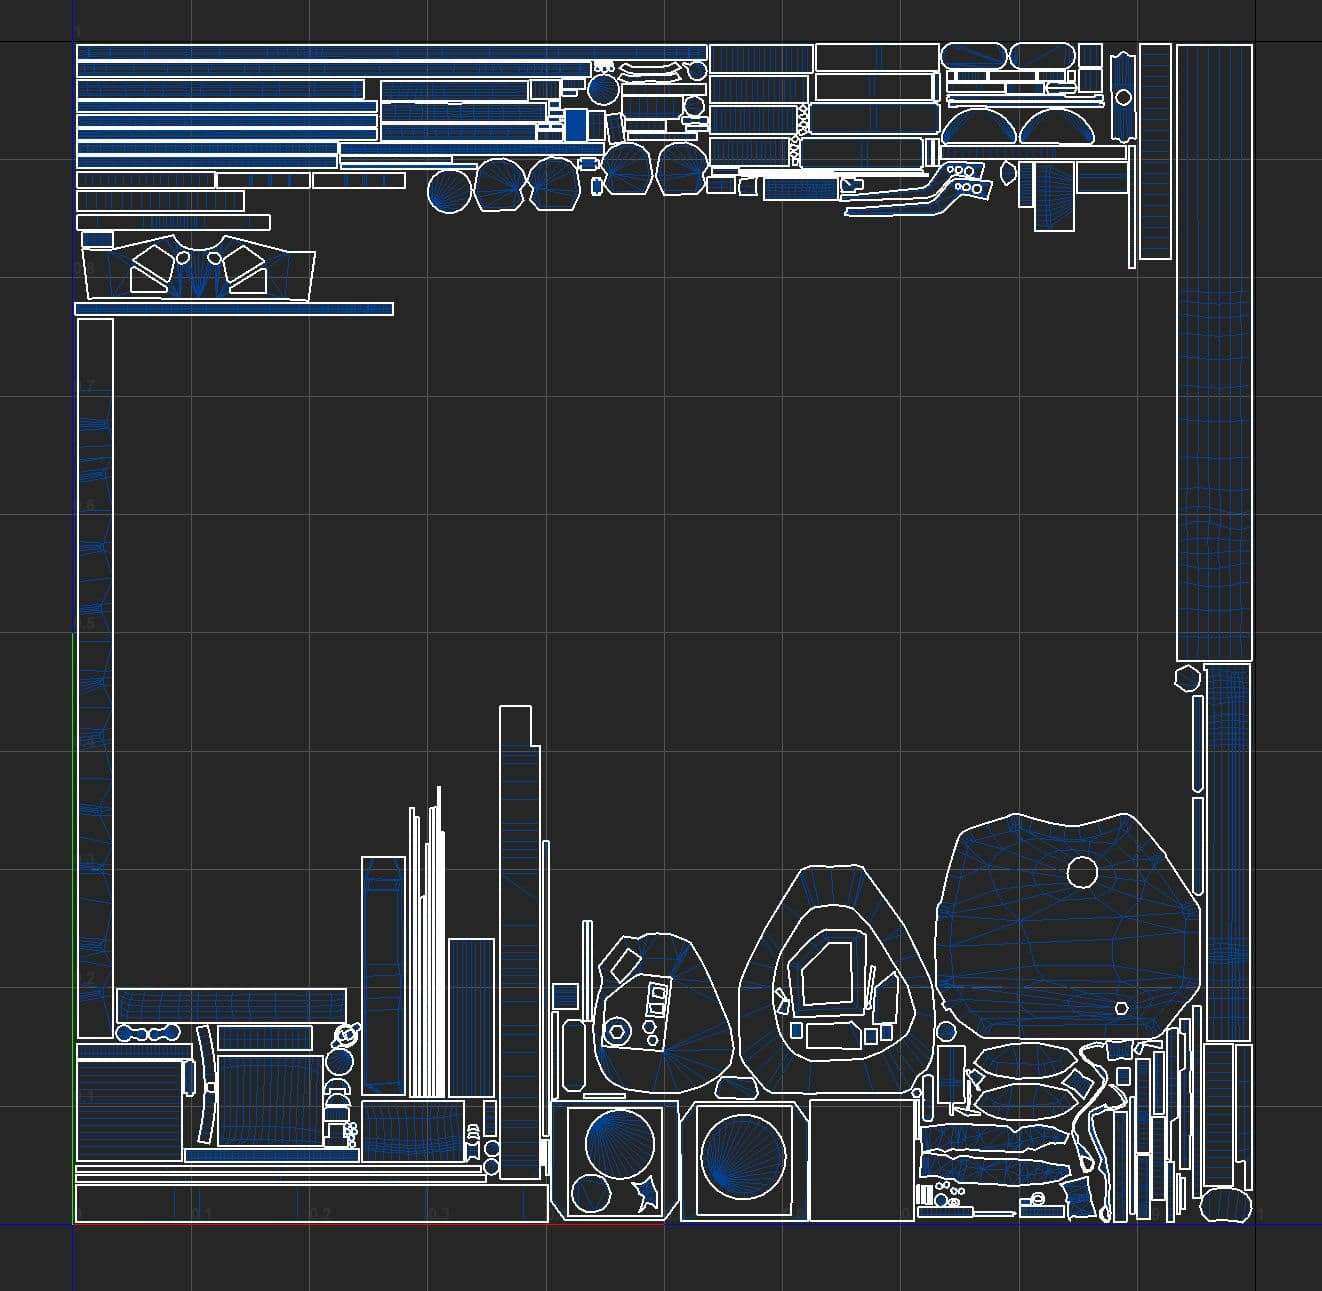
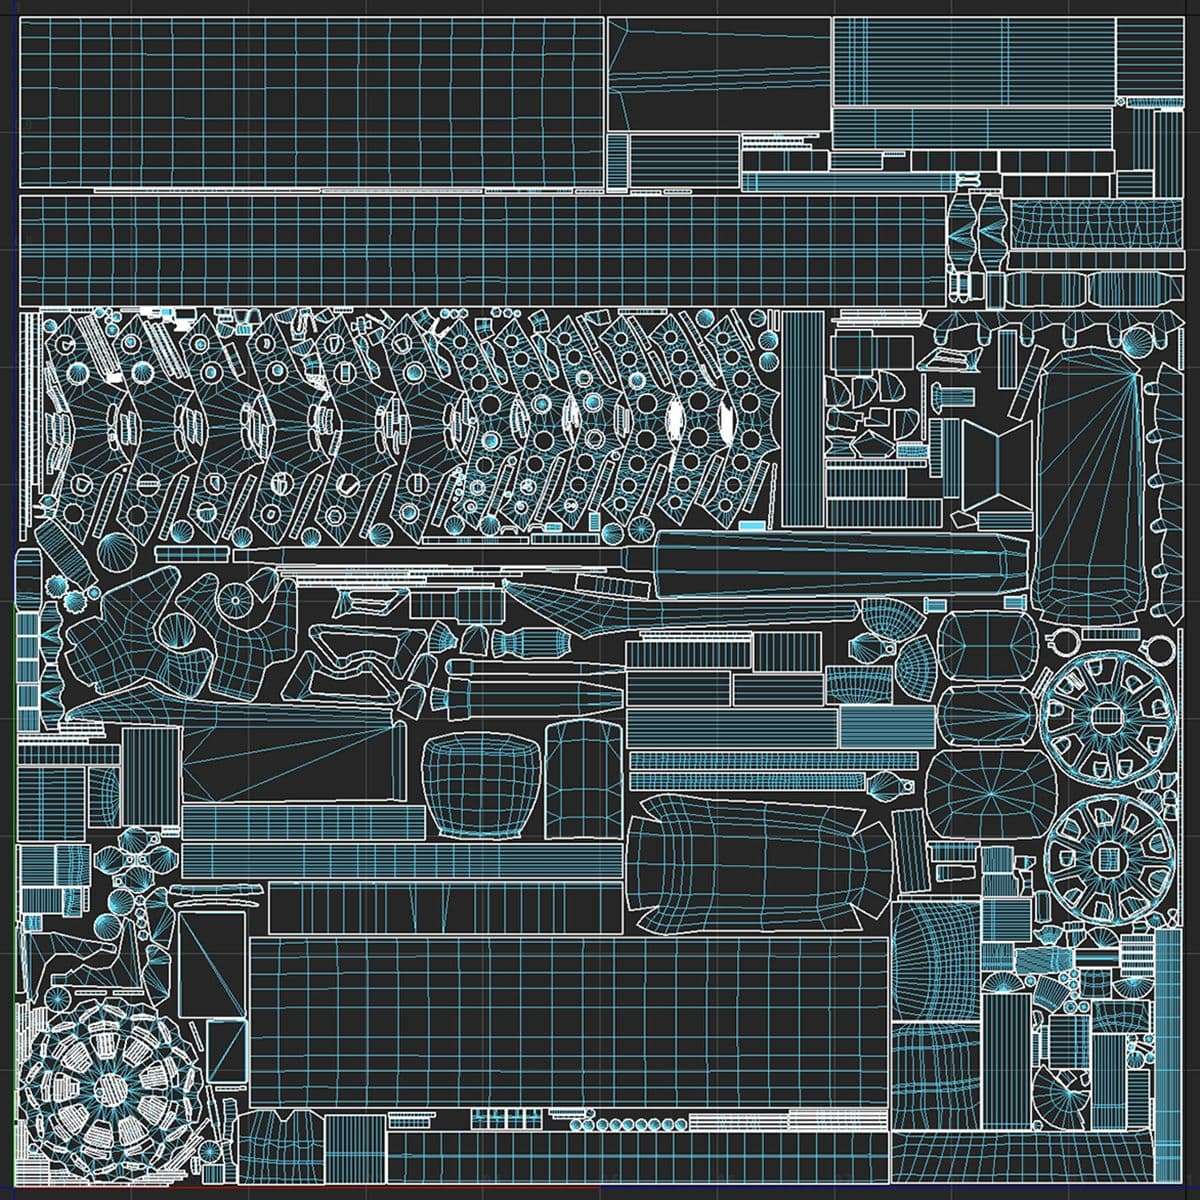
Though for this heroic asset, I used more of a manual approach. Back in Maya, I used the straightened shells to outline the 0 to 1 UV space and then manually filled in the rest of the puzzle. It takes time, but in the end it’s worth it.
When doing UVs it is important to keep in mind the texel density - all my shells were uniformly set to 10.24 pixels per centimetre at 2K map size. The only odd shells were the cockpit shells, which I doubled the texel density for, thinking about riding this bike in an FPS game where the cockpit will be really close to the camera.
I split the model into 2 texture sets:
Covers the engine, the dash/cockpit, the radiator and the fuel tank
The other map covers the rest, which is the drivetrain and the suspension
Final words about UVs. Make sure to refer to the charts correlating the map size and the pixel distance between the shells. It is important to keep the proper shell padding to avoid artifacts when the game engine will mipmap the textures. You can use Maya’s pixel distance measuring tool to measure between 2 UV points. And always remember - all hard edges are texture borders.
Baking
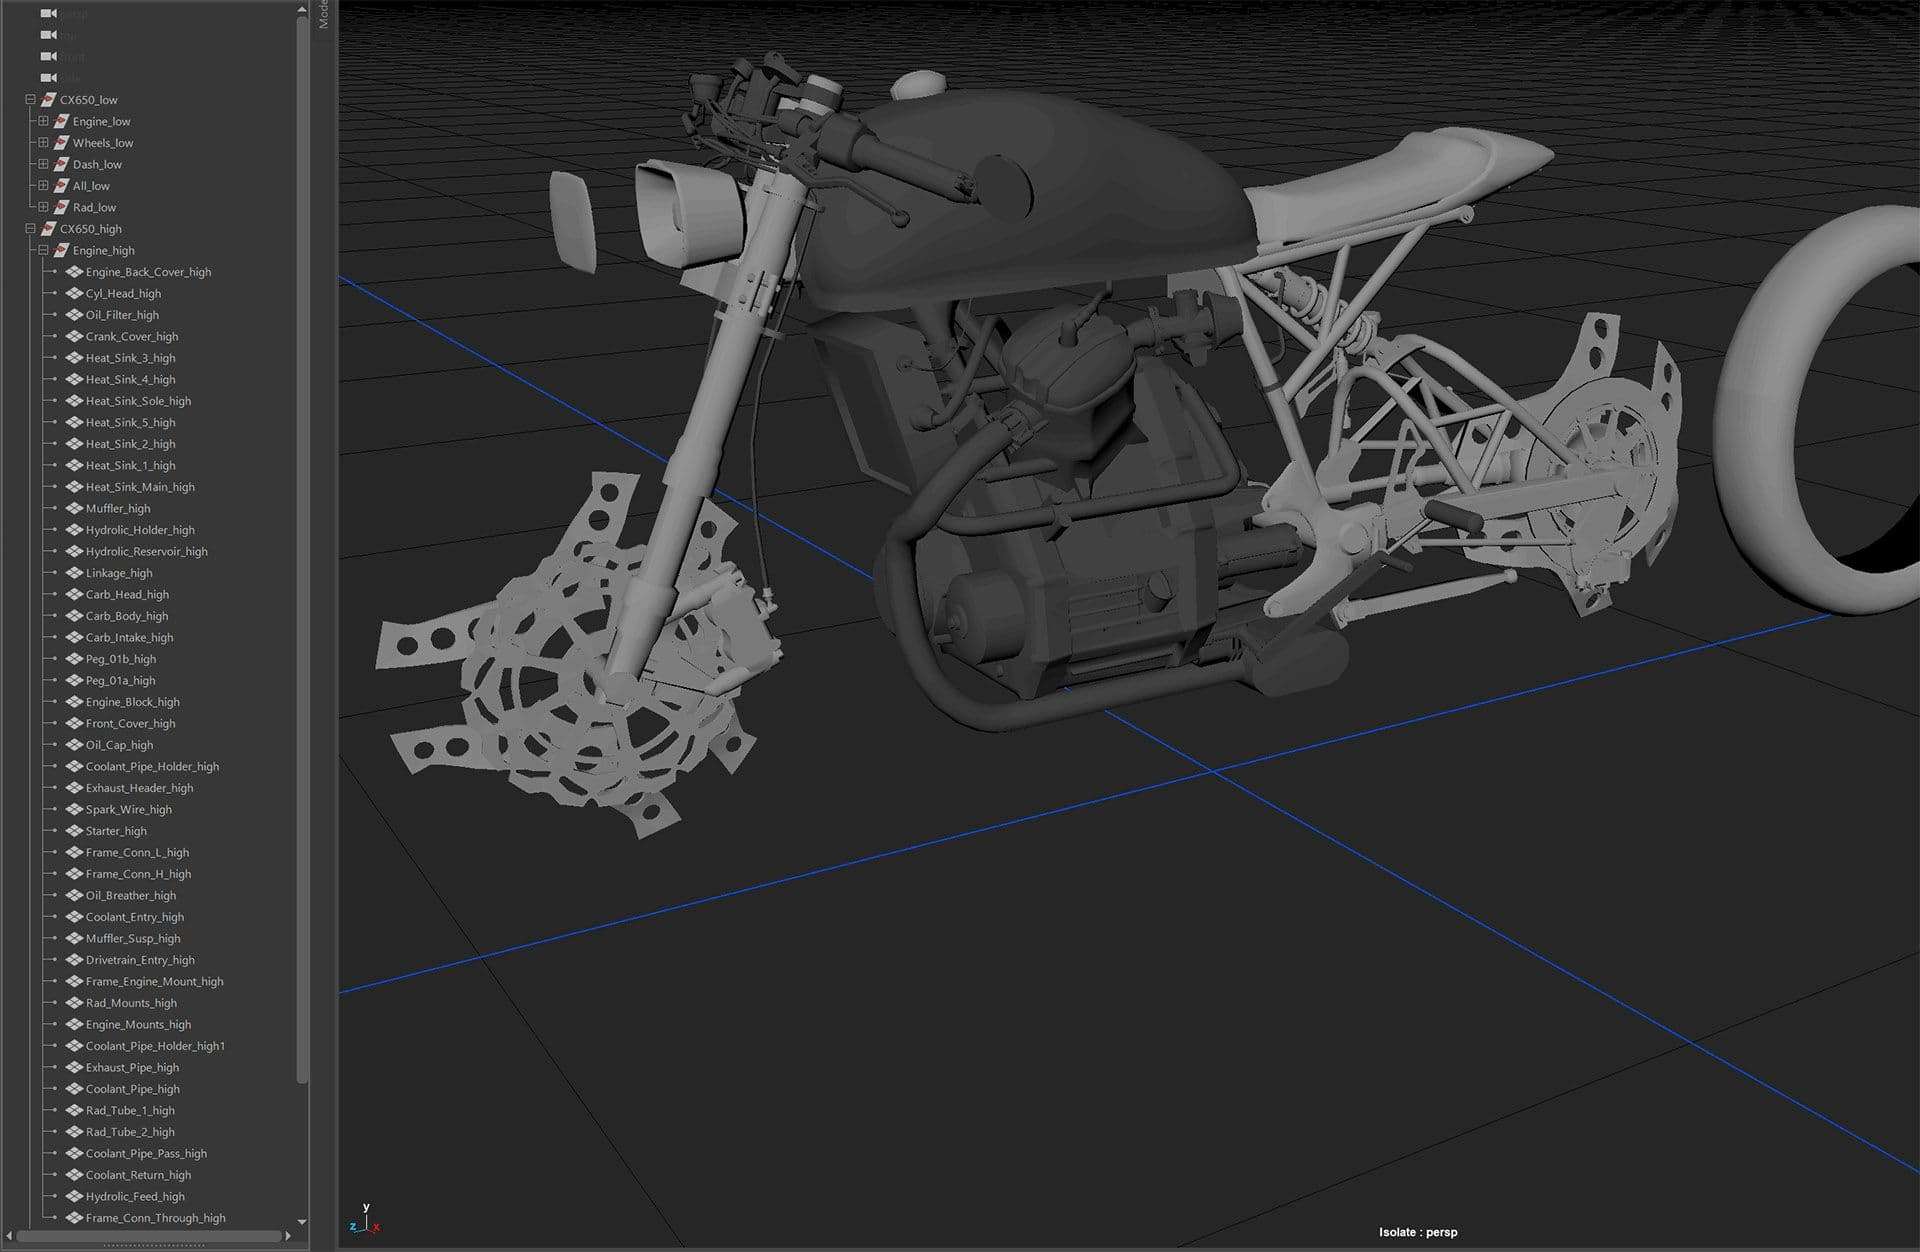
In preparation for baking we should always carefully name and place parts of the model in their own baking groups with proper suffixes such as _low and _high.
This is the standard pipeline these days as opposed to the older method of ‘exploding’ the asset to avoid baking artifacts.
It is a good habit to organise all the low poly parts combined into the main low poly group, and then export as FBX with a low poly suffix. Same goes for the high poly.
Necessary naming conventions for baking
We should also assign different materials in Maya to the different meshes on the high poly model for the Material ID bake. This is simply to use quick and easy masks in Substance Painter when texturing.
Material ID assignment
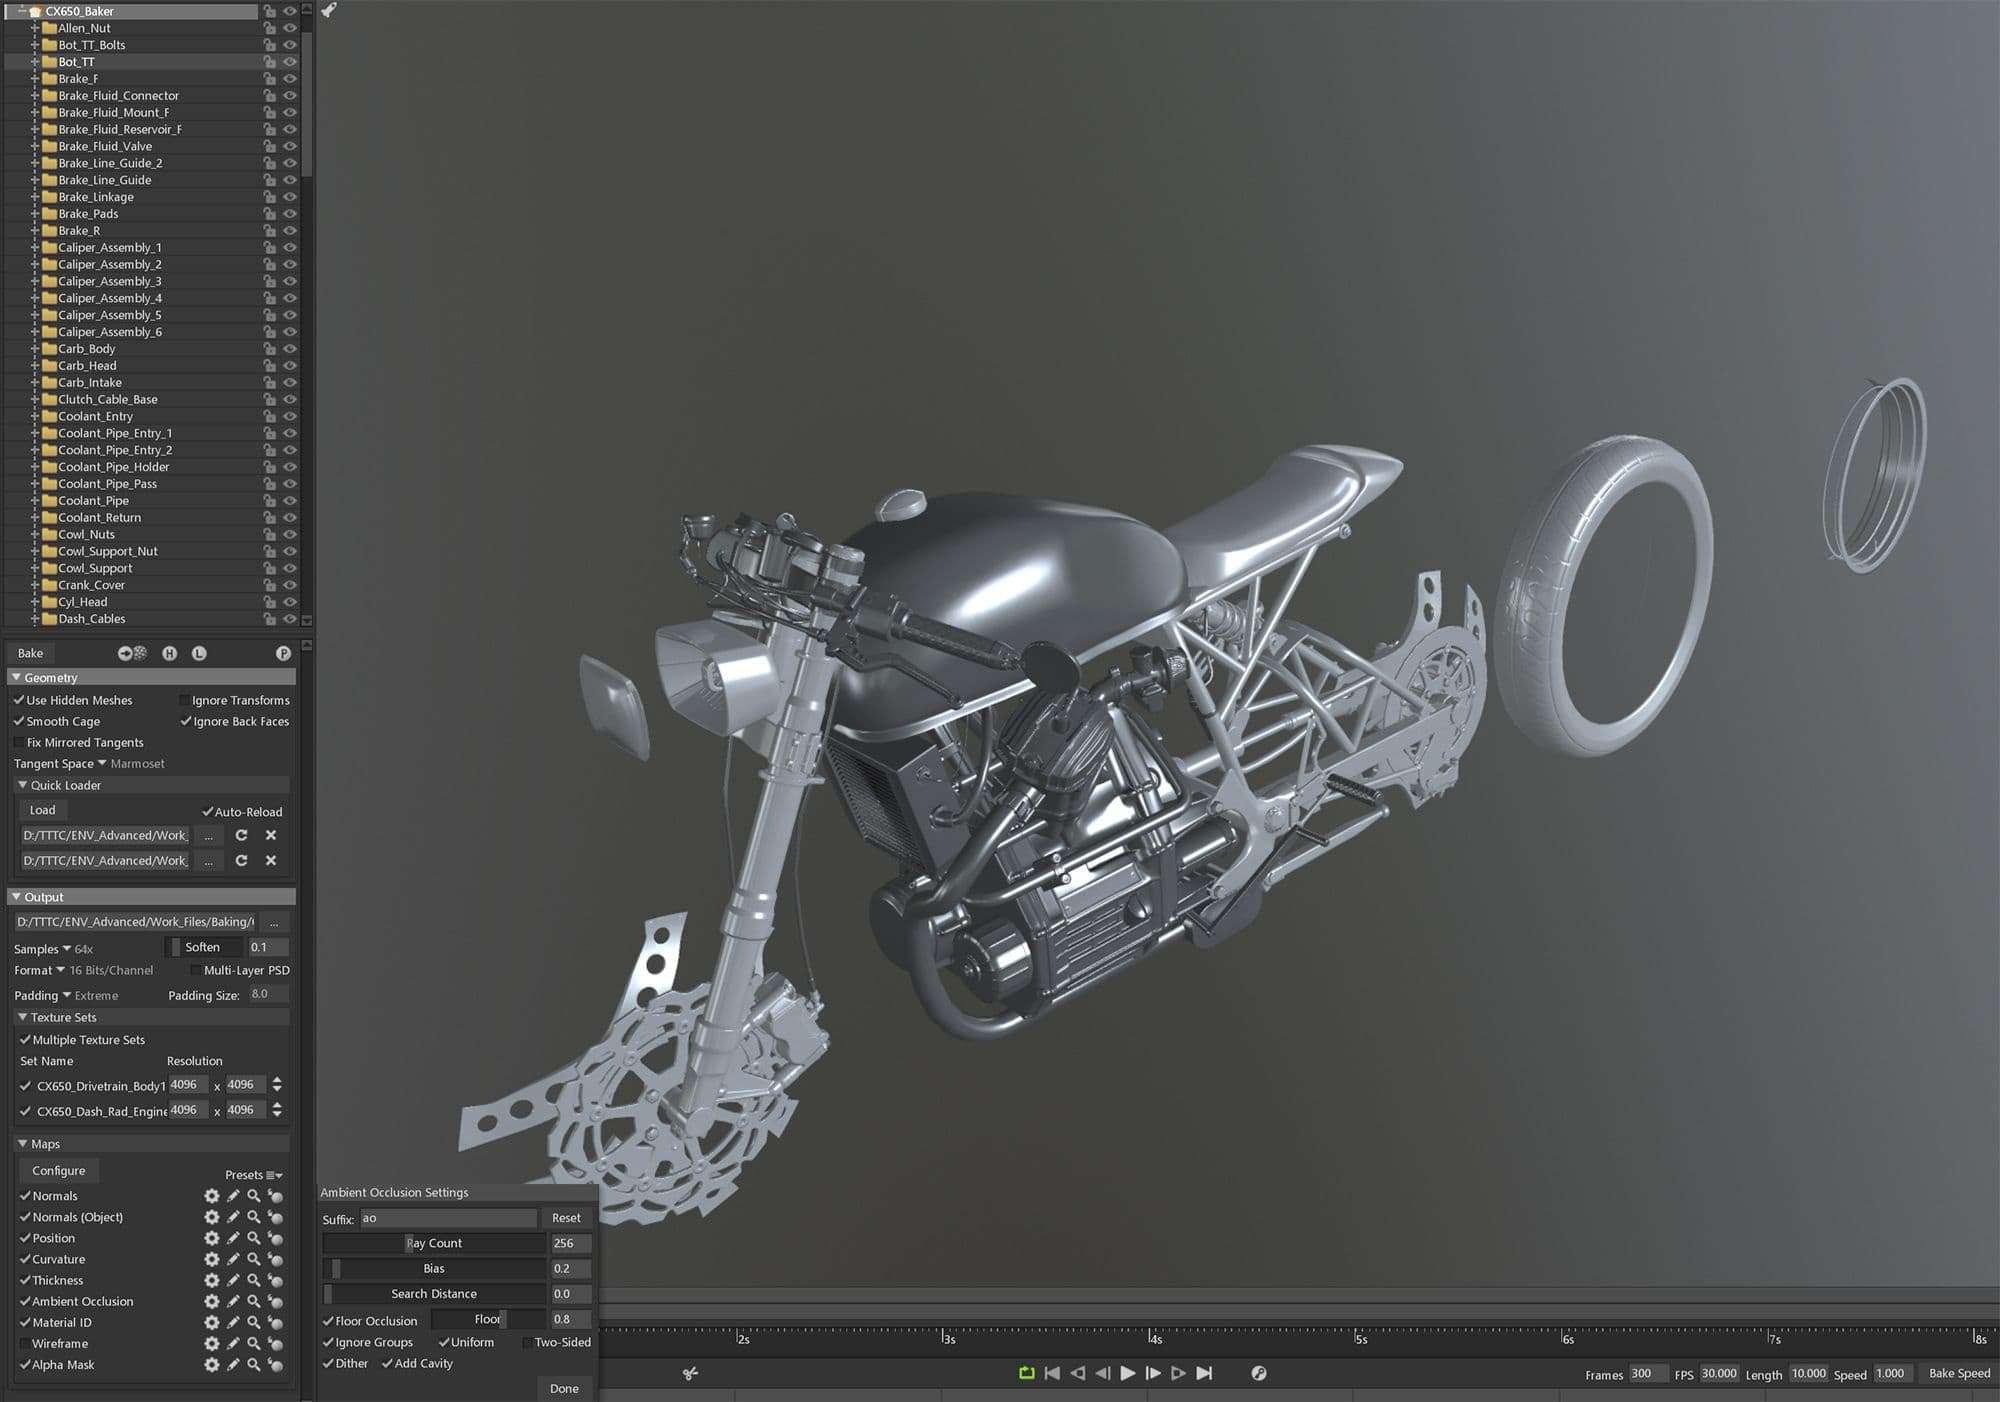
I prefer baking in Marmoset. I love baking in that software, because of its versatility and the ability to quickly fix the cage and skew issues. In case you are wondering why some parts of the model are set farther away from the main body, it is because when we bake the AO we ignore the baking groups, so that we get the AO affecting all surfaces. We do not want the AO to affect some parts of the bike, due to mirroring them in the future.
Marmoset Baking Setup
And just to mention the reason behind mirroring some parts is to cut on the UV size to ensure we can fit the whole prop on two texture sets.
Before we move on to texturing, the last thing I want to mention is how we can go about baking the headlight. I used 2 baked normal maps (concave and convex) and paint in normals with masks later in Substance Painter. The reason behind this is so that you can mask the normals in a way that the refraction shader will bend the light in different directions. You will find more details in this tutorial and I highly recommend it.
Headlight high poly double normal setup
Texturing
Before doing any texturing work in Substance Painter, the first thing we want to do is to enable the ACES LUT made by Brian Leleux. You can download it here; the installation instructions are included. This will give you a better idea of how your textures will look like in Unreal Engine.
Remember the headlight bake? This is how the normals work with opacity in Painter, you can already see the reflection bending in an interesting way. This will be even more apparent once we add a shader on top of this in the engine.
Masked concave and convex normals in action
Texturing is always a matter of layering, masking and checking the references. We should look at dirt and dust patterns on tires, as well as the chunky textures of rubber micro tears. Of course we can only go so far with game resolution textures.
I usually start with a smart mask, then put a tileable grunge in a subtract mode to break up the procedural look. After that I apply warp and sharpen filters, and if it’s not enough I would then paint in details manually.
Tire texturing
When it came to adding tire side labels I imported some alphas and thanks to straightened tire UV shells it was very easy to add in the 2D view mode in Painter.
For metal and painted surfaces, we can use the same approach with masking, subtracting and applying filters. I looked at my own bike photos to see the stone chipping patterns. For these, I imported my own alphas and painted in one mask manually. Another thing to note was the paint on the engine was different, it was powder coated. Luckily Substance Painter has a ready filter for this.
Exhaust texturing
For the welding seams, Substance Painter has a dedicated brush and you can find plenty of tutorials on how to use it best. Once again, this process is all about layering - from plain large to smaller details.
Part of creating a digital asset is learning how it works in real life. It is true for both modeling and texturing. Knowing that carburetors tend to get grimy because filters need to be oiled, we can show that in our texturing work.
Carburetor texturing
Substance Painter filter finishes are great for working with plastic and rubber surfaces as well. Always remember to experiment and see what works best for the looks you are aiming for.
Painter filter finishes on plastic surfaces
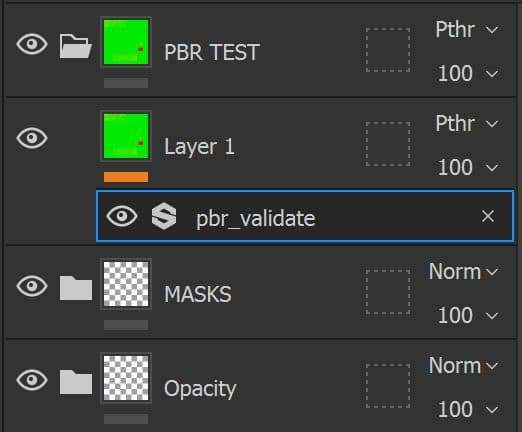
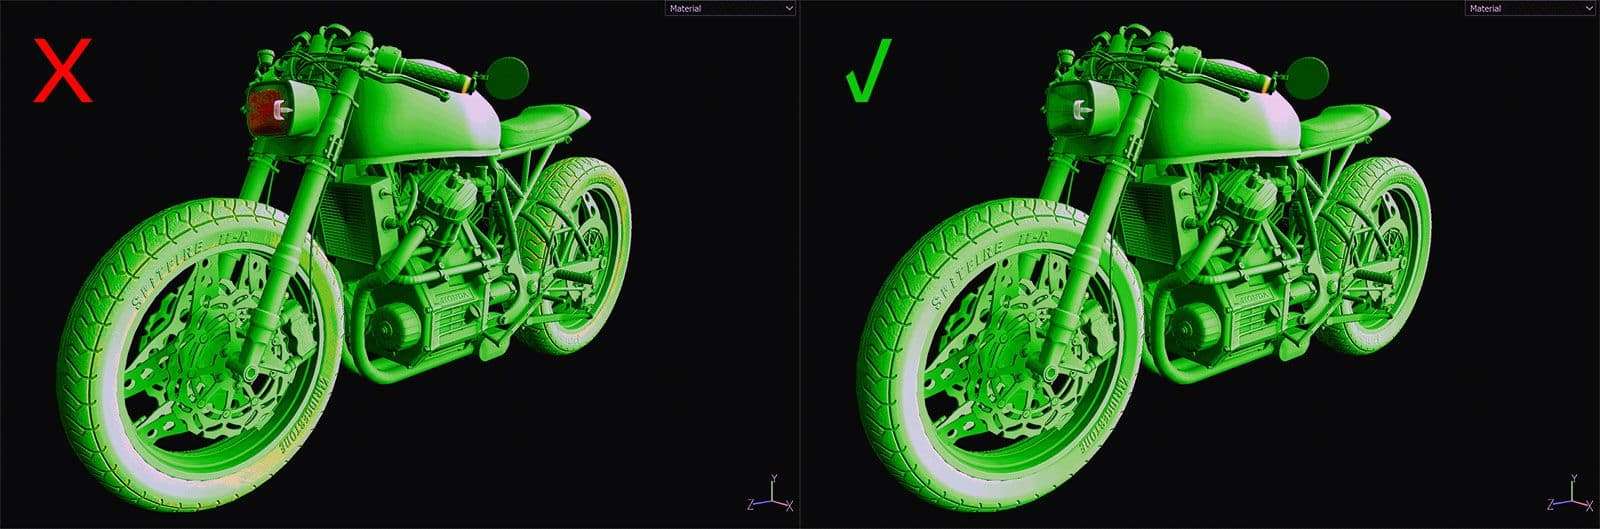
When working with assets in Painter I usually place my export masks (for shaders) at the very top. Above it, I leave a PBR checking layer in passthrough mode to check my PBR values.
With experience you will less likely need this, but it is always good to double check if you are within range. This is to ensure your asset will look physically correct in any lighting conditions. I used the 30 sRGB threshold setting in this filter.
Notice red on the headlight and yellow on the tires before adjusting to PBR levels
Shading
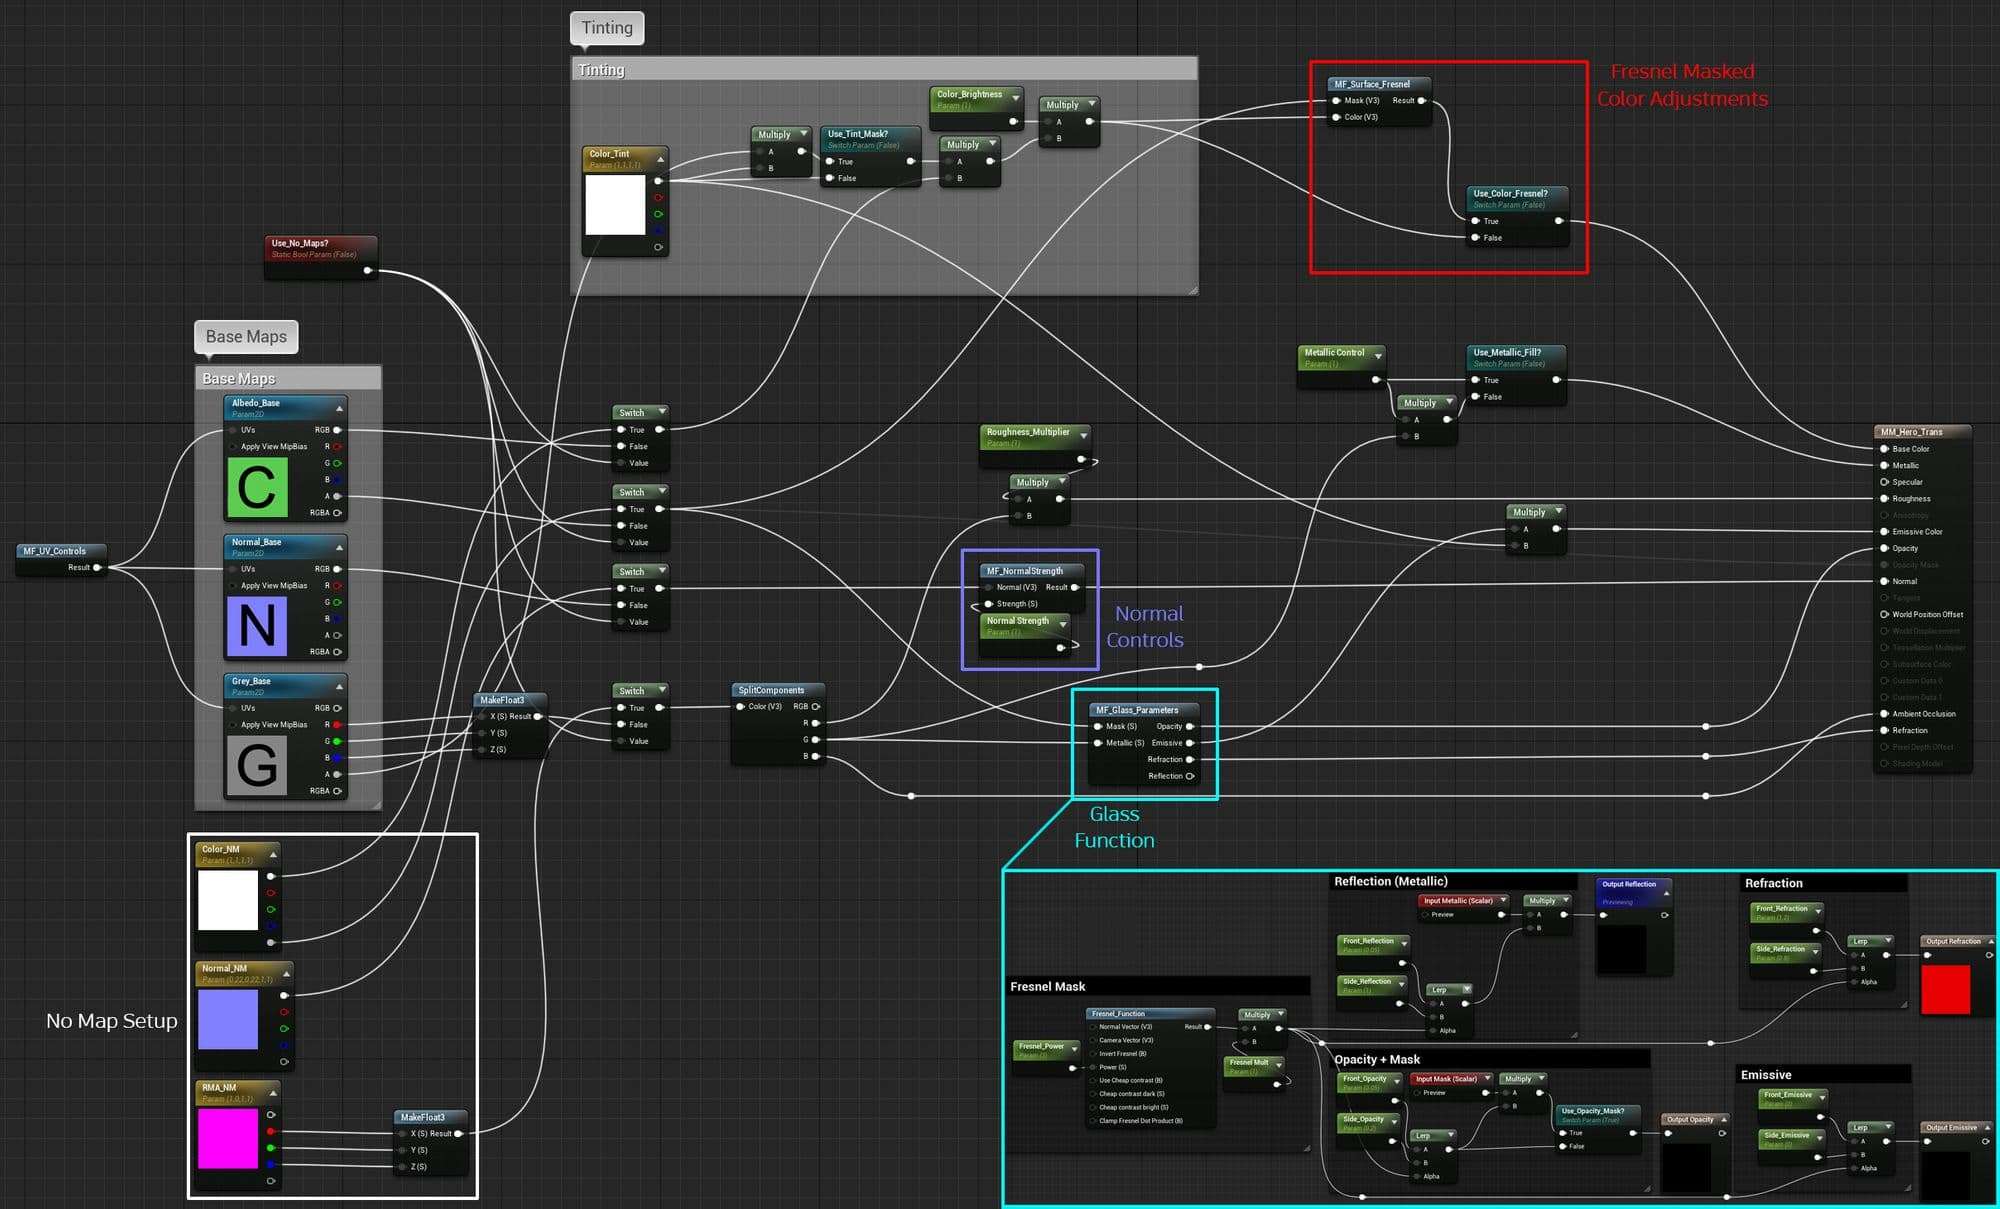
When talking about shaders, Unreal Engine has a big advantage in this matter. Without knowing how to code you can get some impressive effects just using the nodes.
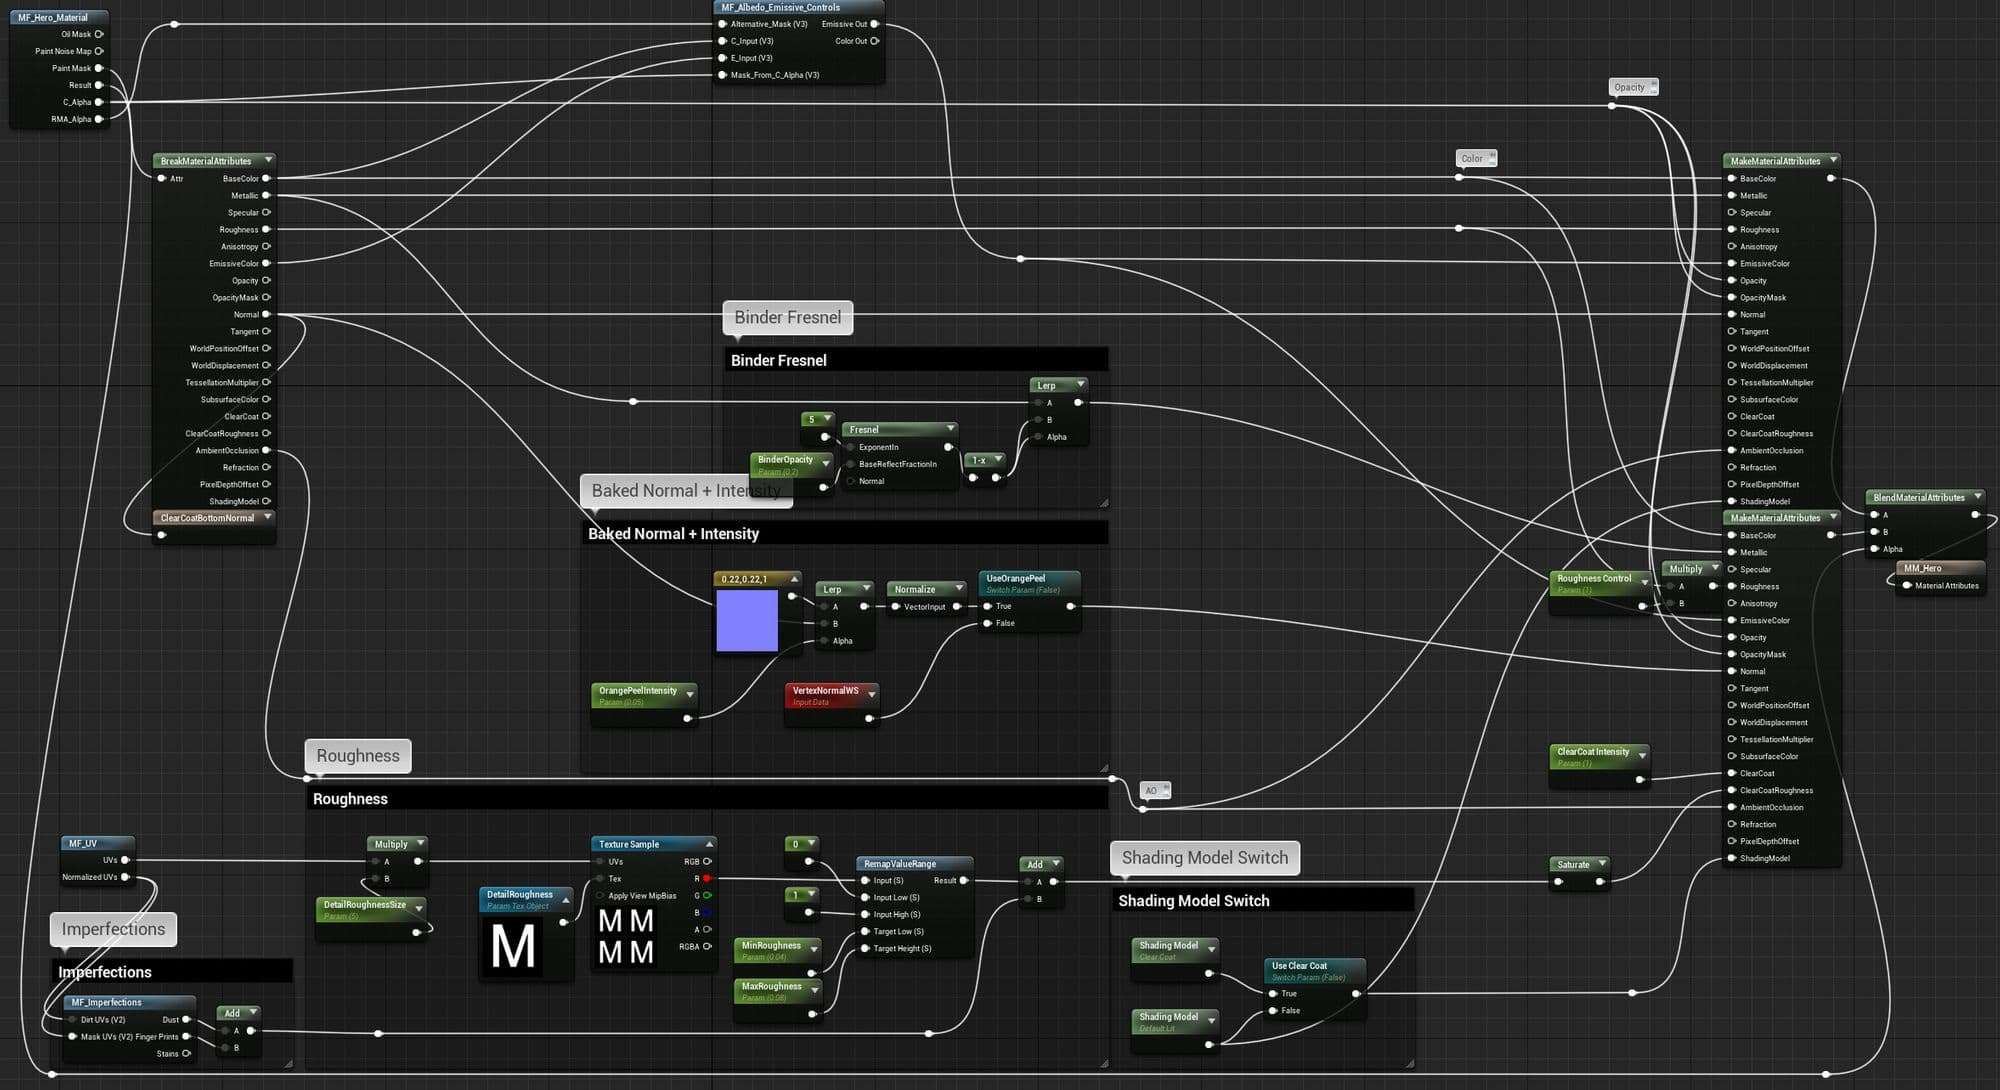
One of the biggest nuances when it comes to working with vehicles is to figure out the car paint shader. It is not as simple as one might think, the paint layer needs to have its own normals to react to light properly under the clear coating layer.
This allowed me to reverse engineer the shader and apply it to my texturing setup, where I used my masks from Substance Painter to blend the materials at the end of the graph to separate painted surfaces from the rest of the bike.
Bike master material
Bike Paint Shader parameters
Here is an example of the headlight with and without the refractive shader setup. The opacity in the shader lets the emissive light pass through, and the refraction, using the normals, scatters and bends the light nicely.
The master material for the translucent refractive shader is used for the headlight as well as other translucent assets in the scene.
Translucent Master Material used in motorcycle headlight instance
One of the limitations of Marmoset as opposed to Unreal Engine is that you actually need to know HLSL/GLSL to create your custom shaders. While it is on my to-do list to study HLSL, I did not have the time to spare while working on this project. So because of that, I had to also import a second set of geometry for the clear coat. Marmoset 4 actually has a good preset to create a clear coat effect, but it did not work with my texturing setup and single geometry, which was intended for Unreal Engine in the first place.
Rendering and Lighting
The scene setup in Unreal Engine was largely dictated by my Bike Shed MC project. The back area of the shop with the bike display was actually made up and was not part of the real life Bike Shed reference.
I wanted to go with something that would fit the original black and yellow colours so a light wooden display was a good choice to contrast the dark bike.
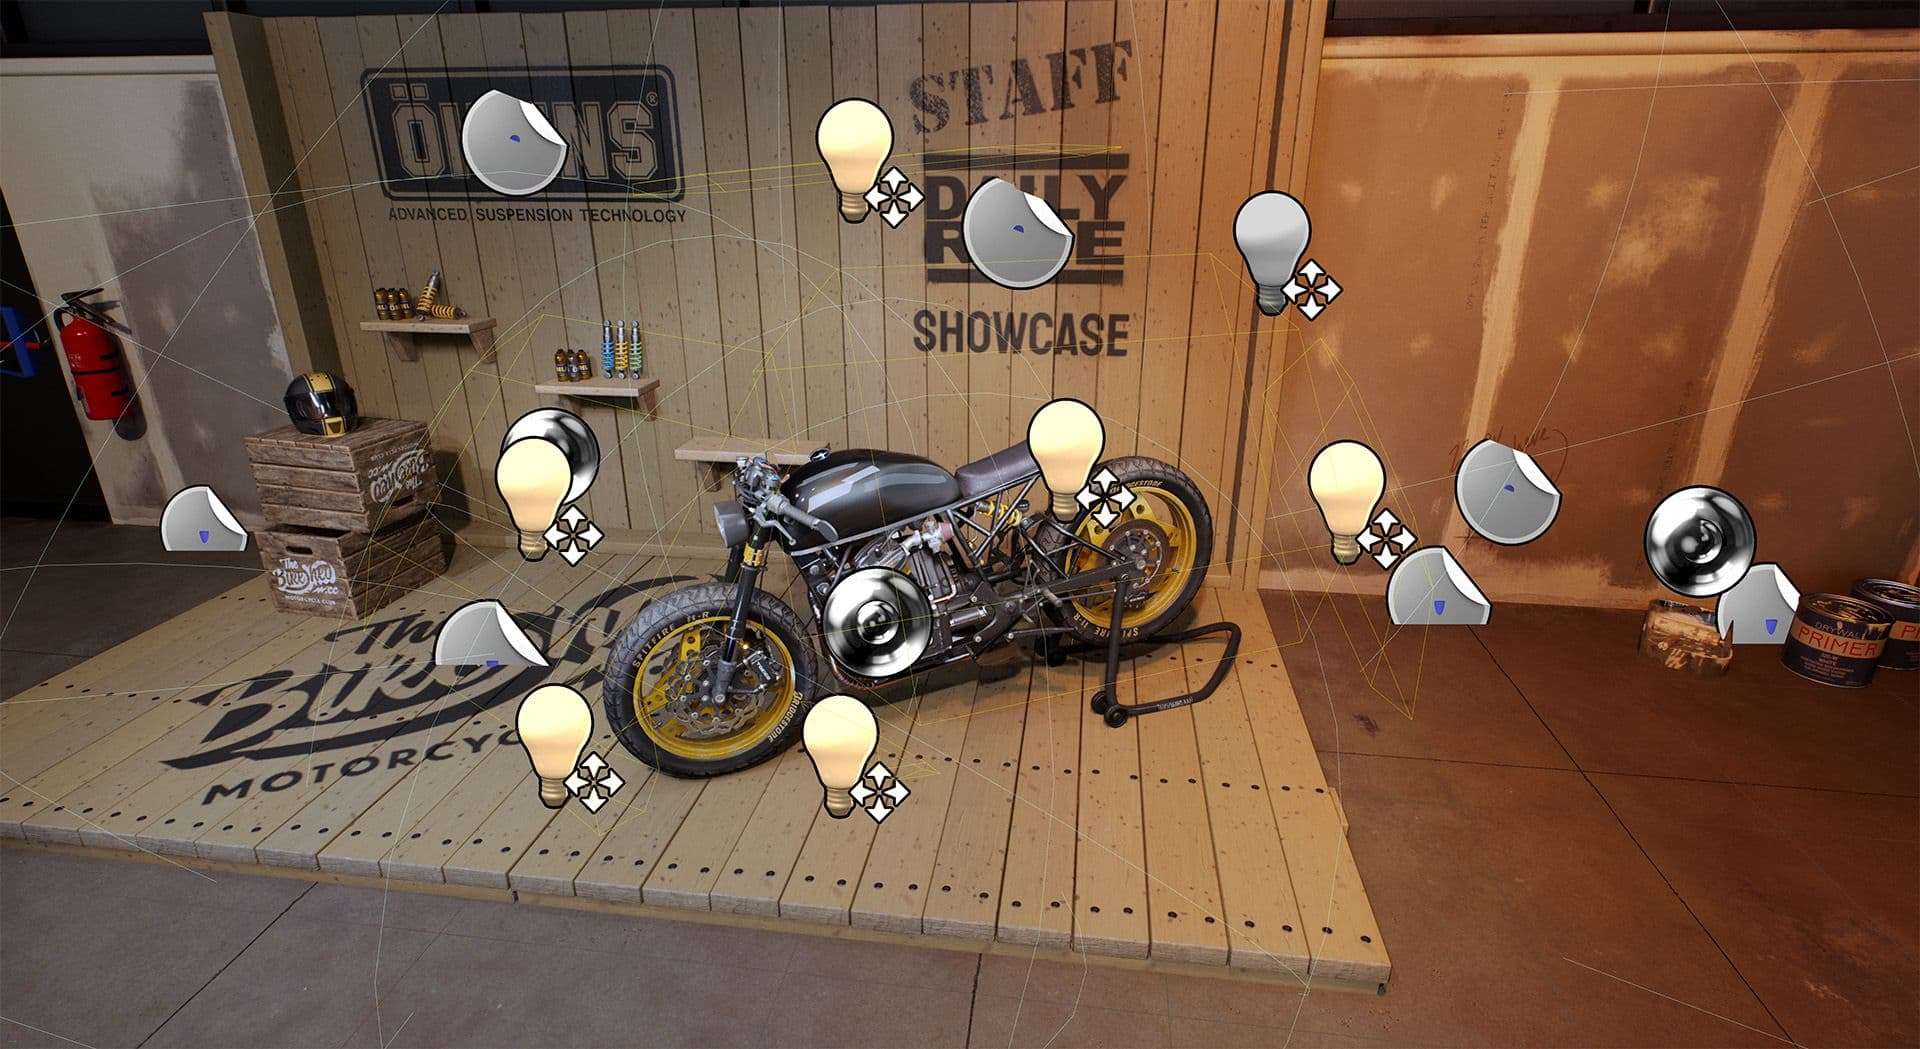
When it came to lighting, I used mostly big light sources. I learned a bit about this process in this 80LV interview with Ronan Mahon. Long story short - vehicles are just giant chrome balls, so we want as much lighting on them as possible, preferably hitting the grazing angles similar to a classic 3 point setup. I also set up a rear lighting to get those contours.
Sometimes you might have to emphasise something on your heroic asset but without affecting the world around it. For that Unreal Engine has you covered with the Lighting Channel options.
Lighting in Unreal Engine
I used Marmoset 4 for my main beauty shots and breakdowns. This is the first time I used the new Marmoset and I have to say I like it a lot.
Using ray tracing is pretty straightforward and Marmoset’s tutorials are more than enough to understand how things work. This is a great way to show off all the reflective surfaces of your asset and enhance your presentation.
Marmoset 4 comes with a really good library of HDRIs and textures. I only had to model simple geo for the background and then applied the M4 library textures, since I knew the background would be blurry anyways.
I imported the bike in different stances, then hid them and worked with the cameras and lighting.
After setting up the shots and naming the cameras I made separate lighting for each of the cameras and named the folders accordingly. Locking them is valuable so that you don’t disturb them accidentally.
When I worked with my main shot and the video, I placed my lighting rig on a turntable to find the best angles.
Marmoset setup
Extra - Bringing Assets to Life
At this point, we have the game ready model, but if it is not enough and you want to go the extra mile, all you have to do is rig and animate it.
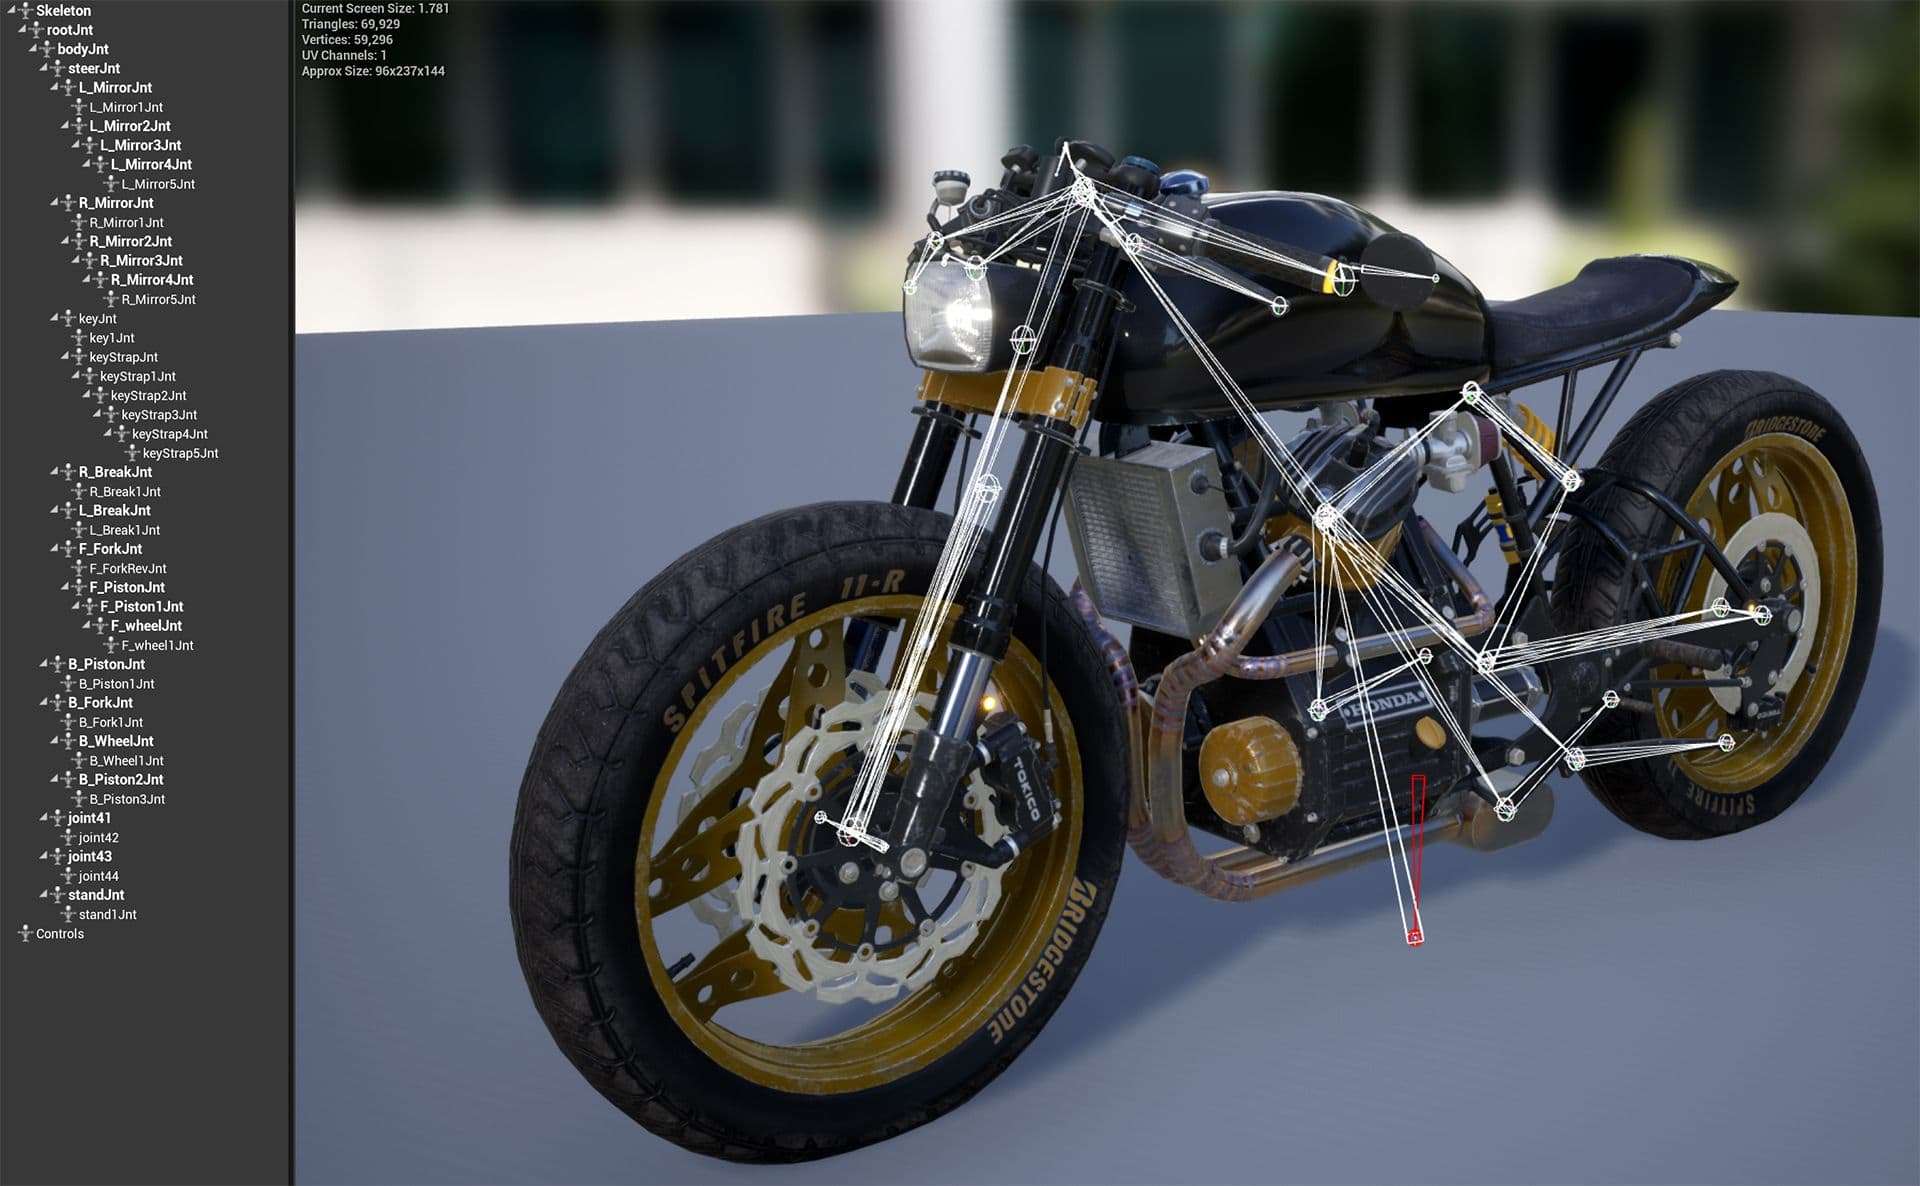
This is something I have yet to learn, but thanks to my classmate Mio Zwickl and her mentor Perry Leijten this bike is now rigged.
Skeleton
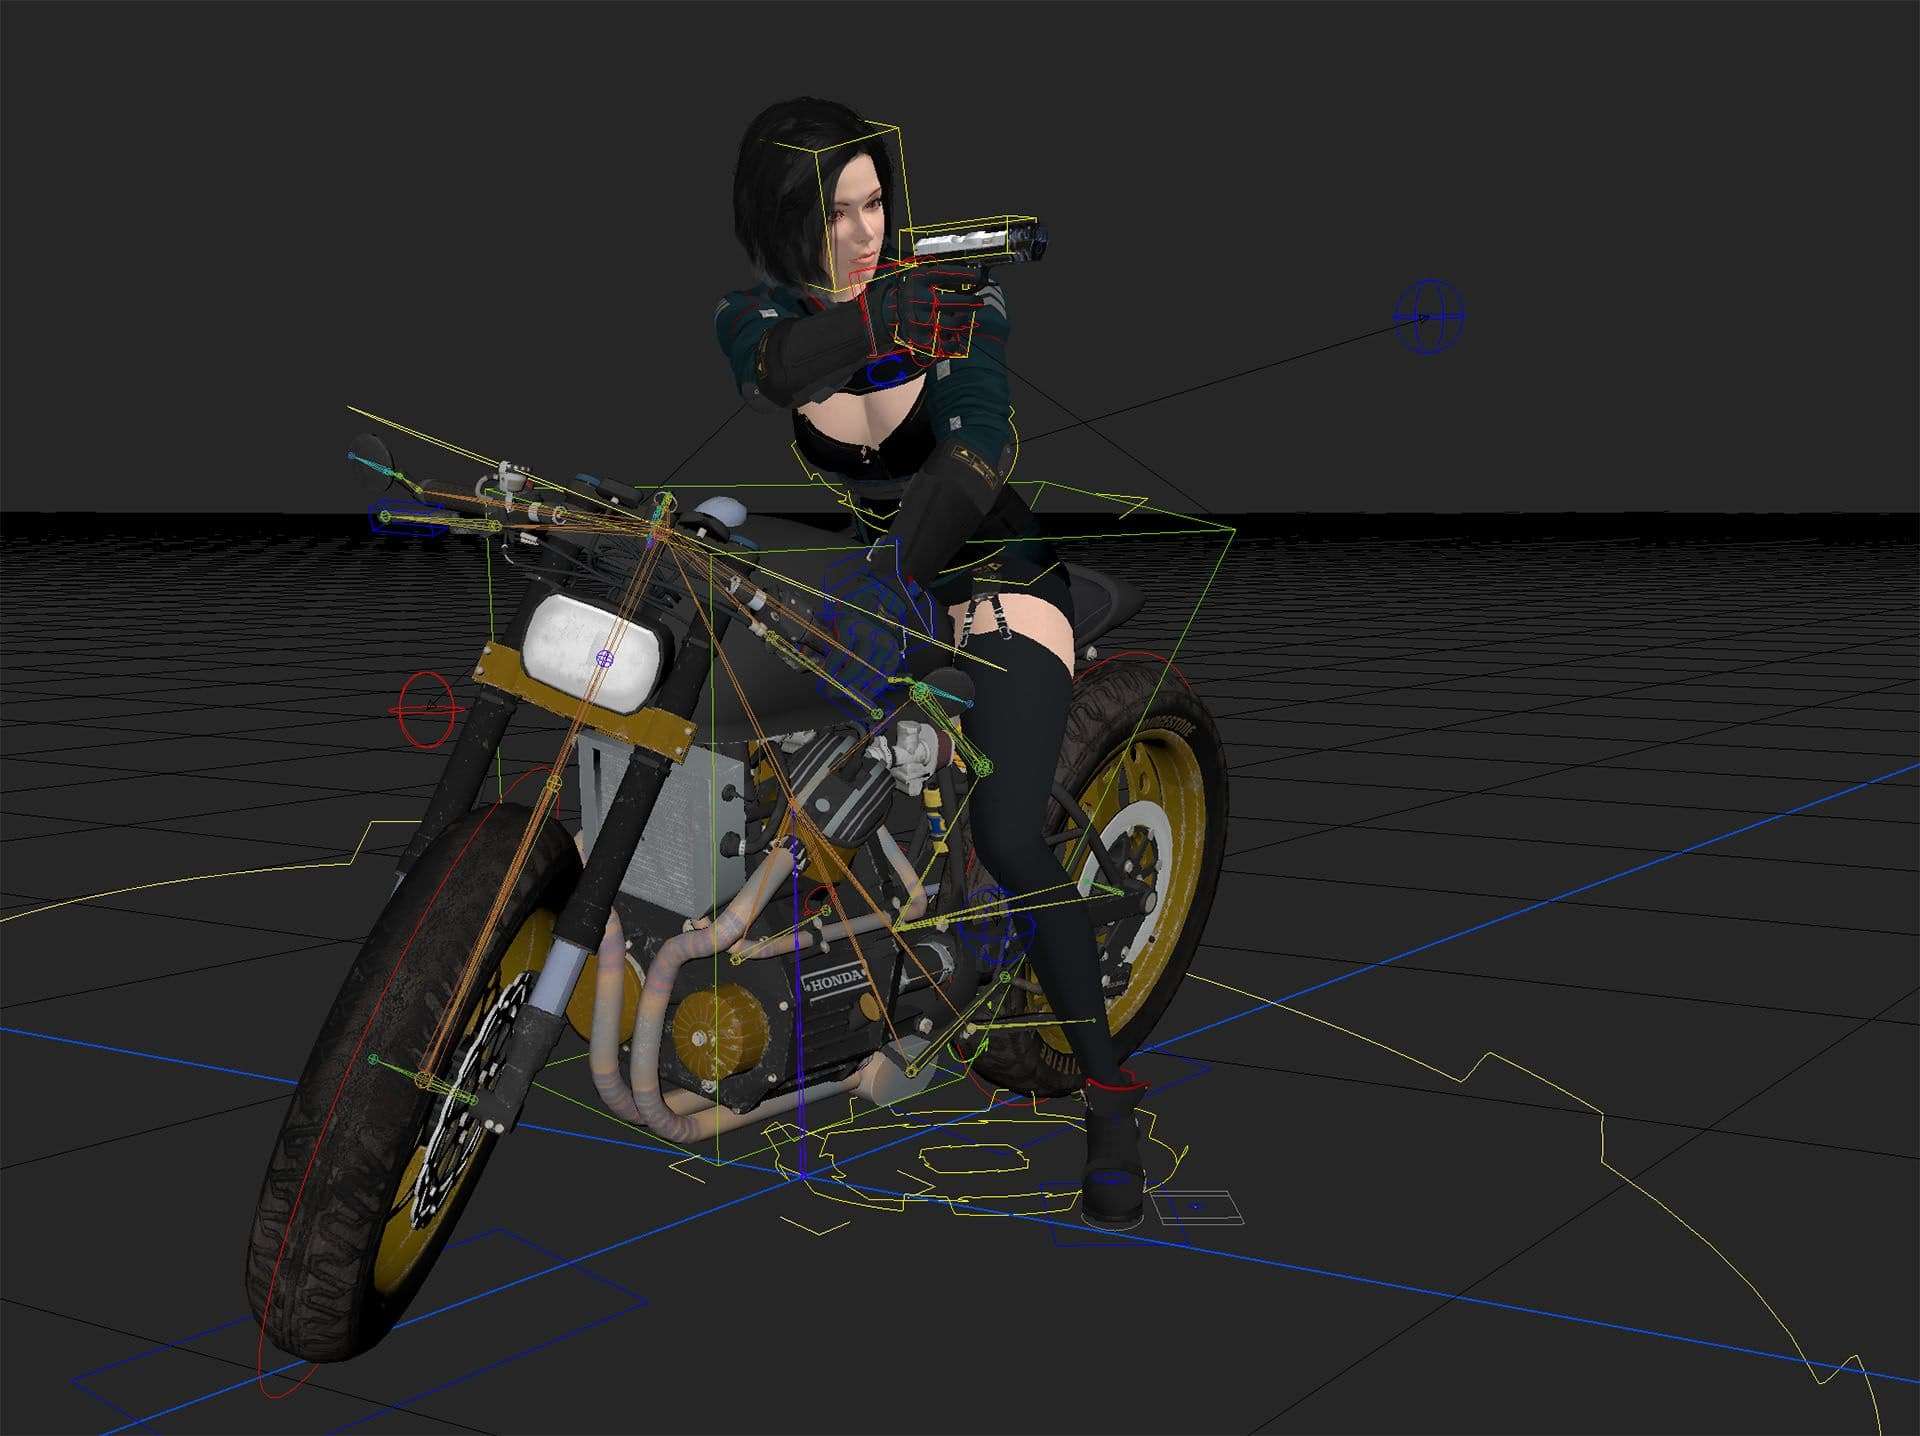
I had some time to play around with controls in Maya. The posed character was made by Mio and rigged by Perry as well.
Rig controls in Maya
Fully animating such a rig in Unreal Engine is not something I have yet mastered (although it is on my list), since it involves a lot of variables such as physics and character interaction, but here are some pretty cool simple results.
Bike test in engine
Tips and advice
Scope. Scope. Scope. If you made it this far, you already know scope is one of the biggest challenges of any project. This is just one bike, but see how much we have covered?
Always leave extra time in your estimation on top of what you think it might take you and be honest with yourself.
Other things to consider:
Start with smaller and simpler props to grasp the basics of modeling, UVing, baking and texturing. Once you are comfortable, tackle a bigger project, but pick a topic you are really passionate about, because it might take a long time to complete, and you will need that passion to push through.
Get yourself a mentor to help you guide you through your process. I am grateful to my Think Tank supervisor Jason Gullion for guiding me through the different aspects of this project.
Have some fun with it! Enjoy the process and the result. And always go the extra mile with your presentation and beyond.
If you have any questions please feel free to reach out via Artstation or Linkedin.
And that is it! Before we wrap up, I would like to thank The Rookies for the opportunity to share the details of this project. I hope some of this information is useful and will contribute to your artistic improvement.
Big thanks to my instructors at Think Tank Training Centre, my supervisor Jason Gullion, and to all my classmates, family, and friends who have given invaluable feedback and support.