Realistic Character Modeling and Texturing in Maya, Zbrush and Mari
Franziska Milius is a 3D Modeller with a background in Illustration and Fashion Design. She transitioned to 3D Modelling and has been creating realistic 3D Characters in Maya and Zbrush ever since. If you are looking to take your character modelling to the next level, this article is for you.
Franziska Milius has a background in Illustration and Fashion Design. She has spent a lot of her time drawing people and faces by hand, studying proportions and anatomical figure drawing.
It was when a friend introduced her to Zbrush, that she became fascinated by the software and the tools it provided, making it possible to create photorealistic models.
PIXL VISN Alumnus, Franziska, takes us through her process of creating realistic 3D Characters in Maya and Zbrush. If you are looking to take your character modelling to the next level, this article is for you.
Introduction
My greatest passion is to create human characters. Naturally, for my first Demo Reel project, I wanted to create a realistic looking character. Since it was the first time I was going to create a full character from sculpting to texturing, shading, grooming and lookdev, I was up for a great challenge.
Inspiration
Before I open Zbrush, I usually spend a day looking for inspiration and collecting ideas. It can be a character’s look, a facial expression or a certain colour scheme that catches my eye.
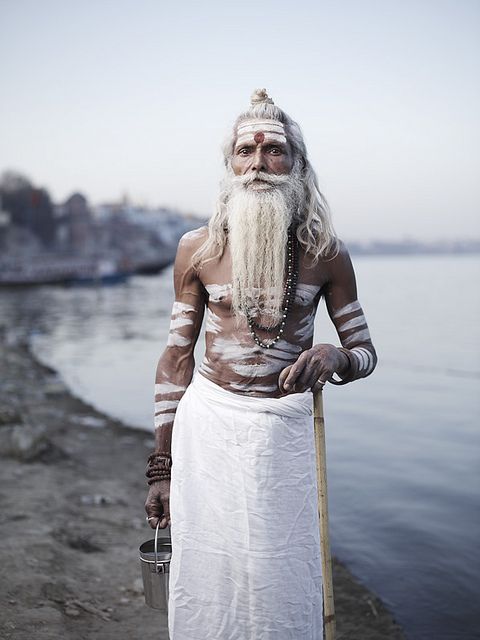
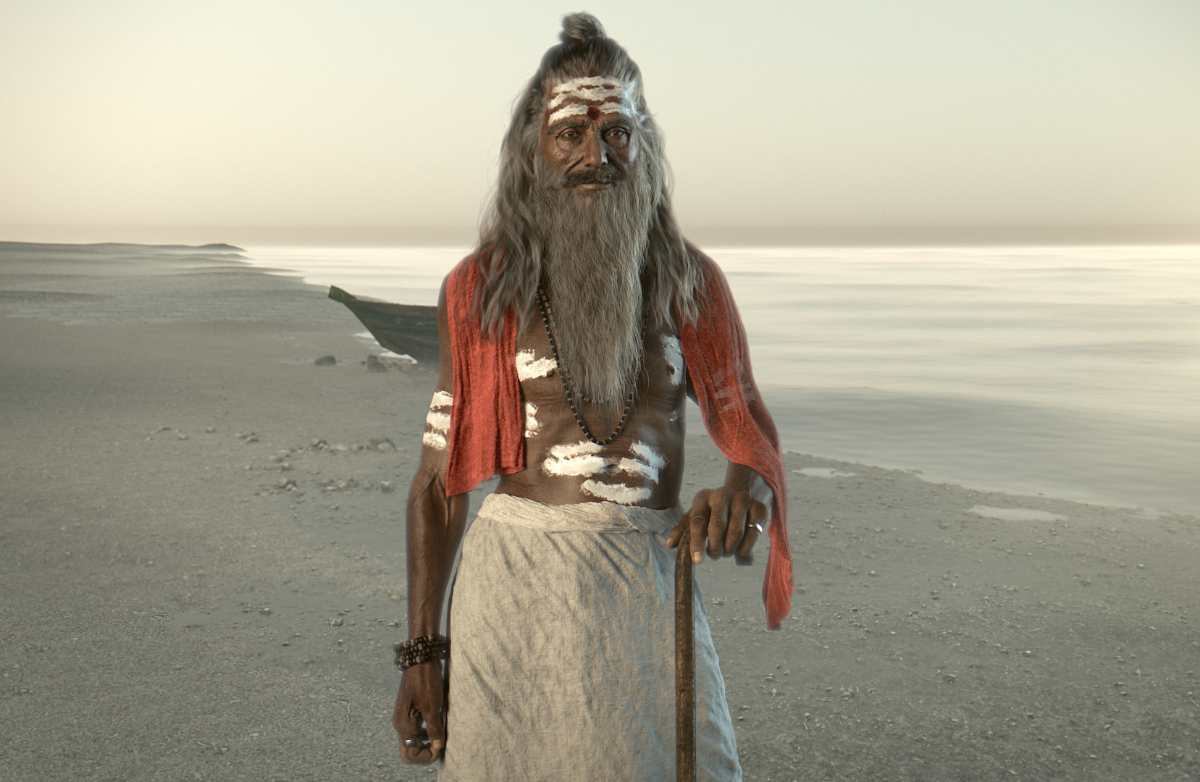
When I found the above photo online, I was immediately captivated by its atmosphere and personality.
I loved all the beautiful details like the paint on the body, and the hairstyle, and so this image became my main inspiration and starting point.
I then went on collecting similar references of faces from different angles, similar hairstyles, body types and hands, so I would have a good idea of what I want my model to look like.
I always use PureRef to create a collection of my references because I think it is a great tool to organise all your images.
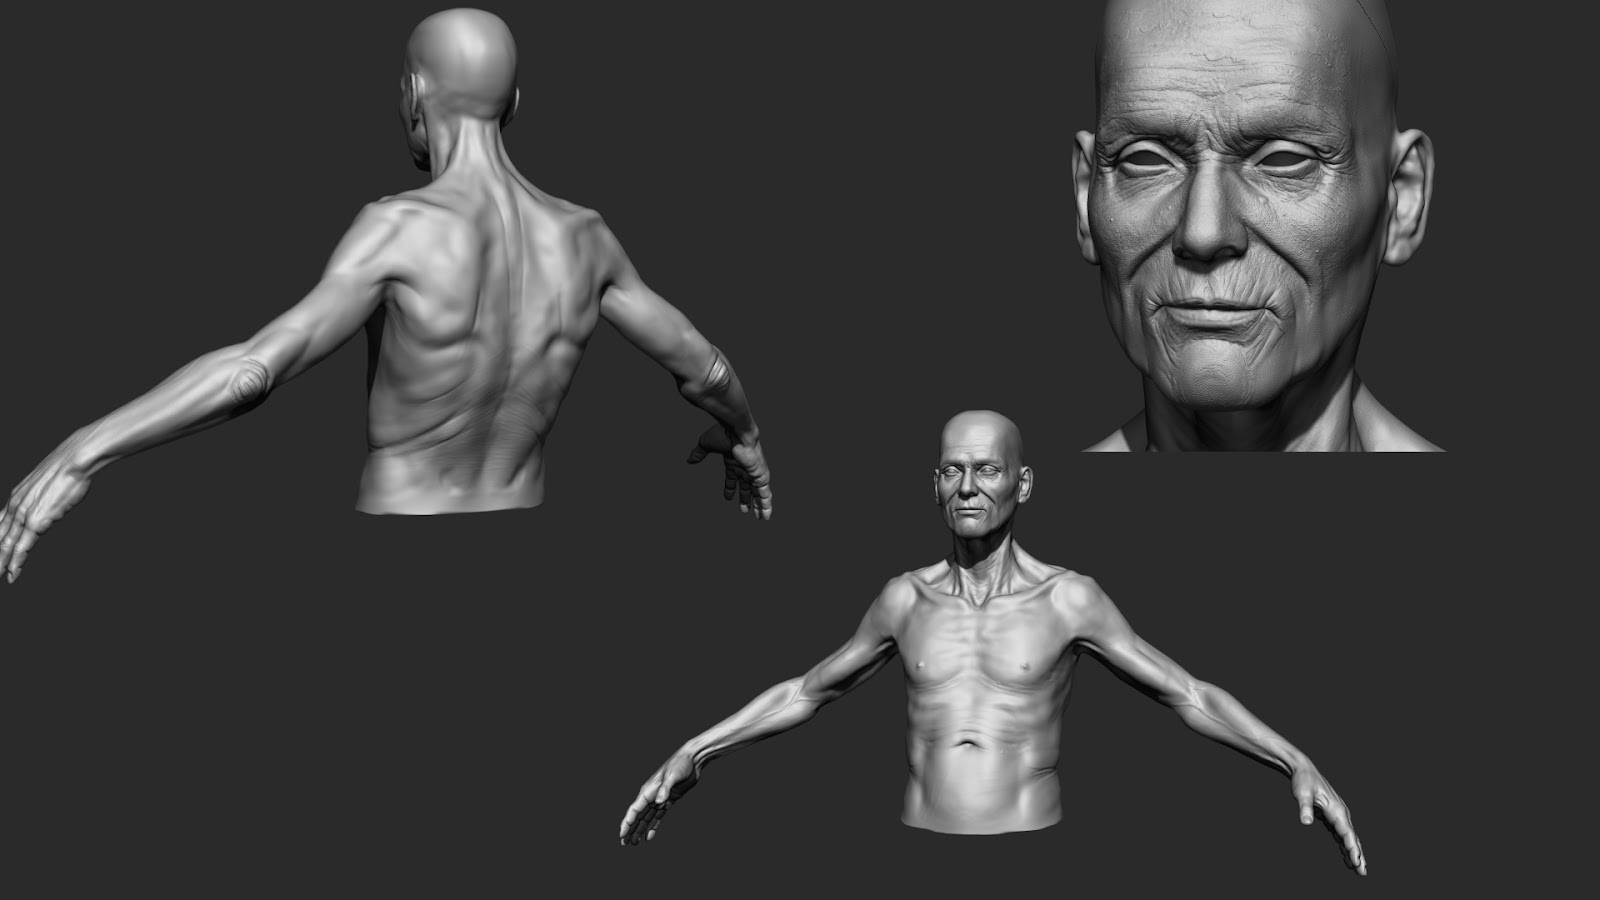
Sculpting
When sculpting I always have my PureRef collection open. Especially for anatomical guidance, I think it is really important to always look at real world references.
Having a good understanding of anatomy is essential when creating characters.
If you are looking for a good guide I can recommend the book “anatomy for sculptors” or I also like to look at 3D scans for example from 3dscanstore.
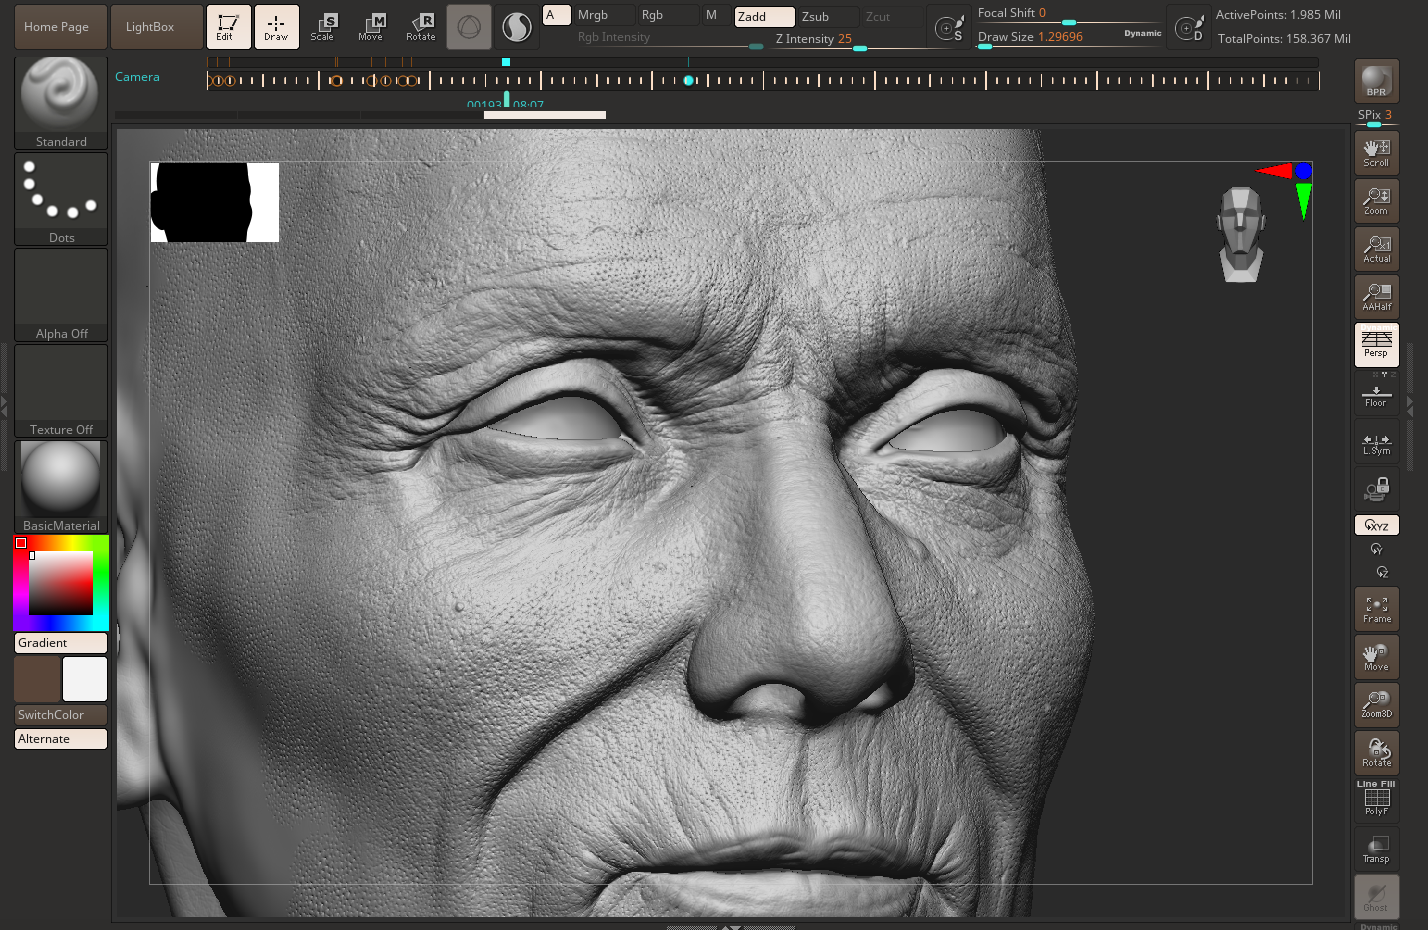
When sculpting it is easy to get lost in small details, so, I firstly try to focus on getting the proportions, anatomy and secondary forms right, before looking at smaller face details such as wrinkles and pores.
My goal for this project was to hand sculpt the whole character in Zbrush, without using any scans. During the process, I learned amazing tricks from some great artists out there.
The biggest challenge was probably the time factor, as I didn’t realise how time consuming it would be to sculpt every wrinkle and pore by hand, but it was also a very creative and valuable process where I learned a lot more about skin texture and appearance.
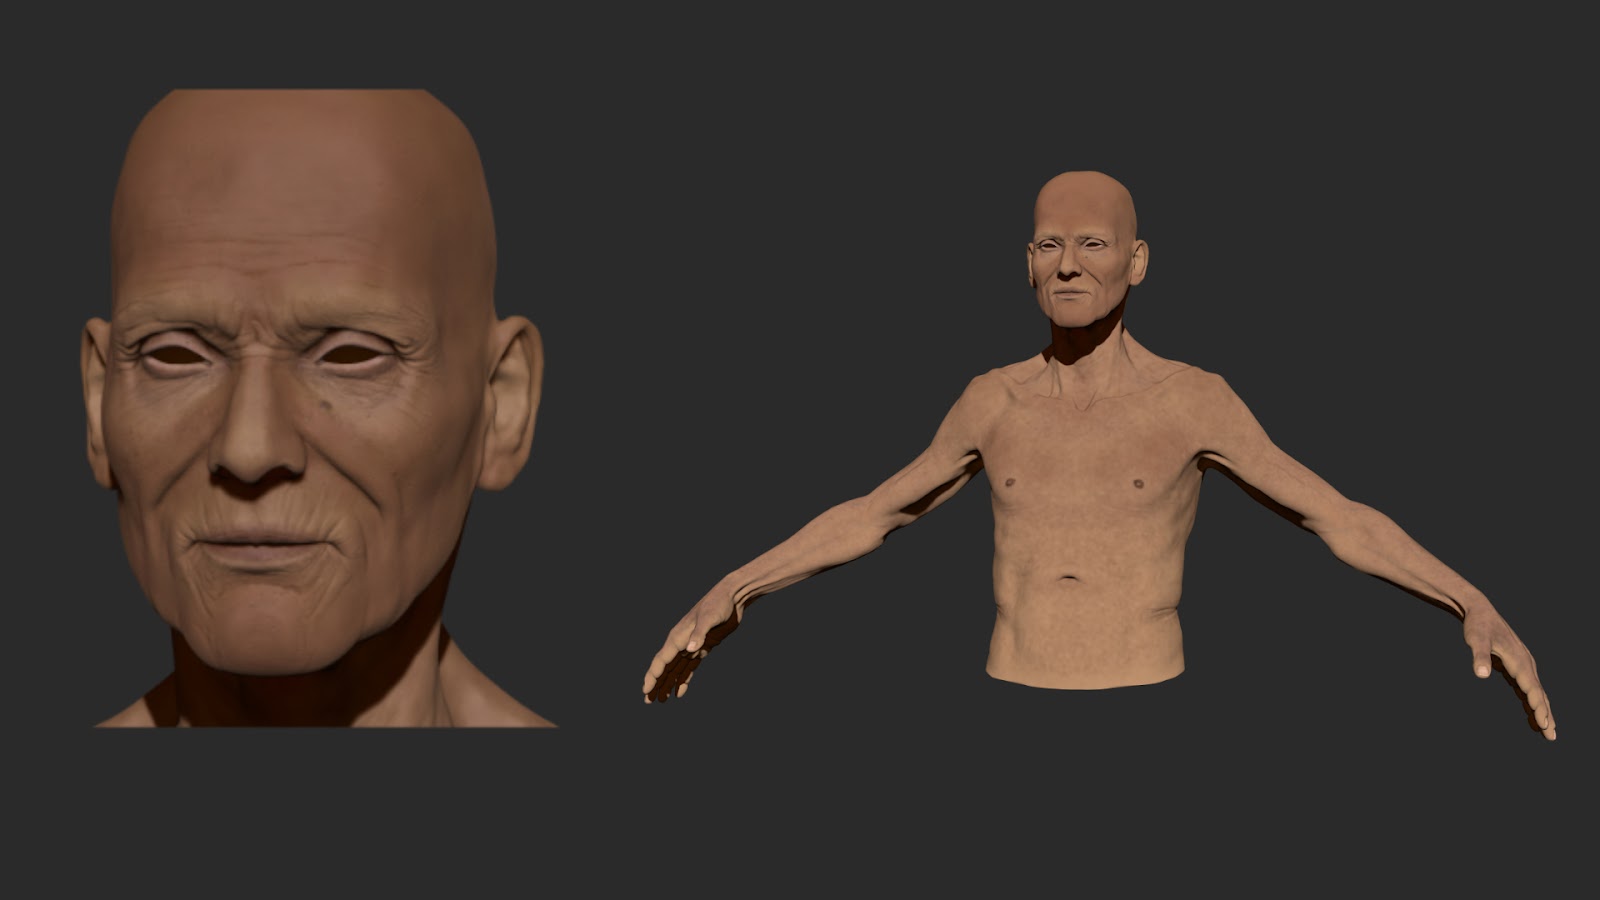
Details and Texturing
After creating the primary and secondary forms, I imported my model into Maya for retopologising and uvs.
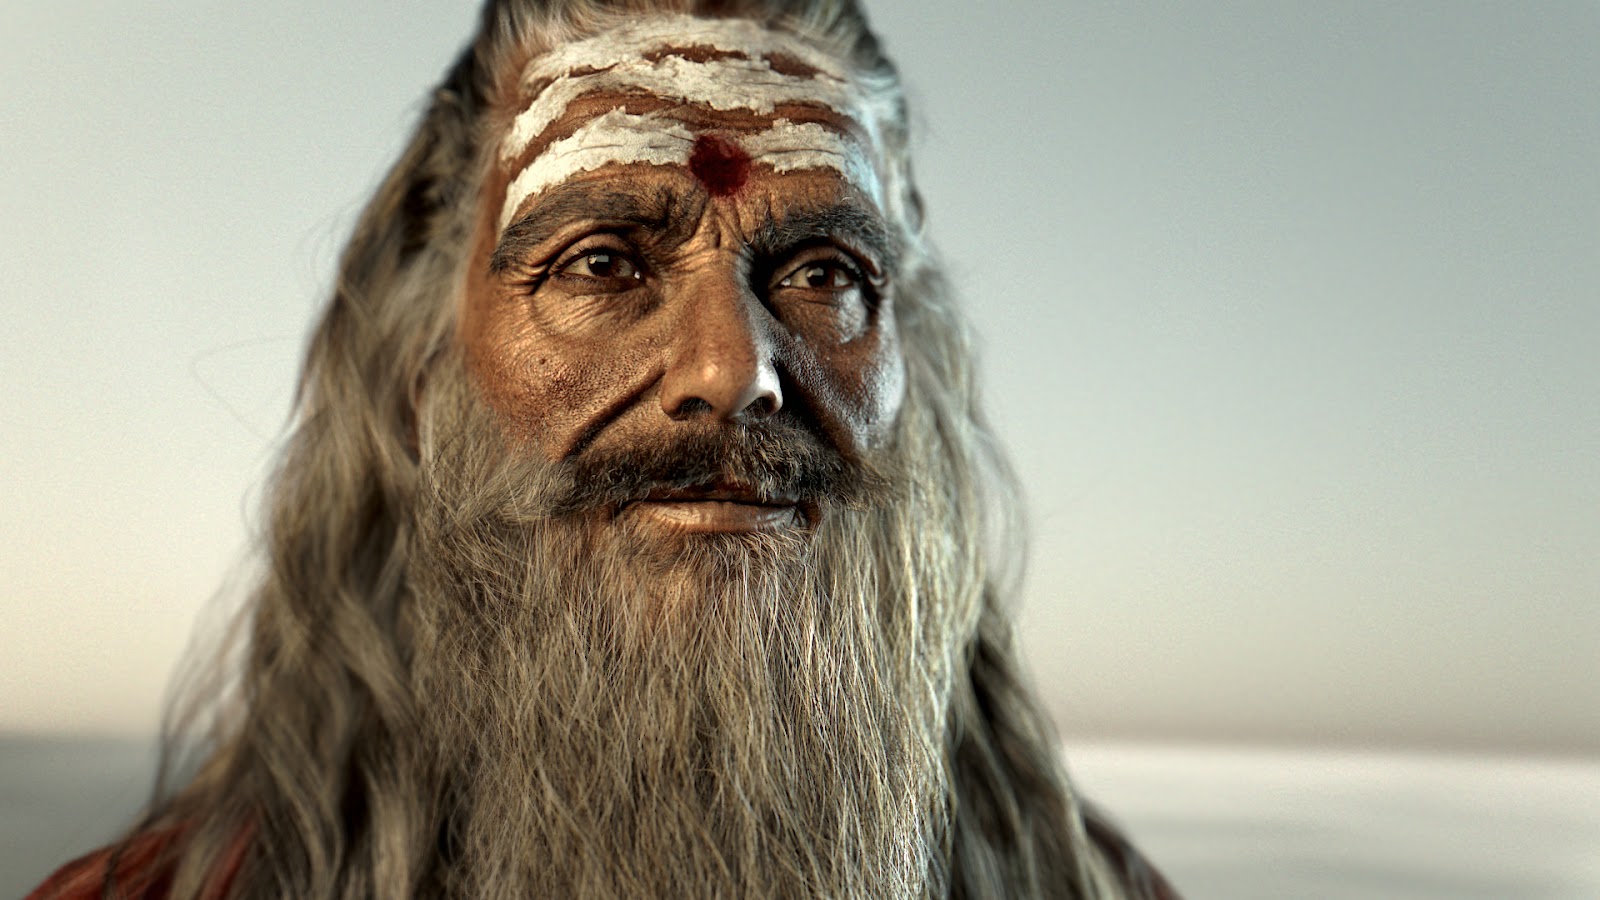
After bringing it back into Zbrush, I started sculpting more details around the eyes and the forehead. Then I switched to HD geometry to sculpt finer wrinkles, pores and other little imperfections. I didn’t focus too much on the chin area because I knew this area was going to be covered by a beard.
I used 4K maps: the Albedo map, as well as the Specular and Roughness map, were painted in Zbrush and in Mari.
First Pass:
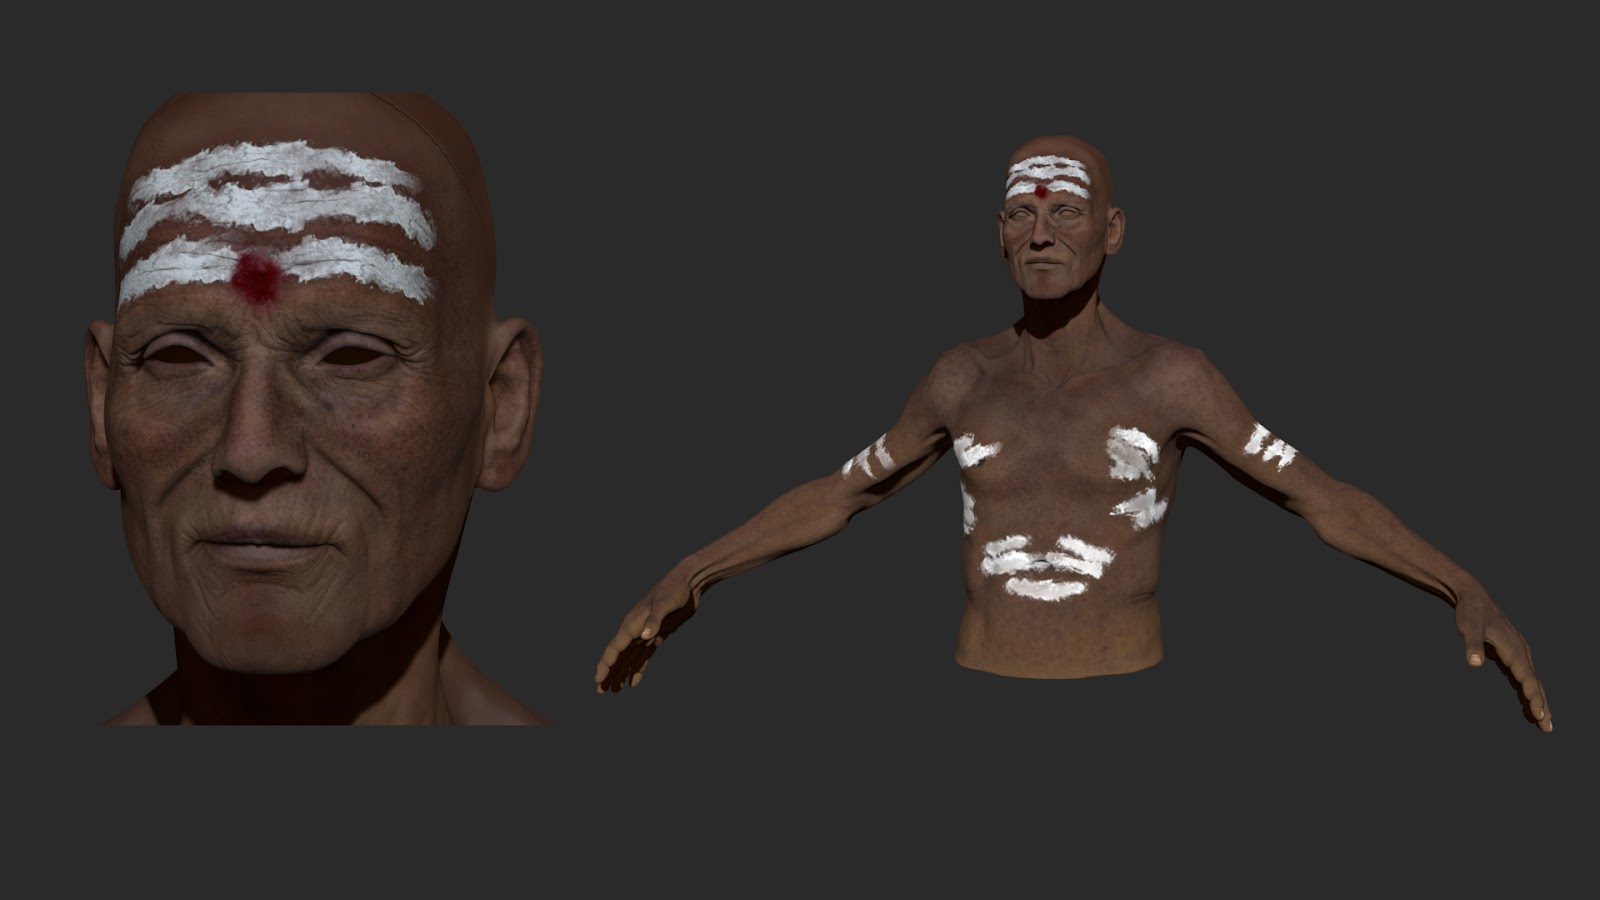
Second Pass:
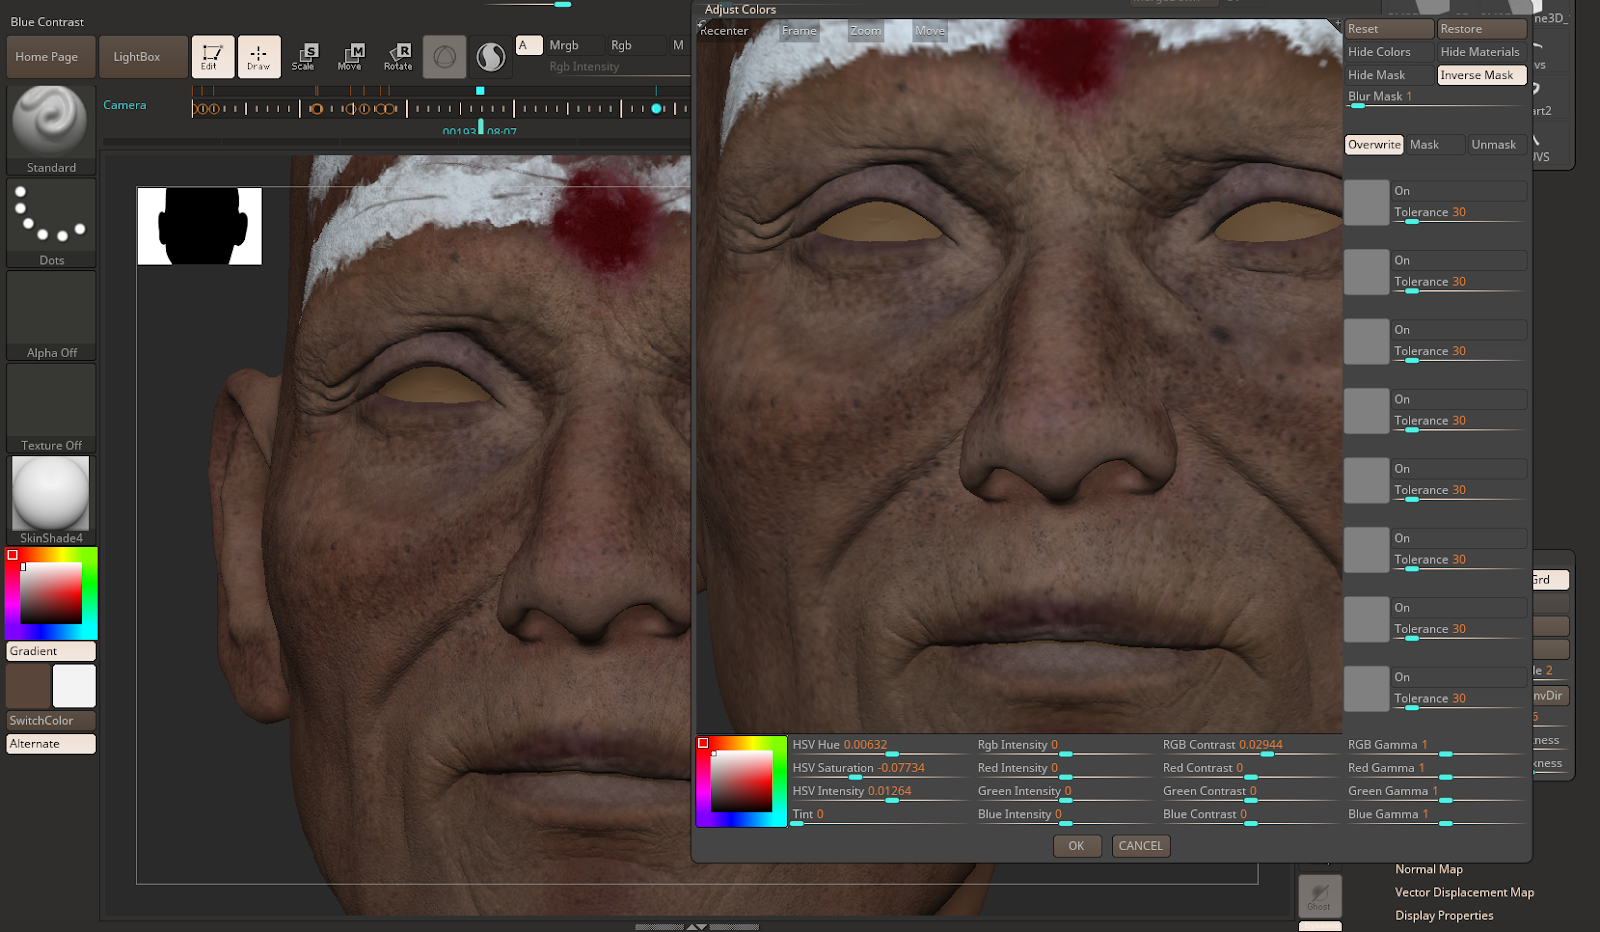
Adjusting Colours
When you polypaint your maps, Zbrush has a really useful feature, which is the adjust colours tool. It lets you adjust the HSV and Rgb values after you painted.
When you plug your albedo map into your shader it can look really different from what it looks like in Zbrush, so this is an easy way to adjust your polypaint.
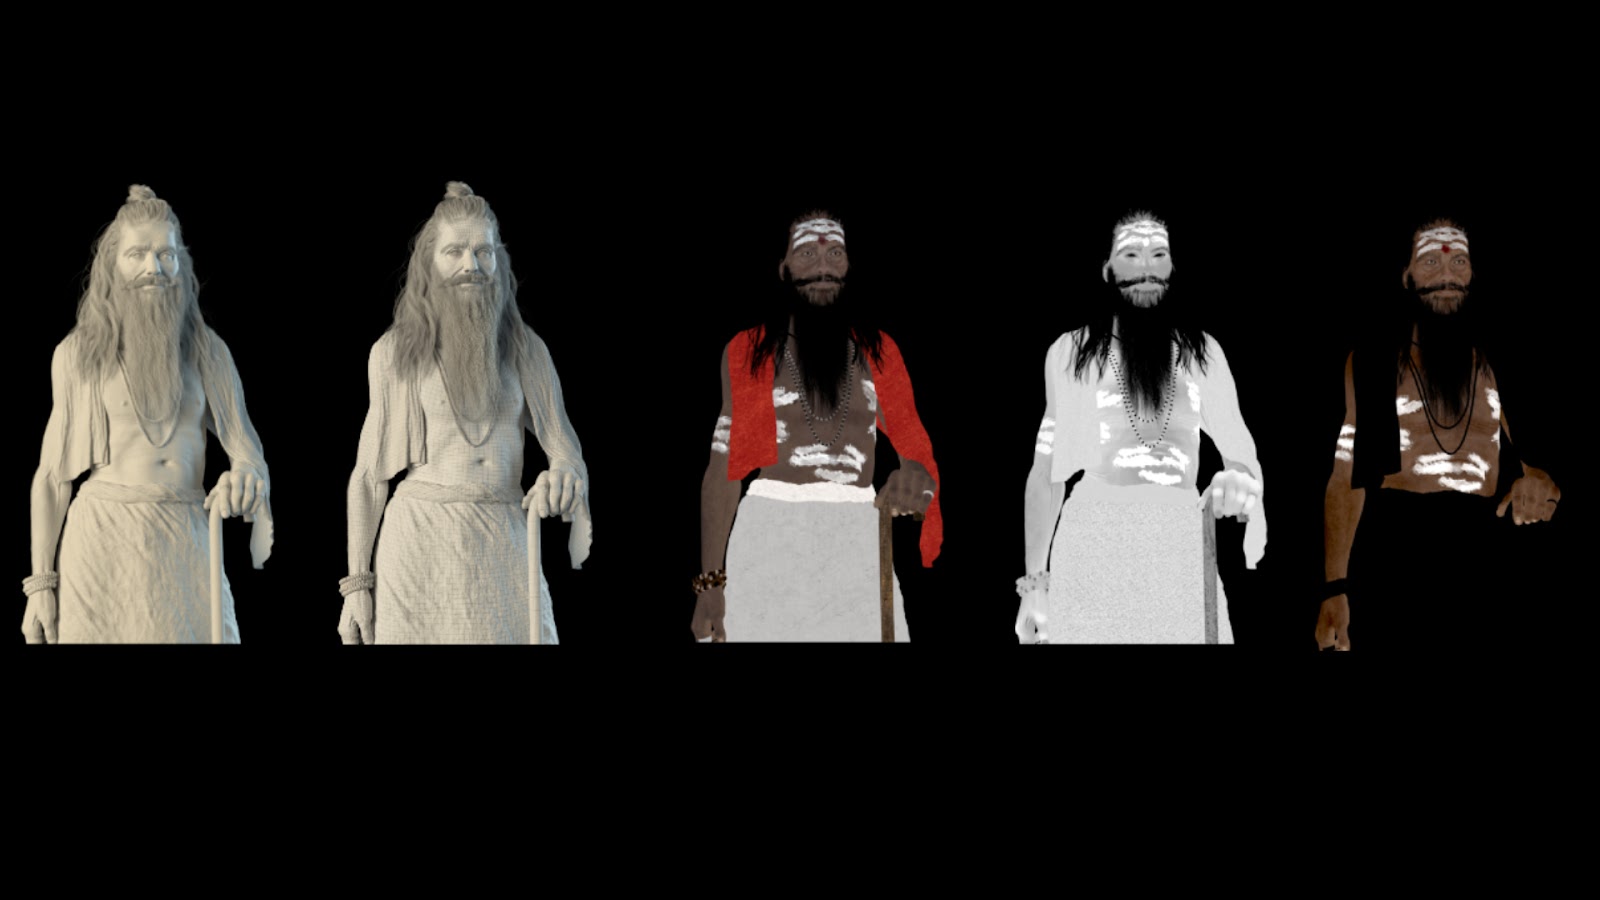
From top left to right: Closeup, Albedo, Specular, SSS
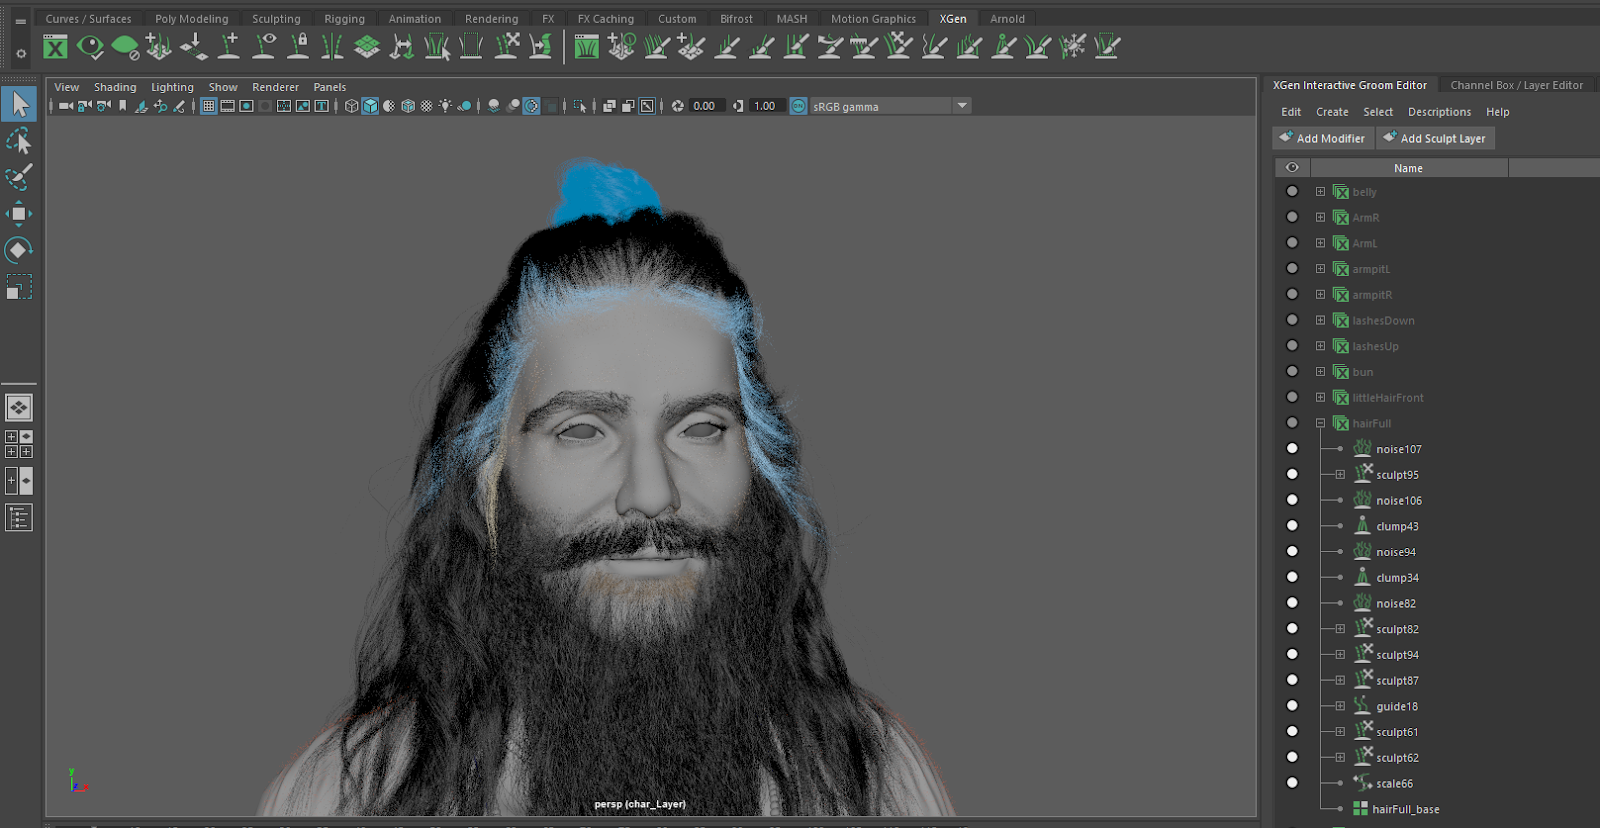
Xgen Grooming
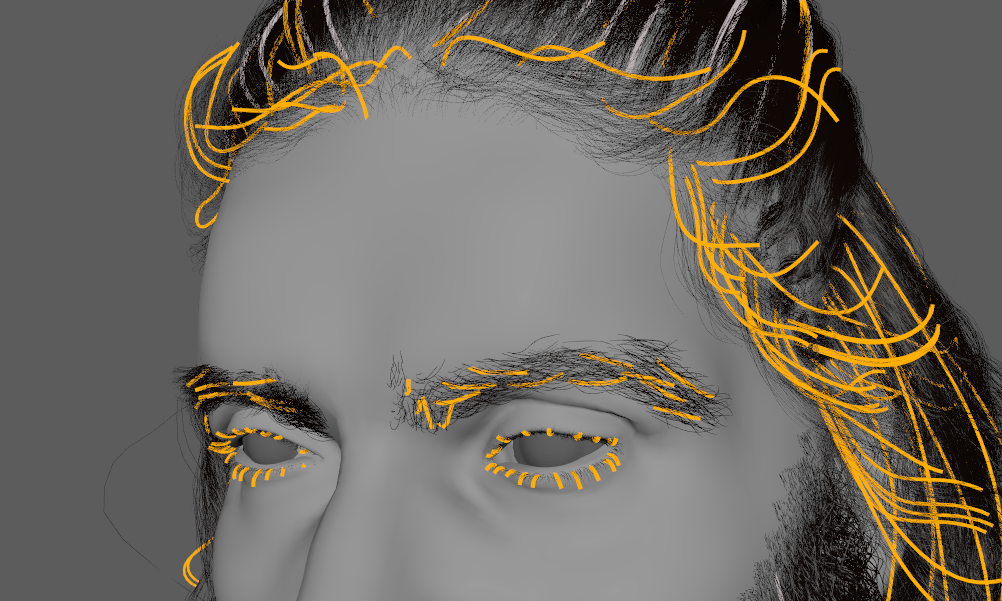
I created the hair with Xgen Interactive Grooming which I think is a very intuitive tool and using guides gives you a lot of control over the hair direction.
For each part (head, eyebrows, lashes, peach fuzz, nose hair, arms, hands….), I created a separate description and many different noise and clump modifiers. For the hairline and eyebrows I also used density maps for a better transition.
For the shader I used aiStandartHair and I rendered everything with Arnold.
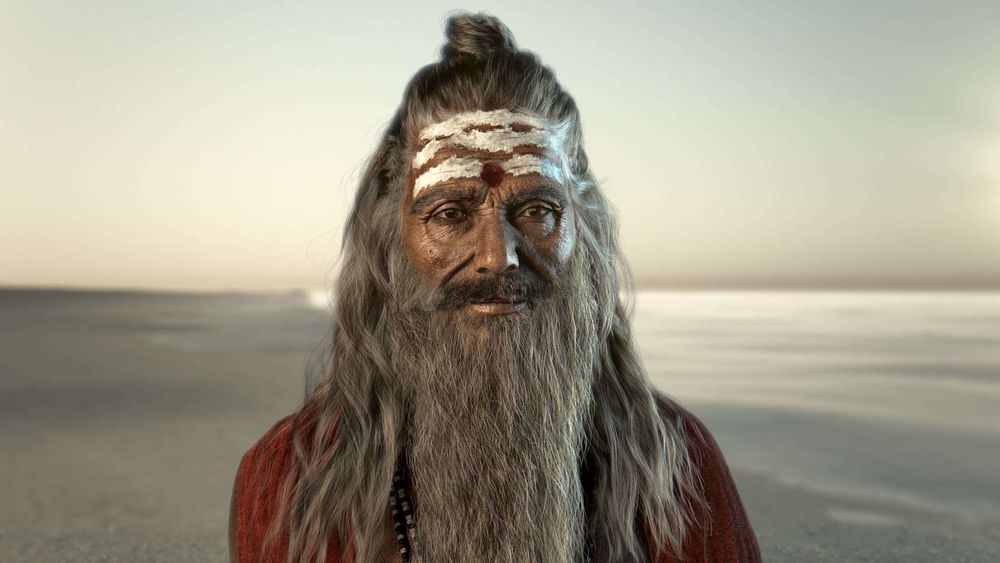
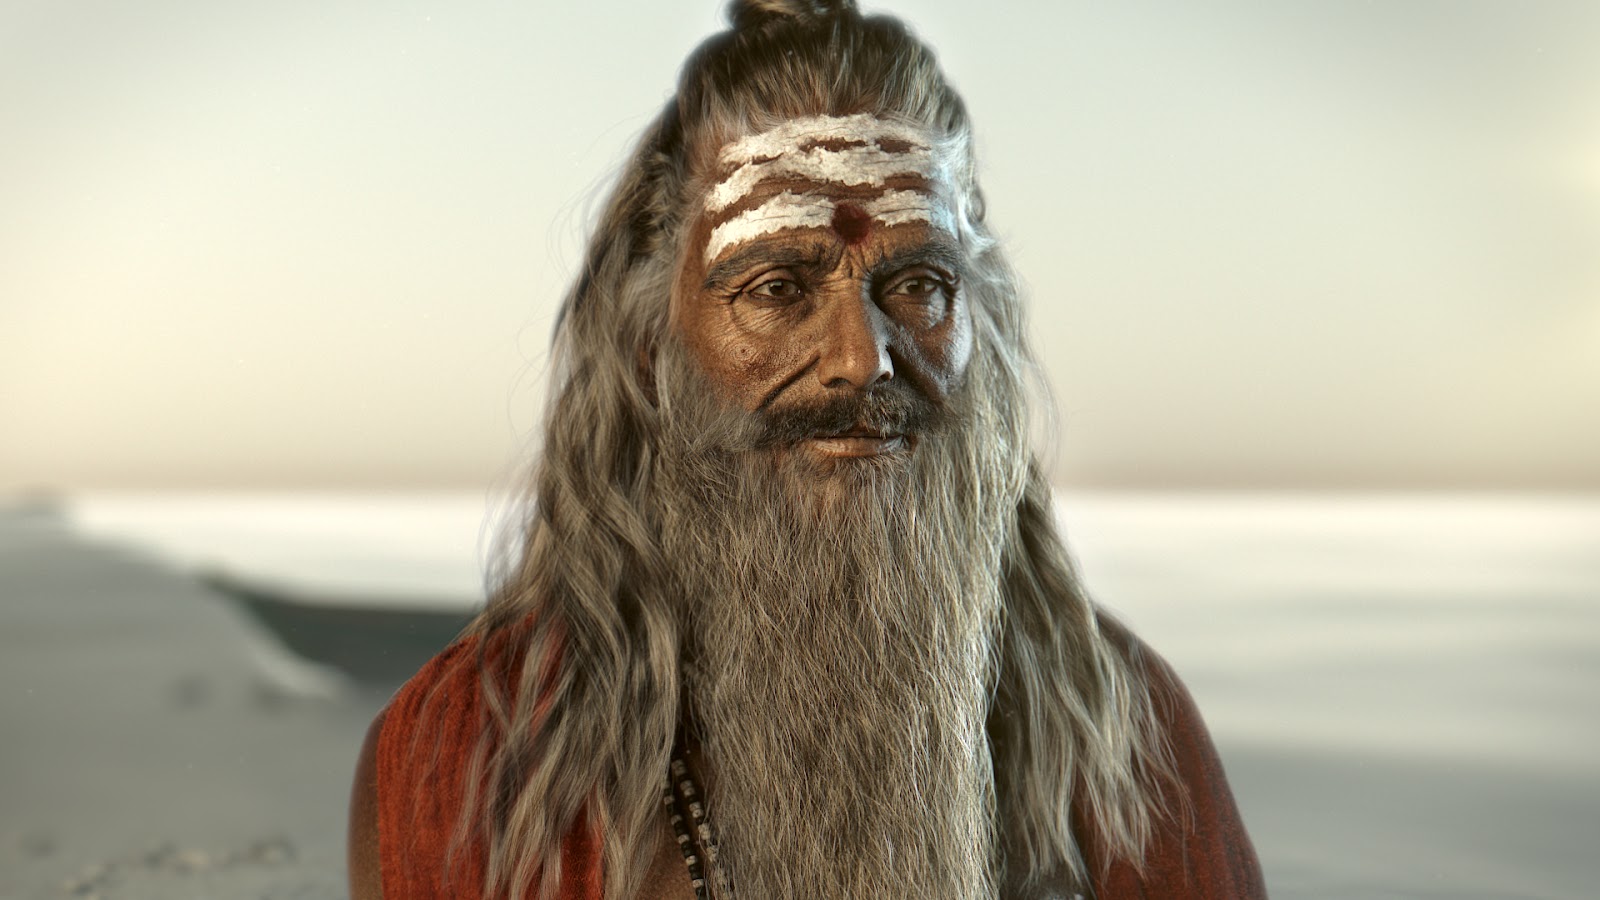
Presentation
For the presentation of this character, I wanted to create a simple background, similar to my reference, but with warmer lighting.
To achieve this feeling, I used Nuke to create Sunset lighting, as well as to add volume rays and small dust particles.