
Fundamentals for Lighting 3D Animated Scenes
Ivan Pechalin, a Lighting Artist and 3D Animation & VFX Student at PIXLVISN Media Arts Academy, takes us through the fundamental of lighting to create a stand-out lighting piece for your portfolio.
Ivan Pechalin, a Lighting Artist and 3D Animation & VFX Student at PIXLVISN Media Arts Academy, takes us through the fundamental of lighting to create a stand-out lighting piece for your portfolio.
Ivan Pechalin is a Lighting Artist and 3D Animation & VFX Student at PIXLVISN Media Arts Academy. Ivan specialises in lighting 3D Animated Scenes, and in this article he takes us through the fundamental of lighting to create a stand-out lighting piece for your portfolio.
I decided to specialise in Lighting with a focus on 3D Animated scenes. During my studies, I thought it would be great to prepare myself for this challenging work - I like that you can light and render and essentially deliver the final shot after you are done.
I am not a master, I am still learning and have to improve myself every day. In this article I will share with you what I have learned about the fundamentals of lighting for a 3D Animated shot for your portfolio.
Where do I get these nice-looking animations to light you may ask? There are many animation students and people working in the industry who are working on personal projects but have no time or skill to light them.
I found that reaching out to my peers via ArtStation or The Rookies to see if we could collaborate wasn't as scary as I thought. People are mostly open and interested in creating nice looking projects together.
I saw this incredible animation from Jean Motta on LinkedIn and immediately decided to write to him. Below is the final result of our collaboration.
There are also some other resources where you can find animation, such as the Rookies, Academy of Animated Art, or you can take advantage of Mixamo and use their animation presets for characters. You can also work with fellow students at your school as I have done, for other projects.
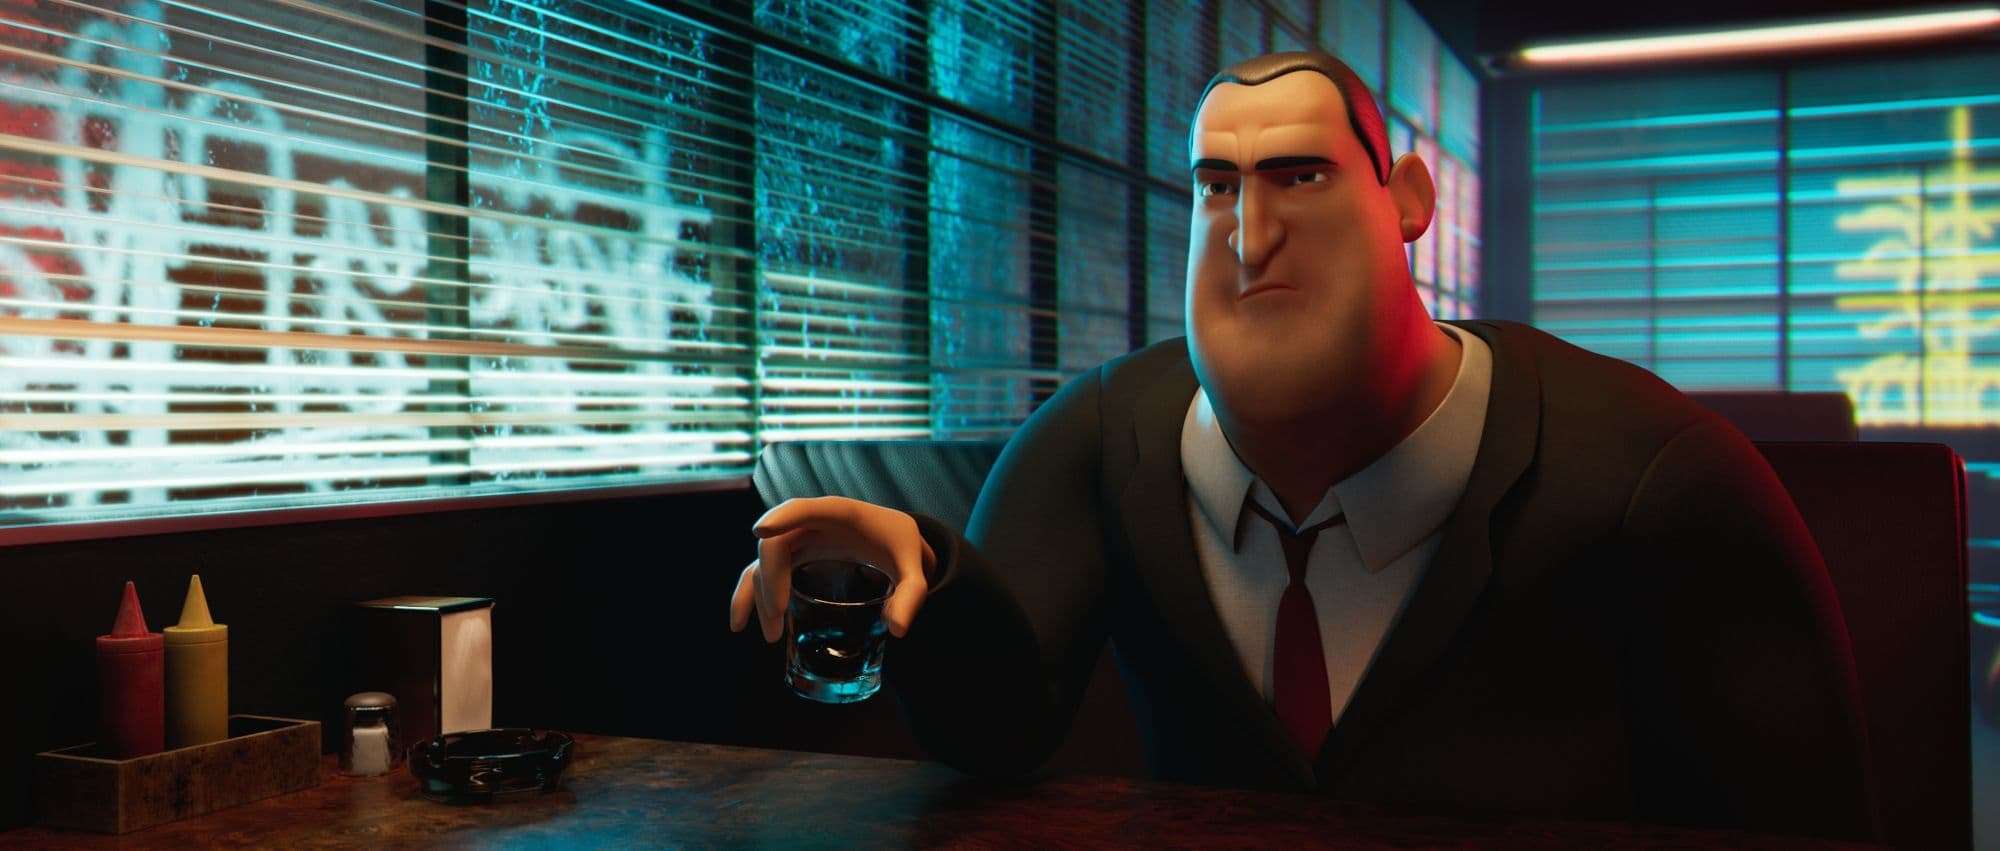
In the beginning, I always try to decide how I want to tell the story through lighting to make the animation even more believable. In the case of the scene I am referencing for this article, I have this very serious guy sitting in the bar and talking to someone in front of him about sinister things. The music track was very helpful in informing the atmosphere of the scene even more. The key storytelling elements for me were tension and danger.
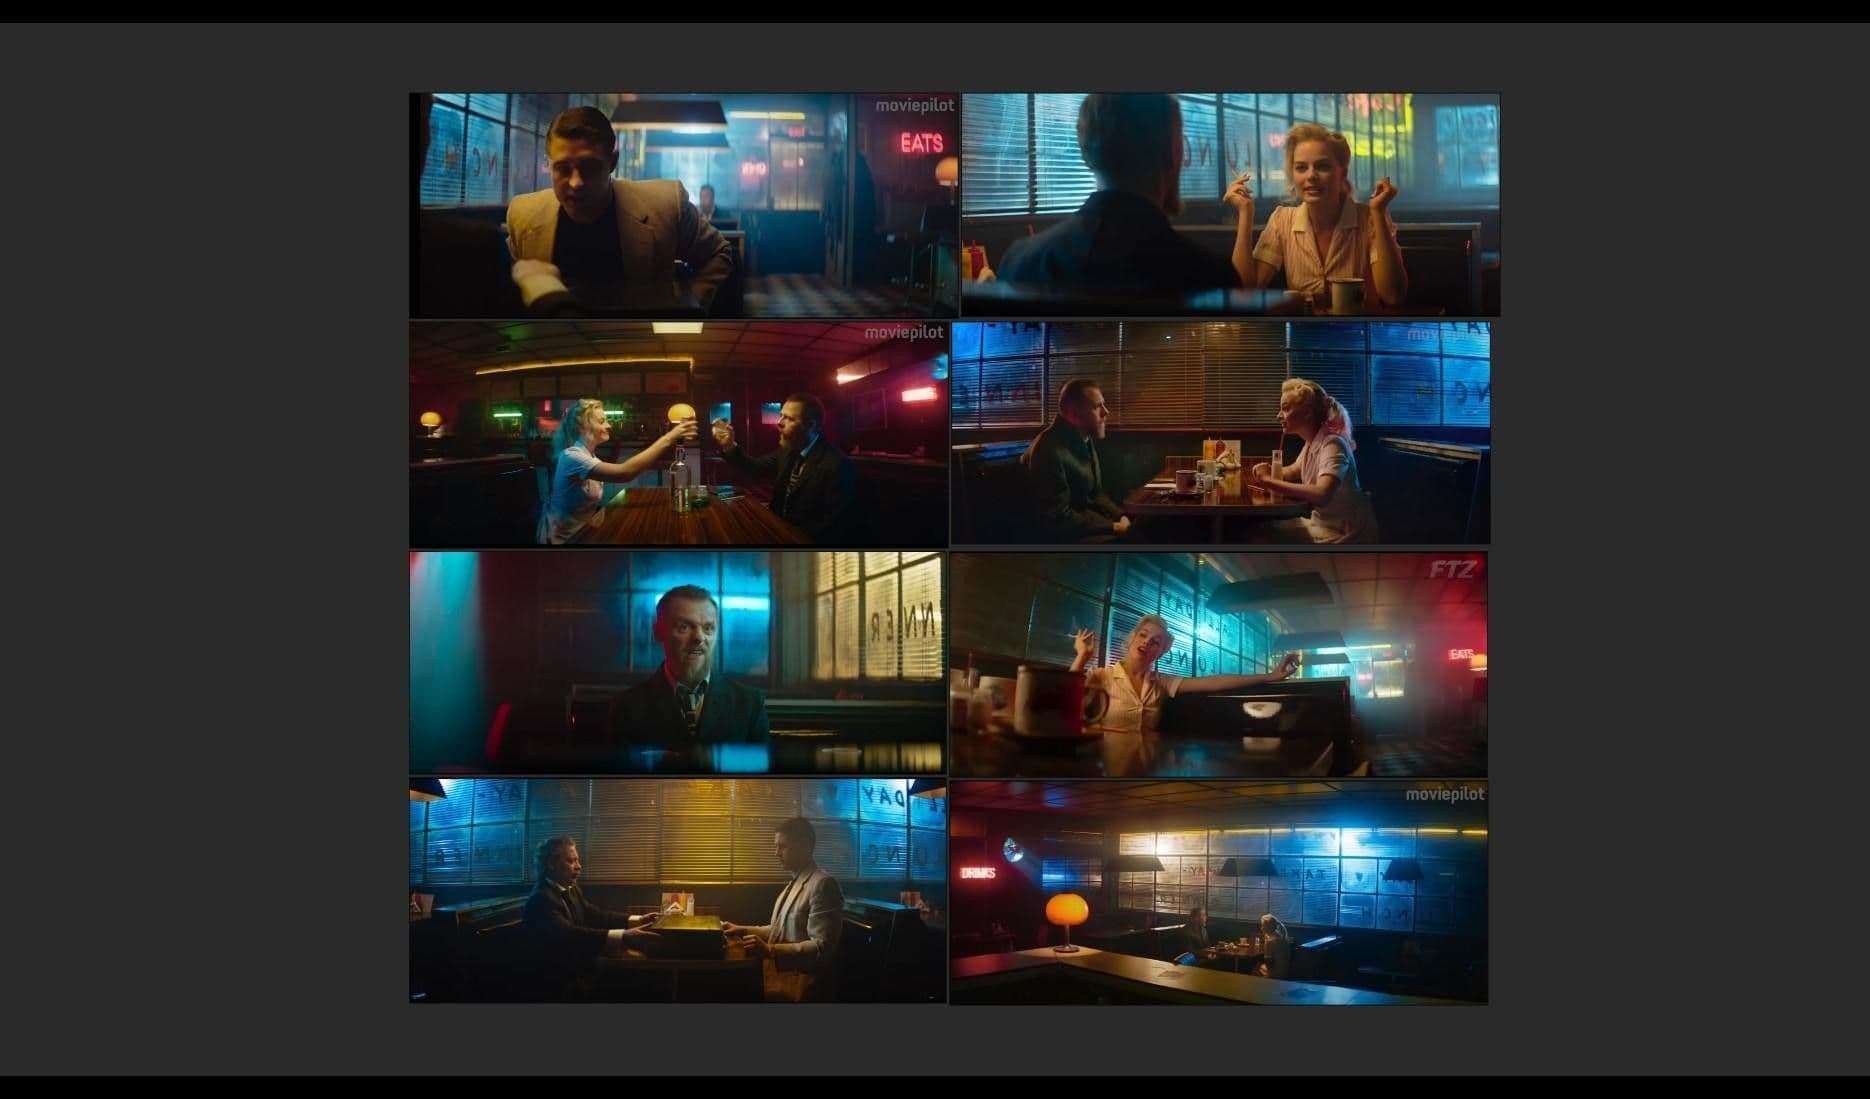
After defining the main theme, it was time to collect references. I like to search for inspiration in cinematography, so I found these screen-grabs from the “Terminal (2018)” movie, and it was exactly what I was looking for.
Here are some of the main resources where I always find inspiration: Shotdeck, Unsplash, Pinterest, Artstation, Youtube, Moviecaps.
At the beginning of a project I always define a clear plan to avoid getting stuck by unexpected surprises. What also helps me a lot is to show the animation to someone with experience so they can point me to areas that may need more work.
When I receive the animation I start to analyse how everything is set up and If I want to make changes to it like adding some objects or maybe make some camera adjustments. I always want to communicate with the animator when I am thinking about these things because it's important to respect their work.
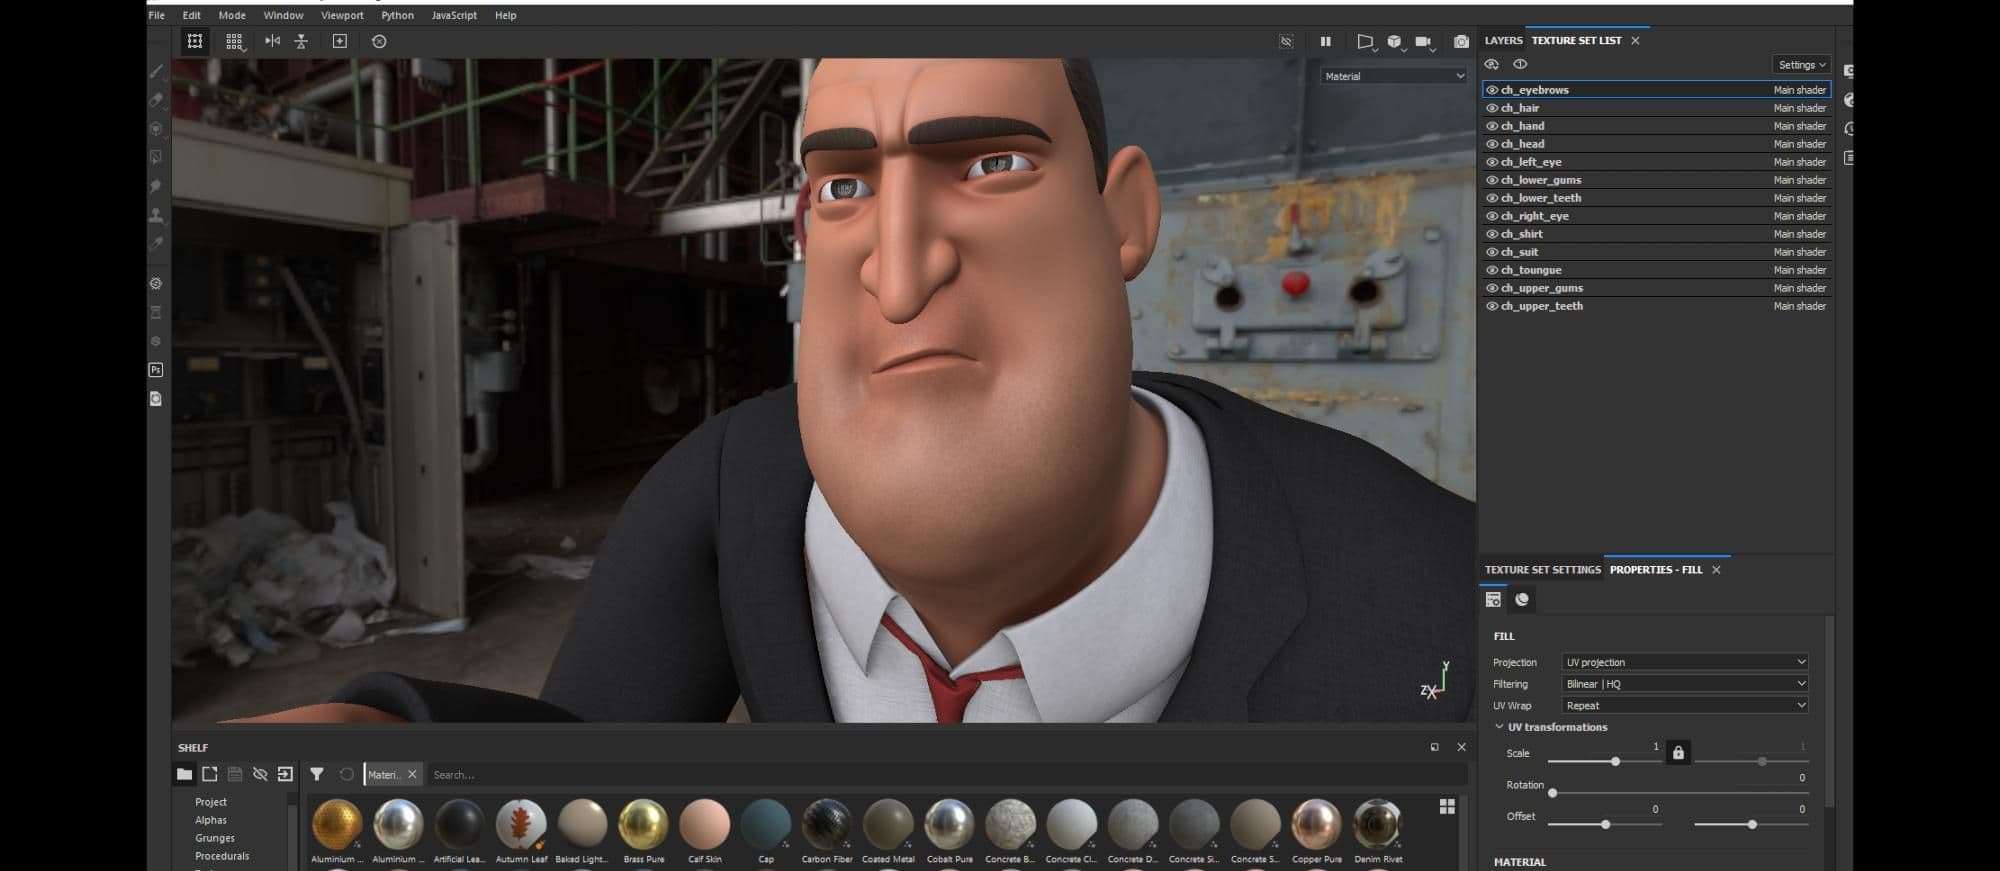
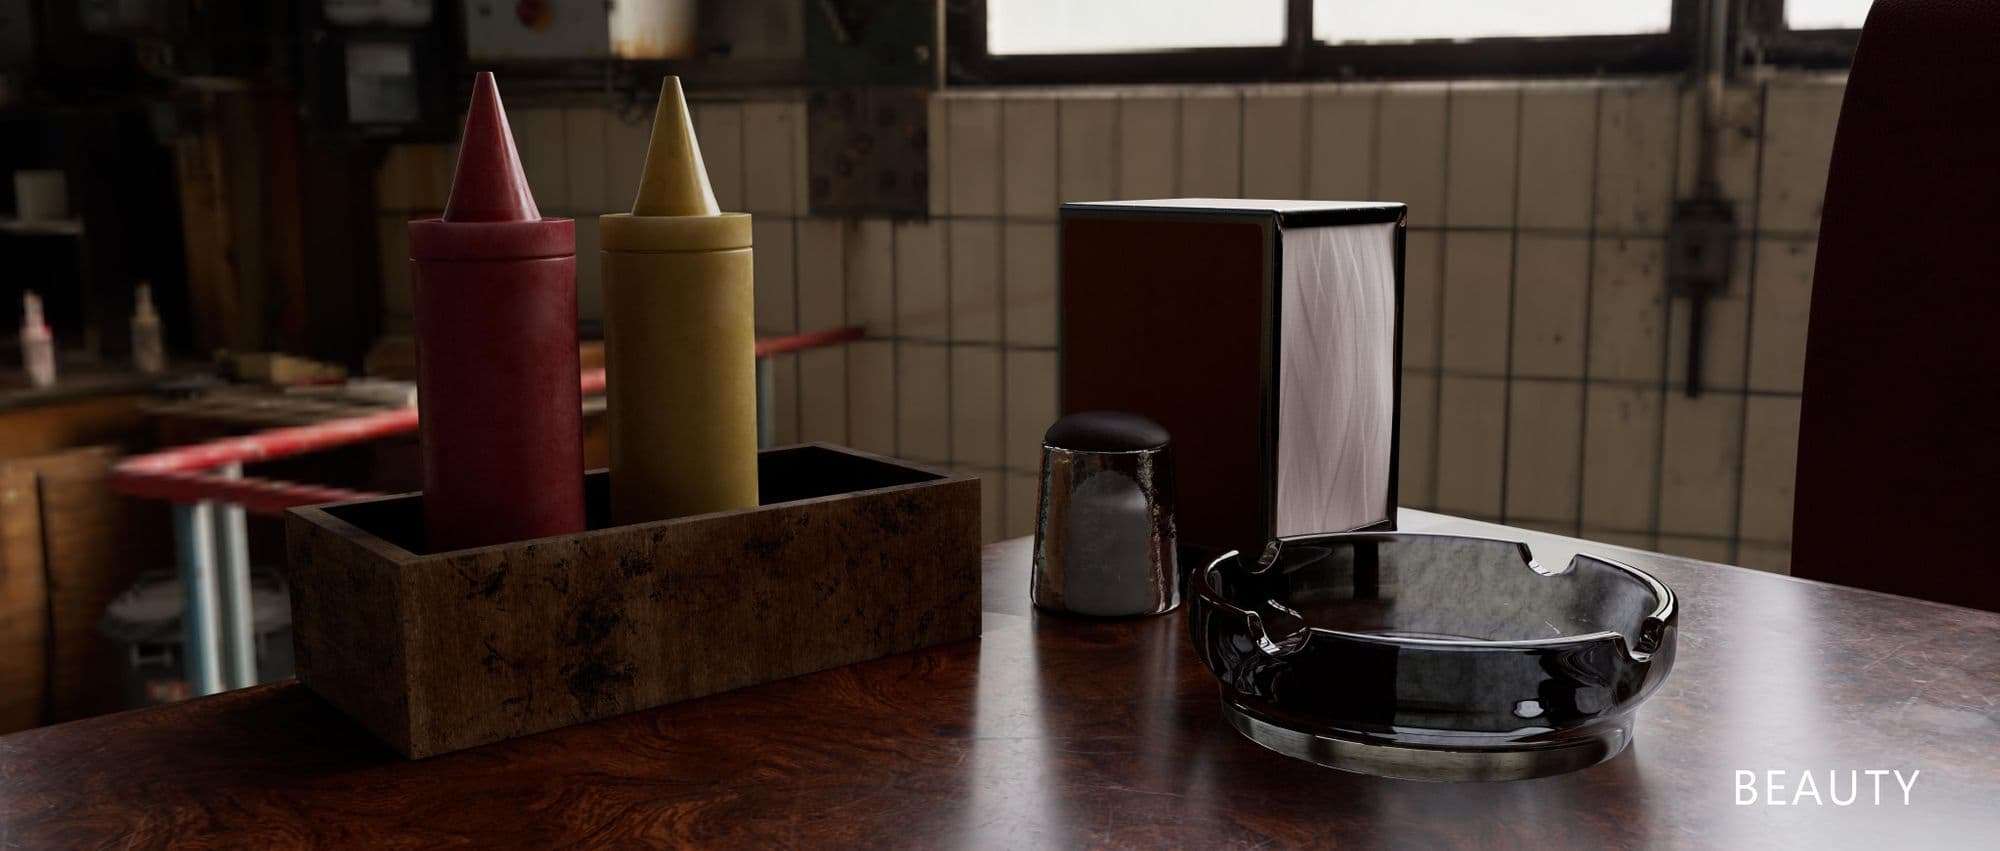
Studying the scene also helps to get an idea of how much additional work I have to do. During my time at 3D school I learned a lot about other fields like modeling, texturing, animation and could always add some extra elements to the scene if needed. Here for example, I textured the character and environment:
I think everyone has their own style of working because Lighting is a very creative process. But what I like to do from the start is to analyse references and ask myself questions:
1. Why is it lit like this?
2. Which feeling/emotions does it express
3. What kind of story is being told? Which compositional decisions are made? etc.
It is very interesting to study the still images from the actual movies as I have done below.
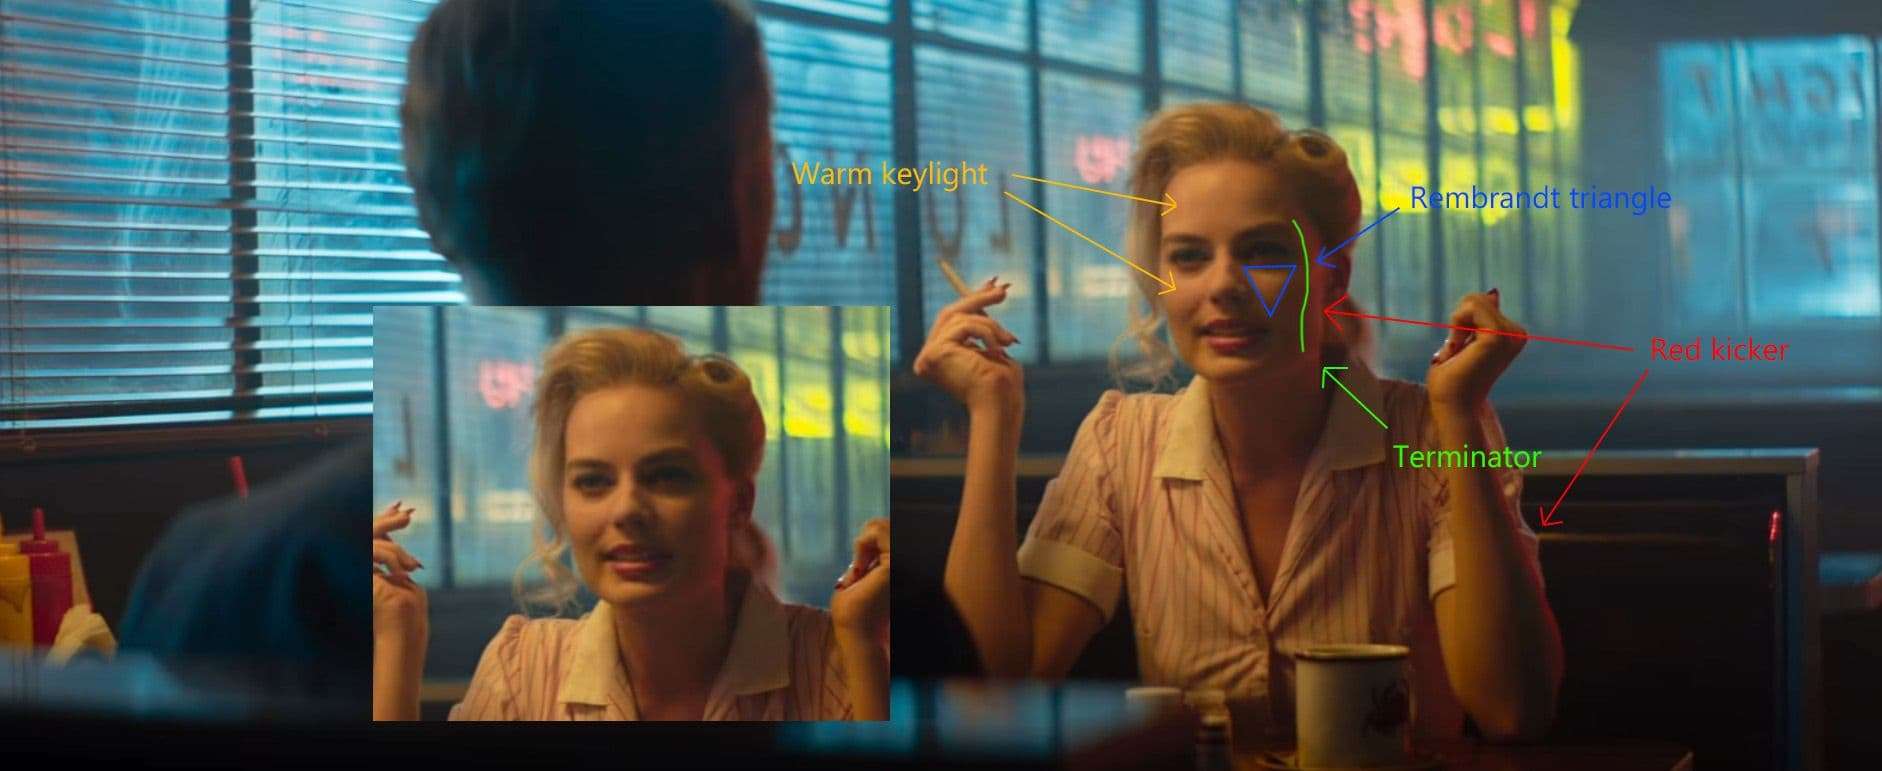
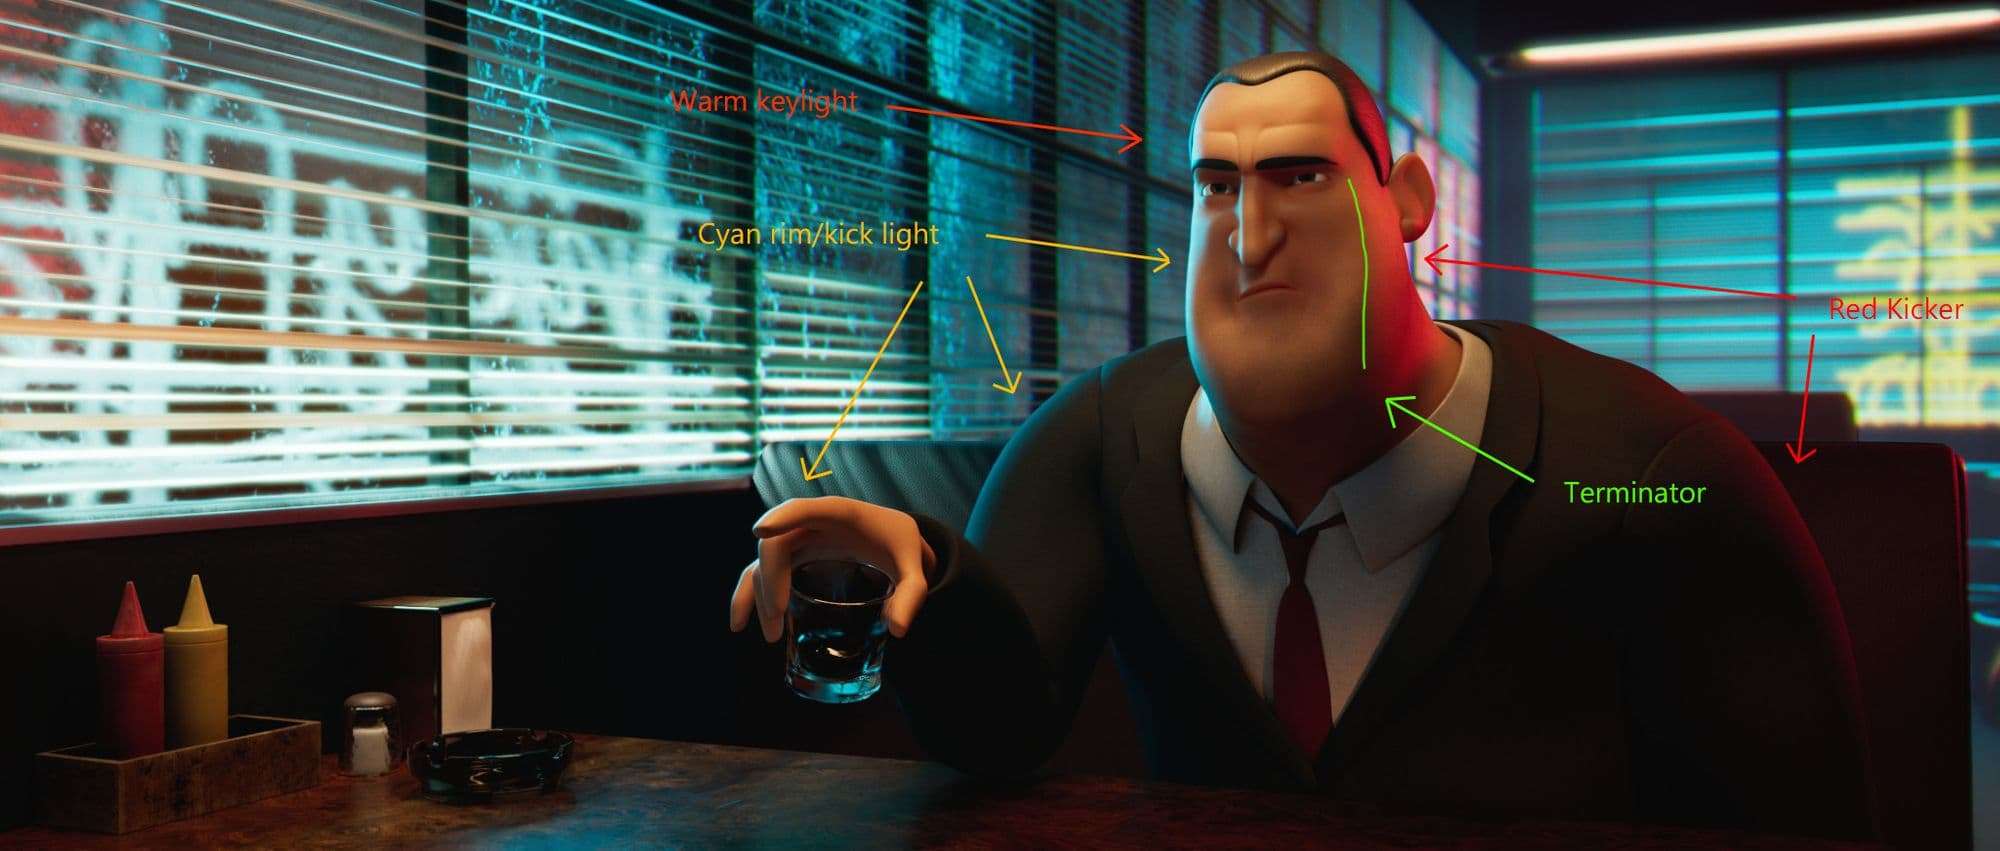
After analysing the reference, I start to place my lights. I don't try to match the reference 1:1; I just take things I most like about it and want to implement into my scene. For example, in my render below I added the warm key light and kick light from the right. I also exaggerated the light coming from the windows to have more contrast. Another thing I wanted to add is the terminator because it helps shape the character's face.
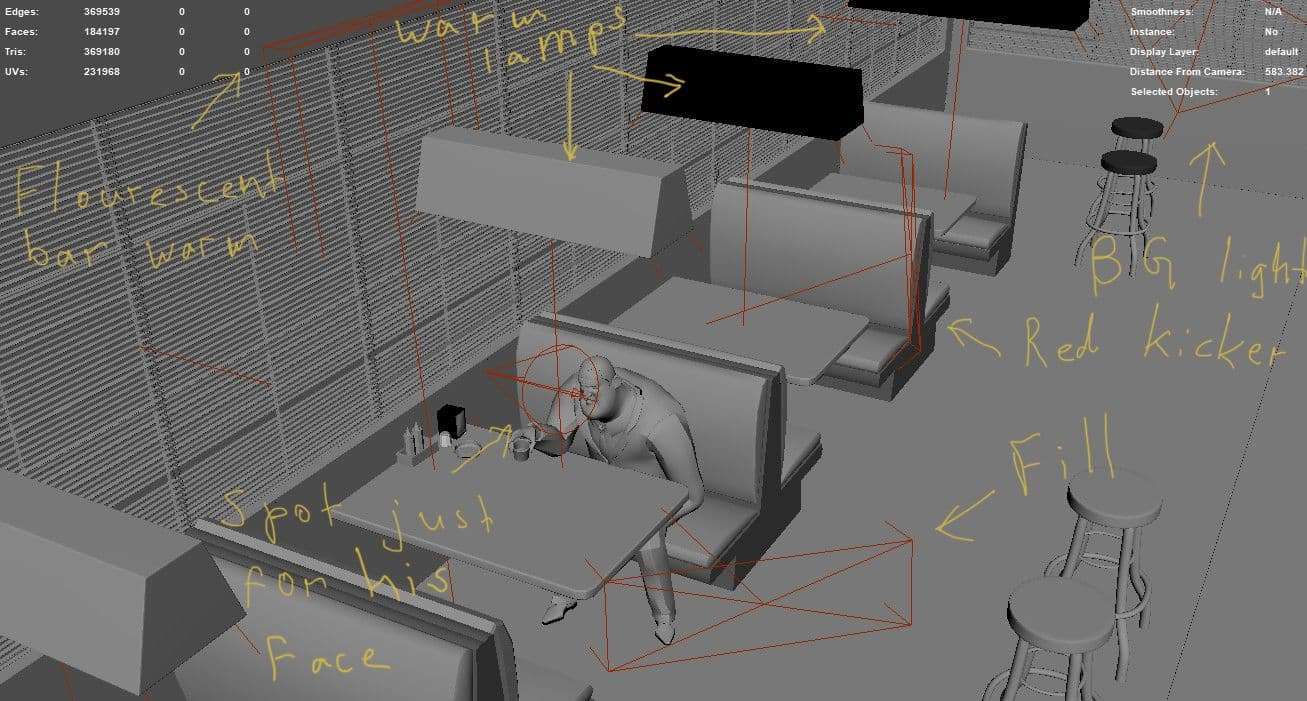
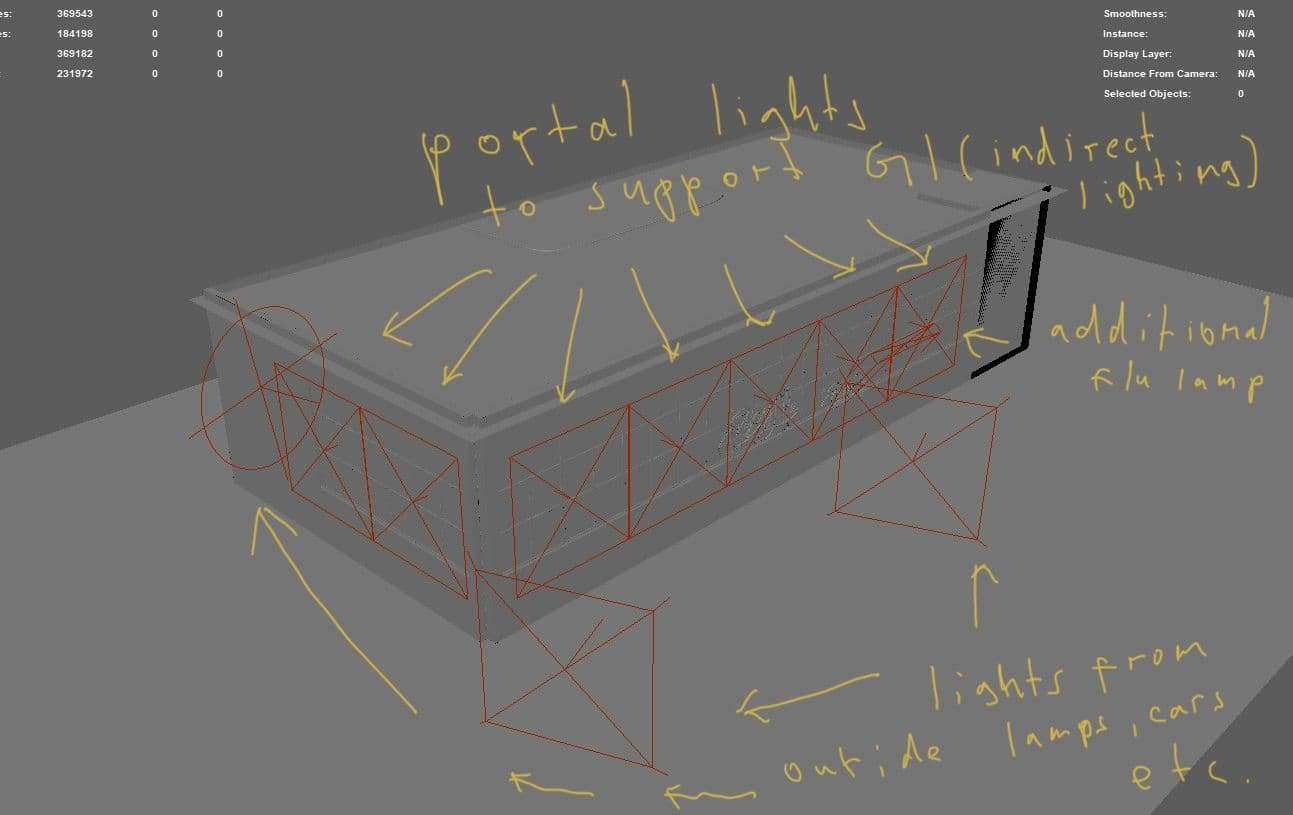
For the environment, I used an HDRI map of New York City at night to get a variety of artificial lights coming from outside, and then I incorporated additional lights to add more directionality. I also used the advantage of portal lights; it is very useful for rendering interior scenes to help the renderer with indirect Lighting.
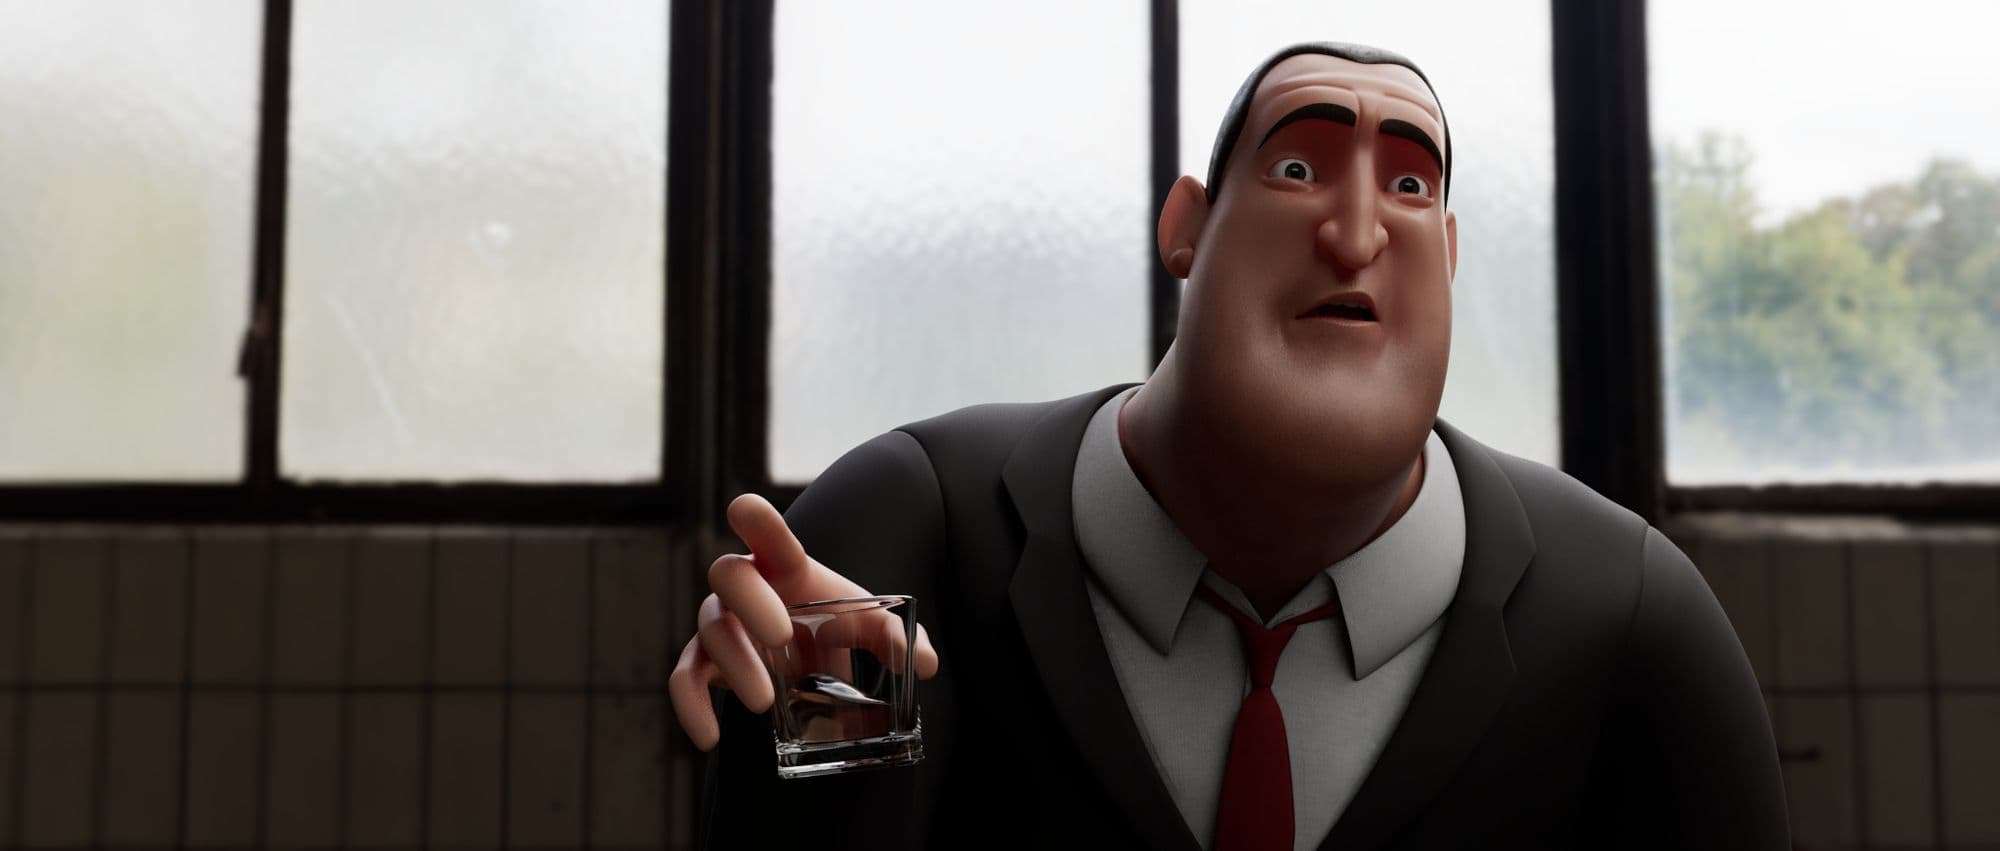
The most challenging thing about rendering animation is to have good Lighting throughout the whole animation because the character is moving, and everything has to work at every frame.
I try to pick 2 or 3 keyframes and work on them to make sure my lighting is consistent. I also like to make render tests in lower settings to get the feeling of how it looks in the movement and to spot problems in the early stages.
What really helped me to improve my workflow is a Chris Brejons book. In my opinion, it is a must-read for every lighting artist.
Lighting is not just a creative process; you have to know how to do certain things to get everything to work, to make composting easier, and to ensure the final output looks seamless.
These four things which I think are important to take in account are:
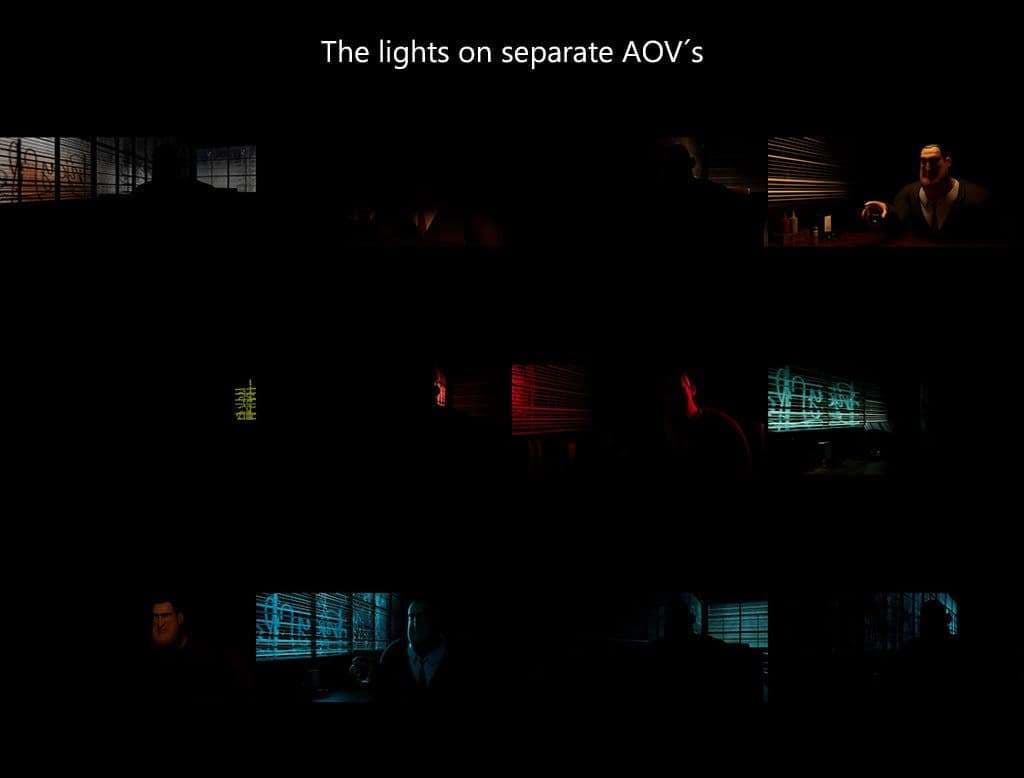
2. Setting up render passes or AOV´s. Some of the advantages are that it helps identify the noise or other issues in the image and gives you access to each area of the image in compositing. For example, you can change the specularity afterwards. Here you can find a good explanation for it.
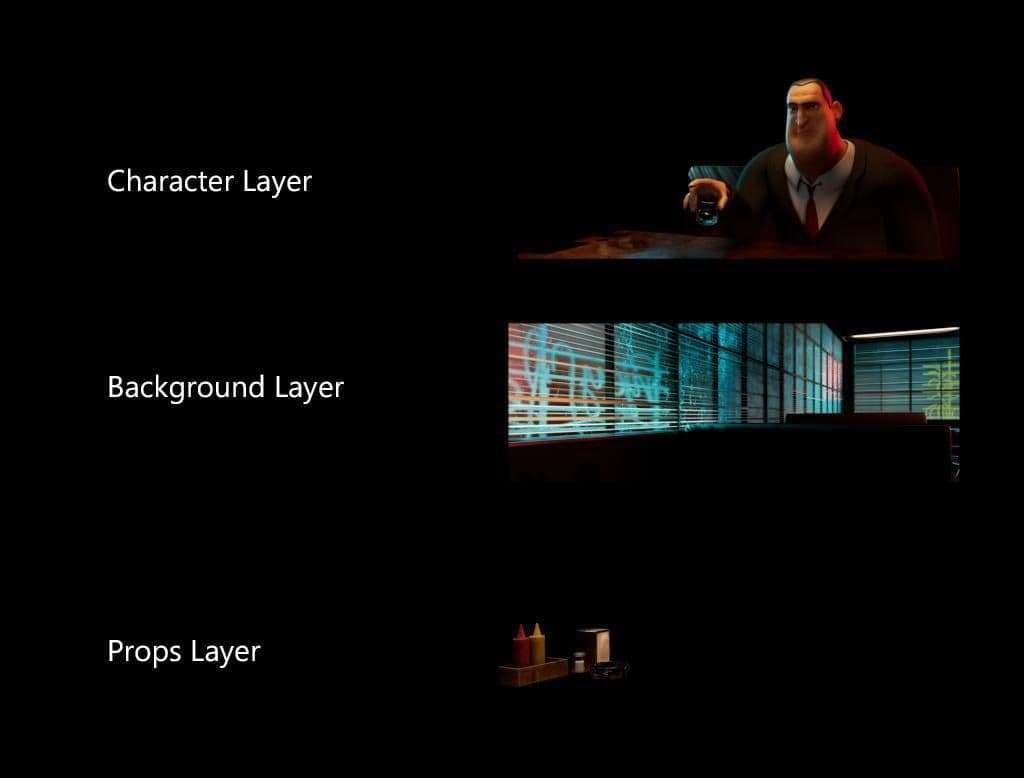
3. Setting up light groups. You can make adjustments to your lights in compositing without rendering the image again. Here is a good tutorial about how to set these up.
4. Scene optimisation. It is good to be familiar with the rendering package you use. You don't have to know every button but at least the core settings so you can render your animation in the most efficient way. Every render package has good documentation, and most of the time, it is written with simple language without any deep technical words.
What really changed my way of thinking about the rendering process is the tutorial from Alexander Corll which I definitely recommended!
It is a great experience bringing things to life and to see them moving on the screen, but the best part for me is to work in a team with inspiring artists where you can learn and support each other. I hope you enjoyed the article, and feel free to contact me on LinkedIn or Instagram if you have any questions or want to get feedback on your work. Thank you!
You can find more of Ivan's work on Instagram, ArtStation and Linkedin.